When ranking automotive thrills, starting an engine for the first time has to be near the top of the list. Will it start? Will it leak? Will it run well? Will it keep running? What’s that noise? Why is that so red? What’s that smell?
If all goes well, the uncertainty soon bleeds away, leaving nothing less than euphoria as the realization of a job well done sets in. A thrill indeed.
Unless something goes wrong. Not only does this type of failure bring about immense frustration, but it can also have a devastating effect on the wallet. Sometimes failures are inevitable—the results of bad parts or botched installations. An incorrectly mounted 50-cent gasket, for example, is capable of wrecking hundreds or even thousands of dollars in reciprocating assembly components. Often, however, these issues can be prevented.
Following a methodical start-up procedure can minimize the amount of damage that failures cause. Having made hundreds of first-time starts, we’ve developed a course of action that has kept us out of trouble many times. We always break in an engine with the same oil we plan to use throughout its life. For an older engine like this Triumph, we go with 20W50 Castrol GTX. While most of our start-ups go perfectly, this one didn’t. A massive oil leak kept drama at the forefront, but it showed why a solid procedure can be so important. Here’s how we do it.
Step 1:
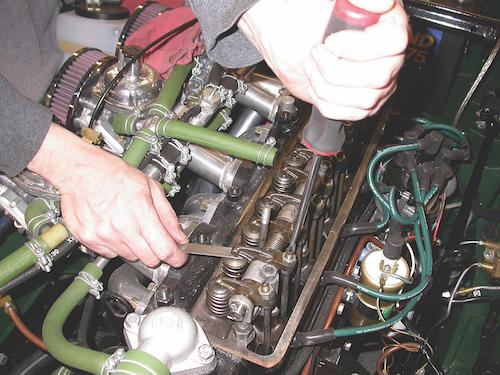
We begin our start-up procedure by adjusting the valves. We use the procedure outlined in the factory manual, but we follow our cam maker’s recommendations if we’re running an aftermarket piece.
Step 2:
Next, we pull all the spark plugs and check the compression. Ideally all the numbers should be identical, but it’s fine as long as they’re within 10 percent of each other. If any cylinder is radically low, we readjust the valves for that cylinder, then check again.
Don’t panic if the reading remains low, as we often find that an offending valve will seat within the first few seconds of start-up. We do listen carefully during this process, however, to make sure there isn’t excessive valve noise or evidence of poor running, which indicates a dropped cylinder.
Step 3:
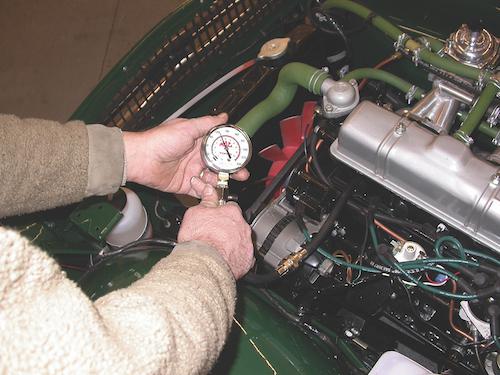
With the spark plugs still out, we crank the engine with the starter until we get oil pressure. Some engines allow you to prime the oil pump to achieve oil pressure sooner. Either way, the process usually takes 30-45 seconds. If we end up waiting significantly longer, something is wrong and we stop the procedure until we find the problem.
Once we have oil pressure, we look for oil leaks, then double-check the oil level. Once the oil filter, passages and cooler lines have had an opportunity to fill, we usually find ourselves down a quart or more.
Step 4:
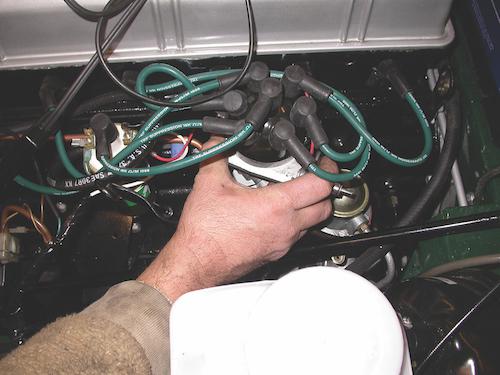
Now we can reinstall the spark plugs and connect their wires. We always triple-check the plug wires: We ensure that they are not only in the correct order, but in the correct direction, too—clockwise or counterclockwise at the distributor.
Then we position the distributor, using our best guess to select a timing setting that will start the engine. If we’re in doubt, we static time the engine.
Step 5:
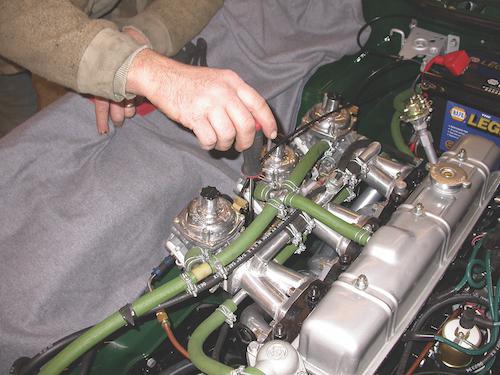
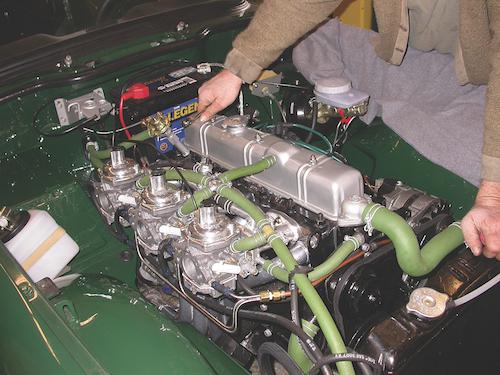
A multi-carb engine like this one adds an extra step, as we need to adjust each of the idle screws the same amount. In this case, we went in two-and-a-half-turn increments. If you’re working on an injected car, in theory you can skip this step.
Step 6:
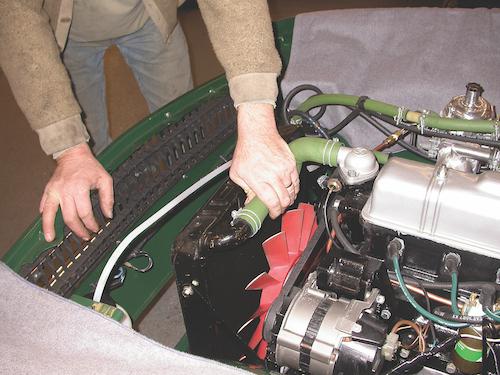
Now we double-check all the fluids: oil, gas and coolant. We always squeeze the top radiator hose to make sure it’s full of coolant. Even if the radiator looks full, air bubbles might be hiding in the upper hose.
If we find or even suspect any bubbles, we remove the radiator cap and squeeze the top hose to release this excess air. Then we refill the radiator and repeat the procedure as necessary.
Step 7:
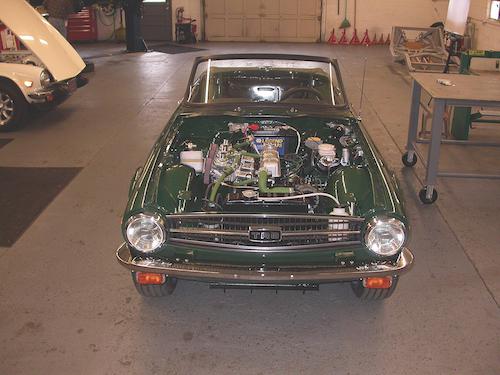
Before starting the engine, we make sure that the brakes and clutch work. Why? In case we need to move the car right away. For this same reason, we also place the car on its tires instead of jack stands. We take these precautions mainly because of fire risk; if a fire erupts, we want to be able to quickly roll the car outdoors so it doesn’t take the garage down with it. In fact, we usually work with the car outside or just inside an open garage door. This also keeps the fumes from overwhelming us.
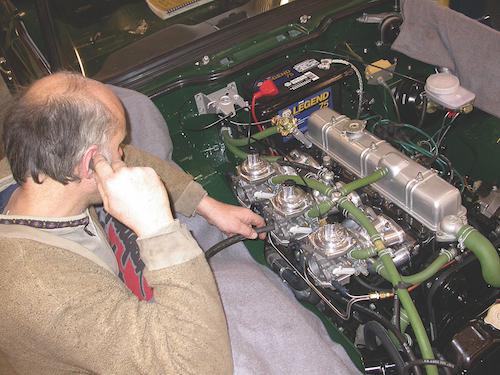
Time for the moment of truth: With an assistant nearby and ready with a fire extinguisher, we start the car. If we’ve done everything correctly, the car should come to life almost instantly.
Once our car is running, our assistant holds the engine at about 2000 rpm while we adjust the idle. The cam and lifters rely on splash oiling, which is especially important as they bed in. We then keep the engine running at 2000 rpm for about 20 minutes.
Step 8:
Here’s another step for those running carburetors or individual throttle bodies: Make sure the individual units are balanced. The old hose-in-the-ear method works well here, as matched carbs will produce matched tones.
Step 9:
We then double-check that the ignition timing is correct. If we change it, we again set the idle to hold the engine at 2000 rpm.
Step 10:
Abort, abort! We always check a newly fired engine for leaks, and we found a pretty large one this time. It sprouted at the rear of the engine, so we immediately turned off the car to investigate.
While we feared rear main seal trouble—this would mean having to remove the engine or gearbox—the problem turned out to be a missing oil passage plug. Once installed, we fired the engine back up and worked on bedding the cam and lifters.

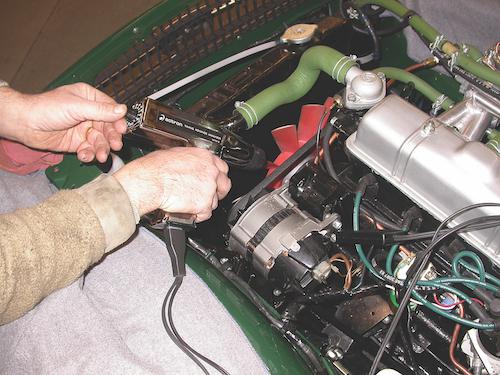
Step 11:
Using a digital pyrometer, we constantly monitor temperatures. We find this tool to be indispensable for engine start-ups—spending about $30 to $100 allows you to effectively monitor an engine as well as other parts of a car.
In this case, we use the pyrometer to keep tabs on the temperature of the coolant as well as the engine block and cylinder head. We like to watch the temperature of these areas rise to about 180 to 200 degrees—if the engine doesn’t get any hotter than that, we’re a go.
With pyrometer in hand, we also check the engine’s thermostat at this stage. If the thermostat opens when the coolant reaches the appropriate temperature, we move on to the next step. If the thermostat doesn’t open on cue, then we have something to fix.

Step 12:
Once we ensure that the cooling system is working properly, we start monitoring the exhaust temps. We mainly look for consistency, as all ports should hover around 350 degrees.
You can also do some brief diagnostic work here. A cool exhaust port is a quick sign that one cylinder isn’t firing, and a port above 800 degrees is a sign that the mixture is off—either too rich or too lean.
After monitoring the exhaust for about 20 minutes, we turn off the engine so that we can retorque the head and readjust the valves. We often perform another compression check as well. Once that’s taken care of, we start the engine, set the idle down to about 800 rpm, and get ready for our first test drive.
Like what you're reading? We rely on your financial support. For as little as $3, you can support Grassroots Motorsports by becoming a Patron today.


