A 14-Step Guide To Surviving Overhead Camshaft Headwork

Carl
By Carl Heideman
Dec 10, 2022 | Camshaft | Posted in Shop Work | From the Aug. 2012 issue | Never miss an article

Photography by Carl Heideman

It’s going to happen sooner or later. 

Something in your engine will break, wear out or require an upgrade, forcing you to—gulp—pull a cylinder head. This job can be quite overwhelming and complex, especially if you’re working with an overhead-cam engine, but it’s much less intimidating when you break it down into steps. 

One of the cars in our fleet, a 1988 Alfa Romeo Graduate, recently needed some headwork. Had this been a Miata, Honda or other modern DOHC engine, we’d have gone about the repair the same way. 

Afraid to face the mysteries lurking behind that valve cover? Don’t worry. Just follow these steps, and we’ll leave the night light on for you.

Step 1

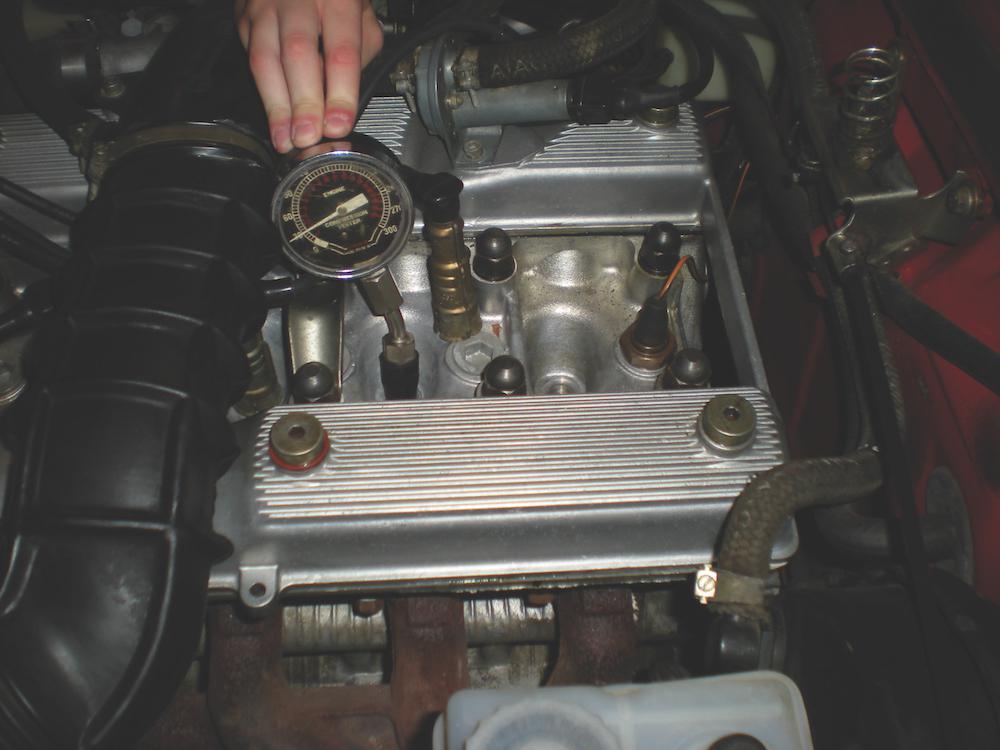
We knew our engine was down on power and suspected the culprit lay in the head. We wanted to diagnose the problem before tearing things apart, so we started with a traditional compression test. 

Three of the cylinders were at about 150 psi, but No. 3’s reading of 30 psi indicated trouble. Because only one cylinder was down on compression, we suspected a burned valve.

If two adjacent cylinders had been similarly low on compression, we’d have suspected a blown head gasket between them. Another common issue with blown gaskets is coolant leaking into the combustion chambers; that one’s better diagnosed with a leak-down test.

Step 2

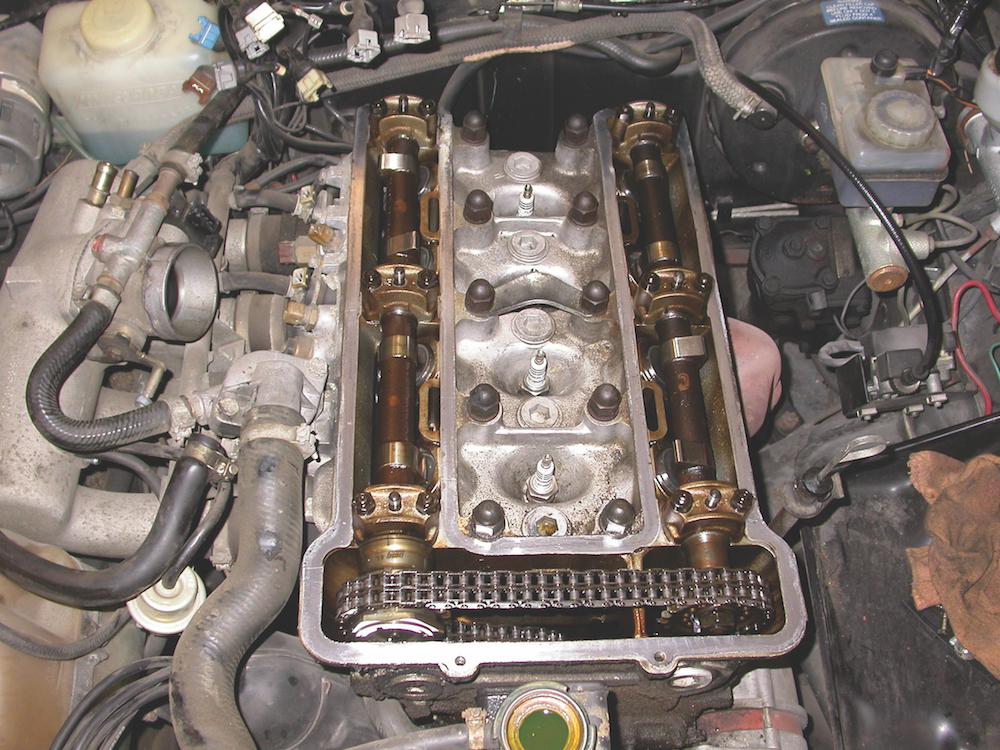
We started disassembly by pulling the plug wires, air intake tubing, valve cover and nearby sundries. That complex array of hoses and connections can be a pretty daunting sight, especially when you’re also worried about properly timing the cams. 

Our approach is pretty straightforward. We pull out the service manual first and read it carefully—often several times. As we take things apart, we continually check the book to make sure we’re on track. 

Perhaps more than the manual, we rely on our digital camera: We use it to snap dozens of photos from multiple angles. If something in the manual isn’t clear, we’ll have these pictures to guide us.

Step 3

Now that we’ve extolled the virtues of the service manual, we’ll admit it: We often defer to experienced opinions or improved methods. While Internet forums can sometimes offer quality information, use them with caution. How do you know Cam_Dude69’s advice has been vetted in the real world? 

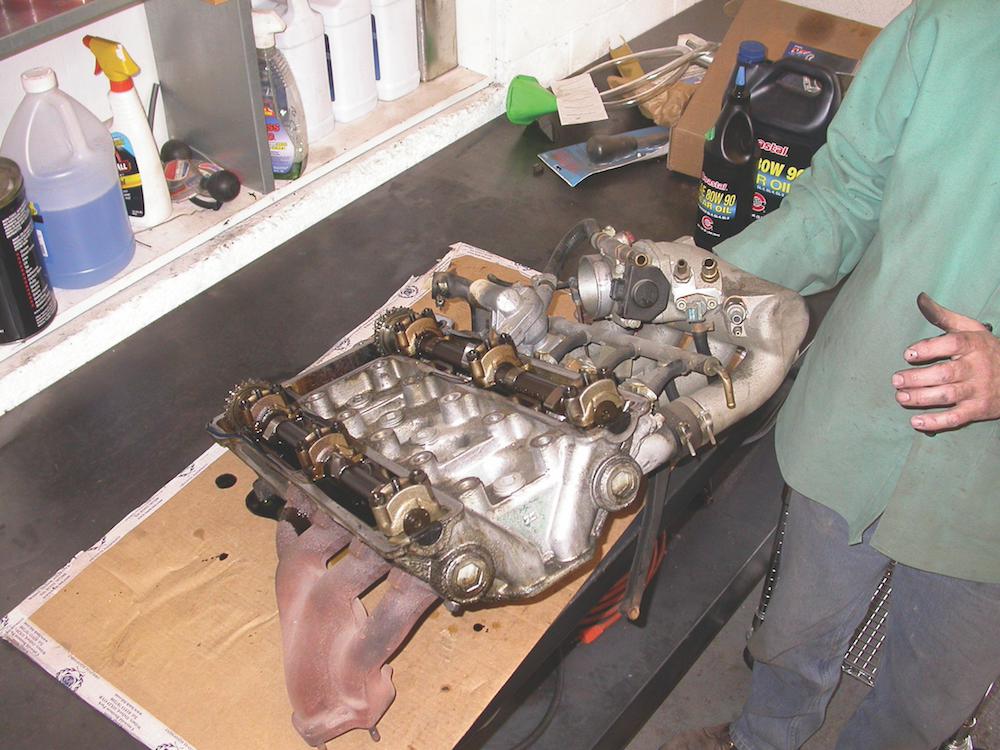
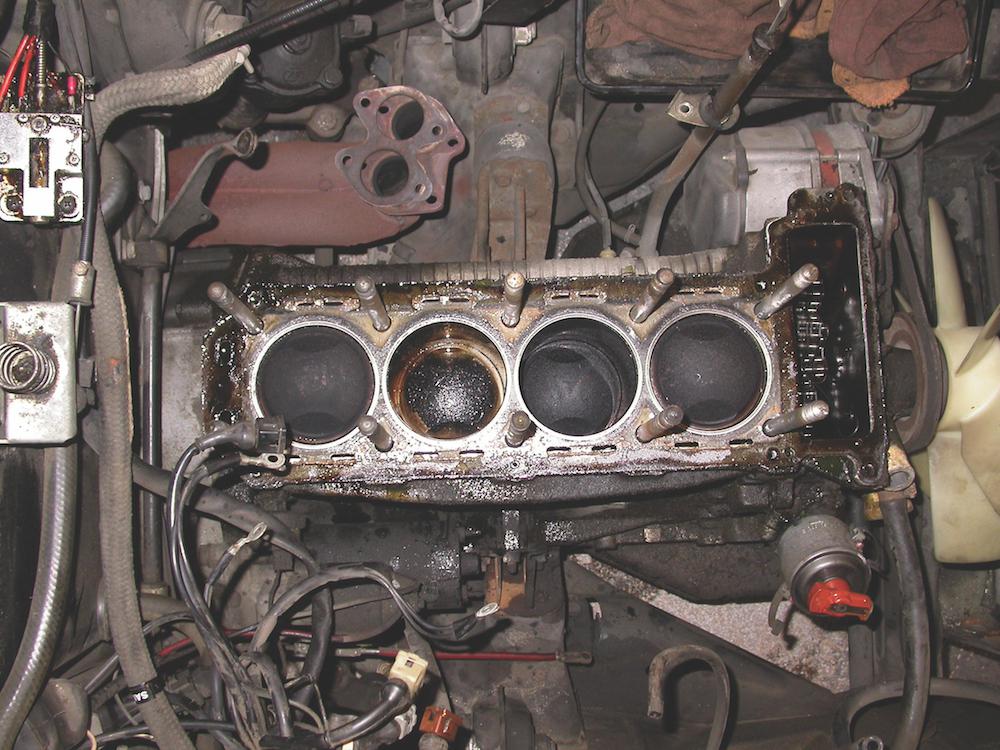
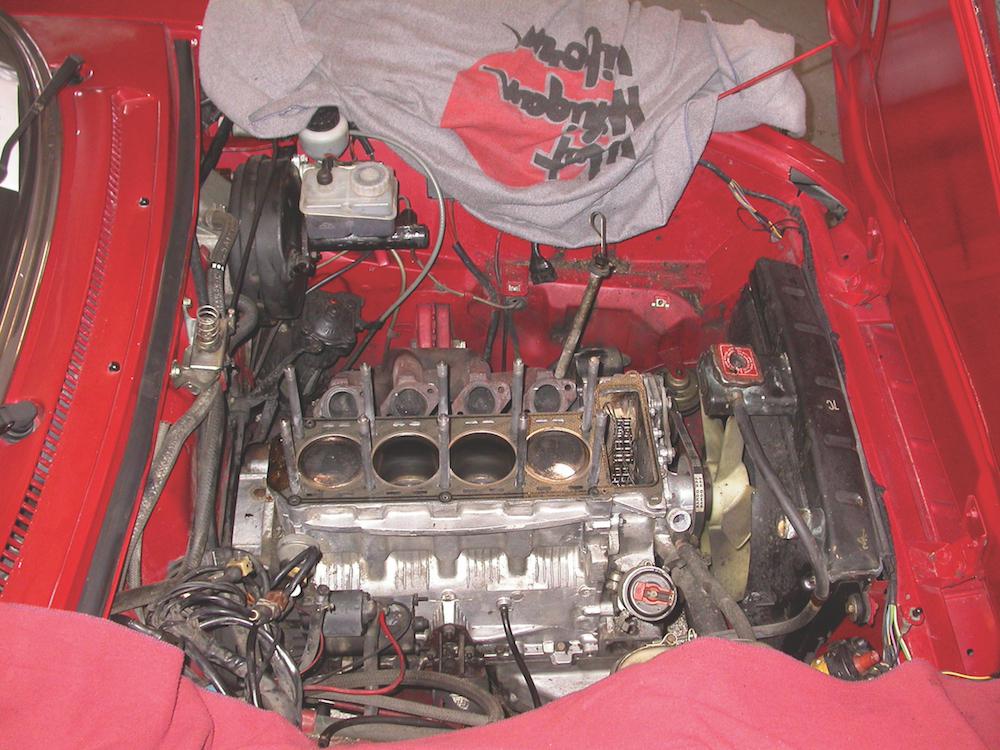
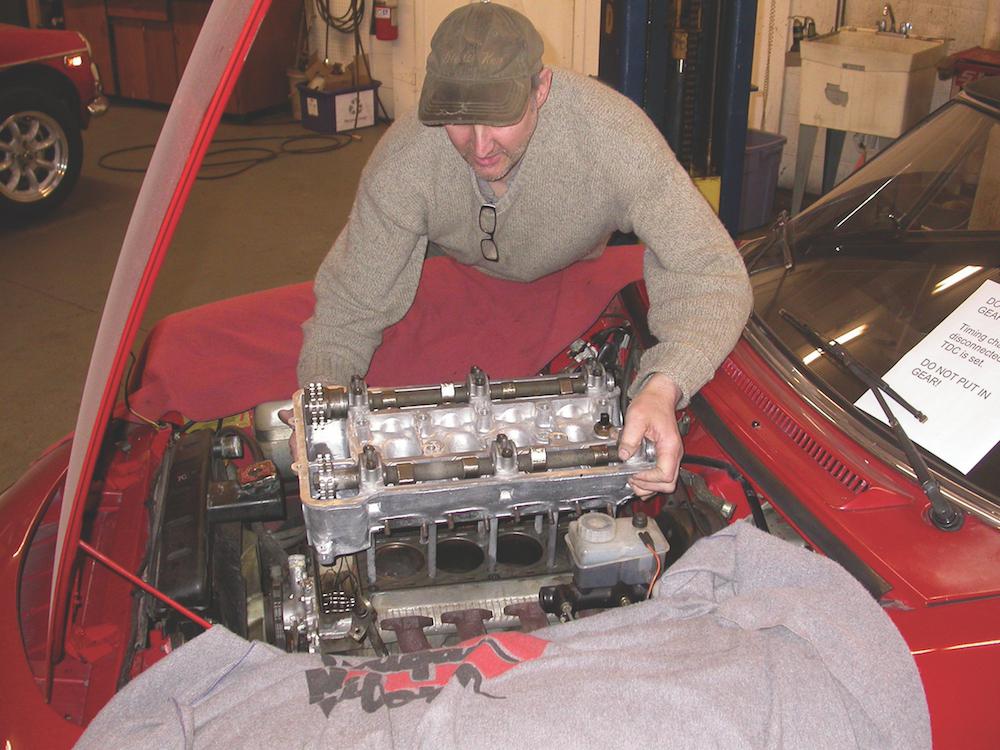
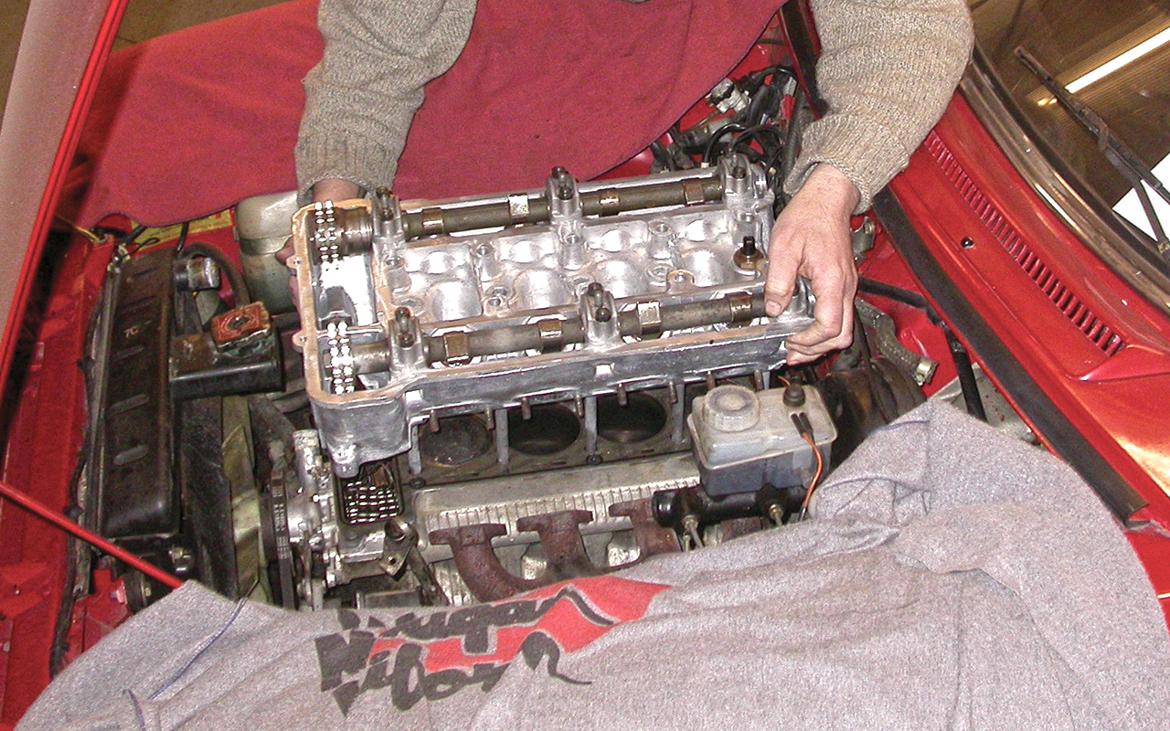
We knew from our own experience that removing the Alfa head with the manifold intact would save us a bunch of time. After securing the chains so they couldn’t fall into the sump and removing the head nuts, we pulled everything as a unit. We then continued the disassembly and inspection process on the workbench.

Step 4

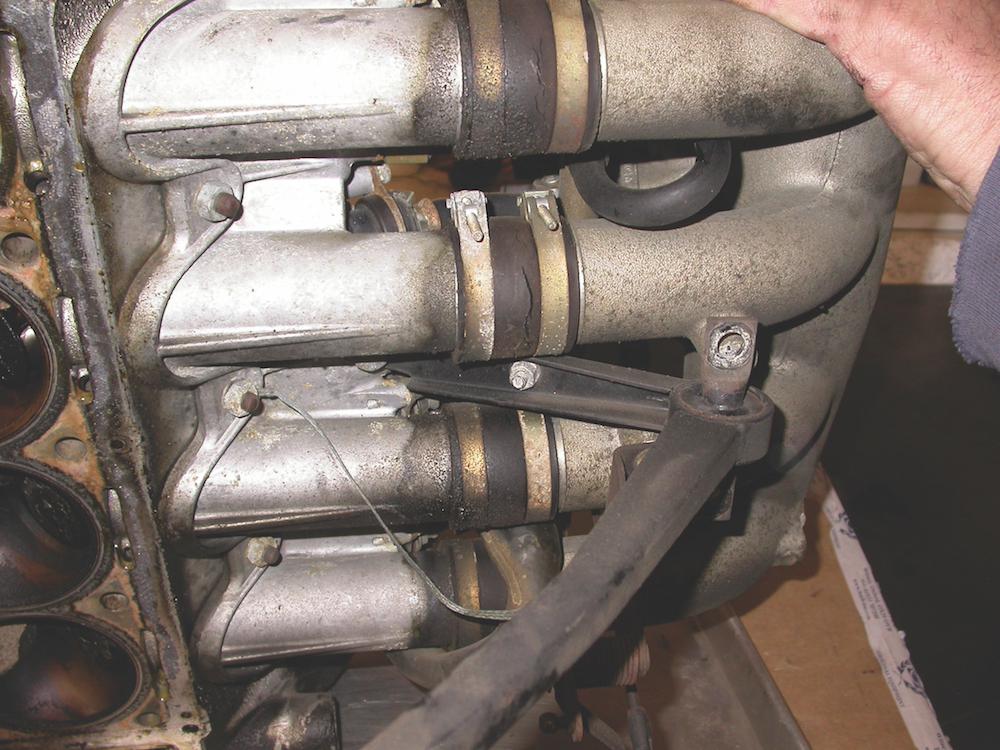
Our visual inspection of the intake hoses showed they need replacement. Furthermore, the cracked No. 3 hose might have caused a lean condition that burned our valve.

Step 5

After we looked at the No. 3 exhaust valve, there was no question we needed to pull the head: The valve was clearly burned and was causing our low compression. It’s not always this easy to spot damage on valves. Sometimes it’s much more subtle and can only be revealed through further disassembly and testing.

Step 6

We sent the head to our local machine shop, CD’s Engines. The head wasn’t cracked, they reported, but it would need a full makeover with new valves, guides and springs. We ordered the necessary components from Centerline Alfa and got CD’s going on the headwork.

Step 7

While the head was in the shop, we took the opportunity to clean our filthy engine and bay.

Step 8

A lot of time with solvent, paper towels and brushes yielded some impressive results. After cleaning, we carefully checked the deck surface of the block with a straightedge to make sure it wasn’t warped.
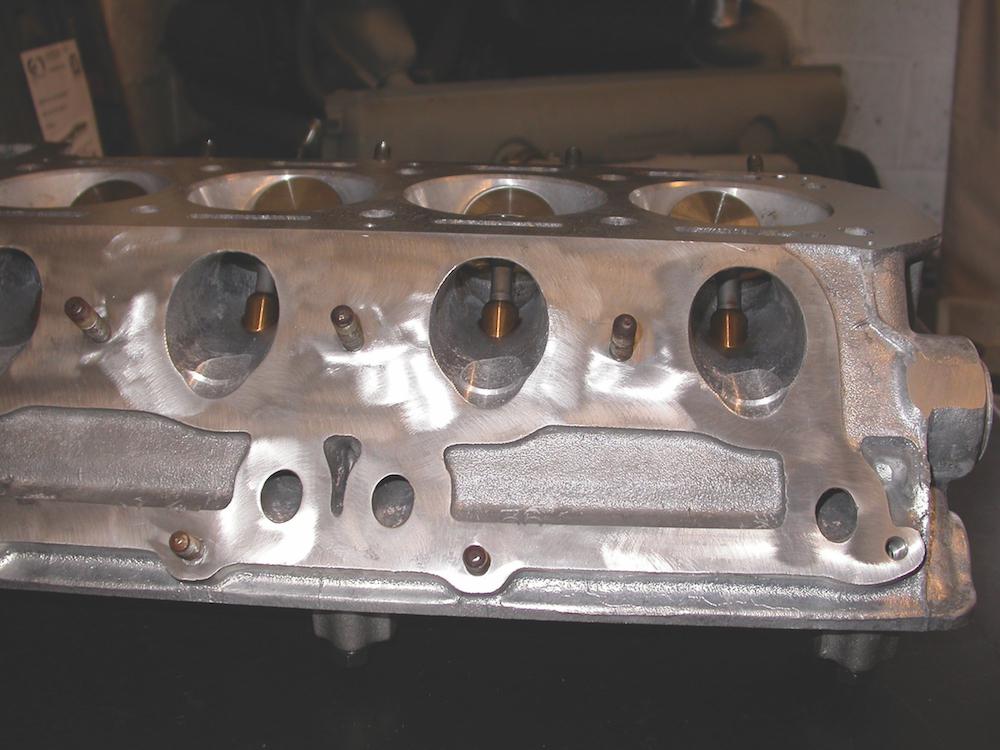
Step 9

The head was spotless and ready for installation when it came back from the machine shop. CD’s also took care of the valve adjustment, as this Alfa head uses shims rather than self-adjusting hydraulic tappets. You’ll pay a bit more if the machine shop does the work for you, but it’s often worth it to reduce the hassle, especially if the job calls for special tools. 
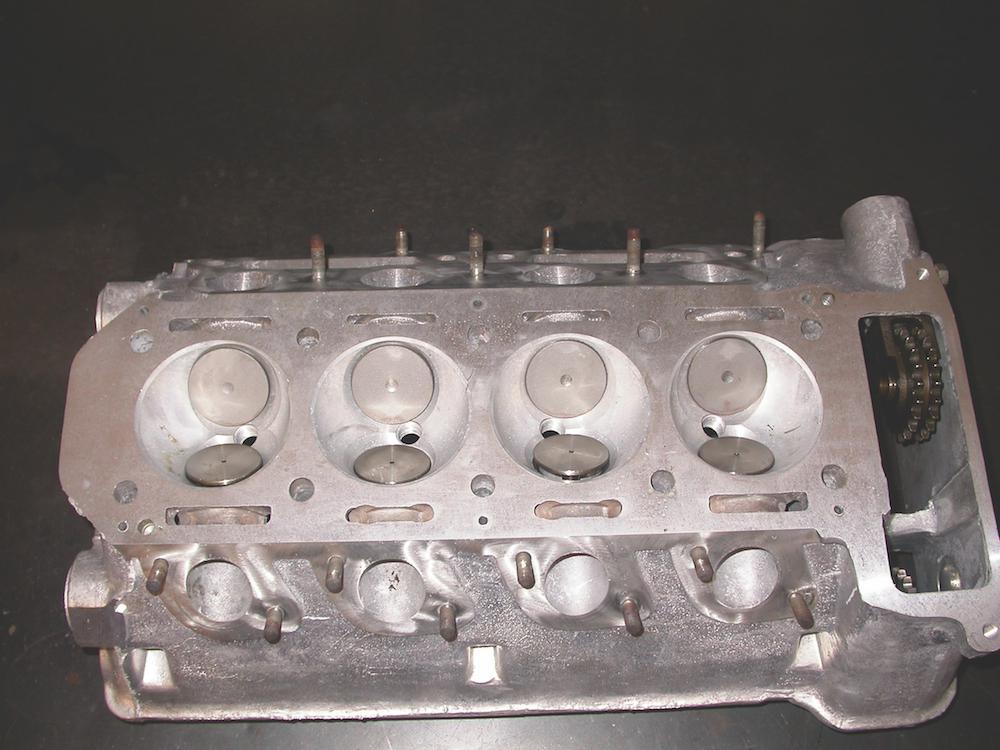
Step 10

When we send our cylinder heads for service, we typically ask the shop to do what they can to improve flow. In the case of this Alfa head, however, the factory ports were so nice that they didn’t require any extra attention. In fact, many modern cars can skip the prep work thanks to the excellent CNC machining done at the factory. 

Step 11

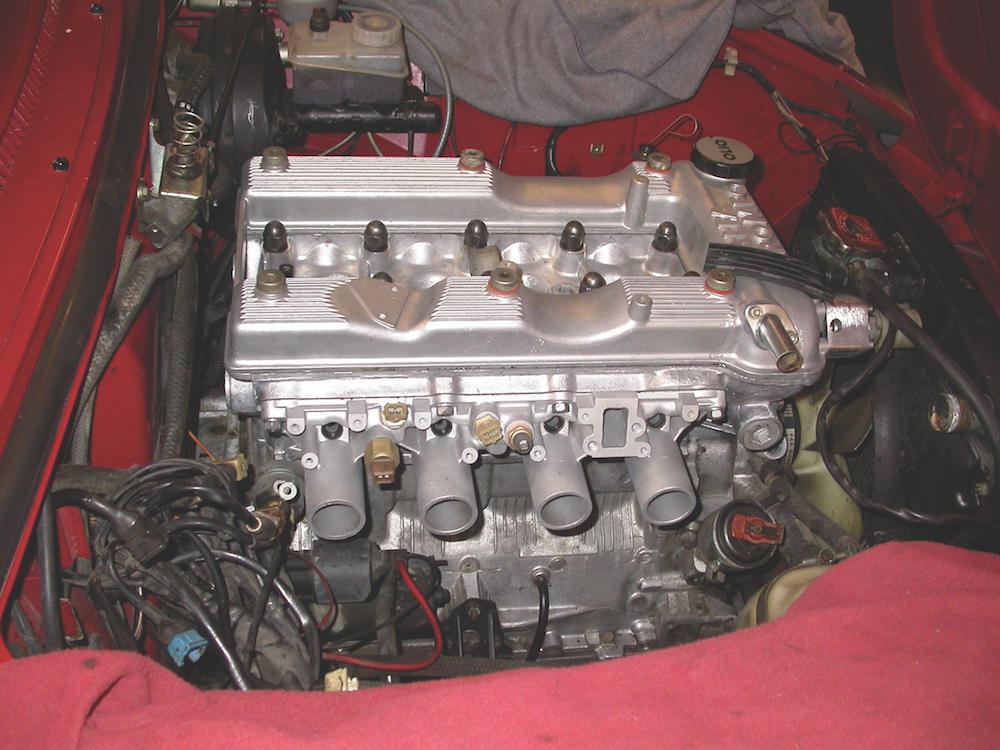
Now that the new head gasket was in place, we could carefully lower the head into position on the block. We decided to leave off the manifold as we installed the head: It may be easier to pull everything as a unit, but reassembly is best done piece by piece. It takes longer, sure, but it allows us to be a bit more careful and precise during the process. That way, nothing gets pinched, blocked or mislocated.

Step 12

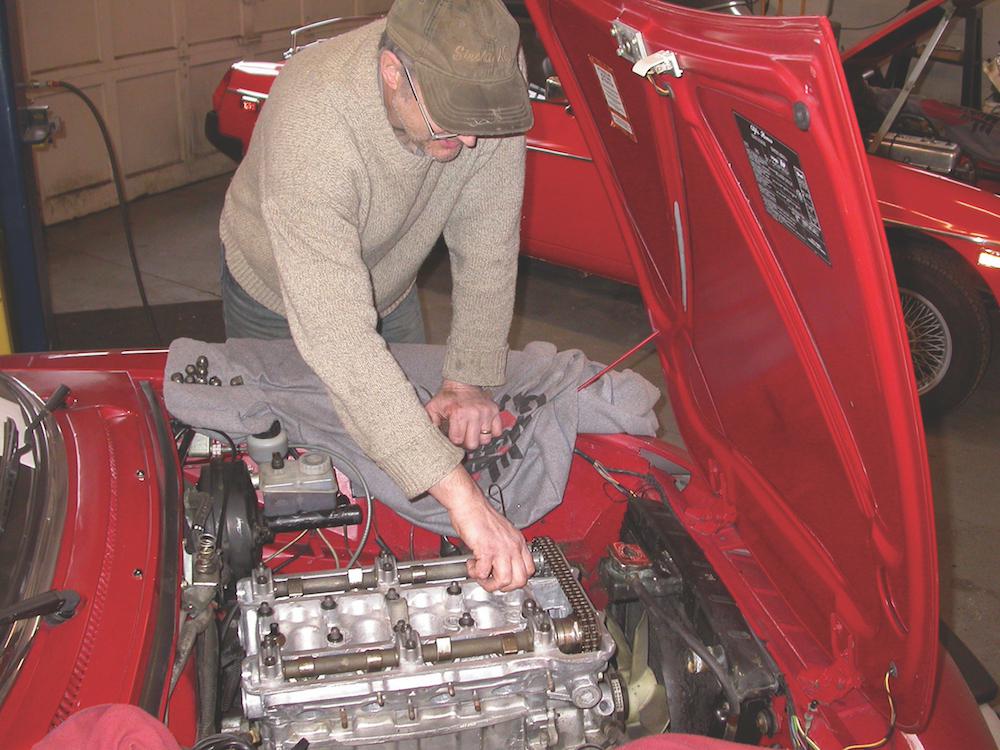
After reinstalling the head, we did the initial torquing of the head nuts. Next, we timed the cams and reconnected the chains according to the procedures detailed in the service manual. These may be tedious jobs, but they’re not difficult. We always take the time to double- and triple-check our work, especially if we’re dealing with an interference engine.

Step 13

Using our memory, our photographs and our manual, we put the components back on the engine, bit by bit. We took the time to clean each piece and replace any old components or hoses. Our goal, of course, was to have nothing left over at the end, and we succeeded.

Step 14

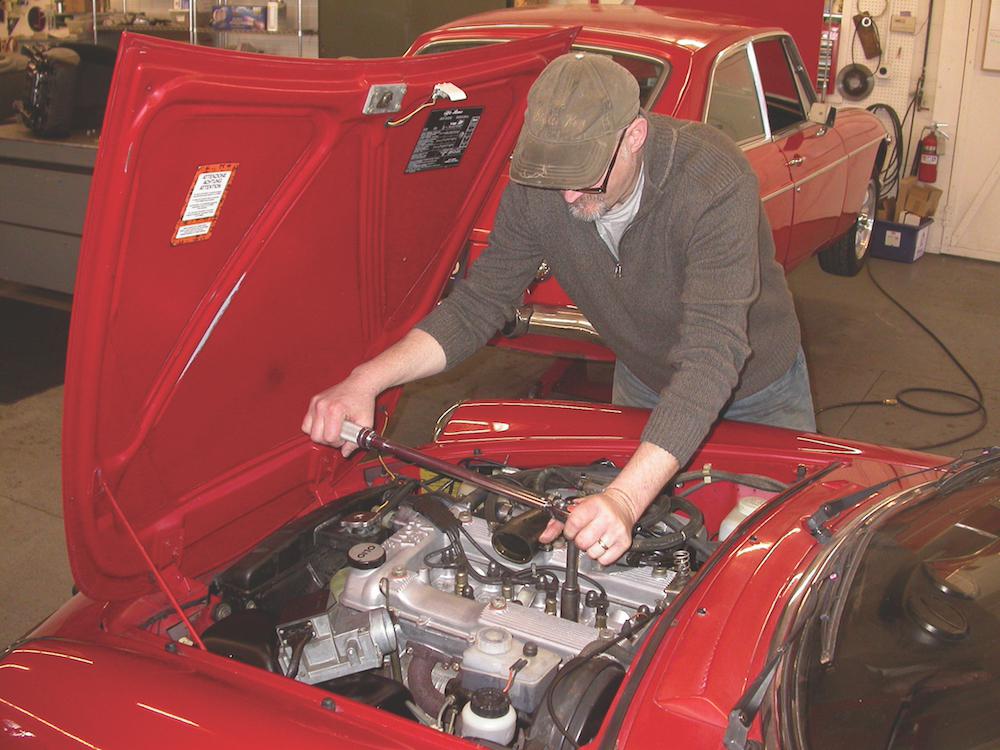
No matter the name on the valve cover, our post-headwork starting procedure is always the same. Before firing up the engine, we turn it over at least two full revolutions by hand to ensure there are no interference issues with the valves. 

We then restart the engine as though it’s a new one. We build oil pressure by spinning over the engine with the plugs out, then replace the plugs and start the engine. We run it at 2000 to 2500 rpm, watching for leaks and other problems. Once the engine is fully warmed, we shut it down and retorque the head nuts. Finally, it’s time for a drive. Our work is done.

Join Free Join our community to easily find more Camshaft articles.
Comments
Jerry From LA
Jerry From LA SuperDork
10/24/20 12:21 a.m.

My first engine rebuild was a FIAT 1600 twincam.  My V-8 buddies were giving me props since the head was in three pieces (the cam stands were separate) and the at-that-time exotic cambelt.  However, I found it a lot less intimidating than figuring optimum pushrod length for  proper rocker tip wear patterns on the valve stem.  All I had to deal with were bucket tappets which were relatively foolproof.

Jerry From LA
Jerry From LA SuperDork
10/24/20 12:34 a.m.

Also, I think it would be a great help to people if you showed them your method for tying up the timing chain and how you maintained and checked the cam timing afterwards.

frenchyd
frenchyd PowerDork
10/24/20 9:42 a.m.

In reply to Jerry From LA :

Jaguar V12's are terrifying because there are two heads and this whole mess of tubes and wires.  ( the fuel line is even air conditioned to prevent vapor lock) 

   But once you get into it it's simple and straight forward.  With a bonus.  Jaguar builds a simple stand that holds the timing chain clear so you don't  have to replace the timing chain.
Jaguar has used the same cam guage since 1948. It's right in the tool kit. Put the engine on TDC #1 slide the cam guage over to confirm timing and you are done. If you want they have notches in the timing gear that gives you a 2&1/2 degree change every notch and if you want less than that reverse the timing gear and you have 1&1/4 degree change.   

Vajingo
Vajingo Reader
10/26/20 12:00 a.m.

Half the engines I've met, it's been easier to just pull the engine and replace it with a junkyard engine. 
call junkyard>find engine> it's already pulled on arrival>truck home>pull old engine (which involved nearly everything the head removal almost had)>install new engine. Drink beer. 

or...

Spend hours cross shopping parts, prices, availability, and finally order parts>parts arrive (hopefully) weeks later>Oh look, the wrong parts were sent>back to the beginning> pull nearly everything required to pull the whole engine>Take head to machine shop>cross fingers it doesnt get screwed up>weeks later, go to install parts>Oh, look, some of the parts got destroyed/missing/incorrect. Drink beer, but NOW complain. 

Vigo (Forum Supporter)
Vigo (Forum Supporter) MegaDork
10/26/20 10:45 a.m.

I cant remember if this was the first head i pulled but the first engine i rebuilt was at 16y/o, and I couldn't find a single thing wrong with it to explain the knocking noise it made until... i got to bolting on the CRACKED FLEXPLATE!! angry I had pulled it without noticing the cracks because there was a shim plate over it that covered the crack. Upon reassembly, i realized how much big of a rabbit hole i'd gone down over a misdiagnosis.

So that was a good learning experience. If i could go back, i probably wouldn't change a thing. I still get to say i rebuilt my first engine when i was 16. I spent a total of ~$120, not counting the $16 flexplate.. blush

jimgood
jimgood Reader
5/30/22 2:07 p.m.

Do you disconnect fuel lines when priming the oil system for the first start up? I have no experience with engine rebuilding but I had an interesting issue with my mower when I went to start it for the first time this season.

Because I've had bad luck with starter switches, I replaced the start position in my mower with a separate start button. And it will kick the starter over without the key on (that was the simplest way to wire it).

My luck trajectory continued with that button. I decided to "prime the oil system" for the first start of the season. But the button got stuck in the depressed position and I ran around like an idiot trying to get it unstuck. So the starter ran for possibly 2 full minutes while I fumbled around.

But that's really just the back story. Once I got that resolved, I got the mower started and it immediately started blowing huge amounts of smoke and would not run right. I did some research and found that the long cranking period with no spark might have caused wet fuel to gather in the cylinders and seep past the rings and into the crankcase. This was easily confirmed by pulling the dipstick and taking a whiff. So the oil became seriously diluted with fuel. When it finally started up, that caused the smoking. I changed the oil and it cleared up.

So, do you disconnect the fuel lines or otherwise disable the fuel system while cranking then engine to prime the oil system?

BimmerMaven
BimmerMaven New Reader
5/30/22 4:02 p.m.

In reply to Vajingo :

I agree.

This dirty engine with crumbly rubber hoses is obviously not a beloved car for this owner...so, the cost effective plan is a used swap.  Some engines are cheaper than gaskets and sundries.


For your special car, start with a used engine and take your time,..


frenchyd
frenchyd MegaDork
5/30/22 10:42 p.m.
Vajingo said:

Half the engines I've met, it's been easier to just pull the engine and replace it with a junkyard engine. 
call junkyard>find engine> it's already pulled on arrival>truck home>pull old engine (which involved nearly everything the head removal almost had)>install new engine. Drink beer. 

or...

Spend hours cross shopping parts, prices, availability, and finally order parts>parts arrive (hopefully) weeks later>Oh look, the wrong parts were sent>back to the beginning> pull nearly everything required to pull the whole engine>Take head to machine shop>cross fingers it doesnt get screwed up>weeks later, go to install parts>Oh, look, some of the parts got destroyed/missing/incorrect. Drink beer, but NOW complain. 

I don't know which engines you work on. However the cracked hose on the intake would be something easily missed and doesn't indicated serious neglect.  Not worth risking a used engine of unknown maintenance or usage.  
  Replacing a valve isn't very complicated and it's straight forward to re-shim the clearance.   Head off it's less than 1/2 hour to do the whole exhaust side and probably worth doing the intake  side which should only take 15-20 min. 
     As far as Jaguars go which I'm most familiar with.  The bottom end of a V12 is so robust it rarely ever would need refreshing.  The top end is extremely durable too except more vulnerable to mistakes. Easy to improperly fill the radiator and be short coolant. You actually have to read the owners manual to do it properly. 
  Or leaves and trash between the radiator and A/C  blocks most air from going through. 
    Vacuum hoses split with age and heat.   Or timing off.  Again the owners manual tells you the distributor needs oil periodically and if it doesn't get it the advance freezes resulting in timing off causing overheating. 
     Ferrari, Aston Martin, Jaguar, and other high end cars need more than a typical DIY guy does. But when they depreciate so quickly that's the service level they typically get.  
  On the other hand plenty of guys read the manuals and find out ownership can be a very inexpensive thing if they do the work properly and themselves.    
     

wspohn
wspohn SuperDork
5/31/22 12:25 p.m.

I LIKE OHC engines!

I have played around with old (Jaguar, Lamborghini, MG) with no issues as well as new (Ecotec etc.)

One thing I have trouble getting over - the look of a vintage DOHC engine with the angled cam covers just looks ..right to me. The flat top style (which I understand reduces casting and machining costs) just doesn't look as nice.  Who was the first to do that?  First one I recall was the Lotus twin cam from the early 60s.

You'll need to log in to post.

Our Preferred Partners
A1uoSMyOdrXCUrfSwEenA0Gqu5ENeX2wAOKxBL17XEYCv7NifBtFX33eZ5cEnac7