


Basic body work part 1: Repairing rusty sheet metal
Basic body work part 2: Applying polyester filler
Basic body work part 3: Applying paint
Basic body work part 4: Wet sanding, buffing and polishing

 Photography Credit: Per Schroeder
Modern myth claims that you can paint a car in your driveway for 50 bucks. What they’re not telling you is that it takes hours if not days to make that $50 paint job look even half as good as a professional’s work.
And unless you roll on some tractor enamel sourced from a hardware store, you’re looking at about $200 in automotive-quality paint and supplies before you spray even a single panel. Things are never as cheap or easy as they sound.
Let’s cut the bull: Painting a car on your own is tough and takes a lot of time. However, we’ve found that if you’re willing to trade off some long hours for money saved, you can still get a great finish without breaking the bank. Here’s how you do it.

Modern polyurethane enamels have three parts that need to be mixed together before they are applied: enamel, reducer and hardener. The enamel is mixed up in the desired color using various pigments and, if desired, metallics. Typically, the mix is formulated using a postal scale, and the tinted base makes up about 60 to 70 percent of the final solution.
The reducer is simply a quick-evaporating solvent that makes the paint easier to spray. Reducers are formulated for various evaporation times. Slower evaporation will be better for warmer days and will result in a smoother finish, while faster evaporation will work better on cold days and be more resistant to runs and sags. Reducer makes up approximately 20 to 30 percent of the mix.
The hardener is a catalyst that allows the paint to quickly harden. About 10 percent of the applied paint winds up being hardener.
When it comes time to apply the paint, there are many different options: rattle cans, brushes, rollers, disposable air brushes and the traditional paint gun fed by compressed air.
Rolling and brush work require a steady hand, and each stroke will leave lines, bubbles and marks. These methods can require a lot of post-paint sanding and polishing to smooth out their inherent uneven application.
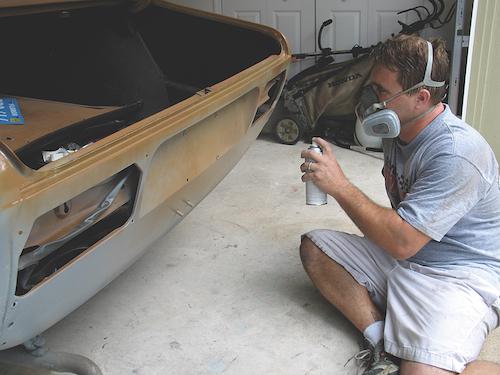
Spraying can result in a smoother finish, but it does create a lot of overspray and can also be tough on your lungs. Make sure that you wear a good face mask or respirator to avoid inhaling the paint fumes. Breathing modern catalyzed enamels can lead to various nasty maladies including death, which is pretty permanent.

We painted our Saab using rattle cans. The paint shop mixed together the paint and hardener before filling the Nason 441-37 fill-in reducer cans. These vessels are disposable, and we’ve had good luck spraying the catalyzed enamel within a day of its injection into the can. The enamel will harden inside the can if it sits on the shelf more than a day or so. Our Saab required 18 cans at $6 each.

Before you paint, make sure that everything you don’t want body-colored is either masked off or removed from the car. Removing the parts almost always yields a more professional look. Yes, it takes longer and there’s a good chance you’ll damage a clip, but the better end result is worth it.

The paint needs to be adequately mixed up before it’s applied. Although the paint was thoroughly mixed just minutes before it was injected into the rattle cans, we still took the time to shake each one before spraying its contents.

Photography Credit: Scott R. Lear
The trick to a smooth finish is to apply the paint from just the right position and distance. This requires holding the can or spray gun at different angles from the surface depending on the materials and environmental conditions. If the paint is drying before it hits the panel, thus creating a rough texture, move closer to the surface. Warm temperatures will exacerbate this problem.
Being too close to the car or spraying in cold conditions will cause the paint to get thick and sloppy. The solution? Back away from the car to get a lighter application.
If you’re not careful, painting a car with rattle cans can result in a striped finish. The narrow angle of application from the spray tip leads to small rows of thick paint that we call tiger stripes. Ideally you want wide fans that are evenly applied. Try alternating directions of hand travel: side to side, diagonally and even up and down—although this last one makes it hard to avoid runs.
Go back over the painted portions of the car and fill in any low areas with another thin coat. You might have to sand, polish and remove paint to create a smooth surface later on, so err on the side of caution and apply extra.
Wait for your paint to dry completely before removing any masking tape or trying to reassemble the car. In fact, we’d wait on reassembly until all buffing, wet sanding and final post-paint work is finished.
Be patient, as you’re almost ready to apply those numbers and sponsor decals. We’ll cover wet sanding, buffing and polishing in the next part of our Basic Body Work series.
View all comments on the GRM forums
You'll need to log in to post.


