


Thanks Rod1 What a great project and read.

Thanks Rod1 What a great project and read.

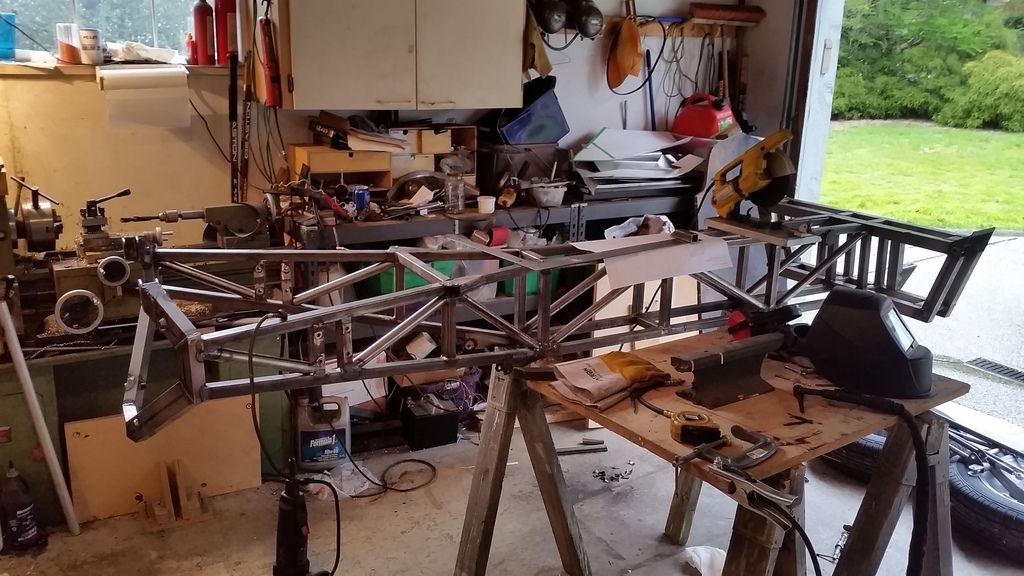
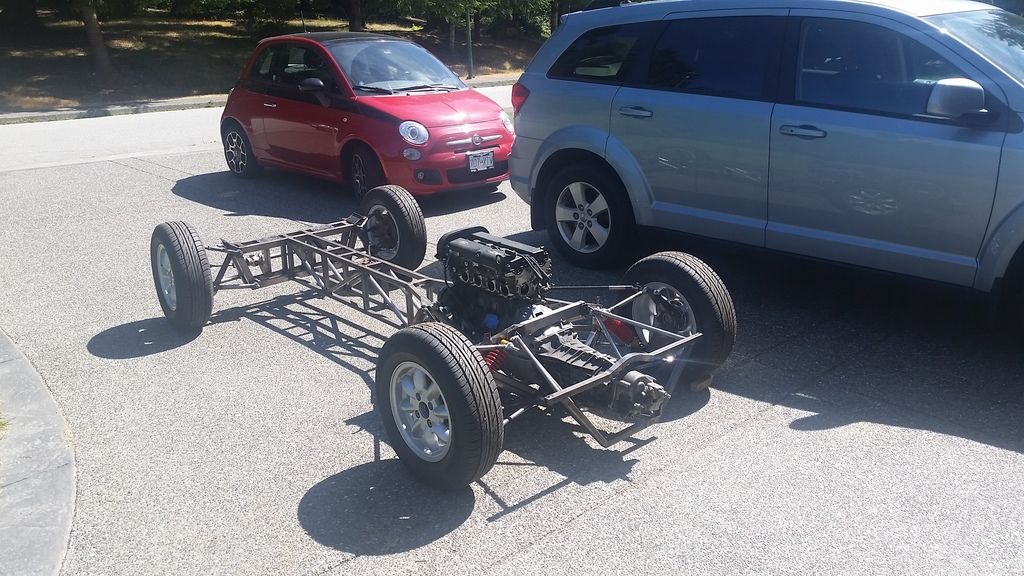
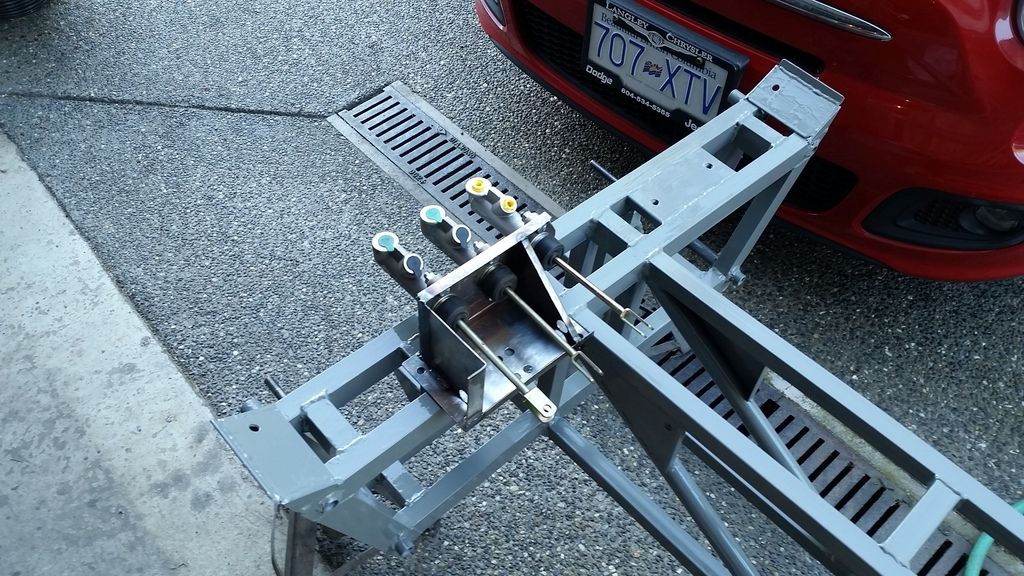
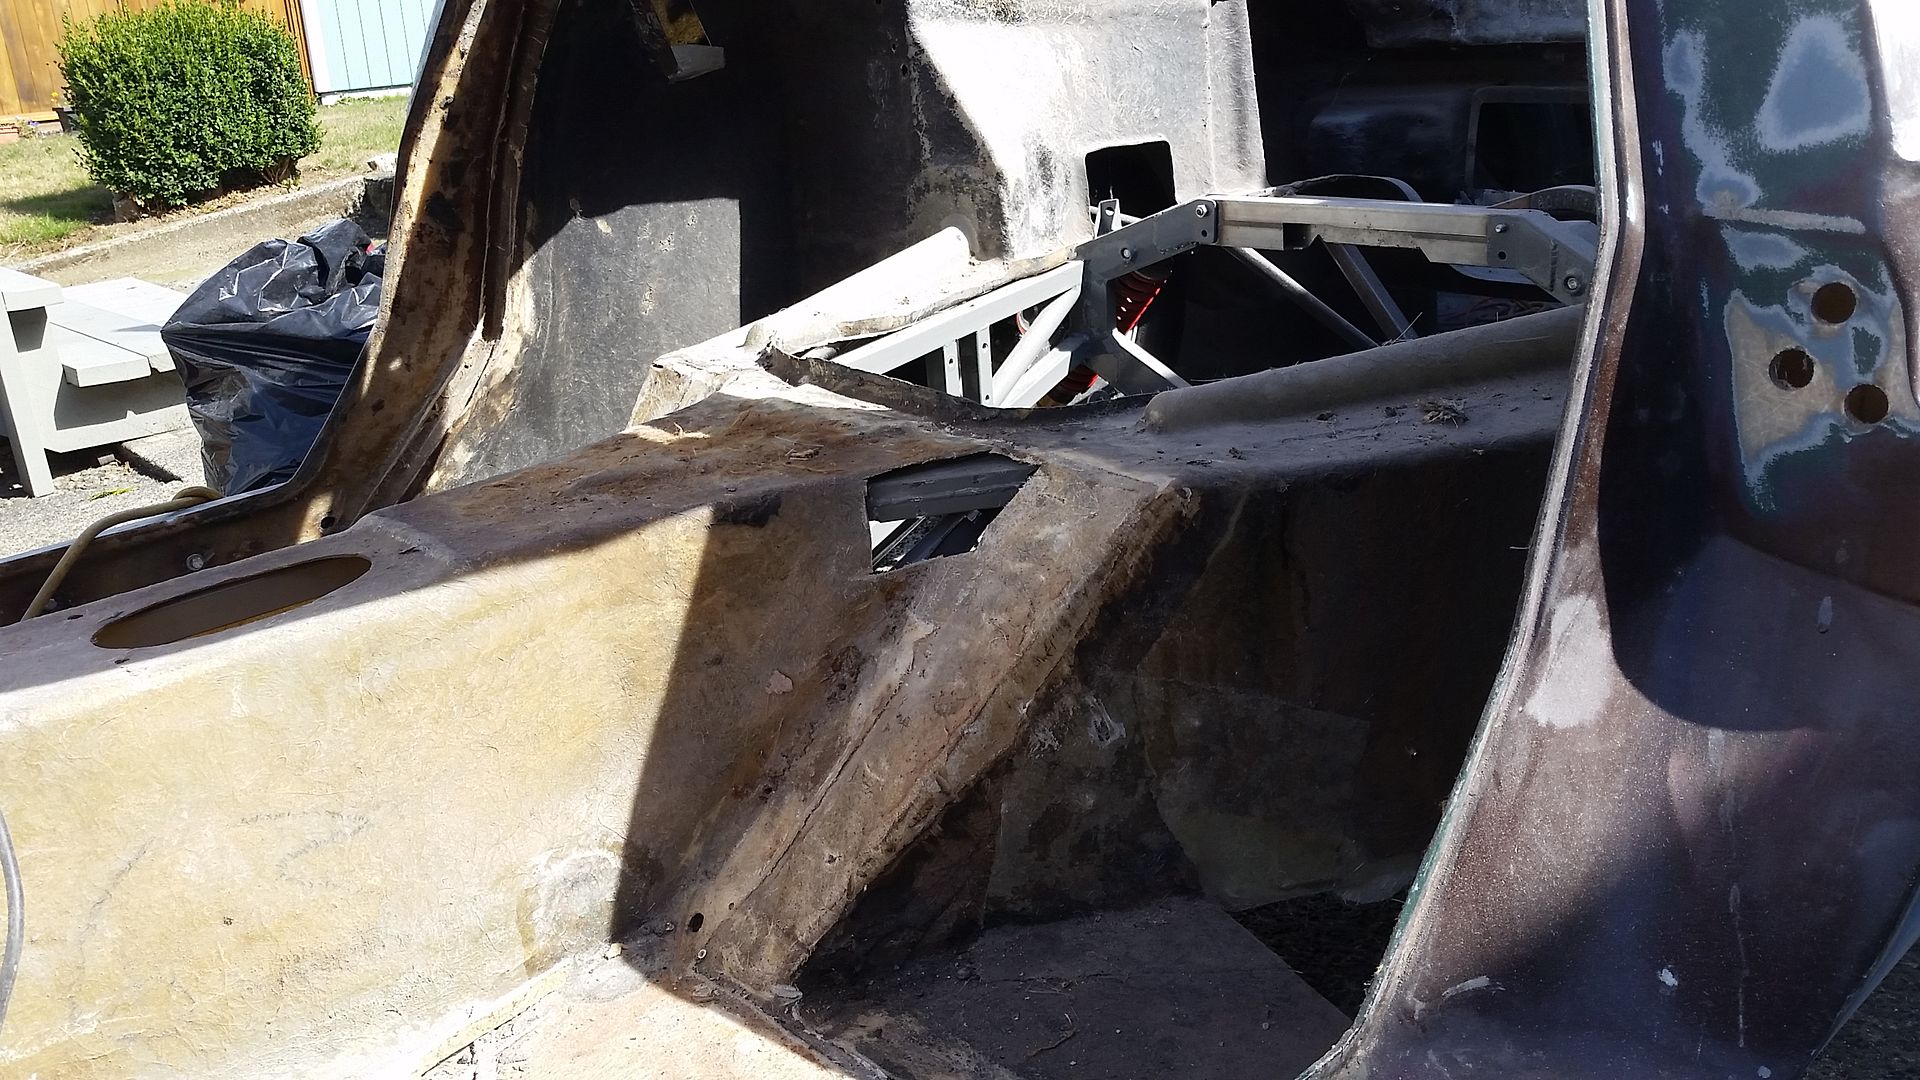
A bit of an update, I removed the body from the chassis this past weekend, removed the four corners and took it back to the main garage (mum n dads place). I added some engine bay triangulation then fabricated a gearbox/rear body mount cradle. I've opted to make the cradle removable to make removal of the engine and gearbox a little easier. I had originally wanted to hang the gearbox from the upper cross member of the rear chassis hoop, but the Renault box isn't quite set up for it, plus I've had to carve up the cross member to miss the various webs on the bell housing. Sunday saw me start on final welding of the chassis, but I didn't get as much as I had hoped done as the argon tank quickly went to empty. So sometime in the next two weeks I'll get exchange the tank and get back at it.
Here are some very brief pics, and yes I really do need to clean the garage.

Rod
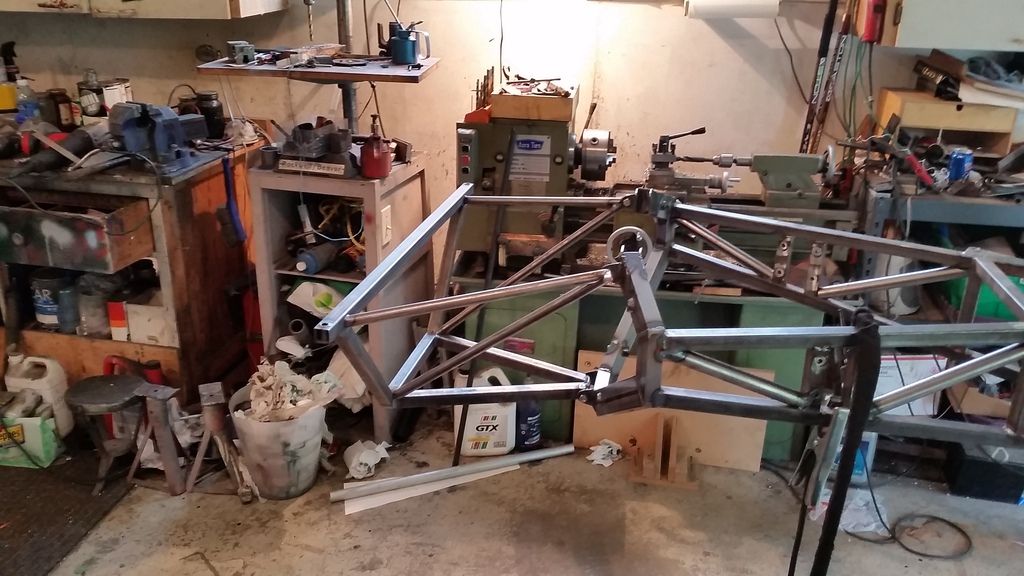
A small update, just so no one thinks that this thread is dead. I ordered and received a set of gas lenses for my TIG welder just before heading off on a whirlwind European vacation (had to go see a high speed parade in Monaco that turned into a bit of a race once Lewis took his ill-timed pit stop), so this past weekend I put the new toy into action. I have to say the gas lenses were worth the money, you can actually weld in very very tight spots. The chassis is 90% finished in terms of welding, the last bits to do on it are the many threaded bushings and body mounts, then its time to splash some paint on it and hang it from the wall until the body is finished. I finally got around to sorting out the steering rack placement, I had originally just tack welded the rack mounts to the chassis to get to a roller stage, but never looked at bump steer. I spent the first part of yesterday cutting off the tacks and moving the rack up and down until I dialed out nearly all of the bump steer (I'm sure there is still a very small amount of change, but nothing close to the 1/4" +/- I had with the rack in the original spot).
Next weekend I'll hopefully have the gearbox mounts done and maybe have the bulk of the threaded bushings machined up and welded to the chassis.

Very cool!

Lethal Locost #2 is entirely TIG'd with a gas lens. I ~quite~ like them.
Are you using cheater lenses in your welding helmet yet? Or are you not that old?
Are you using cheater lenses in your welding helmet yet? Or are you not that old?
Nope, not that old yet. Though I did have to buy a new welding mask when I picked up the TIG welder, my old one was so pock marked from sparks associated with MIG welding, I could barely see through it.

I love old Lotus cars. This is utterly fantastic. Subbed.
corsepervita wrote: I love old Lotus cars. This is utterly fantastic. Subbed.
You need to see more of RoddyMac's projects. Fantastic Indeed!

How do you plan on running the TB's? I have some Focus SVT lower intake manifolds laying around I can sell you.

Scottah said: How do you plan on running the TB's? I have some Focus SVT lower intake manifolds laying around I can sell you.
I'm planning on fabricating an intake manifold, have my local laser cutter cut the plate then weld on some stubs. I don't think the SVT manifold will work for the carbs as the carbs need to sit at an angle to keep the float bowls more or less level.
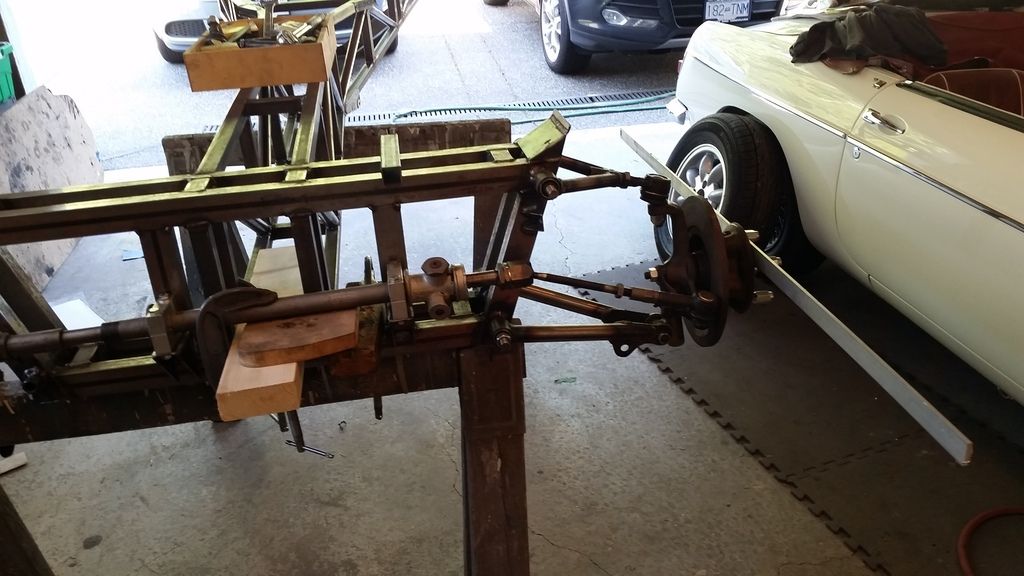
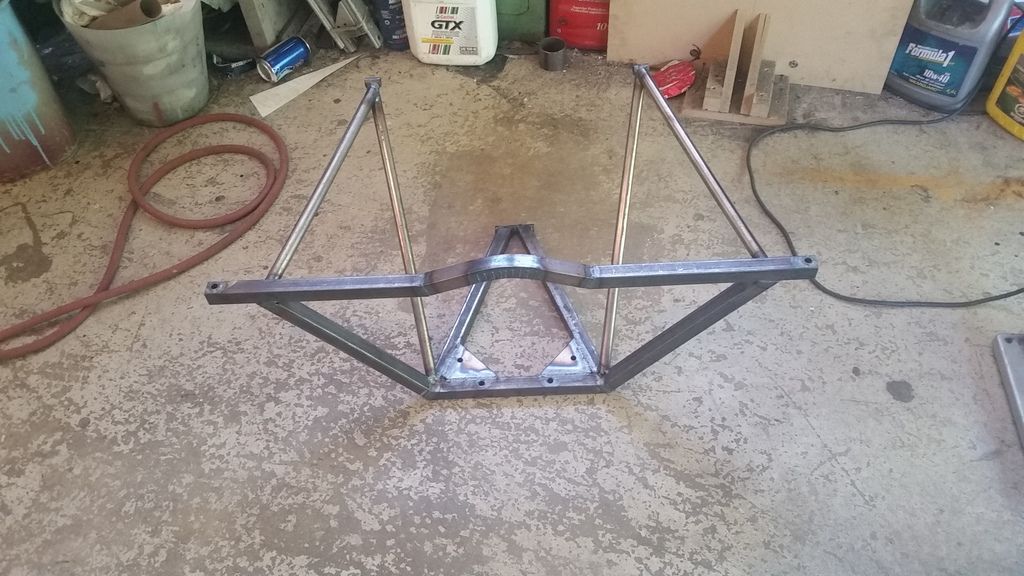
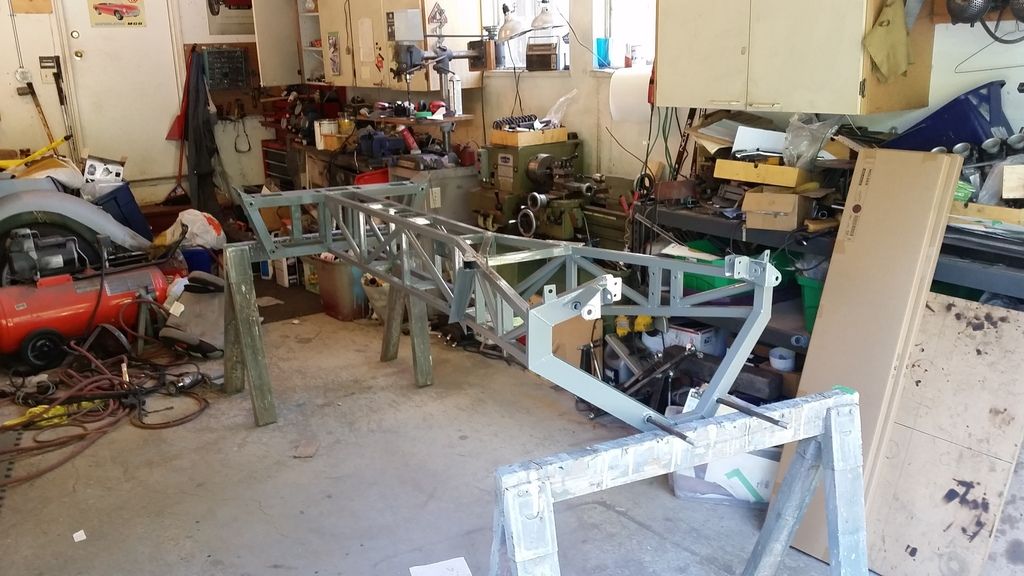
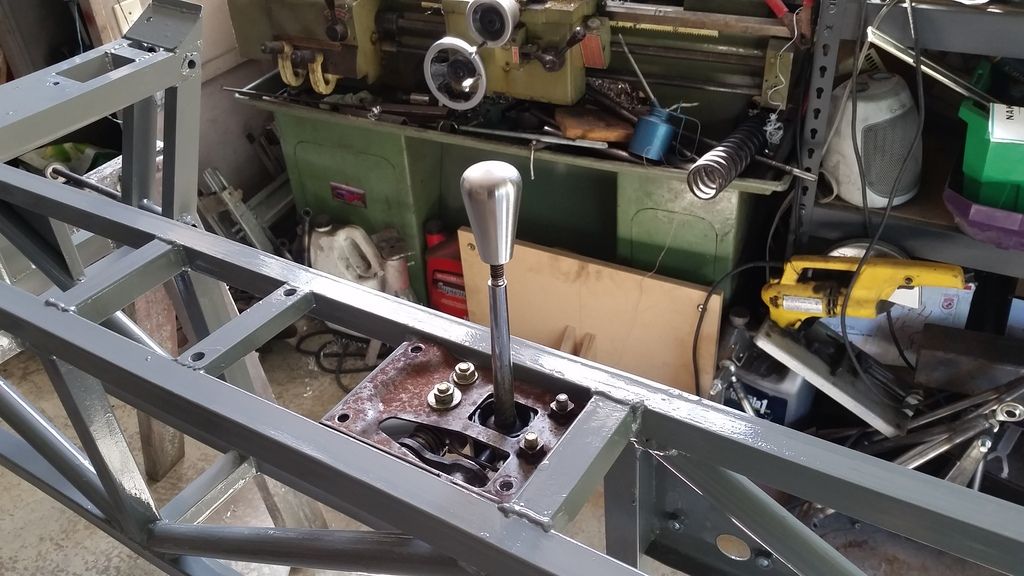
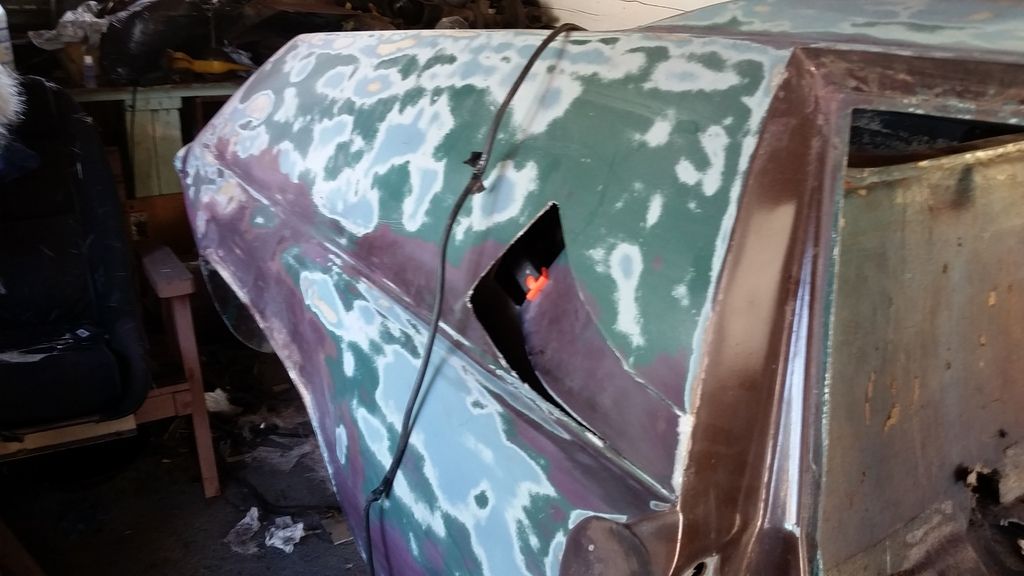
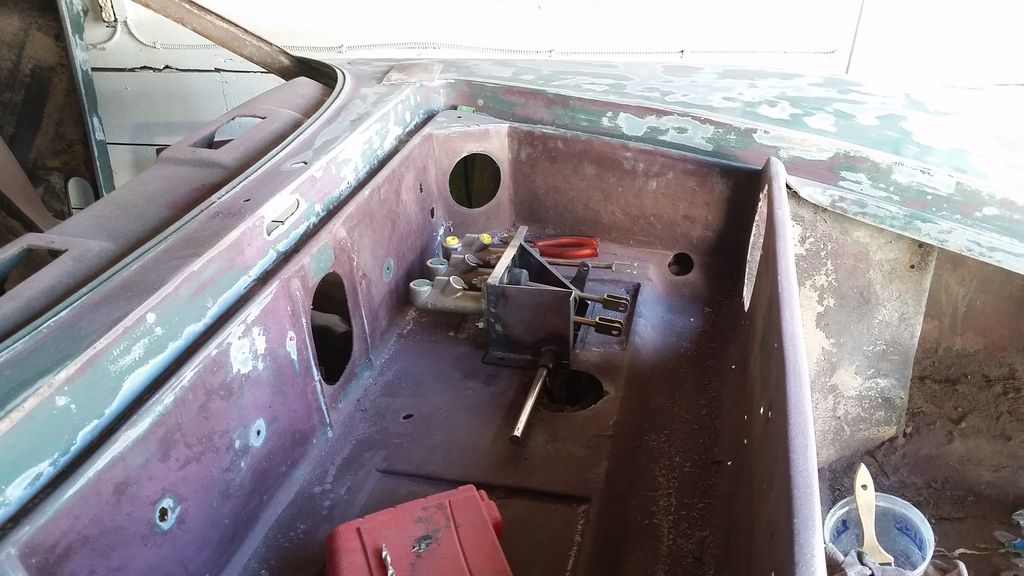
In other news, I did a bunch of work over the weekend. I managed to get a bunch of stuff checked off the list, but there is still lots to do. I welded in the mounts for the shift lever, some mounts for the pedal box stiffeners (going with a hanging pedal assembly rather than the stock floor mounted one), and finally put the engine and gearbox in to fabricate the gearbox mounts. I had to modify the rear frame assembly I had built a few months ago in order to clear the gearbox, luckily it wasn't that big of an issue. Anyway, here are a few pics:


Very cool!

What was your method for putting the arc in the square tube that goes over the gearbox? I see heat was involved.
Was it "free hand" or did you have a more precise method?
NOHOME,
Dear old dad suggested heat, but I decided to do a test piece by cutting slots the width of a cut-off wheel almost all the way through the tube, leaving one side of the tube uncut. I spaced the cuts at roughly 1/4", then with the tube held in a vice I bent it. The slots were welded up and turned out quite well. The test piece is the piece welded to the frame. I may dress down the welds, but dad thinks it looks neat the way it is. You can sort of make out the welds in this pic:
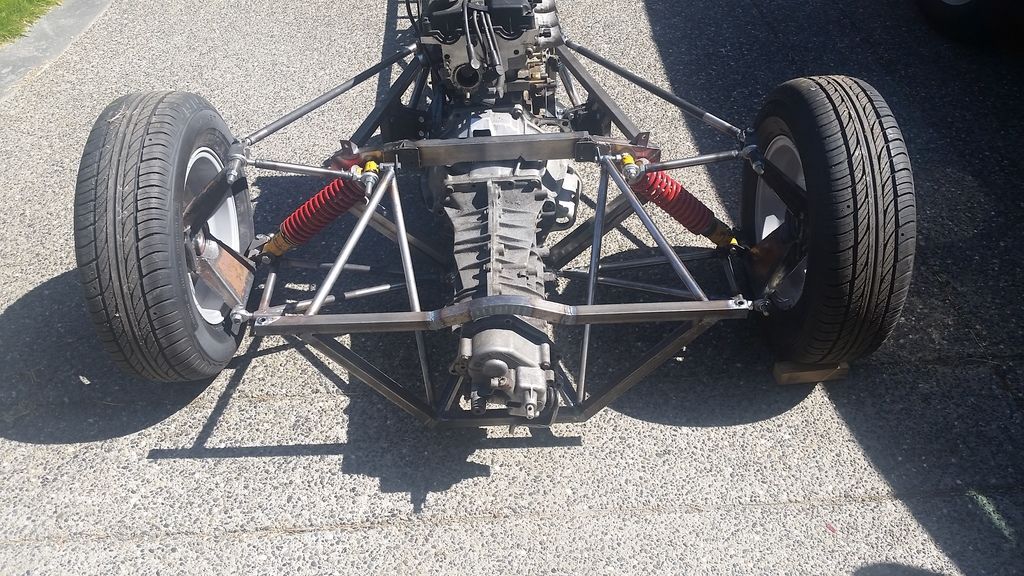
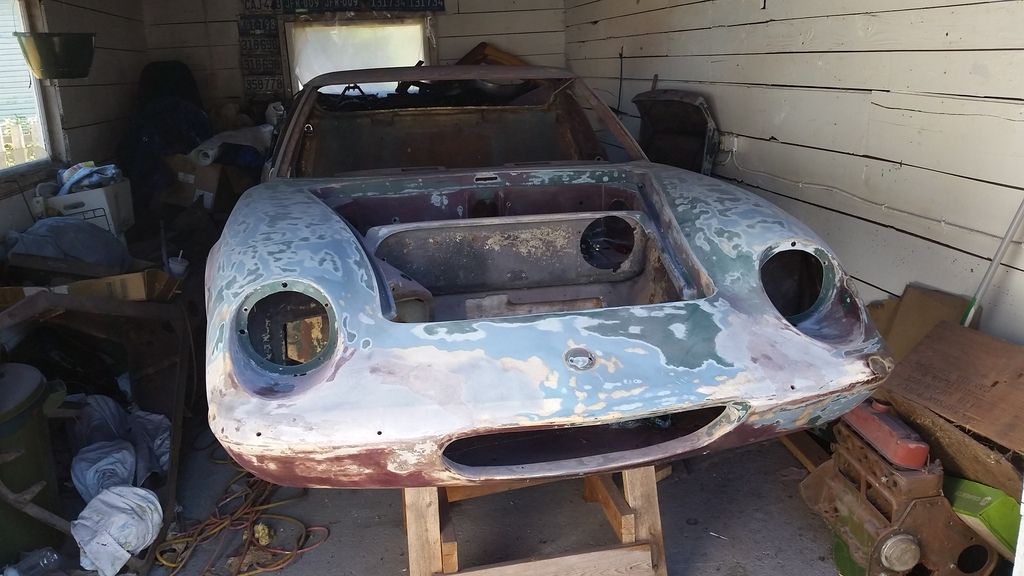
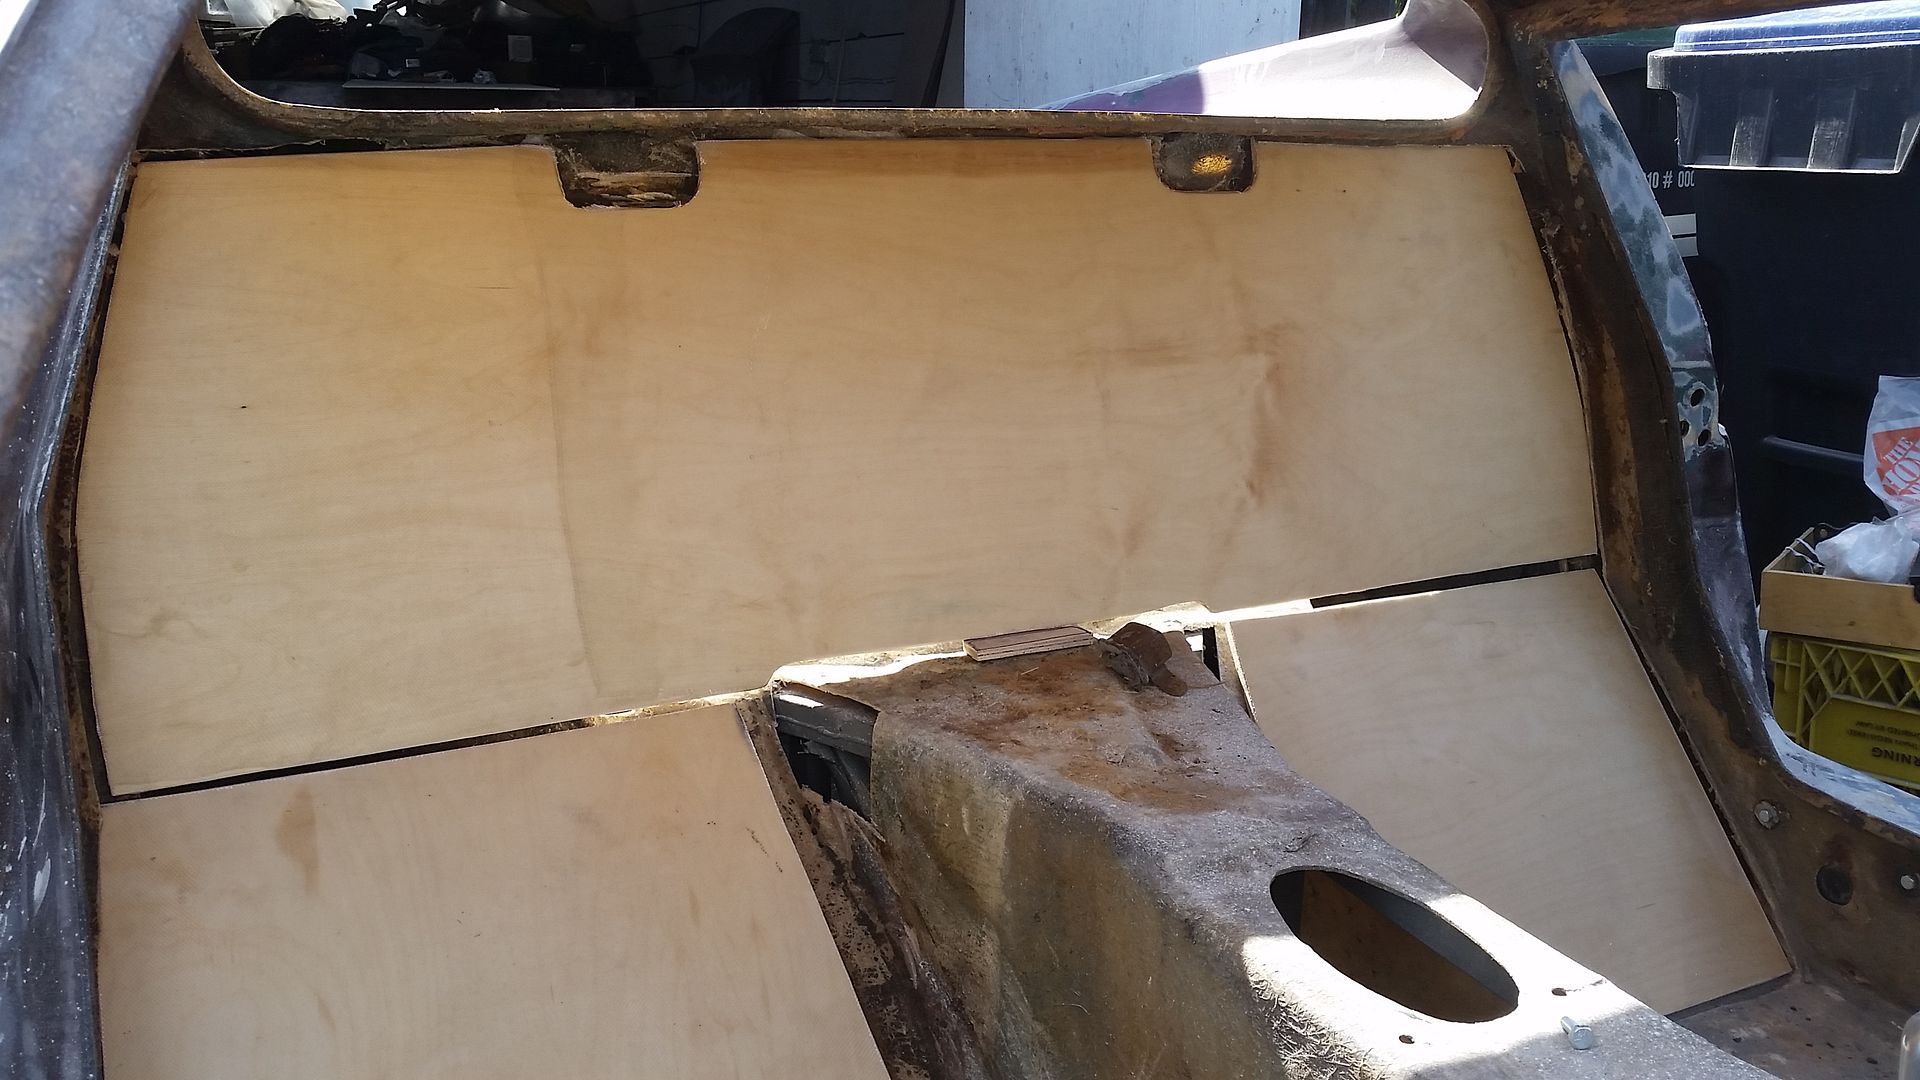
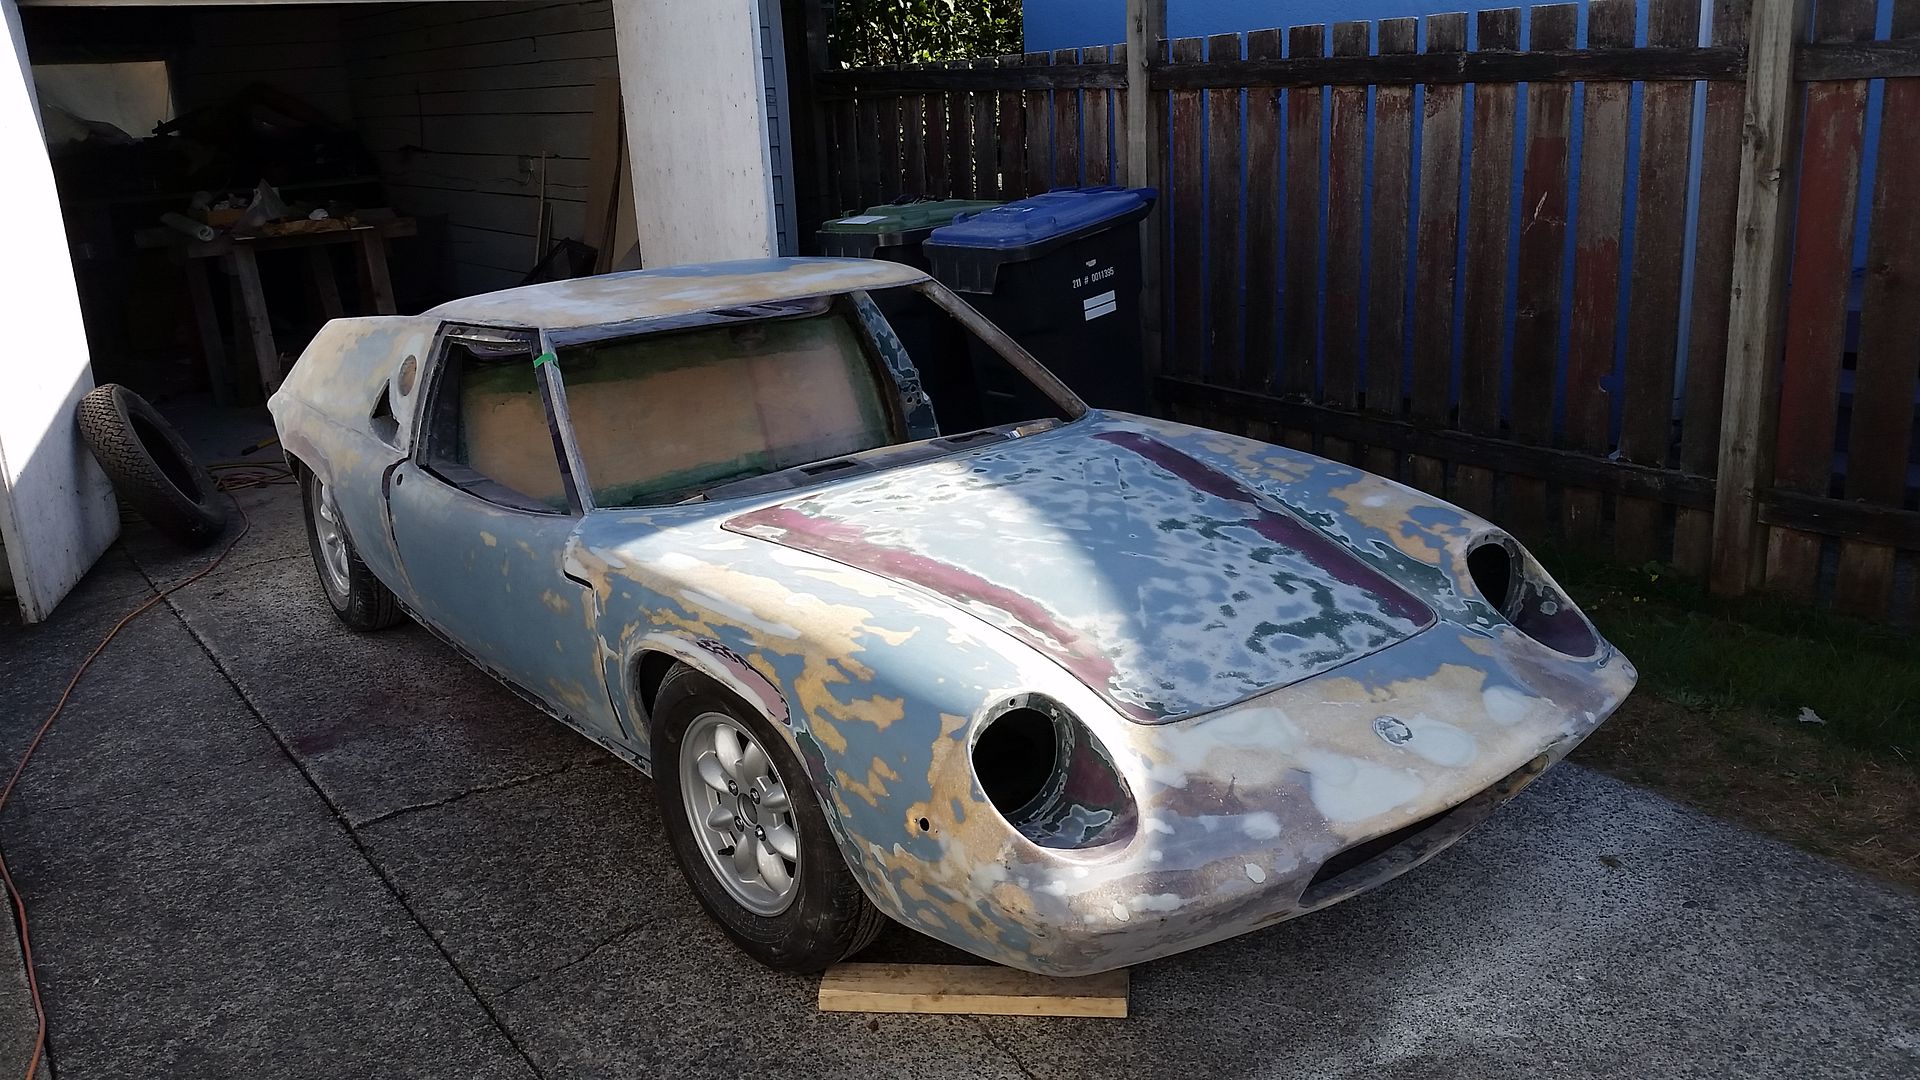
Since I last posted I've managed to paint the chassis, make another shift knob (the one I had made seems to have grown legs), start on the pedal box (I've copied the stock Lotus 47 pedal box as best as I could, but I'm using modified Spridget pedals), hang the chassis on the wall and start on bodywork. I've stripped 80% of the paint from the main body and have uncovered more and more spider cracks. This thing is turning into way too much work. I'm now contemplating having the doors, engine cover and front cover soda blasted instead of sanding all the old paint off. Does anyone on here have any experience with soda blasting fiberglass panels? Dear old dad had the wings and nose from his Caterham 7 media blasted, but neither of us can recall the media used nor any idea on the surface finish post blasting.
Anyways, here are some pics:
Rod

Looking good!

This project is awesome. I love watching it progress. If it were my decision I would definitely haul the body over to the soda blaster's to have all the crap stripped off. IMHO there's no worse job on an old car than dealing with the multitude of E36 M3ty paint jobs that are layered on over the years by previous owners.
I have tried most methods and they all have their drawbacks. Quick search saves me some typing. My current project was sandblasted as a bare shell and I have spent a lot of time trying to get the sand out. It keeps coming out of who knows where! I would hate for a puff of sand to aparate during painting. That said, dust is going to be created during the sanding process anyways and you have to be careful cleaning that up.
"Soda blasting isn't strong enough to entirely clean or strip the metal. In addition, the material will have a tendency to get into areas that you will find difficult to remove it from. The biggest concern really, is the after-effect of the product because, although it can remove rust, it can also cause it if not rinsed or removed thoroughly. Sodium bicarbonate is similar to sodium chloride (salt)
Read more : http://www.ehow.com/list_7504433_problems-soda-blasting.html"
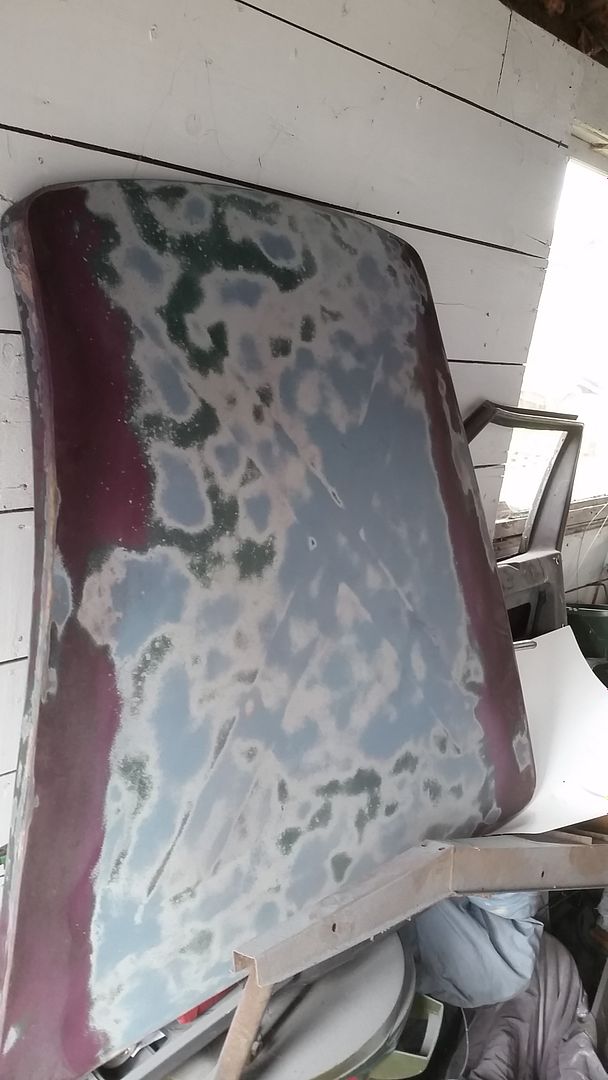
Luckily the body has only had one paint job since it left the factory, the green spots are the original paint and the two grey layers are a polyurethane primer/sealer and a surfacing primer. As I've got most of the body sanded back I'll continue with using the orbital and hand sanding, plus carting the body shell around isn't that easy as I have neither a truck nor a trailer. But I can easily fit the doors and two lids in my car. In terms of nooks and crannies for blasting media to get trapped in, the engine cover and front cover have none, but the doors do have a large cavity. I'm just getting tired of sanding, and sanding and sanding....

I am currently cleaning up a shell after blasting, and yes, getting everything out is impossible, but I'd say on a fiberglass body, why not. You aren't going to rust.
For my project, the biggest concern is all that media holding water when it gets wet, and causing rust. Also, hypothetically, say you took this Europa shell to soda blasting, doesn't that soda dissolve in water, unlike my bead and sand blasting? As such,I'd say take it outside, and run the hose in it til it runs clear, right?
As to carting it around, I kind of think it would sit flat tn a full size truck bed (I know my Bugeye Sprite does). I have also put 4X4s across the rails of a truck bed , and put a small car up there. Friends are a necessity here.
Regardless, I love the build, and look rorward to the incredible craftsmanship contained in this thread.
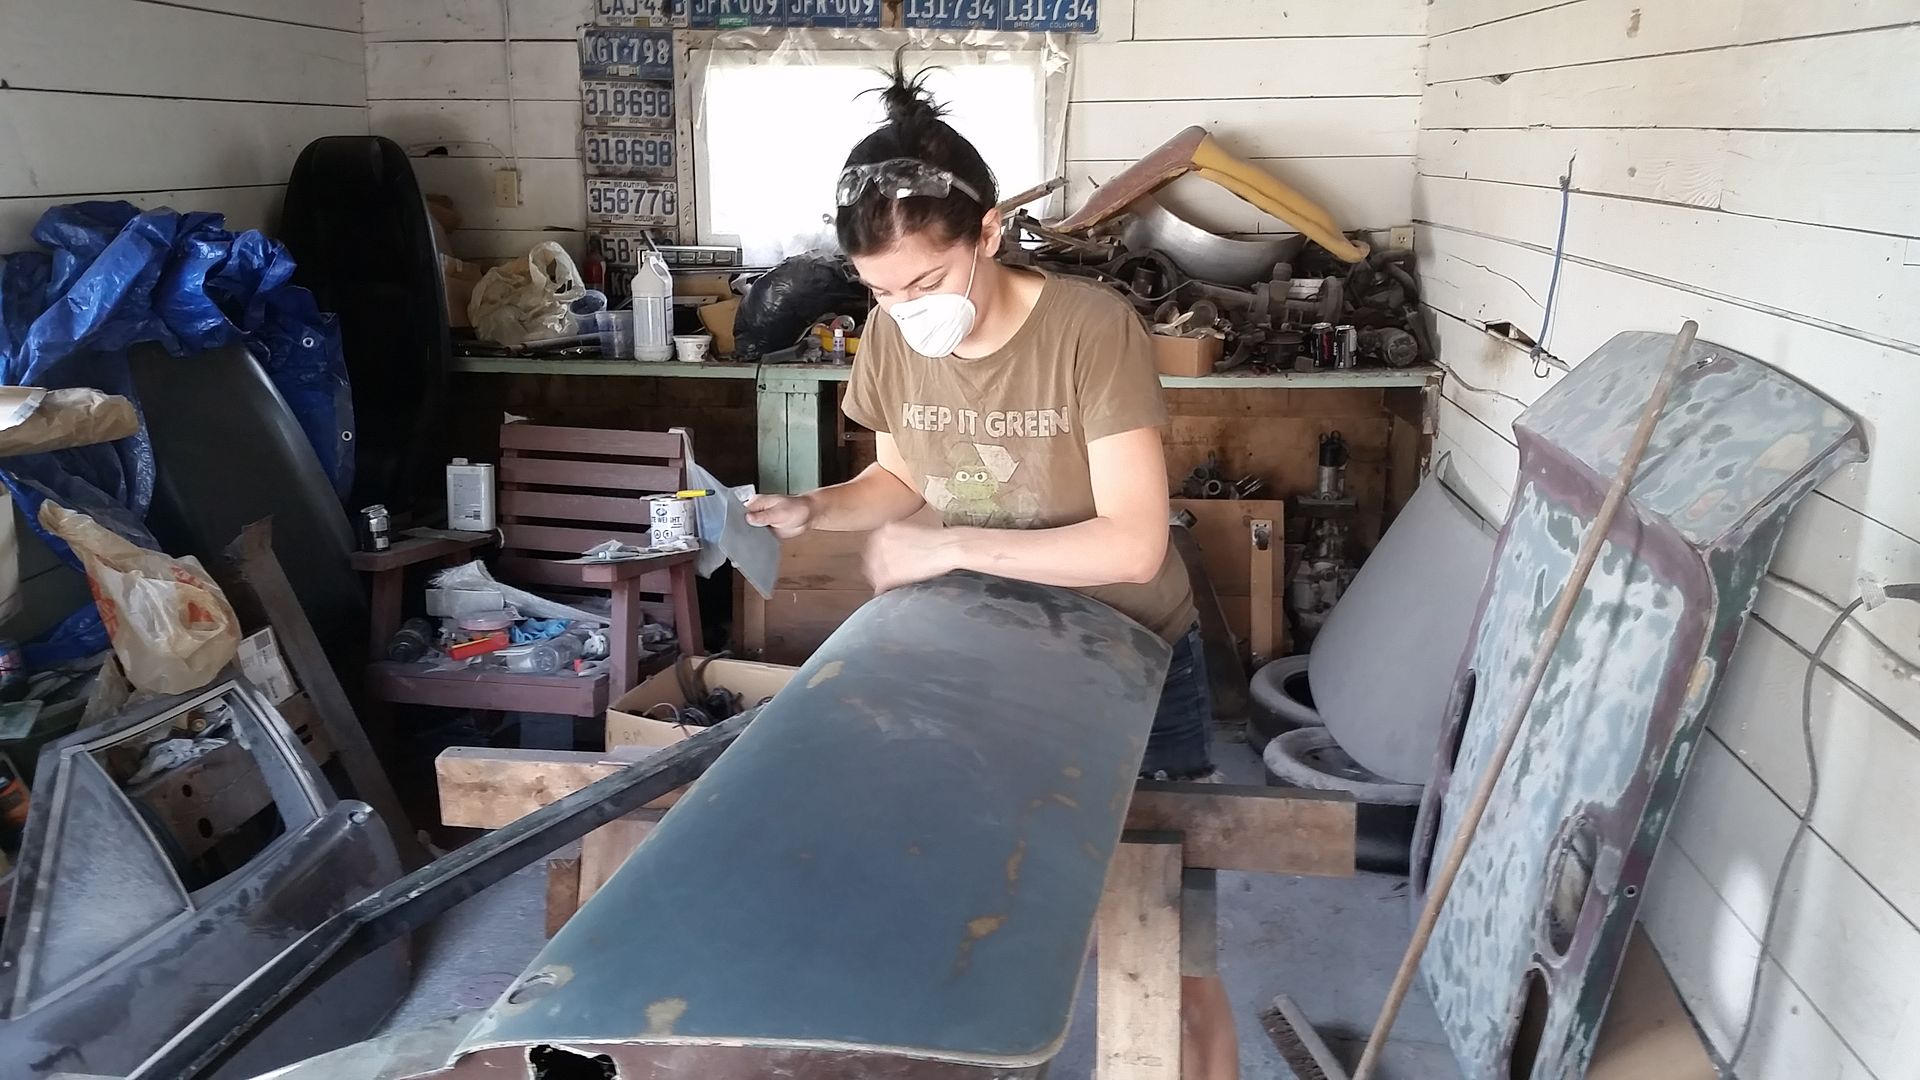
I managed to get some help on the weekend with sanding (honestly she wanted to):
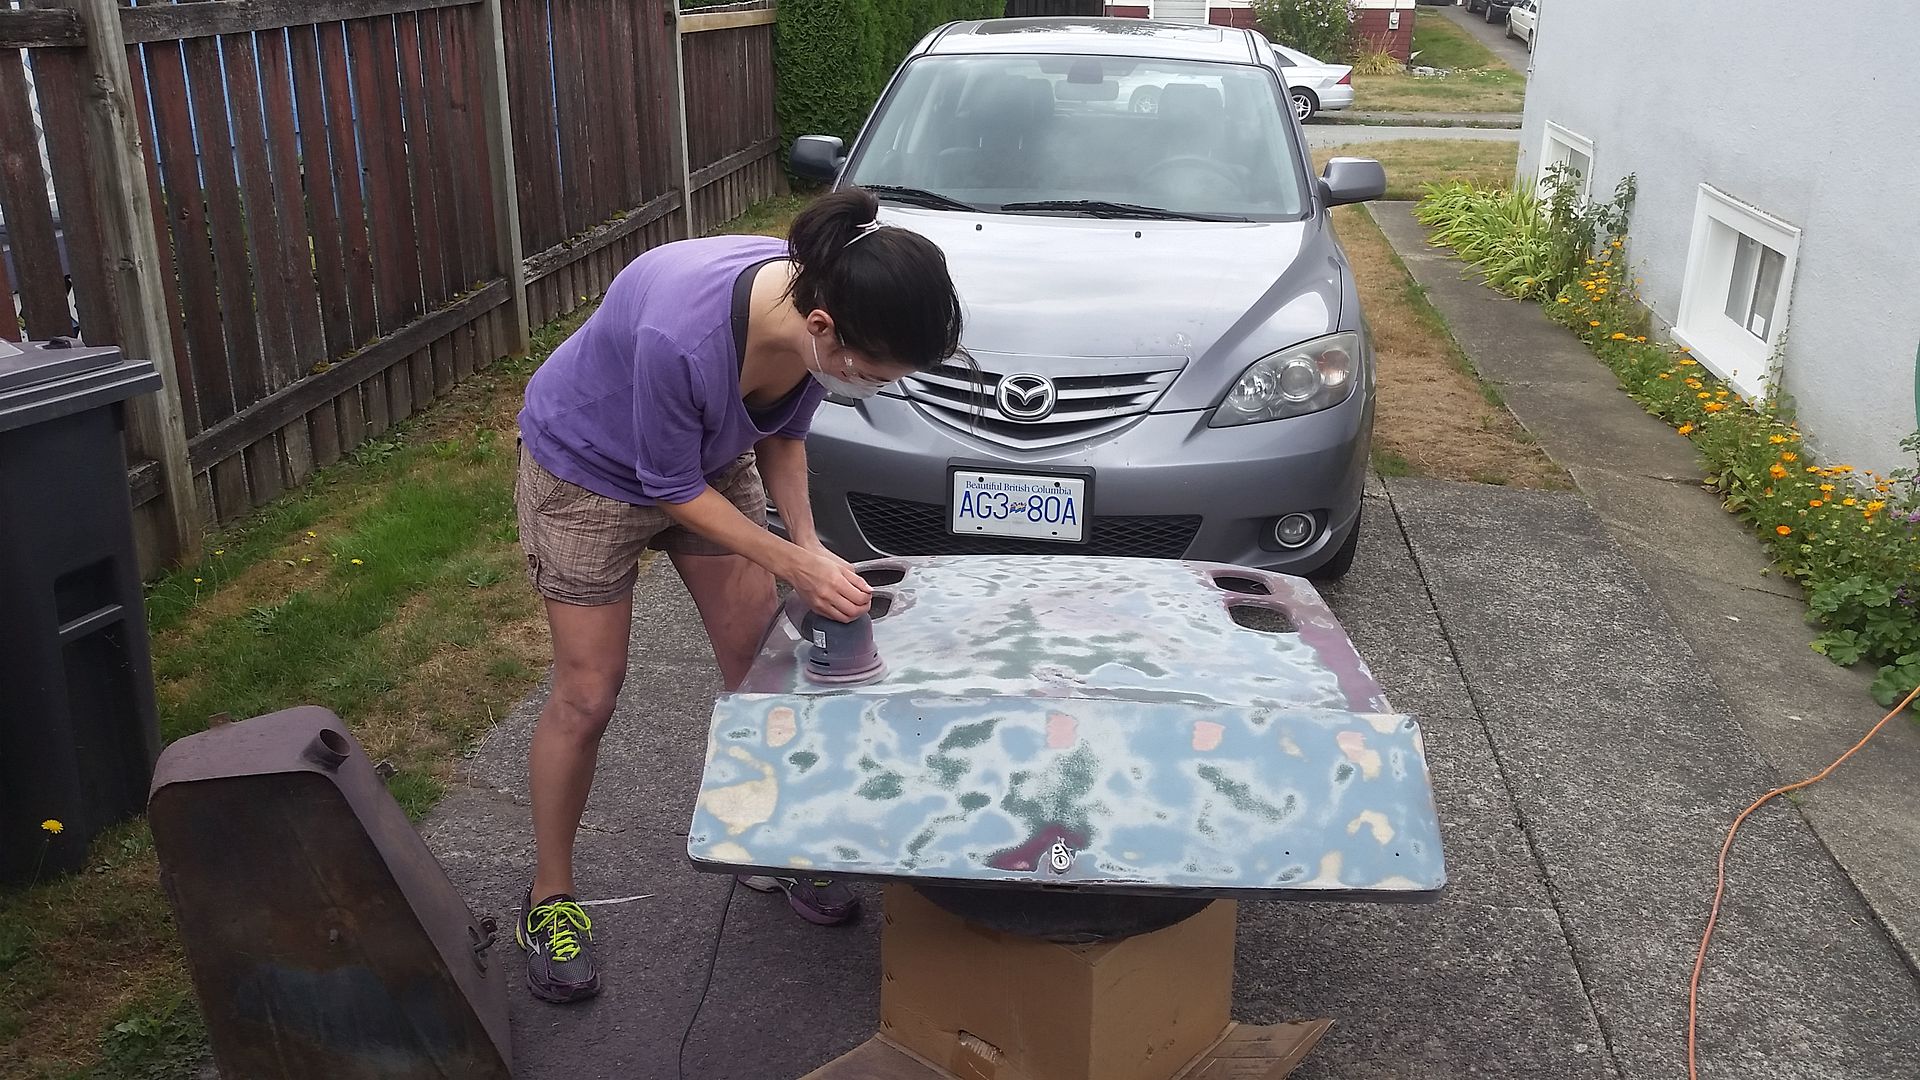
She got most of the purple paint off both the front lid and the engine cover which has sped up the bodywork process. I had planned on doing them over the fall and winter but I might have them both in primer with the body tub.
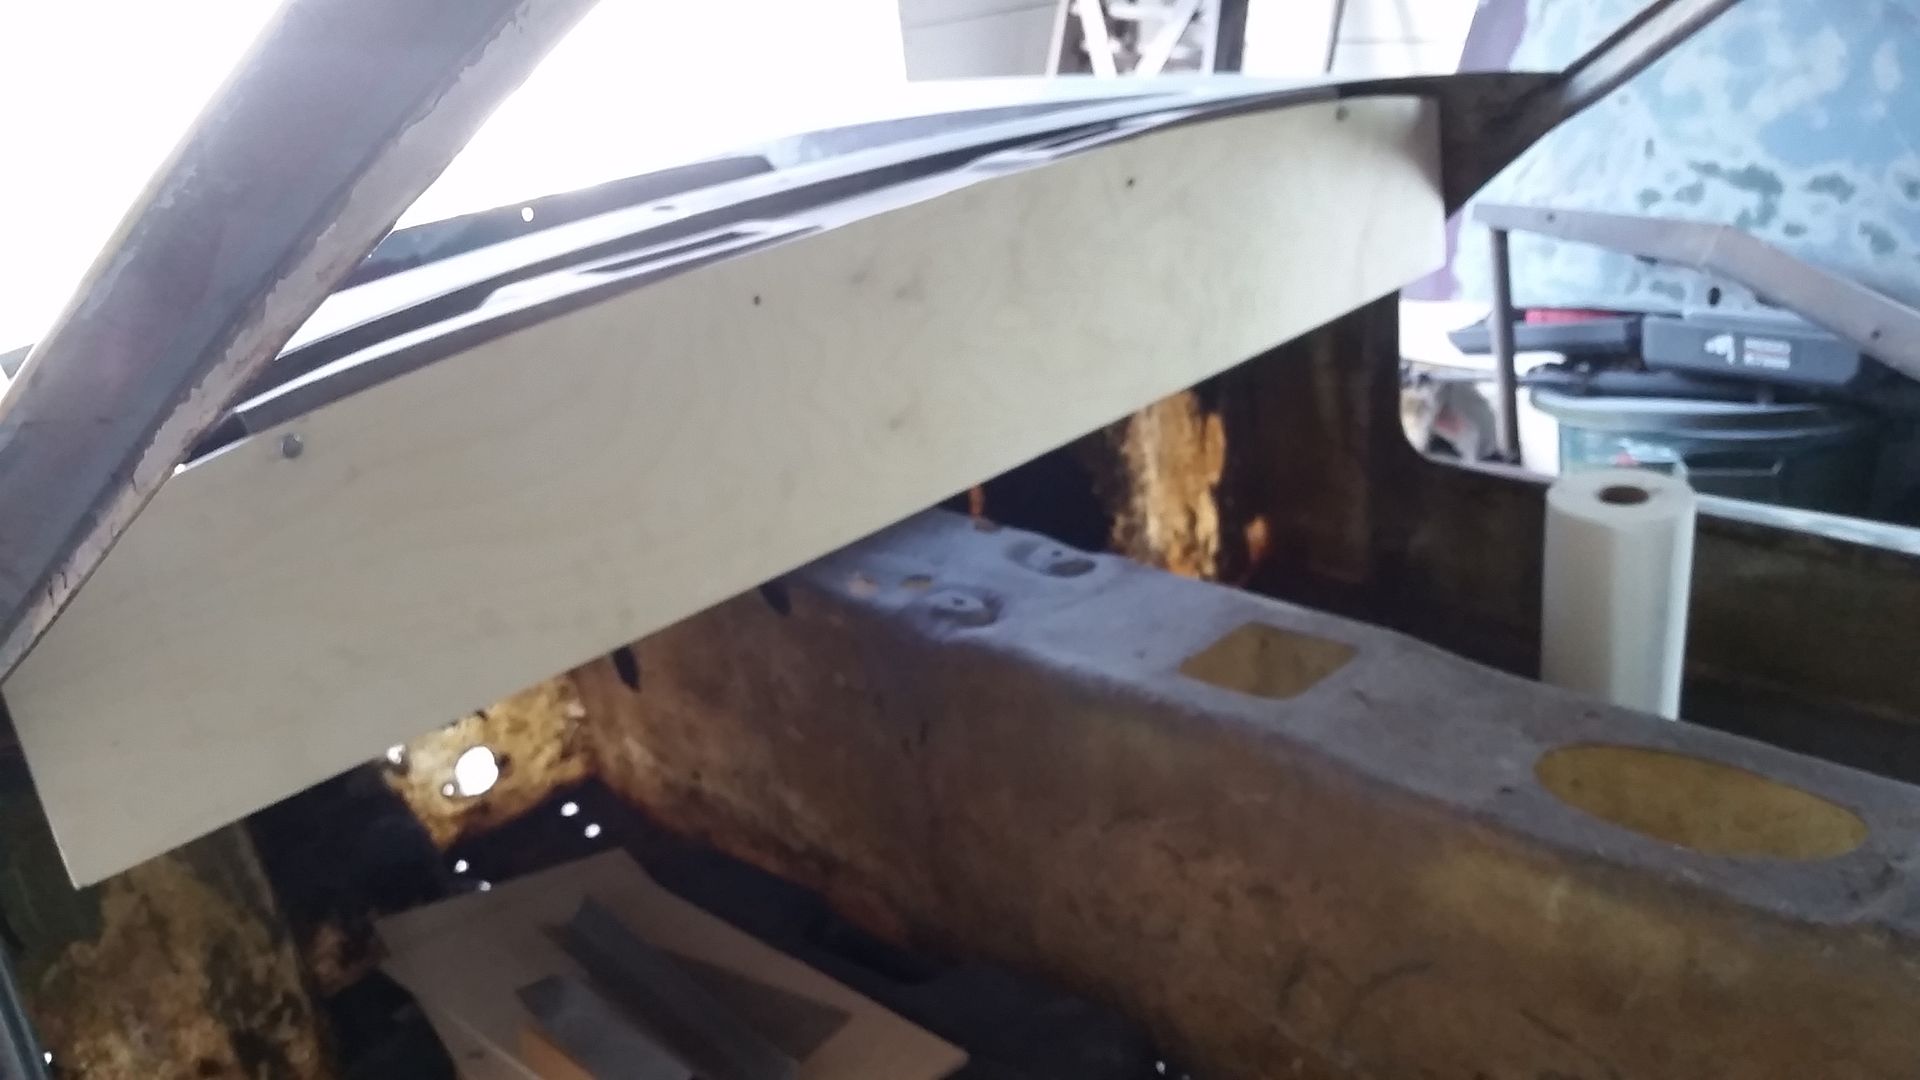
In regards to the body tub, it never looks like there has been progress, but I'm down to a few small repairs to the LH sill flange and finishing the vents and fuel filler recesses.
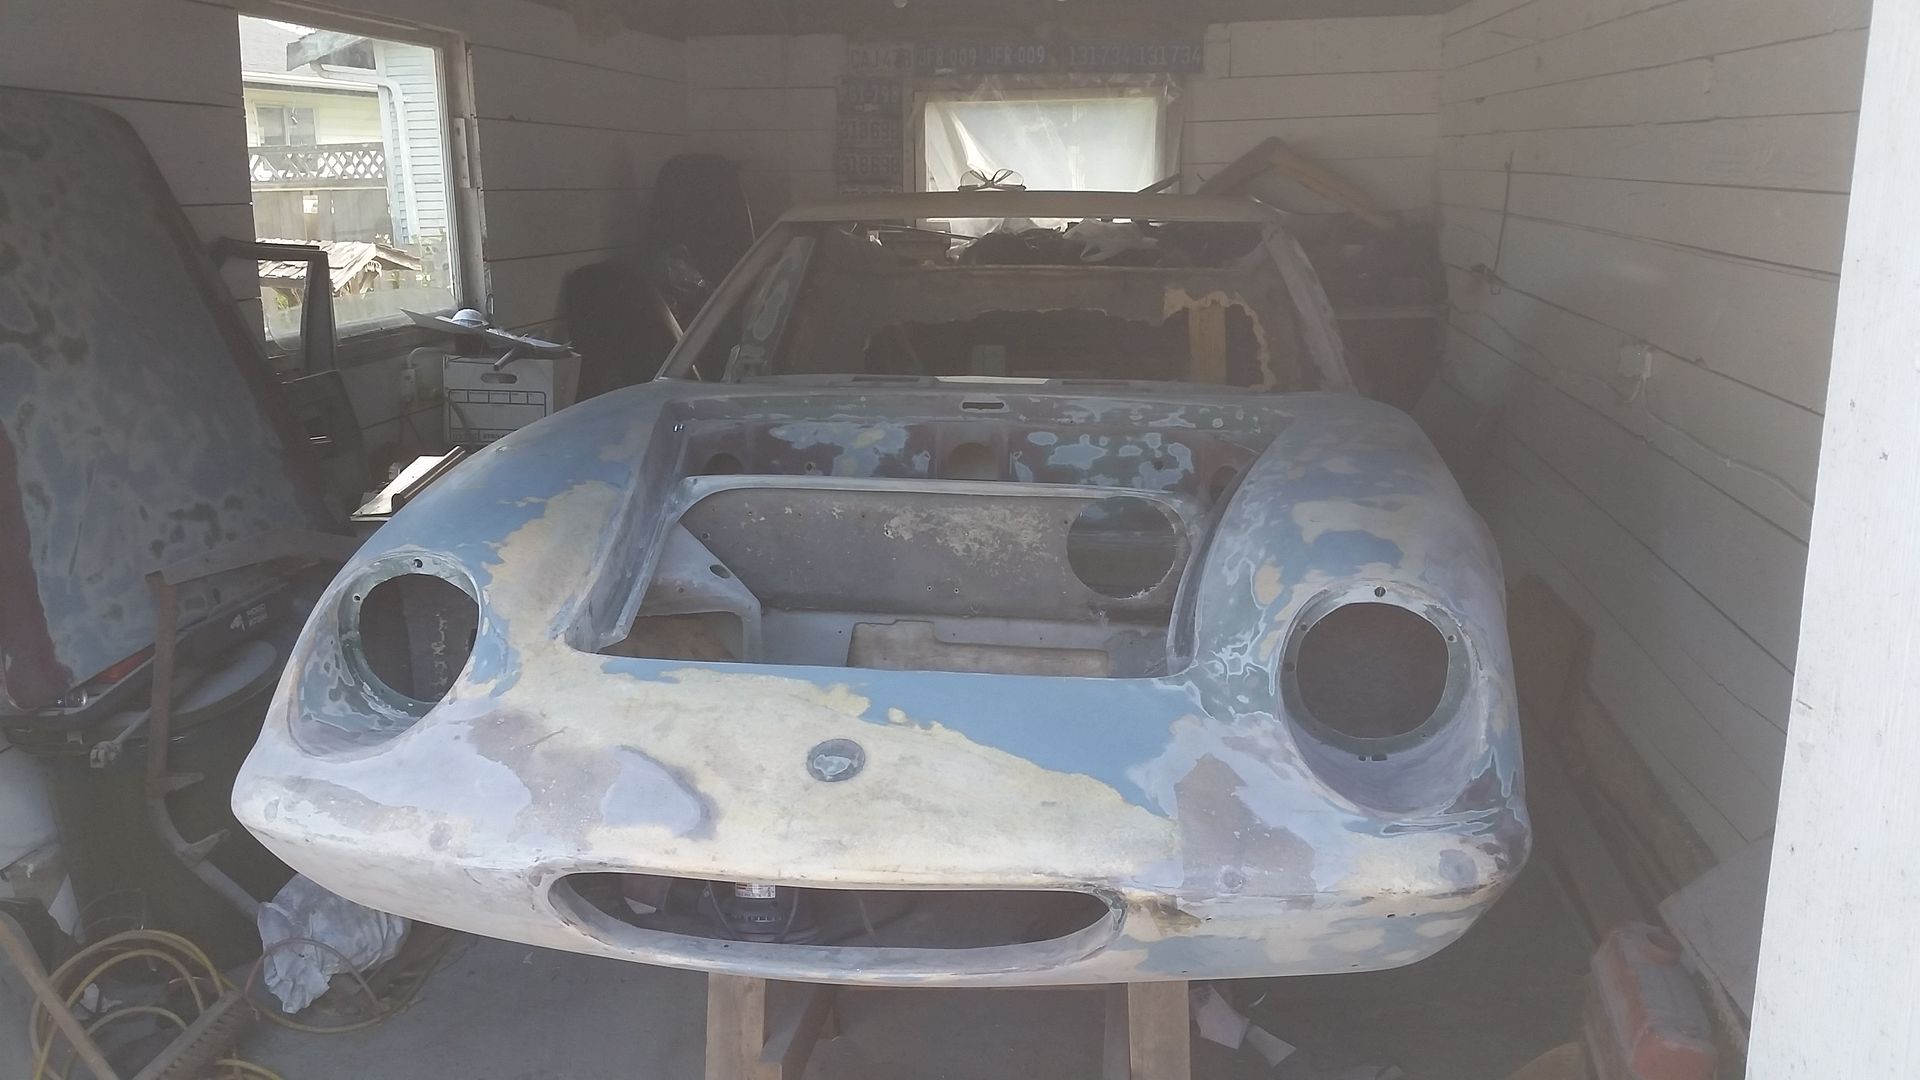
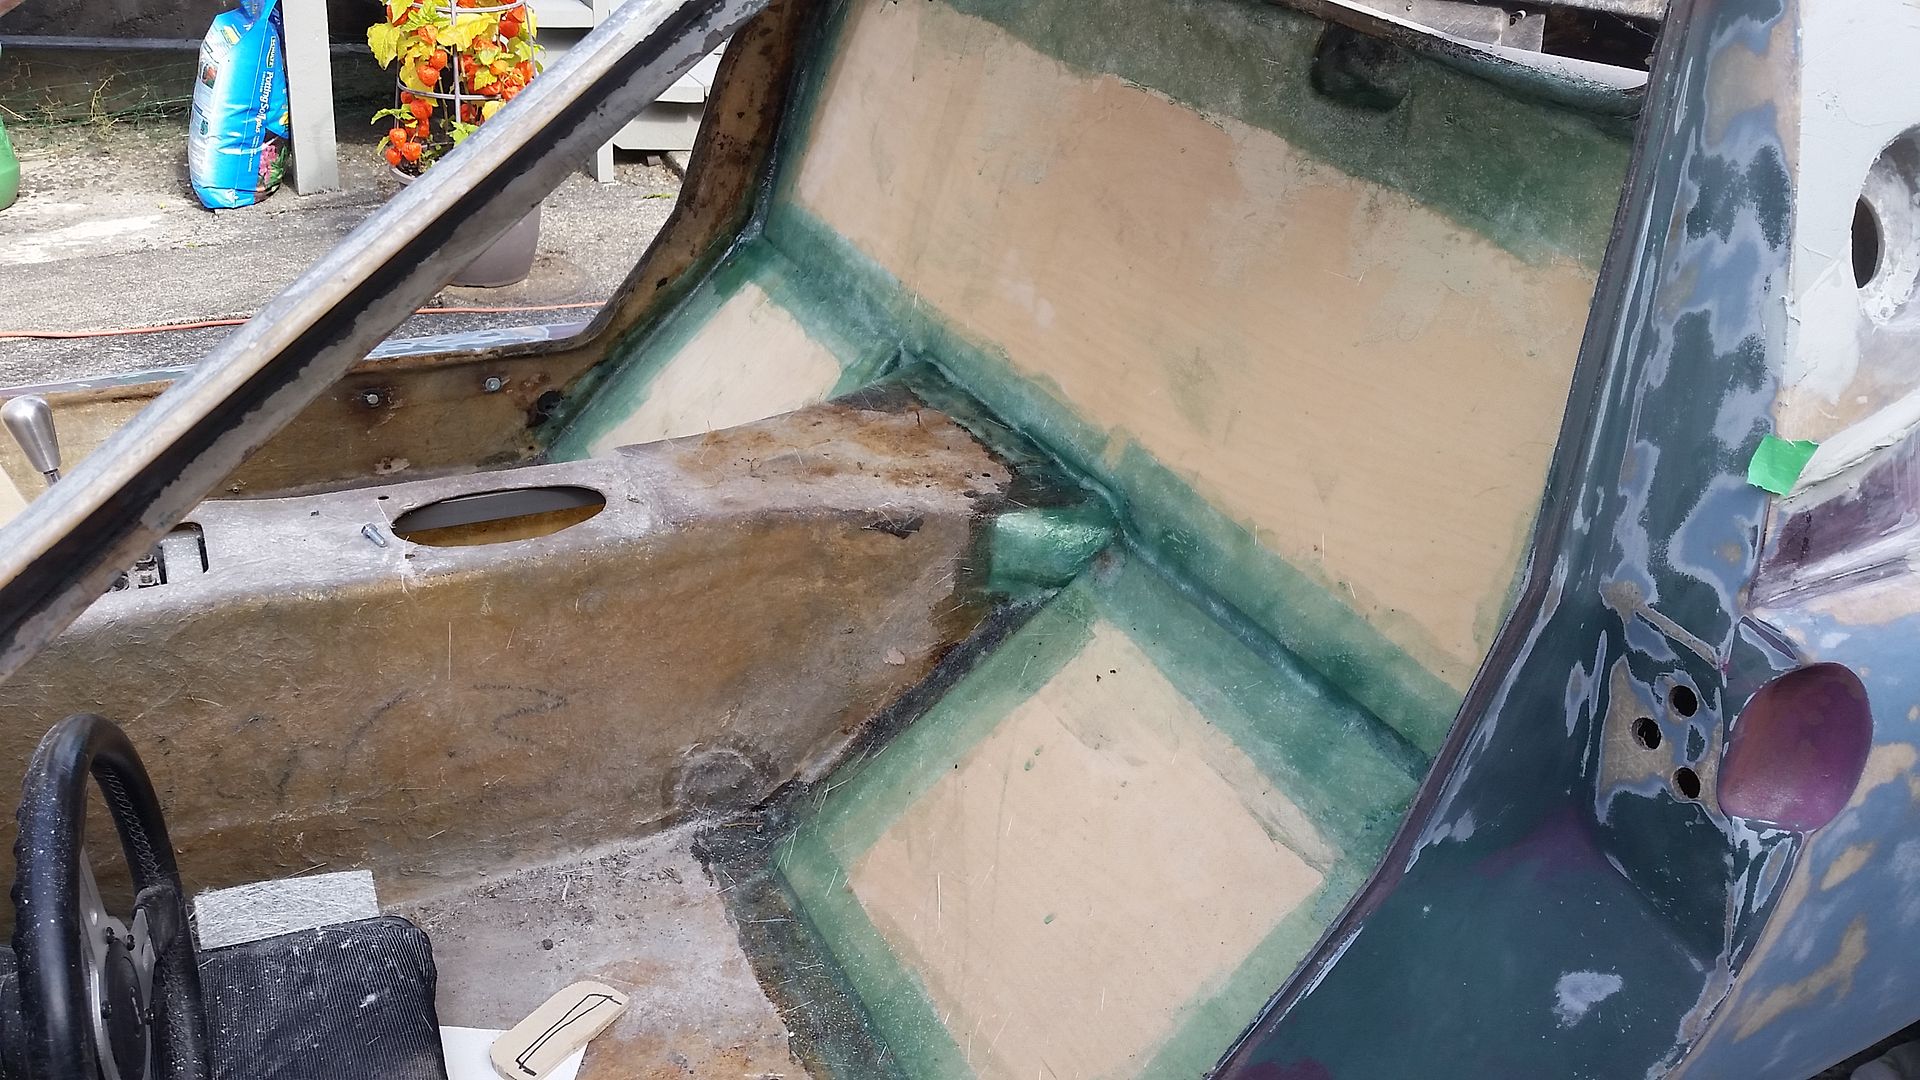
I did get the rear upper trailing arm covers laid up, and they turned out quite well, now its a matter of sanding the underside smooth to match the factory finish, and get onto the little cutouts I made inside the cockpit to clear the trailing arm brackets. And yes, the firewall is getting replaced once I plant the body back on the chassis (sometime soon I think). The stock firewall is made of a thing called "beaver board" which is basically ceiling tiles, it absorbs sound, water, and oil but doesn't last very long. The new firewall is going to be made of marine grade plywood which will be glassed both sides then bonded into the body tub.
I also got started on the dash assembly, it doesn't look like much at the moment, but its helped with laying everything out so far. I'm hoping to make it look somewhat like a Lotus 46 dashboard.
That's all for now, next weekend should see the RH side vent nearly finished and the fuel filler recess cut into the side panel.
Rod
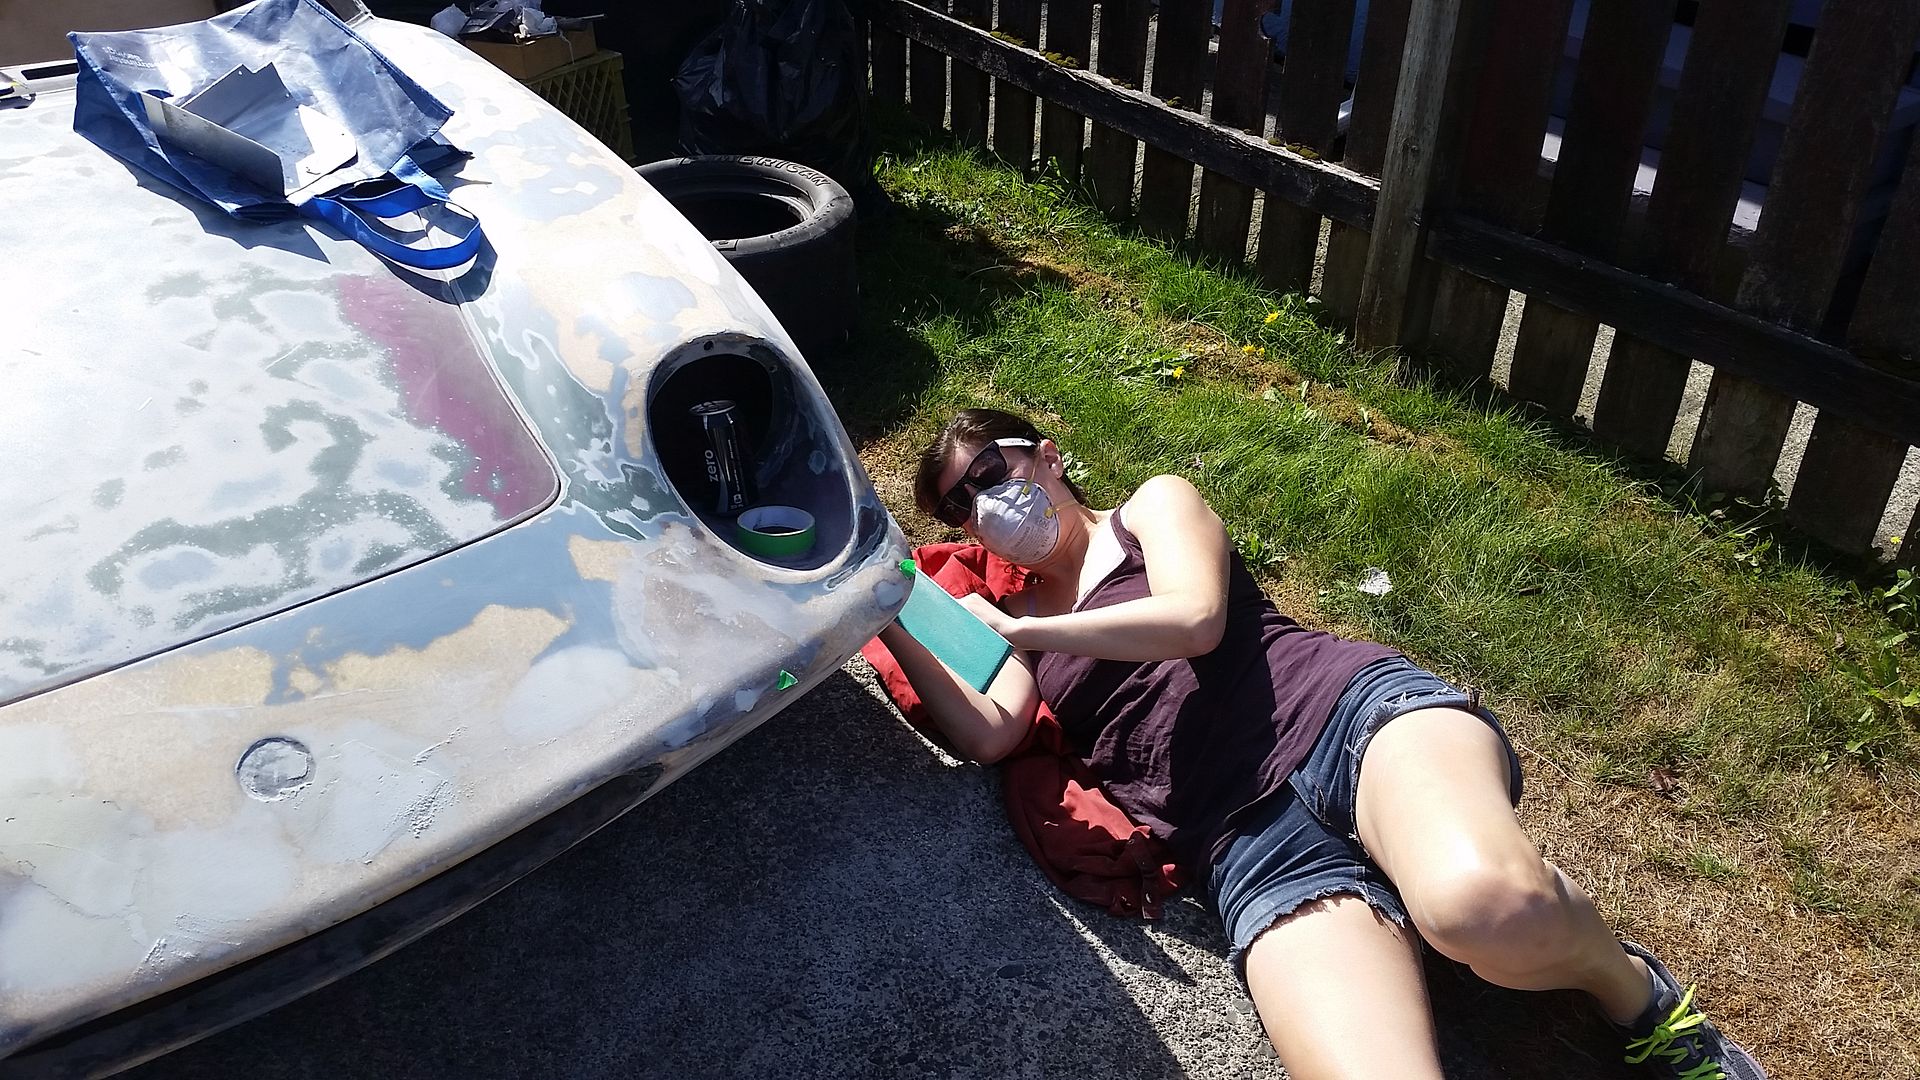
I managed to convince my helper to help out for two days this weekend. She managed to get both doors nearly stripped, and got most of the little bits on the body tub sanded and filled.
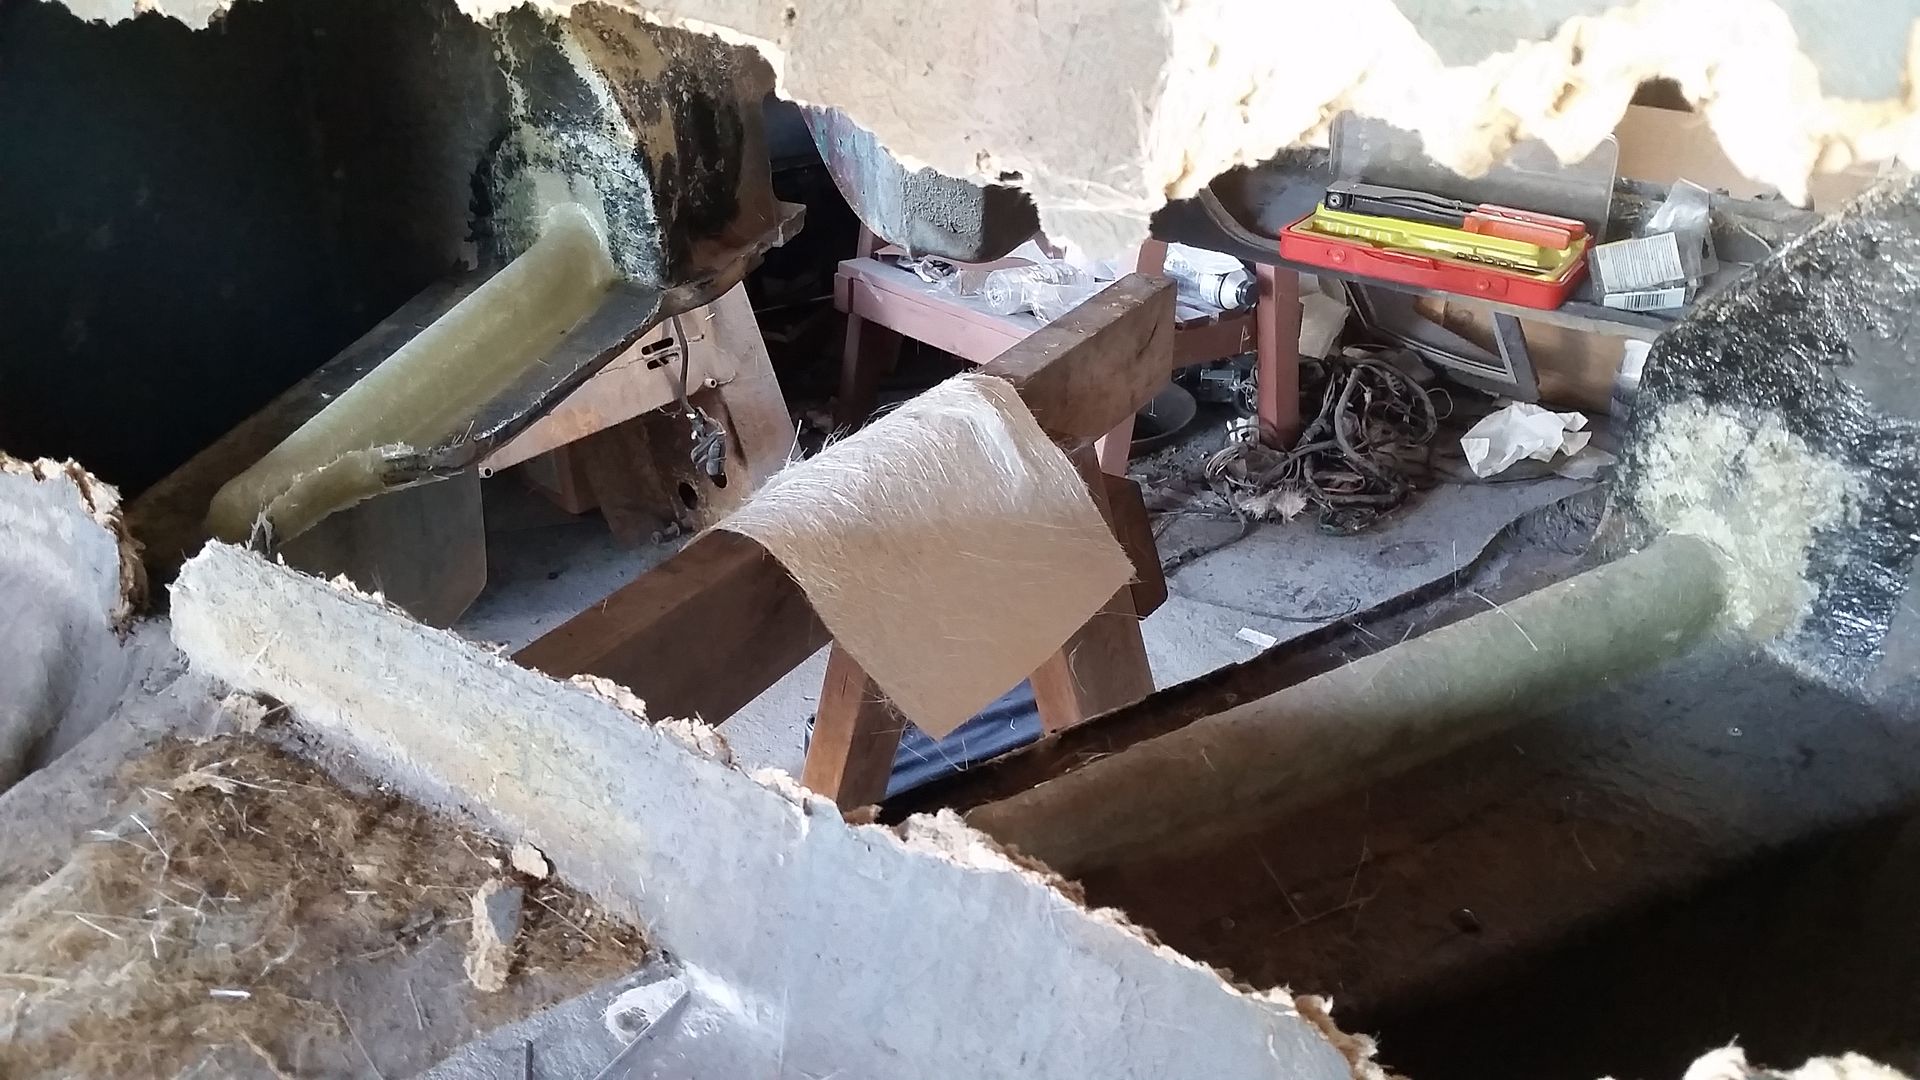
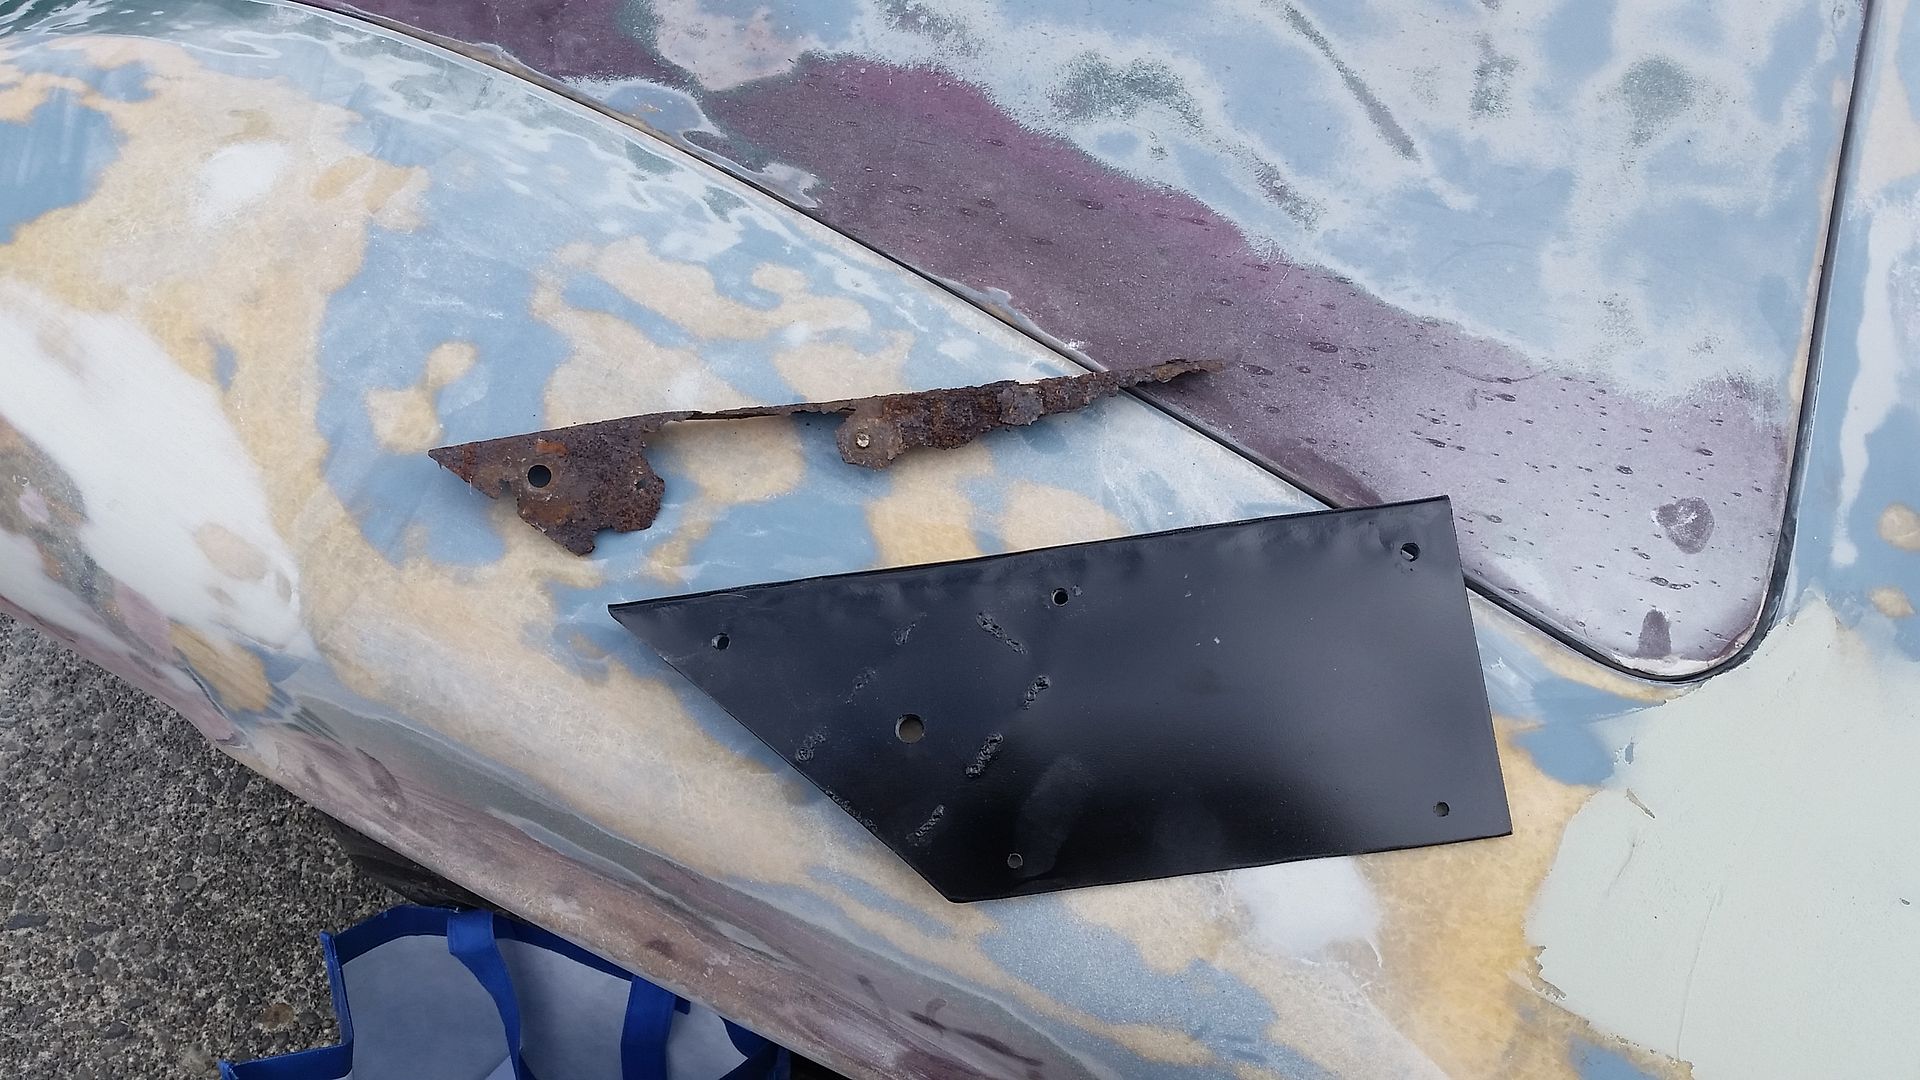
I managed to get the old seatbelt mounts out of the rocker panels and replace them with a set of mounts I had made a few weeks ago. The mounting bolts had to be cut off, as there was nothing holding the nuts in place:
I also removed the old firewall, or what was left of it, and cut and glassed up a new one. The new one is made of plywood that was glassed on both sides, then glassed into the body tub. I only managed to get one side glassed in, the engine side will get glassed in sometime in the future.
It looks like I might meet my goal of primer by the end of next weekend, fingers crossed.
Rod
A Lotus with minilites = YEssssss!

This is starting to look like a Europa that may get done. I'm impressed

nocones wrote: This is starting to look like a Europa that may get done. I'm impressed
Let's not jinx the guy.

Looking good. When you get the Europa finished, have you thought about maybe taking on a Biturbo for your next project?
You'll need to log in to post.


