FWD to RWD, biggest issues are the throttle body and upper hose as mentioned. If you look back in the thread I made an elbow for the throttle. Upper hose I sorta have that mocked up as well. It was one of those things where I did some fitting, I will be able to make it work but I didn't finalize anything. A custom water neck would make all that way easier, but I don't wanna make one. In the states the Camaro used this engine in a RWF application, NA though. In Australia that did use the L67 in a RWD car and there are bits if you can get em to make things work. The blower case is Angeles at the throttle end, and they also have a curved tube to kick the throttle out, etc etc. But for the trans, Camaro T5. They literally took the FWD engine and shoved it in a Camaro with a different intake manifold. So stock Camaro flywheel, clutch etc.
I've never heard anything about that coolant passage being an issue. Nor am I worried about it. The engine is stock and it will stay that way.
Her issue in this car with this engine was the accessory drive. Especially since I wanted AC. Compressor stock is down low , and in this engine bay there is no down low. Other issue was the alternator up too high, the heater hose outlets which are part of the alternator bracket. All this stuff I had to make. The accessory belt has been completly rerouted, and custom heater hose fittings made. Spend a few min and look back through this thread. I address all this stuff.
Harness needs to be reworked as well, oil pan had to be changed. Camaro pan and pickup worked well though. If you can get away with relocating the throttle and deal with the upper hose for your project and not have to re engineer the accessories it may be worth it. This is a lot of work for 240hp. I could have done a 4cyl with this amount of power much easier, in this car anyway. Every part of this was a lot of work. I mean just look at the exhaust lol. But I like the 3800, the blower ass more torque which i also like. I've never been a fan of the 60 deg V6 that's commonly used in these cars. So common there are bolt on kits available. But I wanted that bling factor of the blower when you pop the hood. Because supercharger


 [/url]
 [/url]
 [/url]
 [/url]
 [/url]
 [/url]
 [/url]
 [/url]
 [/url]
 [/url]
 [/url]
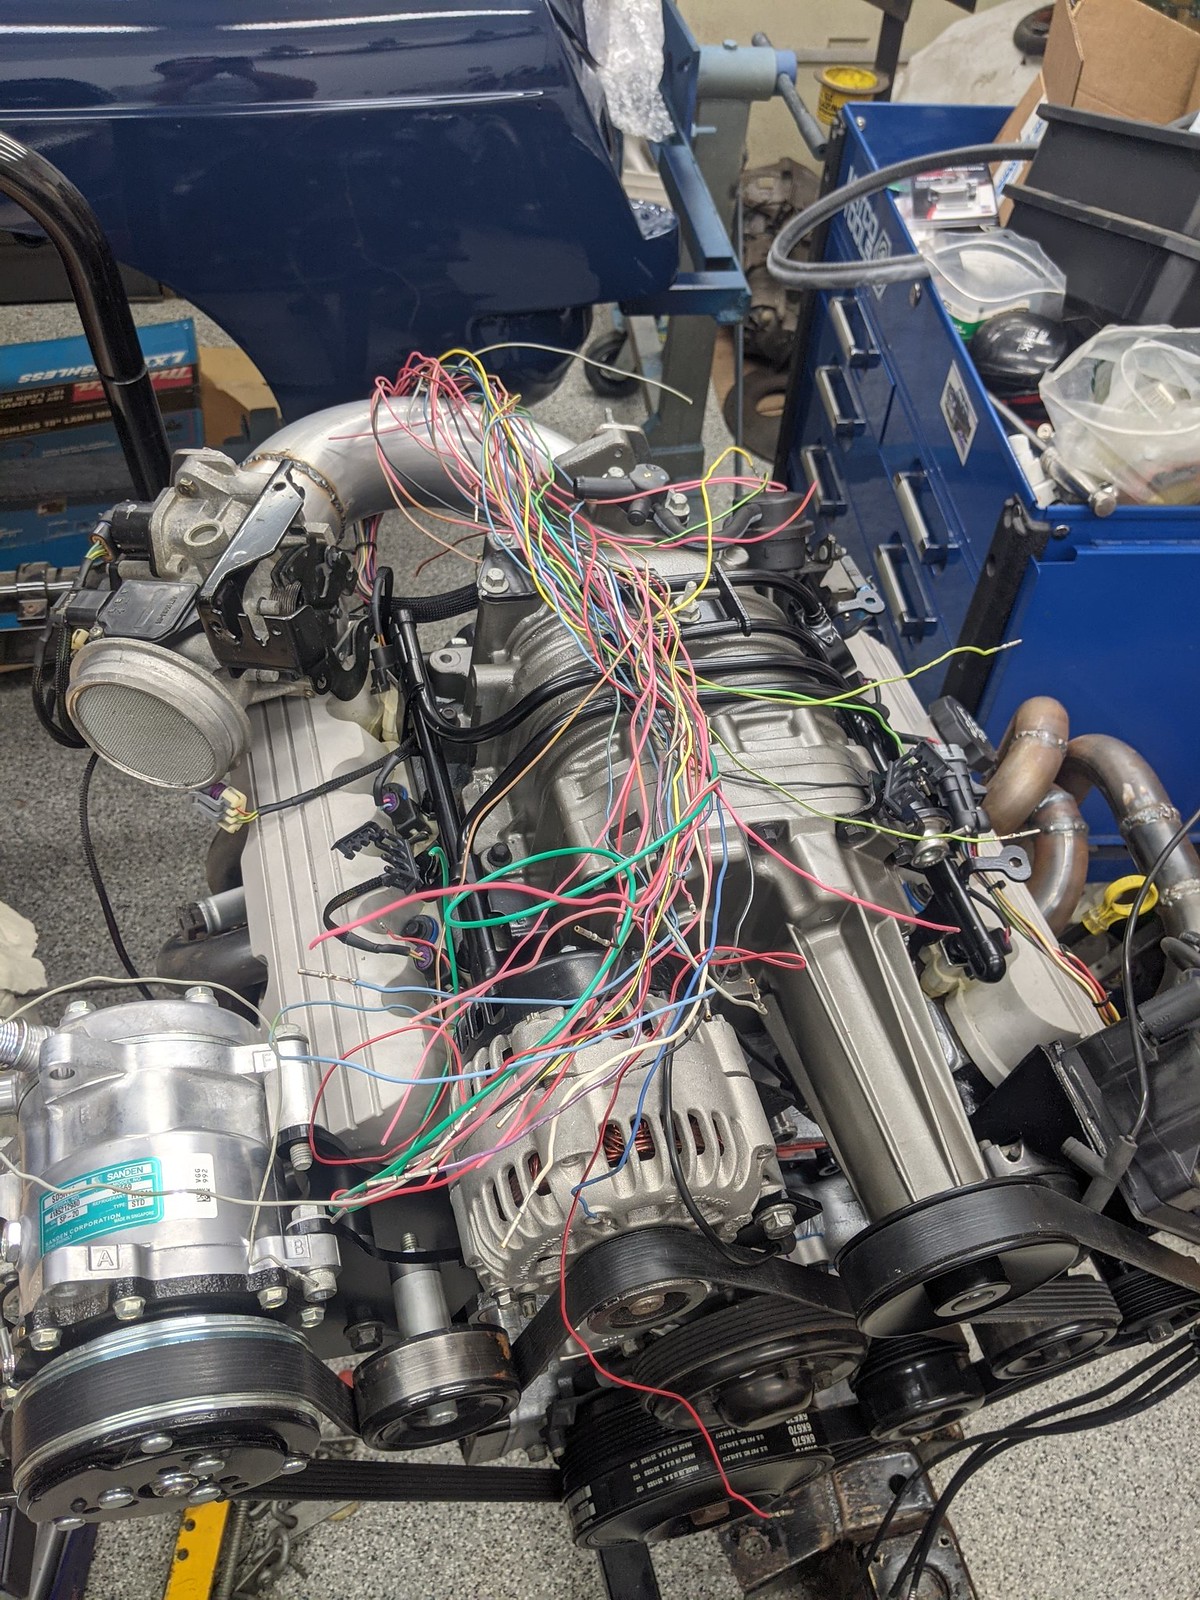 [/url]

 [/url]
 [/url]
 [/url]


 [/url]
 [/url]