


Sky_Render wrote: How did I miss that Joe had a build thread on GRM?
I thought I told you about it?

Sky_Render wrote: How did I miss that Joe had a build thread on GRM?
I thought I told you about it?

In reply to Sky_Render:
Now you'll know how I got the zombie thumb.
First the good news. The rusty trailing arm section came out without too much fuss. The inner frame rail looks pretty good.
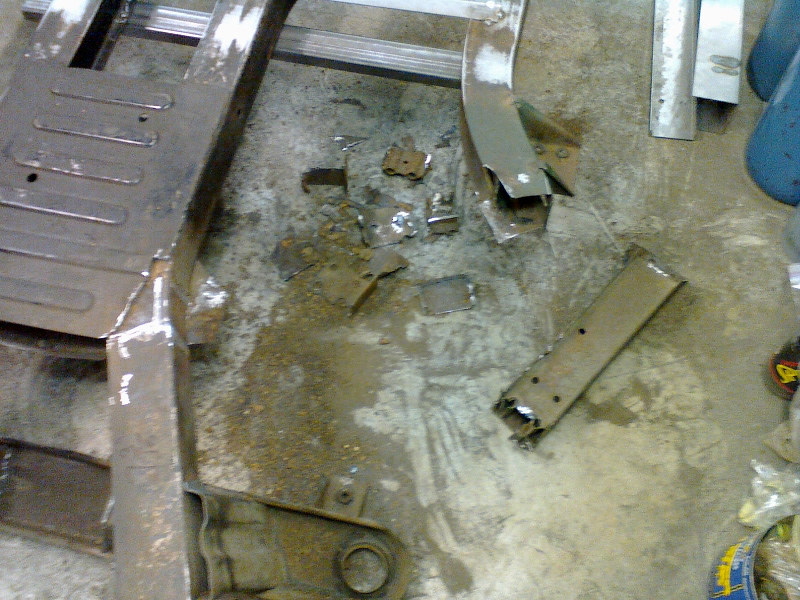
This was after sweeping up two handfuls of rust. The internal reinforcements were pretty crusty, so it looks like I made the right call. The new trailing arm piece fits. Now I just need to clean up the weld areas and weld.
Now the bad news. After fitting the new section, I carefully lined it up with my marks and took some measurements. It's right where the original piece was. The problem is that it doesn't match up with the other side. I measured from several points, and it looks like the new outer corner is 1/4" forward of the other side. The angle of the tailing arm sections to the rear frame rails is off by roughly the same amount. That's bad even by British car standards. Then it hit me. The new trailing arm sections are 1/4" thicker than the original ones. So maybe you need to remove 1/4" from the outer frame rail inner wall at this corner.
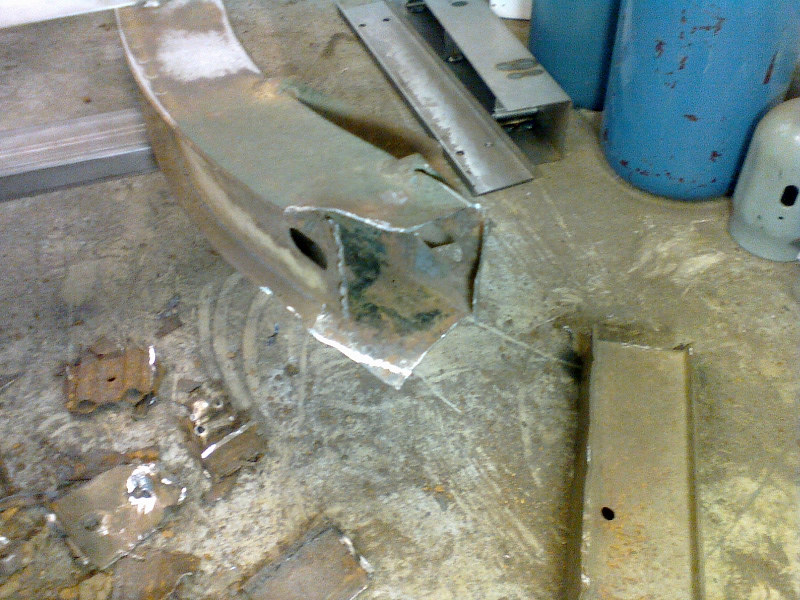
Measuring the old repair (which I didn't do), it looks like that wasn't done. So that trailing arm section is too far back at the outer corner.
E36 M3.
Fixing that will require cutting almost the entire piece out. Shimming the inner trailing arm mount 1/4" would offset the pivots too much, and it may need even more shims to actually get toe in. I'd rather have as few shims as possible, so it looks like I'll be doing some more cutting on the other side.
Two beers later, and I haven't come up with a better solution. I was thinking that while the total thickness of the trailing arm sections is 1/4" thicker, the flanges may also be wider. So the inner wall (which isn't welded yet so that the piece can be welded internally to the frame) may not be 1/4" different. I'll check that tomorrow. Maybe more beer will bring wisdom.
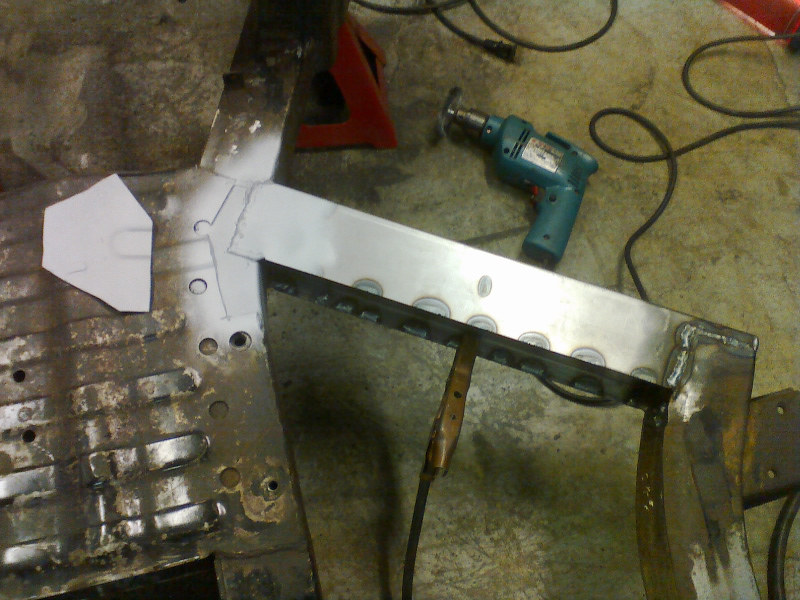
Things look somewhat better now. It turns out the width of the new frame rail section measured at the walls is only 1/16" thicker. The flange is a full 3/4" compared to 9/16" for the original. So the previously repaired section should be fine. I still don't understand how the one I replaced was so far off, but it must have been. I took some measurements from my bent frame and from my restored TR6, and they both are closer to the older repair. Even the angle between the frame rails matched. So I moved my new trailing arm section back 1/8" at the outer corner and went for it.
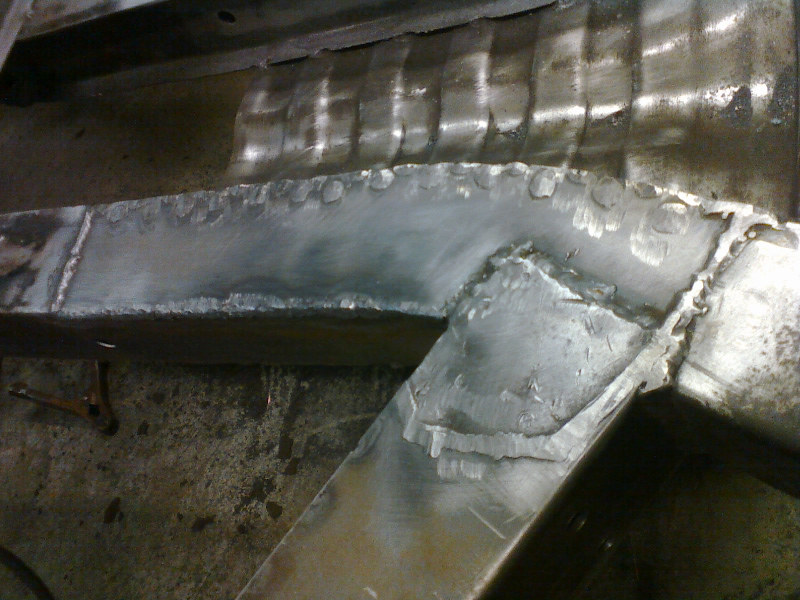
The outer corner turned out pretty nice.
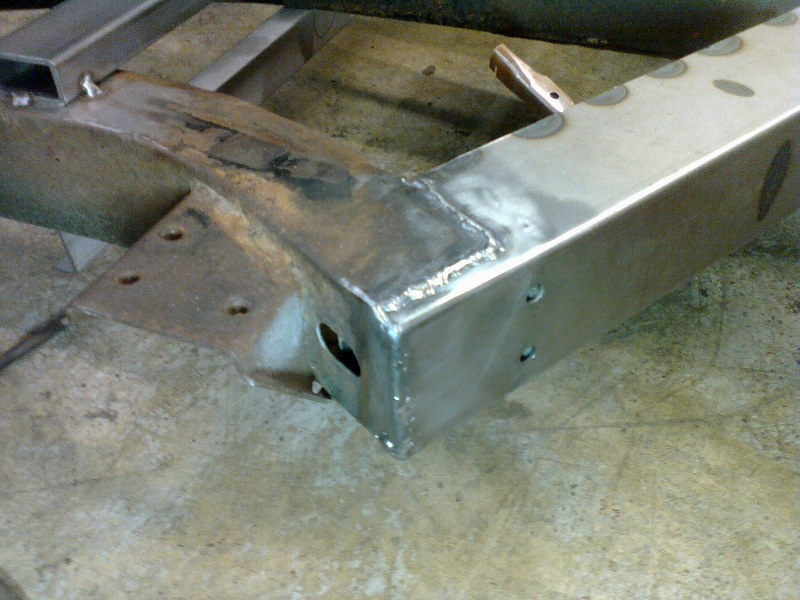
At least now both sides are within 1/8" of each other. Now I just need to fully remove the lower cruciform plate and make sure the frame rail bottoms aren't rusted out.
I've been thinking about roll bars recently. I have a nearly useless roll bar that bolts to just the differential shelf. If I were to put one on this car, here are the requirements.
1) Fit under the soft top and hard top.
2) Not intrude too much into the passenger compartment (e.g., no high door bars).
3) Bolt directly to the frame mounts (including mounts that may be added).
4) Not add more than 50 lbs. total weight.
Here's one example that I believe would meet all of these.
For SCCA FSP, I would need to delete the firewall mounts (only 6 mount points allowed). This is supposed to only weight 45 lbs. I could fairly easily add mount plates to the top of the differential bridge. What I like about this is that the roll hoop is mounted to the differential bridge, so shouldn't limit seat travel. This should provide adequate rollover protection for autocross and street. More importantly, it should add some much needed chassis stiffening.
So, how hard is it to bend roll bar tubing? I'll probably add the differential bridge mount points now and later take it to a shop that does this sort of thing for a living.
I have a plan for adding extra mounts for a roll bar/cage. It turns out that I may be able to use the roll bar I already have by modifying it with the forward braces shown above. It may also need a diagonal brace.
The only other thing I've accomplished in the past three weeks is extending an oil pump pickup by 1" to make use of an aluminum oil pan that I bought to help stiffen up the block. The bottom of the pickup was slash cut to within 1/4" of the pan bottom. This pan came with a windage tray, but I may make a baffle with doors to keep oil around the oil pickup during acceleration.
Forgot pictures again. Maybe next time.
So I fabricated the roll bar mounts onto the differential crossmember. I decided to basically duplicate the existing body mounts, but 3 inches inboard. I also added an extra nut to the existing body mounts. There's a reinforcement on the body tub that prevents a single plate on the frame. This should transfer load to both the spring perches and the towers that connect to the frame. I'm going to mount the existing roll hoop and deal with the forward pieces later. Once the welding on this is complete, I can proceed with powder coating the frame.
SCCA Street Prepared rules now allow eight roll cage mount points, so long as the firewall isn't penetrated. Not sure if this would help, If I could connect a cage to the front suspension towers, I'd bolt through the firewall. I could add addtionall braces in the back, but these would need to penetrate the body tub to do any good.
Also, there's this.
"Carburetors, fuel injection, intercoolers and intake manifolds are unrestricted."
Does that mean I can Megasquirt this thing?

Yes it does. SP is bolt on mods. However, you are restricted to using the stock cam and the only porting allowed is one inch for port matching so that's the limiting factor.
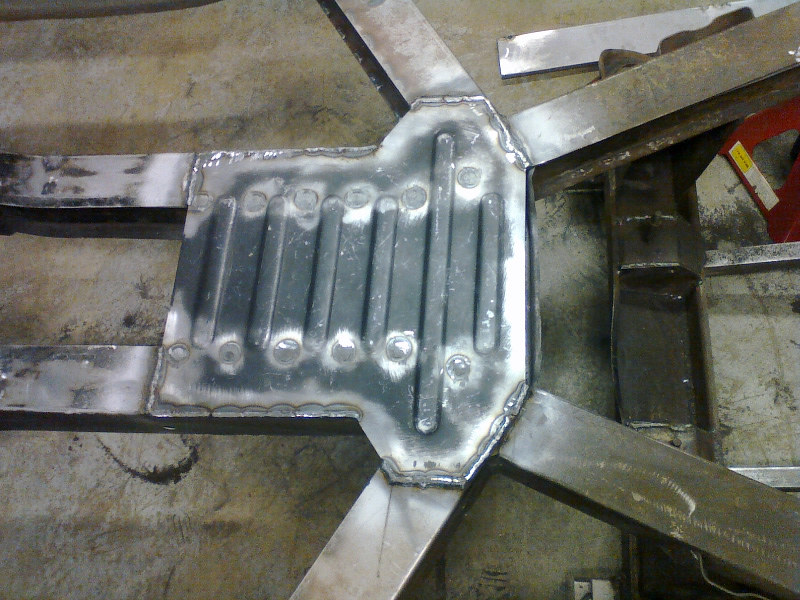
More unrusting of the frame. The bottom cruciform plate arrived yesterday. It's a fairly nice reproduction from England. I was hoping to finish the frame this weekend and did manage to get the roll bar mounts welded in.
There are a second pair of nuts 2 1/2 inches further back over the differential bridge. Bolting a roll bar across these mounts will also help protect the spring perch from cracking, which it can do.
Next I cut off the old cruciform plate. What I saw wasn't pretty.
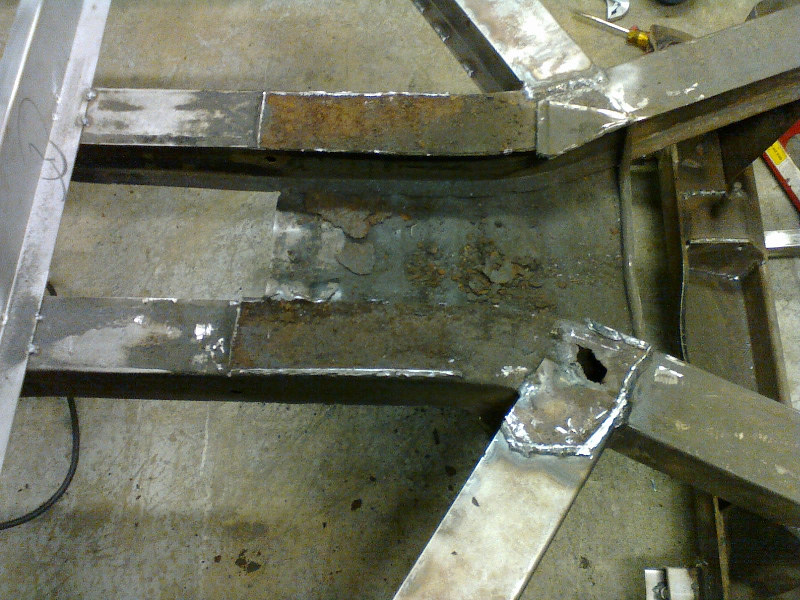
There was a layer of rusty metal covering the bottom of both frame rails. I cleaned this up with a wire brush and cut away the rusted-through section. The guy that did the earlier trailing arm section repair welded to paper-thin metal. I'll at least need to put a patch in there, but it may not be a bad idea to replace the entire frame bottom where it's rusty. The non-rusty side of the hole is 0.075" thick, and the other pitted side is 0.060". Other areas look worse, so I'd guess worst case the metal is about one third rusted away. New steel will be stronger and less likely to continue rusting. The only downside is a higher risk of warping the frame. I just need to be patient when welding in the patches.

Jerry From LA wrote: Yes it does. SP is bolt on mods. However, you are restricted to using the stock cam and the only porting allowed is one inch for port matching so that's the limiting factor.
Yep. Headers and exhaust are free as well. Internal engine mods are fairly limited in SP. Stock cam and pretty sure stock valve train as well (no rocker assemblies like Goodparts'). Limited over-bore (+.20) and decking. Extremely limited balancing.
Unfortunately, all this means that pretty much anything you do to "fix" many of the inherent deficiencies (and poor quality control) of a Triumph engine made in the 70's will knock it out of SP.
In reply to Ian F:
I knew about the limitations on internal engine mods, but just never considered that you could switch from carbs to fuel injection. The head is going to be the real limitation on this car. A compression bump to at least 9:1 and a fast street cam help wake these motors up. If I stop doing SCCA events, I can always swap heads and cam later.
The other question I'm asking myself is how to add fuel injection. I have access to an early and late Weber manifold, so the Weber throttle bodies may be the easiest (but not least expensive) way.
One option: http://www.pattonmachine.com/TBI-Main.htm
These will bolt up to the dual Z-S manifold. Or a triple-carb manifold from Goodparts if more direct air flow is desired.
Or if you're handy with a welder, fab up a port injection manifold a la FIS6 (Google: Teglerizer + FIS6).
Even though the Weber-like throttle bodies are fairly expensive, there's a reason I'm leaning that way (besides performance). If I decide to put carbs back on the car, I can sell them to anyone that can use Webers. The Patton and custom options are more specifically Triumph, or cars that used Z-S carbs. I was originally going to use a Richard Good triple manifold with injector bungs welded near the valves, and may still go that route. It's cheaper, and the Z-S throttles should flow enough air for a stock motor. If I decided to just build a fast TR6 with internal engine mods, this wouldn't be my first option, though.
Megasquirt gives me fine control over the fuel and spark. It works well on another TR6 I set up. Even if there's not much extra power added, it's worth it for the improved controllability.
After a marathon session tonight, the frame is done. Here's the patched frame bottom.
Making this patch was harder than I expected. I wanted it to go under the trailing arm section, so it took a bit of shaping. No wonder TR6s bend like Gumby. The frame metal is only 16 gauge. At least it's easy to work with.
Welding on the bottom plate was fairly easy, but took a lot of time. I clamped the two sides evenly and did 1" beads, moving around and always doing welds in matching pairs on each side. Since I couldn't get to the inside of the frame rails, the plate was plug welded to the inner frame flange.
A quick check with a digital level shows that the frame isn't twisted more than 0.2 degrees. I doubt it would have skewed, but I'll do a few diagonal checks this weekend.
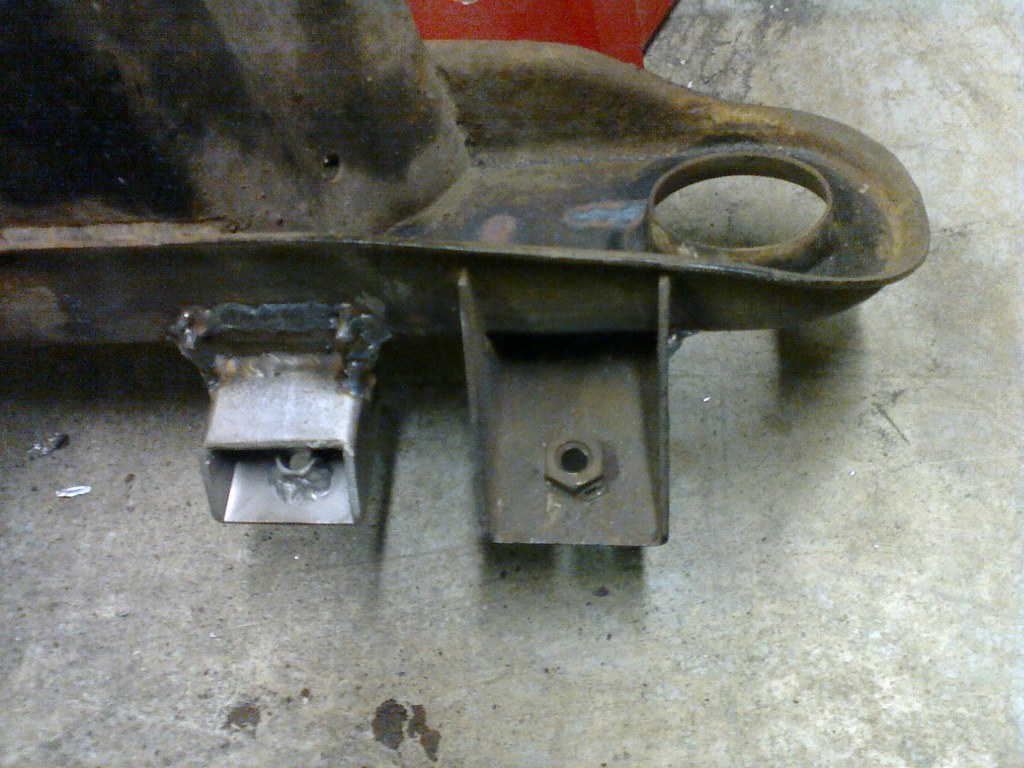
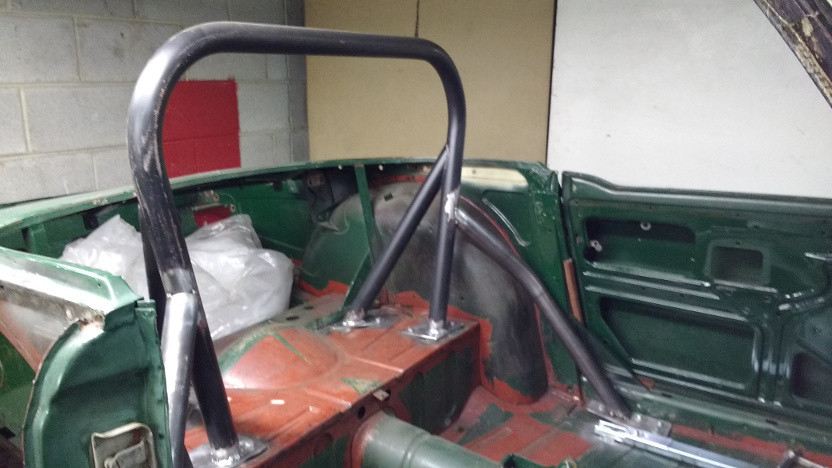
Here's a better view of the roll bar mounts.
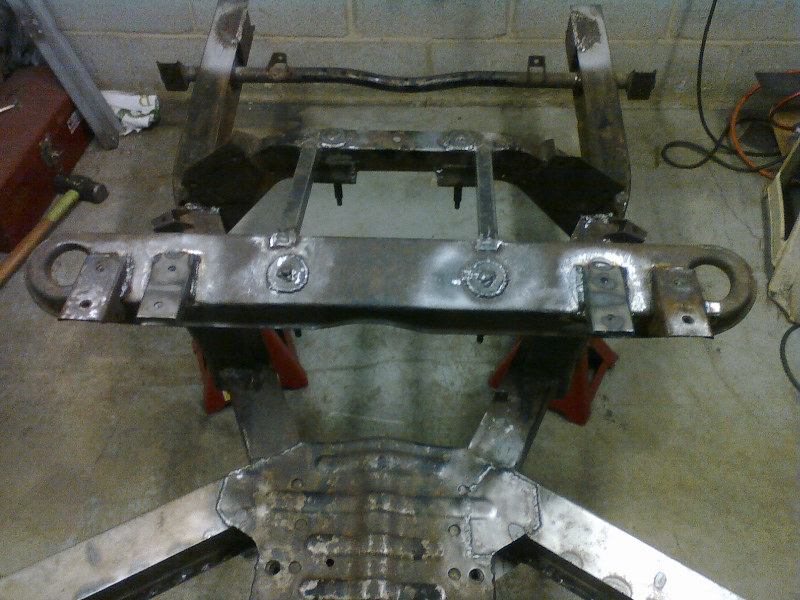
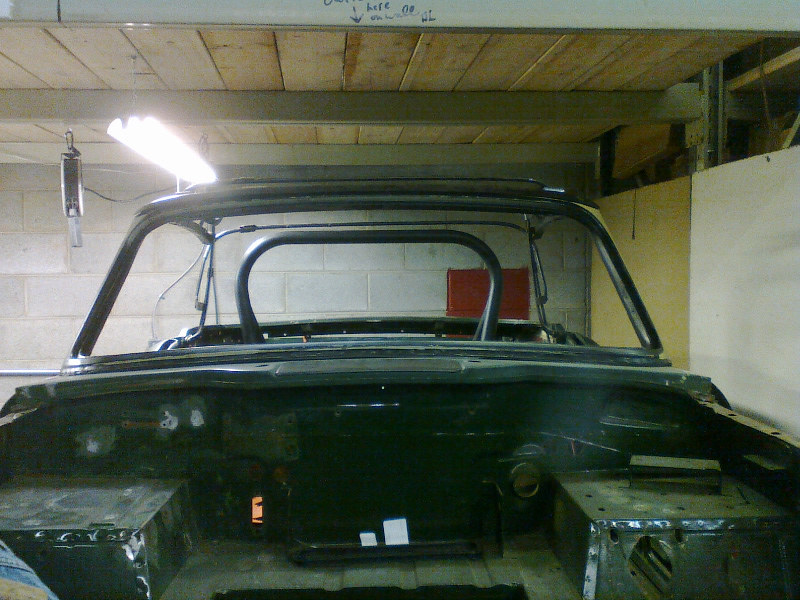
The body tub is back on the frame for final checks and roll bar installation. The welding doesn't appear to have thrown anything off; all mount holes line up nicely and the doors still close well. Here's the roll bar I'm mounting.
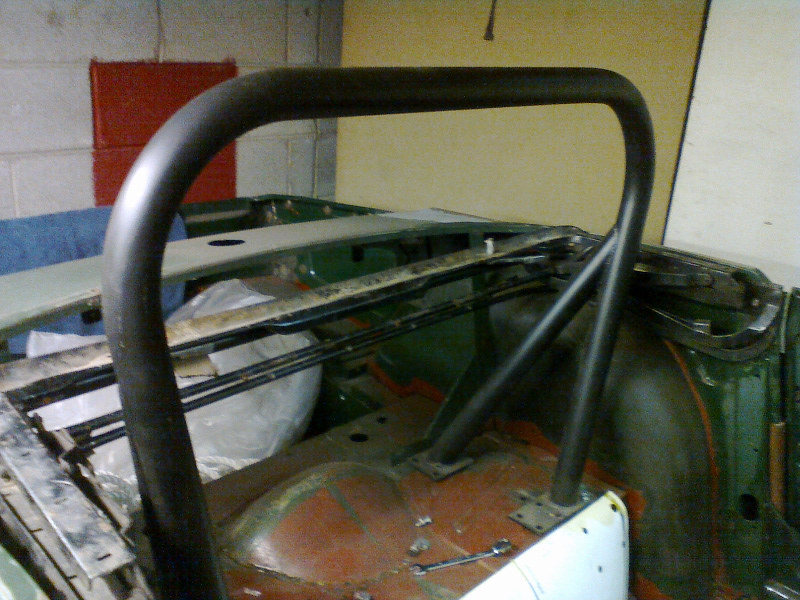
Before I drill more holes in the tub, I wanted to make sure this roll bar doesn't interfere with the top frame. It's fine. Next I'll make some new mounting plates to match the frame mounts and weld those on. When I cut off the old mount plates, I should check the wall thickness of the tubing. It feels fairly heavy to me.
It looks like the roll bar is going to fit. I also have a straight, non-rusty windshield frame.
I got the new mounting plates bolted in tight with temporary spacers between the body and frame. Now that I know how thick they all need to be, I can mill some aluminum blocks instead of stacking washers and the Triumph body mounting spacers.
Next is cutting off the old mounting plates and welding the bar to the new ones. I also need to weld some nuts on the tub for the rear braces.
I also realized that my hard top is already painted the same green as the tub, and it's not a bad paint job. Maybe I'll have to rethink the color choice and keep it green (with a tan interior, of course).
I did everything to mount the roll bar except the actual welding. All of the mounts are bolted up and the bar (sans the original mounting plates) is sitting level on the new mounting plates. Some of the welding will involve welding nuts and reinforcement plates under the differential shelf. Welding up is not my favorite thing to do, so I put it off until later this week.
I learned that the roll bar I'm using is made of tubing with 0.120" wall thickness. The seam doesn't appear to be spot welded, but there is a visible protruding seam on the inside. So this doesn't appear to be DOM tubing. It also isn't chrome moly, which is good since I only have a MIG welder.
While the body is on the frame, I'm going to finish welding the tow hitch and patch a couple of rusty areas. I also decided to weld some large washers to the floor pans around the seat mounts in an attempt to keep them from pulling through the sheet metal.
I took half a day off today to celebrate Columbus by welding in my roll bar.

This was after the bar was just tacked to the mounts. I also welded in the rear mount plates underneath. Halfway through, I ran out of wire. Good thing there's a welding supply store within half a mile. While I was there, I finally bought an auto-darkening helmet. My old one was driving me nuts from trying to see what I was welding underneath the car. Should have made that purchase last year. Sigh.
Before I call this done (for now), I still need to make up some mount plates for the floor mounts and prototype how the forward braces will go.
I fitted the original driver's seat to experiment with the forward roll bar braces. Without that, I can put the seat back almost all the way. The problem with the stock seats is the reclining lever and tilt release lever. Where I'd normally position the seat, they will barely clear the planned forward roll bar piece. That leaves almost no rearward seat adjustment, and I'm not tall (5'6"). Fixed-back race seats may be the answer.
Today's screw-up was warping the trailer hitch cross bar when welding on the receiver tube. I was in too much of a hurry when welding the gussets and bent the tube 1/2". After much pounding with a mini sledge it's better, but the front mounting holes are off by 1/8". I could cut the end plates off and reweld, but the final welding on those was already done (so lots of work to undo). Alternately I could either find a press big enough to take the entire crossbar (about 30"), or oval the mounting holes. Or start over. Crap. The good news is that it will definitely take the 200 lb. tongue weight and 1000 lb tow weight.
After a not-so-good night's sleep (dreams of steel tubing warping before my eyes), I thought of a solution to fitting the stock seat. I've been driving a TR6 for over 25 years, and have not once changed the seat back angle nor tilted the whole seat forward. If I remove those things and bolt the seat solidly to the seat rails, there's no interference with the roll bar forward pieces. Besides, the seat reclining mechanism is rusted together anyway, but it's at the right angle.
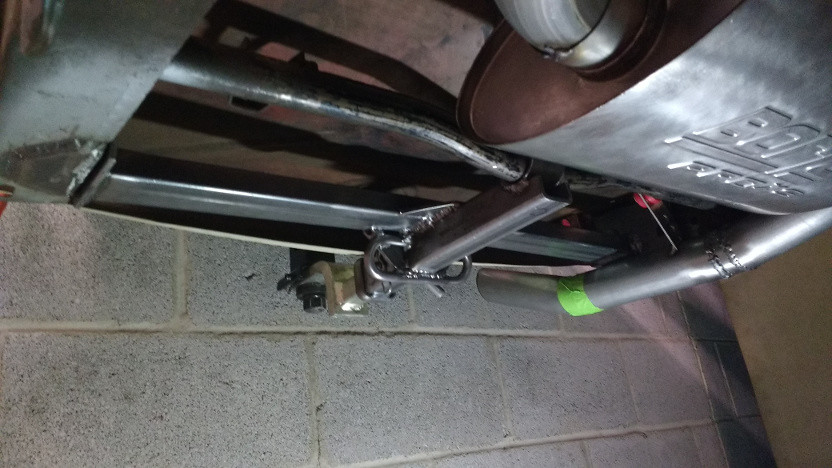
I ovaled the mounting holes on the tow hitch and managed to get all of the bolts to fit. It still comes within 1/8" of the valance, but it doesn't flex enough to contact. I hung the muffler to check its fit with the hitch, and everything looks good.
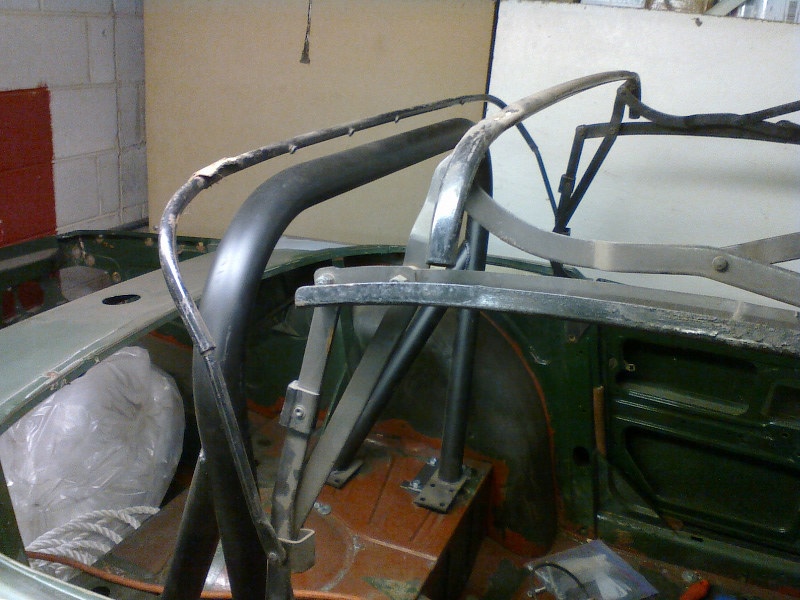
I welded washers to the top of the floor pan around every seat mounting nut. These have a tendency to crack and pull through the floor. With the driver's seat in place, I played around with the fit of the forward roll bar tube. Here's what I came up with.
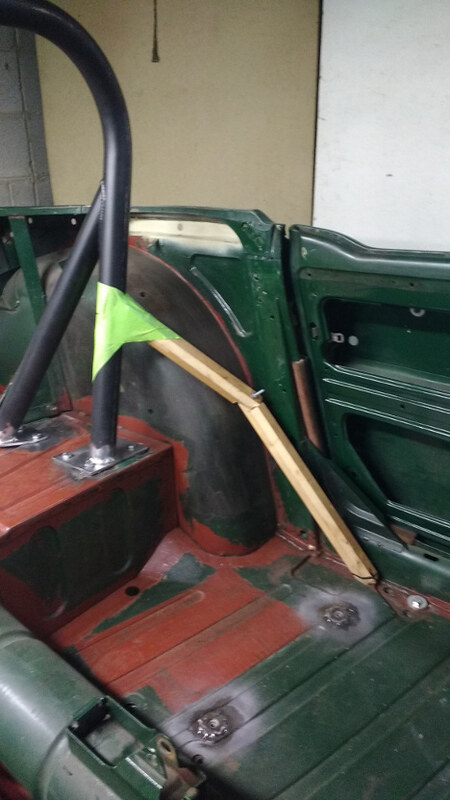
Looking at this now, I should move where the forward piece meets the hoop up a few inches. The location I had here is a little below the top of my shoulder. The lower mount plates should be fairly easy. The only question I still have is whether to add a single bolt mount on the back of the frame so that there's a bolt behind where the bar meets the floor.
I made up the lower mounting plates this week. I also got two pieces of bent tubing from Piper Motorsports. That's sort of like using a 5 lb. hammer to hang a picture; those guys can fabricate very nice stuff. But they had the tubing and I got to see their shop.
Fitting the forward tubes wasn't hard, just tedious. Our bandsaw is down so I used a cutoff wheel to cut the tubing. I considered making a jig to cut the fish mouth joint in a drill press, but went with paper templates and a grinder instead. That's definitely the slow way, but I only needed four cuts.
Instead of doing all of the welding today, I'm going to add rear mounts to the frame for the lower plates. The body mounts I'm using to tie the mount plate to the frame only have three 5/16" bolts. Even a single 3/8" behind the mount will reduce flex in the mounting plate and help keep it in place if I (hopefully not) ever need the roll bar. With the rear mounts in, I'll tack it all together and wait until all of the weight's in the car to do the final welding.
I'm glad that's done.
When I took the mounting plates back up to add the rear bolts, I realized that some weld beads on the tub were tilting the plates just a bit. I ground those down, but then the angles changed. It shouldn't have been hard to change the bottom angle, but I kept overshooting. Then the fish mouth cuts needed adjustment since the tubes were shorter, and that changed the bottom angle further. I think this is one of those jobs that gets easier with experience, but I'm not interested in doing this sort of thing very often. I'll probably add some gussets to the forward tubes for extra stiffness.
Moving along.
You'll need to log in to post.


