Thanks. Patience or just some strange addiction, I'm not sure...
After some driving and adjusting during the summer I finally got the Capri on the dyno at Sävar Motor again.
Short spec:
205 Pinto block
DP Pistons in 91,5 mm bore, 38 mm flat tops
Maxspeedingrods steel rods, 129,5 mm
(should give me around 8.55:1 CR)
RWD YB oil pump and spray bar
YB sump with wings, and trap doors
Pinto crank
TTV steel flywheel to take 240 mm YB clutch
Head is a carb Pinto head with slight port job
Paul Ivey/REC valves (REC 882 inlets 1.800”/45.7mm, REC 297 exhaust1.500”/38.0mm)
Kent FR34 camshaft (the kit with supplied springs etc. from Kent Cams)
"Swedish plenum" intake, YB trumpets fixed to Pinto flange
Pulse split exhaust manifold
Mitsubishi TD04-19T turbo, internal wastegate (modified Holset actuator)
Megasquirt MS3 with MS3X board. MAC valve boost control.
While the engine had been reasonably responsive during the summer, at around 1,4 bar, it was evident some real dyno tuning was needed.
We started off at spring pressure (no boost control activated) and that leveled out at close to 1.1 bar. At around 6500 rpm the power was still climbing but just over 7000 we heard a clatter in the knock sensing equipment. We figured it might be valve float or possibly the rather aggressive ramps that made the sound. Another 500 rpm would have been nice but not this time.
The baseline ended up at 245 whp (6900 rpm) and 273 Nm (5800 rpm), not a bad number and quite perfect for registration purposes.
After that, we enabled the boost control and started to dial in more boost for track use. This is my first try with a real boost control system, and that was quite interesting. At around 1.5-1.6 bar the turbo stopped flowing more in the higher rev range so we decided to ramp down the boost towards 7000, and instead kick it up a bit until 4500-5000.
This gave a max power of 279 whp (5800 rpm) and 416 Nm (4400 rpm).
Now for the interesting part, comparing to the old engine specification (lower compression ratio, smaller head/valve/cam, bigger Holset HX35 turbo).
When we tuned that in 2015 the top results were 284 whp (5900 rpm) and 398 Nm (4400 rpm), at 1.8 bar. At 1.1 bar that engine gave 226 whp (5900 rpm) and 325 Nm (4500 rpm).
Dyno graphs:
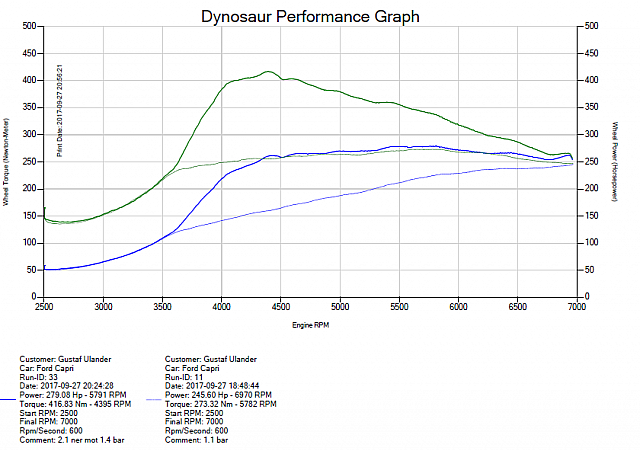
(New engine)
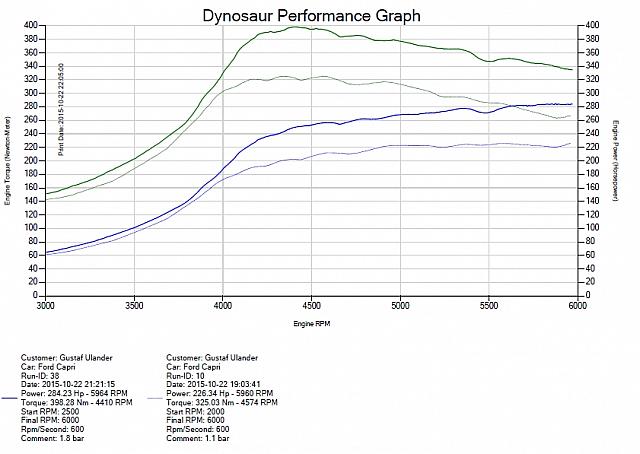
(Old engine)
I do think I now have an engine with a broader power band. Barely had time to drive it before the winter though.
So, onto the diff/axle "solution".
Back in 2016 I snapped one of my specially made steel drive shafts (or, if the CV joint broke first and then snapped the shaft?). I got a used standard drive shaft from a Sierra just to get the car going. But the sensible thing was not to just replace with the same parts over again, but instead to upgrade. The rear suspension is based on a Sierra XR4x4 so it has the 7" diff and the smaller "100 mm" CV joints.
I started working on getting the bigger "108 mm" CV joints instead, together with thicker drive shafts. These usually do not "fit" my Quaife differential, but luckily Quaife will do stub shafts for the bigger CV joints. Just a credit card away...
Then I had to get the outboard stub axles as well. I found an E-bay company selling new ones but when they arrived I really did not trust them. They have some play in the splines for the hubs - probably a non-issue on a standard car but with over 400 Nm, no. Instead I raided a friends stockpile of old Scorpio parts, he had just parted out a Scorpio V6 estate and that one has the big CV joints. Good find.
I had already ordered new steel drive shafts to suit, and also got some new SKF CV joints at a discounted price. Still I hesitate to sum up the cost of this rear end!

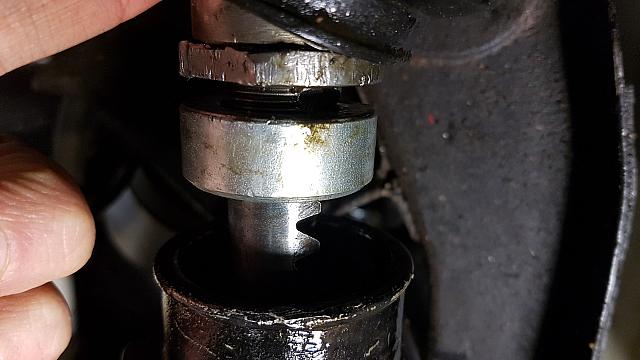
New CV joints fitted...
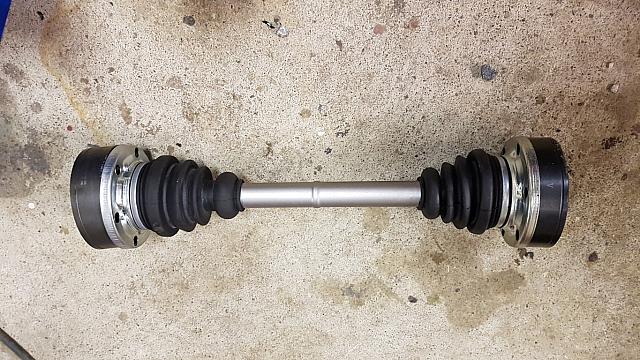
...and the completed shaft.
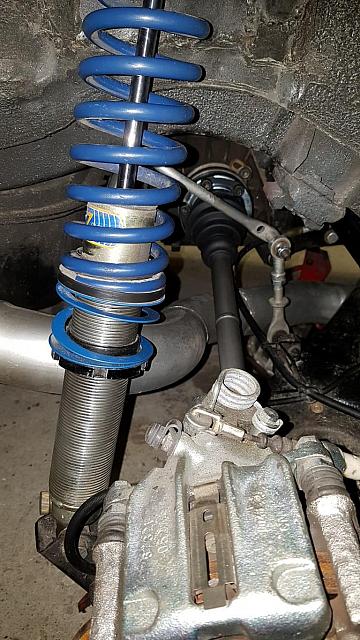
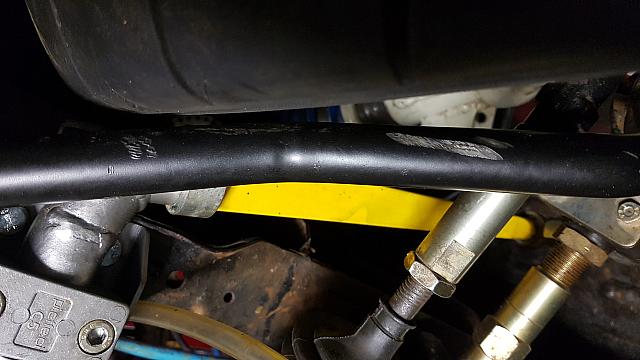
All fitted up, hard to see, and looks just like before. But the shafts are thicker and everything is just beefier. If it breaks again...well...I don't know what to do. Or maybe I do, I guess then it is time for a completely different approach. But this should work (famous last words!).
Gustaf