
TimM
Reader
10/3/21 10:48 p.m.
Pete: Thanks for the comments...getting exciting.
No worries on the uncovered barbs...we just need to do some internet searching time on task. Appreciate the offer to dig into the manuals - we can do the same.
A quick late night Google on forums appears the charcoal canister is left open to atmosphere as is the small tube off the boost solenoid. The barbs on the intake tube, one does appear to go to the valve cover, but the other is not yet identified.
We sent a note of help to the manufacturer of the silicone tube for input - likely it is obvious...and we are too close to it!
Progress! Thanks again.
TimM
Reader
10/4/21 2:52 p.m.
Our new baby battery showed up today via Amazon.de. ~$80 for the 540 crank "quadruple A" size weighing in at just under 22 pounds. Not much reserve power there, but...
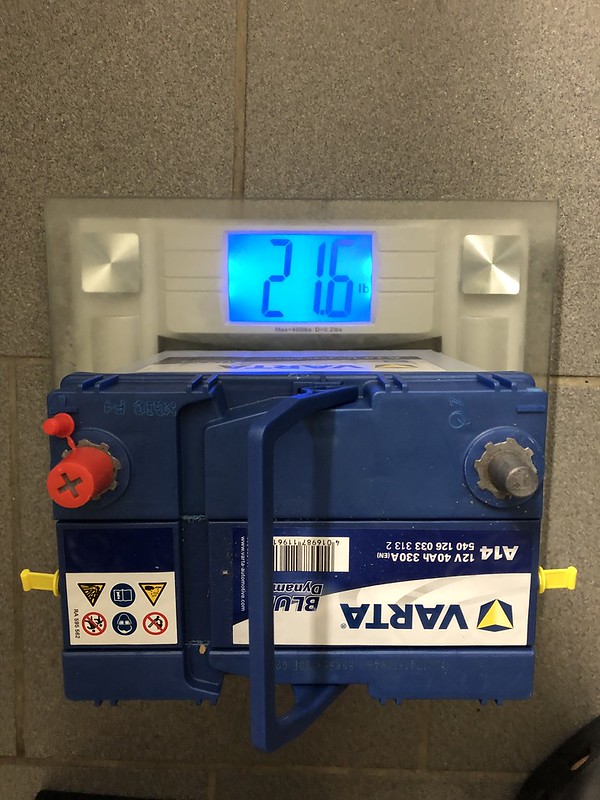
It fit (with the relocation tray) and we applied power after being 6 years idle. Nothing let the magic smoke out!:


It all looks to have progressed fine! Excellent thread.
I crawled around my Evo8 and thought I has something similar for those tubes you pictured but I didn't find a confident match. The fuel vapor does get fed back into the intake as well as EGR but sorry I don't know exactly where those go.
I like how you pre lubed the engine. And refreshed the valvetrain.
I think the concept of Evolution does allow Mitsubishi to hold stock parts for an EvoV because they still used that part on the 6/7/8/9 so despite such a low volume car it has a decent population of buyers per part.
I smiled at your need to remove the pulleys to tilt the engine for the transmission install. I had the same back and forth on my first trans drop.
FYI I don't know how your trans tunnel is or room behind the engine is for you but I found the rear trans mount to the lower crossmember almost impossible to torque cleanly. I think I tried a long socket extension from the side of the car and also tried from on top so had to have none of the intake or coolant line installed to reach it.
TimM
Reader
10/9/21 3:04 p.m.
Advan046: Thanks for the words. I think you are correct about many standard parts across the years. Great for the enthusiast. The first time always seems more difficult - little tips and tricks that make smooth work.
I believe one change from the 5-6 to the 7, is the subframe/crossmember is above the transfer case. Making the install quite easy as is the access to the north/south crossmember. So far I haven't cussed too much on the Mitsubishi design. The parking drum brake assembly kicked my tail for 40 mins last night though...
Pumped the diff and transfer case full of 75W-90 fluids.
Reassembled the right rear brake/wheel and reversed course on the fuel tank disassembly. It was decided to not drop the tank at this time...priority is to get this running and road legal and follow up over the winter on a few areas. We assume the fuel pump will work...
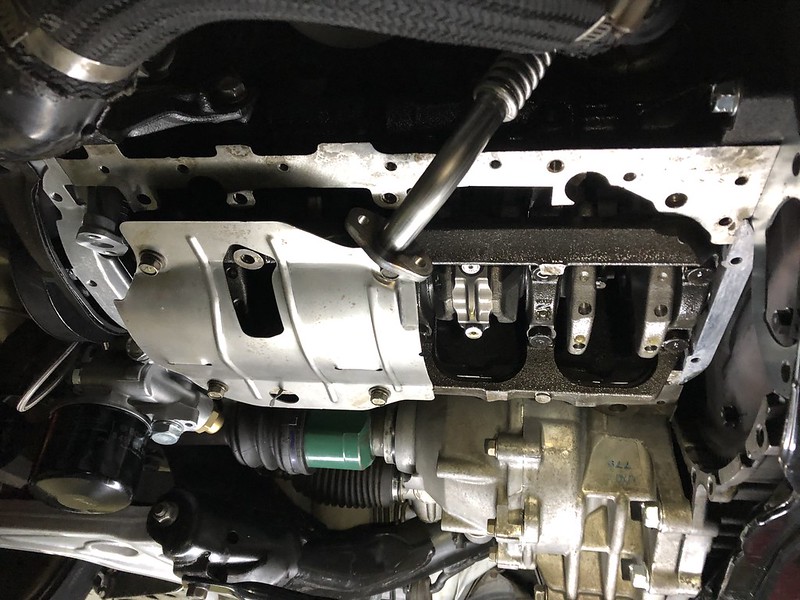
Also neglected to install the OEM windage tray for various reasons (I forgot)...so off came the pan (relatively easy):
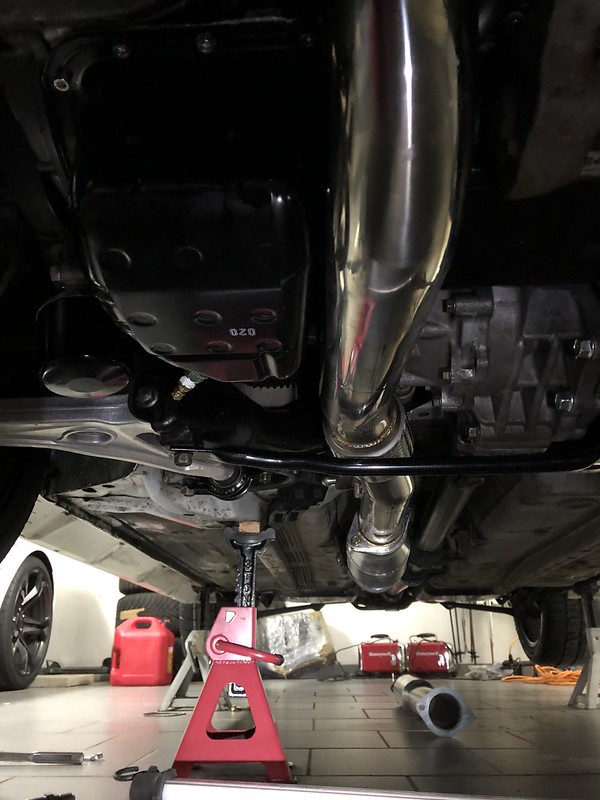
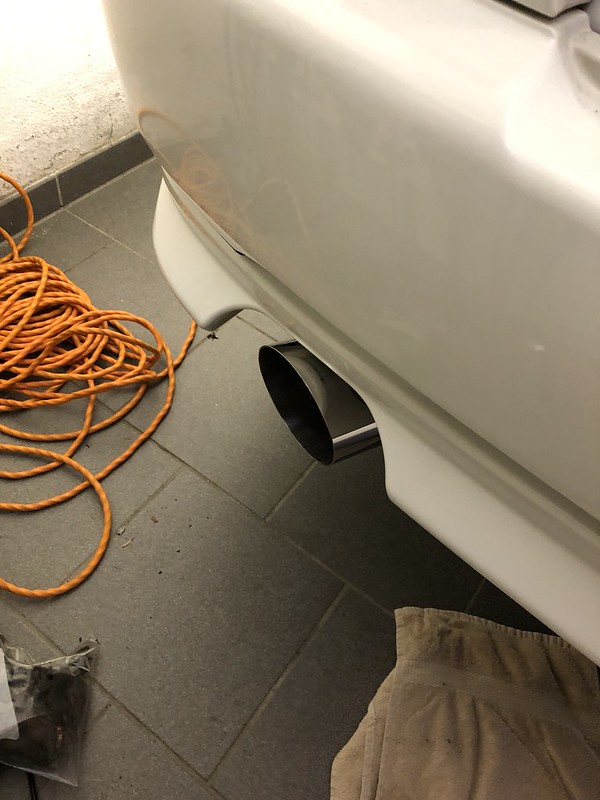
Full exhaust shot...nice 3 inch full thru...hope the neighbors won't hit the ceiling!

And the M2 downpipe installed...unfortunately, the bung we had welded in for the wideband O2 sensor was installed about 10 degrees higher than requested...running directly into the transfer case - not going to work:
We will try to use the blocked off bung in the cat pipe...flipping the cat end for end so the wideband is on the front side of the matrix. Possibly further back than ideal, but currently just want to ensure we aren't pig rich on start up.
TimM
Reader
10/11/21 1:26 p.m.
No music this weekend...
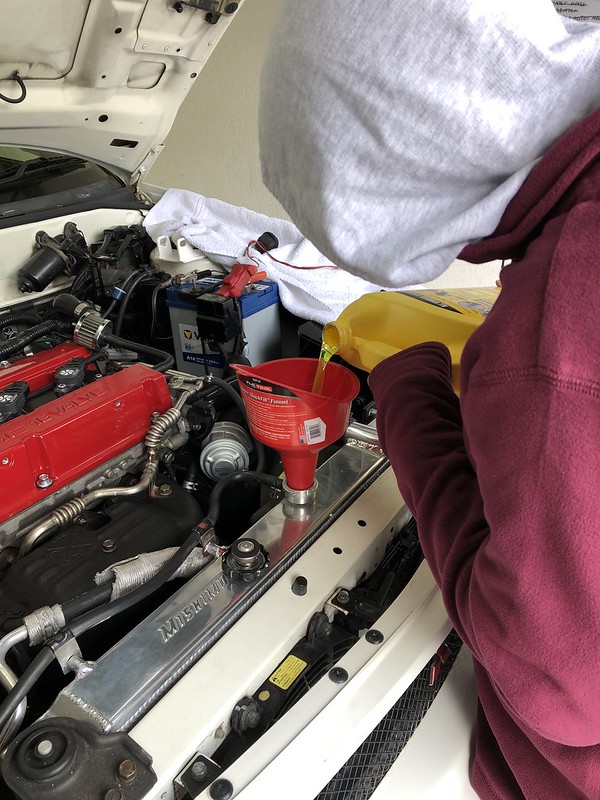
Added oil (10W-30 VR High Zinc Oil):

Added coolant:
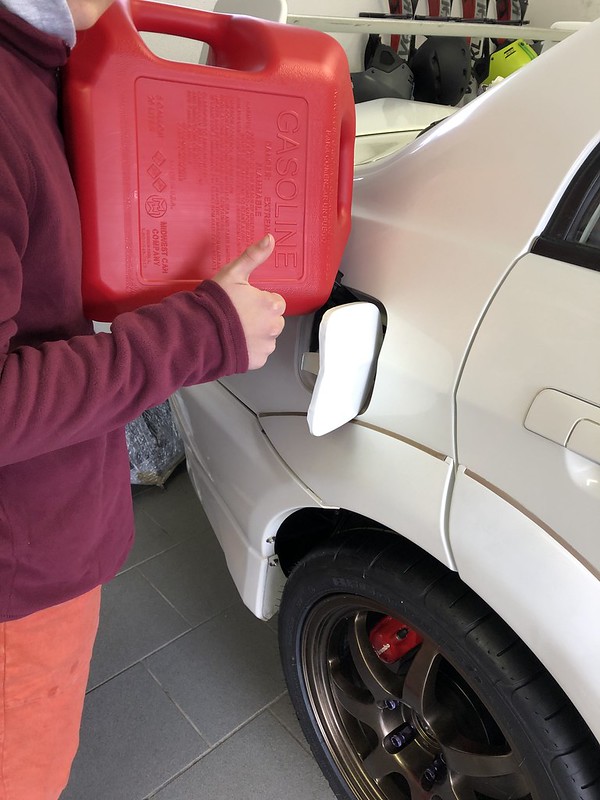
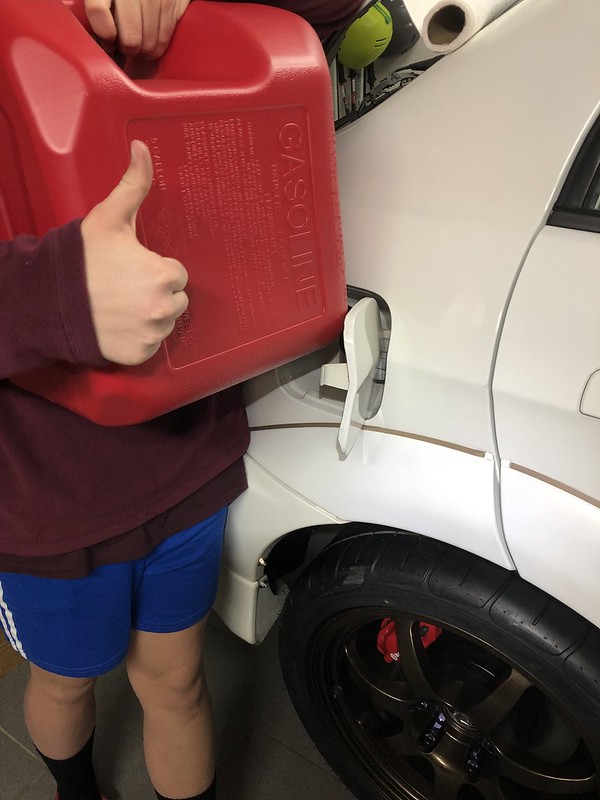
Added 5 gallons of 98 octane fuel:
Even hung the new exhaust with huge tip:
We pulled the plugs and hit the starter to 'prelube' the engine. Funny...didn't hear any hum from the fuel pump. Keyed the ignition multiple times to no avail...silence. No fuel came out of the engine compartment fuel filter either. We reseated the one engine fuel relay and fuel pump connector.
So...image showing us draining 5 gallons of fresh 98 octane fuel:

We have a multimeter on the way...assistant's enthusiasm waned a bit...
TimM
Reader
10/16/21 3:03 a.m.
The Evo seems to have a bit of a complex electrical system...two relays, one for high pressure (WOT) and one for low pressure (part throttle)...but relays are hard to come by - few parts that are no longer available.
Nonetheless, we had a new pump and so down the tank came. Not easy or clean, but no show stoppers. Lots of 'shells' covering the top of the tank thanks to nature making their home for 6 years. Successful in avoiding any spillage into the fuel, we believe. The real challenge was dropping it enough to pull the fuel pump module out...which was solidly connected to 2 hardlines at a 90 degree angle of 14 inches. They fixed this on later models, like most modern cars, I suppose.

Unfortunately, what was inside was a Walbro pump...same we were installing - known for its reliability.

But, several key motions to the car, we had fuel squirting out the belly of a loose fuel line! Don't know if the old pump was jammed (it worked on the garage floor afterward), loose connection, or...) So back in the fuel went:
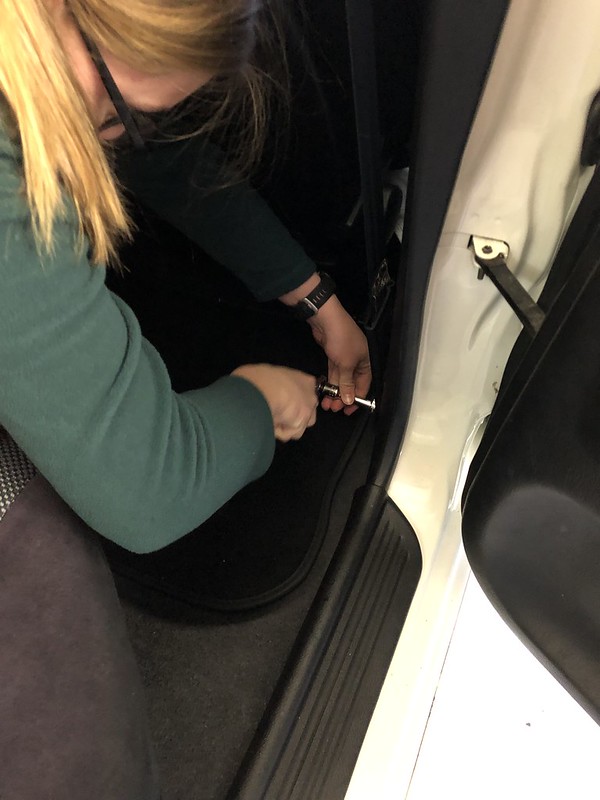
Due to lack of Assistant time, I worked the gauge install a bit - primarily the AFR and oil pressure, but in the end did all 4 simultaneously since they all used the same routing...waiting for Assistant to work the 'liquid metal' (solder) portion:

Used a hanger to poke the wires thru:

This port under the right front fender...perfect!:

Uncovered this mess...believe it to be a turbo timer...turn the car off and this device keeps the motor running for a set time to cool the turbo...I would like to remove it, but the bundle scares me a bit - will hold on that action until later:

TimM
Reader
10/18/21 1:30 p.m.
Weekend fun:
Finishing up installing the Autometer gauges...oil pressure and AFR for start up...manifold pressure and oil temperature for later...her workspace:

Loves that solder...got quite proficient after 18 odd connections!...all with heat shrink:

New dash panel install after tidying up all the wires...old one has holes drilled - quite reasonable in cost from UAE! These cars just snap apart and back together - love it!:

Installing. Note previous owner installed a fog light...not sure why...not a requirement in Germany, but it is in UK...hmm:

Ready for engine start:

It runs...idles smoothly at 850 rpm with just over 1.0 lambda (~15 to 1 AFR)...


Not so fast...oil pressure appears about 100 psi low!
We drained the oil and swapped in an OEM filter...no change on the pressure. Autometer pressure senders have been erroneous before (this one moved and followed engine rpm so...), but there is a good chance we didn't prepare the replacement block for the deleted balance shafts. IE massive internal oil leak. So new bearings, a few gaskets, and replacement balance shaft bearings are on order. Plan of action is to remove the engine and verify the cause...and swap all the bearings for good measure - hopefully 5 minutes of run time didn't scratch the crank! The supervisor takes full responsibility...
The positives - no dash lights including ABS, AYC, Check Engine, etc. Even moved thru the gears into 3rd... So all is installed correctly and we know we can do it without missing any more parts! I expect once parts arrive, we can turn this in a day or two assuming no damage.

pheller
UltimaDork
10/18/21 6:36 p.m.
Man I wish we could import these stateside because their use of the common engine would make maintenance and sourcing parts much easier than other JDM models that had very unique motors.
In reply to TimM :
That's rough, but your low oil pressure is similar to what I experienced after replacing the bearings. My understanding is that low oil pressure can also trash the oil pump, so I'd suggest checking it closely while the engine is out again.
TimM
Reader
10/19/21 3:17 p.m.
pheller: Only a couple of years and they will be legal...our situation is very convenient - fortunately.
Pete: We hope the oil pump is not damaged - new is another ~$250! I'd heard starving the pickup for oil will cause damage to the pump (we are waiting for a road race oil pan), but hopefully, just stationary will avoid that issue. We do have a complete set of bearings on the way...the OEM light never illuminated so based on other Evo owners, this is a good sign as far as damage is concerned. But we will check it out carefully...thanks.
Time will tell...probably be 3 weeks before we commence.
TimM
Reader
10/25/21 2:24 p.m.
Another order from a month ago showed up from Japan:

Replace missing plastic and fasteners on the front inner fenders. Miss one of these and the stuff starts to fall apart it seems...still very reasonable on cost - just glad they are available new.
Still waiting for all the important parts...
TimM
Reader
10/27/21 2:35 p.m.
Another box showed up tonight from the states:

New pressure sender, balancer bearings (which we will install 180 degrees out to block the oil passage, and set of rod bearings. The main bearings are still enroute along with oil pan related gaskets (OEM order).
TimM
Reader
10/31/21 1:11 p.m.
Assistant installing the new parts...battery j-hooks replacing the original stripped models:

New turn signal housing due to damaged 'pins' to the light to seat properly:

My jerry-rigged intermediate shaft puller...used to separate the trans and transfer case. Takes quite a bit of force to overcome the small c-clip...and I don't own a slide hammer. It worked!
Trans is out...again:

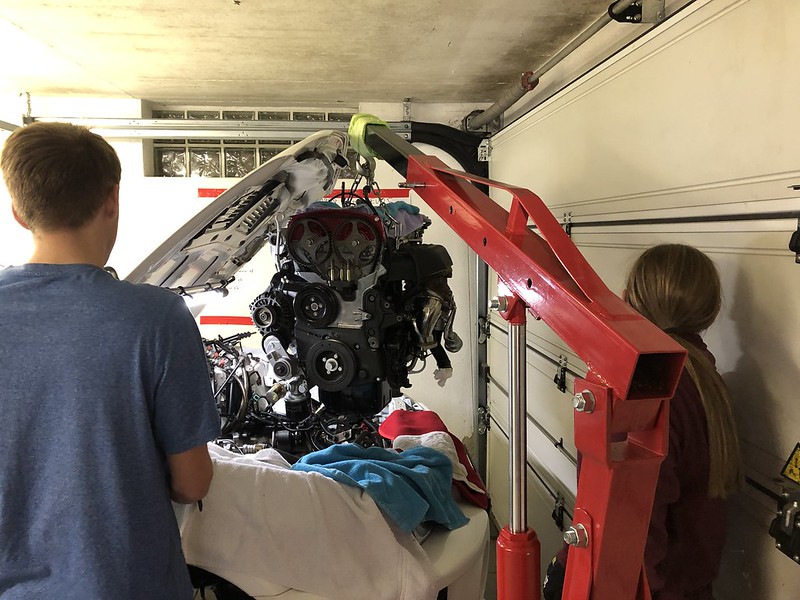
Engine ready to be plucked...have to wait until after the Halloween activities:

TimM
Reader
11/1/21 3:48 p.m.
A quick yank tonight and on the engine stand in 30 mins.

Fortunately, the assistant was still smiles at the task...hopefully we can get it reassembled ricky tick!

Many times easier muscling a 250 pound chunk than an American V8 at 550+ pounds!
TimM
Reader
11/2/21 3:20 p.m.
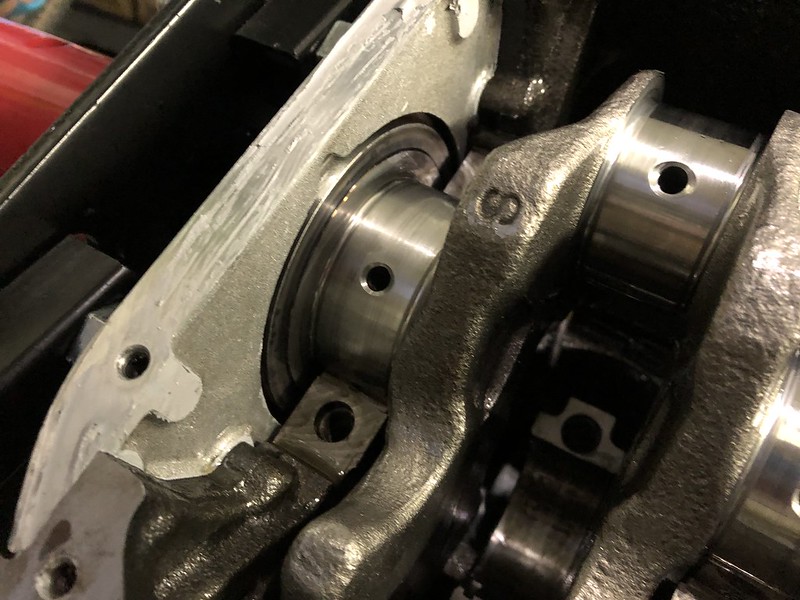
Did a quick tear down to the oil pump plate...something missing!:

No bearing race whatsoever! The hole on the right of the boss leads directly to the beginning of the main oil galley - massive oil pressure bleed off!
Prior to bearing race install (hole is purposely misaligned:

Installed:

Unfortunately, I see enough sparklees in the oil pan that we need to pull the bearings/crank and hope we didn't do too much damage...(less than 5 mins run time)
In reply to TimM :
Wow!
I just about have my old engine ready to pull & plan to do a post mortum on it to see if I may have a similar issue. I'm also going to pull apart the other engine to check it too.
DAng, that's a tough break. Been there though... 'Hey, why do I have an extra oil pump nut on the bench...?'
TimM
Reader
11/7/21 1:27 p.m.
Obviously, this was worst case...no oil pressure on a new engine...ugh. Now all the bits to do damage...
We flushed 12 quarts thru the engine (3 quarts fresh oil fill, running the oil pump, draining the pan, pulling the pan, and brake-cleaning it clean - reinstalling for another 3 quart session). No more floaties...next to examine the bearings...

Unfortunately, the #5 main bearing (last one to get oil) has some finger nail catching grooves - not terrible, but I'm not a machinist. So out it came and try to take it to the machine shop for a look see - hopefully just a minor polish...or a new crank.
Number 1 main bearing shell - showed the most wear, but the crank journal was fine:

The rod bearings didn't look too worse for wear (get oil after the mains) surprisingly. The rod bearings are only $30 total. The mains are OEM Mitsubishi and run $185 a set...which we are still waiting on. The snow is coming so not looking good for us.
TimM
Reader
11/11/21 3:40 p.m.
Our machinists said he will polish the journals of the crank, but no guarantees. Hopefully back next week.
In the mean time...another small batch of bolts arrived from Japan. Picking up duty due packages means we must visit the Stuttgart airport and interact with the DHL lady - the epitome of German customer service. Once we stopped taking it personally, it became more comical/enjoyable. We ask, "Do you speak English" (in German) - her curt replay "nein!" Next she asks, "Let me see your ID!" in excellent English! It goes on - like a British comedy...
Nonetheless, new seat bolt anchor...previous was remnants of a harness:
And assembling the front end inner fender plastic - two mud guards and an intricate brake duct...once we located the correct little plastic clips, is quite solid...we have quite a few plastic clips of various sizes now...

Cross our fingers for bearing and crank deliver by Thanksgiving...excellent time to spend some time in the garage.
And some relief to the registration for this vehicle...took some smooth talking and two tries, but we have been granted another 3 months extension...avoiding the exclusion of the American inspection system. Forcing us to use the German TUV and all its restrictions. I can sleep now...
TimM
Reader
11/25/21 11:06 a.m.
Crank was returned with an ok bill of health. It did clean up sufficiently with a polish. New bearings received and installed. We also went whole hog and added a new oil pump/plate to hedge our bets as much as possible. Tonight the oil pan was reinstalled...waiting for sealant to set.
Only image I took...prepping the rear main seal:

Half of each day is already spoken for with volunteering to sell Christmas Trees, but tomorrow we will pre-lube it and retime the cams. Saturday it gets reinstalled fulling and I'm going to try my darnedest to fire it up on Sunday.
TimM
Reader
11/27/21 11:57 p.m.
Progress!
Decided to complete the valve cover since all the parts (drill/tap/bolts) arrived (took two tries on the SS button head bolts)...drilling:

Tapping:
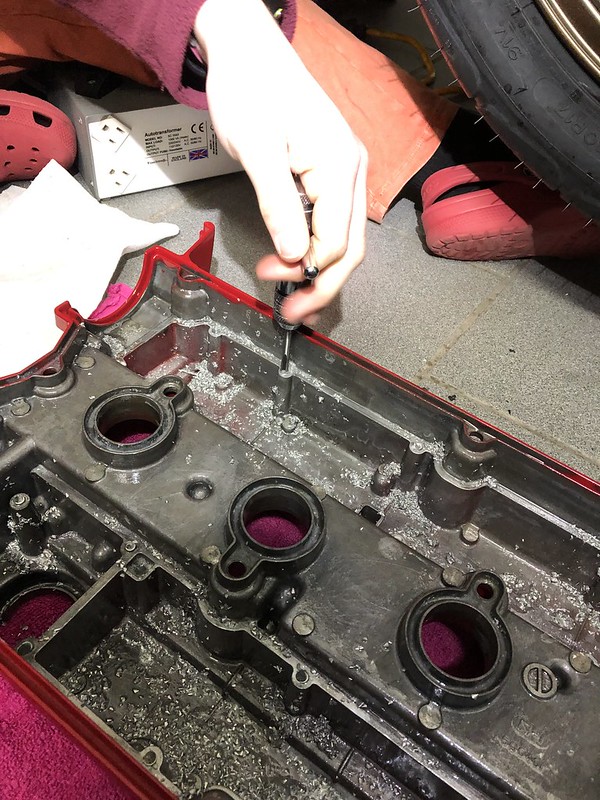
Complete with blue locktited oil separation baffles with a dash of sealant on the edges (like OEM)!:

Installed and cams timed!

Looking back at the process a new valve cover in the beginning would have been a better way to go, but the assistant wouldn't have had so many experiences!
Today it will be hung with clutch install and in it goes!
TimM
Reader
11/28/21 12:10 p.m.
Pete...one step forward and two...it seems sometimes! Thanks!
Only have excuses...
We did get it dropped in...just hookups left.
Always satisfying to hang an engine - turning point:

Eye candy - twin disk...seems overkill for this Evo:
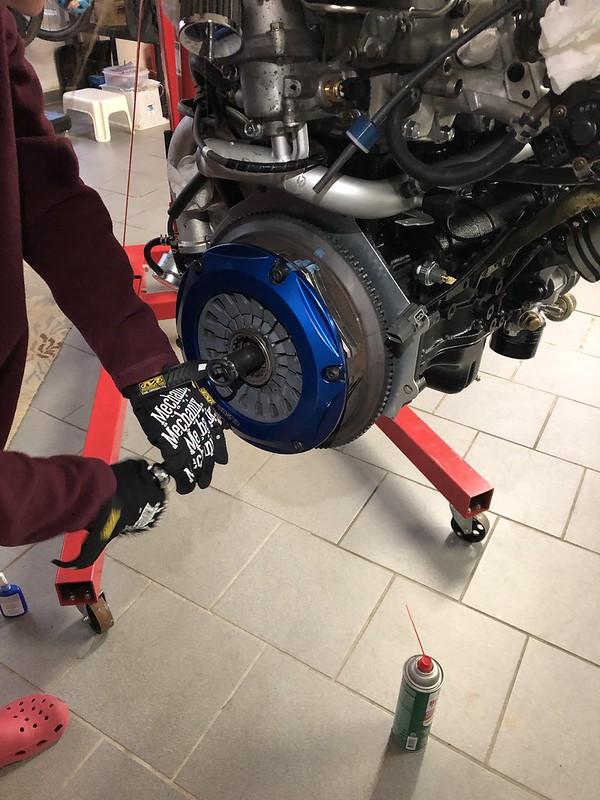
All hands on deck...although an incredibly easy drop in...just one mount with a jack underneath awaiting the trans install:
Trans went in smoothly - bit of sweat as it wasn't nicely balanced on the floor jack...didn't drop it though! More to follow...
TimM
Reader
12/4/21 2:13 p.m.
Progress!
New OEM battery hold downs get pretty close to the closed hood...Assistant and her Dremel made quick work - hold it tight and watch the rags!:

Topping the 10W-30 Valvoline VR Racing Oil...:
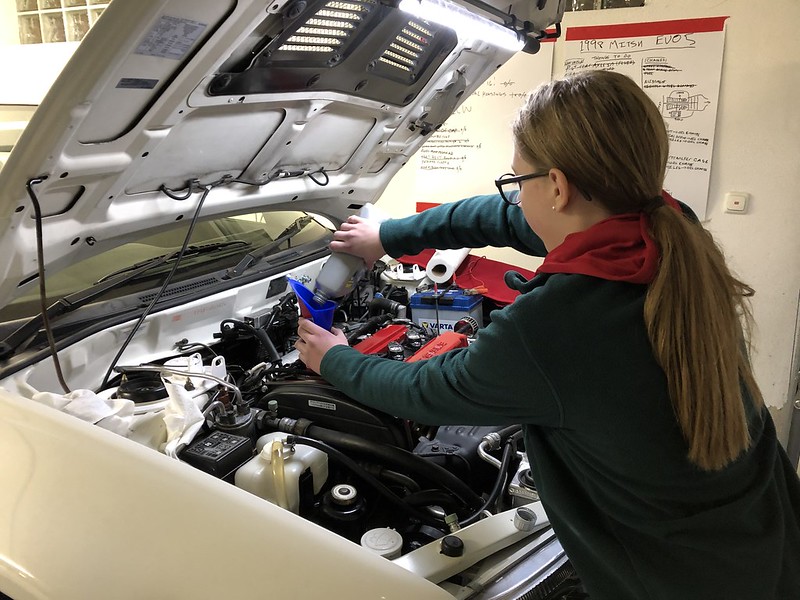
Ready to give #2 attempt a whirl! Funny how the second time it goes together much easier...:
Pulled the plugs and spun the starter...50 psi of oil pressure! Good news.
Tentative success! Fired right up pegging the oil pressure gauge - 100 psi! Few minutes to warm up and settled to a ~28 psi warm idle. Believe that is a good number!:

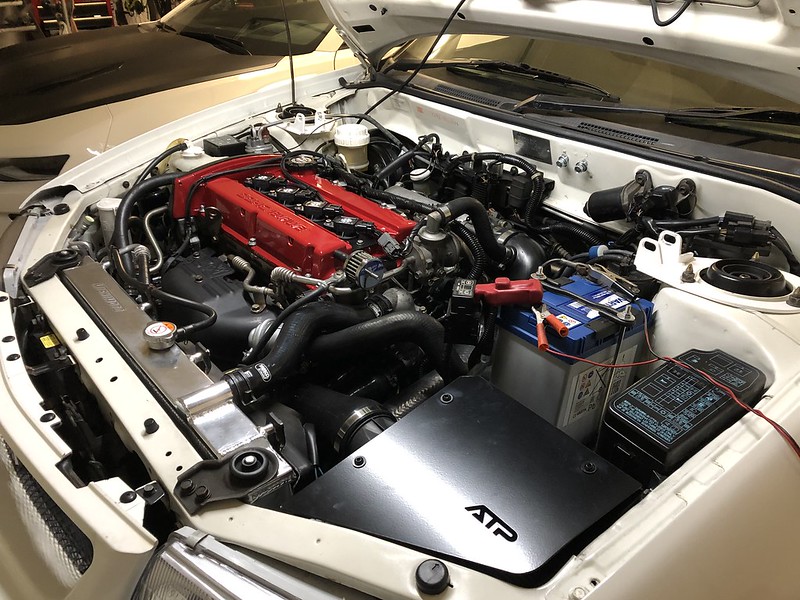
Is this metal Evo 9 blow-off (recirculation) valve installed correctly? Finding an OEM-like Evo engine compartment is a bit harder than one might think:

Can't speak to the bpv but nice job doing a second rebuild and getting it together!


