


Other than that, it's good


Other than that, it's good
First I'll patch that hole, then pull it down and spot weld it down the body, and then the bottom seam.
But, wow, the body is super thin near the door opening.

In reply to alfadriver :
Looks like you developed a good plan according to what you knew and your own strengths - nd you're now having to adjust to the unexpected thin-ness(?) Of the base metal. Good on ya for pushing through, it'll be great to have it knocked out!
Just watched some videos on the next step- the suspension. I'm not exactly sure why I'm slightly intimidated by it- it's a lot more straight forward than I think it is. But the first step has to start now- dealing with very rusty fasteners.
BTW, Keith- should I invest in a bearing removal tool, or make one of my own? And by invest, I also mean asking the local auto shops if they rent them. A few of the videos suggested that the needed diameter to press them out may not be part of the kits.

The pivot bolts that go through the lower outer suspension will probably give you the most trouble. Clean them up, soak in PB Blaster (or similar) several times and be ready to fight them. Maybe you'll get lucky, but those have never been easy for me. I've used a small Harbor Freight press and a vise to remove the bushings. The press worked better, and the vise was never the same.
I'm planning on doing the same rust repair on my MSM after it warms up to tolerable in the garage.
Some welding. Most of it went well, some had some hidden dirt. And the panel fit wasn't great, so that made it more fun. But it's 95% in. 

With some sanding down.

I've seen a lot of people who think the punch holes from a tool is too small- but I knew the metal was thin- so I went really wide in the weld compared to the hole. That really worked nicely, I must say. Far more successful plug welds than I've ever done before.
Lots of waviness in the bottom seam- but this was really where the bad panel showed up. Not so bad that I'll need massive mud there, but still kind of a pain to deal with.
Still have about 6 more plug welds on the fender lip, and then find the holes to weld up- and that's done. Which is also all of the body work I'll be doing that needs welds.
Since this it's still pretty cold out, I'm going to not do filler now, and move onto the rear suspension. So today, I put some rust converter on the bolts that are clearly going to be tough. Seeing people struggle with those on the various YT videos, I suspect some of those are going to have to be replaced. We will see- but it would be nice if the Rustoleum version of the rust converter got me a good start to get them out.
Finished planned welding and got to a DA sander.


Still happy with it- the waviness is small enough that filler will deal with it.
Any suggestions on how to get that lower control arm bolt loose? The nut came free easy, but the bolt seems pretty frozen in there. I'll probably hit it with an impact wrench every time I go by to try to get it free.
alfadriver said:Any suggestions on how to get that lower control arm bolt loose? The nut came free easy, but the bolt seems pretty frozen in there. I'll probably hit it with an impact wrench every time I go by to try to get it free.
Patience, a little bit of heat on the arm ends (use propane, not acetylene), and a big berkeleying breaker bar with an impact socket to turn the bolt slightly did it for me. I put a jack stand under the suspension near the bolt head and pressed down. After it turns a little, hit it with penetrant and try it again after an overnight soak. Maybe an impact wrench will shake it loose.
Hopefully Keith has a better approach.
Well, after a day of dissassembly, I think the lower control arm is completely shot. And it's not because of the one bolt- that's solidly attached to the upright as opposed to the arm. But I can not loosen the shock mount. One side spins, and that's it- I can't feel a nut to grab onto from the other side, let alone access to a nut. They are so rusty, though, it would be better to just replace them.
The good news is that the springs are actually fine. Much better made than the control arms. (the upper is fine- didn't get the road abuse from the ground)

You may just have to cut the bolt on each side of the arm if the bolt is siezed inside the bushing collar.
In reply to Sonic :
I may.... but before I go that far, I'll try to use a new impact gun that I need (old ones have died)- and if that doesn't work, I'll pre-buy the lower control arms and then cut them apart when those show up.
At least I know the bolts are corroded enough that I should not use them when this goes back together- so a BFH can be used.

Sorry, missed this earlier.
Big bolt: lots of penetrating oil. As I'm sure you know, that is not WD-40 :) squirt it, walk away, squirt it tomorrow. Then get the impact going on it, that'll help it come free as the impacts help shake it all loose. All standard rust belt stuff. If it's rusted to the upright, then you can be fairly aggressive with heat.
There's a square captive nut inside the arm for the shock bolt. It's not welded in, but sits in a little cage that can easily come apart when faced with a rusty set of threads. It's difficult to access as a bonus. I've had to cut a few shocks out, I don't miss that. Once you've cut it out, you can replace it with something else. Here's how I have to install shocks on 338, which got this procedure in 1999. The hemostat holds the non-captive nut as I thread the bolt in. For removal, I wedge a screwdriver in there to lock the nut.
In reply to Keith Tanner :
Thanks for the direction on the shock attachment- do you do anything to make it permanent in the arm? For sure, I'll be taking the whole set up out to get better access to all of that. But would a couple of spot welds on that captive nut help?
As for the large bolt- it's rusted to the upright- as it spins in the arm (I have the upright loose). Other than cutting out part of the bushing, how in the world does one get penetrant into that?
I guess I don't completely need to bail on the arm, yet. But part of the HF run will be a press as well as the impact gun.
If you can get spot welds on that that thing, you're a lot better than I am :) If you can recover the original nut, you might be able to bang the cage back into shape. Since it's something I don't regularly need to access on 338, I chose to just leave it. If it was on the race car, I'd have to come up with a better solution.
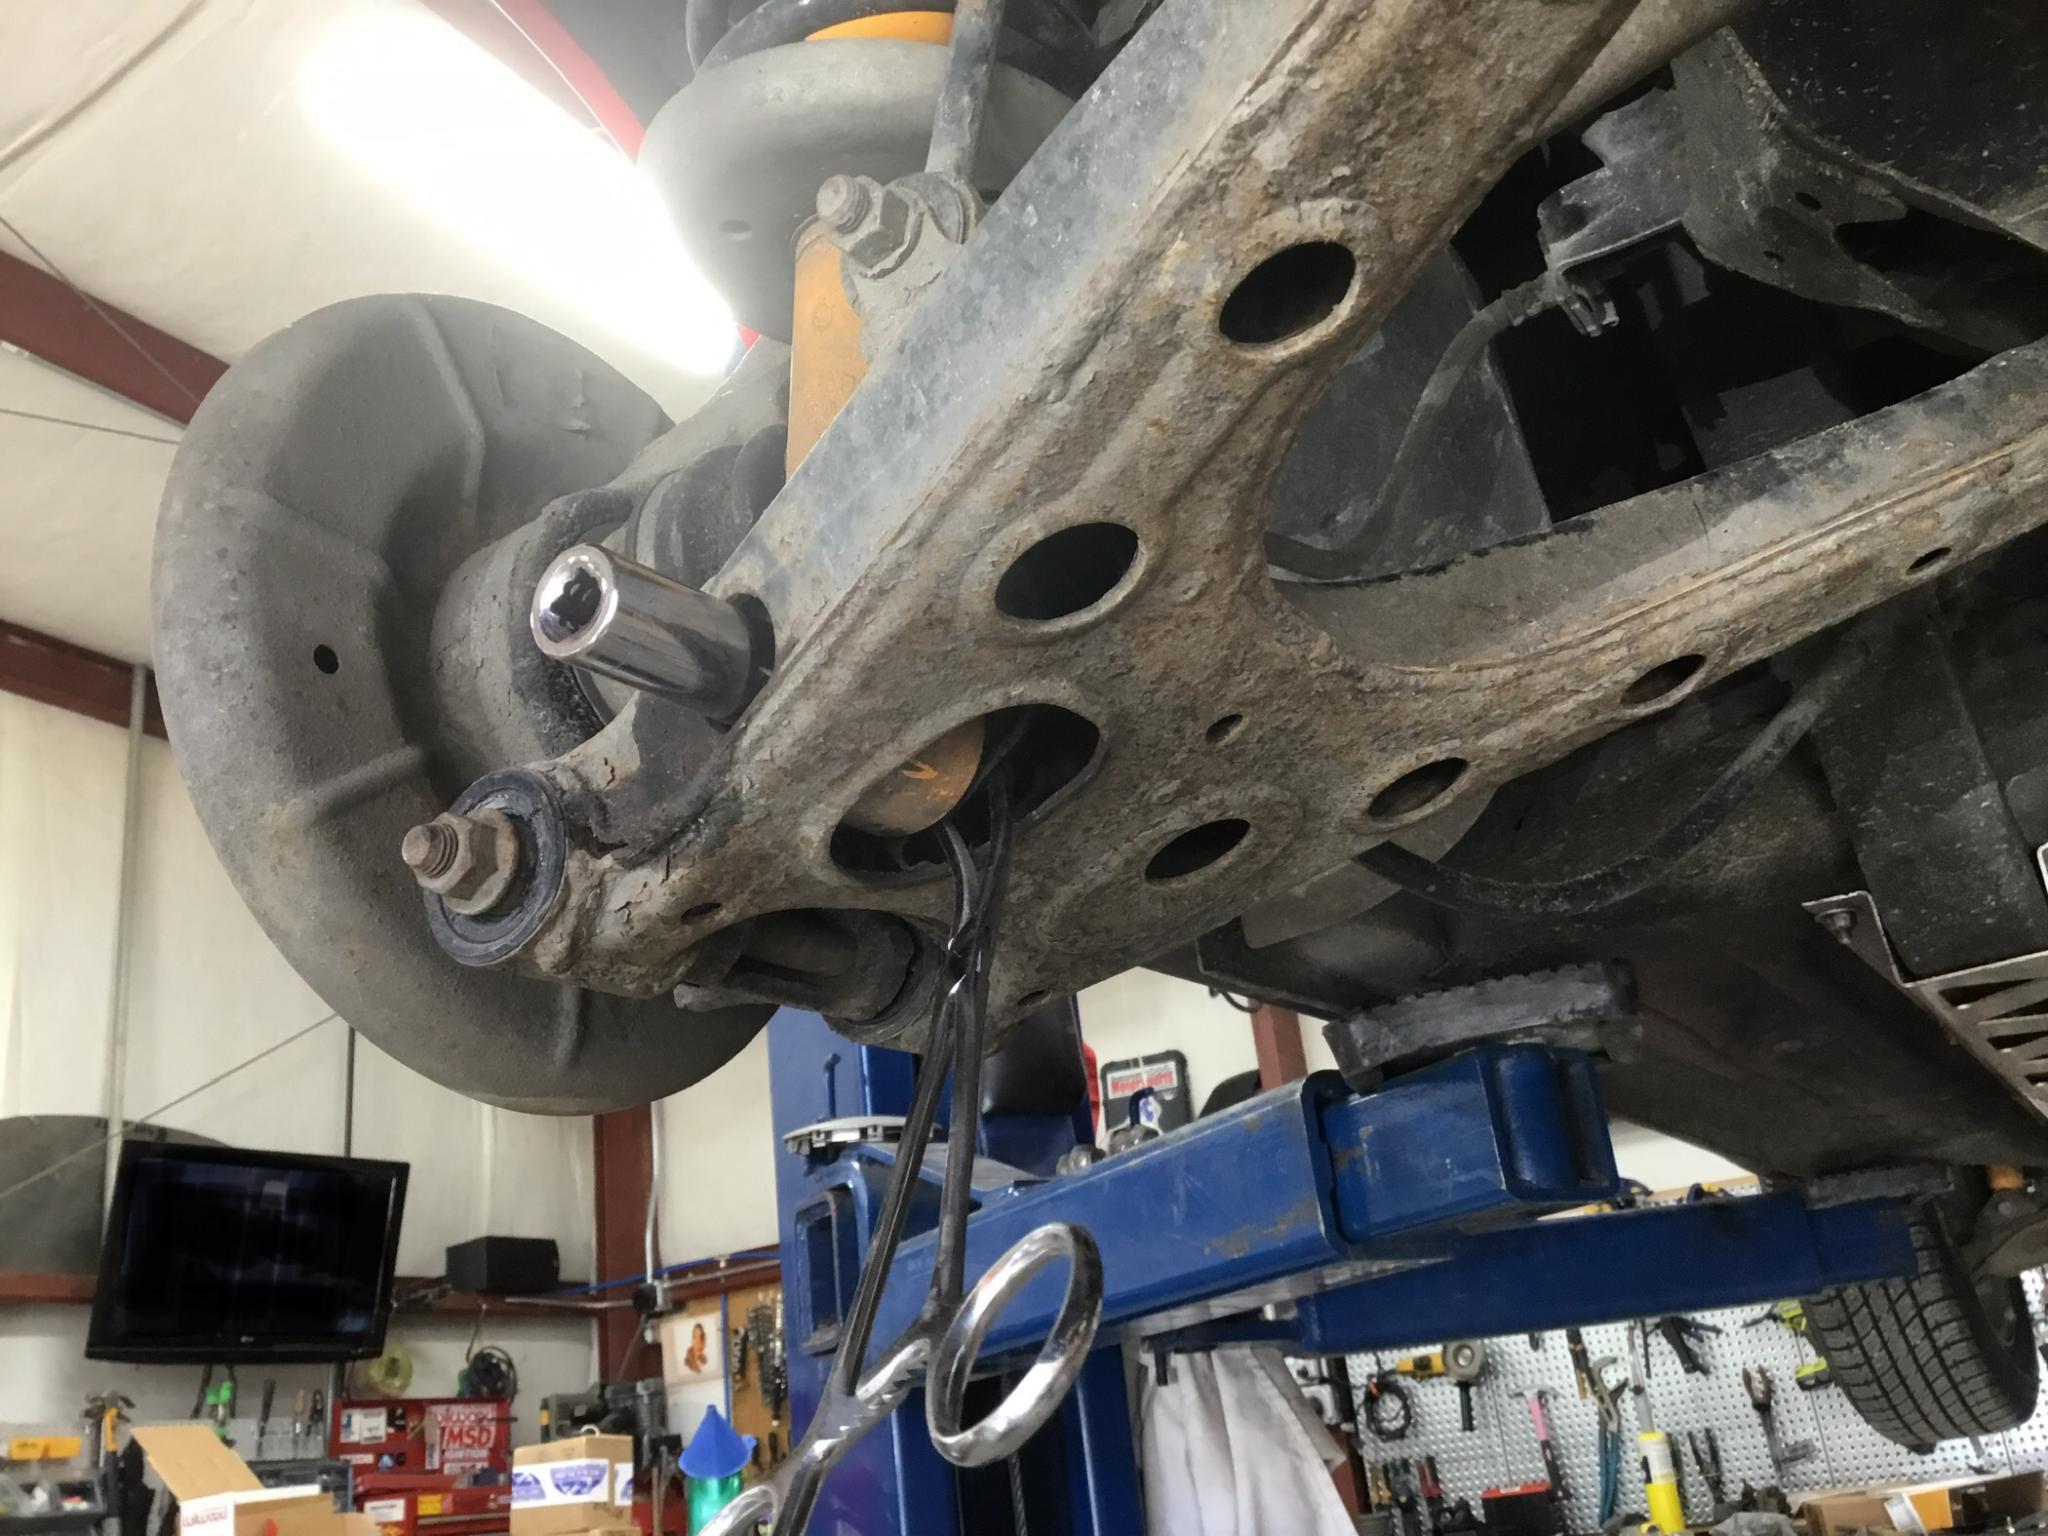
As for the big nut, you can get to the inside edges of the upright. Look at it from the same angle as that picture, you can see the middle of the bolt there.
In reply to Keith Tanner :
ah... I almost thought that was a solid tube. I still may pull the whole arm out to do the work, though. Just the two inner bolts and the sway bar. It will be bulky, with the shock and the upright/axle attached. But I can turn it over and put it in a vice for better access.
That's the bolt itself. So hose it down, put it in the vice and get out the BFH :)
Good news: Both rear upper control arms are out.
Decent news- one of the 4 lower control bolts is out.
damn... the other 3 are very stuck. And the lower control bolt is still stuck with the brand new impact wrench.
Just keep working on it. If I can get the arms out, maybe it will be easier.
4? We're not talking about the long outer bolt on the lower rear arm then, there are only two of those.
Try loading it up with a breaker bar and delivering short,sharp shocks to the bolt and/or what it's passing through. This is assuming lots of penetrant.
In reply to Keith Tanner :
Two on each side = 4, so of those 4, one had good access for an impact wrench and I got it off.
Both of the lower outer are seized to the upright, still. I'm going to change penetrants and see if that changes anything. But I'm also going to try to get as much debris from the bolt out, too. Maybe that will help get stuff in there.
If I can get the arm out, then I can use gravity to help get the fluid into the passage. And then turn it over a day later. And I can also make sure the upright is stopped- so that any impact to the bolt will transfer into where they are joined.
But if all else fails, well, I guess I get a pair of new uprights and lower control arms... They are out there.
Ah, you're talking about the inner bolts. Note that they have alignment cams on them, it'll be MUCH easier to remove the nut than rotate the bolt. Get the nut off and hammer that thing out.
In reply to Keith Tanner :
There so much rust, I can't move anything,lol. Paitence and more fluid. At least until we get back from vacations when I could buy something.
Got the arms out. So that's one thing.
But it sure looks that the spinning captive nut is going to be almost impossible to deal with. I have a few ideas but how one puts it back in place even if I can get it out....
And the upright and lower control arm are still the way they are. At least now gravity is helping me get the fluid down there.
Once they are apart, I'm going to take the uprights to a shop to replace the axle boots.
The uppers had a lot of caked up rust, but once wire brushed, they get back to normal pretty nicely. Once really cleaned, I'll see if I can reuse them.
You'll need to log in to post.


