1 2 3 4 5 6 7
BirgerBuilder
BirgerBuilder Reader
9/3/19 2:25 p.m.

Yeah, that turbo went in real easy, I was talking with my brother about moving the actuator down and toward the engine for more clearance but I will worry about that later.

Next on the agenda, Tubes!

I was looking over how the cheapest, 'build your own' kit was about 75$ on china-bay. and I found this add on facebook.

So I drove up and got 8 feet of it and some 90s too. 5$ a foot, 10$ for all 4 of the 90s.

I should only need 3-4 feet and the 90s so hopefully, 30$ total.

Before I could get into that however, the first piece coming off of the flange is aluminum, and free, so i started there. I cut the tube, flipped it around and fitted it back together.

This went, surprisingly well. The welding did too!

As you can see, my welding still needs much work before it'll look nice, but it holds air.

Now, I had to take a break and help my son with his current project. But he's pretty handy so we had that ready for paint in just a few minutes. Way faster than I can finish a project.

I went back to the stainless tube and attempted to run a bead on the first section with spectacular failure. I didn't take any photos but I immediately burned through the thin walled pipe and the interior was completely boogered up. After that, I turned the amps down and then I couldn't get a good arc going at all.  So, I googled some answers and ended up watching a few videos from the "The Fabrication Series" on youtube which were really helpful. And after about a full day of trial and error, I was able to find my many, many mistakes.

1.) I had some resistance in the welding cables and ended up tearing them all down and replacing the connections.

2.) I was grinding my tungsten on a dirty grinder and contaminating it.

3.) I was welding at too low of an amperage in order to try and stop burning through, but ended up cooking everything.

4.) I needed to back purge the pipe to prevent sugaring/ contamination on the back of the weld.

5.) I just need more practice overall...

So the next logical step is to build a pipe bomb and blow the whole garage up.

Yeah! But actually, no. I made a cheap back purge setup with supplies from lowes and got some practice in.

Again, not pretty but functioning.

so, I made a second pipe fit-up and crossed my fingers.

Not too bad, no burn-through, no leaks, and the inside doesn't look like it's full of burnt grinding material just waiting to fly into the engine.

I had my 3 year old help out with the bead 'roller' and we have one complete charge pipe!

I got it all fit up and was thinking about how I would like a bigger inter cooler and would rather not have to go under the radiator...

Just then, my brother texted me.

$10! Oh, but it's already been sold...

To me! Well time to redesign that first section of pipe...

1SlowVW
1SlowVW Reader
9/3/19 3:30 p.m.

You got a sweet deal on that intercooler.

BirgerBuilder
BirgerBuilder Reader
9/3/19 8:04 p.m.
1SlowVW said:

You got a sweet deal on that intercooler.

Yup, I think the ad had been up for 3 hours when I contacted him.

BirgerBuilder
BirgerBuilder Reader
10/1/19 1:50 p.m.

Unfortunately, with many other projects going on, there was just no way to get this car anywhere near finished for the $2000 challenge.

Oh well, it's been on the back burner a few weeks but we should be resuming regular work soon.

I did manage to sell the old soft-top for $100 though!

My brother wanted to take it auto crossing this Sunday so I pulled the half finished turbo build off and bolted everything back together.

I also removed the oversized (for a miata) battery and put in a motorcycle sized battery instead.

I needed to make a new hold down bracket, which I didn't take any pictures of.

While we were at it, we had noticed that the clutch was acting kind of funny. Normal some times, other times would disengage very close to the floor.

We figured it needed to be bled. First few pumps from the pedal and black filthy goo came out instead of fluid.

When I looked in the reservoir, this is what I saw...

Anyone else ever found pea soup in their clutch master? after using the fluid vac on it.

Yummy. Well, we bled the thing for about 40 minutes and eventually, cleanish fluid came out. Hopefully it will continue working properly.

Without all the sludge in there plugging it up, now all the seals are going to leak...


More Tools Than Sense
More Tools Than Sense Reader
1/17/23 4:04 p.m.

Well, this project has been on the back burner way longer than I thought. 

but the other day, we spotted something on the Market-face and just had to drive 6 hours each way to go get it.

Y'all know what this means 


Mezzanine
Mezzanine Dork
1/17/23 7:14 p.m.

SAAB Sonett + Miata = Miaonett? Sonettata? 

I'm really curious to see how well the Sonett body fits on a Miata. 

More Tools Than Sense
More Tools Than Sense Reader
1/18/23 3:47 p.m.

So far we have been calling it the Mazda Mionnett. 

And as for fitment, It's a little narrow but we'll keep cutting and I'll keep posting. 


Dusterbd13-michael
Dusterbd13-michael MegaDork
1/18/23 4:16 p.m.

Box flares. 

Shavarsh
Shavarsh HalfDork
1/18/23 4:28 p.m.

Awesome!

More Tools Than Sense
More Tools Than Sense Reader
1/18/23 6:35 p.m.
Dusterbd13-michael said:

Box flares. 

That was the original plan but there has already been some discussion about skipping the flares and just leaving the tires sticking way the hell out.


TED_fiestaHP
TED_fiestaHP HalfDork
1/18/23 6:59 p.m.

You could cut the top of the fender and extend the entire fender wider.  

    You could cut the body in the middle and widen the entire thing, bit it looks like the roof already almost matches the windshield.  

    If you get the turbo to work and fit up this body, this thing will really be awesome.

      Will be fun to see what you do with this.


More Tools Than Sense
More Tools Than Sense Reader
1/23/23 3:17 p.m.

Couldn't do too much body work this week as a one man operation so I picked up a little side project. 

The wide tires we have on there bump us out of the narrow tire category and those wheels are massively heavy for such a light weight. 

Luckily I got these 13 pounders for $80 a few years ago, just one problem...


Yup, there is a reason they were so cheap to be sure. Two of them look just like this. 

Welp, either I can fix em, or I'm only out $80. Release the monkey with a tig welder!

this is the second attempt, on this one I welded one shallow line on the back and then ground the front down all the way to it. 

On the first attempt, I cut half way through the front, welded it up, felt pretty confident about it and then went to weld the back only to realize that the small change to my of freedom of movement made some big changes to my welding abilities. 

Anyway, after about a full day doing what a skilled welder could do in less than an hour, I ended up with a product that is at least half as good!


eh, 80 dollars is 80 dollars. 

Now I just have to get all the old paint off these bishes.

More Tools Than Sense
More Tools Than Sense Reader
1/26/23 7:04 p.m.

Well, we had some time over the past weekend, and I have been wheedling away at it during the day. So here is some minor progress on the body swap. 

We plan to keep the rear half of the body removable so first we made up these hinged pegs for the body. 


While I was working on that, my brother made up some receivers by splitting a piece of pipe that was already a snug fit. 

We added some bolts and clamps and here there are bolted under the frame rails. 

Also, a lot more mazda got removed to clearance the fiberglass body. It's going to have to get re-formed anyway to better match the Saab lines anyway. 

I don't have the most updated picture, but more than this has been cut away. 

But that's ok, because we have our first bit of alignment achieved! 


Oh, yeah, just 56,457 more elephant sandwiches to go!


jfryjfry
jfryjfry SuperDork
1/27/23 11:36 p.m.

Holy smokes!  That looks ammmaaazing.    I can't wait to see this thing come together

TurboFource
TurboFource Reader
1/28/23 9:21 a.m.

Interesting build!!

More Tools Than Sense
More Tools Than Sense Reader
1/31/23 3:32 p.m.

Thanks for the encouragement! 

More progress! I started to make a ledge for the fiberglass body to sit on. I plan to have a rubber gasket glued in here and then some type of latch to hold it together, since I want the body to be "quick release" 

Here is the scrap sheetmetal tacked in place. 

This should also strengthen the uni-body back up a little bit. And it's hard to get a good picture of it but I tried my best to clean up the weld and make it look like a smooth body line. 

Does it look OK? That's exactly how it looks.

Now, since I want the attachment points to all be latches, it sure would be convenient if there was some type of latch system for attaching a roof to the windshield...

Well of course there is, Too bad I sold the crappy old soft top already to recoup the $100 maximum for the Miata.  

Fortunately, an even crappier soft top is available! 

With the rest of the soft top cut off and sent to the scrap pile, we now have a very high quality attachment for the new "hard-top" 


So I trimmed the roof back another few inches to accommodate and it's not too bad on alignment. Next up, I need to bolt/clamp the two together and then we'll add fiberglass to mesh the two at a later date. 

automotiveflux
automotiveflux New Reader
1/31/23 3:44 p.m.

This thing is going to be wild

jfryjfry
jfryjfry SuperDork
2/1/23 8:49 a.m.

I didn't see anywhere, but I assume the saab body is metal. 
 

didnyou save any of the miata rear fender?  Specifically the part in front of the rear wheel?  I'd try and scab that body line part and replace that section on the saab to make that line flow

More Tools Than Sense
More Tools Than Sense Reader
2/1/23 3:14 p.m.

The Saab body is all fiberglass. And every single panel on the miata was smashed, save for the passenger side door, that's how we got here in the first place. 

David_H
David_H New Reader
2/3/23 4:03 p.m.

Very cool project, I'm impressed on you level of frugality! The sonnet kinda reminds me of a 280 z

More Tools Than Sense
More Tools Than Sense Reader
2/13/23 3:33 p.m.

Thanks for the kind words guys! I am pretty excited for the look of this car having never bought that Datsun I so sorely wanted. 

Too bad, not that much work got done this week as I was otherwise occupied with a short hiking trip. 


But this weekend I did manage to get some time in the garage, I was back to melding the fiberglass roof into a "hard-top". I had already trimmed the fiberglass back a bit and I cut it a little more to get a nice alignment without anything hitting. 

The center of the soft top rail already has two captive nuts where the pull handle attaches so I made a simple bracket and screwed it into this reinforced area of the fiberglass. I believe the rear view mirror used to bolt in to this, but whatever it's purpose, there a section of steel inside the fiberglass in the center and they line up perfectly.  

Now  that the center is held in place, I wanted to pin the fiberglass roof down in two more places to keep it all aligned while I work on the permenant afixing. 

I didn't take any pictures making this bracket, but there are two bolts sticking out of the bottom of this piece of sheetmetal. One goes through a hole in the metal rail pinning the fiberglass down and the other goes through, just the fiberglass but further away from the edge. I wanted to keep it low-profile so I can glass over it in the future. 

Here's how they look underneath. 

I'm really happy with how close the shape of the roof matches the shape of the rail. I was thinking I would have to add a ton of fiberglass to fill the gap but, hopefully it won't take much at all on the front section here. 

Next part of the plan involves making some long metal triangulated braces on the outside edges of the rail that will hopefully; hold the rail the fiberglass, keep everything from flexing and cracking, keep rain out of the cabin, blend the width of the roof to match the windshield, and not look like dog-turds. Wish me luck!


More Tools Than Sense
More Tools Than Sense Reader
2/17/23 2:46 p.m.

As I mentioned last time, I want to add a good bit of rigidity to the roof where it connects to the rail. And, as you can see below, the windshield is about 40mm or so wider than the roof on both sides. 

So let's see how many birds I can hit with my sheet metal rock. 

First off, I need some free sheet metal...

Literally at the end of my street last week. So the free metal was released from the cabinet and the first chunk was bent into an L. 

Now this perfectly rectangle sheet metal does not at all line up with the body lines of a Sabb Sonnet so it's time to deploy more tools! 

This stretcher/ Shrinker combo I got from, probably harbor freight, actually works really well on thin sheet metal like this. 

So after a few minutes, I went from picture A to Picture B. Nicely matched curve. 

I did a good bit more bending to get the panel correct in all 3 dimensions and then cut it down to make a nice transition back to the normal width of the roof. 

Also, conveniently, the section I had to cut off the panel could be flipped around and trimmed to fit across the bottom to make the triangulated shape I was after. 

I forgot to get a picture of that separately, but here it is, on the car. The front got welded to the soft top rail and then I drilled and riveted all along the side and bottom where it touches the fiberglass roof line. Once this was done, I detached the roof from the car and was shocked that the (relatively) heavy, metal rail did not sag at all when I lifted the roof up from the center. 

Last thing I did was flip the whole roof over to make welding the underside easier. Not to toot my own horn too much but I think this worked much better than expected. Hopefully once it's been fiberglassed over, it will be strong, waterproof and at the very least, not ugly. 


More Tools Than Sense
More Tools Than Sense Reader
2/27/23 3:07 p.m.

Well, more work has been happening, a little bit at a time.  As you can see below, the right side received the same treatment as the left, adding a "shelf" where the body sits. 

Now this quarter panel was very dented so I cut away all of it and then bent the door jamb back to approximately where it belongs. 

Because all this metal is missing, I of course need to weld more back in. 

So, back to the filing cabinet for more raw material. (which is like 28 ga steel, and it's so tedious to work with because you burn holes right through it. Oh well, free is the right price and lighter is better.) So I cut a piece and just bent it to around the right shape and tacked it in. 

You can see that the top is bent down to better meet up with the fiberglass body but the rest matches the door's shape. Since we will need to make fender flares any way, I'm thinking it will be easier to just puff up the body to align with the doors/ miata body. 

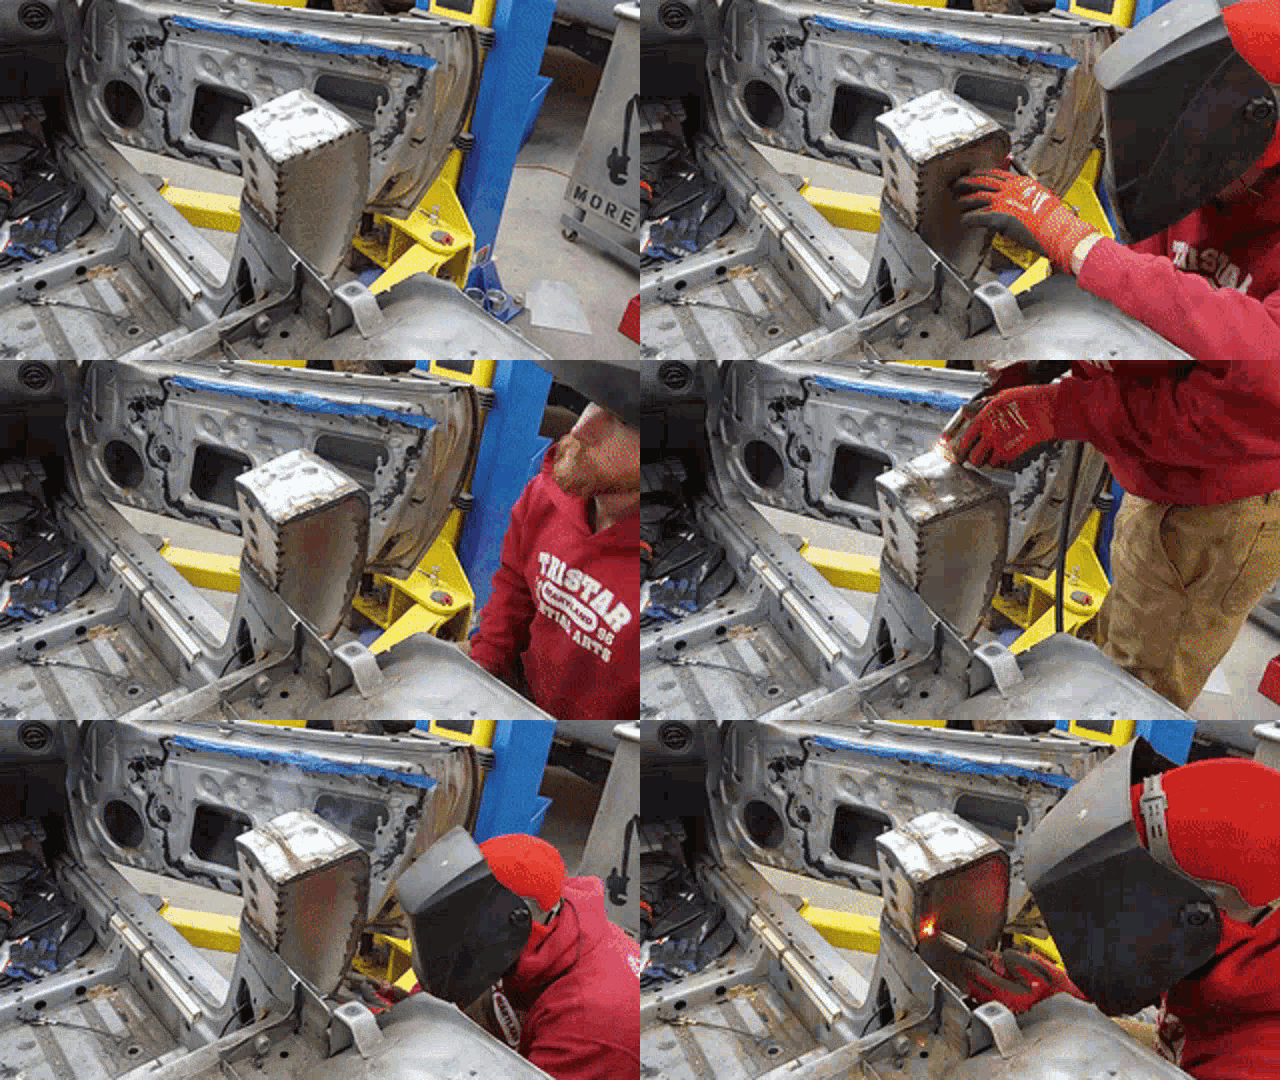
Anyway, using more filing cabinet, I made a support for the back side and lined it up to top portion. 

After welding that together, I made a backing panel with a bunch of pie cuts. I wish I had added some bead rolls to it for stiffness but, what's done is done. 

Pinned in place with Cleco Fasteners before being tacked as well. 

After that, all the tack welds are filled in, very quick work, as you can see.

And now I just need to try and make an exact copy on the left side... easy. 

(Oh, and a lot of sanding and bondo)


jfryjfry
jfryjfry SuperDork
2/28/23 11:38 p.m.

One bite at a time...

maschinenbau
maschinenbau GRM+ Memberand UberDork
3/1/23 10:01 a.m.

Dang! Now that's how you revive a build thread! Awesome idea. This build is the epitome of what the $2000 Challenge is all about IMO.

1 2 3 4 5 6 7

You'll need to log in to post.

Our Preferred Partners
SDRufhej3hmR7ph82X3CWxZ0w7hzIp52lNBWph6cnMMcfDTc4VrhoHjDpsP7jDUi