


There is some amazing E36 M3 happening in this thread, I can not WAIT to see this car in person ![]()

There is some amazing E36 M3 happening in this thread, I can not WAIT to see this car in person ![]()

Engine went back in last night. Got started on fuel system. My daughter helped me make up hoses; she held them while I crimped the ends:
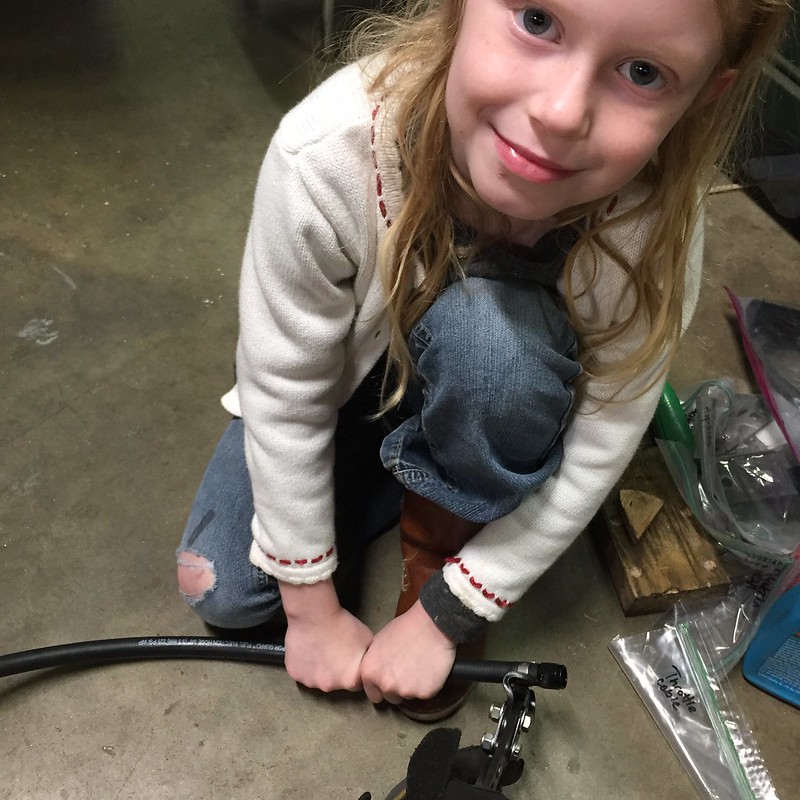
All hose is 3/8" Earl's Vapor Guard, with -6 AN fittings.
I bought a bunch of components from Radium Engineering to make the fuel system install go smoothly, but I found a hitch before I made it very far. This banjo fitting is designed to allow you to retain the Bosch 044 check valve on the pump discharge, but the banjo bolt was bottoming before it even made contact to seal the fitting.
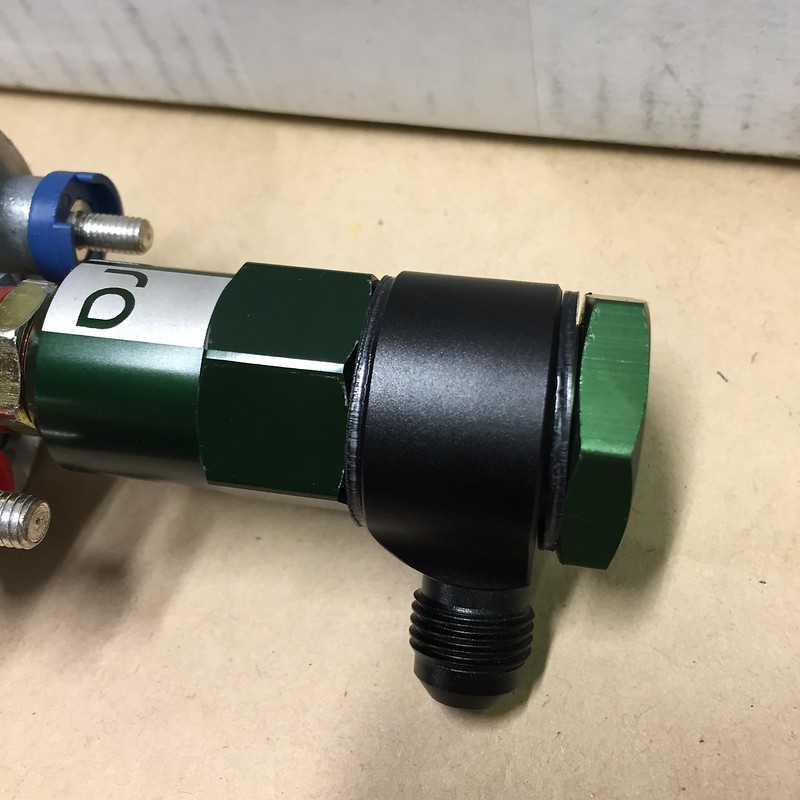
I could either wait a few days for the vendor to make it right...or I could deal with it myself. The latter wins, of course. Lathe to the rescue:
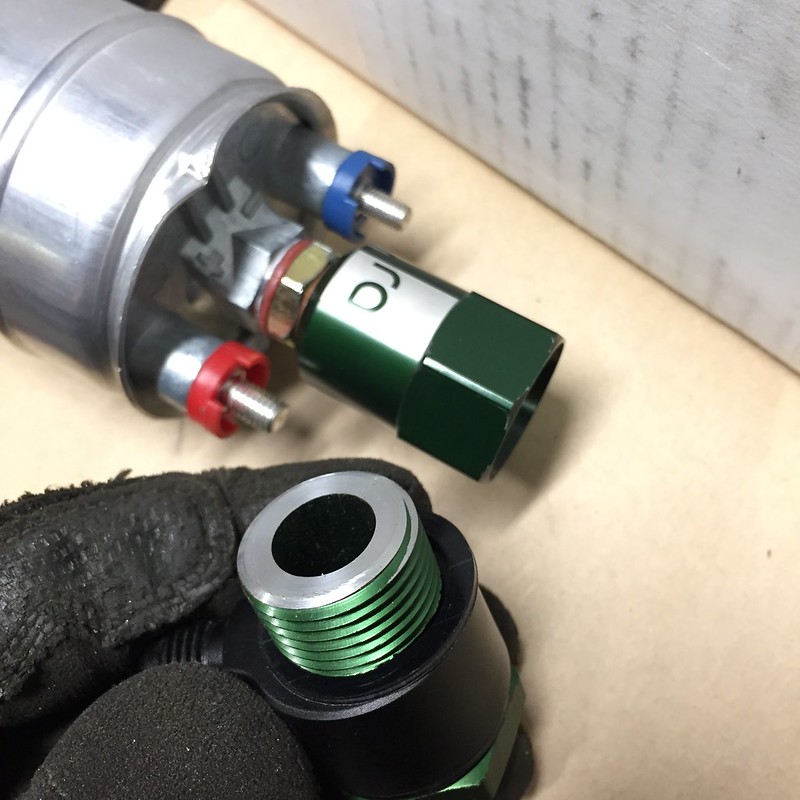
The rest of the Radium stuff is really nice. I have their fuel pressure regulator body that lets me use ubiquitous Bosch pressure regulators that pretty much everything in Europe uses, as well as their catch can.
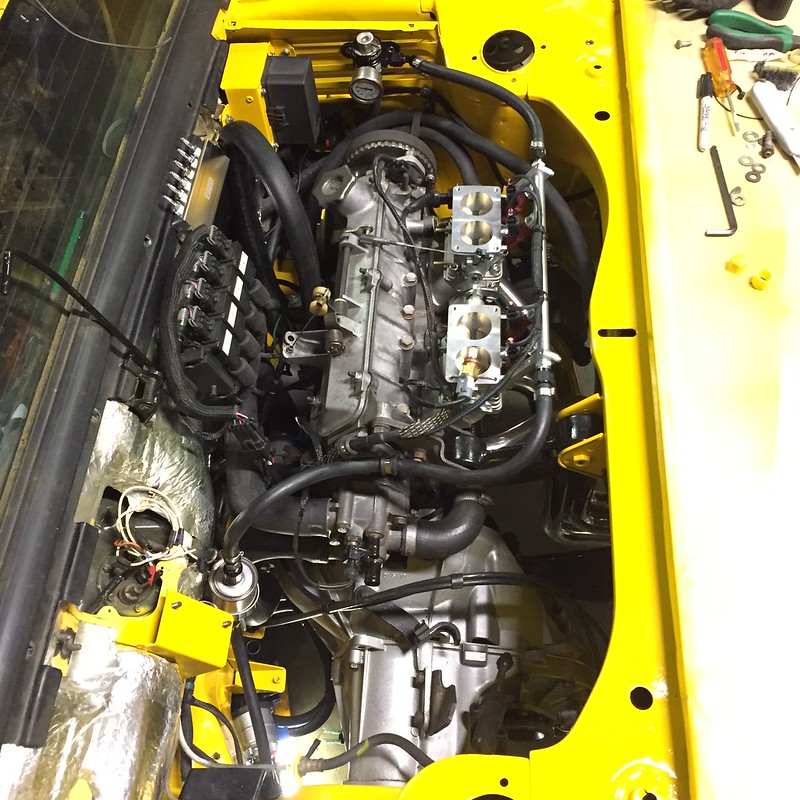
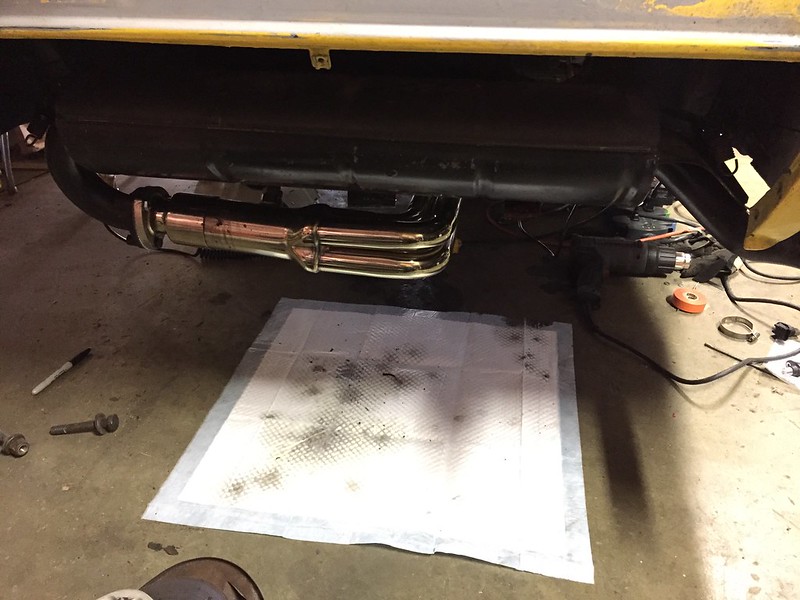
The placement of my pump is too close to the tank, and I wasn't able to get the supply line feeding the pump to fit without making a big loop. I'm not too happy about that, but the loop fits well and rests on a rib on the transmission housing very nicely. I added some heat-shrink abrasion sleeve to both supply and return visible here to make sure nothing happens to these hoses. The return line follows the same routing.

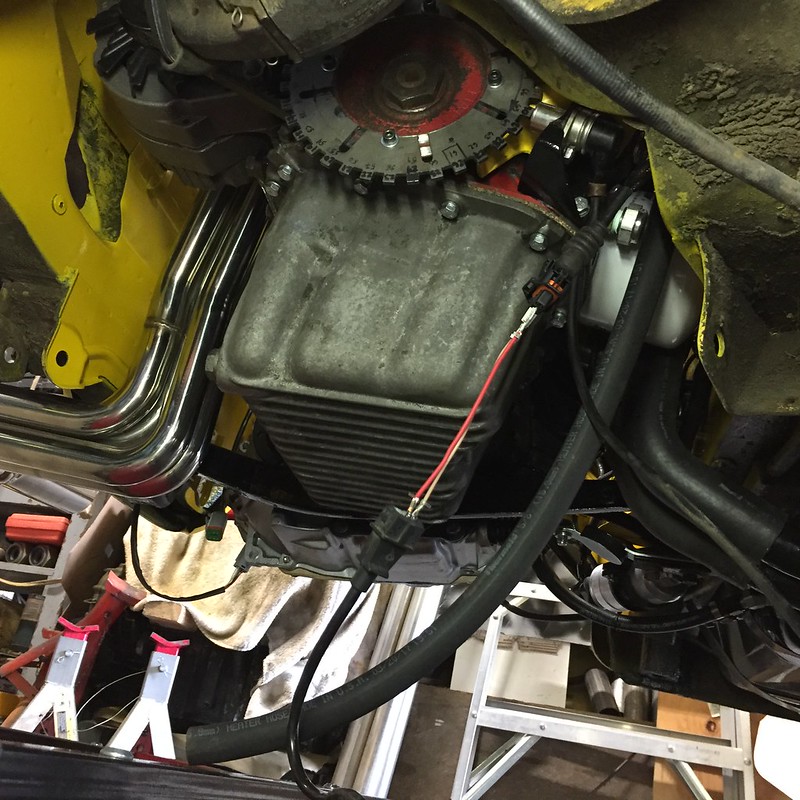
Harness is now all plugged in. I suppose it's time to add a battery and start testing everything, but I'm scared as E36 M3 to actually do it. Engine's current state:
Seven days until Hungary Bill arrives...It's crunch time.

Weeehoooo that looks amazing. Those Jenvey bodies you have are money. One of my friends has them on his Alfa Milano track car. Was going to offer up a couple choices of some rims I have stored. Then I went back and checked the thread and saw you have a nice setup already. Wish I had some time to motor on down that way and toss in a hand to help. Won't be starting in on my 71 spider until we are in our new house at the end of next year. So I'm living vicariously through this build and storing up some of the wiring and machining for my project.
Borrowed the truck's battery Saturday morning and started doing diagnostics with the ECU. This was my office for the morning:
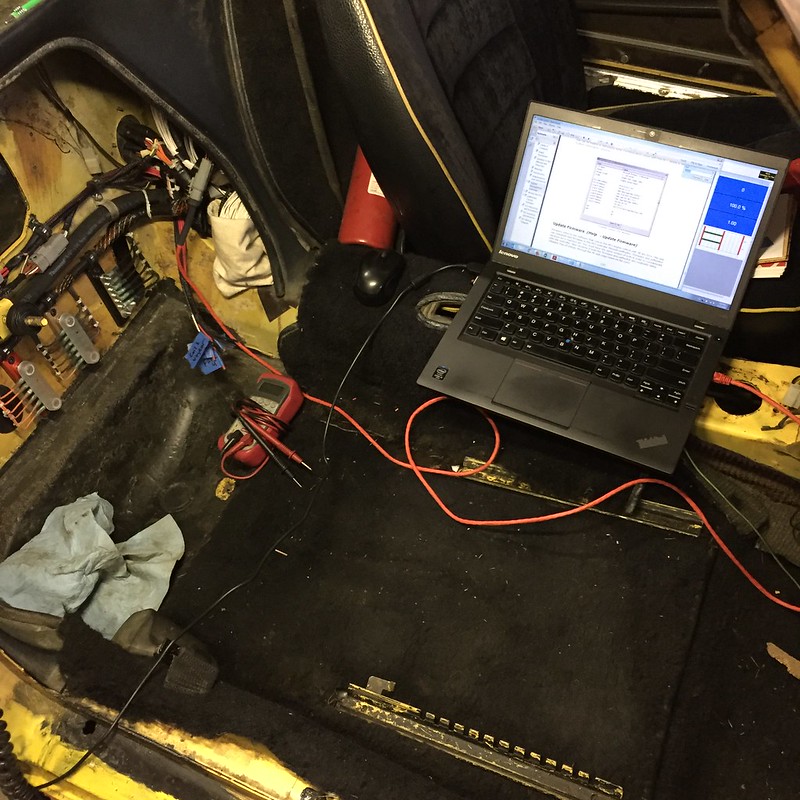
Fuel pump roared to life the minute I turned the key. All injectors and coils fired as designed, TPS & wideband were calibrated, MAP, coolant, air temp all reading as expected.
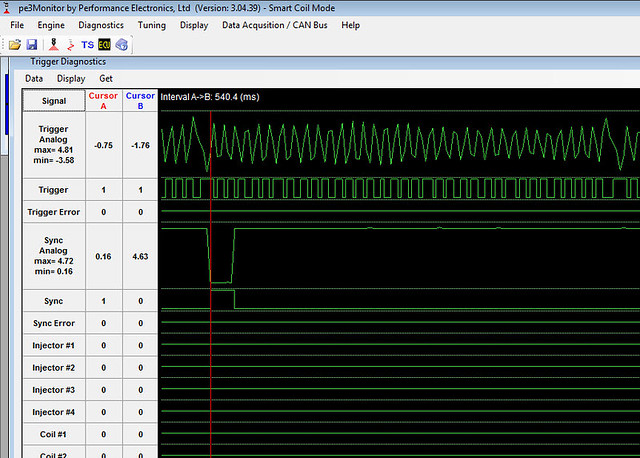
Using the built in oscilloscope, I turned the engine over to make sure I was getting a good signal from the crank and cam sensors. I wasn't. The cam sensor was reading on the scope just as it should, but I couldn't get the crank to read clean. I swapped in a spare sensor, I adjusted air gap, I changed settings. I was starting to get frustrated, so I just opted to swap in a crusty old Bosch VR sensor from a SAAB just to troubleshoot. Same mount form factor made this easy - it's also part of the reason I chose the Hall effect sensor I did. Check out this splice job:
And just like that, I got a perfect read on the crank. The Hall effect sensor I was using just doesn't like my reluctor - the teeth are too close together. As one tooth leaves the sensor, another is starting across the face, and a Hall sensor needs more tooth spacing to read correctly. Here's what I got right out the gate with the Bosch variable reluctance sensor:
I need to adjust TDC degrees in the ECU a little to get the placement right since switching to VR. The ECU reads the "zero crossing" of the signal, which means I need to clock the reluctor a few degrees so it's accurate. I can adjust this in the ECU without any physical sensor changes, but I need to play with it a little.
Good signal on the triggers meant it was time to try starting.
Pretty much started right up with a little throttle. Open header, but still sounded decent. I don't have any hoses or coolant in the car, so I only got to run it for a few seconds here and there, but getting the coolant system sorted is what I spent the rest of the day working on. Happy dance over here for sure! ![]()
I've spent soooooo many hours stressing about actually getting this to run. Considering how easily it started, I don't know whether to believe it was because all this is easier than I thought or if all my preparation just payed off.
Brad, thanks for the wheel offer - I should consider picking up a spare set of wheels at some point. No hurry, obviously. You're welcome to come by if you get an afternoon free - it's pretty clear that this is where I'm spending all my time lately. ![]()
Looks like we could even go for a tuning cruise!

It's your preparation. Great work!
Pretty obvious, but once you get that first start under your belt, you just want to work on tuning! Not having coolant meant I couldn't...I sort of did this by design because it would force me to get these tasks done quickly because I knew I'd be motivated. Needed a bracket for the reservoir. I switched to a common VW Jetta/Golf reservoir because my old Fiat tank leaked and didn't have any internal baffling and was prone to cavitation. Capacity is a good deal less than the Fiat, so we'll see if that becomes an issue. The tank was $18, so I'm not out much if it doesn't serve. Start with a cardstock template and transfer to steel:
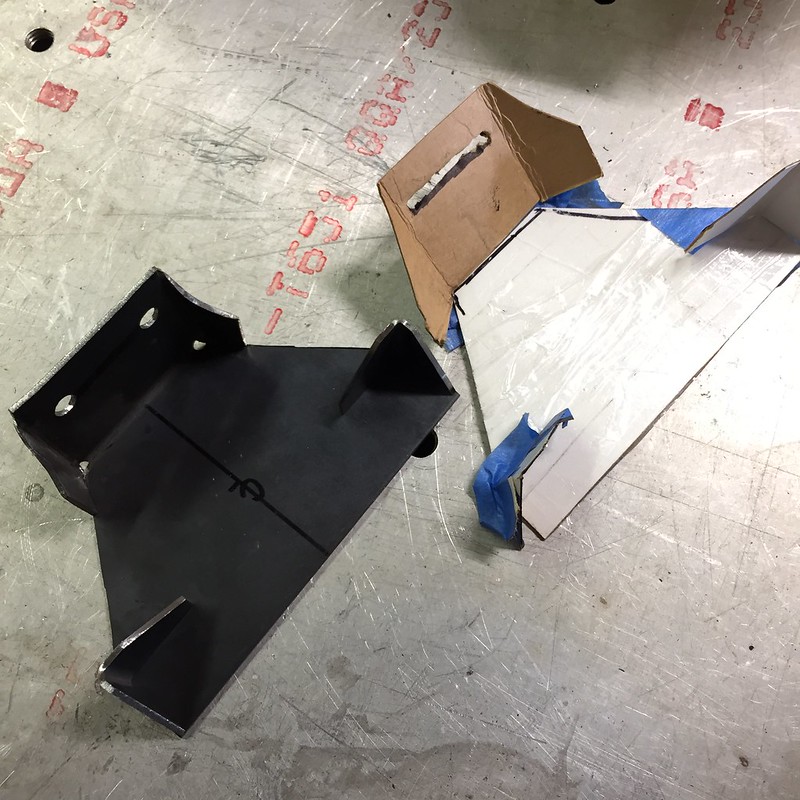
Add rivnuts and Tig welder:
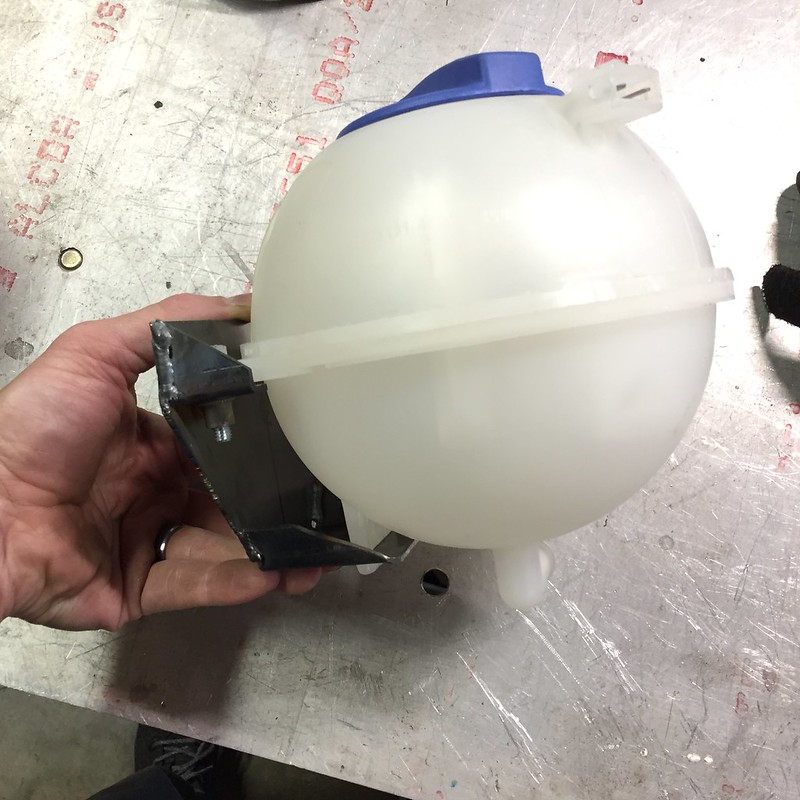
I was feeling pretty proud of this bracket at this point. Right up until I tried to bolt it into the car, where I was reminded how I'd made a mental note about avoiding interference with the fasteners and the edge of the reservoir. A mental note I'd forgotten when I drilled the holes. The center mounting bolt is preventing the reservoir from aligning with its mounting holes:
I slotted the holes just a little and then found a nice thin head Fiat bolt. Disaster averted:
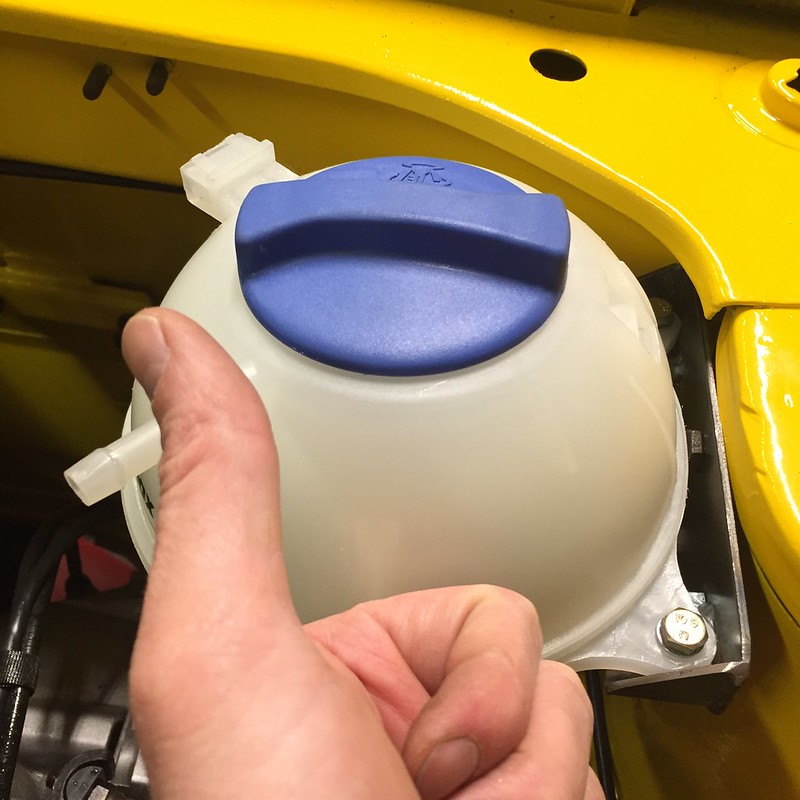
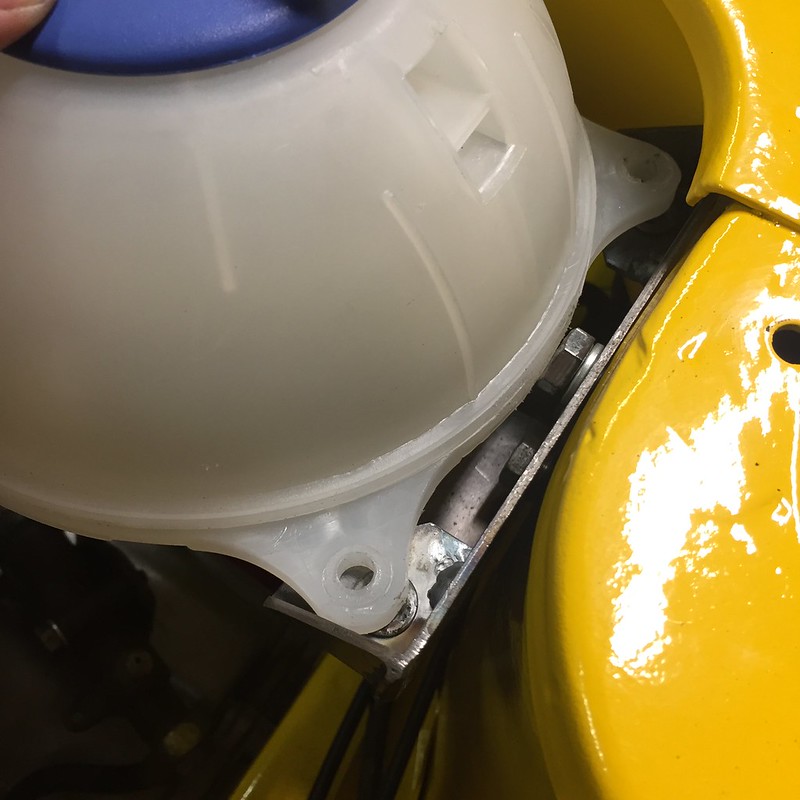
Paint is drying right now. Decent hose clamps are slated for delivery today (thanks Amazon Prime!), and then I can fill the cooling system and get on with tuning.
Here's the reservoir in place. I am saving as much room in the forward left side of the engine bay in order to get a decent sized airbox and filter. Looking for suggestions on drop in factory solutions. Stefan suggested a Turbo Dodge airbox a few pages back. Anything else I should look at?
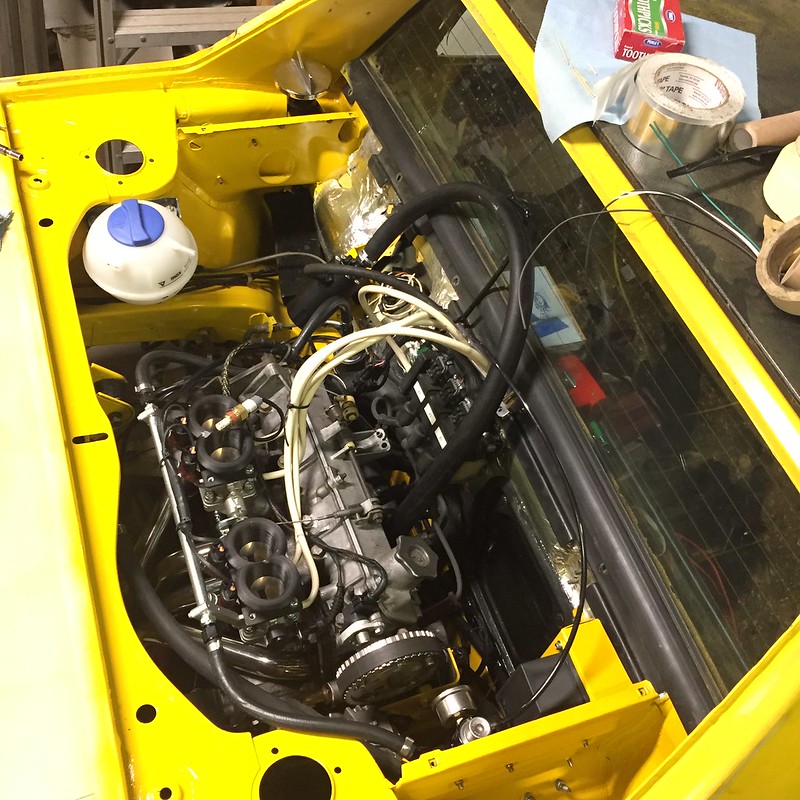
Disregard the rat's nest of vacuum tube and the big looped hose to the catch can. I used what I had in the shop instead of getting the right stuff at the FLAPS.

Awesome! Just awesome.
There is a air box from a rzr used in the AW11 rally cross build, it looks nice and compact. Not sure exactly how much room is there.

Such badassery! It warms the heart to see your X1/9 adventure taking off just as I draw mine down.
Keep after it, you are doing great work here!

Congratulations. I only wish my TR6 was running right now. Good work.
Man, with your fabrication skills, and all the tooling you have handy, would adapting another vehicle's filter box really be an easier solution?
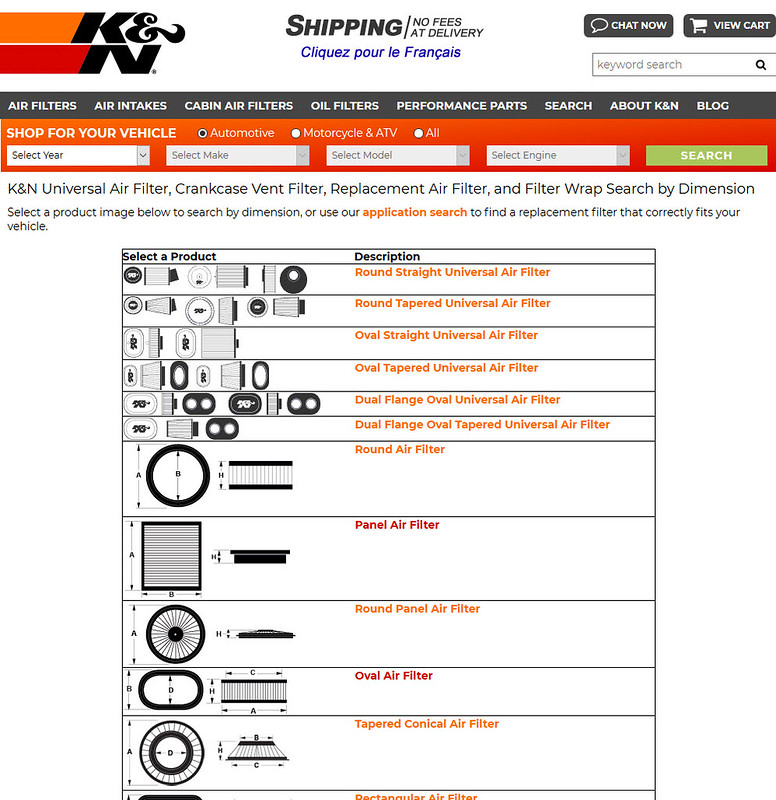
I was thinking you could search K&N filters by size (linkey: K&N Oval air filter search ), create an oval plate to be installed under your throttle bodies (give it a little lip), and clamp another oval plate to it with the filter in between. Make it a tall filter to give the ITB's a little room to breathe?
Failing that, the Datsun 240z has a long airbox that mates to two SU carburetors. A little welding and cutting could make that work. Not sure if you'd be able to keep the ITB's inside it though.

^This one is $28 at the Z-store.
Inside looks like this:

RZR airboxes are on the list to research now.
Bill, you're sort of on the right track - I'll be half fabricating, half adapting. The plan is to put an airbox like the one you posted over the throttle bodies, then feed it cold air from an airbox on the driver's side being fed from the side body vent directly below it. I don't have a ton of room over the throttles - just enough for the horns to live inside the air box and provide enough room for airflow. I might have to cut up my deck lid a little to make it all breathe the way I want.
Managed a few hours in the shop yesterday. First up was exhaust. I wanted to try bolting the stock muffler up to my header to quiet things down a little. The stock muffler is stainless steel, and lines up somewhat close to where I needed it:
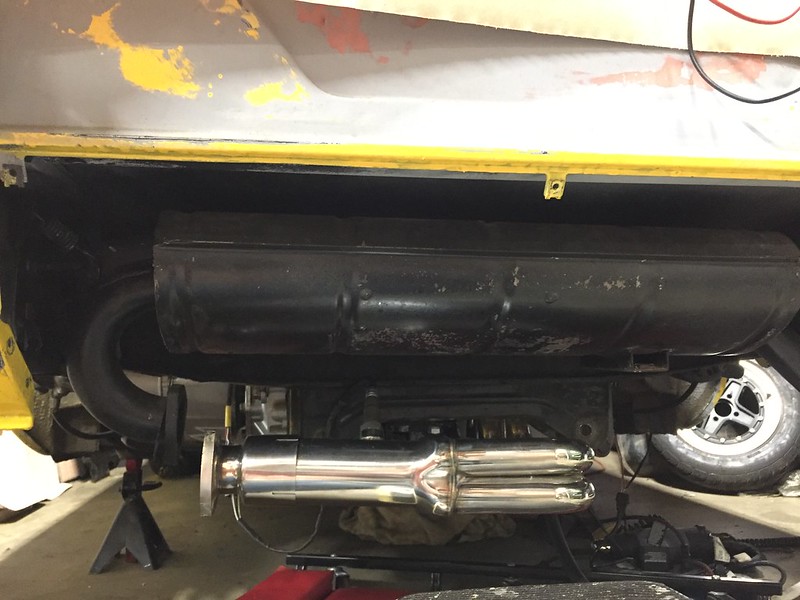
Check out the reducer it comes with for the collector. Yuck. Remember this is temporary. Necks down from 2-1/2" to 1-5/8". Anyway, I lowered the muffler down from its stock mounting with a few zipties. Ordered a strap clamp to secure the reducer to the collector. Here's how it sounds now:
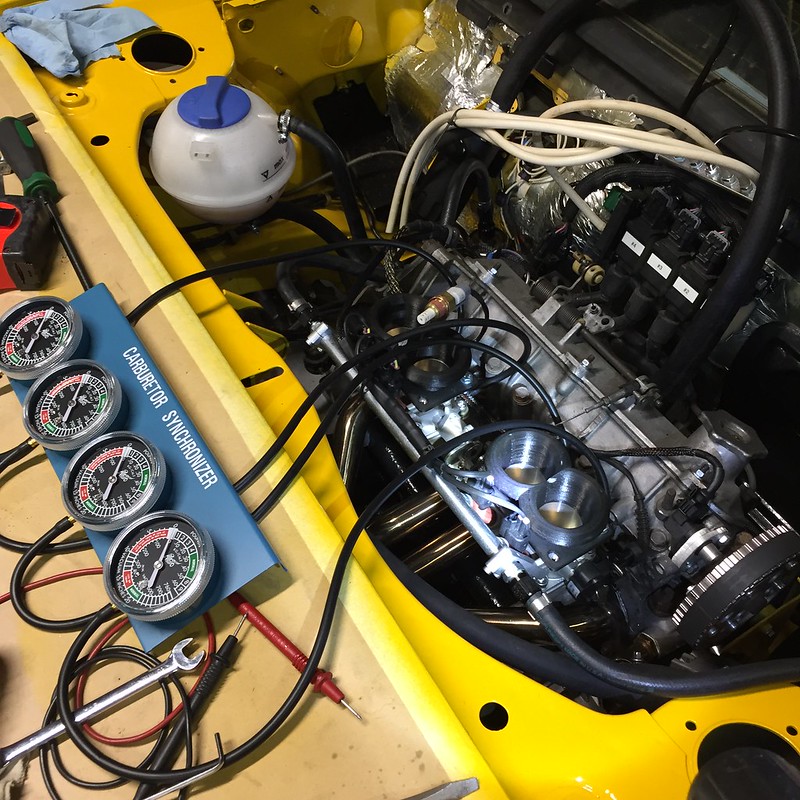
Hose clamps came, I picked up some heater hose to get my reservoir hooked up. Cooling system buttoned up, I proceeded with some tuning. I need to get the idle stabilized so I can get the throttles all balanced out. Remember that 25% off eBay coupon? Mine turned into this carb synchronizer. Need to figure out how to use this thing:
There's a little straw color forming on my header. ![]()

Think I have a 240Z air cleaner assembly kicking around. You can have it for the cost of shipping if you want to mess with it.
In reply to PseudoSport :
Wow, thanks so much for the offer! Will you shoot me some dimensions first? I need: height above carbs (at mounting plate), width, length, and air inlet diameter.
Hey Bill, thanks for the link to K&N filter finder. That tool is amazing for this kind of mix-and-match game! You can set the parameters you want (length, width, material, a million other variables), and it will feed you what they make and even tell you what car it fits! Impressive. Even if you want to run another brand of filter, at least you can find the make and model car to ask after. Go here: K&N Filters

I used an ITG air filter on my dual Weber fed X1/9. Note this is not the actual photo of mine, but one i found on the internet. They come in various sizes and it would only need a plate drilled to the correct size for your application. It worked pretty well.
In reply to racerdave600 :
I'm doing something similar as a stopgap until I can get a final airbox solution described above. The X engine bay is HOT and I want to get some fresher air from that side vent. I've got some Empi air filters on the way.
I have a spare cone filter I could bring if you thought it would be helpful. It came off the my GTV6.
For the GTV6's some of the guys route their intake through the fender wall. This puts the filter in a pocket outside the engine bay but still behind the grill, (it's protected from tire dirt by the fender liner)
Something like this here.


Mezzanine said:In reply to racerdave600 :
I'm doing something similar as a stopgap until I can get a final airbox solution described above. The X engine bay is HOT and I want to get some fresher air from that side vent. I've got some Empi air filters on the way.
To get decent flow from the body side vents, remove the plastic mesh between the fins. The mesh is really pretty tight and does not provide a significant amount of flow without modification.
Hey, I went through all my Datsun parts last night and couldn't find it. Must have gone in the last parts purge. Sorry to get your hopes up.
In reply to stafford1500 :
Thanks for the tip - the mesh will be removed for sure.
In reply to PseudoSport :
No worries at all - thanks for taking the time to look for it last night!
Four days until Bill is here, and I'm going all in on making the car road worthy-ish. New bushings in the rear control arms.
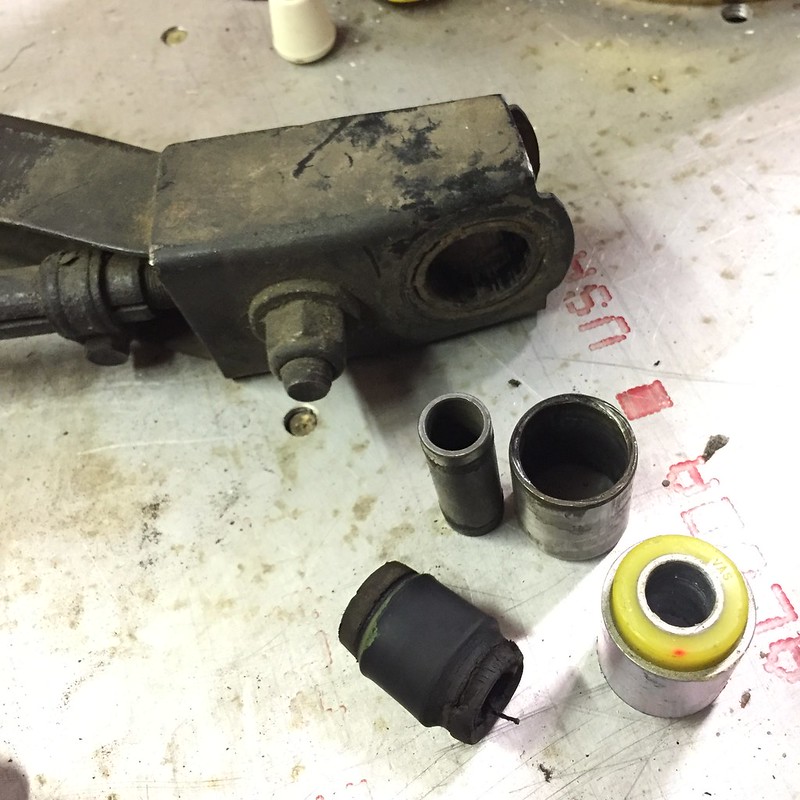
I had to relieve the driver's side control arm to clear the hump of the five speed. I added some reinforcement and painted it up. Put some new silicone boots over the ball joint and tie rod ends. Both of these ball joints are NLA (like for real, even swapping to something close), so best I could do is replace the old dry-rotted boots. Good thing the joints are tight. #paintitblackputitback
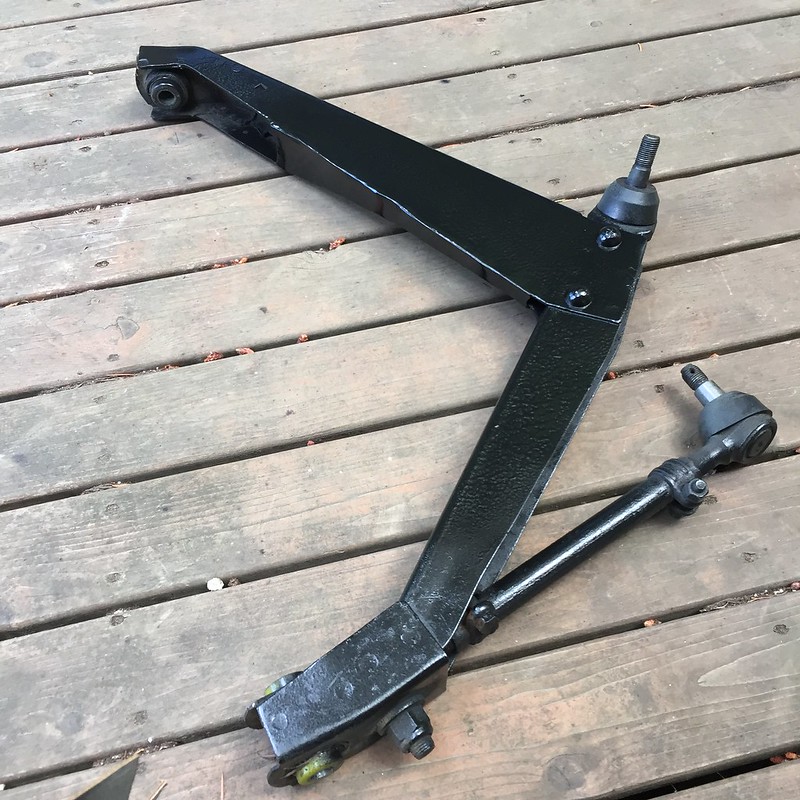
Hubs/uprights are swapped to the later style as part of the five-speed swap too. Needed to mate to the later style drive shafts.
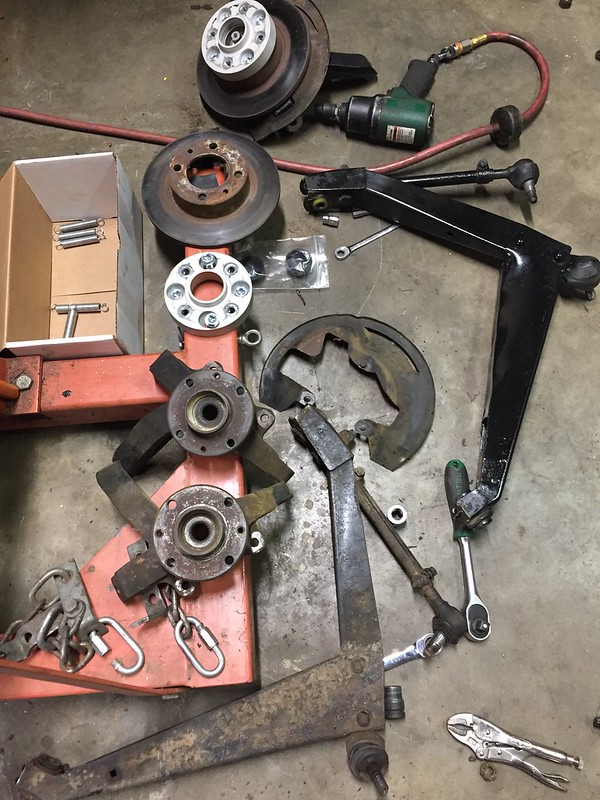
Swap those last two bushings and I'm ready to reinstall. In other news, the engine seems to have a solid oil leak at higher revs...but the leak might have been from when I ran higher revs without the PCV/catch can hooked up to vacuum, so it might be seeing some blowby pressurizing the crankcase and forcing it out the main seals. Either way, this oil leak will not be fixed until I get some road tune time with my friend Hungary Bill.
I think Bayless can rebuild the rear control arms, but they don't sell the ball joint, at least last time I checked.
What are you using for shocks and springs, Vicks fiat has some options.

The braided sleeving really modernized the look of the engine. I might glean some ideas from this. Youre in the home stretch!
T-minus-10 hours until the Hungary's hit the road ![]()
Need us to pack any tools or parts? Eaton M90? Parts to a landcruiser Prado? Sand? (we've got plenty of that last one!)
You'll need to log in to post.


