


I love this build!
Carry on....
I love this build!
Carry on....

I've taken a sort of hiatus to wake the bike from its winter slumber, do some compare and contrast style reading: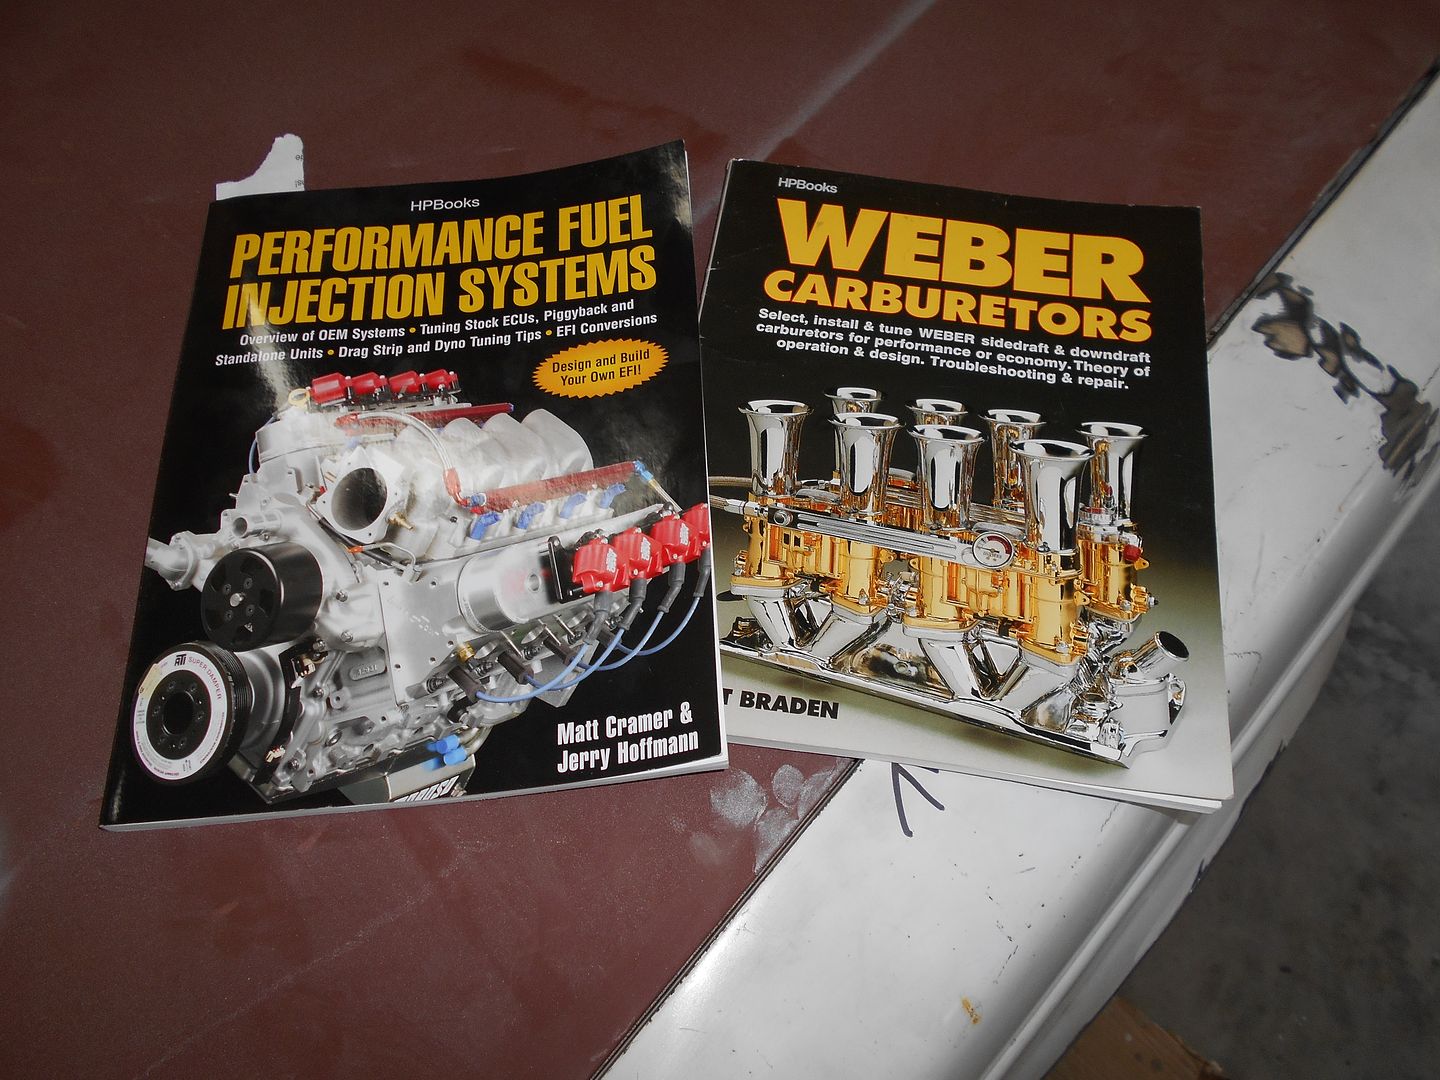 and a good bit of head scratching. Those two books are highly recommended, by the way. Both have a real "You can do this, Buddy" kind of mentality, and are very down to earth and informative. I have this forum to thank for making me aware of the Fuel Injection book, co-written by our own Madscientistmatt, in case I wasn't the last to know.
So, here's what's going on. Below is how level the frame horns are at the bumper mounts with them darn near level at approximately the transmission mount.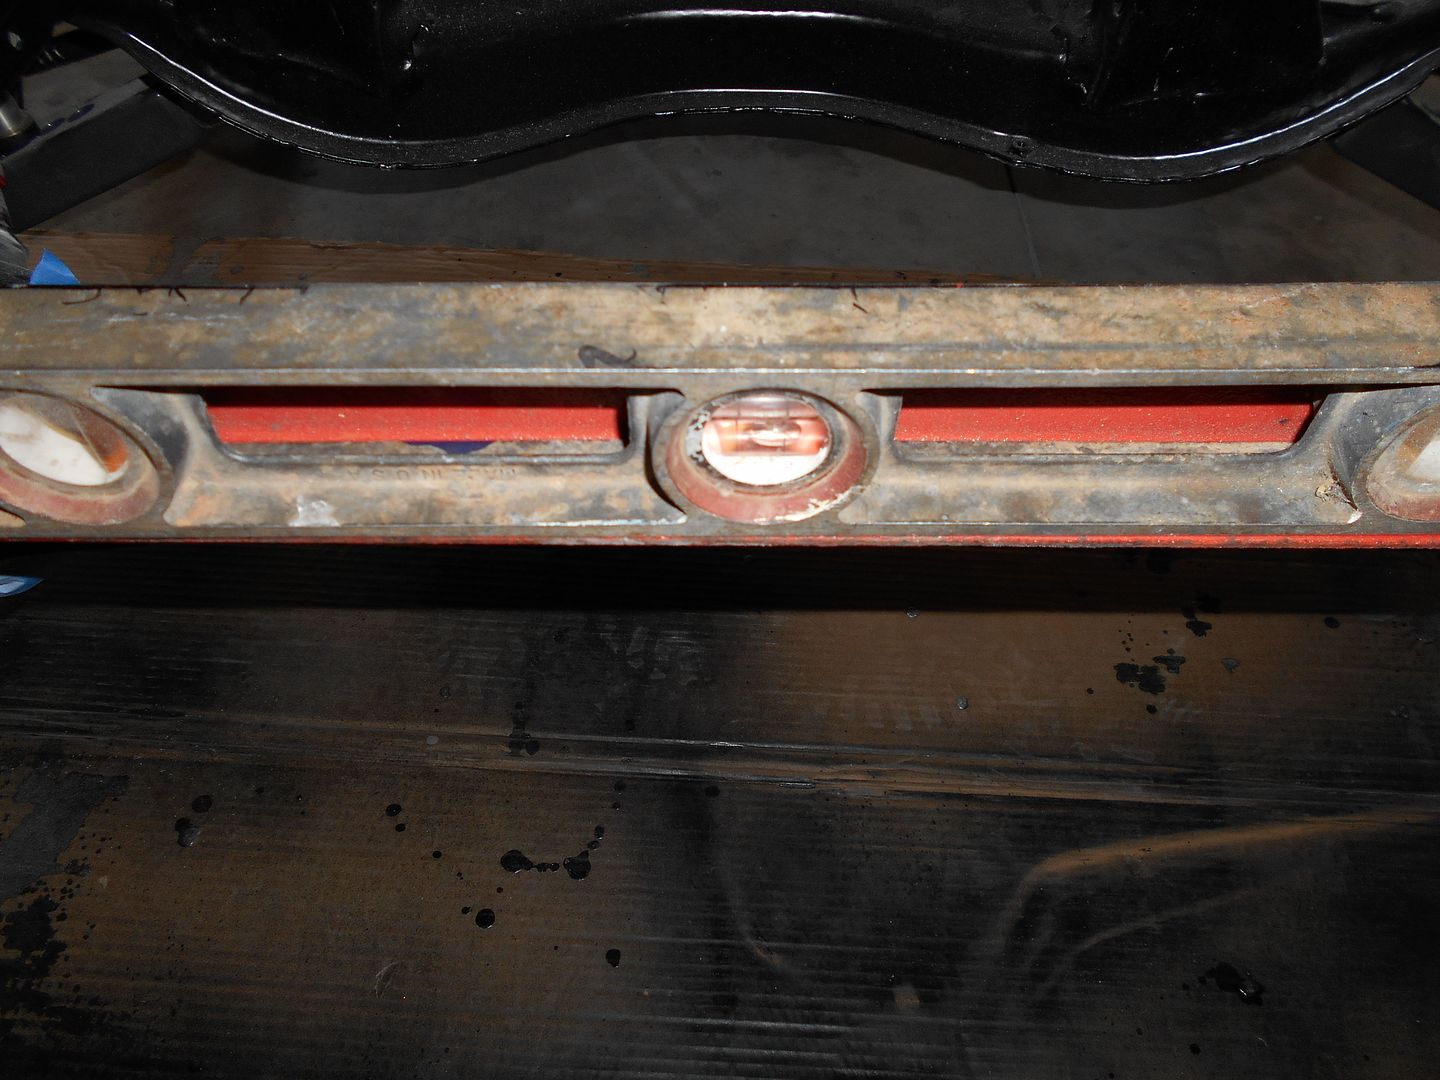
That amounts to about 3/8" lower on the passenger's side. Also, most of the bolt holes for the driver's fender don't line up, and some serious deformation of the fender is required to get about half of them in. It looks to be pushed(pulled, really) up and back. This is not exactly unexpected, as I went into the cowl so deep, and had it supported from the two extremities, and did a lot of welding at the heart of the car's structure. Anyway, I'm deciding how to tackle this. One thought is to lay an I-beam along the floor, attach some chains, and bottle jack up at the jacking point.Like right where the front jackstand is in the picture below. Then again, maybe I'll take it back to my frame shop guys.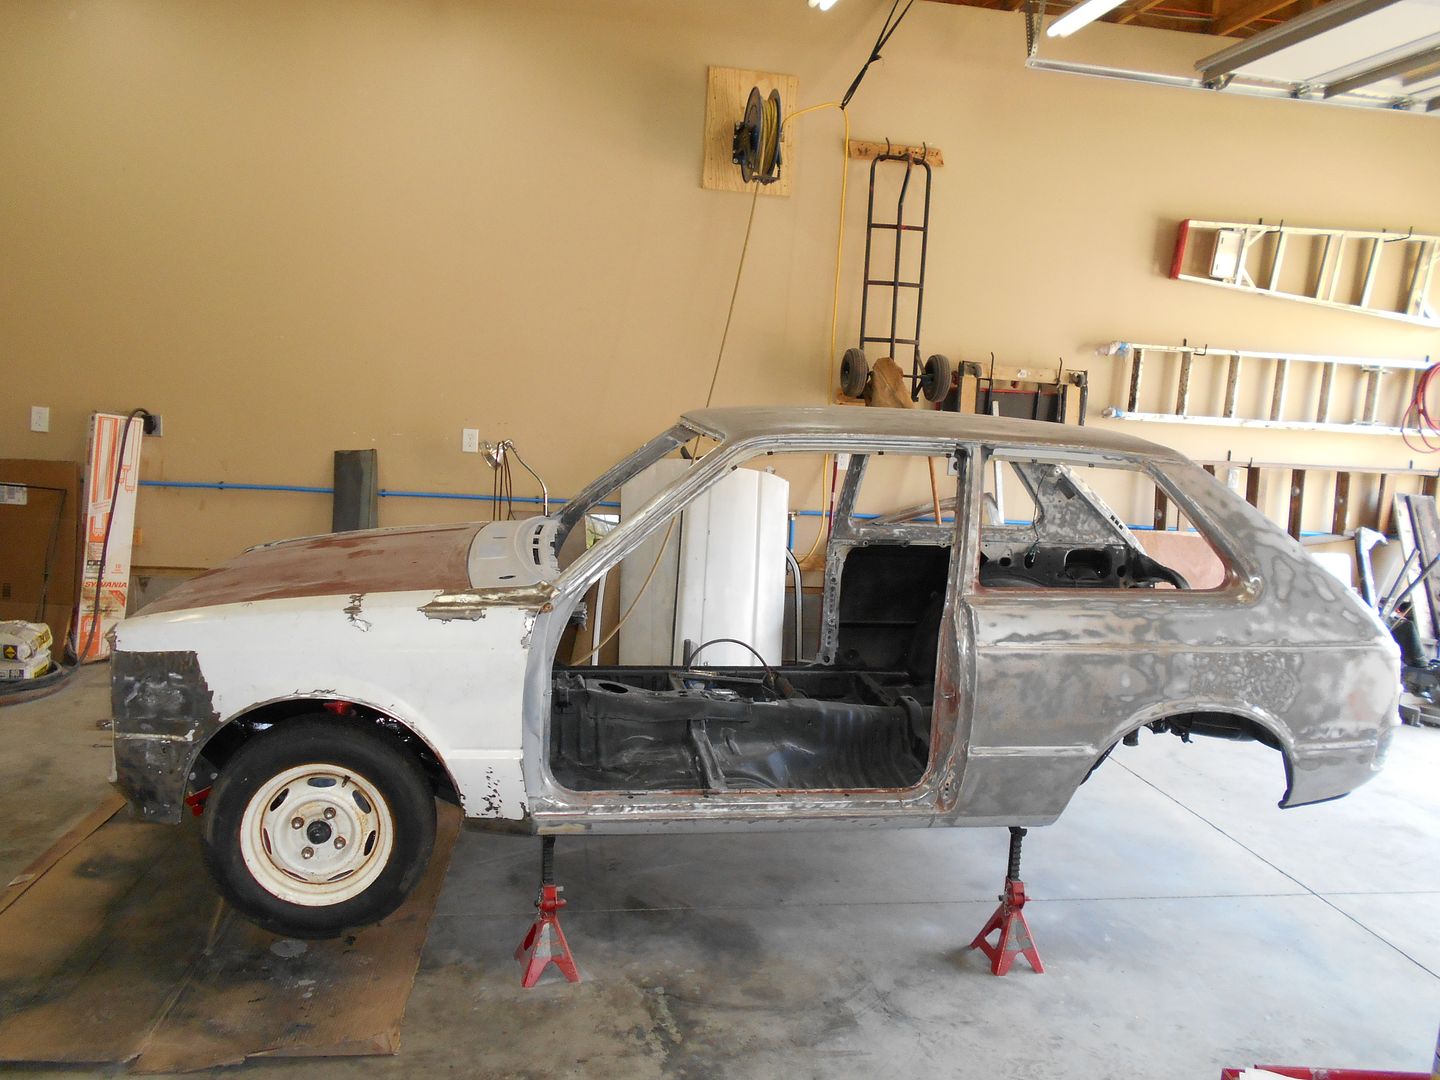
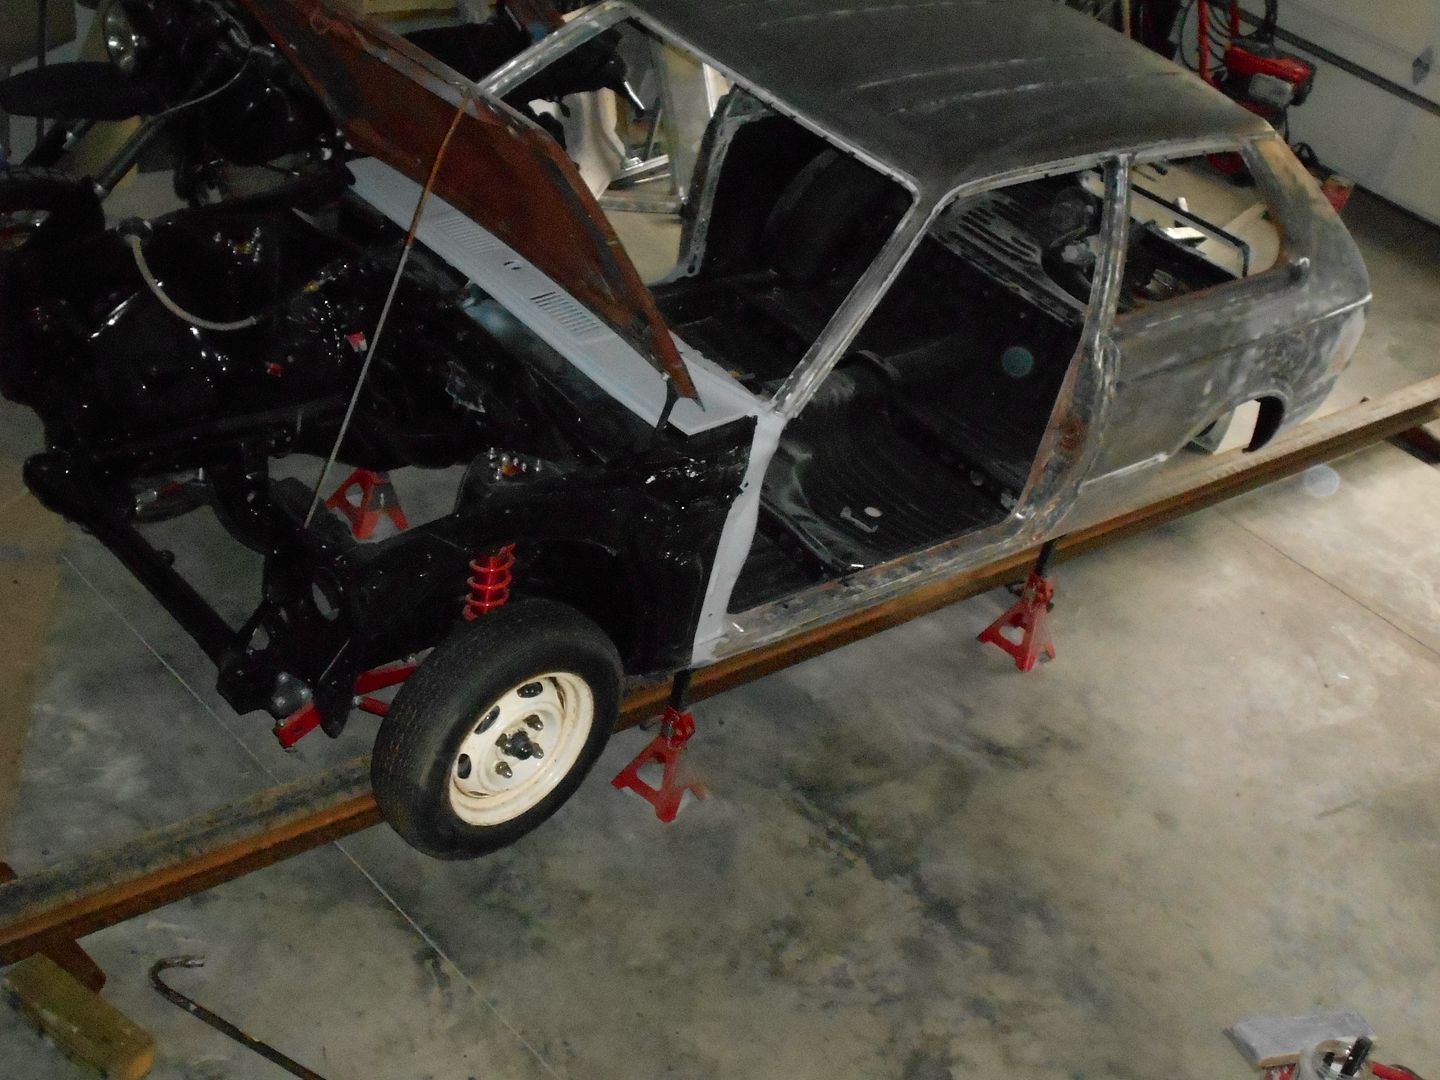
So, I've just been fiddling. Mocking up fenders and hood, giving it a ROUGH suspension alignment that would at least allow me to flat tow it (all except for the missing rear axle-keep reading).
Here's a shot of the mounting holes on the driver's fender, but it is tweaked towards the rear of the car pretty hard right here.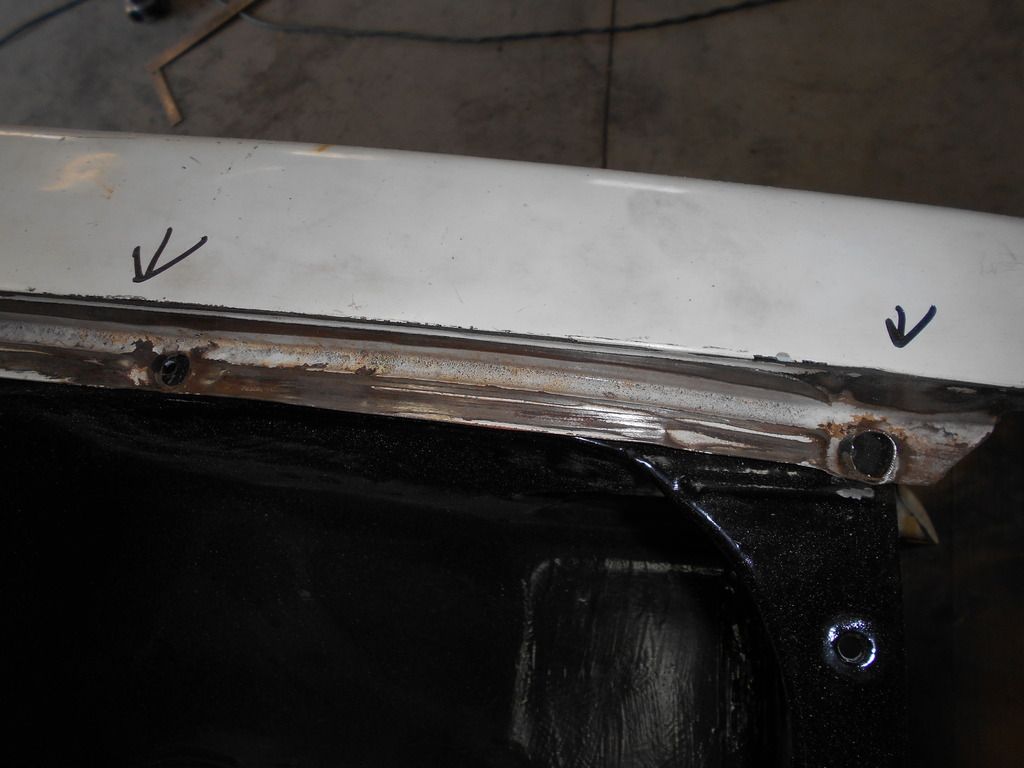 And finally, a front 3/4 view so it at least looks like I am moving forward.
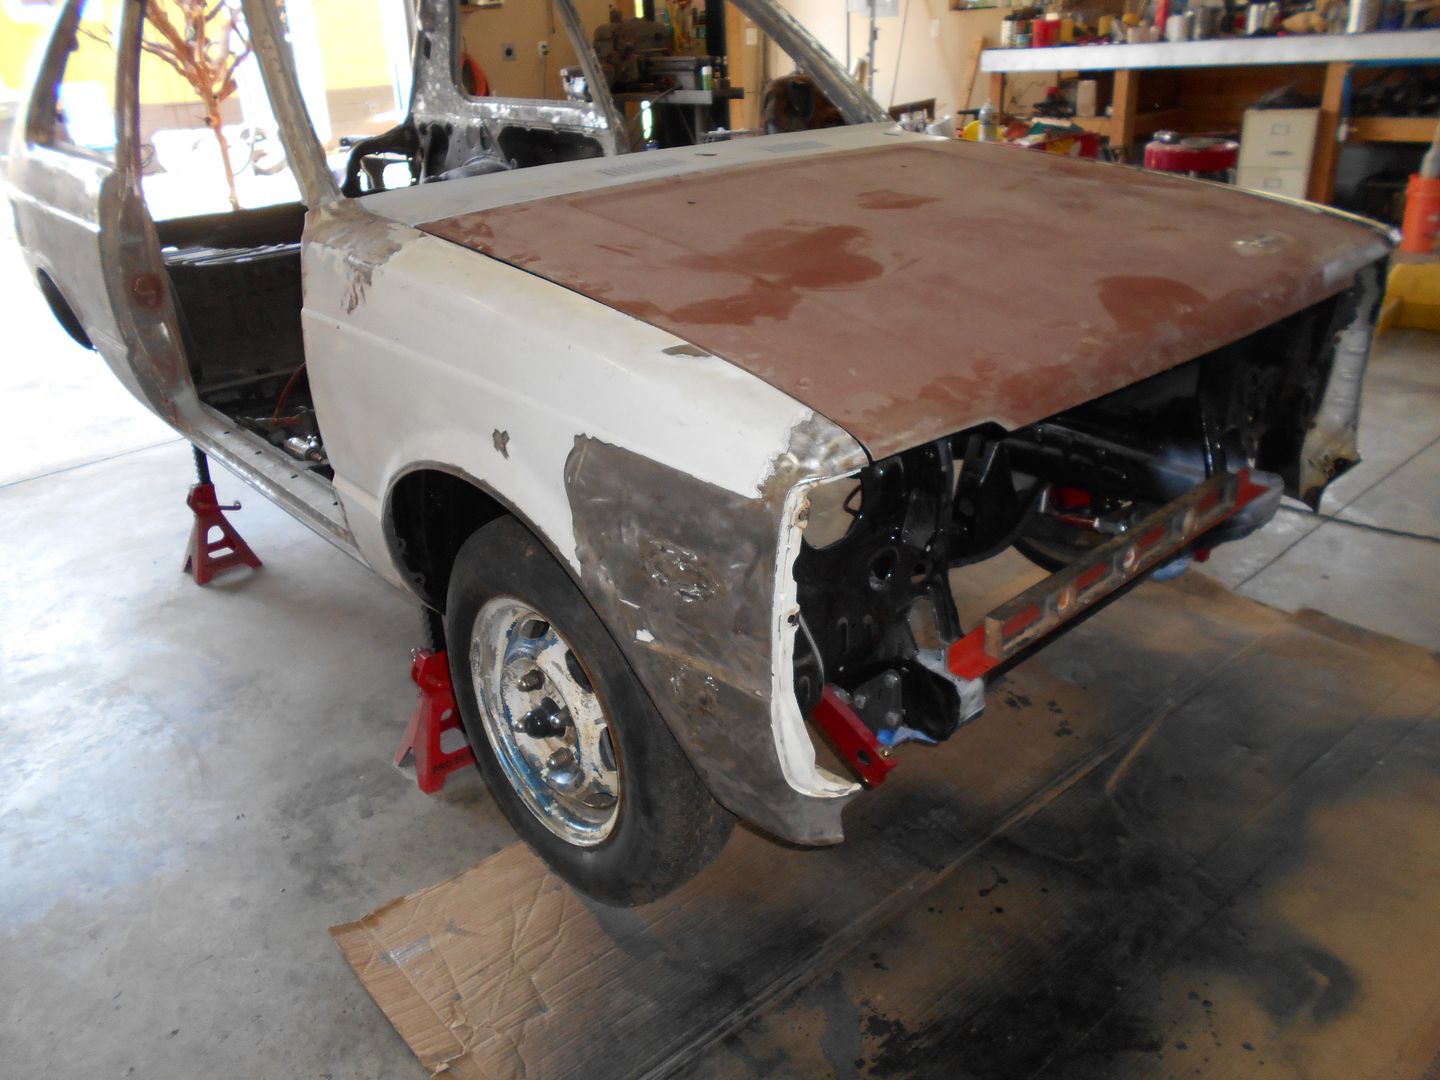 Today, I'm headed back out to splash some paint around, maybe weld a little, and basically fiddle around.
Mid-term plans may involve going back to the AE86 axle. Thursday was four months to the day since I dropped the one from the spacevan off, and I went by, and somehow refrained from telling the guys at the 4X4 shop how nicely I think it would fit in their collective rectum. I am still only out the $121 I paid for the axle, and can walk away at any point. More later.
To finish up yesterday, I threw some aircraft remover at the doors and front fenders.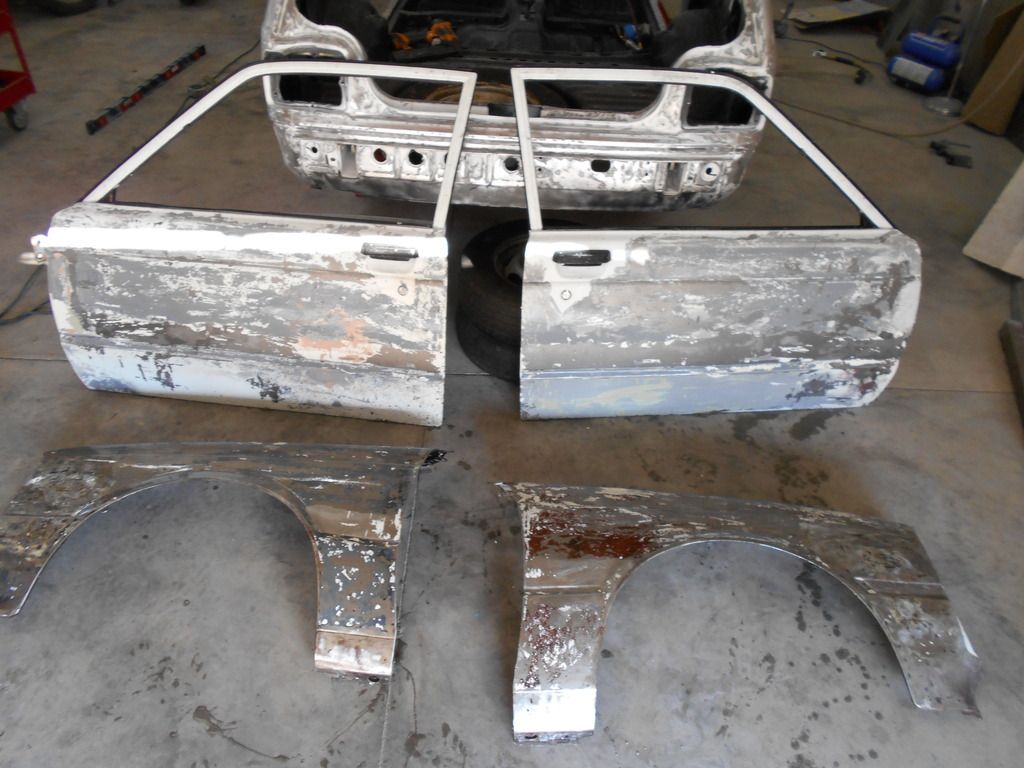 We're talking the nasty, thick gunk that looks like that delicious stuff Captain D's gives you with chicken strips, not the aerosol type. Powerful. That was followed up by the old pressure washer, and today, I went at it with the 40 grit and the DA.
Fenders: Passenger's door:
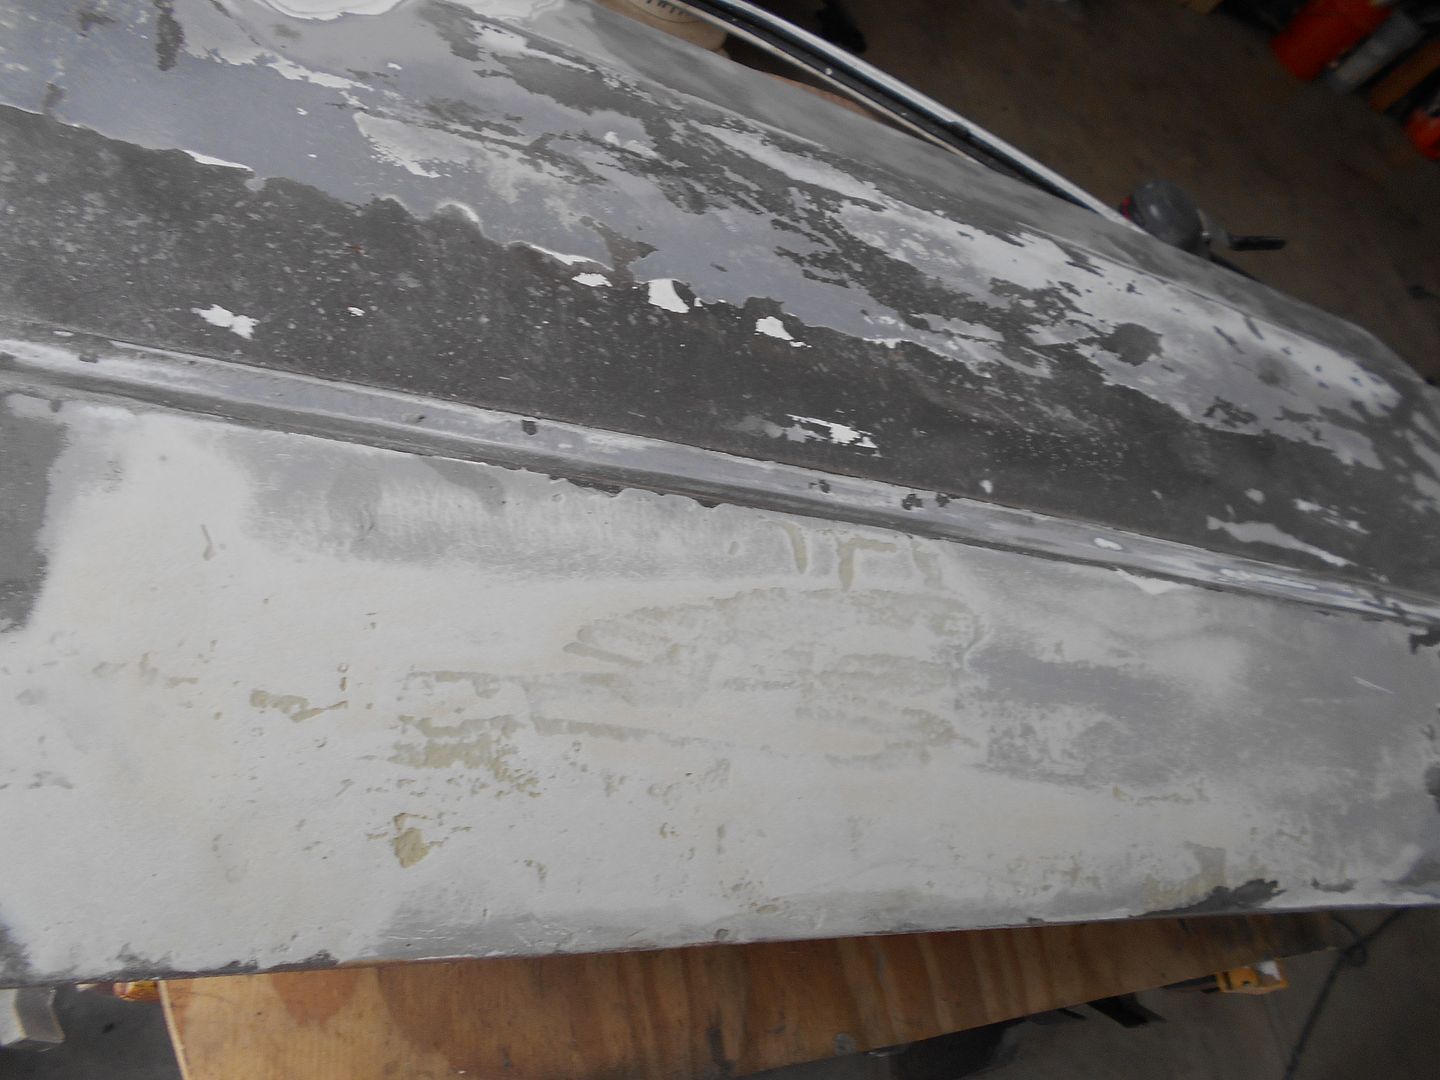 and the Driver's door:
 Fair amount of Bondo, and since I corrupted it with the aircraft remover, and because it's the right thing to do, I'm going down to bare metal. Maybe my hammer work will reduce how much filler is needed.
I'm coming to a plan with my twisted frame. Of course, it involves having the rear axle installed, and doing a 4 wheel string alignment, and lots of measuring with a bare set of wheels I have socked away, so for now, I'm goofing off with mindless, tedious, albeit necessary bodywork. Later.
Frankly, I have ground almost to a halt. Still no word on the @#?&%$ axle. That, and the flu moving into bronchitis have conspired to keep me largely out of the shop. But, as i can't let this thread stagnate completely, I snapped some shots today.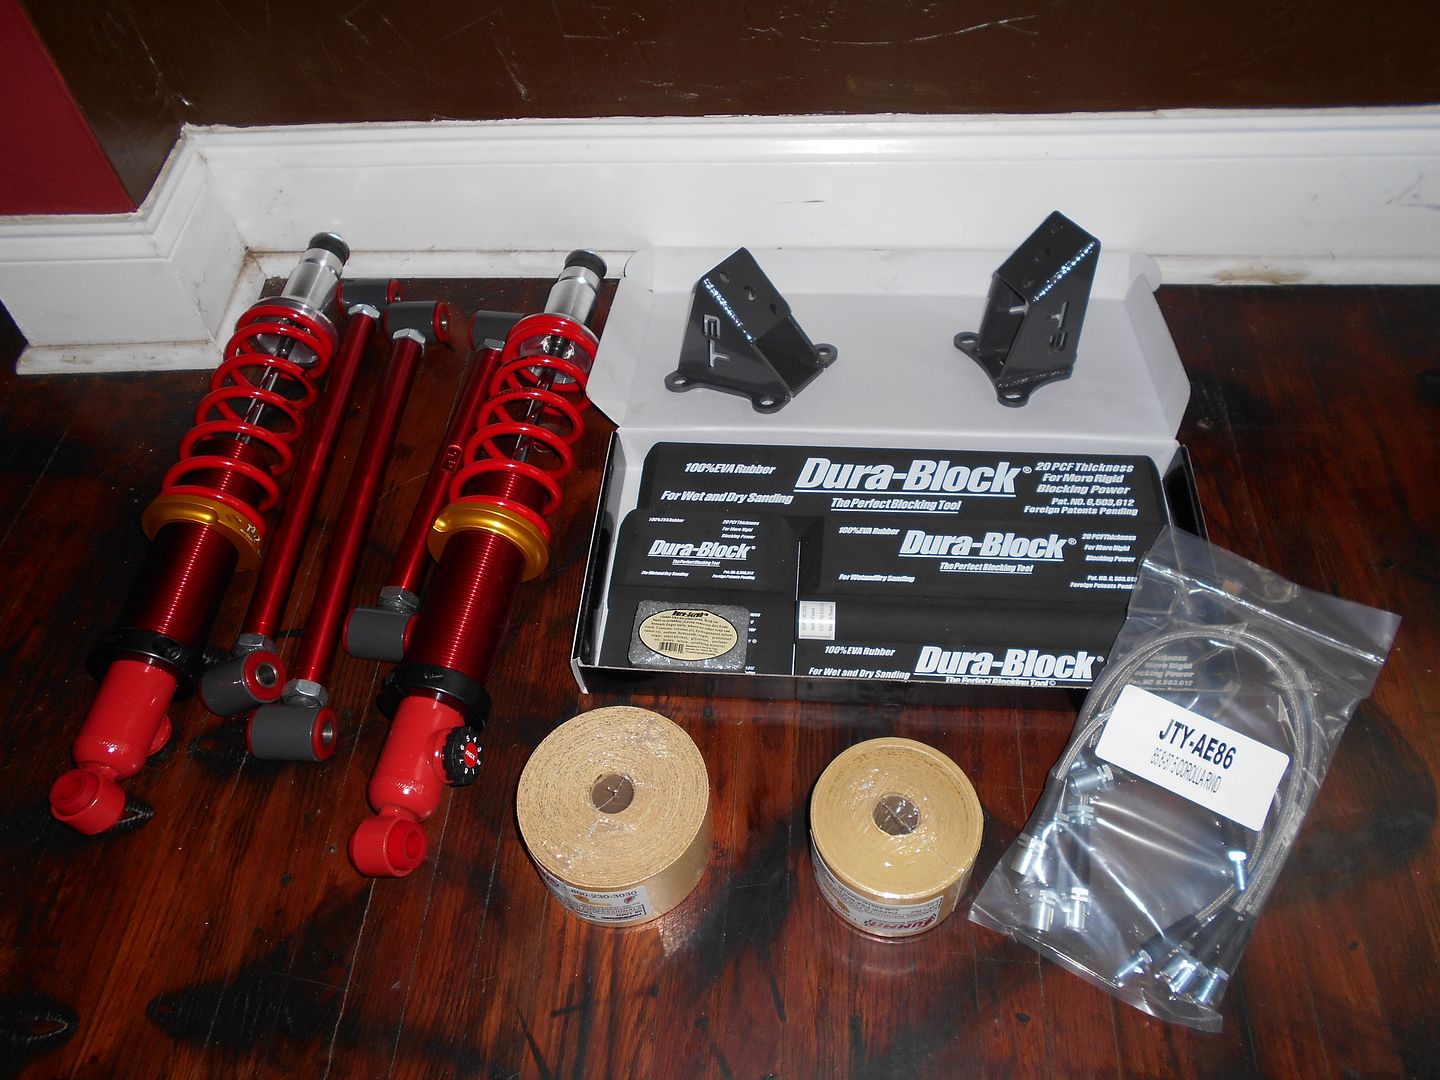 The parts pile in the living room has seen some turnover. New T3 engine mounts, braided lines intended for an AE86, dura block 6pc. sanding blocks and paper (following NOHOME's advice there), and let's not talk about the coilovers and 4-link.
The doors are pretty rough. Lots of bondo.
Driver's.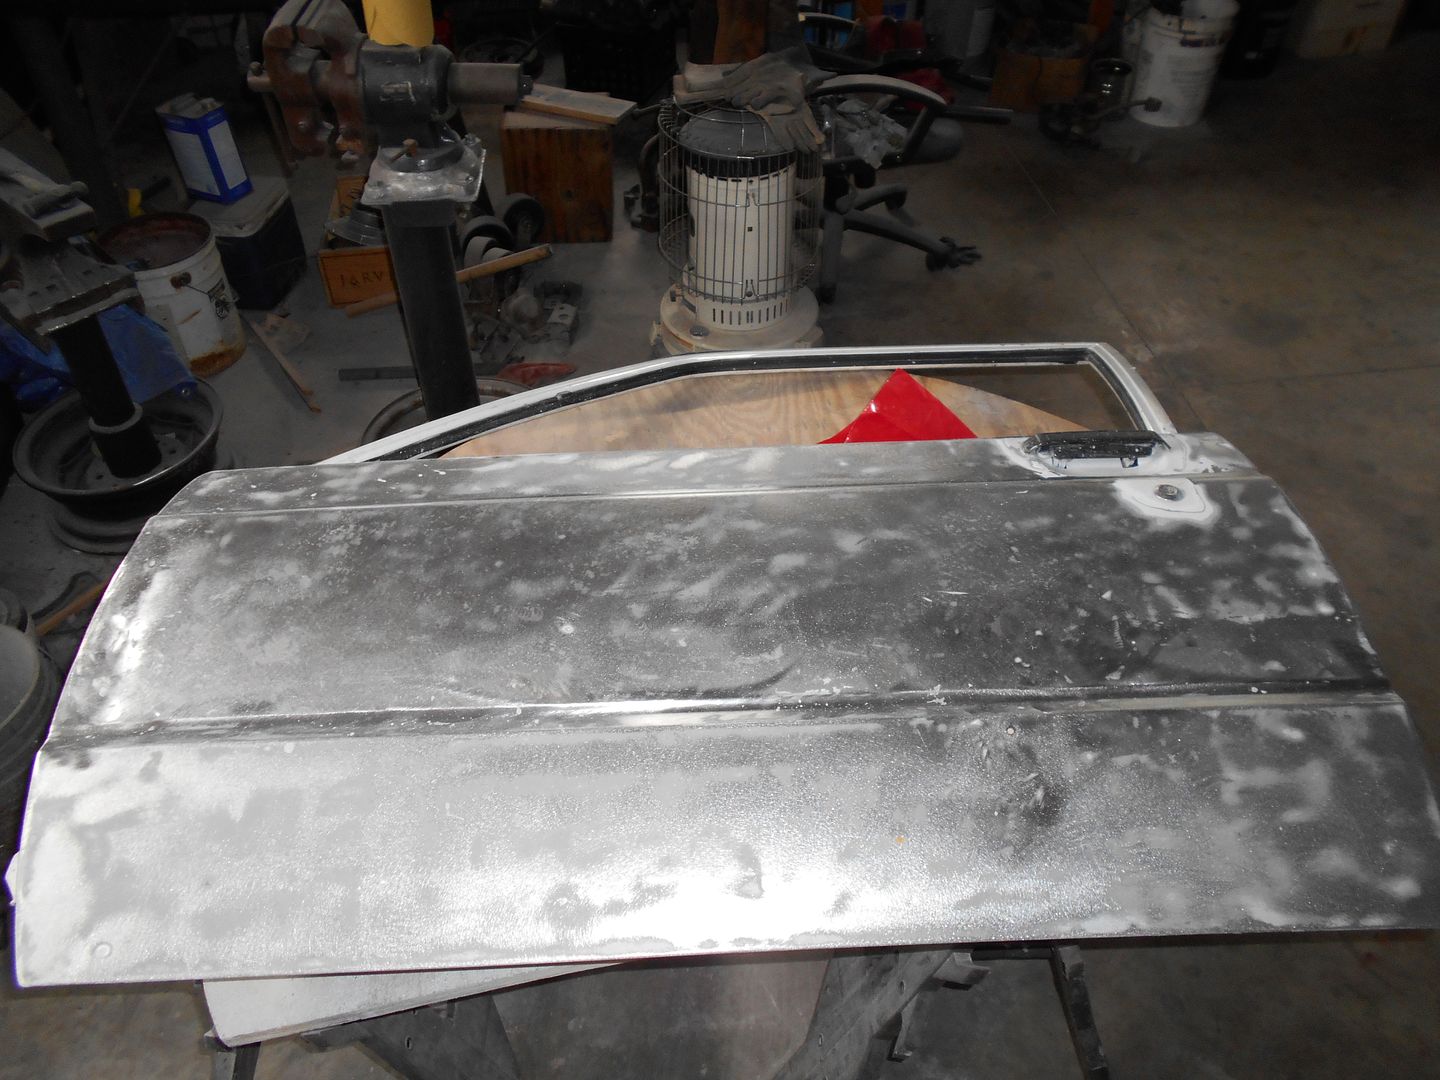 And passenger's
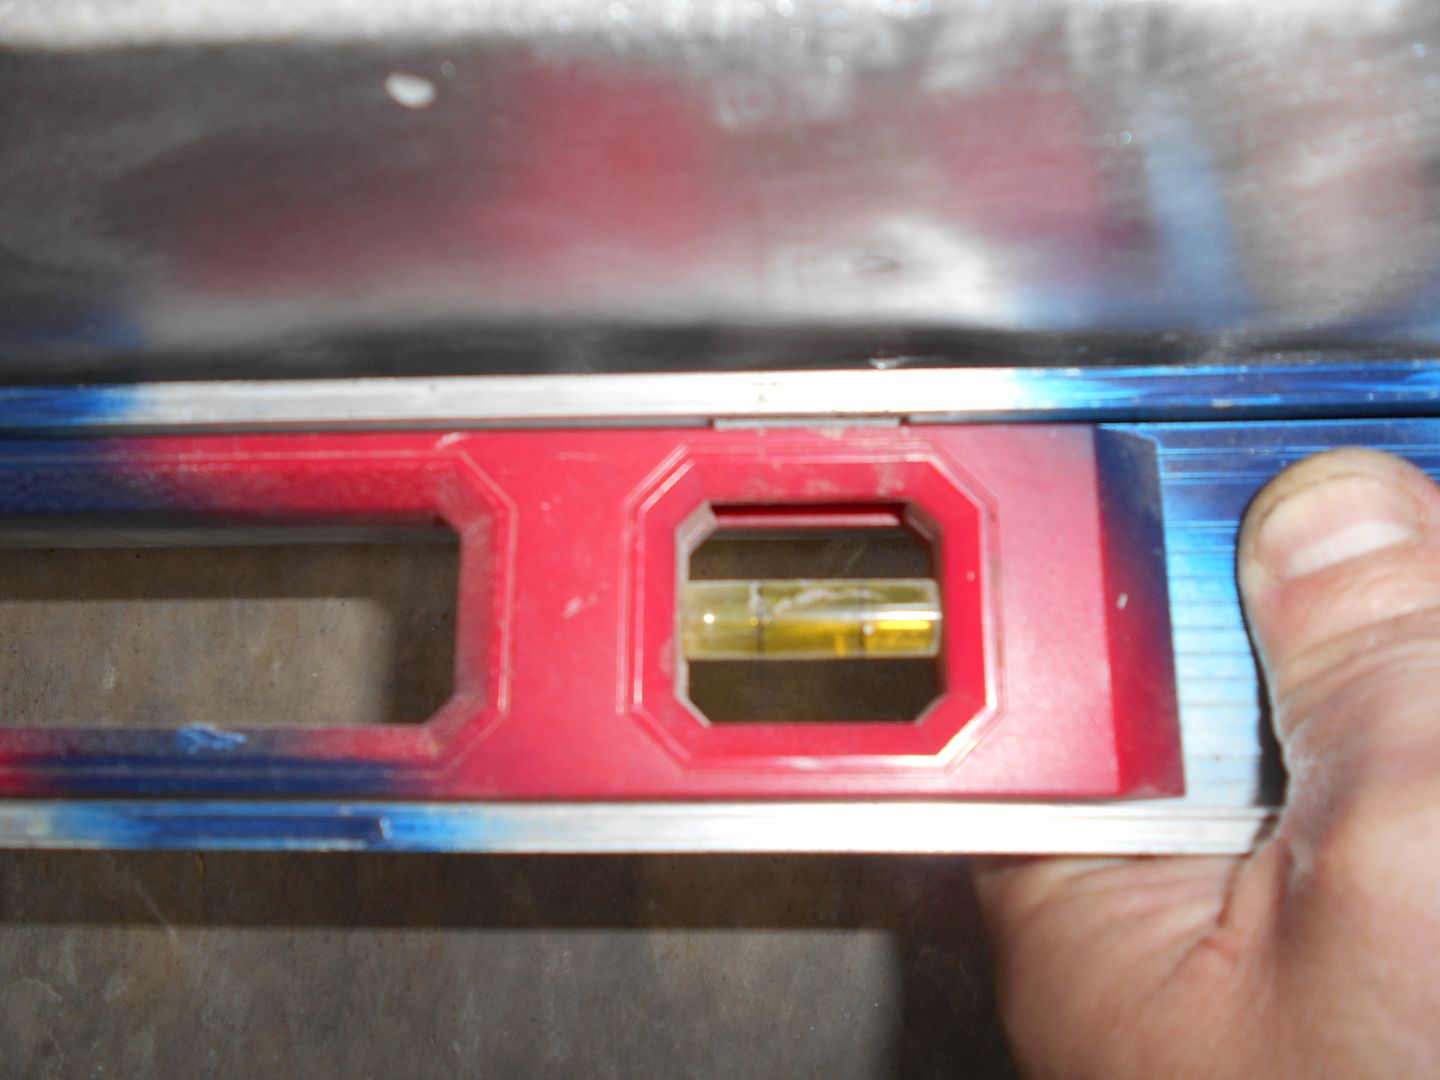 I feel I can do better.
And, I borrowed an I-beam from work, along with a bottle jack. That's a 4" super duty or some such thing. Heavy duty, and I've rolled 40K lbs machines around on them, so should be stout enough.
 So, that's it for now, I'm laying low, and scheming. I could have easily built the motor mounts, but took the easy way out. Feels good. I am doing a quick paint and tile job in the kitchen very soon, but there will be more Starlet progress in the future.

Keep it up! Lookin' good!
Thought I'd drop these here for more motivation...

This thing showed up at autocross last weekend

Unfortunately I think they were having some problems with it, but it was pretty awesome. Go Starlet!
Update time. Lots has been happening, just not too much auto related until today.
First off, Thanks guys for the inspiration, it is much appreciated.
I had a bad bout with the flu that turned into bronchitis and has laid me low all month. I'm still not 100%, and have to keep welding and sanding to a minimum.
None the less, I got a bit done today. First, starting out slow, I rebuilt the driver's door hinges.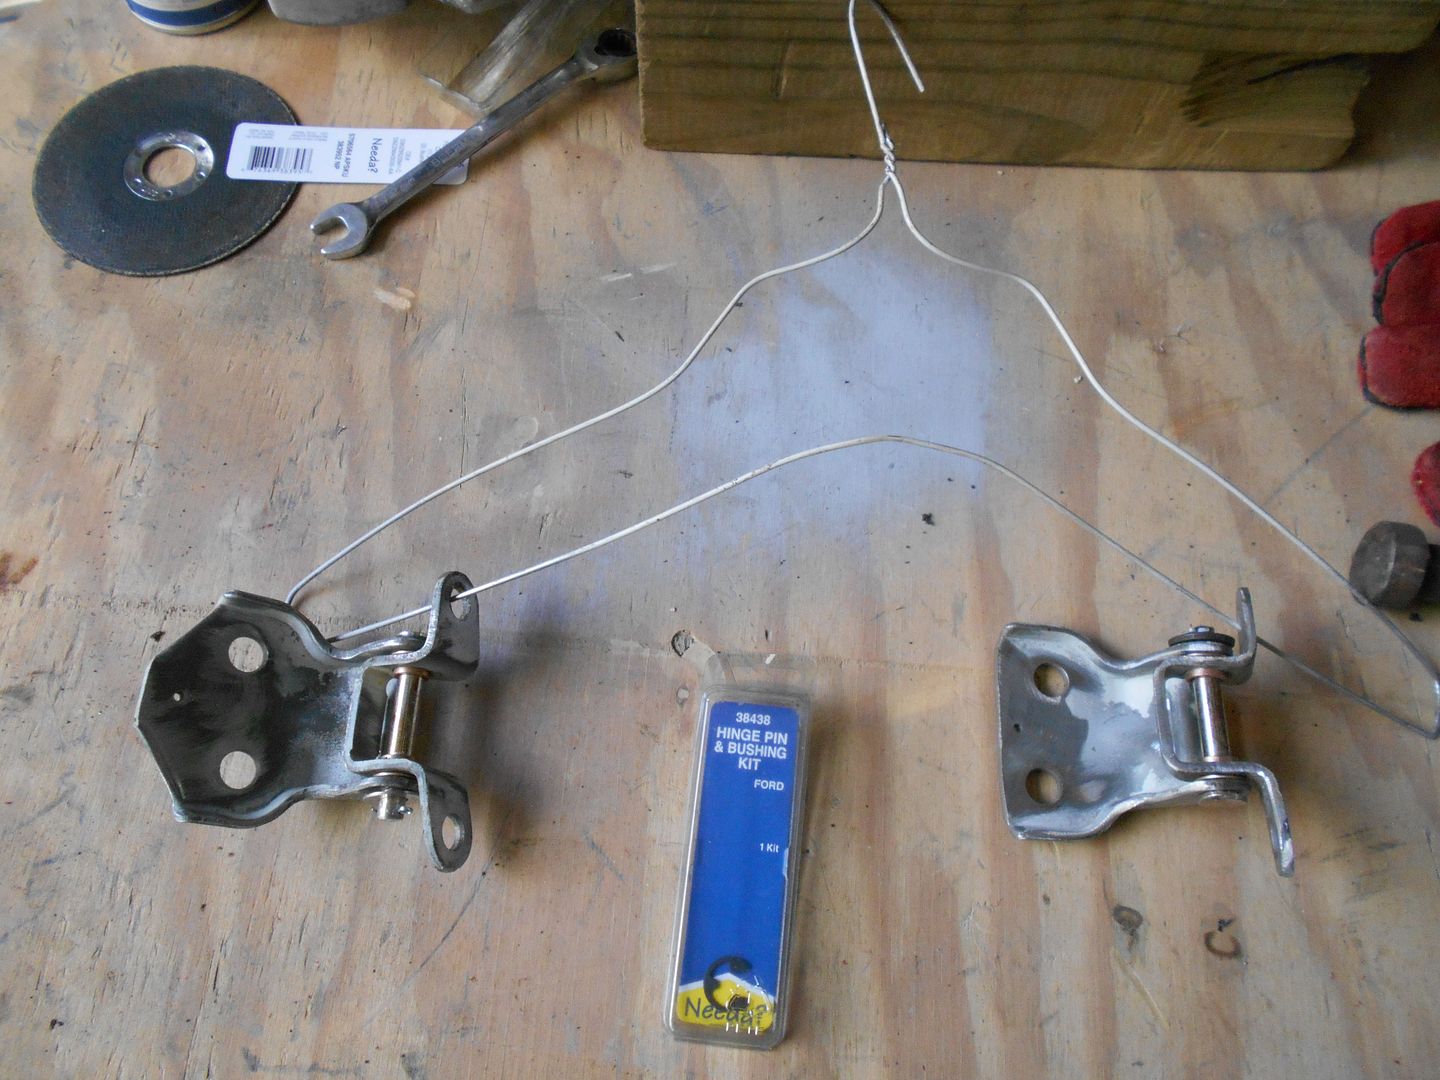 I used ford pins and bushings, as they were the closest thing the local guys had. They required some slight mods, but worked out okay. The passenger hinges were deemed okay.
So, on to my hillbilly frame rack.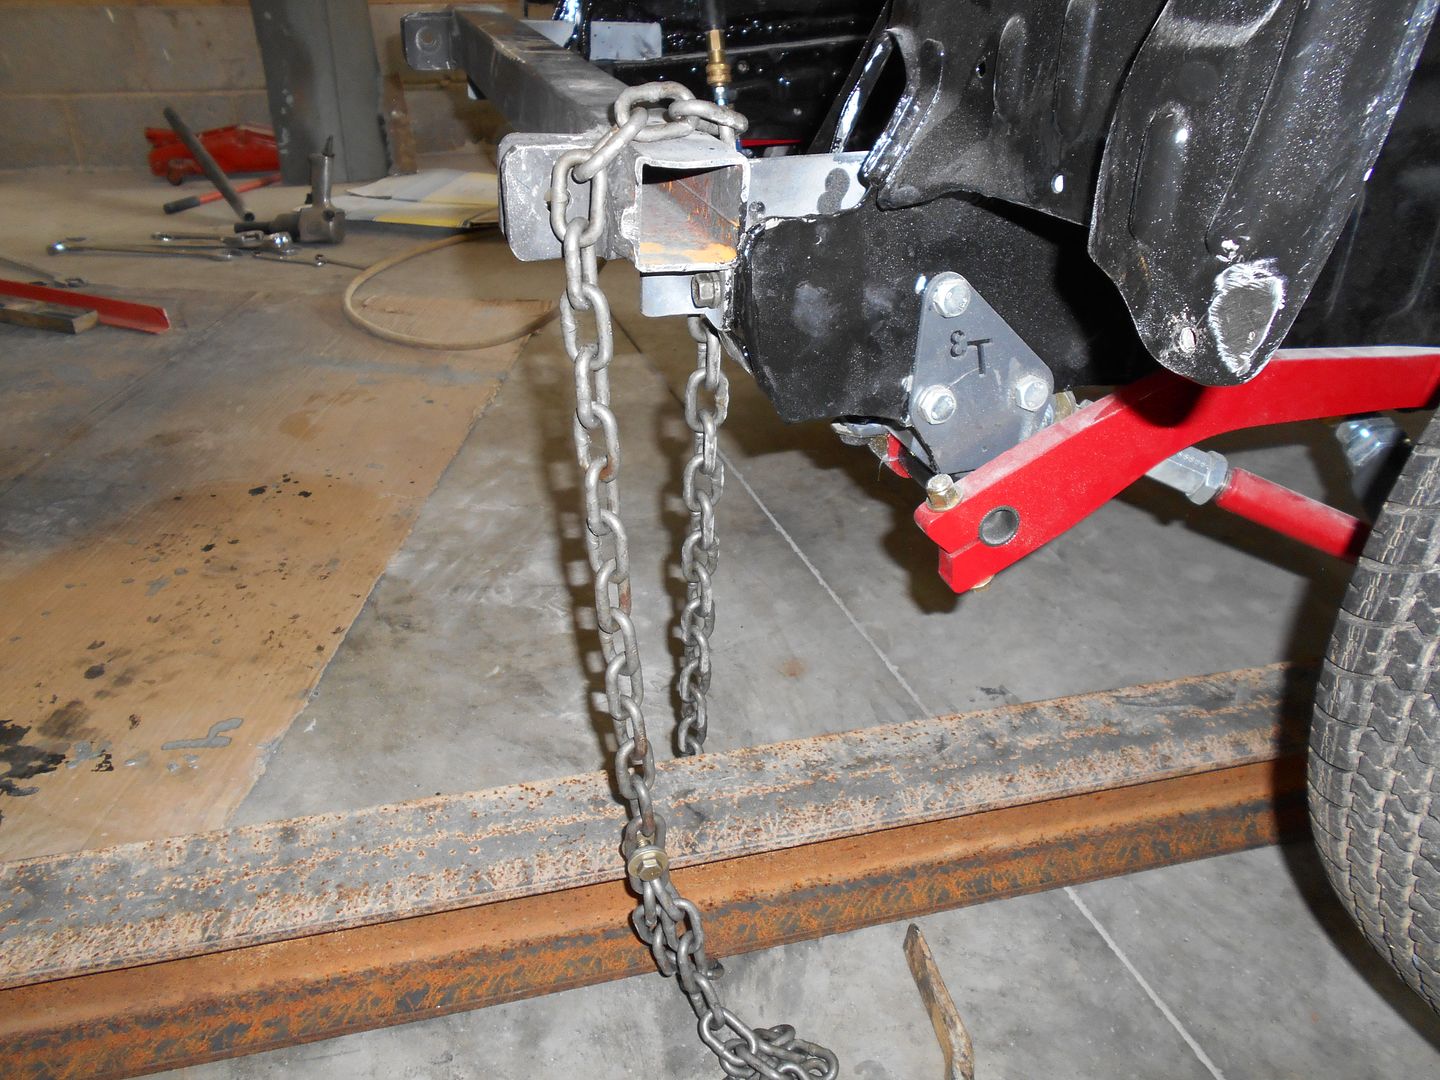 I started by bolting my old tow bar/bumper/rotisserie mount back on, and chaining it to the I-beam.
Then built a connection from the rear 4-link mount to it out of scrap.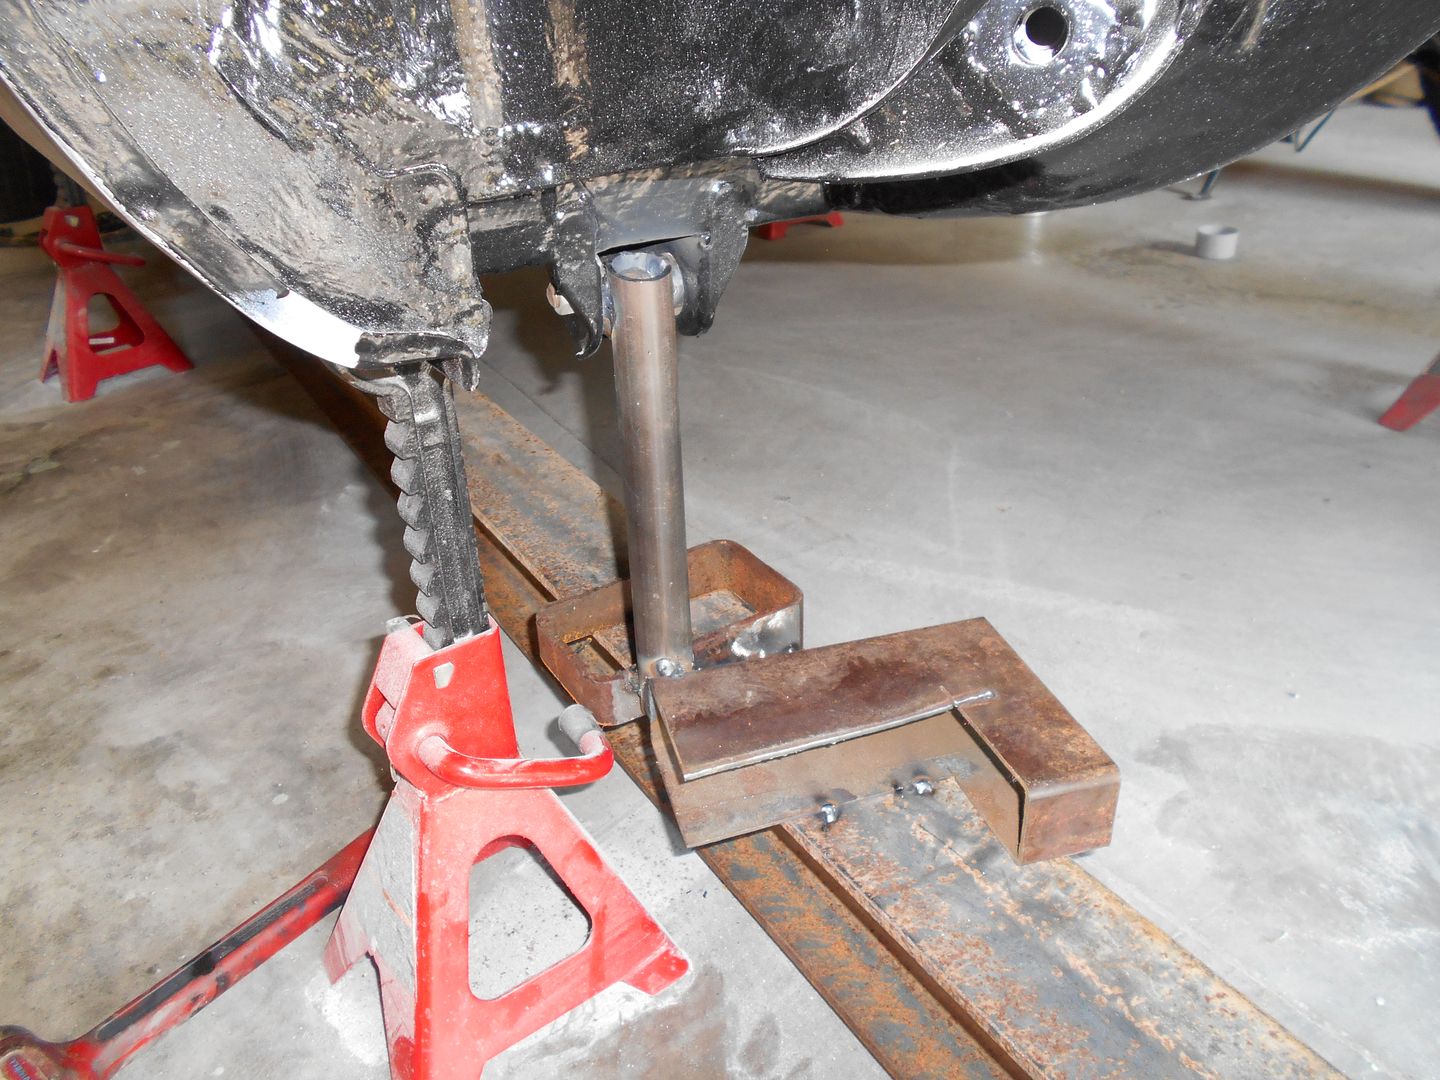 Followed by putting a bottle jack in the middle to push up on the "frame rail".
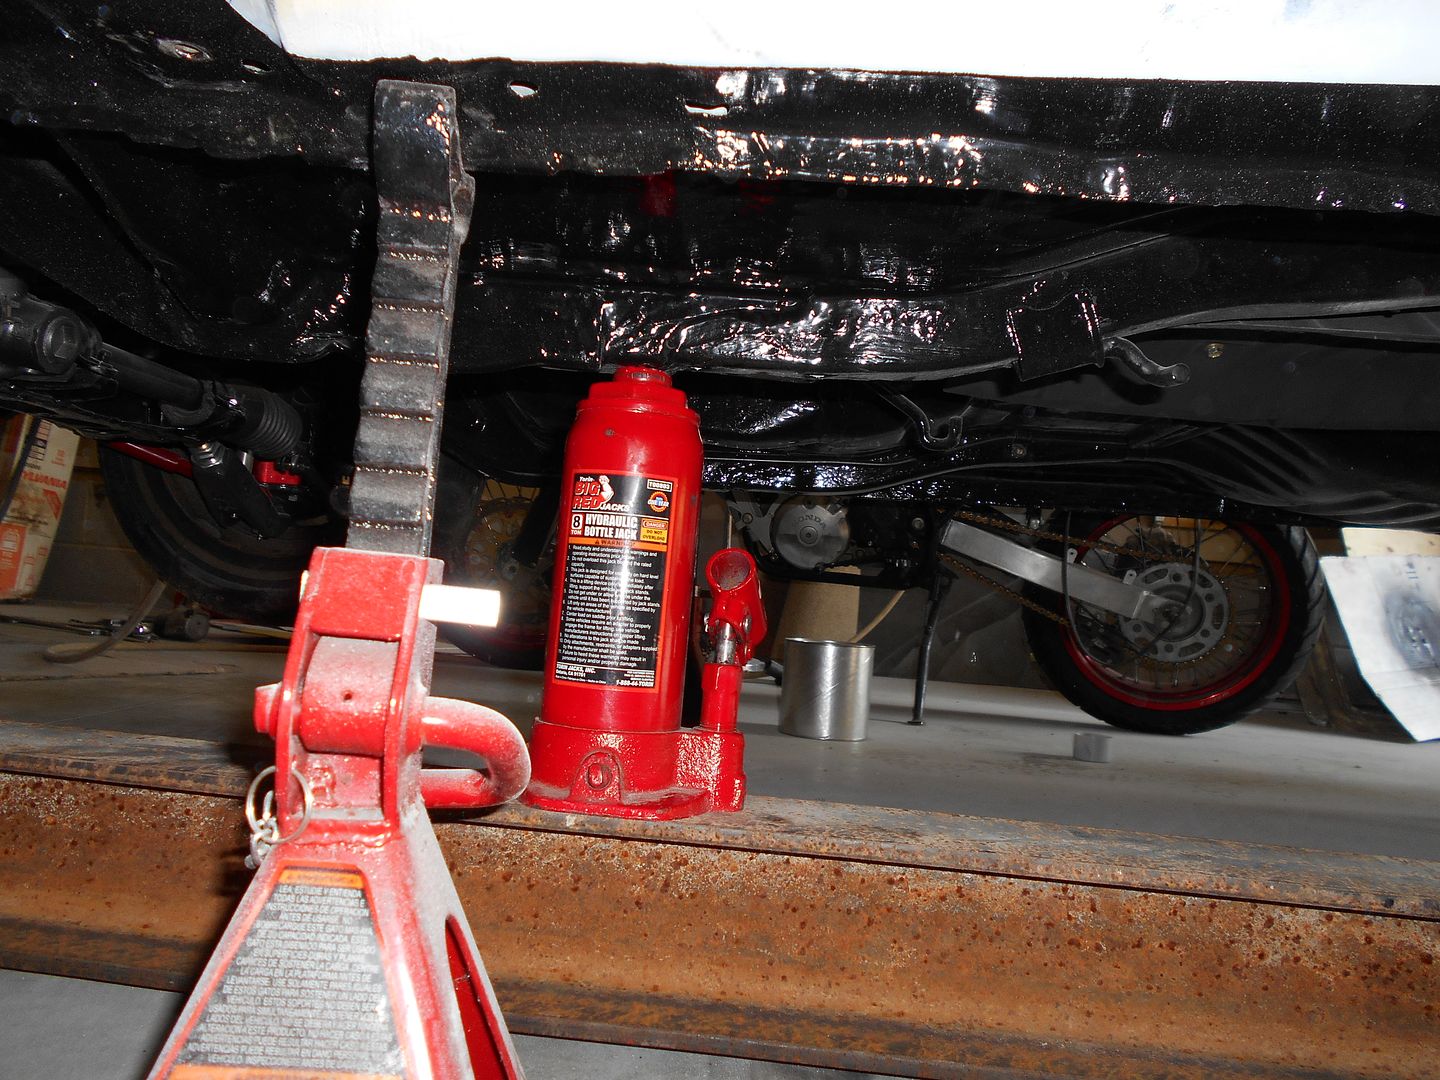 The whole contraption looked like this:
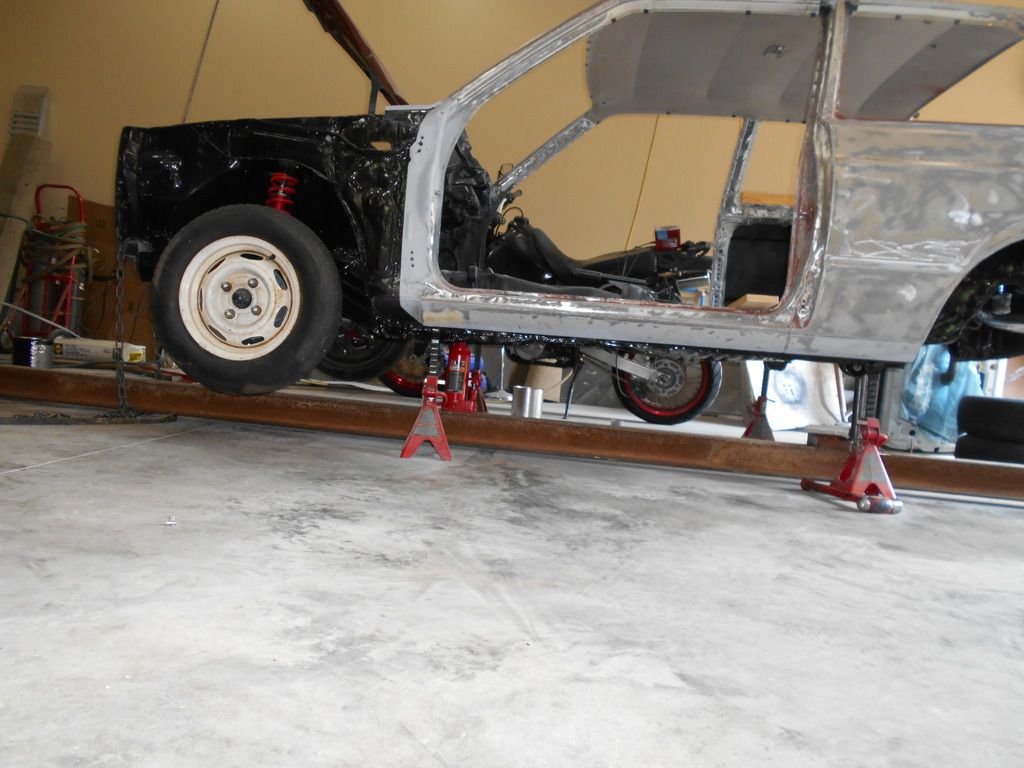 It is a little dicey, because it wants to pick it up off 3 jack stands, and even though it weighs next to nothing, that's no good. It also wanted to roll the I-beam the way I had it set up. None the less, as a proof of concept, it seems to work. I got the driver's rail to move 1/16". 5 more of those, and we're good.
I'm thinking of stacking some wood blocks up to increase my safety quotient a bit, and thought it wise to walk away, and think a bit before proceeding.
In other news, I have completely given up on my axle. Tomorrow will be 5 months since I took it to these jokers. It was a $120 junkyard part, that they have at least $600 worth of work in, probably more if their machinist ever cuts the axles. So, should they ever call, I'm just going to ignore them. I'm out an axle, an ebay slotted rotor, and 5 months. Ho-hum. Trying to be positive, I figure maybe that's the universe telling me I should learn to rebuild and set up a differential. So, right now, rebuilding the GT-S rear looks like the plan.
Quick Update: The Patented Smithytronic Frame UNberkleyer seems to be working. I had to redo the attachment to the bumper, and 4-link mount.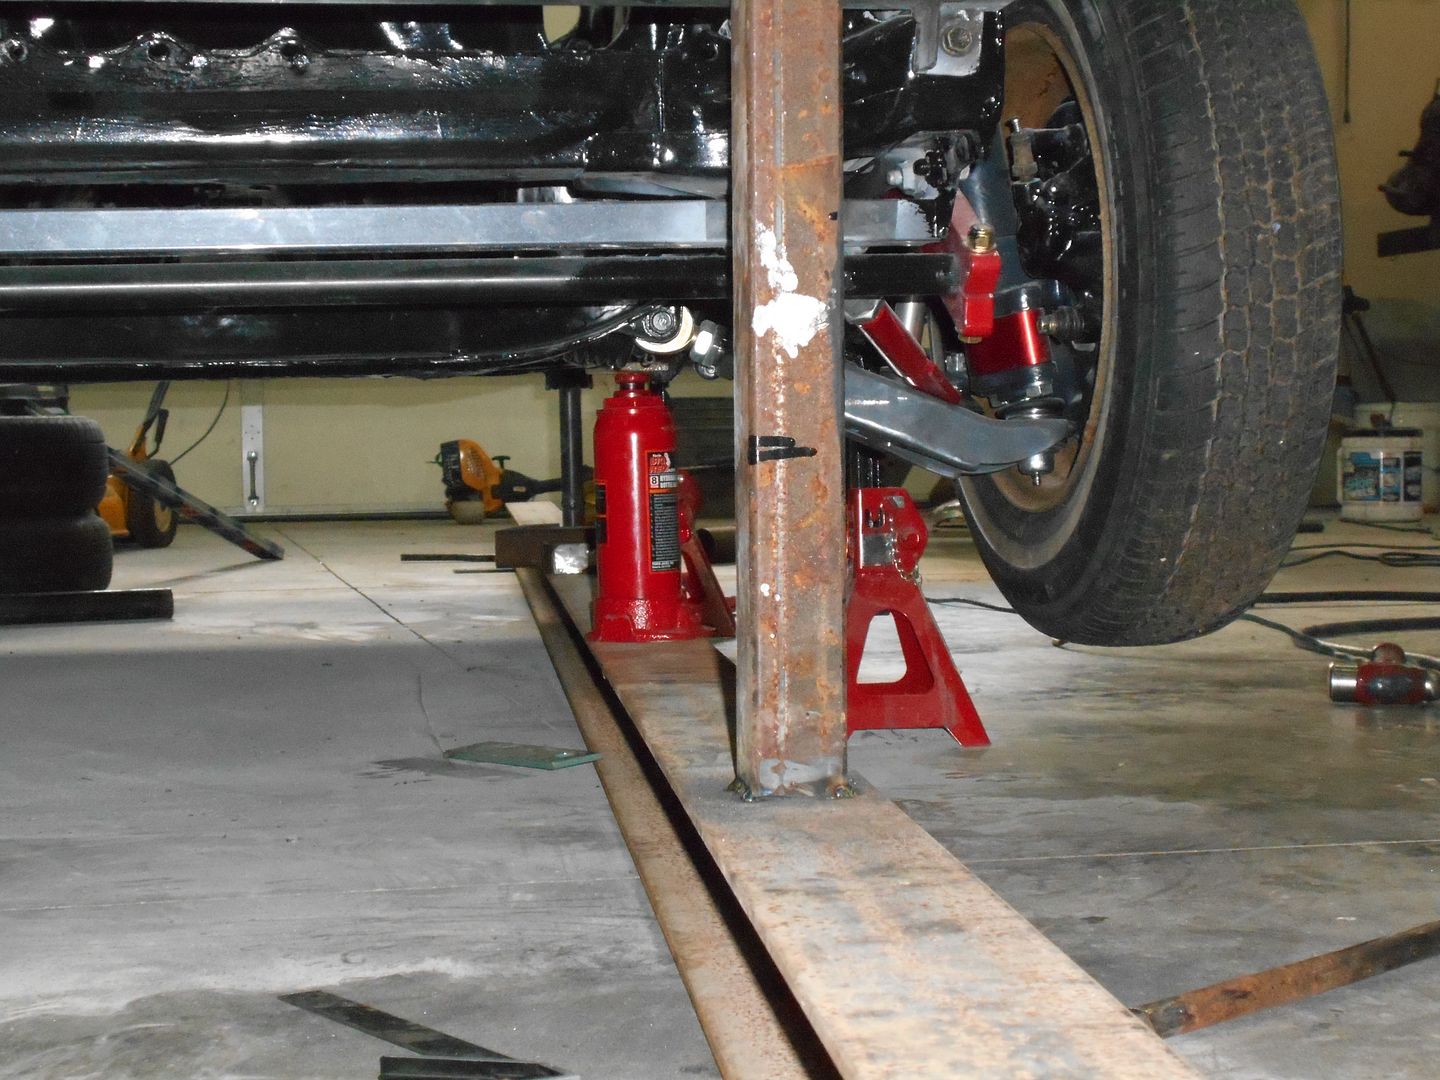
I eliminated the chain, and made sure the 4-link mount, jacking point, and bumper mount were all in line. Before, the I-beam was trying to roll, because I had the 4-link mount off to the side. 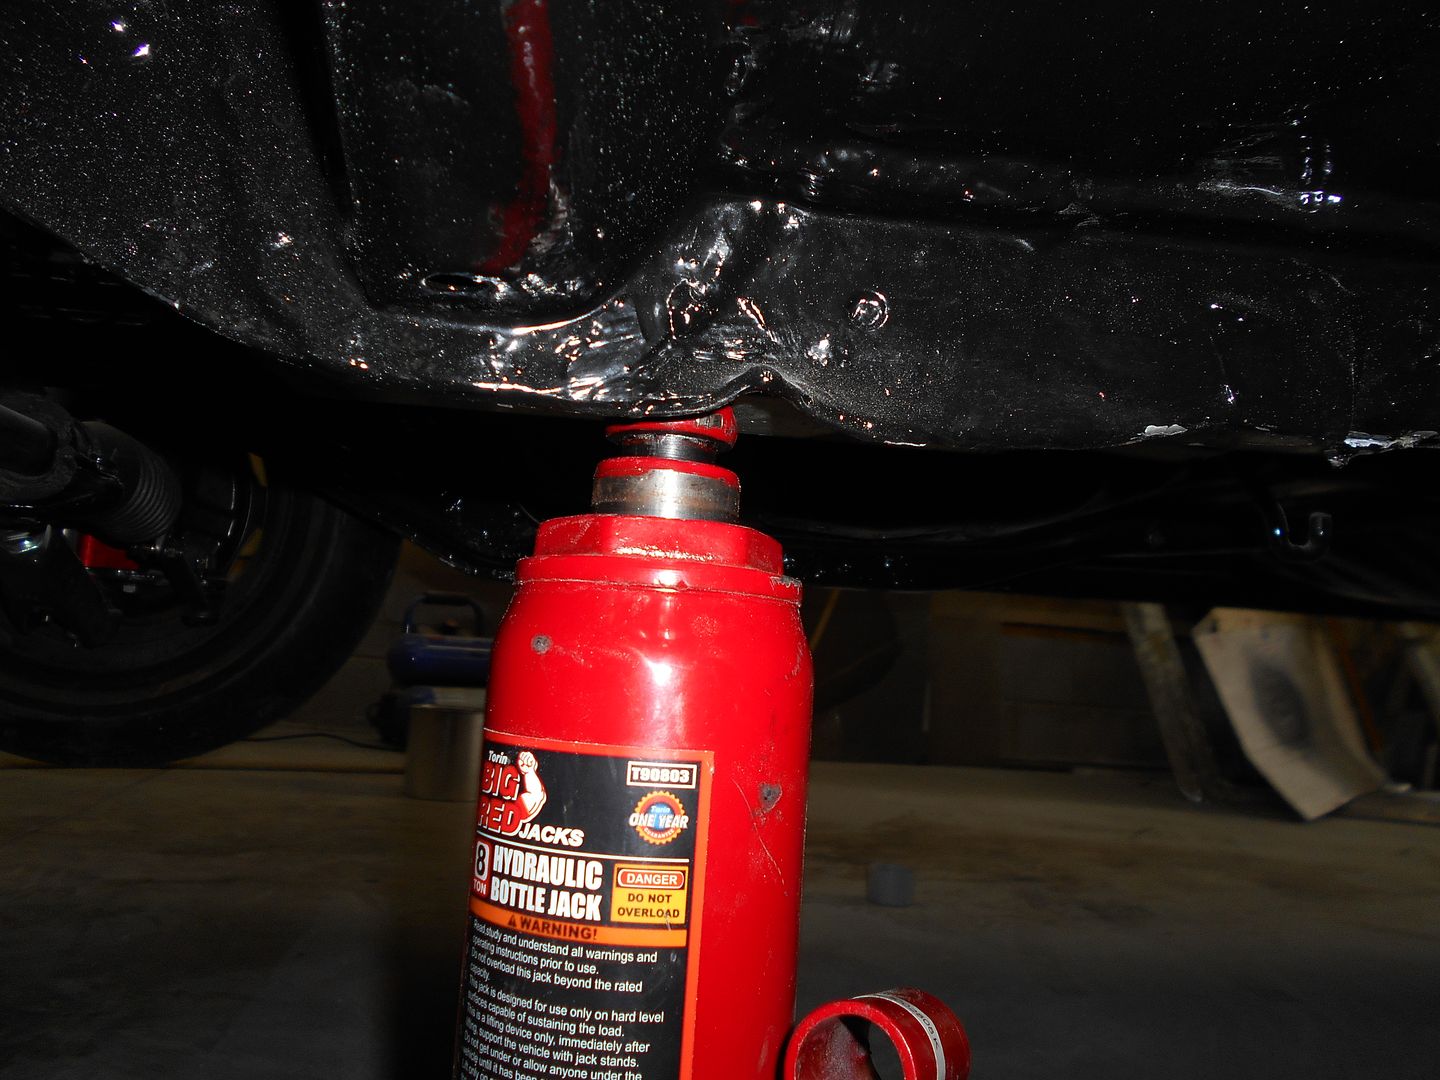 Above was the jack extension with it just snug.
Below is 44 pumps later.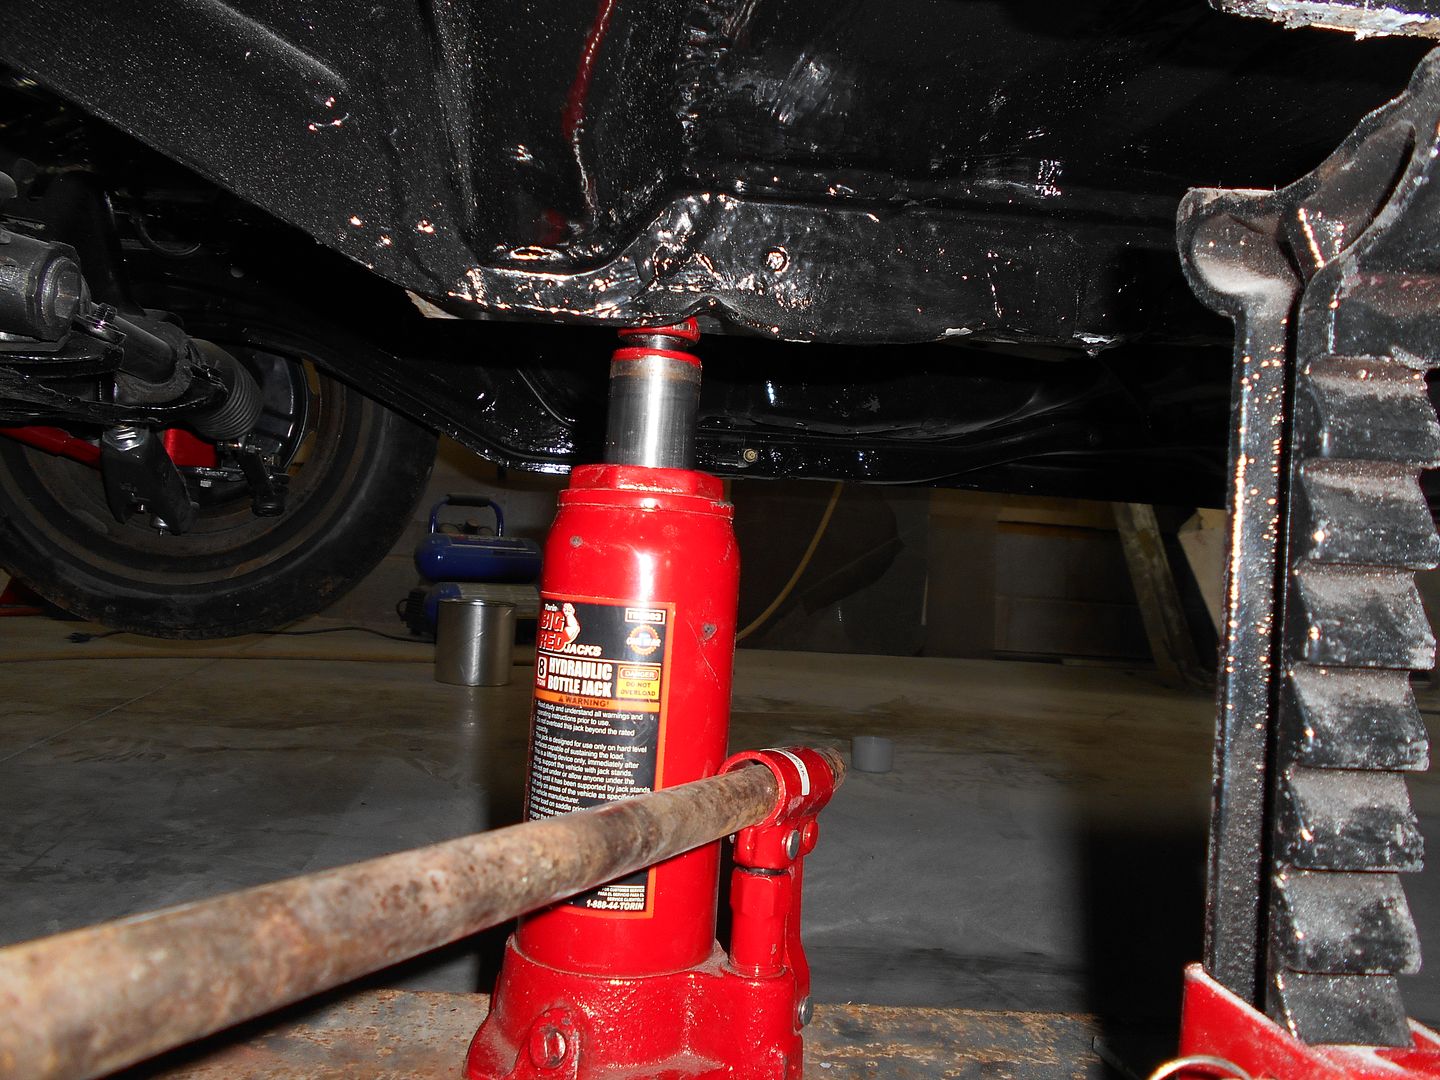 All that got me 1/4" out of the 3/8" height adjustment I need. I had to cut the front mount loose, as it tried to rest on the I-beam. Once it is about 3/4" shorter, I'll try to sneak up on the last 1/8" I need.
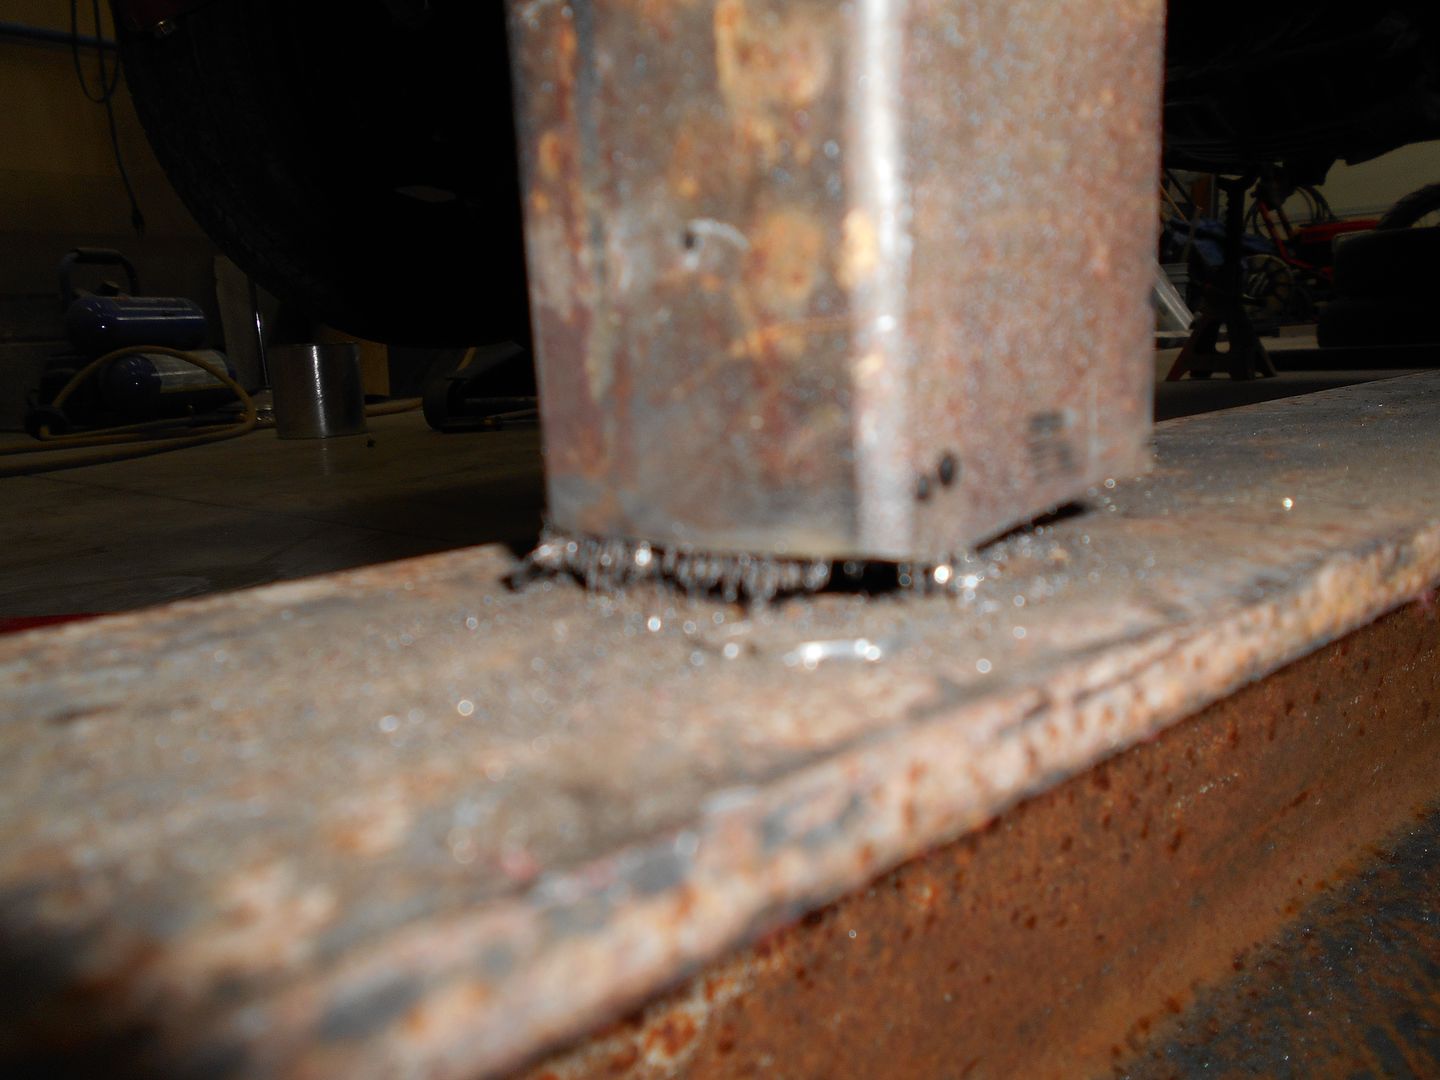
All this was pretty tense, as I went very slow, measured VERY often, and generally worried. There was a 1/4" spreader plate on top of the jack, and the cracking and popping noises were really exciting. The garage floor is pretty darn level,which is good, as it is my reference point, and I realize my results will not be perfect, but this is really interesting stuff to attempt. Cheers!
No pics, but I got the measurement dead on. Feelin pretty good about myself.
Dismantled the beam so I can return it to work.
Nice work! I don't know if I would have thought to try and press the frame back into shape - glad it worked out for you.
In reply to cmcgregor:
Honestly, I don't know how straight I got it. The frame shop basically used the panels to align it, and I screwed with so much that I figured what-the-heck, and started messing about. I'm not entirely sure another trip to a frame shop, or even a fabbed subframe are not in the car's future. I have the frame level. Now I just wonder if the driver's frame rail is pushed back any. A 4 wheel alignment with the rear axle in is the only way forward I see.This felt like a step forward. Thanks for reading. More to come.
Looks like it's coming along nicely, I would call the 4x4 shop and ask for the manager and see if they still even have the parts and ask for them back.
Here's another Starlet resto-mod for inspiration:
http://www.speedhunters.com/2015/10/project-kp61-saga-the-story-so-far/#_presentation-262935
Updates are becoming more sporadic, but stuff is still happening
I just did a very necessary clean up out in the shop. It was trashed.
First thing, a cheap HF drier so I don't ruin my nice new DA. 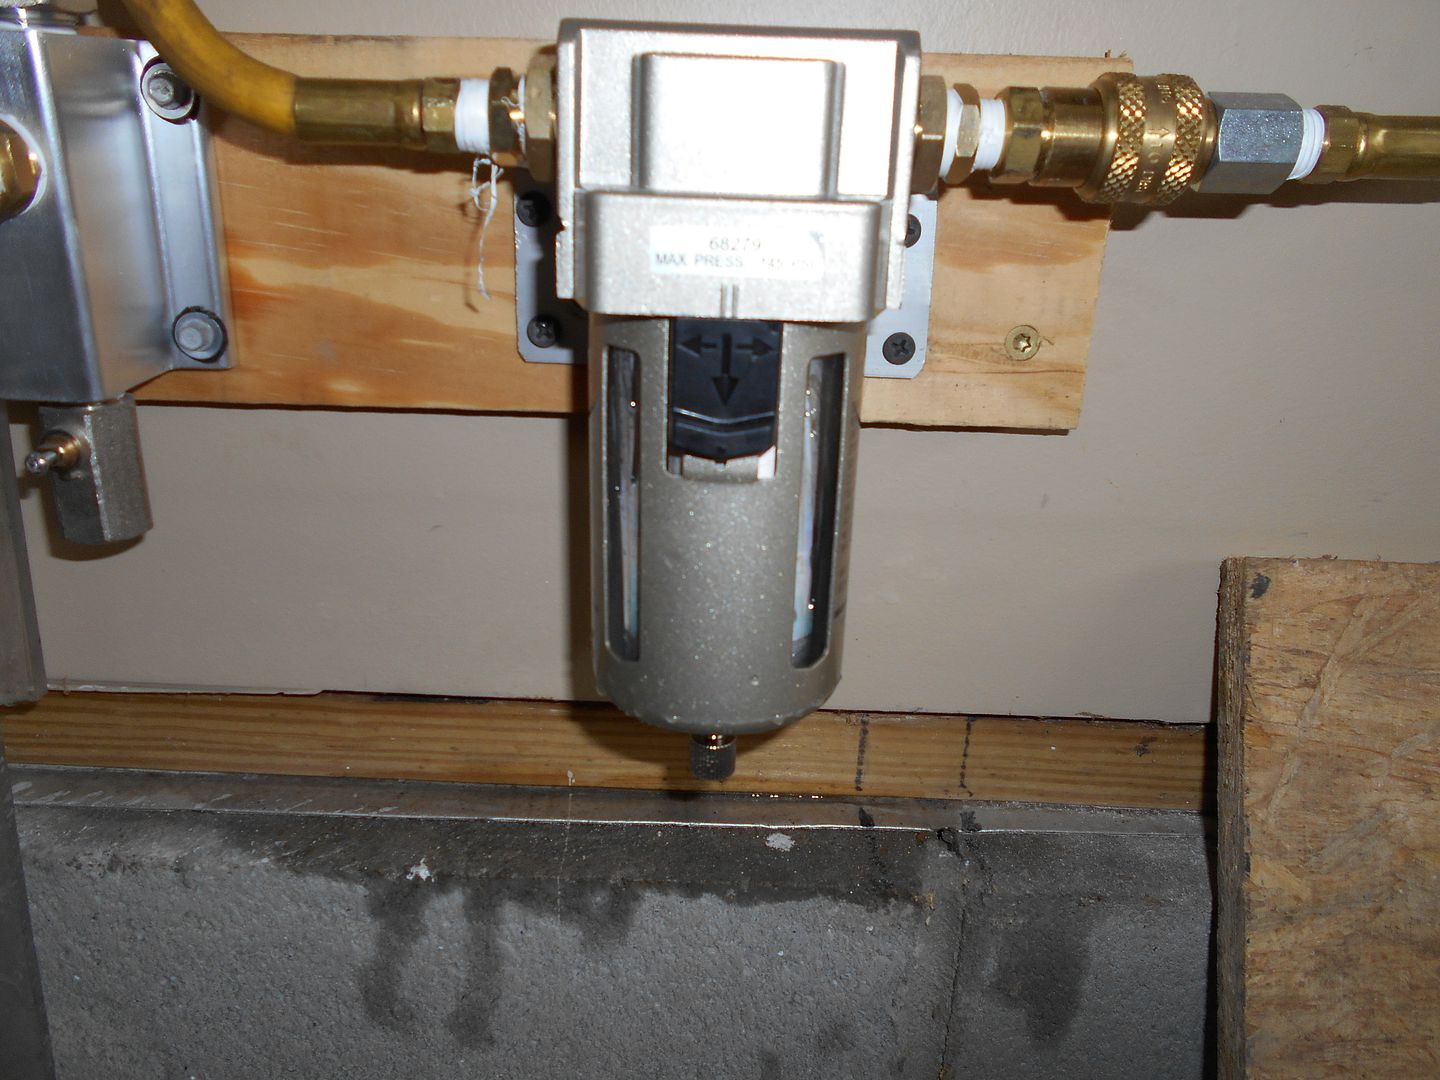 Works well.
Then I hung a tie down from the rafters, and set up a makeshift table so I could get at the back side of some of those dents a little easier. Passenger's side before: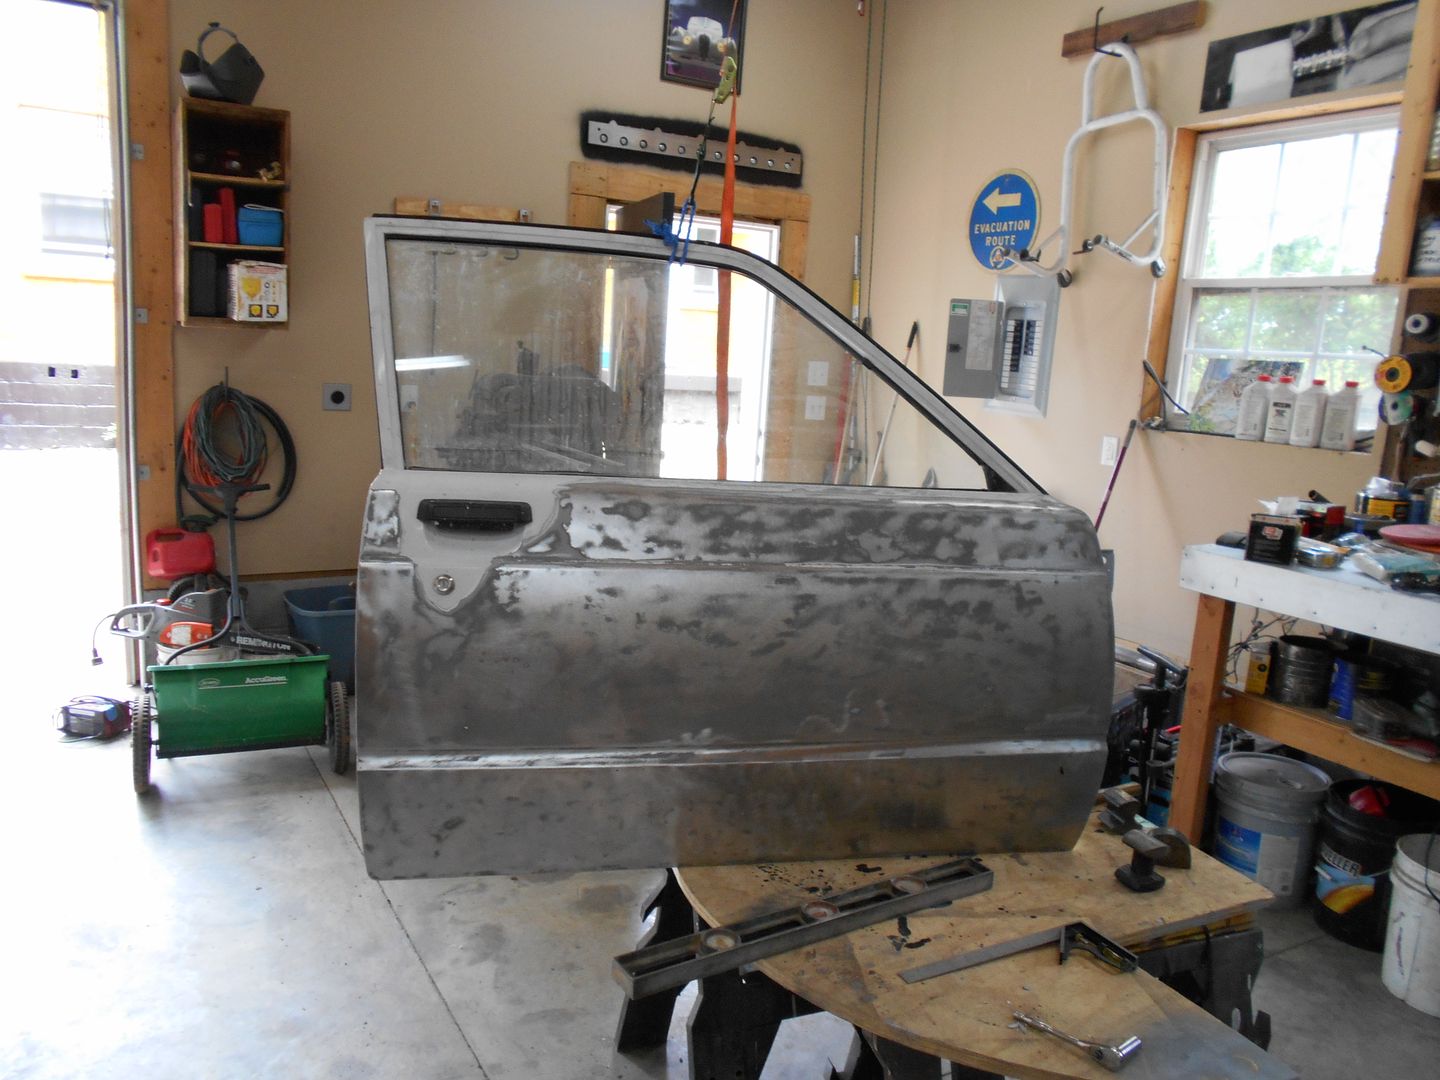 It doesn't photograph well, but I'd estimate this will require 75% less body filler than before. It was 1/2" thick over quite an area. I promise, those divots at the bottom appear worse in the photo than they really are. After:
 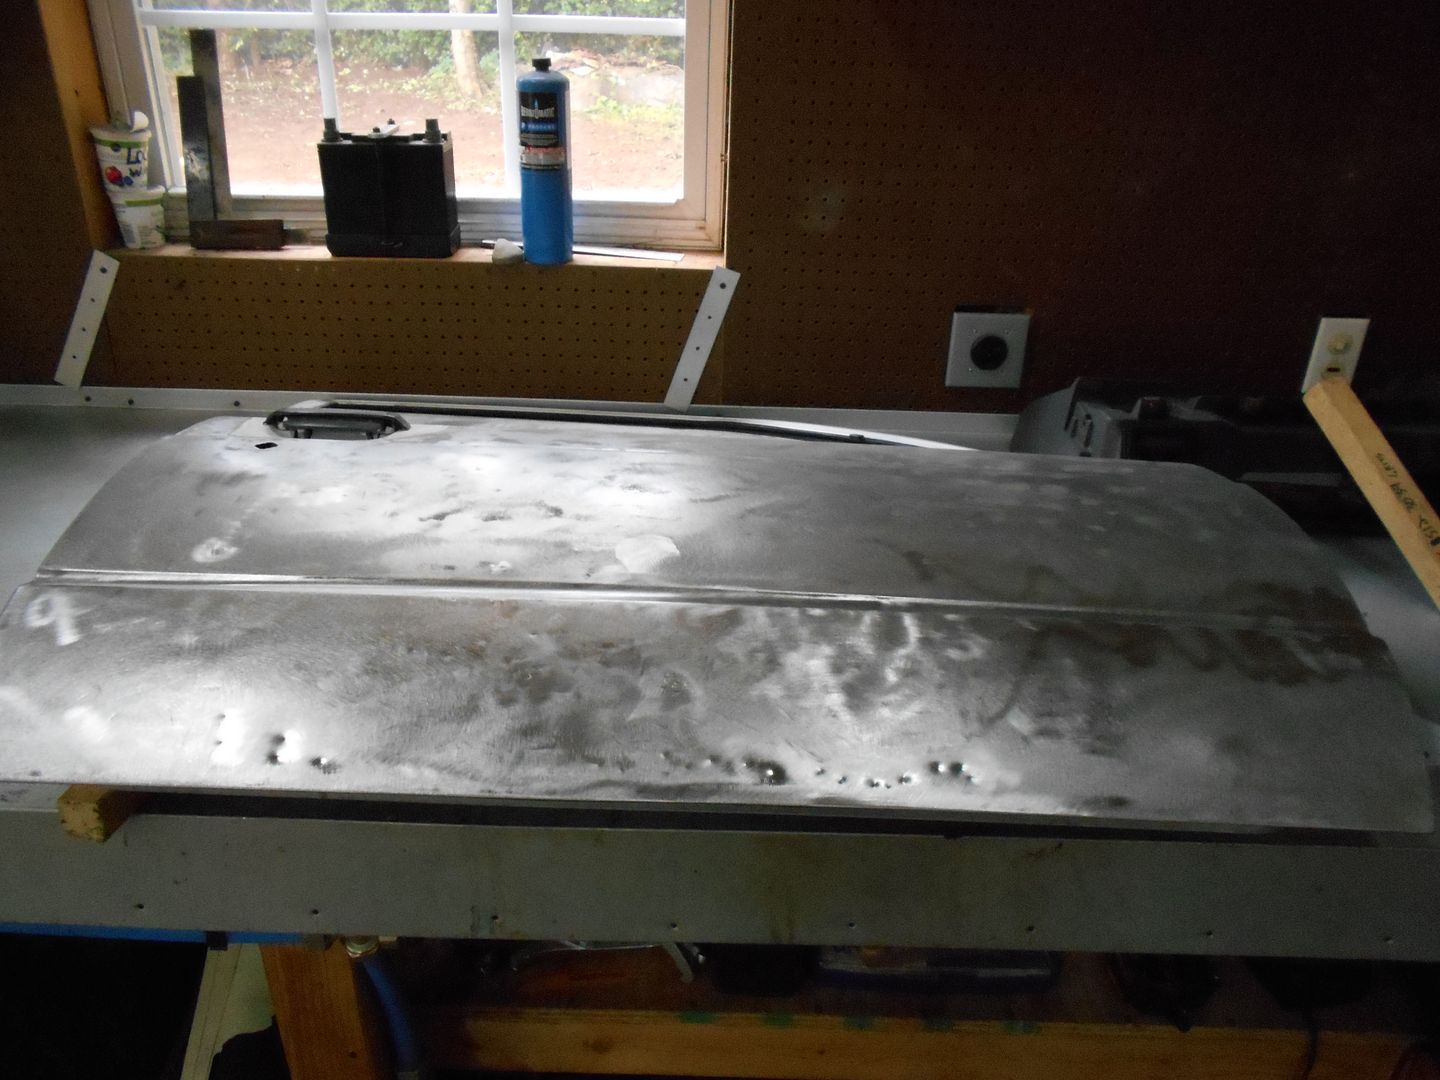 I got as far as welding up the holes some brainiac had drilled in the driver's door to slide-hammer the crap out of it. It is much worse than the passenger's side. I also drilled out the mirror backing plate's spot welds as I have something different planned.
 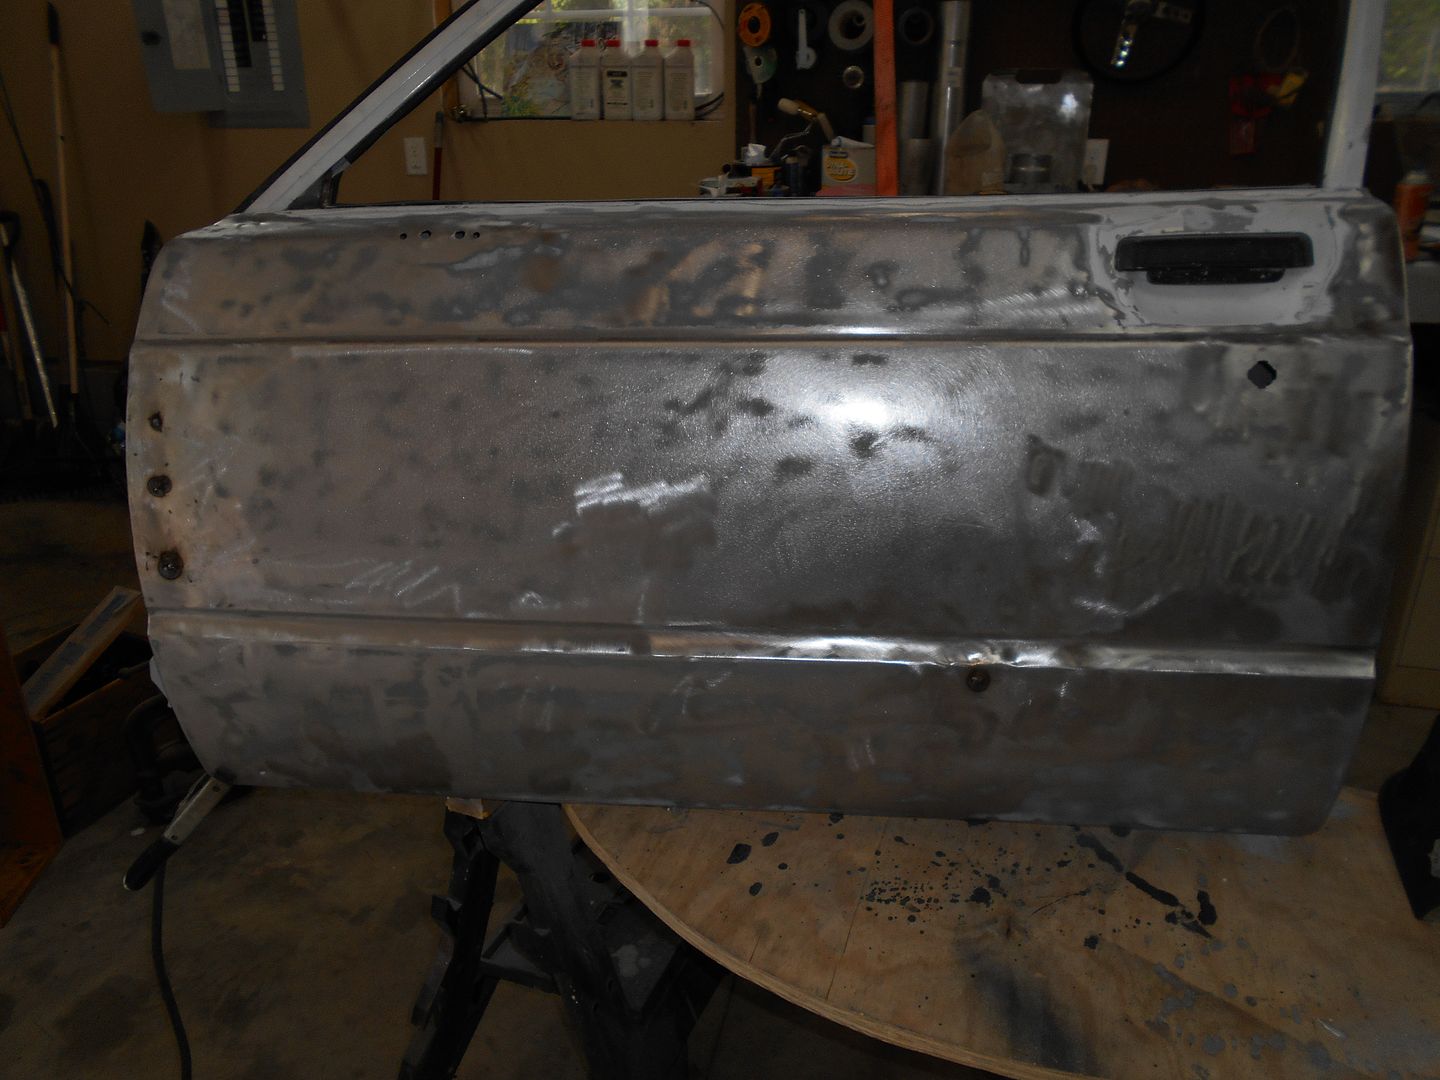 Cheers.

That's very cool. I'm amazed at your frame straightener rig. Never would have even imagined something like that.
I have officially crashed and burned. I'll draw it out a bit for maximum effect.
Today, not being at work and all, I started out slow. I first rebuilt the driver's window regulator.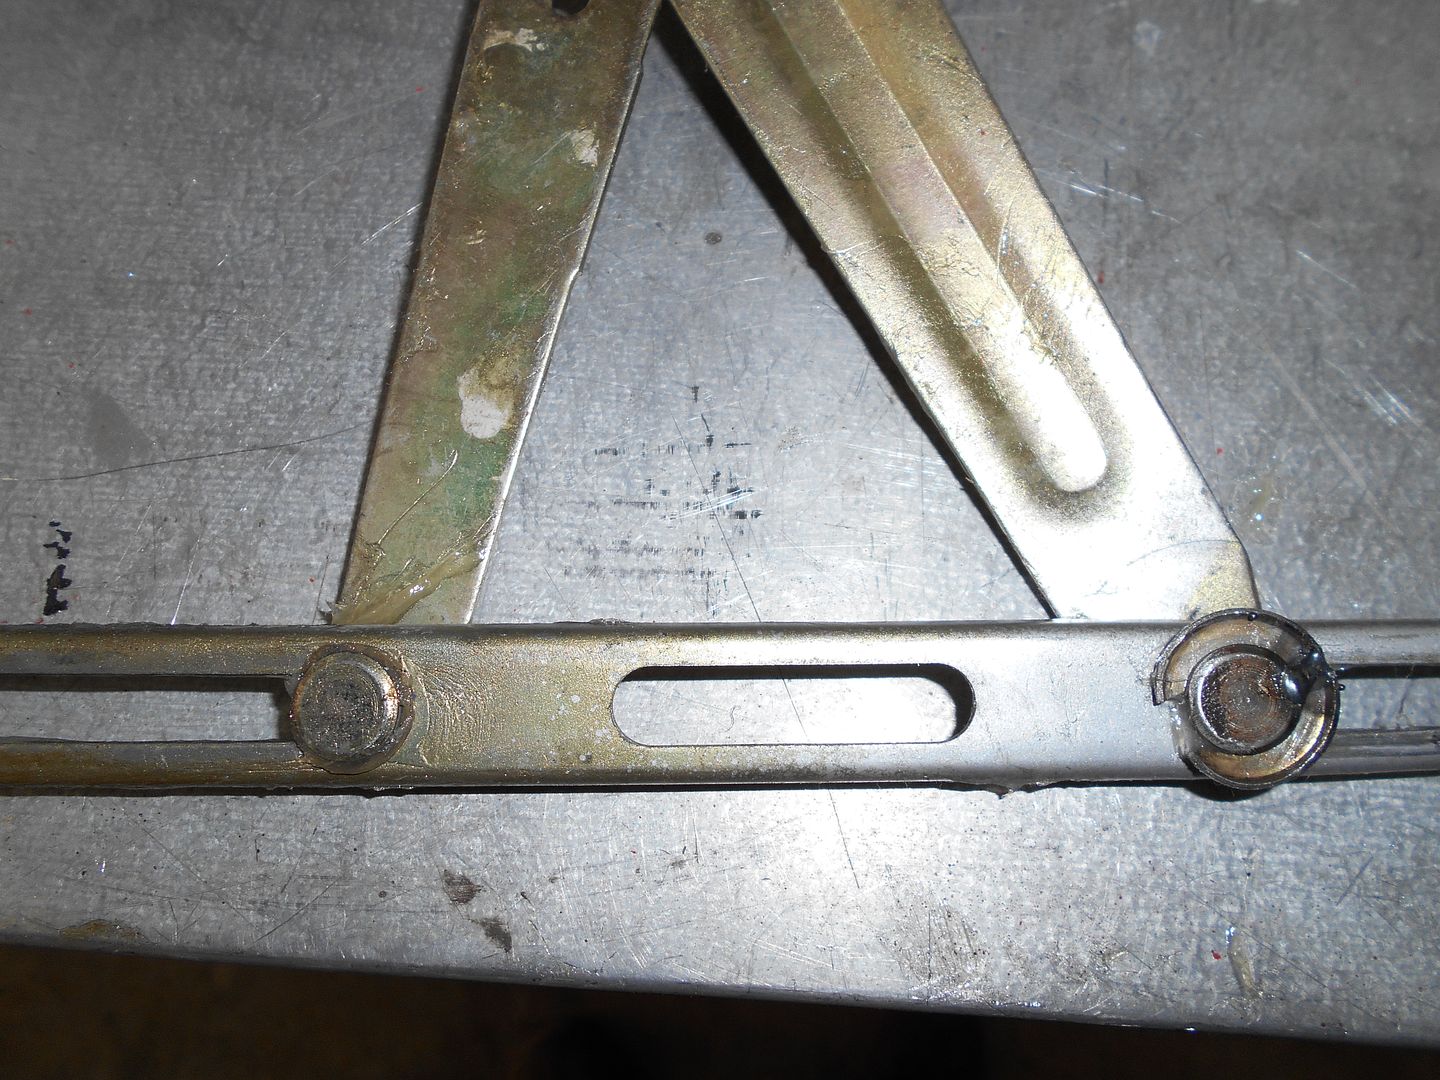 My repair is on the right. A small tack holding a washer from my coffee can full of washers, some twisting, hammer blows, and grease, and all was looking good.
I've been using a straight edge to help me find the low spots I'm trying to minimize in the doors.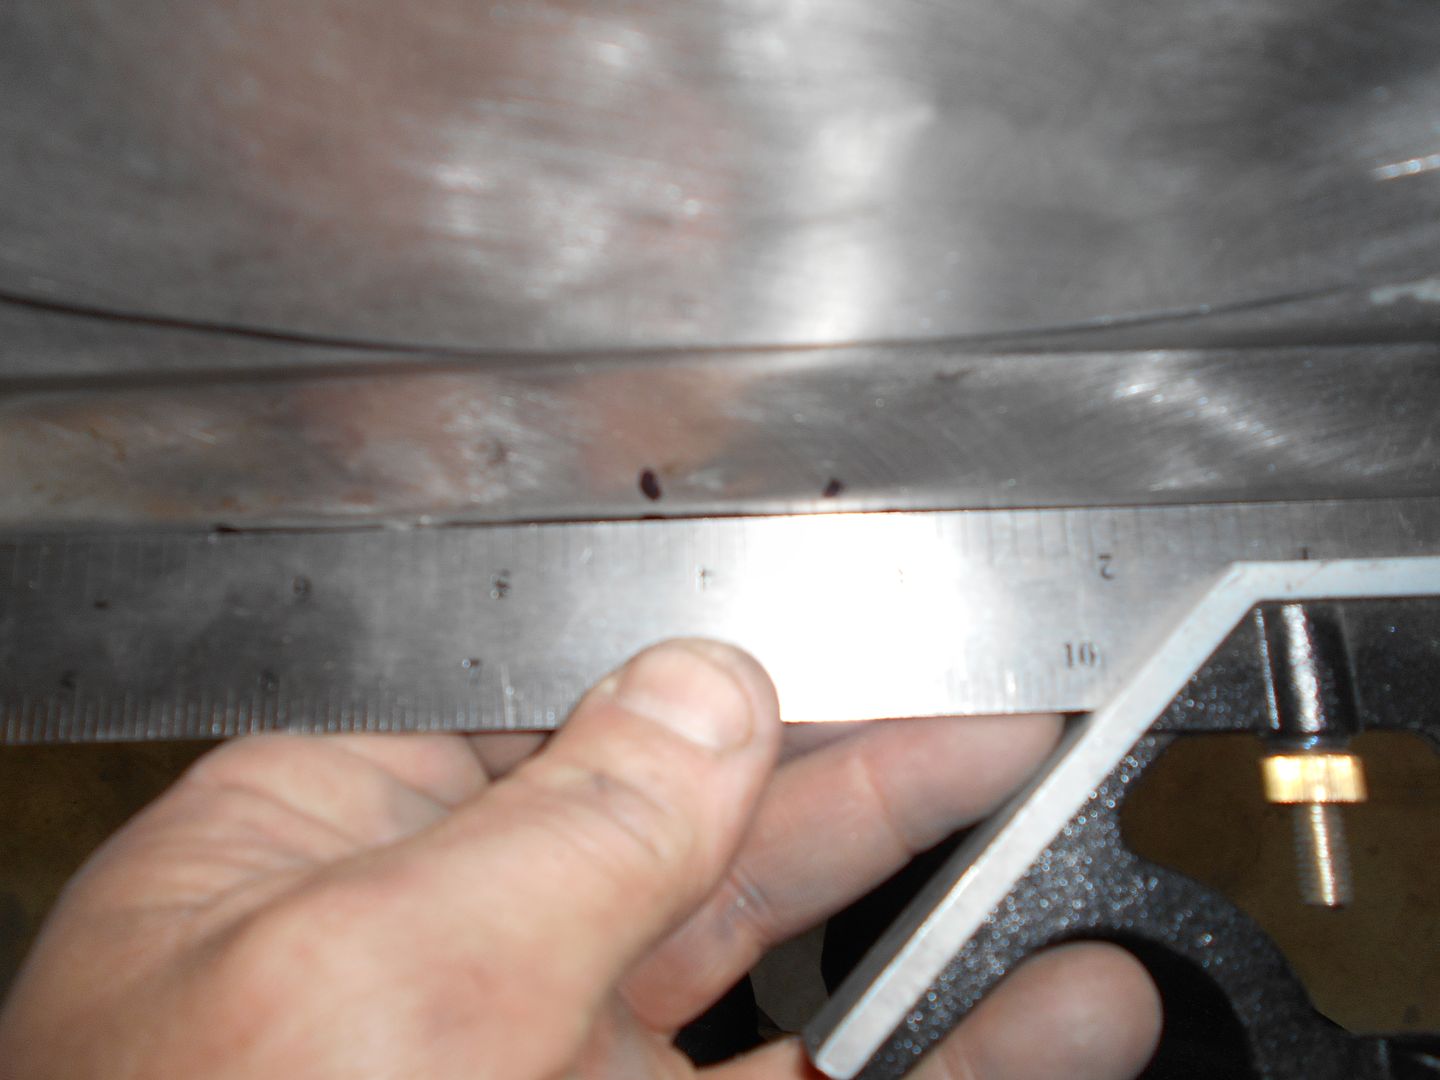 What I couldn't get to from the back, I decided to try my hand at like so. Anyone seen Hellraiser?
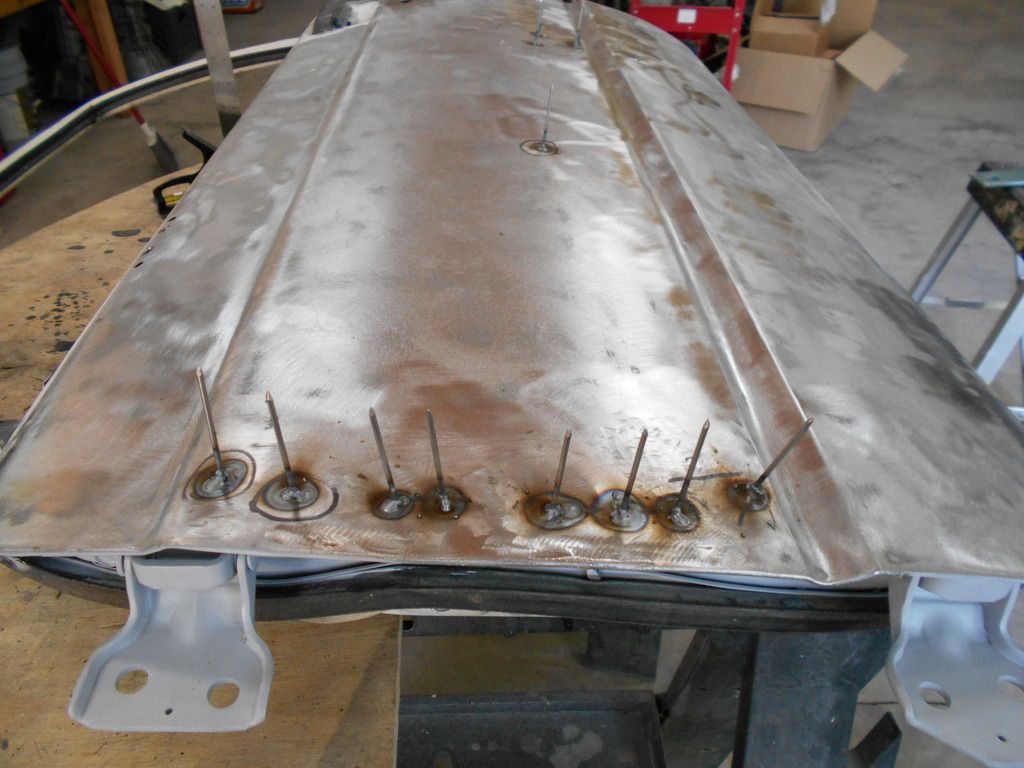 It was my first time using the vice grip attachment for the trusty slide hammer.
 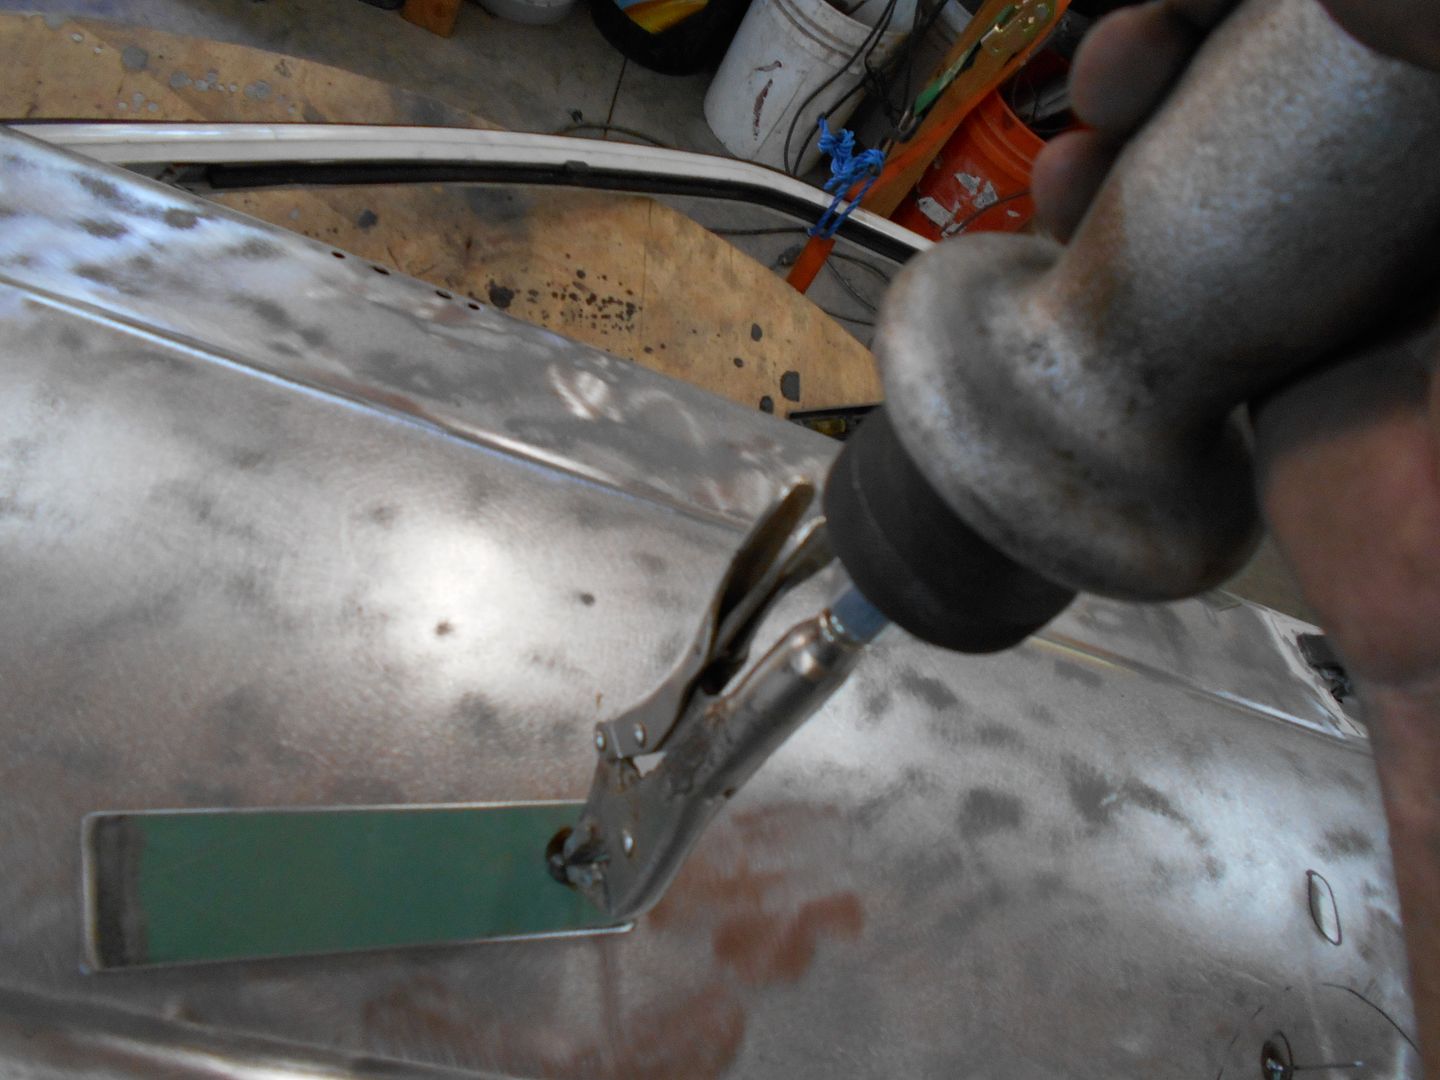 All this was going swimmingly. In between welds, and just to take breaks and such, I've been sanding the tub. The plan was to get everything sort of straight, and put a sacrificial coat of primer on it. Well, I just happened to start sanding the driver's A-pillar, and something just felt off...
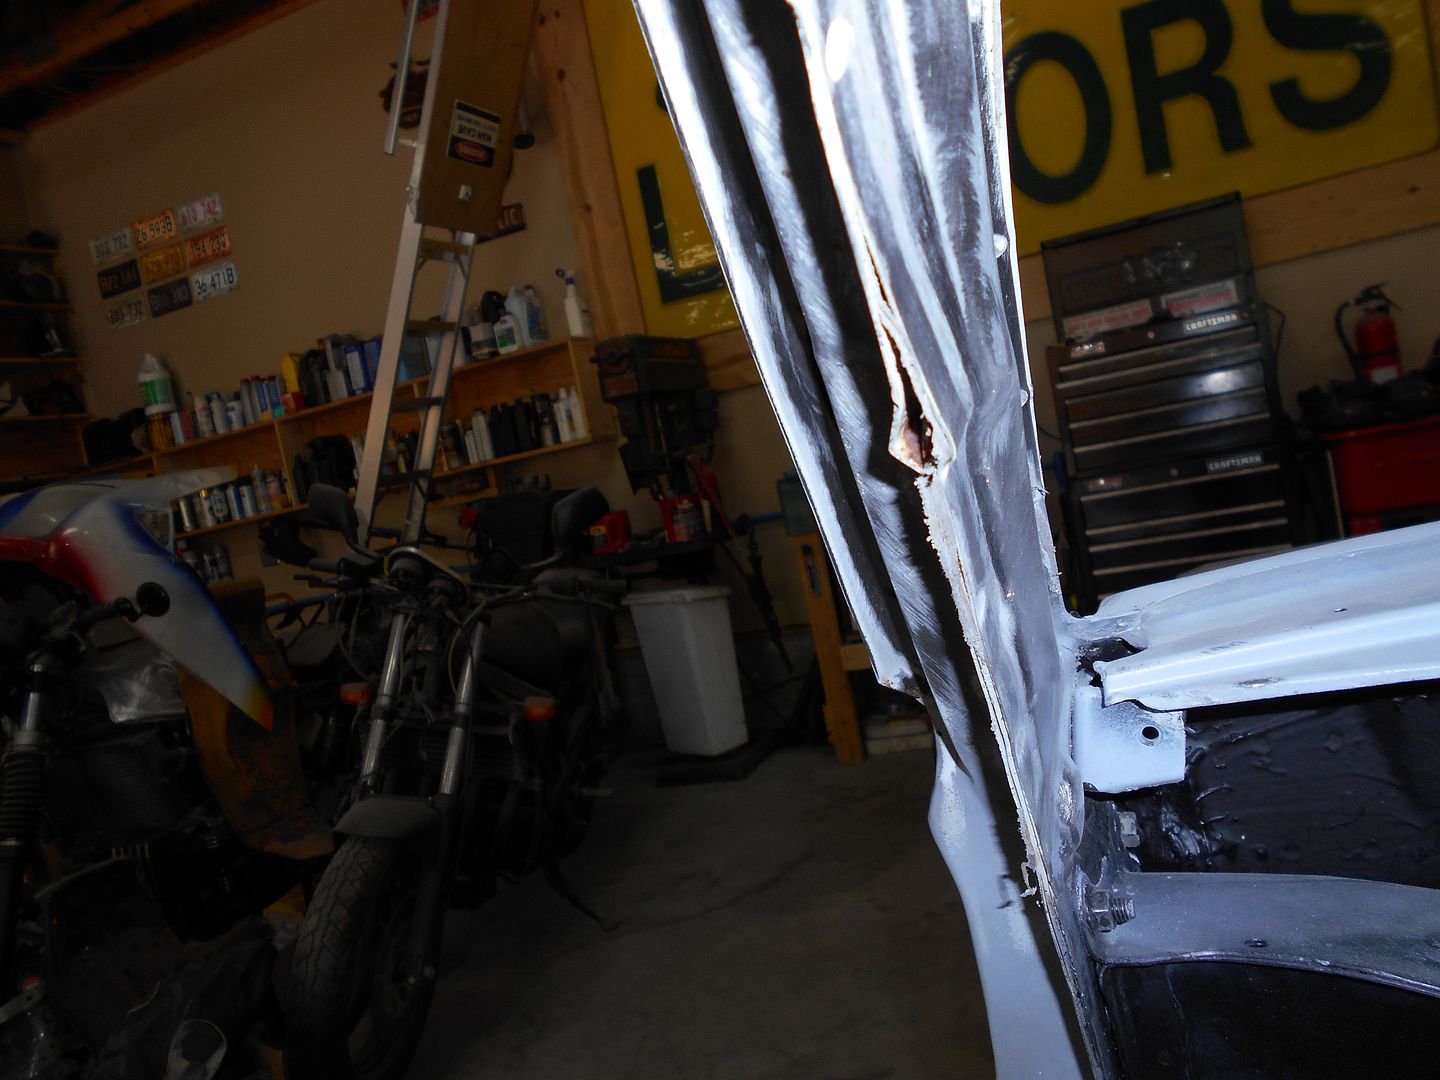
 It seems I was a touch premature congratulating myself on the effectiveness of my I-beam frame jig. Remember the popping and creaking noises I described as I was pushing up on the frame rail? Well, as I had seam welded the heck out of a lot of other places, something had to give, and that something was the A-pillar. It is kind of a bummer.
I'm thinking I'll keep messing with the door for a bit, then try fitting body panels so I can see what a mess I have created.

I would not panic too much. Toss the doors on and see how they fit.
A good man with cutting and welding equipment can not be stopped.

Sounds like a good plan. It might take some patience to align the panels, and I'm sure there is a way to deal with the small wrinkle in the pillar. After coming so far, we're still pulling for you! ![]()
Thanks for talking me off the ledge, Fellas.
Yesterday when I noticed the damaged A-pillar, my mind went everywhere from "Its totaled." to "Now I need to re-bend the frame, cut everything off, and fabricate a tube front end." Simply fixing the A-pillar didn't enter my mind.
So, I figured I'd just chew on the idea before doing anything about it. Today was a bunch of milling about. I cleaned up front fenders, the front valence, and got the first coat of filler on the doors to make sure those tiny bits of porosity left from the welds didn't take on any rust. 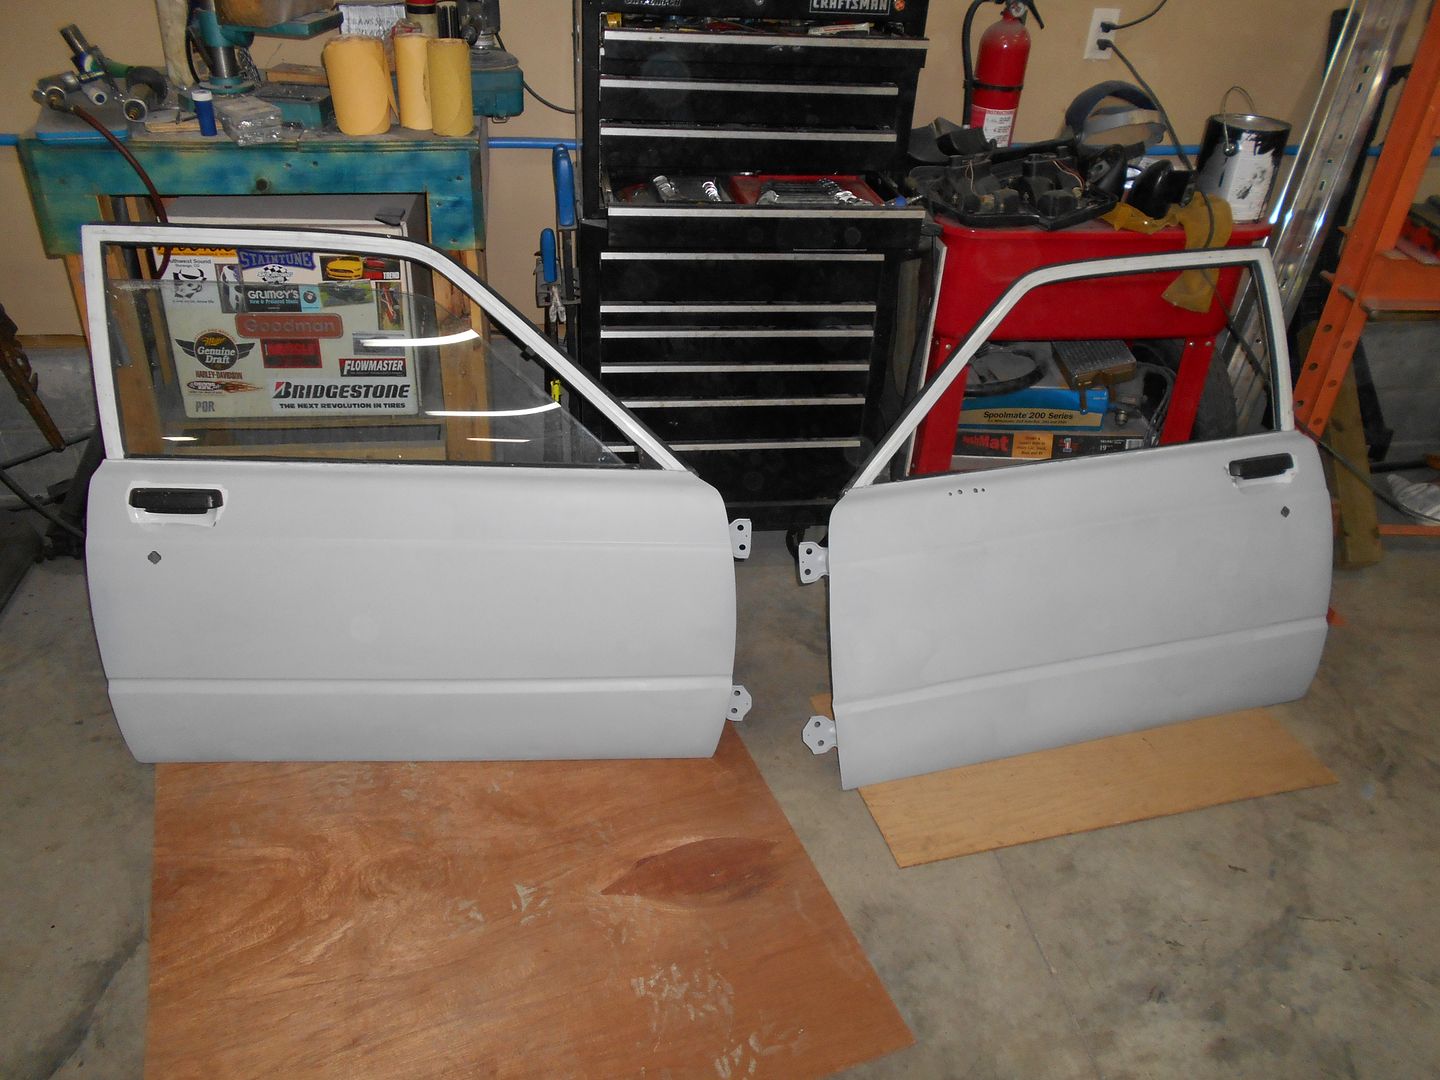 Shop coat of primer, and a lean to the side.
Something really obvious I re-learned today: Sharpies bleed through paint. It would be a real bummer if it showed through the final coat.
This will be a picture heavy update with not a lot of real progress at all. Advice is welcome, as I am trying to determine the best way forward.
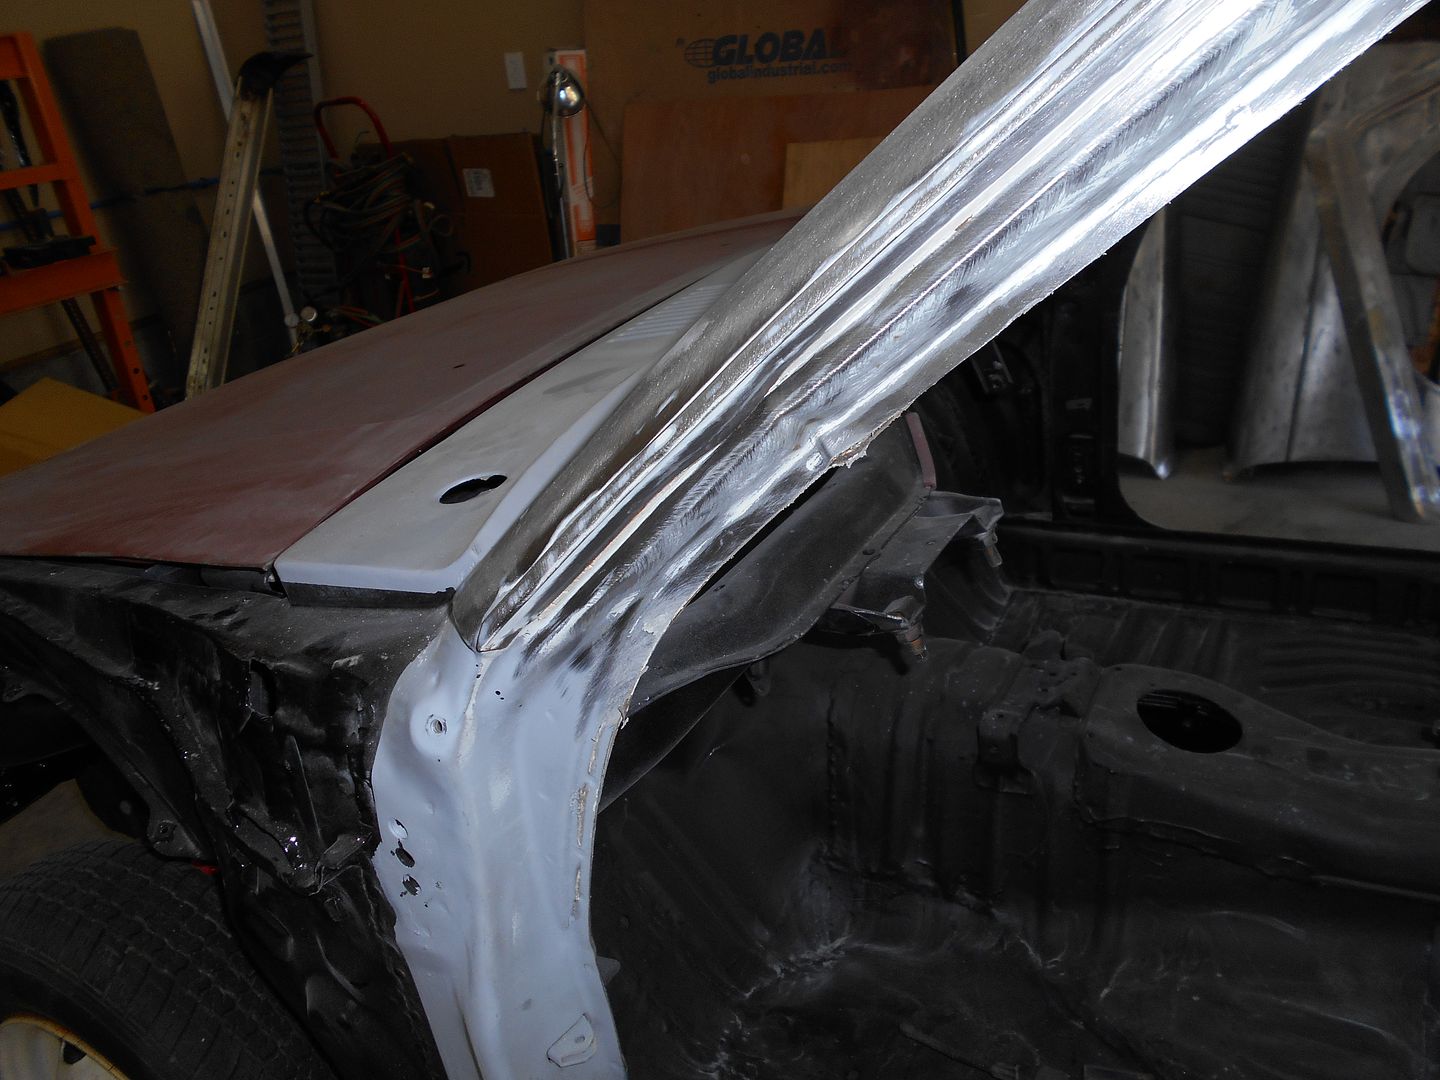
Basically, what's going on is this; The cowl has held steady as it is seam welded to all heckfire, and beyond, but the top of the driver's door frame, just below the window glass is 1/4" wider than the passenger's. There is the buckle in the A-pillar I showed a couple of updates back, as well as one on the rocker at the base of the cowl I just found.
Passenger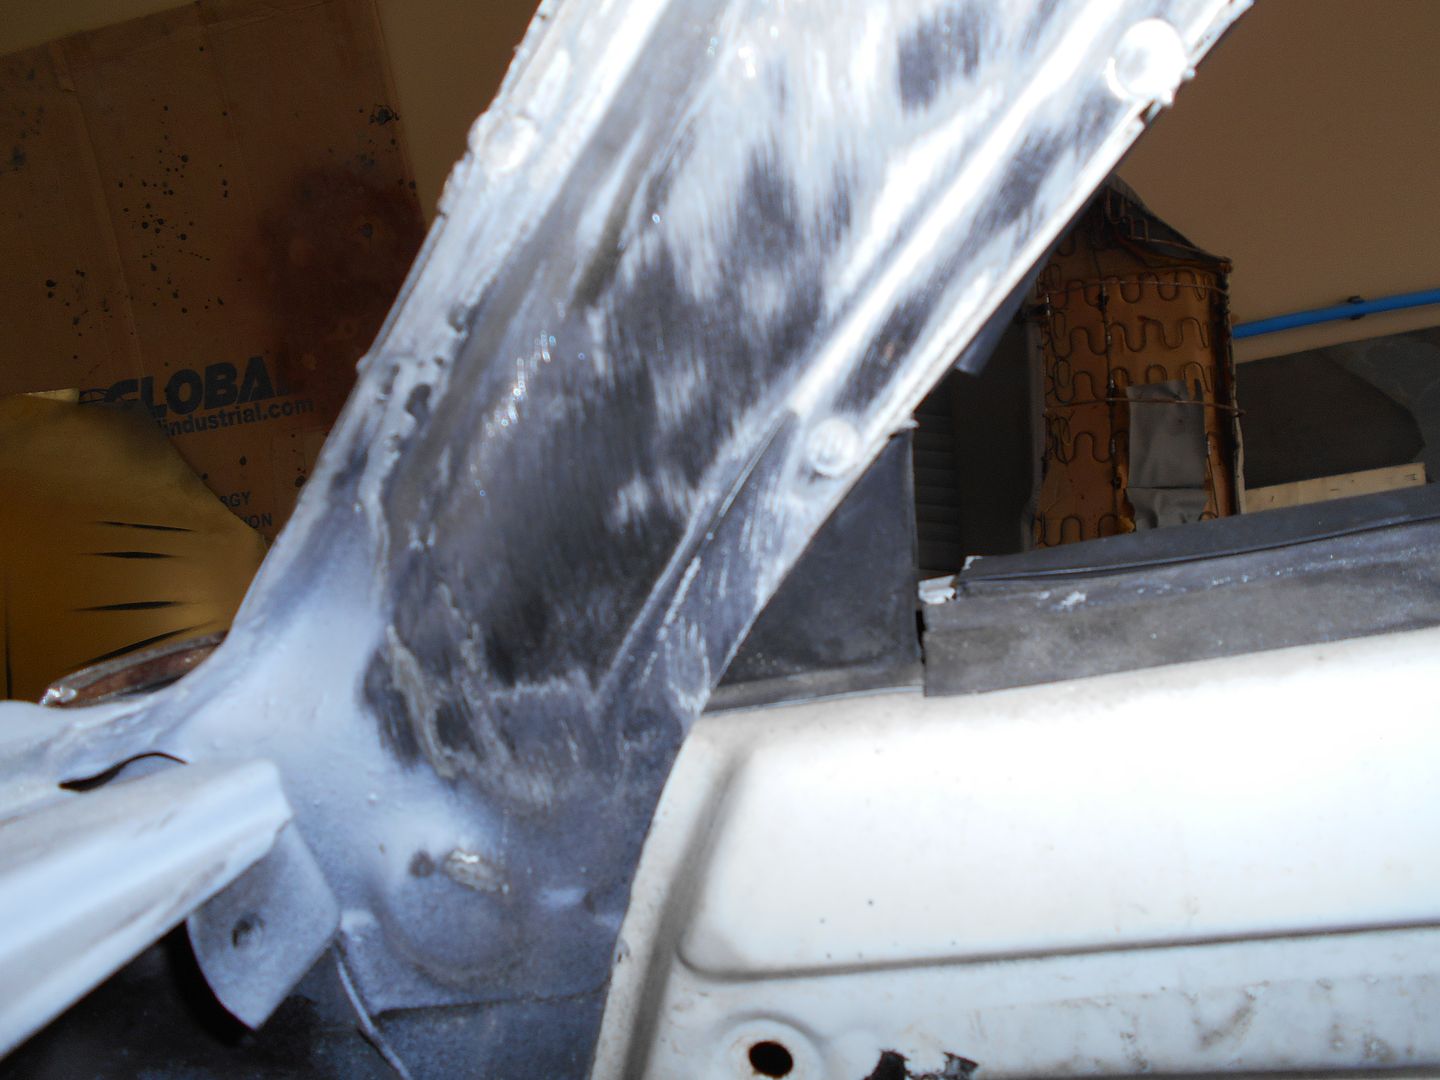 Driver
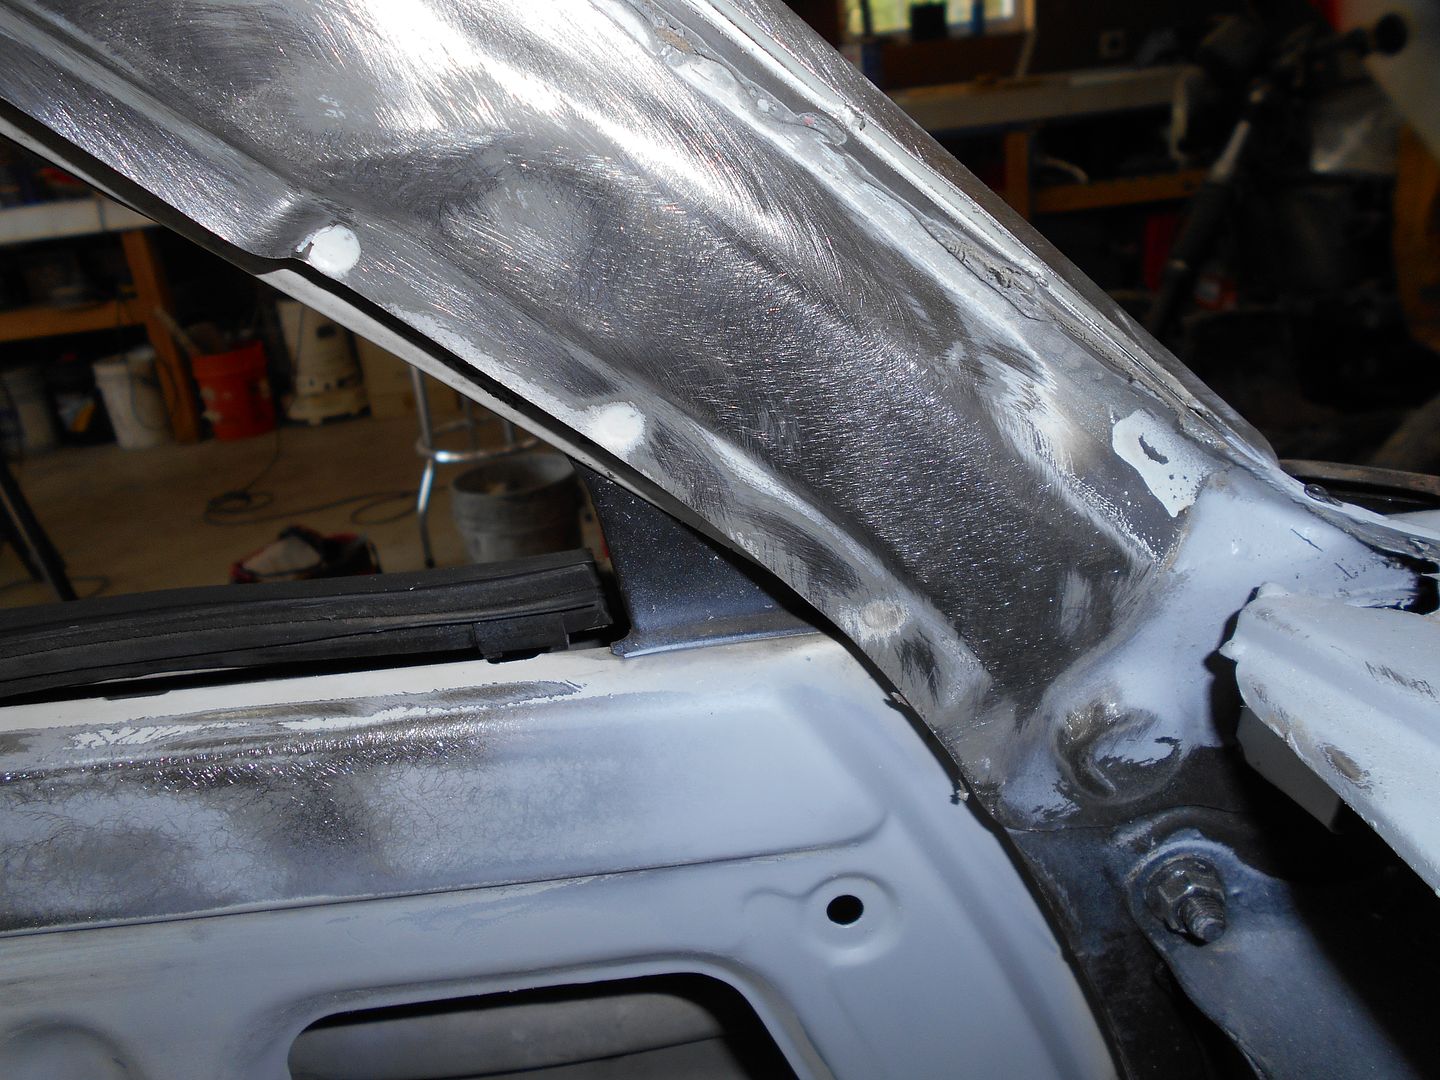 There is a reinforcing plate that ends right where the buckle is in the upper left corner, also note the distance between the door frame to the bulge in the door. This is where I have 1/4" too much on the driver's side.
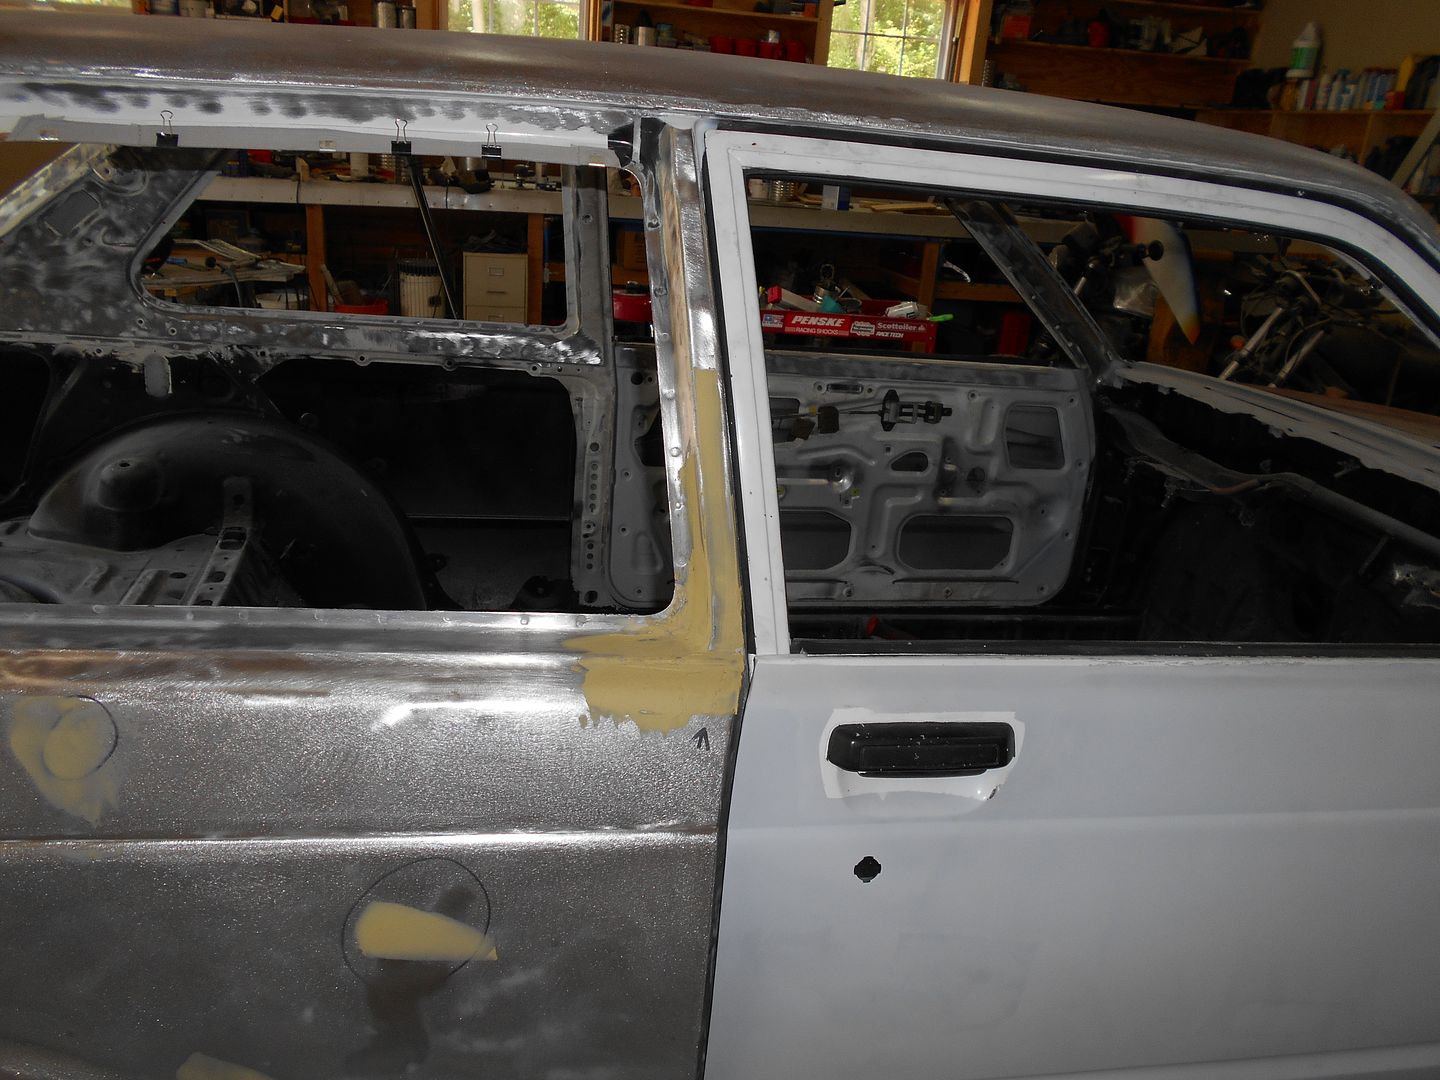
From the outside: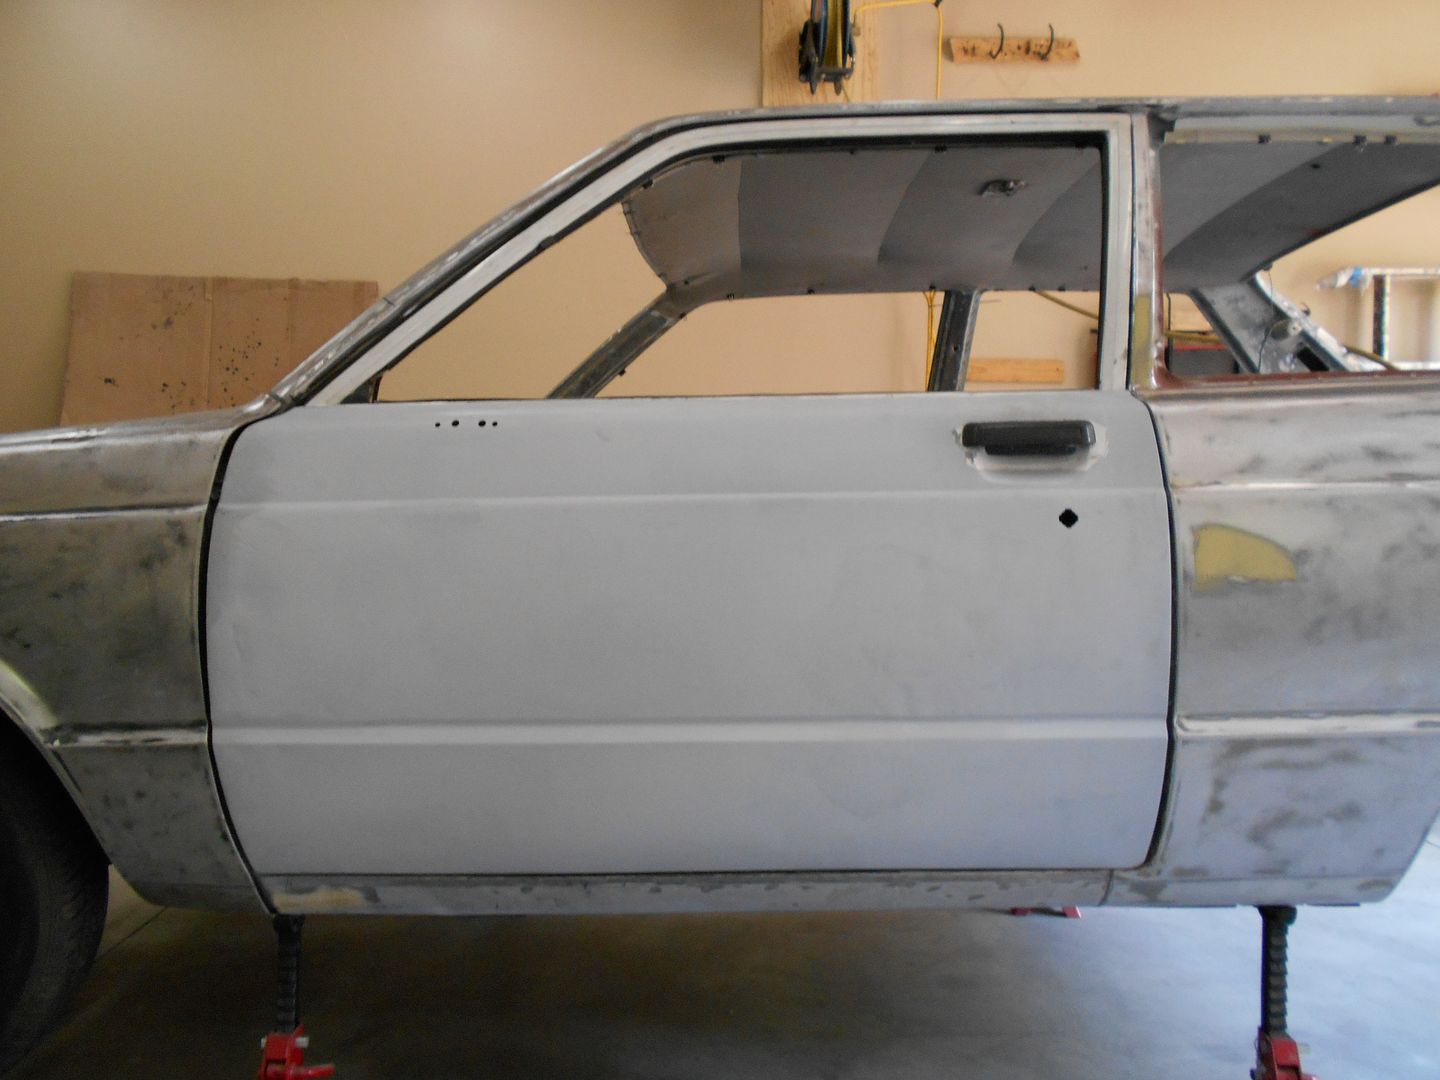
Looking at the picture above, imagine the firewall, Cowl, front of the door frame, and very base of the windshield all rotating forward pivoting on the bottle jack under the frame rail below where the gas pedal should be. The gap is super tight up at the B-pillar, and way wide at the front near the fender. This is with the hinge holes hit with the die grinder to get in the ballpark. This took some time.
The passenger's side for comparison.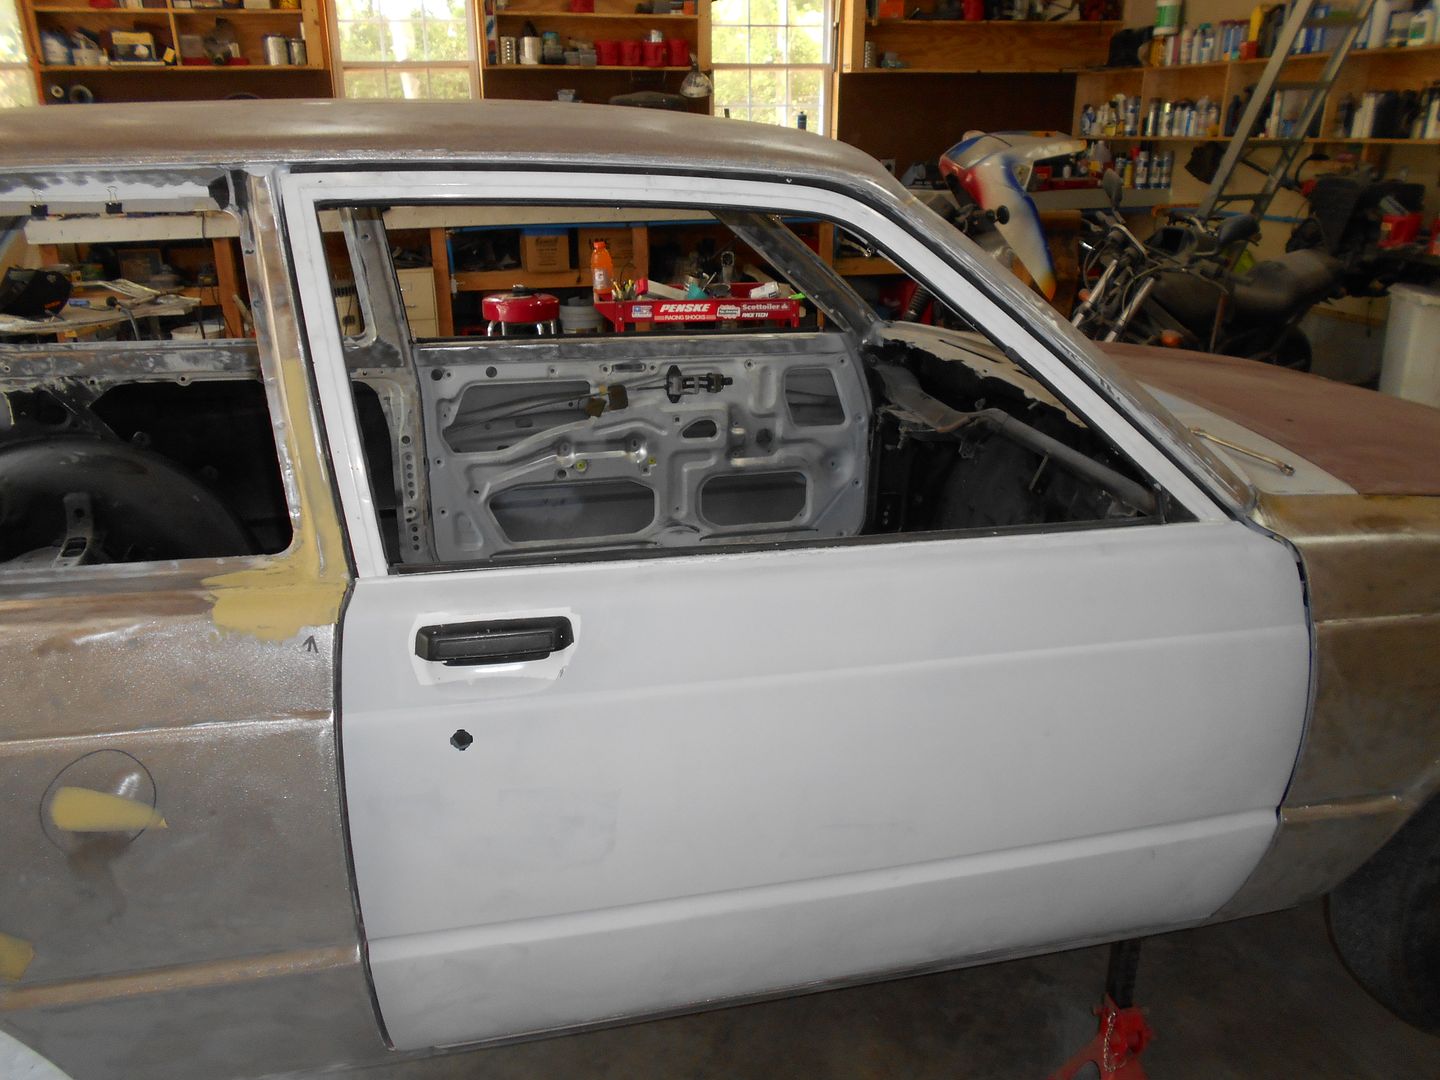
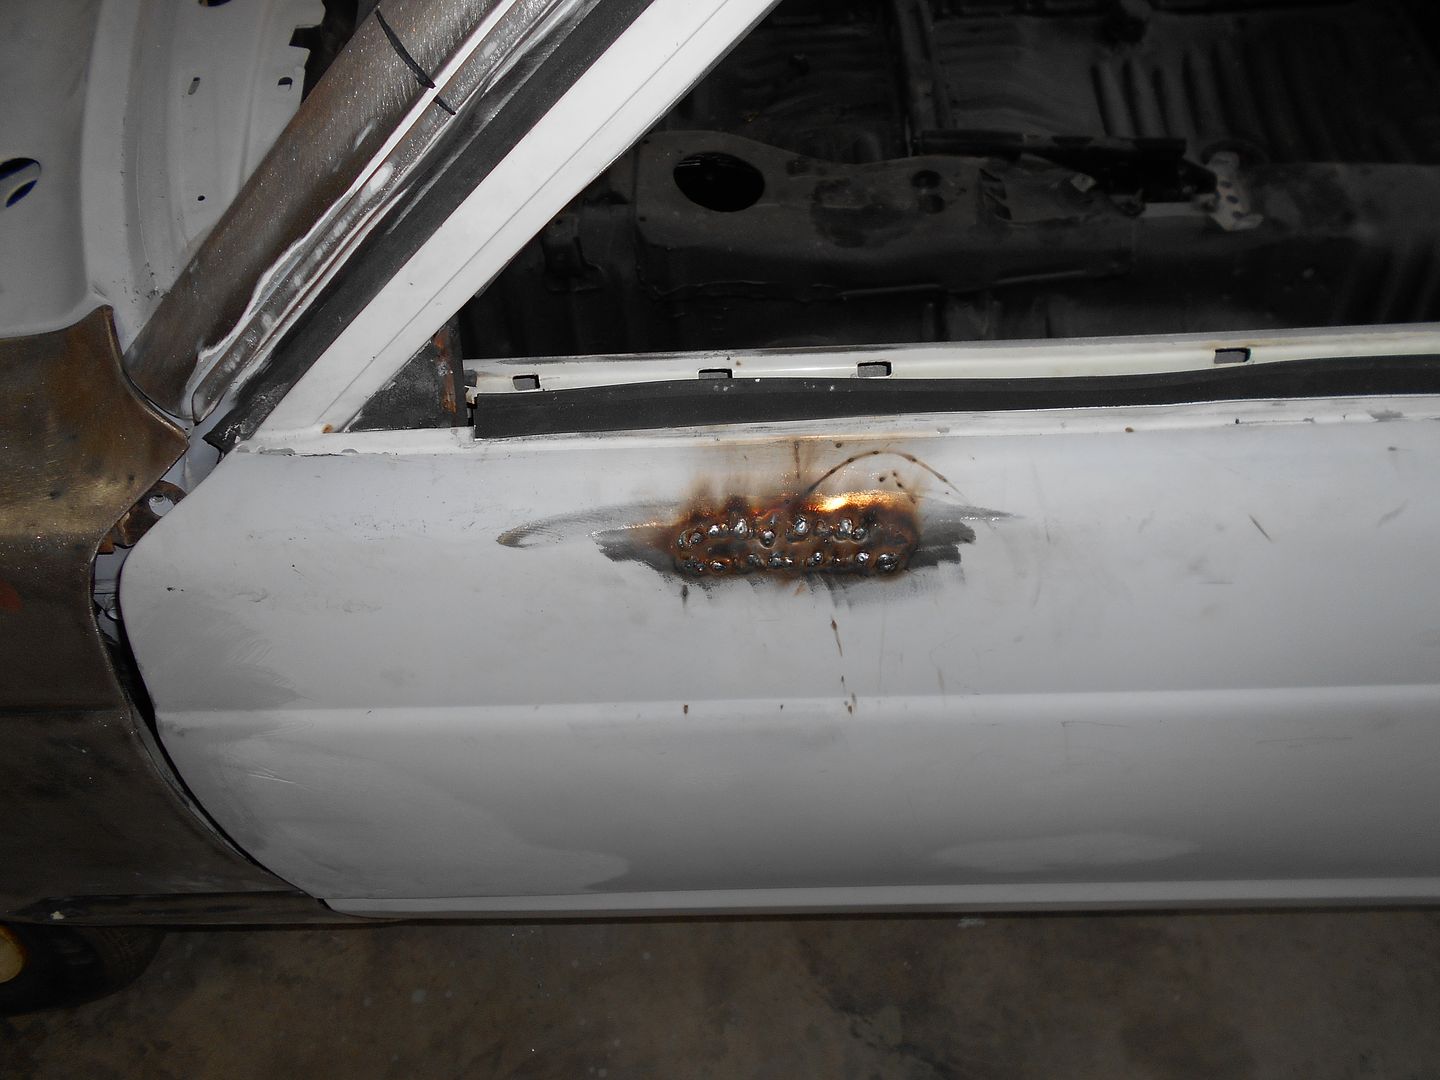
Detail of driver's side: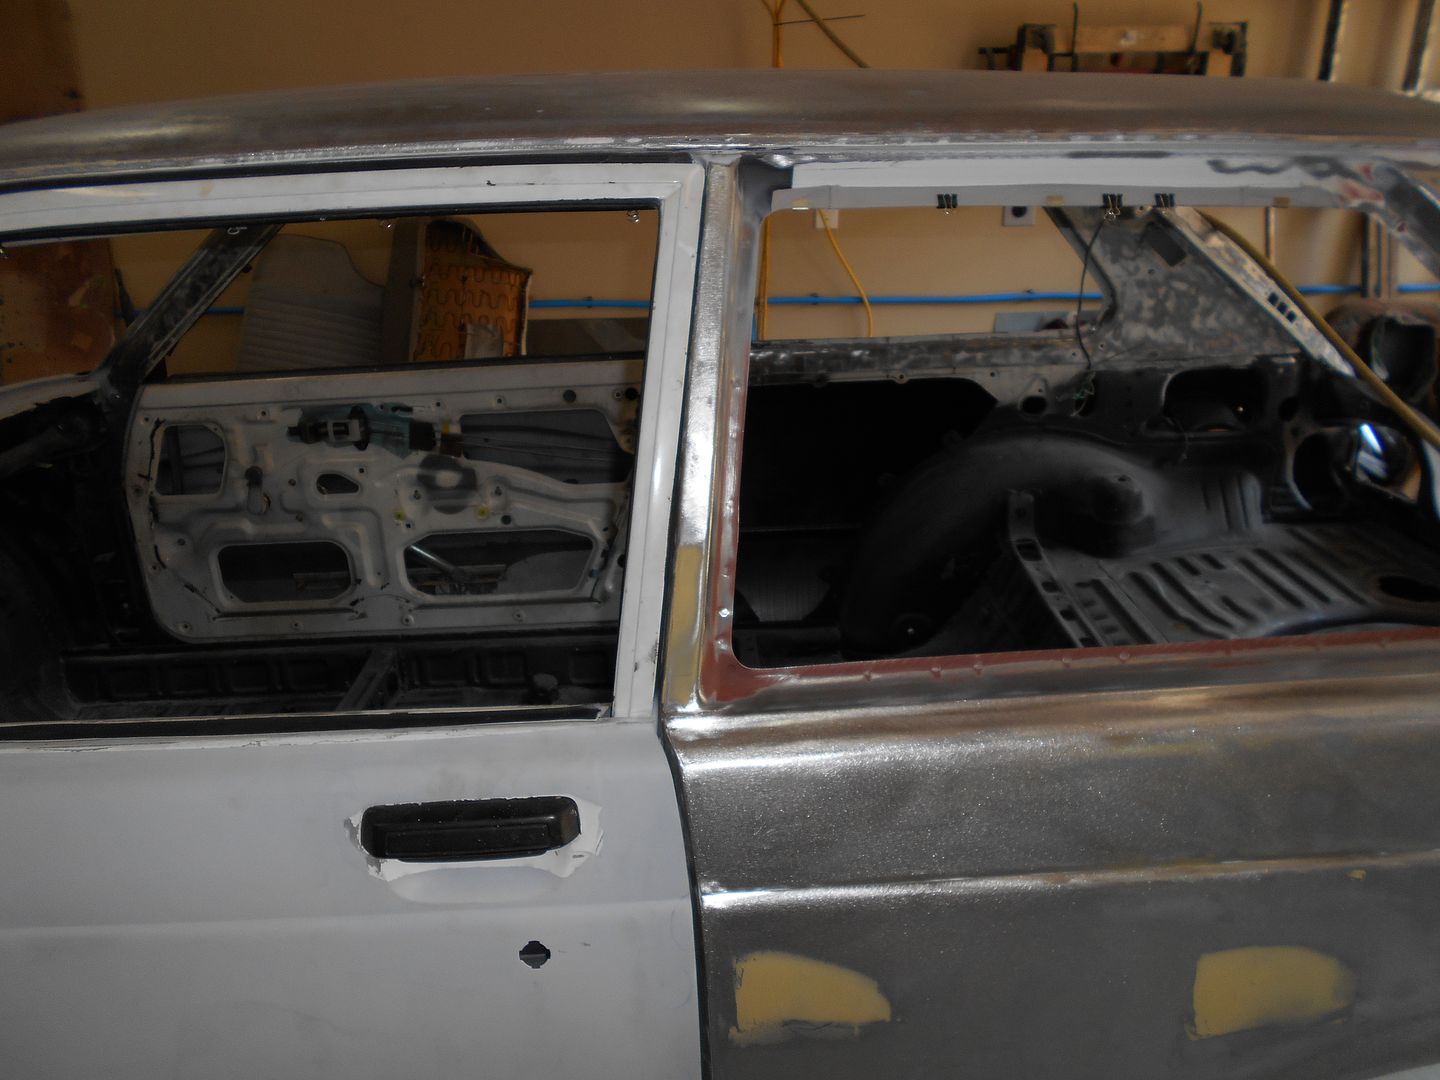 Did I pull the B-pillar forward?
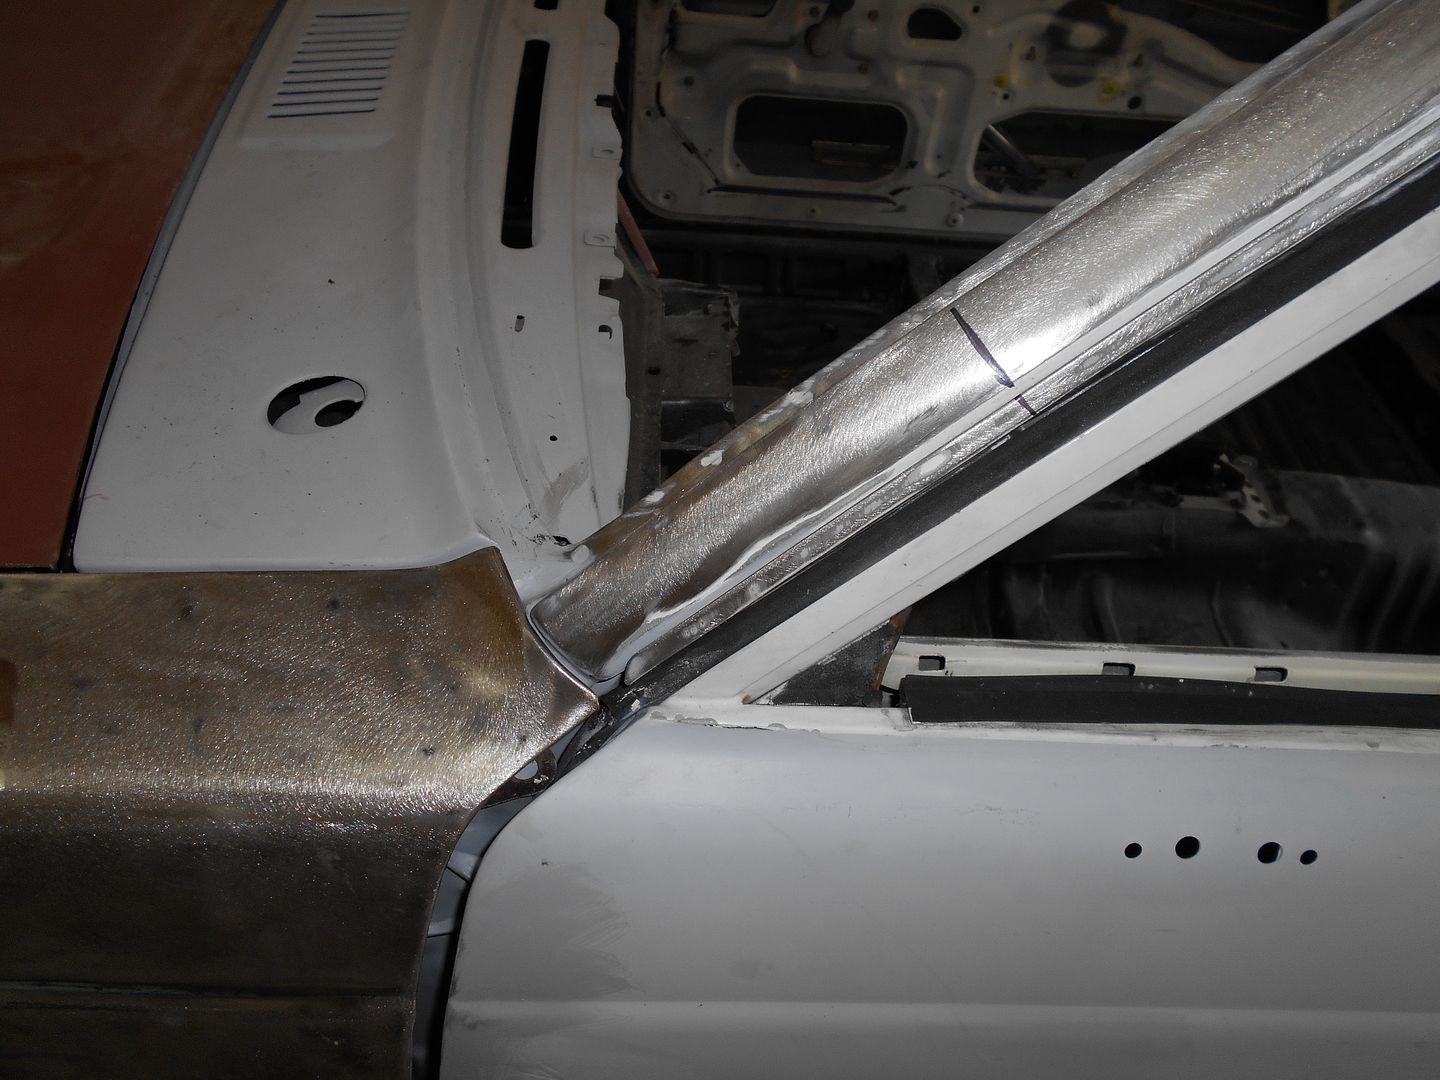 The front clip looks workable.
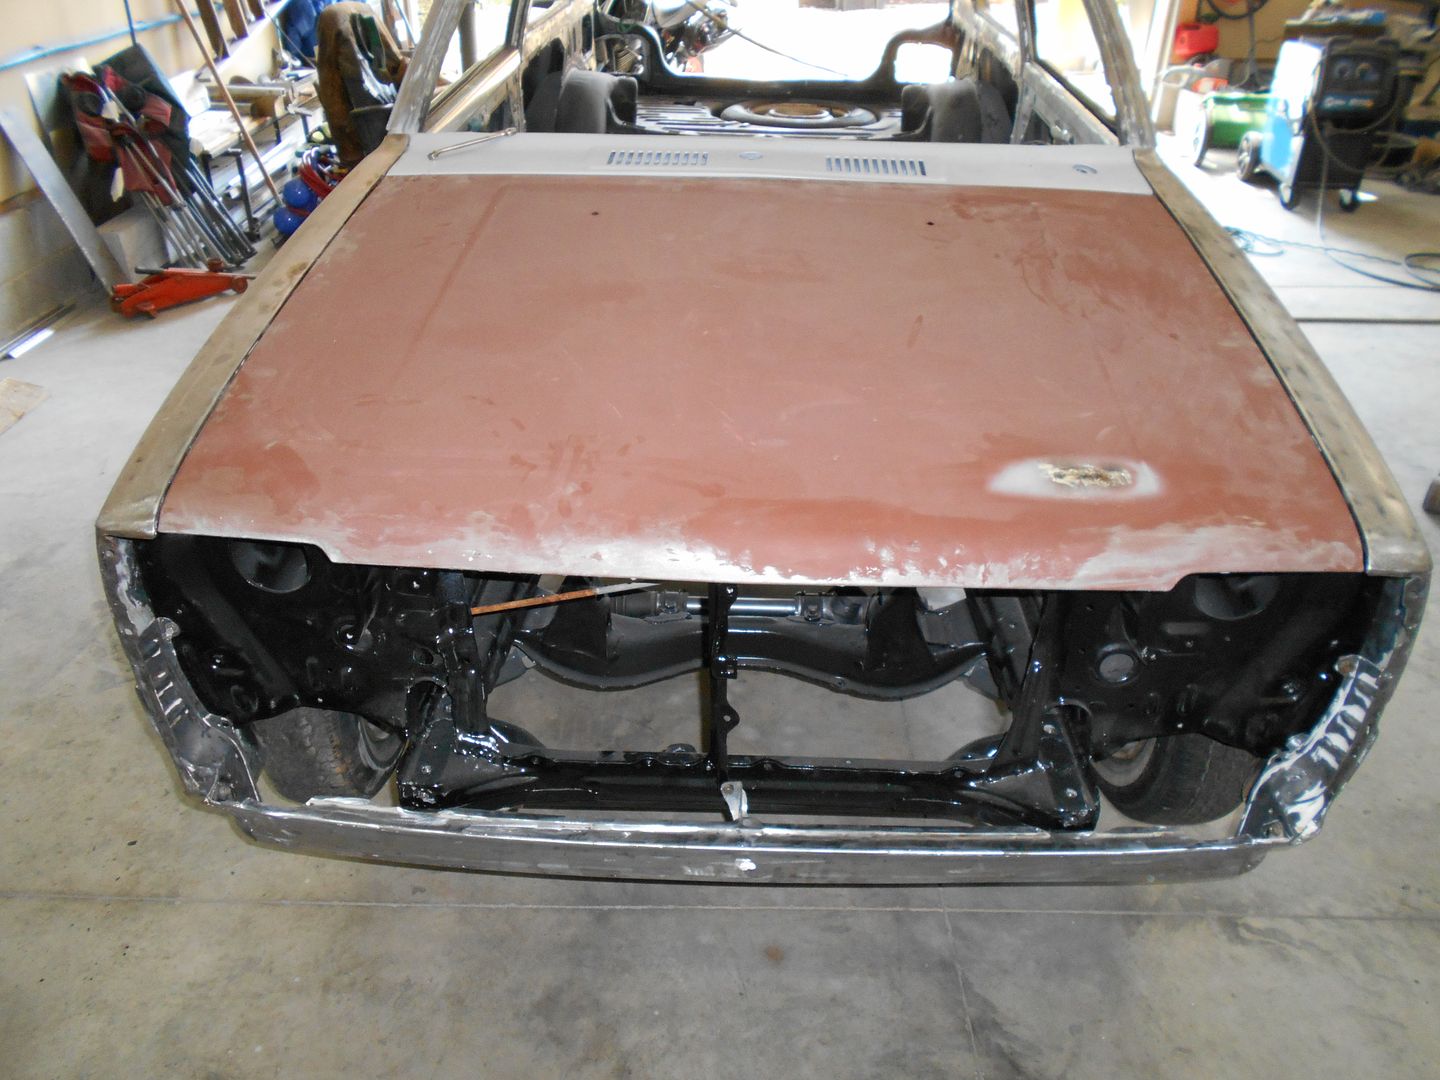 So, these cars were not known for tight door gaps, and the like, and I'm not above welding rod to the door edges to cheat a bit, but i'm clearly not within fettling range. My thought is to cut in the center of the buckles, and start working my way towards "good enough".
I can live with some hackery to make the door seal function, but obviously want to keep that nonsense to a minimum. As it is, fenders will need some customization of mounting holes, and tomfoolery, but the real question is what to do about that door. Vertical relief cuts, and slowly draw it in? Just fix the buckles, and start moving stuff, starting with the hinge points, and working back to the door jamb? Scrap it all, and build a tube frame? Any comments that do not involve time travel, and supporting it from the frame, rather than the rotisserie while fixing the cowl (as I SHOULD have done) are welcome.
 Who's got two thumbs, and knows how to avoid the subject at hand? ...This guy!
While thinking about the real problem, I decided to just carry on like nothing's wrong. You know, by fiddling with mirrors.
And a jig for the 4-link.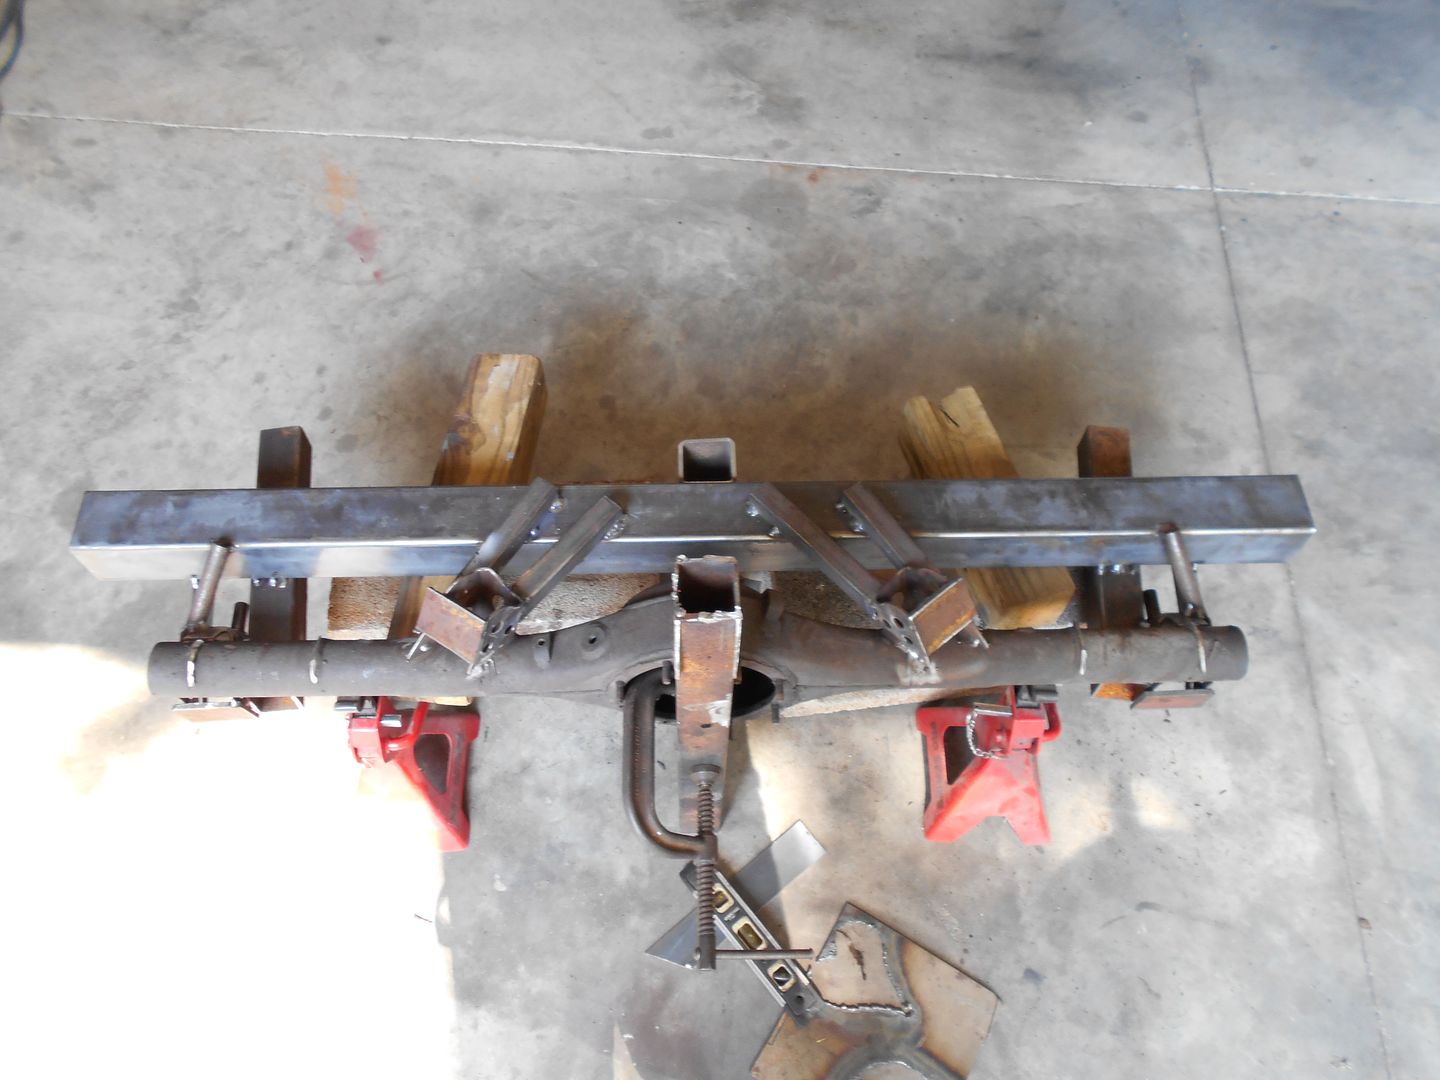 When it comes to addressing the buckle in the A-pillar/bent tub/Berked all to heckfire Starlet project, I have the seed of an approach.
First thing is to DO NOTHING until I'm out of ideas. Every day, I have more ideas on how to cut, pull, weld, hammer, and generally force this thing to comply to my will. I have plenty of approaches that seem to be feasible, but none that continue to hold water after scrutiny. So I built my version of precision blocks to hold it up off the floor. They will get better bases before any real action begins.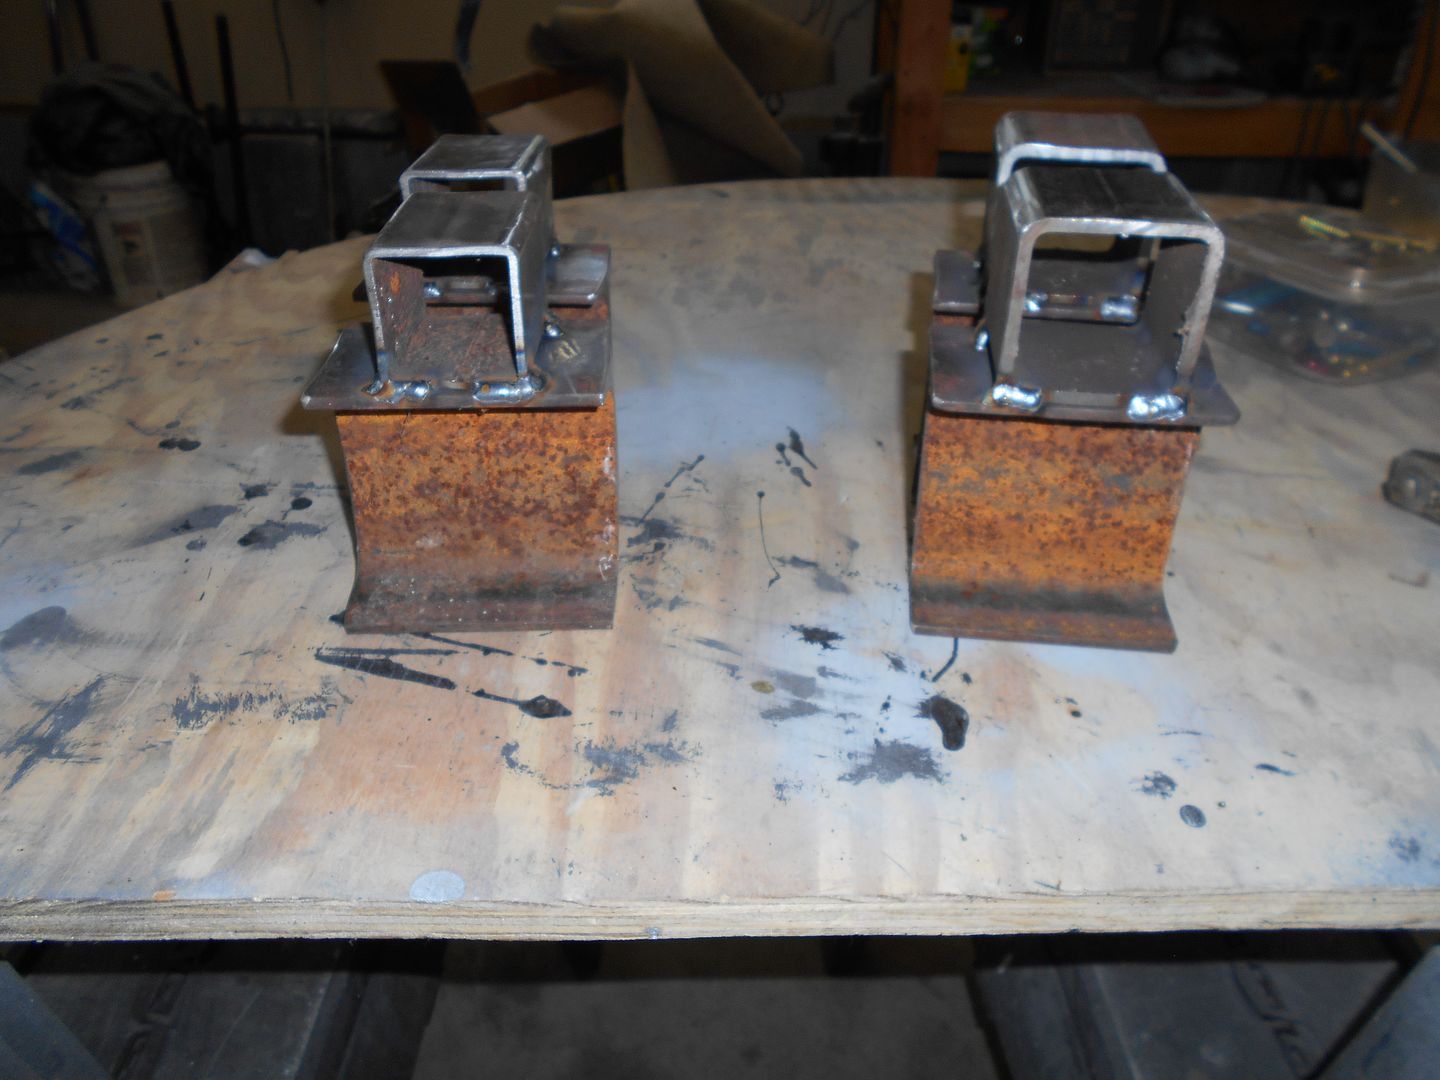 The taller ones go to the rear, and give it the tiniest bit of nose down attitude.
The next step is endless measuring. I believe the cross bar under the dash may have been a factor in the buckle. It definitely needs to be loosened and/or removed before any attempts at straitening happen.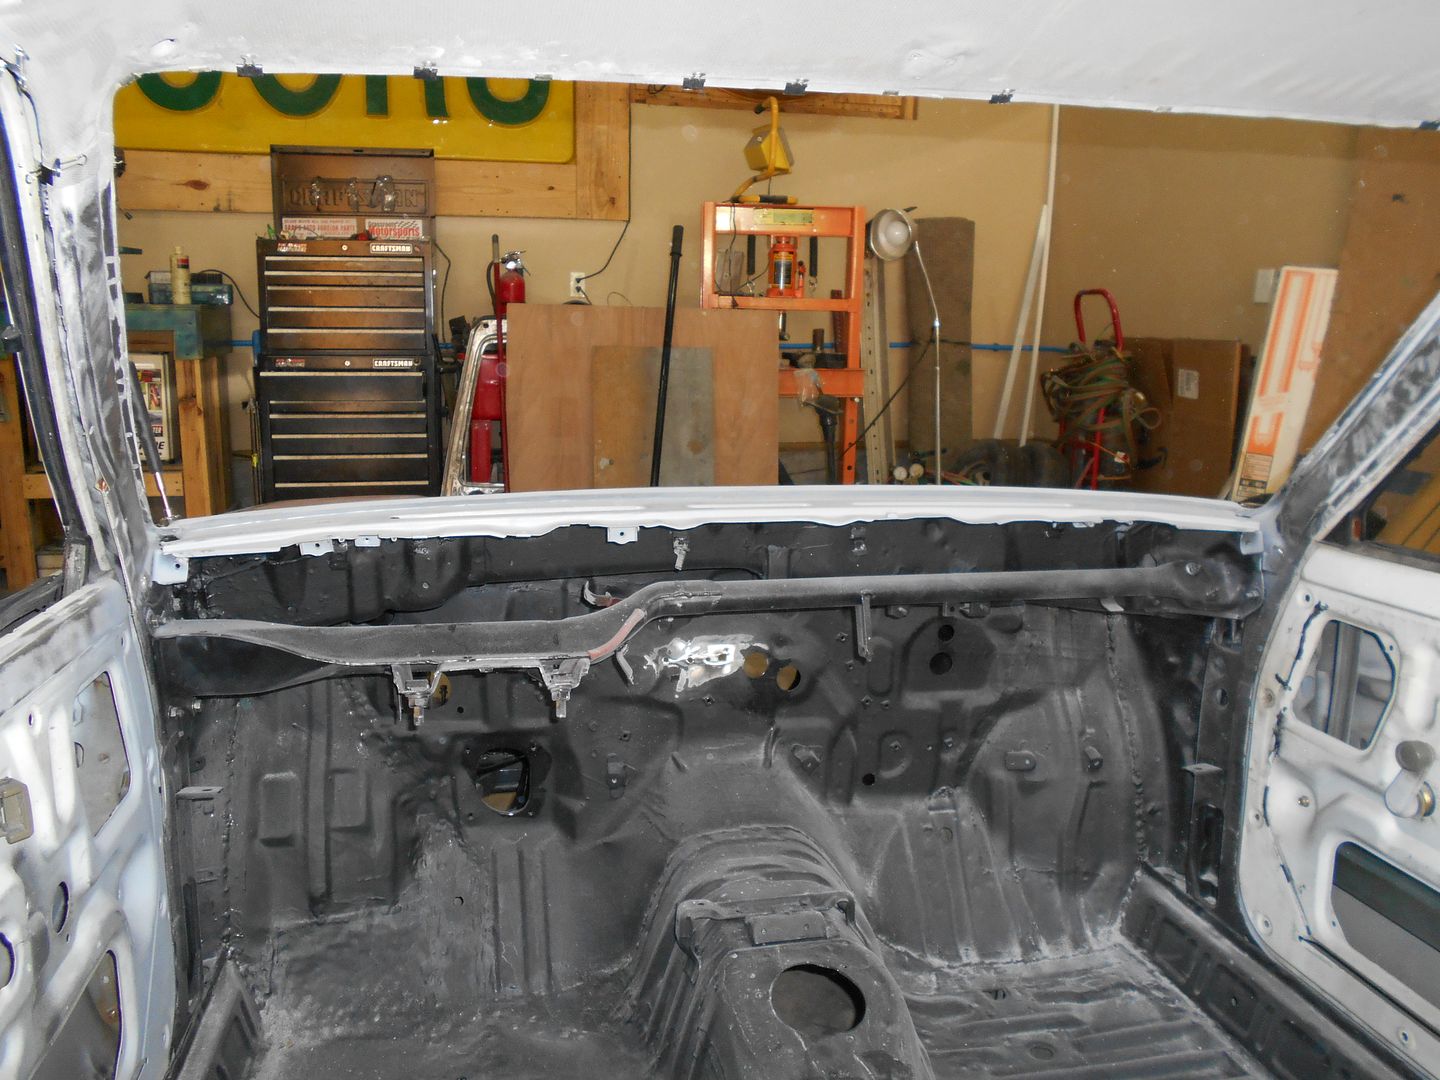 I guess the next step will be to GO SLOW! The core of my plan is to avoid bottle jacks, and the like. No port-a powers, nor uses of extreme force. I figure keeping the frame rails level is the priority. Then make relief cuts as necessary, and use ratcheting tie-downs, and the come along to get stuff as close as I can. Then back to suspension alignment. Heavy.
I can already see my initial plan of cutting at the buckles is Bollocks. Their disappearance (through getting other things inline) should actually be indicators that I'm getting stuff back in the ballpark.
Here's a picture of the poor bastidge dropped a bit lower than I intend to go, just for some motivation. 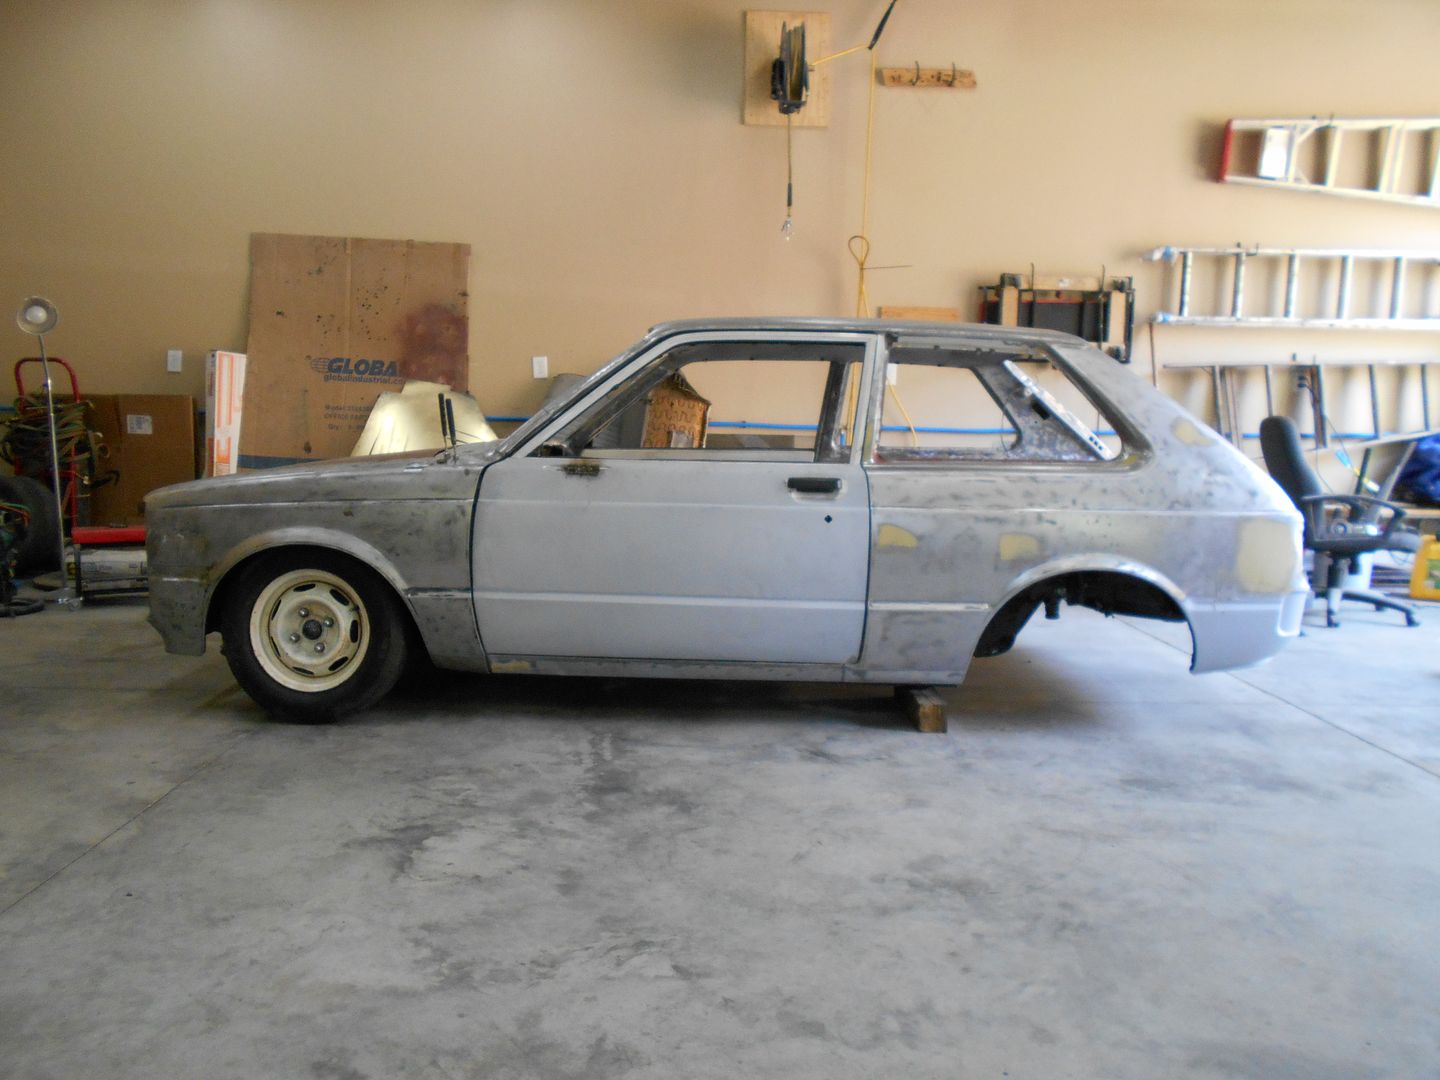
Boy...do I ever know THAT though process!

So much work--funny how these little cars can grow on you. I was parked at a car show but not a participant. There were all sorts of Italian super cars--but the little Starlet got most of the attention.
This just popped up for sale locally to me for $5500.00, only 1 pic but it looks MINT! I hope to go look at it this weekend.

In reply to DirtyDiesel:
That's a beaut!
You'll need to log in to post.


