


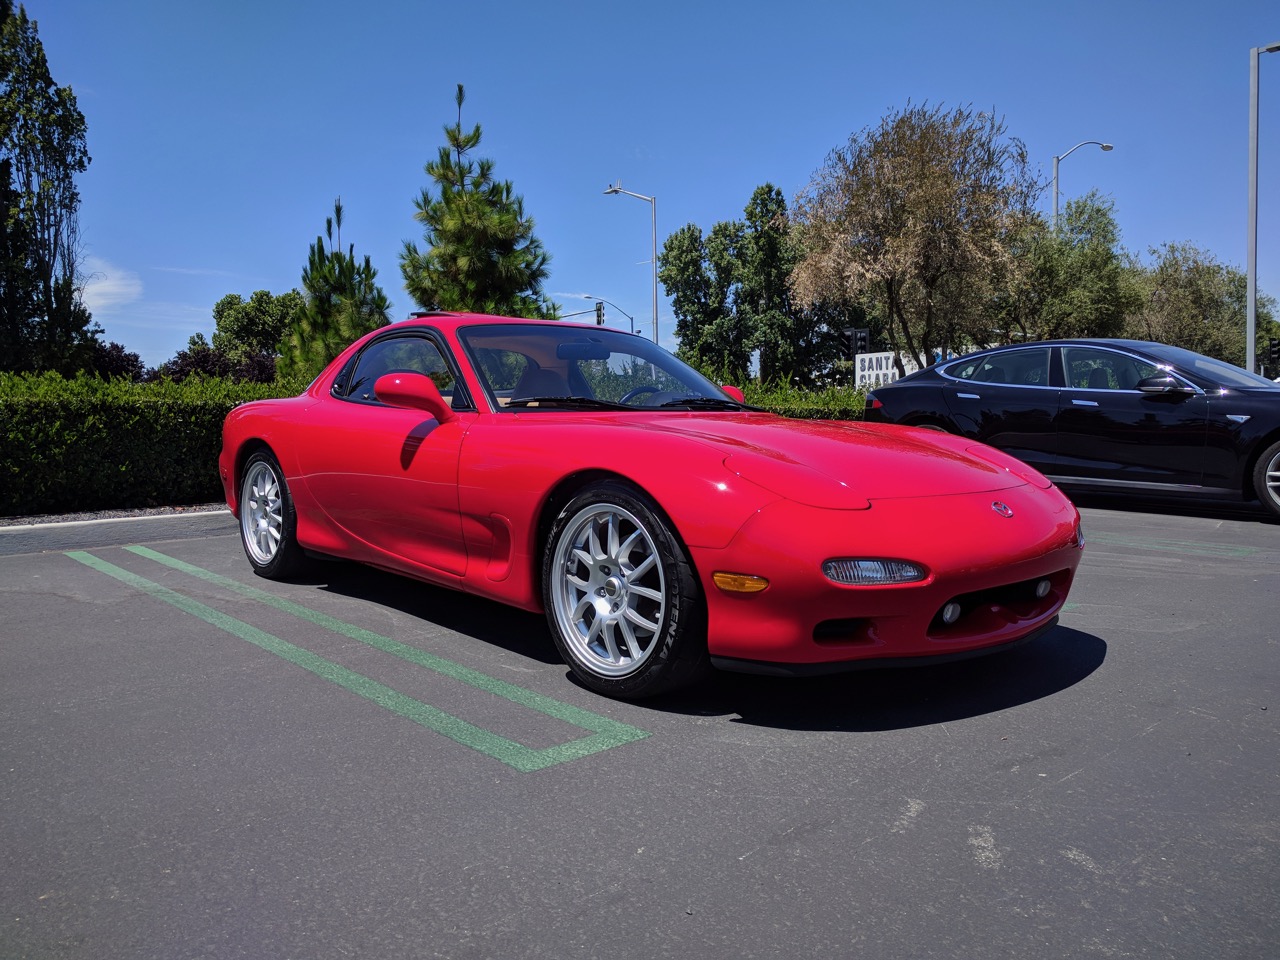
Unbelievable shot

Unbelievable shot

So when I bought the car, I was told that the AC worked great, but when it arrived, 2 years ago, it was really anemic. The '93 FDs were sold with R12 systems, this one had been converted to R134a at some point in its history. Conversions aren't as good as when properly running R12, but it should be better than that. I checked the pressures and it was low on refrigerant, so I topped it up. Worked great for a week, then it was low again. I put in dye, no leaks under the hood, but it was leaving glowing green puddles when it was parked -- dye coming out the evaporator drain. Since my knowledge of AC systems was pretty limited I decided to punt that job to a shop, dropped it off, a few hours later I got a call back congratulating me for correctly diagnosing the problem, but saying that they couldn't fix it because there are no parts available. Mazda doesn't make evaporators any more, had none left in stock, and there are no aftermarket ones.
To make matters more complicated, the FD came with two different AC systems, some had a Denso system installed at the factory, others had a Mana system installed at the port, and there's no definitive way to tell which is which without physically inspecting it and knowing what to look for. I did some more research and concluded that my system was probably the Denso one (most Touring cars had the Denso, and it had a silver receiver/dryer with a sight glass). I poked around looking for a used one for a while, not much luck until a buddy of mine bought a crashed FD as a parts car. It had an evaporator in it, and had been a Touring, so was probably a Denso as well. I picked it up from him a few months ago.
So this weekend another friend of mine was over, saw the evaporator sitting on the bench, and asked what it was for. I told him the story and he said putting it in was easy, so we embarked on the project. :)
The evaporator on the FD comes out really easily, similar to an NB Miata. You don't need to pull the dash, just the glovebox. You flip it down, pull off a couple trim pieces, and there are two bolts holding it in along with a bracket.
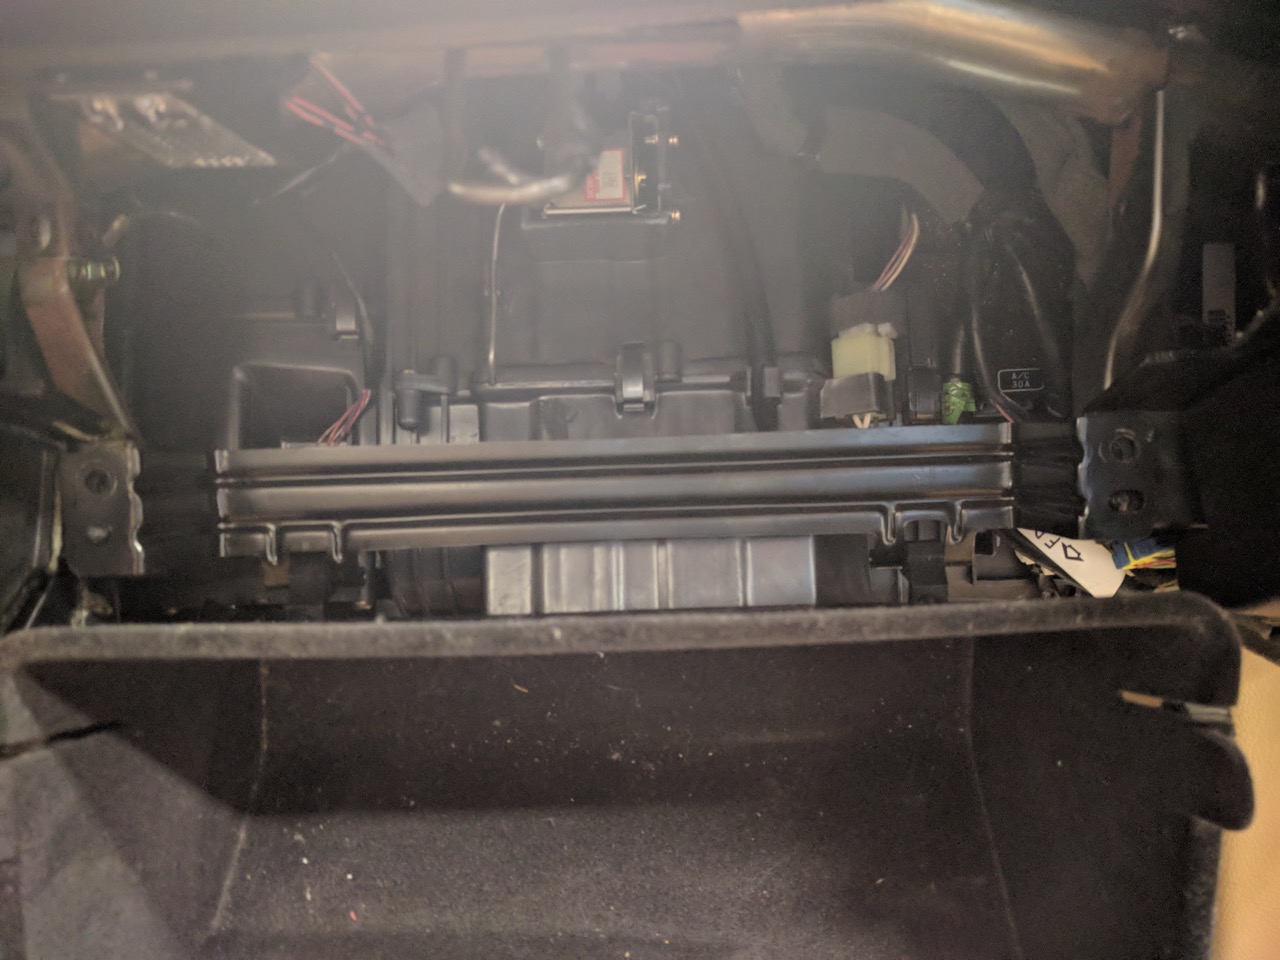
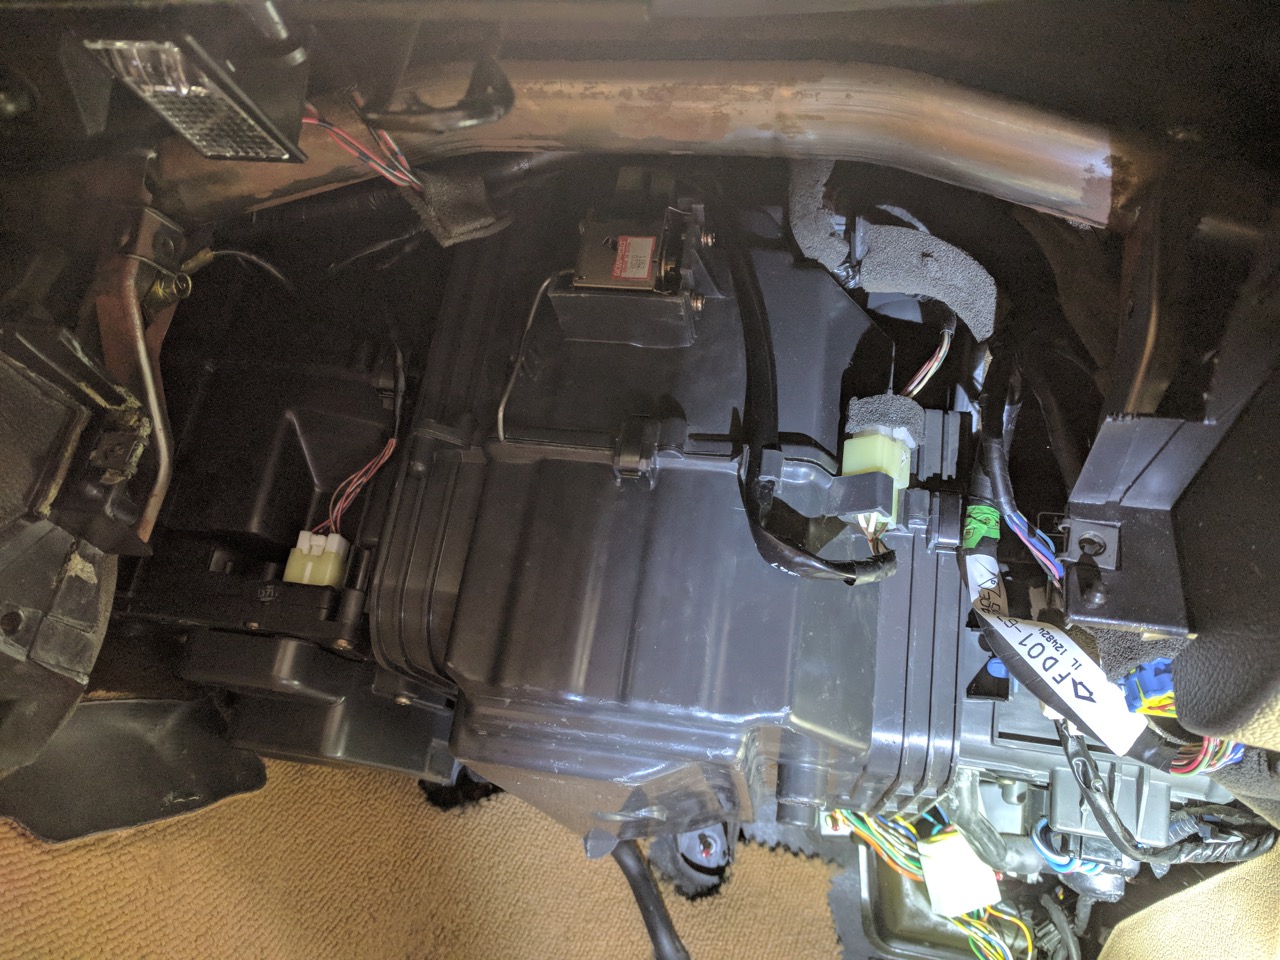
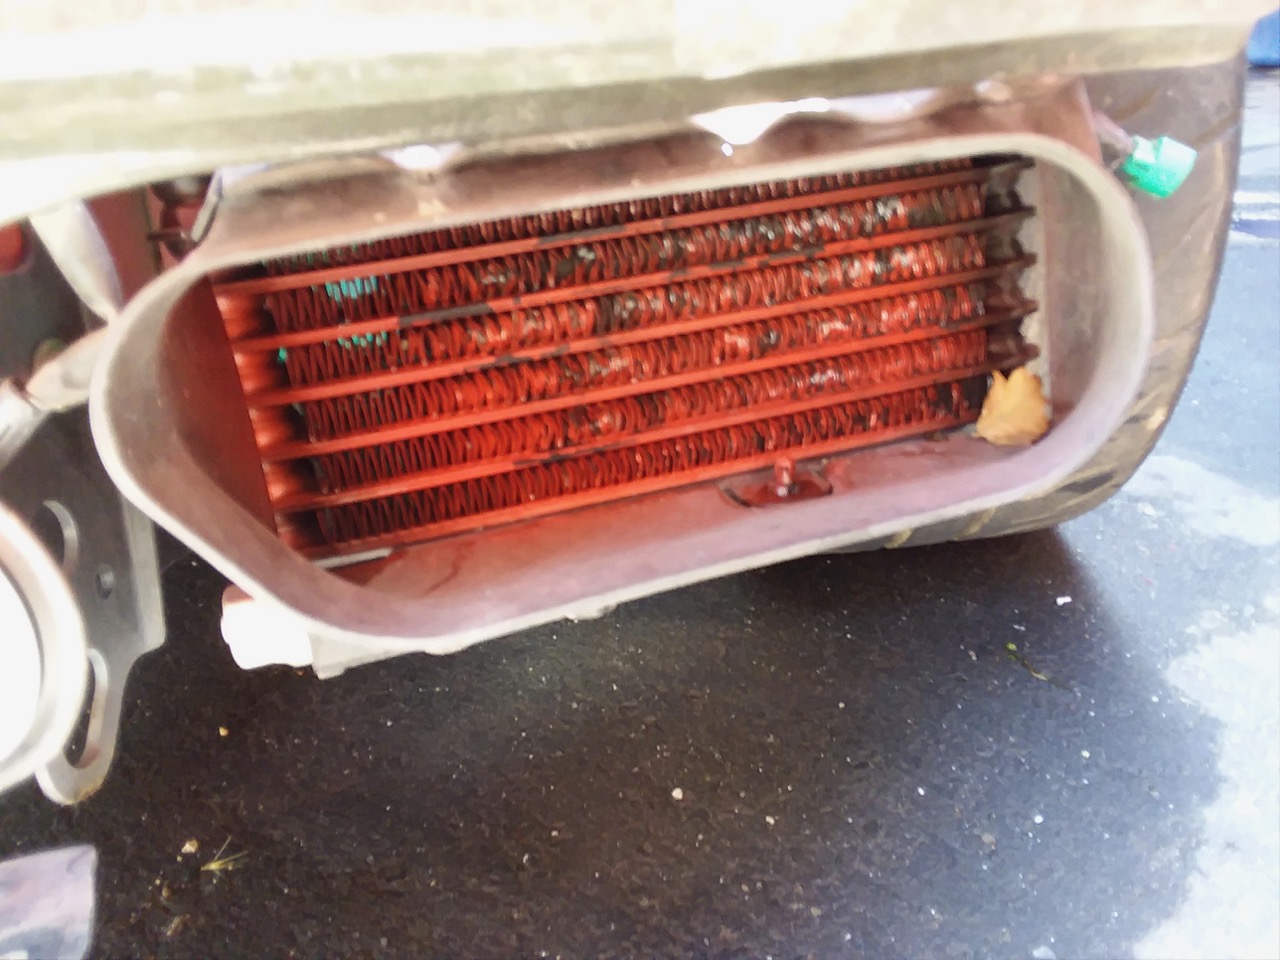
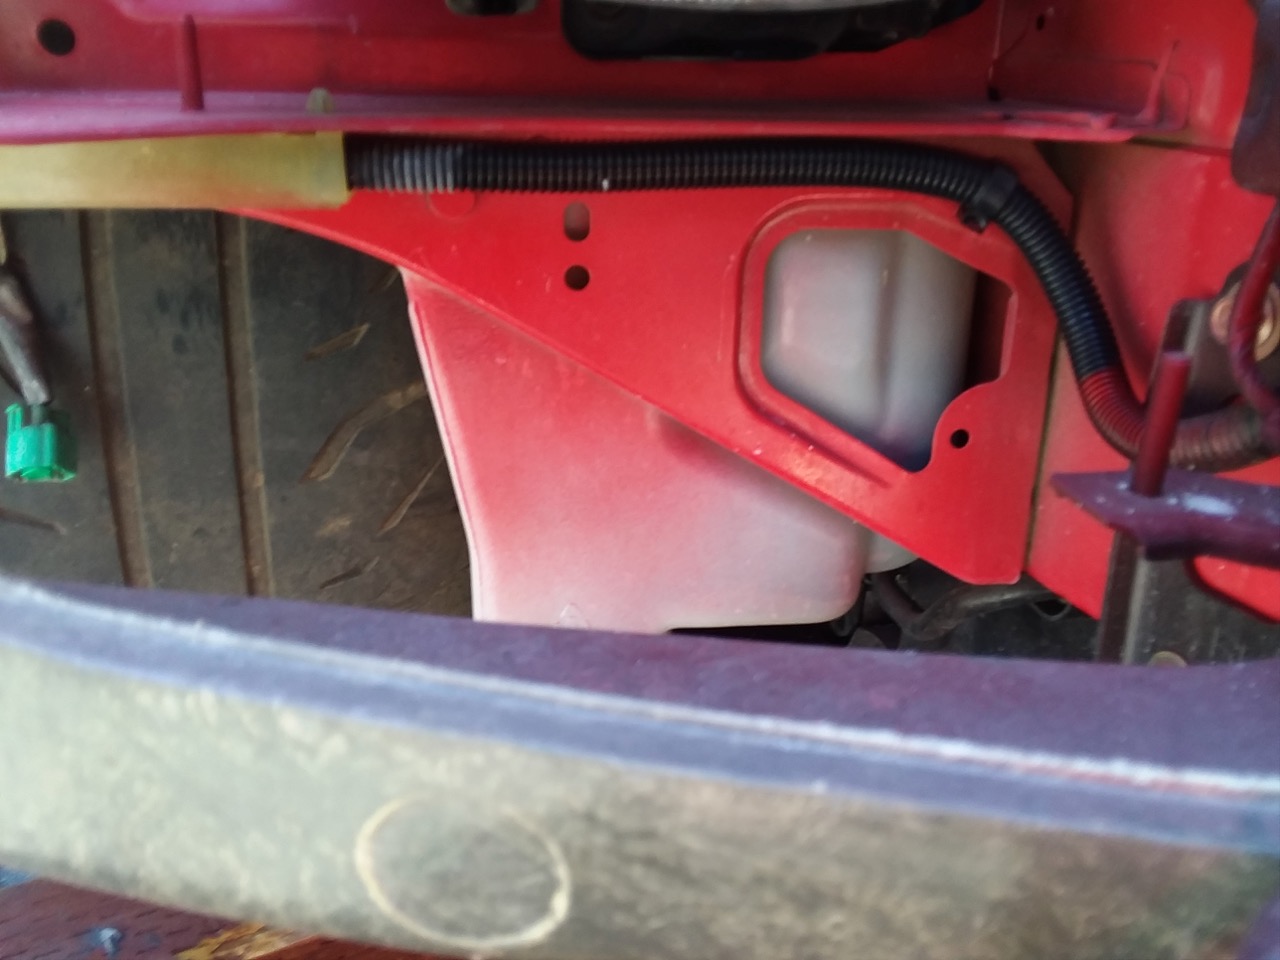
Pop it out and here's the evaporator. It's the plastic box in the middle, between the two sets of vertical ridges.
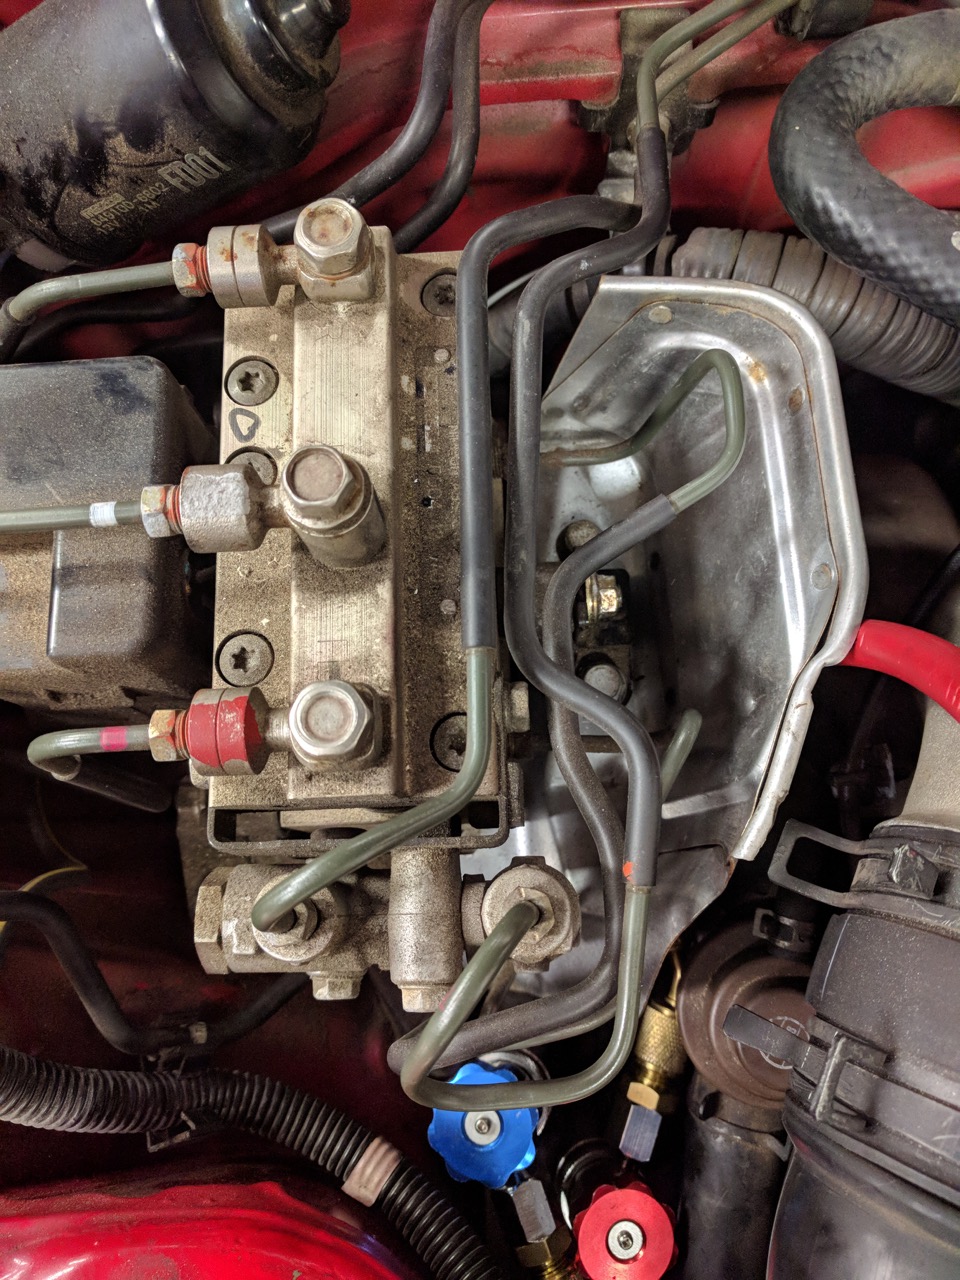
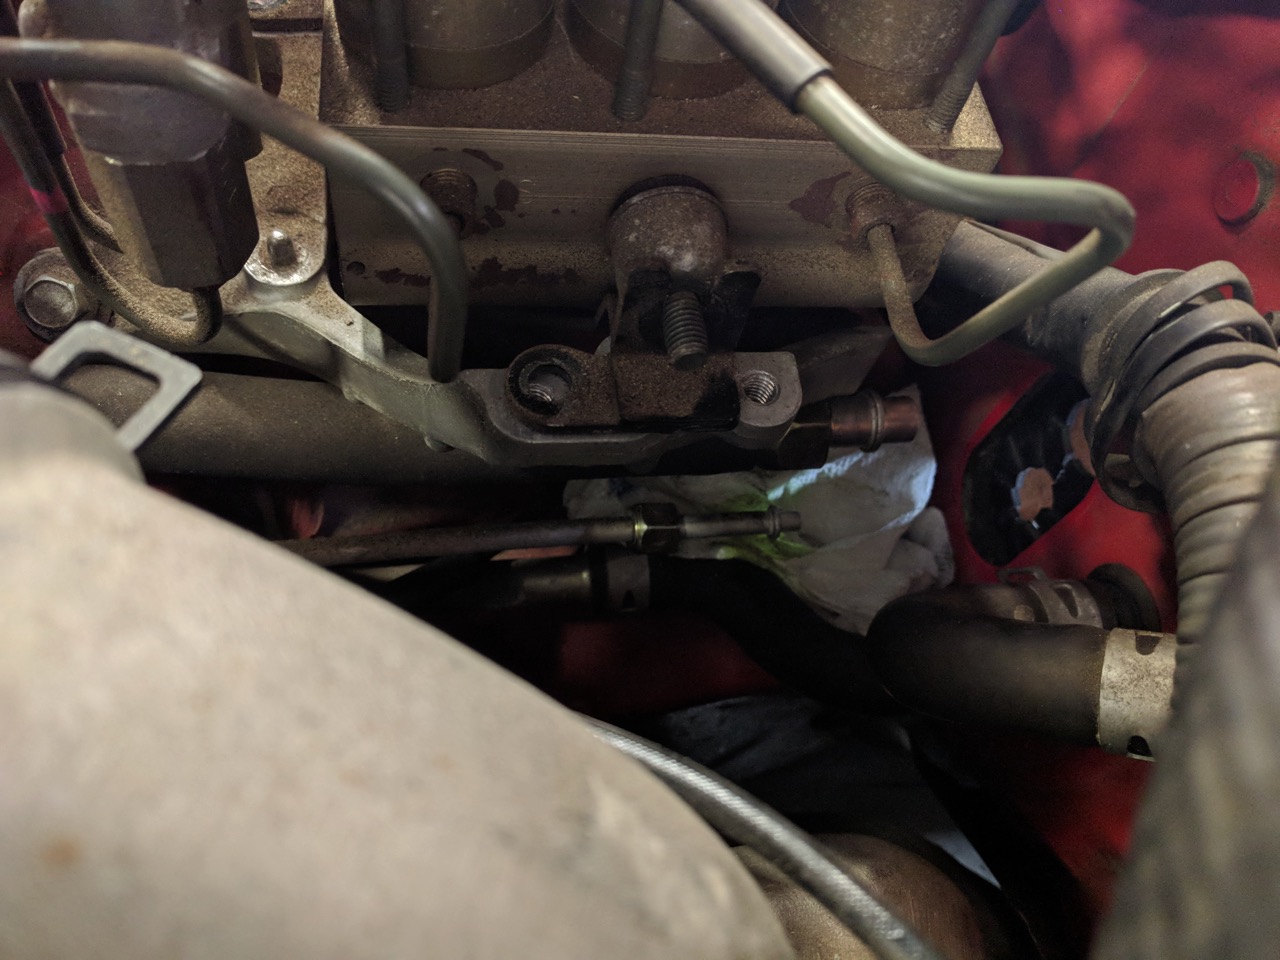
The two AC lines stick through the firewall into the engine bay, between the turbos and the frame rail. They're kinda tricky to access, although pulling off the ABS system heat shield helps a bunch. Gotta loosen the ABS in the bracket to get it out though.
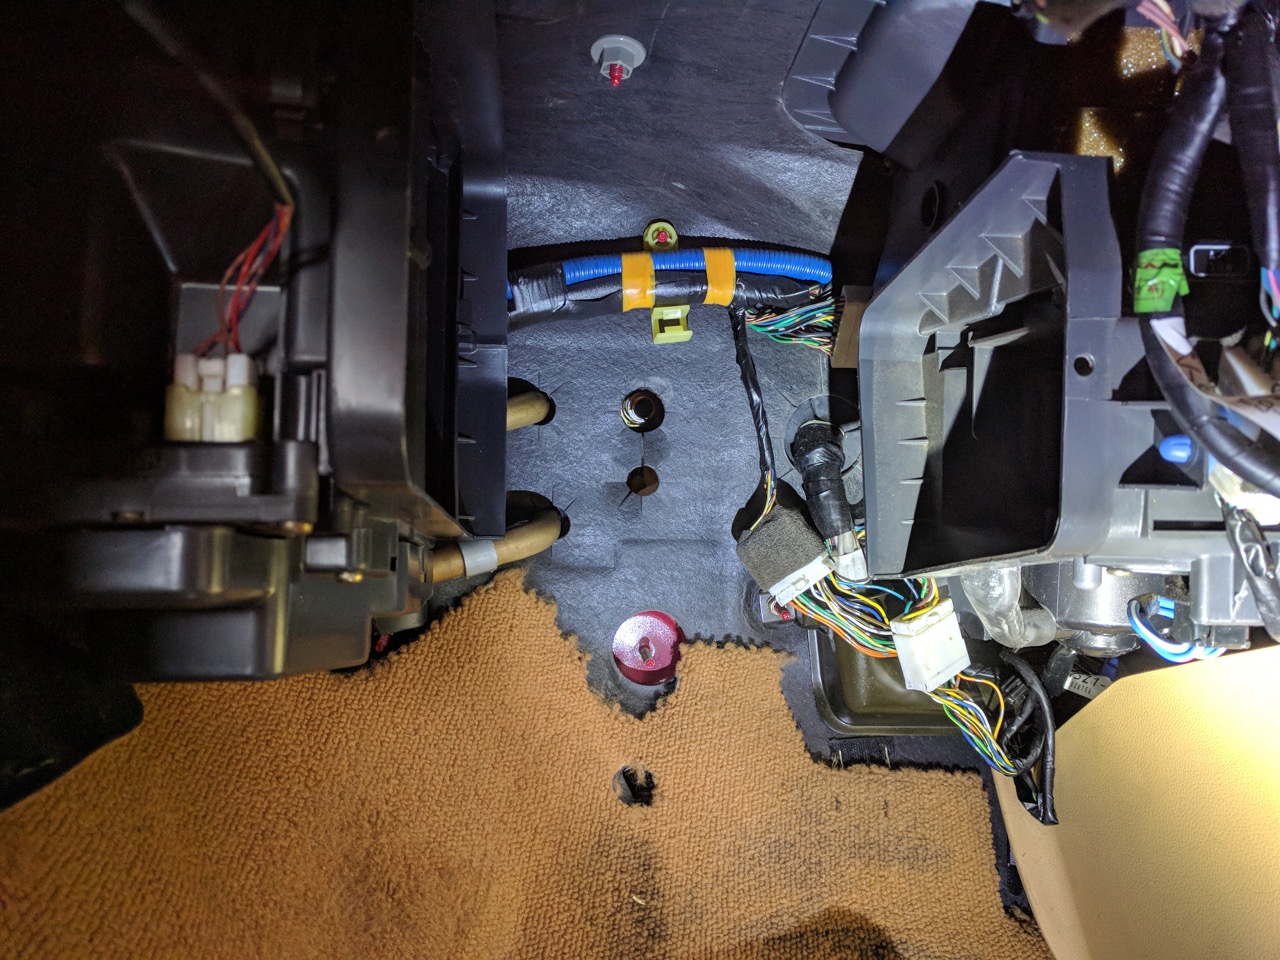
Two ac lines, one nut at the top, one nut at the bottom and it pulls straight out of the dash. There isn't even a clamp around the air lines like there is on a MIata. Don't pry it down, though it wants to come straight out.
Here are the AC lines in the engine bay:
Out of hte car it looks like this:

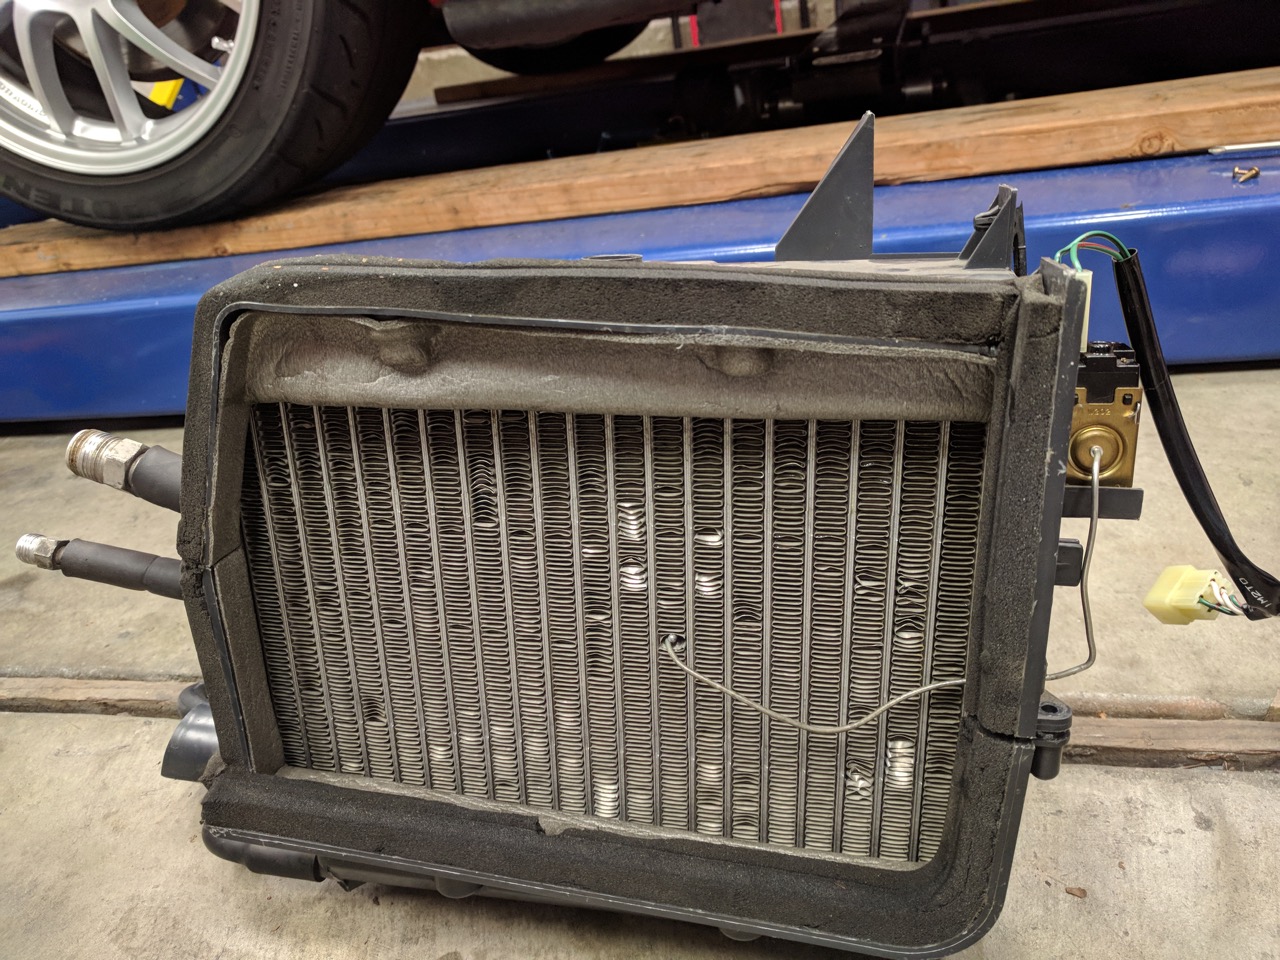
There's a temp sensor on the side that measures the heat exchanger temperature.
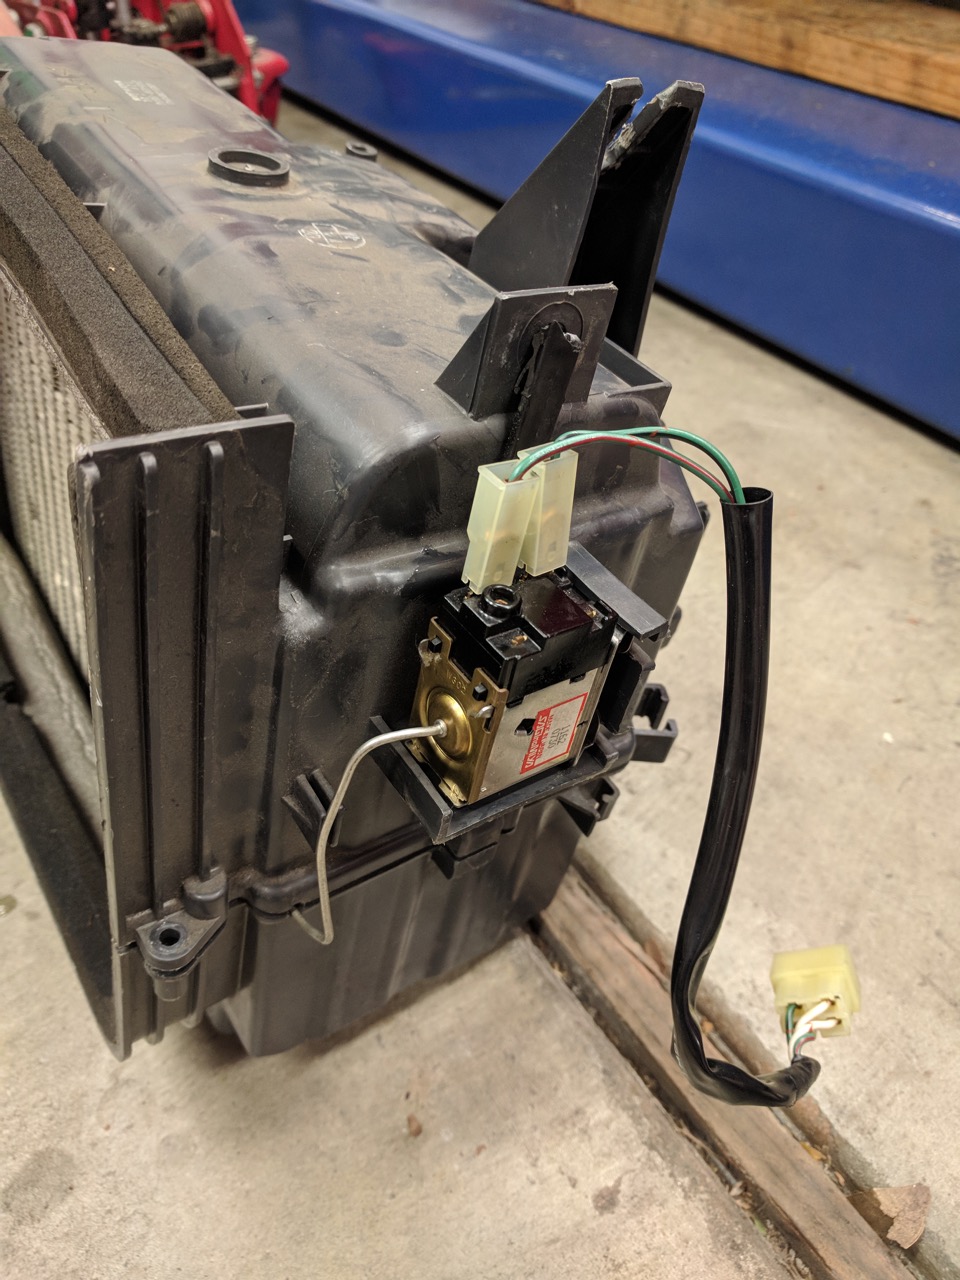
A few clips and screws and the plastic case comes apart.
And here's the exhanger, the lines, and the temperature/pressure bypass thingey. They're held together with two bolts, four O-rings on there. 3 big ones, 1 small one. Pair that with the 1 big and 1 small in the connection to the lines in the car.
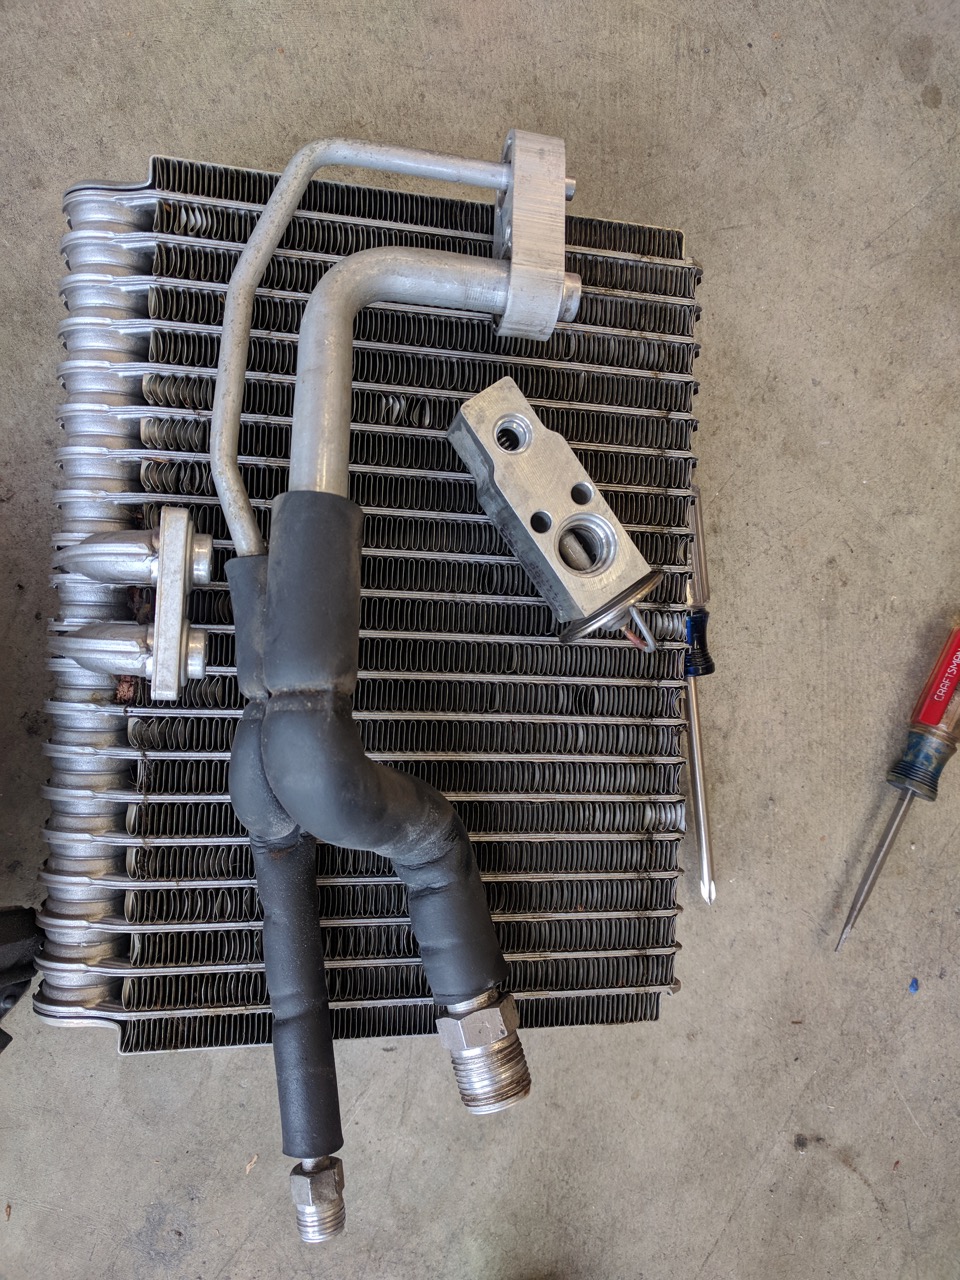
O-rings. The O-rings in both the broken and the new system were all old, hard, no longer round, and the wrong material for R-134a anyway. R-134a needs viton, not, uh.. whatever the old ones were. Neoprene? Crusty old O-rings.
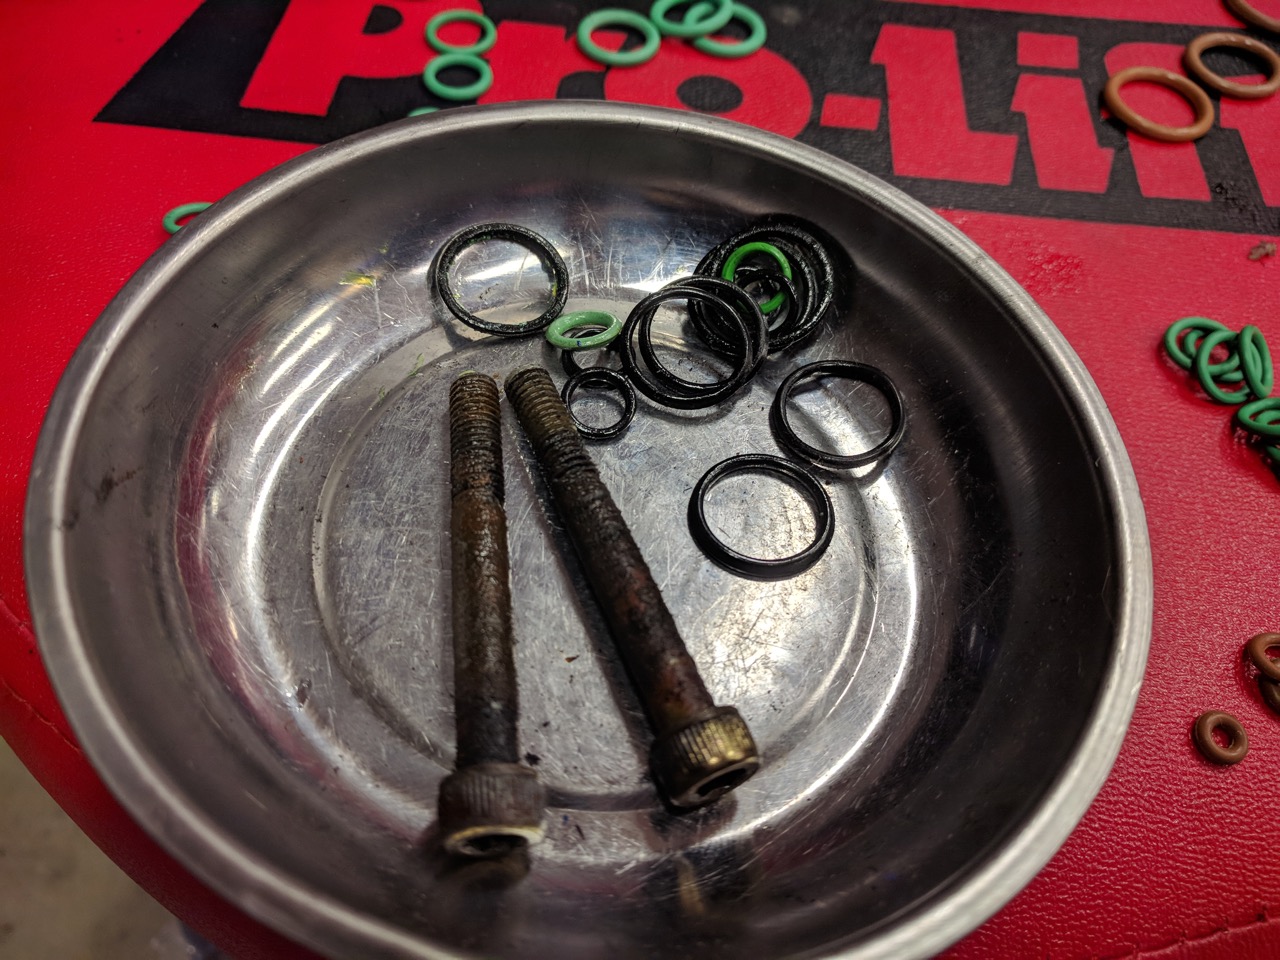
So we embarked on a trip to find new O-rings. HF was sold out of viton O-rings, AutoZone had an assortment box, but they also had a kit for $10 at another store downtown that supposedly contained every O-ring to rebuild the system, so we drove over there to get it. The brown ones are from the assortment box, the green ones are from the kit. All are supposedly viton.
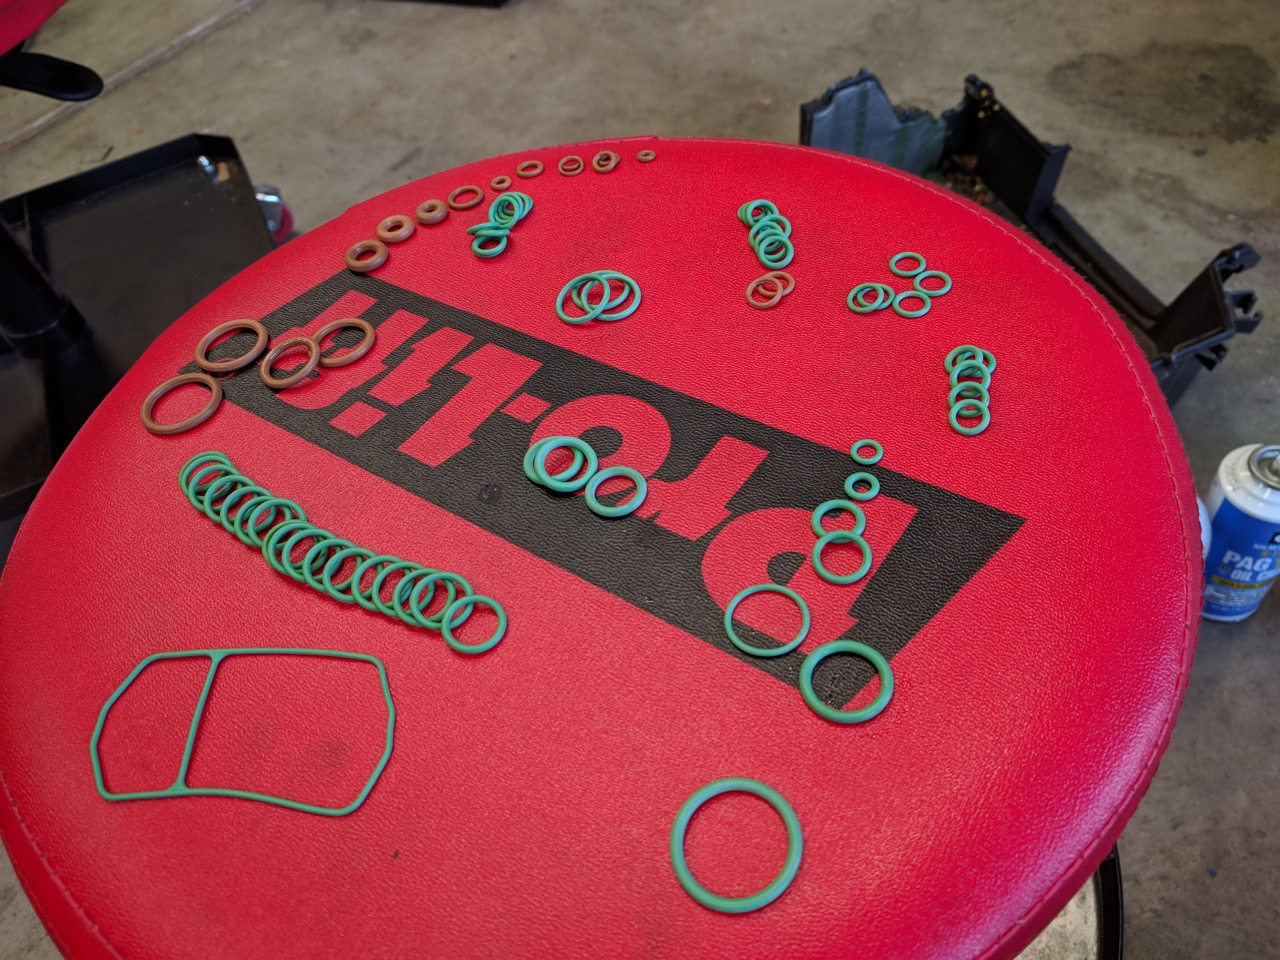
I dunno if the kit was lying or if it was for the Mana system, but it only had 3 of the big O-rings (I don't remember the exact size) and we needed four. Fortunately there was one of those in the assortment box. It also had enough of the small ones to get the two in the evaporator, plus we also replaced two in the sight glass because why not, they were easy to get to. I'm sure there's still another 20 or so in the system that are the wrong type for R-134a, but I wasn't about to take the compressor out.
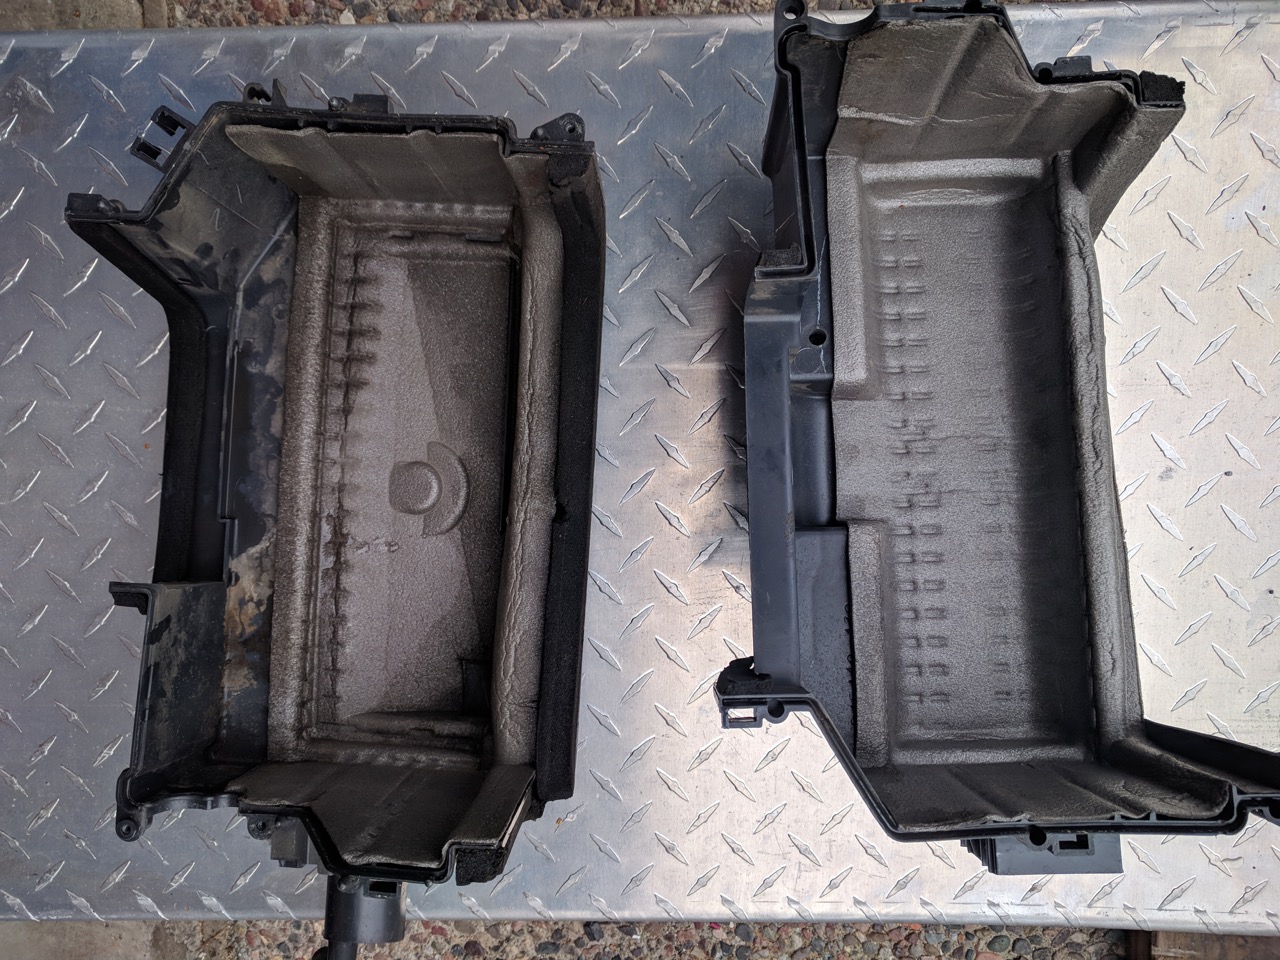
The old evaporator was a bit scuffed up, but it wasn't really clear if or where it was leaking. It's possible it was just the old O-rings that caused the leak. Regardless, the one from the parts car was in better shape and the box wasn't full of dye, so we put it together using that one. The screws and clips off the parts car were all rusted, though, so I used the clean ones of those.
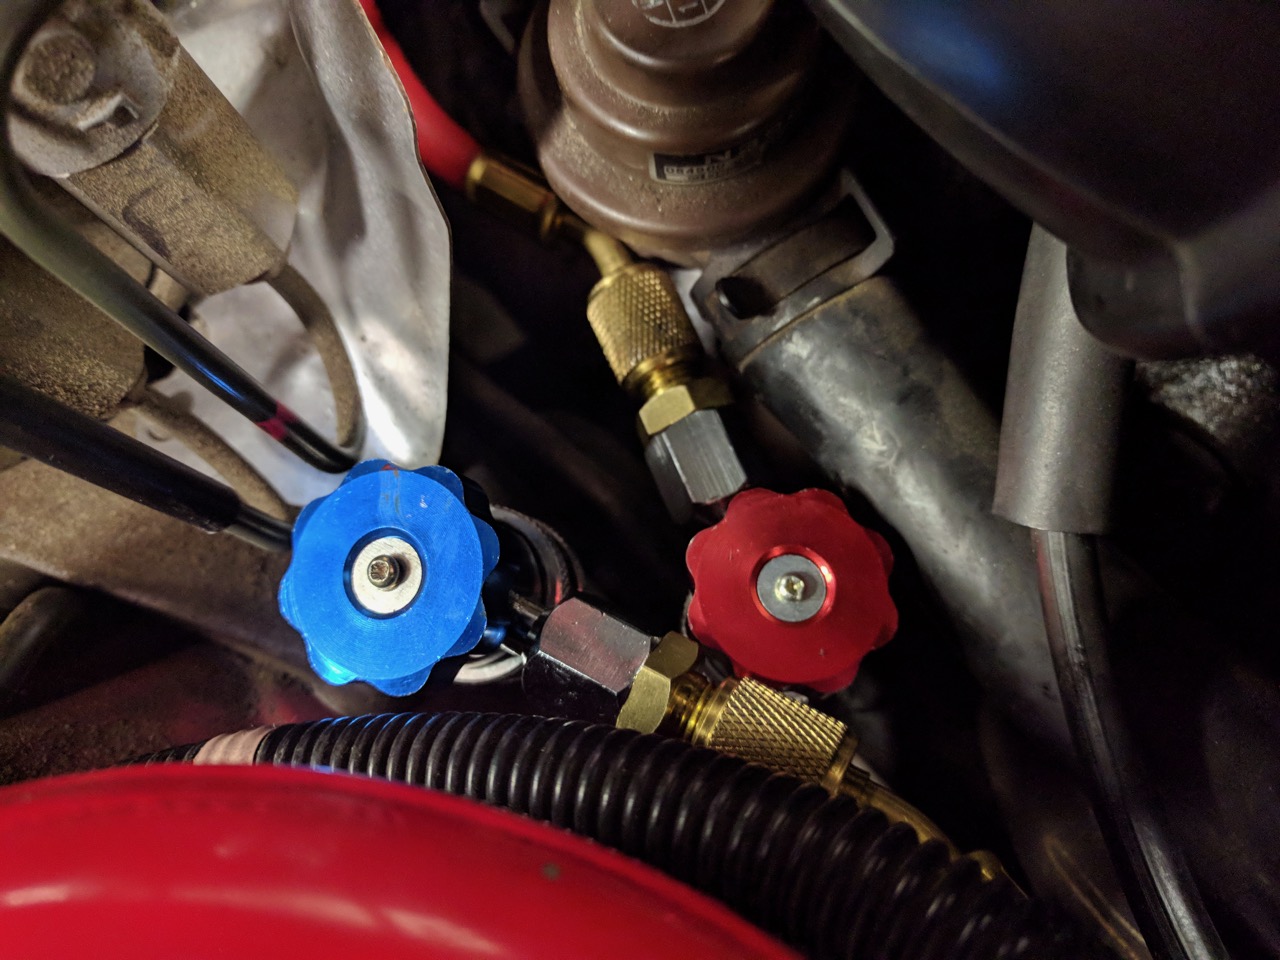
Next we hooked up the manifold gauge set that I've had for a long time.
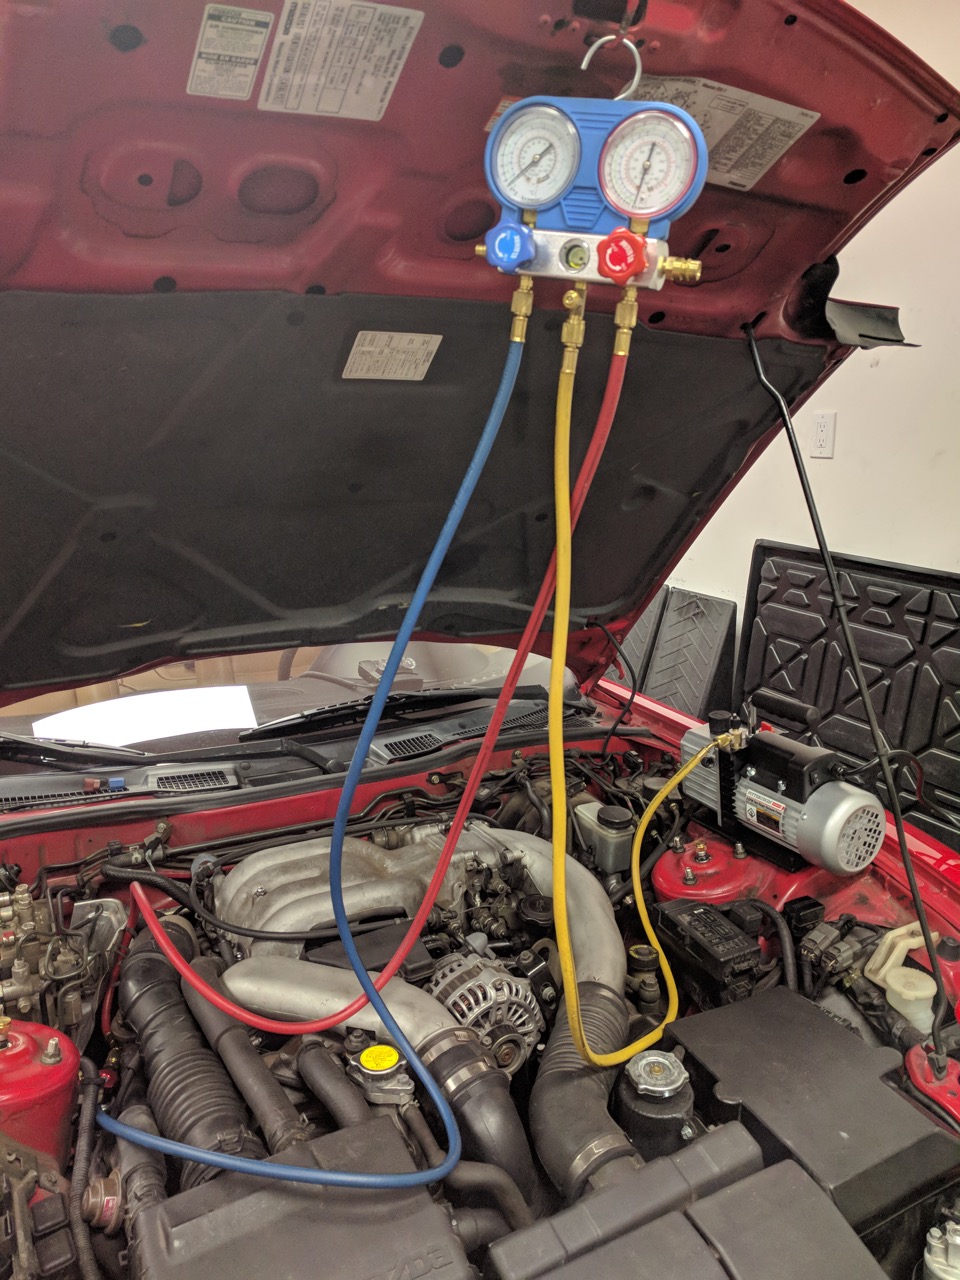
While at HF, we'd picked up the vacuum pump they sell.
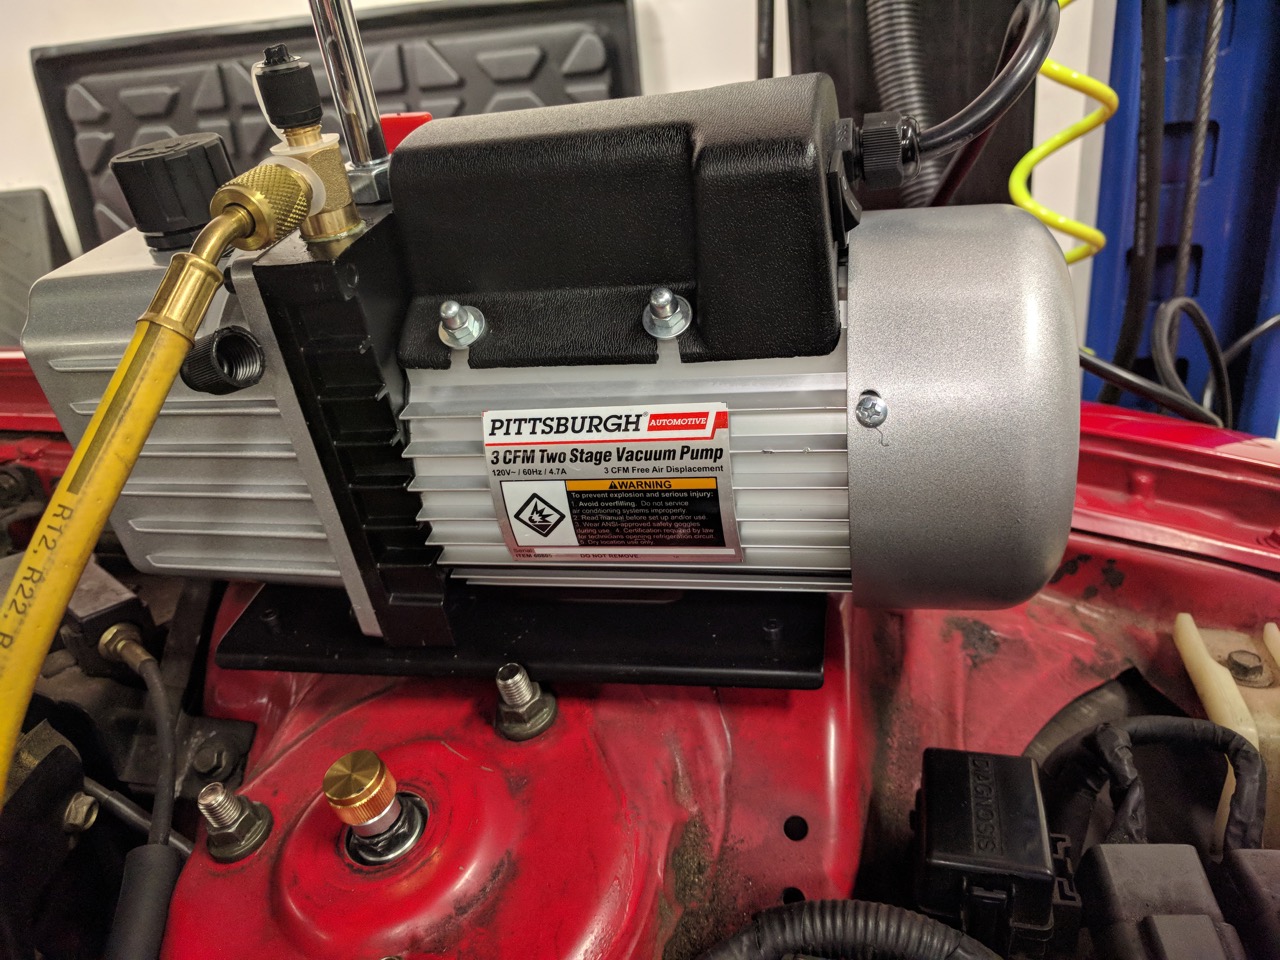
I have a general policy of not buying HF power tools, but I'd heard decent things about this pump so I decided to give it a shot. It worked to vacuum the system down, at least once we'd tightened all of the hose fittings on the manifold set. It does tend to spray a lot of oil mist out of the vent while it's flowing a lot of air, so if you're using one and it keeps blowing mist (like mine did), then it means there's a leak. :) Once we'd got them tight it stopped blowing mist.
Vacuumed it down for an hour, added a bit of compressor oil, put two cans of refrigerant in it, and now it blows 38 degree air. Yay! Time will tell if it stays sealed, but it held vacuum when we turned off the pump, so that's a good sign.

I bought the same pump when I had to replace the high pressure line on my Sierra. Worked great.
I have to commend you on this refreshing of a stock FD. You’re technically doing a mechanical restoration and I would prefer to see this than someone doing another LS swap.
I guess that’s why I like this board so much, because there’s some Rotorheads on here and it’s not a specific make forum, so the sarcastic riff raff is not present on builds like these.
SyntheticBlinkerFluid said:I have to commend you on this refreshing of a stock FD. You’re technically doing a mechanical restoration and I would prefer to see this than someone doing another LS swap.
Thanks! I dunno quite how to classify it -- this is really only the second car I've done any significant wrenching on. The first (my Miata) is coming up on 20 yeras of ownership and has gotten progressively more and more wild. I can see the appeal in doing it, but I know where that road goes and I don't want to go down it with the FD. :)
At this point, I'm not sure what the next thing to do on the FD is. The pre-cat delete idea is still rattling around, just from a heat standpoint. What it really needs, though, is a bunch of cleaning underhood, and some oil leaks fixed.
Well, 5 days later and the refrigerant is gone. I'll have to put it up on the lift and go over it with the UV light to see what else is leaking.

Didn't someone here use a refrigerant detector and a bottle of mechanic in can (Blue Devil variety I think) to fix their Porsche AC unit? Depending on where the leak is coming from it may be shot anyway if it's the condenser.
The0retical said:Didn't someone here use a refrigerant detector and a bottle of mechanic in can (Blue Devil variety I think) to fix their Porsche AC unit? Depending on where the leak is coming from it may be shot anyway if it's the condenser.
What is "mechanic in a can"? Is that a spray sealant thing? I don't think I want to use the leak stopper stuff on this car's AC system because the parts aren't available and I'd hate to clog up the ones I've got with goop.
In reply to codrus :
Yea the stop leak type stuff. Found the thread (also I meant evaporator not condenser.) Maybe message mrap1000 and see how it's held up.
I can certainly understand the hesitation since they're not my favorite solution either. If it is the evaporator, can a radiator shop patch up something like that possibly?
I don't know where the leak is yet. I've replaced the evaporator and every O-ring in it, which suggests either the replacement evaporator also leaks (it came out of a crashed parts car, so I have no idea if it was working before), or it's some/all of the other dozen or so O-rings in the system. It doesn't appear to be peeing dye out the evaporator drain like it was before, but...
Maybe I'll pressure test the evaporator that I took out and see if I can figure out what was wrong with it.
Huh, I never did update this thread on the AC thing. Pulled it apart again and discovered that one of the O-rings that I *thought* was AC compatible turned out to most definitely be not. It had basically disintegrated, leaving a huge leak right at the joint into the evaporator. Replaced that, revacuumed, refilled, and it's been working great for a couple months now.
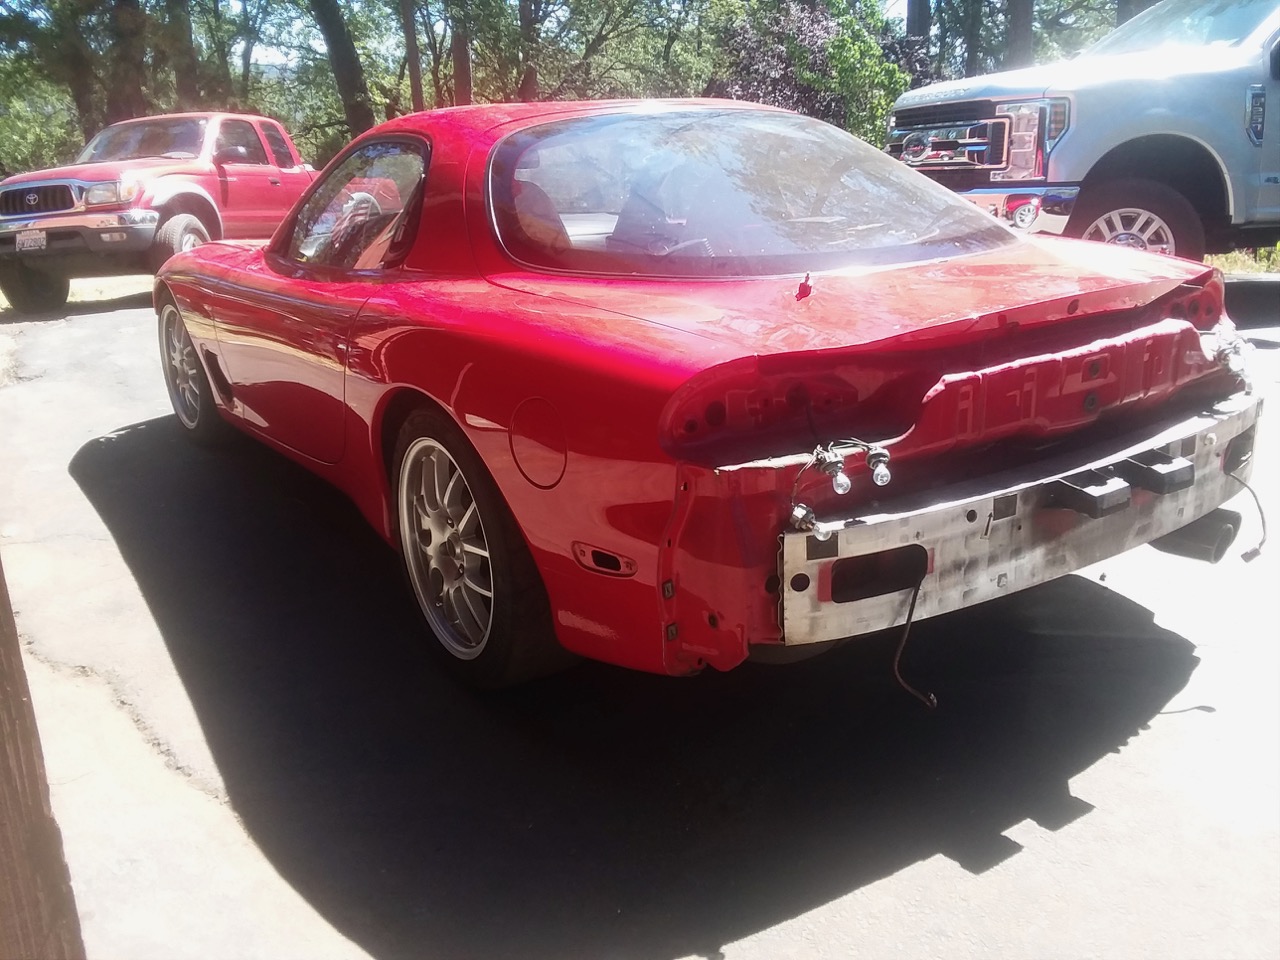
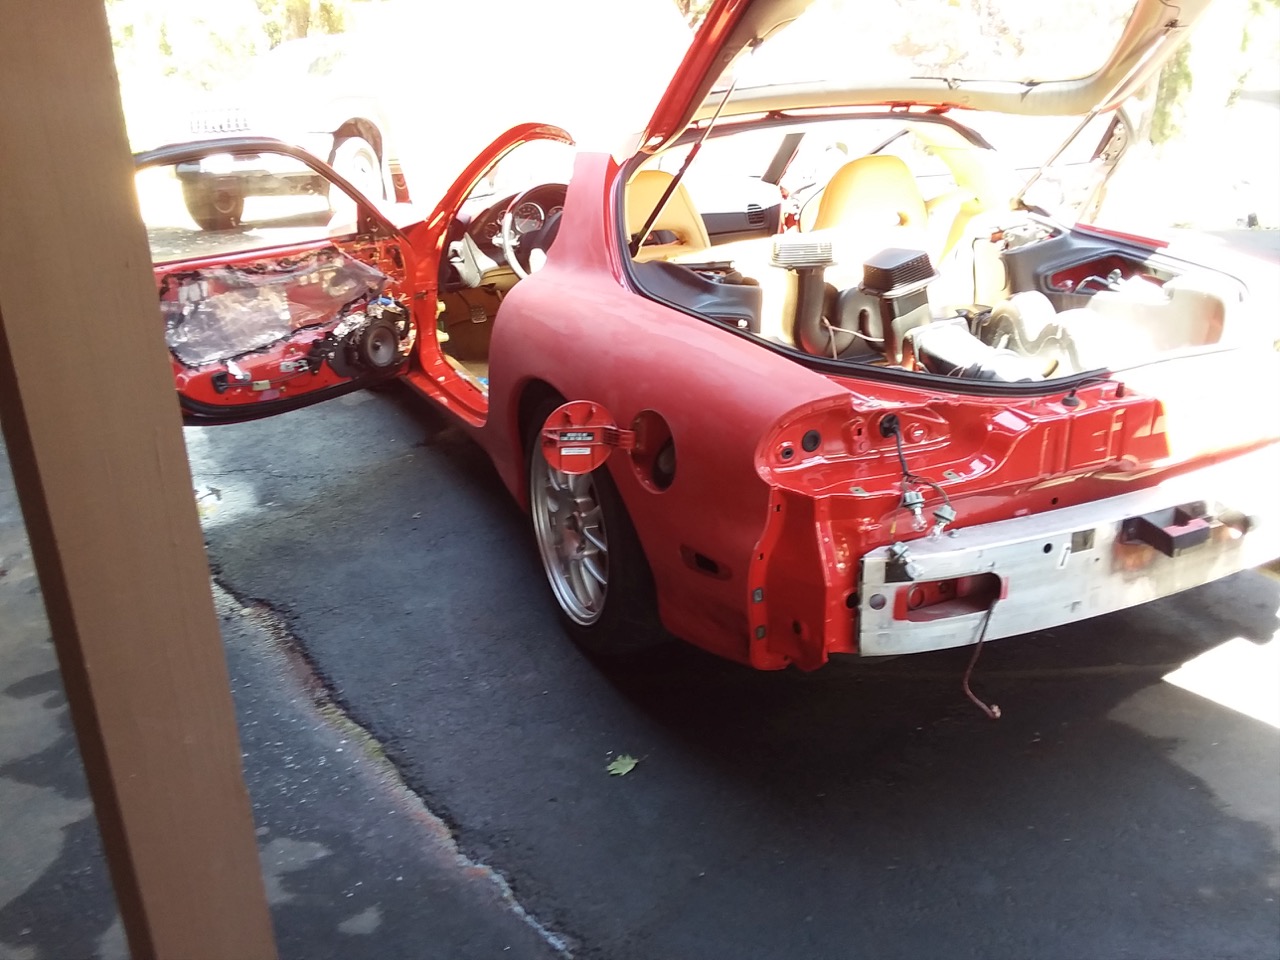
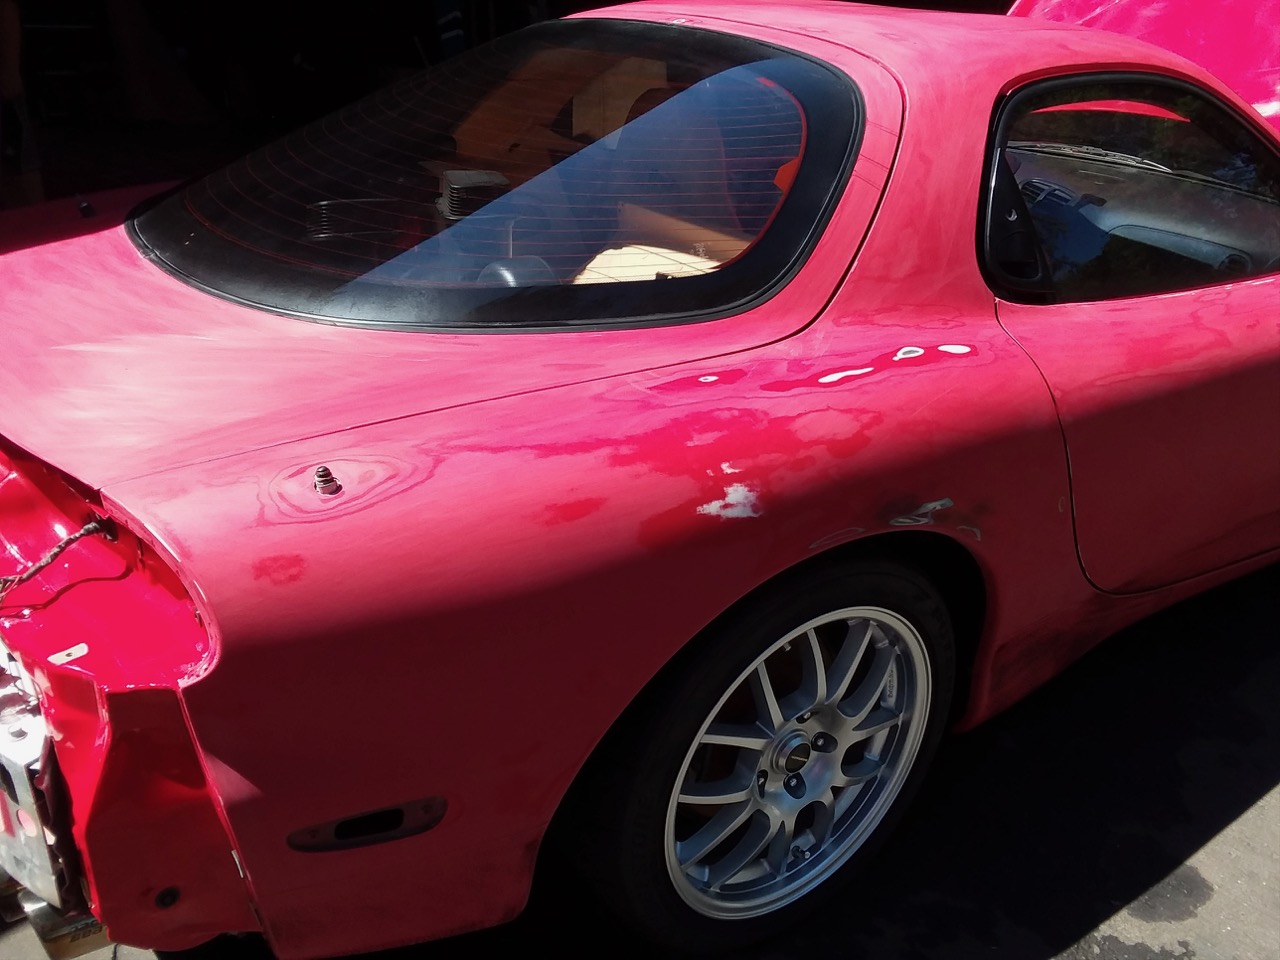
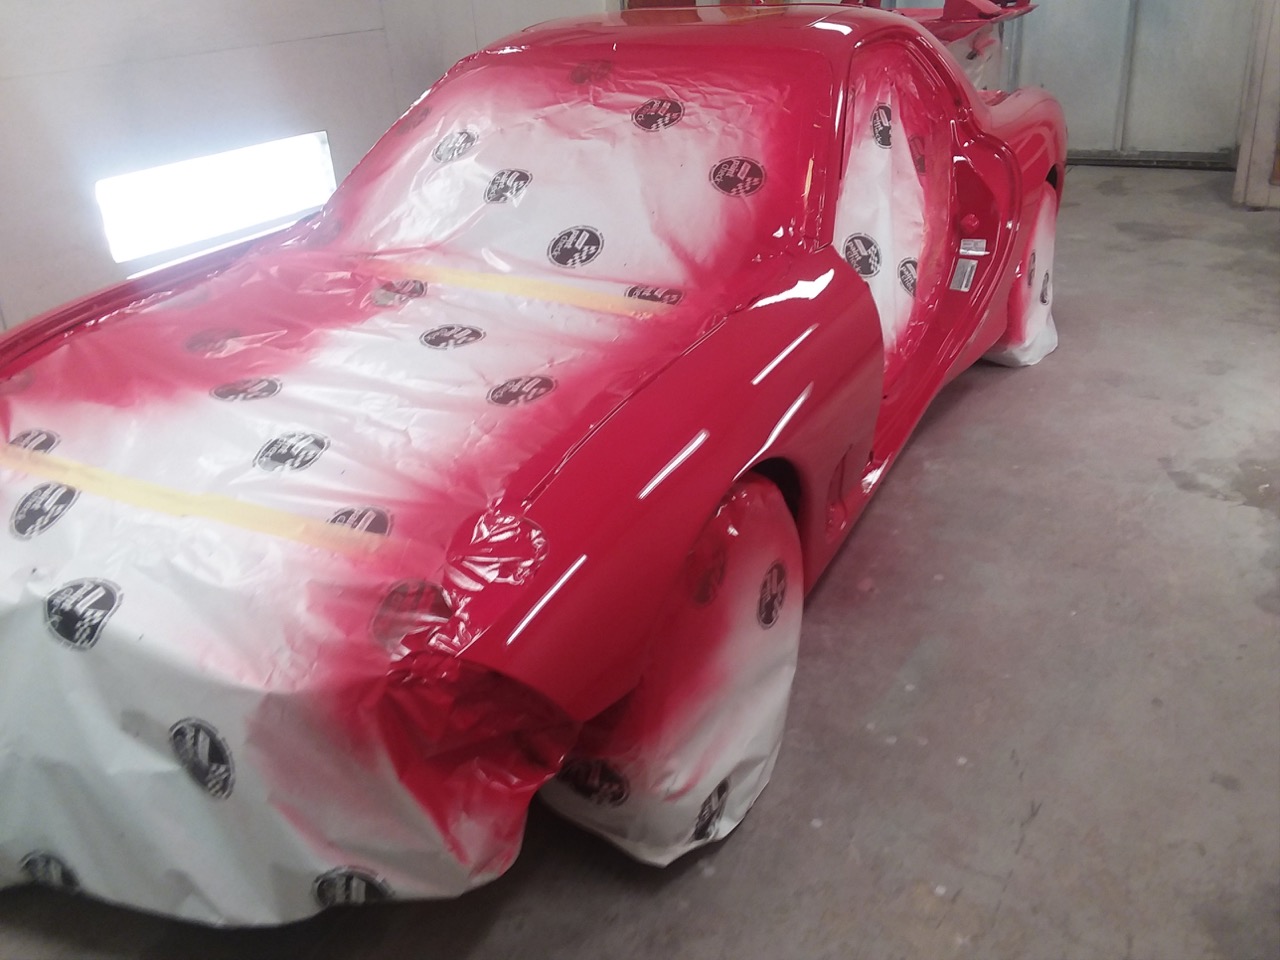
One other big thing had been bothering me about the car for ages. When I bought it, the sellers said it had only had minor paint work, to fix some rock chips in the front bumper. Foolishly I trusted them on that, and while I had the car inspected (it was in North Carolina, I'm in California), the inspection was at a Mazda dealer and they didn't say anything about the paint on the car. When it got here, it turned out to have had the whole car painted at least once. It was the wrong shade of red (with more orange in it than the proper Mazda color), the door jams didn't match (not hugely obviously unless you were looking for it, but...), tons of overspray in various places, fisheyes, masking lines, etc, etc. Apparently I didn't caveat emptor enough. :-/
The car looked OK from 5-10 feet away, so I mostly just tried to ignore it for a couple years. A month or so ago, though, a friend of mine hooked me up with another friend of his, who recently retired from painting cars but still likes to do a few here and there to keep his hand in. We talked about it and he agreed to paint the FD for a reasonable price. It spent the last month at his shop, I got it back yesterday, and the difference is astounding.
For some reason, I always find partially-disassembled, midway-through-bodywork photos to be a bit disturbing, so I didn't post any of them until it was done. :)
There was some bondo on the right rear quarter panel, as if something fell on the car.
Overspray on all kinds of stuff:
Into the paint booth. Front fender had a ton of little dings in it, so got some filler as well:

Needed a few new parts as well. Some rubber bits that had decayed with time in the front:
Mirror mounts/seals:
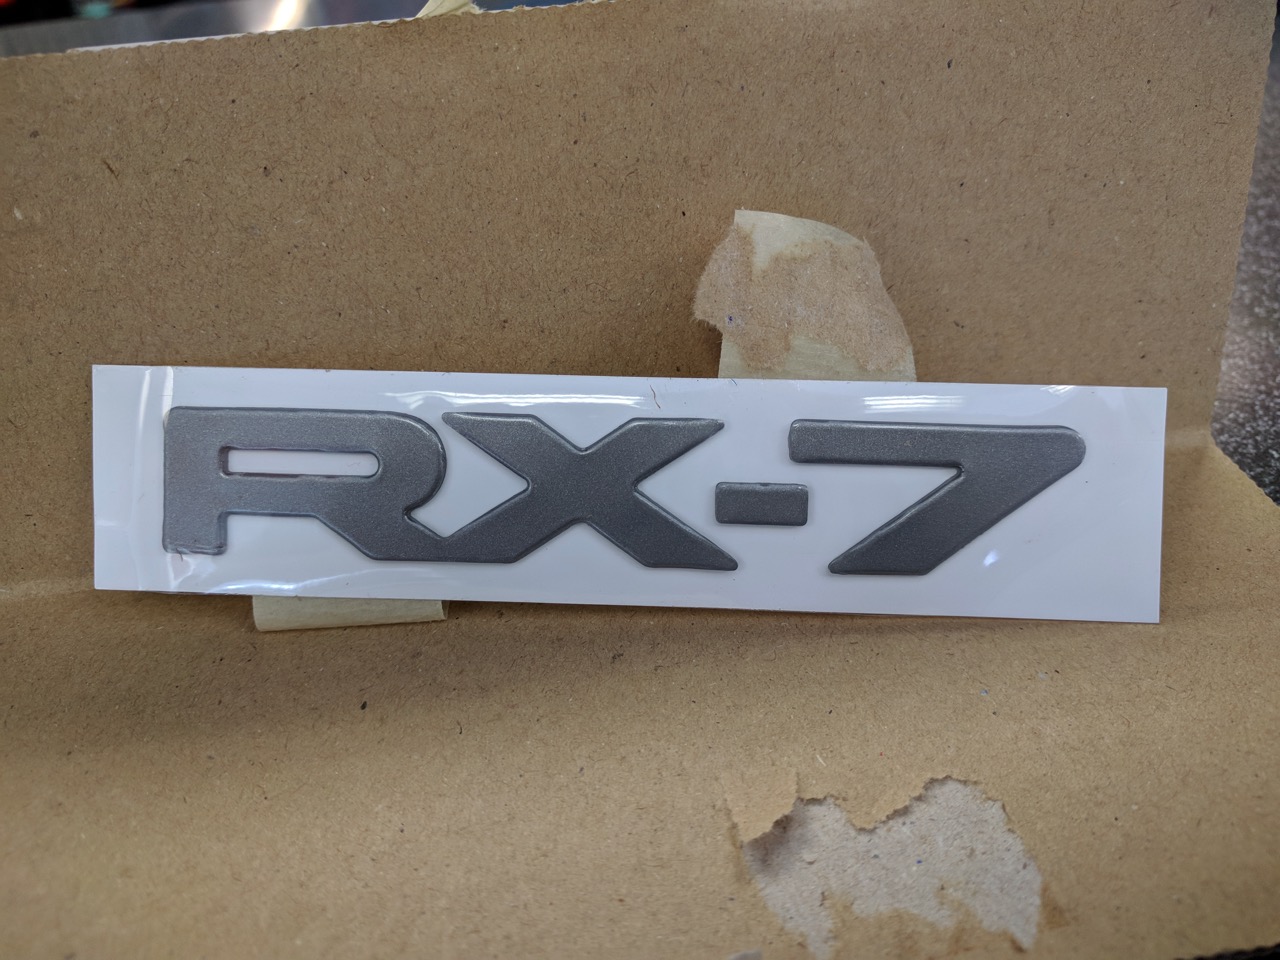
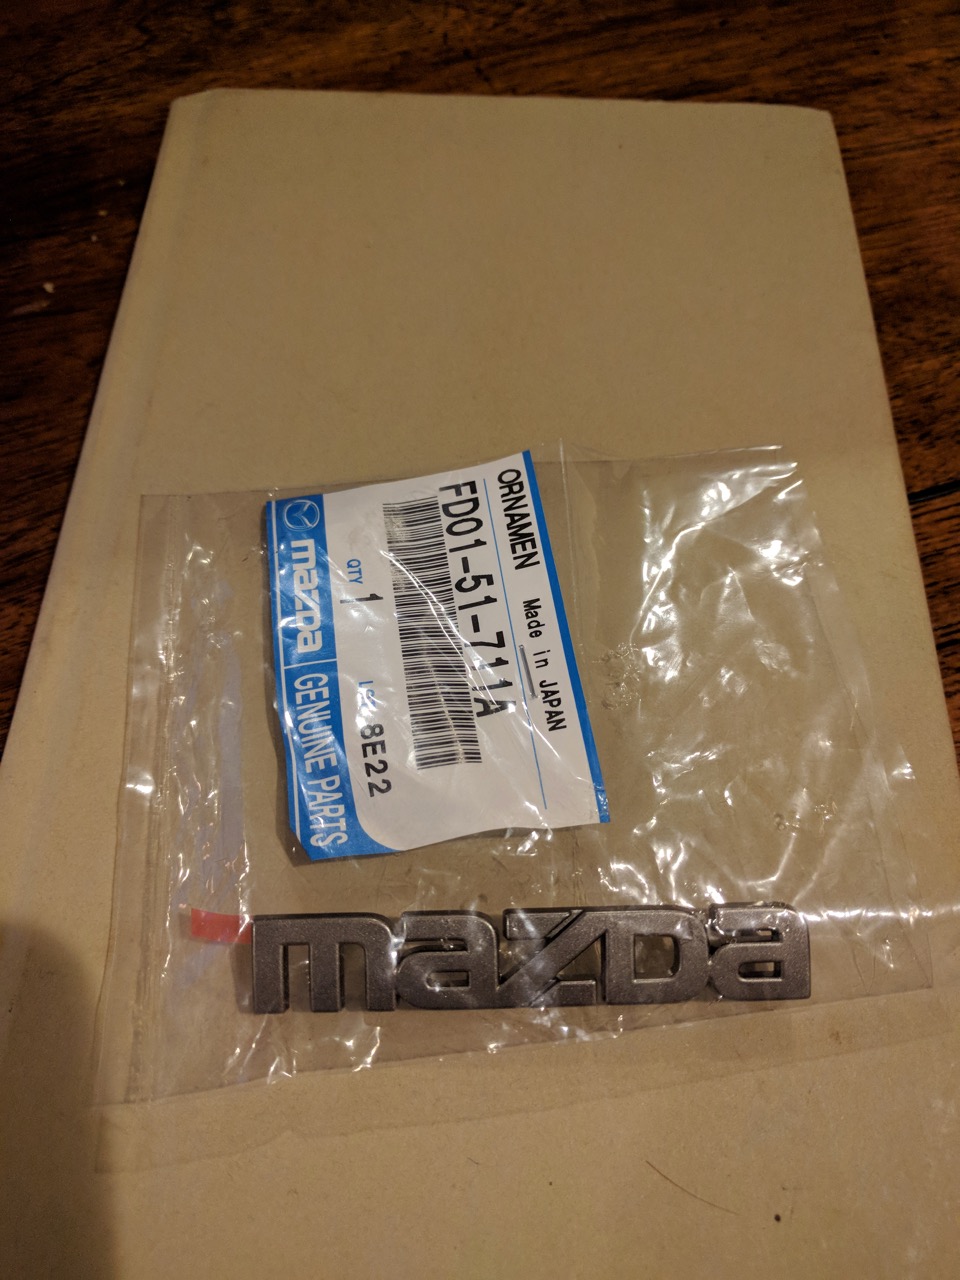
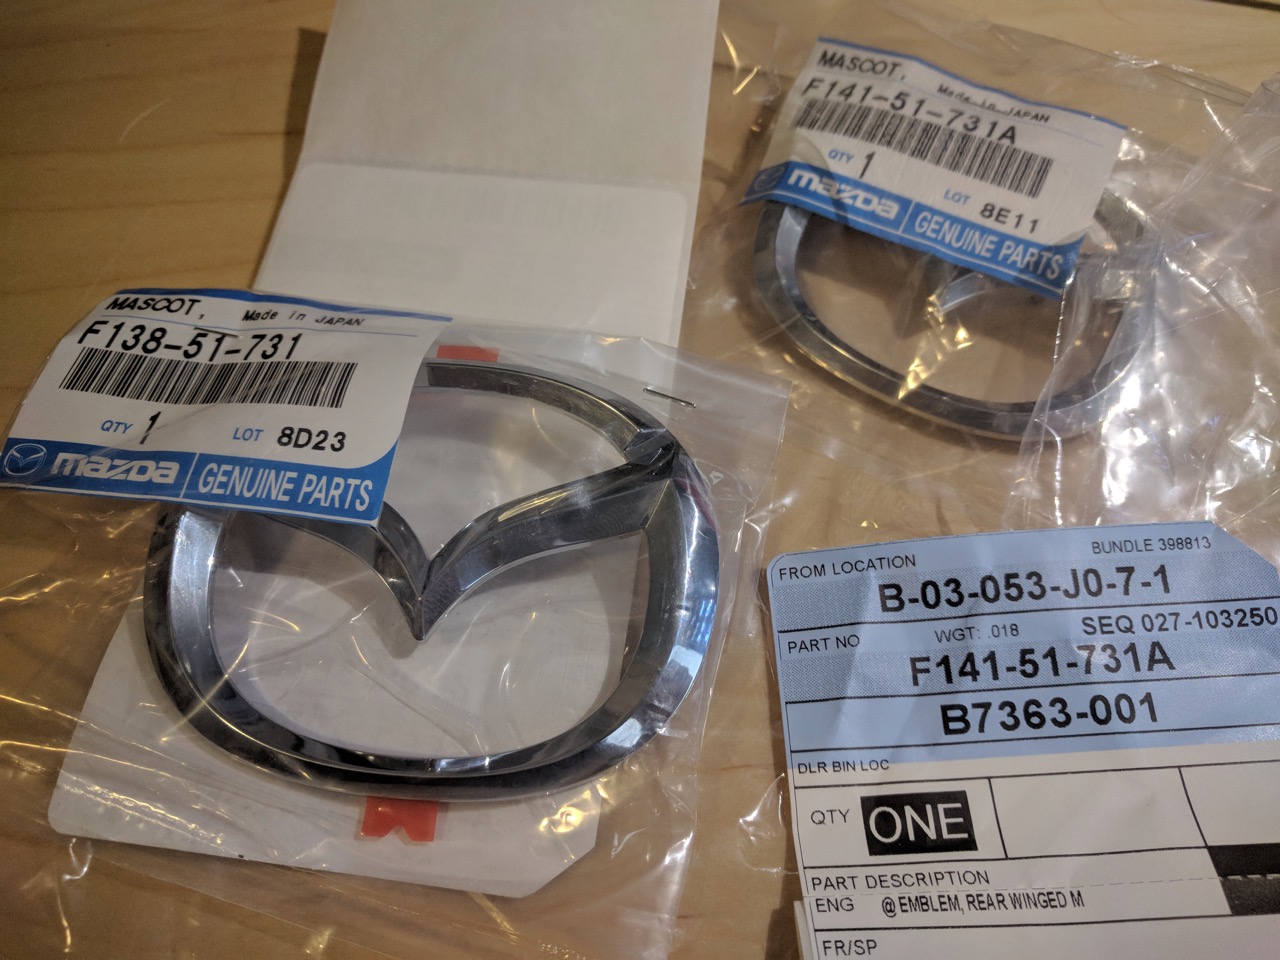
And badges. The old ones that came off the car weren't usable, so I needed to replace them all. The car has four -- a "toilet seat" early-90s Mazda logo (diamond inside a circle) on the front & rear, a "MAZDA" name on the rear, and an "RX-7" above it. I got the "RX-7" one no problem, but "MAZDA" was on back-order and the rear toilet seat is No Longer Available. I checked other cars of that vintage, basically you can get the small one for the Miata, but all of the larger ones are gone.
What you *can* get are flying M badges. They never used them on the FD here, because the transition happened in 1998 and they stopped selling the FD in the US after 1995. They sold it Japan through 2002-ish though, so there are modern Mazda badges available that fit the car. Mazda Motorsports brings them over from Japan, so I guess I've got some "JDM, yo" parts on my car now. :)
So how's it look? I'm blown away, it's everything I wanted it to be. I need to take it out with the SLR and get some proper photos of it this weekend, but here's a few quick ones with the phone cam:
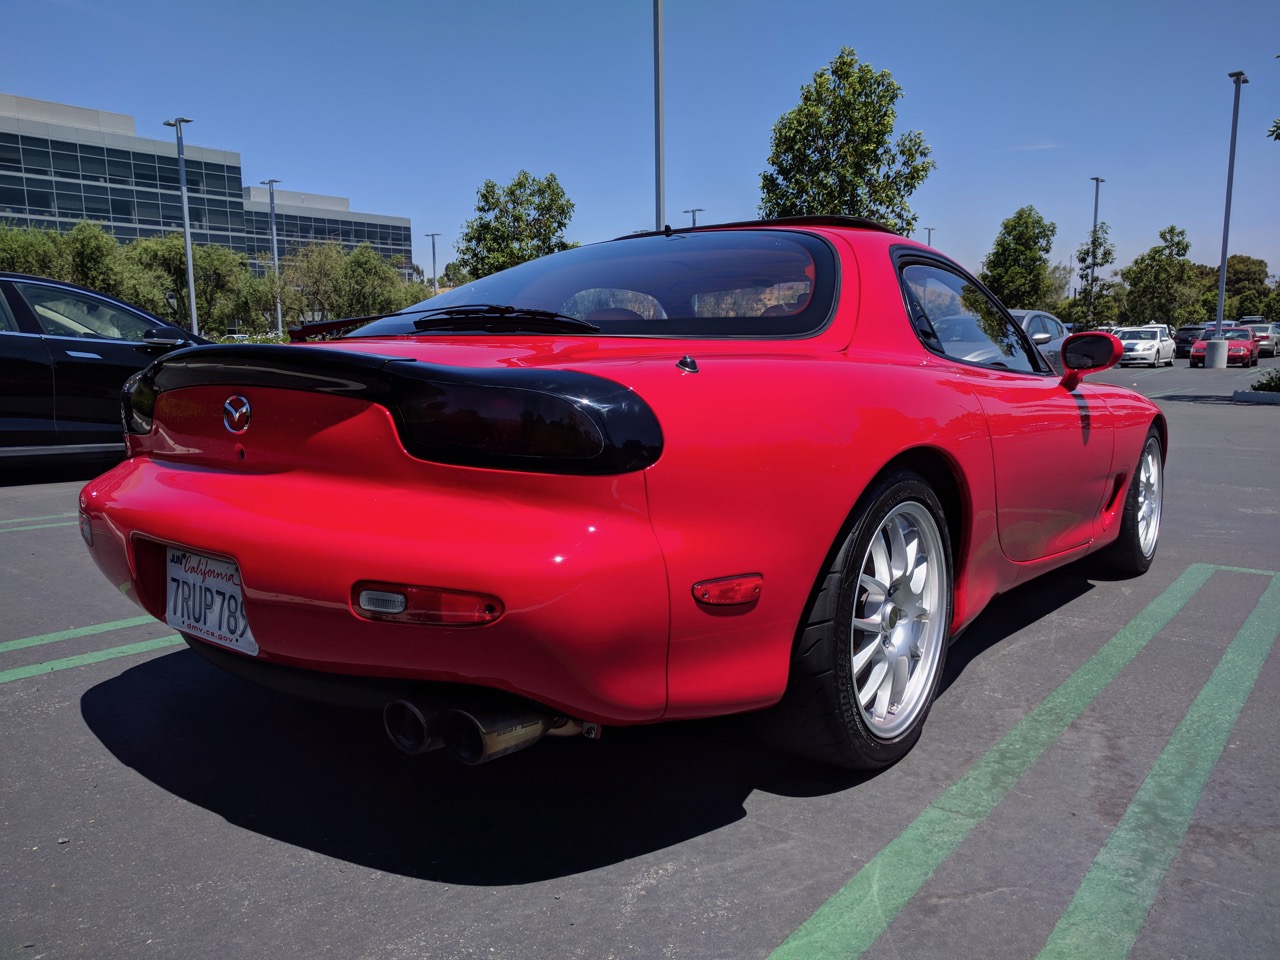
(The "MAZDA" and RX-7 badge aren't installed yet because they only just got here)
I suppose this isn't a very "grassroots" post, because I didn't do any of that work myself. I know my limits and bodywork is definitely not within my range of things I have the skills and/or temperament to handle, so this is one that got handed over to the pros. I'm very happy with the results.
The keen-eyed out there will spot a couple reassembly errors on the car. A couple of the tires are on the wrong side, and the rear wiper was installed in the down position, rather than the up. I've fixed them both already. :)

Looks amazing. Body and paint is best left to the professionals. You made the right call.

Kudos. The FD is and always will be one of my favorite cars--yours is a gleaming example.
I finally got the time to go shoot it with the SLR today:


this is amazing. I've always been a fan. I have friends that have had and FB, FC, and FD. The restraint in just maintaining with replacement new parts to keep it stockish is appreciated.
I've also helped replace the upper seals on the FC in a college parking lot in the winter, so I knew how temperamental they can be!
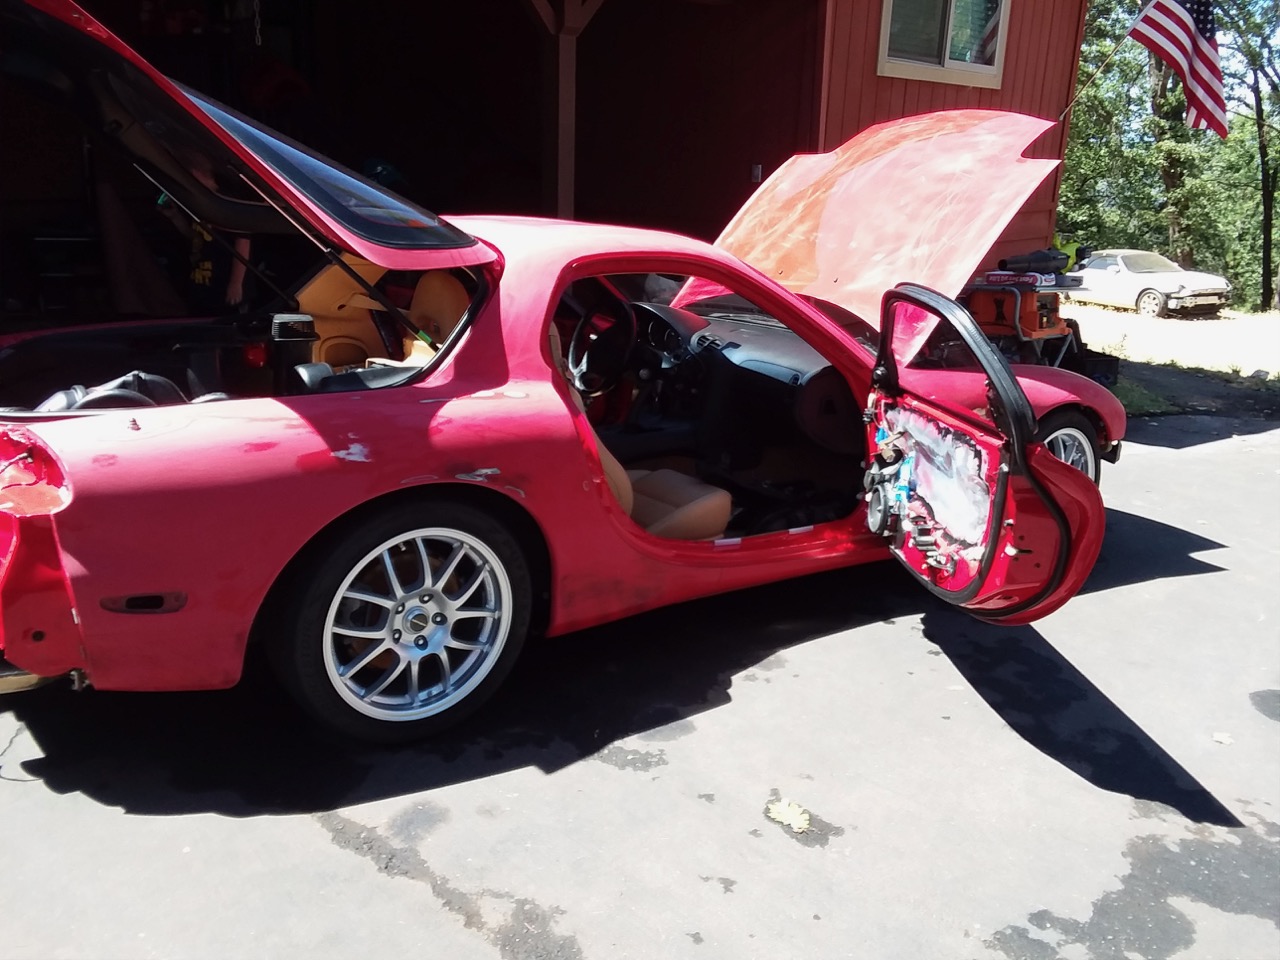
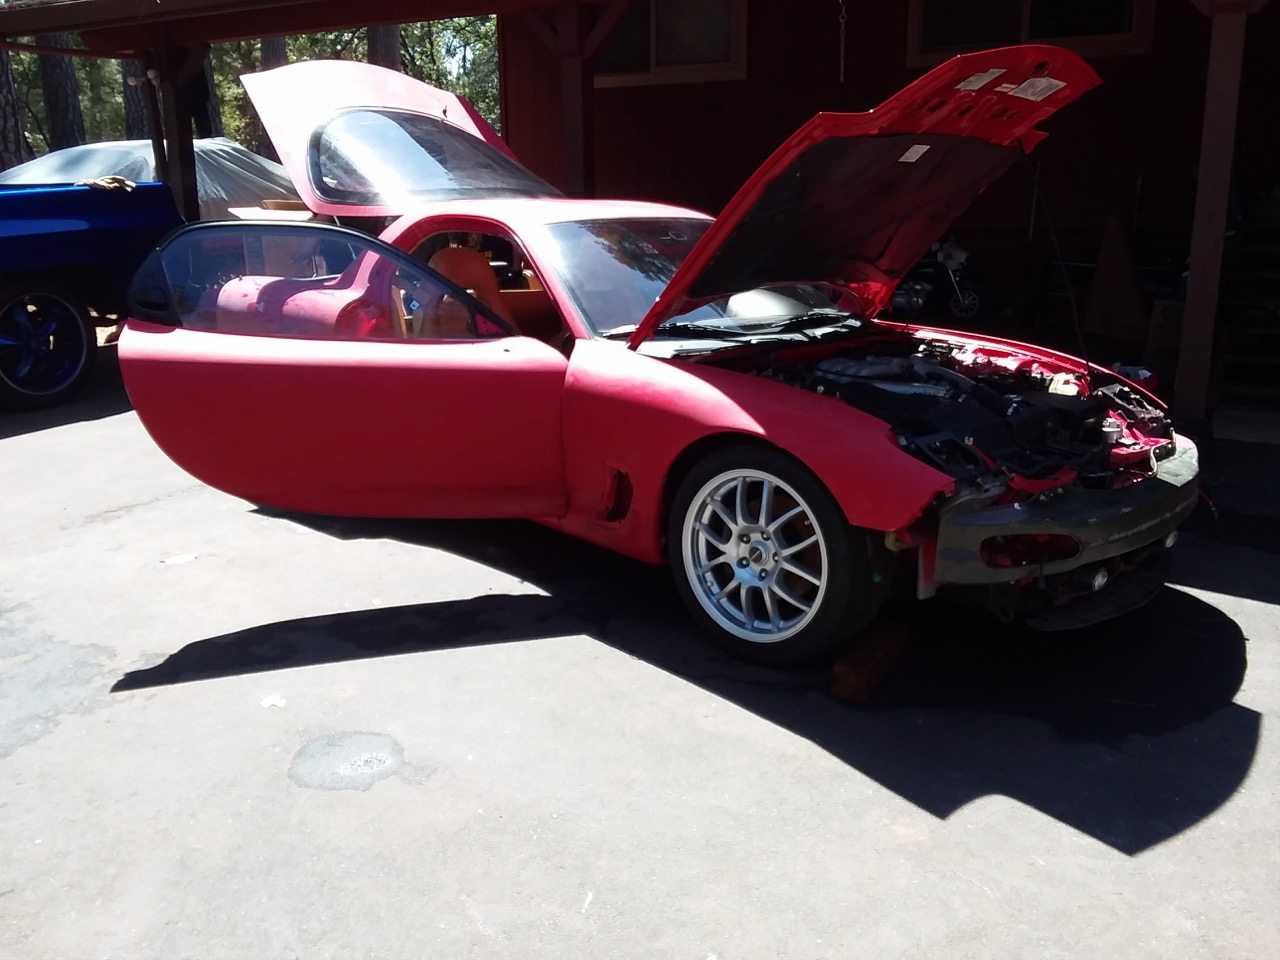
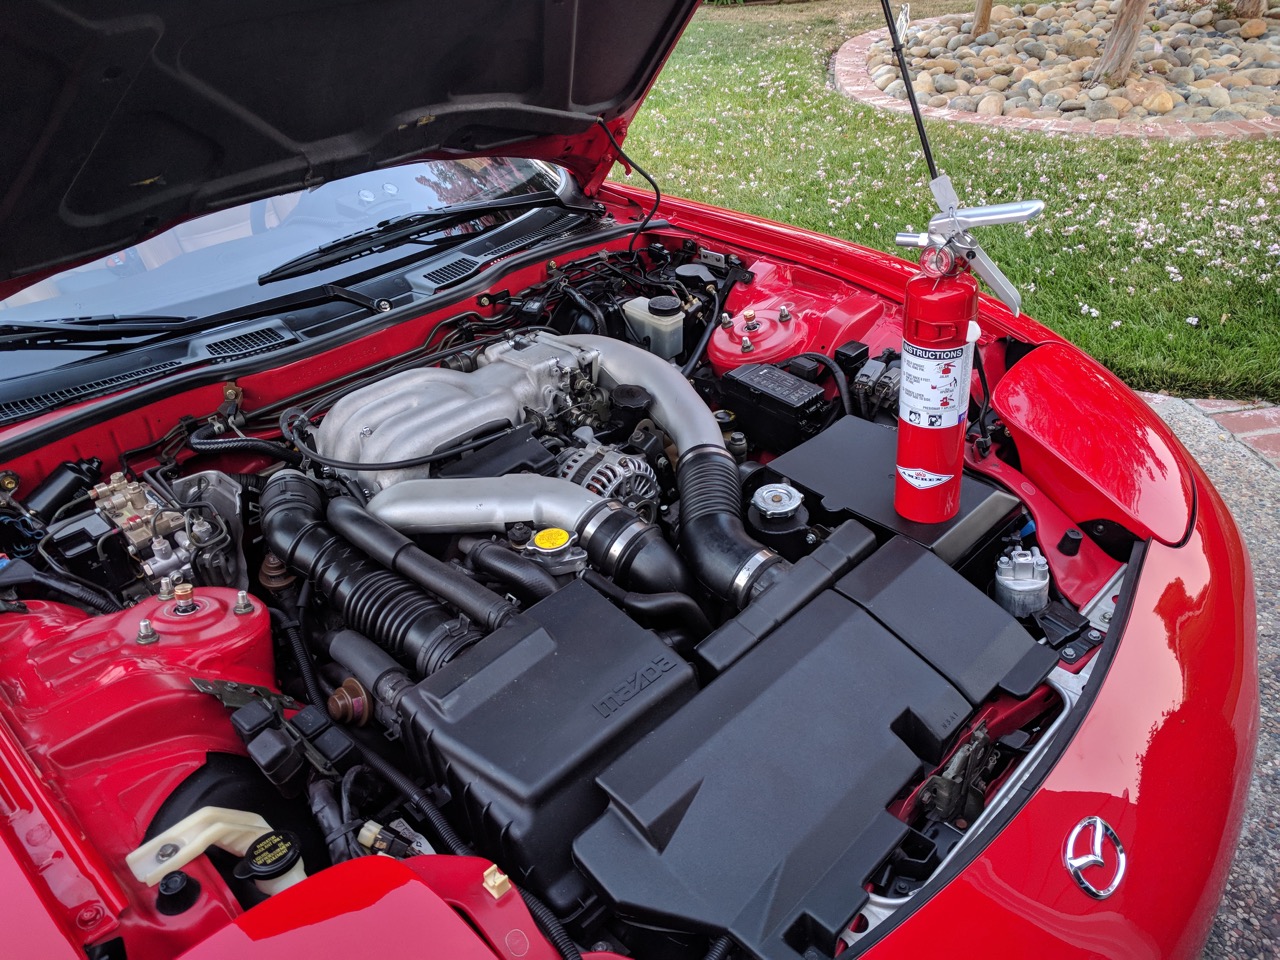
So I drove the FD to work today. This evening, about a mile from home I started smelling hot oil, and saw a bit of smoke drifting out of the hood gap. Got it onto the driveway, grabbed a fire extinguisher (need to get around to mounting that in the car), and popped the hood. No flames, fortunately, but there's definitely something leaking oil onto the turbos and making smoke. Might be a supply line, might be the turbo crossover outlet pipe leaking out oil that's gotten past the seals in the compressors. I'll need to pull it apart to tell, and right now the Miata is on the lift waiting for me to install the new calipers so I need to finish that first.
Glad I didn't need this...
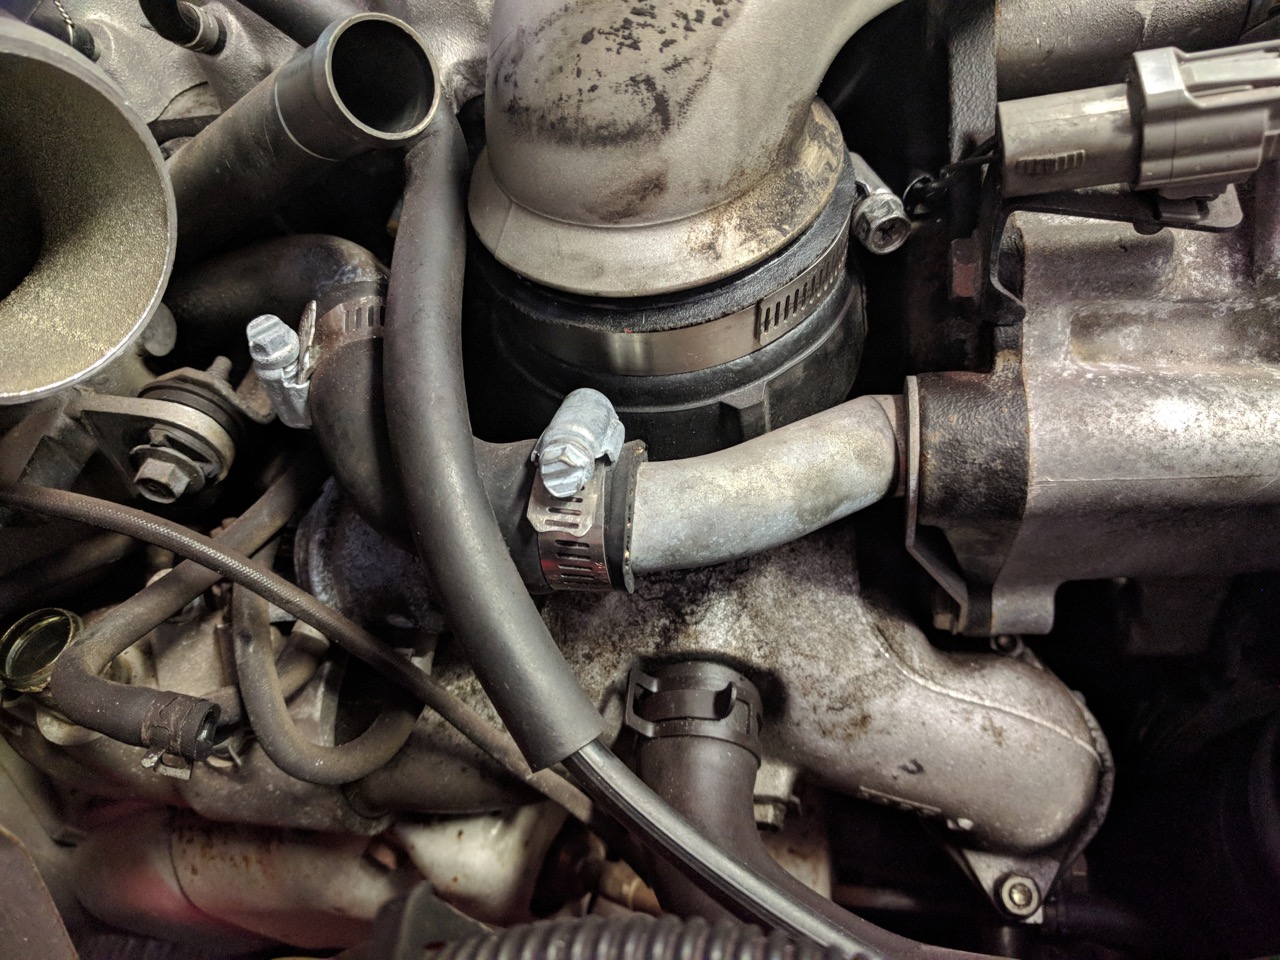
So over the weekend I pulled the turbo outlet piping off the car to take a closer look at the oil spray. Didn't take any pictures, alas, but there's a lot of oil spots on the outlet piping from the turbos, as well as lower down on the heat shields for the exhaust bits. The smoke is coming from the latter, obviously. In the process I discovered a couple of hose clamps that were loose enough to rotate on the couplers.
So my current theory is that the painting guys took some of the intake bits off to clean them (it's definitely cleaner up top than it was before) and didn't tighten the clamps properly when putting them back on. The post-turbo intake plumbing has a bunch of oil in it, presumably from some combination of leaking turbo oil seals and the PCV. The turbo outlet piping points straight up, then has a rubber coupler that goes over it, effectively creating a small cylindrical reservoir for oil to sit in when it settles out of the intake air stream. So if that hose clamp is loose, when the turbo pressurizes the intake it's going to spray oil out that loose fitting, and down over the turbo.
So I fixed all the clamps and put it back together and drove it. Still smoked, although that might just be from the residual oil on the turbos, I need to go hose it down with brake cleaner or something.
I also looked at the oil pan again, it's leaking, a lot. Recommendation seems to be to reseal it with a new pan, sealant, a Banzai Racing oil pan brace, and skip the OEM gasket. I've got the engine support, and I ordered the brace today. Alas the oil pan is on back order.
Interestingly, the Mazda Motorsports parts catalog shows four (4) oil pan part numbers for a 93 RX7. The first one is superseded by the second, but there's two more at exactly the same price, and no VIN range to specify what they're intended for. They're all on back order...

One of my favorite cars ever, keep up the good work. And keep it for me some day.
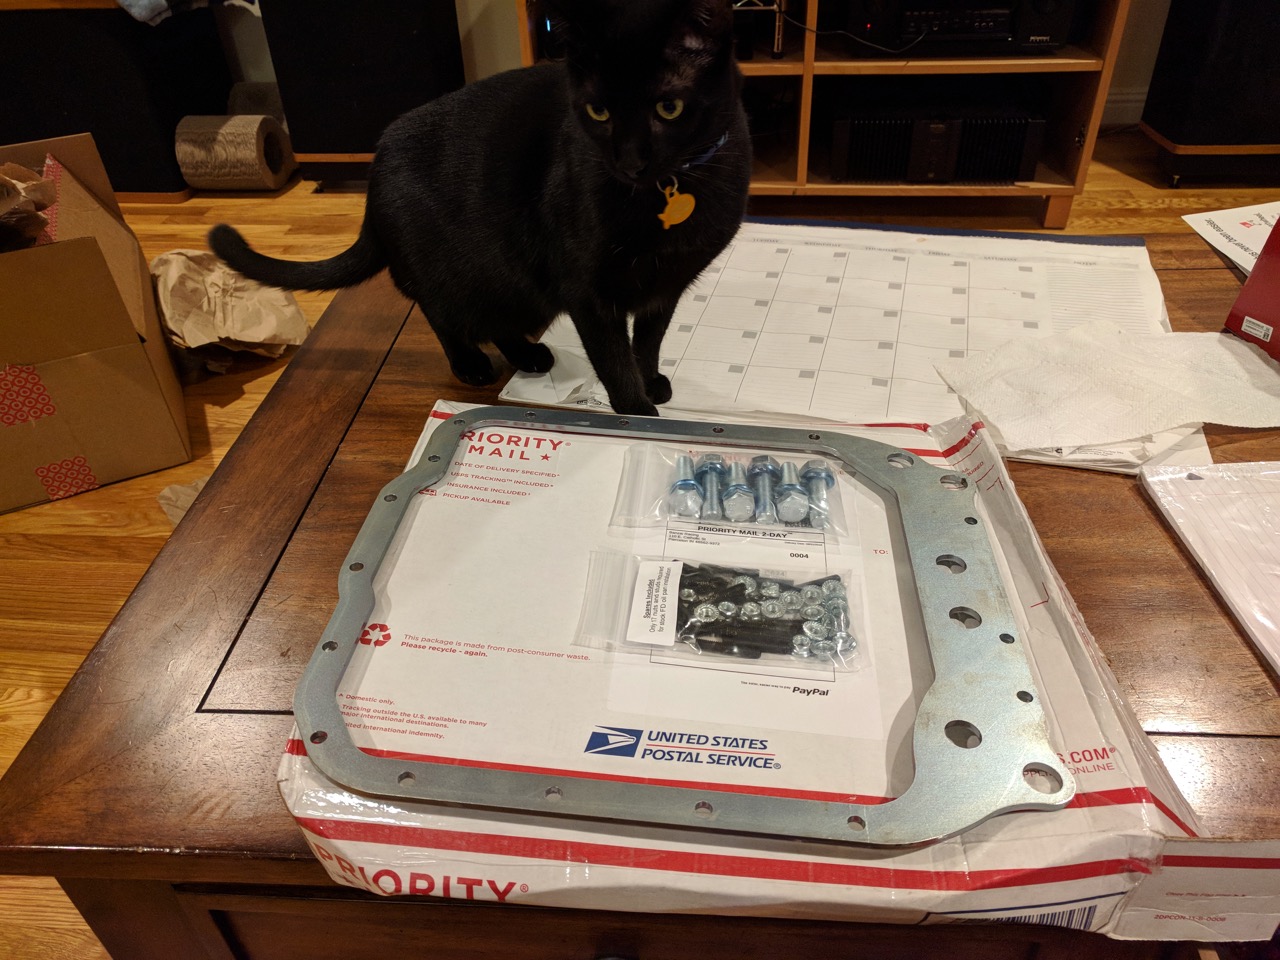
Collecting parts for the oil pan resealing. This is the Banzai Racing brace, it passed feline inspection. :)
The car is looking great! Still one of the most beautiful designs in the last 30 years.
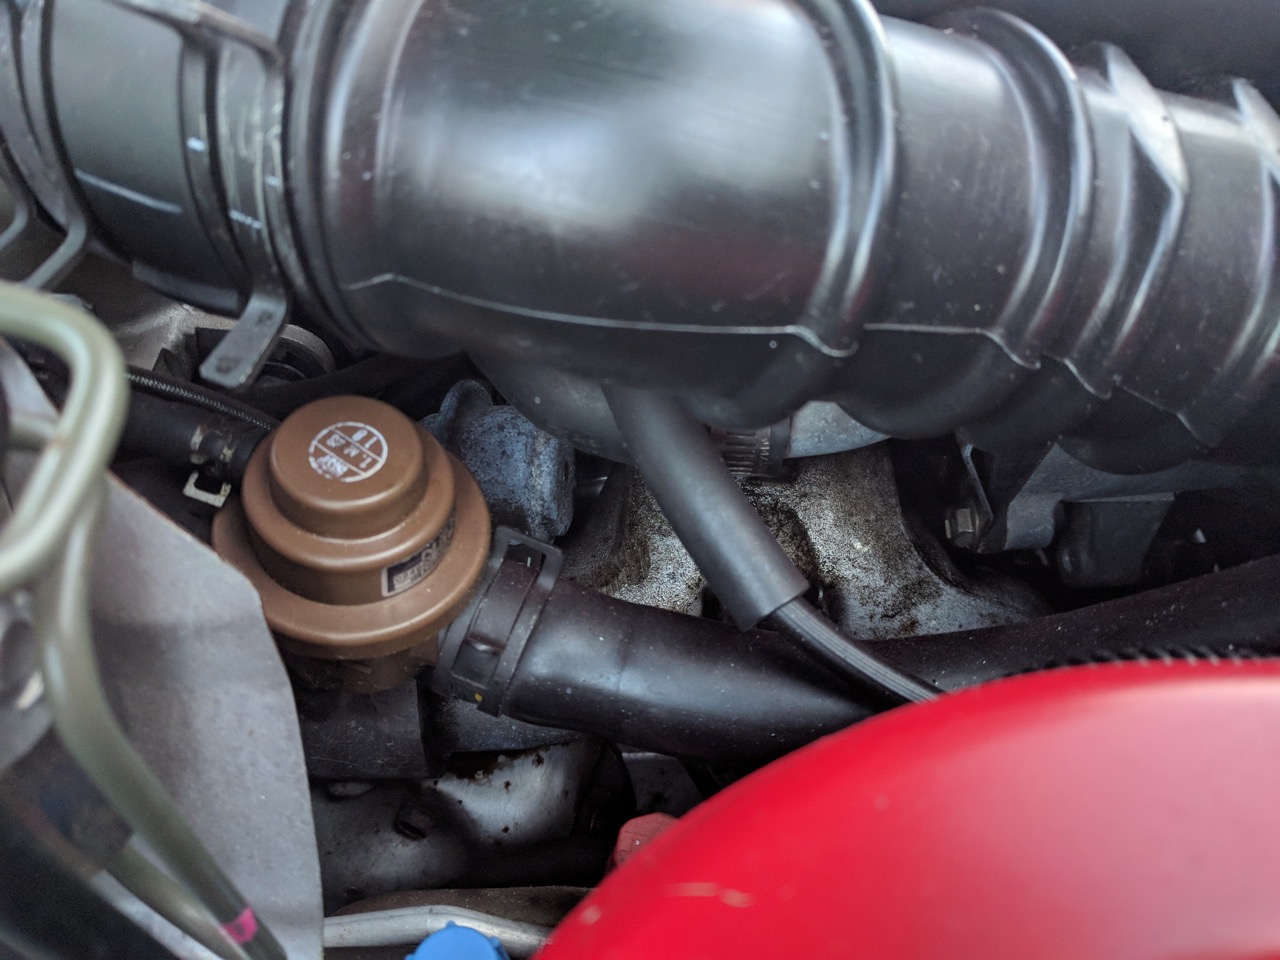
I'm still waiting on the other parts for the oil pan resealing, so I took another look at the oil leaks near the turbos. I started pulling parts off to get down to it and discovered that the short 90 degree hose attaching the rear turbo's bypass valve to the compressor outlet was rotating freely on the nipple, even though it had a spring clamp on it. 25 years and the heat of the turbos has baked the rubber into something that feels more like hard plastic.
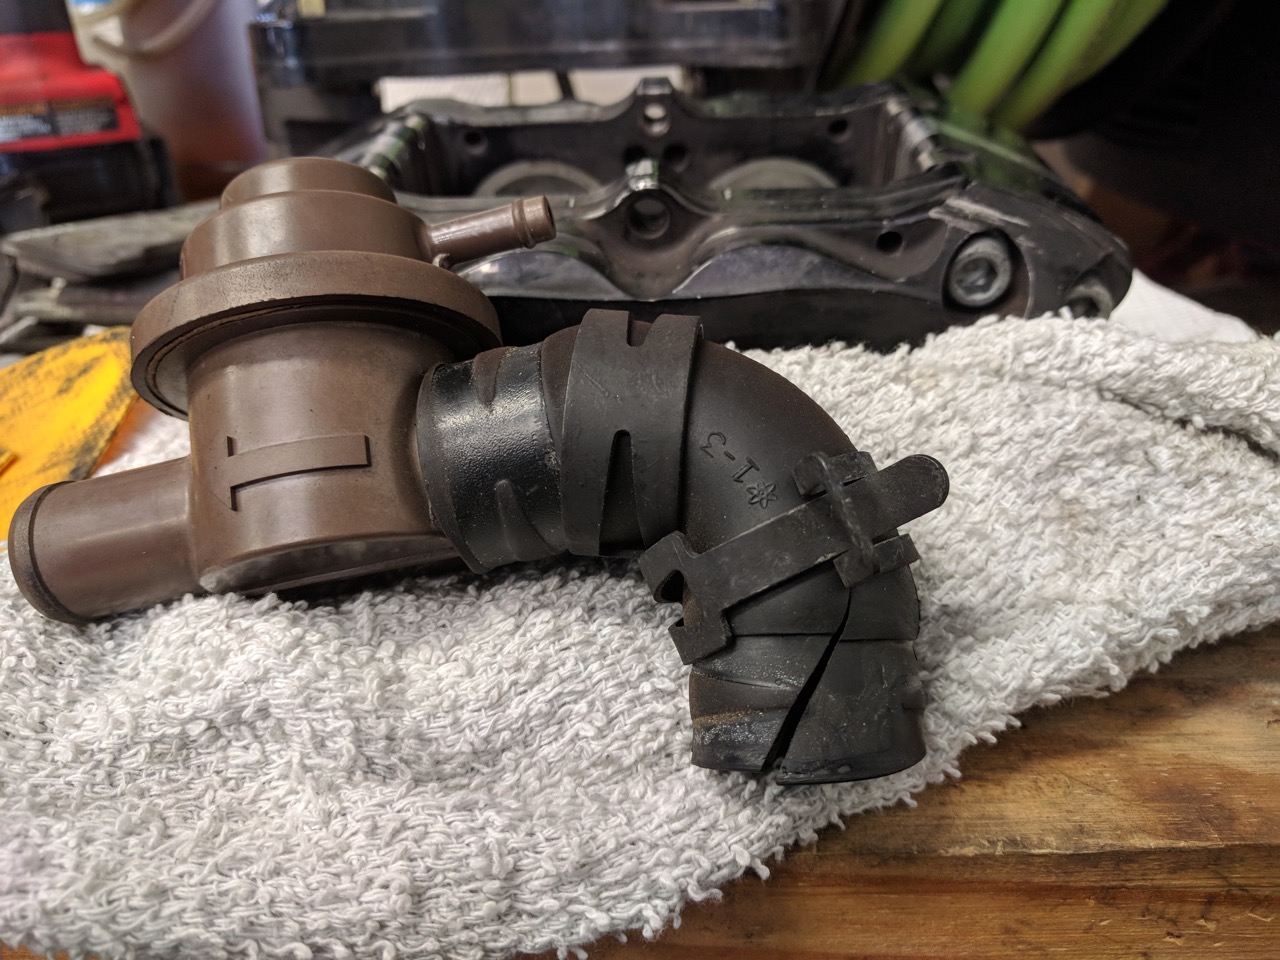
It goes on the nipple at the far left of this photo:
This is the worst, but all of the hoses in that area are having the same problem so I hit the Mazda Motorsports web site and ordered a bunch of replacements. Fortunately they all appear to still be available.
More parts for the oil leak project. Recommendations that I'm reading online are that the oil pan braces works best when used with a new oil pan, rather than old bent one. Since they're relatively inexpensive through Mazda Motorsports and I don't want to do this twice, I decided to order one.
RX-7 oil pans look strange:
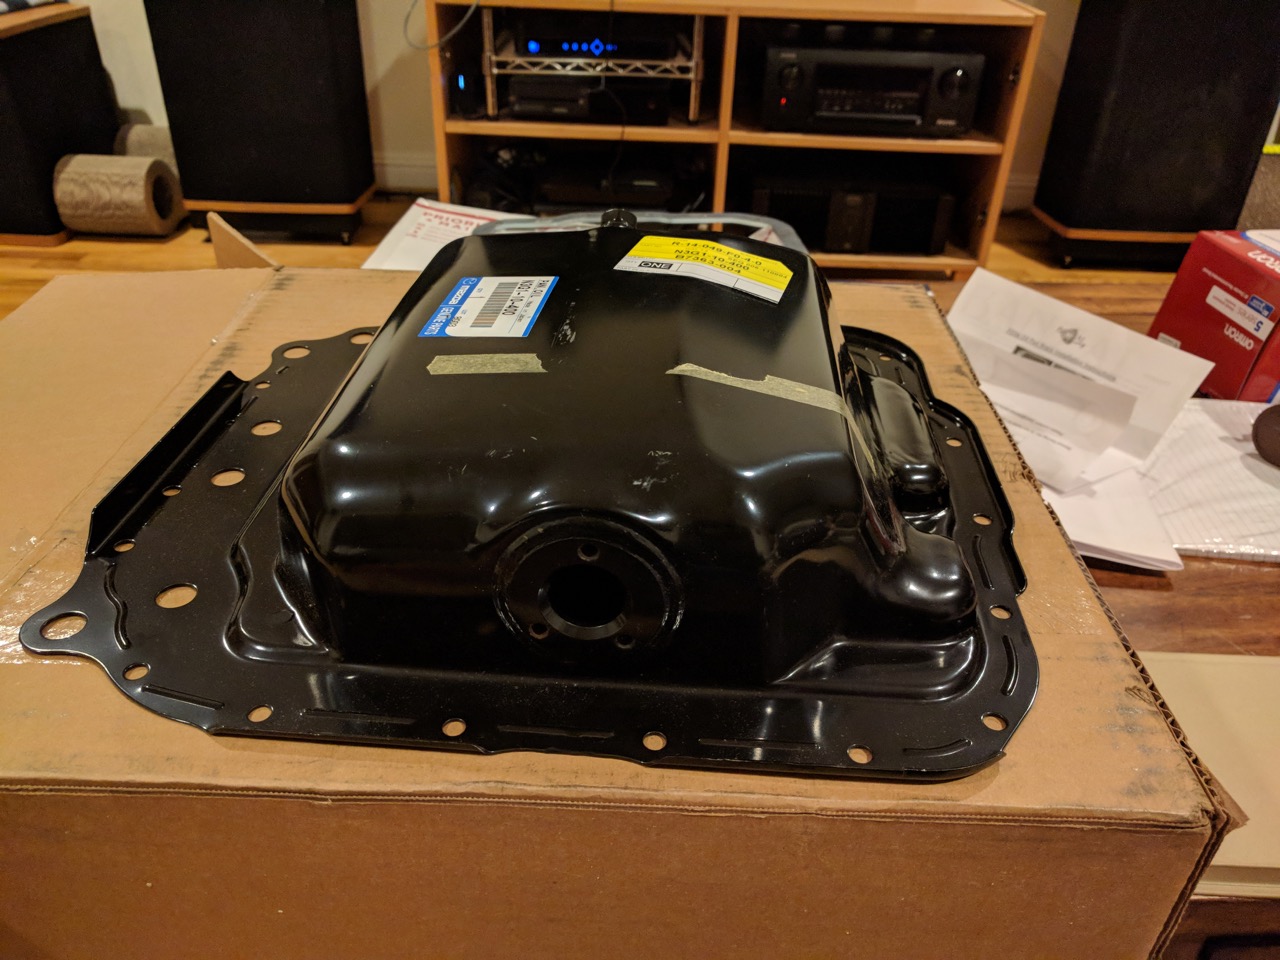
The braces fits nicely on it, though.
I didn't have quite enough time to tackle the oil pan over the weekend, but I did fix one significant oil leak by replacing the O-rings between the oil filter mount and the block. Didn't take any pictures though.
I've got about 2K miles on the new clutch so far, and while it's holding just fine, it's not quite behaving properly. It seems to be very prone to letting out that burning clutch smell with minimal provocation. Pulling up my driveway and into my garage will do it -- the kind of thing that *will* smoke a clutch if you do it badly, but this one seems to be really delicate and unable to handle much heat at all. It's an Exedy stage 1, not a puck, so it's a standard sort of clutch feel, very streetable. I pulled off one of the access covers and there seems to be a surprising amount of clutch dust in there for 2K miles...
It's sometimes also making an odd whirring sound when applying power with the clutch partially engaged (like when pulling up my driveway slope). I don't think it's the throwout bearing, because it doesn't do it when stopped and pushing the clutch in, only when applying power.
So it sounds like I probably need to pull the transmission off again to look at what's going on in there. Given that I also need to reseal the oil pan, this makes me wonder if it wouldn't be better to just pull the motor and transmission together and do both of those things off the car. Anyone ever pulled an FD motor? Do they come out easily with the transmission still attached like on a Miata?
So while O-rings on the oil filter mount *were* a significant source of oil leaks, they were a long way from all of them. It's been leaving puddles of oil in the garage whenever I drive it, and I finally got around to doing the oil pan today. Well, starting on it, at least, it's not quite done yet.
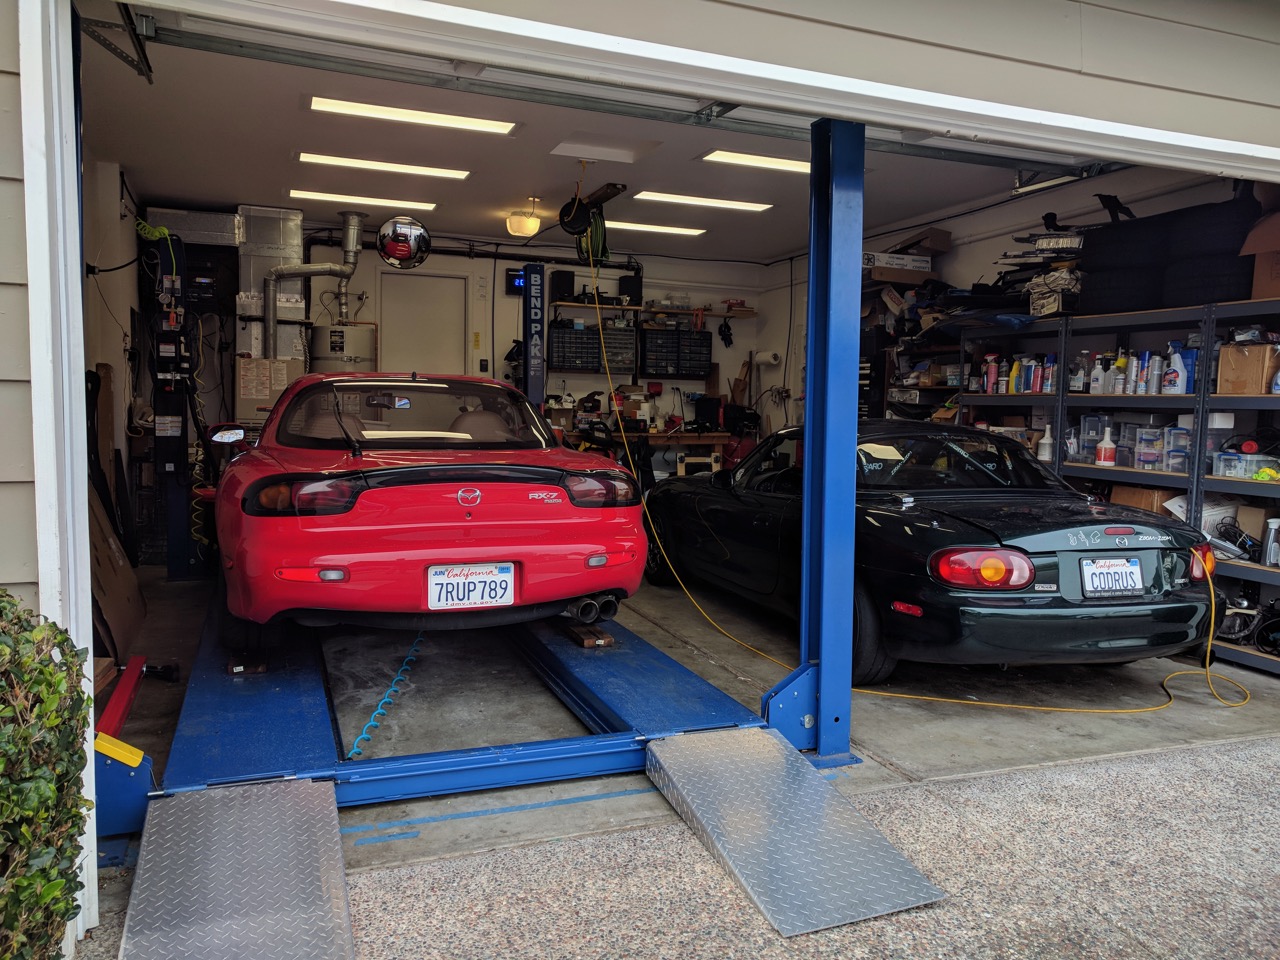
FD on the lift, ready to go up:
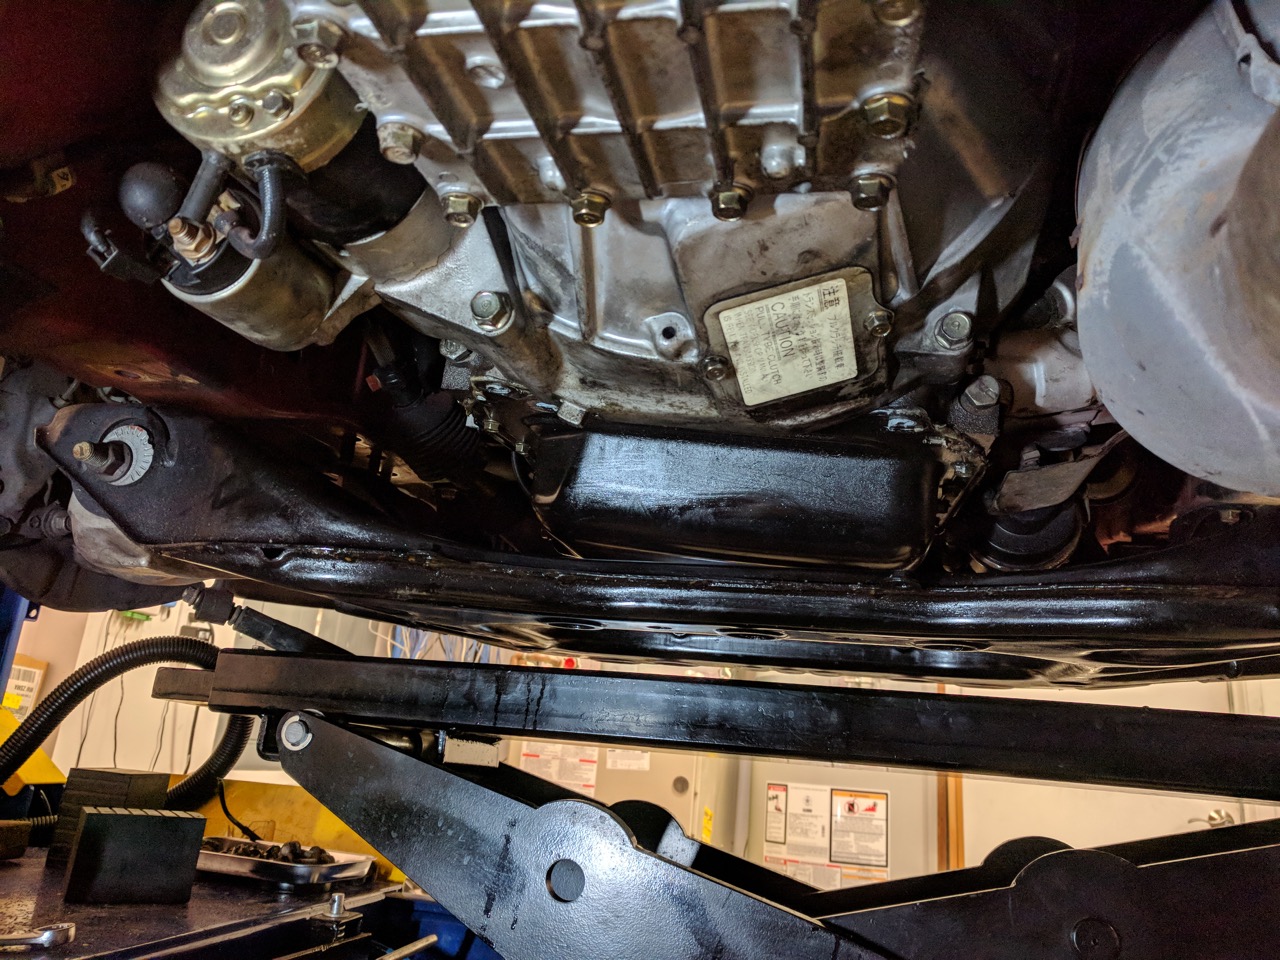
Jack the car up off the front wheels and put it on jackstands on the lift ramps, then use the rolling jack to lift the engine by the oil pan as far as it'll go. Support it from above with a fender-mounted enigne support. Forgot take pics of that.
From what I've read online, some people have managed to get the oil pan just by doing this and not touching the subframe bolts. I have no idea how, with it up against the transmission tunnel I couldn't even get enough clearance to access the bolts on the motor mounts, so off they came. It's going to need an alignment again when I'm done, that's fine.
The motor mounts came off.
The two mounts are different. The original mount on the intake side is aluminum, the one on the exhaust side is iron. Presumably this is because they wanted to save weight, but the exhaust was too hot to have one on that side. Replacement mounts are all iron -- I had bought new one because from what I've read online they're usually dead. Sure enough, these were toast.
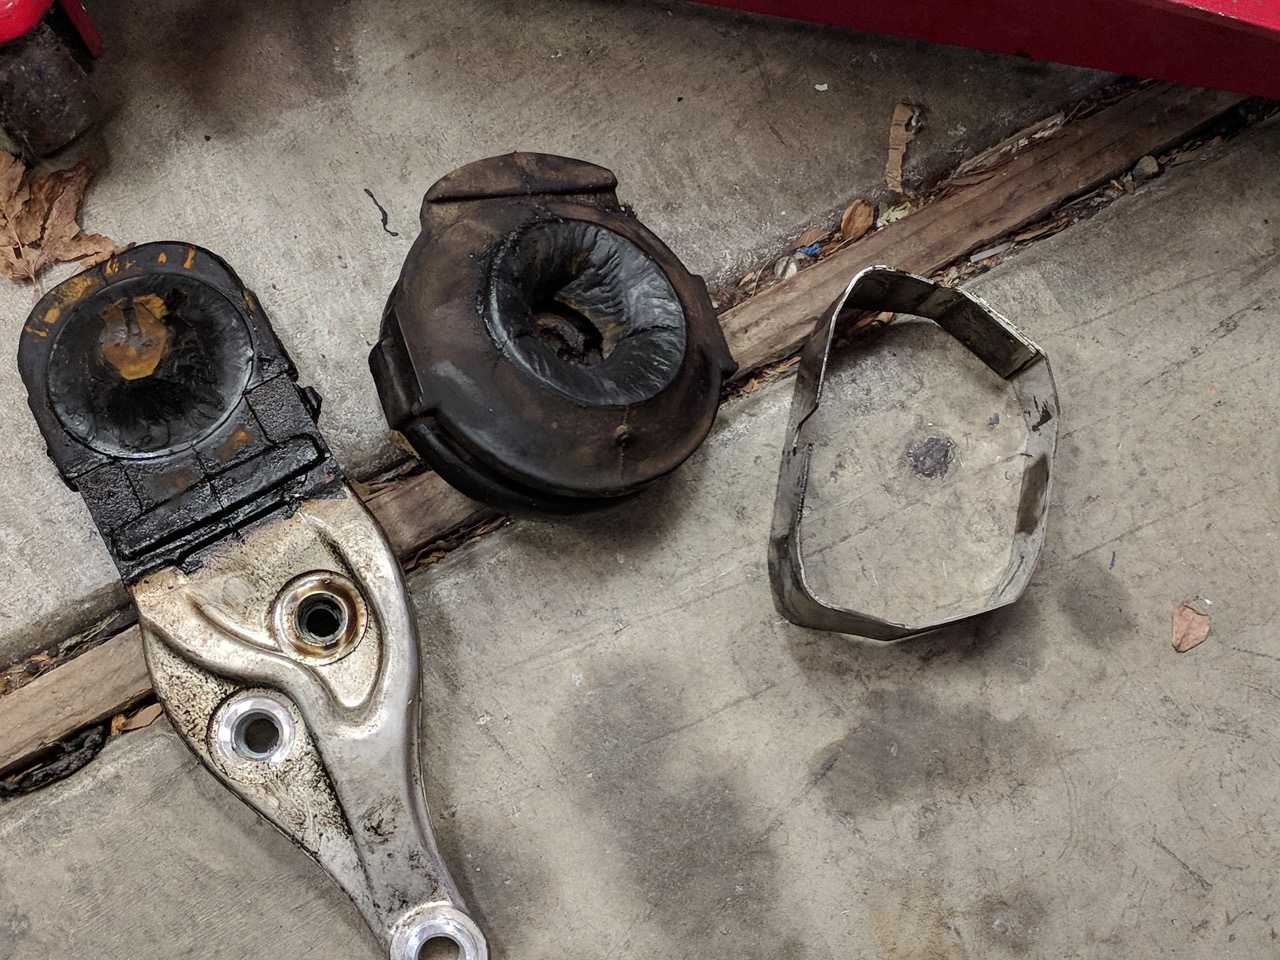
The exhaust side one wasn't quite that bad, at least it didn't fall apart. Definitely needed replacement though.
Unbolting the sway bar and the steering rack means the subframe is now just hanging on the lower A-arm. The bushings hold it pretty well here.
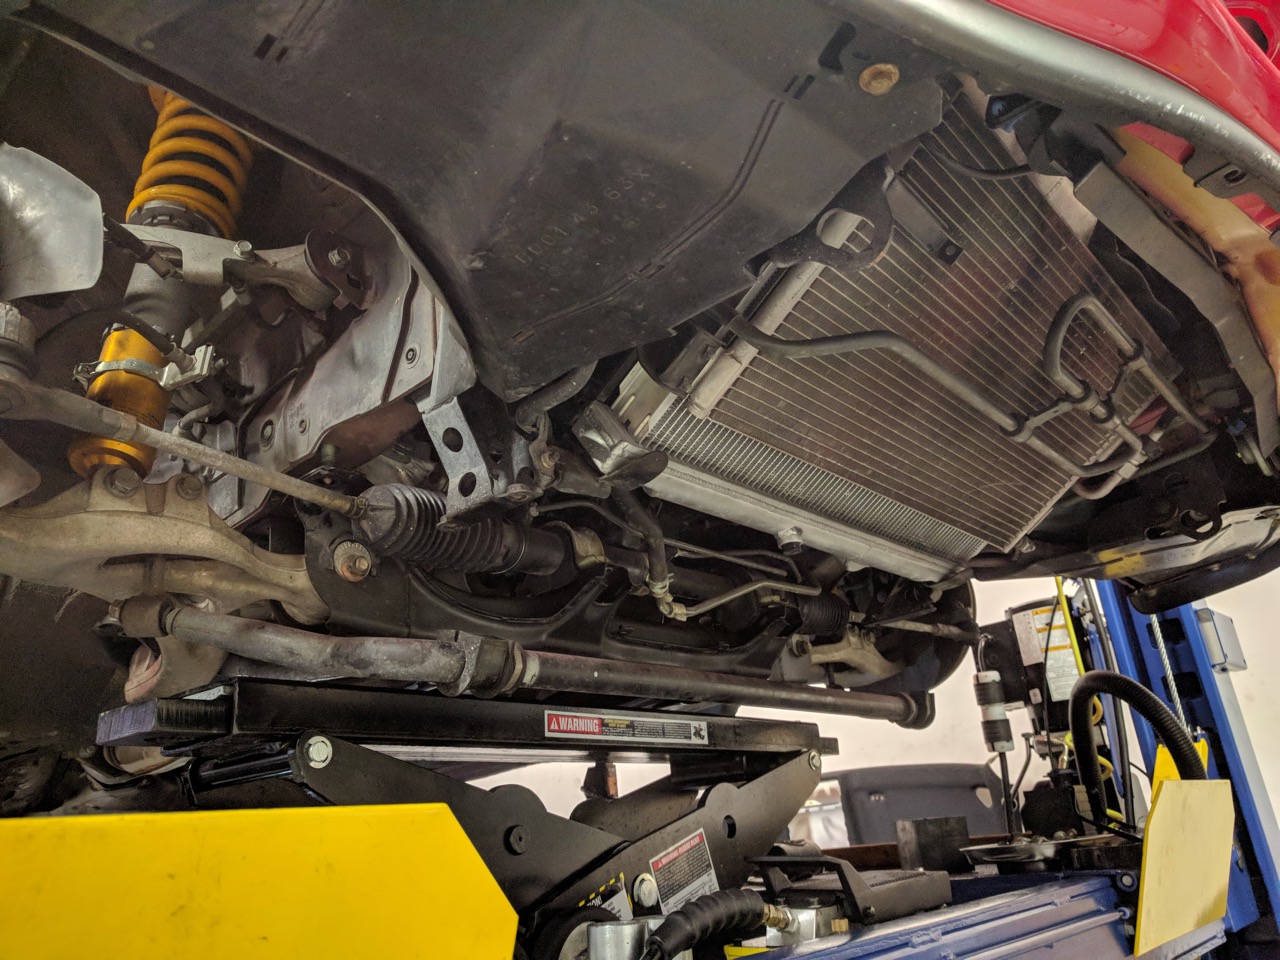
(The friend who's helping me pointed out that the radiator is actually touching the steel mounts on the bottom -- looks like it's going to have to come out and get shimmed with rubber or something. A project for another day).
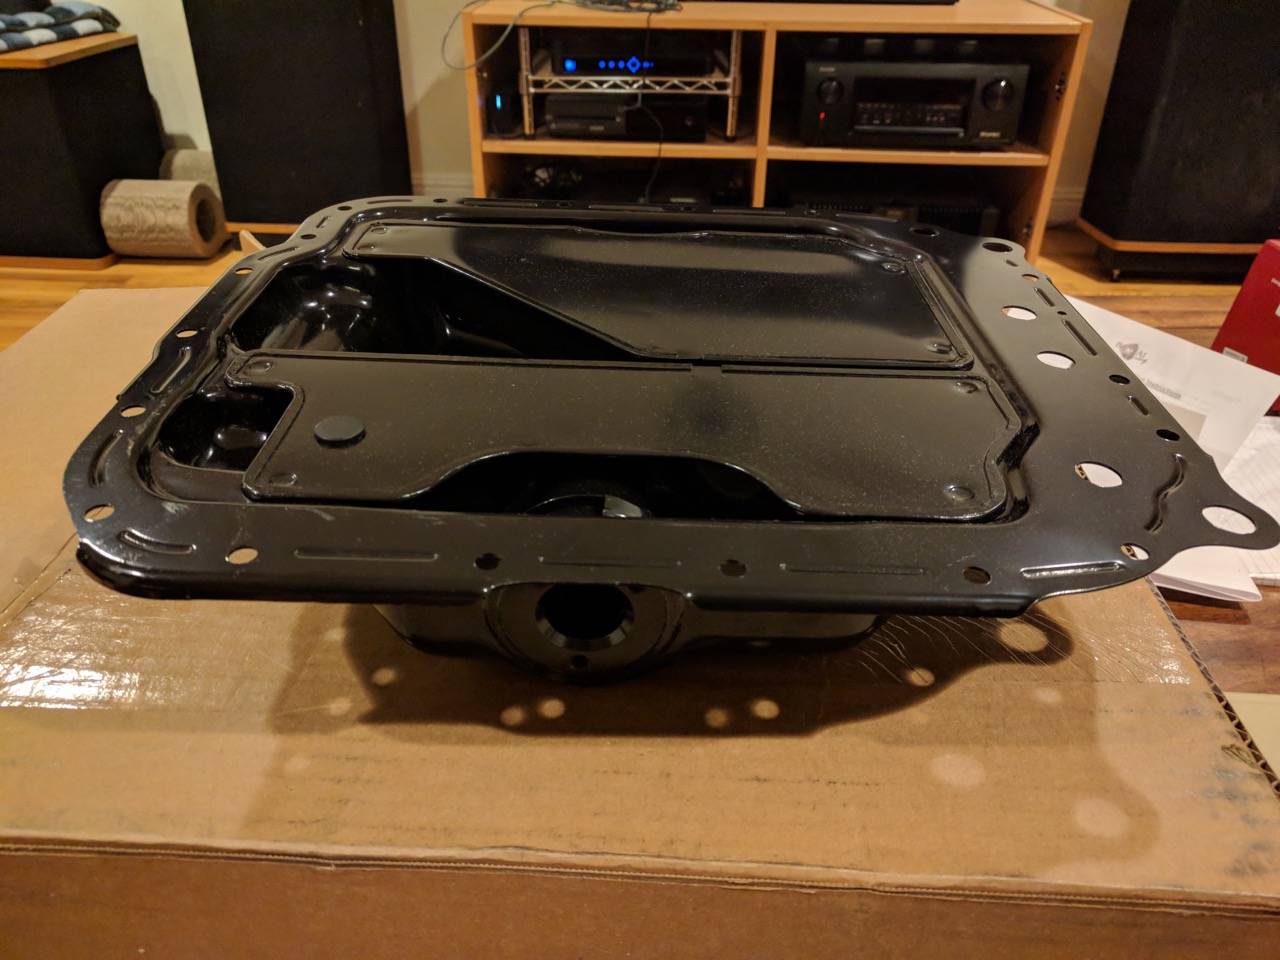
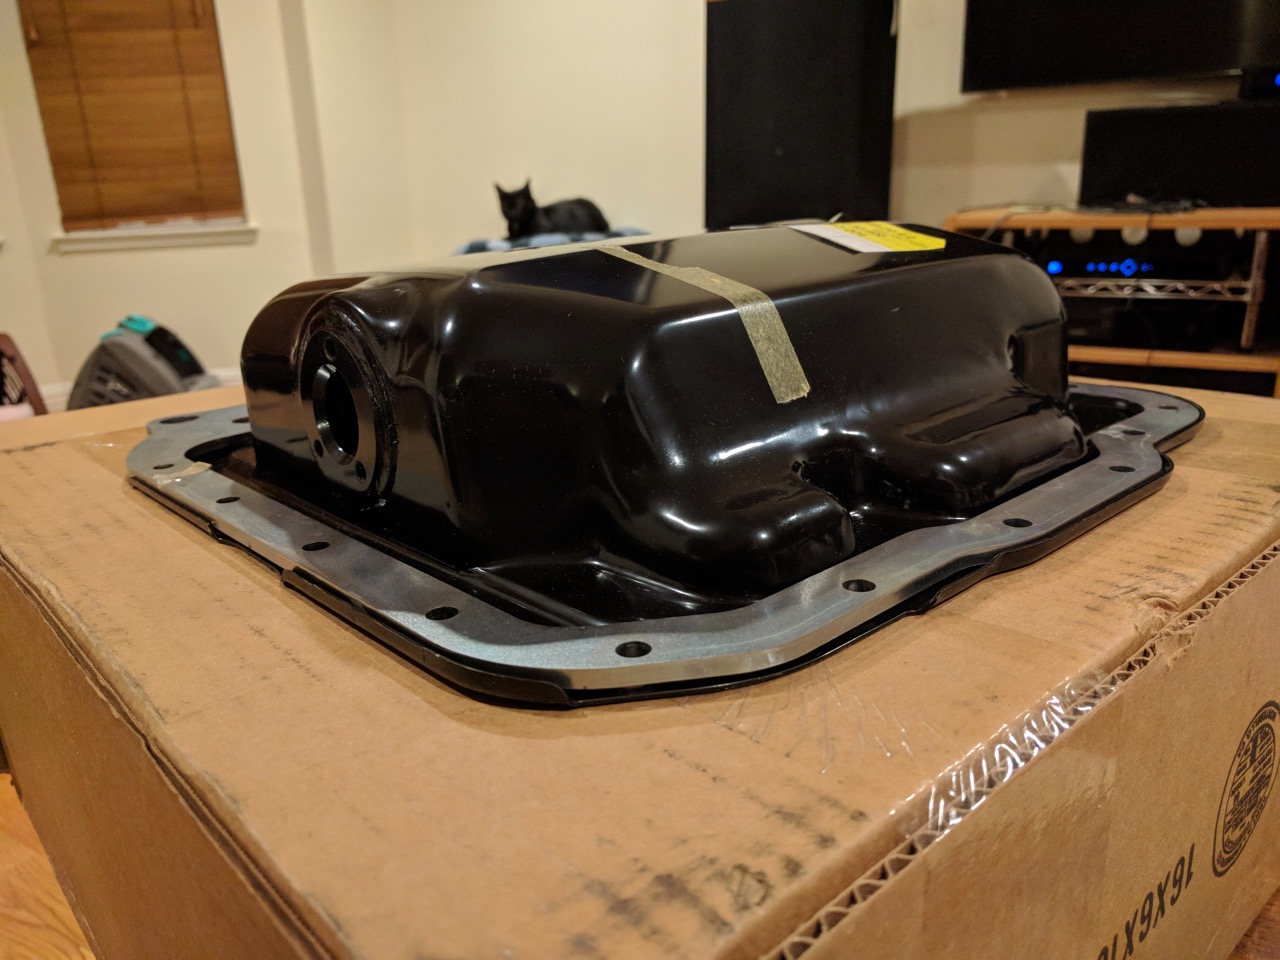
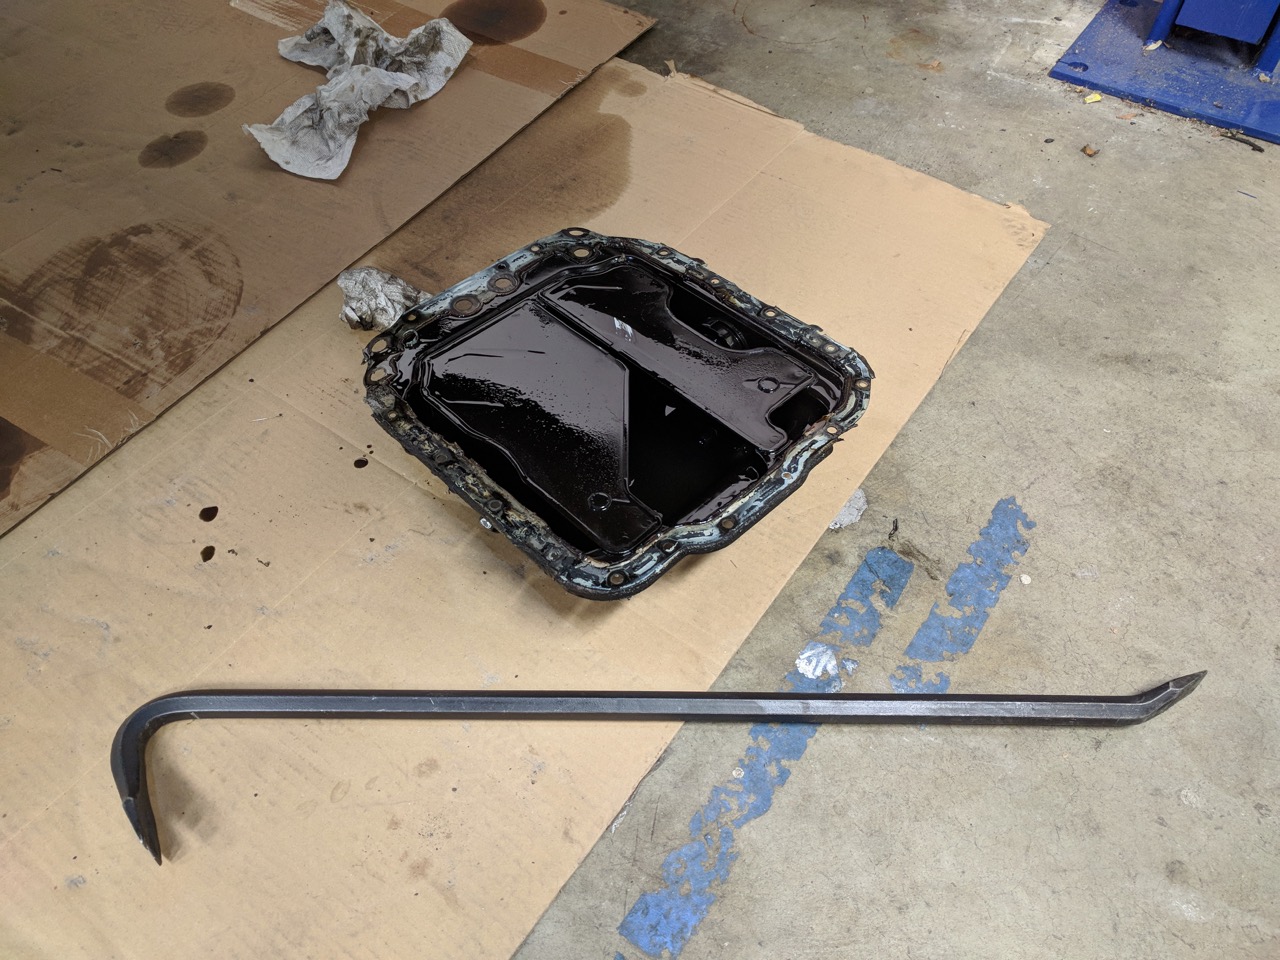
Everyone online also suggested purchasing a replacement oil pan. Sure enough, getting the old one off required enough prying that it got bent to crap. Glad I don't have to try to recondition it. :)
(Gordon Freeman assisted here, no head crabs allowed in the FD).
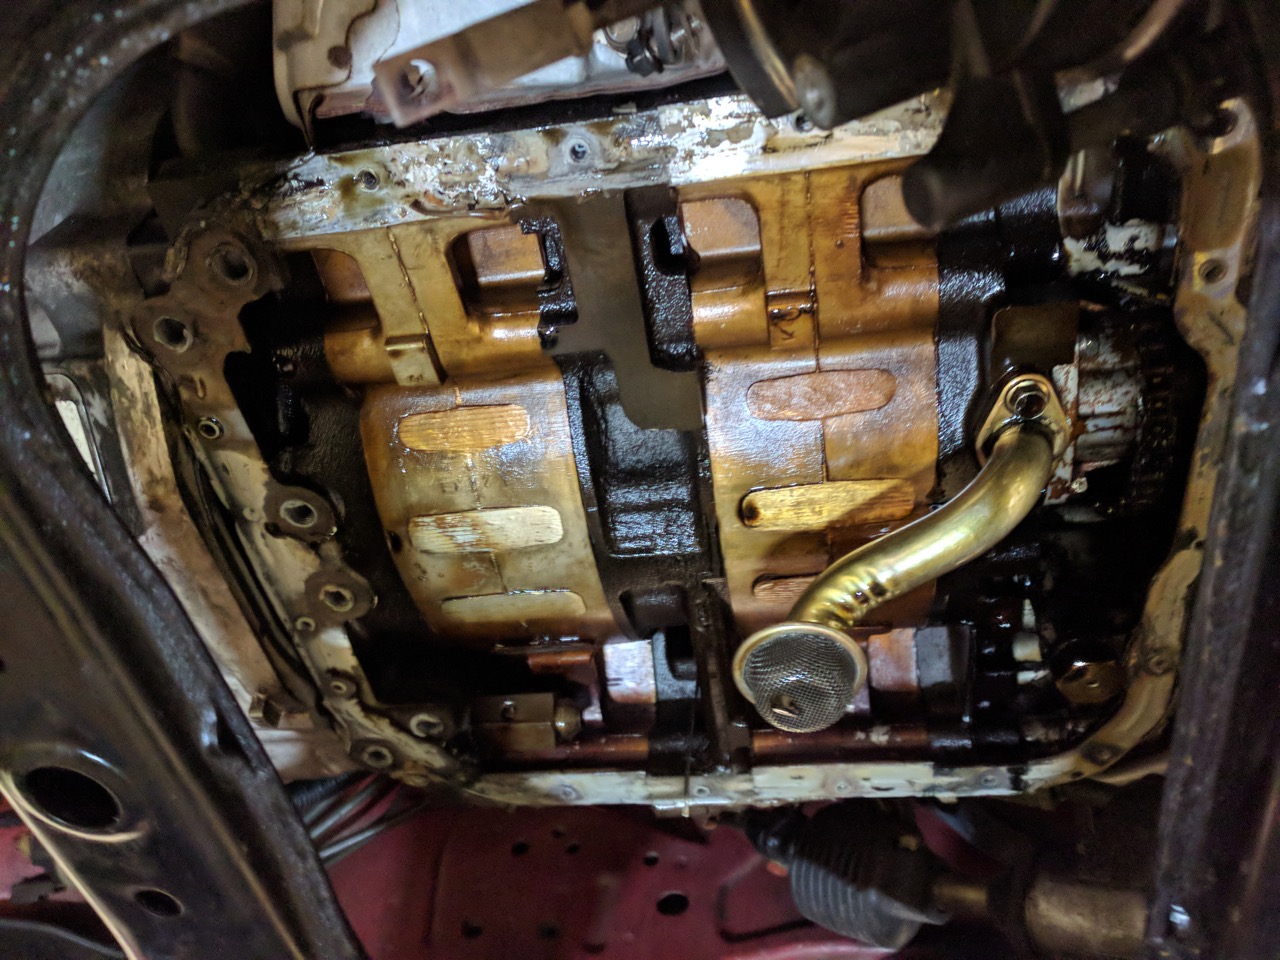
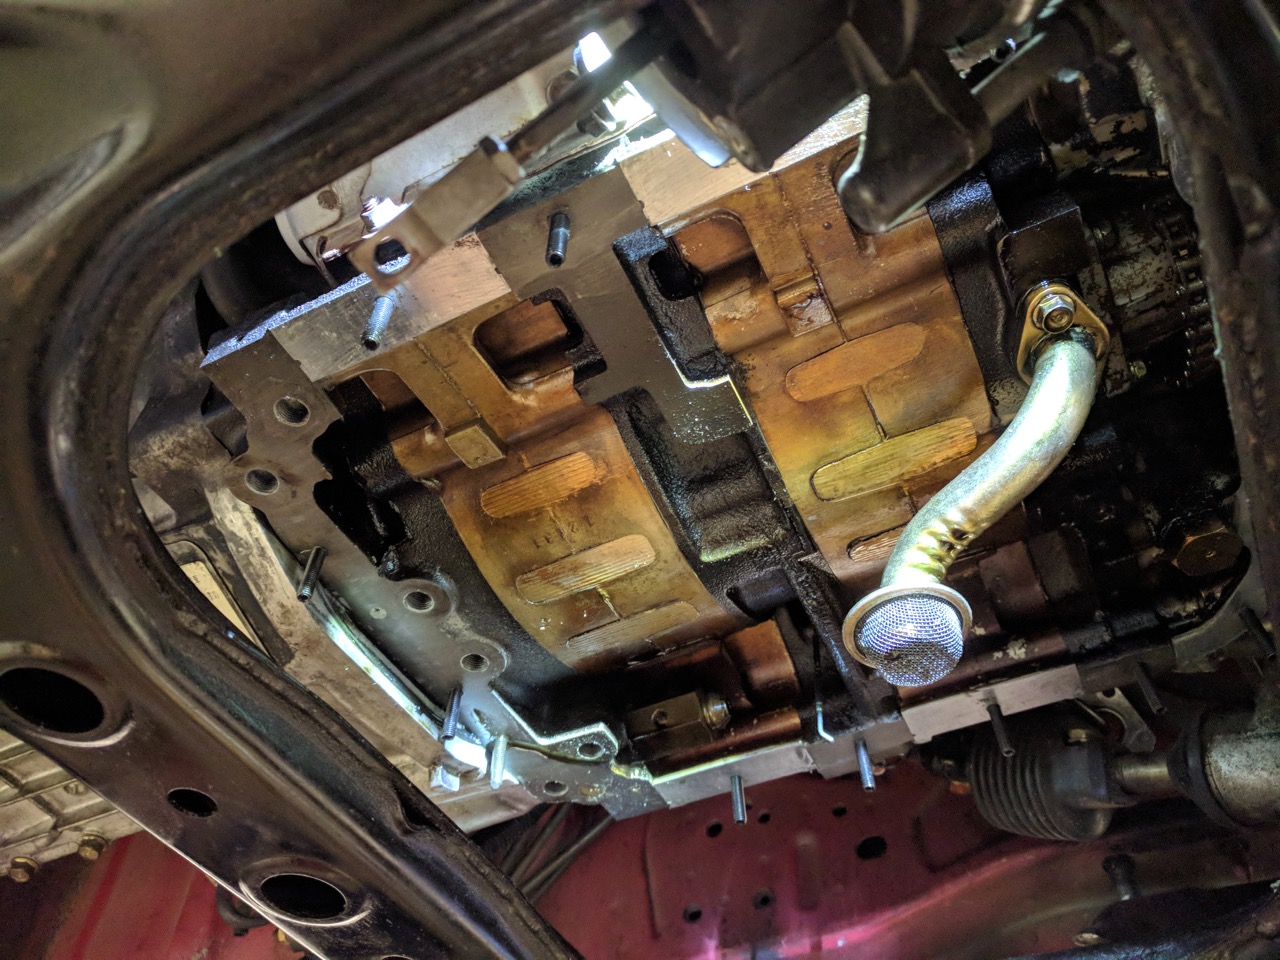
It's kind of freaky how the bottom of a rotary doesn't really look like anything.
The new oil pan is going on with a Banzai Racing oil pan brace. The brace uses studs instead of the factory bolts.
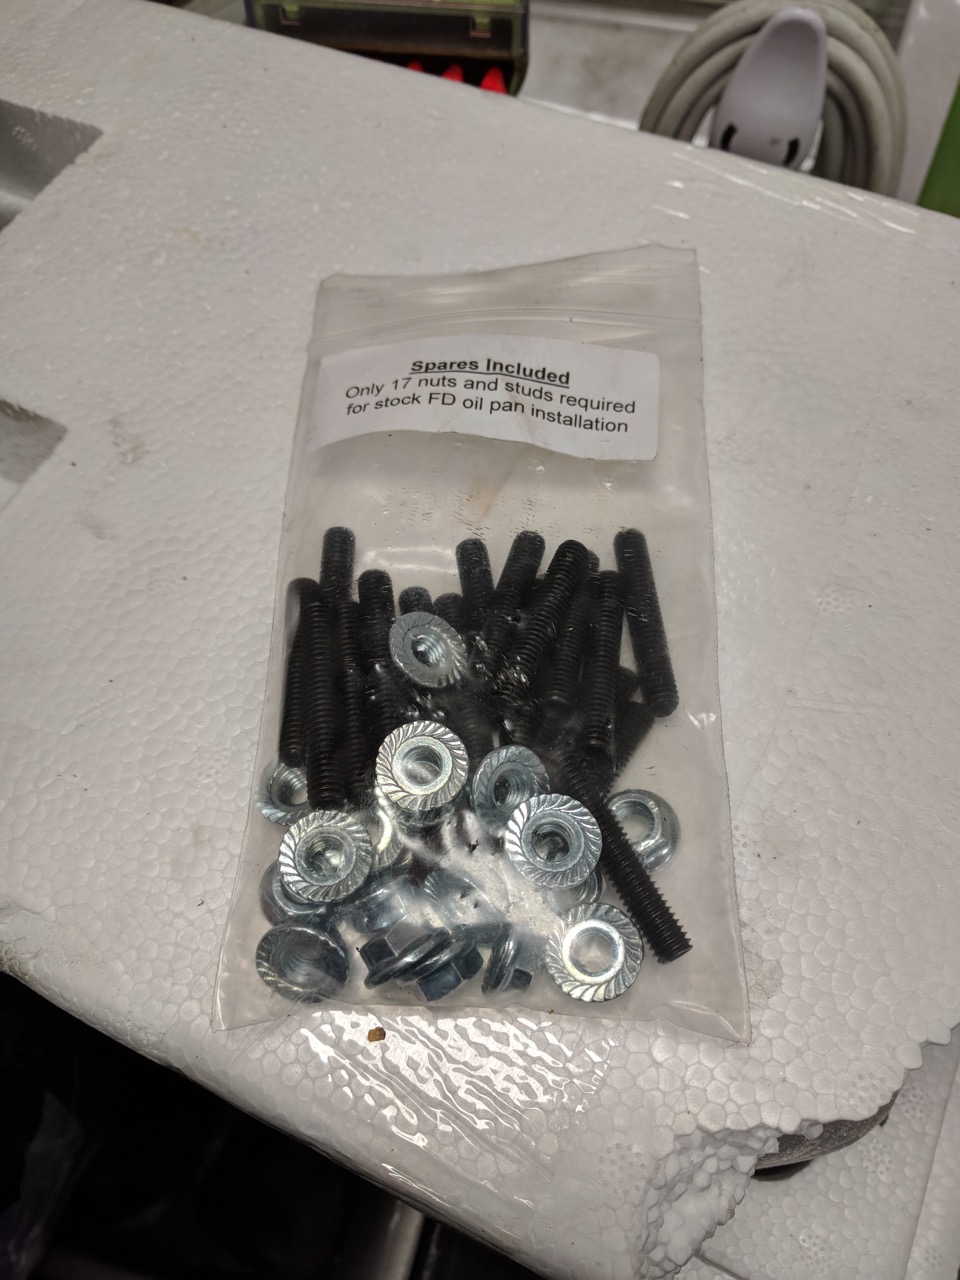
They recommend chasing the threads with a tap. I had a Harbor Freight tap that was nominally the right size, but it didn't feel right so I just cleaned them up with a pick.
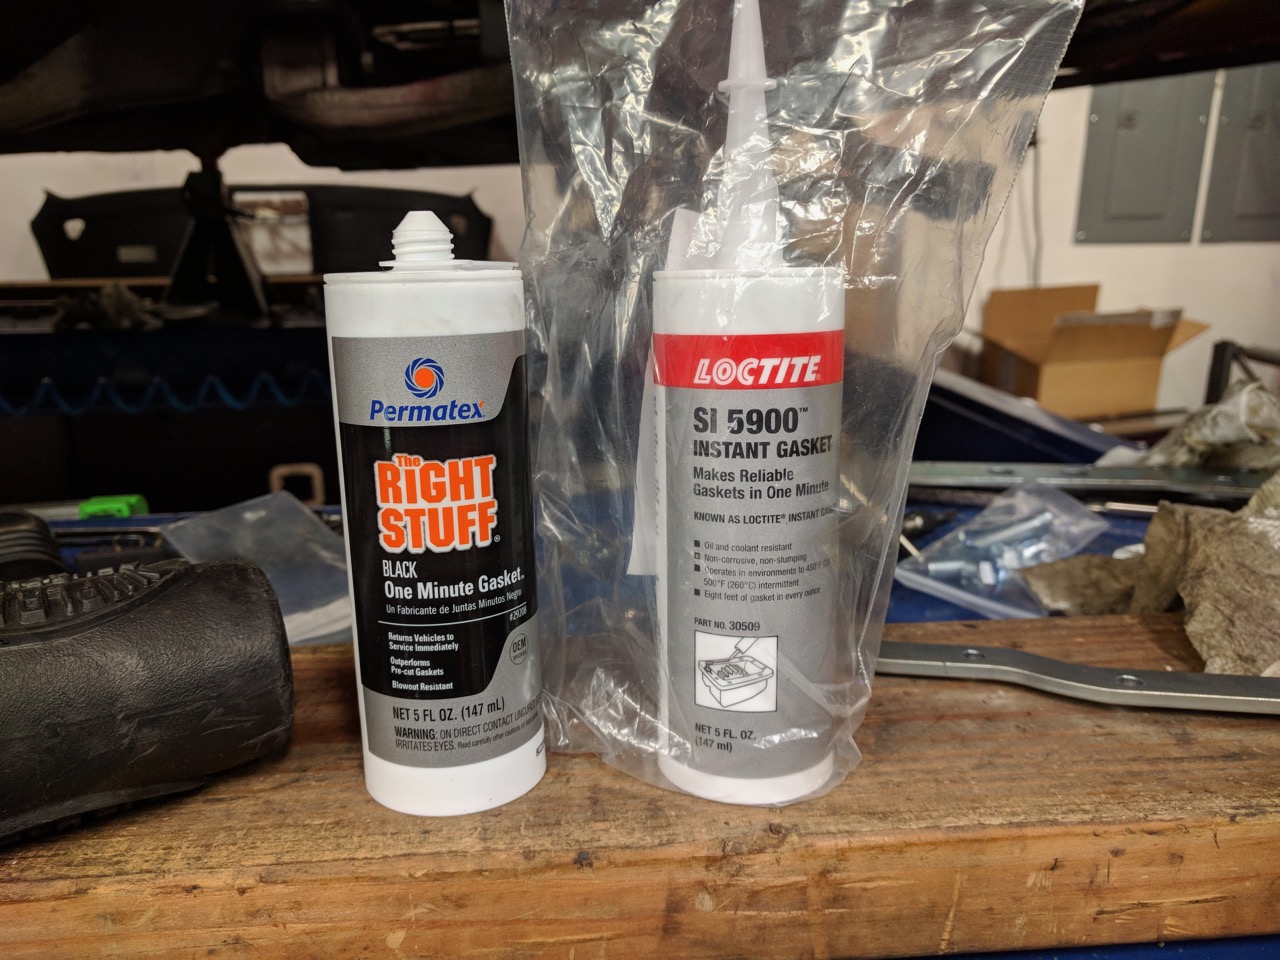
Supposedly Mazda installs these with a (mostly useless) gasket -- I didn't find one when I took it off, so I guess someone's been in there before trying (and failing) to fix a leak. Everyone online recommends leaving the gasket out and just using sealant. There were a couple recommended online, I bought one, then I couldn't find it, so I bought the other, then I found the first one. So now I have both. Guess I'm set if I need to do another one. :)
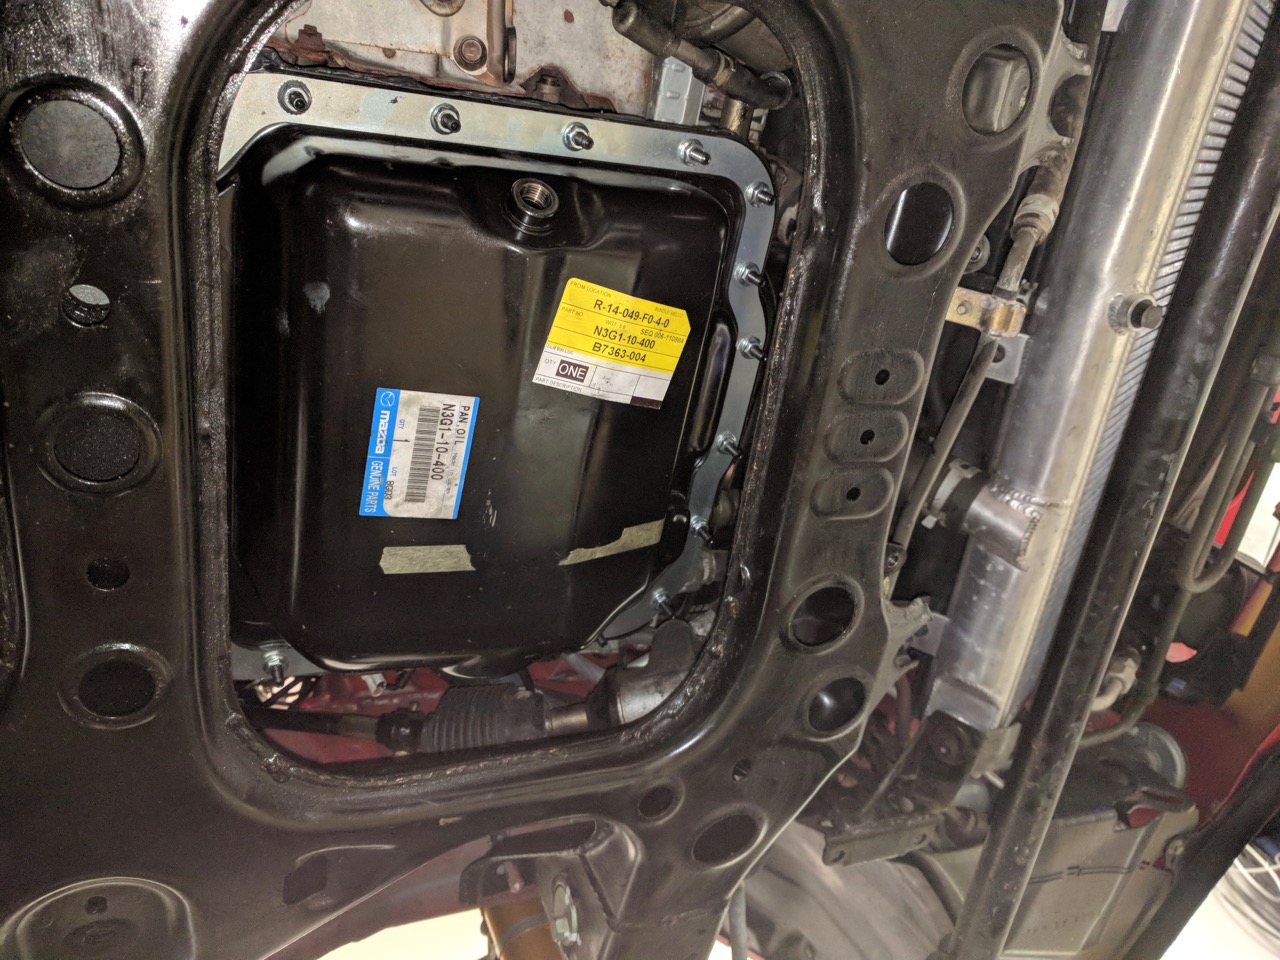
Clean everything up, install the studs, and it looks like this:
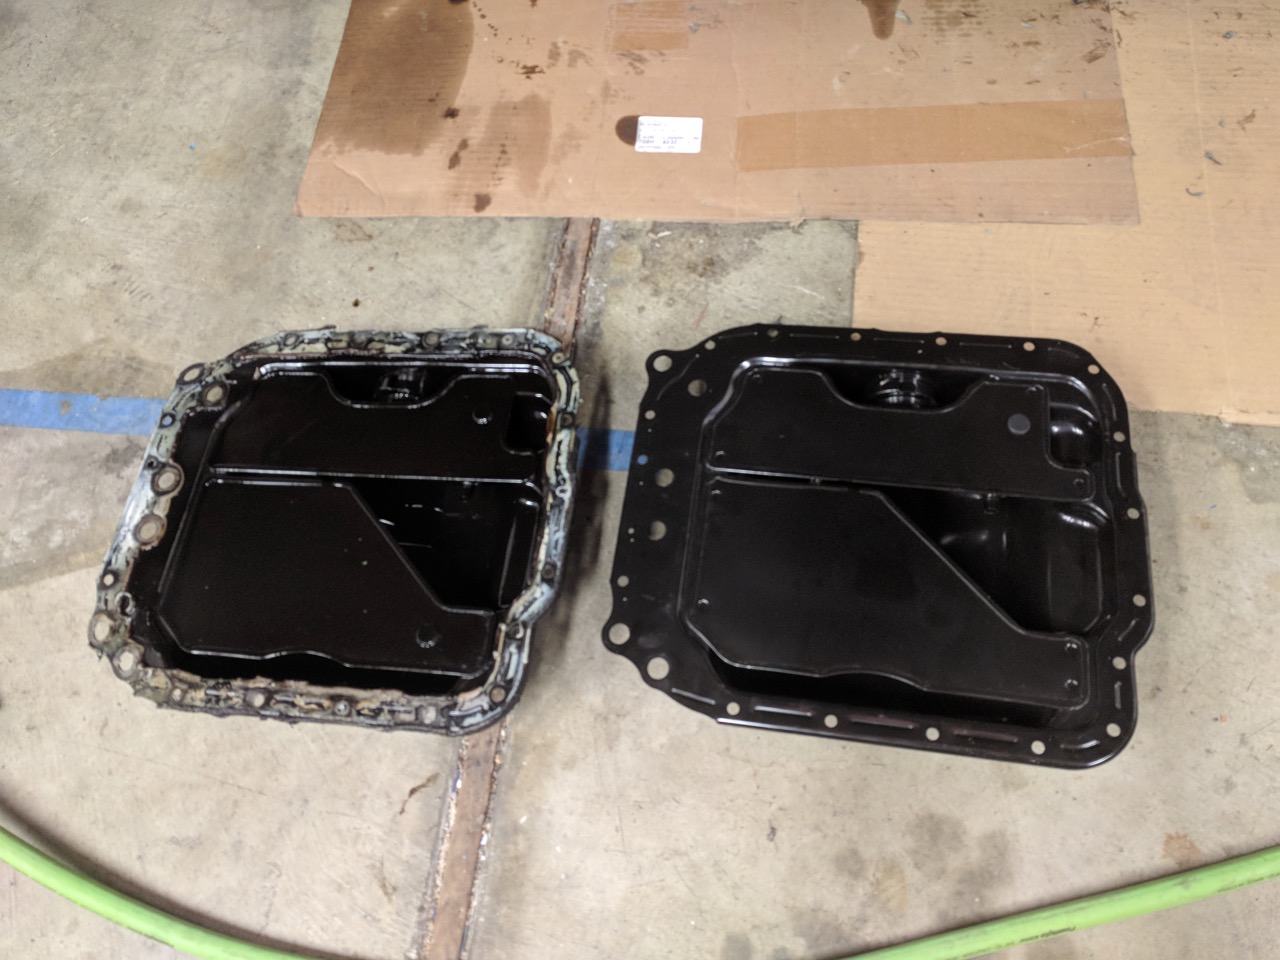
Old and new pans:
Take a break at this point to go to Lowe's, buy a $3 caulk gun to use with the sealant, and grab dinner. Come back to do a bit more.
Pan is installed, motor mounts are bolted to the engine, but subframe is still hanging. I'll finish it up tomorrow, probably.
You'll need to log in to post.


