1 2 3 ... 9
infernosg
infernosg New Reader
12/22/17 9:34 a.m.

I'm a long-time lurker and I figured it's a good time to try to become more active in this community. I started reading GRM about 8 years ago when I got my first RX7 after deciding to become more involved in Motorsports and less in the "tuner" scene. Here's a little information about me. My name is Jon and I'm obsessed with Mazdas. Between my wife and I've owned 6 of them over the past 12 years. What started as a sporty/stylish alternative to a Corolla or Civic for a college commuter (Protege5) eventually evolved into a multi-year project (1986/89 RX7-this topic) and even getting into classic motoring (1979 RX7). With this topic I'm going to attempt to cover the six and half years of work I've put into to RX7 chasses that got me to where I am today. With the car finally running I hope to have it broken in and tuned to return to the track in 2018.

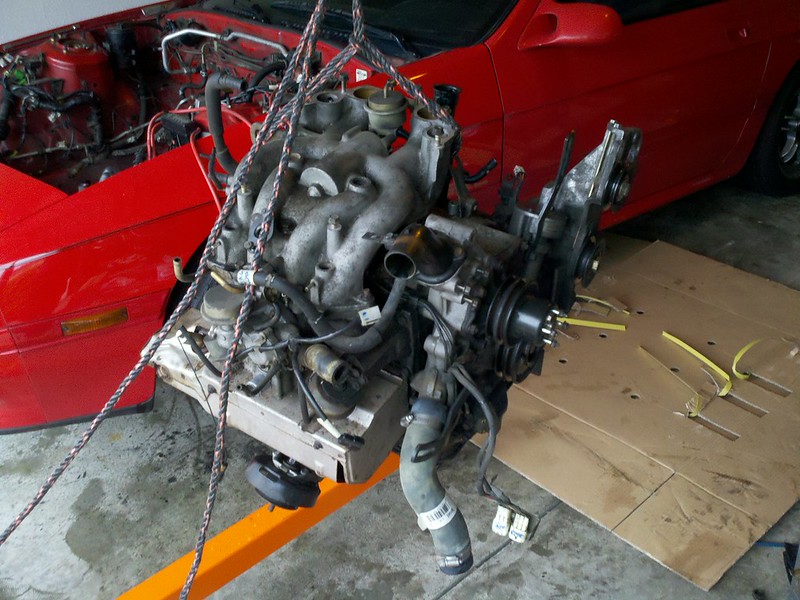
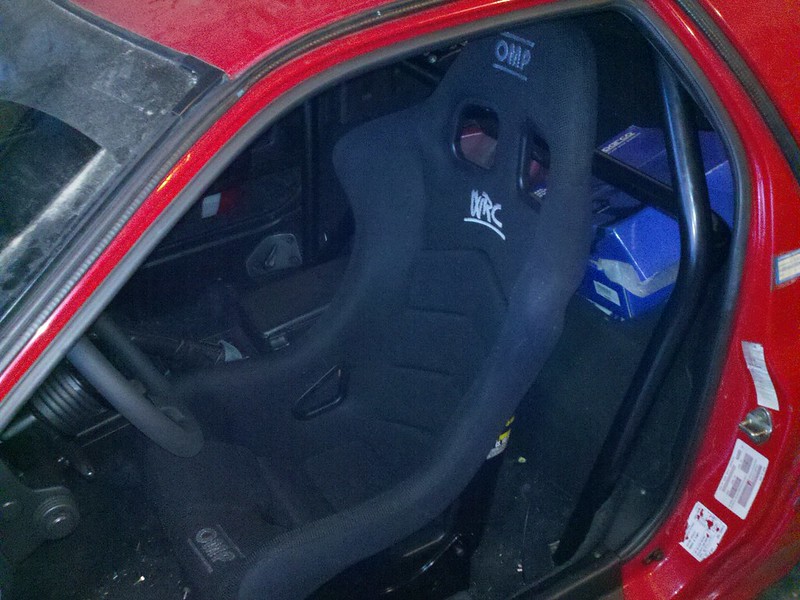
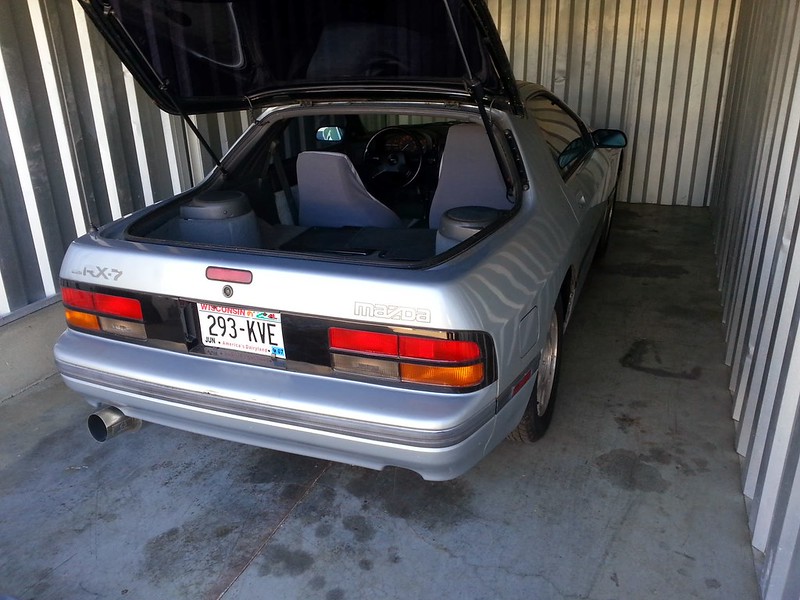
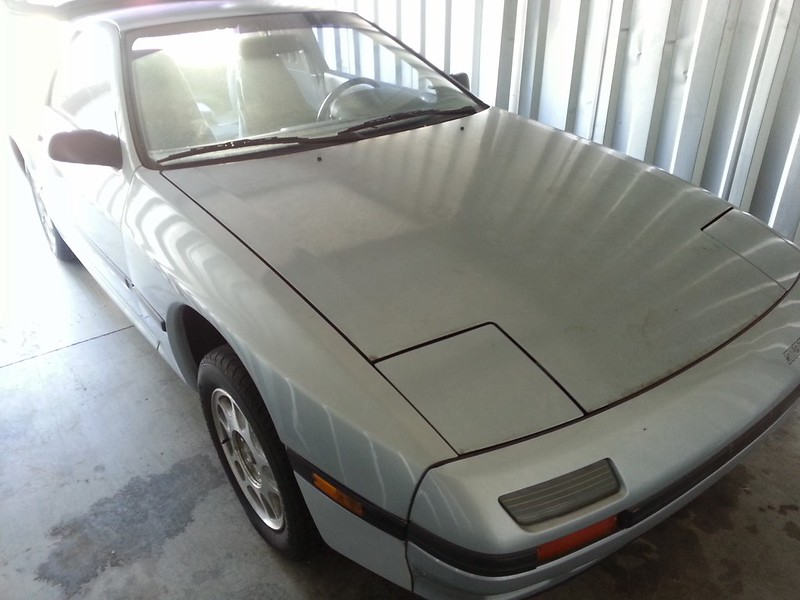
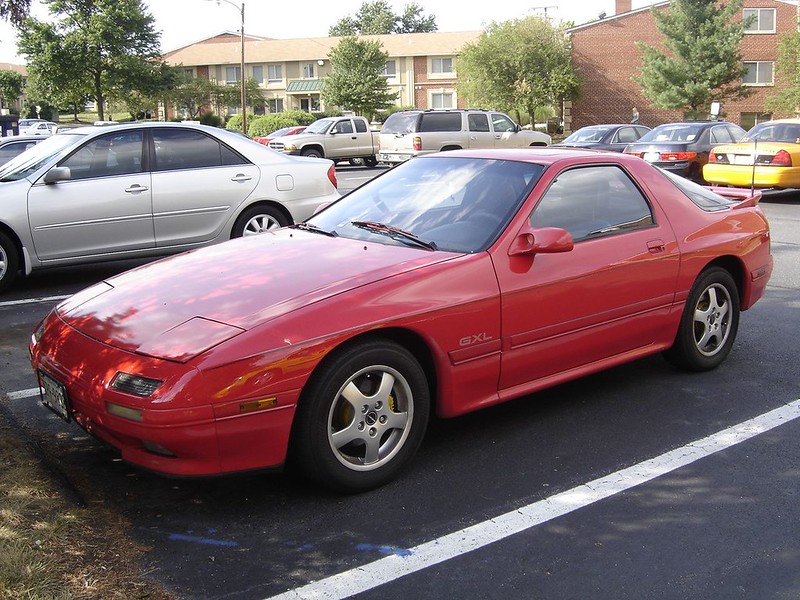
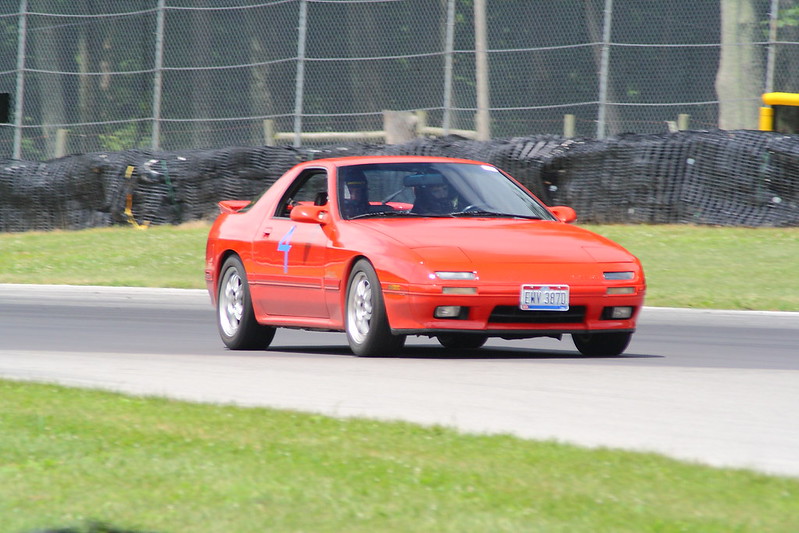
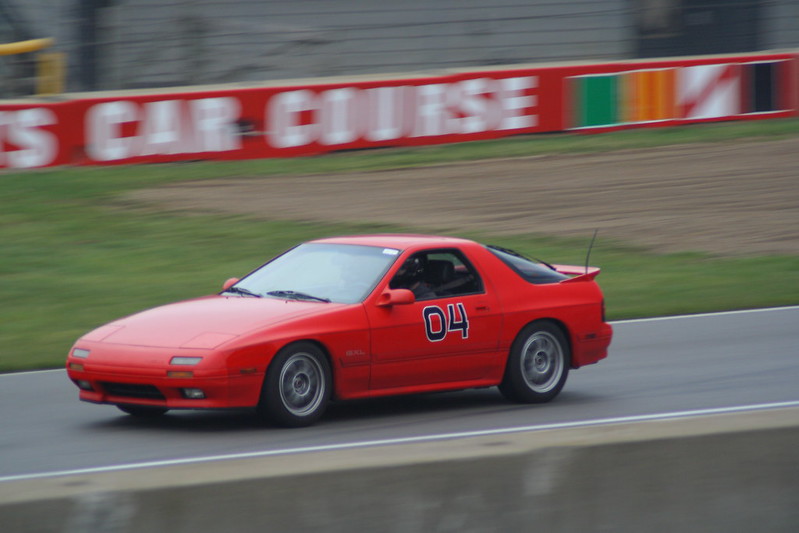
Back in 2009 I had my first Motorsports experience. I attended a Grand-Am race at Mid-Ohio as part of the Mazda Corral and was quickly introduced to the world of sports car racing. Despite over 4 years of work and thousands of dollars put into my Protege5 it was still a 5 door, FWD, "tuner" car. Though the Protege was a modestly-proven platform, after hearing the wail of the 20B-powered RX-8s I convinced myself I needed to be a part of the masochistic Wankel-powered car owners club. Within months I had sold the Protege5 and had my then fiancee pick up this stock 1989 RX7 GXL.

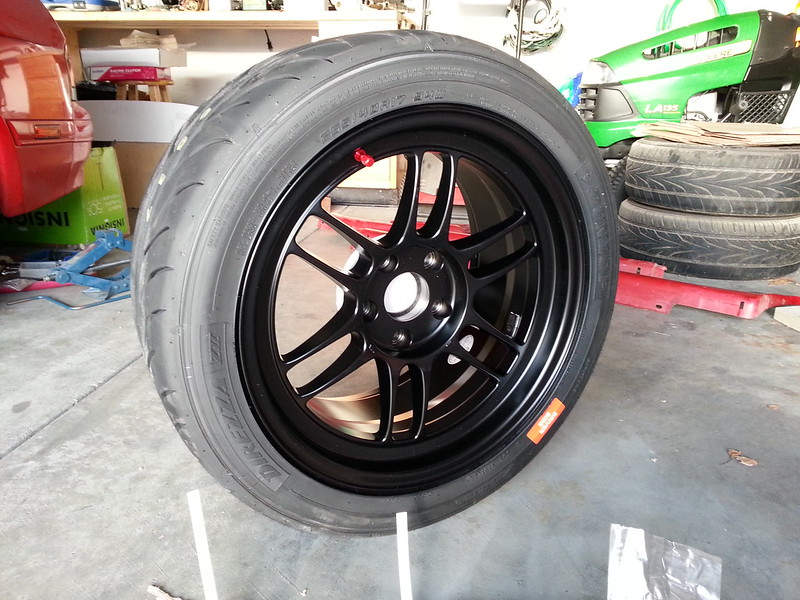
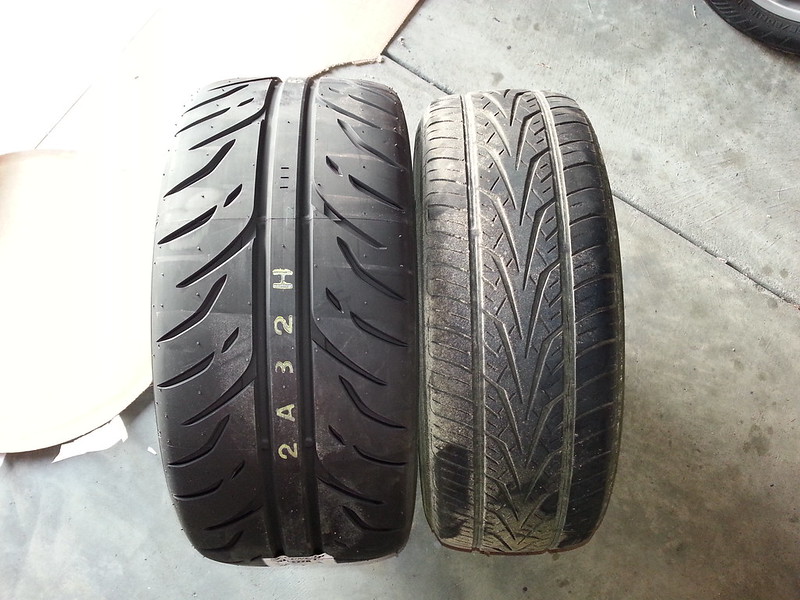
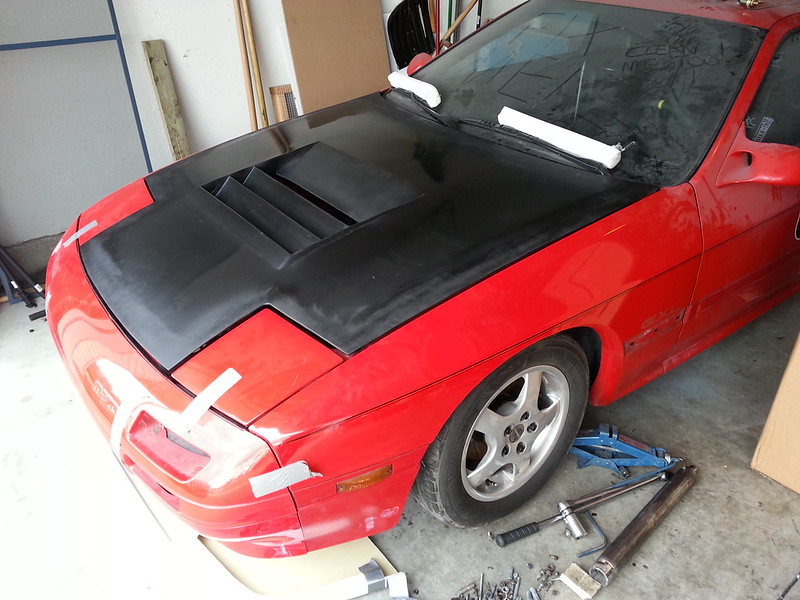
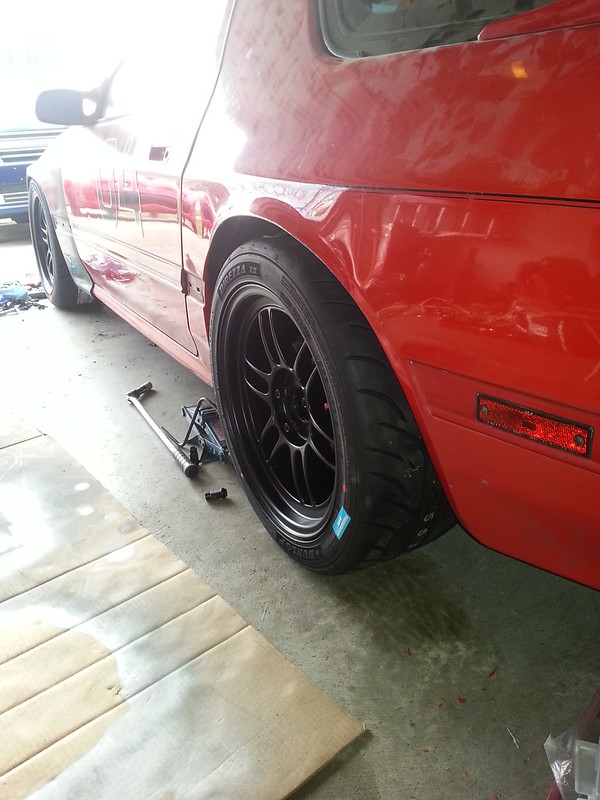
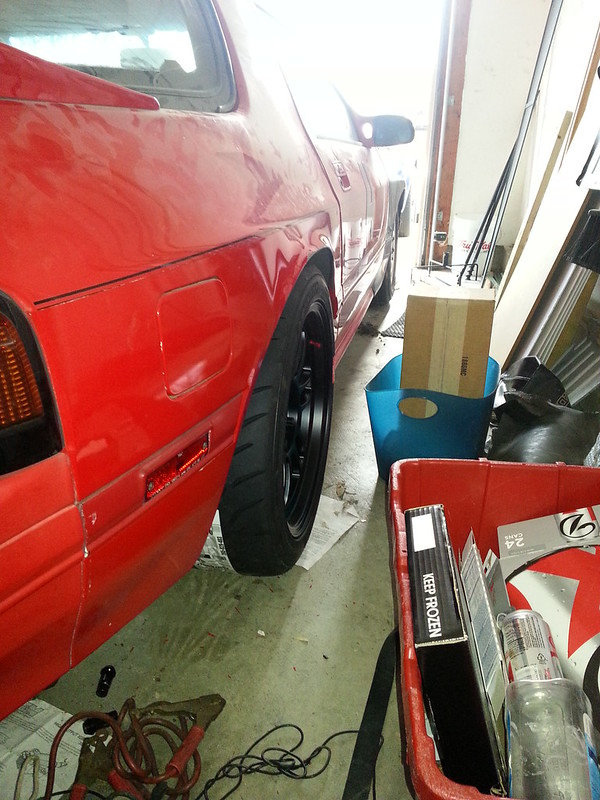
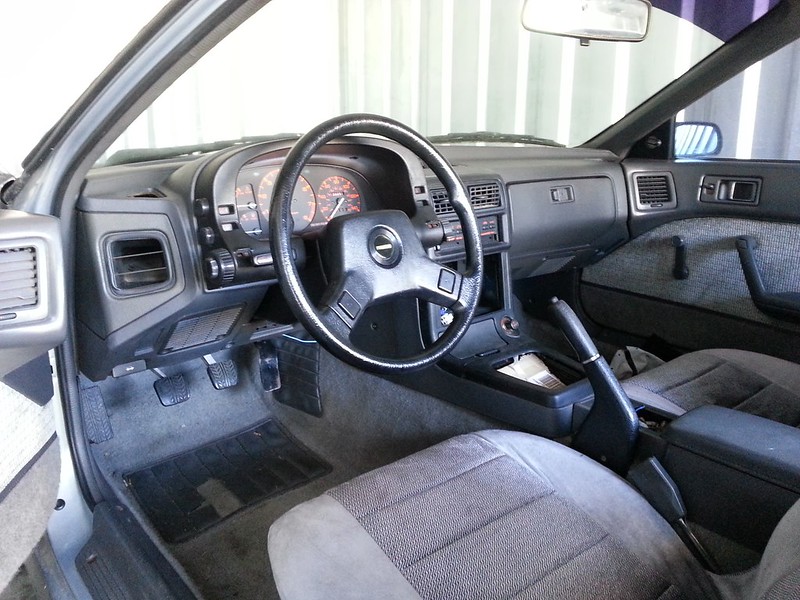
I spent the first few months fixing things like non-functioning window switches and broken interior plastics. After that the fun began. Unlike my previous car I swore I wasn't going to touch the engine save for general maintenance. I was only going to modify the suspension until I was comfortable on the track. Within a year the stock, adjustable suspension was replaced with an adjustable coilover system and the '90s-vintage Borbet wheels were replaced with Enkei RPF1s and wider rubber. My first taste of the track was in April 2010 for a Hyperdrive at Mid-Ohio.

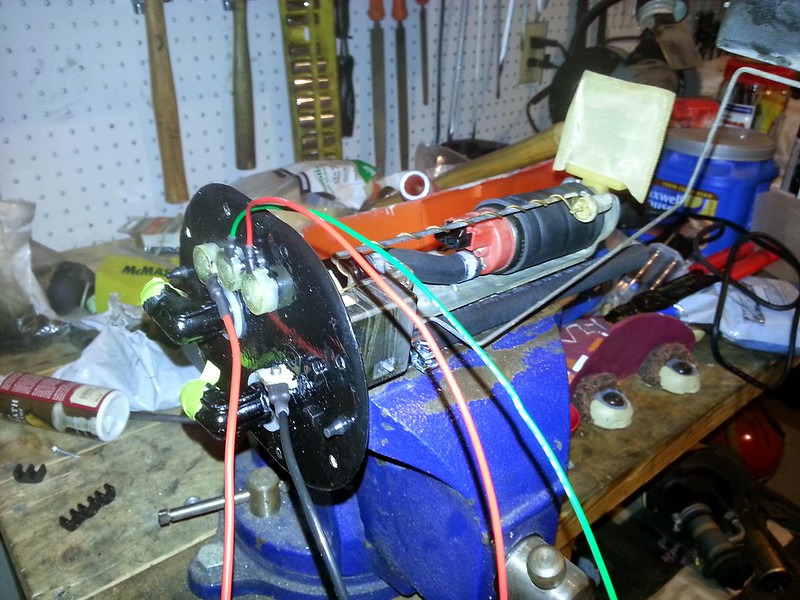
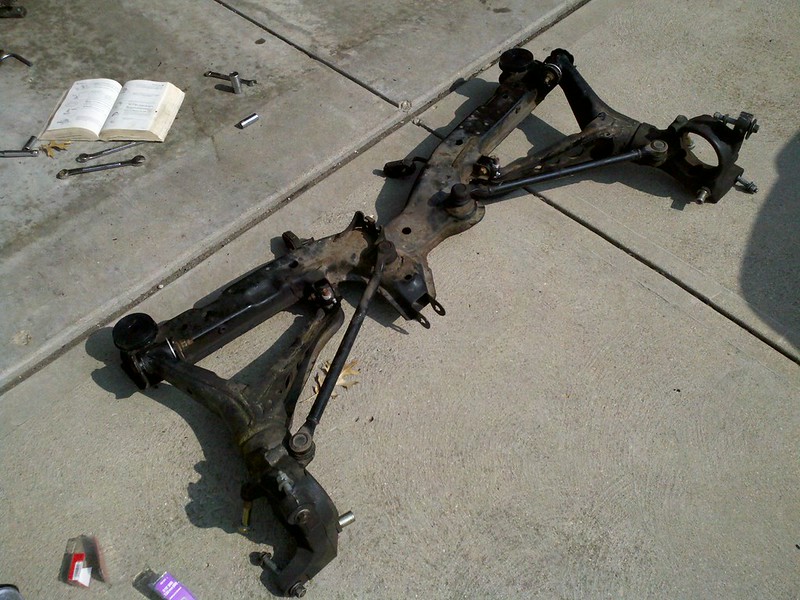
I was hooked, but for reasons I can no longer remember I didn't go to any other events that year. That Winter, I went even further into the suspension modifications and started on the drivetrain as well. Polyurethane bushings replaced the worn-out stock rubbers ones. The "rear steer" function was deleted with UHMW bushings. The engine, transmission, and differential mounts were replaced with stiffer rubber units from the Mazdaspeed catalog. The biggest change, however, was to the differential. I managed to score an assembled rear end from the elusive GTUs model with the viscous LSD and 4.30:1 final drive ratio. Knowing the viscous-type LSD wasn't the best for track use and that later Miatas used the same ring gear diameter I procured a TORSEN LSD from a 1.8L Miata and went about swapping that in.

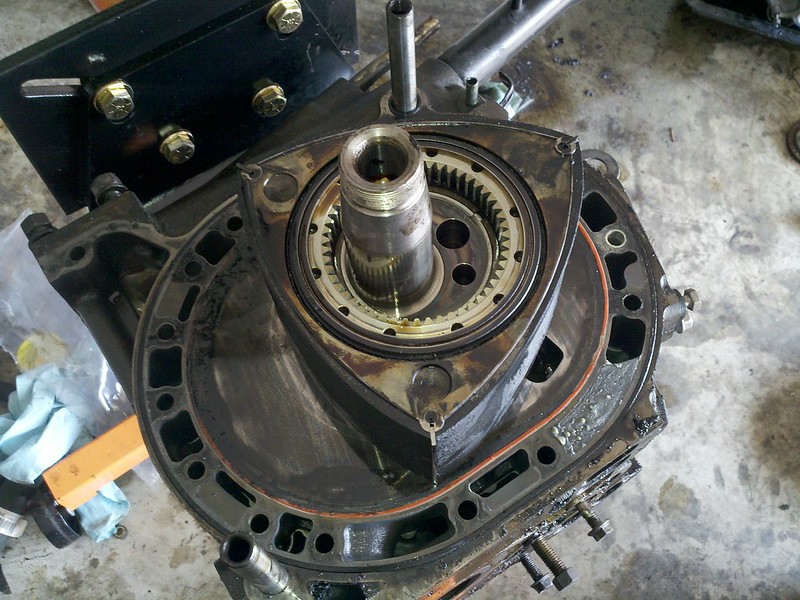
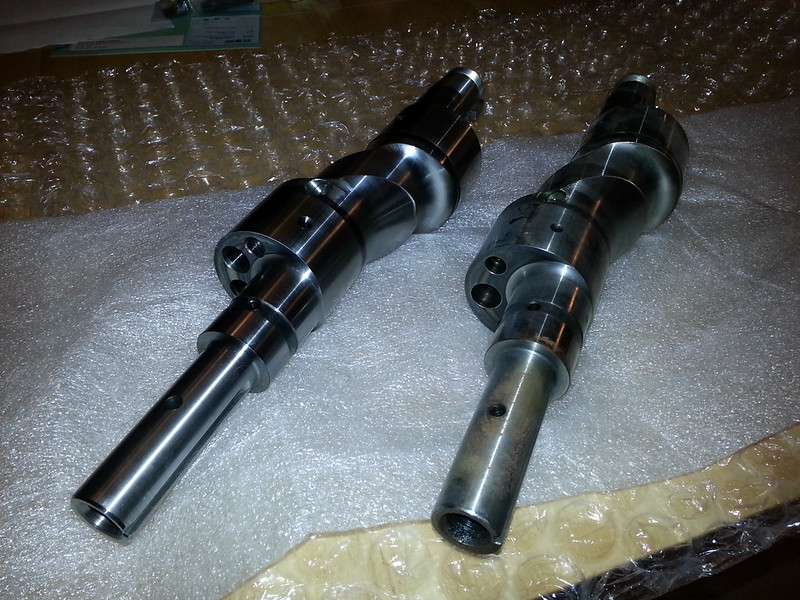
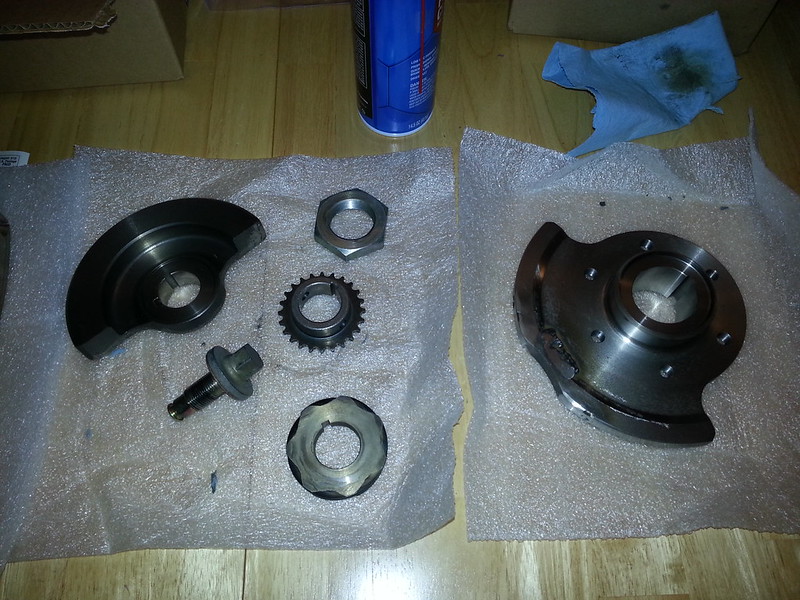
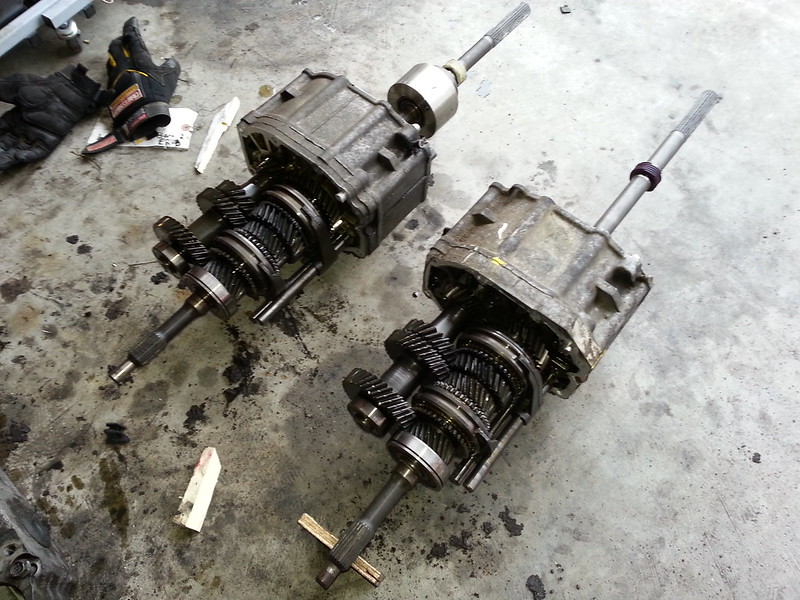
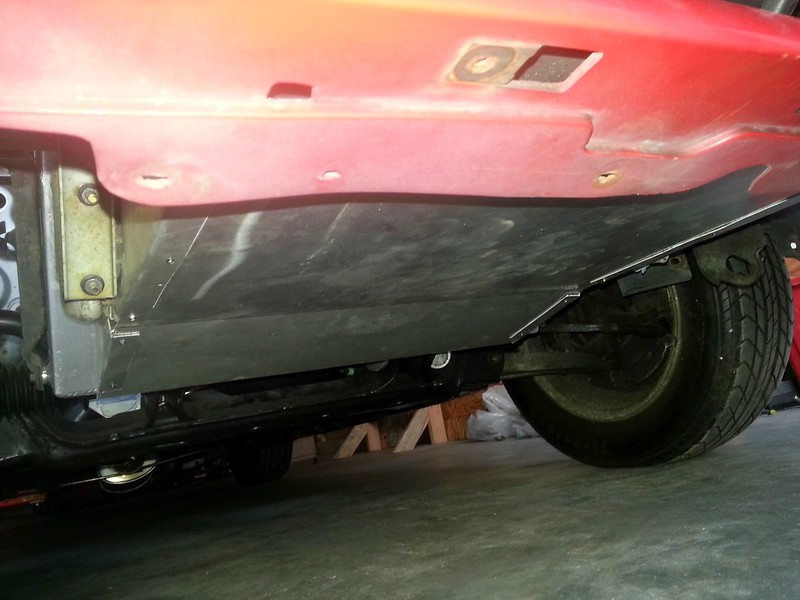
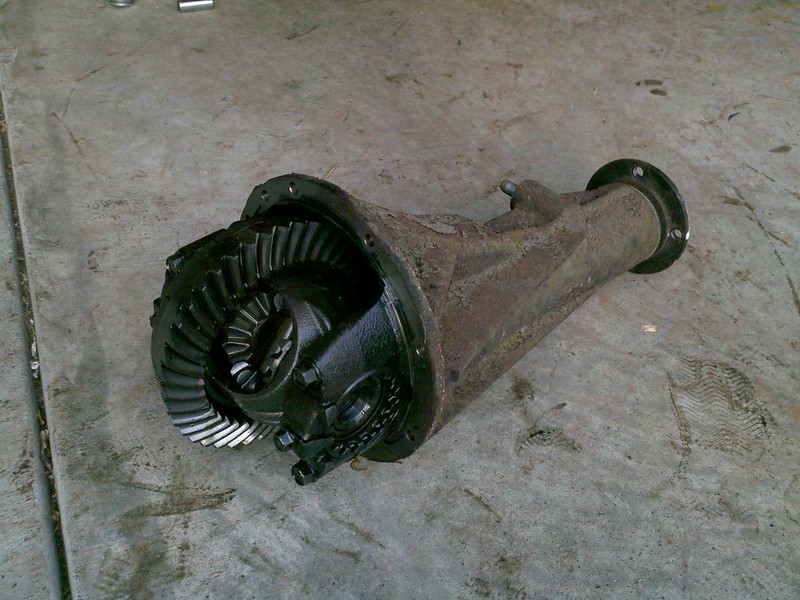
Stock, open rear end with 4.10:1 ratio:

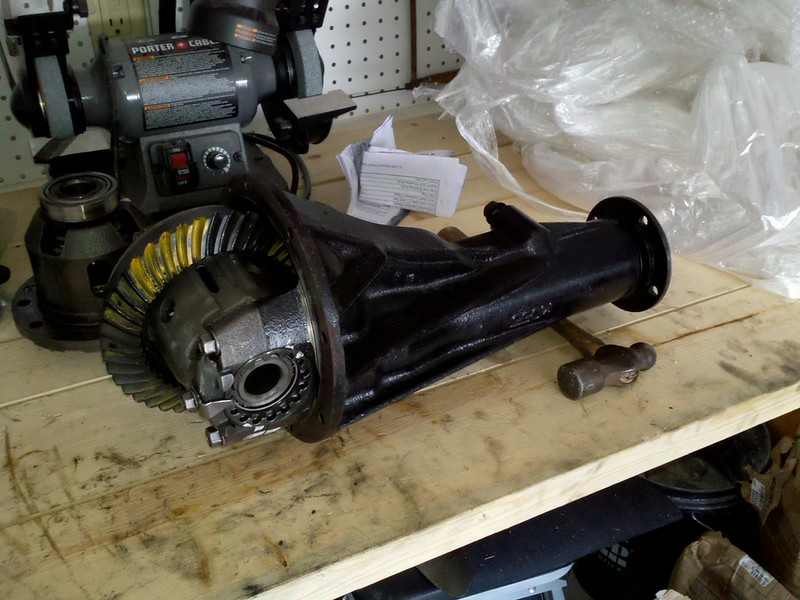
Replacement with Miata Torsen LSD and 4.30:1 final ratio:

I also added UHMW sub-frame mounts, bushings with spherical bearings for the forward mounting points of the rear control arms, and individual camber-adjusting links to correct the copious amount of negative camber RX7s achieve by lowering the rear suspension.

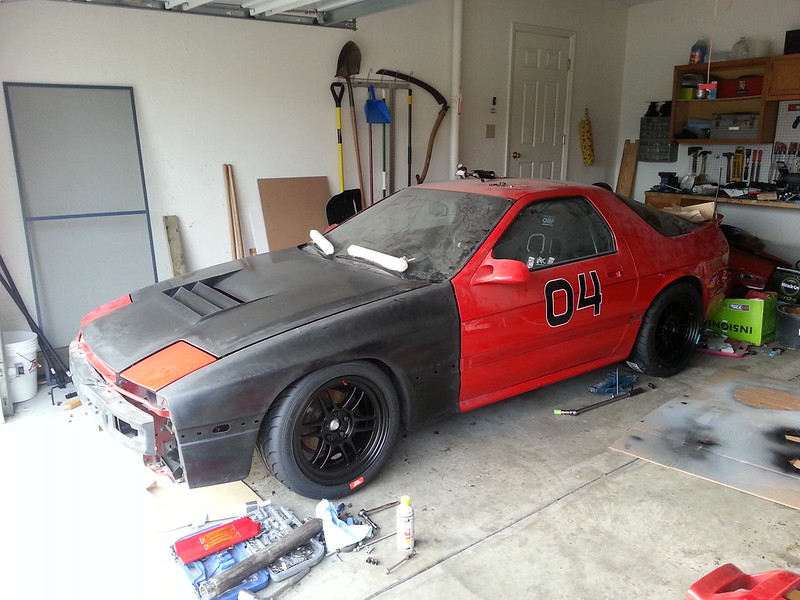
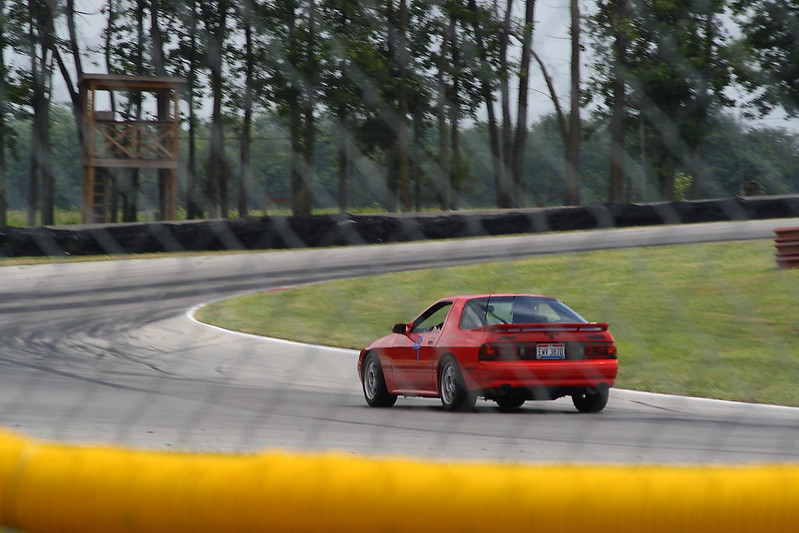
This was all completed just in time before the first HPDE of the 2011 season. I was all set up for a full season of track days. As with the Hyperdrive the previous year I had a blast.

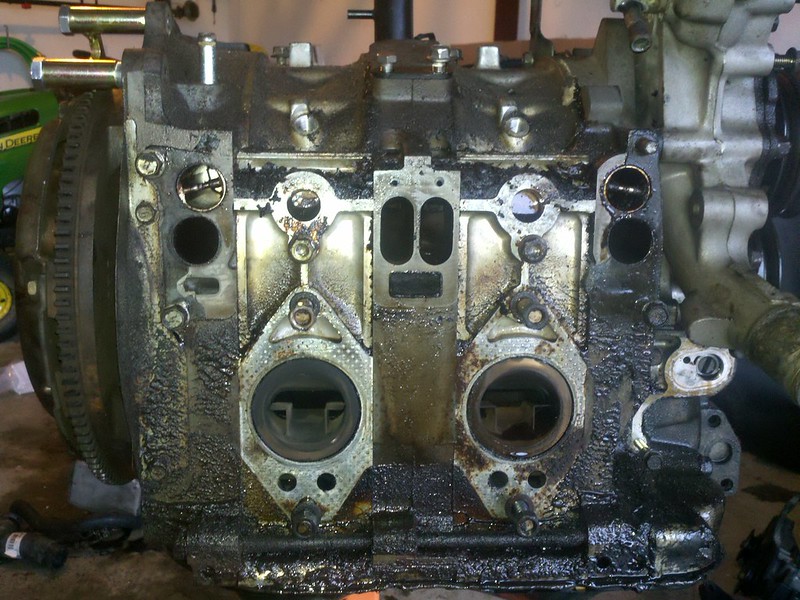
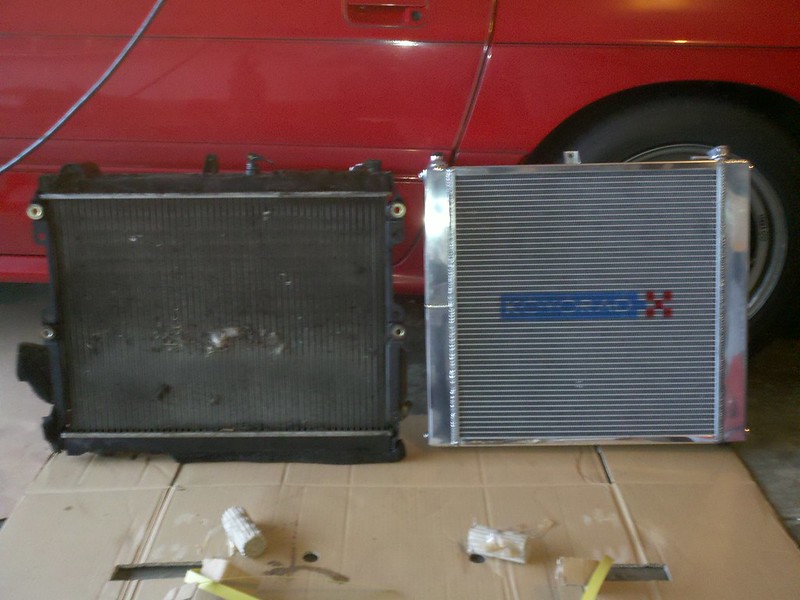
Unfortunately, it wasn't meant to be. On the second-to-last run of the weekend the "low coolant" buzzer went off coming out of the esses. I looked down to see the temperature gauge quickly rising so I turned on the heater and limped back to the pits. I decided not to risk the final run of the weekend, so I topped off the radiator and limped the 2.5 hours home.

Up next: diagnosing the problem and going down the rabbit hole

infernosg
infernosg New Reader
12/22/17 9:58 a.m.

I drove the car periodically over the next few weeks. Mazda was the marque manufacturer for the 2011 Mitty and I was hoping I'd be able to make it. Unfortunately the car had different ideas. Each time it became harder and harder to start and after 10-20 minutes of driving the low coolant buzzer would go off. I was losing coolant but had no leaks and the overflow bottle was full. It was a bad sign. The final nail in the coffin was when the car was seemingly running on one rotor. After doing some research and asking questions I was told to run the car with the radiator cap removed. Sure enough it bubbled and splashed all over the place. Something was pressurizing coolant system and all signs pointed to a failed coolant seal. It was time for the engine to come out. I had never pulled an engine out of a car before so this was a learning experience for me.

This led to all sorts of fun discoveries. As soon as I removed the intake manifold it was clear I had some kind of oil leak - one of the oil injector lines had fallen apart and was leaking all over the top of the engine and down the side.

One of the auxiliary port sleeves was seized in place. Once I got it out it was clear why.

Clearly the car wasn't running at its full potential but none of this was related to the pressurized coolant system. So began the fun task of disassembling the engine.

At the time, I was expecting a blown coolant seal so I did my best to organize all the stock seals so they could be reassembled in the same places.

Go figure the last part exposed is the one with the failure. I got all the way to the front housing before I discovered the culprit.

Let's take a closer look at the bottom-left corner.

That sure looks like a coolant seal failure to me. But wait, there's more! The housing itself also failed. It's hard to see in the picture but the casting material that supports the outside of the seal is gone. The housing was trash. In hindsight, naturally-aspirated RX7 housings are a dime-a-dozen. I could have likely picked one up for $100 and had the car back on the road that year. However, for reasons I still can't fully explain, I went off the deep end. "Since the engine is already out..." I said to myself, and what was supposed to be a simple rebuild turned into a project of ever-increasing scope that would last over six years.

Up next: things get out of hand

infernosg
infernosg New Reader
12/22/17 11:28 a.m.

I had gone the turbocharged route in my previous car (Protege5 with full Mazdaspeed setup) so this time I wanted to do something different. Besides, turbocharged RX7s are all over the place and their reliability is suspect. Since maximum power was never my goal this car was going to stay naturally-aspirated. Soon my goal became clear: a bare-bones, light-as-possible, ~200 HP street/track car. Gone would be just about anything not required to run the car: air conditioning, heater, power steering, etc. I decided I was going to use an aftermarket engine control system so out came the stock wiring. I was merciless. In the picture below the wires on the left would be all the remained of the stock power/emission harness.

This same fate was shared by all. By the time I was done all that was left was the power system, lights, seatbelts, fuel, and instrumentation wires. I took over 20 pounds of insulated wire to the scrappers later that year.

Despite having no heat or A/C I decided to keep the blower motor. Everything was gutted.

I decided on the Haltech Sprint RE for the ECU. It's a pretty bare-bones ECU that would do everything I needed and nothing more. By the end of the Summer I had the ECU in place and most of the interior wiring completed.

Part of that was relocating the battery to the bin behind the passenger's seat.

Since I was going to street/track the car and I had the interior removed I decided why not install a roll bar. Since this was never to be a serious race car I figured a bolt-in unit would be fine. I recalled seeing ads for Kirk Racing in the back of GRM issues so I gave them a call. Add a OMP WRC seat and Sparco steering wheel and the interior was pretty much complete by the end of 2011.

Next up: the interior is nice and all but it's not a car without an engine

wvumtnbkr
wvumtnbkr GRM+ Memberand UltraDork
12/22/17 12:51 p.m.

MOAR!

BirgerBuilder
BirgerBuilder New Reader
12/22/17 1:27 p.m.

Great write up so far, love the car. 


infernosg
infernosg New Reader
12/22/17 1:57 p.m.

Concurrently with all the interior planning/work I was also figuring out what to do with the engine. I knew I wanted a naturally-aspirated build. I figured it would be more durable for track use, despite having less power. The problem is the N/A FCs really aren't good powerplants to work with. The S5 cars (1989-91) make okay power in stock form but there really isn't much room for improvement due to the use/design of the auxiliary intake system. Without going into too much detail the N/A cars have extra ports (5th and 6th) in the front and rear housings that open at higher engine speeds. These open using pressurized air from the air pump, which is also part of the emissions system, which I no longer have. Aside from some truly ingenious (and complicated) workarounds my only option appears to be leaving them open all the time. Most people are okay with this but I didn't like the idea. The combined intake area is too large for all but very high engine speeds. This would make an already torque-less engine even worse, which isn't so great for powering out of turns. I had read how the older, 4-port engines responded much better to porting (akin to swapping cams). Unfortunately these housings are hard to find, expensive, usually in bad shape, and are known to have thin spots. I decided to experiment with something I'd seen only a handful of other people try: take a newer 4-port turbo engine, ditch the turbo, and use the higher-compression N/A rotors. In the end I decided on S4 (1987-88) turbo housings because the stock port timing is nearly identical for all four ports. This would make intake manifold design easier down the road. I ended up keeping my N/A rotor housings but the exhaust sleeves would be swapped out for turbo sleeves without the diffusers. Here's the side housings after being cleaned, lapped, and re-nitrided at Chips Motorsports, and the rotor housings after being "resurfaced" at Goopy Motorsports.

The next internal discussion was the porting configuration. Again, since this was still to be a street/track car peripheral and bridge porting was ruled out. While I can't argue the sound is intoxicating I wanted something that could idle below 2000 RPM. I reached out to Logan Carswell at Defined Autoworks for advice. They had developed a large streetport configuration that had yielded over 200 HP to the wheels on their testbed FB. I ended up going with this.

Around this time I started watching YouTube videos of N/A RX7s. I cam across a few claiming to run individual throttle bodies and I was hooked. I've always loved the sound of the old Weber IDA-powered RX7s and the plan was to match that with modern fuel injection. On Logan's advice I went with massive 55 mm IDA-style ITBs from EFI Hardware.

Logan's advice was actually that I needed 52 mm but at the time I couldn't find anything in that range. I had Logan fab up an aluminum intake manifold to match the ITB and intake ports.

Fuel would be provided by two Injector Dynamics ID1000 injectors. This way I could avoid staging and keep it as simple as possible. Unfortunately, test-fitting the intake revealed a small problem.

The throttle position sensor was now interfering with the top-mounted alternator. Fortunately, there are several aftermarket side-mount options and I ultimately chose the version offered by Extreme Rotaries of Australia.

Next I turned my attention to the engine internals. I knew I was going to re-use my N/A rotors because they offered the highest stock compression I could easily drop in. The RX8 has 10:1 rotors but would require machining to the apex seal slots. I decided it wasn't work it for the extra 0.3. I did however, decide to upgrade to the RX8 eccentric (crank) shaft and stationary gears. Oddly enough the RX8 eccentric shaft is quite cheap and is approximately 0.5 lbs lighter than my stock one due to extra holes in the lobes.

The RX8 stationary gears allow me to drop everything in without worrying about clearances. Some small modification was required to an oil channel in the rear stationary gear. I then picked up an aluminum flywheel and new clutch from Racing Beat and sent the entire rotating assembly to Mazdatrix to be balanced.

By this time it's Autumn 2012. I had taken a break for the first 6 months of 2012 because I more or less burned myself out the previous year. We were expecting our first child the October so I was in full-on panic mode trying to accomplish everything I could. By this time I had purchased just about everything I needed to finish the rebuild.

With child imminent and the weather turning colder I was limited in what I could accomplish. I turned my attention to making everything look a little nicer. I stripped the anodized blue coating off the ITB hardware and painted the engine components in the most boring combination.

Up next: spark and fuel

infernosg
infernosg New Reader
12/22/17 2:16 p.m.

Let's jump back to Autum 2011 again. I was still coming up with my overall vision for the car. Since I was sparing no expense at this point I figured I'd look at the ignition system as well. The FC ignition is actually fairly robust. It's not uncommon for the FD guys to use FC ignition coils. However, seeing 10,000 RPM in my head and the stock coils won't cut it at those speeds. I considered CDI at one point but it wasn't something my Sprint RE could power. Around this time the IGN-1A coils started to generate a lot of discussion. Speaking with Chris at LMS-EFI only confirmed that these were the coils for me.

The fun part was figuring out where to put them. Most people run them on the driver's side frame rail next to the engine. Unfortunately my side-mounted alternator prevented that. I considered mounting them on top of the engine but figured there wasn't enough space. In the end I mounted them in the stock battery location and had custom Magnecor wires made.

I wasn't super happy with the length of the leads but it really wasn't any worse than stock. As you can see I also started finishing up the wiring in the engine bay as well. You can also see some of the new fuel lines. Rather than risk running the stock pump I obtained a Aeromotive Stealth 340 gph unit along with a reusable fuel filter, fuel pressure regulator, and a bunch of -6 AN braided stainless steel lines.


Since the fuel rail, FPR, and filter all used AN fittings I figure it would be easier to ditch the stock hard lines and run new fuel lines. Overall this was easy but required some creativity at the fuel tank.

In the end I was able to keep the fuel filter in the stock location and mounted the FPR on the firewall for relatively straightforward line routing.

It kind of looks like I'm nearing the end doesn't it. I mean, I've covered the interior, engine control, the engine, ignition and fuel. The only thing left is to build the engine and start it up, right? Well, something weird happened in early 2013. Maybe I was enjoying modifying the car too much or maybe I was afraid to finish it. Either way, 2013 was the year I completely changed the direction of the car. It all started innocently enough

Next up: deviating from the original plan

infernosg
infernosg New Reader
12/22/17 2:48 p.m.

The last task I really needed to tackle was the steering. I had intended to eliminate the power steering and now with the side-mounted alternator that was a requirement.  I've seen several ways of doing this: loop the lines or plug the holes but everyone always seemed to complain that the feel still wasn't like that of a true manual rack. I always had the option of swapping a manual rack, but those were hard to find, often in bad condition, and the steering rate wasn't fast enough for what I wanted. What comes next should be familiar with most Miata owners. In fact, this whole post is going to be heavily inspired by the Miata. Enter de-powering the steering rack. The process itself is simple enough. Especially since the setup is similar to the Miata.

At the time I had a cheap Eastwood MIG welder I had used to make a couple small things (battery box, ignition coil bracket). I used that to weld shut the ports on the rack and weld up the pinion to eliminate all steering play.  I also stripped the housing down to bare metal and gave everything a new coat of high-temperature paint.

At this point I had been frequenting multiple RX7 forums for three years. I was reading about all sorts of neat things people were doing like using RX8 eccentric shafts and de-powering their steering racks. Then I came across an interesting informational thread: the N/A RX7 transmission was nearly identical to the Miata's. In fact, on Mazdatrix's website they claim the gear ratios out of the 1.8L Miatas are a good, cheap, option road racing due to their relatively close ratio. This is further confirmed on Mazdatrix's website in their transmission section. The only caveat was the housings and input shaft length were different. I thought this could be a neat future project and didn't really think about it more until I stumbled upon a transmission out of a 1996 Miata while at a Pick-and-Pull looking for another part (more on that later). The price was right so I snatched it up. Time to add transmission rebuilding to my skillset.

Apparently this is Mazda's "Type M" transmission and has been in use since the early RX7 and 626 days. Mazda continued to make small changes/improvements all the way until the end of the NB in 2005. Once you get inside the bell and tail housings they really are very similar.

Unfortunately, to get to the input shaft the entire transmission has to come apart. The result is a fun parts-explosion only possible with the use of a factory service manual.

I've fully documented the disassembly/assembly of a Mazda Type M transmission but I'm going to spare everyone that here. In the end the Miata input shaft is turned down to match the length of the RX7.

In all, internally, my transmission is a Miata. The only RX7 parts used are specific to the bell and tail housings. While I had everything part I cleaned and painted those.

To top it all off I grabbed an aluminum driveshaft because why not?

Time to take a step back. Why was I at that Pick-and-Pull to begin with? Well, another fun fact I found was the larger brake master cylinder out of a 929 could be used in the RX7 as long as either a Turbo or 929 brake booster was used. I happened to find a matching set at said Pick-and-Pull. The reason for this is I never liked the feel of the stock brake pedal. No matter how many times I bled the system it always felt mushy. The larger 929 master cylinder supposedly gave a firmer pedal with better modulation. Unfortunately it wasn't in the greatest of shape.

Based on the rust on the booster I figured the master cylinder was gone. Fortunately, it's far easier to obtain a remanufactured master cylinder than brake booster, which appears salvageable. Some time with a wire wheel, some body filler, and some high temperature paint gave it new life.

In the end the trickiest part was finding a tee for the front port and bending the stock brake lines to work with the new arrangement.

So now I've ventured into the transmission and braking system. What else is left? What else could I get into that would further extend this project?

Next up: exhaust and cooling system

Vigo
Vigo UltimaDork
12/23/17 12:32 a.m.

Nice work, keep it coming.

JtspellS
JtspellS SuperDork
12/23/17 6:21 a.m.

Excellent build!

bruceman
bruceman Reader
12/23/17 10:55 a.m.

I feared there was LSx content but no another surpriserotorhead

Mr. Lee
Mr. Lee GRM+ Memberand UberDork
12/23/17 11:19 a.m.

I've felt the call of the spinning dorito's again lately. Then I stomp on the gas pedal in my Sliverado, and I remember why I got out of rotories. Still love them more than I should. Keep it up, this isn't helping my lust for more brap in my life. laugh

infernosg
infernosg New Reader
12/24/17 1:04 p.m.

If it isn't obvious yet, I'm kind of bouncing all around the build during the 2011-2013 years. I'm not necessarily the most focussed individual so I was doing multiple things at once. Let's focus on the cooling system for a bit. Since my original engine failure appeared was because of the cooling system I knew some changes would need to be made if I was going to get back on track. Almost immediately I decided to ditch the stock radiator for a dual-pass Koyo unit.

I also decided I didn't want the cooling system dictated by engine speed so I replaced the stock mechanical fan for an electric one. I forget the brand (it's not SPAL) but I grabbed the 16" puller with the most airflow/least current pull I could find.

Aside from adding a real coolant temperature gauge this is all I accomplished on this front until Summer 2013. I knew simply sticking the fan on the back of the radiator wouldn't result in the best cooling efficiency. That's when I started to read about people making their own fiberglass fan shrouds. So I decided I was going to play with fiberglass for the first time. I made a frame out of MDF and some quarter-round trim. The goal was to transition the flow from the square radiator to the round fan as smoothly as possible.

The fan-mounting surface is angled to account for the angled nature of the radiator when mounted in the car. I then stretched some fleece fabric over the frame, coated it in resin, filled, smoothed, and then prepped it for use as a mold.

For reasons I'll explain in a bit it would be about a year before I had a finished shroud. Here's the finished product, more or less, without paint.

I also knew at some point I was going to duct the front of the car to force all air that entered through the radiator and/or oil cooler. This meant shaving all the miscellaneous brackets not needed anymore.

So let's pause on the cooling system for a bit and switch over the exhaust. Remember I said I had been following Defined Autoworks testbed FB? In their 200+ HP build they developed a mid-length exhaust manifold. It wasn't a true "long primary" system but it also wasn't as short as the off-the-shelf Racing Beat units. After a year of waiting I finally got my copy.

Unfortunately, a quick mockup revealed the manifold was really intended for cars with the stock intake manifolds. I have about 1/16" clearance between the rear exhaust primary and the rear intake tubing.

Ultimately, I would have the engine flange of the intake manifold machined down a bit to give some more clearance but it's still close to this day. The next step was to get the rest of the exhaust fabricated. I sourced the exhaust components myself. I went with a Racing Beat pre-silencer and muffler because their products are known to be durable and their off-the-shelf exhausts have proven to be effective at reducing the Wankel's harsh exhaust note.

Apparently, I have poor taste in exhaust shops because I think I have what is the worst custom exhaust in the world. I'm still running it today but it will be one of the first things I get corrected in the near future. Crush-bends, 409 SS, and overall just crappy welds and fitment.

So that's it right? Engine, ECU, intake, exhaust, cooling system, and interior. By mid-2013 all that was left was to build and install the engine and it'd be ready to fire. Somewhere along the line I'd grown unhappy with the appearance of the car so I made the decision to make some big changes.

Up next: wider is better

infernosg
infernosg New Reader
12/24/17 1:29 p.m.

I convinced myself the exterior of the car needed a makeover. I had always liked how the Turbo II cars looked from the factory but I could never figure out why they looked so much more aggressive than the N/A cars other than the hood scoop. After going through a parts catalog a realize the S5 turbo cars also received a modest ground effects kit from the factory. This kit consisted of some slightly beefier rocker add-ons and an option front lip. After browsing eBay and Craigslist for a bit I found a set of OEM side skirts not too far from me and snatched them up.

They were by no means perfect but I had convinced myself body work would be in the future so it wouldn't be a big deal. Factory front lips are hard to come by and while some were still available new shipping was cost-prohibitive. Instead I ended up snagging one of the last fiberglass front splitter from ISC Racing (?).  It didn't come with any mounting hardware so I was on my own there and mocking up the splitter soon revealed why this was likely the last one. Getting this to mount up properly/evenly was going to be a challenge.

With the new aero and added power I needed more rubber, or at least I told myself. I ditched the 16x8 RPF-1s and 225/50R16 rubber and jumped to 17x9 RPF-1s and 255/40R17 rubber. I decided on a different color this time too.

These are massive compared to the original 205/55R15 tires on the 15x6 Borbet wheels the car had when I purchased it.

You're probably thinking, "How are these going to fit under the stock metal?" The answer is, "Not at all!" Even with as much camber as I could managed the tires protruded ~1 in. outside of the stock sheet metal. That's nothing more body work and money can't fix. Enter Shine Autosports fiberglass front fenders.

At +30 mm over the stock fenders these would give me the clearance I needed. And since I was already placing a massive order with Shine Auto that required freight shipping I decided to pick up one of their vented hoods as well. You know, for better cooling.

The rear would pose a bigger problem. I didn't like the idea of rear over-fender flares. Often they looked out of place and required a ton of work to get right. I decided on the old-fashioned method: roll/pull the crap out of the stock metal.

All mocked up:

Going back through my records shows I have everything in place around September 2013. Aside from being ugly the exterior of the car was together. The interior of the car had been completed. The wiring was completed, if not a little sketchy. The car was just an assembled engine and a start-up tune away from running. All that went out-of-the window in the next two months.

Up next: a (not so) fresh start

infernosg
infernosg New Reader
12/24/17 3:43 p.m.

In reply to bruceman :

No V8 content here. While I don't particularly hold an obsession of the Wankel I figured I'd give it a go. They're neat little engines and, knowing what I know now, easy to build. I've got several ideas for the future for this car before resorting to a swap. If I ever did I'm leaning toward a Toyota 1UZ.

In reply to Mr. Lee :

With the car running now (I'll get there) there's only only a small amount of brap. I'll admit seriously considering a bridgeport for the noise alone. I don't have any HP or TQ numbers yet, and probably won't for a while, but it isn't completely gutless. That was one of my goals with the 4 port engine. It definitely pulls harder than my '79 but that's not saying much considering it's making probably 75 HP to the wheels. So far the power seems fairly linear. It really comes alive at 4000 RPM but so far I haven't taken it above 7000 RPM since I'm still in the break-in process.

Ironsides
Ironsides Reader
12/25/17 2:08 a.m.

I remember following your build on mazdas247 for quite some time. Glad to see its moving along again!

gearheadE30
gearheadE30 HalfDork
12/26/17 11:57 a.m.

Cool build! As I am also currently finding my way through scope creep in my most recent project, I'm enjoying seeing how others handle it (and how awesome the end result is!)

infernosg
infernosg New Reader
2/1/18 7:31 p.m.

Alright, sorry for falling off the grid for a while there. Let's see, where was I? Oh, I think I ended around September 2013. Basically, the car was 90% complete. I was an engine build and a few wires away from getting it started. That's when IT HAPPENED. A friend of mine who was collecting parts for a 3-rotor build decided to sell his chassis. Why is this relevant? He was working with an '86 BASE model. The '86 model means no automatic seatbelts. BASE means no power locks, no power windows, no rear wiper and, most importantly, NO SUNROOF! One of the things that always bothered me about the GXL was that it was pretty much the "luxury" trim. Power locks, power windows, auto-adjusting suspension, rear wiper, sunroof, etc. The only good items are the heavy duty brakes. It's pretty much the heaviest FC ignoring the convertible models. The '86 base model, on the other hand, is the lightest FC model out there. I think they tipped the scales around 2650 lbs whereas the '89 GXL was north of 2800. The other issue is the sunroof reduces head space by ~1 in. and me and my massive head/helmet was pretty much wedged in there. So after some thought I drove from Cincinnati to Milwaukee and back in one day to pick up this:

It had no engine, no transmission, the stock '86 open differential, and a complete interior. The only upgrades were 5-lug hubs and heavy-duty brakes. As you can see it wasn't in the greatest condition. The interior was worn, the exterior was faded and had evidence of a front passenger's side collision, and there was copious amounts of rust underneath. In my mind none of this mattered because I convinced myself I was going to build this thing from the ground up. I'd take everything I'd done to the '89 chassis and swap it over to the '86 all while keeping the desirable, simple aspects of the '86. I spent the better part of December 2013 in my home garage and a one-car storage unit completely stripping down two cars. There were some unpleasant surprises. Evidence of previous impact:

But in the end I swapped enough parts over so the '86 could be moved to my home garage, which was starting to overflow was parts.

I was able the sell the bare '89 chassis for like $400 and I gradually sold off the extra parts over the course of the next year.

The goal of the build now was the lightest, most bare-bones "streetable" RX-7 I could make. Since the '86 had neither power locks nor power windows all those wires were now extraneous. I decided the radio and speakers would go as well. I ended up with another sizable bundle of wire removed.

The final chassis harnesses are pretty sparse. Front on the left, rear in the middle, and engine on the right:

Next was the sound/heat insulation. I used the dry-ice method, which was great for the flat areas but didn't work so well for the vertical surfaces. Those required a heat gun and a scraper.

As you can see I also cut out the rear speaker towers. All that insulation fit into a 5 gallon bucket...

Total weight loss? Approximately 10 lbs. Yeah, I wouldn't do that again. It turns out removed the foam and jute from the back of the carpet results in a similar weight reduction.

At this point it was late Spring 2014 and I had stripped the car down as far as I could go on my own. No where to go but up from here and things would start to move pretty quickly.

Up next: custom interior touches and more changes to the original plan.

BirgerBuilder
BirgerBuilder New Reader
2/1/18 8:12 p.m.

I am digging your attention to detail. Stuff looks good!


infernosg
infernosg New Reader
2/2/18 11:27 a.m.

Let's keep this moving. The interior of the '86, while complete, was in a pretty sorry state. Despite multiple cleanings the carpet still looked like this:

Also, I wasn't a fan of the gray and preferred the black interior of my '89. I kept the black dashboard from the '89 so I had to make everything else match. The plastic trim was easy enough but carpet is another matter. I tried using fabric dye but that only managed to change the trimming on the ends of the carpet from gray to a very dark purple. I'm guessing the carpet is nylon or some other kind of synthetic that would require being boiled in dye for it to take. I ended up trying fabric paint from your typical auto parts store.

It looks decent in pictures and indeed it was passable in person but I can confirm it's not durable. These photos were taken last Summer (going out of order again) and already I have gray spots poking through in multiple places. I'm holding out for a used black carpet in decent condition at this point. Fortunately I can say I had better success with the door panels and headliner. For the door panels I removed the ratty lower fabric-covered cardboard and replaced it was an ABS plastic panel and I painted the upper vinyl area with fabric/vinyl paint.

To clean things up further I covered the ABS with knock-off "Recaro" fabric and added red nylon pull straps for that race car look.

I can confirm the painted vinyl sections have held up better than the carpet in the long run. Since I had leftover fabric I decided to cover the headliner in it as well.

Working with spray adhesive was a little annoying but I feel like the interior was all tied together now.

Another thing that had been bothering me was the number of gauges I had. The stock cluster with speedometer, tachometer, fuel level, voltmeter, oil pressure and water temperature. The latter two being more representative than actual. Then in the center console I had aftermarket oil pressure, oil temperature and water temperature gauges. Each of these required sensors in the engine in addition to those used by the ECU. Lastly, I had a double-display wideband air:fuel gauge mounting on the steering column. While it didn't look bad (see above) I wanted to simplify the display and have everything right in front of me. My solution is this:

A Racepak IQ3 display specially designed to interface with the Haltech's built-in CAN system. This way, I could display all the parameters the ECU was seeing without the need for extra sensors. The only problem was I now needed to find out how to display vehicle speed and fuel level. Oddly enough, vehicle speed turned out to have the easier solution. I company by the name of Speedometer Solutions makes a neat little device the converts the mechanical signal from the transmission to a digital pulsed signal.

Feed it 12V and supply ground and it outputs a 16/revolution square wave. Fuel level was a little more problematic. The RX-7 uses a typical resistance-based fuel level sending unit and I needed to convert that to a 0-5V signal. Basically, I needed to construct a 5V pull-up circuit. Fortunately, another company already does this:

It's for a Miata but I figure the resistance ranges can't be that different. All I have to do is calibrate the 0-5V output to 0-16 gallons in the ECU software. Unfortunately, I learned my ECU, a Haltech Sprint RE, didn't have the sufficient number of inputs for all this. So away that went and I upgraded to a Platinum Sport 1000.

This would require a whole new engine harness, but more on that later. The next thing to do was to mount the IQ3. In the end I made an aluminum plate and riveted it to stock bezel.

The little turn signal and high beam indicators are a nice touch. They're made by a company called Drag Specialties and I think they're intended for motorcycles. They were spliced into the stock wiring harness easily.

With the leftover aluminum I made a blank panel where the radio used to be.

The UBS sockets are connected to the IQ3 and Haltech so I can easily connect a computer without digging under the dash. Speaking of the IQ3 I wired up a SPDT momentary switch to act as the "left" and "right" buttons that control the display and mounted it on the center console.

That about wraps up the interior details. I've bounced around a bit but this all took place in late 2014 and early 2015. In the next post I'll jump back to late 2014 again but switch over to the exterior of the car.

Next up: some more wiring and getting at the exterior.

fidelity101
fidelity101 UltraDork
2/2/18 3:52 p.m.

What made you choose the platinum sport over the elite series? or was because this was done 3 years ago?

RX8driver
RX8driver Reader
2/3/18 8:16 a.m.

Nice. This project is pretty much what I wanted to do with my old FC.

wvumtnbkr
wvumtnbkr GRM+ Memberand UltraDork
2/3/18 9:08 a.m.

Dude, I think you are building exactly the right ratio of street car and fun plaything for the track.  It's easy to go too far.


Nice balance. Nice choice in parts!

infernosg
infernosg New Reader
2/3/18 12:42 p.m.

In reply to fidelity101 :

That's exactly it. I think the Elite series came out a couple months after I purchased the PS1000. I knew it was coming out but figured it was probably more power than I needed and it was a little out of my price range. I may consider a change in the future because there's a few things I'm considering adding to the car: idle control, oil injection control, two-channel closed-loop fuel control, and electric water pump control. 

In reply to RX8driver :

Thanks! I've heard similar sentiments from a number of people. I'm still not used to receiving compliments now that it's running (I'll get there) since it's been so long in the making.

In reply to wvumtnbkr :

That was pretty much the goal. I've had to go back and add a few things back in (high-beams and horn) when I caught myself going too "race." There are a few items I wish I kept like the stock low coolant, low brake fluid, and low oil level warning lights. On the other hand sometimes I think I should have gone with more "race" safety equipment like a full welded cage and emergency shut-off system. I can see myself getting back into Time Trials and AutoX with the car but I'll probably never be competitive since it wasn't built with any particular class in mind.

Hopefully I'll be able to post more updates later today. I have literally hundreds of pictures and it takes me a while to pick and choose the correct ones to document the build without going into the minutiae and that's not considering my scatter-brained approach to the build.

infernosg
infernosg New Reader
2/3/18 9:46 p.m.

Okay, let's pick this up again. It's circa early 2015 and I've swapped from an '89 to an '86 chassis and swapped over most of my parts. I've made some significant changes to the interior of the car since I had it last assembled in the '89. Now I had to turn my attention to another detail resulting from the change. The S4 (86-88) and S5 (89-91) may look similar, but electronically they're completely different. I decided to keep (what was left) of my '89 harness since it already had been stripped down. This led to some minor things like having to find different headlight motors (with internal relays) and not having a clutch lock-out switch. The two series also have different fuel tanks and pump assemblies. I decided to keep the smaller, 16 gal tank from the '86 so I had to swap all my aftermarket parts over. This is where another difference occurs. Where the S5 cars have a 4-pin bulkhead connector on the pump assembly the S4 uses a simpler post-and-ring-terminal setup. This actually allowed for a much cleaner setup in the end.

I drilled out and de-soldered the OEM ring terminals and wires and replaced them with new terminals and tefzel-coated wire. I now have 12 gage wire all the way from the battery to the fuel pump and no extraneous connectors on the pump assembly. After soldering the new ring terminals to the posts I potted them with epoxy. A quick check with the multimeter showed no voltage drop across the terminal. As seen, I also took the time to coat the cover with POR-15.


I mentioned previously one of the things I really wanted to focus on was engine cooling since it was what took out the original car. Recall I had already procured an upgraded radiator and made a custom fiberglass fan shroud. I still needed to address the issue of getting air to the radiator and oil cooler. Over time I had somehow lost the original front undertray and anyone familiar with RX-7s or automotive cooling in general knows how vital these things are to keeping things cool. To make a long story short I spent way too much time with aluminum sheet and used more pop rivets and riv-nuts than anyone ought to. I managed to make a duct that would force nearly all the air that entered the front of the car through the radiator and oil cooler.


This may be the one item I'm most proud of on this car. The inlet is split roughly 25/75 for the oil cooler/radiator.

In hindsight some vertical support may be necessary. A beadroller would have been nice to have. What's really trick, however, are the removable side panels that allow the oil cooler to be removed from the car without having to take the entire assembly out.

Here's a shot with the oil cooler mounted showing how everything fits together.

I thought about having the oil cooler "exhaust" exit separately but right now it passes through the lower 1/3 of the radiator. No ill effects so far... How it looks on the car:

Sometime in the future I'll make an undertray/splitter that'll seal from the front of the car to the front wheels/subframe are. I can for certain this setup works almost TOO well. I have a hard time keeping the car warmed up on moderately cold days (50-60 degrees Fahrenheit).


Changing gears now to electrical. At this point the chassis harness was pretty much complete. It just needed to be wrapped. With the PS1000 I needed a new engine harness. I wasn't thrilled how my own harness for the Sprint RE turned out so I started to look into aftermarket options. Haltech makes a plug-n-play harness for the FC RX-7 but it assumes use of the stock connectors. Instead, I went with a harness-making service from the shop I had purchased most of my ECU items from, LMS-EFI. I had gotten to know Chris pretty well and he was familiar with my build at that point so it seemed like a good decision. We decided the engine harness would be completely separate from the chassis harness, so rather than use the stock wire pass-throughs in the firewall I re-purposed one of the heater core pass-throughs as a location for a 39-pin bulkhead connector. This would put all the wires I needed right over top of the engine instead of having to run around it. After some back-and-forth and a couple of revisions this is what I ended u with:

The keen-eyed may have noticed a Hall Effect sensor in the first image. Since I had upgraded to the PS1000 that allowed me to utilize a Hall Effect crank angle sensor instead of the OEM variable reluctance sensor. Full Function Engineering provided the hookup:

The OEM crank angle sensor, being mechanically-driven off the crank shaft, is know to have some slop. This would provide a much more stable, and reliable signal, which is good seeing as it's literally the only engine position signal the ECU sees. No camshafts here! Since I'm at it, let's briefly jump forward in time to Summer 2016 when I finally got around to wrapping up the chassis harness. I don't have the patience for full Raychem heat shrink covering so I went with fire-retardant expandable sheathing with strategically-placed adhesive-lined heat shrink tubing. Here's the engine-side of things:

You can see how much I've removed from the car. The entire harness is pretty much dedicated to vehicle lighting with connector here and there for the alternator field and sense wires and the starter solenoid. The lone 12-pin Deutsch connector is for my oxygen sensors and reverse lights, which have their own sub-harness.

It's not perfect, but it beats corrugated plastic wrapped in electrical tape. I tidied up the fuel pump area as well.

That completes the wiring and some miscellaneous exterior stuff.  Give me a day or so and I'll be back with some eye candy.

Next up: finally doing something about the exterior of the car!

1 2 3 ... 9

You'll need to log in to post.

Our Preferred Partners
sPGMNcIdTtBTMAOkYgXv5UuLvU7p3zken7bZvwISnTF61q3wjC08DtyukegTYnOm