1 ... 4 5 6 7 8

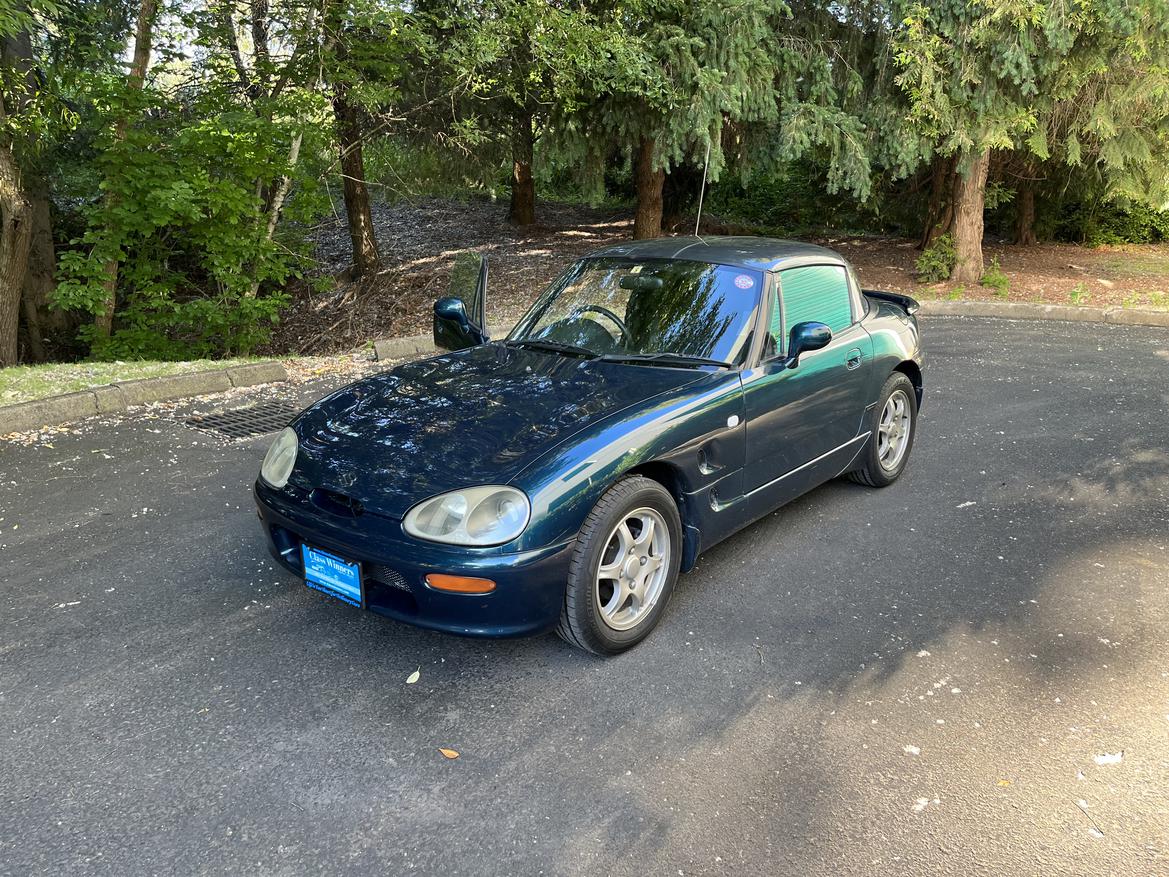
The boss announced an extra-long holiday weekend with Friday off, so I have extra time for Cappuccino stuff! Yesterday evening we had a work-related Pinzgauer plus trailer arriving at work, so I just *had* to move the green car to make sure there was room! And since it would be a shame to drive it only 50 feet, I took it for a spin on a summer evening...so much fun!

I made good progress on the silver car today!

I got the correct caliper and got both rebuilt front brakes installed.

I did a little parts juggling between the green car, the silver car, and my parts stash to end up with upgrades for both cars! I got washer bottles installed, and swapped the amber side markers to the green car (clear on silver car.) Battery trays and tie downs are next on the list. I put the new ones on the green car, and move the cherry used ones to the silver car, and junk the dilapidated stuff coming off the silver car for wins all-around!


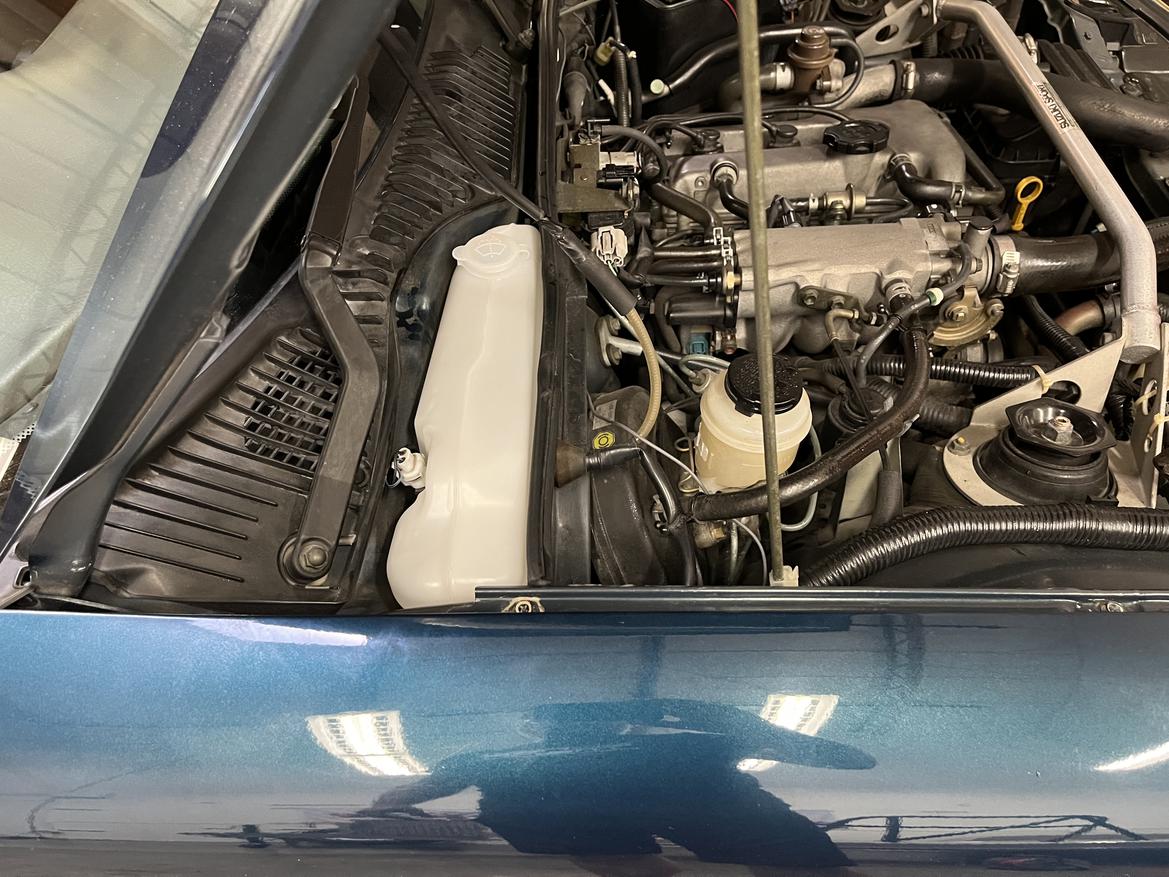
I wire-wheeled and POR15ed the slightly rusty seam on the firewall and under the battery on the silver car. I will go over this with white paint later. While it isn't the perfect restoration fix of cutting out the rust and fabbing patch panels and trying to seamlessly blend them in, I'm looking at it as a big improvement and more stable for the next owner. 

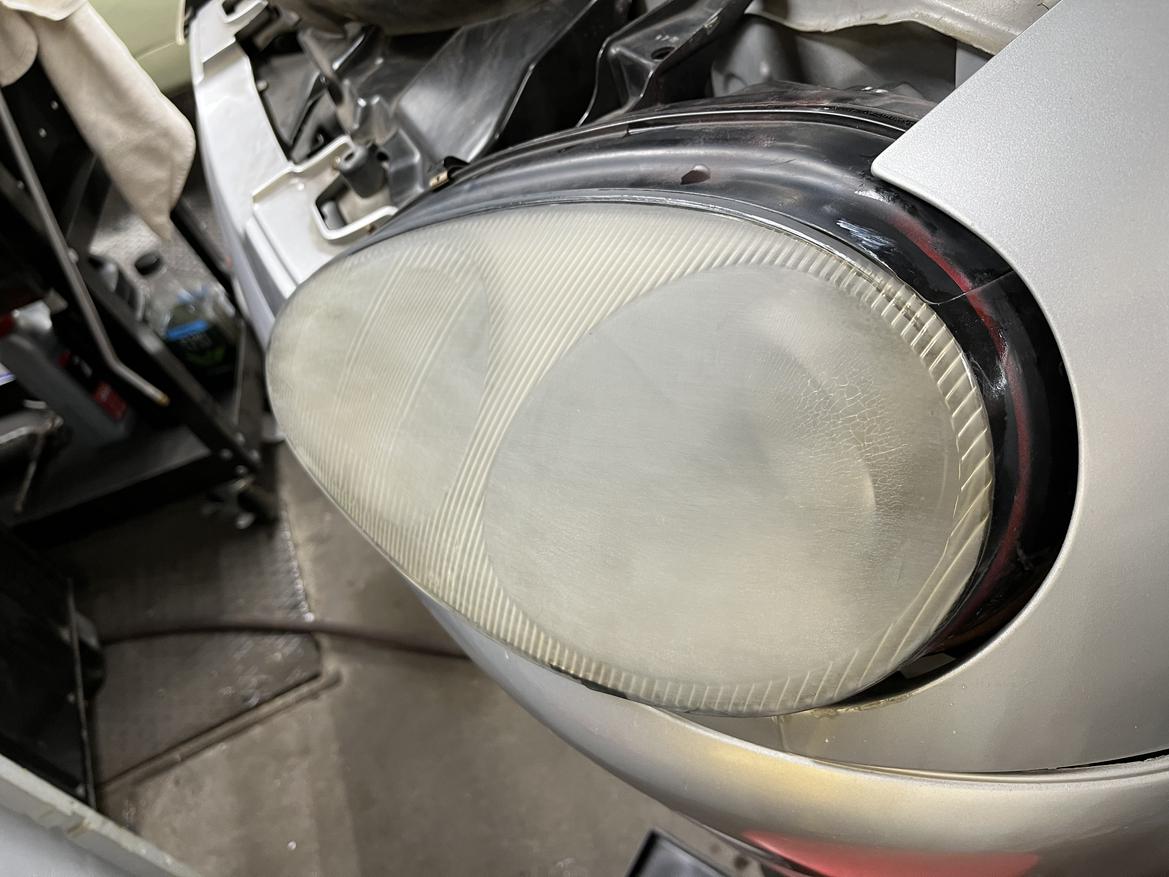
I also got all the under car hardlines ready to install, but didn't snag a pic, and started polishing the stock headlights! I finished with 1500 grit, need to pick up some 2000 grit wet/dry sandpaper and sand again before polishing.

Should be able to move on to rear subframe re-assembly later this weekend!

Got more done today, and didn't take enough pics! 

Since I'm no longer putting the new aftermarket adjustable control arms on the silver car, I had previously sourced some better condition stock rear arms for everything but one of the two upper arms. Here's an example of the better-condition part ready to go on the car.

For the one crusty arm I couldn't find a better replacement for, I checked the balljoint and bushings, and they seem okay, so the ugly rust is the main issue. I wire-wheeled it and found the arm is solid, just had flakey surface rust. I knocked the flakes back, and POR15'd the rusty areas, taking care not to paint-in the bushings in case the next owner needs to replace them down the road. I probably won't do a second coat with satin black since the gloss/satin mismatch won't be visible, and the main goal is to protect the part and prevent future rust.

I also covered the black POR on the firewall seam with some miscellaneous  white touch-up paint. It looks really bright and glossy against the dingy original paint, but also looks better than either exposed rust or black paint. Now that I have the black covered, I might do some masking and spray a closer match paint in this highly-visible area. Or maybe I'll just send it; thoughts?

I also wet-sanded both headlights with 2000 grit, followed by 2500, and then one pass with plastic polish; huge improvement so far! Sorry I didn't take a photo! They will need another buffing with the polish, and then sealer before being reinstalled.

I can set aside my must-be-better-than-new perfectionism and get more done when I'm building it to sell rather than for myself, but I still want the end result to be something where I'm happy having my name associated with it, and left everything I've touched improved over where it was when I got it. But also trying not to go overboard and spend months and months and lots more $$ getting it ready to sell! Just want to do right by the next owner. Rather than attempt my own version of repairing the rust on the bulkhead behind the seats and on the underside, I plan to be up-front with the condition when selling, price it accordingly, and let the new owner decide to run it as-is, clean it up and do a rudimentary patch, or go full-tilt and form perfect replacement panels, cut/weld/grind, and attempt a more visually seamless repair. That way I'm not doing a quick and dirty repair that they will want to undo, nor doing extra concours-level work that will go unappreciated, and won't make the car overall worth enough more to make up for the time invested.

Right after my last post I came down with Covid, but now I am back and making progress on the silver car again!

I got the clear side markers and amber bulbs swapped over from the green car. I cleaned up all the accumulated dirt while I was in there.

Onward to reassembly of the rear subframe! I topped off the differential oil as some leaked out the breather when removing it.

On the subject of gear oil, the guy who sold me the green car has owned a half-dozen or so Cappuccinos, and reported that second gear synchro issues are often from a previous owner using the wrong fluid, and many times can be improved by using the proper fluid in the transmission. Suzuki calls for 80W90 GL-4, which was a bear to find, but I eventually sourced some Redline. Everything I was finding in the correct weight had friction modifiers or was limited-slip oil, or had a warning about using with yellow metal. I also now have a better understanding of why a previous owner might end up saying, "Eh, 80W90 GL-5 should be close enough, right? What could the harm be?" I hope it improves the shifting in the transmission in the car.

Since the fasteners holding in the rear subframe were all rusty when I removed them, I chased all the threads in the captive nuts to ready for a nice install. I also anti-seized the bolts going in to help out future owners wanting to work on the car.

Got the coated e-brake cable clips installed and cables routed properly in front of the gas tank.


With all the hard-to-reach stuff handled, I crawled out from under the car and got to putting the differential back into the subframe.


It was very gratifying to see it assembled with the painted diff mount and new bushings! My shopmates were also around and working on projects, and at about this point, one of them was looking at an unused new dash pad, and mentioned the irony of not wanting to install it for fear of making everything else worn or imperfect in the interior look worse! I looked at the differential case, and decided that I have to pick my battles, and it is perfectly functional as-is, and the slightly dirty diff case won't even be particularly visible once installed. I also got the shiny new bigger Grand Vitara fuel filter and bracket installed on the subframe, and the bracket for the speed sensor wiring.

My shopmates gave a hand hoisting it into place, and the bolts ran in to the newly chased holes so nicely! If anyone following along at home ends up installing their own Cappuccino rear subframe at some point, the rear-most bolts (above the rear upper control arm) must be started first, followed by the front-most bolts. If you start with the front bolts, the angle is wrong for aligning the rear bolts and it is a struggle, if not impossible. Other way around is easy-peasy.

I got the rear upper control arms installed as well before running out of steam. Lower arms, toe control links, rear uprights/hubs, rear sway bar, and rear brake calipers should go together fairly easily from here. Next shop session I should also be able to install the driveshaft and fill the transmission!


Made more good progress on the silver car today! My goal is to have it showable/sellable before we're out of the prime summer selling season, and I'm leaving town for a week in just over two weeks, so it is nose to the grindstone time!

I finished off the polishing of the headlights.

I also got them installed. The right one (driver's side) has a little very faint discoloration still, but it seems like it is on the inside, so I decided I'm not trying to pry these open and risk damaging them. They are a lot better than they were, so I'm calling it a win. Didn't get the fender liners reinstalled yet, but I figure that's the perfect type of task to leave for a weekday evening work session after doing my day job this coming week.

I have accumulated about 2.5 sets of rear suspension parts, so I went through the collection assessing surface rust, ball joint, and bushing condition, and picked the best of everything to assemble on the silver car. 
 

Even the best rear uprights/hubs had a little bit of surface rust, so I pressed my tap/die set into service yet again.

I made sure to anti-seize behind the new rotors, even if the rotors are e-coated, the face of the hub wasn't perfectly rust free, so an ounce of prevention and all that...


Don't mind the unstaked axle nut, I threw it on finger tight just to hold things in place for now. My best-condition rear calipers had used pads that looked they still had 90% of the meat on them, so I scuffed up the friction surface and will bed them in to the new rotors on my test drive.

I also added helper springs to the e-brake cables off another set of my rear spares to help minimize the dreaded bind. The e-brake mechanisms on the caliper, the caliper sliders, and the cables on the car are all moving freely, but once again, an ounce of prevention; I want to sell this car on to the next person with a clear conscience.

Looking pretty good to see everything in place!

After snapping some photos of everything in situ, I jacked each corner up to static height and went around torquing fasteners.

I also got the upstream side of the new filter connected up.

The last remaining part of the rear suspension to be install is the rear swaybar, but it goes on after the exhaust, so not today.

I still need to install the driveshaft and fill the transmission, but left those tasks for now as they will also be easy and rewarding post-work weeknight tasks.

Looking a lot more like a car, which feels great!


I didn't do much today, but I did get the original amber side indicators on the green car for a small amount of forward progress. I think they look spectacular; way better on this color car than the aftermarket clear ones, which actually look good on the silver car.

I continue chipping away at the silver car, hoping to have it running/driving before I leave for vacation in just over a week. I was mistaken about the order of the rear sway bar and exhaust install, so I got the sway bar installed with new end links. The end links are Moog RX-8 units which have a fitting for grease, unlike stock. Found these through the ever-helpful parts interchange list maintained by the online community of Suzuki Cappuccino America on Facebook.

You might also note the rear flex lines, black braided stainless with new stainless banjo bolts! 

Up front I need to install some more new hard lines before I can connect the brakes.

Before getting around to installing the new brake hard lines, I felt the need to finish the paint touch up at the seam along the firewall. I also drilled a couple small holes to fix the two wiring harness tabs that completely rusted off. The paint is a blend of gloss white, flat grey, and a smidge of flat yellow model paint that came out fairly close to Suzuki engine room off-white. It isn't perfect, but it doesn't stock out like a sore thumb and should help the next owner by stabilizing this area.


While the paint was drying I filled the transmission from above using a little funnel and a scrap of tubing. Did I mention the packaging on this car is ridiculously tight? Not much extra room to access the fill hole on the side of transmission up inside the tunnel. It was slow, but very tidy...didn't leak a single drop! laugh Thankfully the transmission only takes 1.06 liters, so filling didn't take too long. With gear oil coming in quart jugs (0.946 liters) I've got a lot left over in the second jug, but after 9 transmission fluid changes, we will wrap back around and completely use up the remainder! laugh

Getting the hard line from the master over to the far side front wheel well was a bit daunting. I remember that getting the old one out was a hassle, but I don't remember exactly how I did it. Here's the hole it passes through in the left front wheel well.

I decided come down from above, as snaking the whole thing up from below seemed impractical. Unfortunately that meant I was maneuvering the long end around. Here goes my attempt to bend/flex it as little as I can while getting it in place.

I kept referring back to old photos to confirm routing; did it go over or under this bit of wiring harness? How about that vacuum line? Now behind this bracket, I think?

Eventually got it mostly home.

I got the ends of the new hardlines in both wheel wells in place and tightened down. Put the new flex lines in as well.

I also tidied up the routing of the miscellaneous added wiring along the back of the firewall. I also got the wiring harness secured to the two holes I drilled where the tabs rusted off. I've still got to figure out how to secure the P-clips holding the brake line on the factory threaded stud thingies. The factory plastic push-on clips long ago disintegrated, and the "threads" on the stud aren't anything standard...it is sort-of like a self-tapping screw. I'm thinking maybe something plastic I can run down there, or perhaps one of those flexy thin metal push-on style fasteners?

More progress made today on the silver car, despite the heat! It was another scorcher here, nearly 100, but thankfully the shop stays cooler than outdoors if the doors are kept closed. The building isn't well-insulated, but the story above us, the massive size of the building, our eastern exposure, and the mass of the giant timbers all work to keep temps in check.

On to the project car! The primary goal was to install the brake hardline from the rear brake circuit of the master back to the union at the rear subframe. The line is another new genuine Suzuki part I'm installing to make this car dialed for the foreseeable future. The challenge (which I've griped about before) is that all the hardlines (fueling, emissions, brakes) are these long, convoluted twisty runs which are assembled as one outside the car and installed together, presumably to keep costs down when new, and berkeley anyone wanting to service the car sometime down the road...gotta match mark them all, remove them all, assemble them on the bench, and install the them together. The trouble is...I no longer have matchmarks on all.

My idea was to dangle all the lines in place, connecting the far ends, then mock up the infuriating plastic connector bits in between, and hope I can install them (force them on) in place, and if not, mark both the new and used lines with matchmarks using the mocked-up bits, remove the whole shebang, assemble in the bench, and reinstall. Once again, the primary goal is just to get up the point where we can bleed the brakes.

Getting staged:

Making progress:

Decided to start at the back and then move forward for whatever reason. Obviously not quite there yet:

Moving forward and things are...frustrating...every line comes out just below the center of the photo, and there's barely room to fit a hand anywhere. This car is packaged as a car for owning and driving, but not for working on! If you look at the strut top below you can see I've removed a bolt to increase access, and my hands are cut/bruised to E36 M3 trying to get the Evap and fuel rail soft lines over the end of the hard lines, navigating around the clutch cable, the throttle cable, the vacuum lines, the brackets, the intake manifold, the brake hardlines, etc,


In the end, I would still love to get the fuel rail supply line just a little further engaged and tightened down, but we're nearly there, and I'm nearly out of band aids for my hands. I moved back to the rear and did some repositioning, and shortened a few lines. Looks much better. Nearly ready to put the new single-use plastic line separator/holder parts on. Why is this such a struggle? Oh yeah, cheapskates in manufacturing! laugh

Hot here, and I made some huge (sweaty) progress today! Brakes are bled, hard lines run under car. Line protection, exhaust, transmission tunnel braces installed underneath the car. Put a bit of gas in the tank, and wheels on the car! 


Shortly after my last update I went on vacation, and since getting back I've done a little work on both cars.

Here's the original battery tray in the green car...looks pretty good!

Here's the blasted/powdercoated one from the silver car, and the new tie down I bought, destined for the green car.

Here's underneath the battery tray in the green car; zero rust! Judging by the paint that came up, this has never been out of the car before. The miscellaneous aftermarket wiring around I initially attributed to the Japanese EZ-Pass-type automated toll payer, but upon closer examination, I was wrong...more on that in a second...

The underside of the battery tray is the only rust I've found on the green car so far! smiley

The miscellaneous aftermarket wiring off the battery wasn't connected at the battery end, and led me to an anti-rust thingamajig on the inner fender.

Given that I live in the Pacific Northwest where vehicles don't really rust, and the Cappo will be a garaged, occasional nice weekend car, and will also frequently be inspected, and the anti-rust thingie isn't connected, I'll probably ditch it. Thoughts?

On to the silver car. I got the final underbody panel/brace installed.

Under the hood, I disconnected the throttle cable from the throttle body, and loosened up the clutch cable to gain better access to the fuel supply line to get it securely connected.

Then I got everything reconnected, got vacuum lines connected, and things appropriately constrained.

I also got the battery reinstalled with the nice used battery mounting parts off the green car. Sadly, she didn't fire up. Cranked strongly enough, and coughed for a split second a couple times right when starting to crank the second or third time in a row.

I confirmed:

-Plug wires seated, ignition coil connected

-Gas in fuel rail

-Supply and return fuel lines connected correctly

-Spark plugs looking okay and not fuel soaked

-Fuel pump....WAIT...hmm..not obviously hearing the pump running...

Onward with troubleshooting, there seems to be power at the fuel pump relay.

So, good news, looks like the silver car is getting a new fuel pump...and as I sell it, EVERY SINGLE THING in the fuel system except the rail, FPR, and injectors will be new! 
Bad news, gotta put in a fuel pump.

Good news, it is accessible via the access cover behind the passenger seat.

More good news, all the interior trim is still off around the access cover from earlier fuel tank work.

Starting on the pump replacement, I didn't have to remove anything to get access to the top of the pump since I hadn't yet reassembled anything around the access panel.


I pulled the old pump out and compared it to my replacement. Genuine Suzuki pump assemblies (can't get just the pump) are long since discontinued. Some wizard on the Suzuki Cappuccino America group determined that what is described a "Mazda Miata (Universal) pump" is compatible "with some minor trimming." I got a pump off eBay that was described as something like Mazda 6 Protégé Miata MX-5 CX-7 CX-9 and it was a perfect match.

The only dimensional difference on the new pump is the sock, but I don't think it will impact function in any way. The pins and connector are very slightly different as well.

Yup, looks the same to me!

I struggled a bit to get the top of the pump into the pump bracket/assembly. The O-ring was tough to get seated, and I started to get frustrated. A bit of lubrication, a bit of patience, and some deep breaths made all the difference, and I finally got it together.

I used the new connector and new wiring, with the length adjusted to fit.

And back in place:

With the new pump in, I turned the key, and...


Woohoo! Success!

I started reassembling the interior above the access panel behind the seats.

Given the haphazard state of interior assembly when I took it apart, as well as the age of the various plastics, I dove into my drawers of trim fasteners to get parts to complete reassembly because I don't want to put it back together missing some clips. Found some parts that fit perfectly!

One of the well nuts that was installed to hold the accessory or aftermarket cargo net was worthless when disassembling. I thought I might have some, but didn't find them. A rivnut would be a great solution, and I have them, but the existing hole is way too big for M5. I tried mocking up some washers plus rivnut, but to no avail. Might have to hit the hardware store tomorrow.

The additional bit of interior assembly completed involved getting the shifter back together.

Today I started off by dropping her down into the ground for the first time in a little over a year!

I torqued lug nuts and axle nuts, aired up the tires, and pulled the battery off the trickle charger.

I got the bulk of the interior reinstalled...stilll have a few details to finish off.

The test drive went off without a hitch! I drove to the gas station first since I'd only splashed a tiny bit of (dubious old) gas in to test the new fuel pump, and it was reading below empty. It look 6.75 gallons to fill it up.

Then I drove over to work to wash off the 14-18 months of dust accumulation. Second gear is still grumpy when cold, but only a tiny bit grumpy when rushed once it is warmed up. These cars are so much fun to drive around! Every drive feels like an adventure, with "whoosh!" and "pshh!" noises, 8000rpm upshifts without speeding, and cranking through  turns at intersections without slowing down! laugh

Back at the shop, post-wash. Feels great to have reached this point! There's more detailing to do, but getting the worst of it off and going out for a drive and brake bed-in was amazing!


With today's work on the silver car, I'm so close to being to take photos and list it! I think just a proper wash and a little more exterior detailing and I'll be completely done!

I started by getting the last of the interior all screwed back together, like the console, the cargo net on the parcel shelf, and so on. I started wiping down interior panels and then hopped over to details on the roof panels. 

My shopmate showed up, and he and his wife took it for a spin in targa form while I worked on roof panels. They picked up lunch and helped with detailing after getting back!

On the roof panels, some of the rubber bumpers/spacers/anti-squeak thingies had come loose, so I cleaned the surfaces and epoxied them back on.

The most laborious task was cleaning and rejuvenating all the rubber seals with Shin Etsu (there are miles of them between all the top panels, doors, frameless windows, folding rear glass, etc.) While I was working on the top, I also realigned crooked trim, and touched up some paint blemishes.

Honda's Shin Etsu doesn't make worn rubber like new, but it does a great job of plumping up and softening dry and shrinking rubber seals.

One idea I was really excited to finally implement was finishing off the bare metal driver's inner door pull. The homemade metal pull is waaay lower profile than the stock one, which really helps comfort on this borderline claustrophobic car, so i didn't want to go back to stock, but it didn't feel or look great. This was an idea I had when I bought the car and it came out pretty well! I took the homemade metal pull off and wrapped it with thin closed-cell foam. I had noticed that the stock interior color is a dead-ringer fit heat shrink tube, so I slid a long 3/4" adhesive-lined shrink tube over the whole thing and heated it up.

I took the tape off as I slid the shrink tube on.

Then I painted the ends and installed.

I got into the nooks and crannies on the exterior (around lights, emblems, etc) with the bamboo skewer to get the gunk out. Ready for a final wash and might do an exterior ceramic coat. Not going to buff because the paint is so thin.

Drove the silver car to work today...what fun! It just makes me laugh out loud..leaving it in gear and winding it out, with rorty exhaust delivering the triple cylinder bellow, plus audible turbo spool, watching all the heads nearby whip around to see what is going on, and still not breaking the speed limit...and then as everyone rubbernecking is trying to figure out what the clown car is, hang a 90-degree turn at the next intersection without slowing down or lifting...heehee! laugh

Photoshoot fun after work, and I took some solo pictures of the silver car for ad listings.

A few tiny mechanical updates on the silver car for any Cappuccino fans still following along at home: I think the second gear issue was three part (worn synchro, wrong fluid, and worn remote shifter bushings) and after driving it a bit (and getting my left-handed shifting feel back up to par) I think fixing the worn bushings would make it quite a bit better. I'm not going to tackle it, but I'll provide the next owner the parts and suggestion. Another note is that the brakes are spongy, and I suspect there is still an air bubble in one of those new hardlines somewhere. It should have better bite with all new lines, stainless braided, rebuilt calipers, and new rotors. Going to bleed again tomorrow.

Did the brake bleed on the silver car this evening (thanks to shopmate Nashco for the hand) and got a few bubbles out, and improved brake feel and stopping power.
 

I'm going to start advertising it for sale. I've got a huge pile of photos for the ad, just need to write it up and post it around. 
 

Here's the state of the underside as of this evening while up on the lift. I got quite a bit of rusty areas tidied up and protected, and the new owner can drive and enjoy as-is, or there are still a few opportunities for further improvement if desired.


I listed the silver car several places around the internet, and had fun taking it to spectate at the Portland Grand Prix this weekend!

I've had plenty of nibbles, some more solid than others. As of now (four days later,) the silver car is pending sale to a good home with a local buyer from Craigslist...the young couple showed up to check out the Cappo with an SRT10 and a JDM FD RX-7 Turbo! It will be a project car for her. Fingers crossed that it all works out as it seems like it will be a good home for the car.

The speed and ease of the pending sale tells me I was in the right ballpark for a quick sale, but didn't give it away for fire sale pricing unnecessarily.

Next up for the green car is tackling and clearing the registration hurdle, installing my upgraded and refurbished LHD headlights, and a thorough cleaning and detailing!

Catching up to speed on progress on the green car. I swapped in my refurbished and LHD-converted headlights.

While I was at it, I partially removed the fender liner and dove in there to fish wiring through the fender for the new genuine Suzuki amber side markers; they look so much better than the clear aftermarket units on this particular car. Added bonus; I got to clean debris out of the front mudflap!


My first attempt at illumination had one low beam missing, but cleaning the contacts solved that issue...yay!


A few additional interesting things to note; when I ordered these lights, I didn't have a good core to submit, and the headlight upgrade dude offered to source some, so I agreed. He is located in Eastern Europe and these units he sourced didn't have the cutouts for the in-headlight parking light.

Here's the yellowed, crazed, beat-up JDM lights I removed for comparison, complete with hole for marker lights.


Interesting. Might be a Japanese market vs UK market difference? Given that the headlight refurbisher/converter is in eastern Europe, I'm guessing he sourced cores in the UK. In any case, the upgrade headlights are fitted to the car, with the marker lights dangling behind the bumper for now. Might be worth having the stock headlights I just removed from the green car upgraded as well, and using them, but undecided for now, stay tuned for updates.


Pattern might need some adjustment. We'll get it to a proper distance and see. Not surprising, given that the lights were refurbished and not necessarily put in a car for testing. Also, Klipsch at work for the win!


Uhh...initial results indicate adjustment is needed.

OK...progress, but not there yet. Adjustments are complicated by the fact that horizontal adjustment moves the lights on the diagonal bias, also impacting vertical adjustment.


Low and high beam looking better.


After getting the lights sorted, I got the registration/title sorted, I took a long weekend off work and went for a fall Pacific NW road trip in the EA21R. I visited my parents and my dad got to see it and drive it for the first time; I think he enjoyed it! 
 

I took two-lane roads 99.5% of the way and had a blast! Plenty of room for me and a few days worth of stuff. The weather varied quite a bit.

The roof was water-tight and the defrost was totally up to the task. The refurbished and upgraded LHD-converted headlights worked well. Fuel mileage in the 40’s was a nice bonus!

Under hood seems to get hot when hustling in the twisties, especially when headed uphill, which had me thoroughly in boost with sustained large throttle openings in third and fourth. Thankfully coolant temp stayed reasonable, and I didn't notice any detonation or other issues.

I can report that it has enough oomph to pass slow-moving pickup trucks on the winding part of Hwy 101 with a downshift!

With small wheels, short wheelbase, and not a ton of suspension travel, you certainly notice rough roads, but I'm amazed how the car remains fairly composed. The suspension is nicely compliant, and the bump stops seem progressive and compliant as well. It is fun to have enough room in the lane to safely play around with lane position as the situation dictates.

My dad and I took it to an awesome Olympic Peninsula Cidery (Finnriver) and he parked it in a not-quite-a-spot at the end of the row which made for a hilarious photo op.

I can also report that the trunk has room to fit a case of the tall (22 oz? 25 oz?) cider bottles. I think it was touching the underside of the trunk lid, but it closed and latched.


I'm so happy with this little car! I kept thinking on the road trip about how sometimes dreams come true, and owning and using this Cappo is a dream come true for me.


Minor update; spring is getting closer. I'm hoping to take this car out to some autocross, cars and coffee, maybe some TSD/touring rallies this spring. I briefly fantasized about a trackday, but it just doesn't make sense with a) how unsafe it is, b) how much I would have to do to it to meet the rules (i.e. there's barely room for me, available space is measured in fractions of an inch, where the flying berkeley do I fit a roll bar?) and c) I have an awesome Toyota 86 coupe for trackdays, so I would I even mess around with my kei car on the road course? 
 

First step is to get it out for a drive sometime soon to shake off the cobwebs...perhaps a run to work or two. I'm also inclined to swap wheels/tires to the sticky set once the threat of freezing/snow recedes a bit further. Stay tuned for updates!

The weather was nice yesterday so I made sure the Cappo battery was topped off and drove it to work...whee! Still love how ridiculously fun this car is!

It has gotten a bit dusty and dirty over the winter, so after work I got to cleaning and detailing.

This car is amazingly clean for a Japanese import nearing 30 years old, but there is still headway to be made. I feel like each cleaning/detailing session gets me 50% of the way from the current baseline to truly clean...so maybe I'll get there someday! laugh The main issue is that a previous owner seems to have been a fan of detailing, and by detailing I mean working on the large relatively flat shiny parts while neglecting anything hard-to-reach, or with a tight inward curve, or not visible from a standing position. Every crevice and panel gap is packed with excess paste wax that was obviously mechanically-applied. frown Very-stubborn fallout caked in the recesses on the wheels. Could be worse. At least it was loved, always garaged, and never exposed to road salt. I'll happily clean the crevices in exchange for avoiding rust repair, and I think a bit more work and the car will present extremely well.

I added a battery tender pigtail to make it easy to keep it ready to go, and checked a few mechanical things over with everything checking out. I'm registered for the first autocross of the season on Saturday, and the FR-S has a suspect wheel stud and a clunky coilover, so the Cappo might have to tag in. I'm actually really excited to hustle this thing through the cones, even though the forecast is for mid-30's, wind, and mixed rain/snow Saturday morning. laugh

Important autocross prep after work! Sorely-needed new wiper blades to help with the rain and possible snow/slush. Tire pressure check, lug nut torque check, and we're ready for tomorrow! smiley

wheelsmithy (Joe-with-an-L)
wheelsmithy (Joe-with-an-L) GRM+ Memberand PowerDork
3/25/23 8:20 a.m.

Really sweet little car. It's cool watching you give it the attention it deserves. Party on!

In reply to wheelsmithy (Joe-with-an-L) :

Thanks! I haven't had this kind of small-car fun since my Starlet days more than 20 years ago. smiley

1 ... 4 5 6 7 8

You'll need to log in to post.

Our Preferred Partners
zPAN81d8VtvUwvn6XSz7pRV5fKvzBegODw5TvzESnUKzwjBOOQEkyu9XV9mMFtzr