
Nashco
UberDork
2/14/14 9:42 a.m.
jakeb wrote:
Now this subframe is FAR from done. It will get a lot more reinforcements but we are still at the, "lets make it all fit" stage.
Excellent disclaimer...I know better and I know you know better, but some people are quick to judge in the "work in progress" stage. 
Thanks for the update.
Bryce

jakeb
HalfDork
2/14/14 11:45 a.m.
Nashco wrote:
jakeb wrote:
Now this subframe is FAR from done. It will get a lot more reinforcements but we are still at the, "lets make it all fit" stage.
Excellent disclaimer...I know better and I know you know better, but some people are quick to judge in the "work in progress" stage.
Thanks for the update.
Bryce
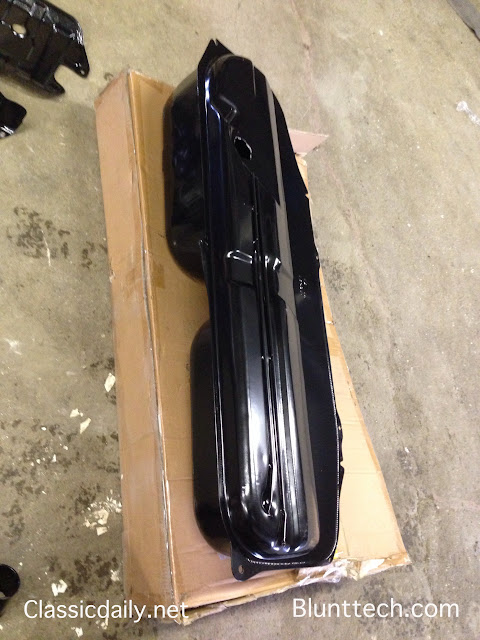
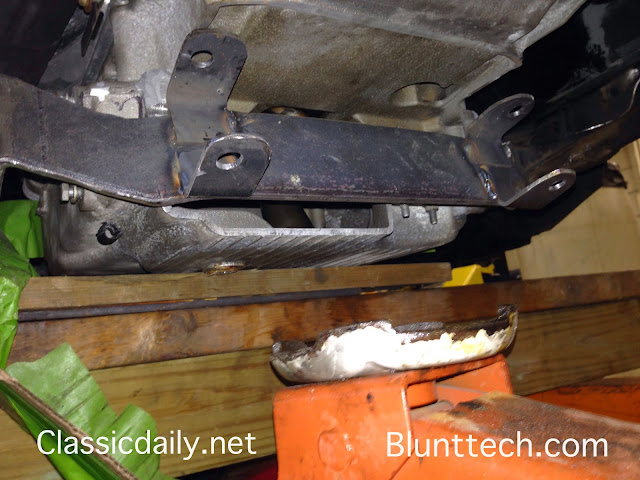
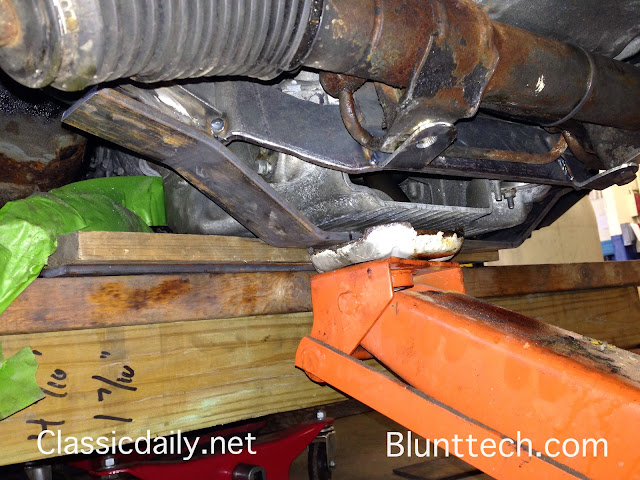
I should have put something on the pictures others have asked about the subframe on other forums. But yes it is NOT complete. It will get a plate under the oil pan connecting the two sides as well as some gussets here and there.
Jesus Christ this is a crazy build! I need more tools to do some crazy stuff too! 
jakeb
HalfDork
2/16/14 8:58 p.m.
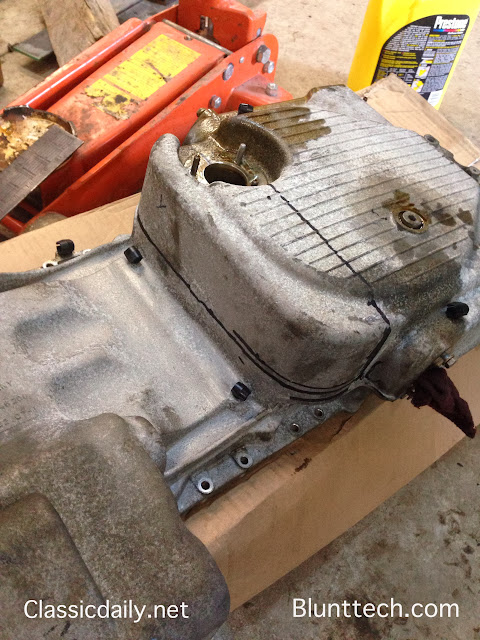
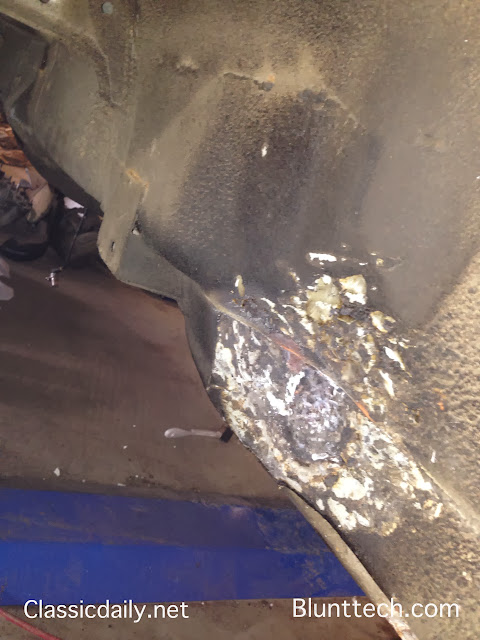
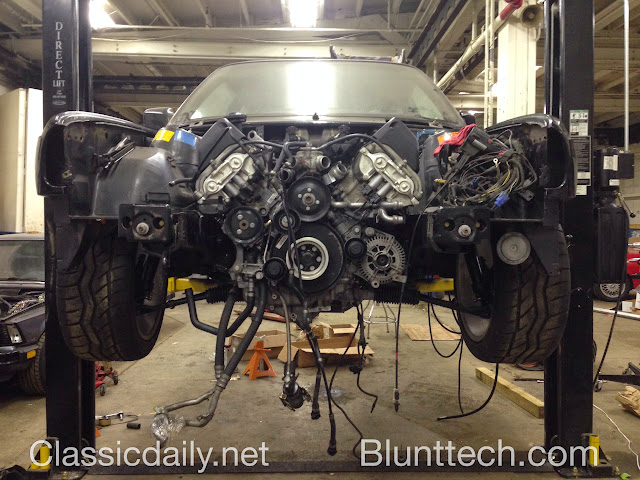
Pulled the pan to cut it apart.
Engine is VERY clean inside.
Time to cut the pan...
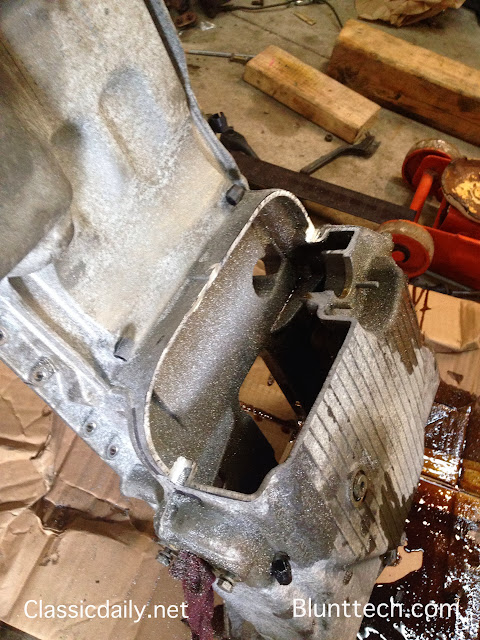
To keep it sealed up
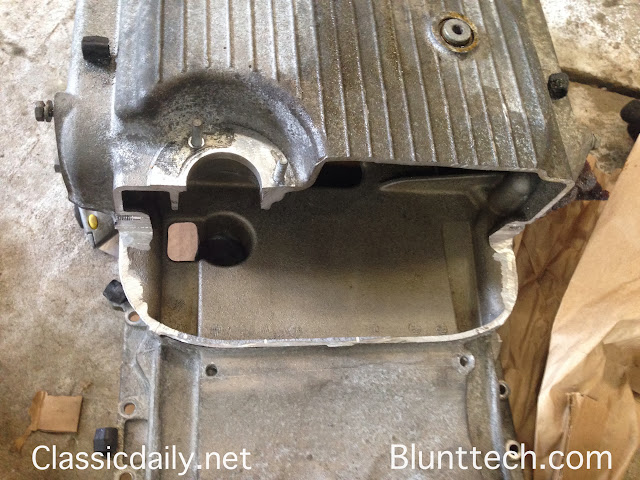
This picture is without the trans on. The pan actually sits closer than this to the subframe/rack mounting.
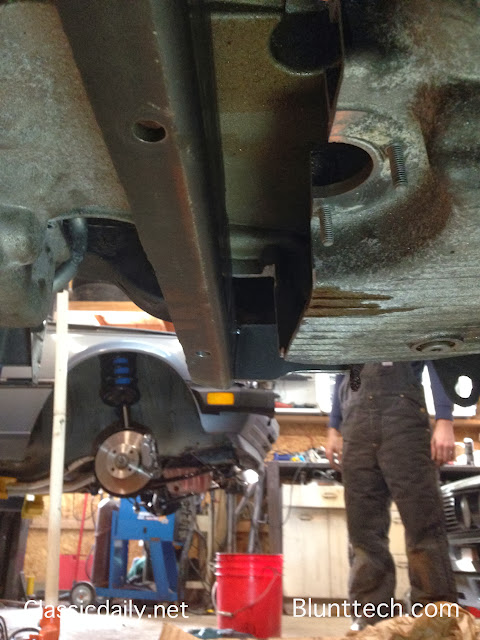
The trans tunnel had to be opened up in one spot to get things to fit better.
A little bit of heat and a hammer did the job.
Getting closer to it's final home
jakeb
HalfDork
3/28/14 8:23 p.m.
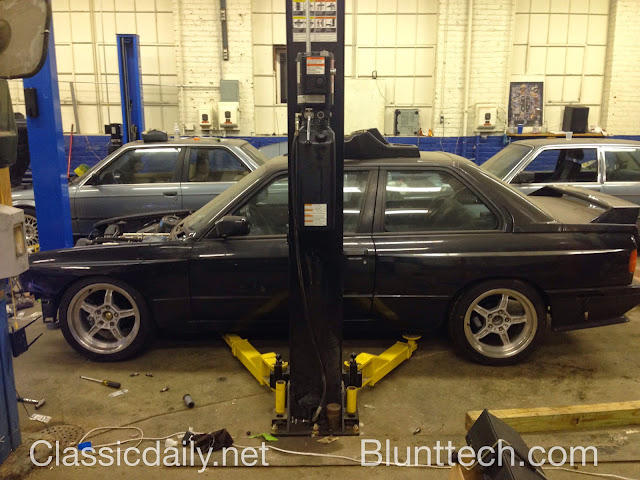
A bit of a slow down with all my projects while I was moving to my new shop. Things are finally moving ahead again so it's time I update some build threads...
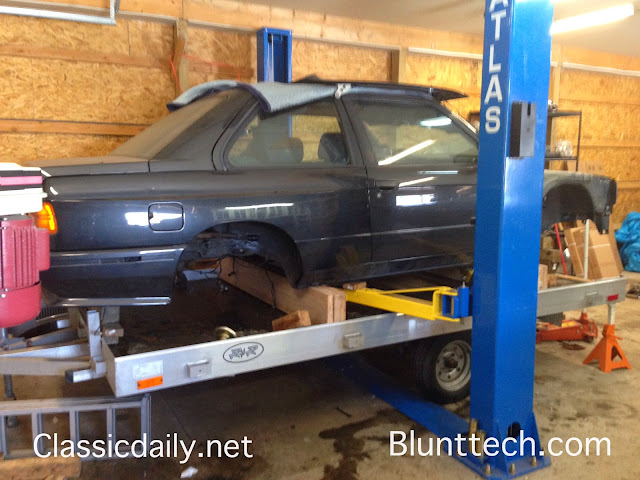
First of all the shell was moved from my home shop to a much bigger space. Let me tell you moving this car was nothing sort of scary. I am sure it was well more secure and nothing was going to happen.
Some pics of it's trip.
made it....
Back on a lift..
https://lh3.googleusercontent.com/-JJkypvIP--4/UzYcJIMg6ZI/AAAAAAAALDk/fU1qLs_SLuA/s640/IMAGE_1596.jpeg
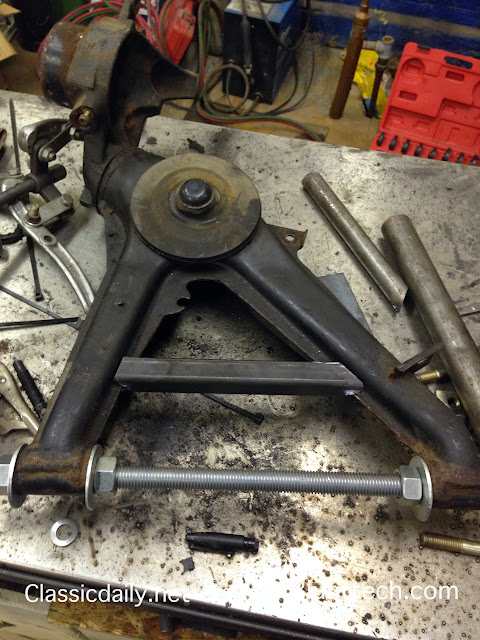
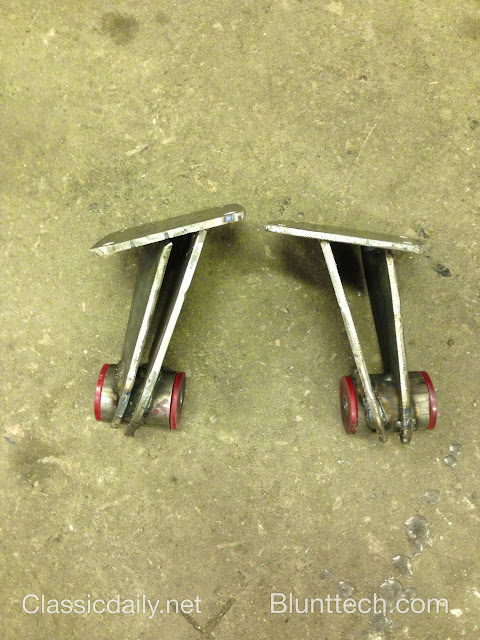
Working on the toe and camber adjusters on the rear subframe.
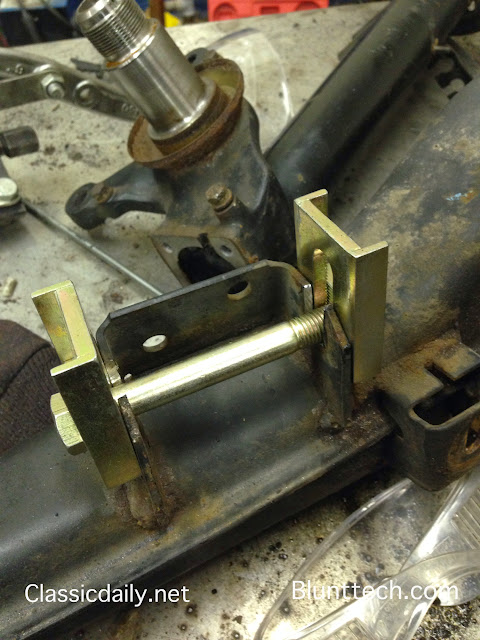
I didn't like how much was unsupported so I extended it some.
Freshly powdercoated bits
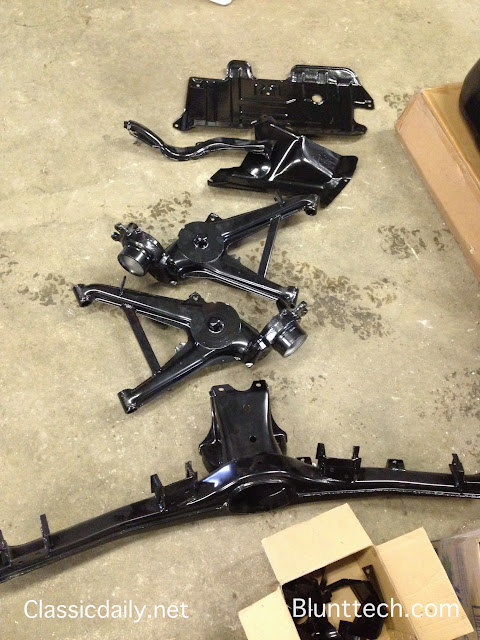
reinforcing trailing arms
A couple pictures of what has been holding things up...
New shop
and a new toy...
You're a couple of hours away, but I am going to HAVE to come and visit...I love what you're doing and the M3 V10!
jakeb
HalfDork
3/28/14 9:31 p.m.
CGLockRacer wrote:
You're a couple of hours away, but I am going to HAVE to come and visit...I love what you're doing and the M3 V10!
sure thing man! I plan to have some get togethers at the shop this summer but you are welcome to come up and check things out sometime.
Following along - always entertaining and educational!
Congrats on the new digs! Awesome!
jakeb
HalfDork
4/7/14 8:21 p.m.
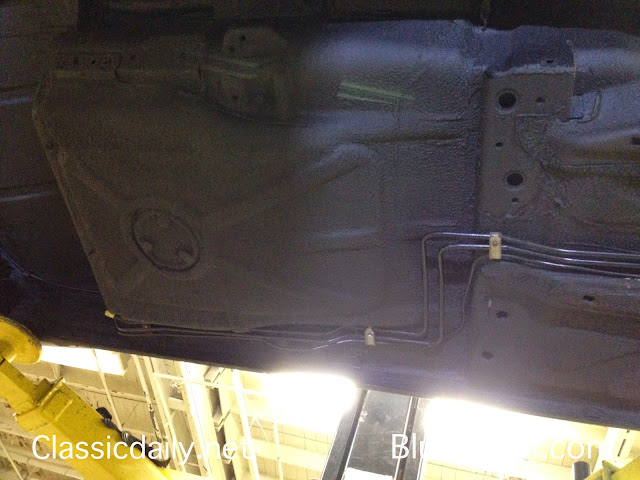
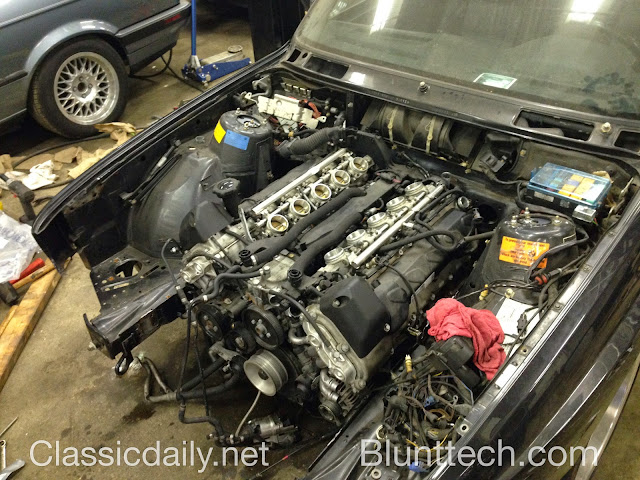
Steve flew in to do some work on the M3 last week....
Got the bottom all re undercoated.
Before
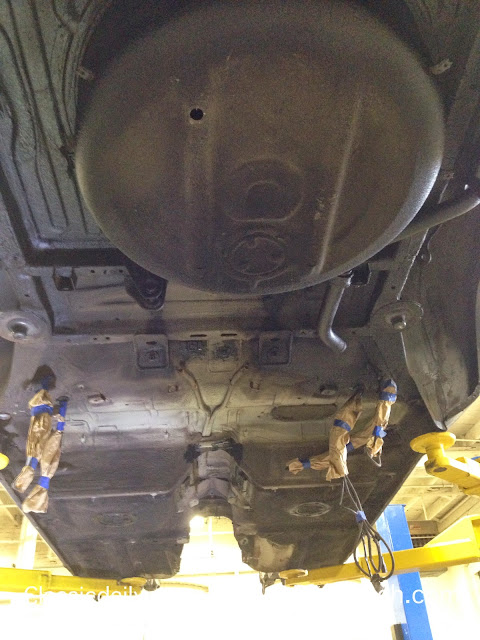
After

Fresh rear subframe and painted diff bolted up.

Subframe in and trailing arms bolted up..new bushings, bearings, etc etc etc

undercoated in the wheel wells too


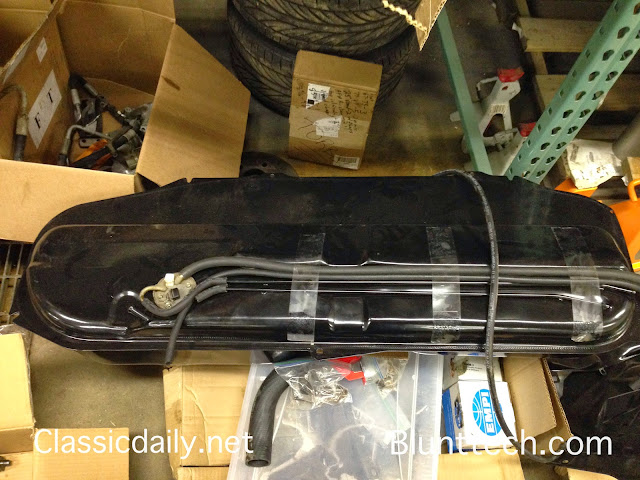
New brake and fuel lines run

Gas tank ready to go in
Nice! Love the build. Thanks for letting us tag along.
jakeb
HalfDork
5/18/14 8:07 p.m.
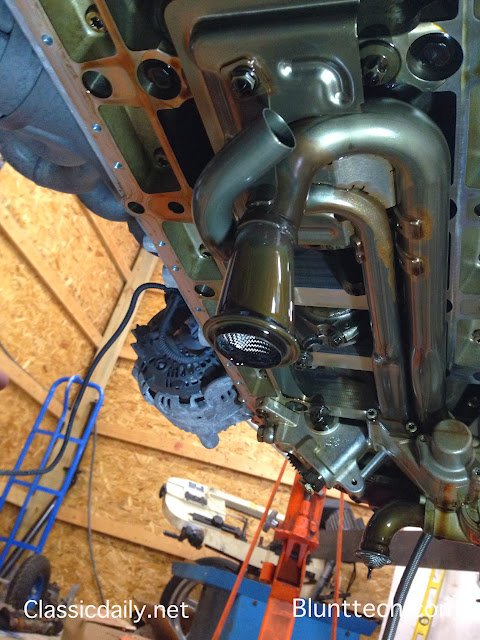
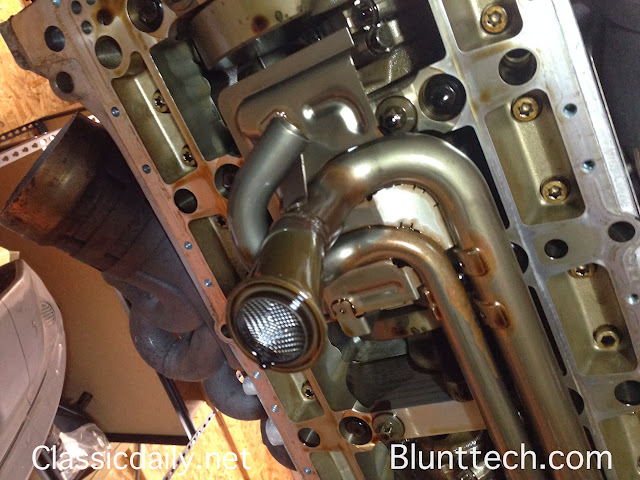
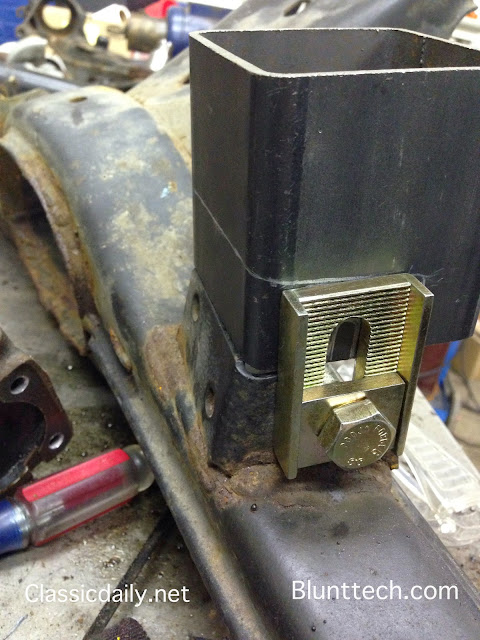
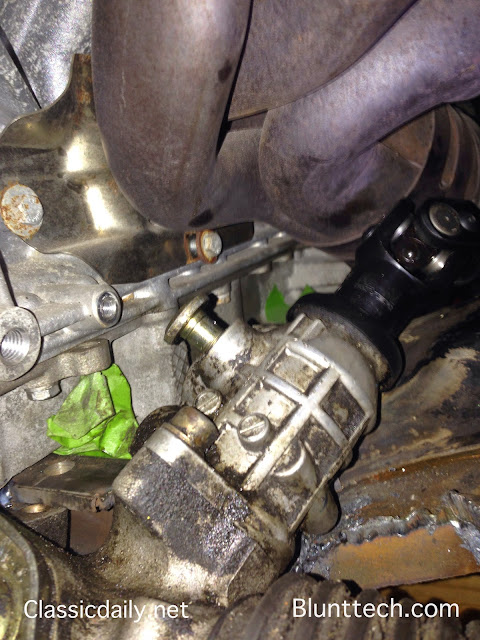
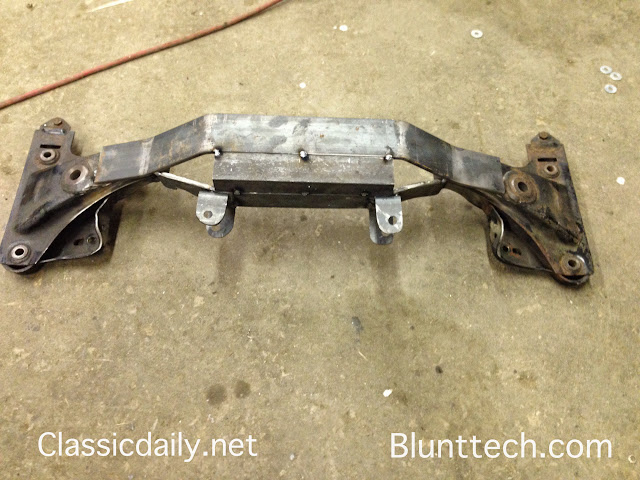
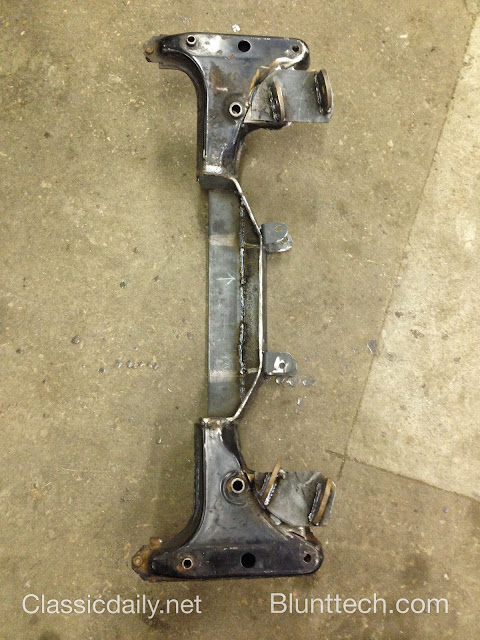
Well the subframe from before was a bust.... The z3 steering rack was wanting to be in the same spot as the header. So we start again.
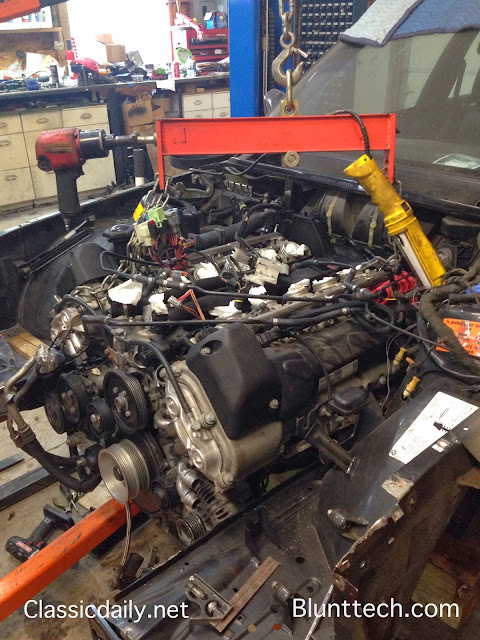
The engine about in it's final location

This is the e30 m3 rack rotated slightly down to clear the header.
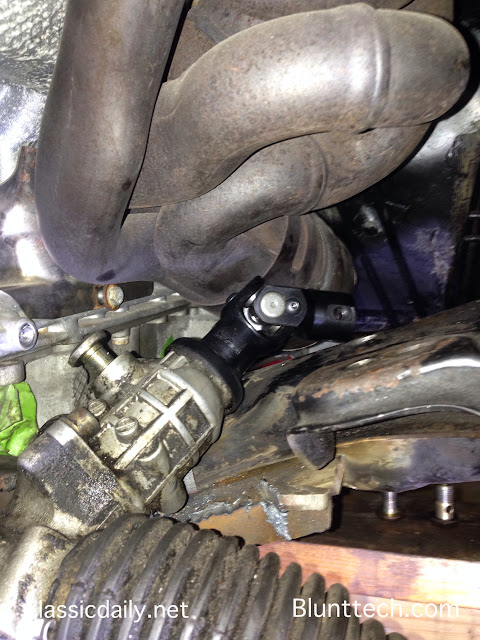
Rack in it's new home in the subframe jig.
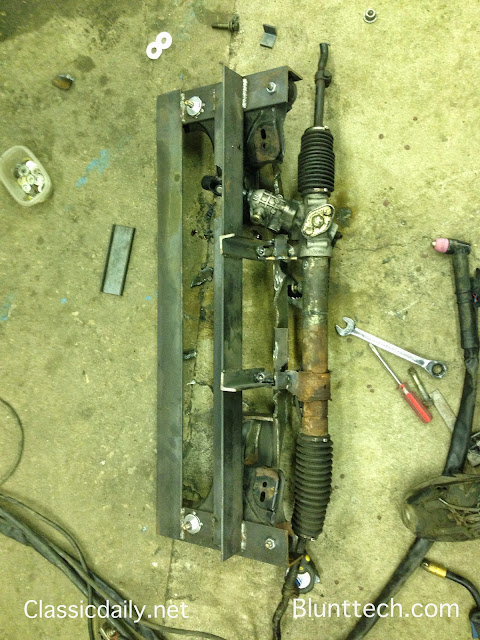
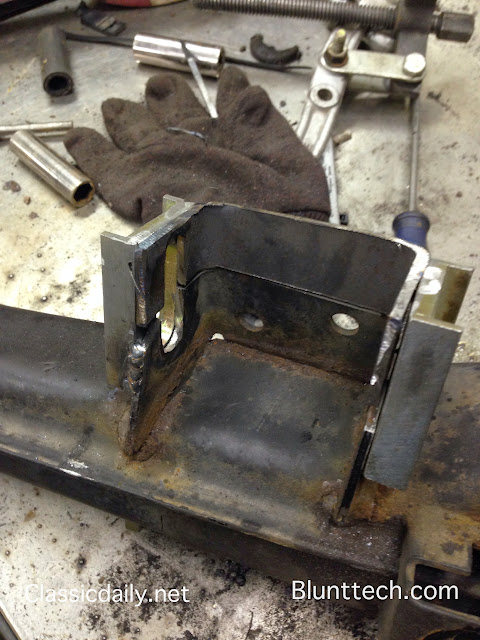
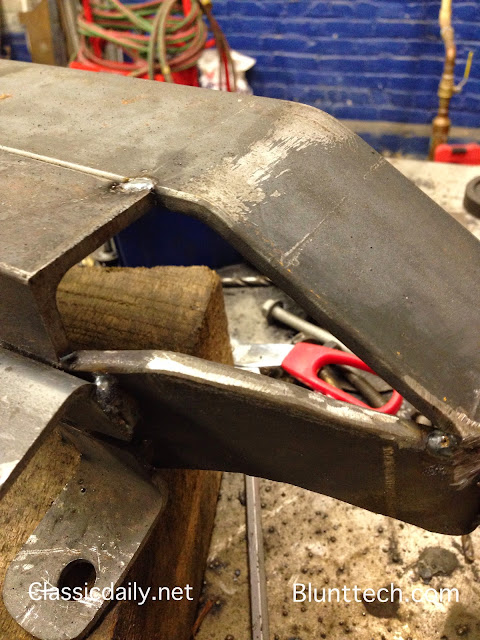
Bending a piece to connect the dots

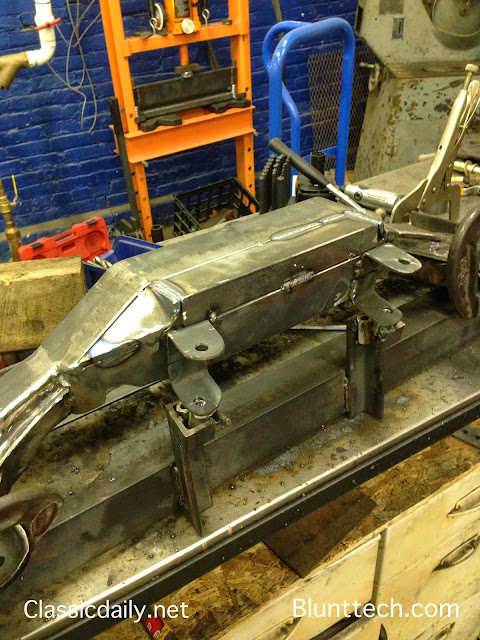
Trimmed down and tacked together
Testing and ears for rack

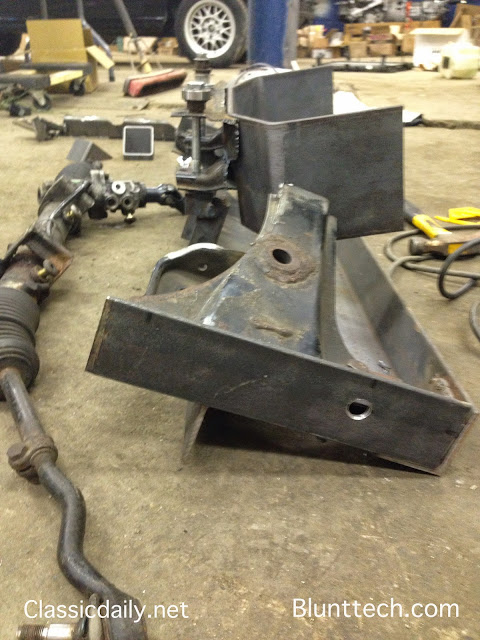
Boxing it in
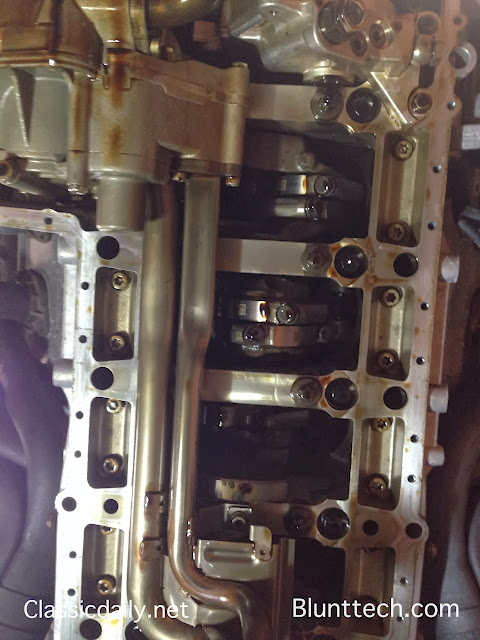
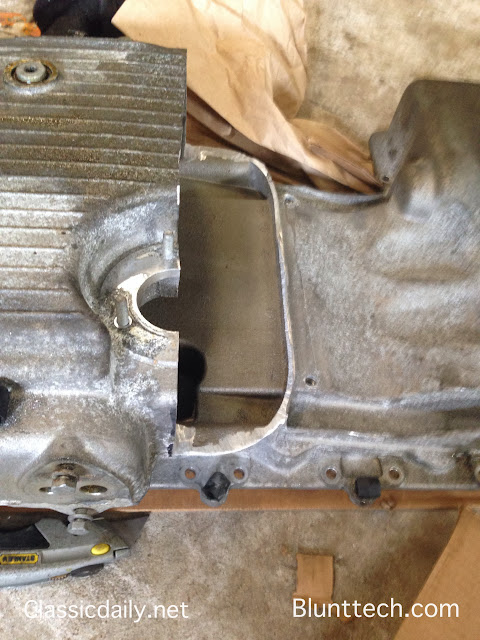
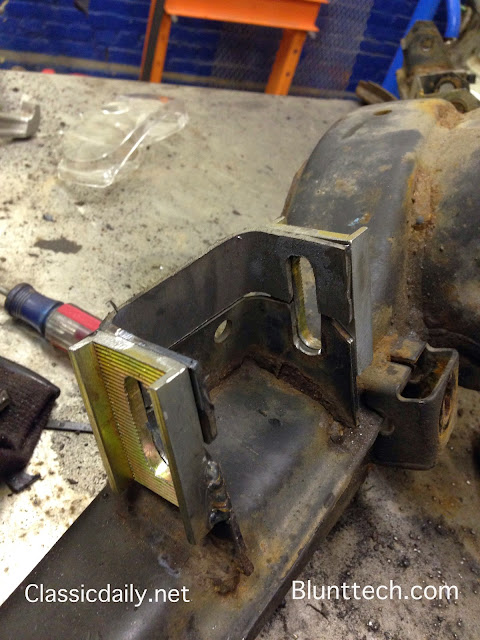
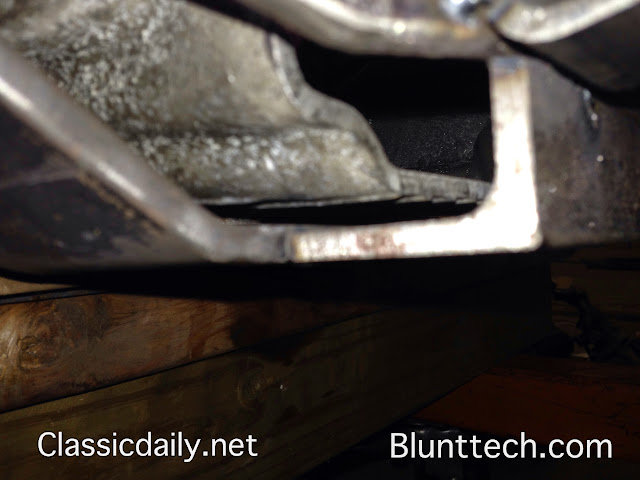
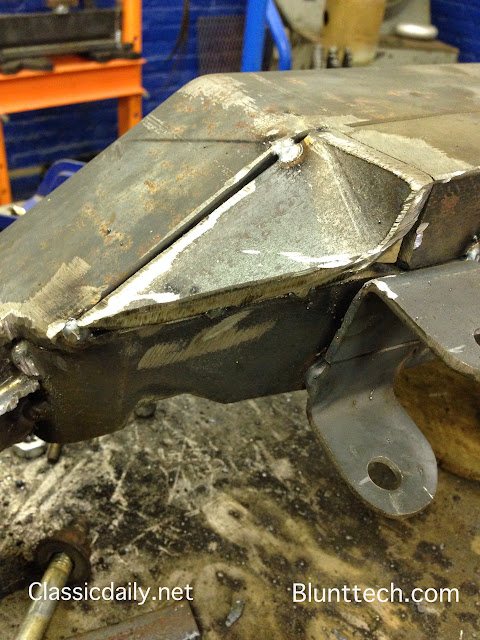
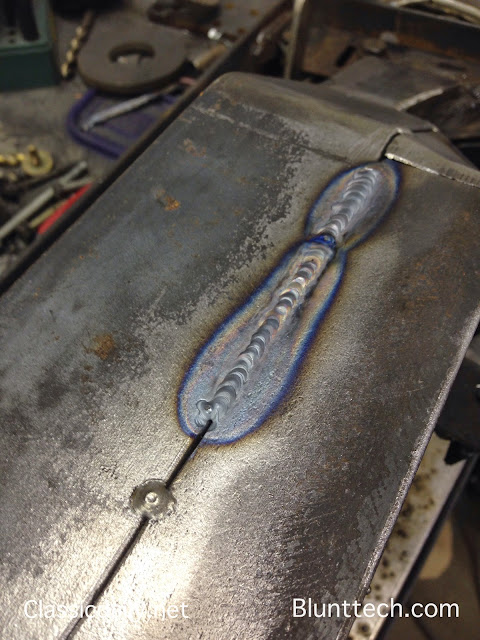
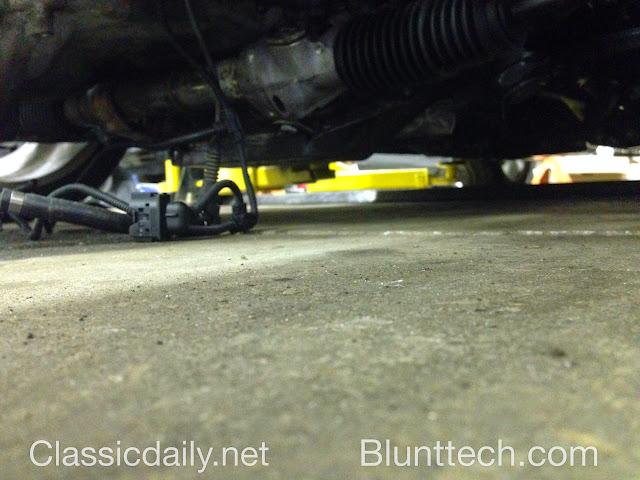
You can see a piece of bent plate going under the pan here. This piece was fun to make.

Tacked together
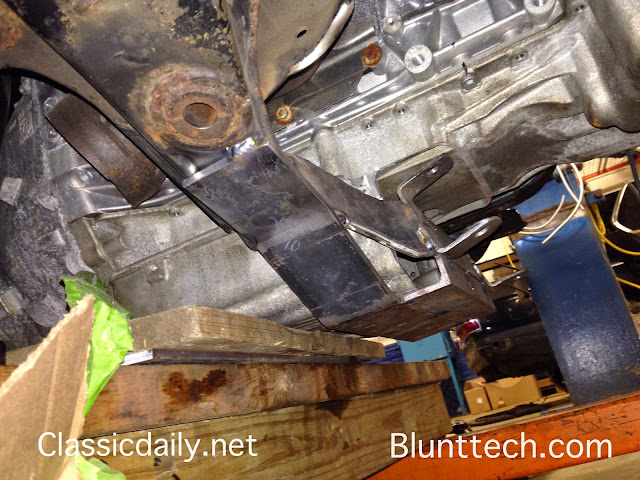
Clearance to the pan...around 1/8-1/4"
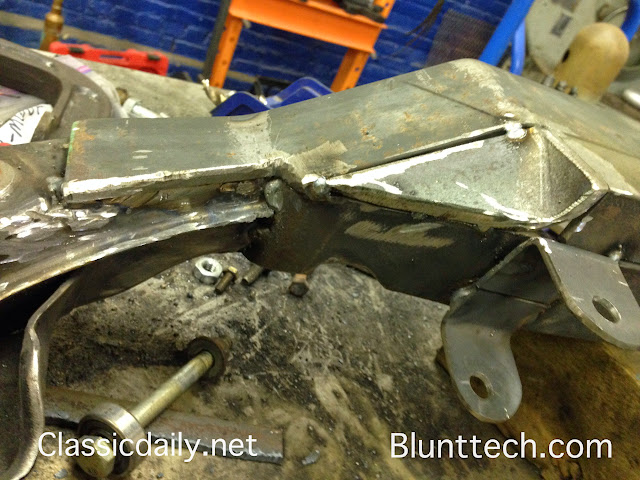
Out of the car
I really like how this part came out. Some little open holes still.
Before (opposite side of after pic)
After
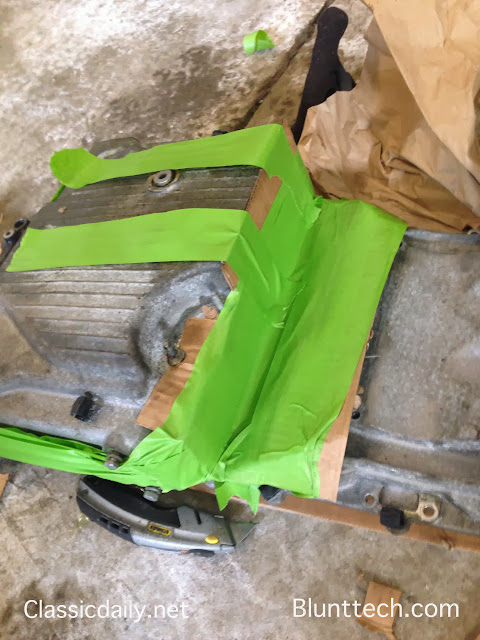
Still more cleanup needed.
Entire thing before welding...

This as ever continues to be awesome. Thank you so much for sharing the process with us. Off back to you site (again) to look at the LSx installs you've done previously.
HAve you considered some high density foam between the cross member and the oil pan? Many rally teams do that with skid plates, otherwise a stone can get trapped in the tight space between the pan and the crossmember / skid plate, then it doesn't take much of a grounding out situation to push the stone through the oil pan.
Awesome as always Jakeb. I need to really start saving up for the swap we talked about long ago (and convince the wife it is necessary.)
jakeb
HalfDork
5/19/14 8:35 p.m.
Adrian_Thompson wrote:
This as ever continues to be awesome. Thank you so much for sharing the process with us. Off back to you site (again) to look at the LSx installs you've done previously.
HAve you considered some high density foam between the cross member and the oil pan? Many rally teams do that with skid plates, otherwise a stone can get trapped in the tight space between the pan and the crossmember / skid plate, then it doesn't take much of a grounding out situation to push the stone through the oil pan.
That is REALLY good idea to put some foam in there. I can see a stone causing havoc.
jakeb
HalfDork
5/19/14 8:36 p.m.
singleslammer wrote:
Awesome as always Jakeb. I need to really start saving up for the swap we talked about long ago (and convince the wife it is necessary.)
Replied to your email. Everyone needs an LSx e39 wagon.
jakeb
HalfDork
6/6/14 8:50 p.m.
This update is from a few weeks ago but just finally getting around to uploading all the pics and posting.
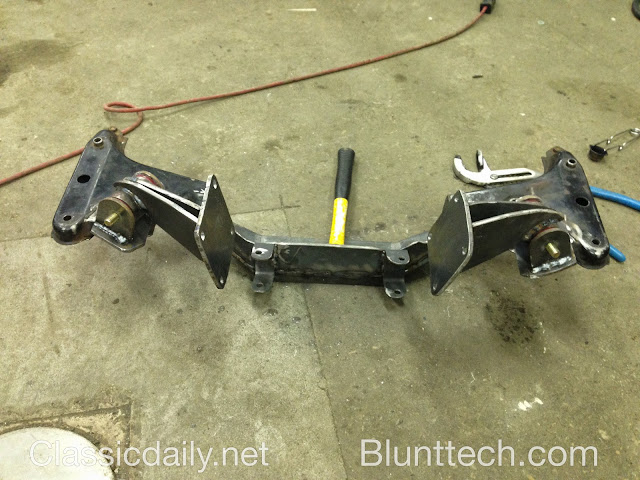
Welding the new subframe up.
Starting on mounts
drivers side
These will be fully boxed and also a new set of plates will be drawn and then water jetted. These are the mock ups.
Subframe with mounts welded on
And with both mounts connected. All this will be powder coated
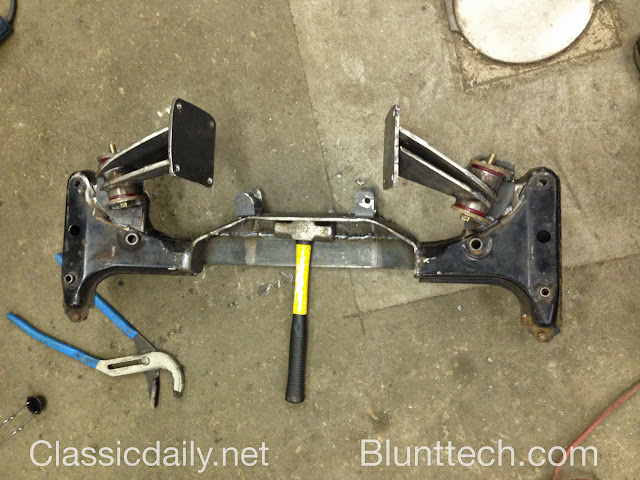
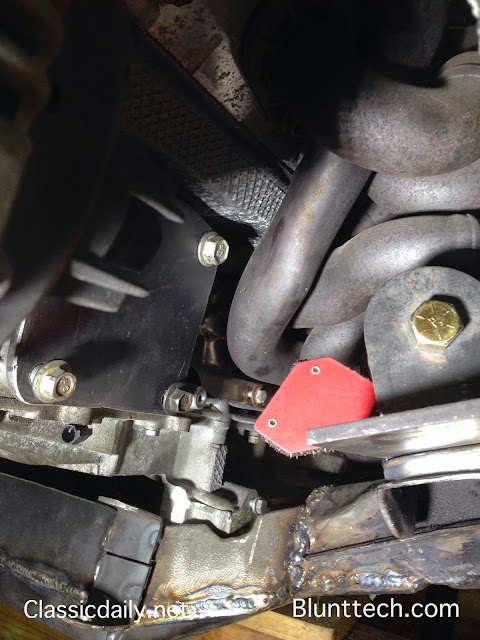
Steering clearance
Adding another joint
And a locator
This is JUST a MOCK up. We needed to have the car movable to take to a show so this locator mount was just tacked on so the car can steer. There will be a stronger more elegant solution once the engine comes back out.
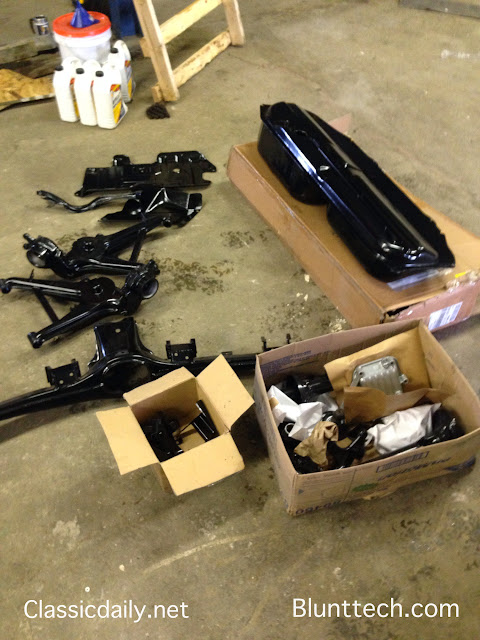
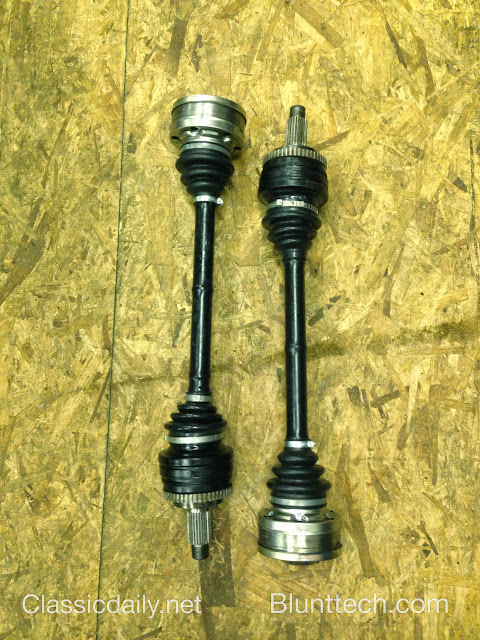
Rebuilt rear axles
A quick shot from the front.
The coilovers are turned all the way down here and there is about 3-3.5" here. Yes it is close but the air boxes are about a 1/4" from the hood.
Here it is at the vintage in NC a couple weeks ago.
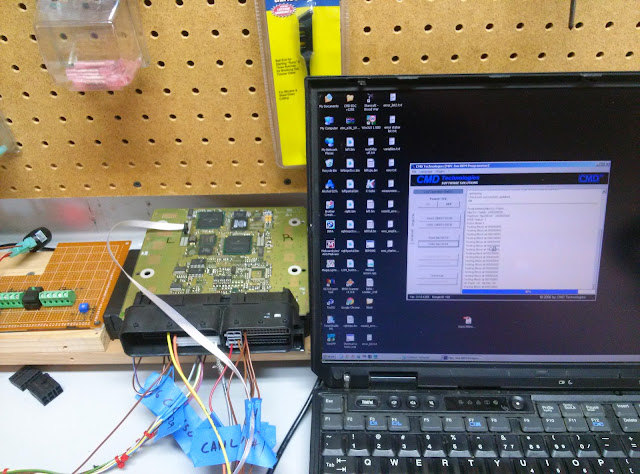
Also it is looking VERY good that we will be using the stock DME. nando has been working on cracking it and it's looking like it's gonna happen.
I just don't even know what to say. 
You've made great progress! Well done its going to be an awesome car when finished! Can i ask whats your plan with the dipstick?
I'm thinking of drilling my sump near the back of the air con compressor and putting a dipstick in there. My plan is to then fill with 9 litres of oil, run the car and mark the dipstick at the correct level. Care to offer any other ideas!
Paul
Paul - you need to update your Reader's Rides section with your progress....
Really cool build. I'll be interested to see how the engine management works out, MS is kind of a crapshoot and stock DME on modern BMWs is such a Rube Goldberg mess that I'm wondering how it reacts. On something of this caliber I'd be inclined to go all in and run Pectel or Motec or similar, but that's big money time. (My shop is in the process of converting our stroker V8 M3 from stock Siemens with a pared down harness to a from scratch standalone setup because of frustrations with how many modules controlling other modules are required to make the factory stuff run right.)
jakeb
HalfDork
7/10/14 2:09 p.m.
Not a huge update but something none the less.
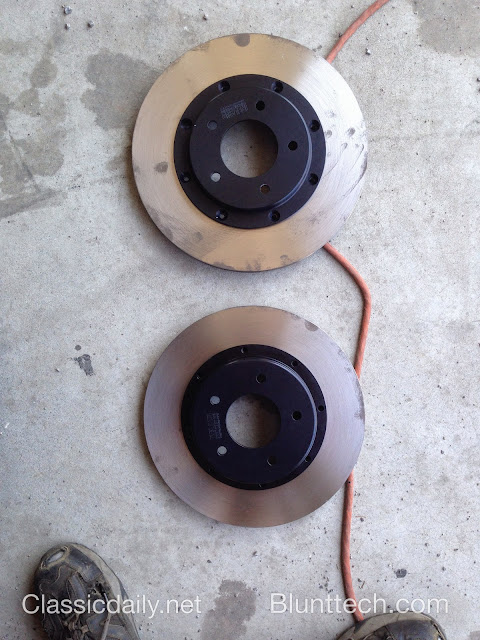
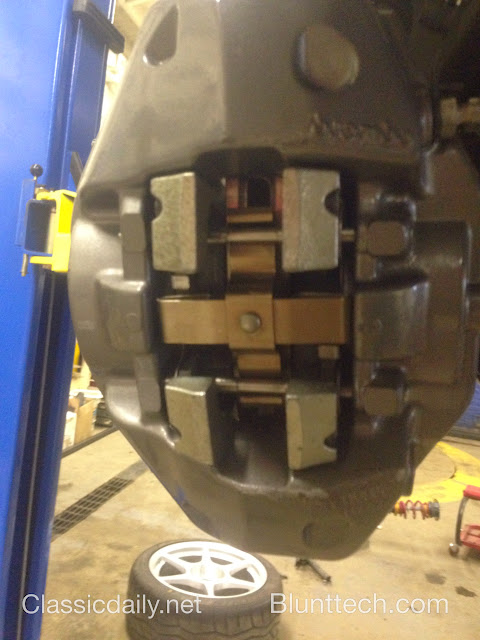
We had found some rotors that were going to work for the brake setup but they were not ideal. So we got some hats from Ireland and then had some rotors made custom from coleman eng.
Here are the rotors when they showed up.
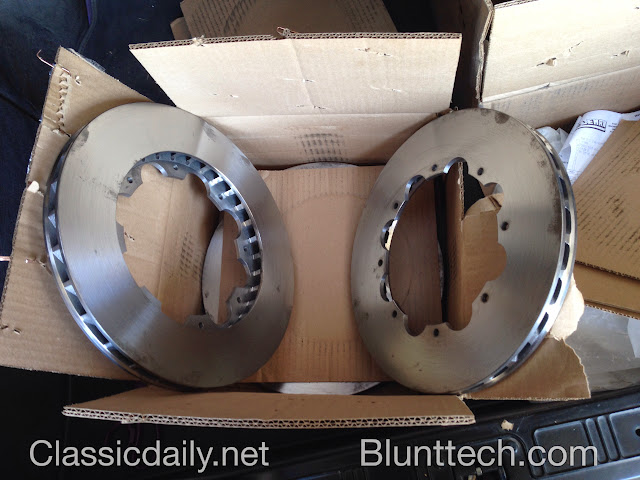
Fronts
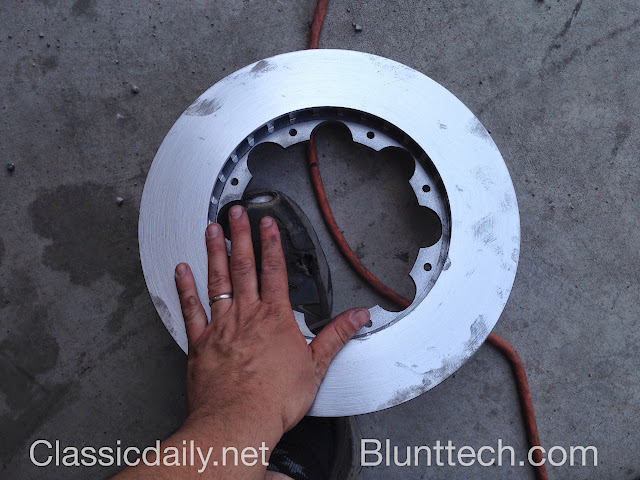
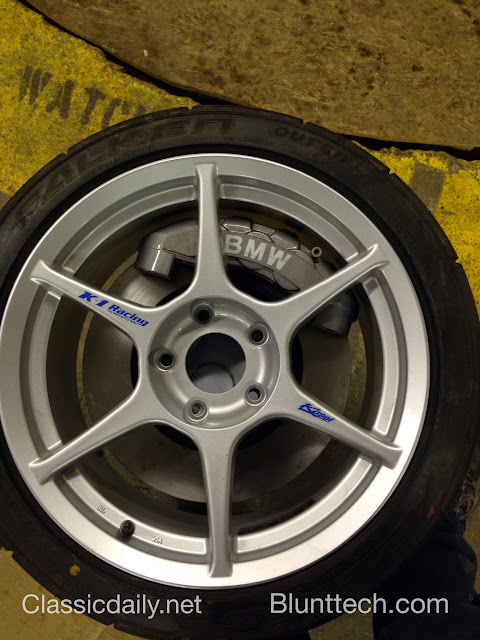
Starting to mock stuff up
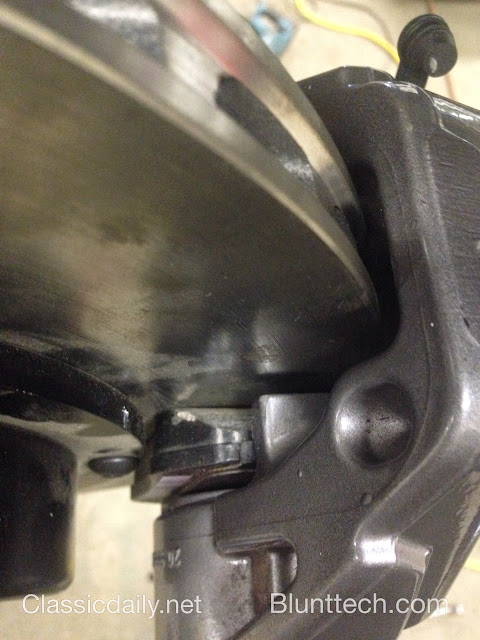
These are just sorta stuck in there...if you look to the left of the caliper it looks like they are hitting the wheel. The caliper is nut but there is a washer in there to keep the caliper clamped to the rotor. There is room all around.
clearance between wheel and caliper
rear rotor....nothing that exciting here.
[img[https://lh5.googleusercontent.com/-DqJ97ieM94Y/U77S8FHKt_I/AAAAAAAAMIU/xwqWJID7drY/s640/IMAGE_1830.jpeg
rear compared to front
jakeb
HalfDork
3/8/15 2:38 p.m.
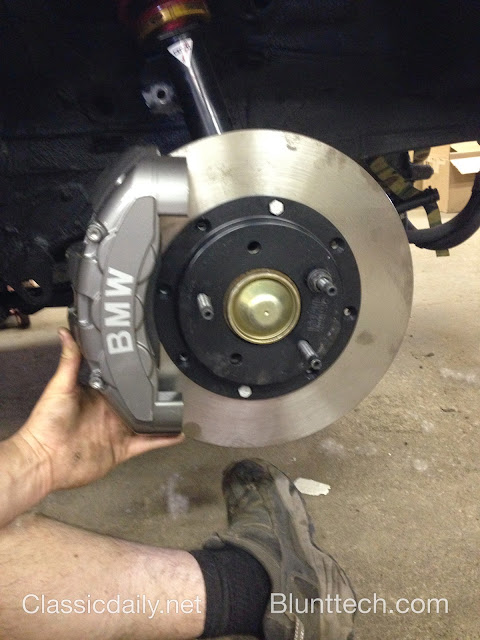
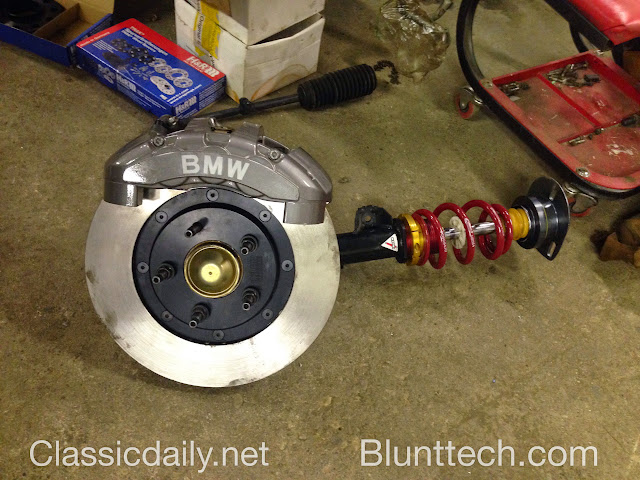
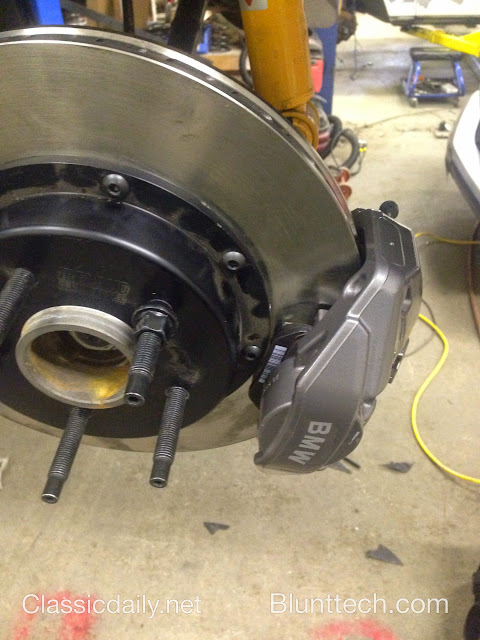
Been spending some time on the brakes recently.
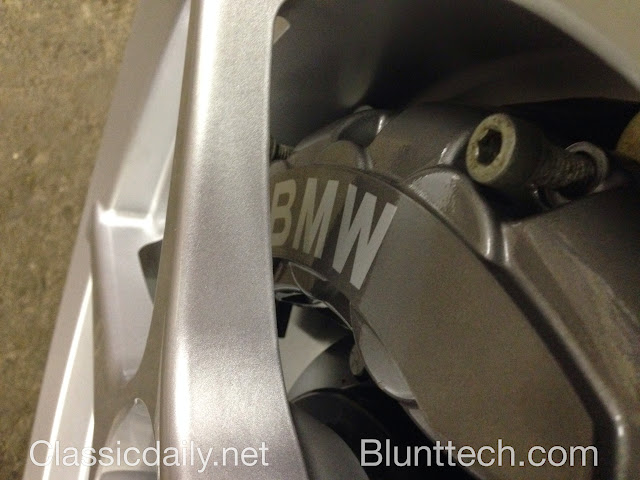
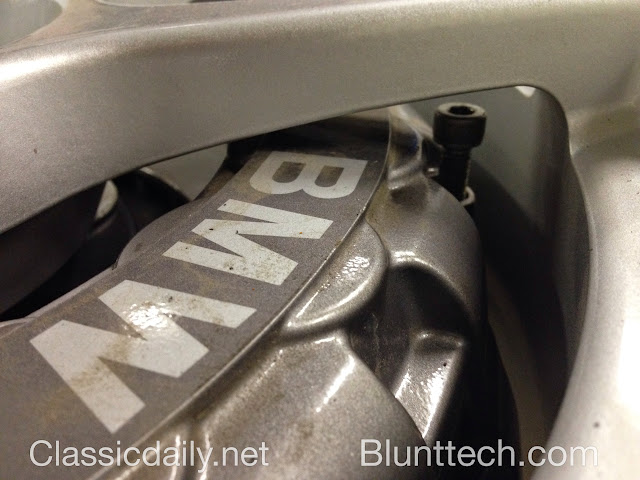
Will be running 135 brakes front and rear.
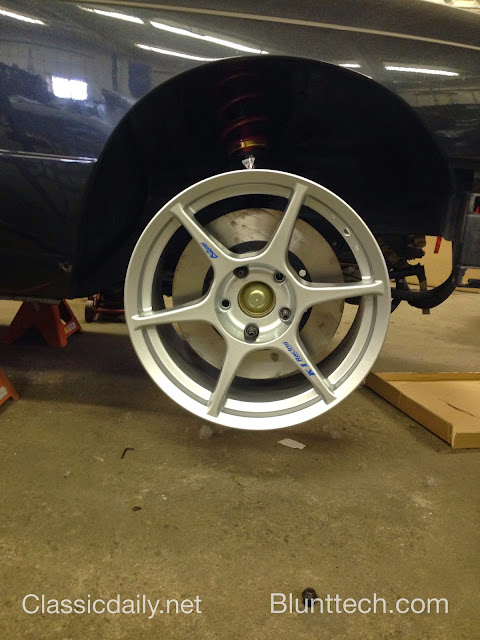
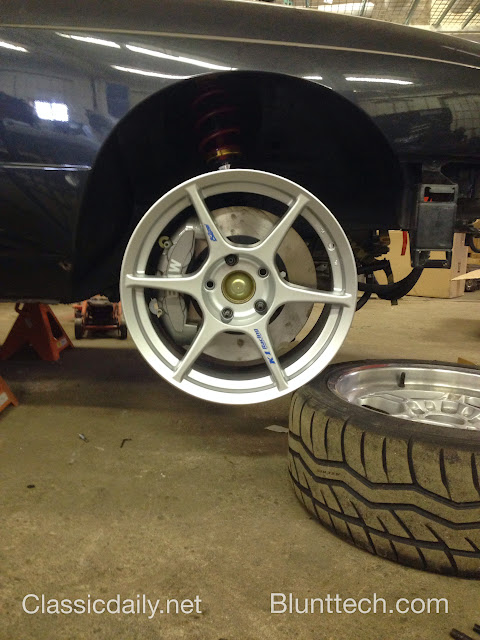
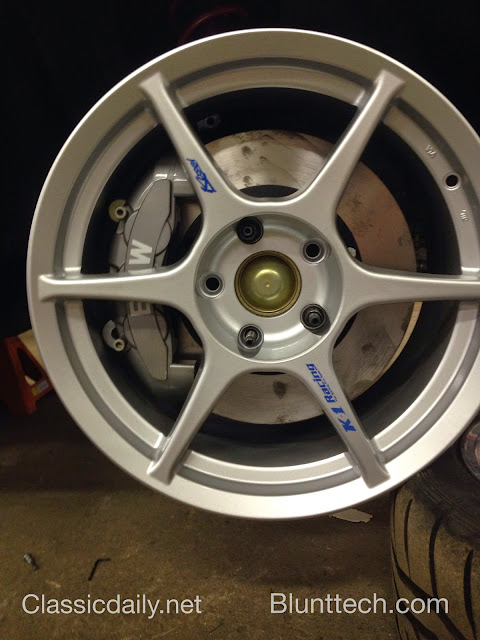
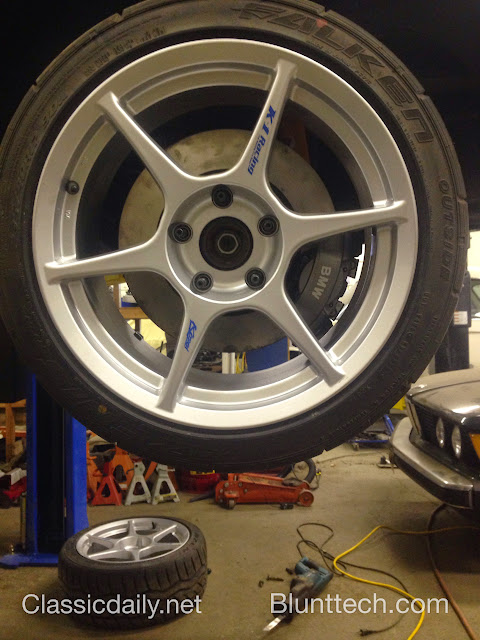
We bought e36 fitment wheels so we could space to fit and clear the brakes.
This is with about 12mm of spacing.
Front brackets were not to bad to make. Piece of 6061 aluminum... Stacked washers just used do to lack of hardware at the time. Brackets will be cleaned up some....edges rounded, etc.
We are using hats from IE with custom rotors from coleman. The hats have been installed INSIDE the rotors to give more clearance at the control arm ball joint.
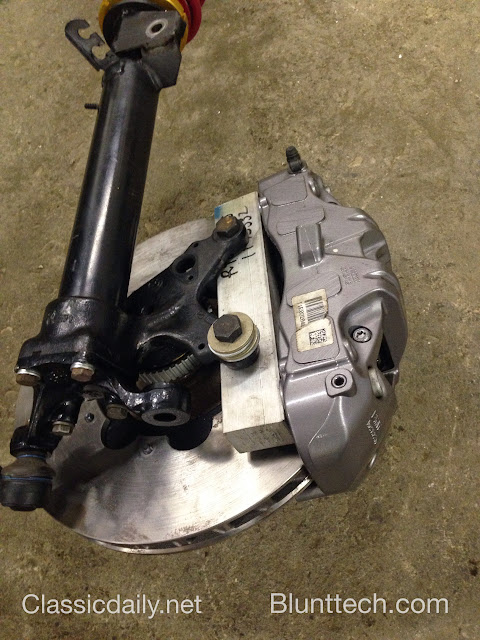
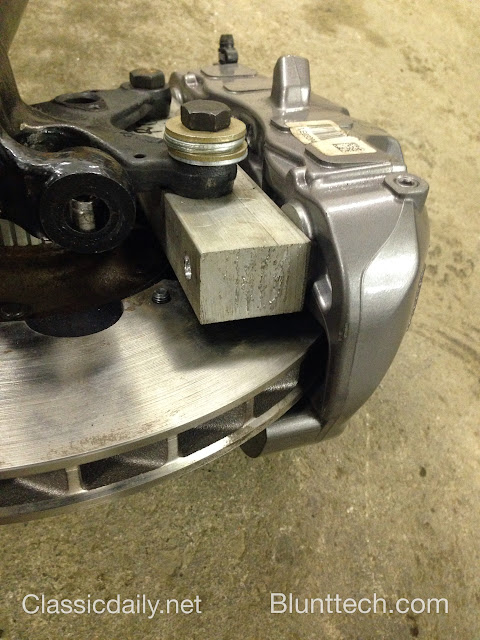
Kinda hard to tell but nice and centered.
All mounted up.
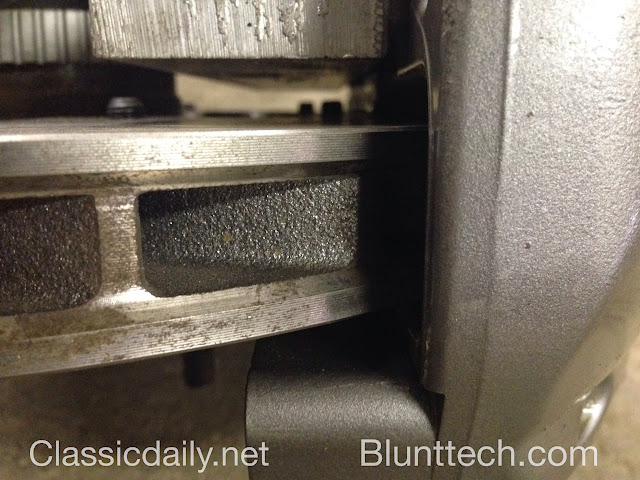
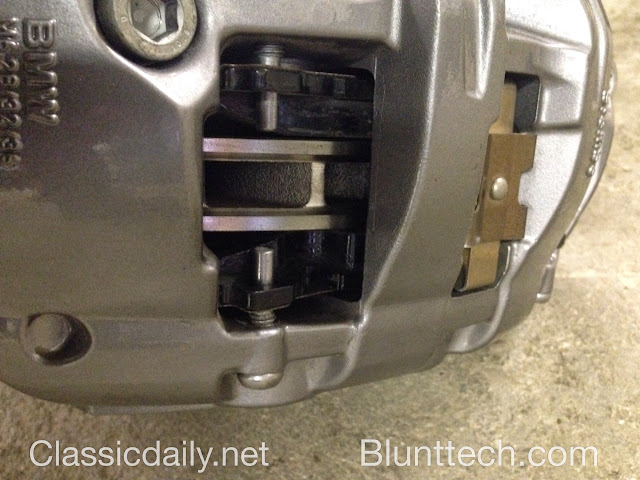
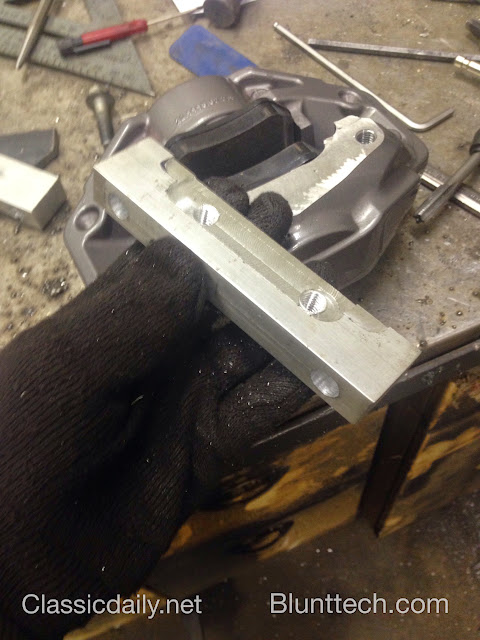
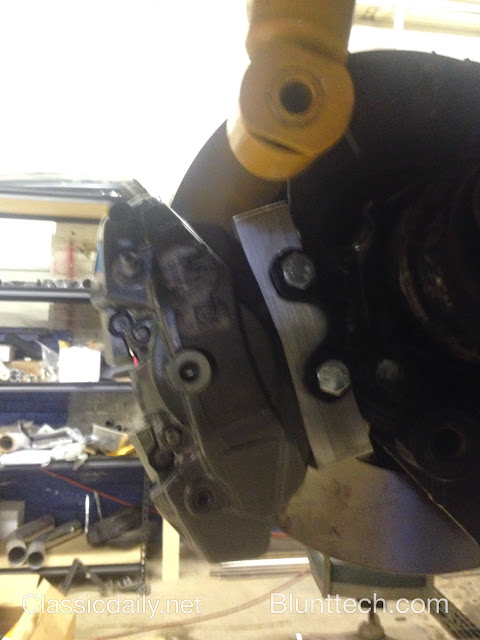
Now the rears were a MUCH different story. We machined the calipers and removed the mounting ears.
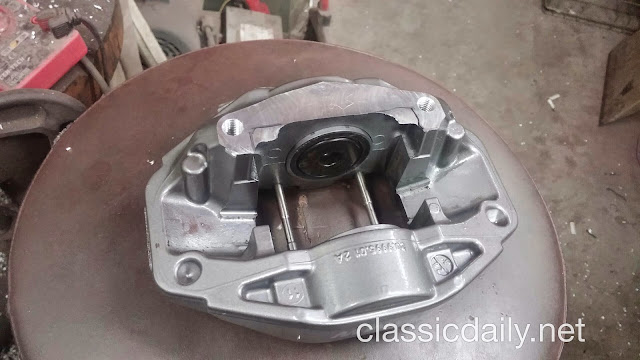
There was VERY little room between the mounting bracket and the backing plate. To keep enough material left in the bracket some was machined out to give clearance at the backing plate.
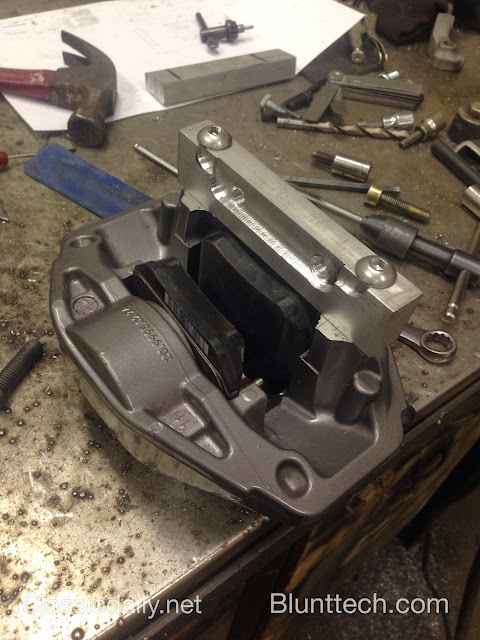
mounted
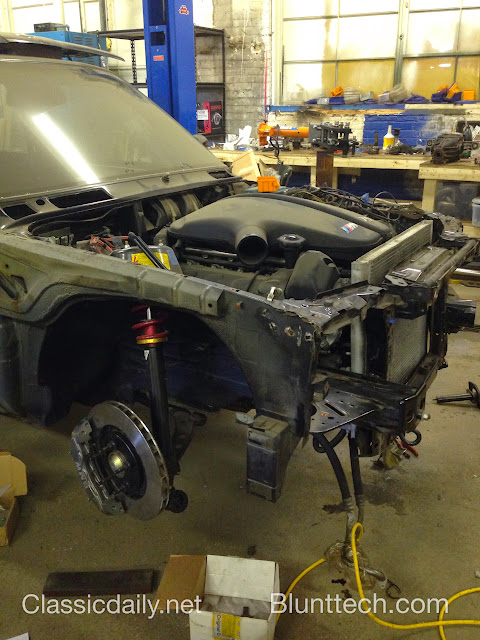
The m5 uses a very odd radiator as it is actually two radiators stacked on top of each other. If BMW designed it that way we would love to keep it. But one issue is the m5 radiator is too wide.

Sometimes you have to cut...

The cut part will be completely boxed in.
And there we go...

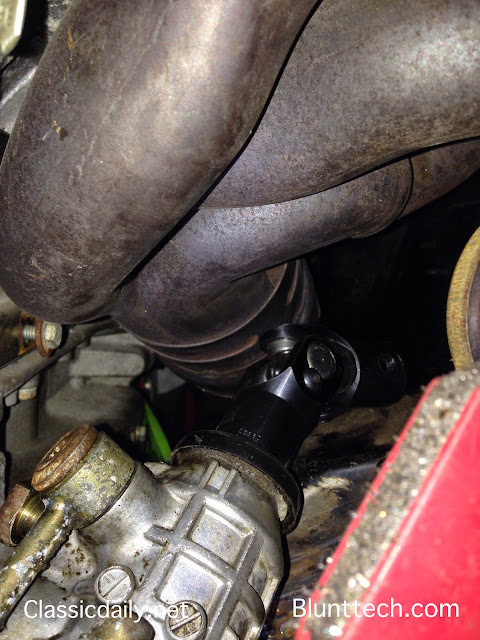
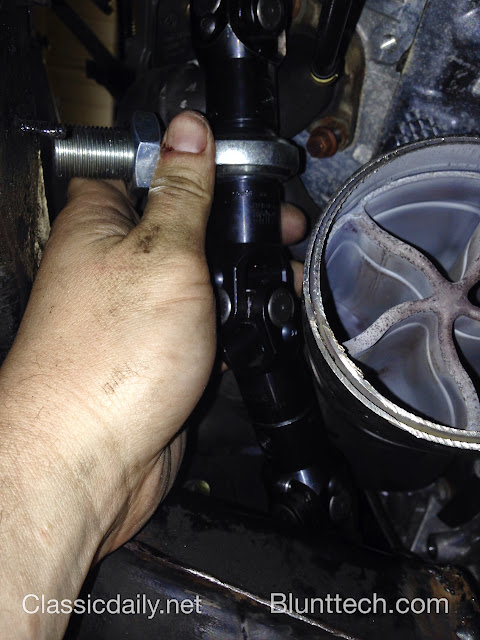
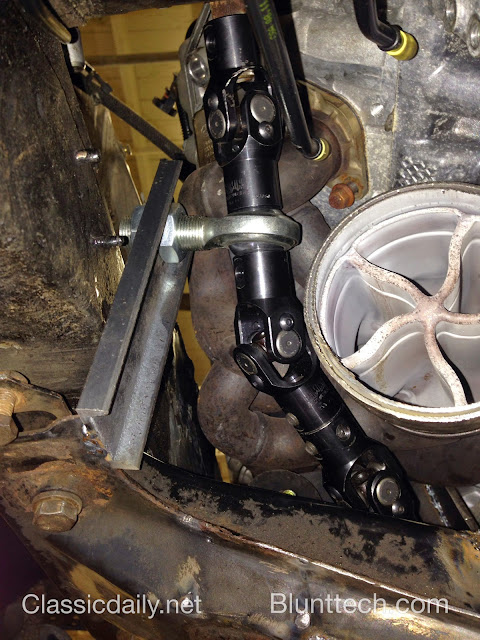
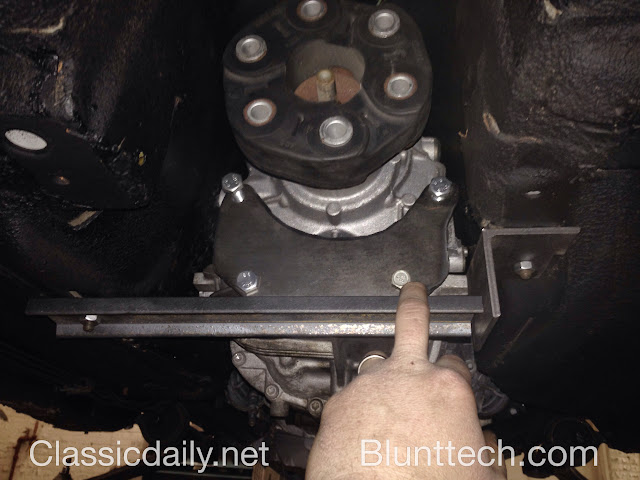
The engine has been mounted but the trans has had a VERY temp mount. But that needs to change. So...getting going on that.
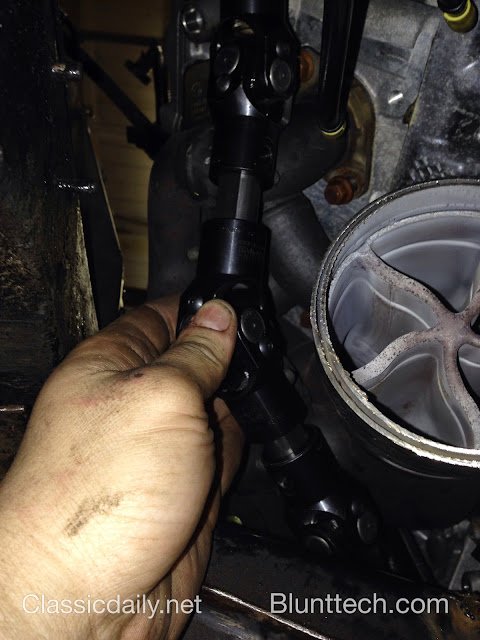
Just to show how big the e60 guibo is.
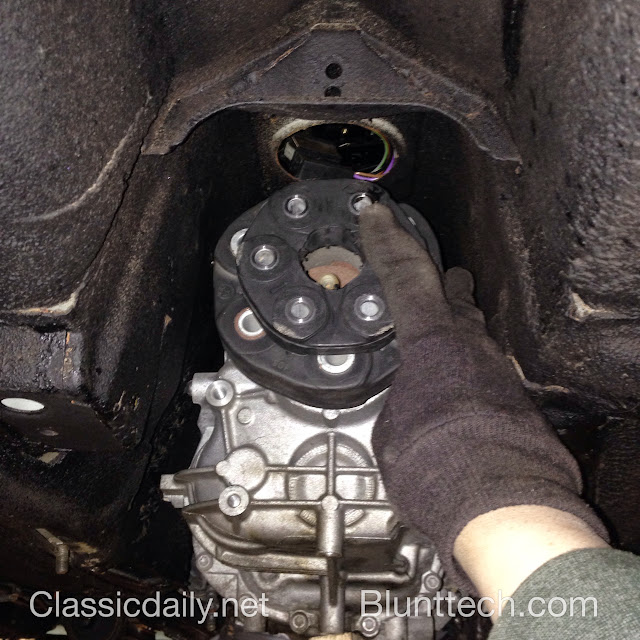
Mount will be two parts.
One that bolts to the trans (flat part in picture below) and then the cross brace. There will be a poly bushing in between (update on that when it shows up Tuesday)

84FSP
Reader
3/9/15 11:17 a.m.
Beautiful! That thing is going to be rowdy. Love the fab work around your brake setup!


