I told you you'd make it home fine lol. If your car made all the noises that my rally car makes when it's just driving down the road, I suspect you would never drive it at all ;)
---
Also in Nick said he was worried, he means it. He called me on the road when I was about 30 miles ahead of him with my race car on the trailer seeing if I could come back and swap cars on the trailer and tow him home ;) of course if you had had to drive my rally car home, he would have thought his car was very civil by comparison lol.
---
Side note number two: stop freaking buying multiple miatas and buy yourself a trailer and a tow rig and minimize your stress. ;)

irish44j (Forum Supporter) said:
I told you you'd make it home fine lol. If your car made all the noises that my rally car makes when it's just driving down the road, I suspect you would never drive it at all ;)
Yeah, no E36 M3. Why would I want to drive around a car that has all the refinement a garbage truck? That's why I've made the compromises I've made so I can enjoy my car the other 30 days of the month. The difference is your noises are normal, mine was not.
---
Also in Nick said he was worried, he means it. He called me on the road when I was about 30 miles ahead of him with my race car on the trailer seeing if I could come back and swap cars on the trailer and tow him home ;) of course if you had had to drive my rally car home, he would have thought his car was very civil by comparison lol.
I think you underestimate how loud my diff was. I've been in your car, it had nothing on this thing.
---
Side note number two: stop freaking buying multiple miatas and buy yourself a trailer and a tow rig and minimize your stress. ;)
Nah, I'm good. 
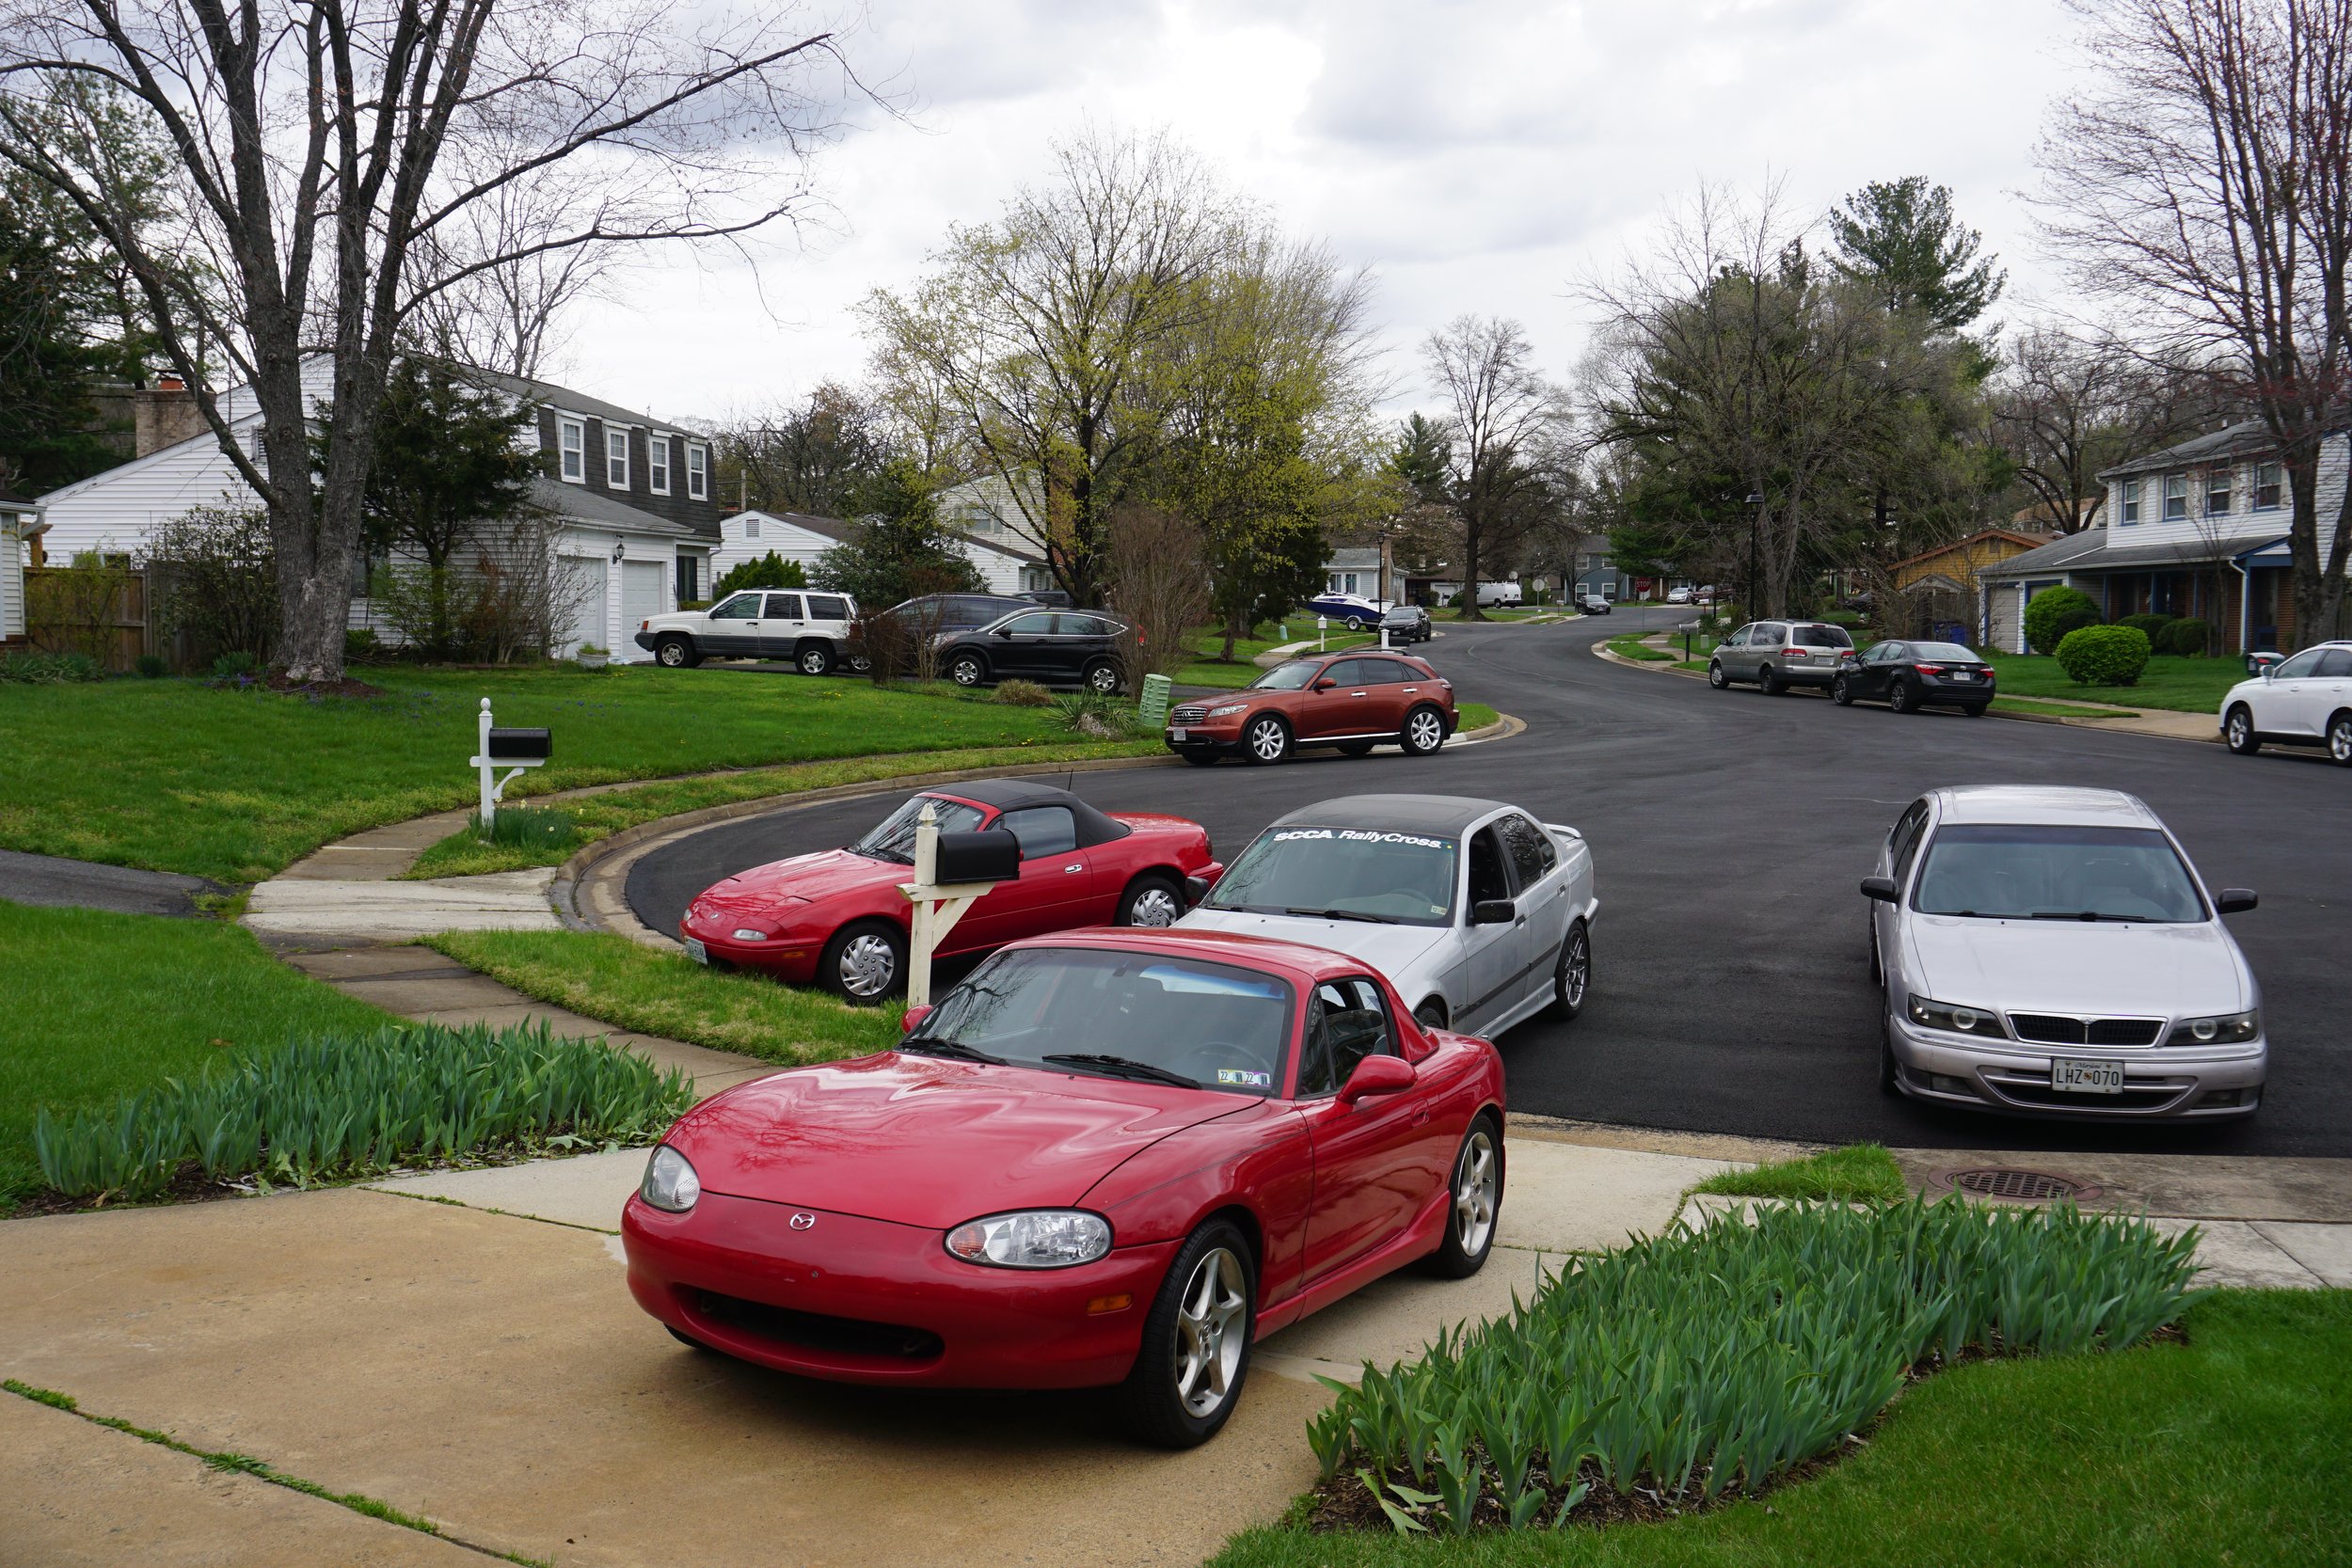
They're multiplying....and evolving.
I mean trust me...I spent the whole last event hitting cones and driving badly because I was staring at my temp gauge climbing to 250* every 5 seconds of every run. I understand worrying about things lol. Sometimes just gotta send it until there's either smoke or the car simply stops, and deal with the consequences at that point.
Don't forget I dove to events for years long before my car was caged, stripped (and after!) and had more than one time when I was pretty sure I wasn't going to make it all the way home from Frostburg (like when my cat was clogged and the car would almost die whenever I went up any hill, which made it a 5-hour trip home from Frostburg, or like the time when my brake warning light came on when coming down the big hill into Cumberland (line had sprung a leak), so i drove 30mph most of the way home in the right lane, mostly using the e-brake and downshifts when I had to slow down. So I know the boat you're in.

95maxrider said:
irish44j (Forum Supporter) said:
I told you you'd make it home fine lol. If your car made all the noises that my rally car makes when it's just driving down the road, I suspect you would never drive it at all ;)
Yeah, no E36 M3. Why would I want to drive around a car that has all the refinement a garbage truck? That's why I've made the compromises I've made so I can enjoy my car the other 30 days of the month. The difference is your noises are normal, mine was not.
---
Also in Nick said he was worried, he means it. He called me on the road when I was about 30 miles ahead of him with my race car on the trailer seeing if I could come back and swap cars on the trailer and tow him home ;) of course if you had had to drive my rally car home, he would have thought his car was very civil by comparison lol.
I think you underestimate how loud my diff was. I've been in your car, it had nothing on this thing.
---
Side note number two: stop freaking buying multiple miatas and buy yourself a trailer and a tow rig and minimize your stress. ;)
Nah, I'm good.
They're multiplying....and evolving.
John England is currently selling his 2-time national champion turbo Miata. Just sayin.........if you're trying to expand the collection lol.

moxnix
Dork
4/27/22 12:00 a.m.
irish44j (Forum Supporter) said:
95maxrider said:
irish44j (Forum Supporter) said:
I told you you'd make it home fine lol. If your car made all the noises that my rally car makes when it's just driving down the road, I suspect you would never drive it at all ;)
Yeah, no E36 M3. Why would I want to drive around a car that has all the refinement a garbage truck? That's why I've made the compromises I've made so I can enjoy my car the other 30 days of the month. The difference is your noises are normal, mine was not.
---
Also in Nick said he was worried, he means it. He called me on the road when I was about 30 miles ahead of him with my race car on the trailer seeing if I could come back and swap cars on the trailer and tow him home ;) of course if you had had to drive my rally car home, he would have thought his car was very civil by comparison lol.
I think you underestimate how loud my diff was. I've been in your car, it had nothing on this thing.
---
Side note number two: stop freaking buying multiple miatas and buy yourself a trailer and a tow rig and minimize your stress. ;)
Nah, I'm good.
They're multiplying....and evolving.
John England is currently selling his 2-time national champion turbo Miata. Just sayin.........if you're trying to expand the collection lol.
Ask mike if he would recommend it.
irish44j (Forum Supporter) said:
John England is currently selling his 2-time national champion turbo Miata. Just sayin.........if you're trying to expand the collection lol.
Meh, I'm not really into FI stuff. I think the ideal Miata is one with a K24 swap and ITBs 
moxnix said:
Ask mike if he would recommend it.
IIRC Mike was pretty underwhelmed by the car and its apparent heatsoak and blown suspension.
moxnix said:
irish44j (Forum Supporter) said:
John England is currently selling his 2-time national champion turbo Miata. Just sayin.........if you're trying to expand the collection lol.
Ask mike if he would recommend it.
The condition of the car is definitely not why it has won two national championships.
Yeah I have heard about it from Mike. I was being semi facetious there about buying it, since I assume Nick heard about it from Mike as well.
My goal here is to get Nick into a car that is not as good as what he currently has. Duh. Lol
Alright, so we had rally-x #2 this past Sunday, but before I get to that I need to update what happened before that.
While the car was incapacitated in my garage waiting for a new diff to be built, I had some time to do other things that would normally be ignored, like replacing the brake pedal switch. I've been getting warnings on the little computer screen about this thing for over a year, so it was high time I finally resolve the issue.
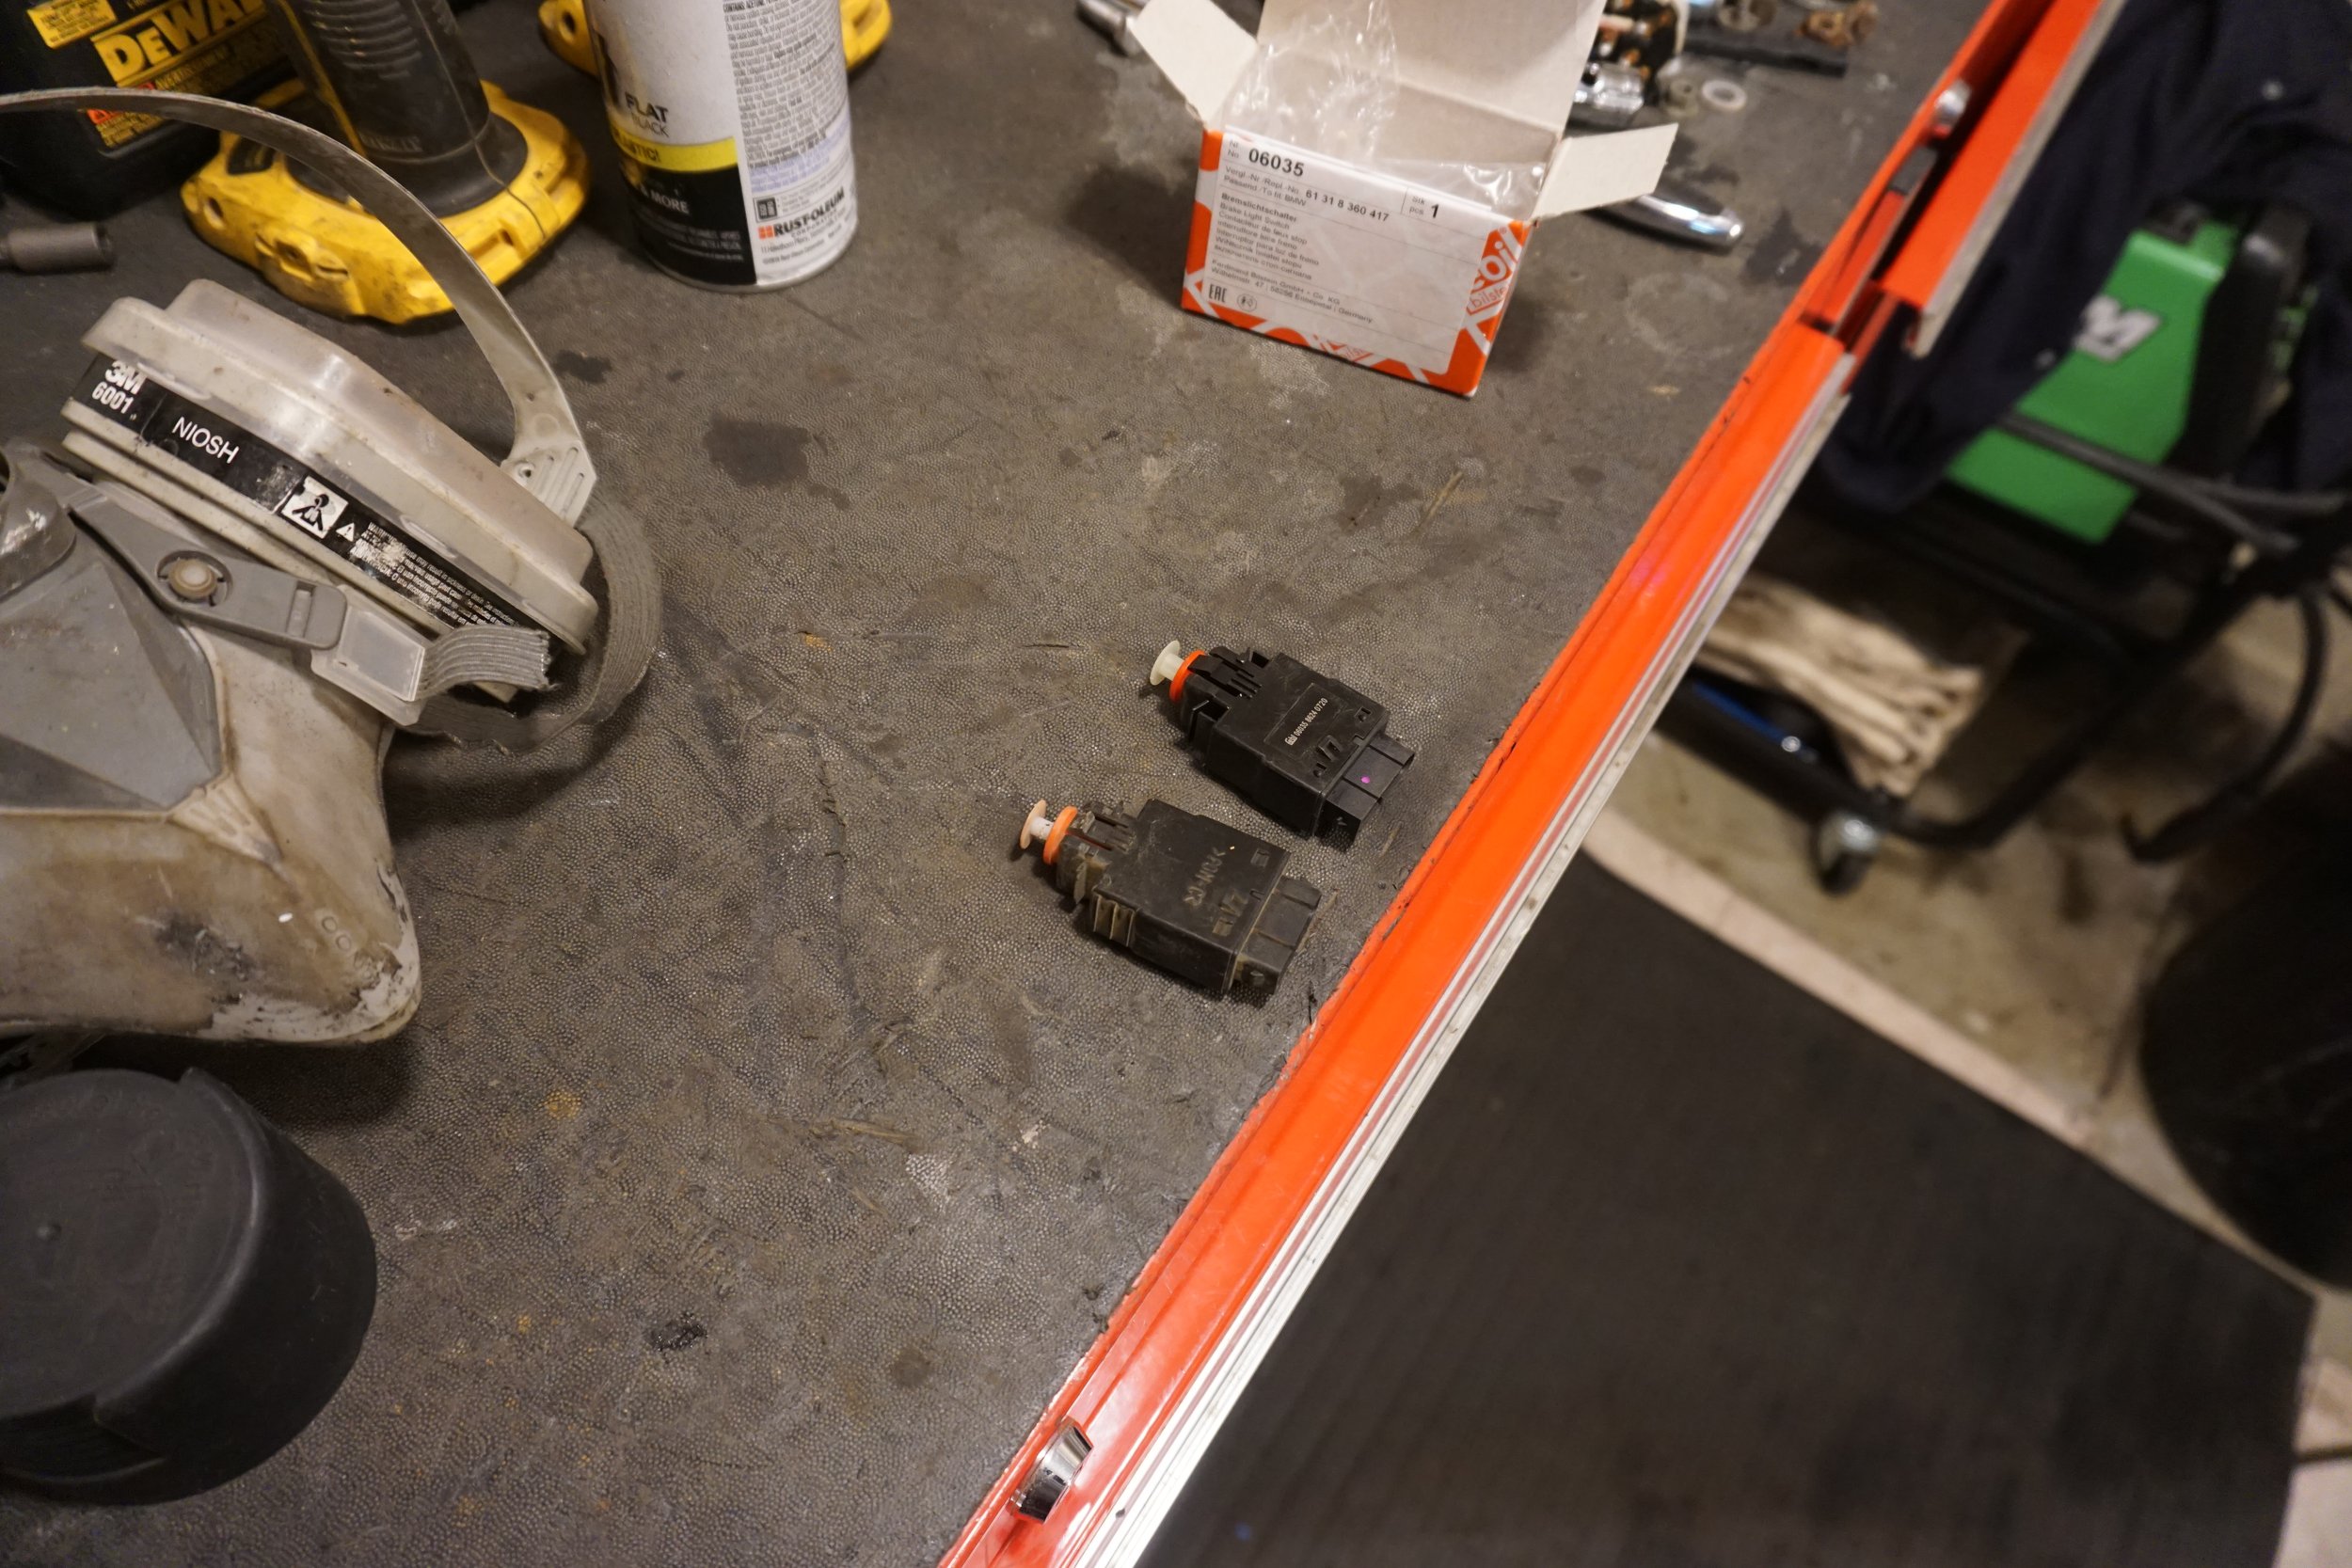
Took me a long time to realize the engine has to be running so you can press the brake pedal down far enough to push the new switch into place.
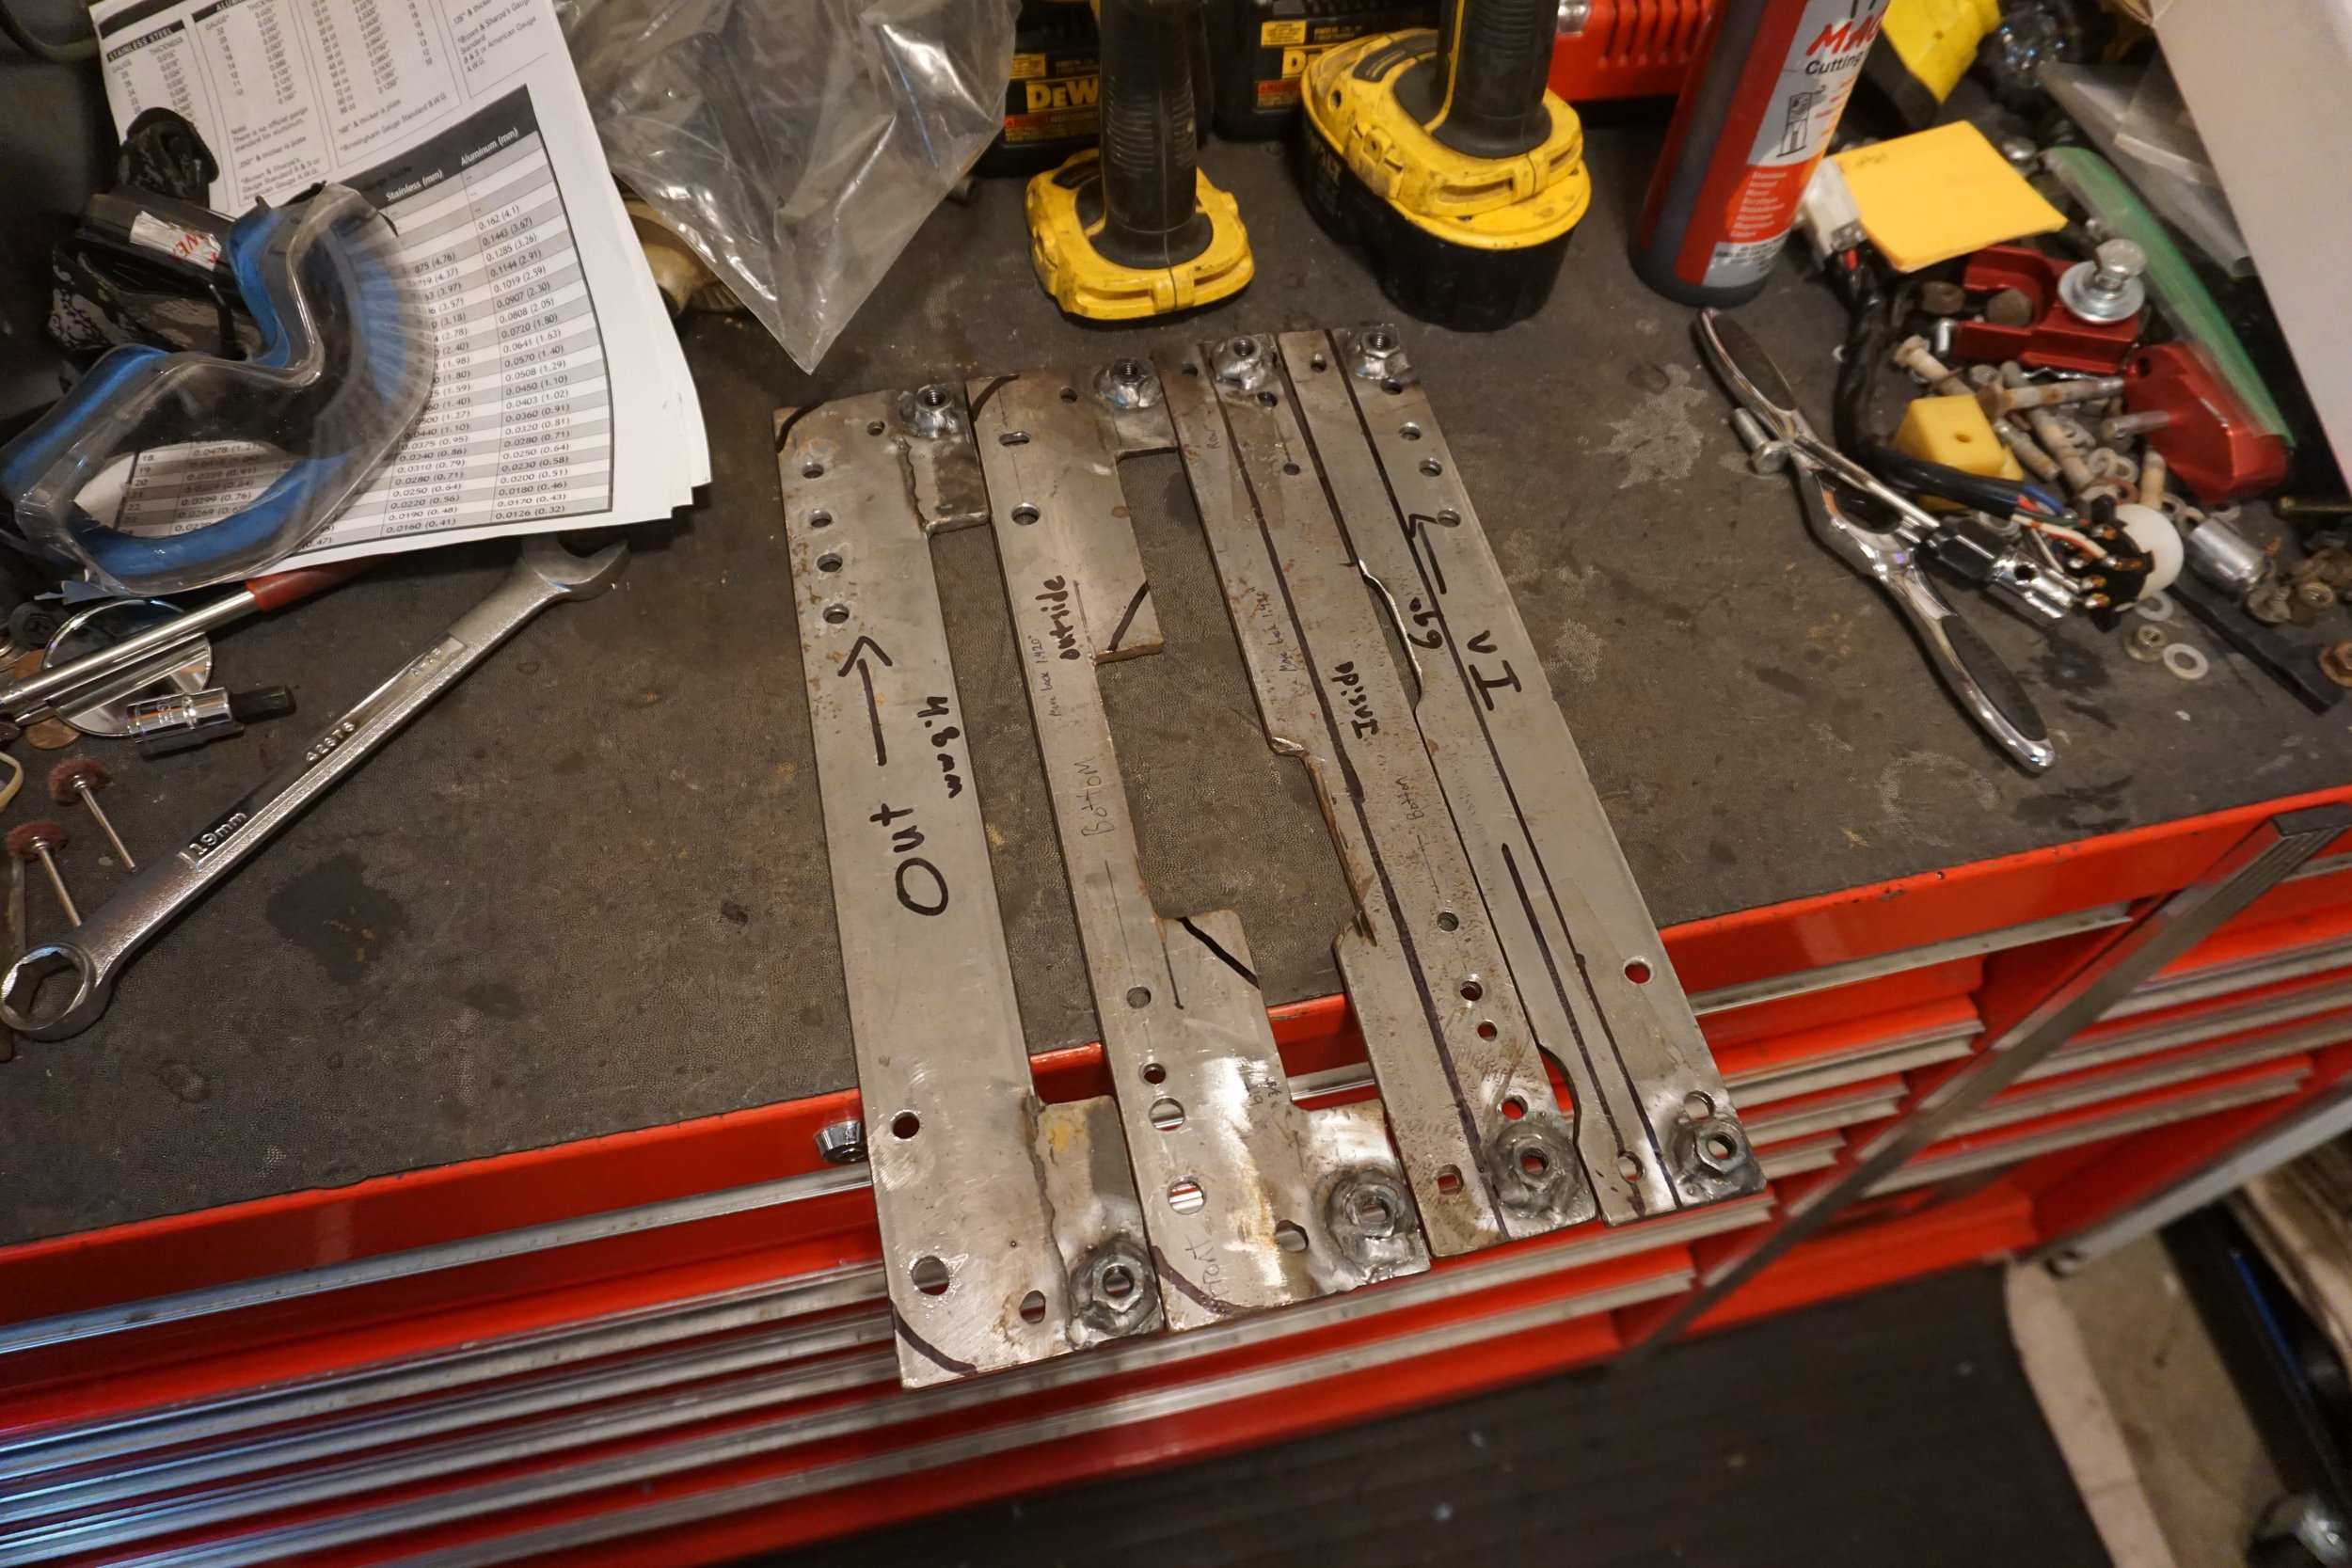
I removed the seat to make the job easier, which gave me the opportunity to do a few tasks I had been putting off. First up was redrilling the mounting holes on the seat bracket plates so allow the seat to sit further away from the steering wheel. I'm only 5' 10" and I have to have the seat pushed back all the way to be comfortable. After drilling new holes, the seat now sits 1.75" further rearward, which should allow taller people to drive the car if necessary. While I had everything apart, I decided to clean up those plates and paint them. But before I did that, I decided to make them a little safer. IIRC, my good ol' country buddies were the ones who originally made these brackets back when I had the E28, and the welds for the nuts left a little to be desired.
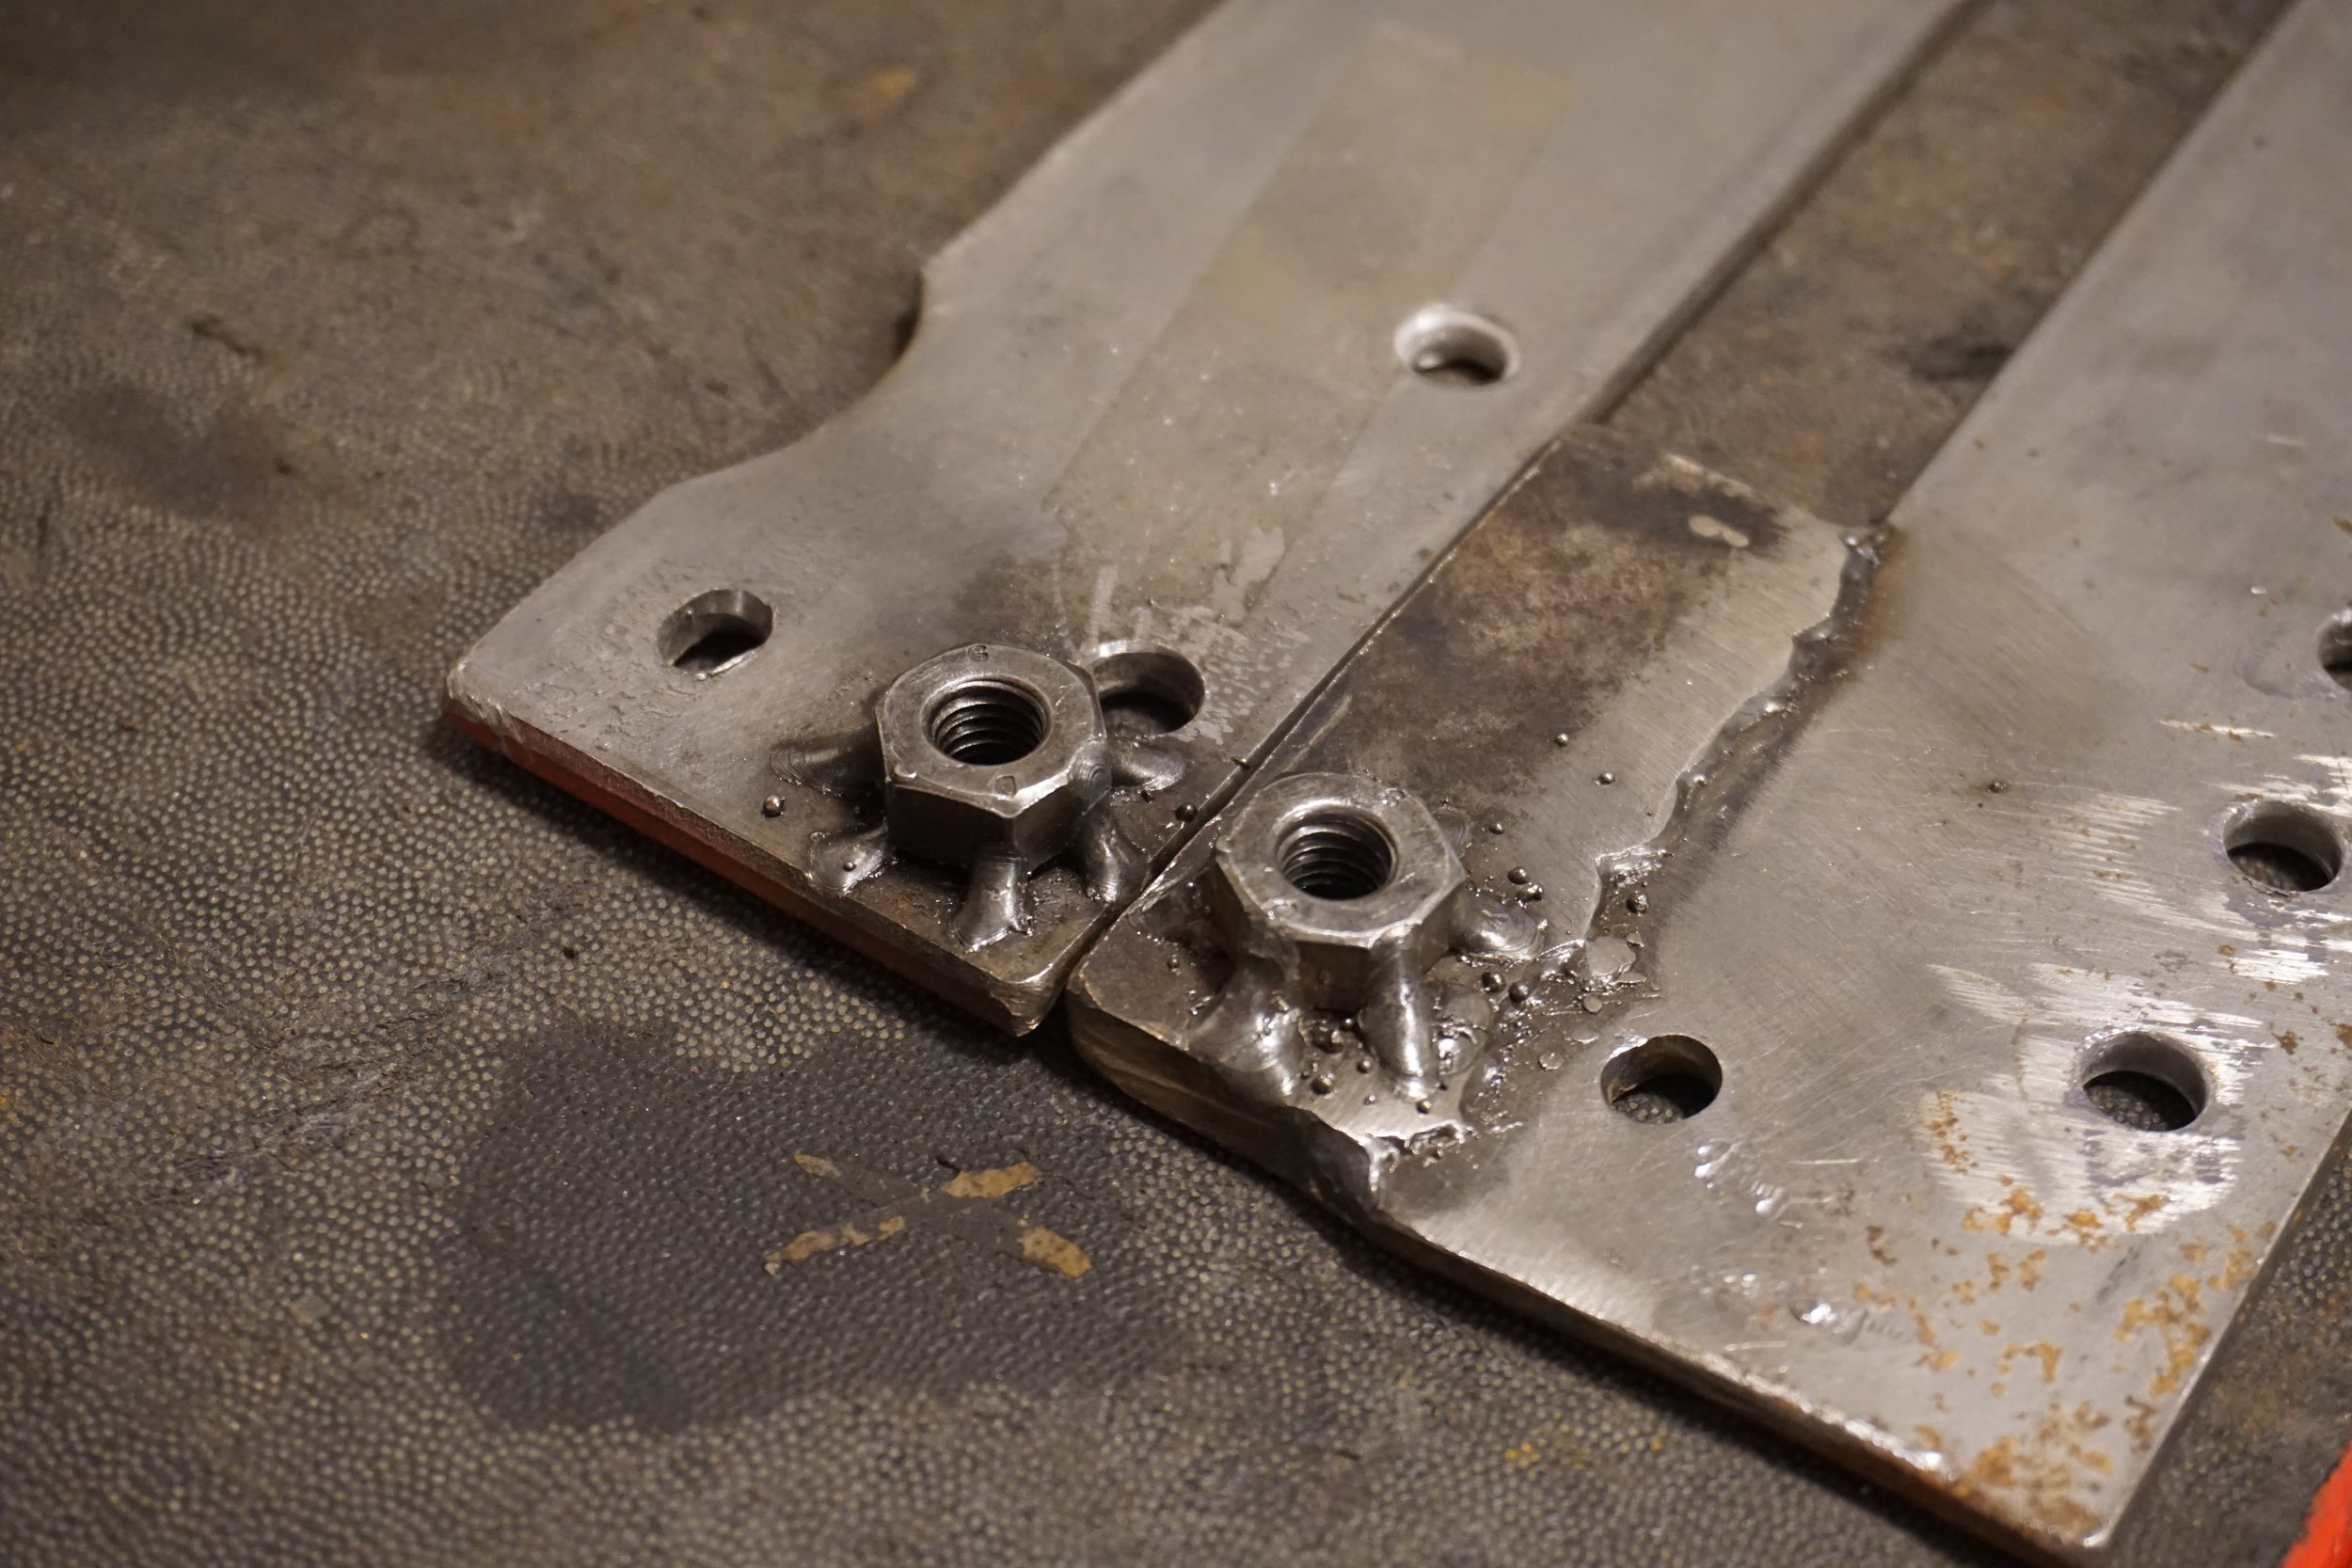
Now that I have a welder, I figured I could try to make them a little stronger. This was far and away the thickest material I've welded on, and it was really nice not having to worry about blowing through it all the time. I'm sure these welds aren't perfect, but they sure look a lot better than what was there before.
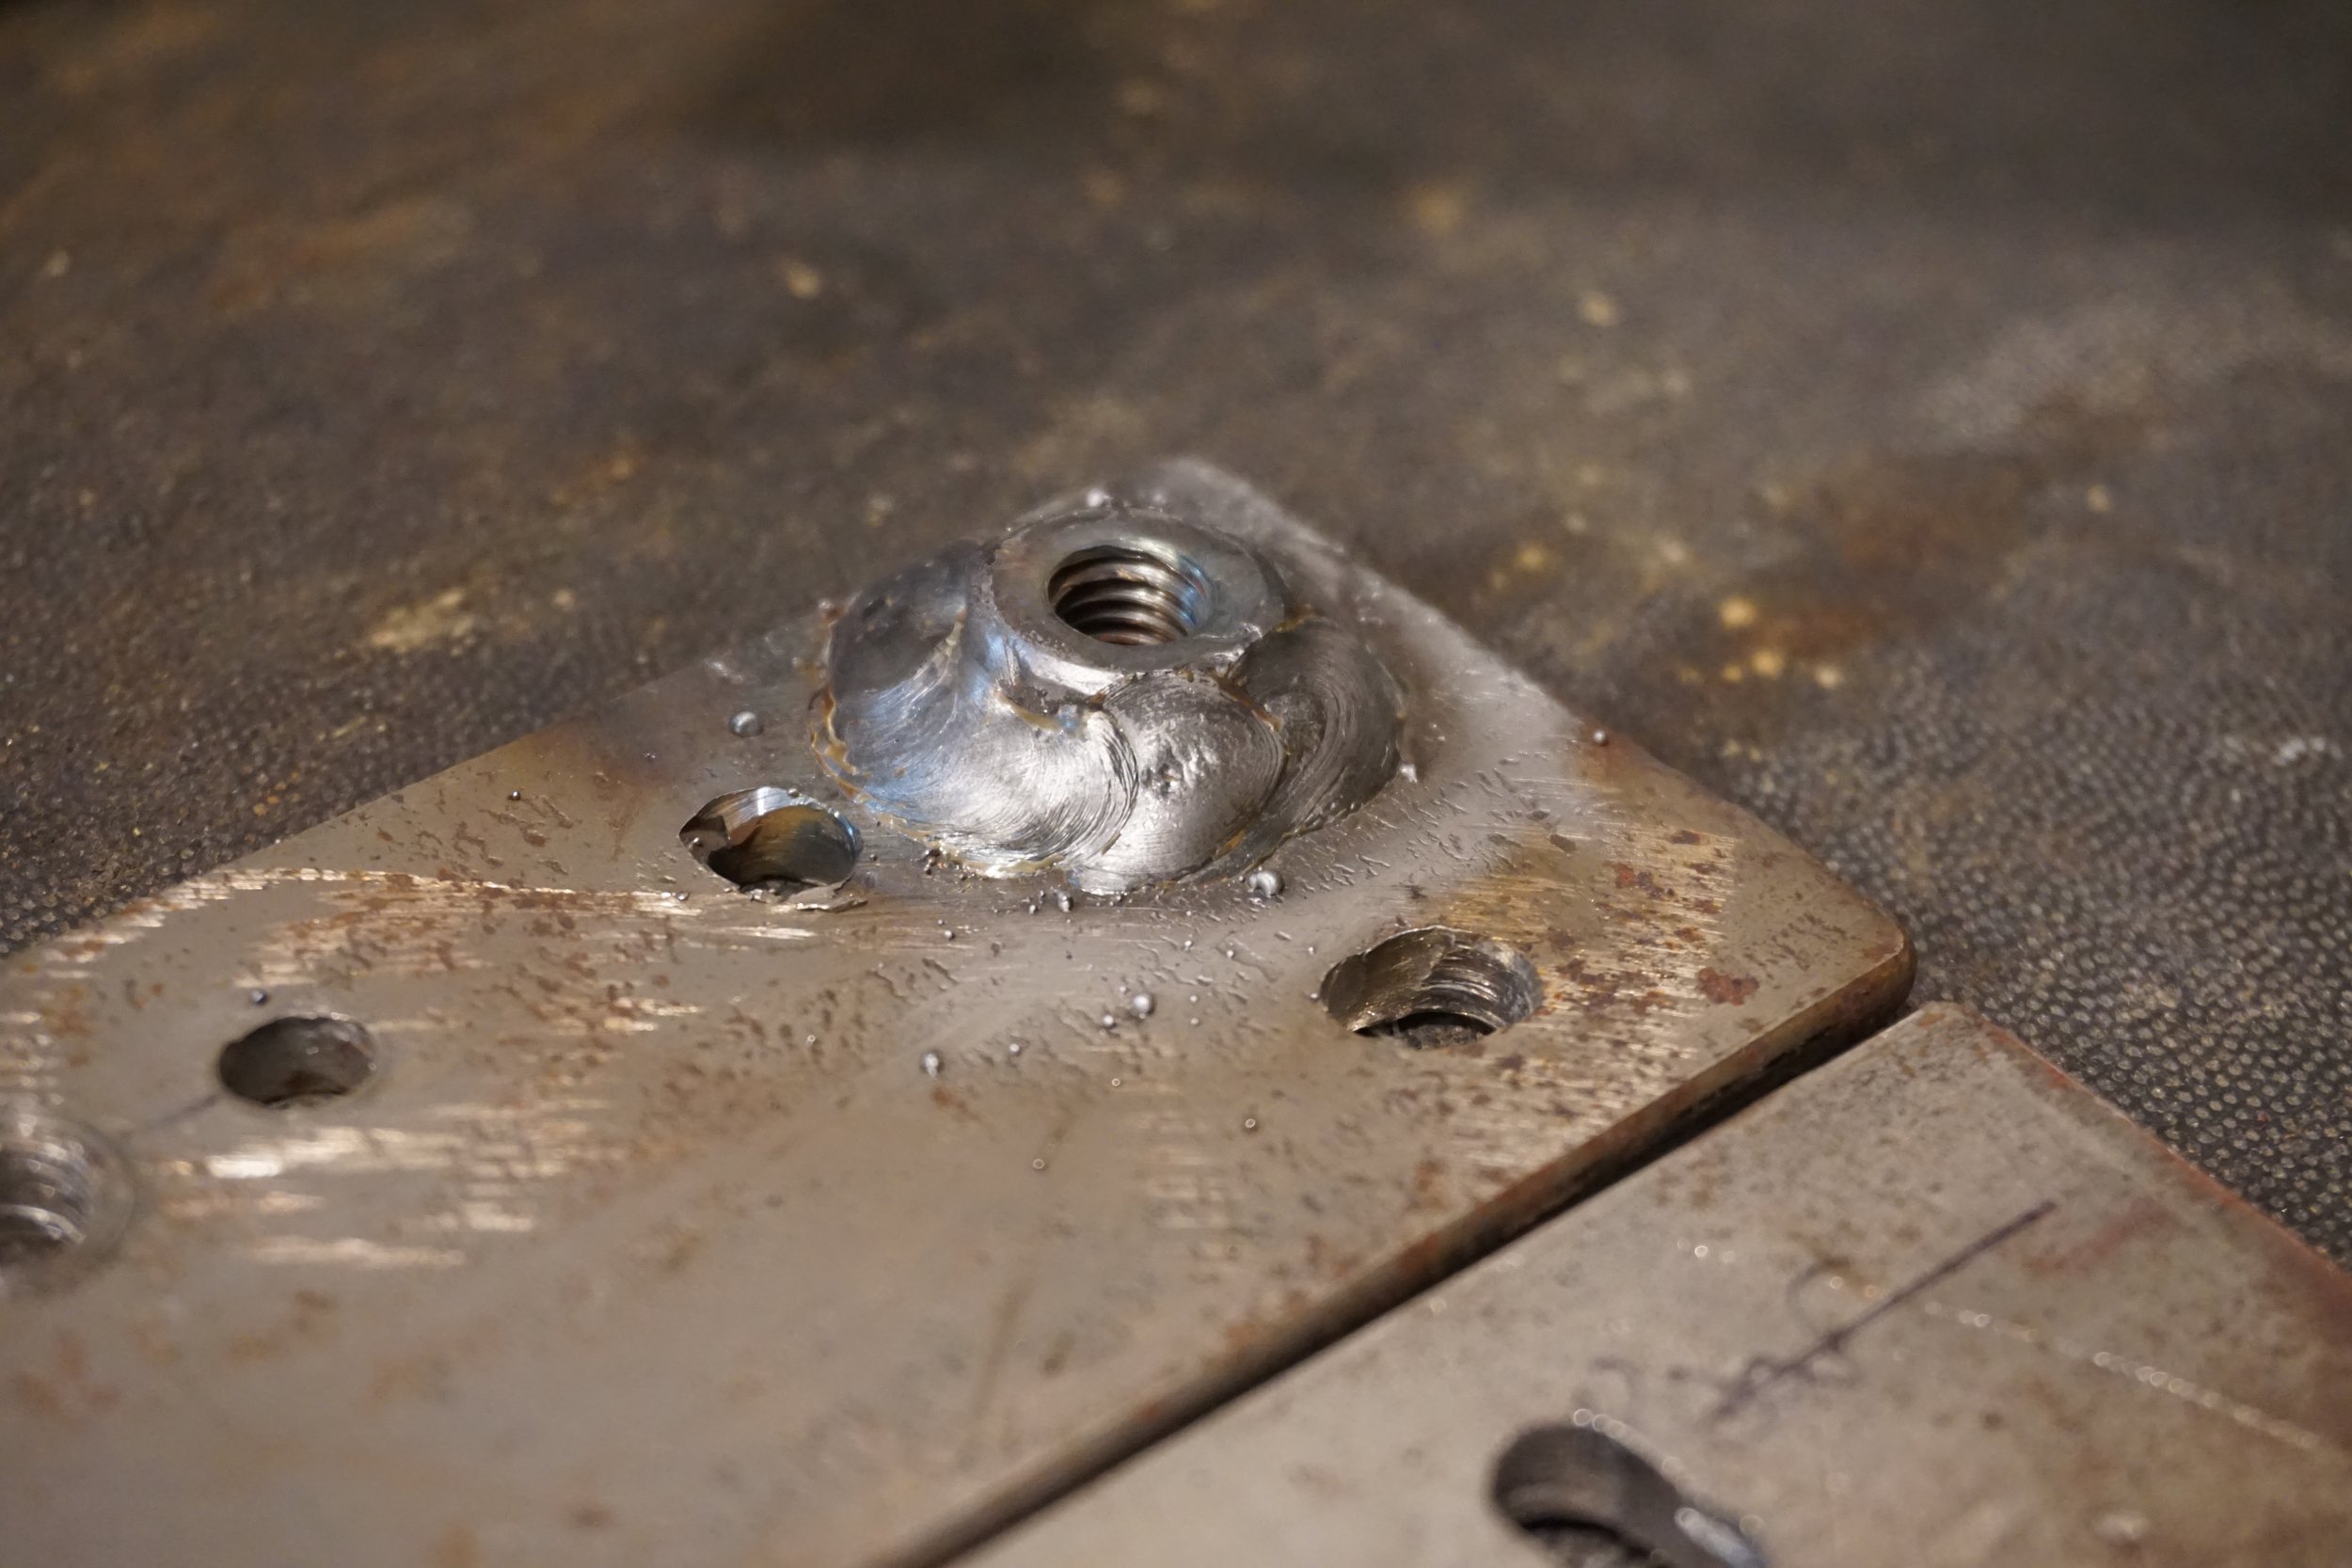
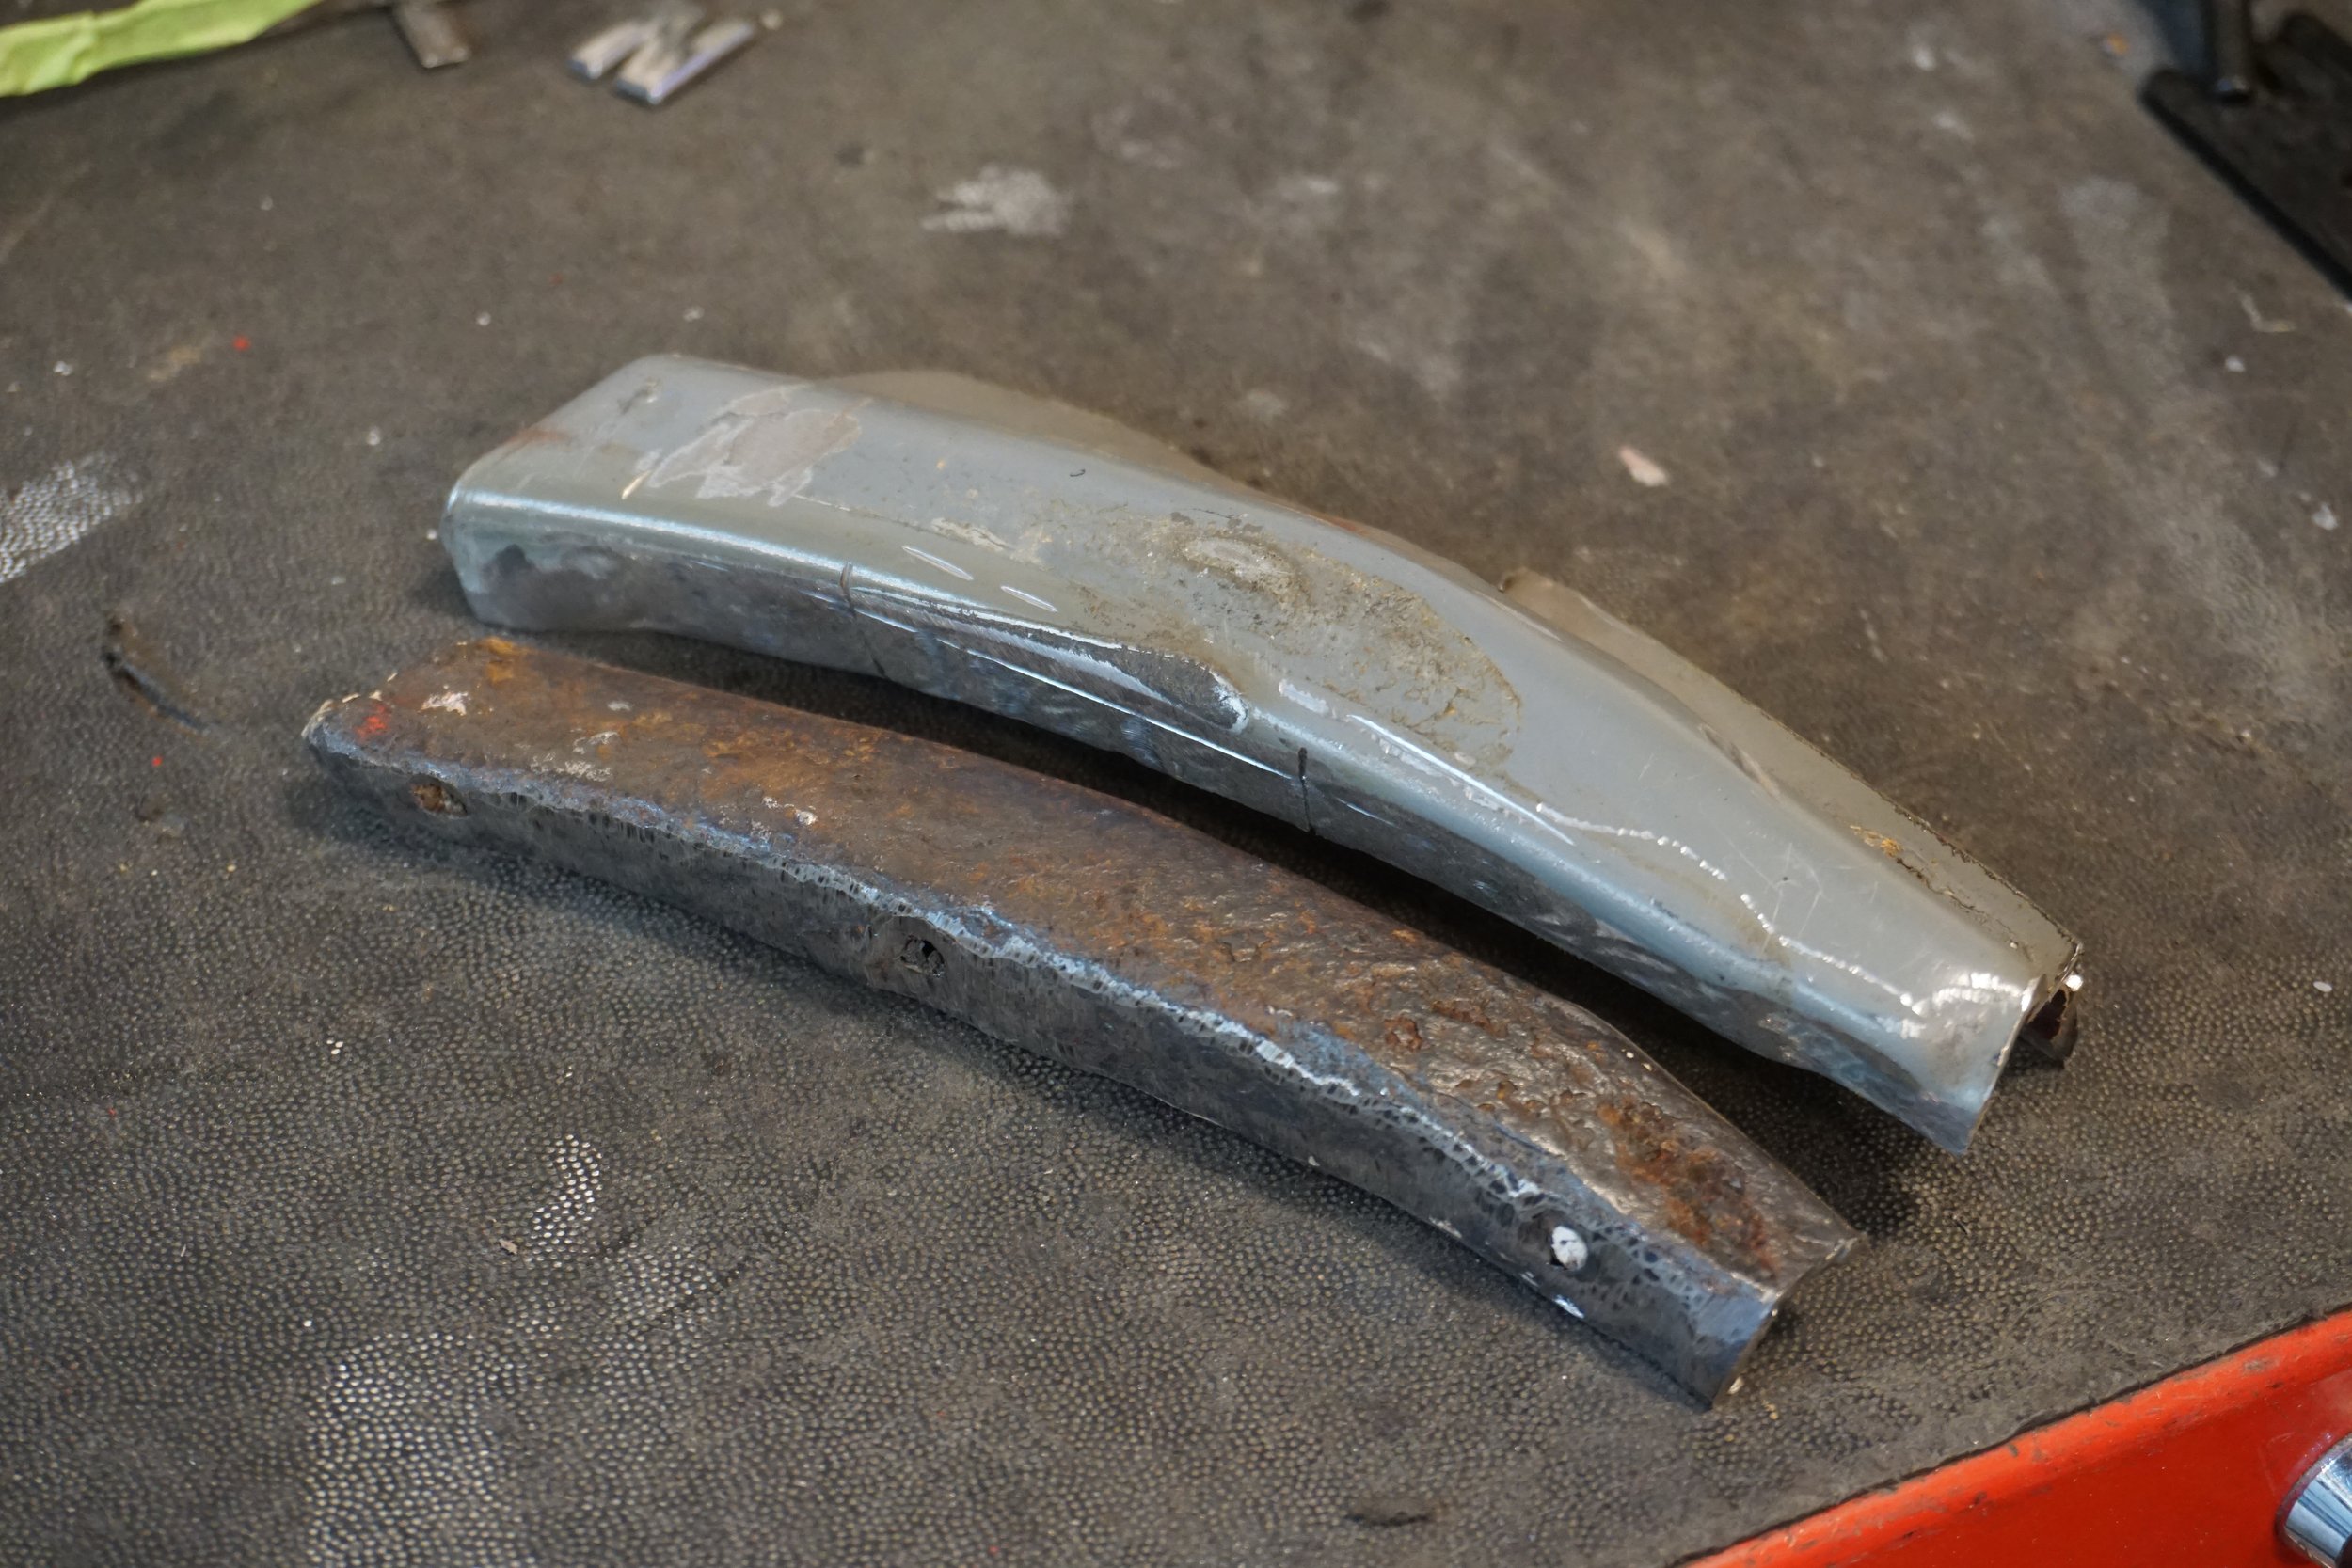
Then I got carried away trimming off excess metal from the plates and smoothing out the edges, until they went from this:
To this:
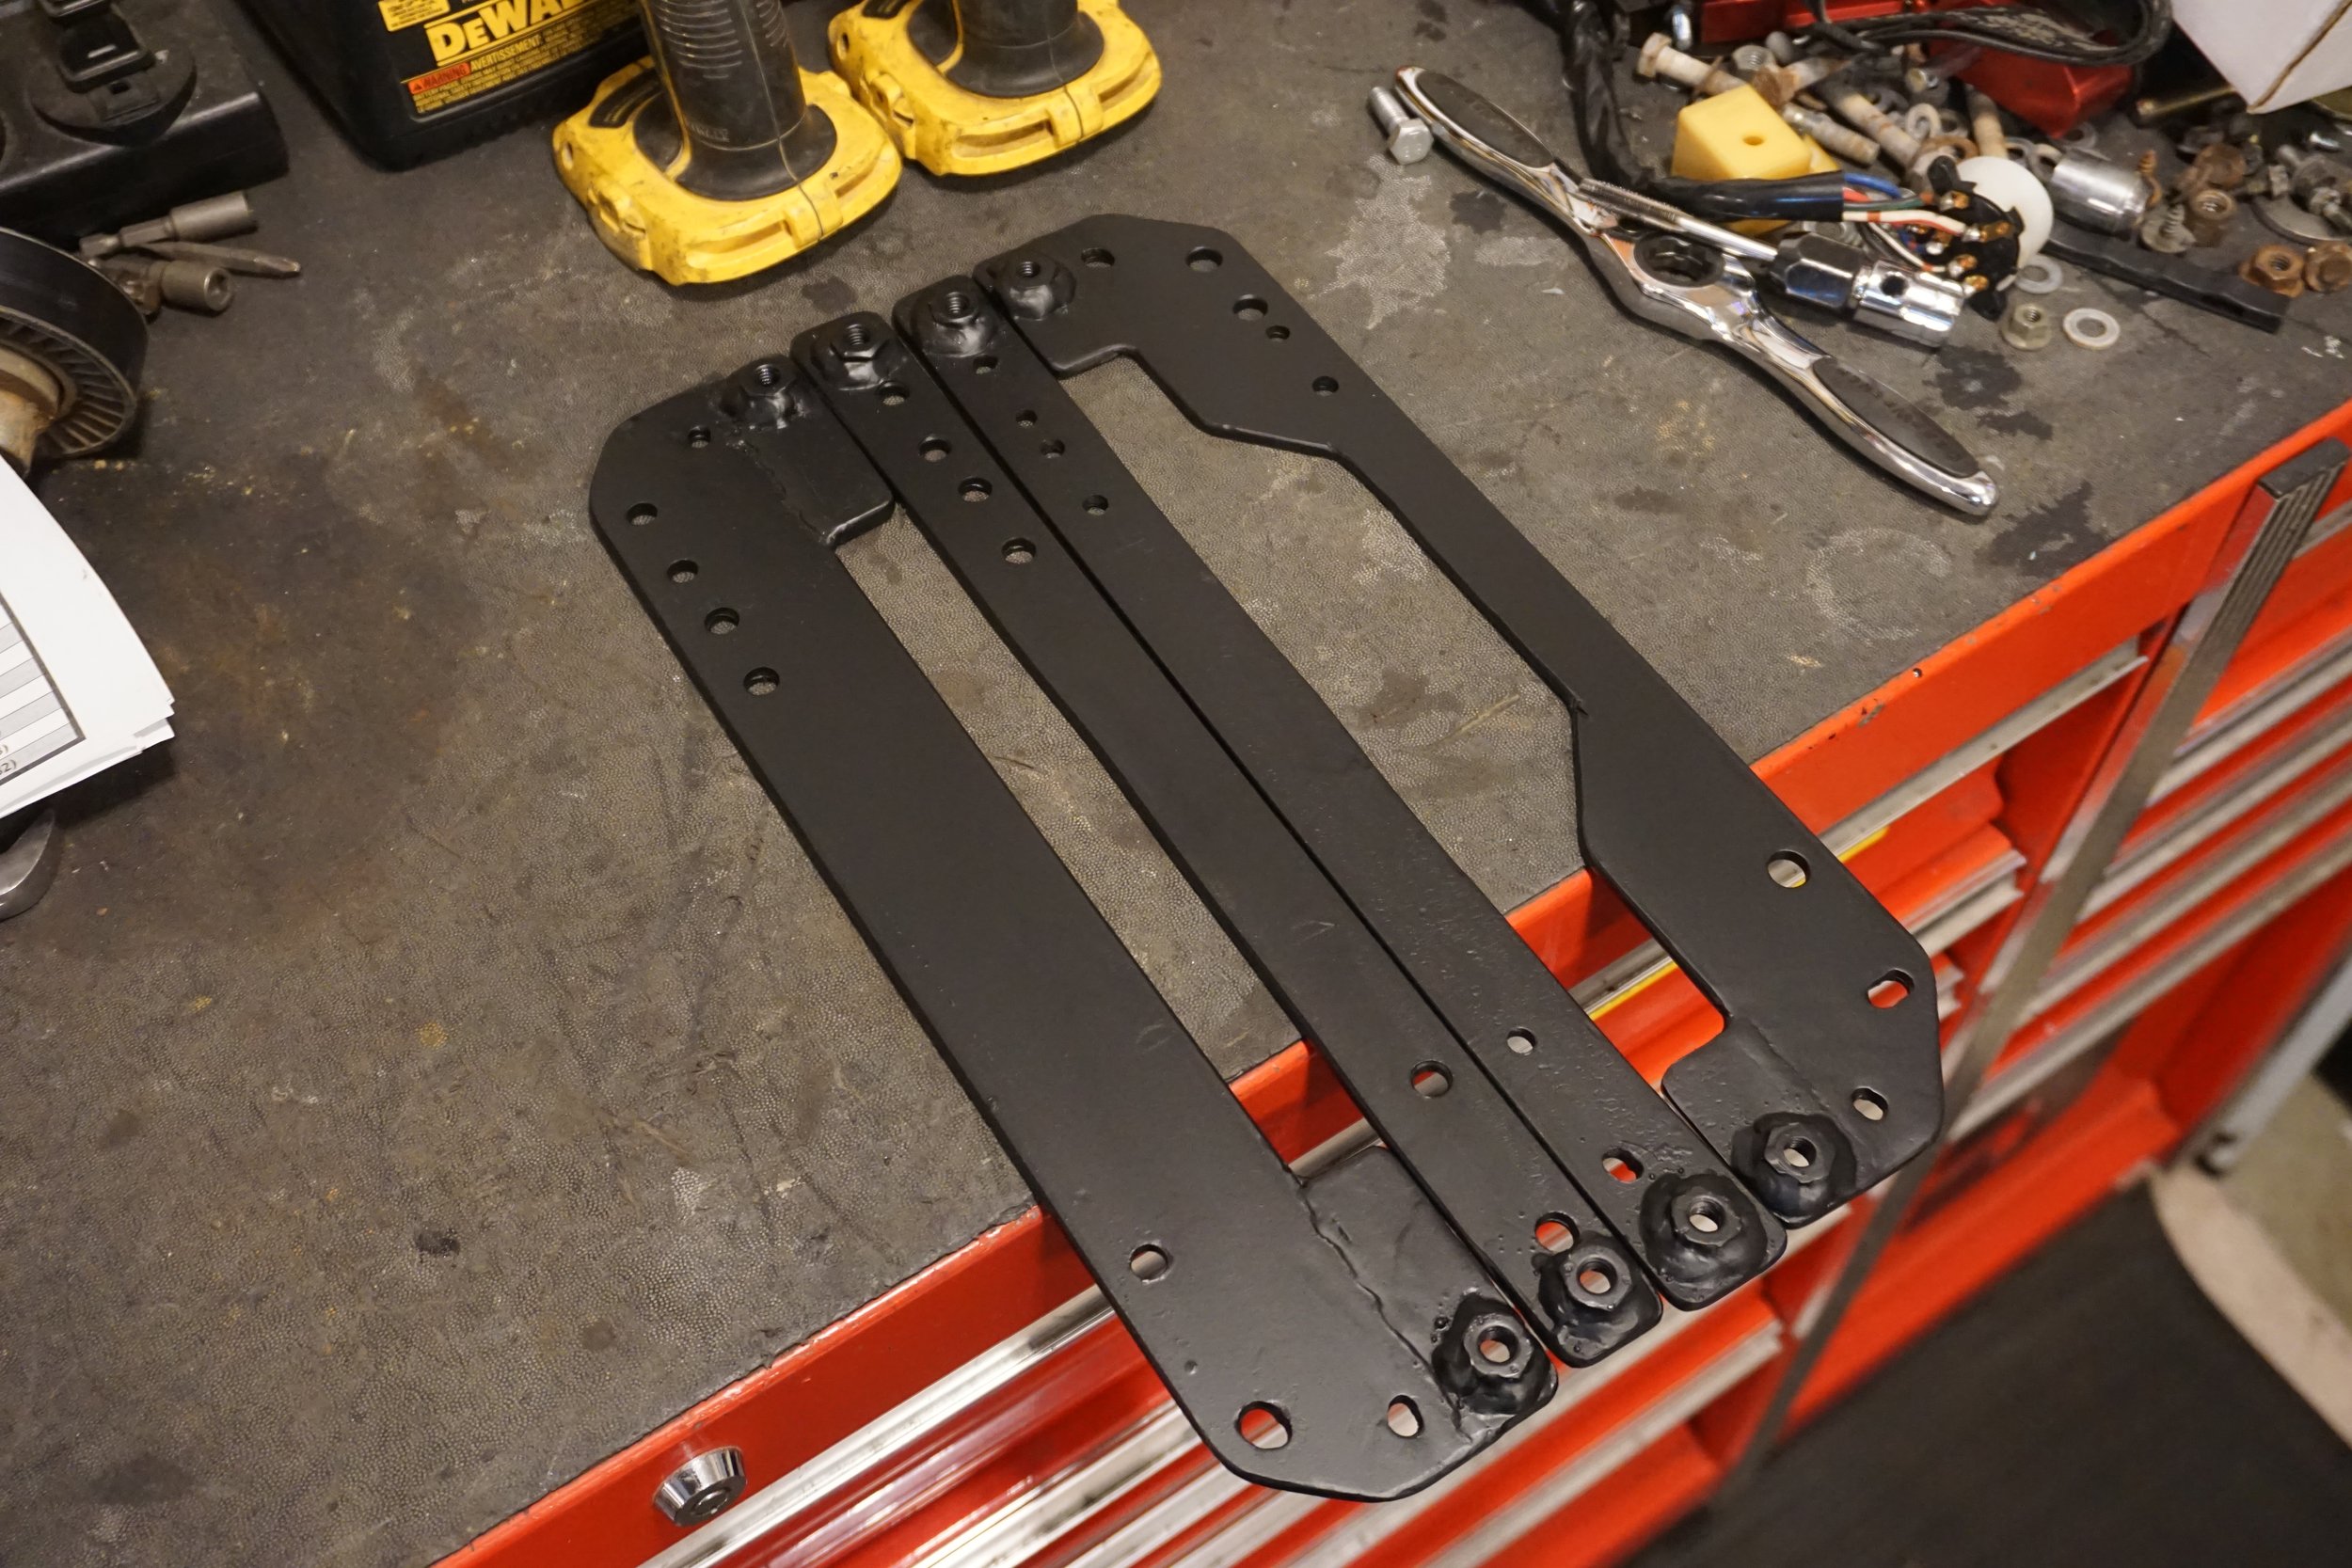
Hooray, that project is finally done!
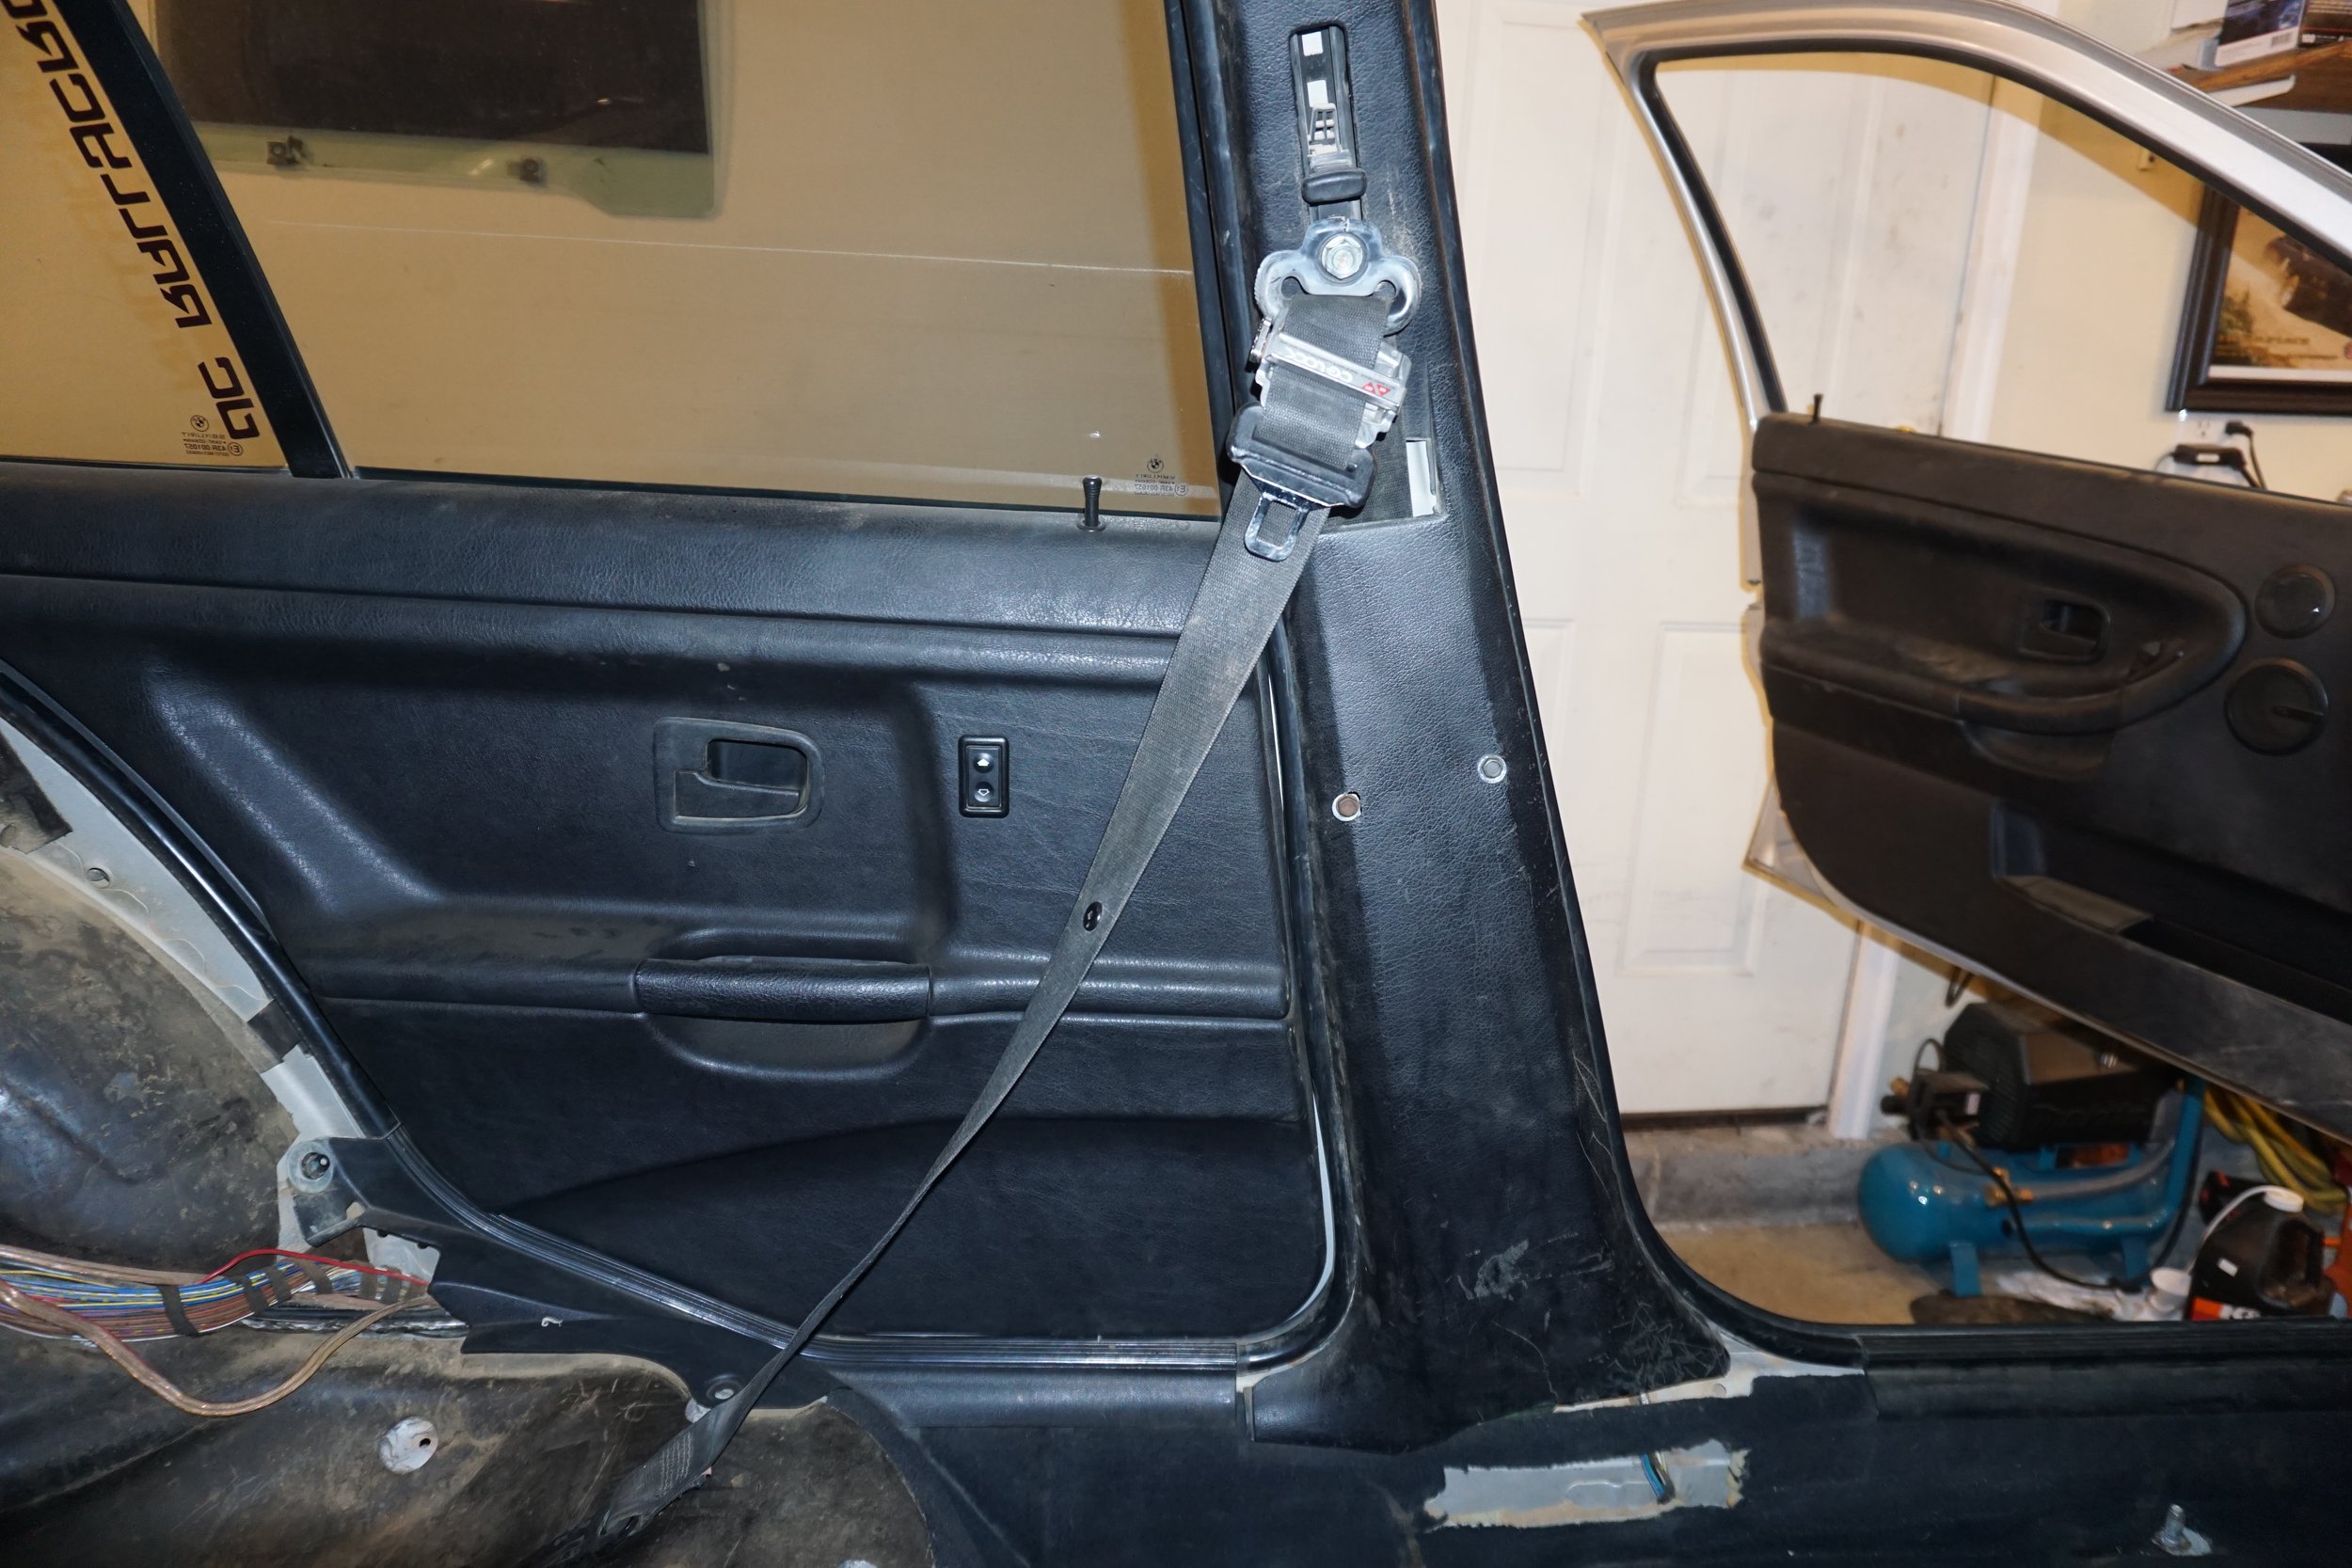
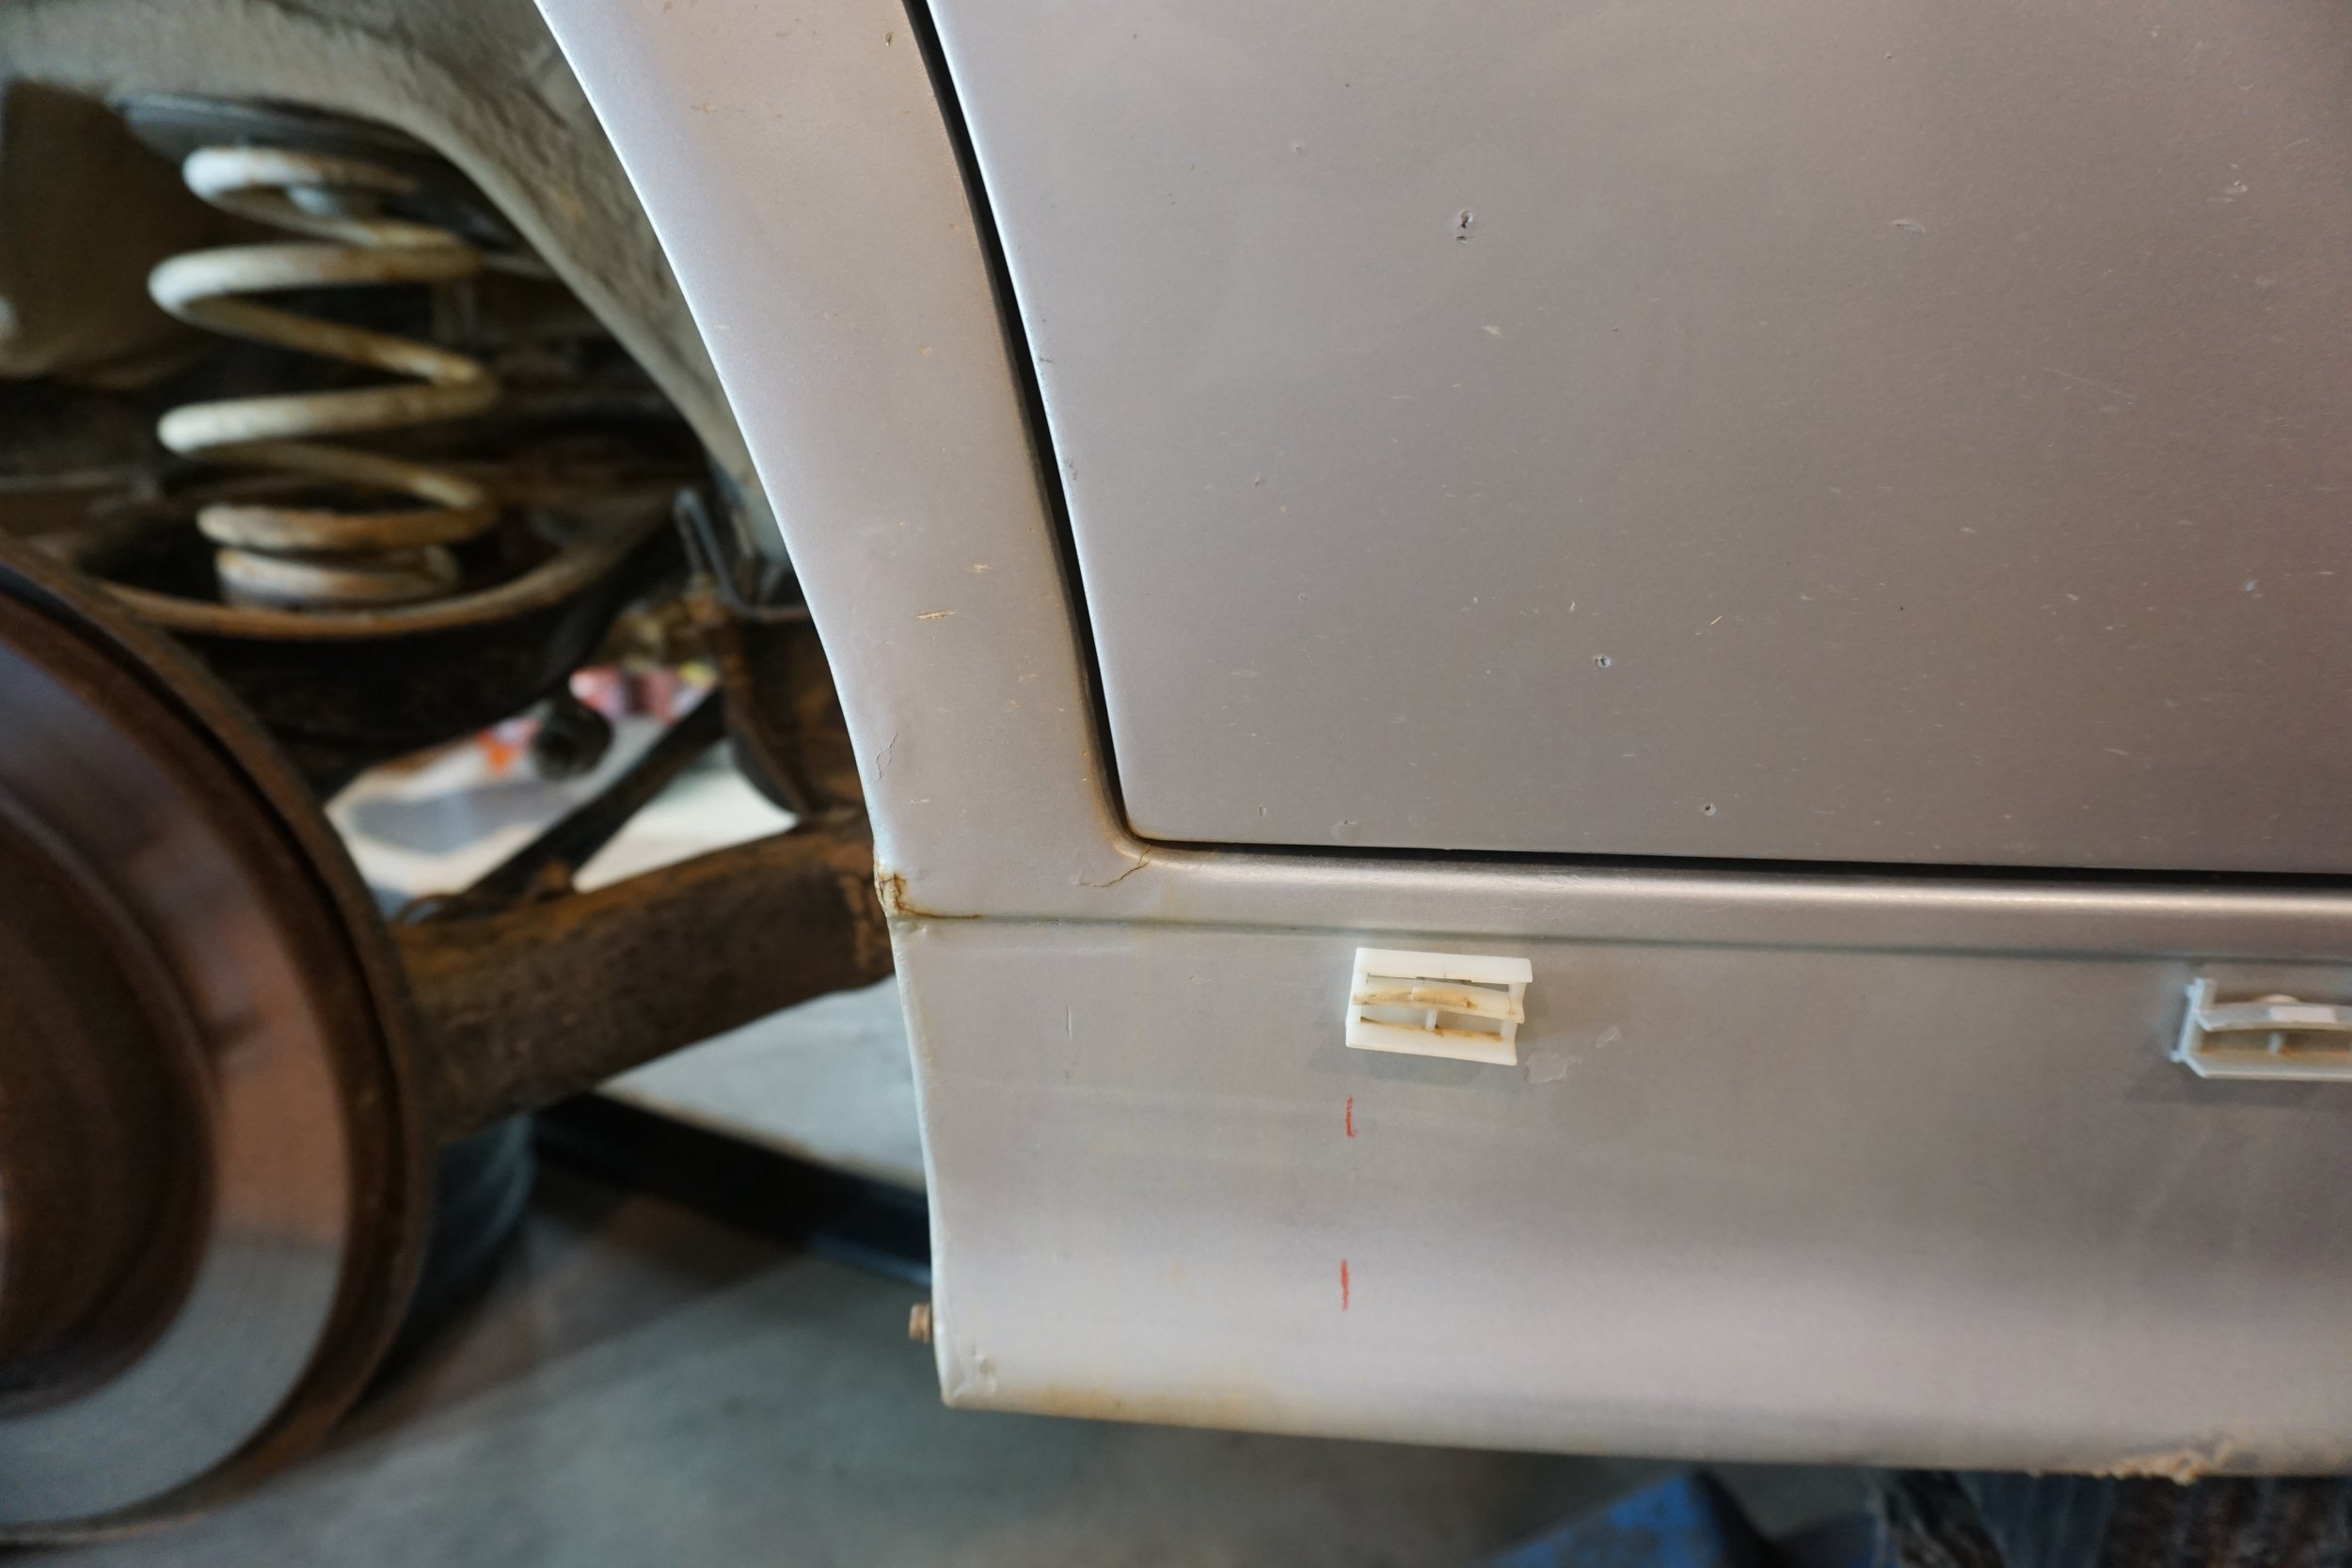
While the seat was out, I bolted the b pillar trim to the pillar, as all of the plastic mounting tabs were broken and the only thing that's been holding it in place are the door rubber pieces. It ain't going anywhere now!
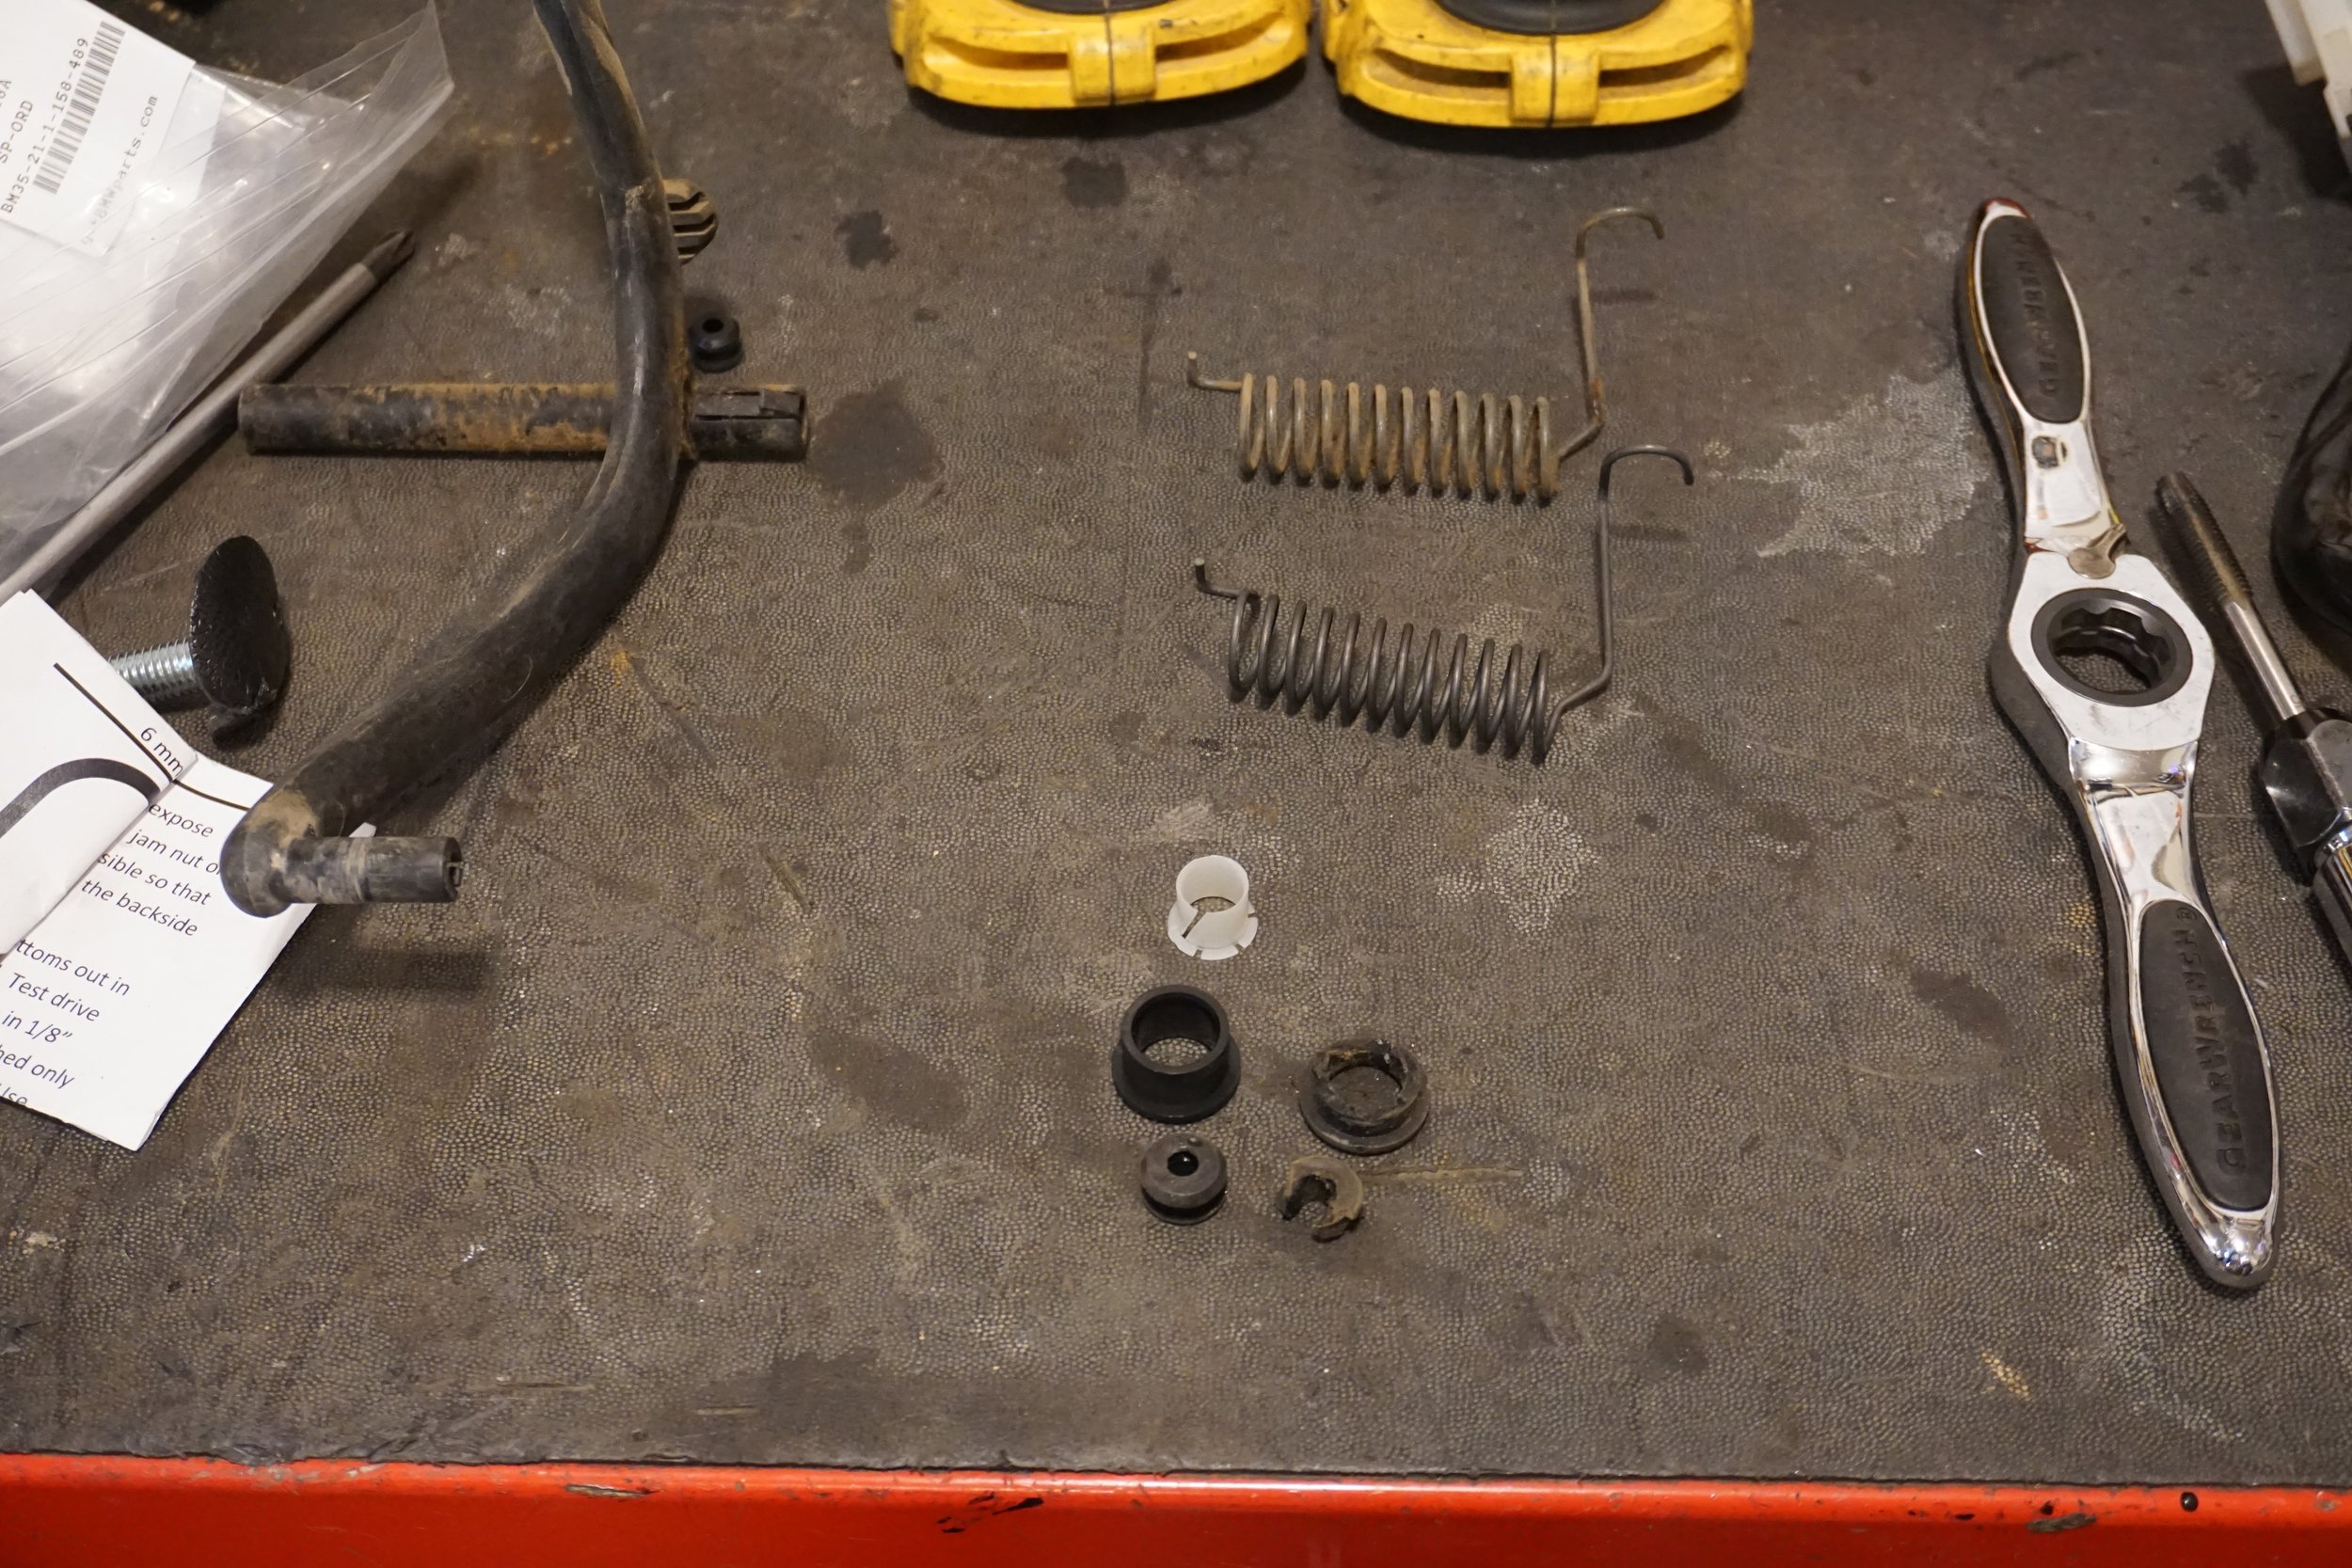
I also "rebuilt" the gas pedal bushings.
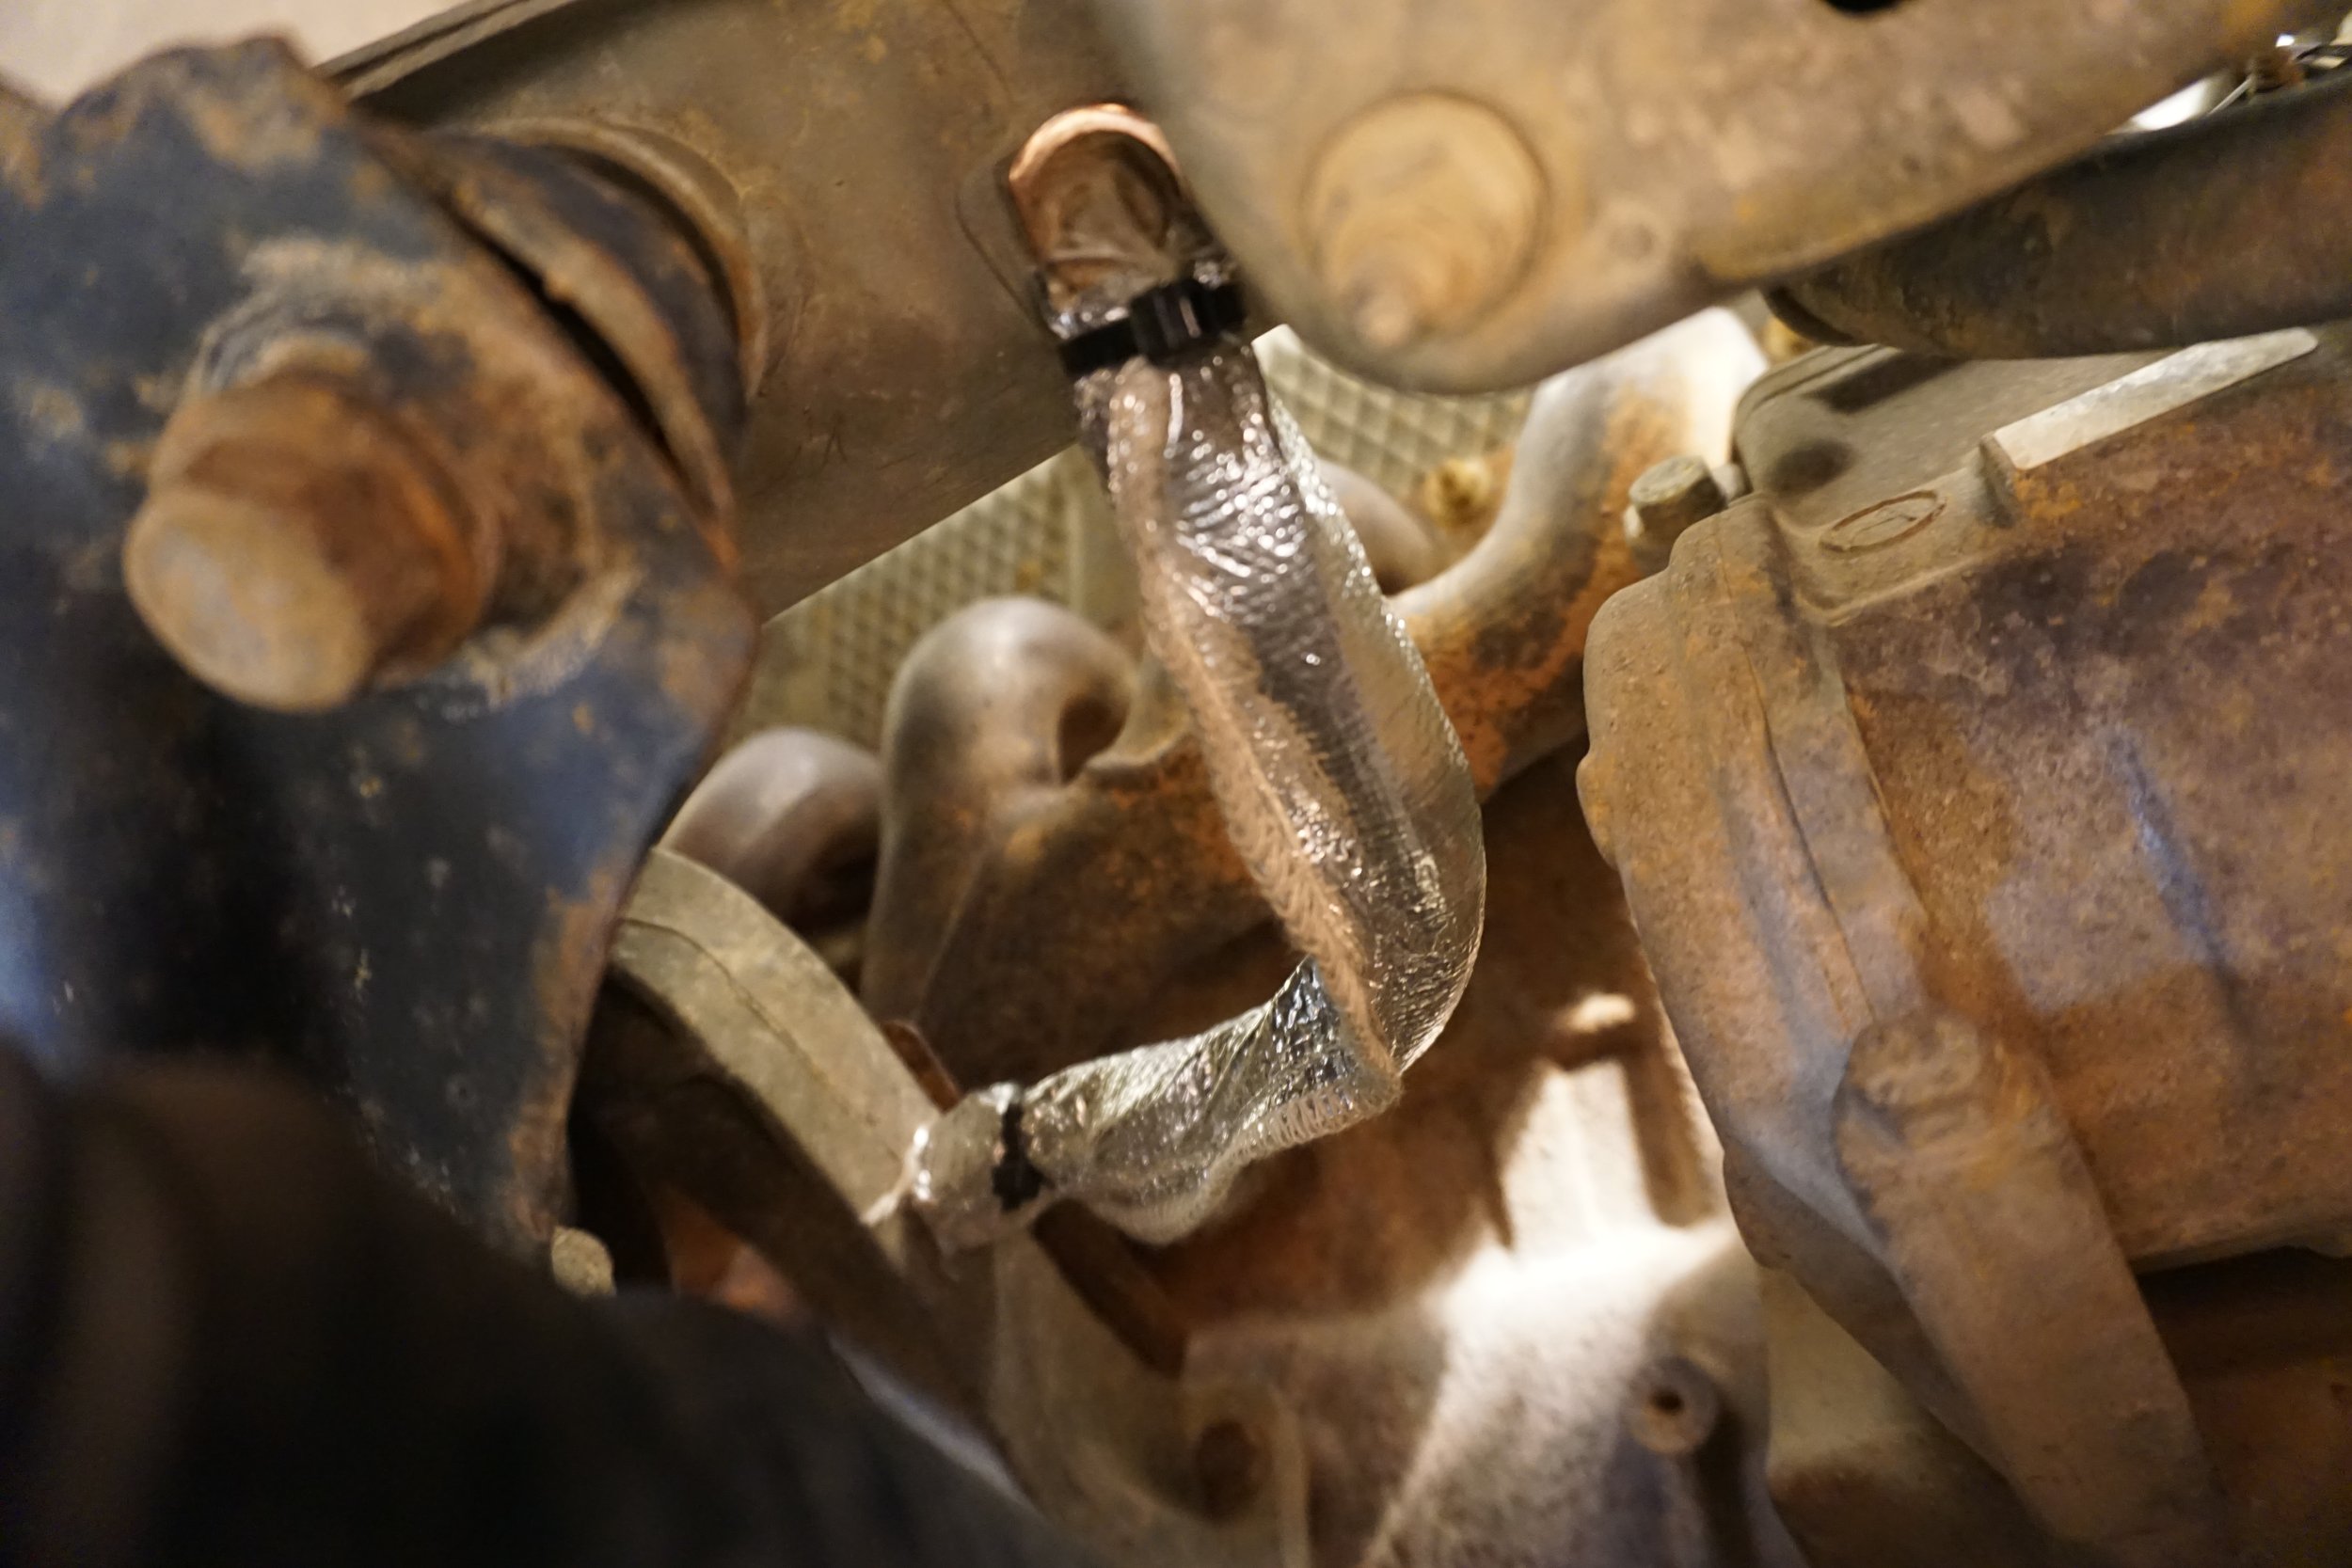
And insulated the new big ground wire in the engine bay:
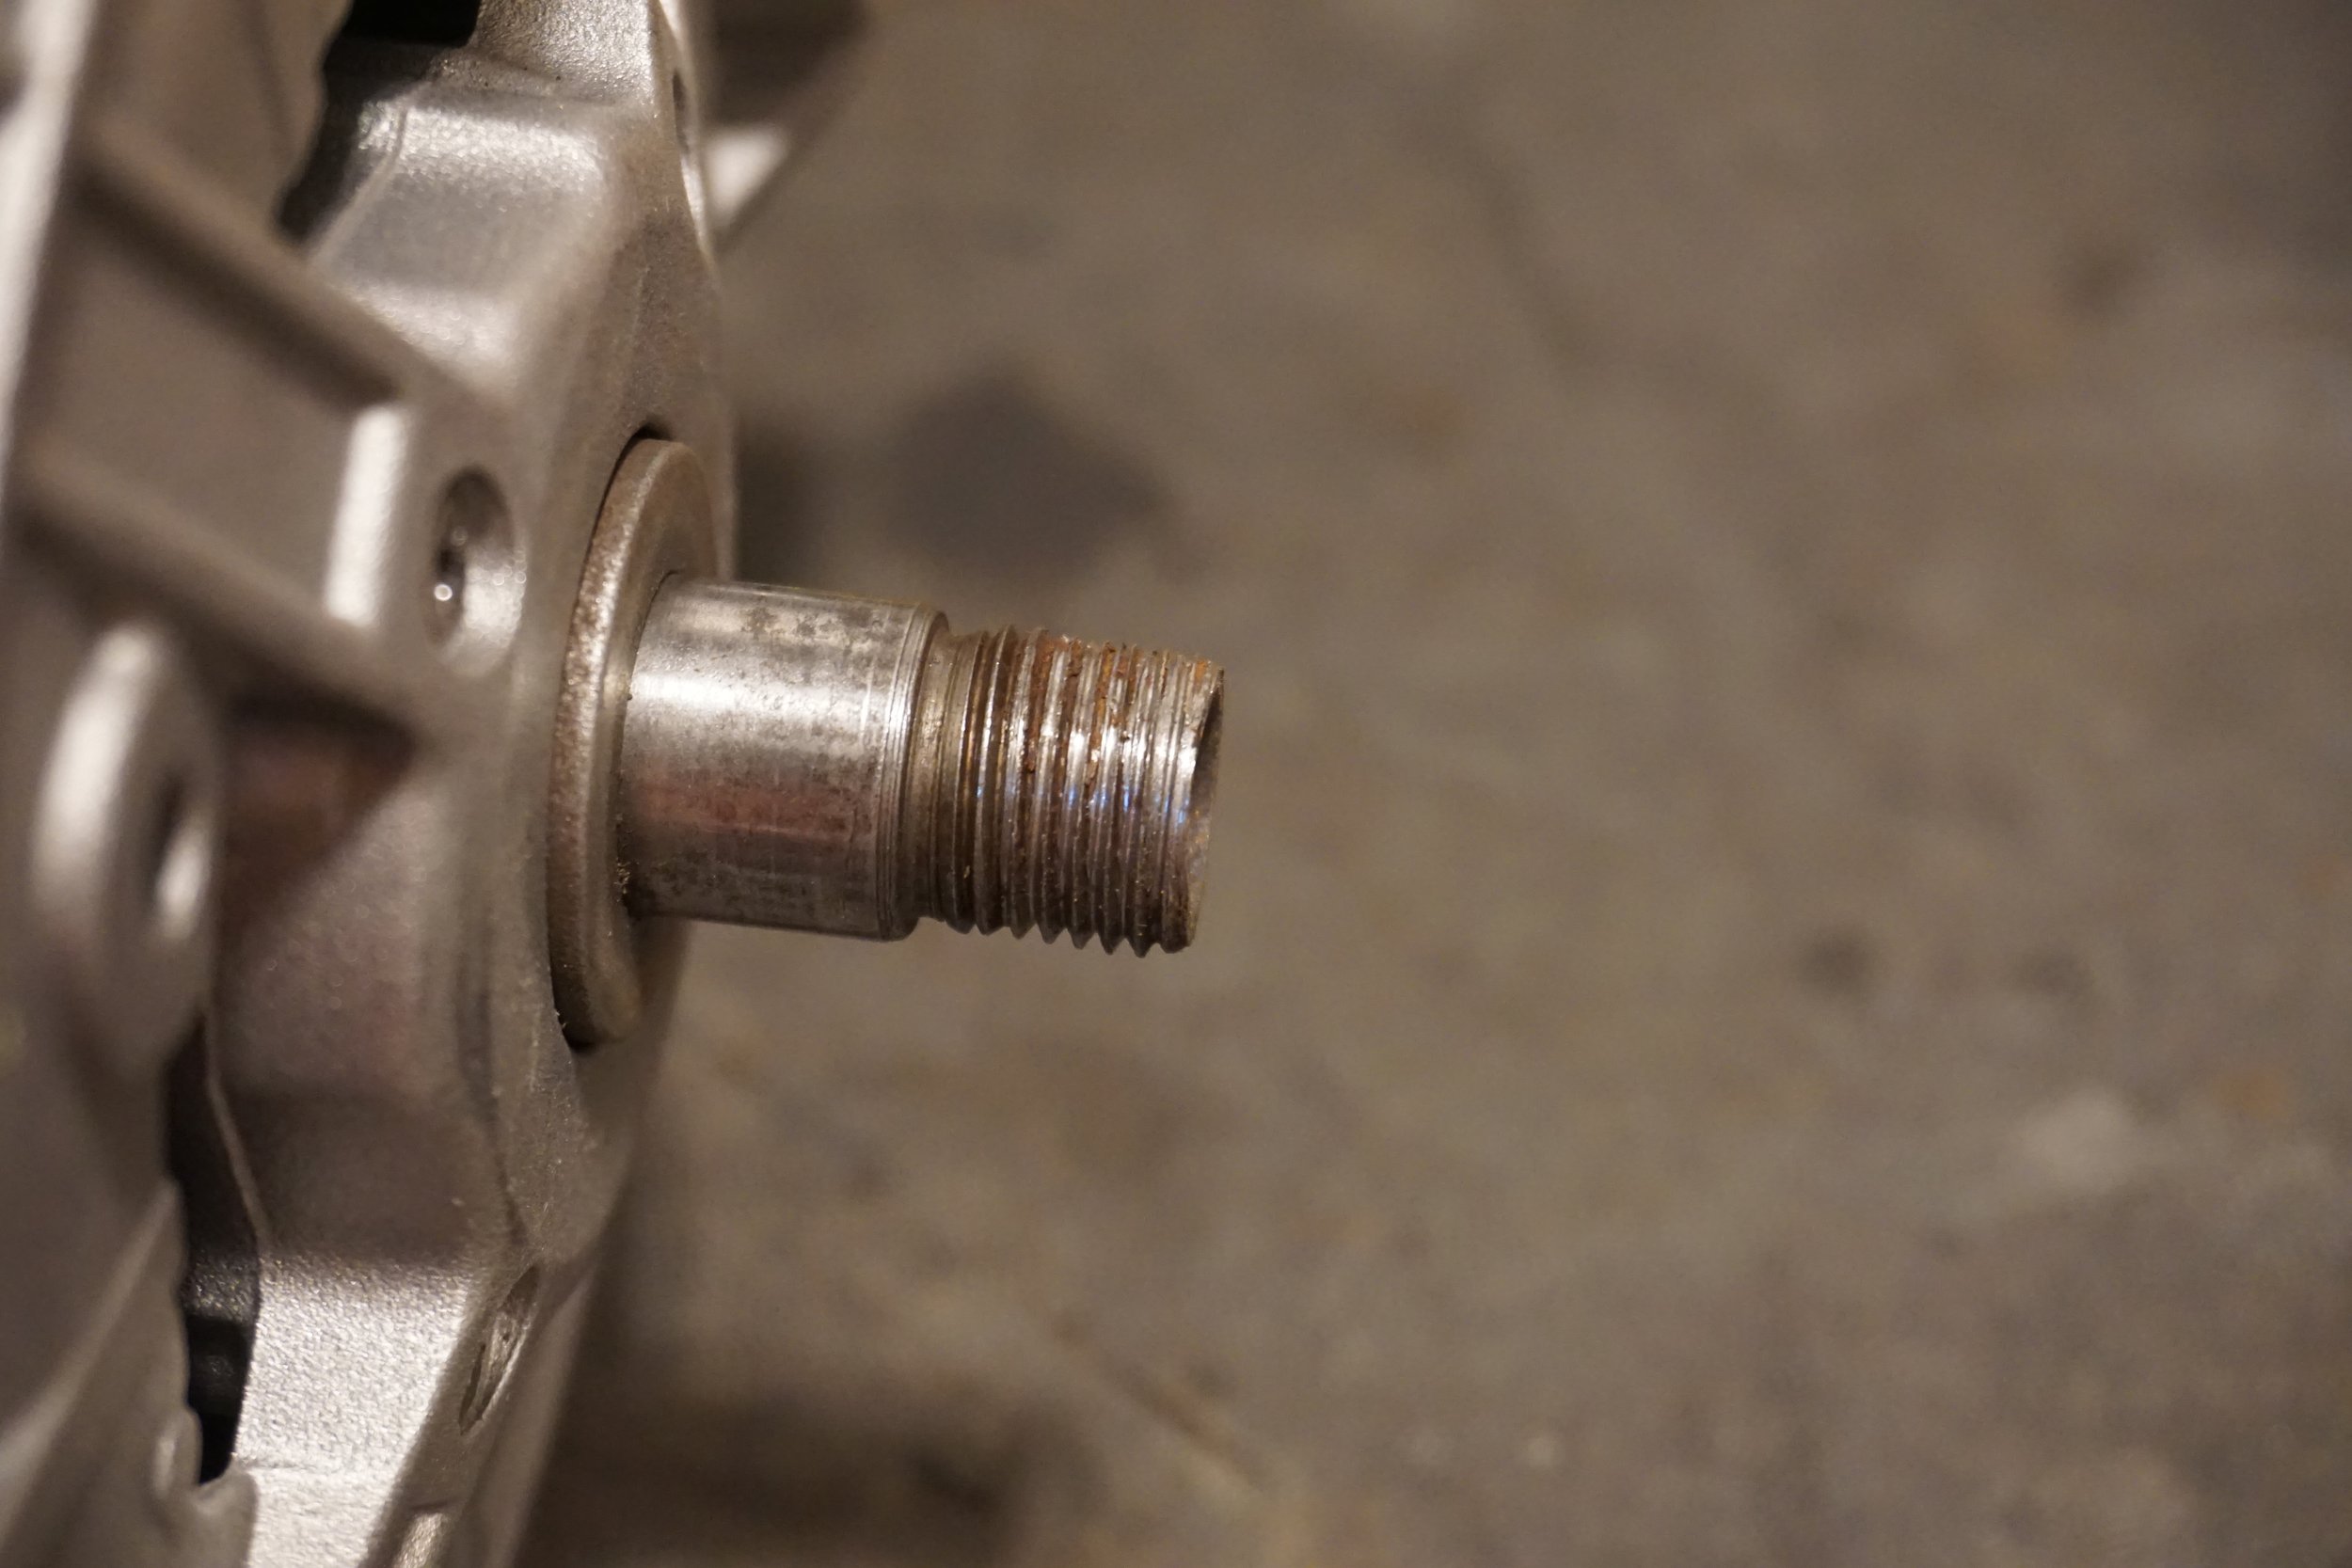
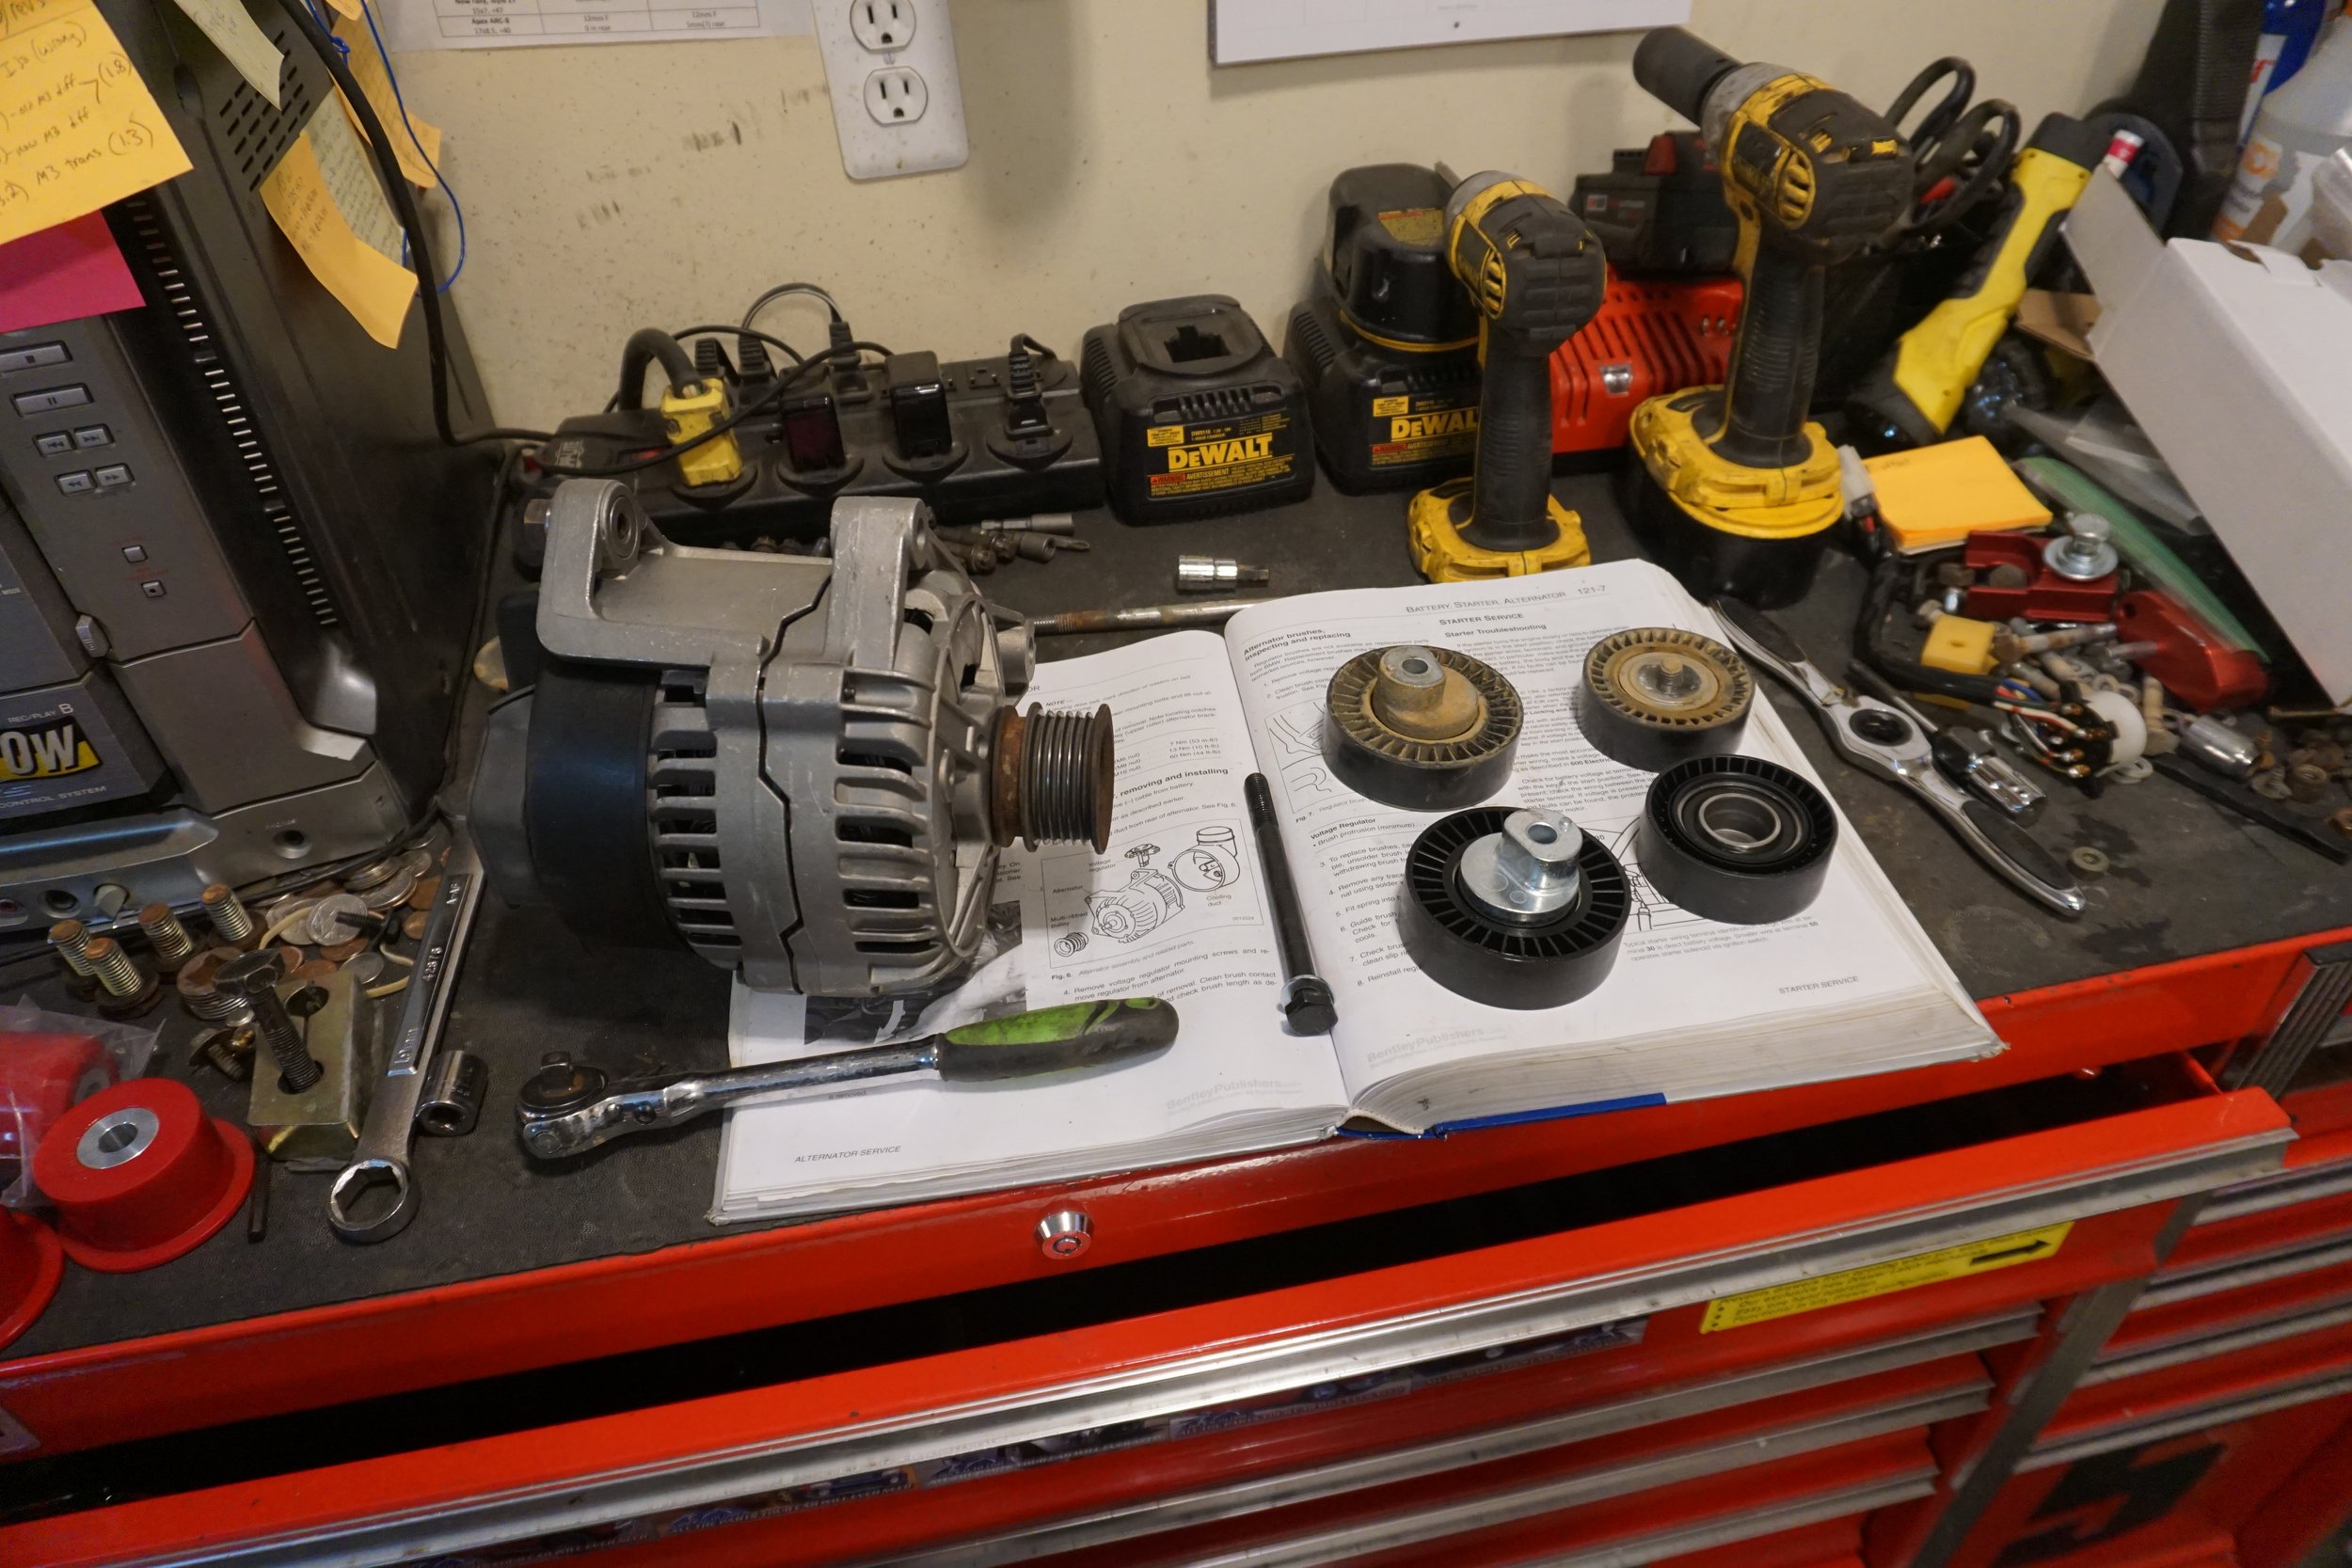
I was also waiting on a new alternator to arrive, as the first one I got from FCP Euro had threads that looked like this:
The alternator and rebuilt diff didn't arrive until the afternoon before the race, so I scrambled to get everything back together. Thankfully the charging system seems to work great, and my diff is nice and quiet. Mark at Danville Diffs located a 3.23 to replace my 3.38 and built it back up with new bearings and 3 clutch packs.
Time for a quick non-M3 related project! The M3 has been dutifully racing for the last year with nothing very exciting happening, hence the lack of updates.
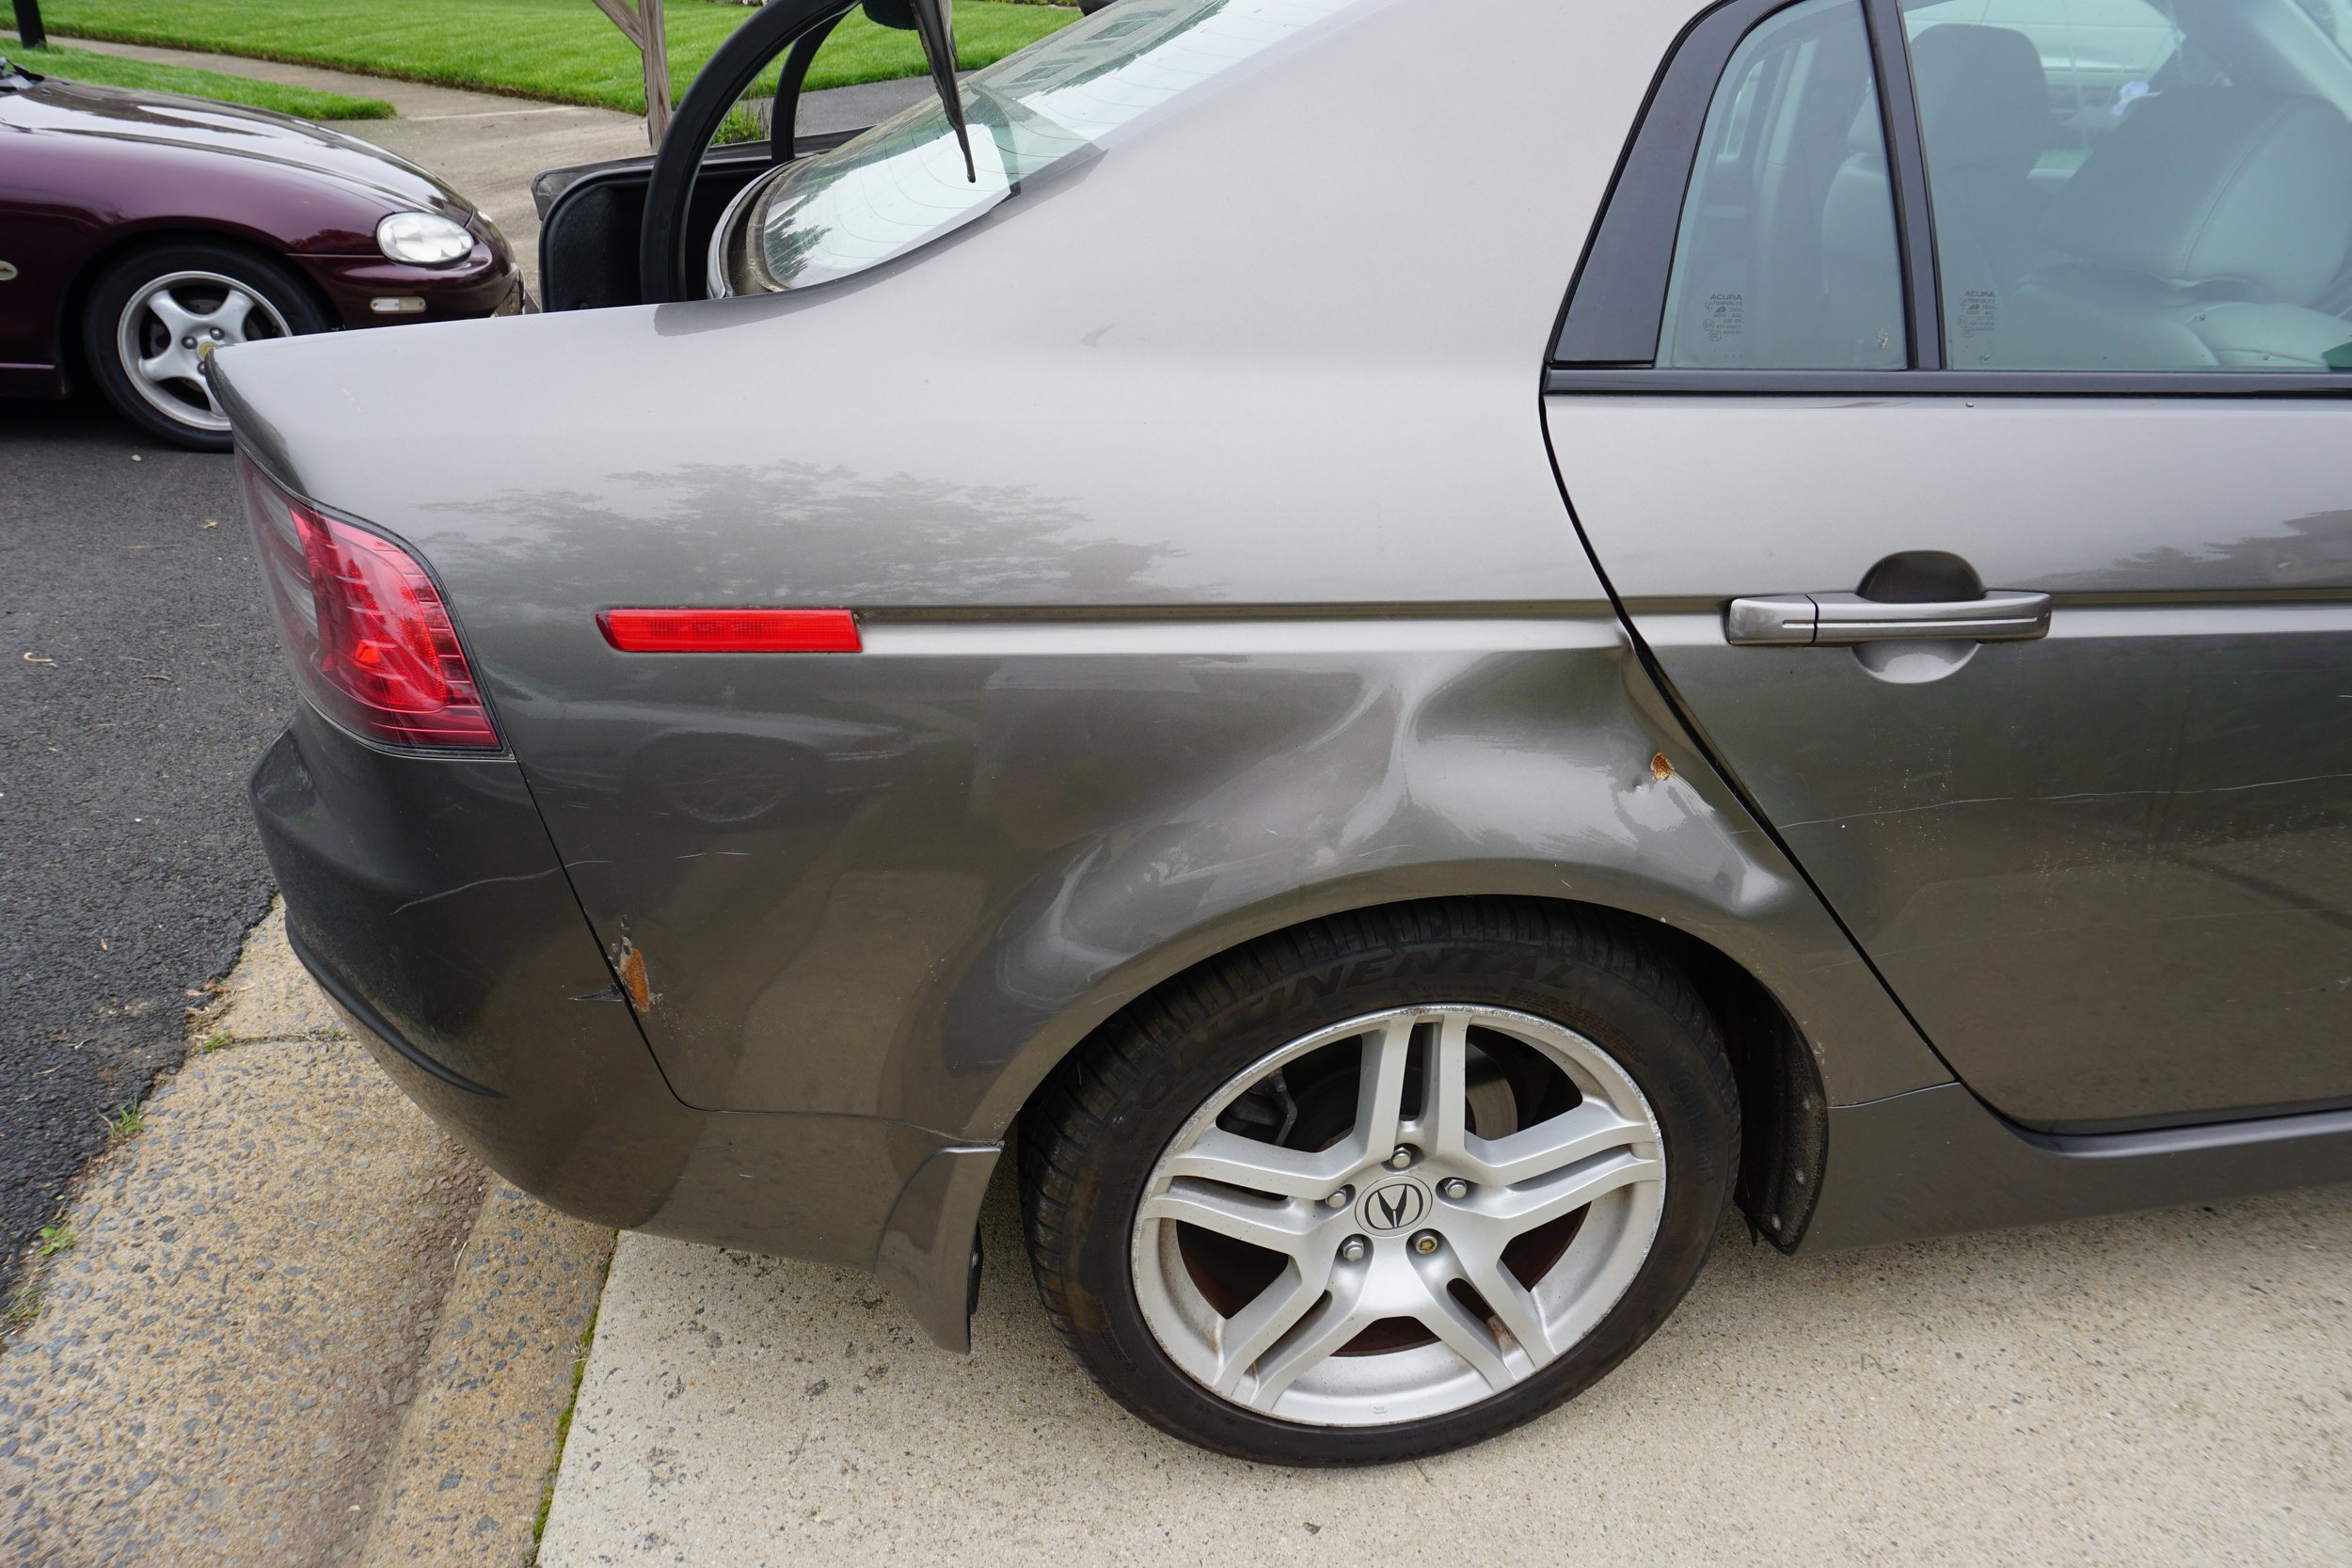
I set up my new 80 gallon air compressor (19 CFM at 90 psi), routed all of the PEX piping, set up the air filtration/dryer, and ordered a whole lot of other supplies and completed my first "real" painting project on my mom's Acura TL. I've done stuff with 2K rattle cans before, but now I've got real paint guns, and real high quality primers, paints, and clear coats. Since my mom doesn't exactly have an eye for paint perfection, her car was the perfect test bed for all of my new tools so I could make my mistakes on her car before moving onto my own. I made plenty of mistakes, but was able to correct almost all of them, and in the end I was very happy with how the job turned out.
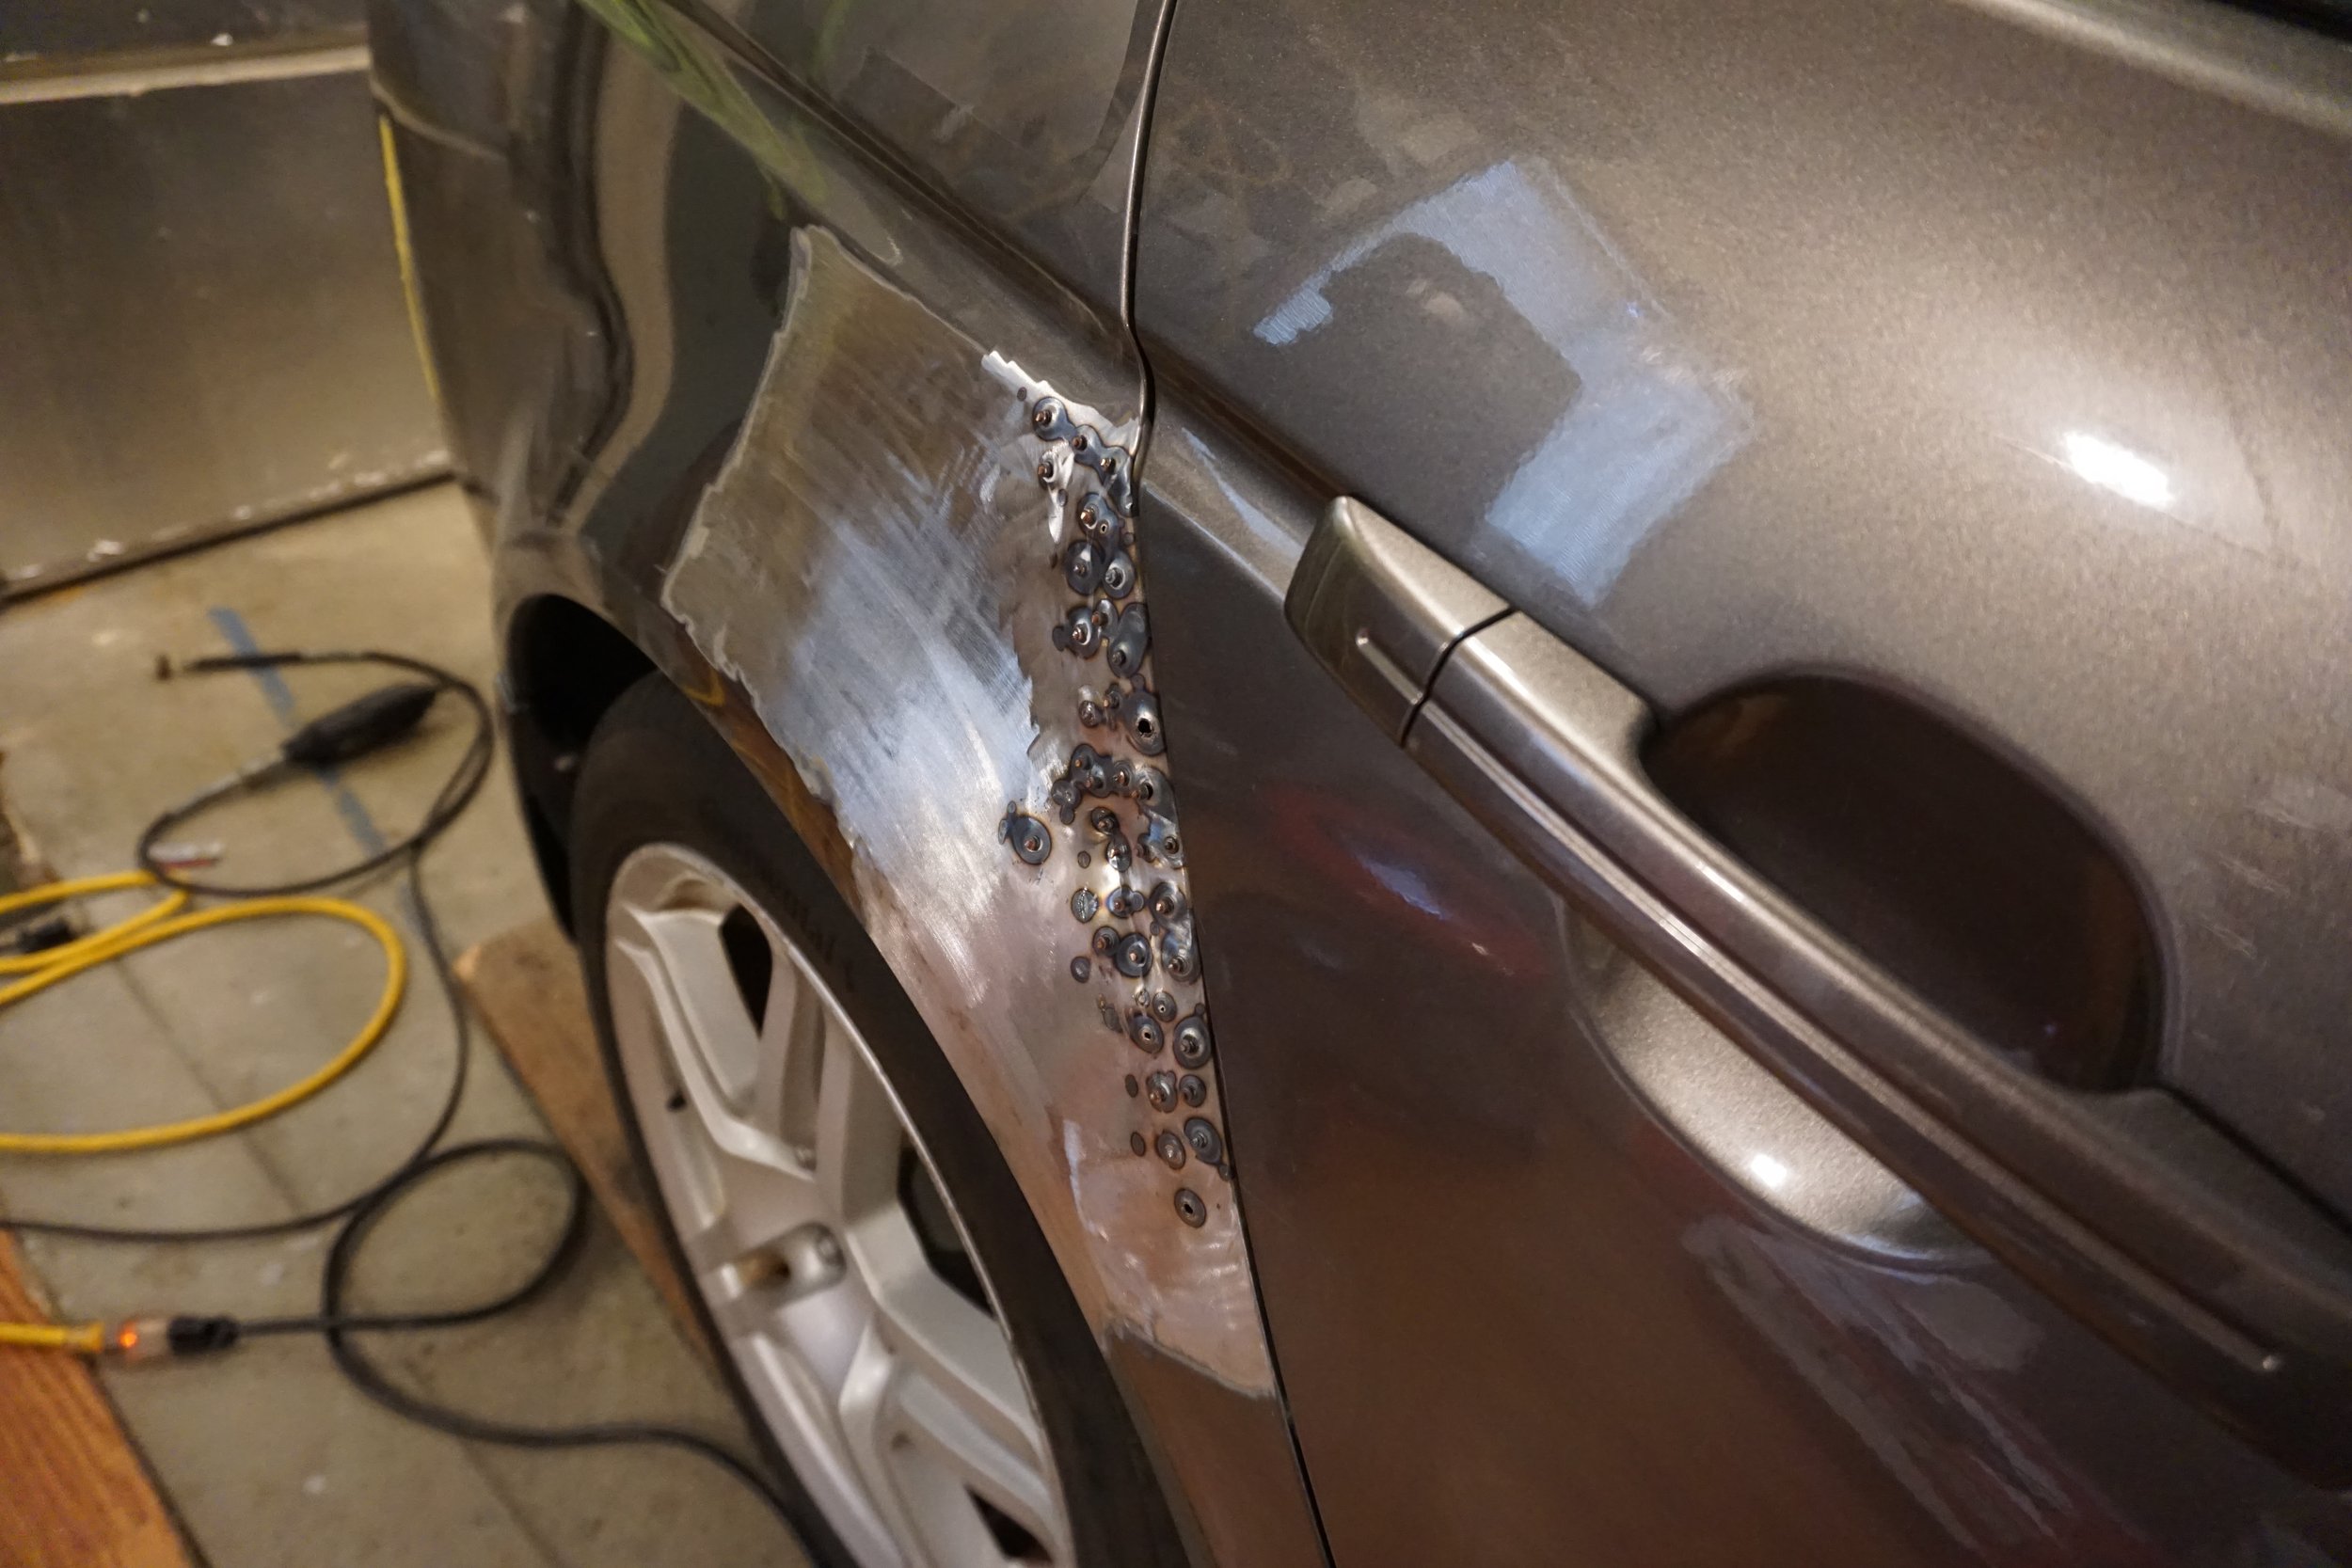
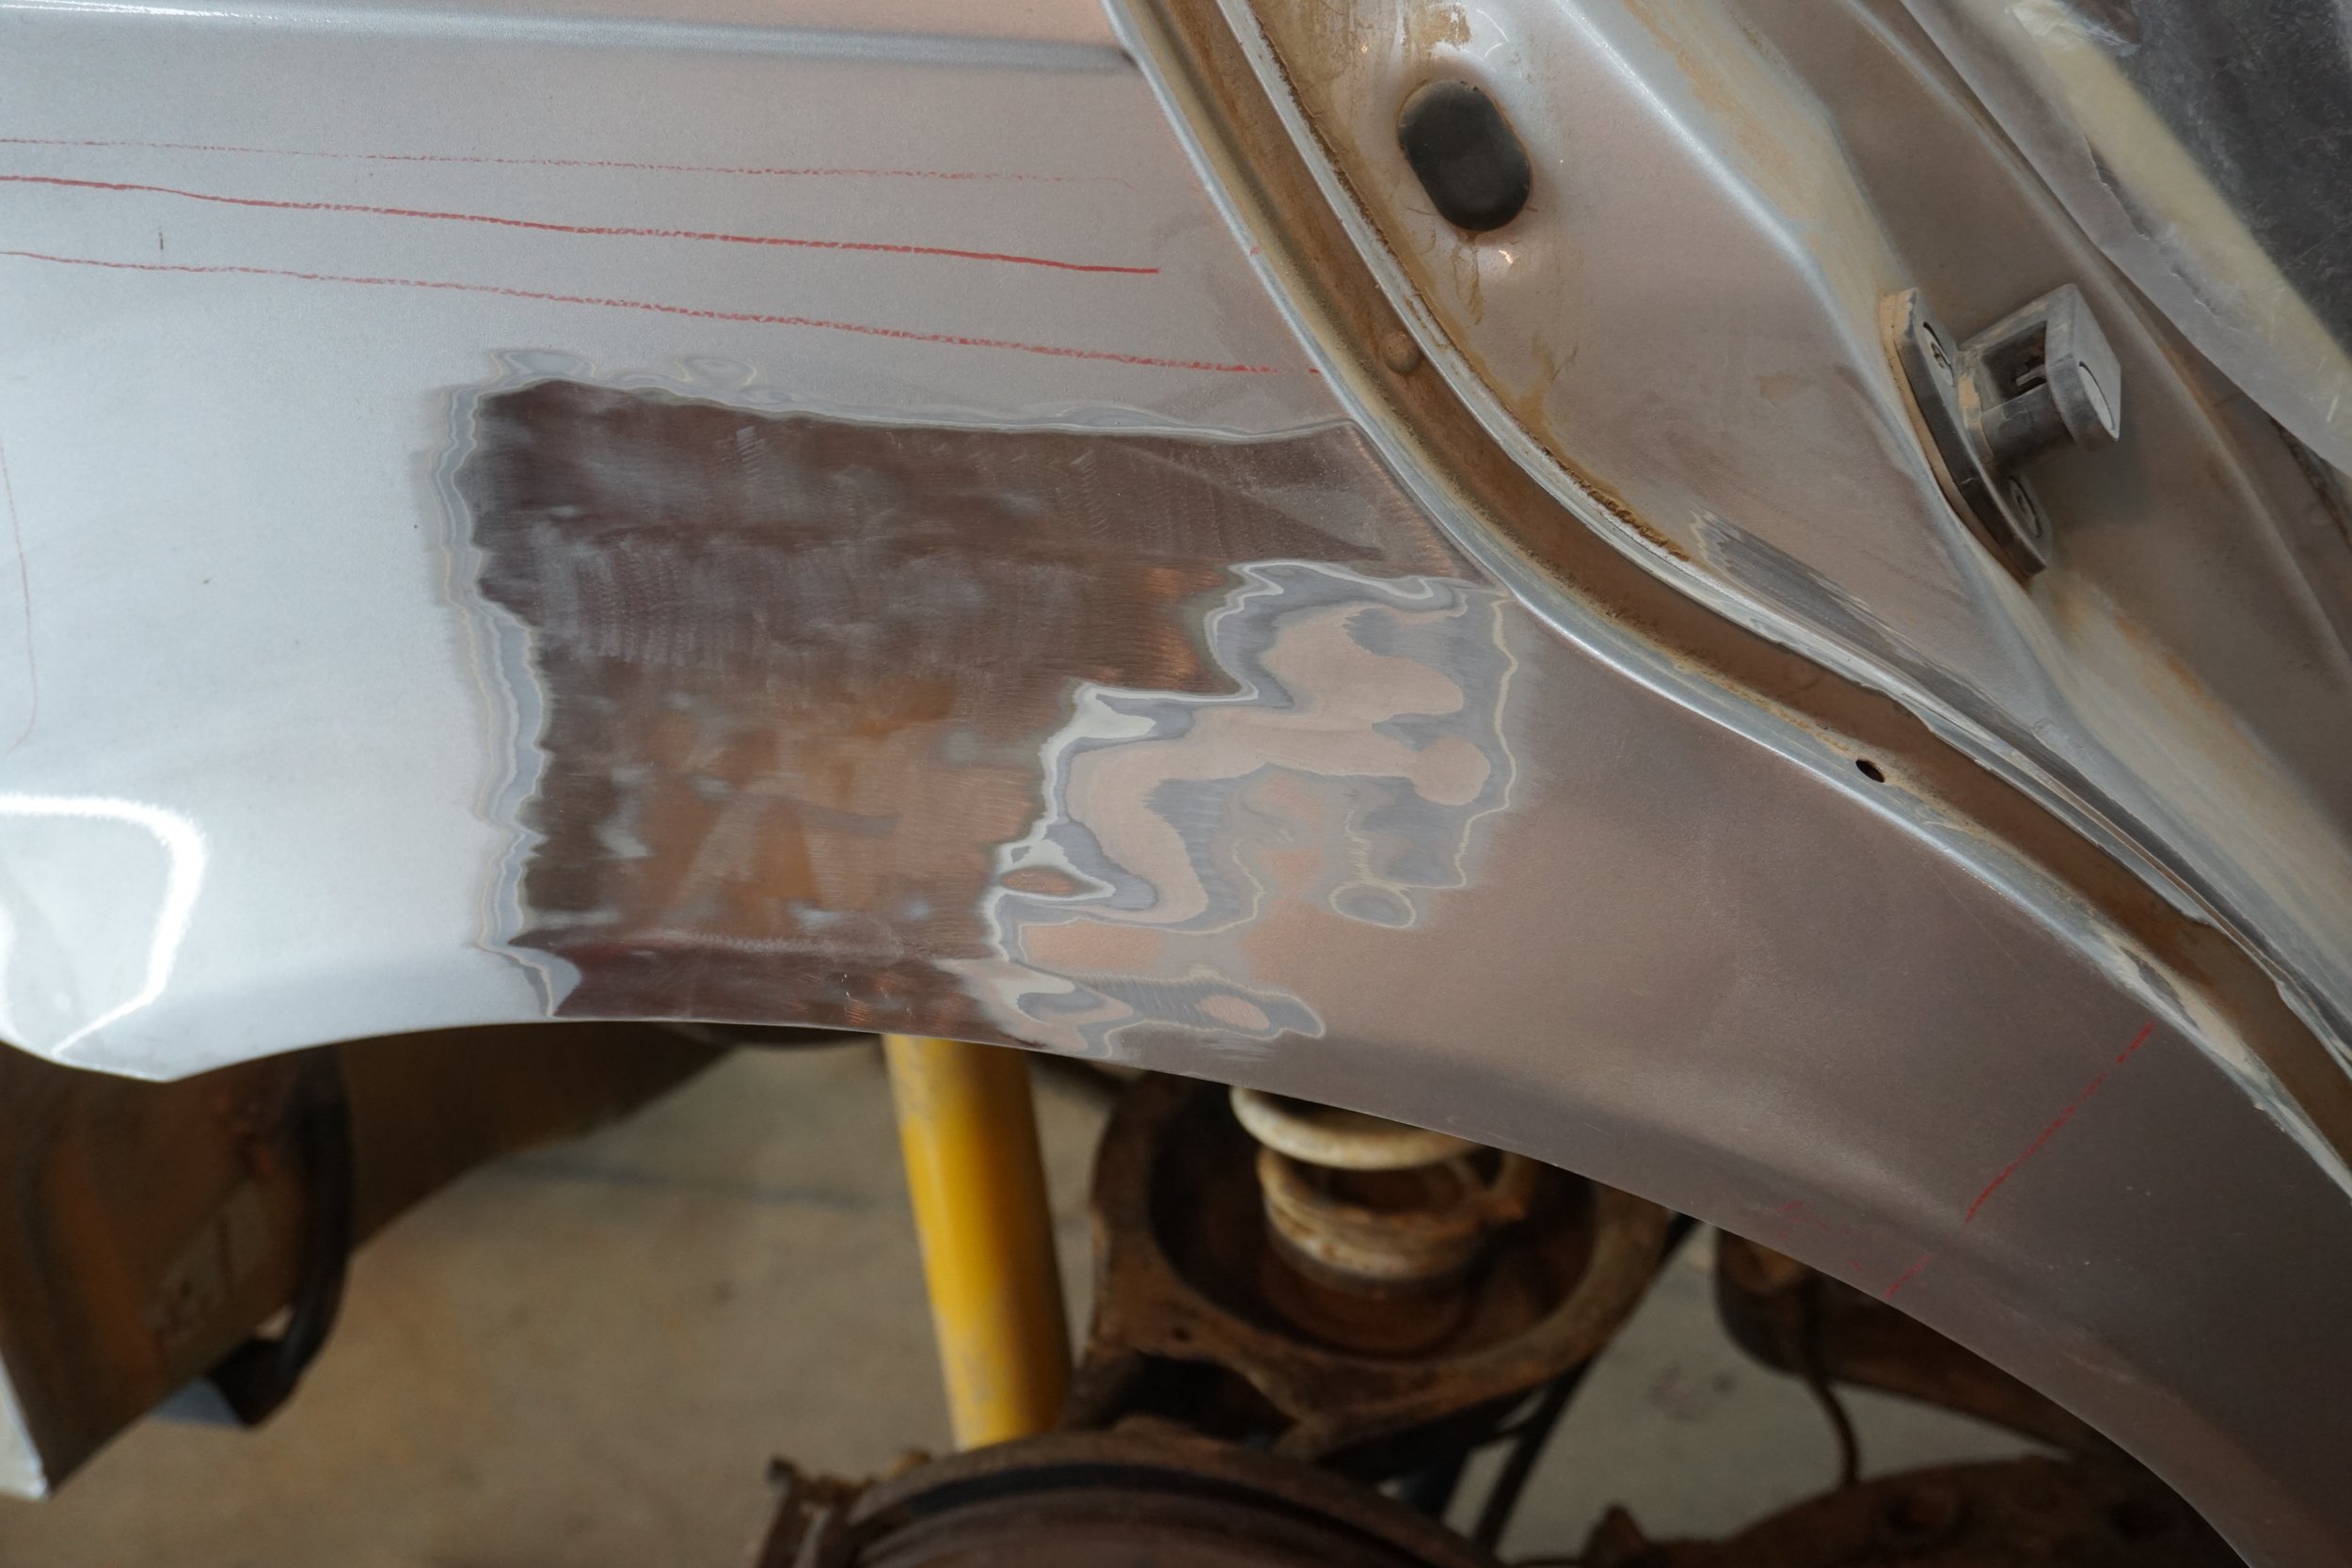
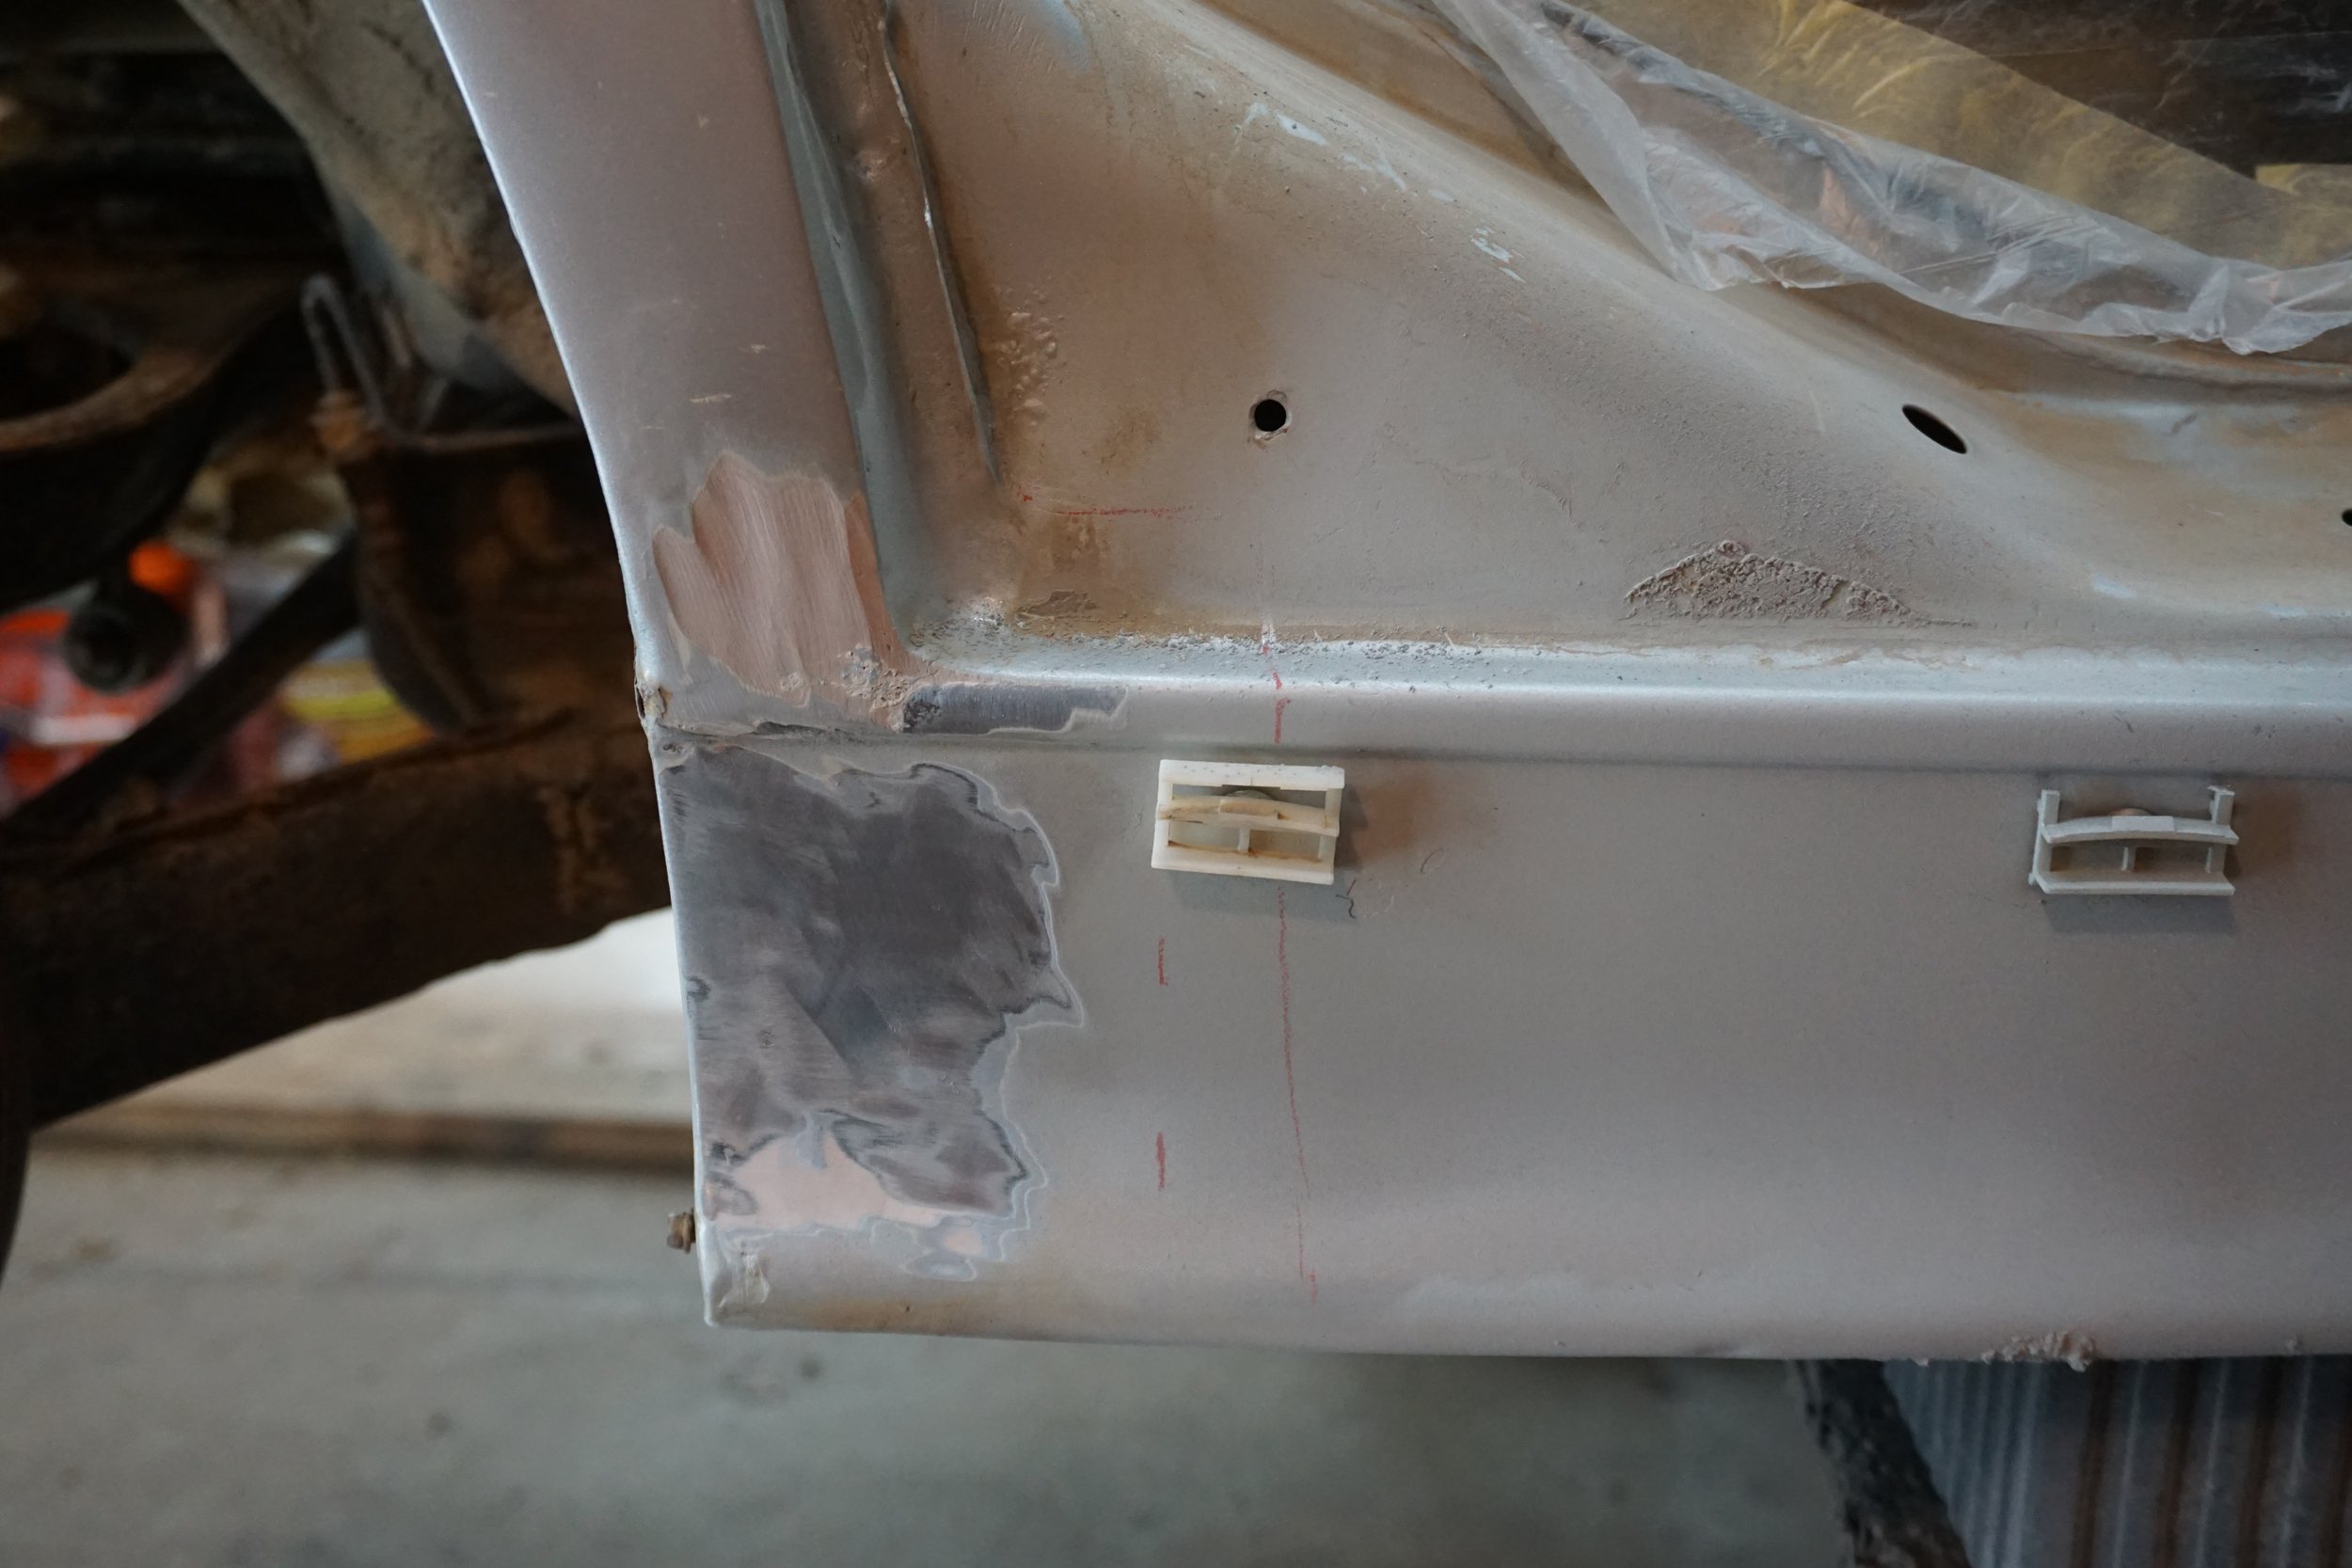
After the stud welder and puller:
After epoxy primer on all bare metal and then body filler:
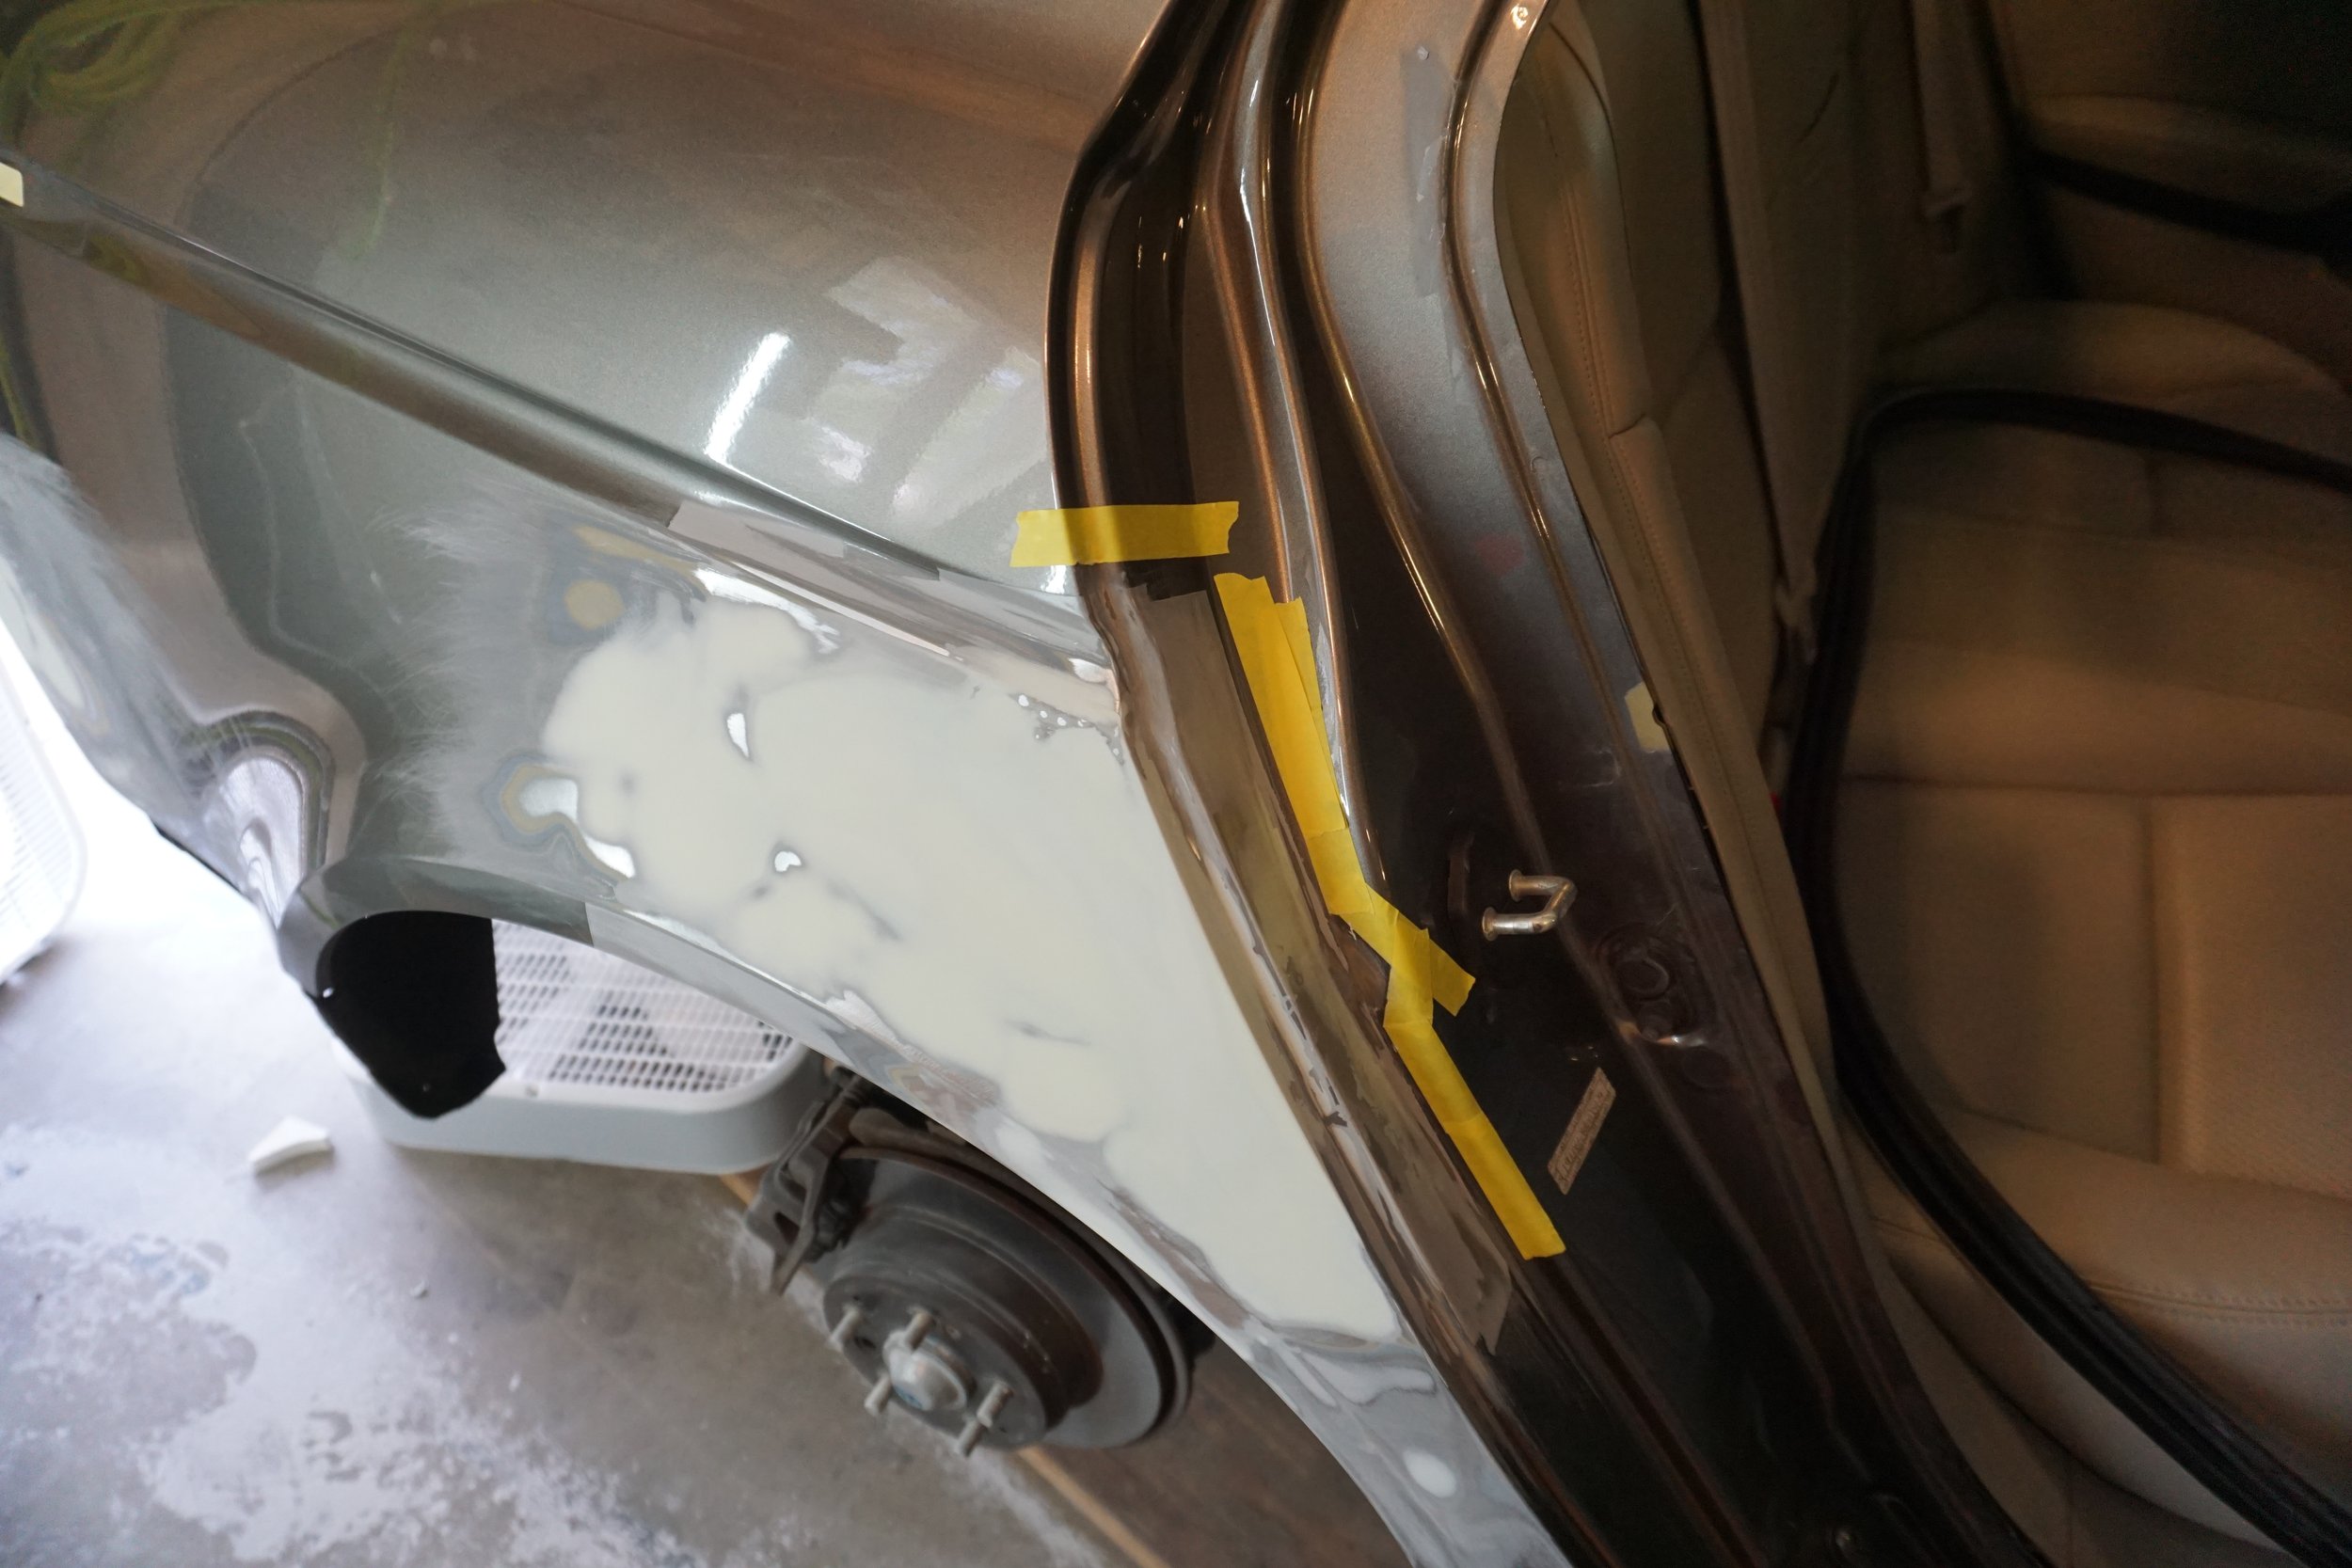
After 2K primer and blocking:
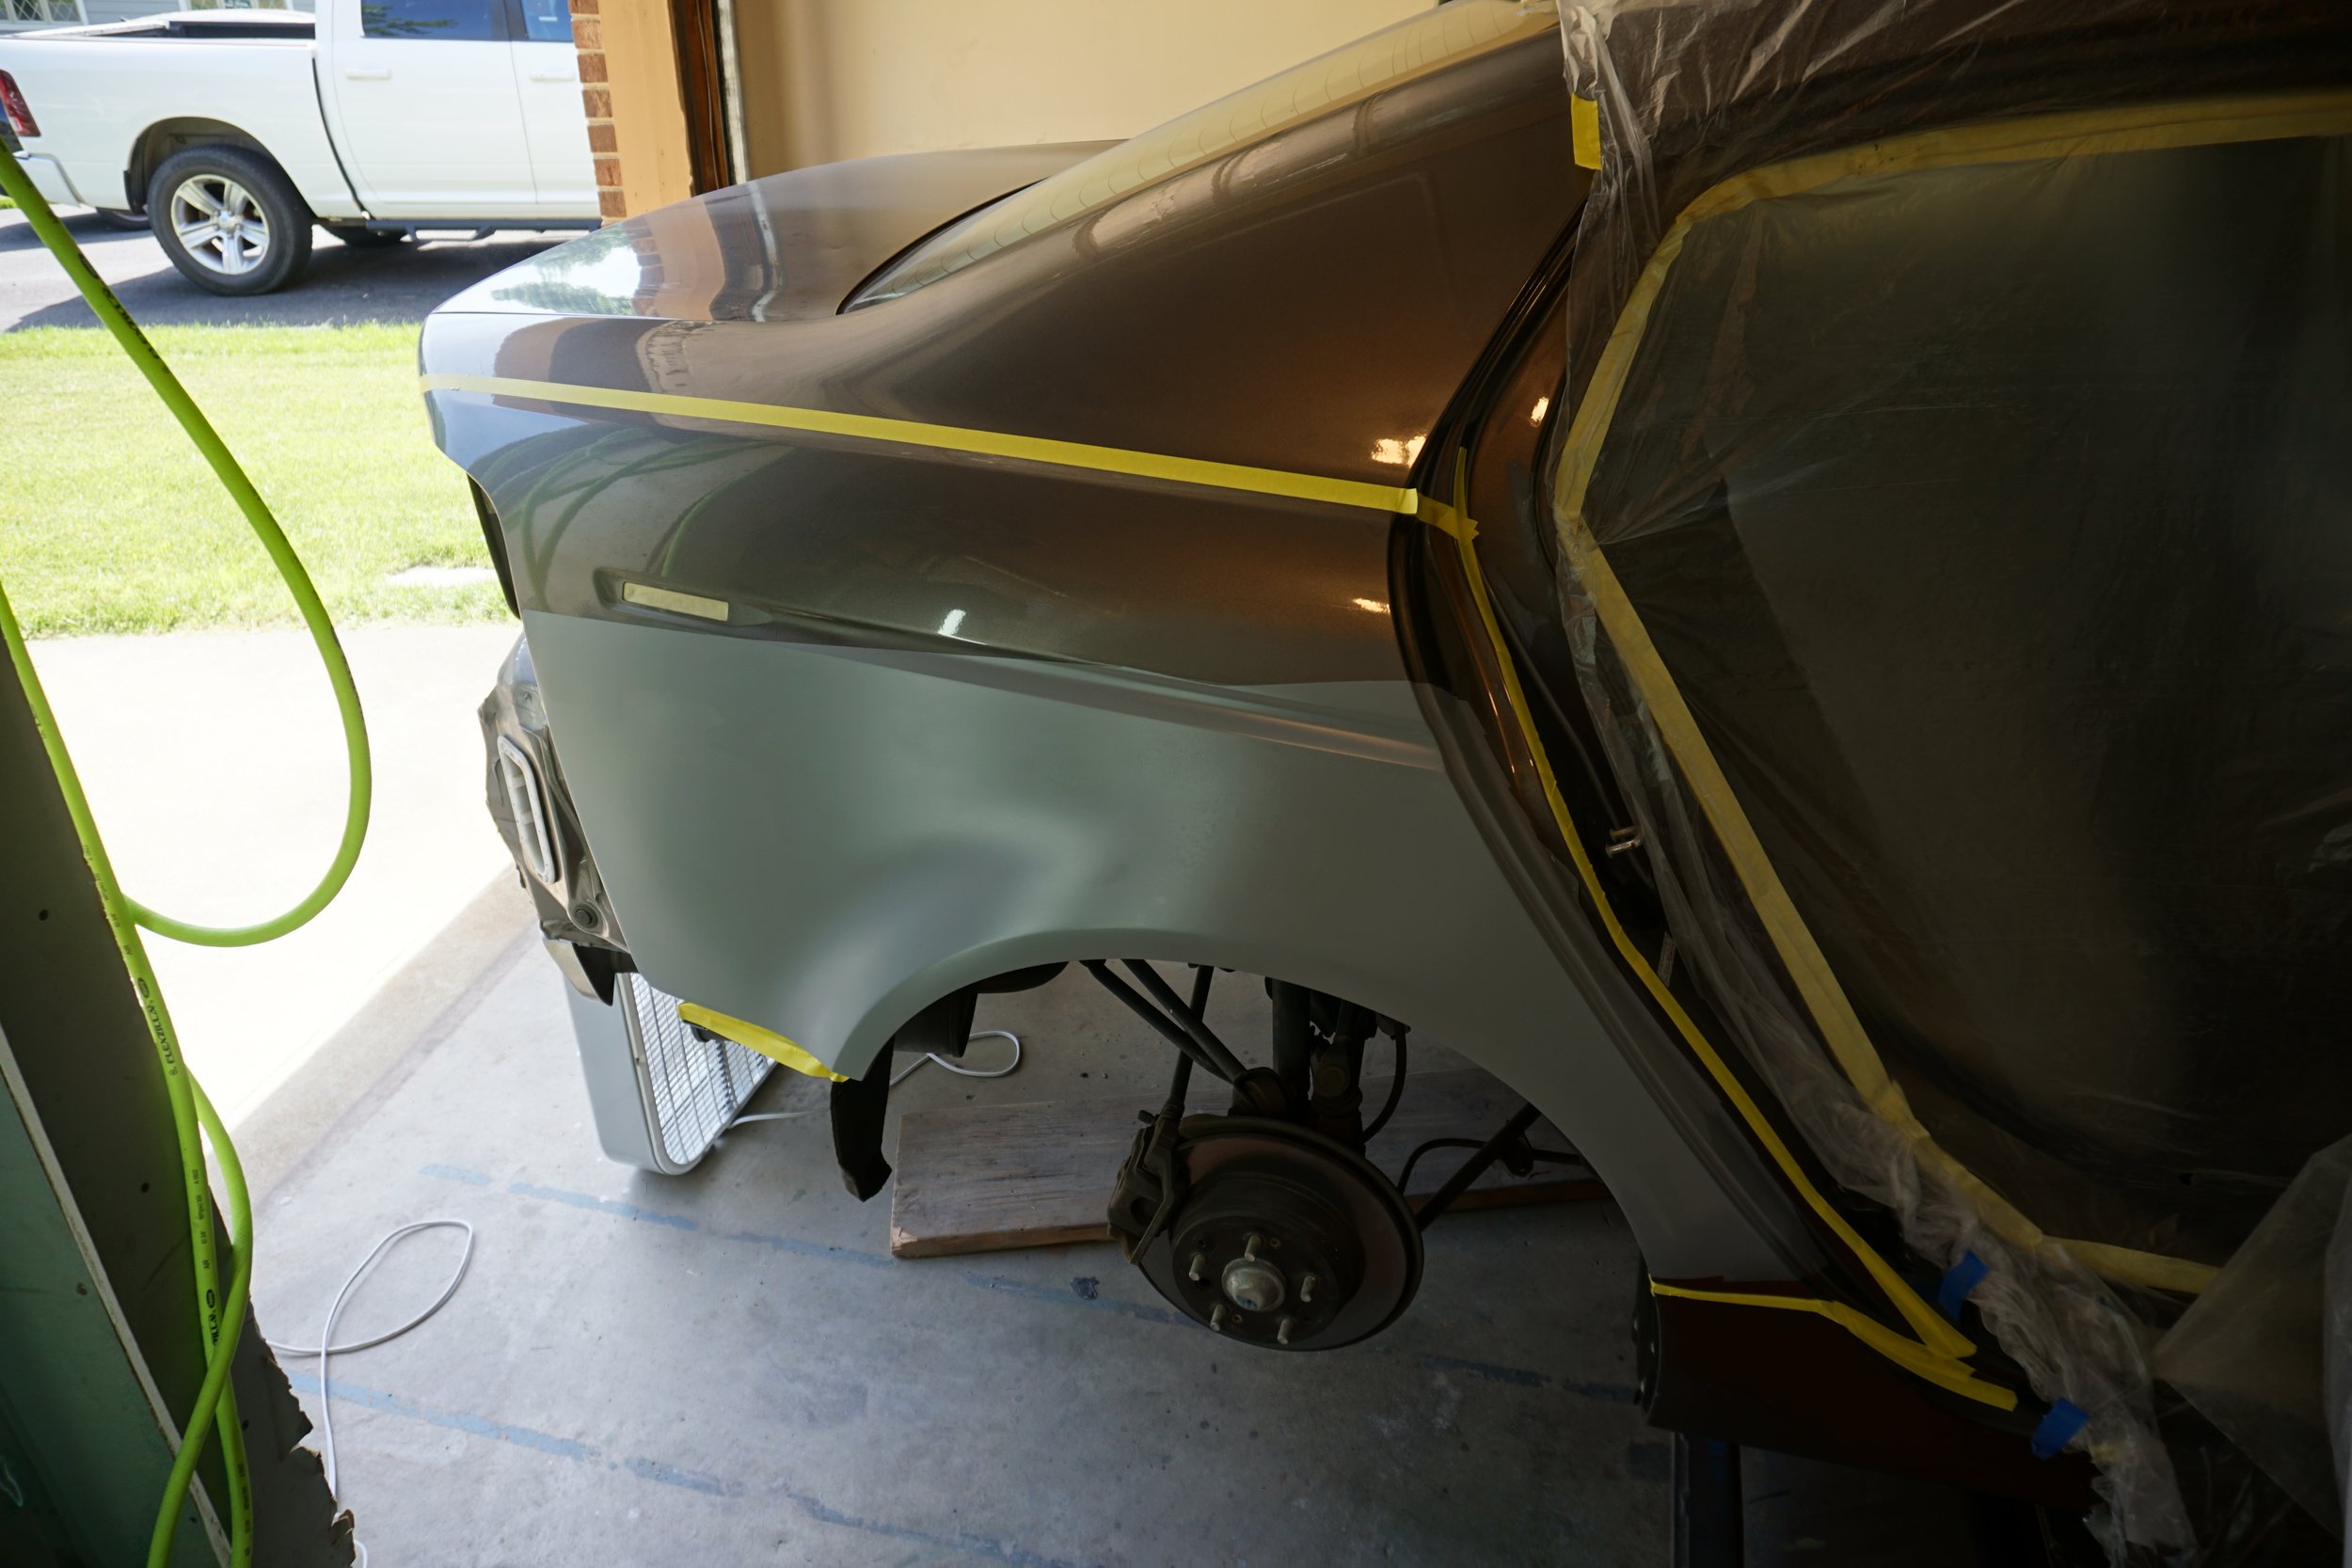
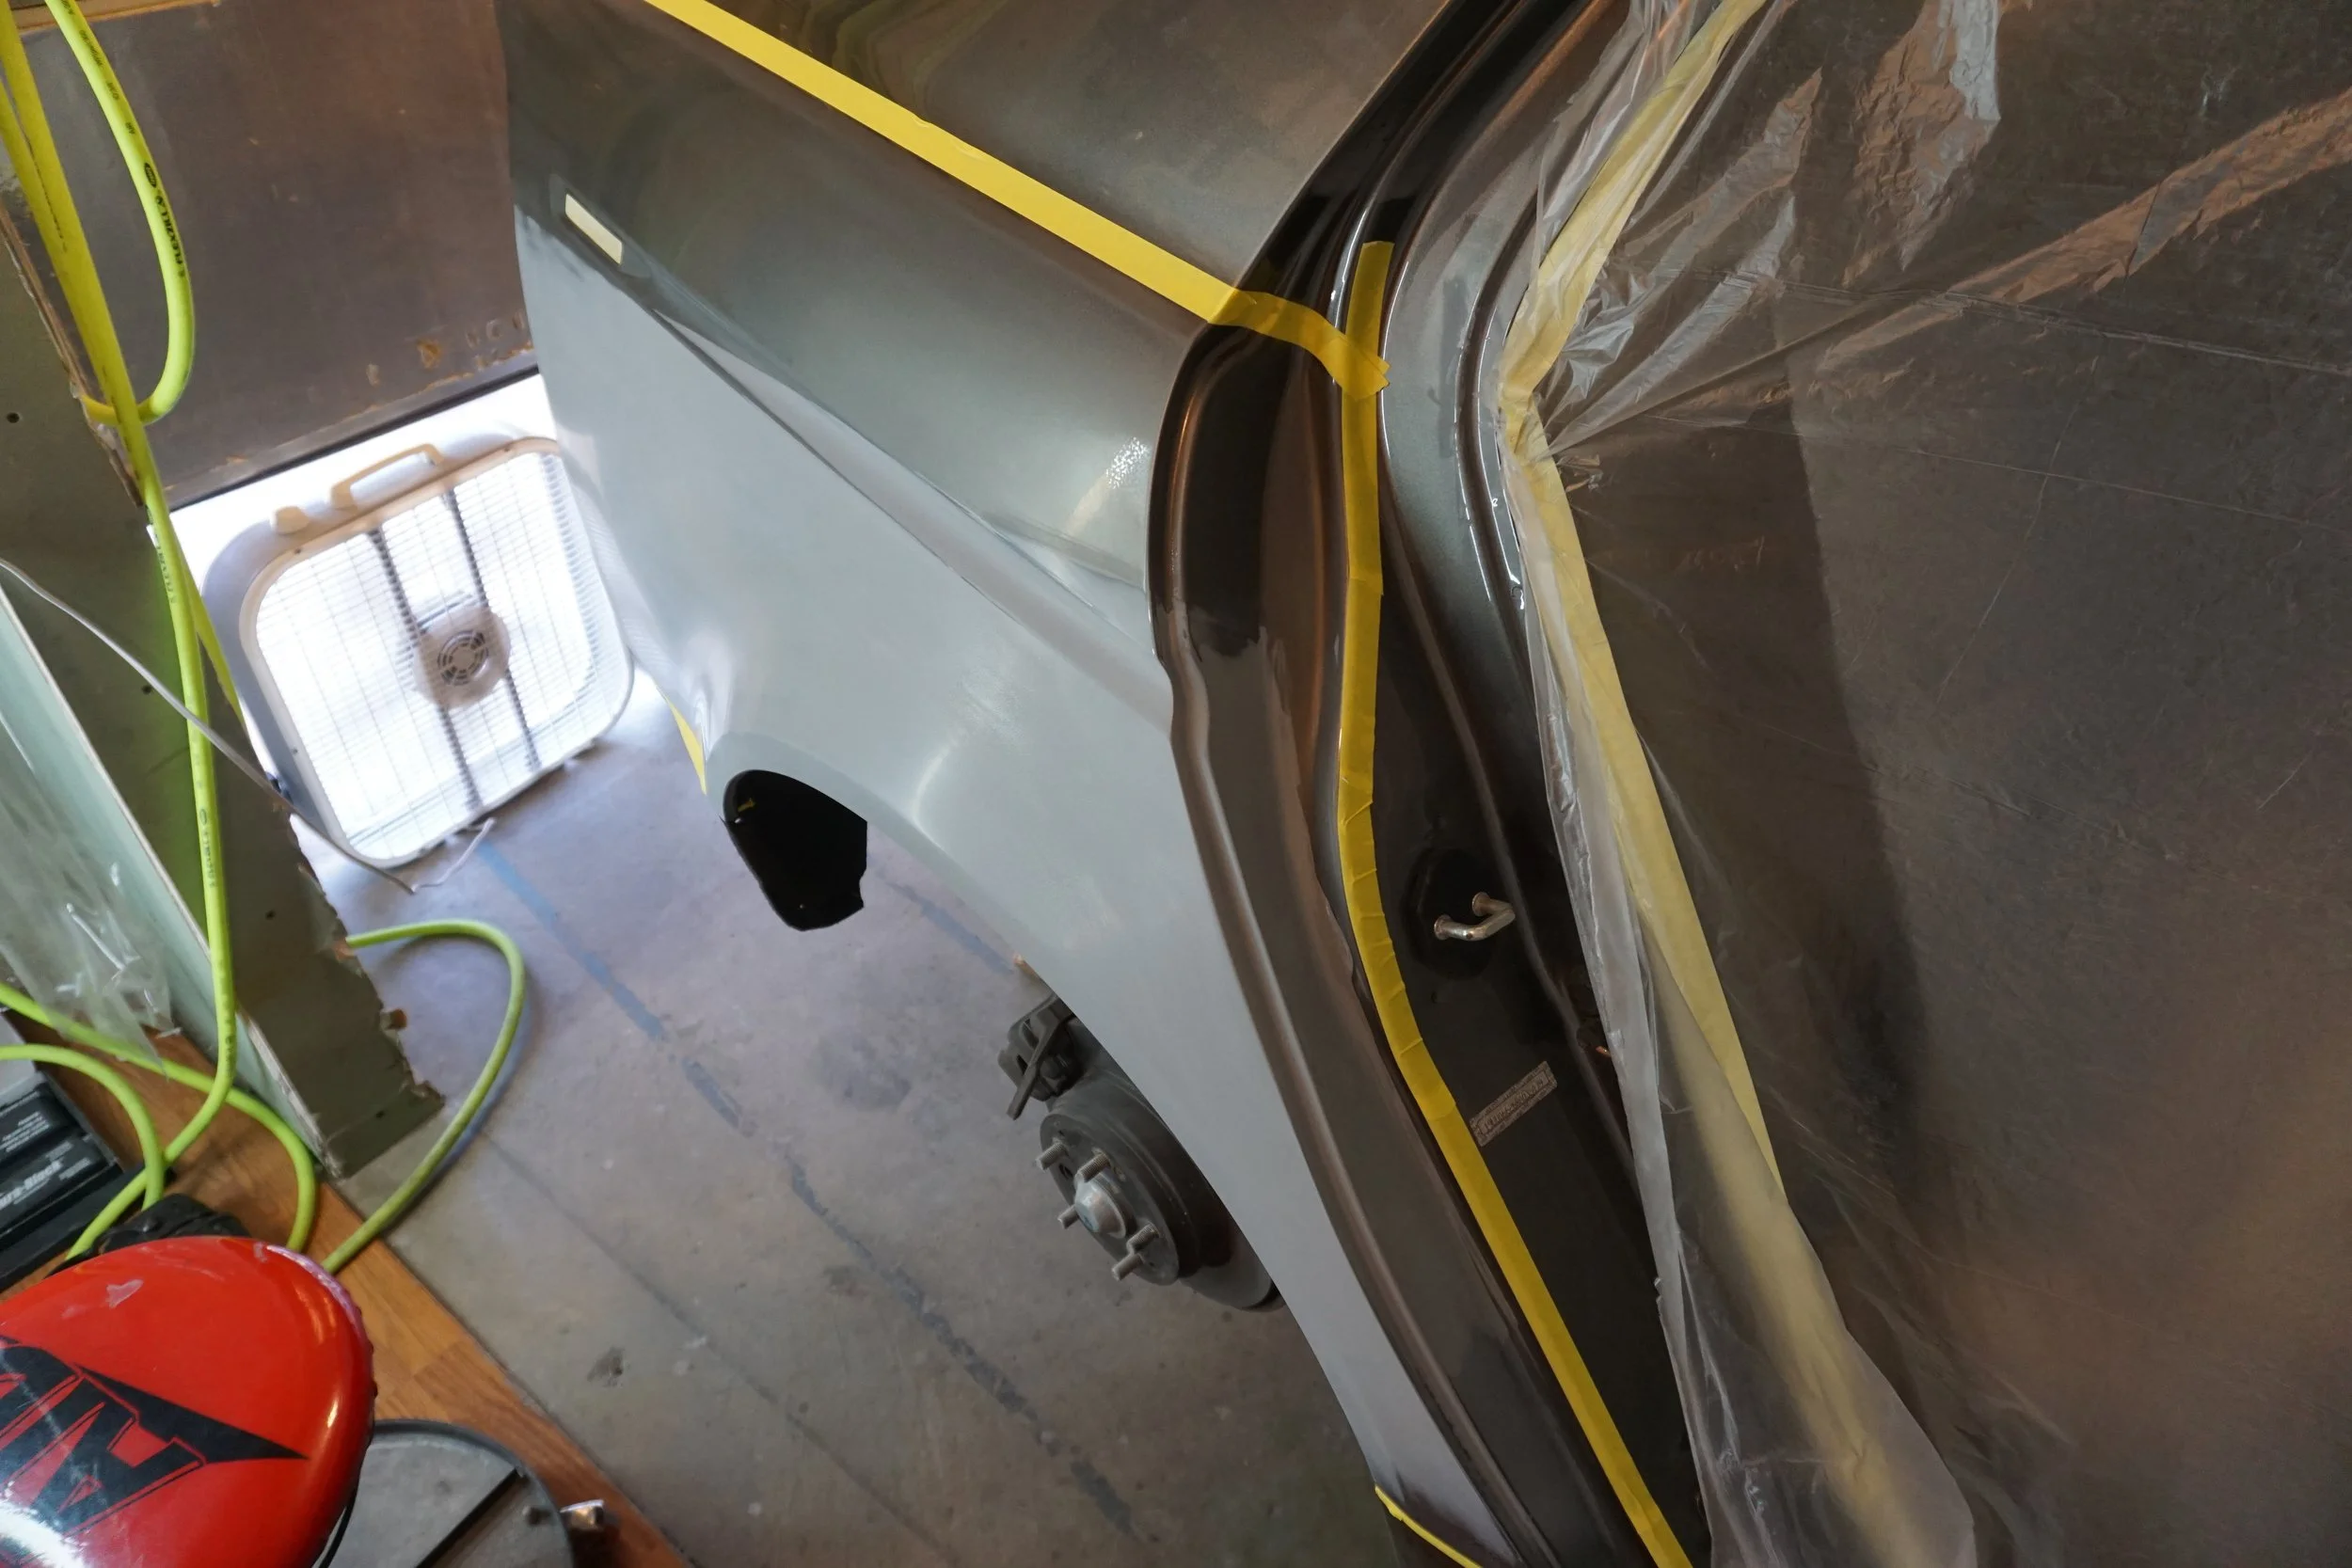
After clear base and base coat:
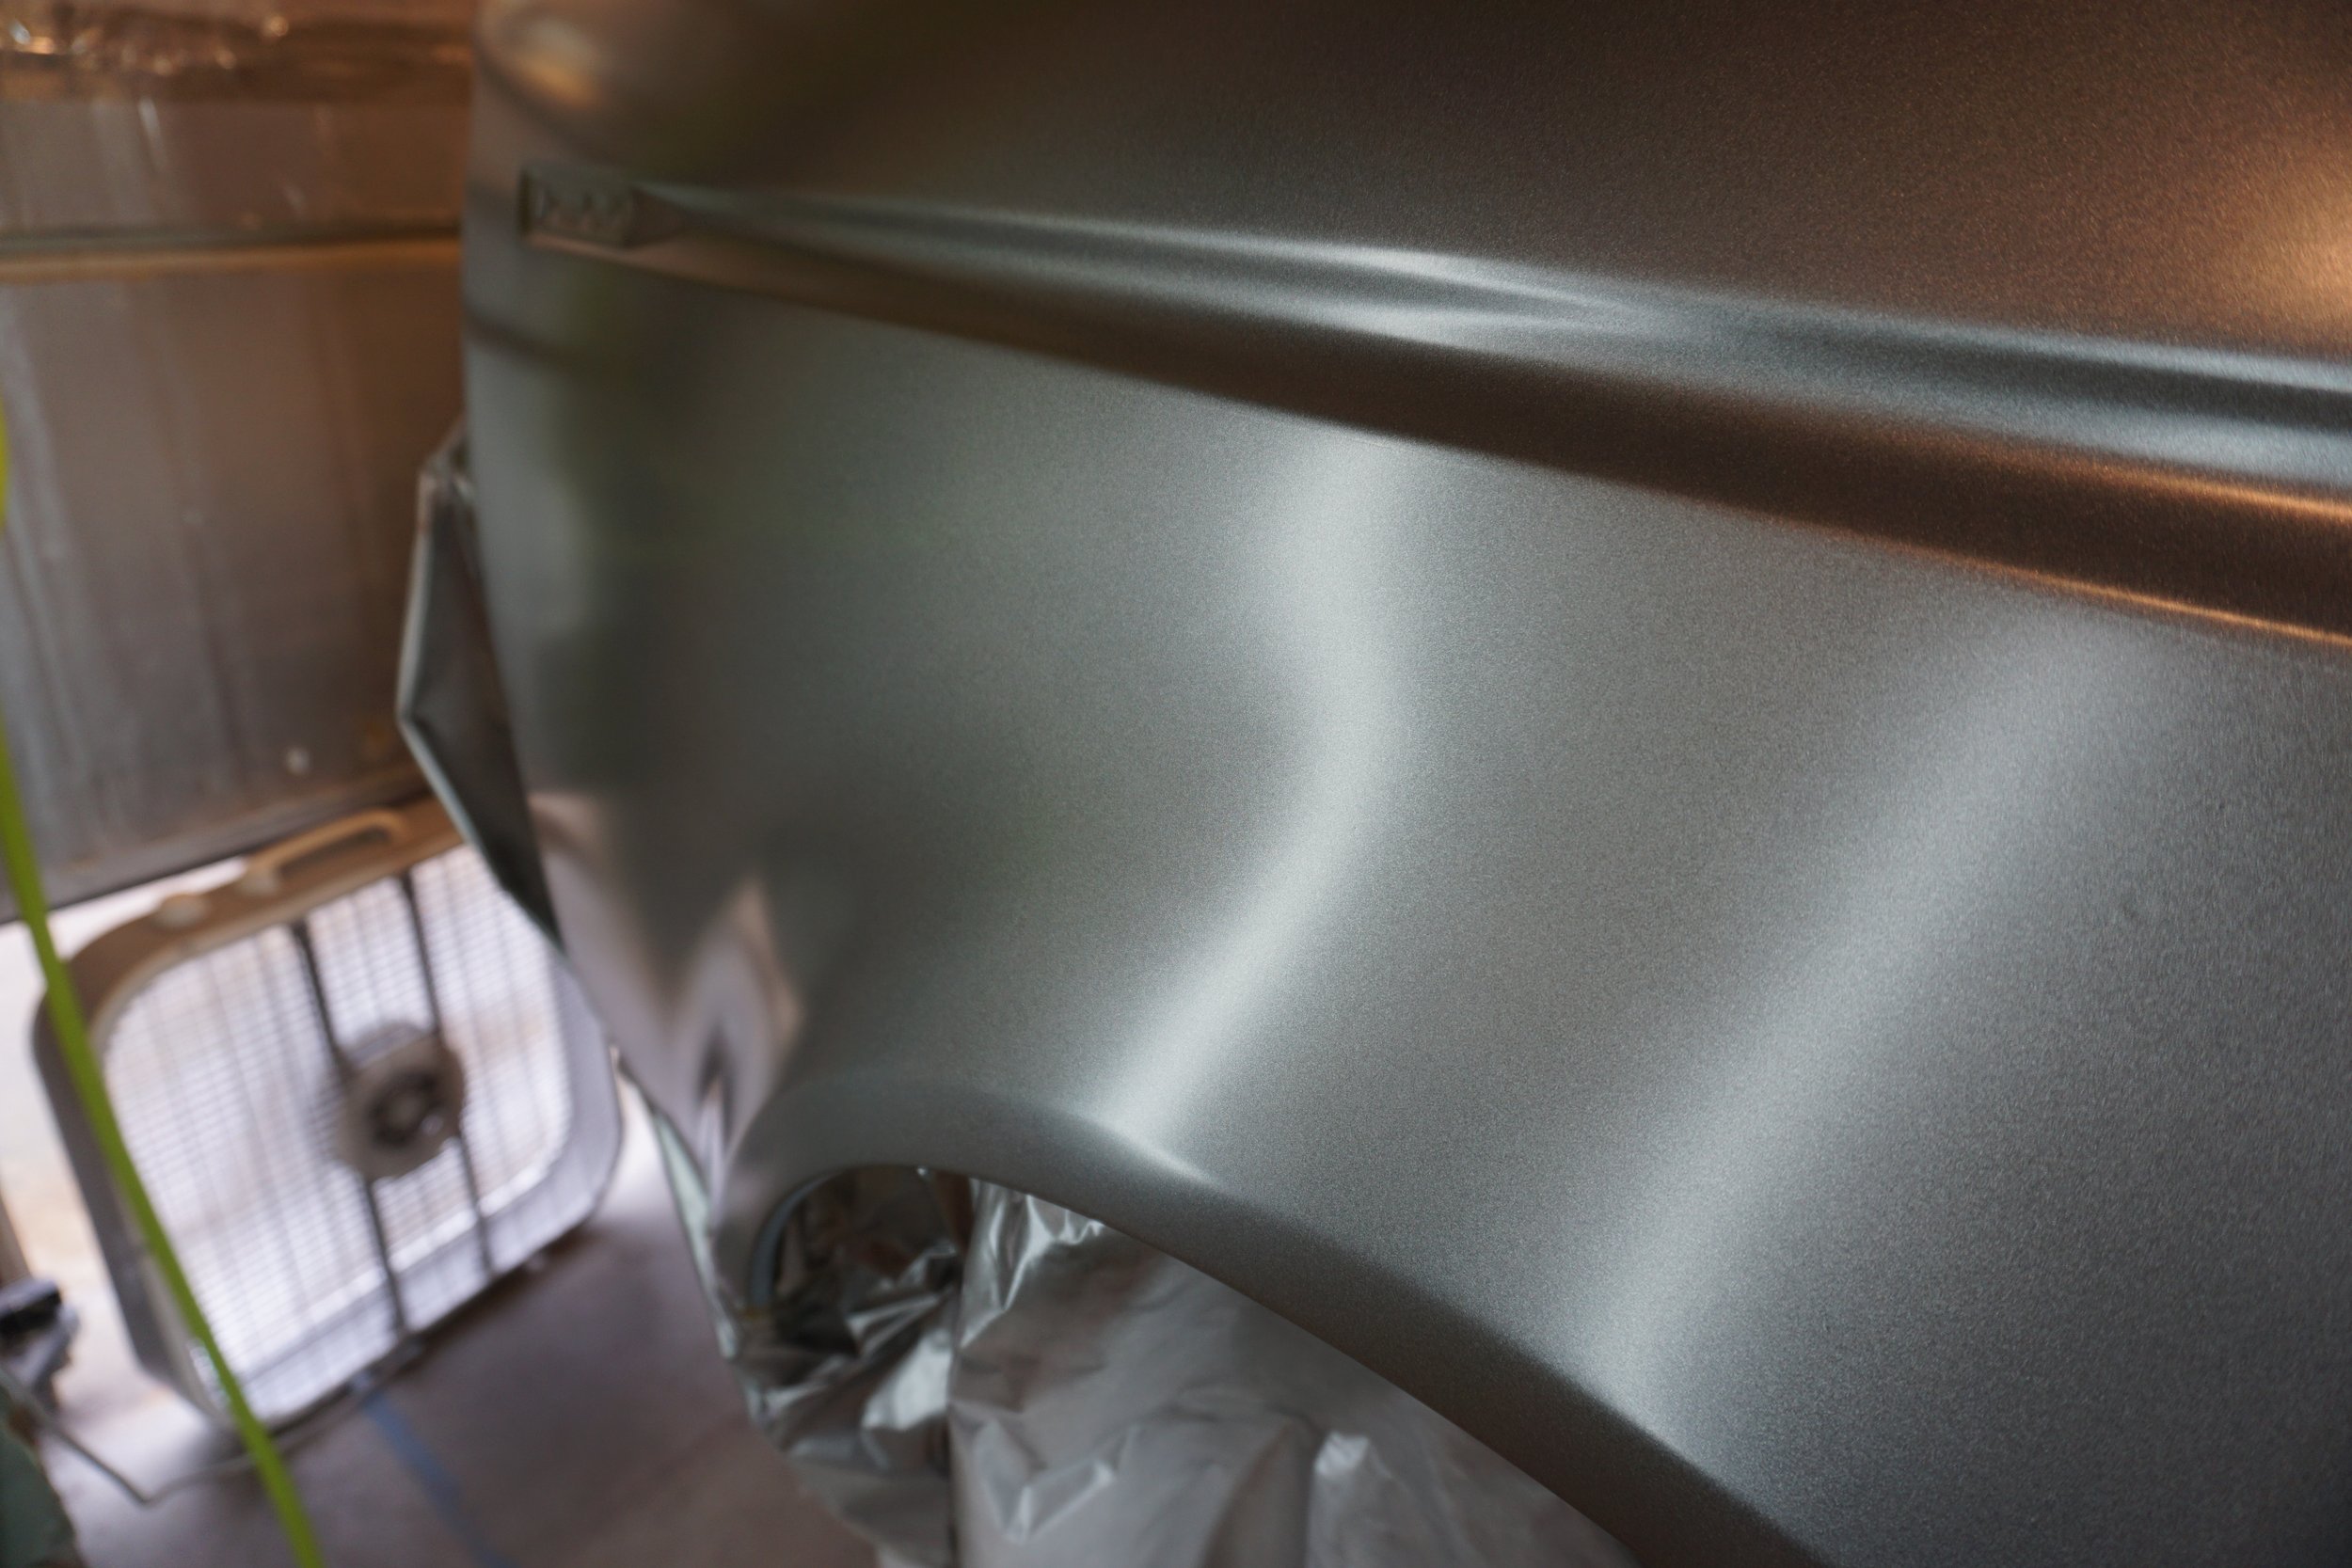
And after clear coat, cutting, and buffing:
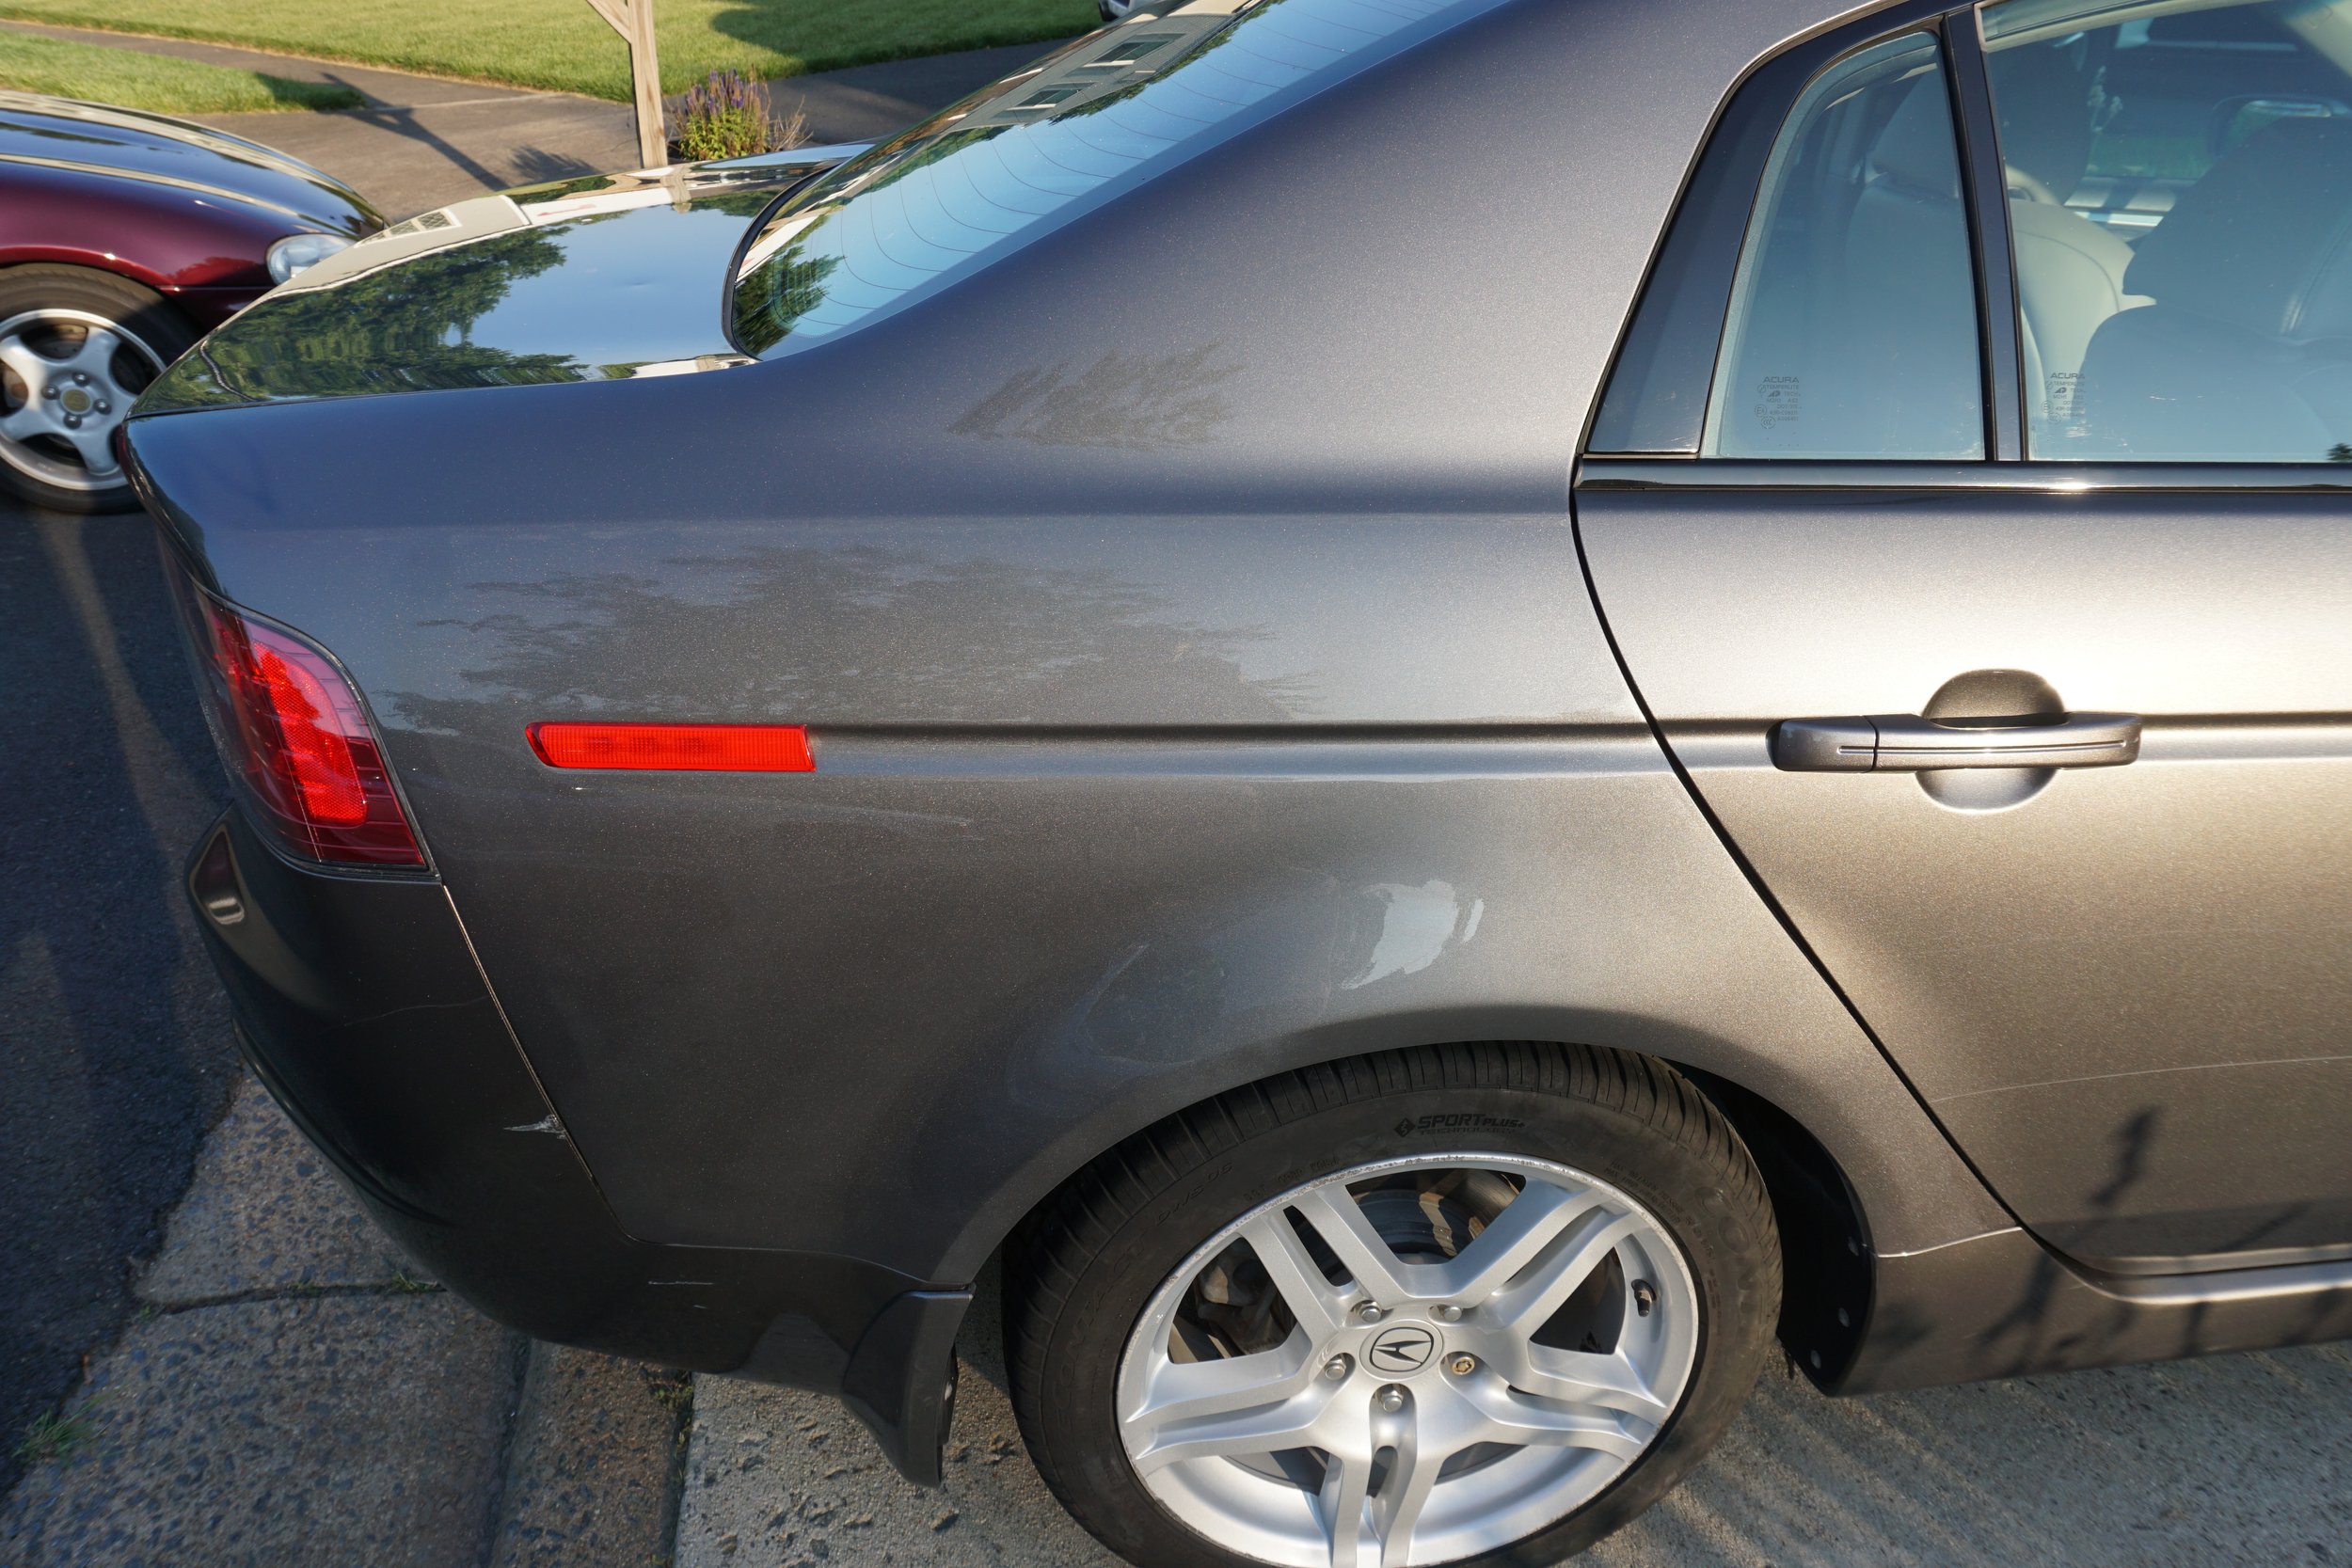
Blending into the door and bumper were out of the scope of this project; my mom just wanted it fixed enough so rust wouldn't become an issue in the future. I made a ton of mistakes, but learned from all of them. The rear quarter panel "rust repair" project I did on the M3 three years ago will need to be re-done (properly this time with cutting and welding) as there are some rust bubbles coming through my repair area. Now that I've got the hang of all my new toys/tools I can tackle the M3!
Well the 2023 rallycross season just wrapped up and I was able to pull off a season championship for the super competitive MR class, so I'm pretty pumped about that!  The car just keeps chugging along, so there haven't been any updates. Until now..........
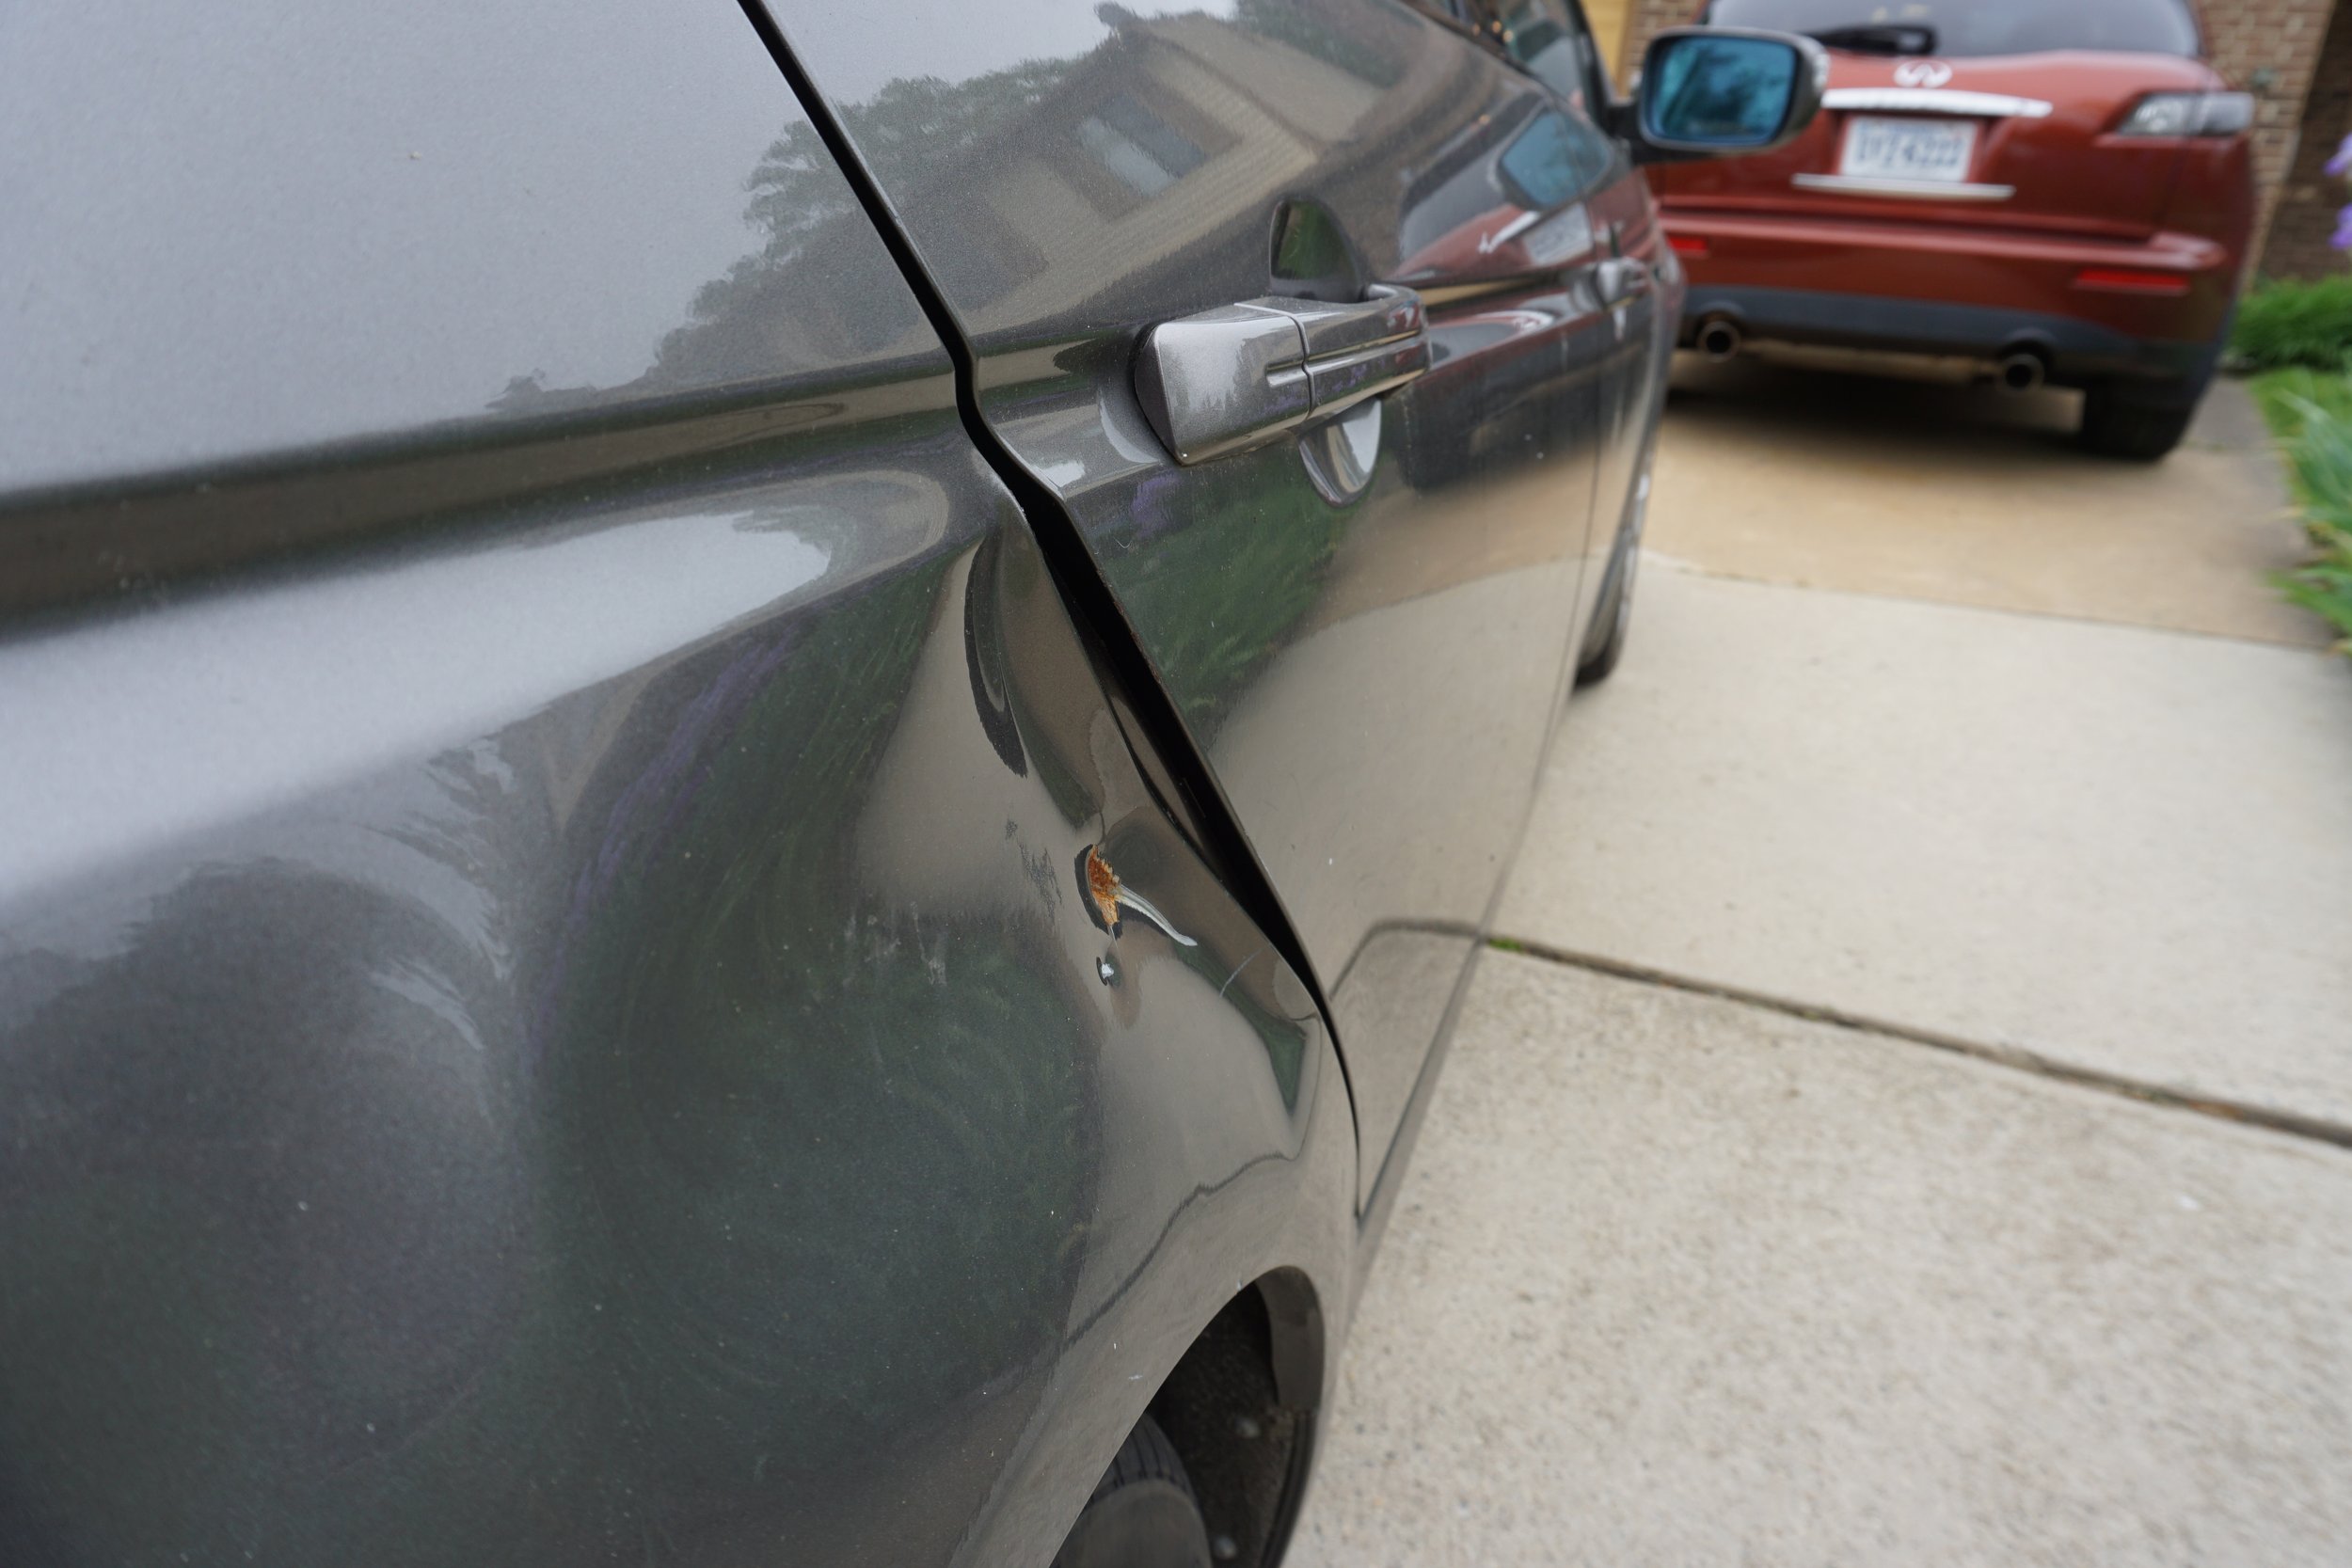
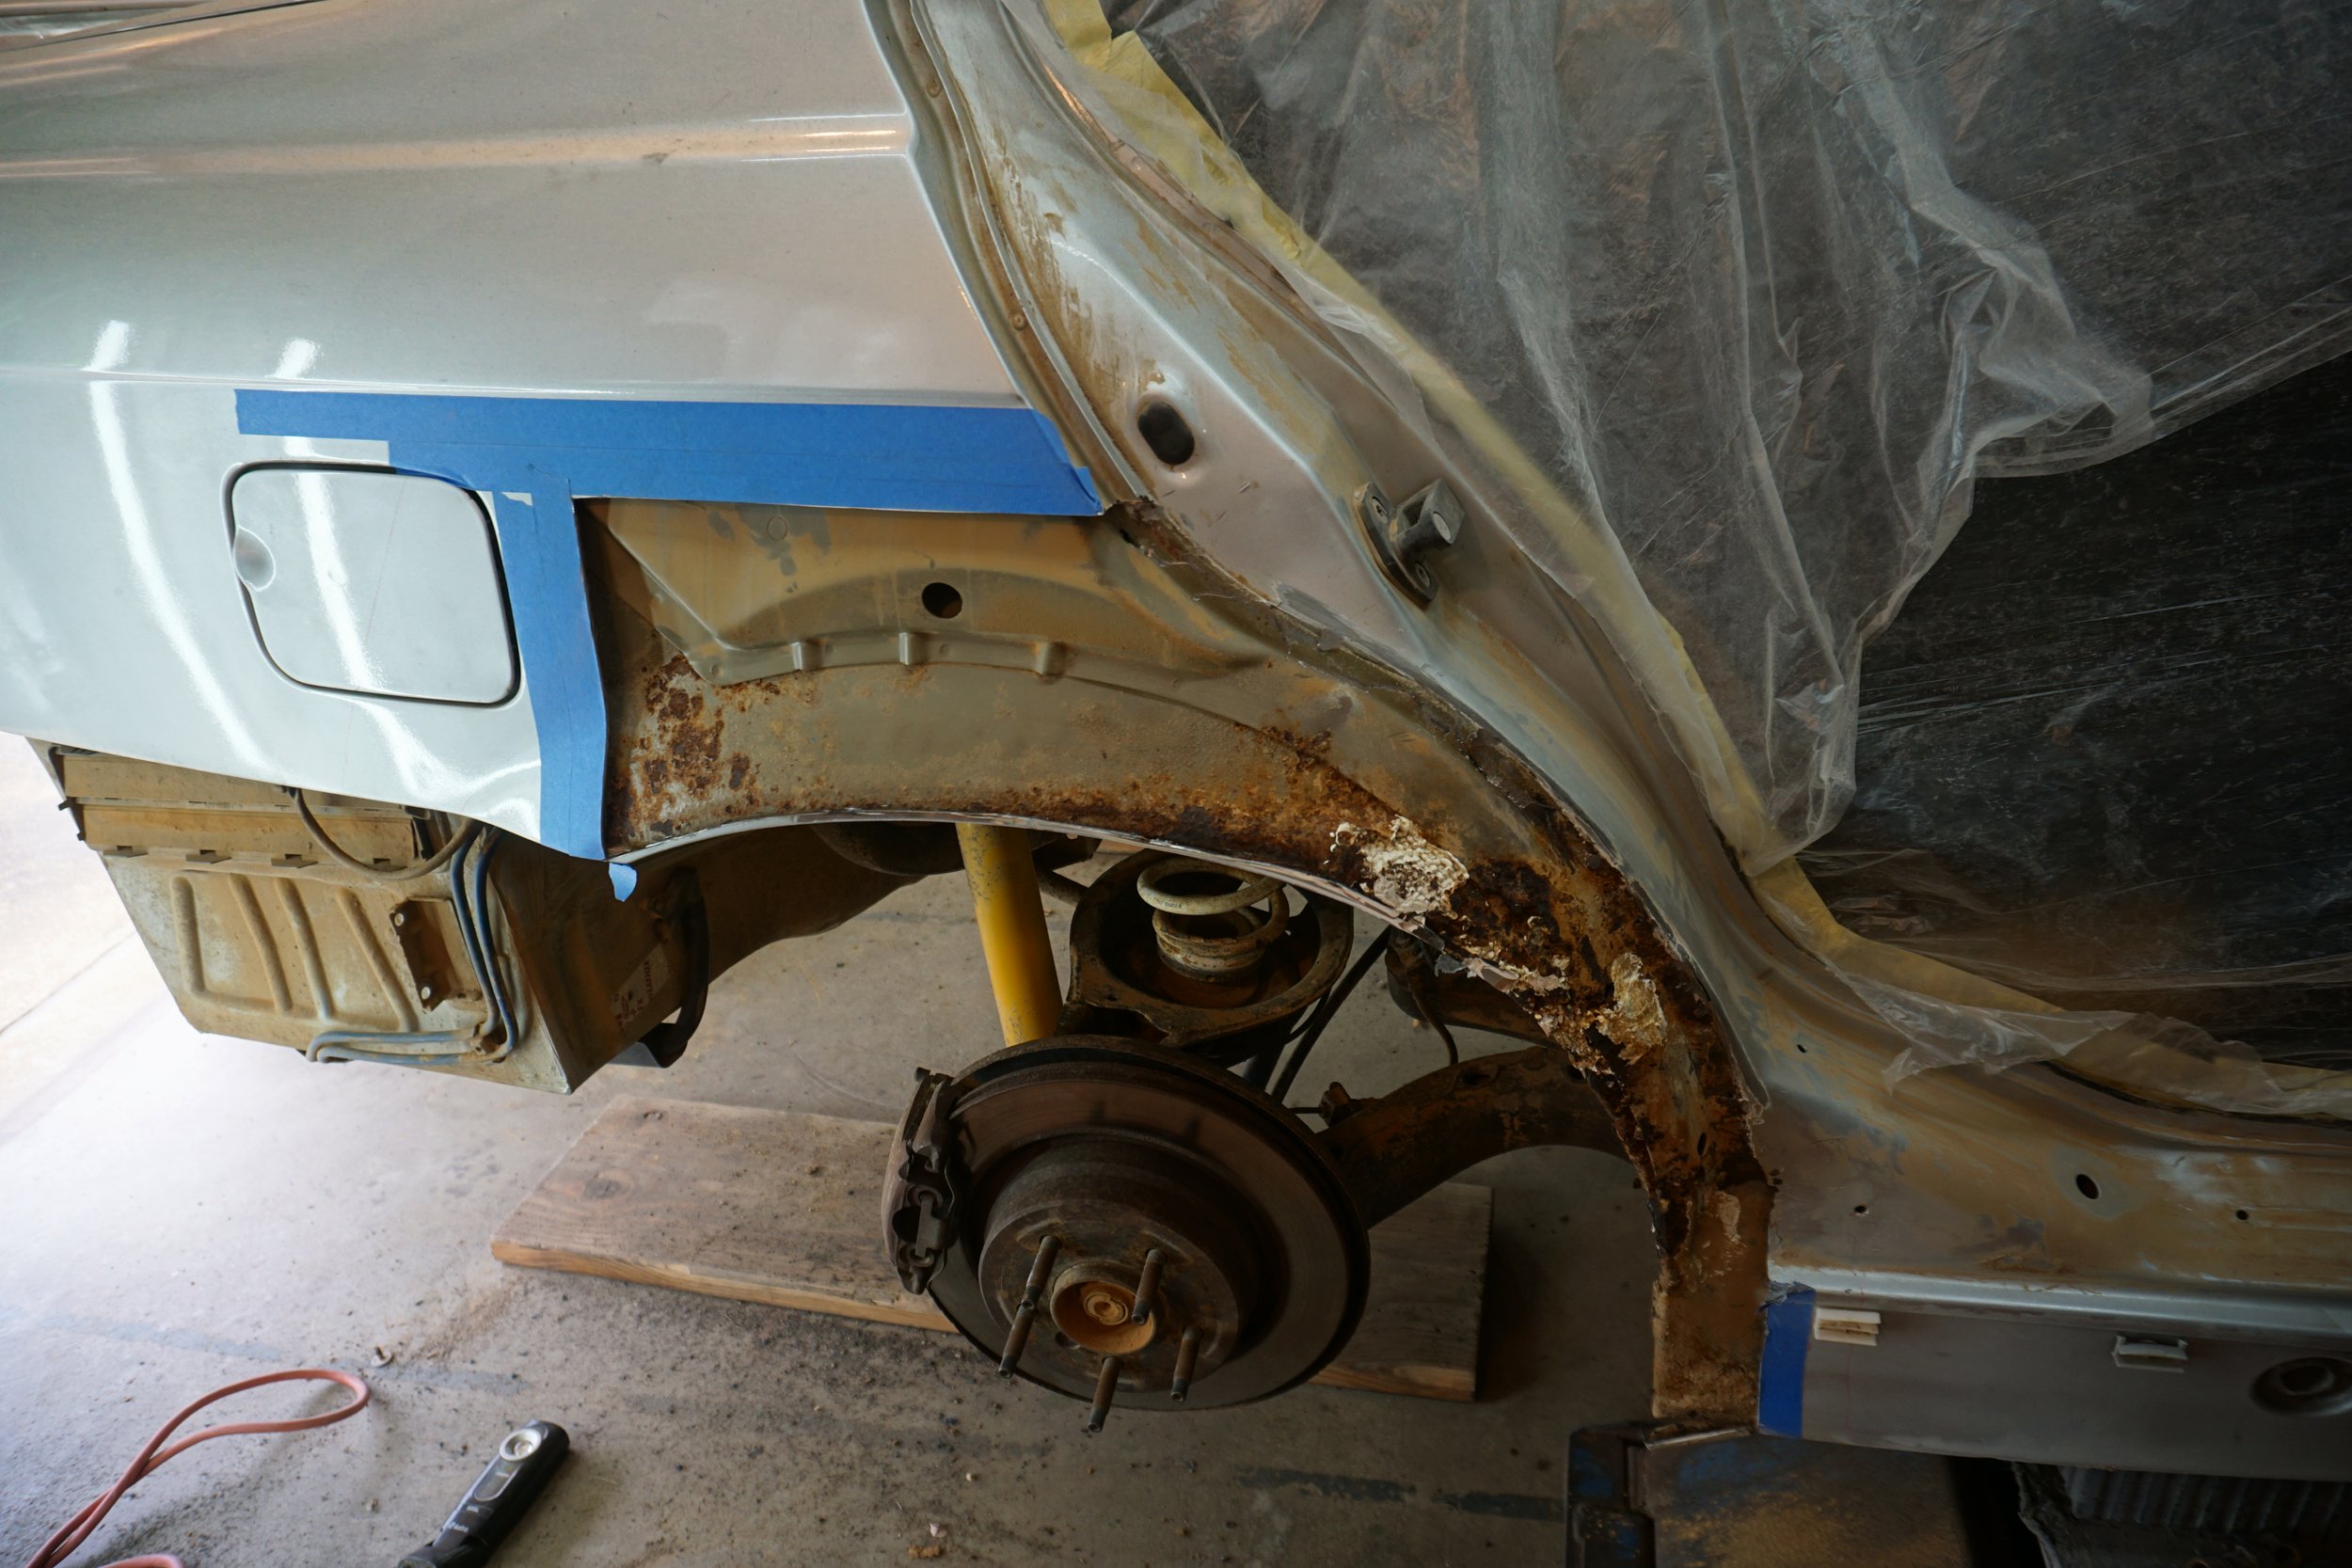
Remember a few years ago when I did a very amateur attempt at "rust repair" on the rear quarter panel of the M3? Well, that work had started to fail and rust bubbles were popping through. Here's a reminder of what it looked like back then before I did my janky repairs:


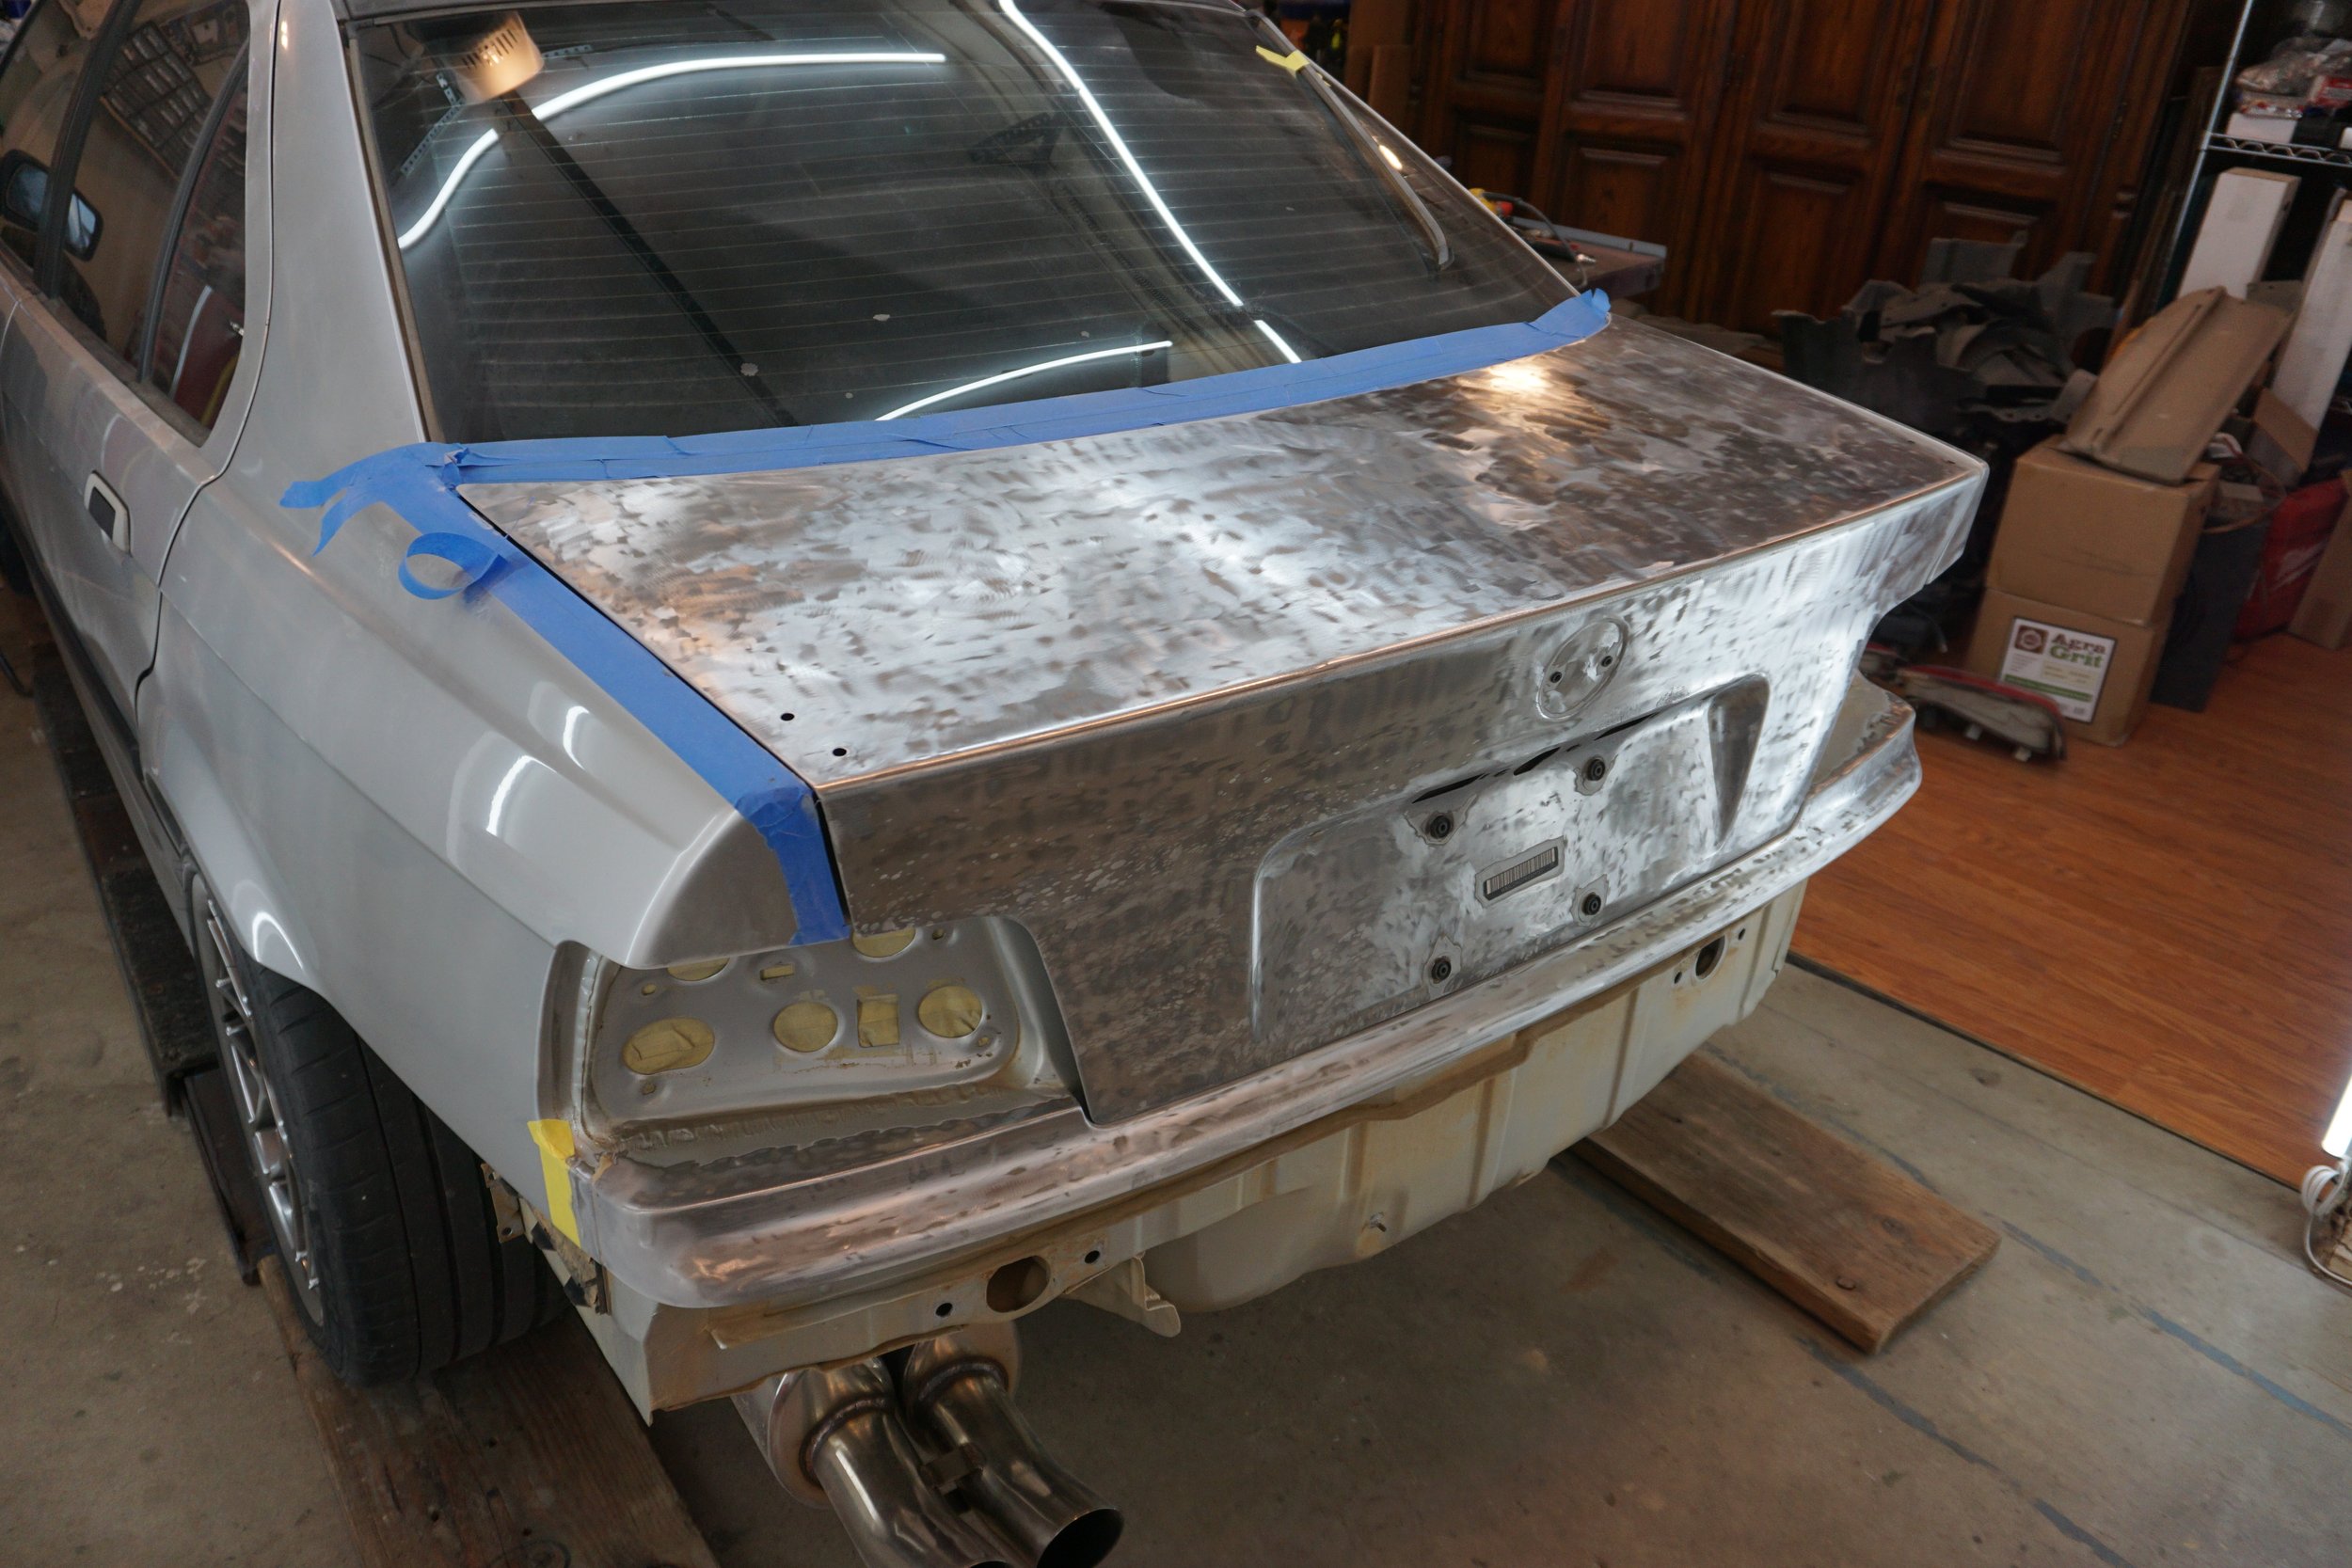
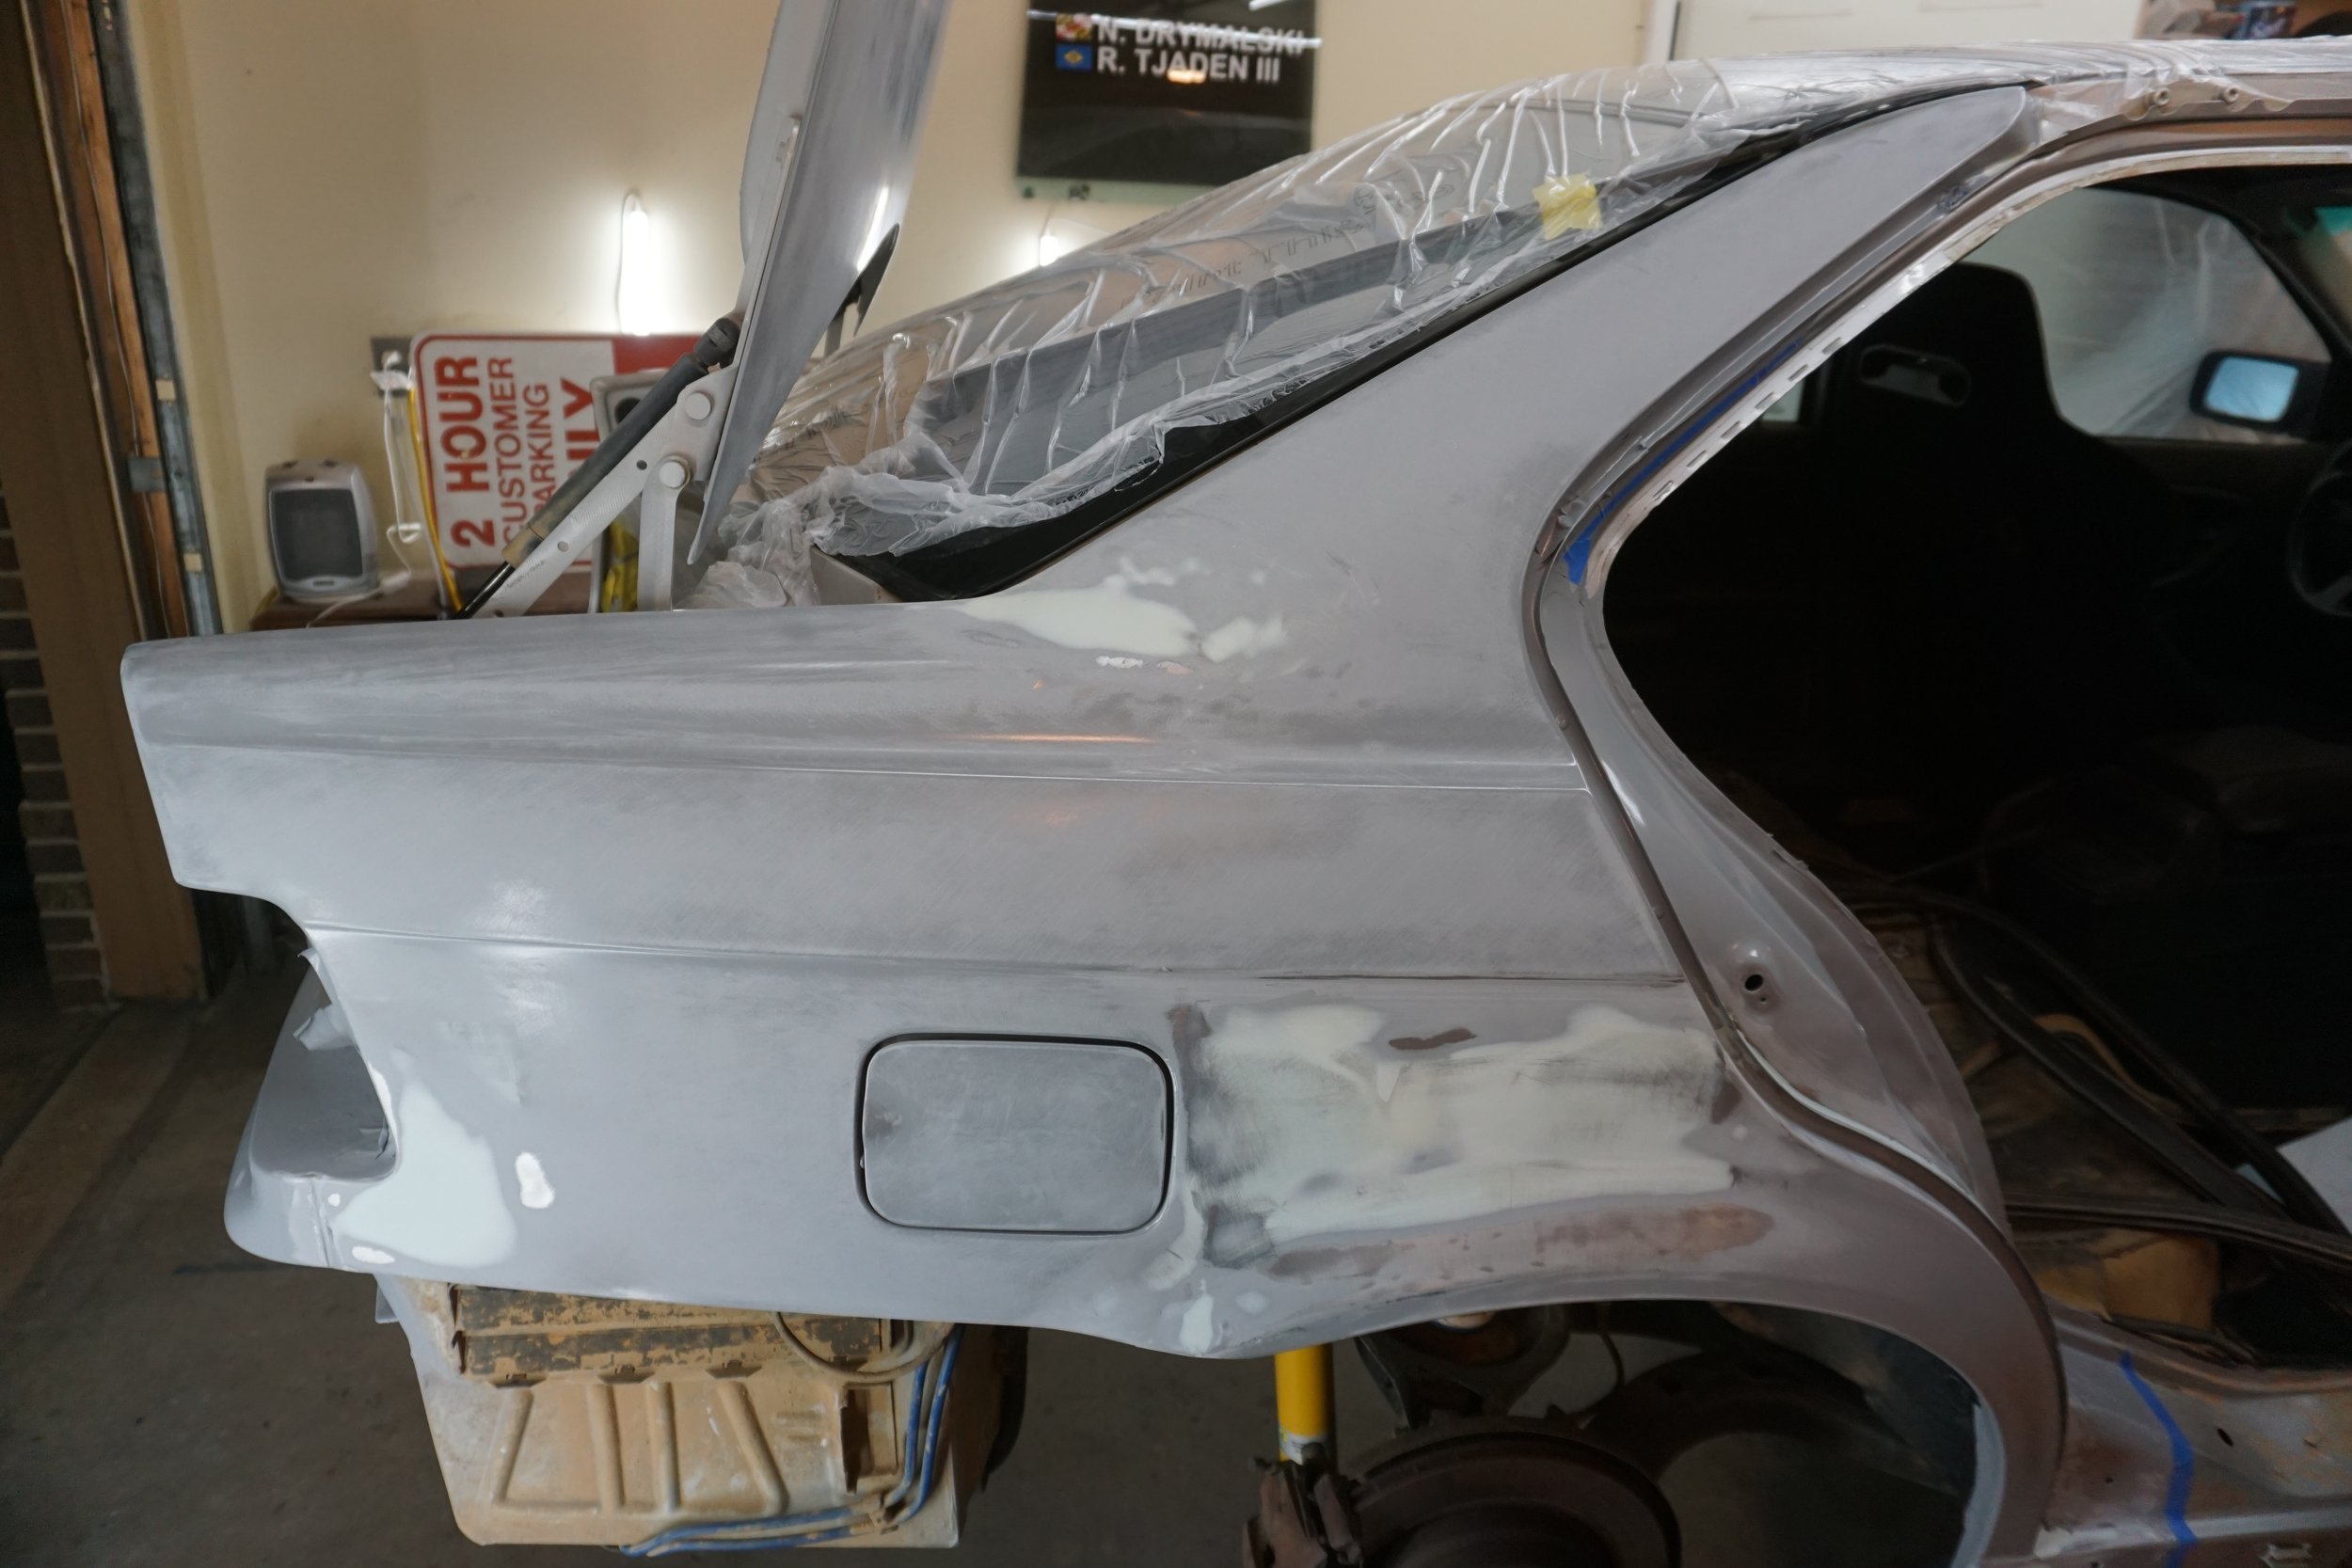
And here's what it looked like before I started the project a month or so ago:
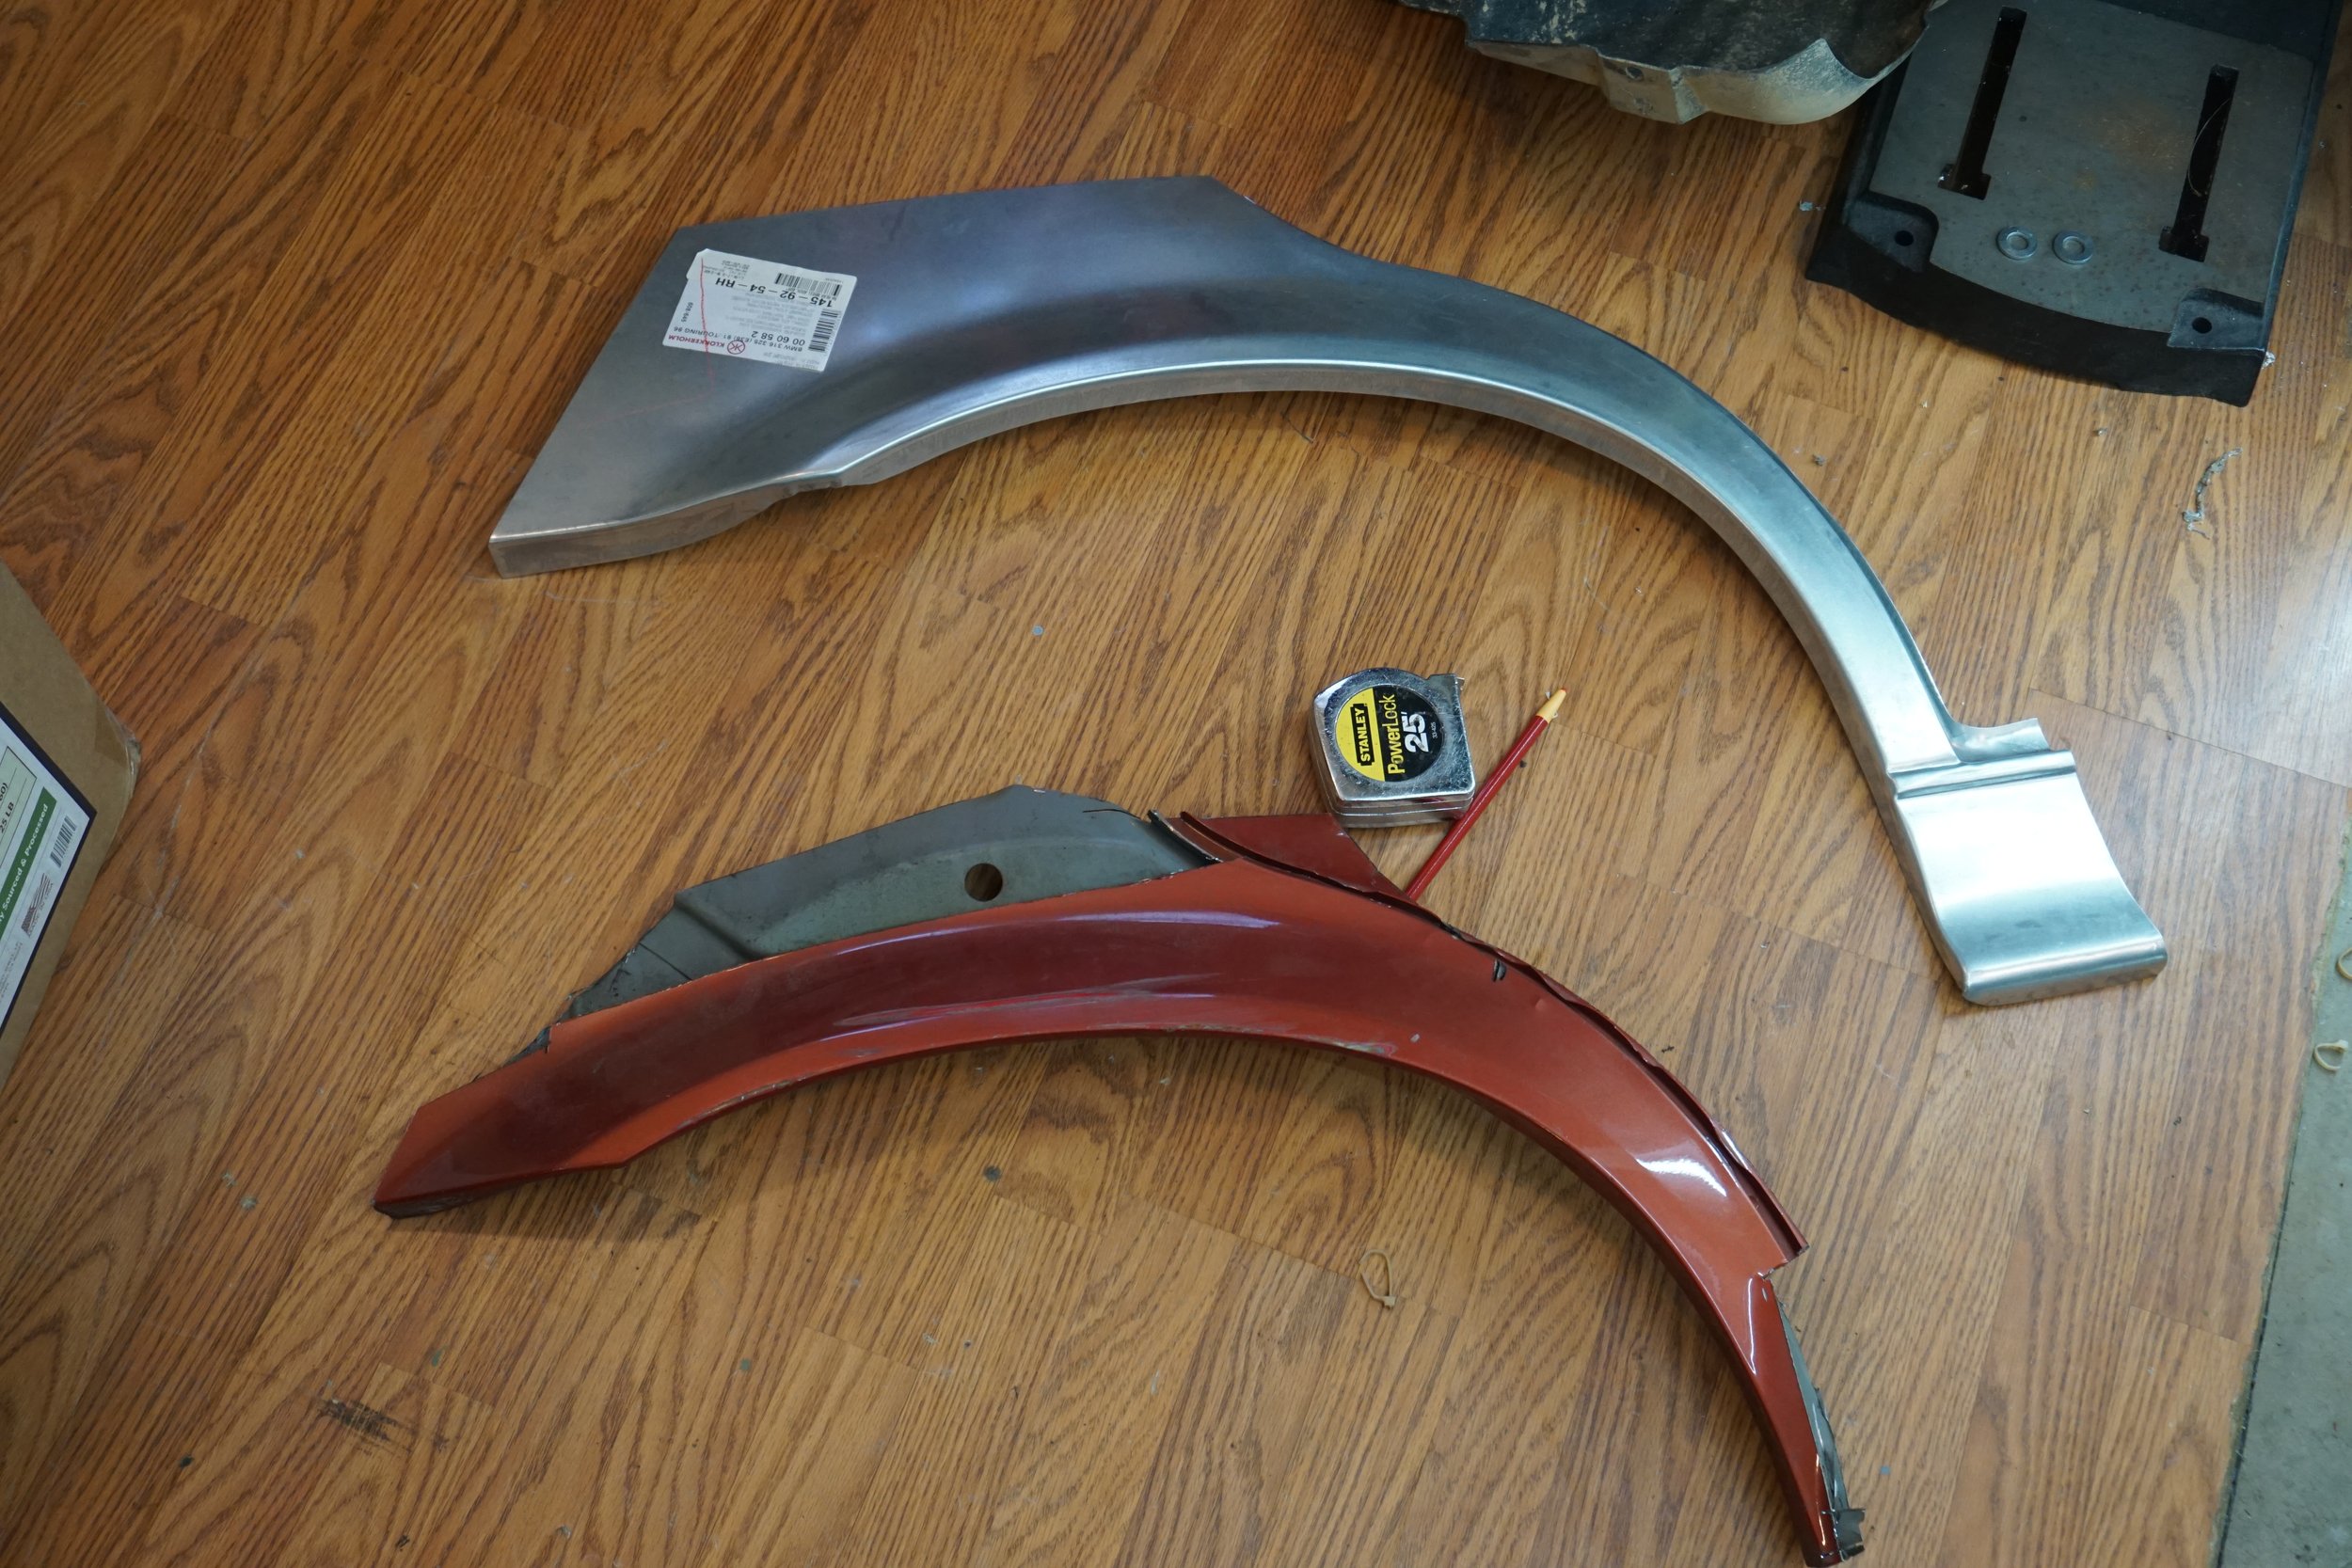
I knew that I was going to need fresh metal to do this properly, and thankfully since then I taught myself how to "weld" and "paint". I bought a replacement section for the outer part of the fender, but I needed something for the inner section too, so I found a car being parted out locally and went to chop out what I could.
There were some other rusty areas that I wanted to repair at the same time:
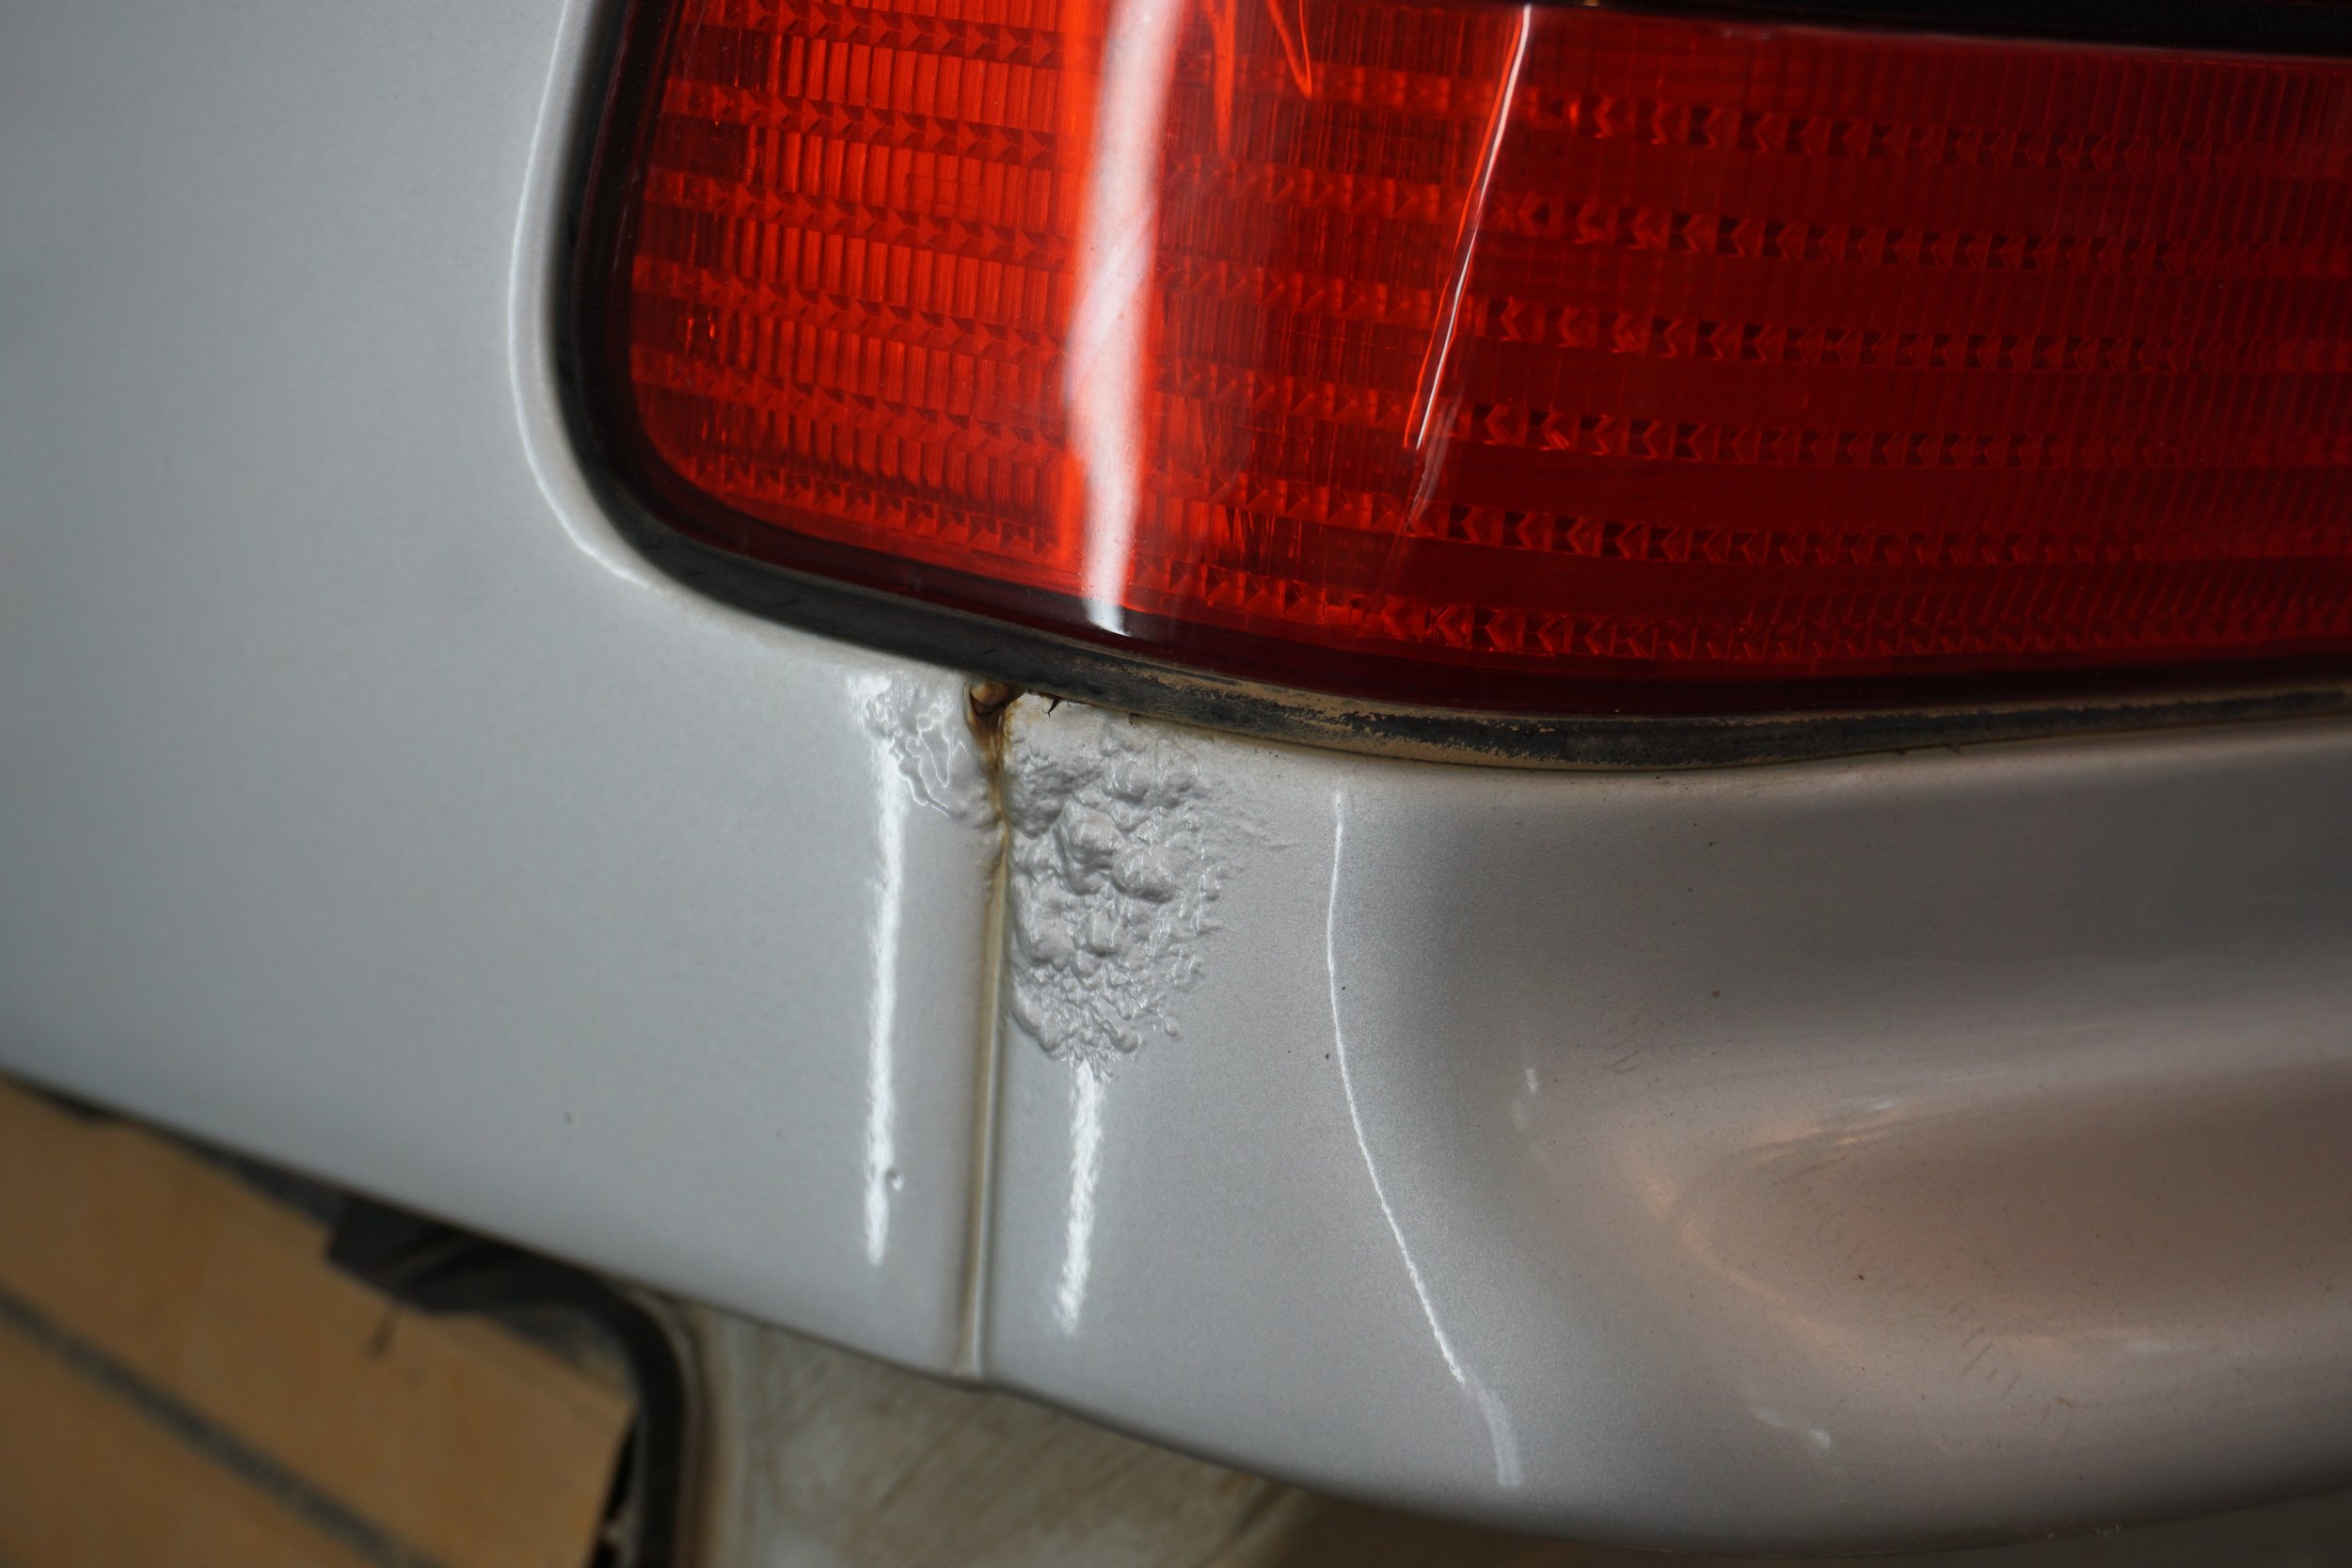
Under the DS tail light:
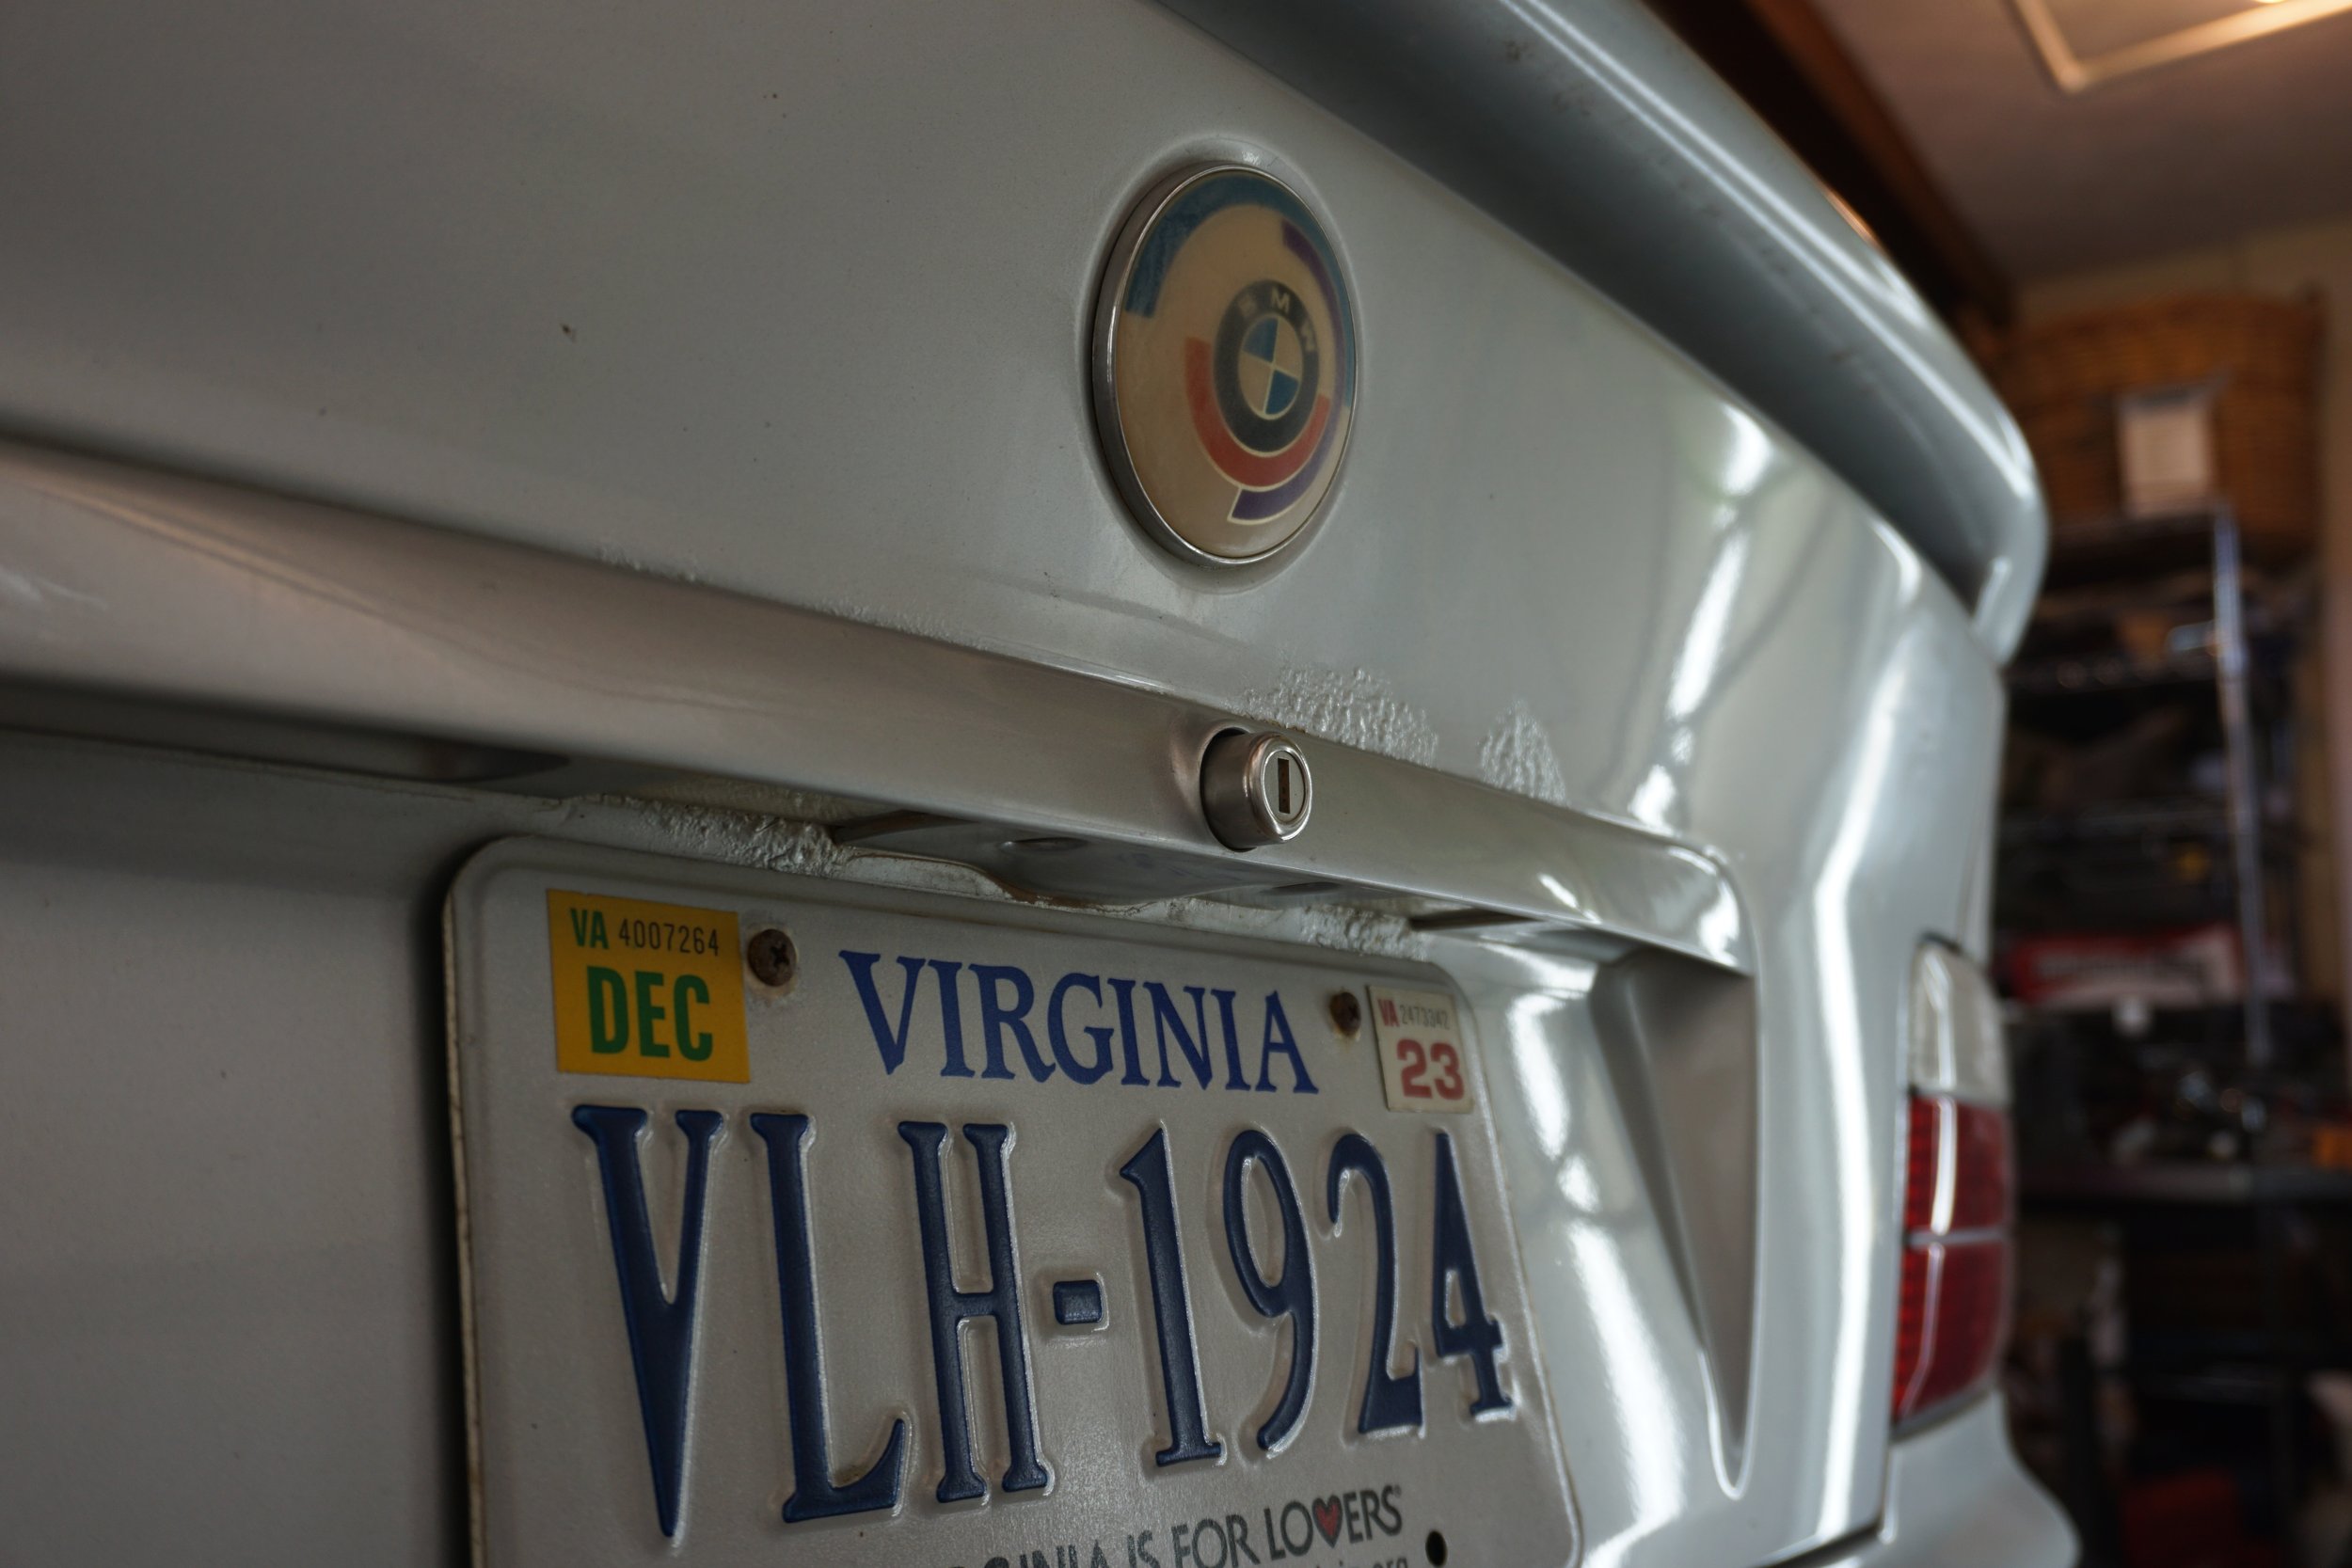
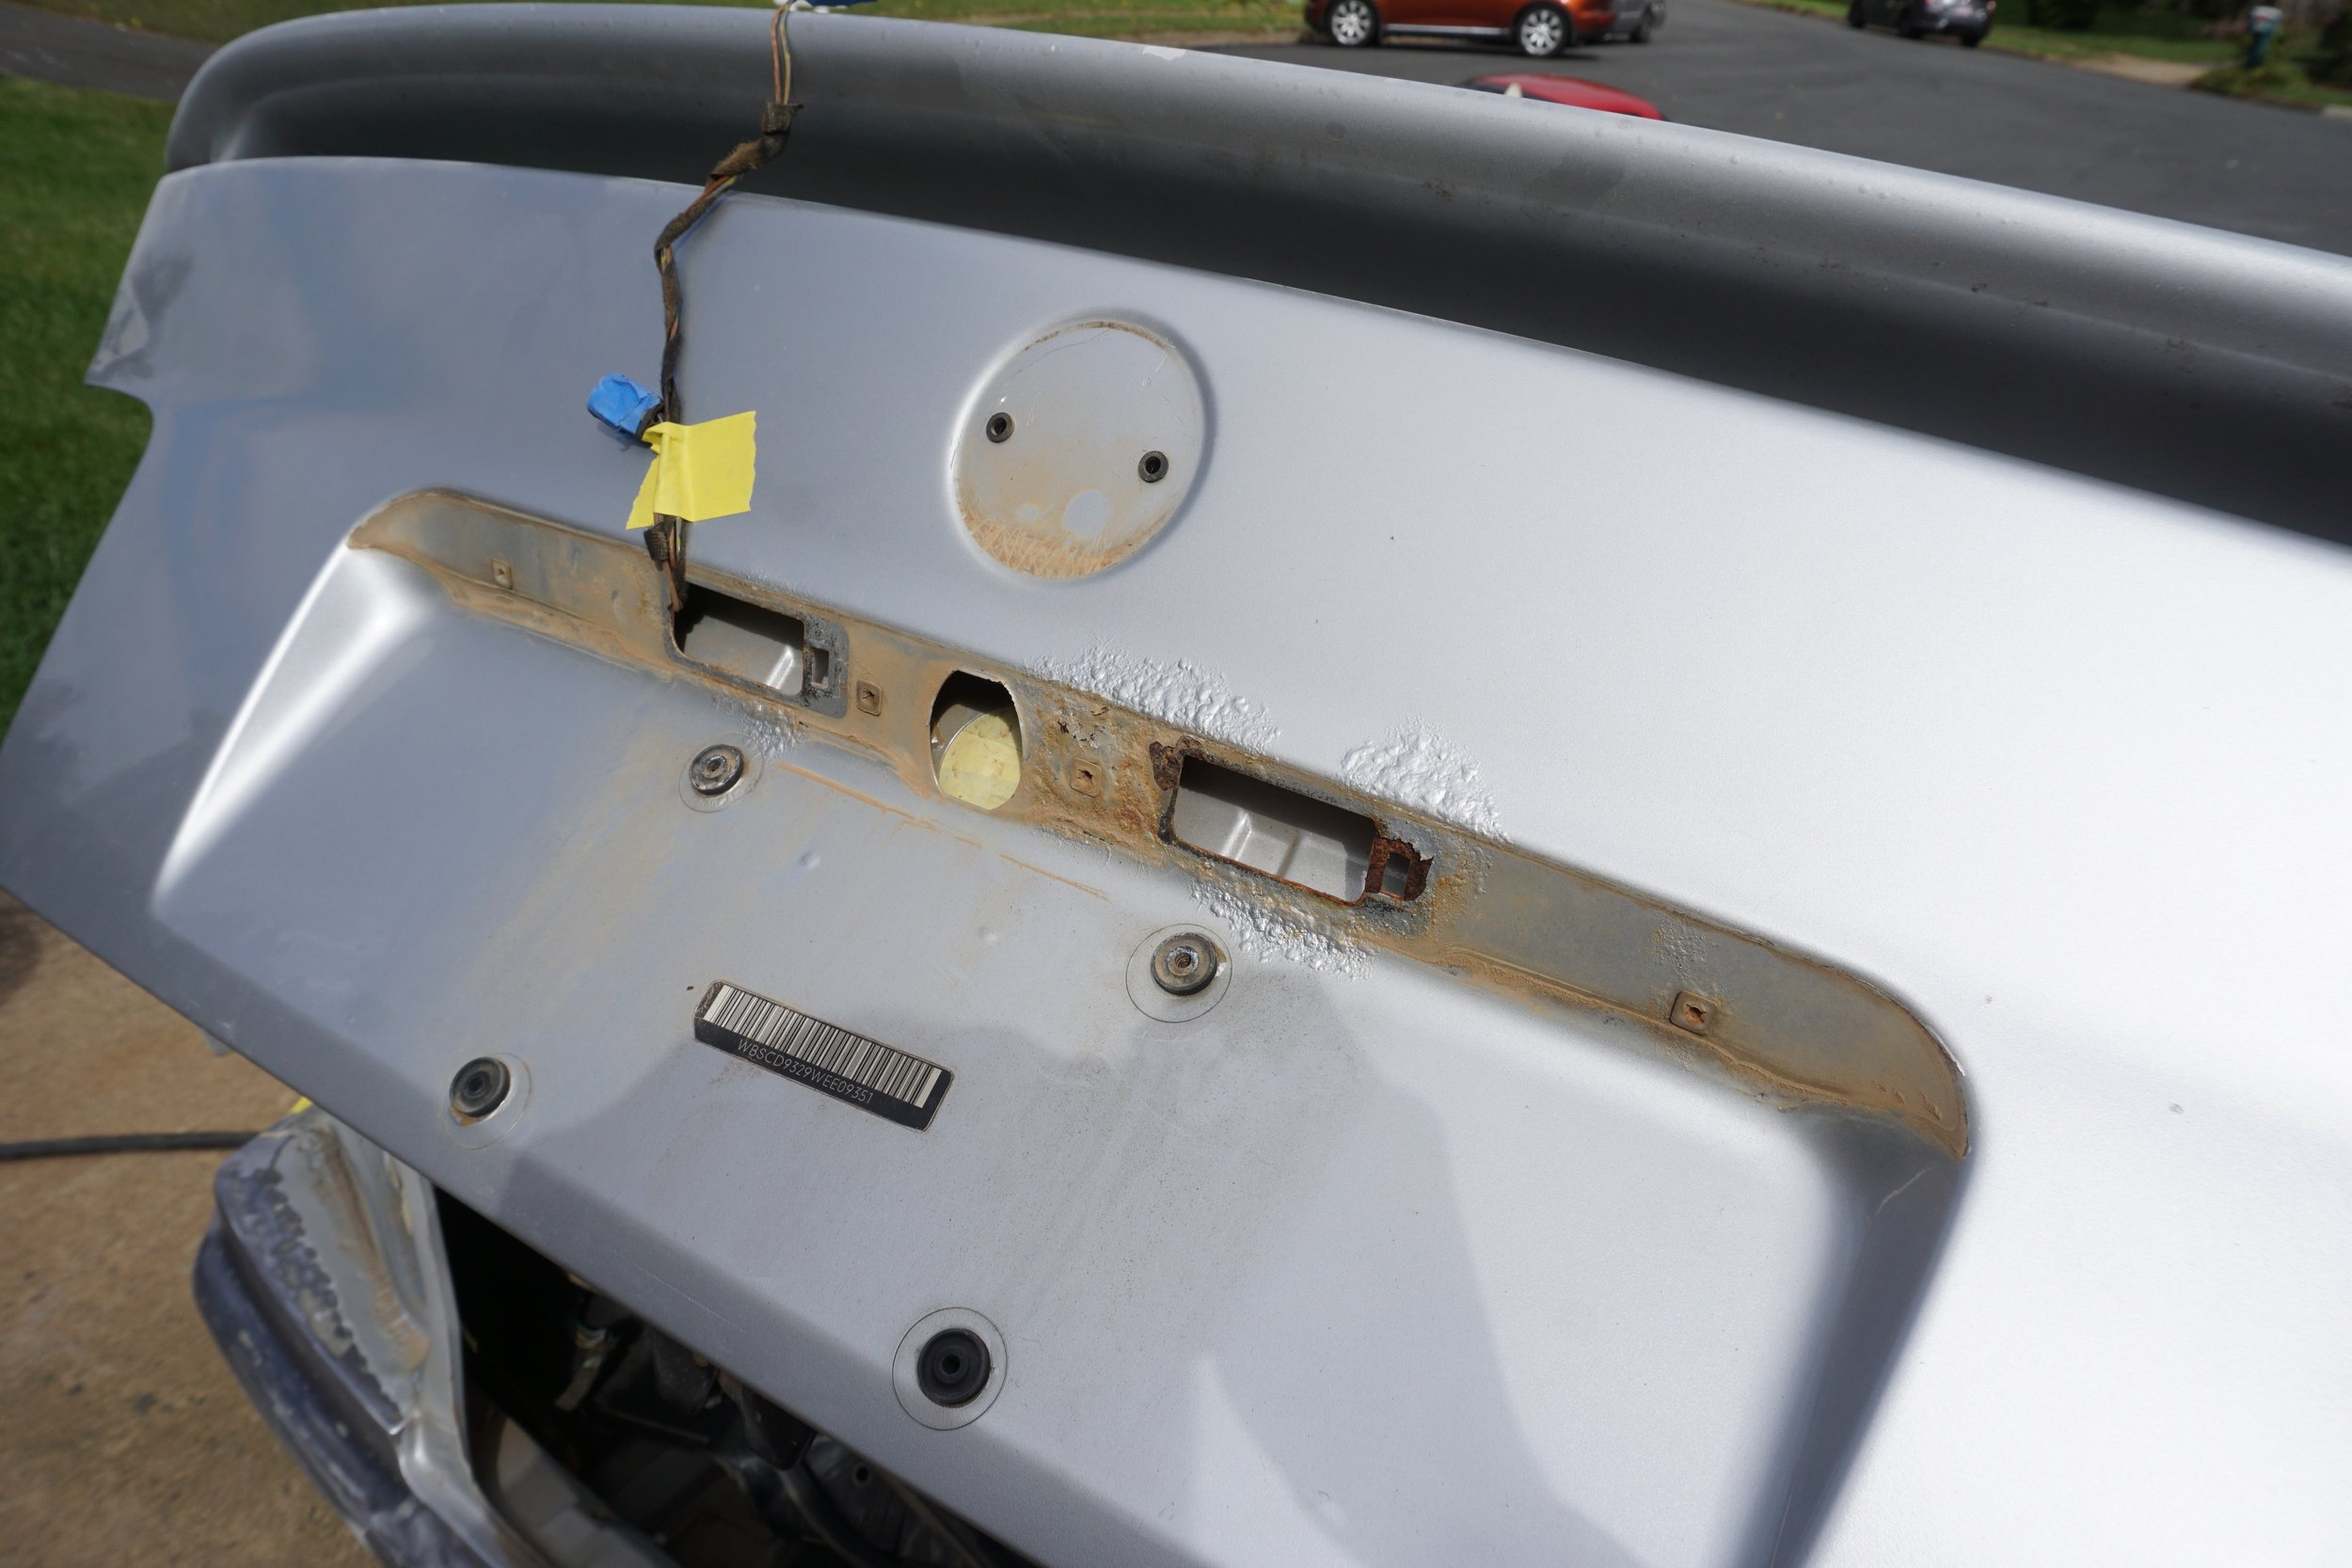
And around the trim on the trunk:
Thankfully I now also have a big media blasting tank, so I can get rid of rust correctly.
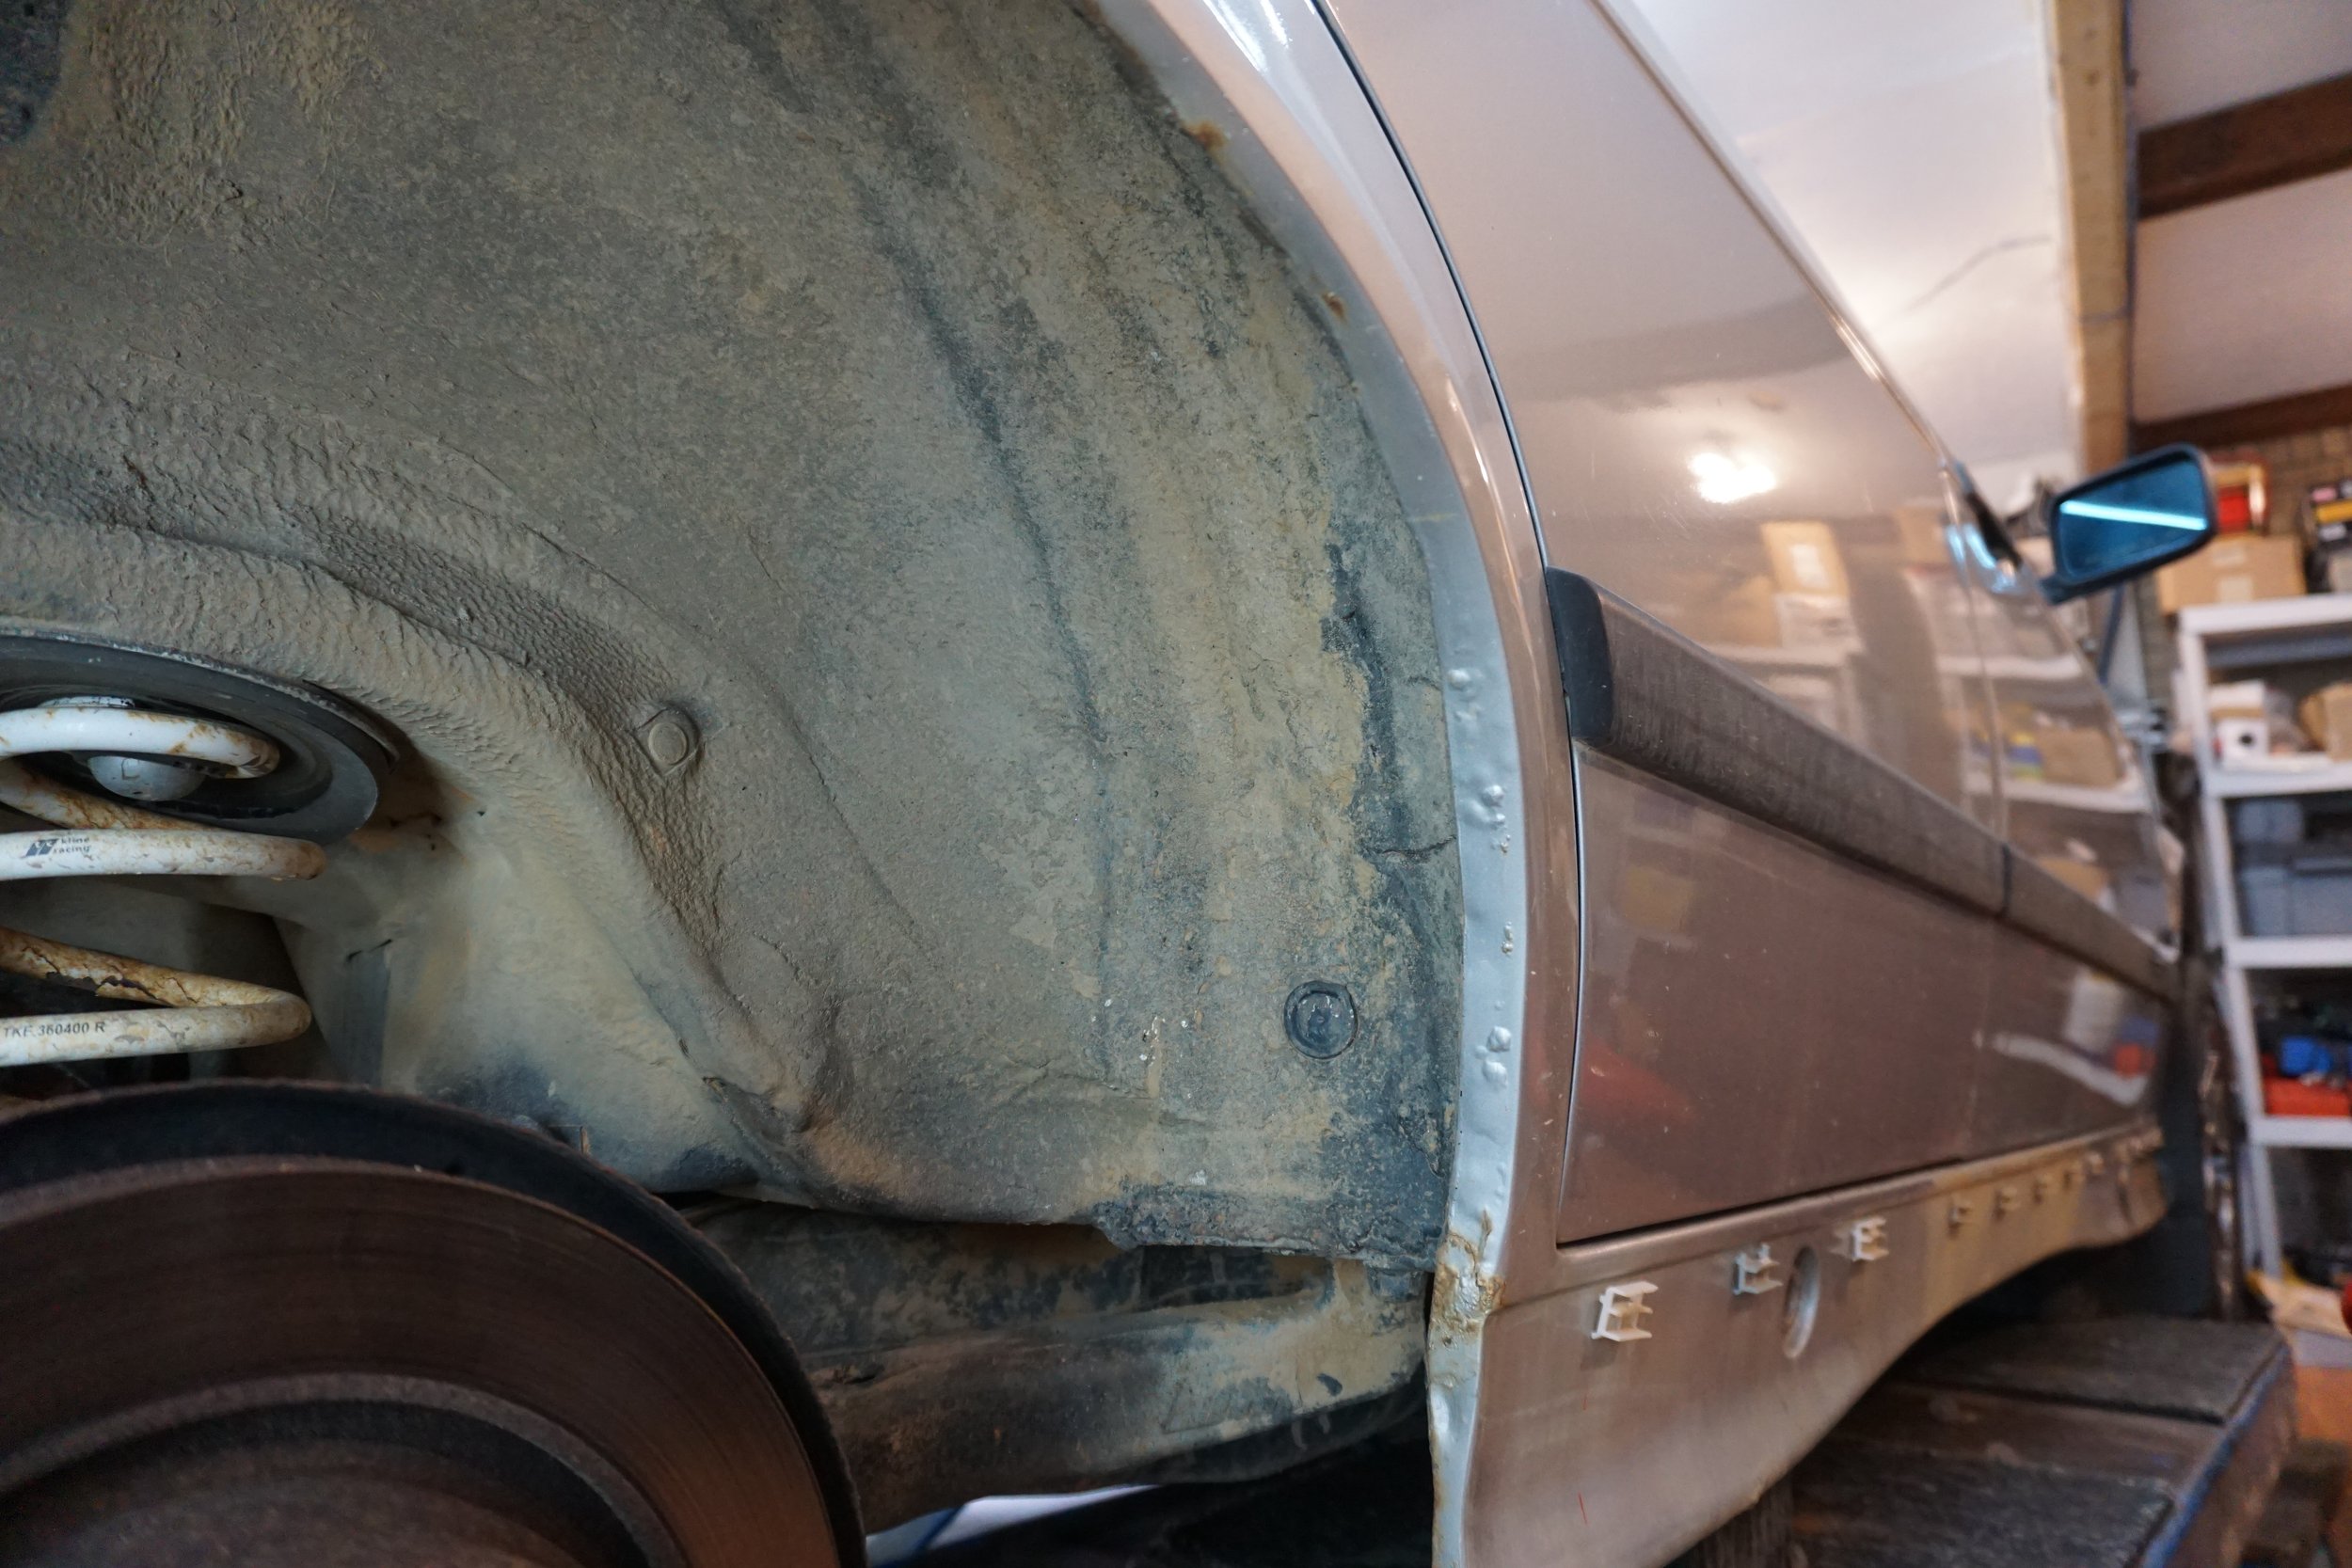
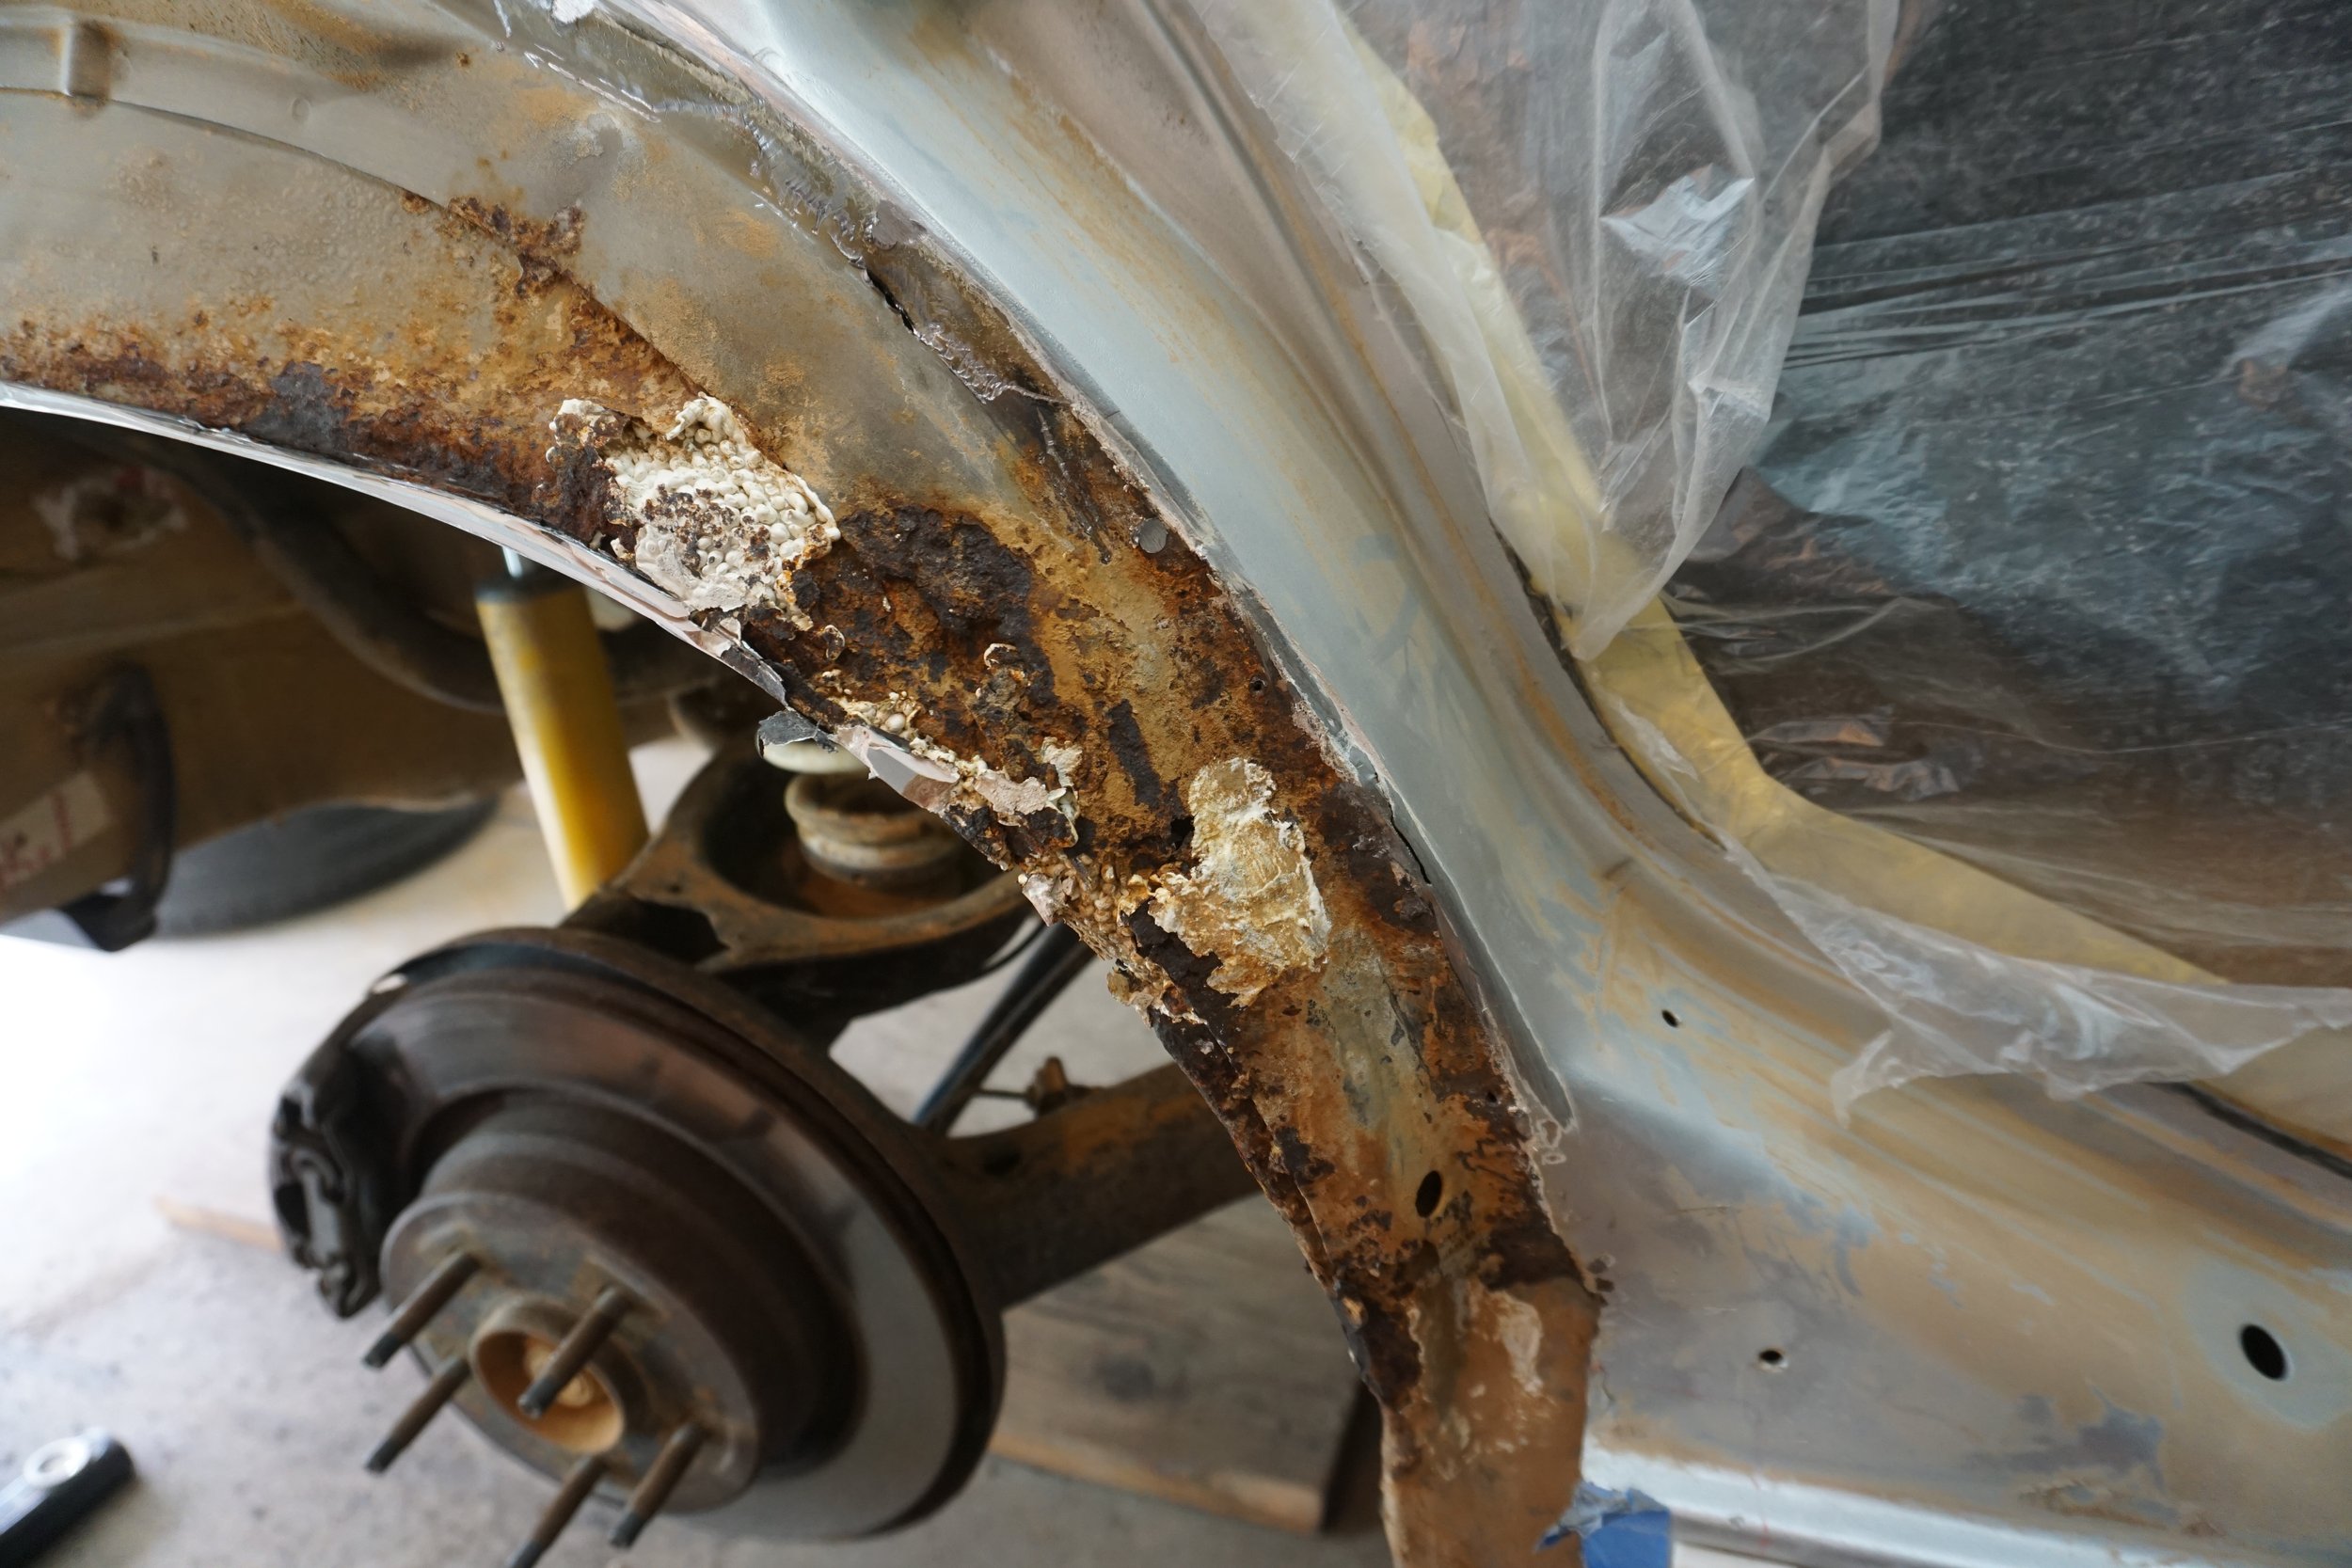
I started by taking it down to bare metal to see how far out the previous damage extended. I think I counted something like 9 layers of primer/paint on this panel! The original paint, the hack repair done before I bought the car from when it was t-boned, and then my first hack job.
Lots of filler down here too
Oooh boy
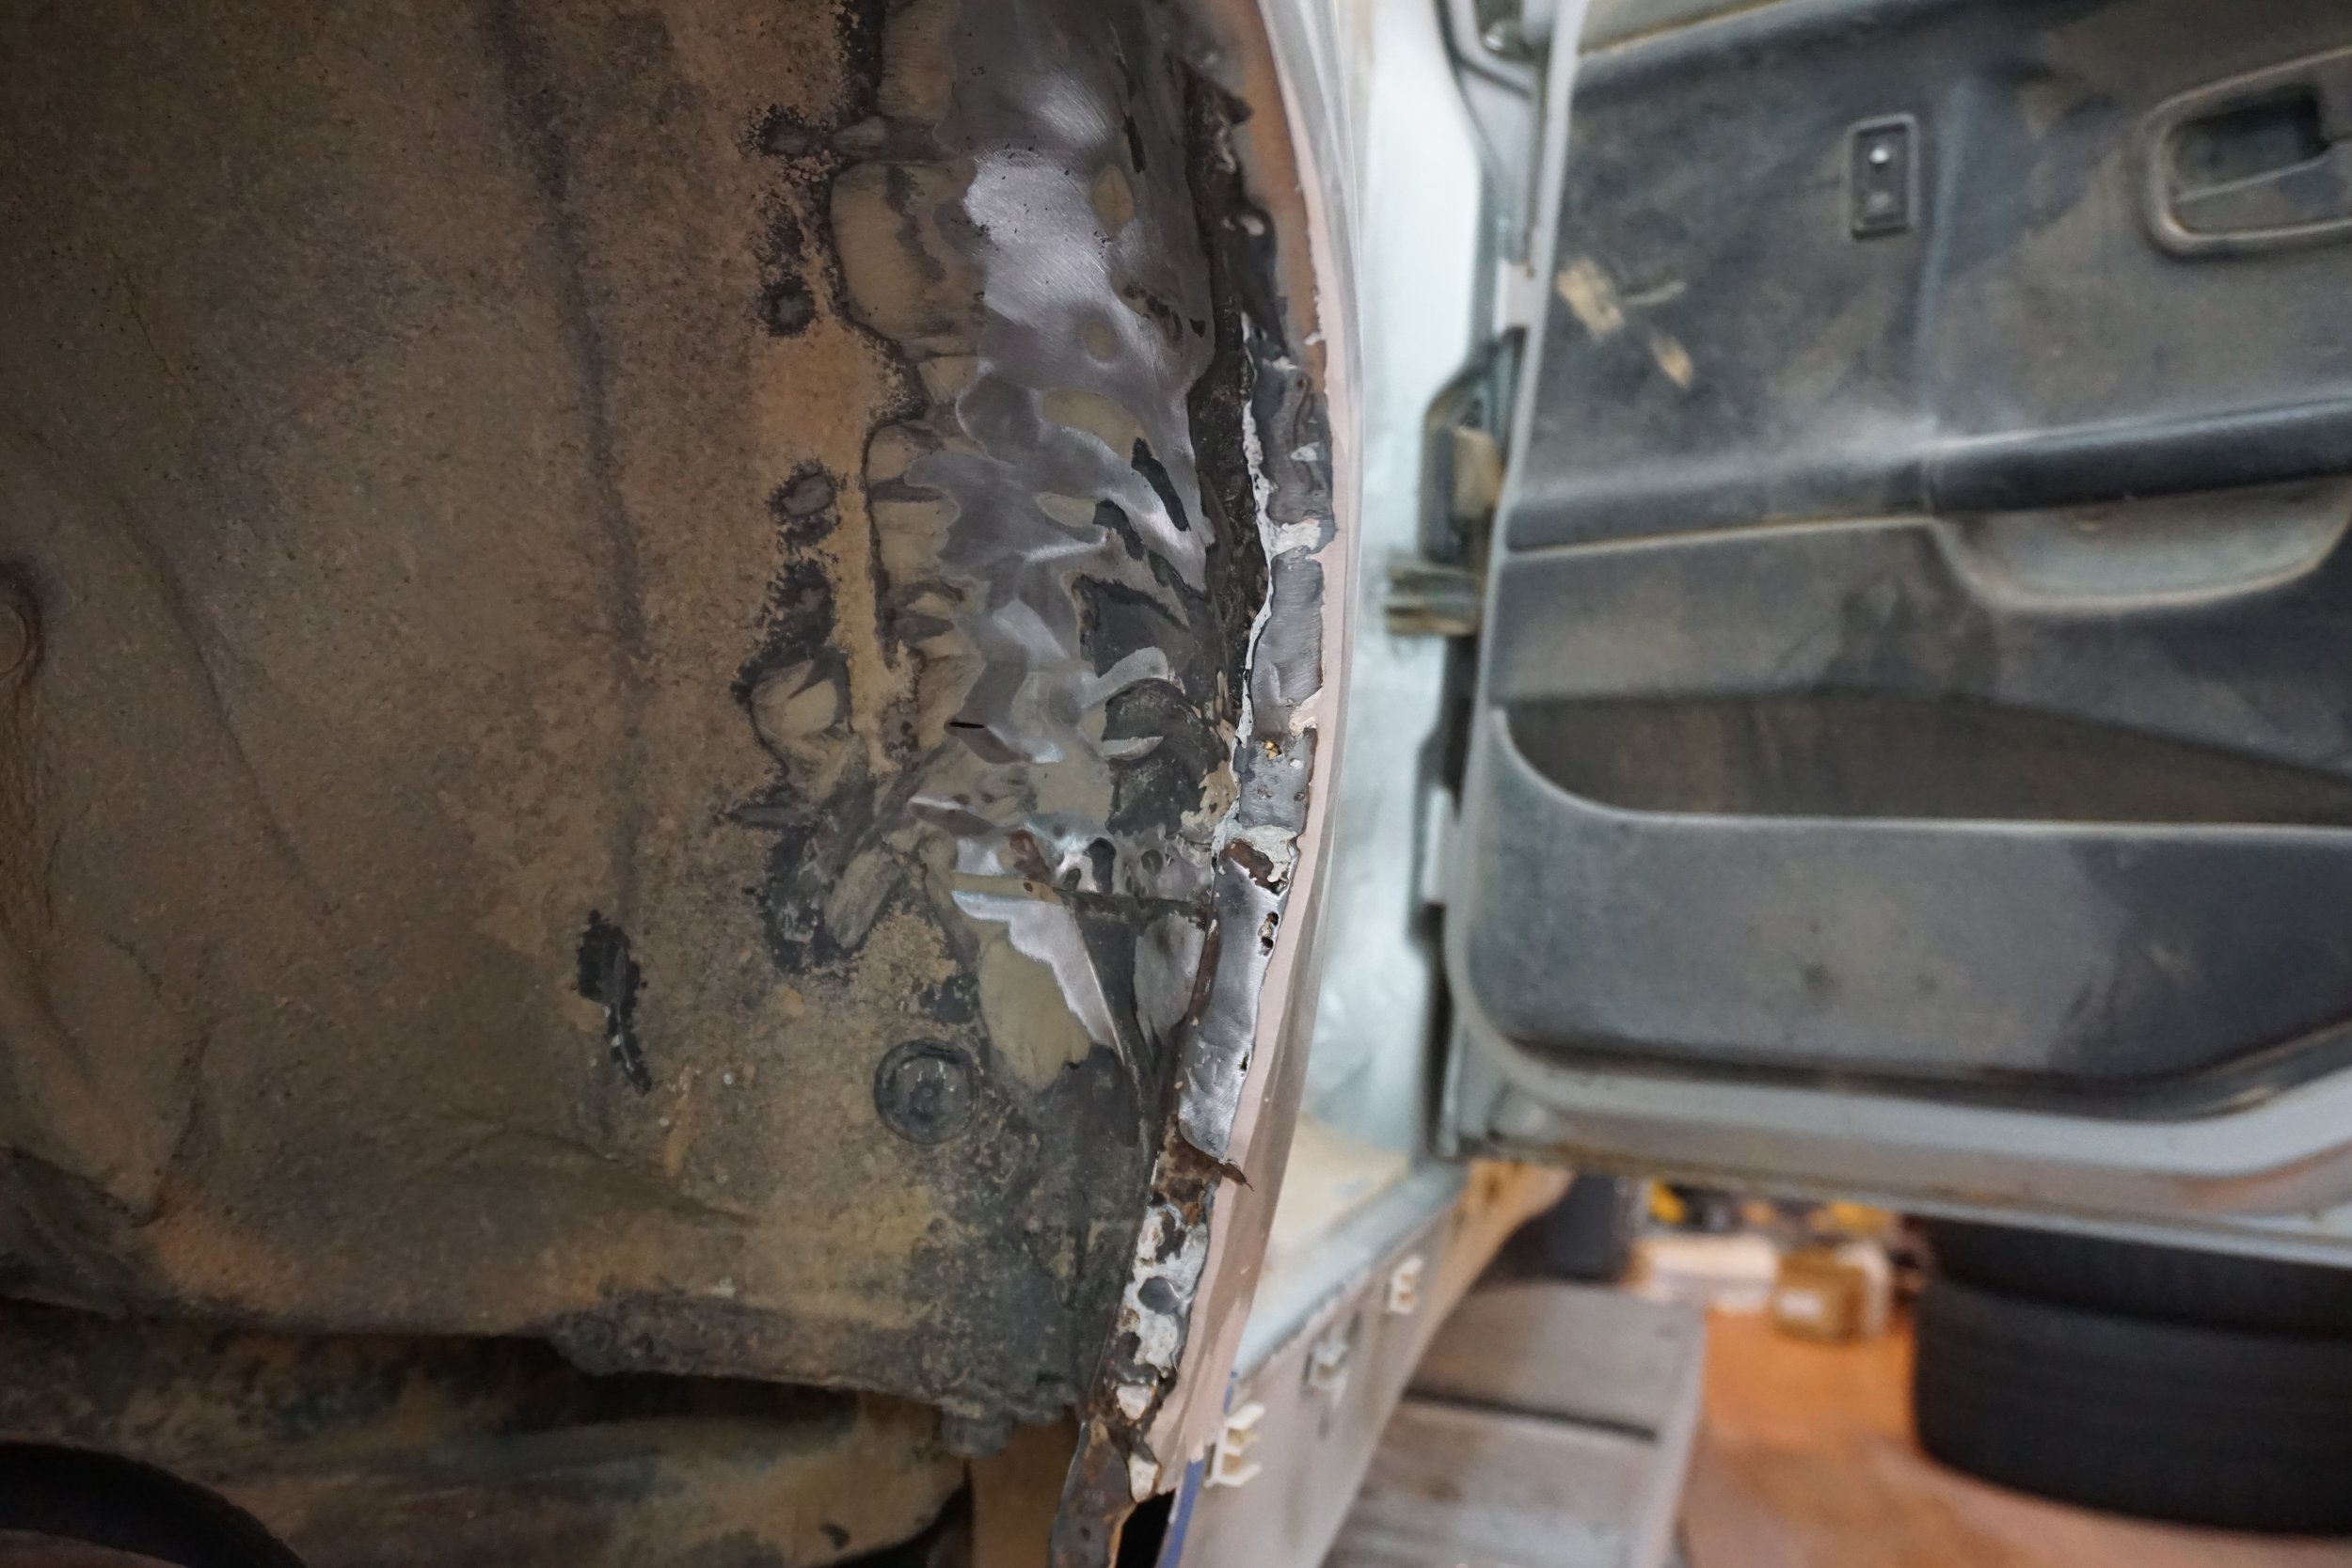
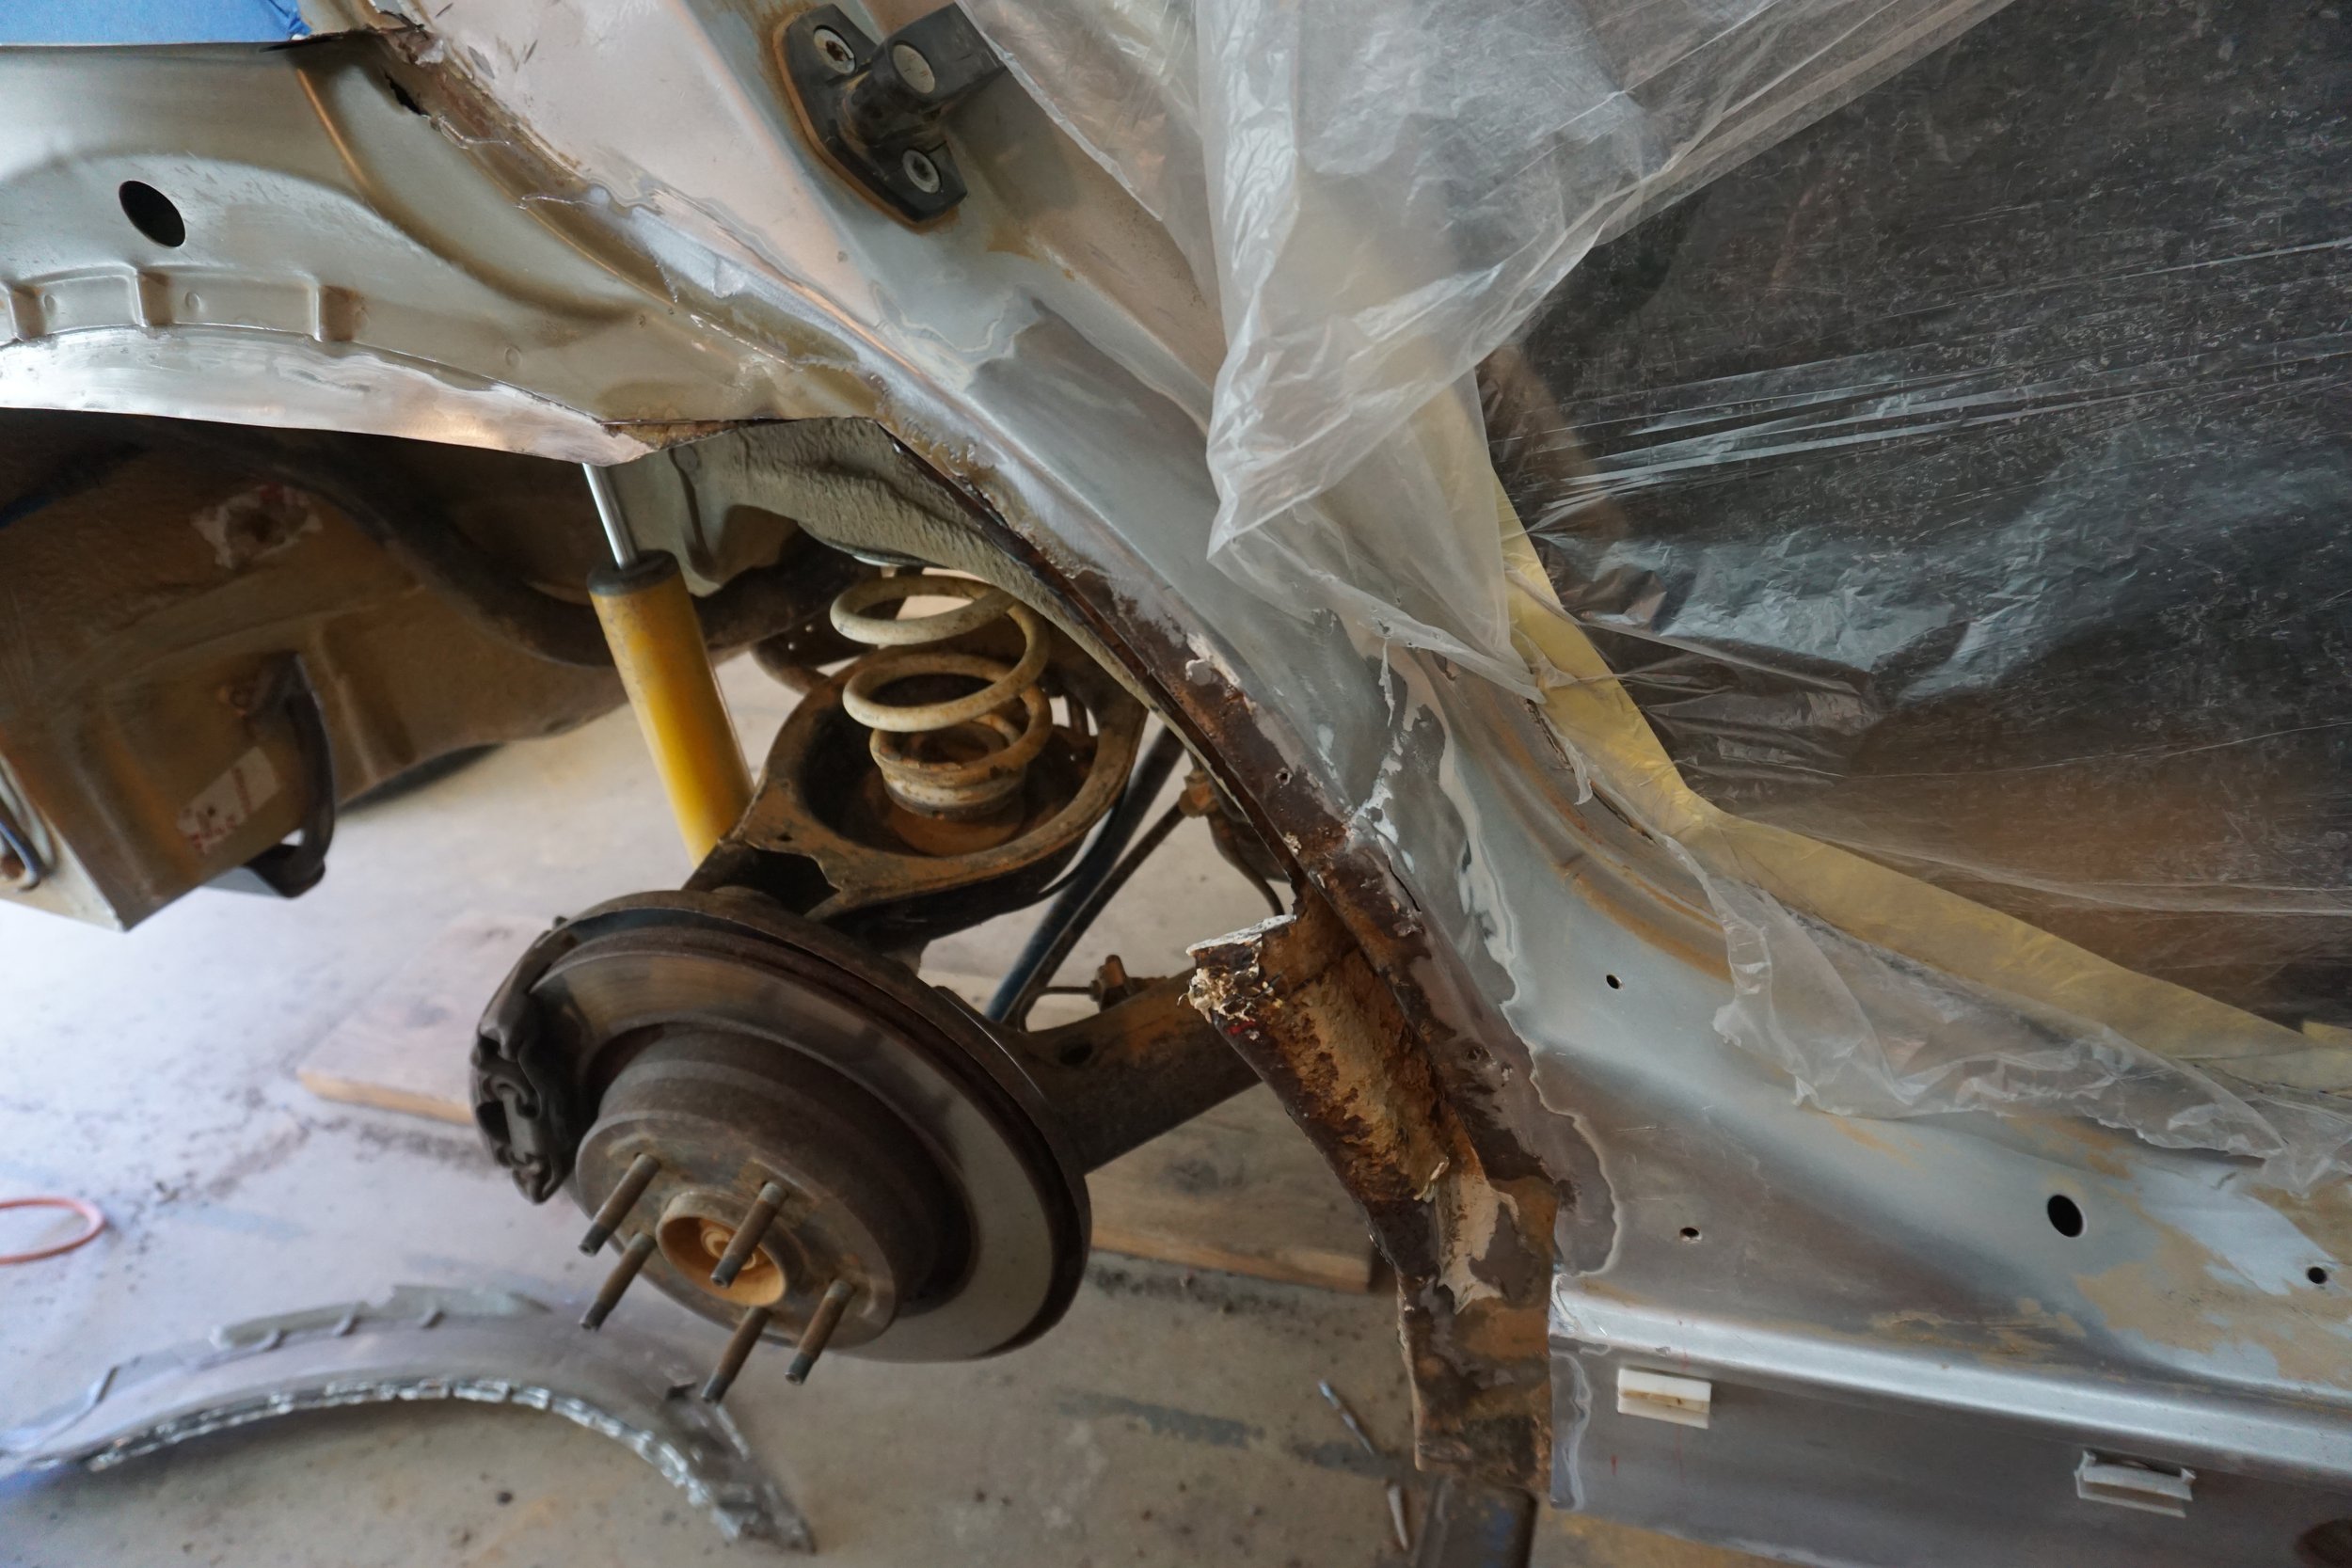
The inside of the wheel well was all crumpled up from the accident. Welding this was going to be a real challenge.
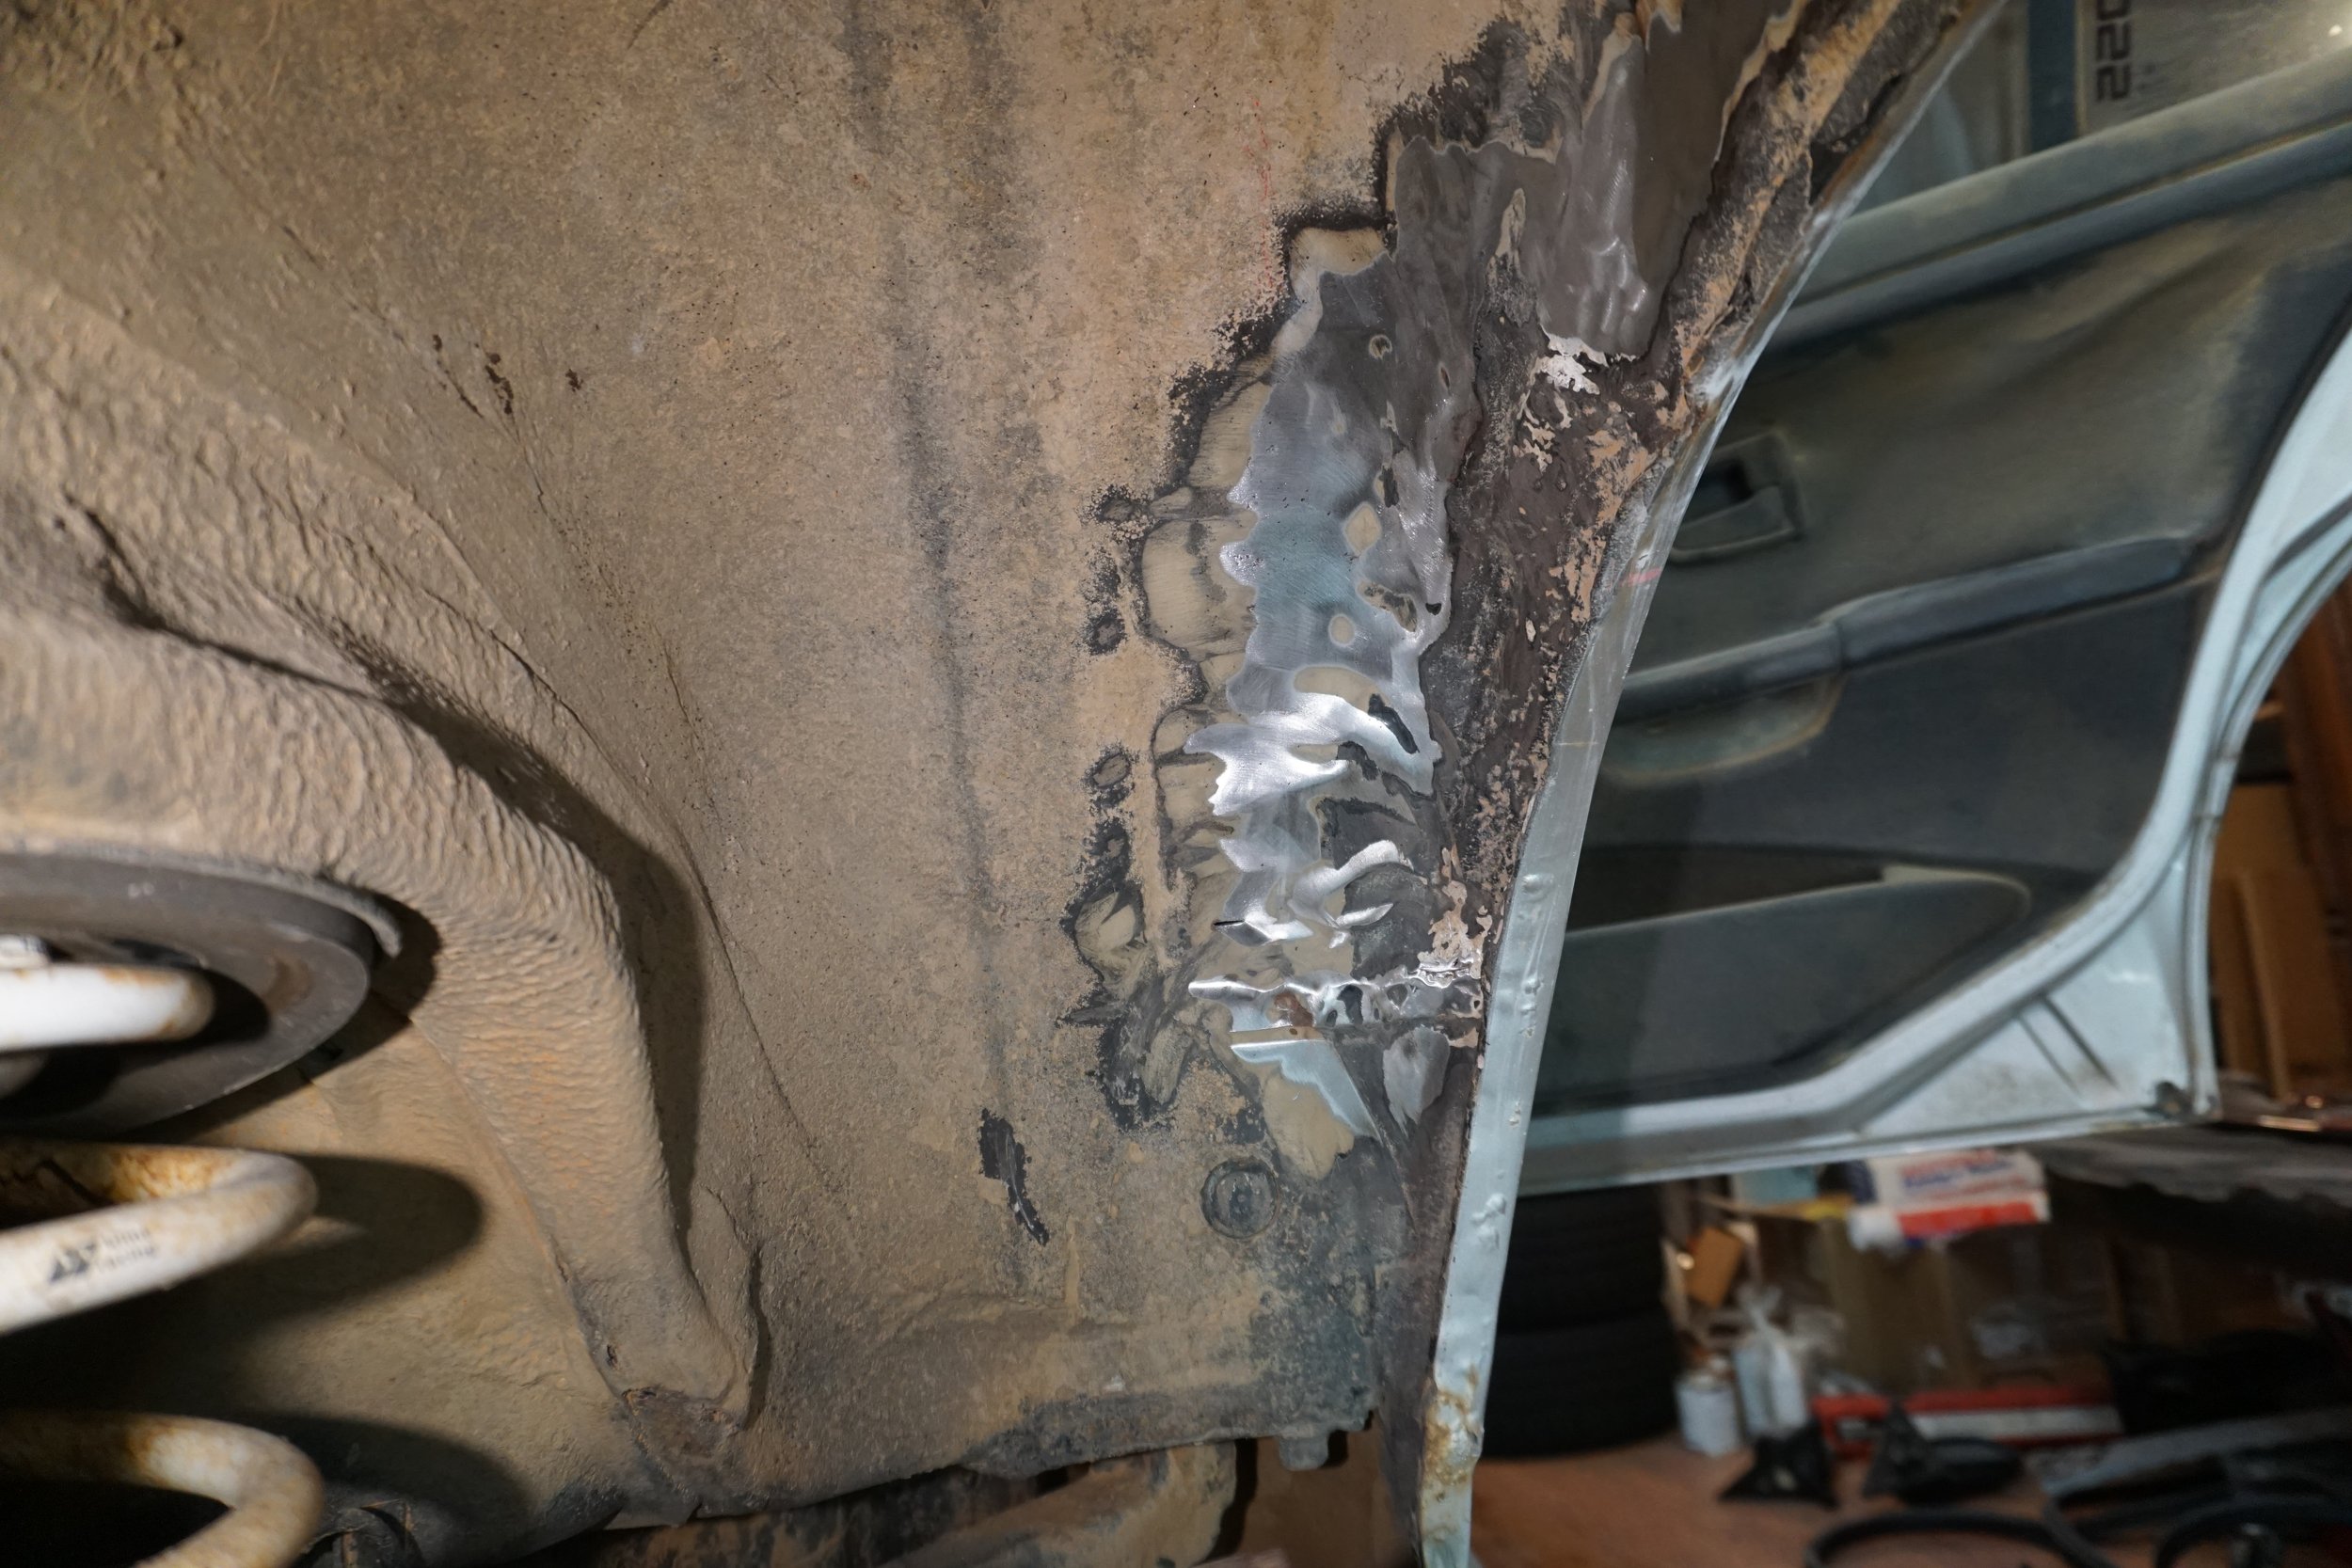
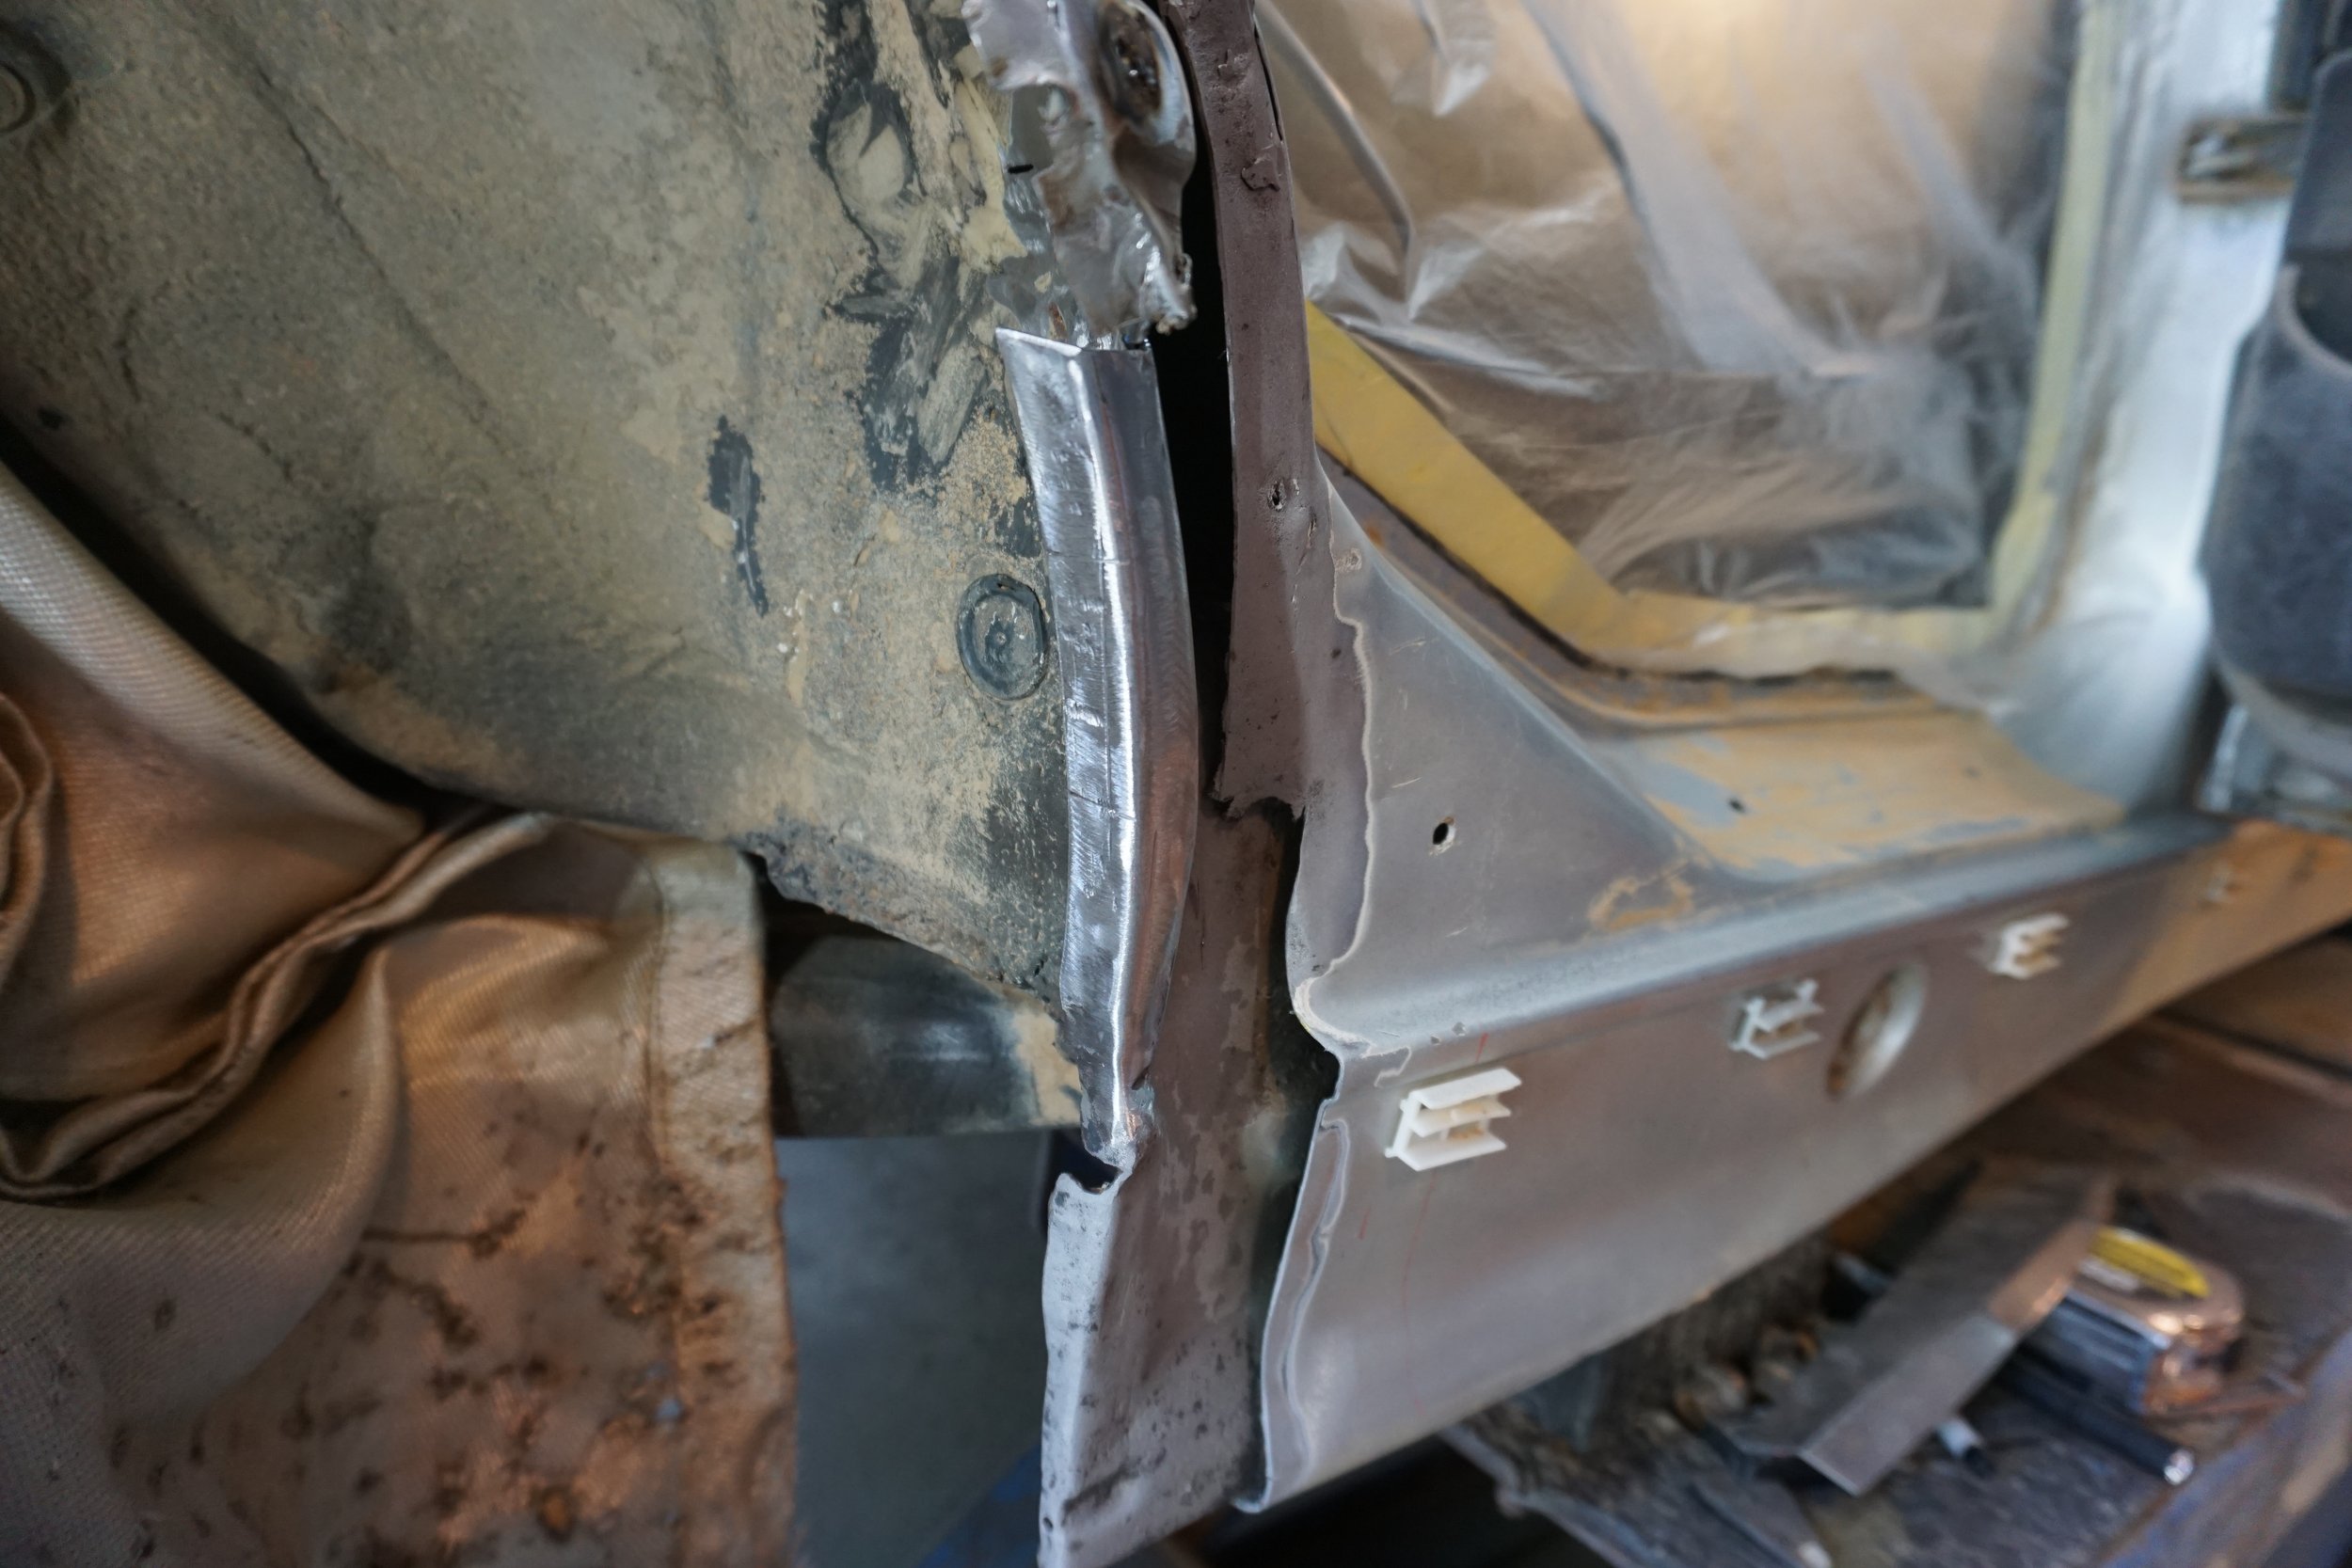
So I started by cutting off the outer panel, and was greeted by an unholy mess on the back side of the inner panel.
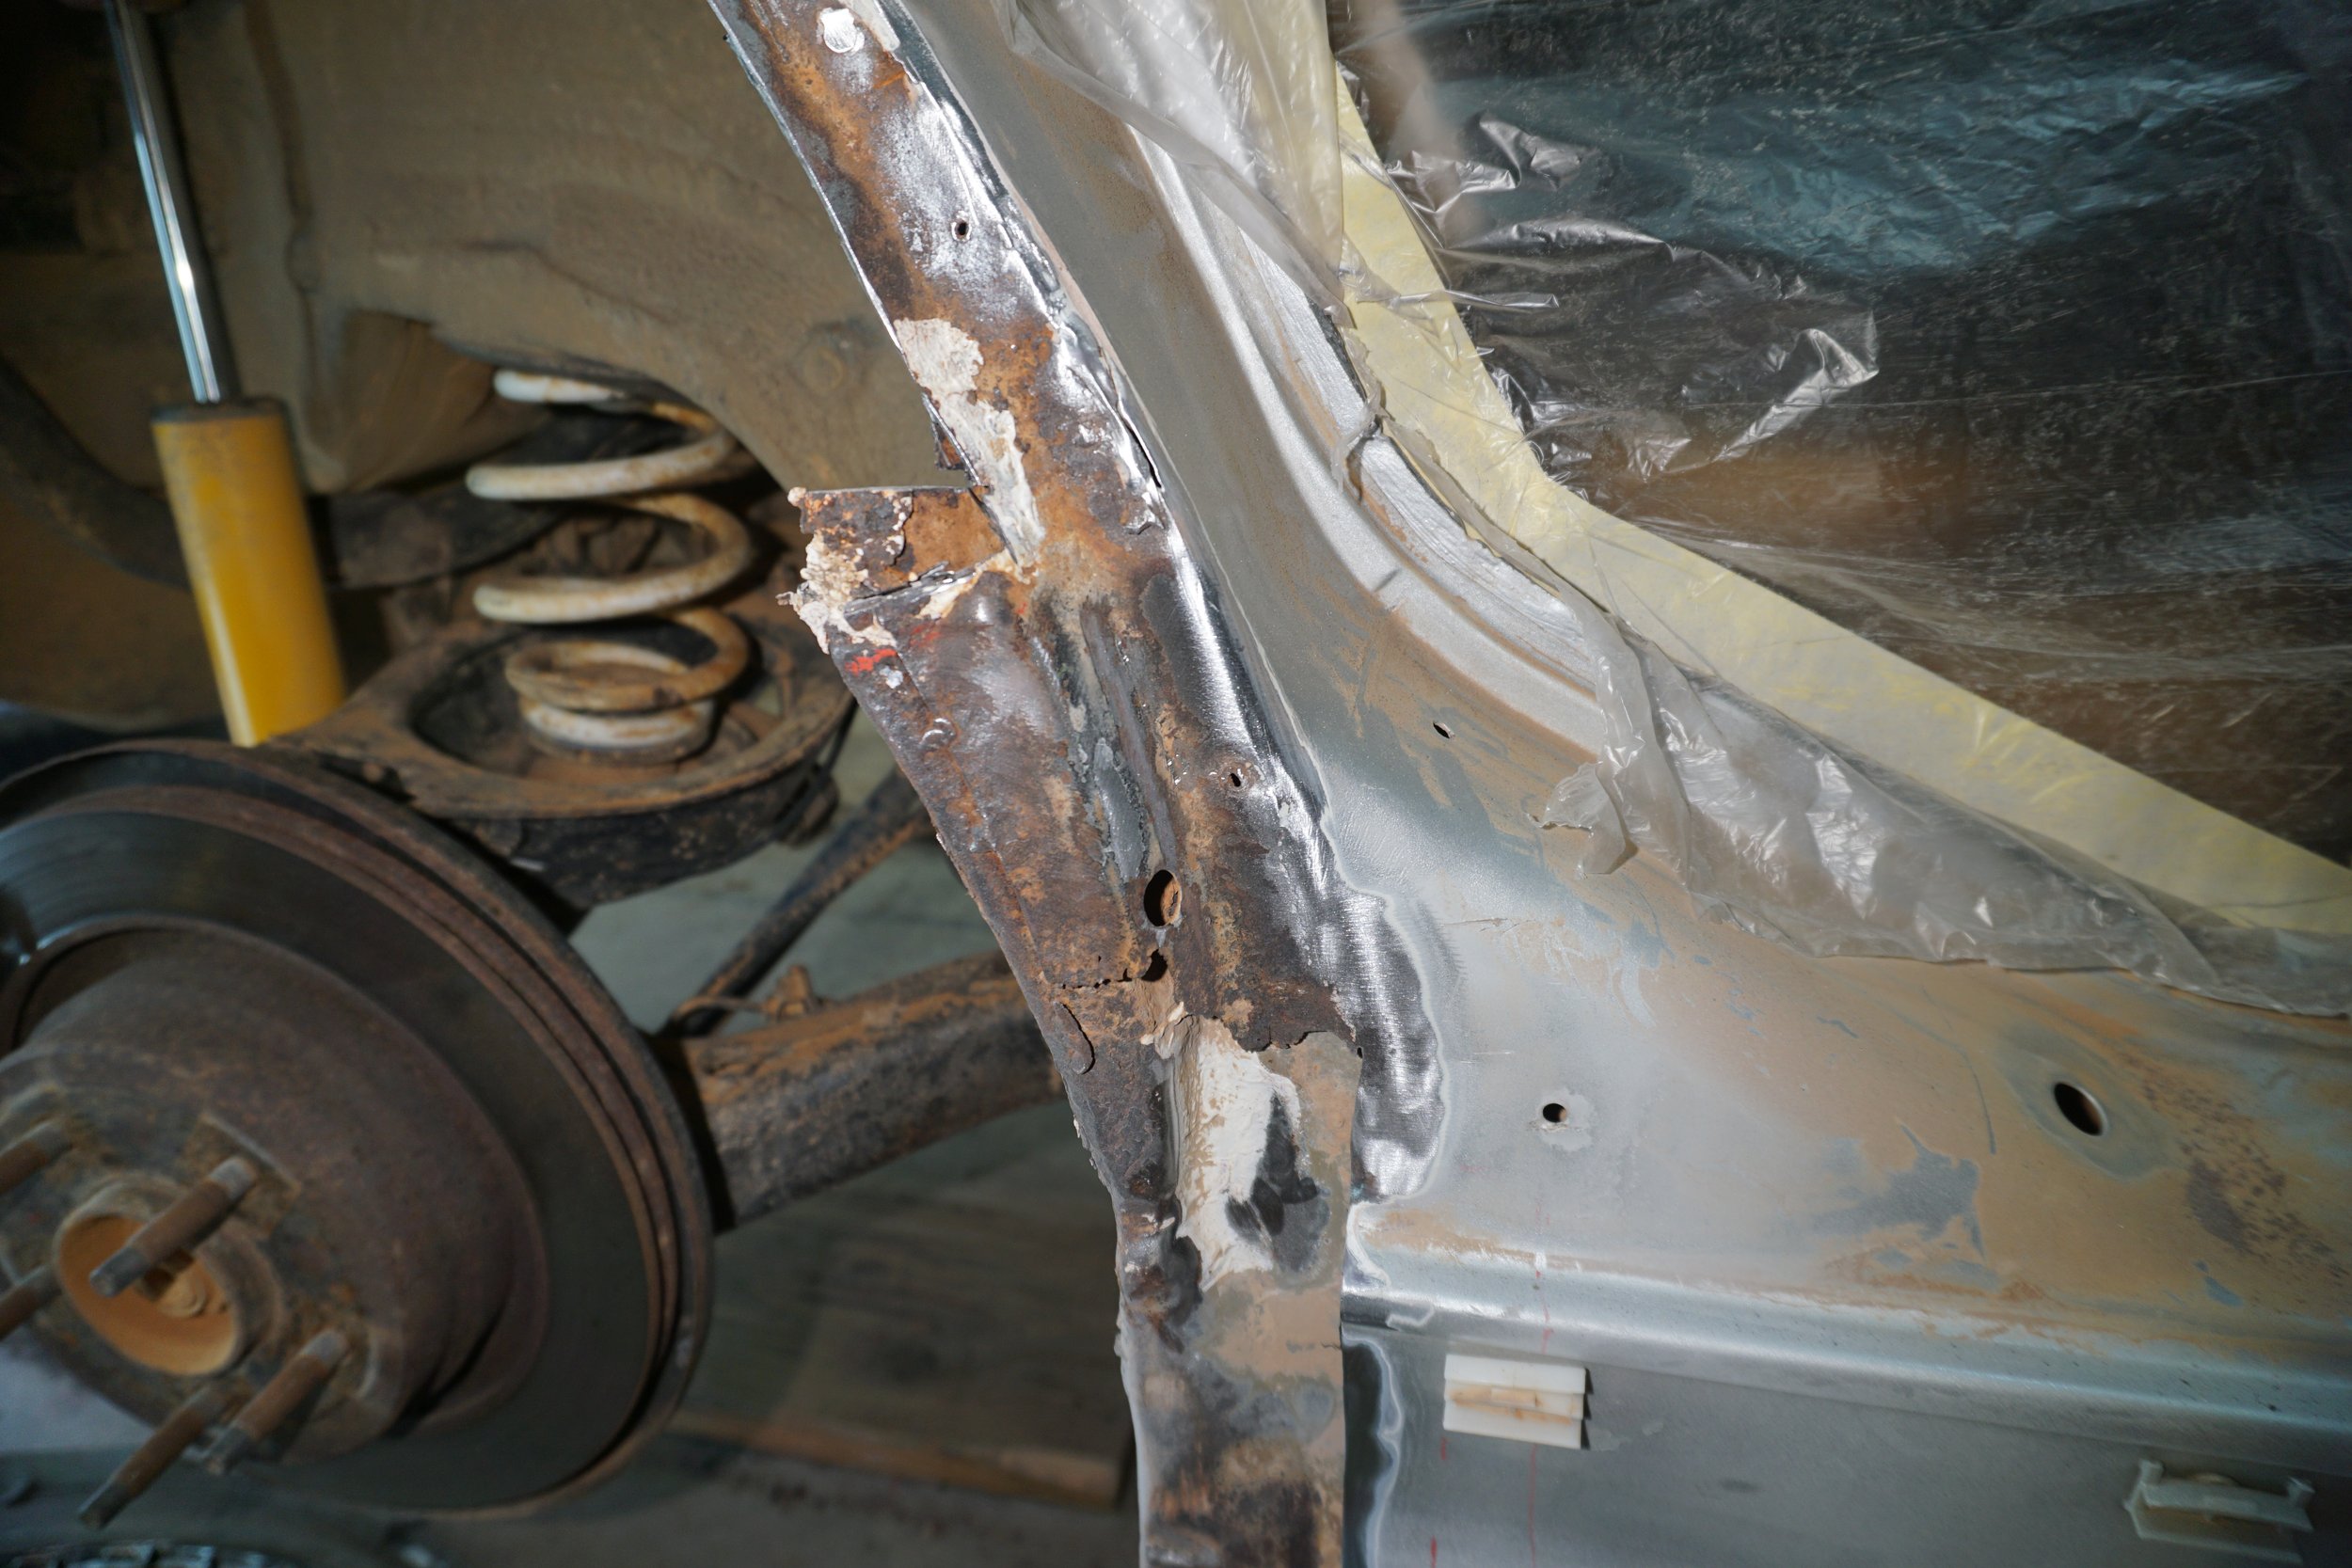
I then cut out as much of the inner panel as I could, and blasted the rest with coal slag to prepare it for welding and eventual paint.
This is where I want to note that according to my measurements, this inner sheet was something like 24-25 gauge sheet metal, and the metal remaining on the car was even thinner due it parts of it having started to rust. As someone who barely knows how to weld, this presented another challenge.
I eventually got it welded up as best I could. Some of the areas that were tucked up in the body were so hard to access and the metal so thin that I just couldn't get them to weld. Not to mention I was trying to get the shape of my crumpled inner panel to match up with the one I cut from the other car. I eventually had to put my OCD aside and just accept it wasn't going to be perfect.
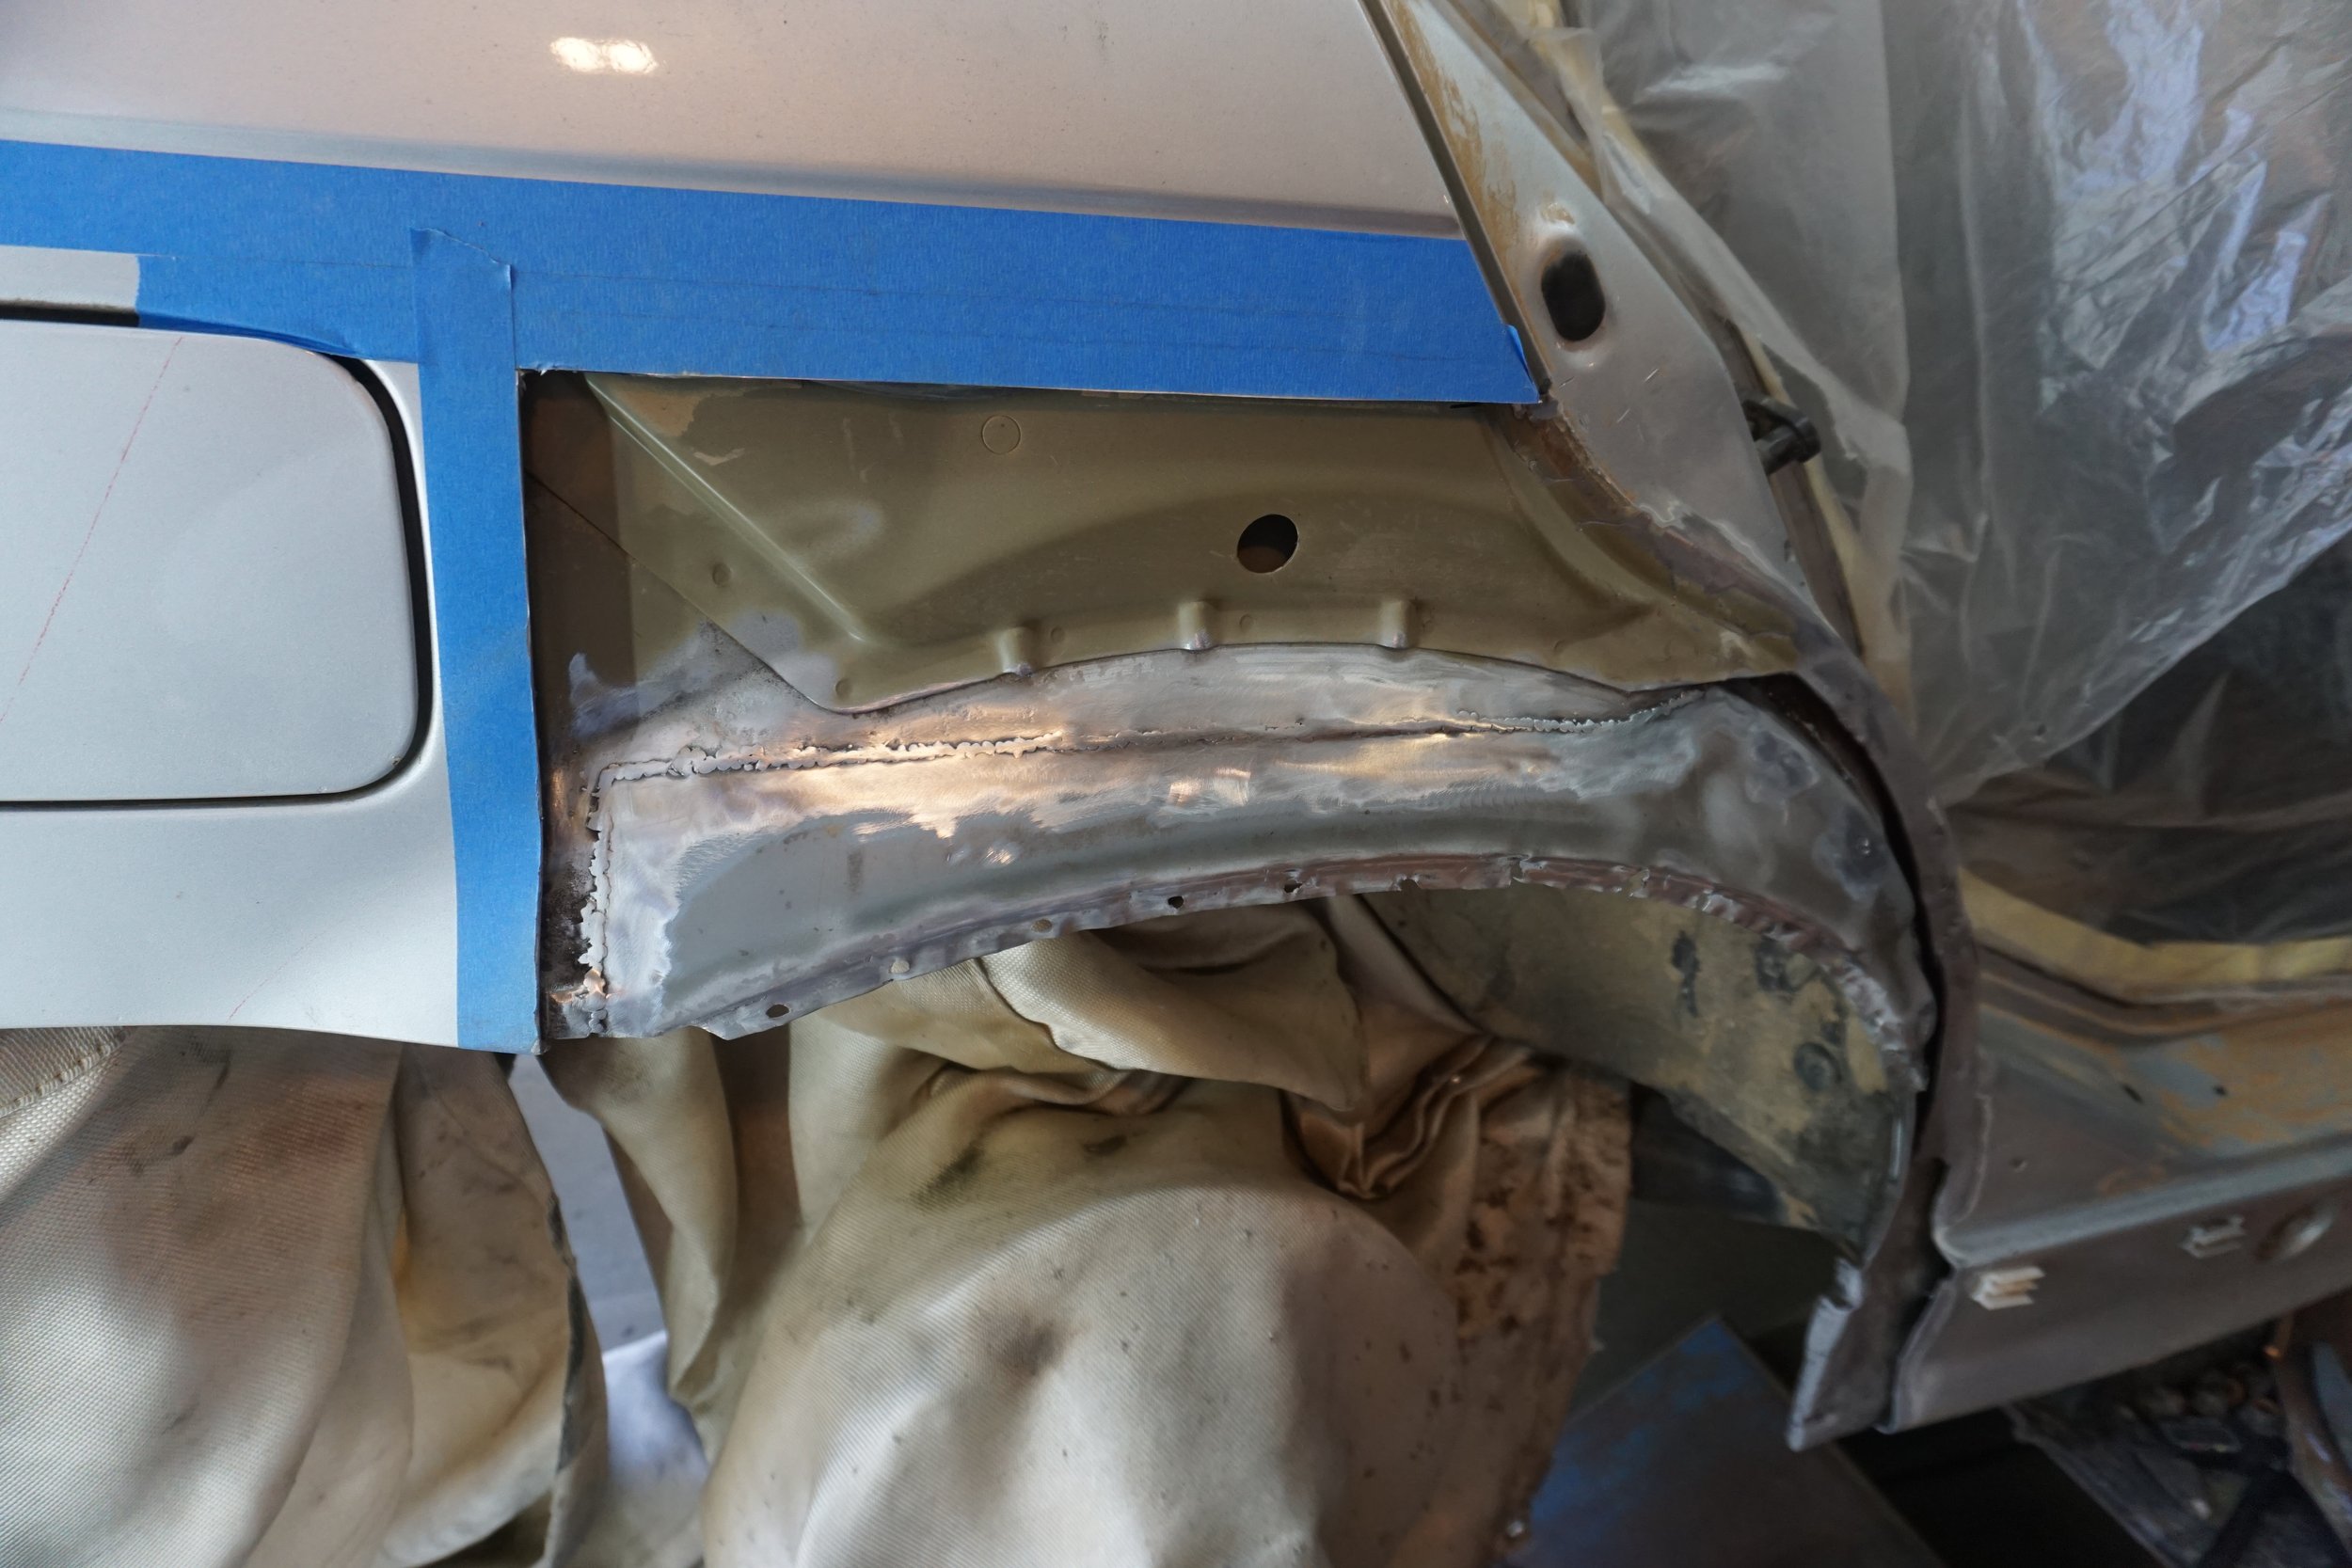
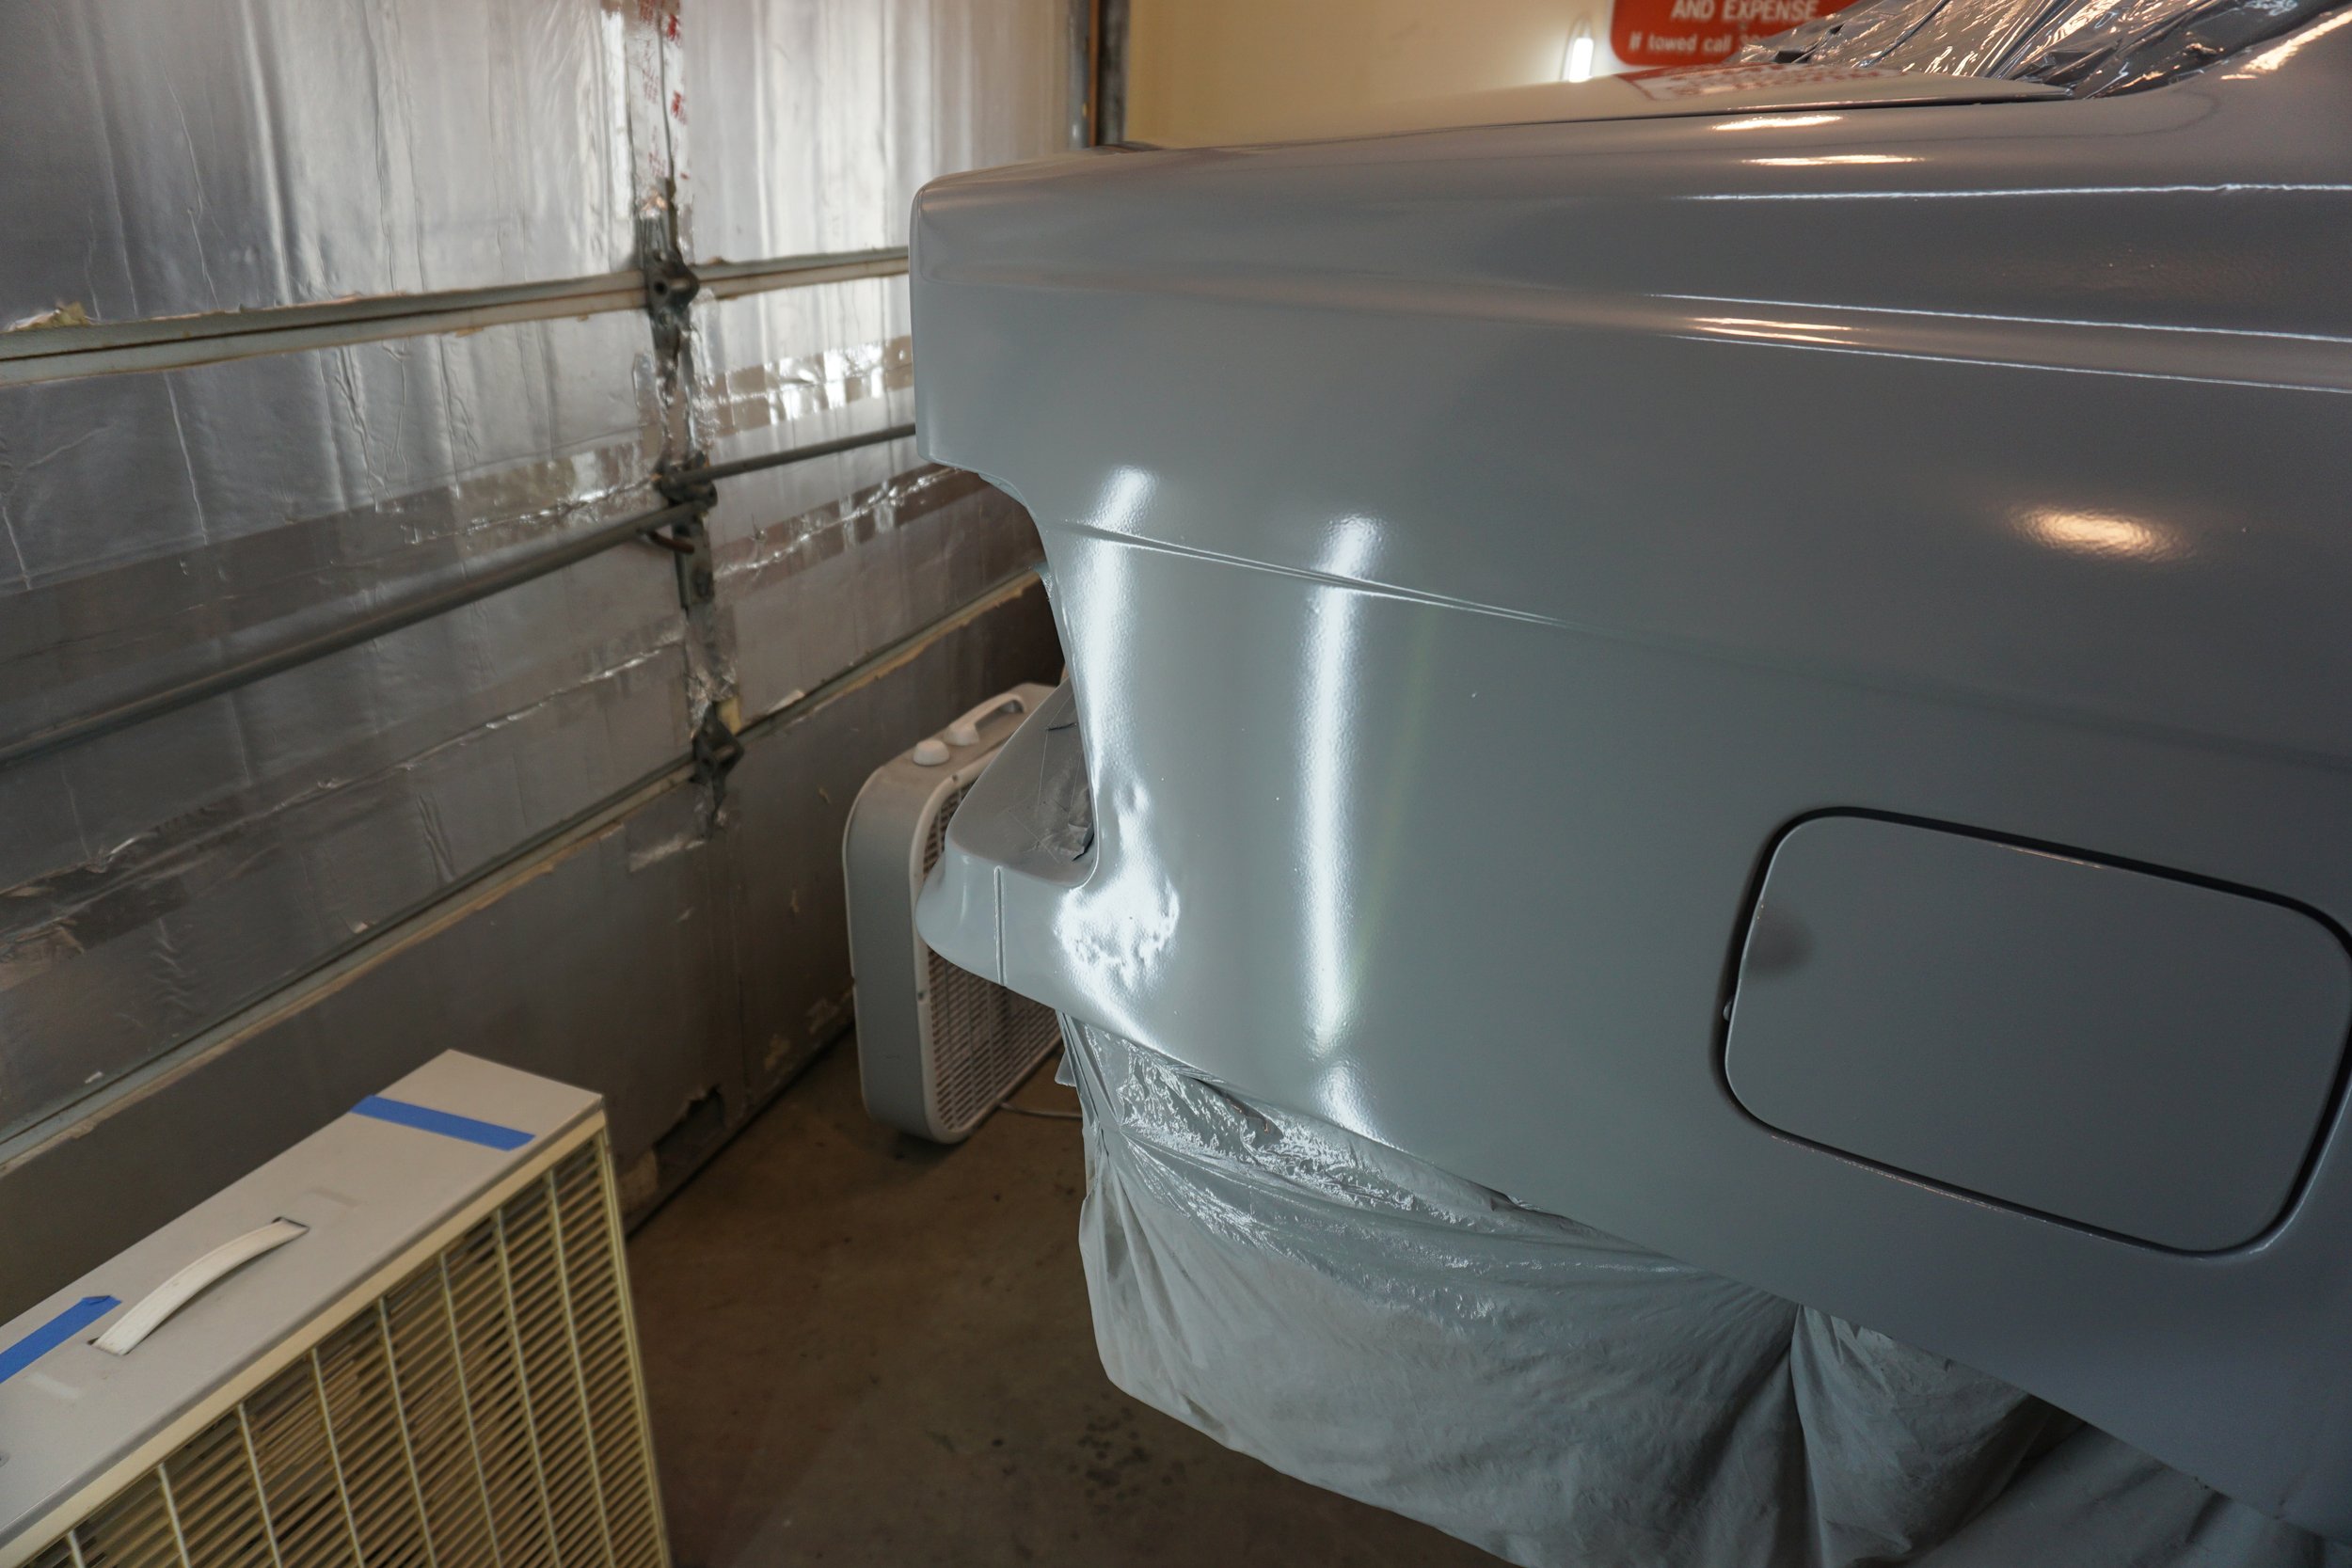
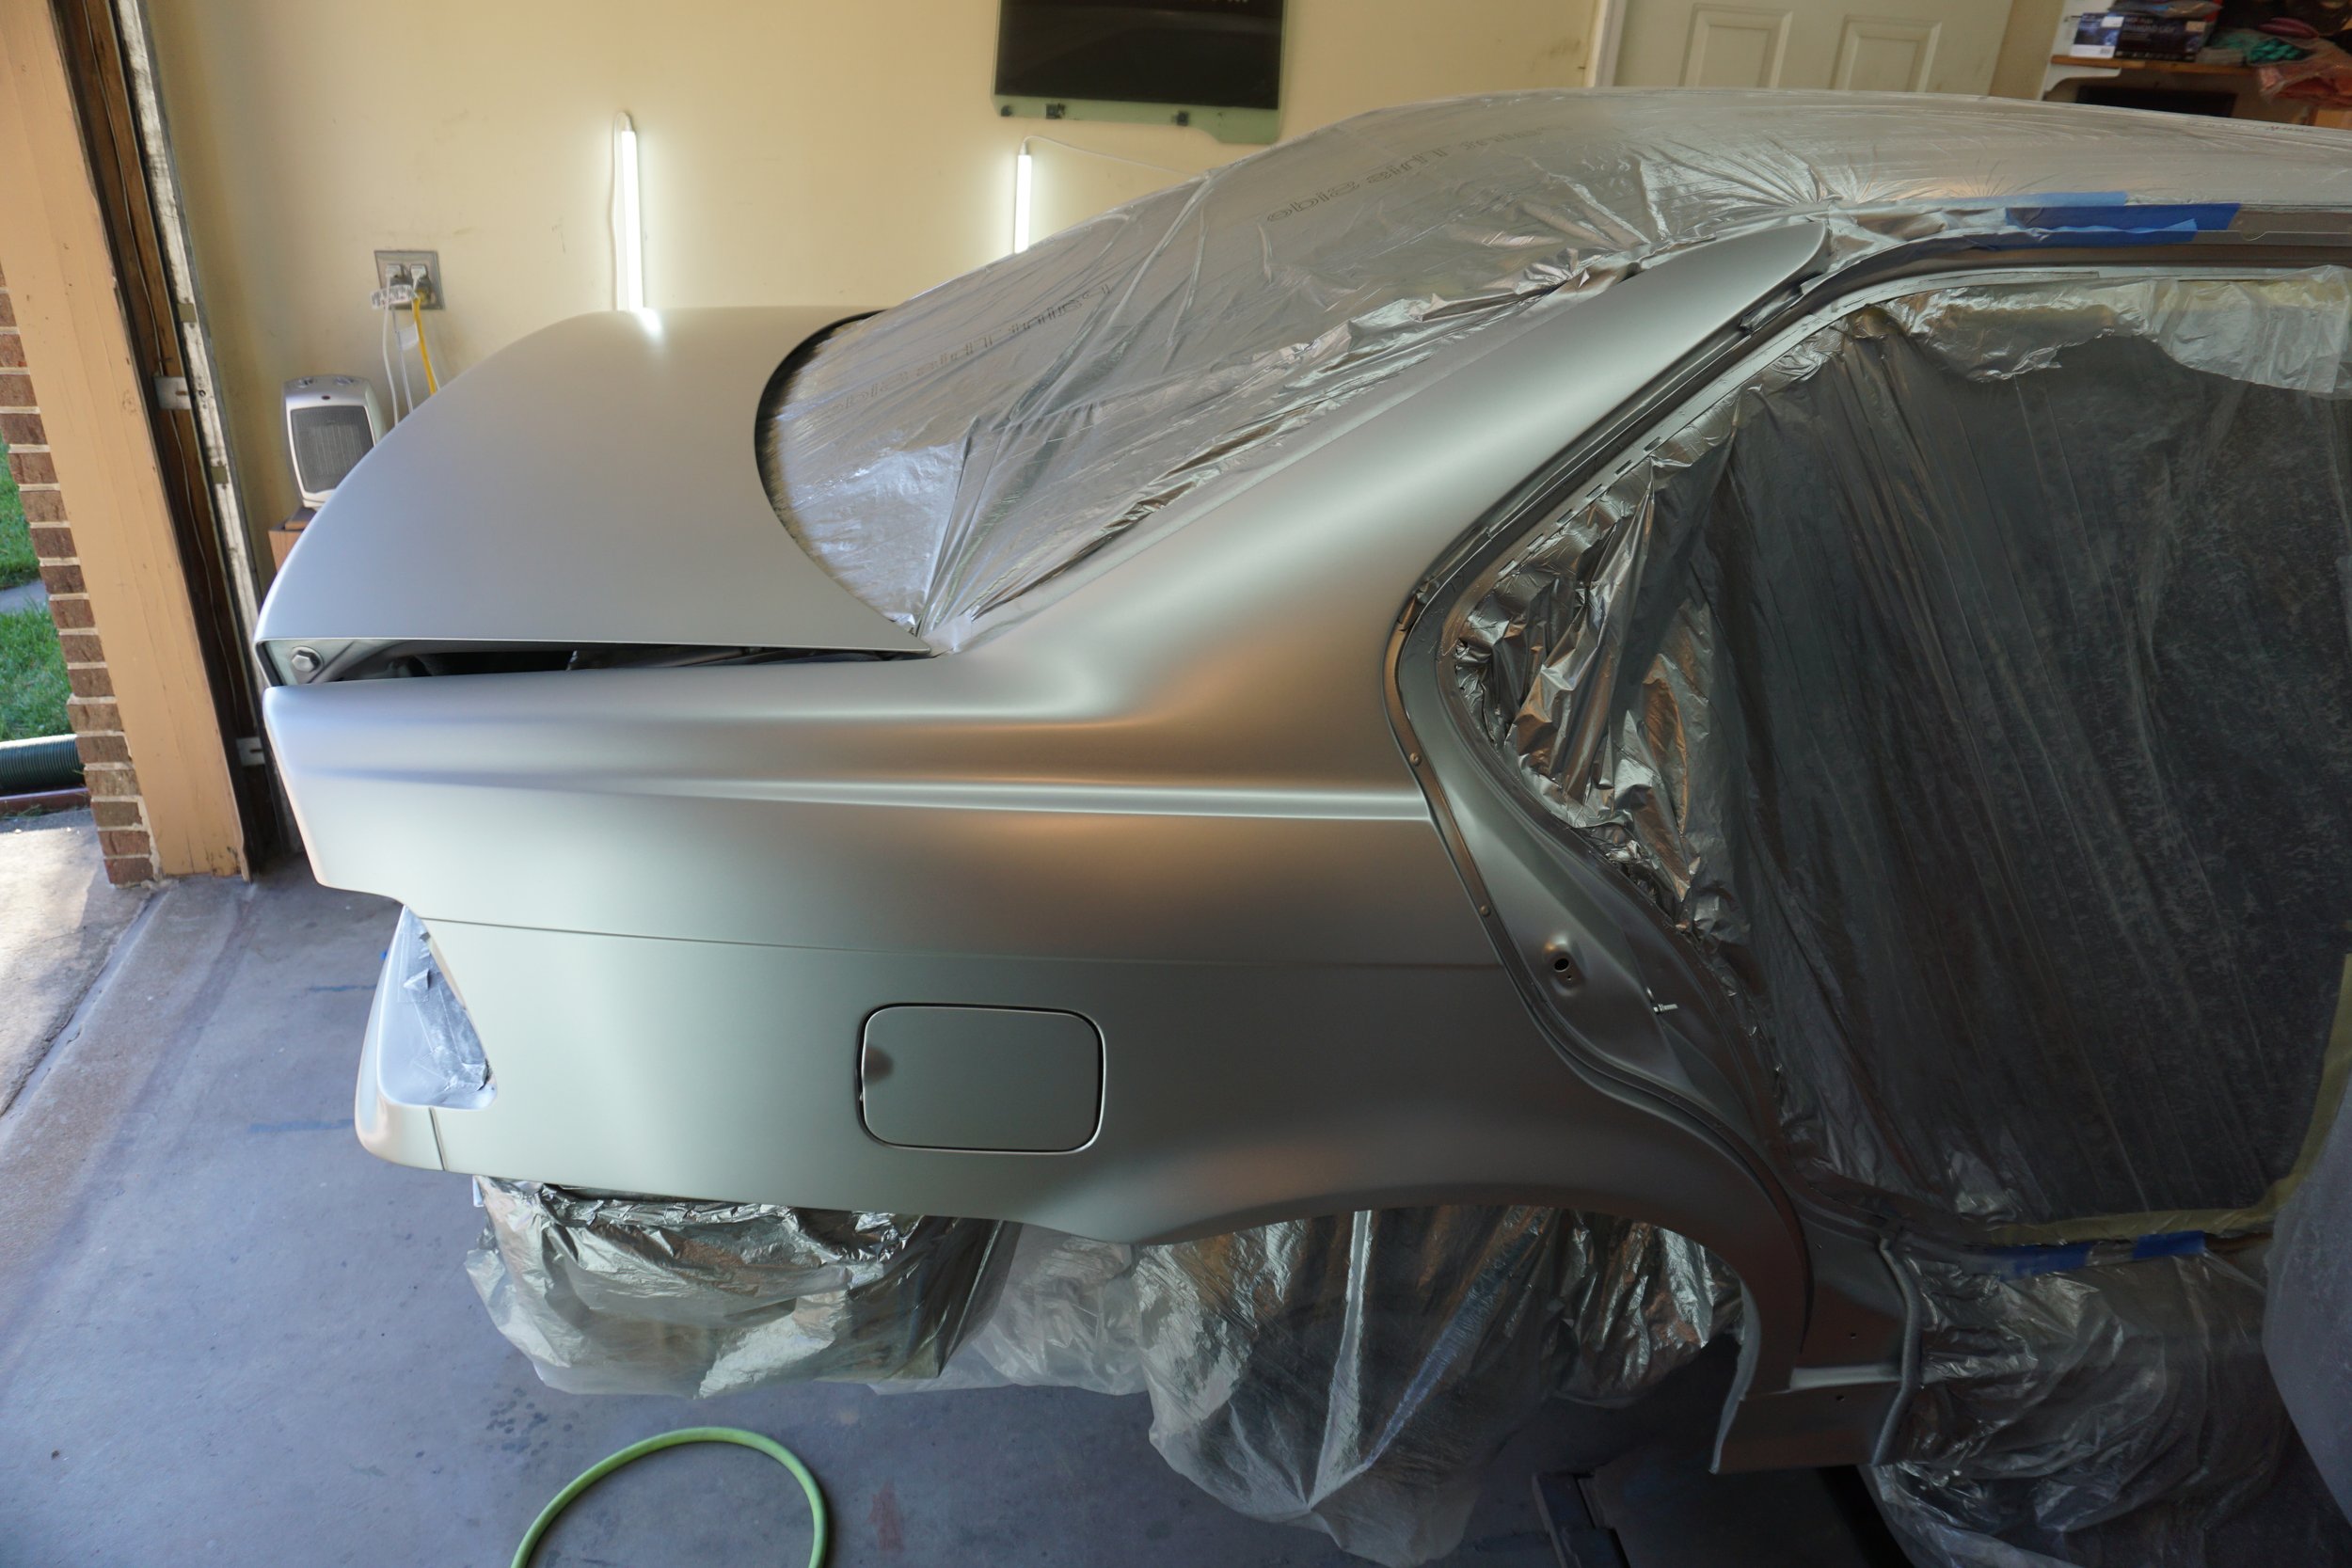
I then used my Mastercoat silver primer on the panel. I am DONE with POR15, as it is JUNK! Mastercoat is an industrial coating and has excellent results in various salt spray tests and is used on a lot of old muscle car restorations. From what I've seen and read, it performs better than my SPI Epoxy Primer, which itself is known as a top of the line primer and is great at preventing rust. The prep work needed for Mastercoat is also much simpler than that mess you have to go through for POR15. It's pretty damn thick and had no problem sealing up pinholes and other gaps between panels.

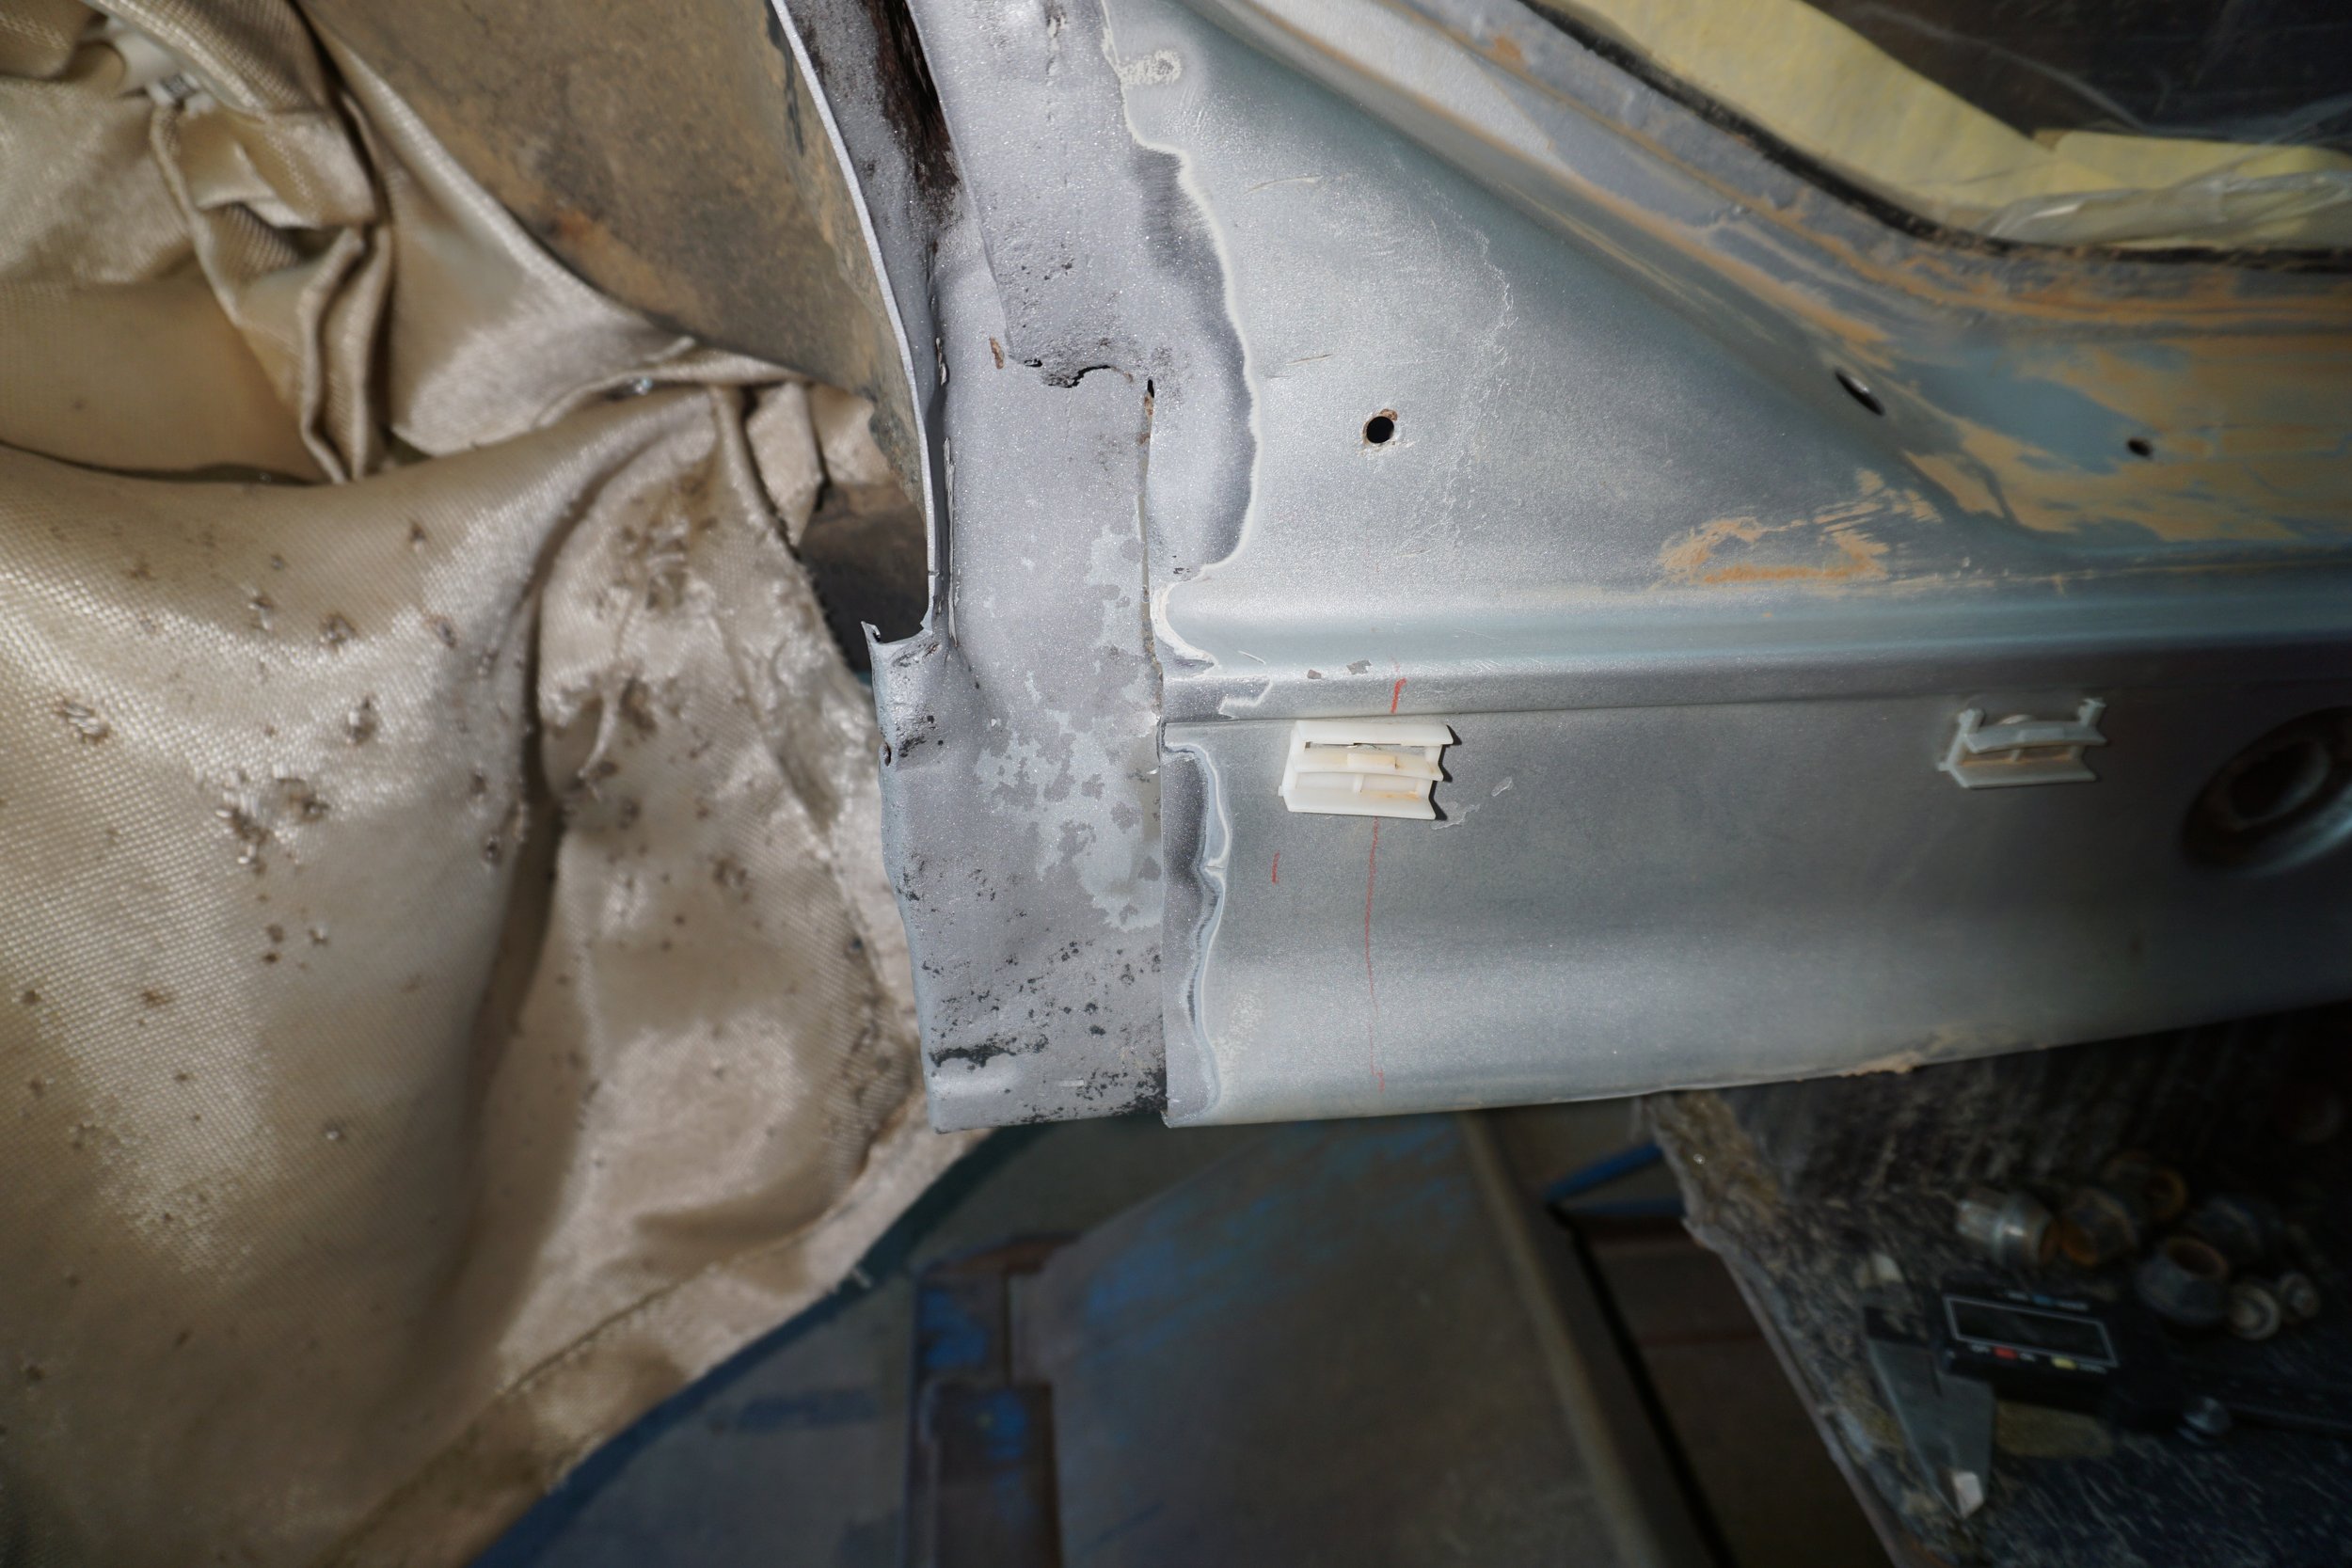
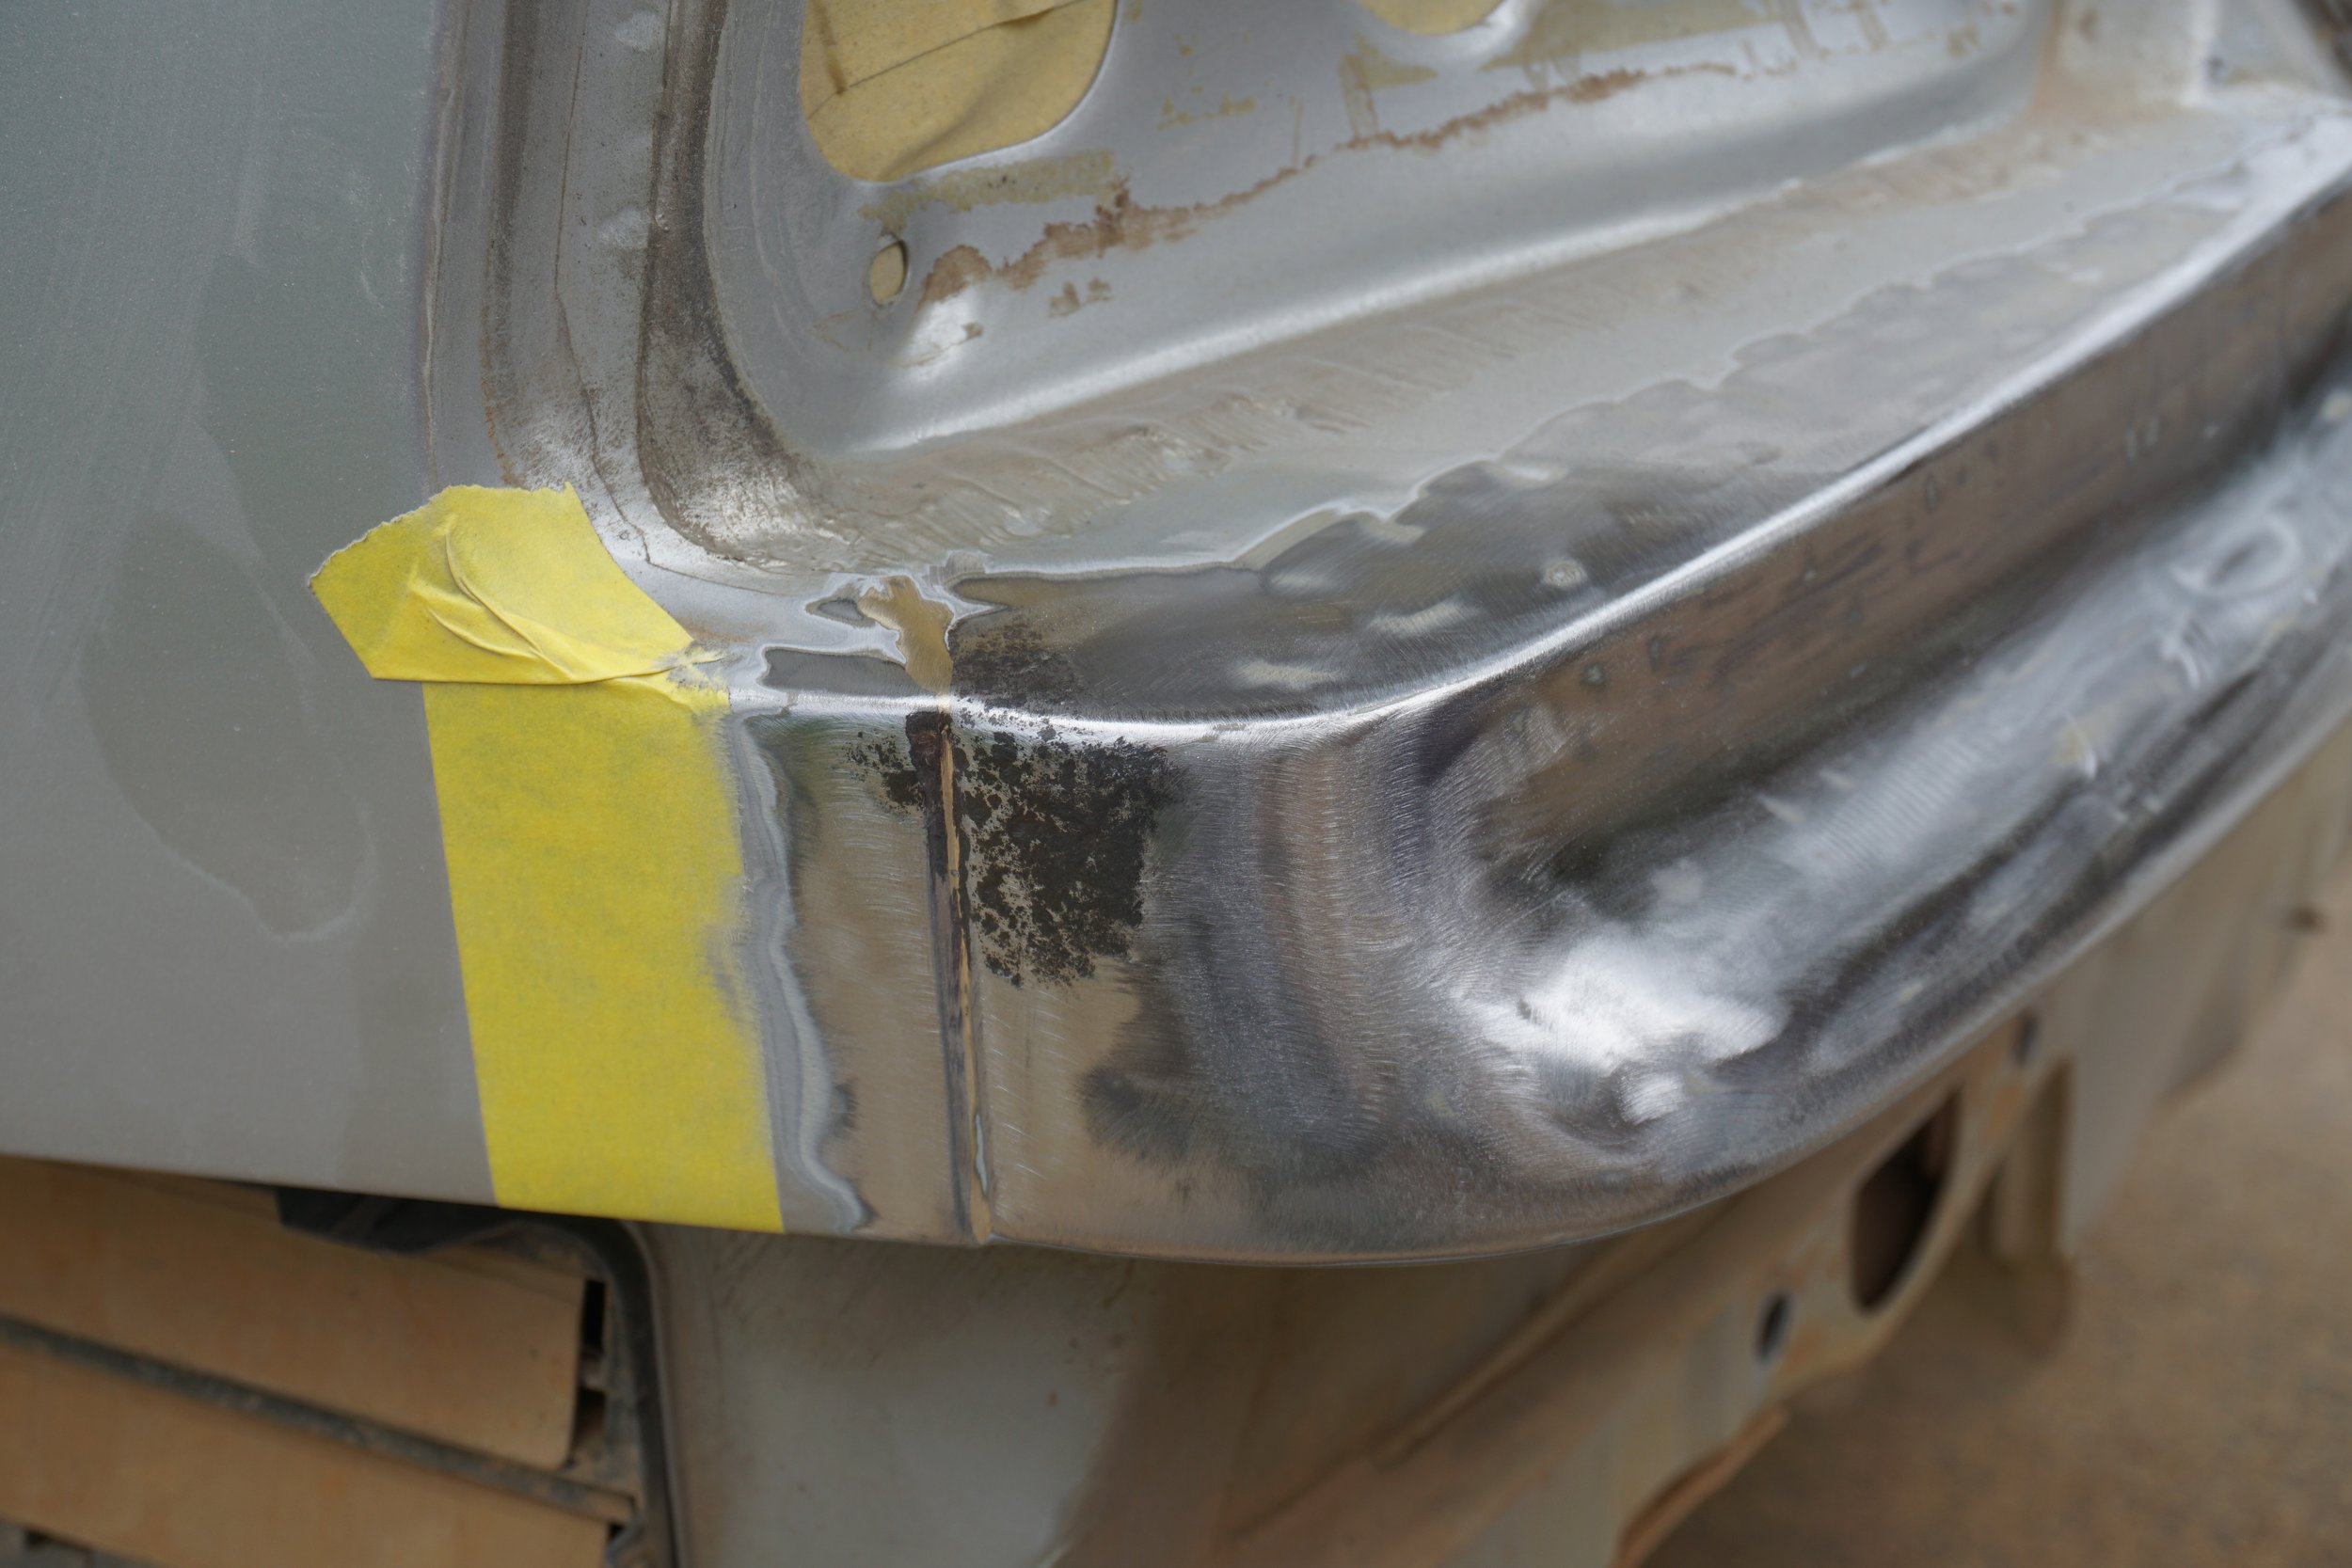
I decided to cut out some more gnarly looking metal and replace it with fresher stuff...
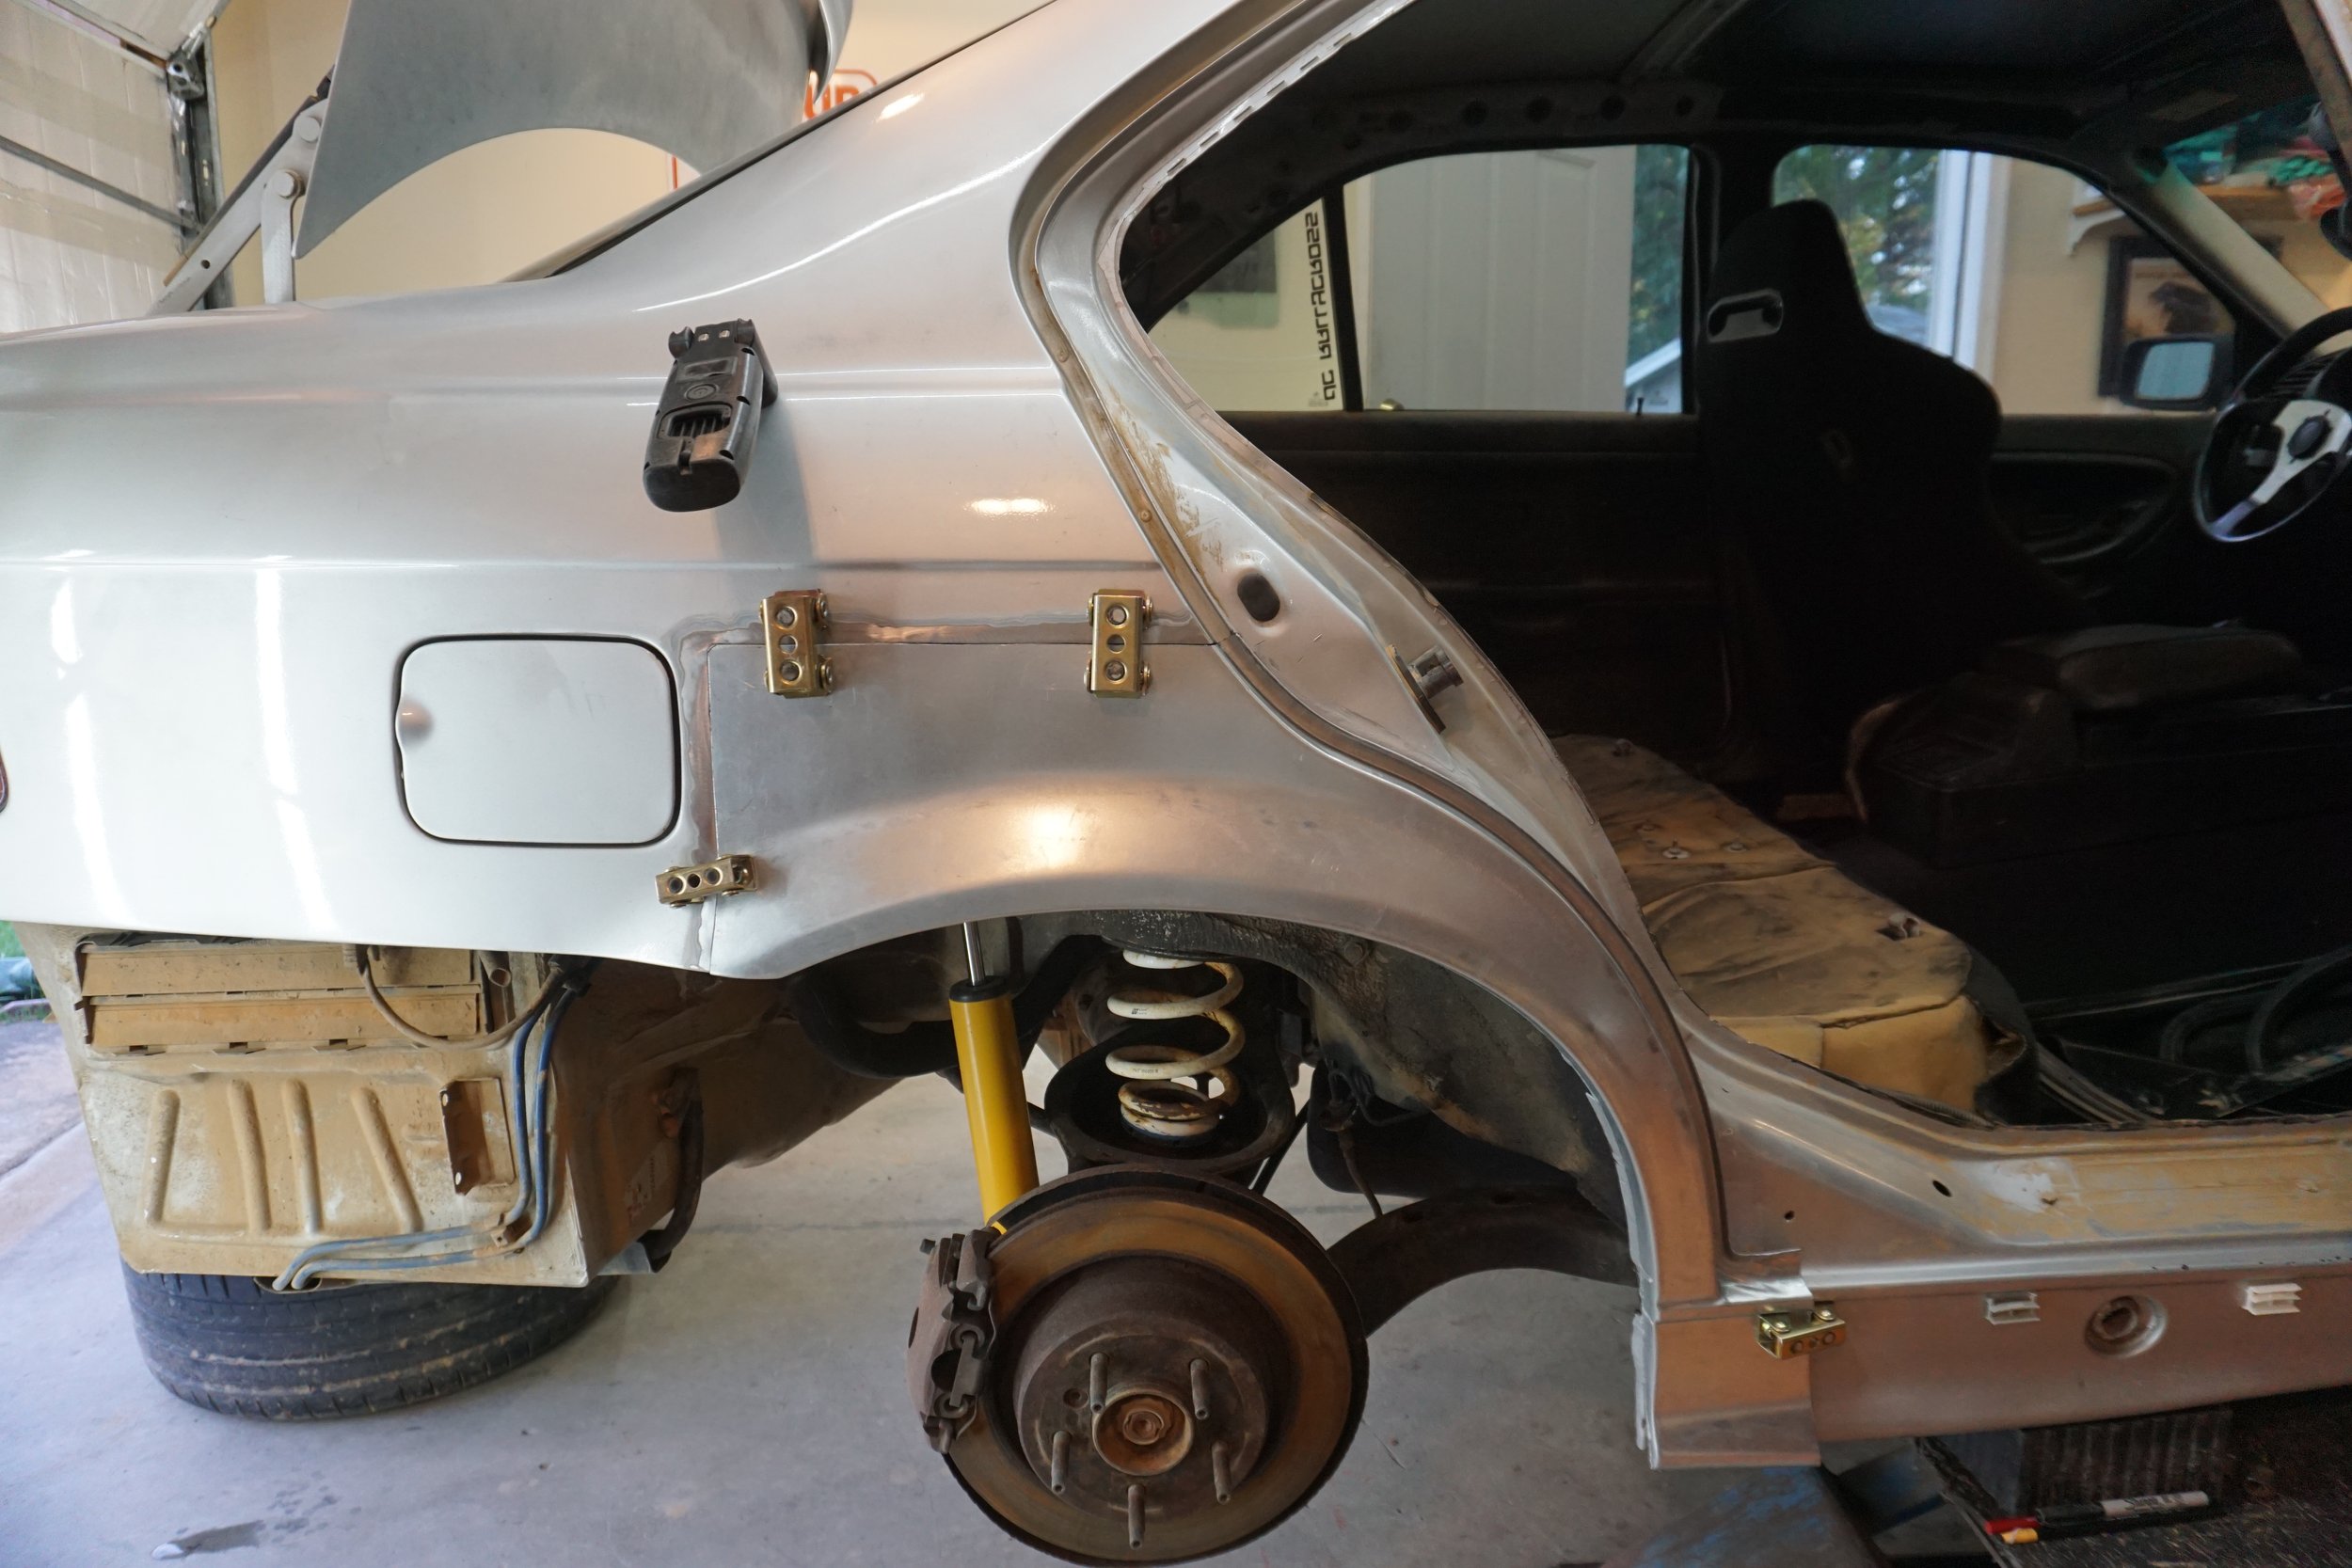
And I did my best to tie the inner metal into what I started calling the "middle" metal around the door arch. It was originally one piece from the factory, but there was no way I could replicate that.

I coated the inside out the outer sheet with more Mastercoat

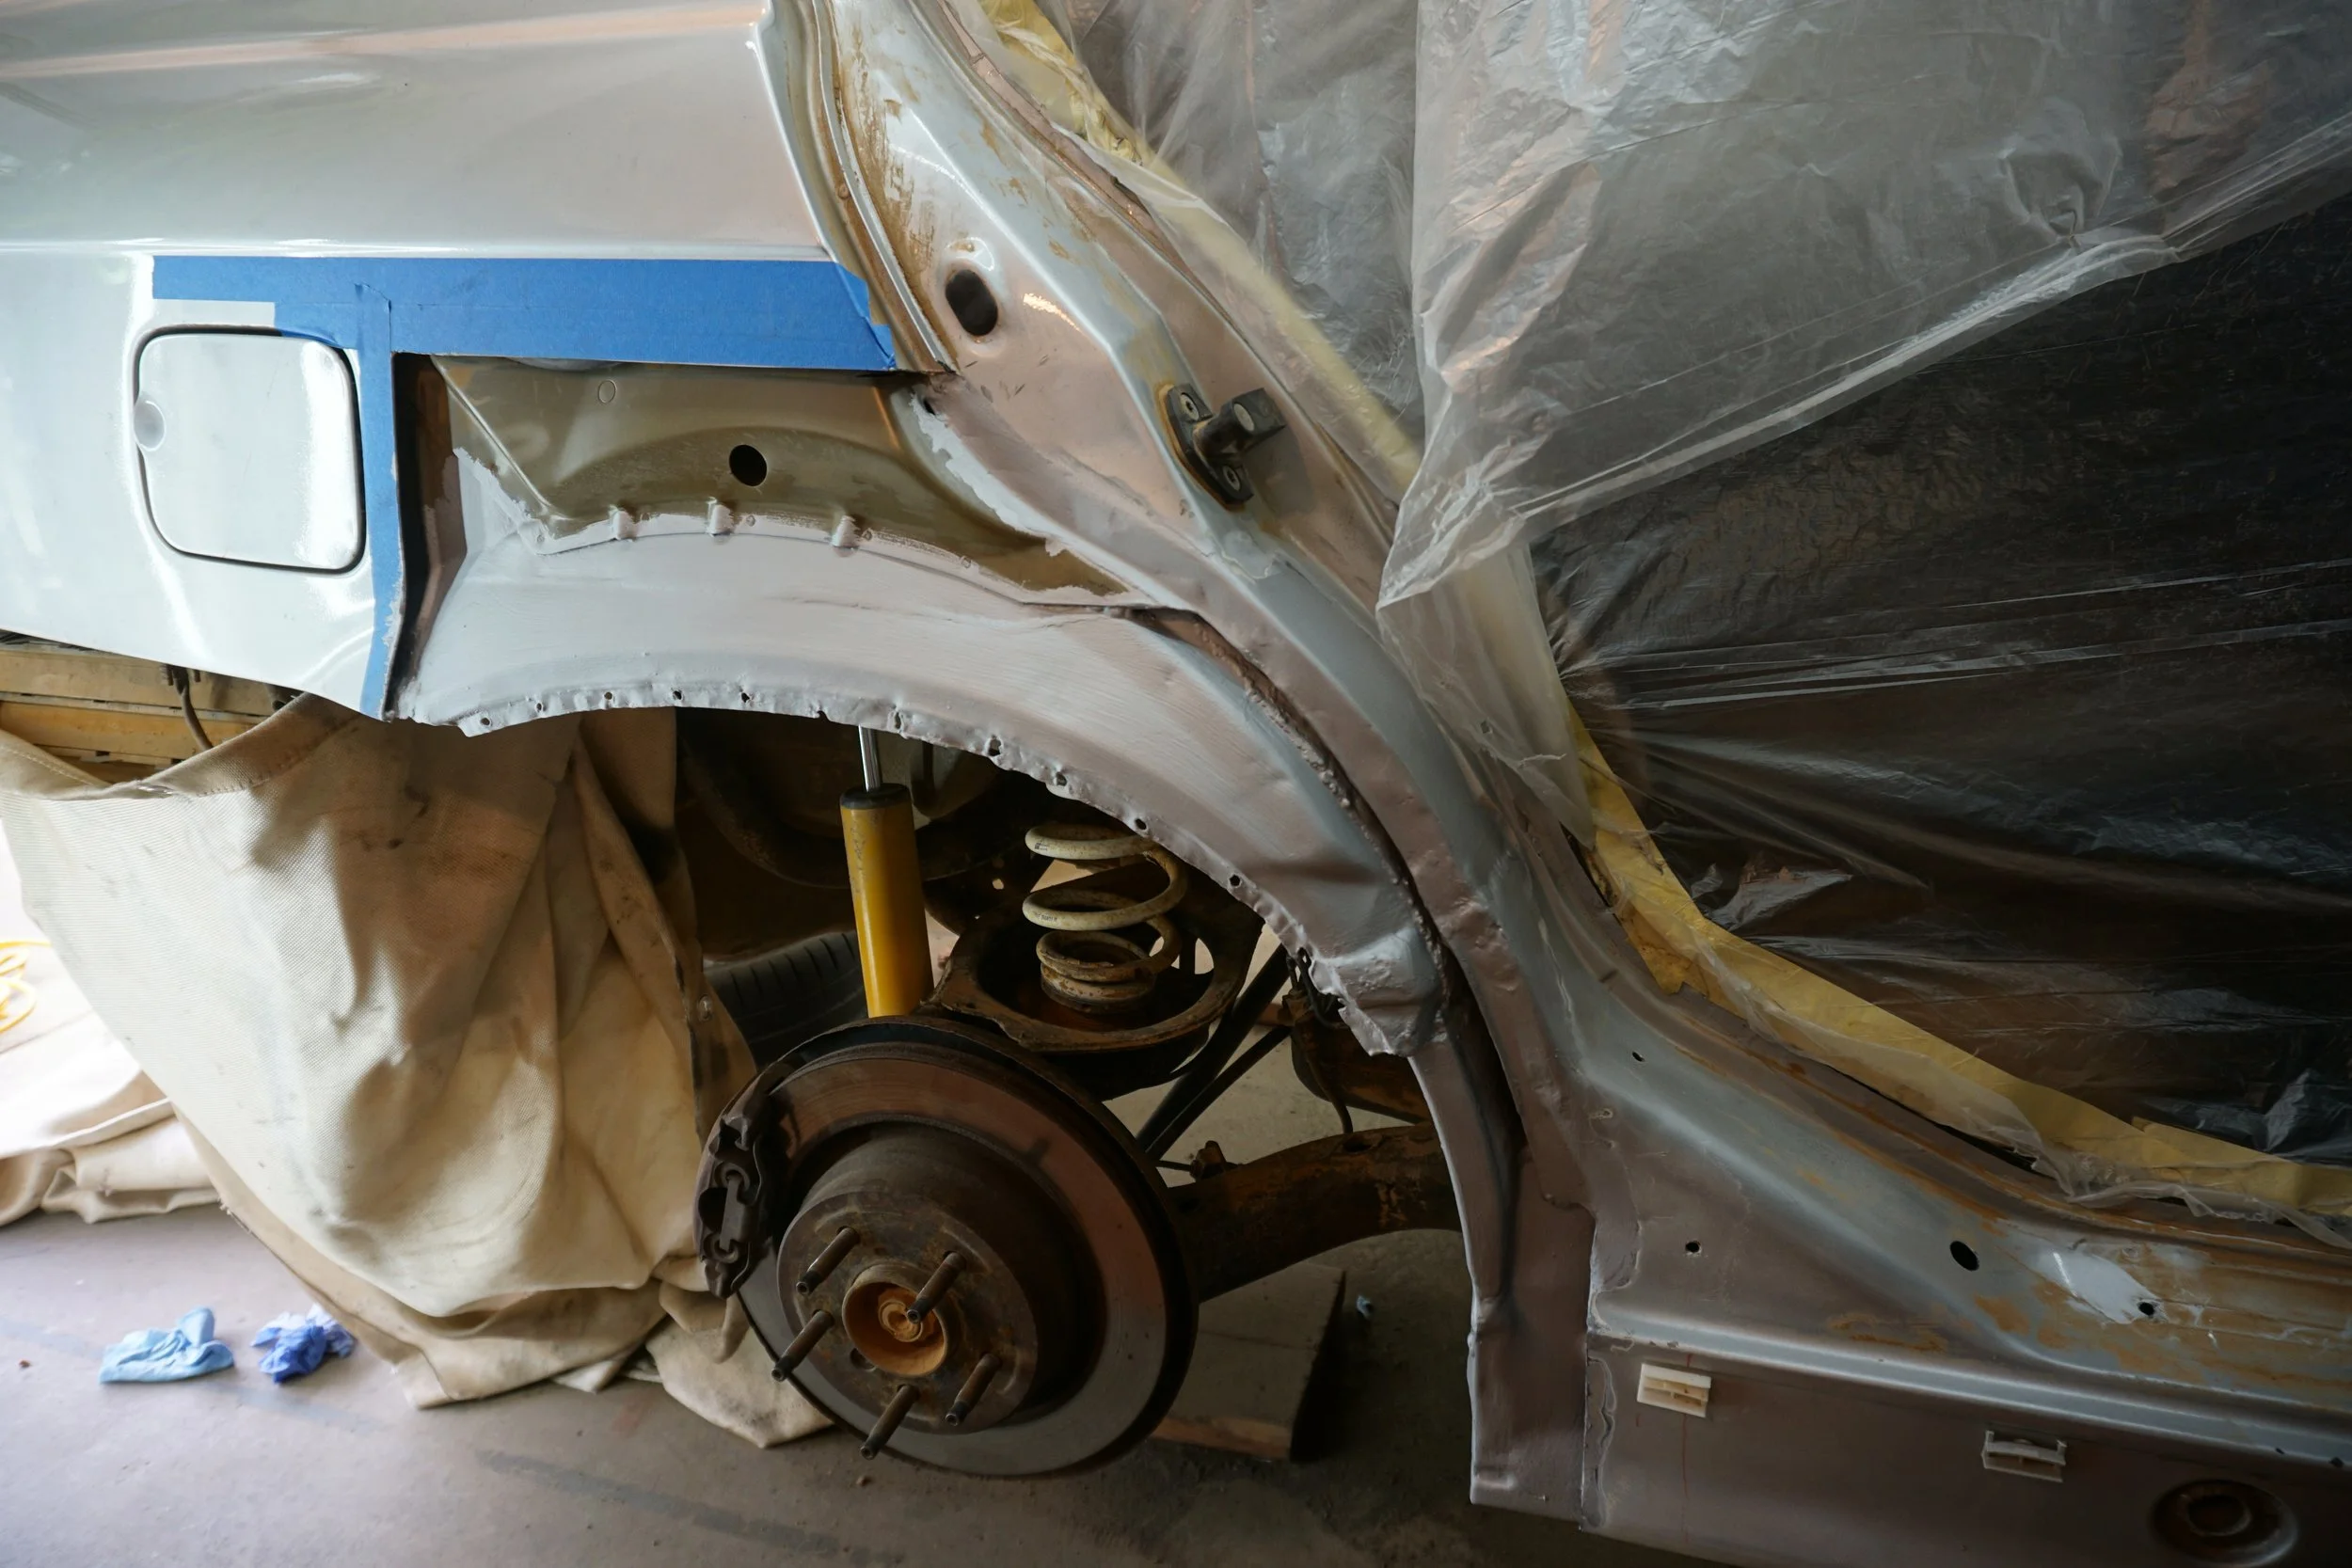
And then spent a LONG time test fitting the damn thing. I started the test fit going from left to right, but it wasn't until I got everything on the left dialed in that I realized I should have gone from right to left! The gap with the door was all messed up, so I had to re-do a whole lot of work in order to get the door gap corrected.
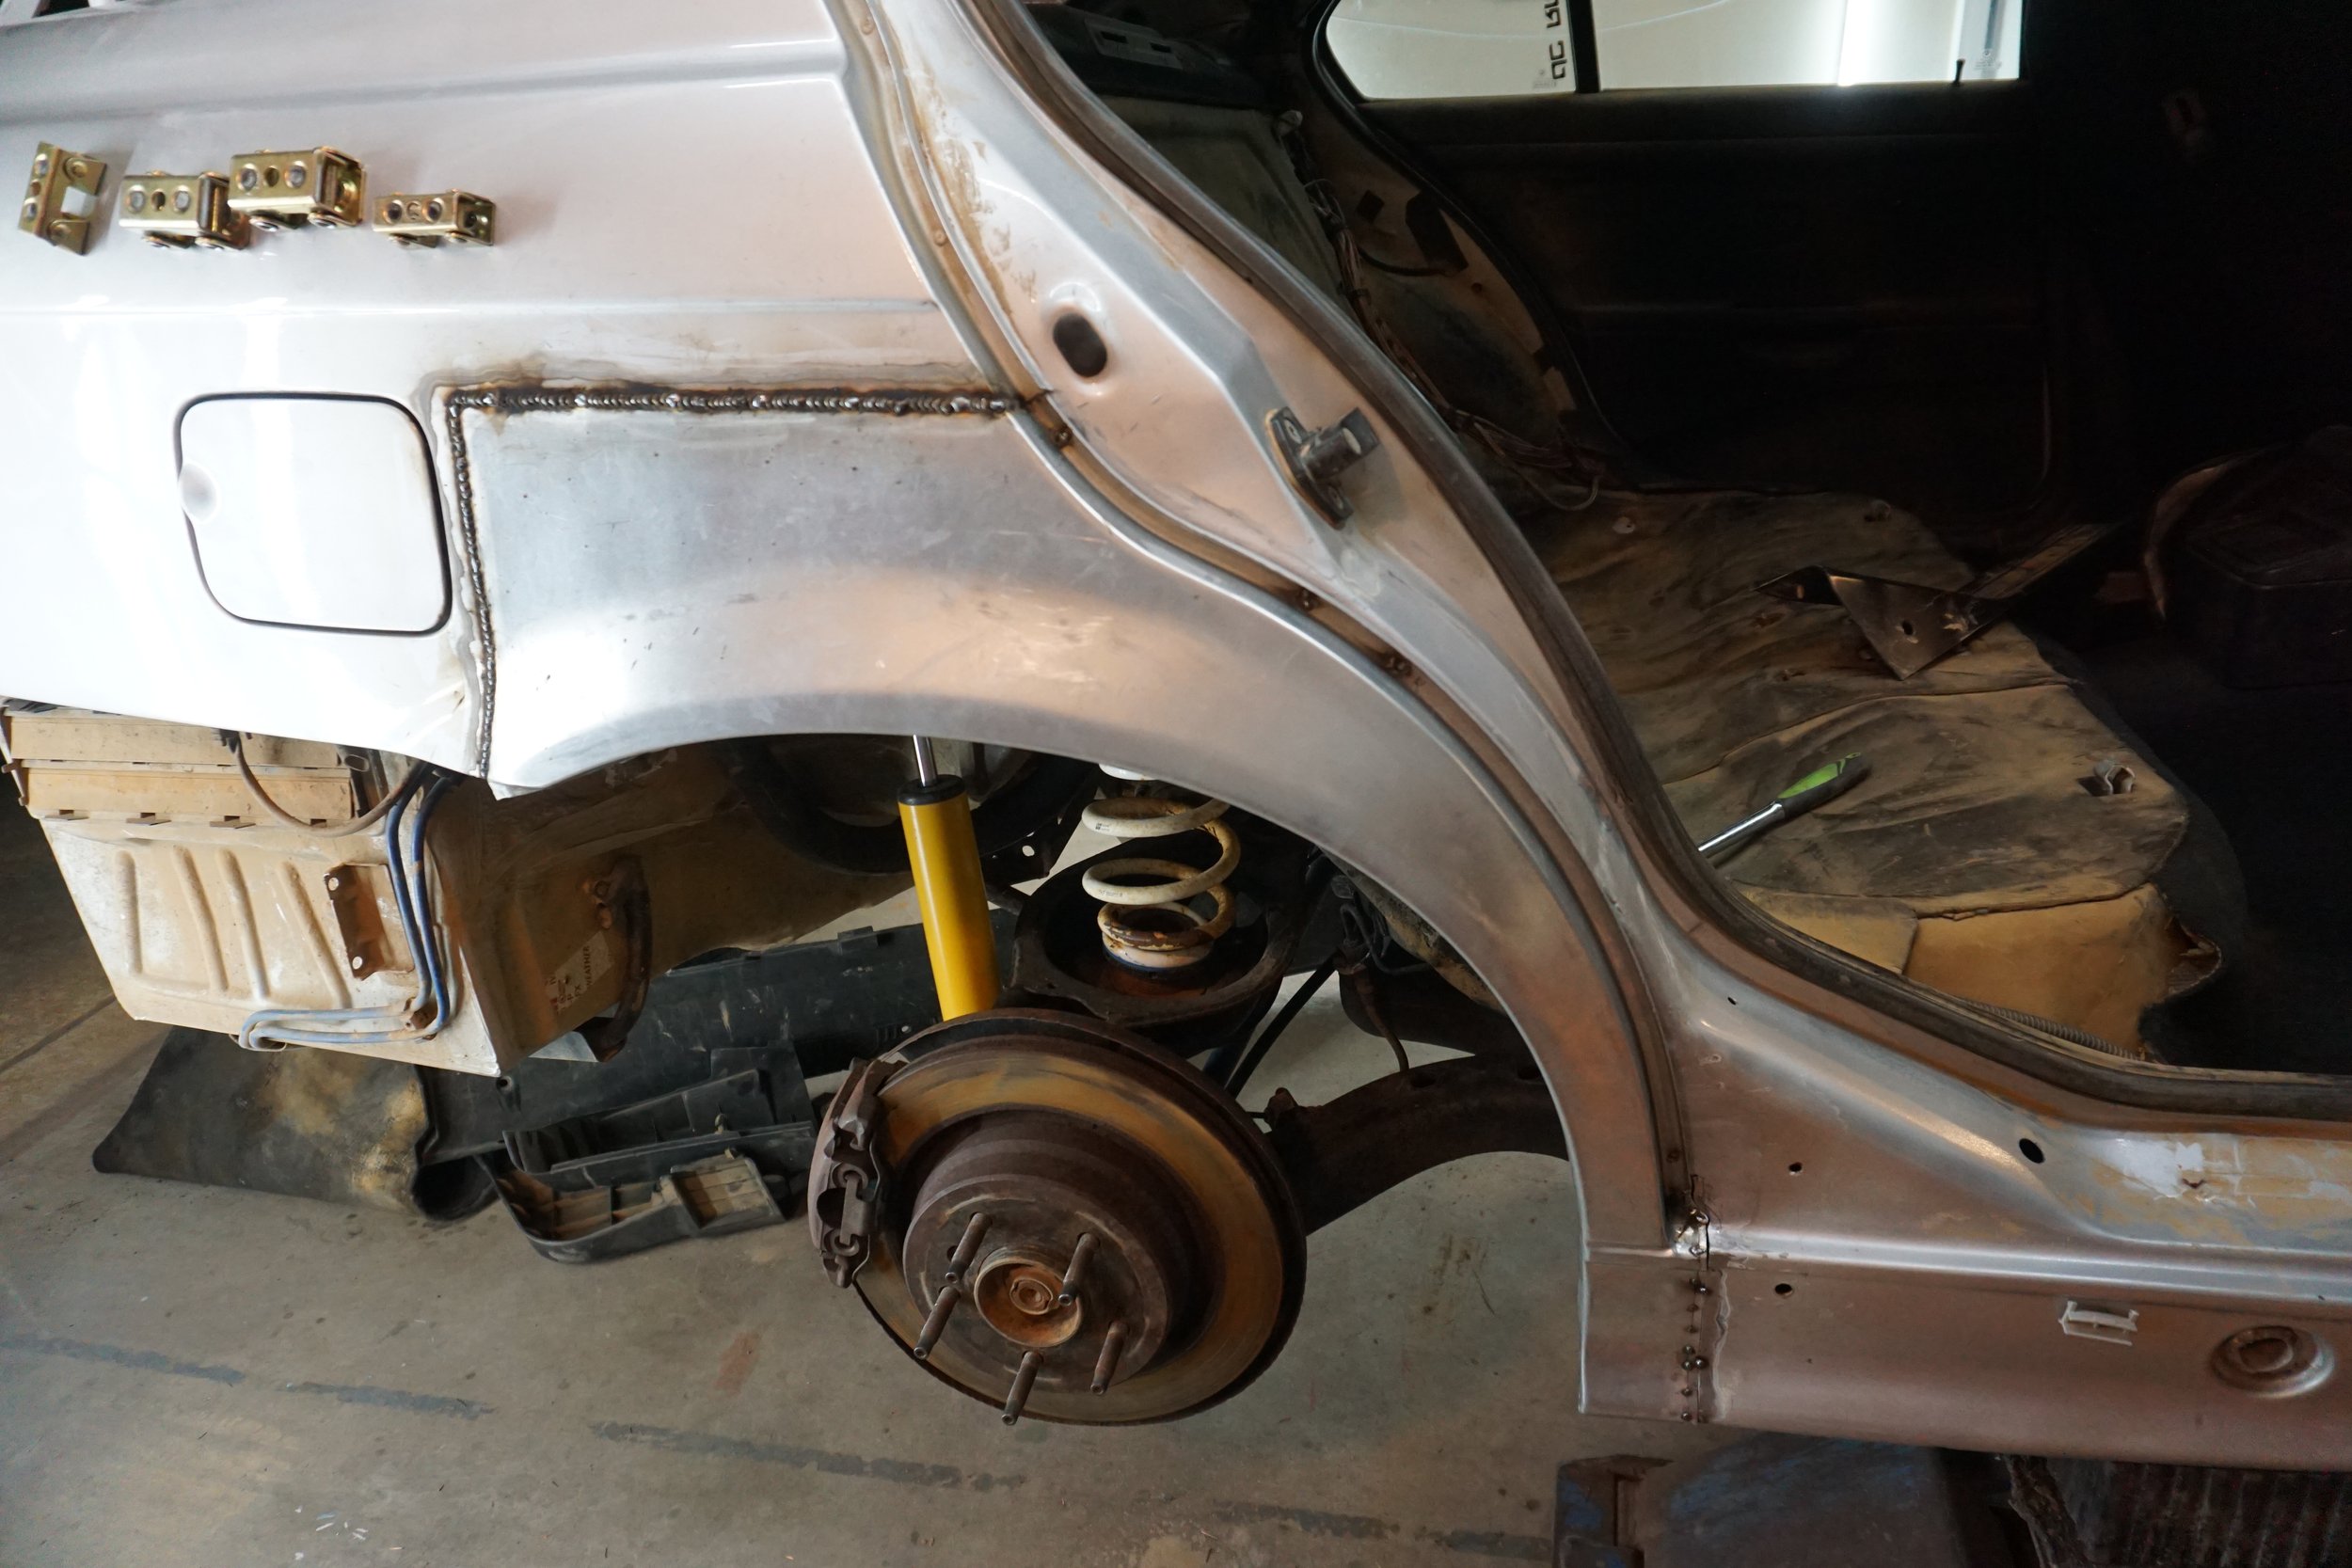
But eventually, I got it done. I didn't put any gap (usually 1/16" IIRC) between the panels, as I didn't want to risk blowing through to gap. I am a complete amateur after all. This also led me to keep the settings a little low on the welder. It would have been one thing if I had access to the back of the panel and could use a copper heat sink, but I didn't, and so I welded it up with basically no gap and slightly cold weld settings. Sure enough, I didn't blow through it once, but the lack of gap did cause some warpage when the pieces couldn't expand properly when they heated up. I did blow each weld off with my air gun to keep the temps down though. I did a few rosette welds along the door curvature where the two pieces met, but for the most part there was a big gap between them that I later filled with glass filler.
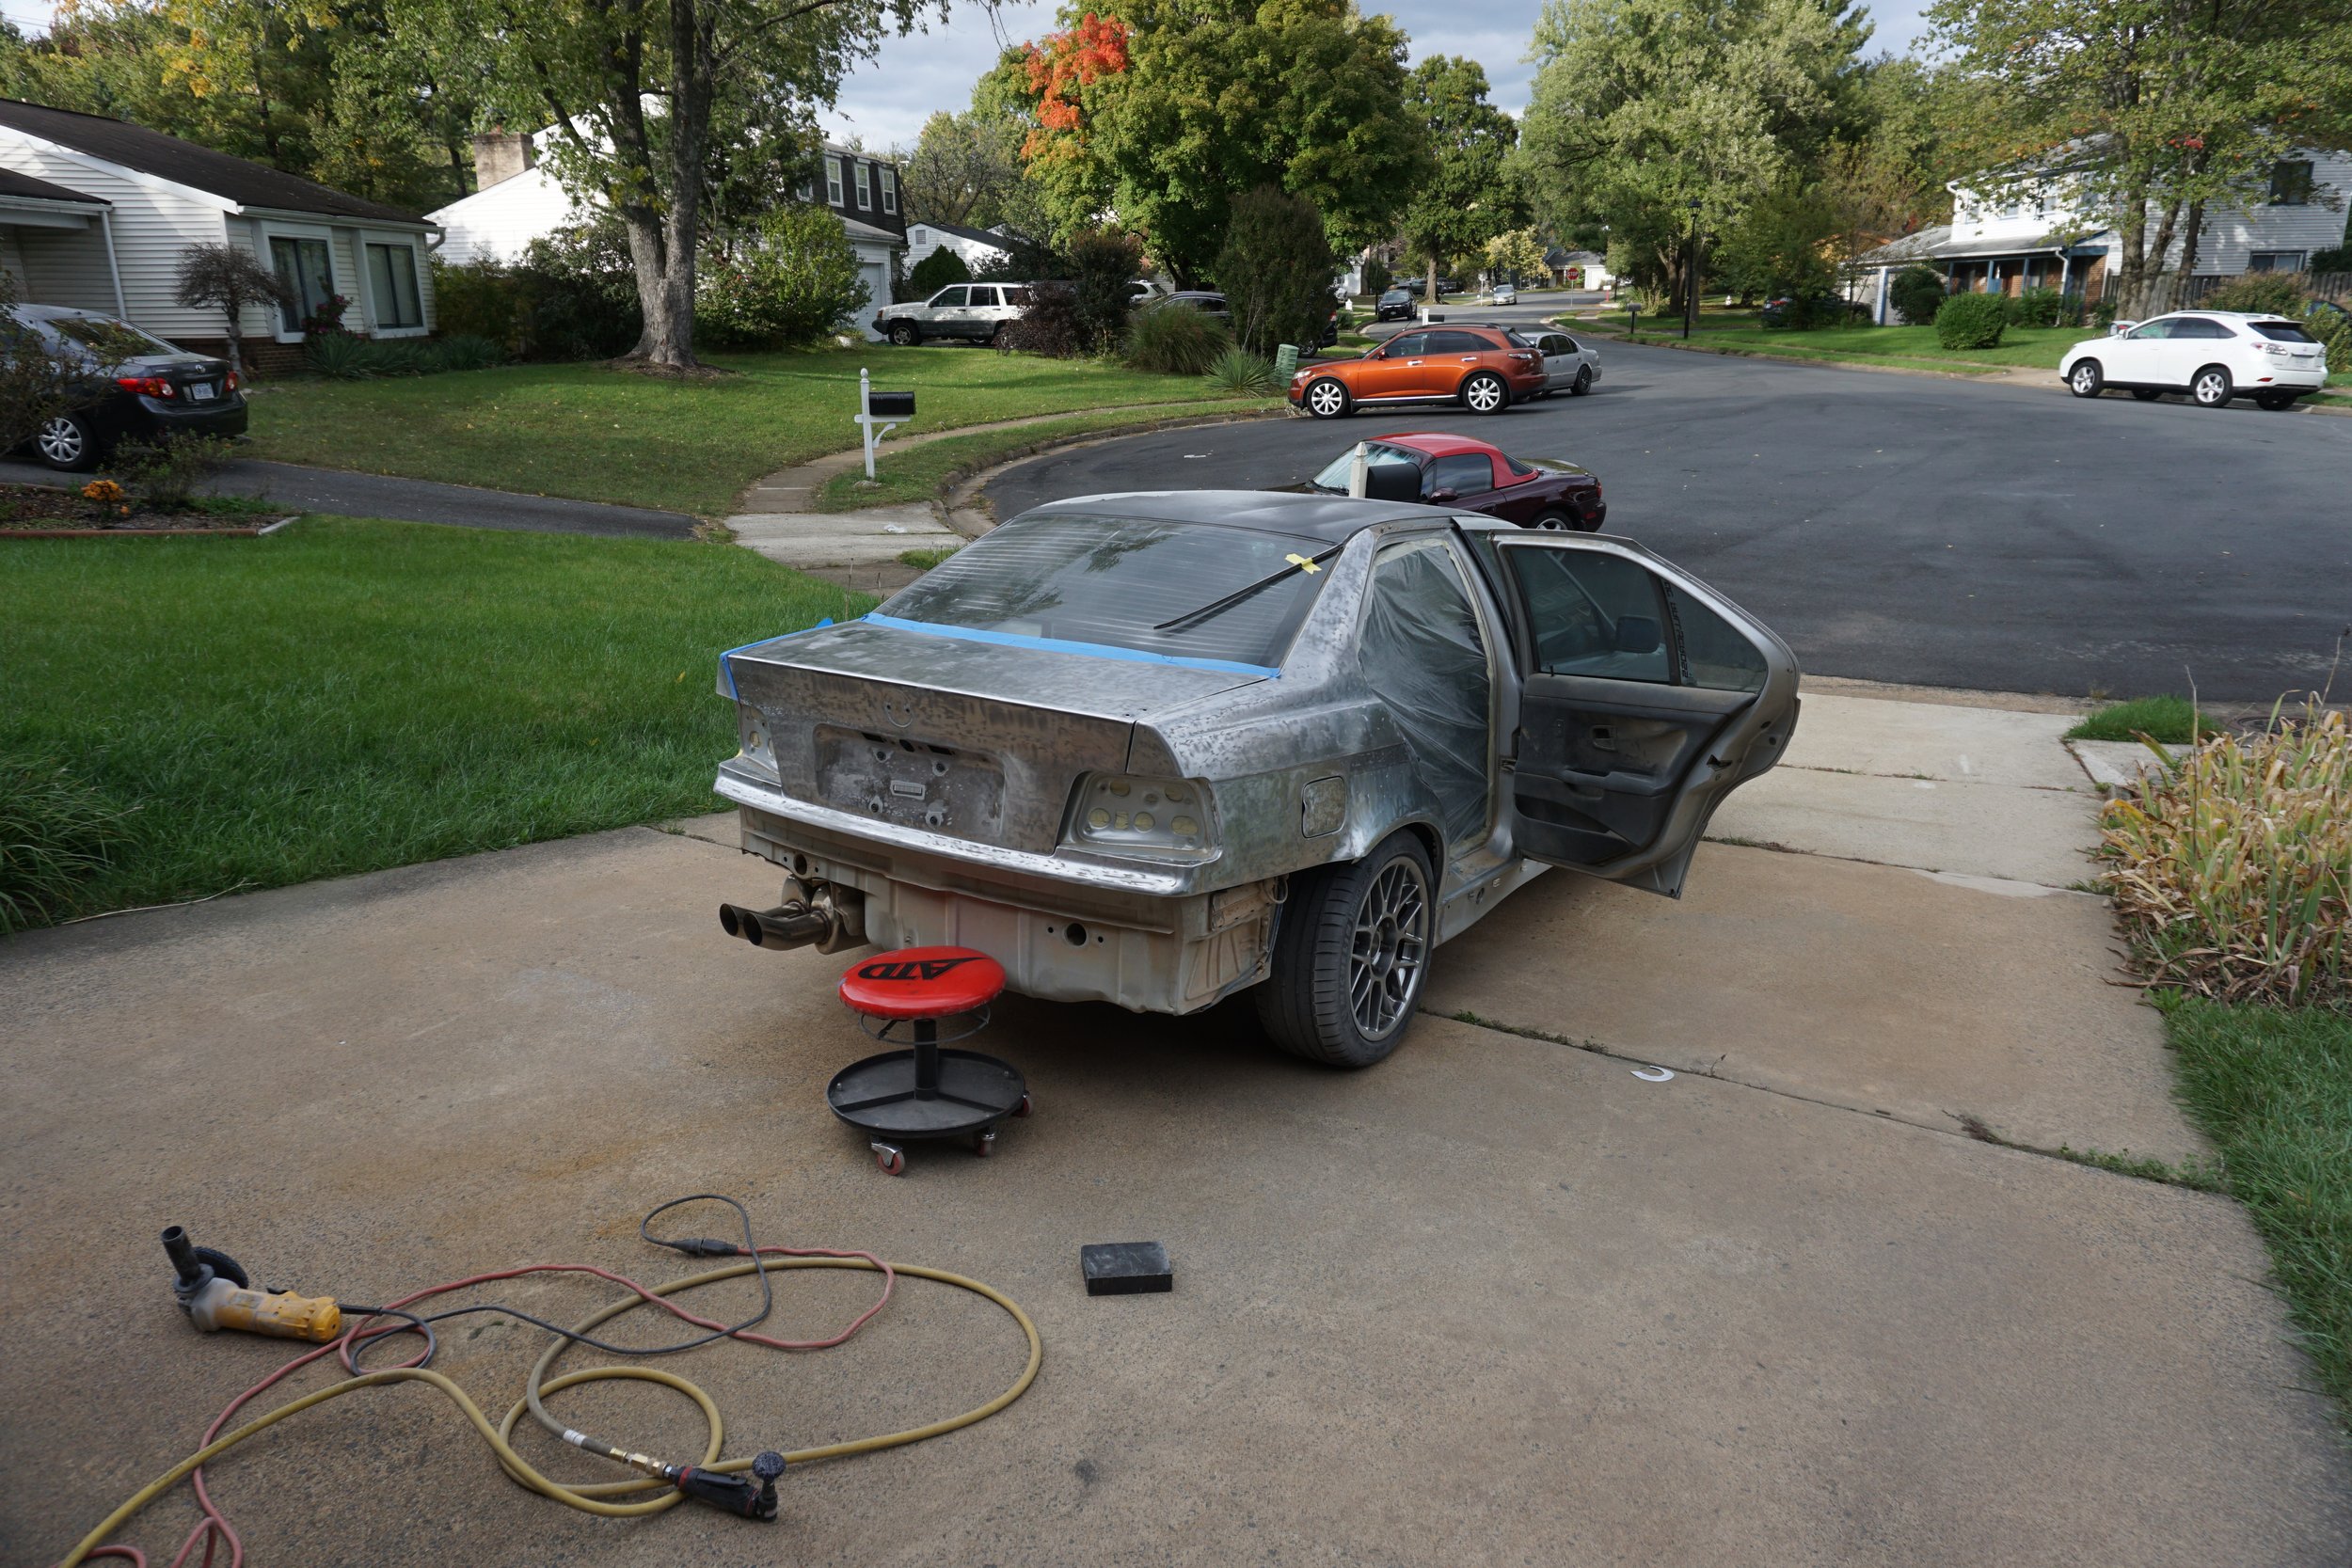
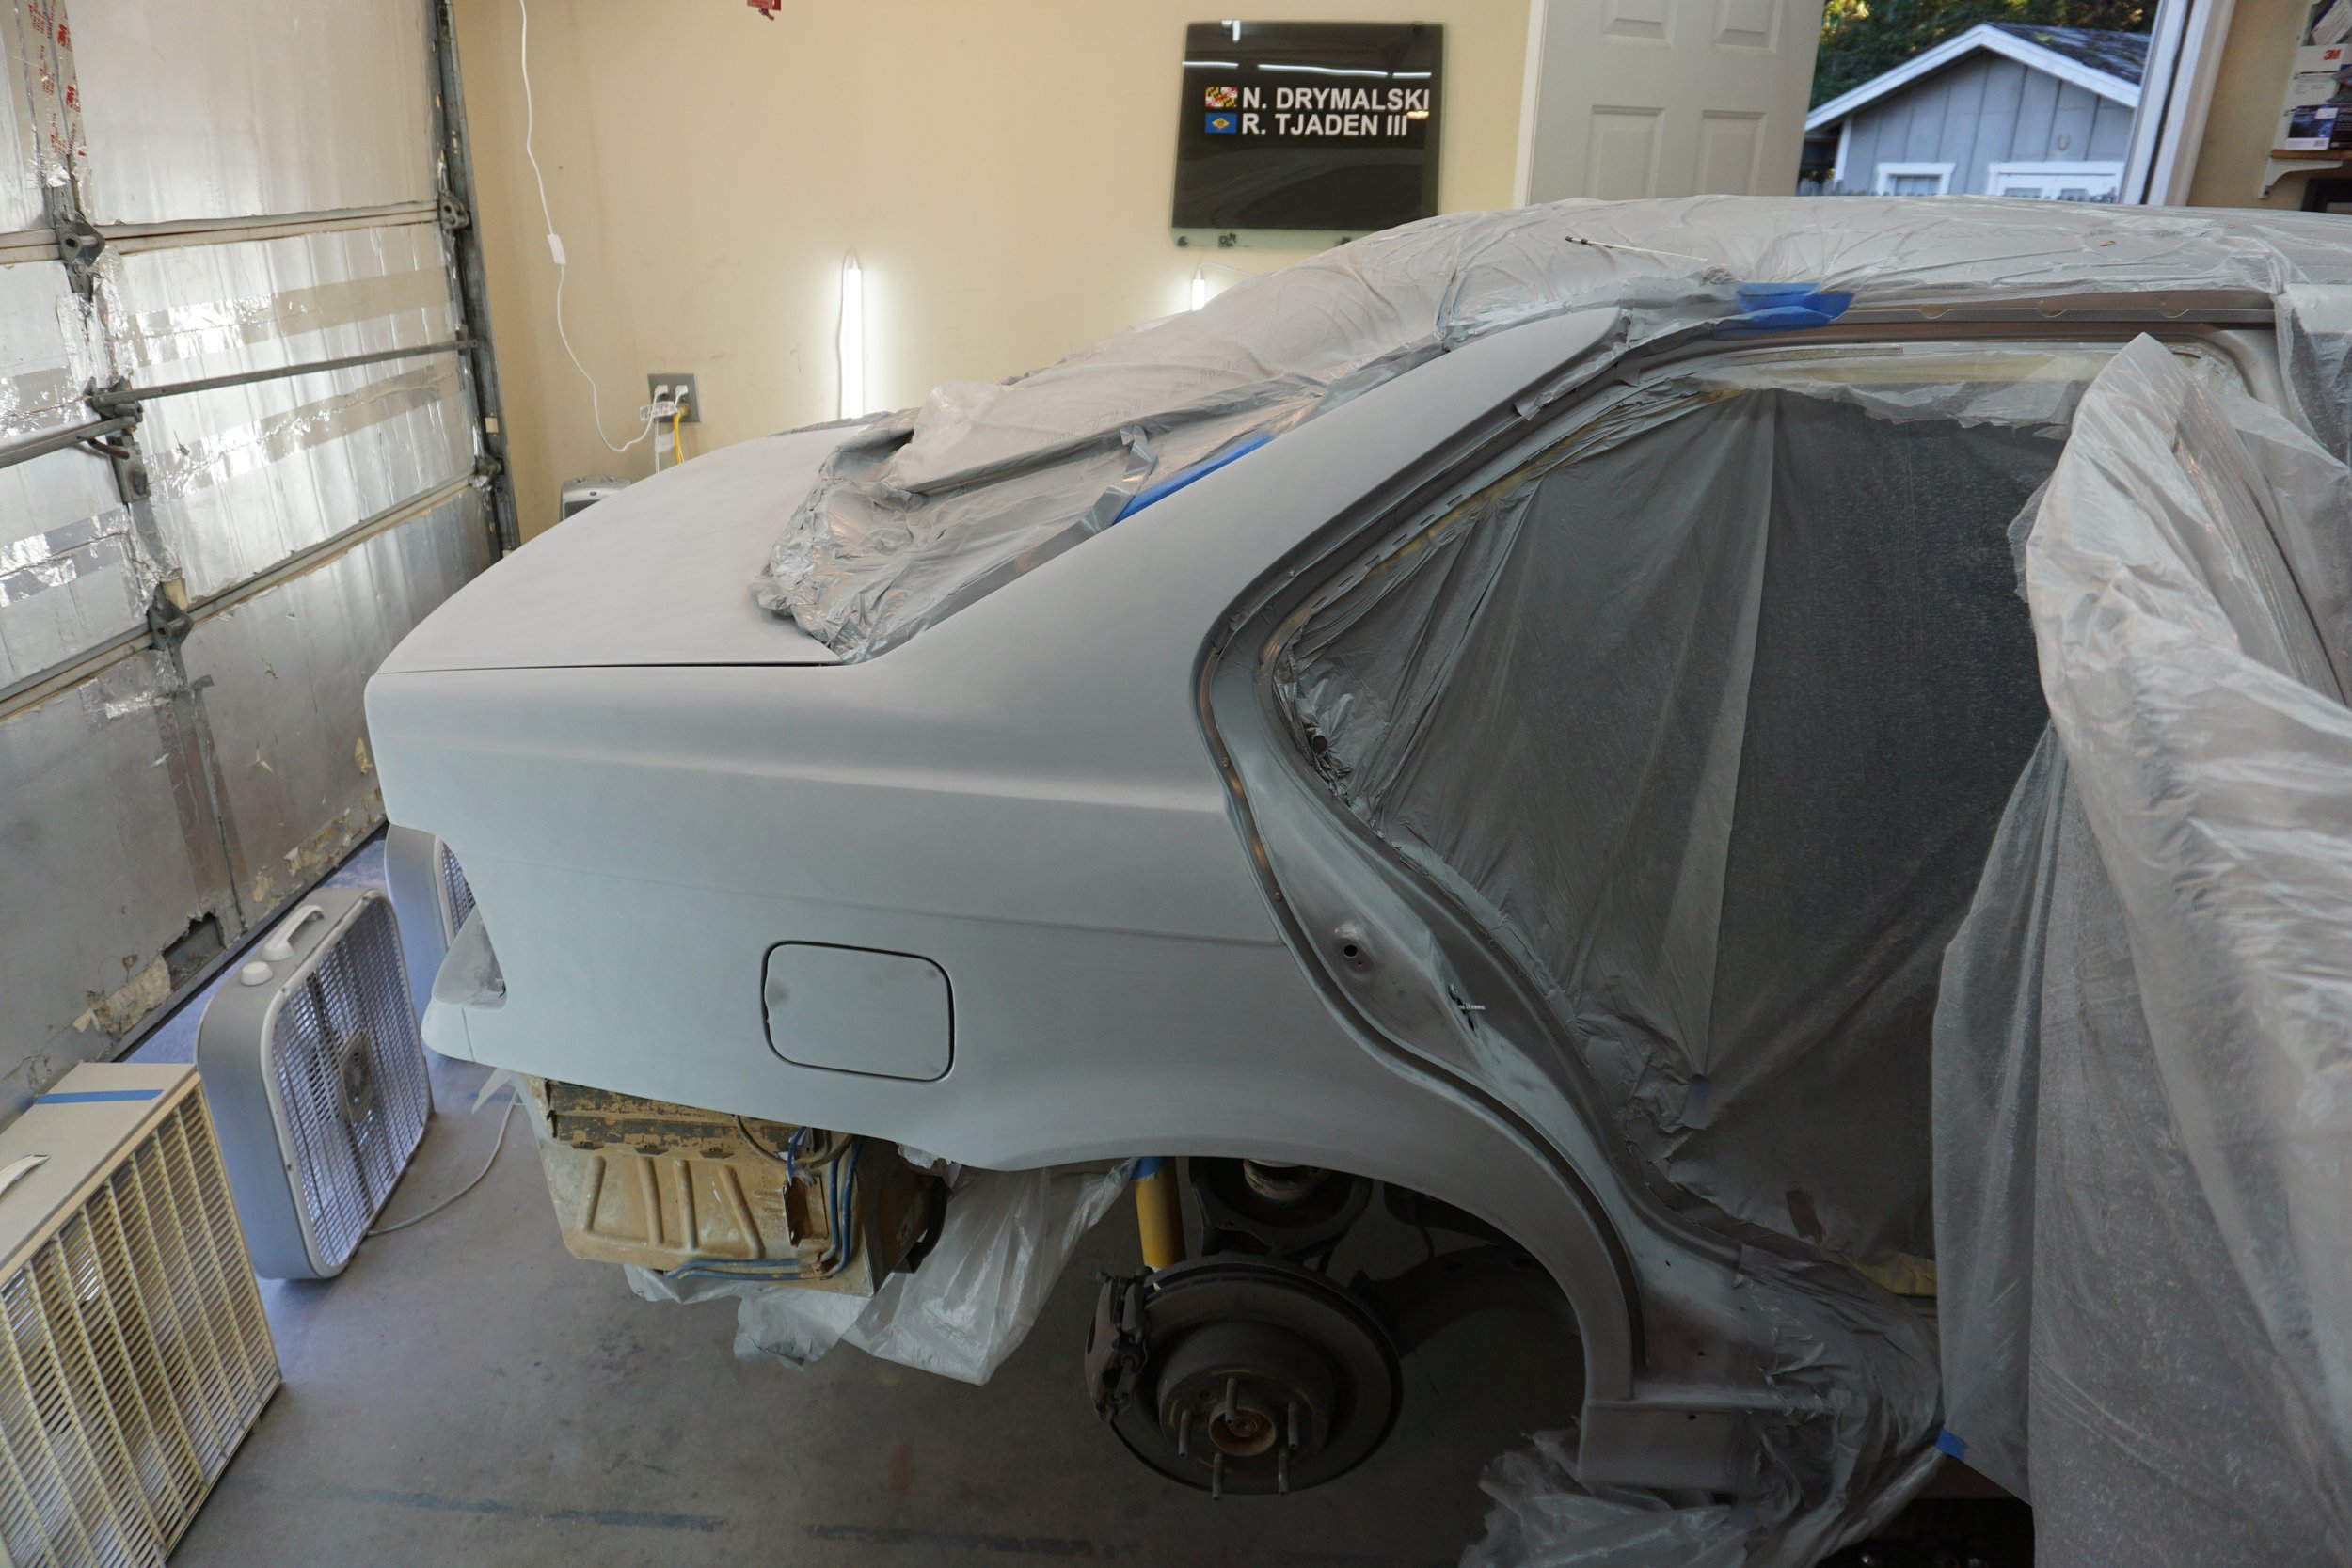
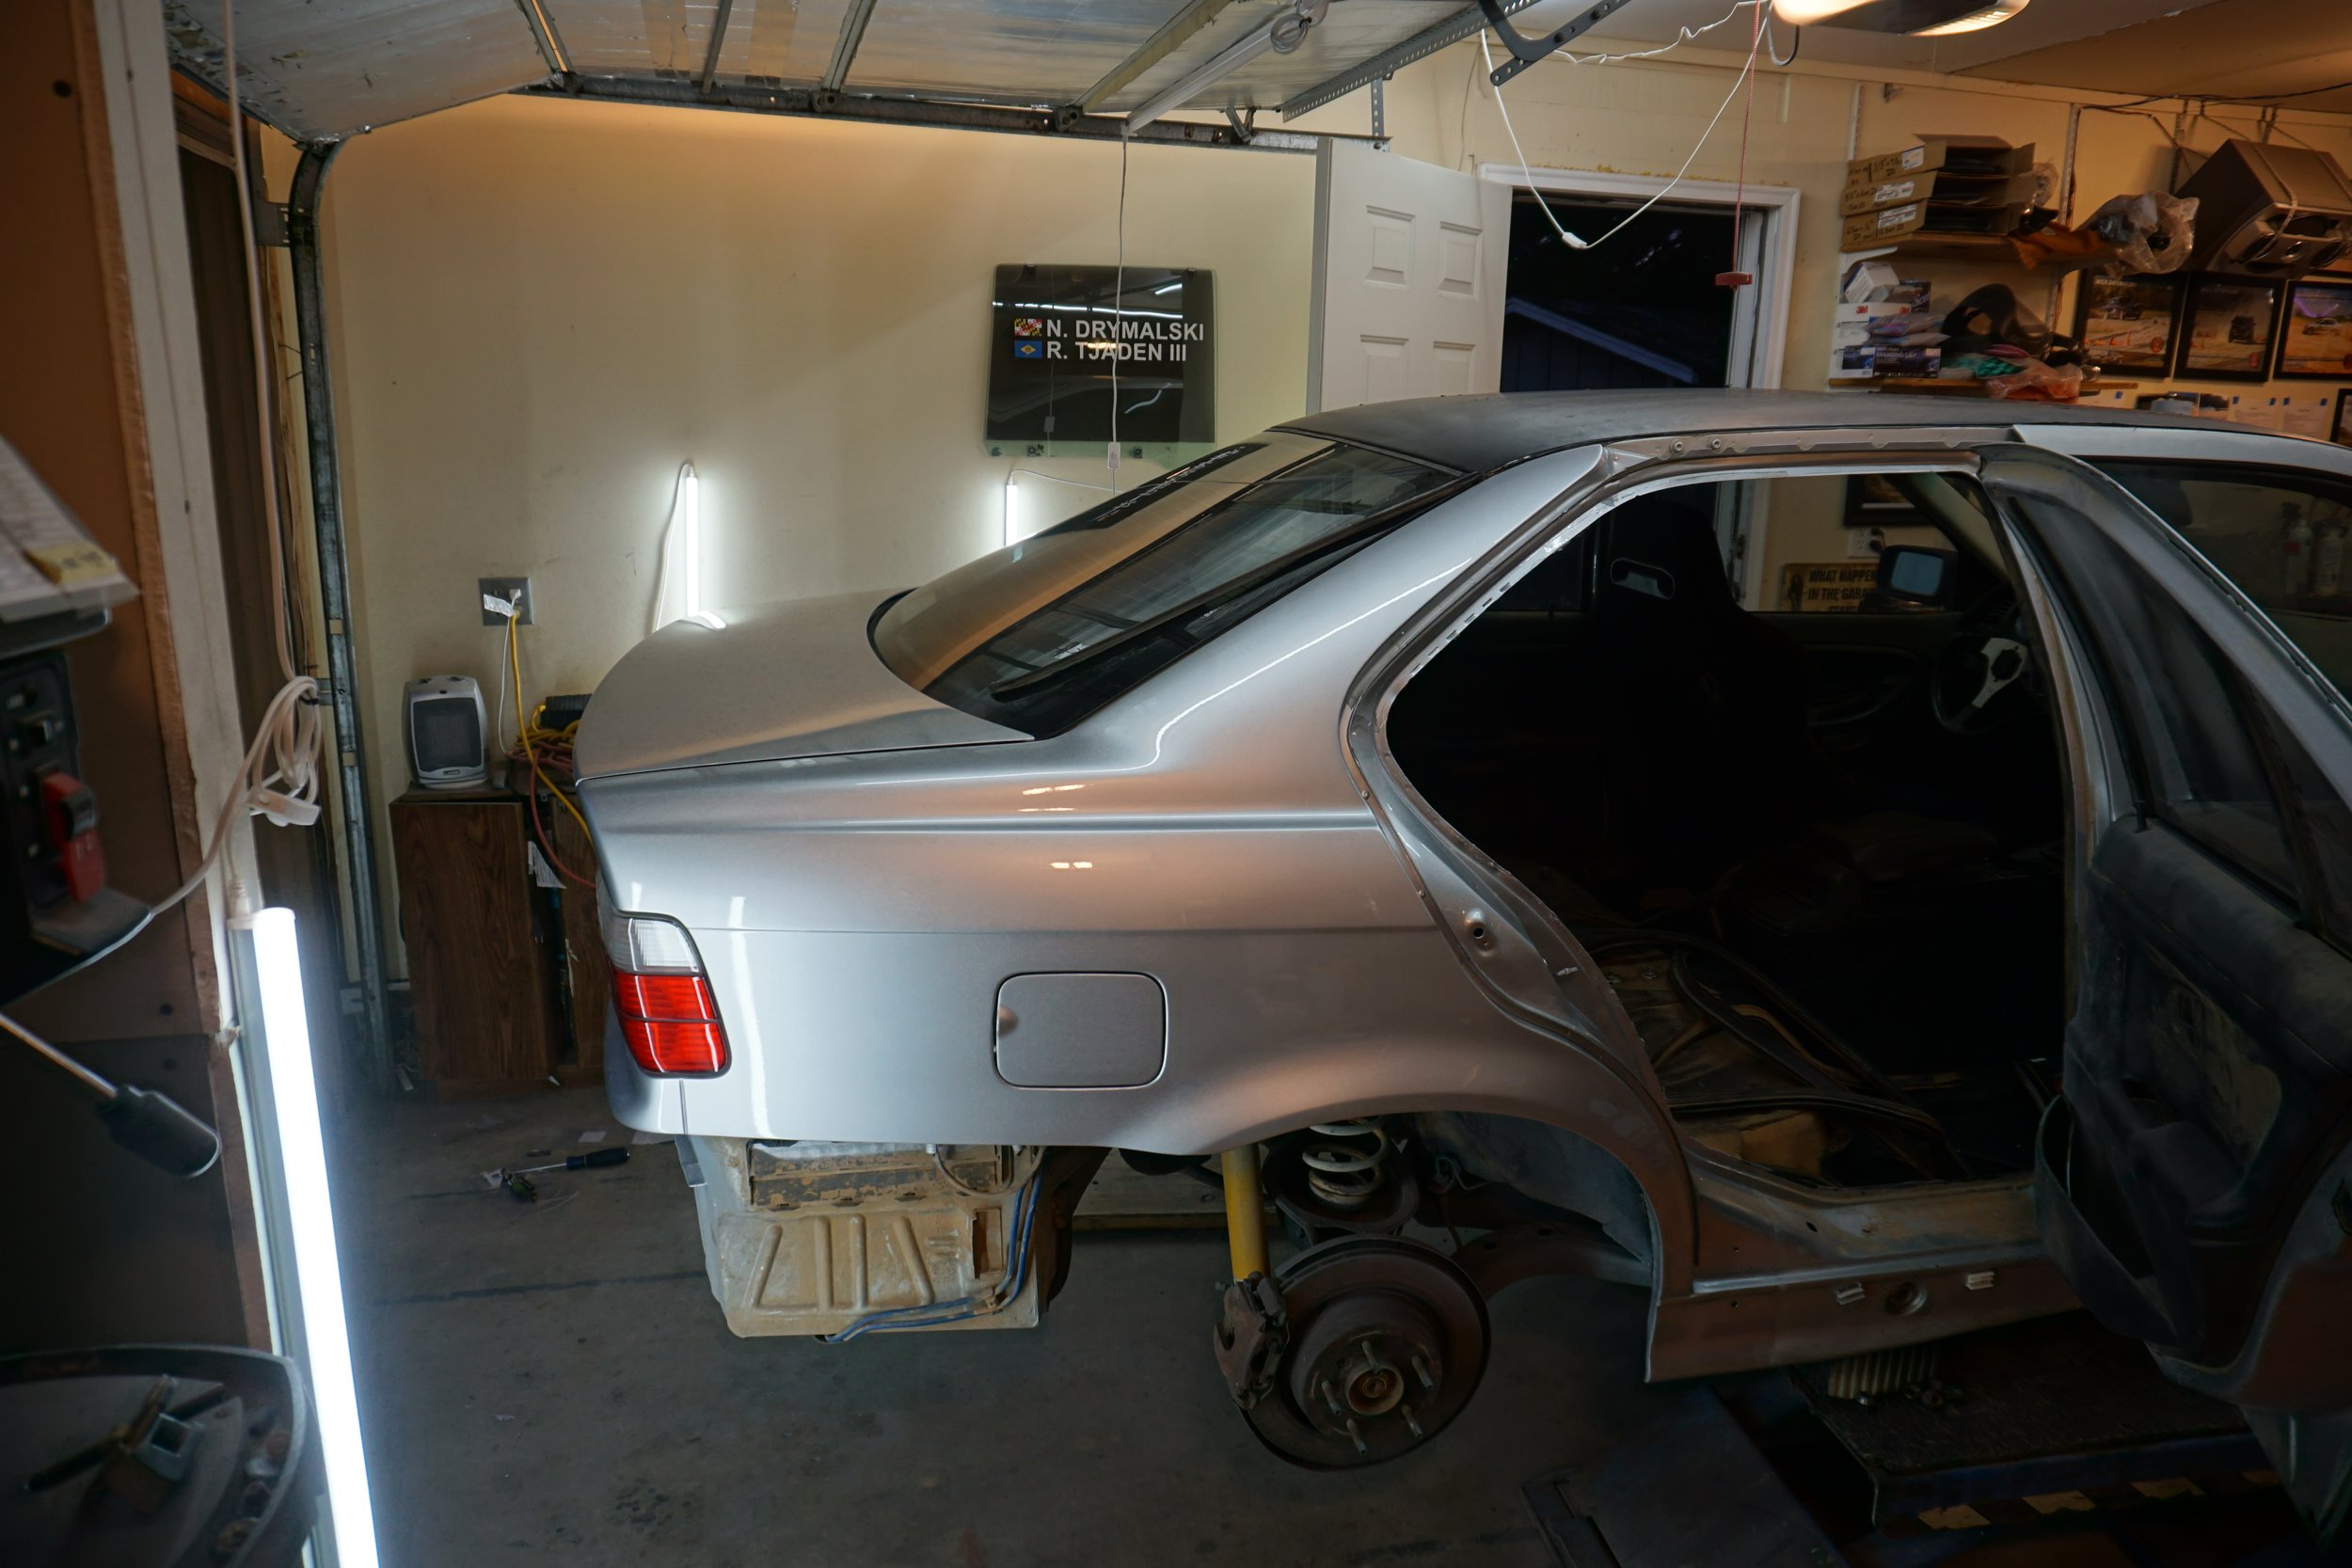
Then I pulled the car out to strip off the rest of the paint. I got some paint stripping discs for my angle grinder and got busy! I discovered some previously unknown body work and a lot of filler up around the window...

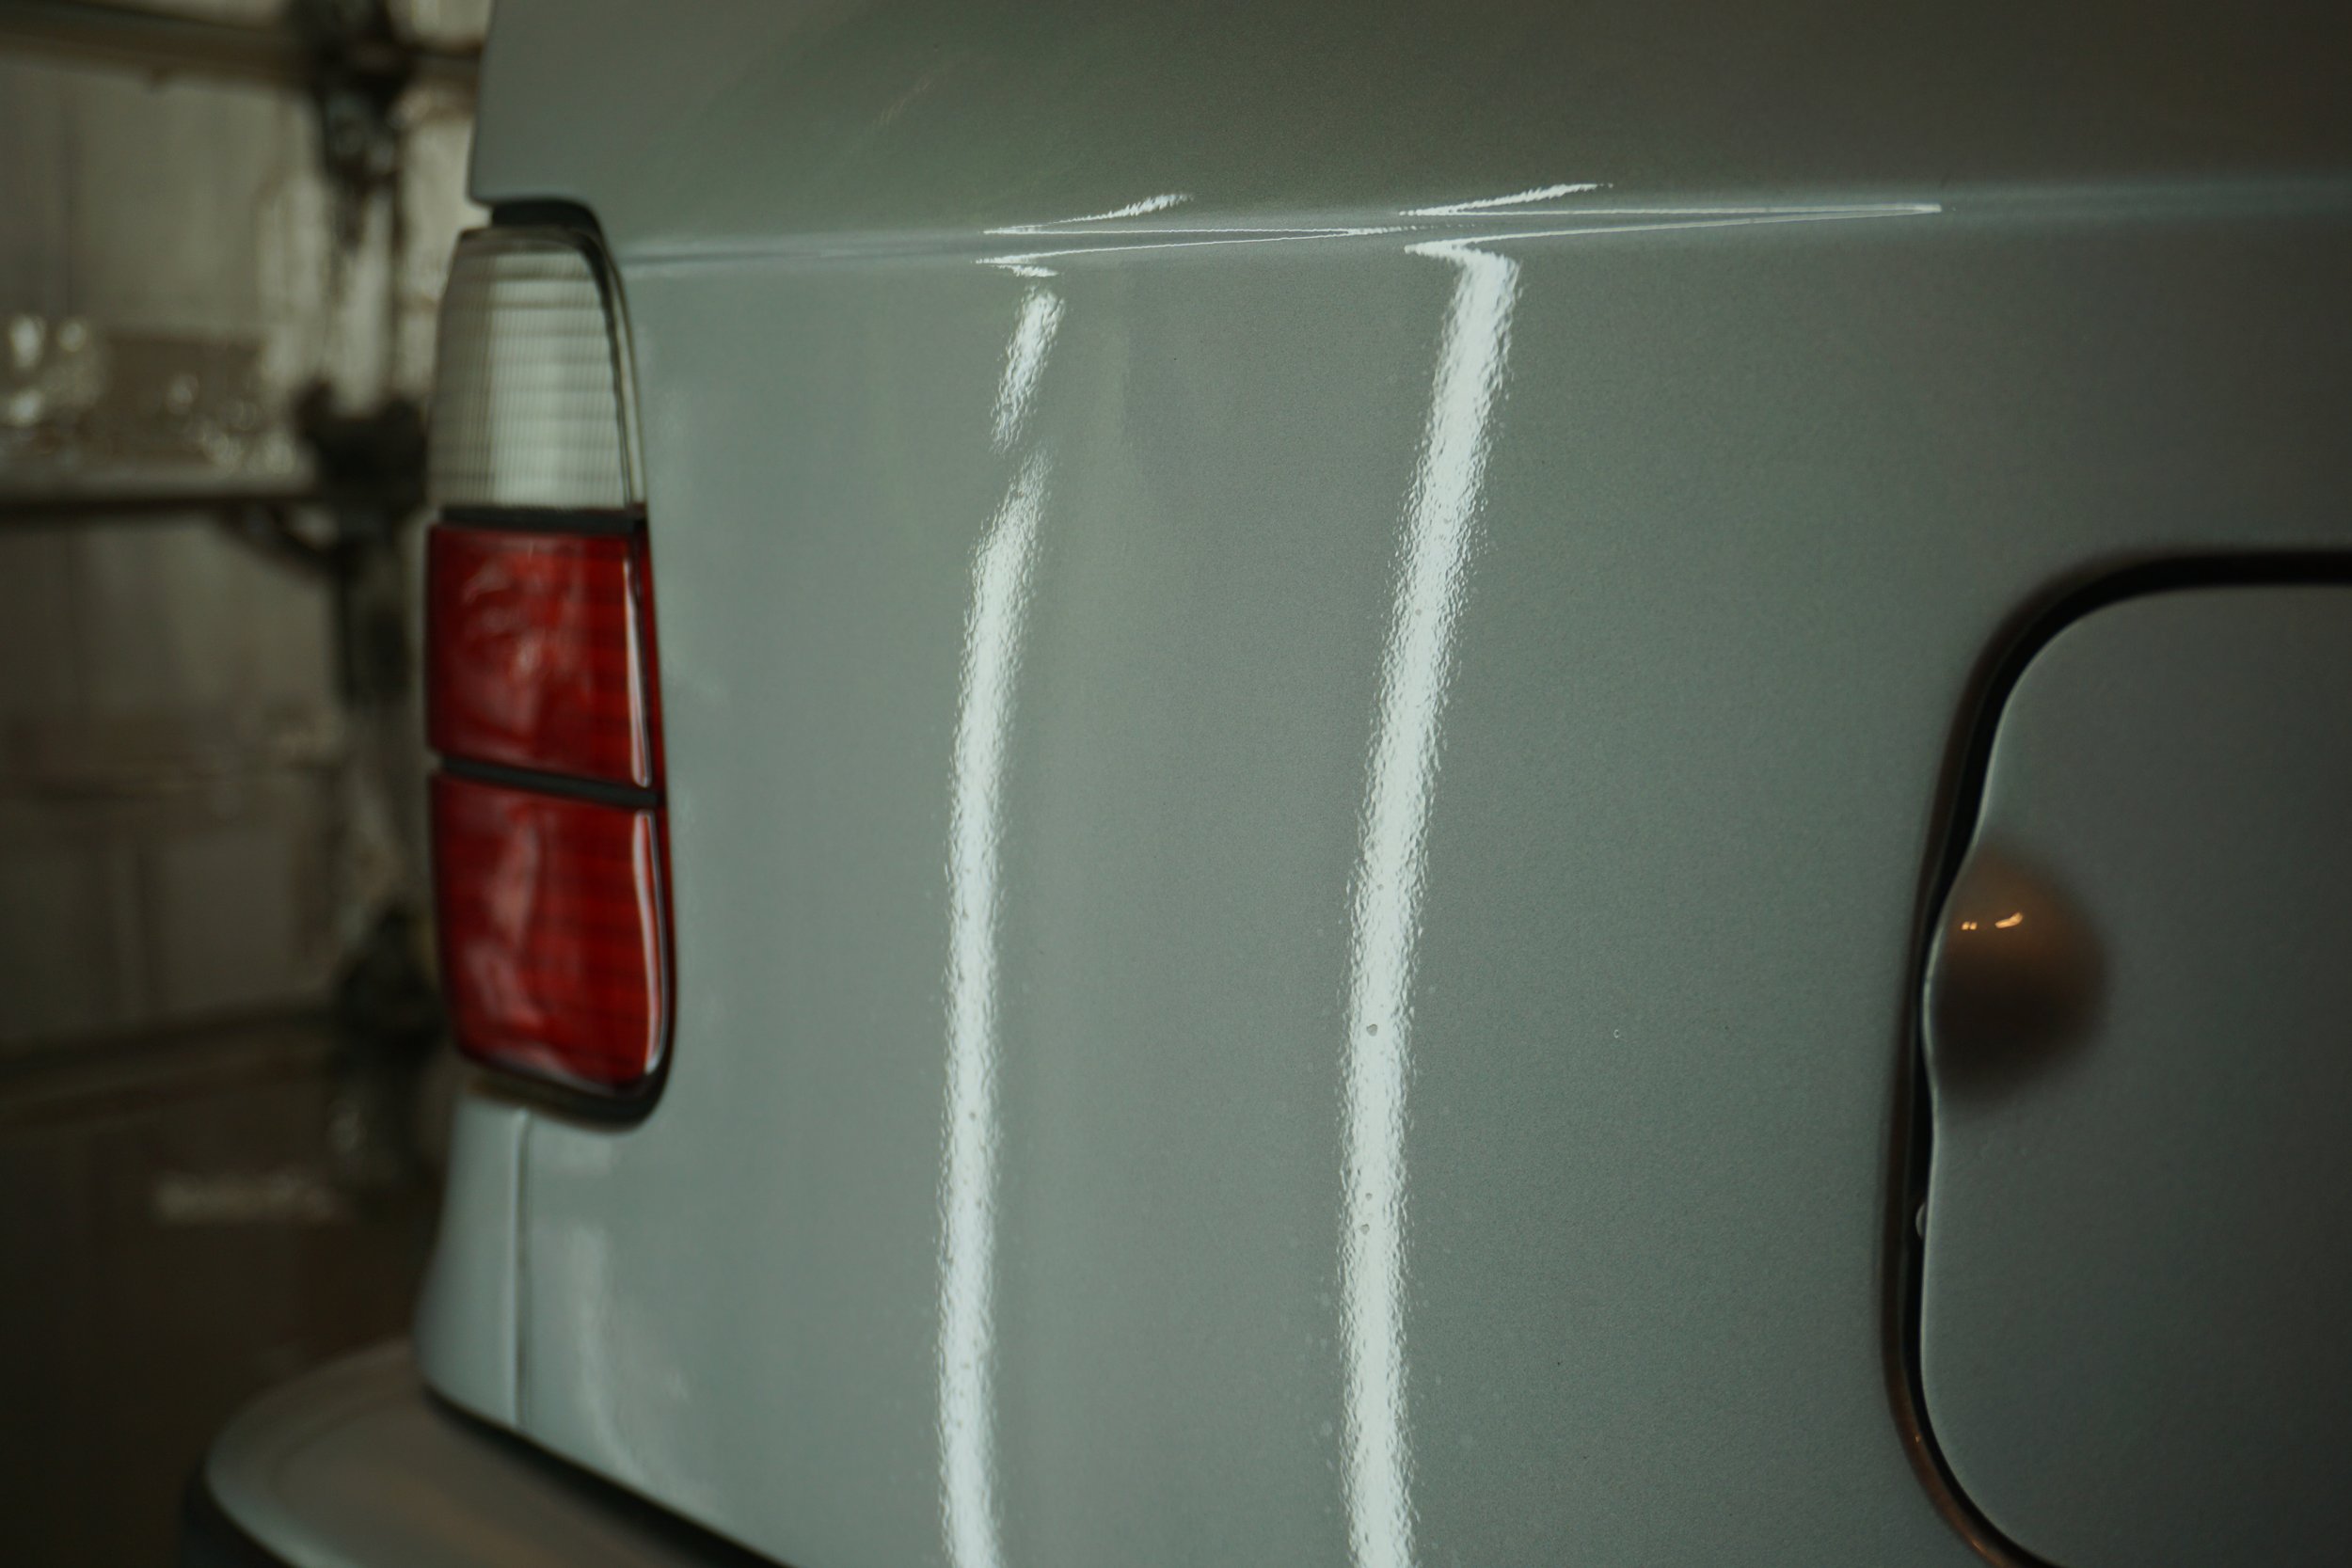
So here's the rust under the DS tail light after peeling away some paint:

Stripped
And blasted with coal slag. Bye bye rust, and hello hole!
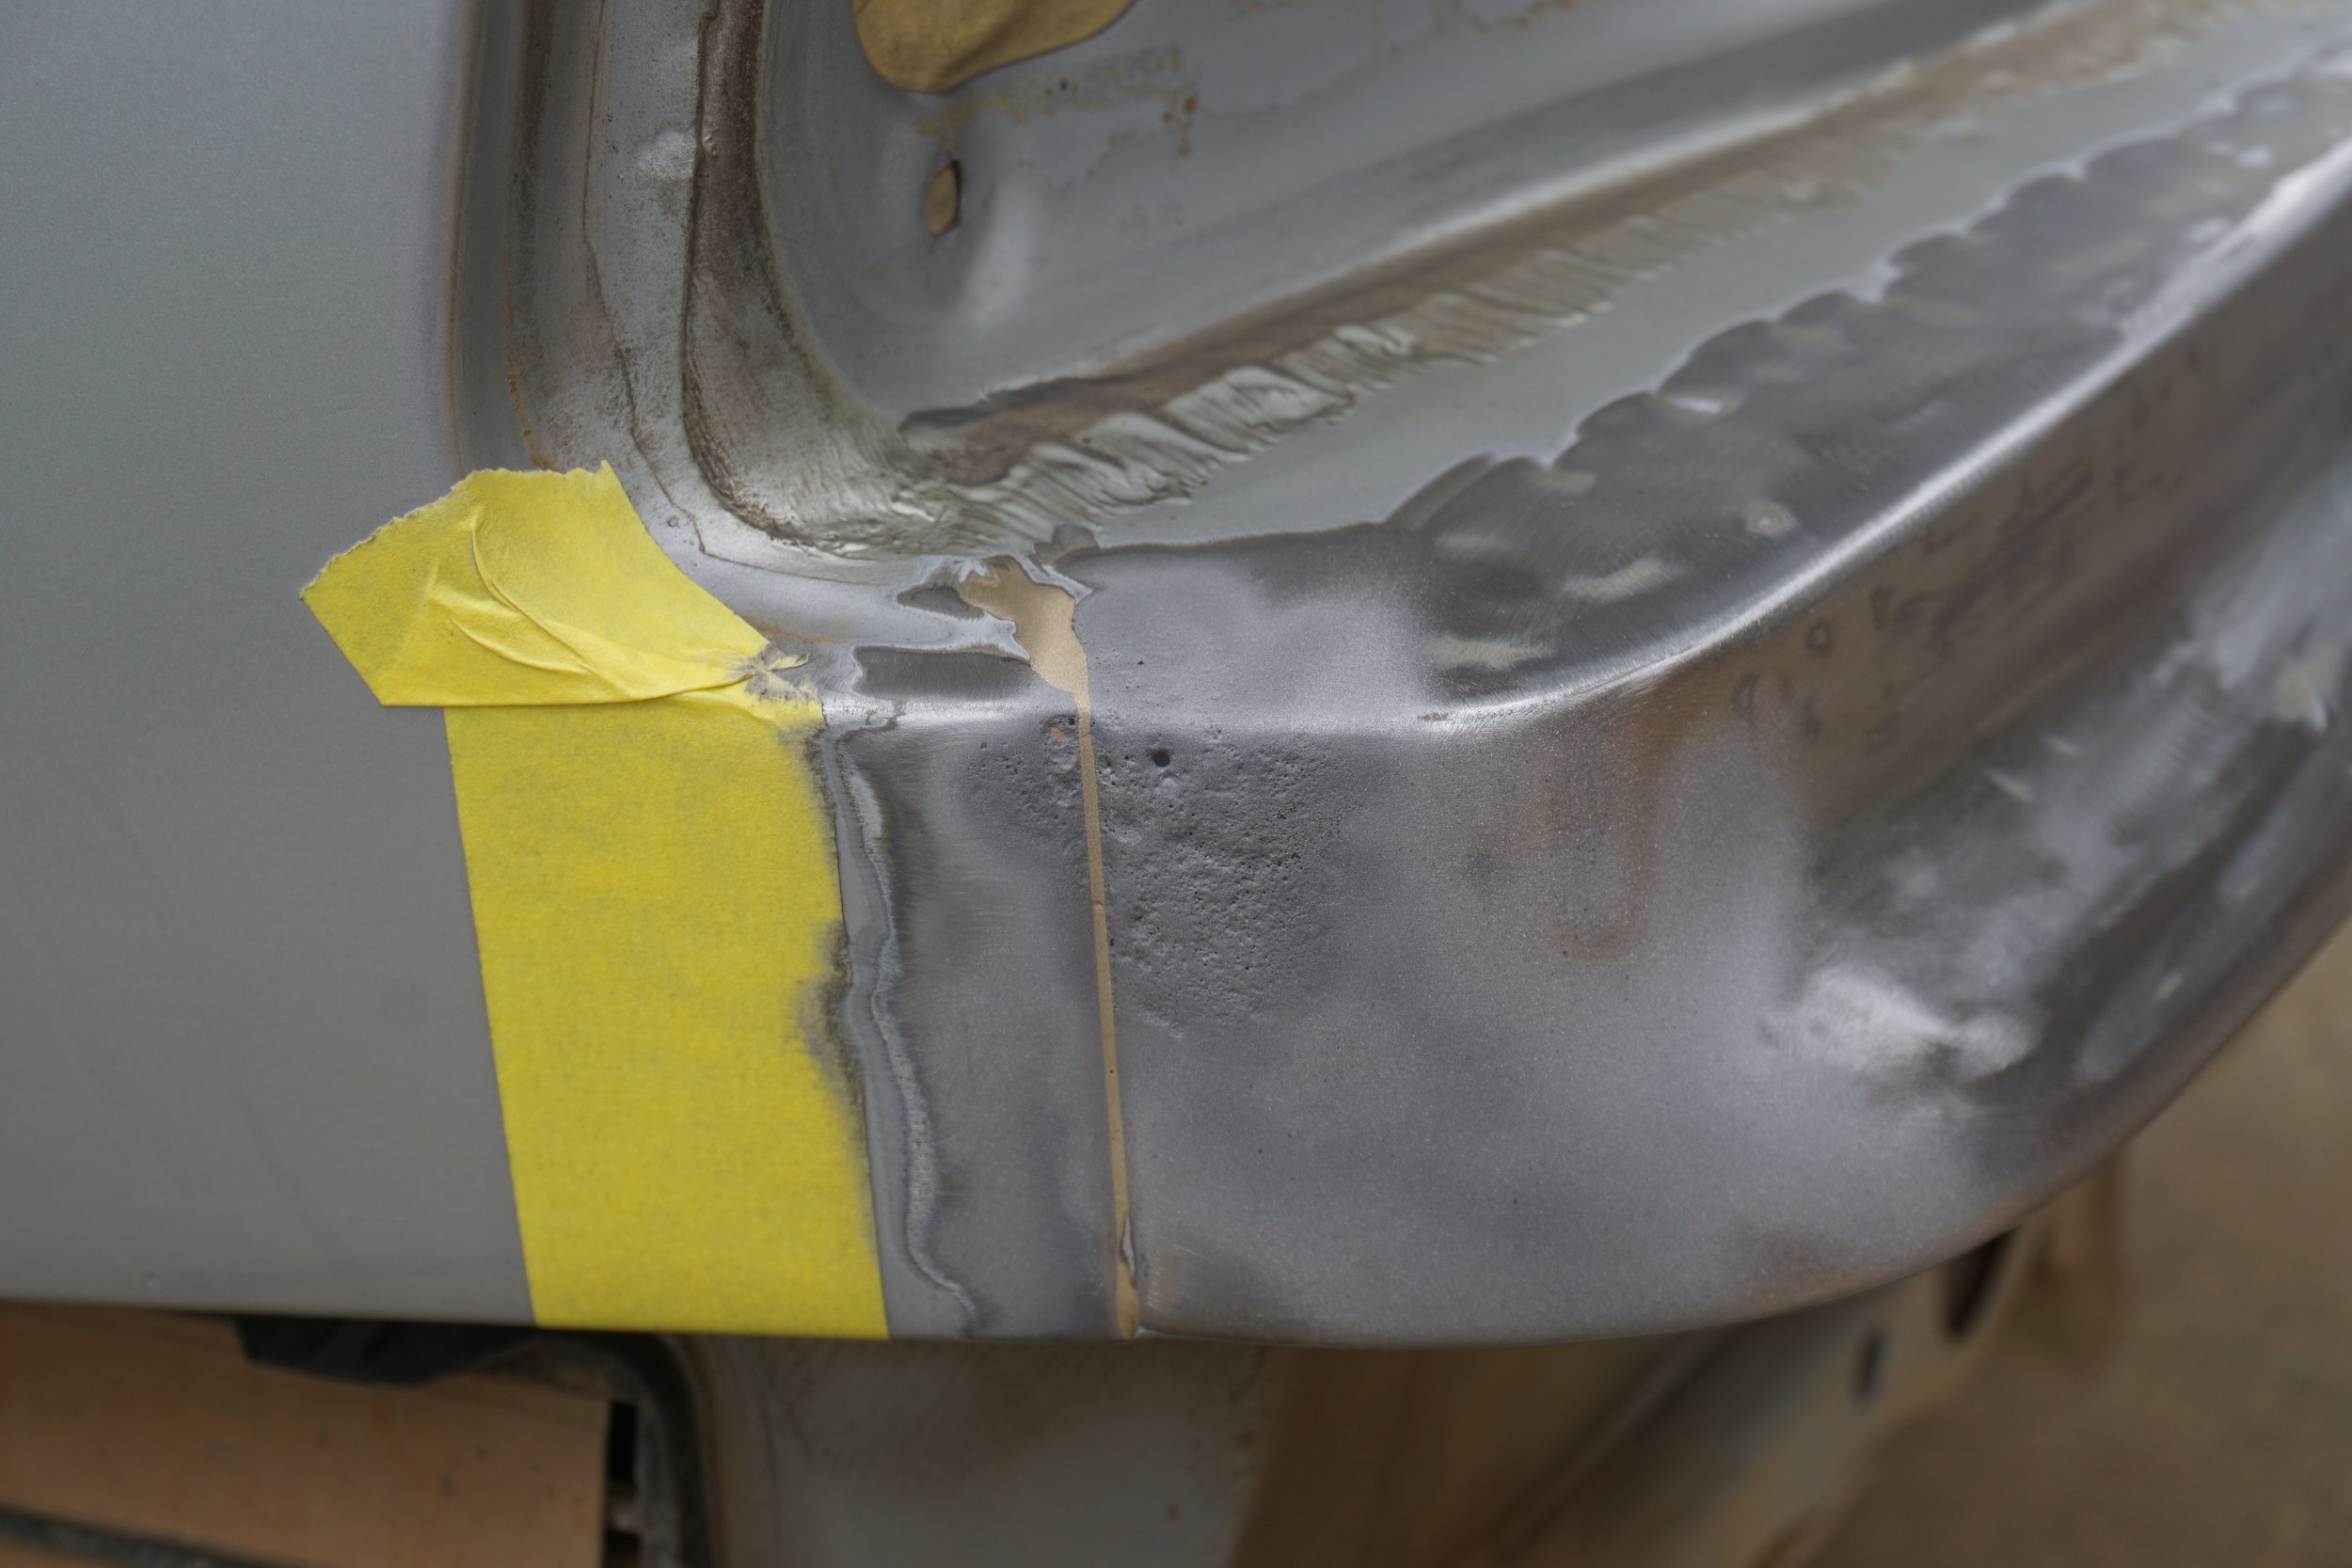
And the same for the trunk rust:
All clean!
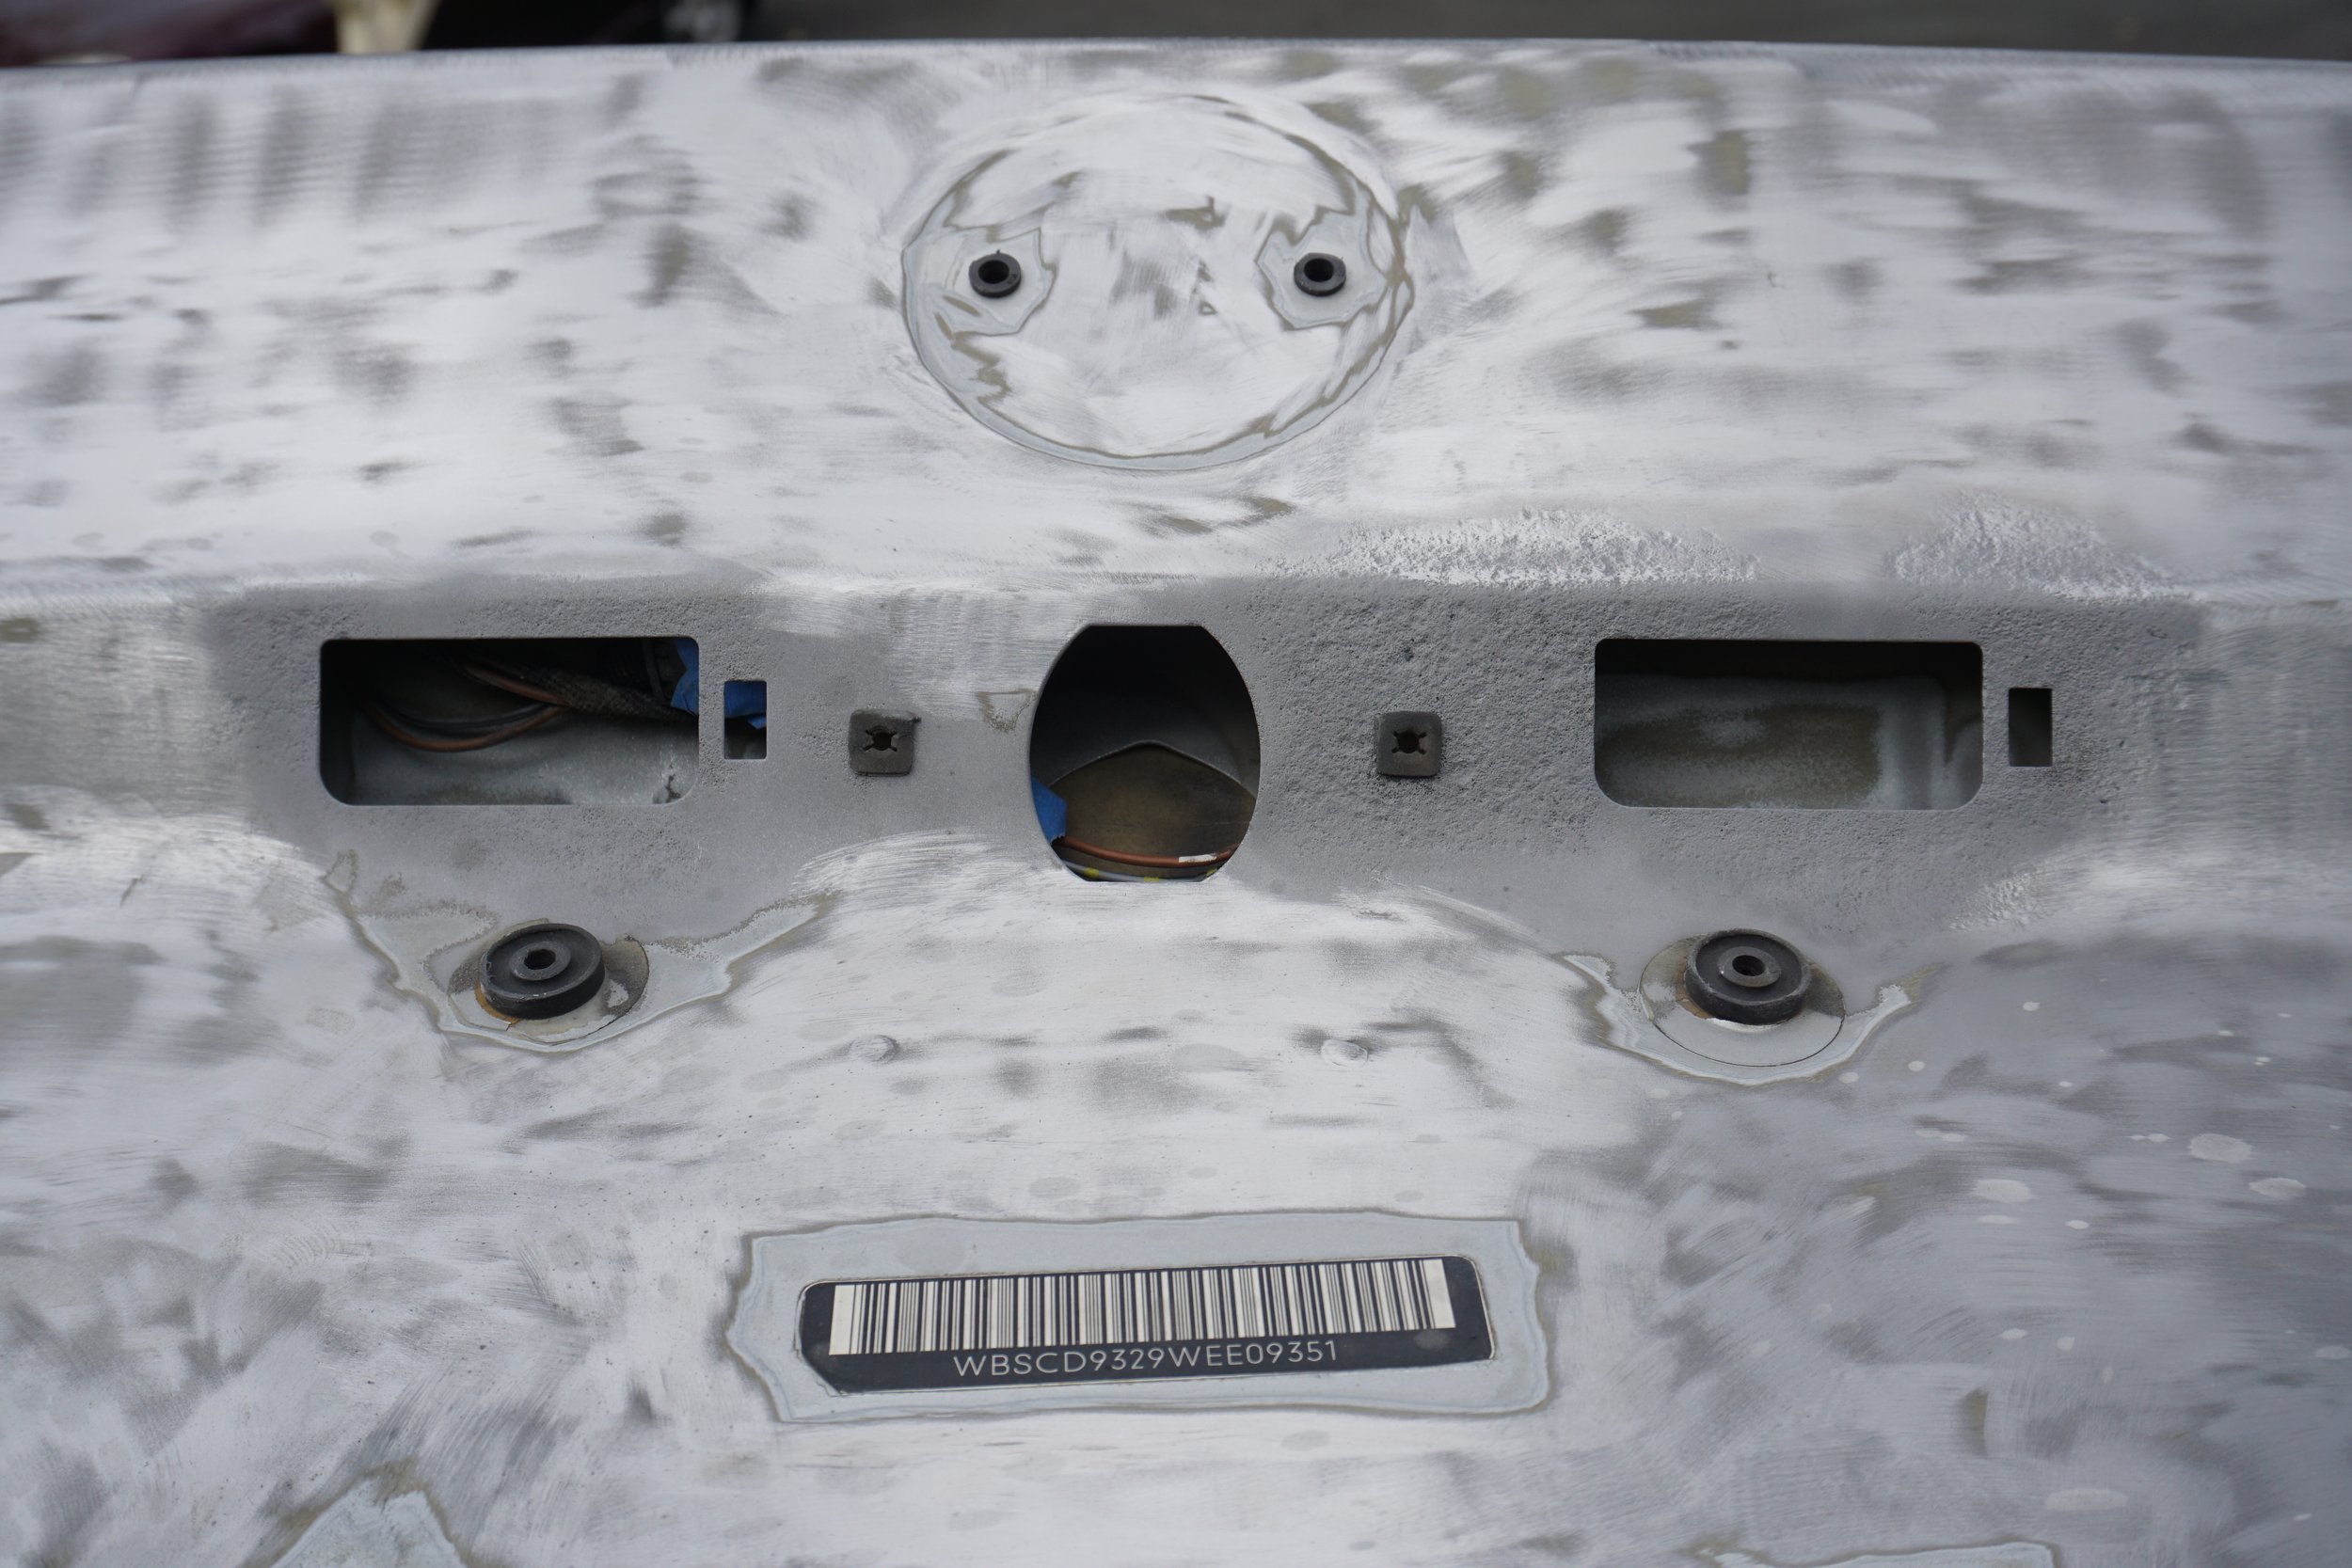
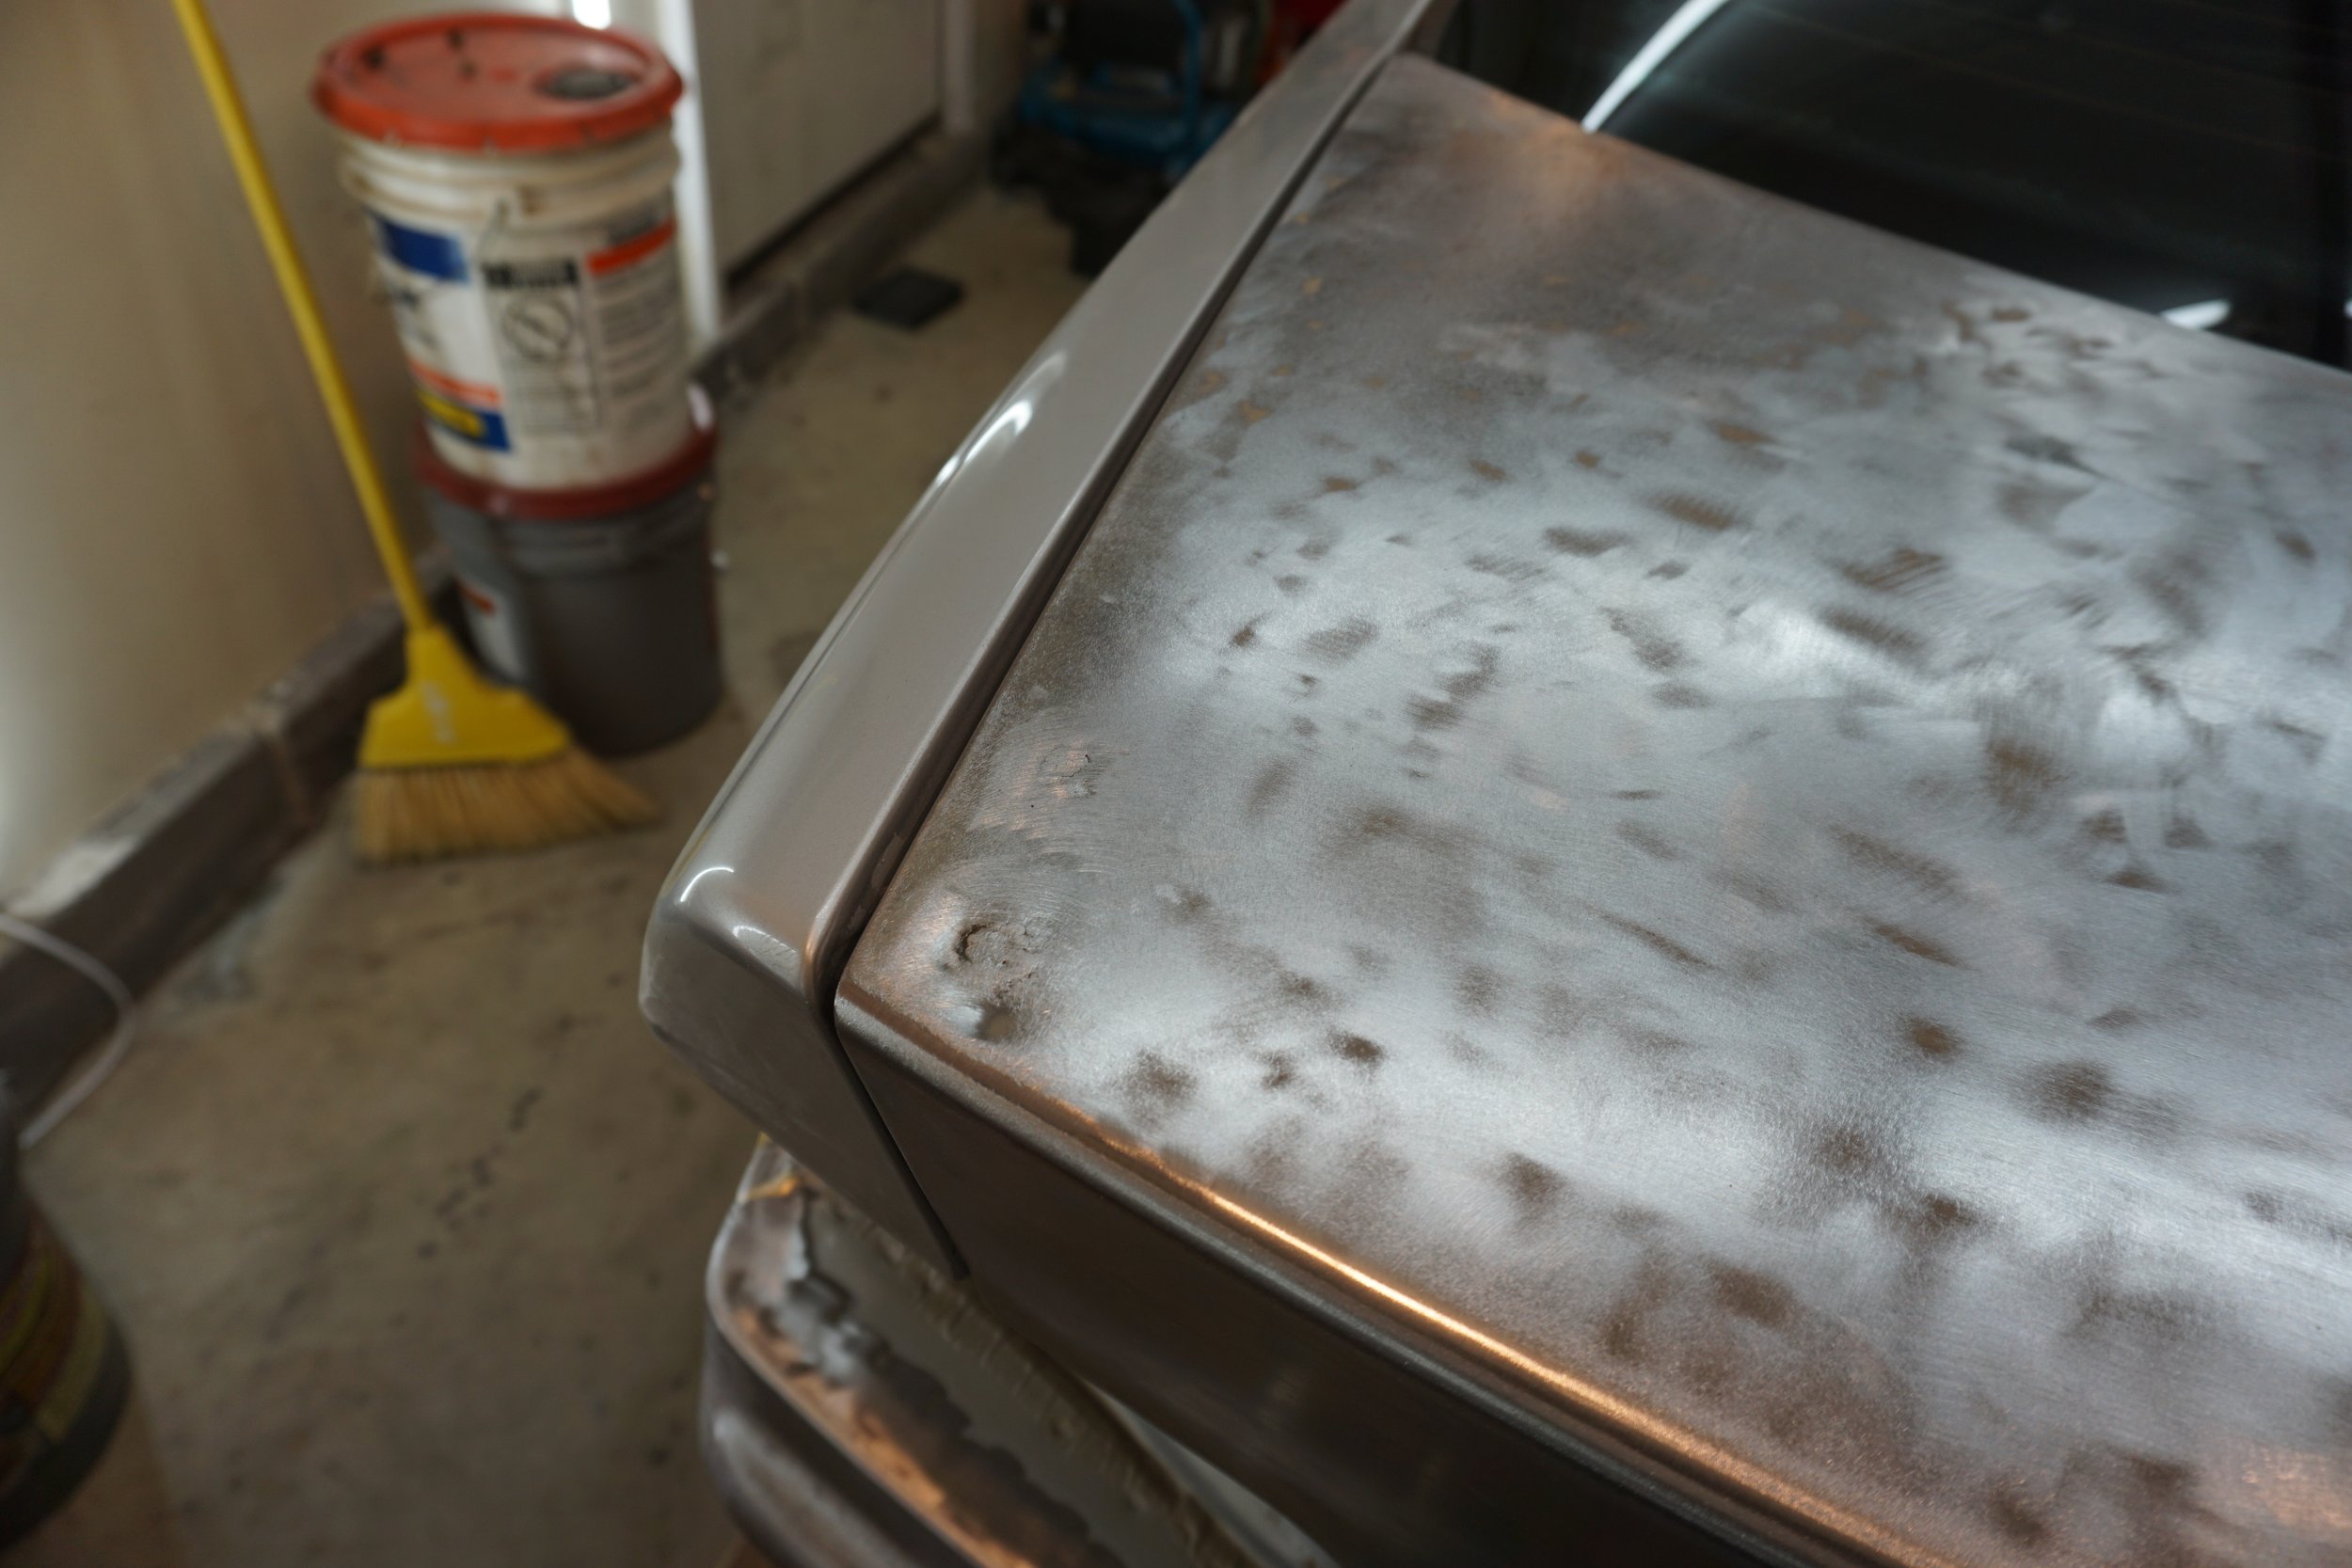
With the car back in the garage it was time to break out the welder again and get rid of the holes in the trunk lid from the old spoiler. It wasn't a factory spoiler, and I think the E36 looks damn good without one, so I wanted to get rid of it. When I removed it I also saw it wasn't sealed up with anything, so it was probably letting some water into the trunk.
Access inside the trunk was decent on one side, but inaccessible on the other, so the welds weren't great. But I eventually got them good enough.
And I found out why there was so much filler under the rear window:
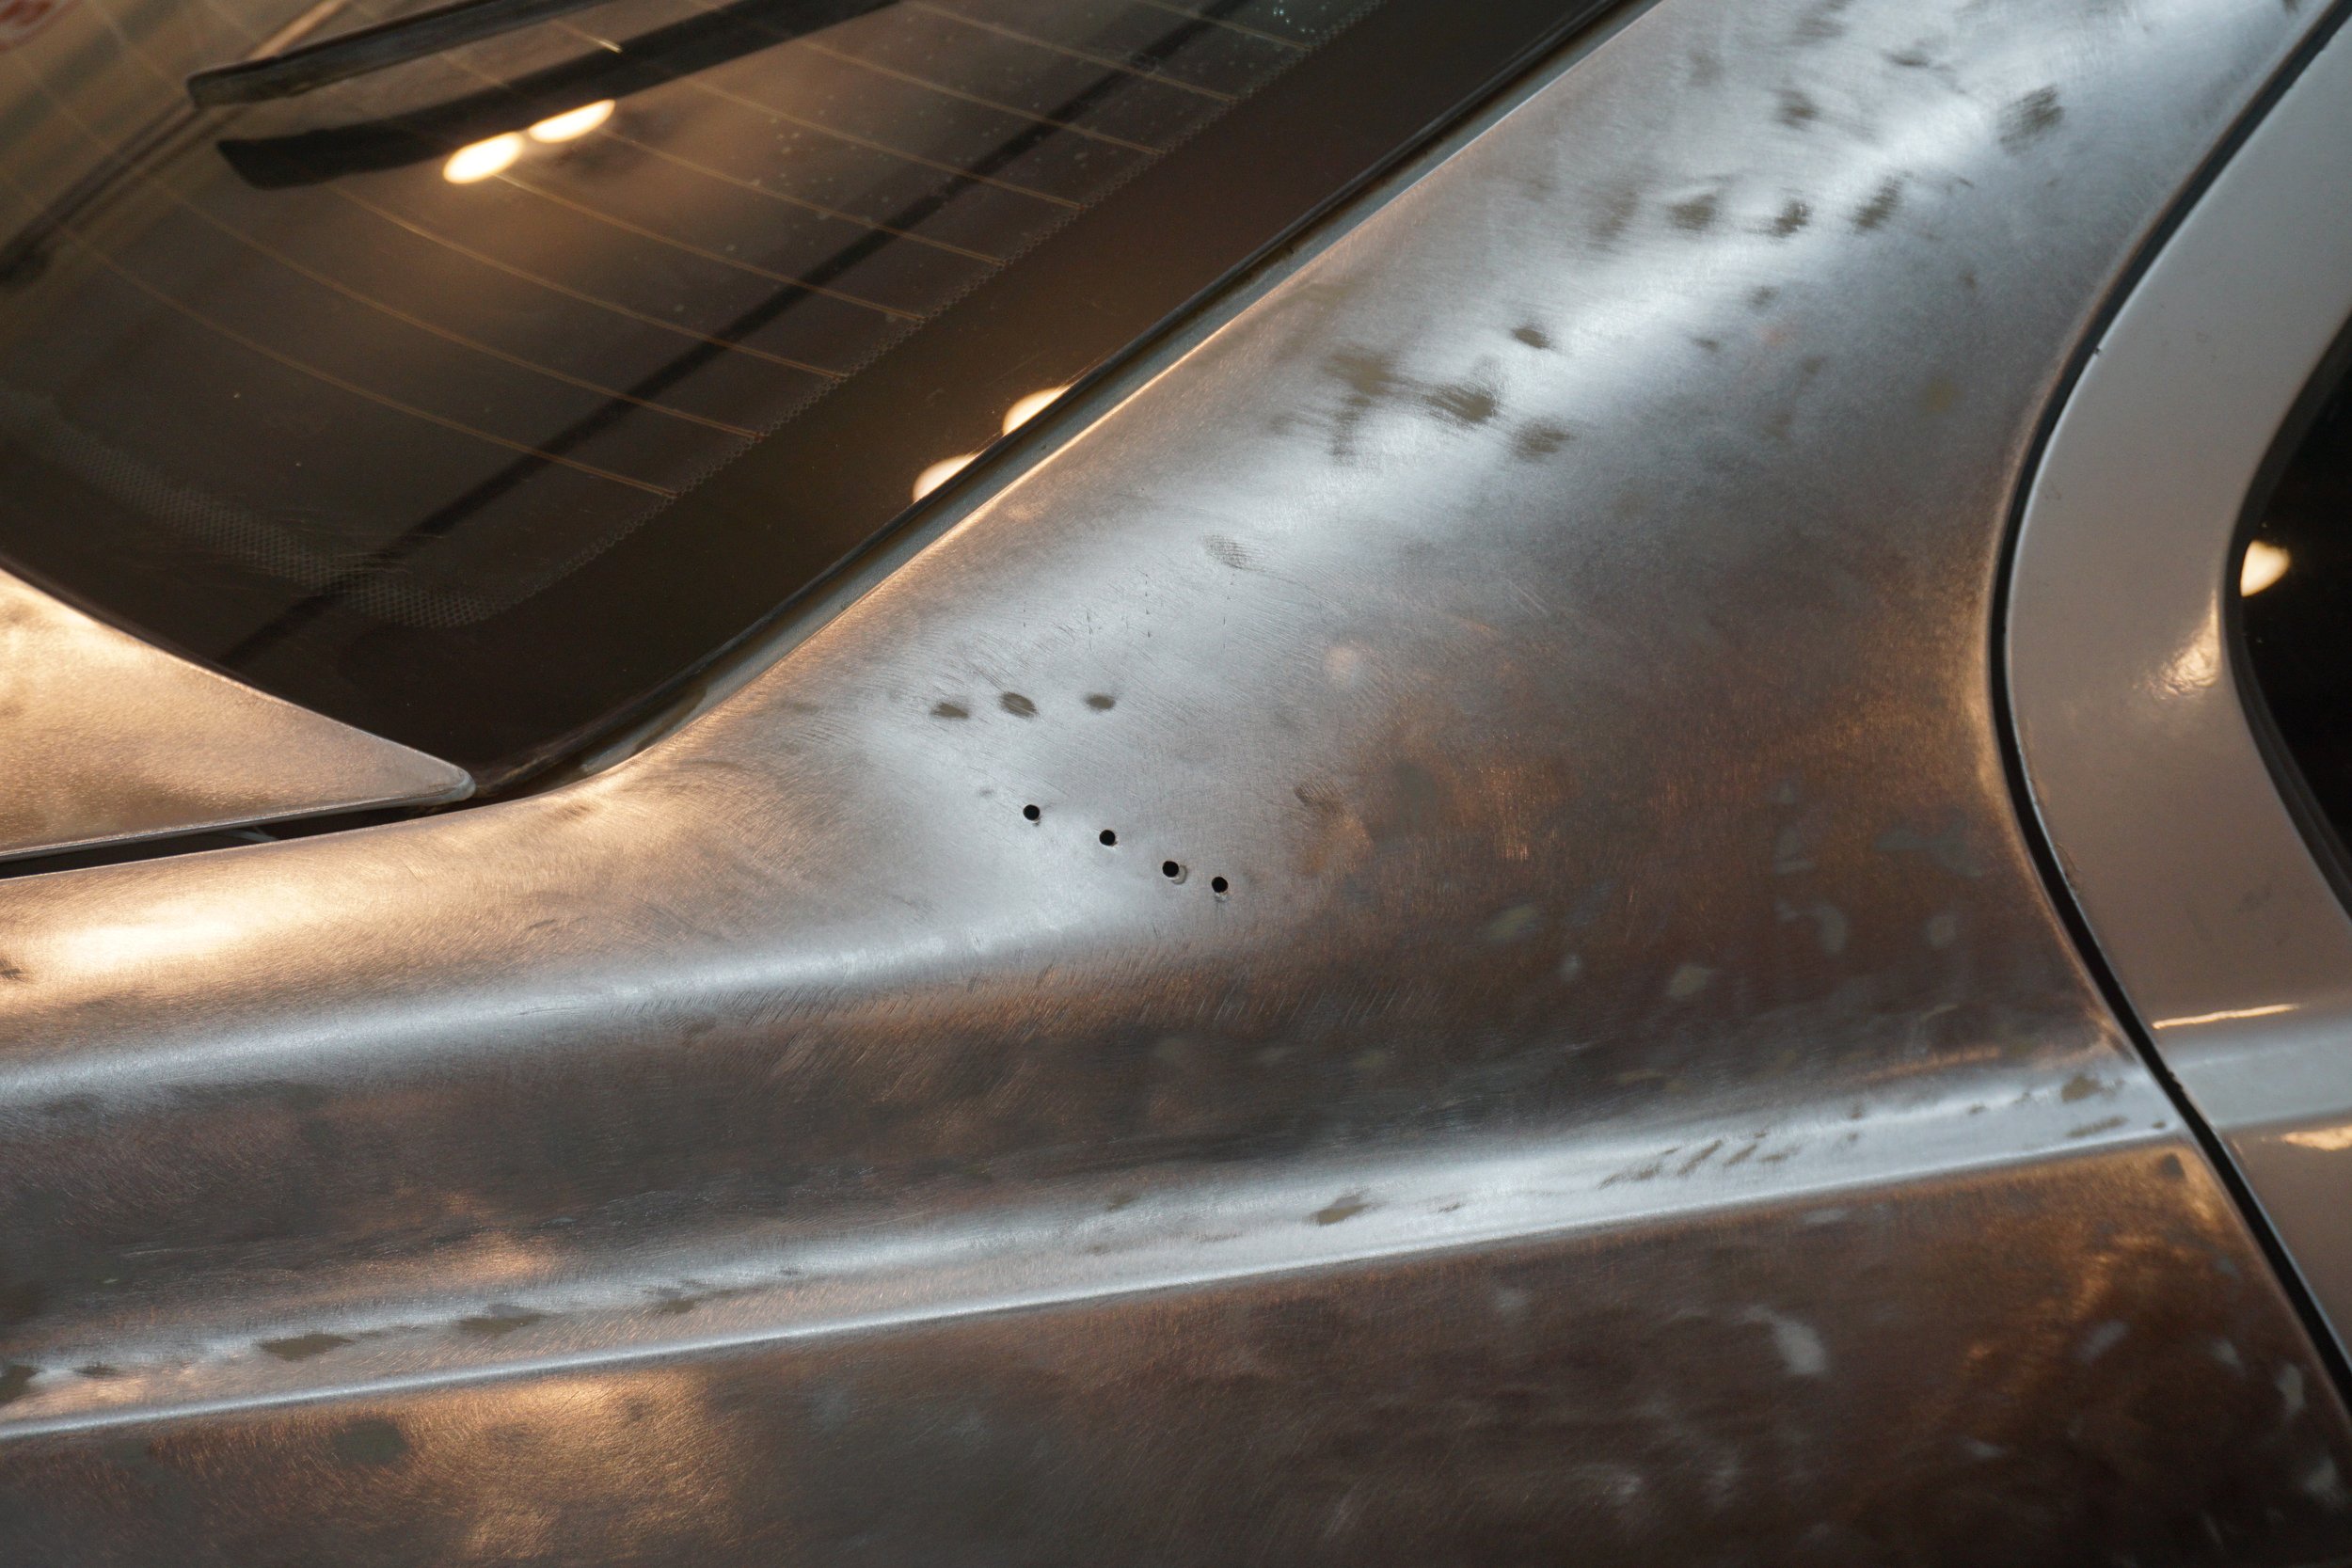
I wonder if those are remnants from previous stud welding/pulling? The metal around the holes seems awfully smooth for that.
I did a few rounds of proper cleaning of the metal with the SPI waterbourne wax and grease remover, and laid down a few coats of epoxy primer. This helped highlight some damaged areas that I couldn't see before, like this one by the tail light:
In my excitement/nervousness to spray the epoxy, I forgot to tack rag the surface before spraying, so I had a lot of debris in it and I had to waste a lot of time smoothing it out before moving on. I eventually laid down some of the 3M Platinum body filler and got things level.
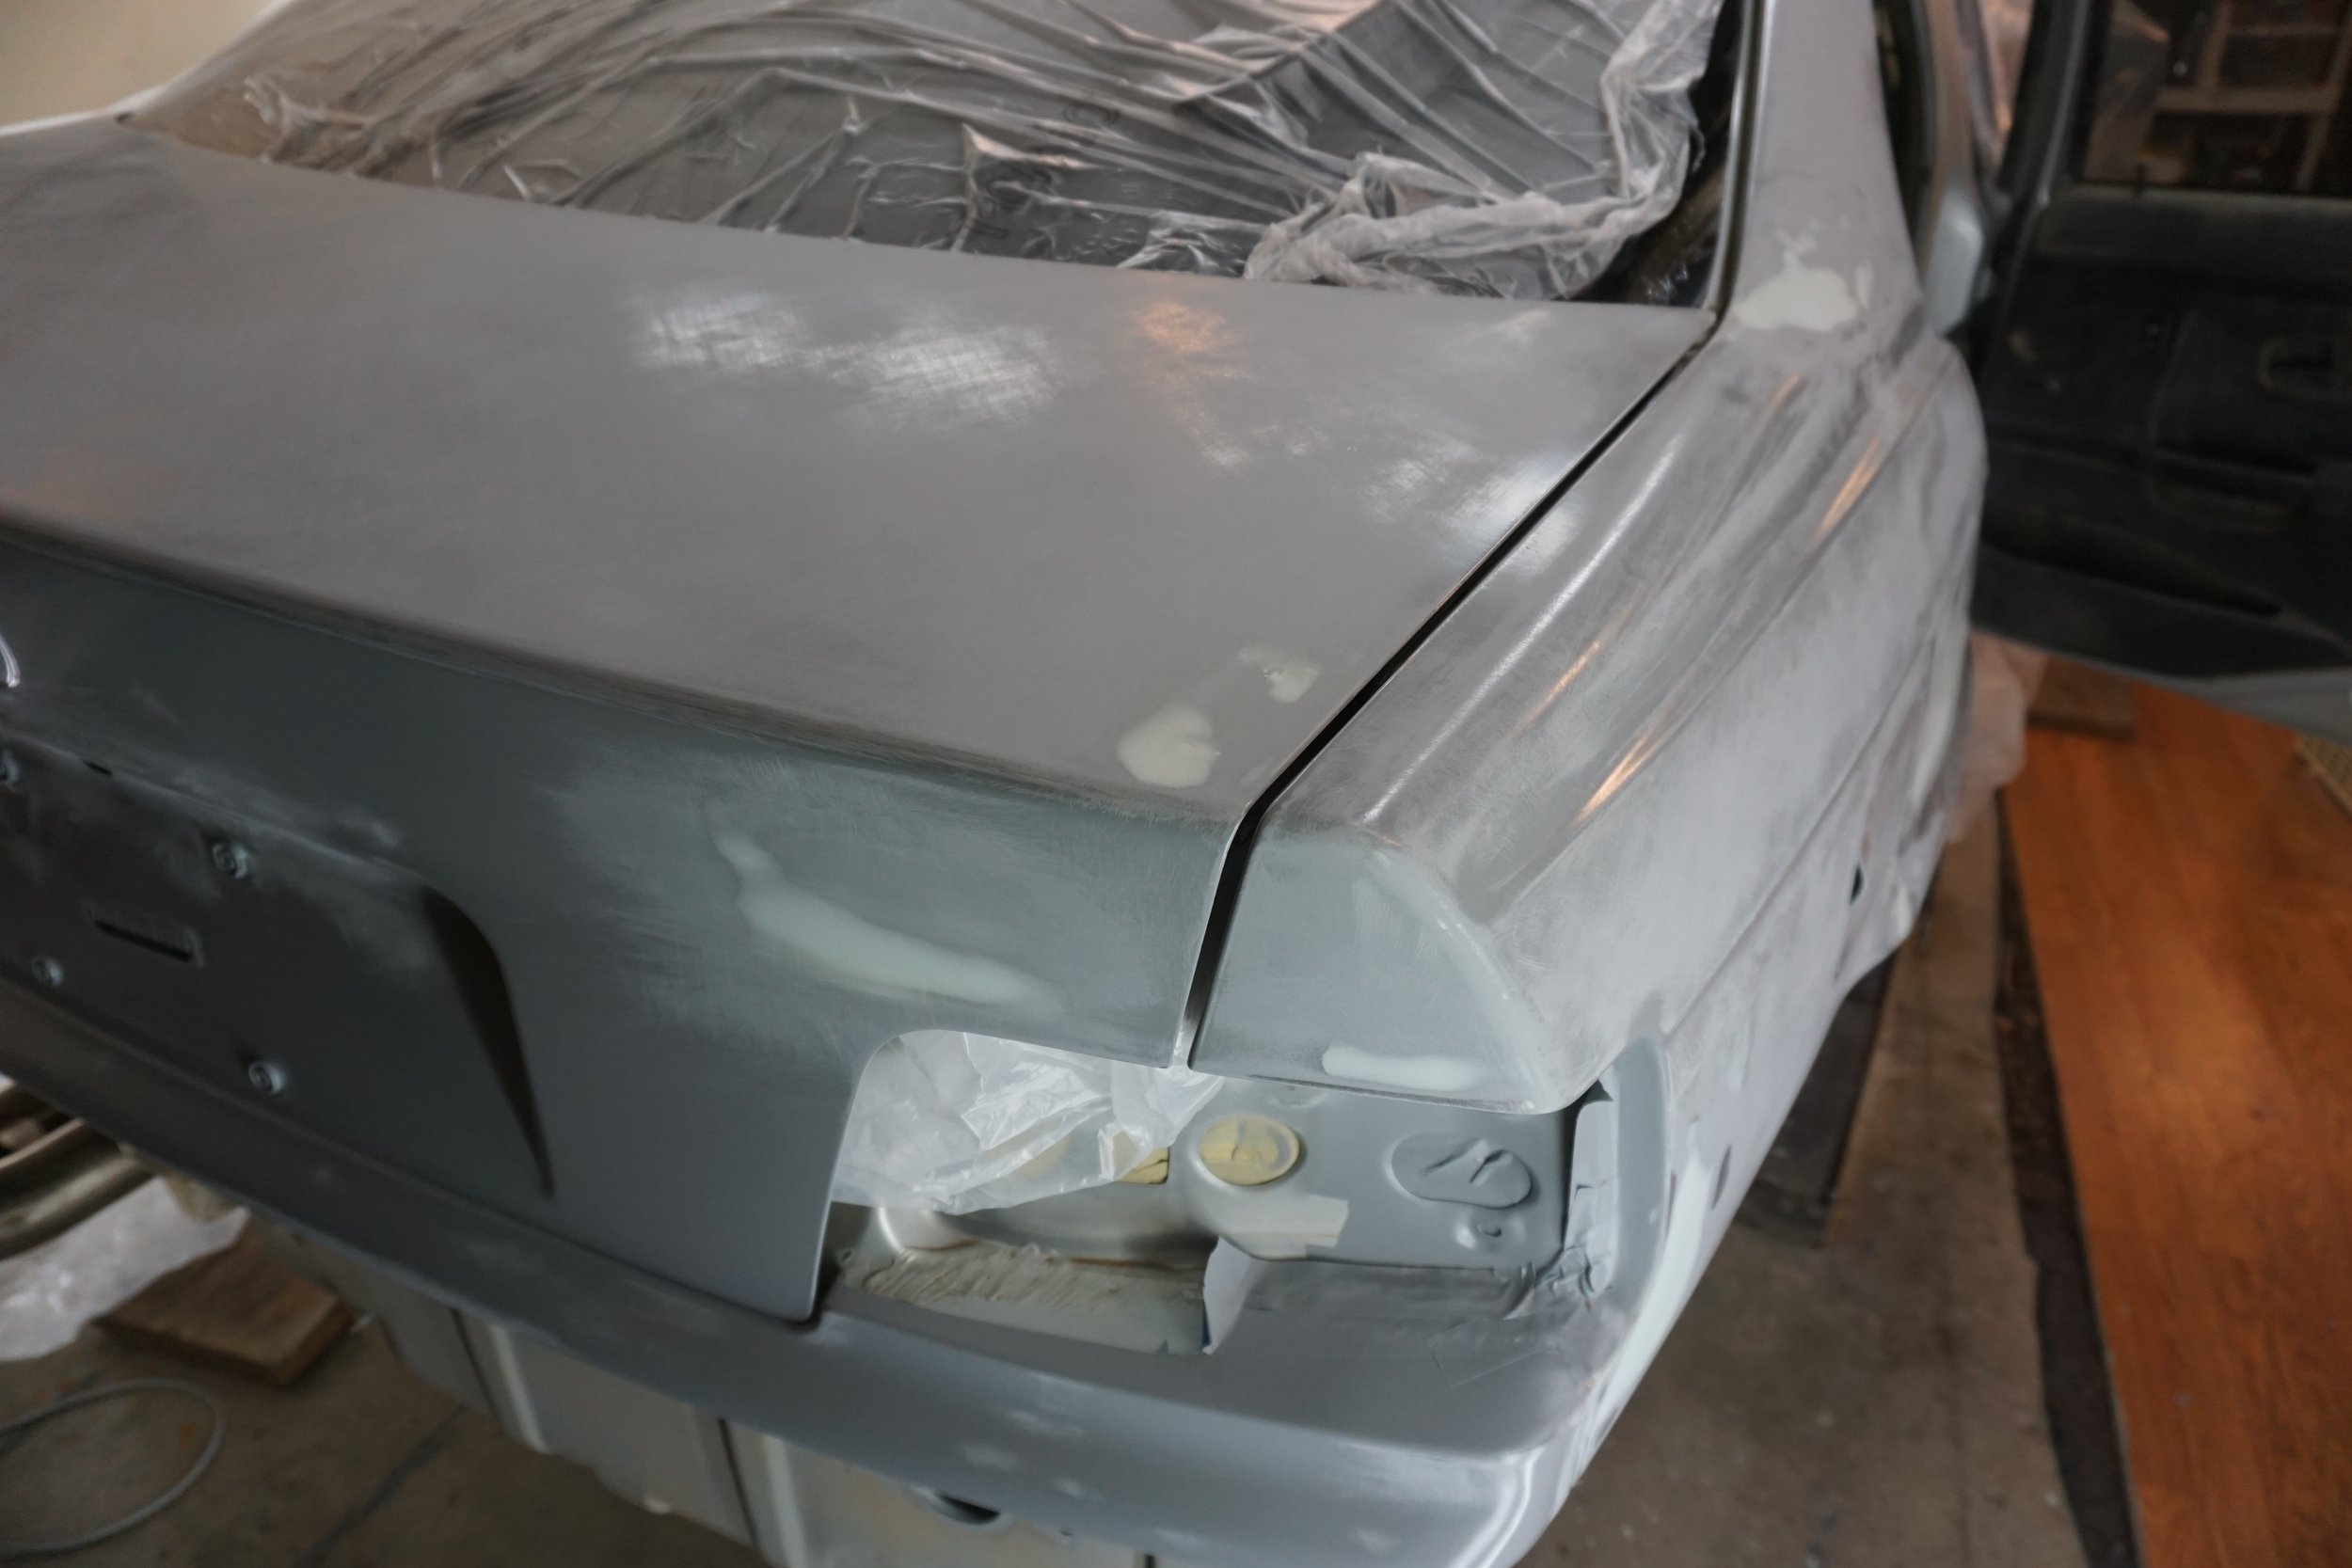
Since I had gone through to bare metal in a number of places, I laid down another coat or two of epoxy before moving onto the 2K. Once again, I had globby areas like the ones shown below in some spots, and as a newbie, I'm not sure what to make of them. Did I just get my overlap wrong in that pass? Was I moving too slow with the gun? Most areas turned out okay. I'm using an LPH400 at 26 psi for epoxy and clear, and 20 psi for base.
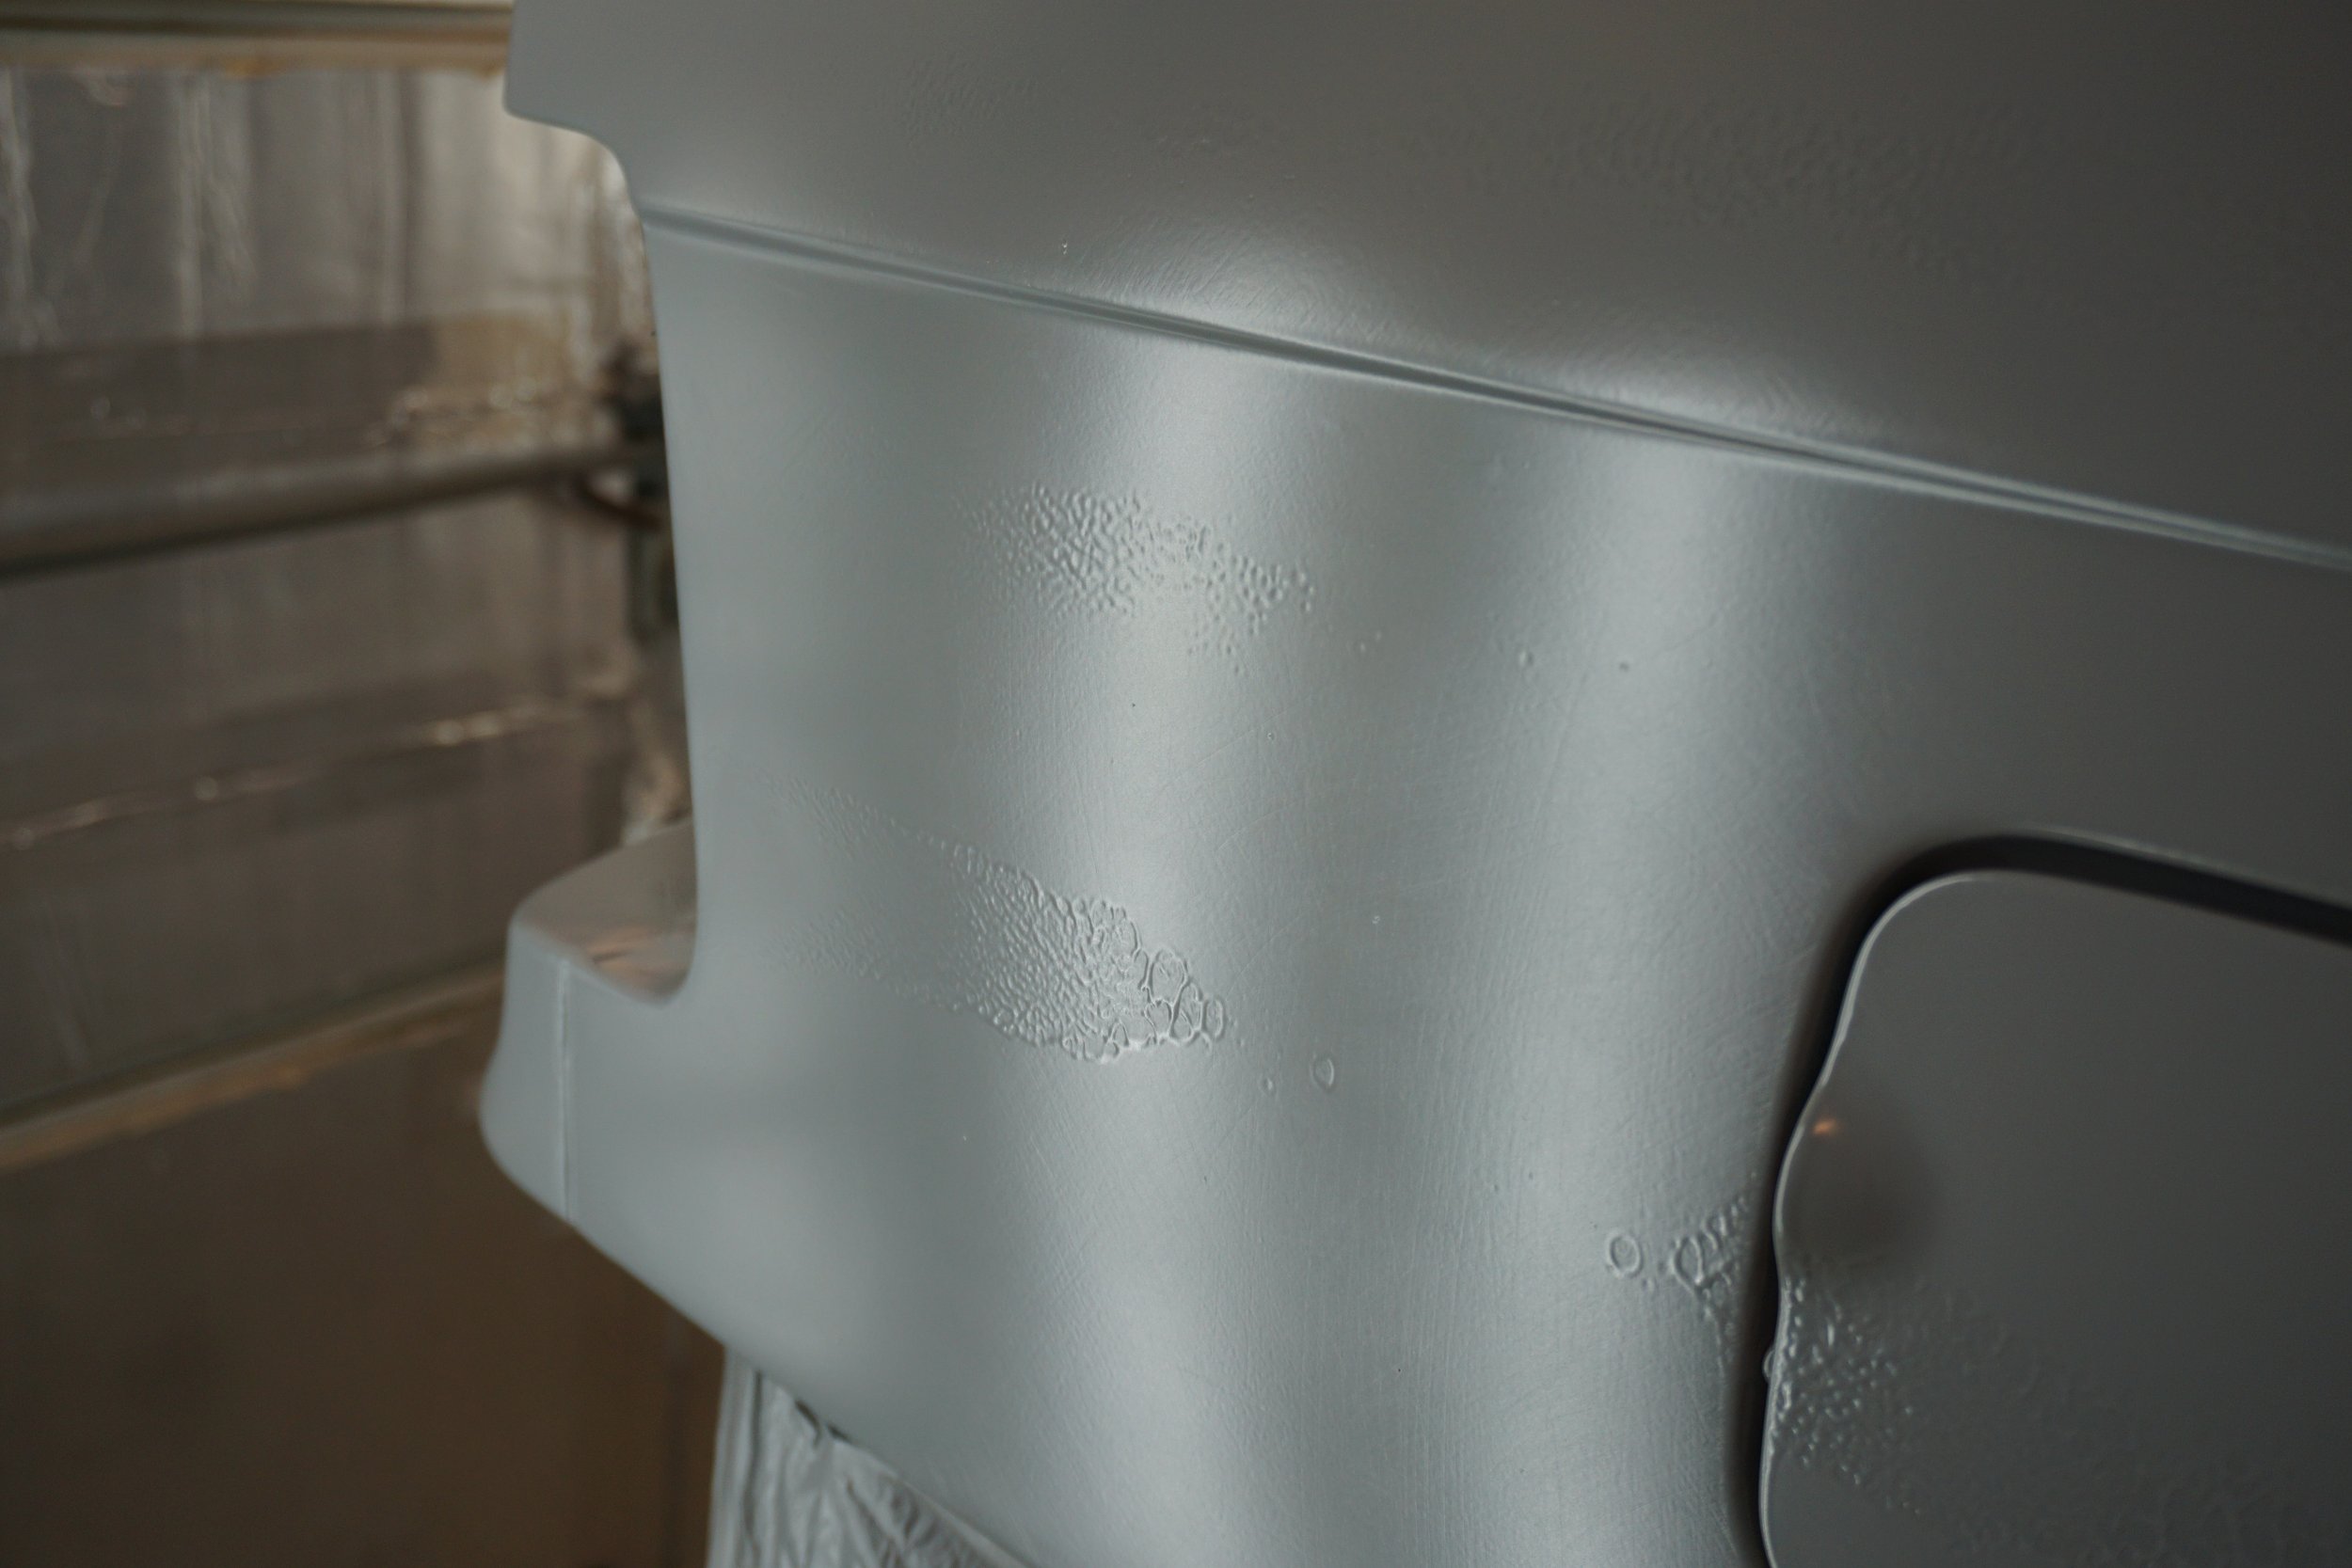
Can anyone hazard a guess as to what I'm doing to cause that?
During the paint phase I was under a huge time crunch to get the whole job finished before the final race of the year, so I didn't sand certain steps nearly as well as I should have, and it came back to bite me. I eventually was able to get things smooth enough for the base coat, but it could have been even better if I had more time. I sprayed thinned epoxy as sealer over the 2K, and while it sprayed better/smoother than regular epoxy, I got a few areas of the globby stuff like shown above, so I had to smooth out all of the sealer before spraying base. I took it up to 600 grit, but I think 800 or 1000 would have been even better if I had the time. Thankfully I sprayed two coats of sealer (instead of the recommended one) so I didn't sand through in any areas to metal or 2K.
Thankfully the base went on great, with only one small run where I got my overlap wrong. I did two coverage coats, and then I tried my hand at a drop coat to cover/hide any mottling/striping. I had plenty of that when I did my hack job three years ago with rattle cans, but this came out perfect!
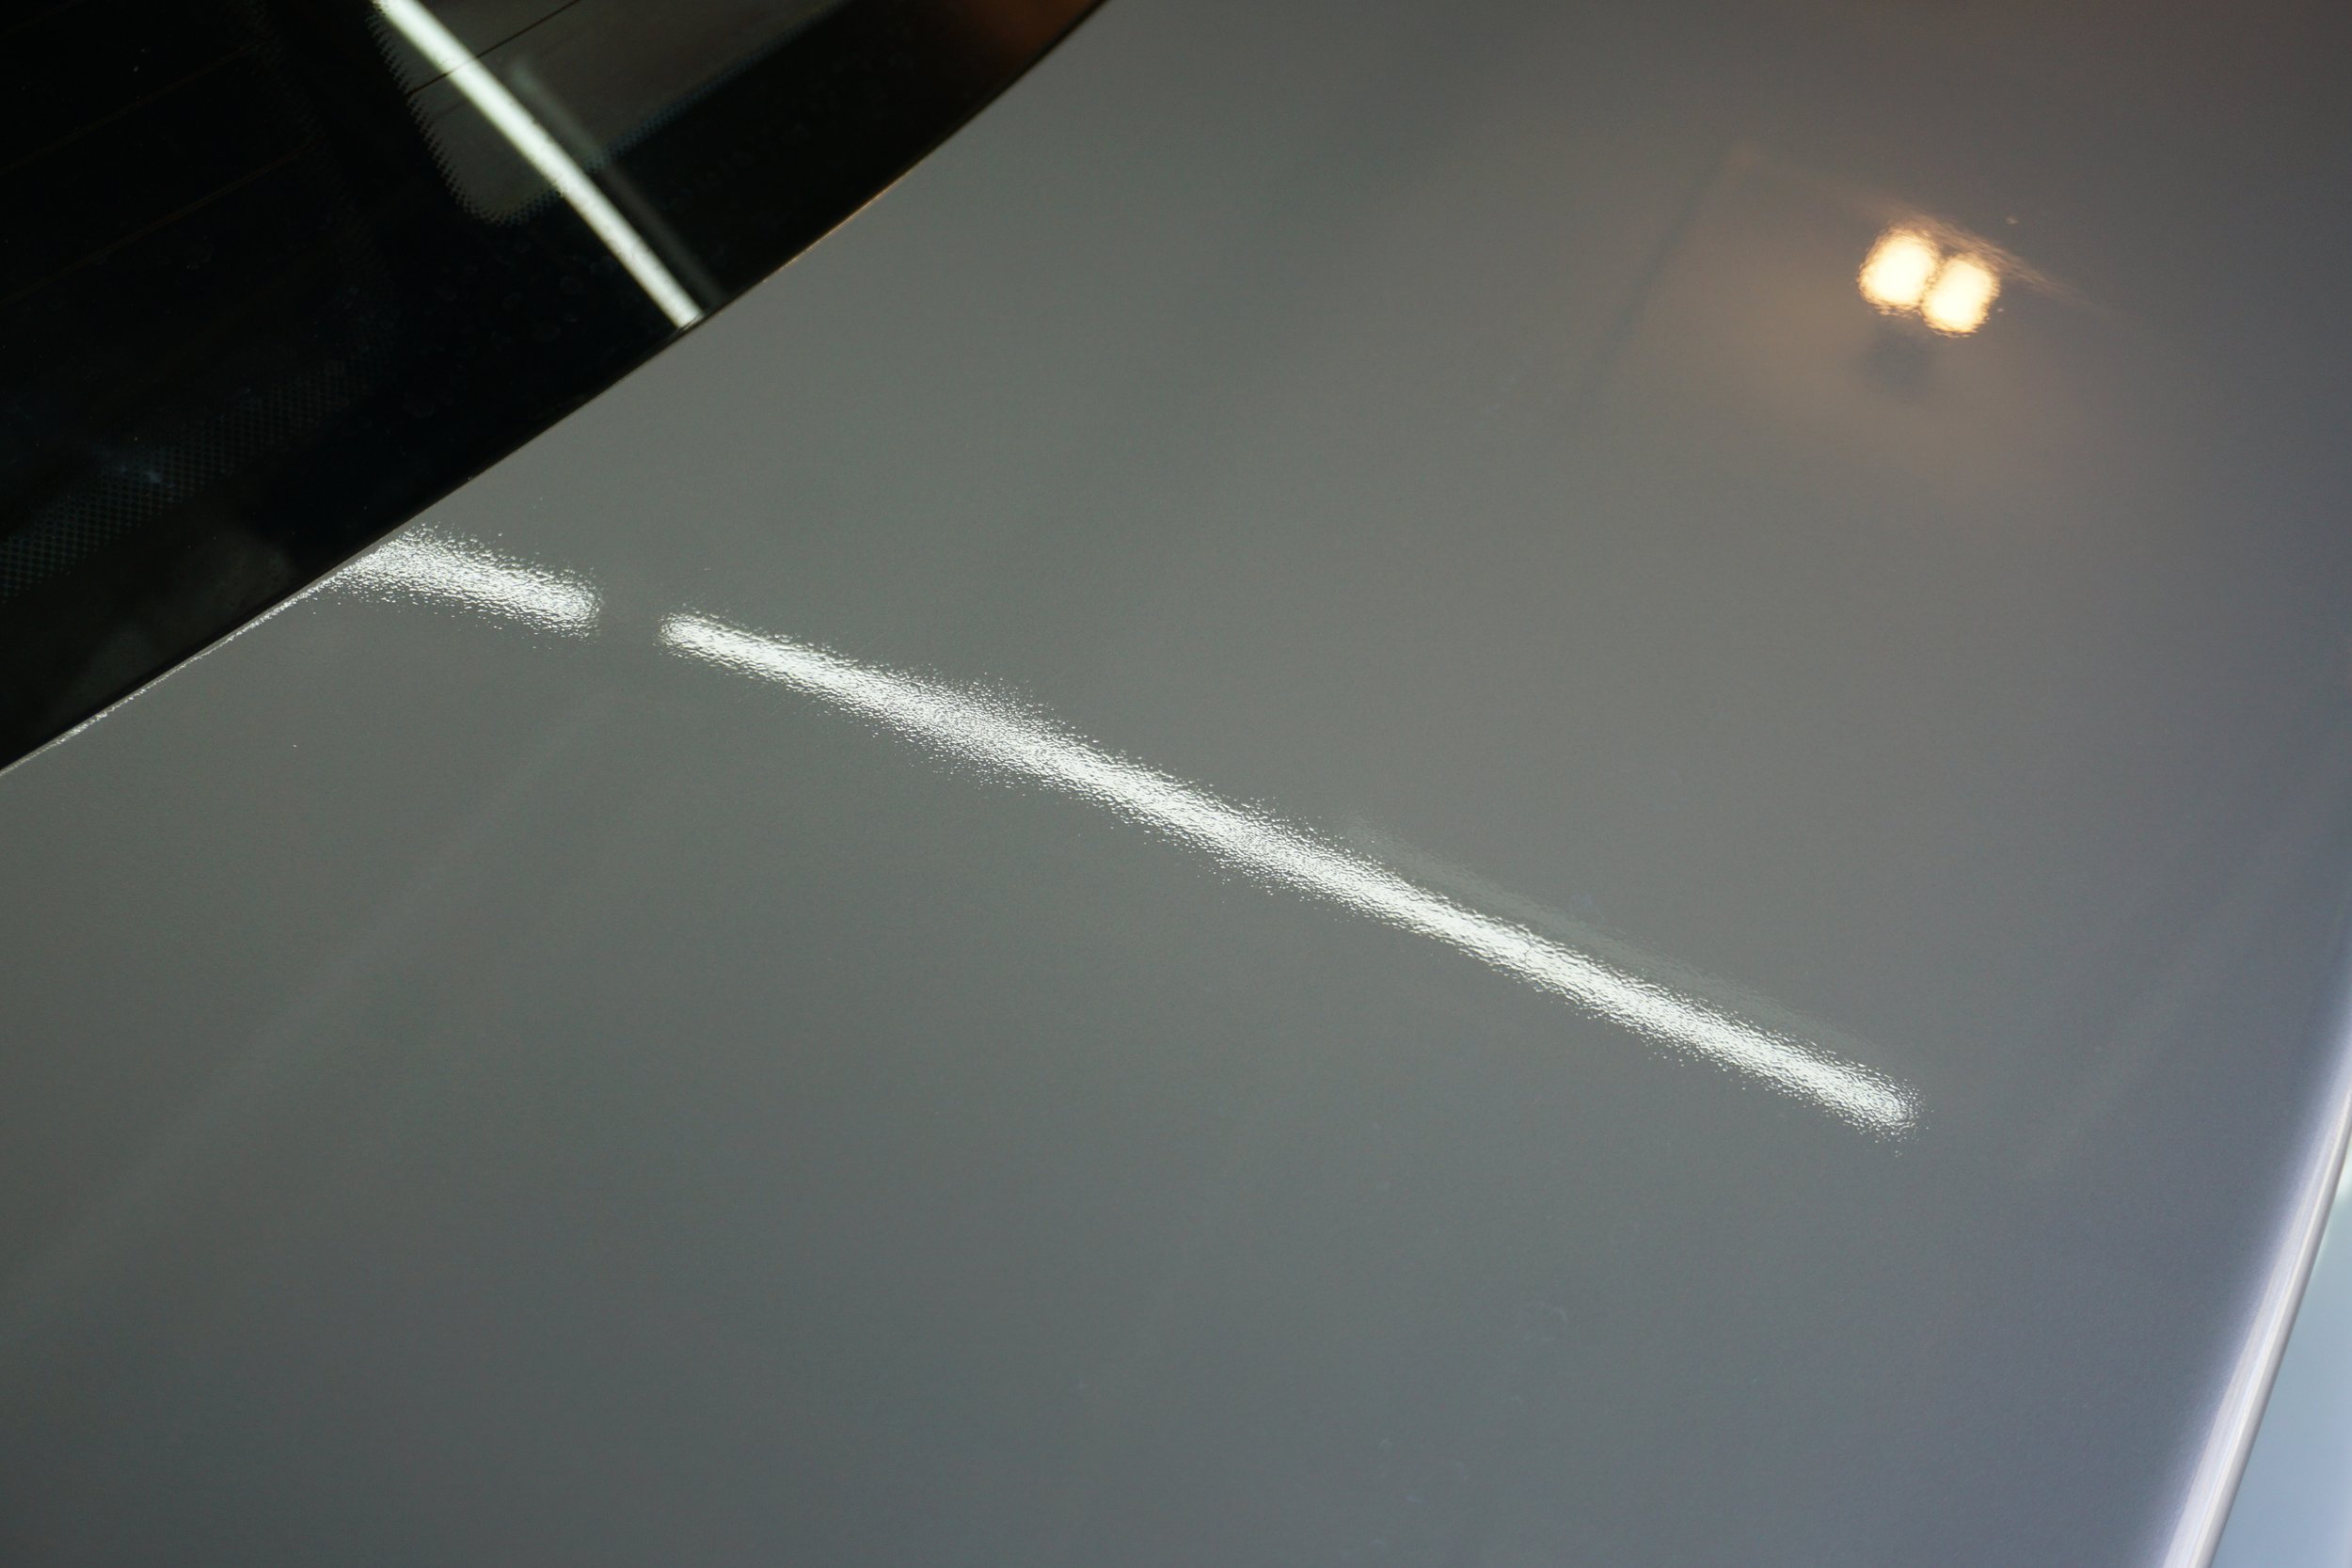
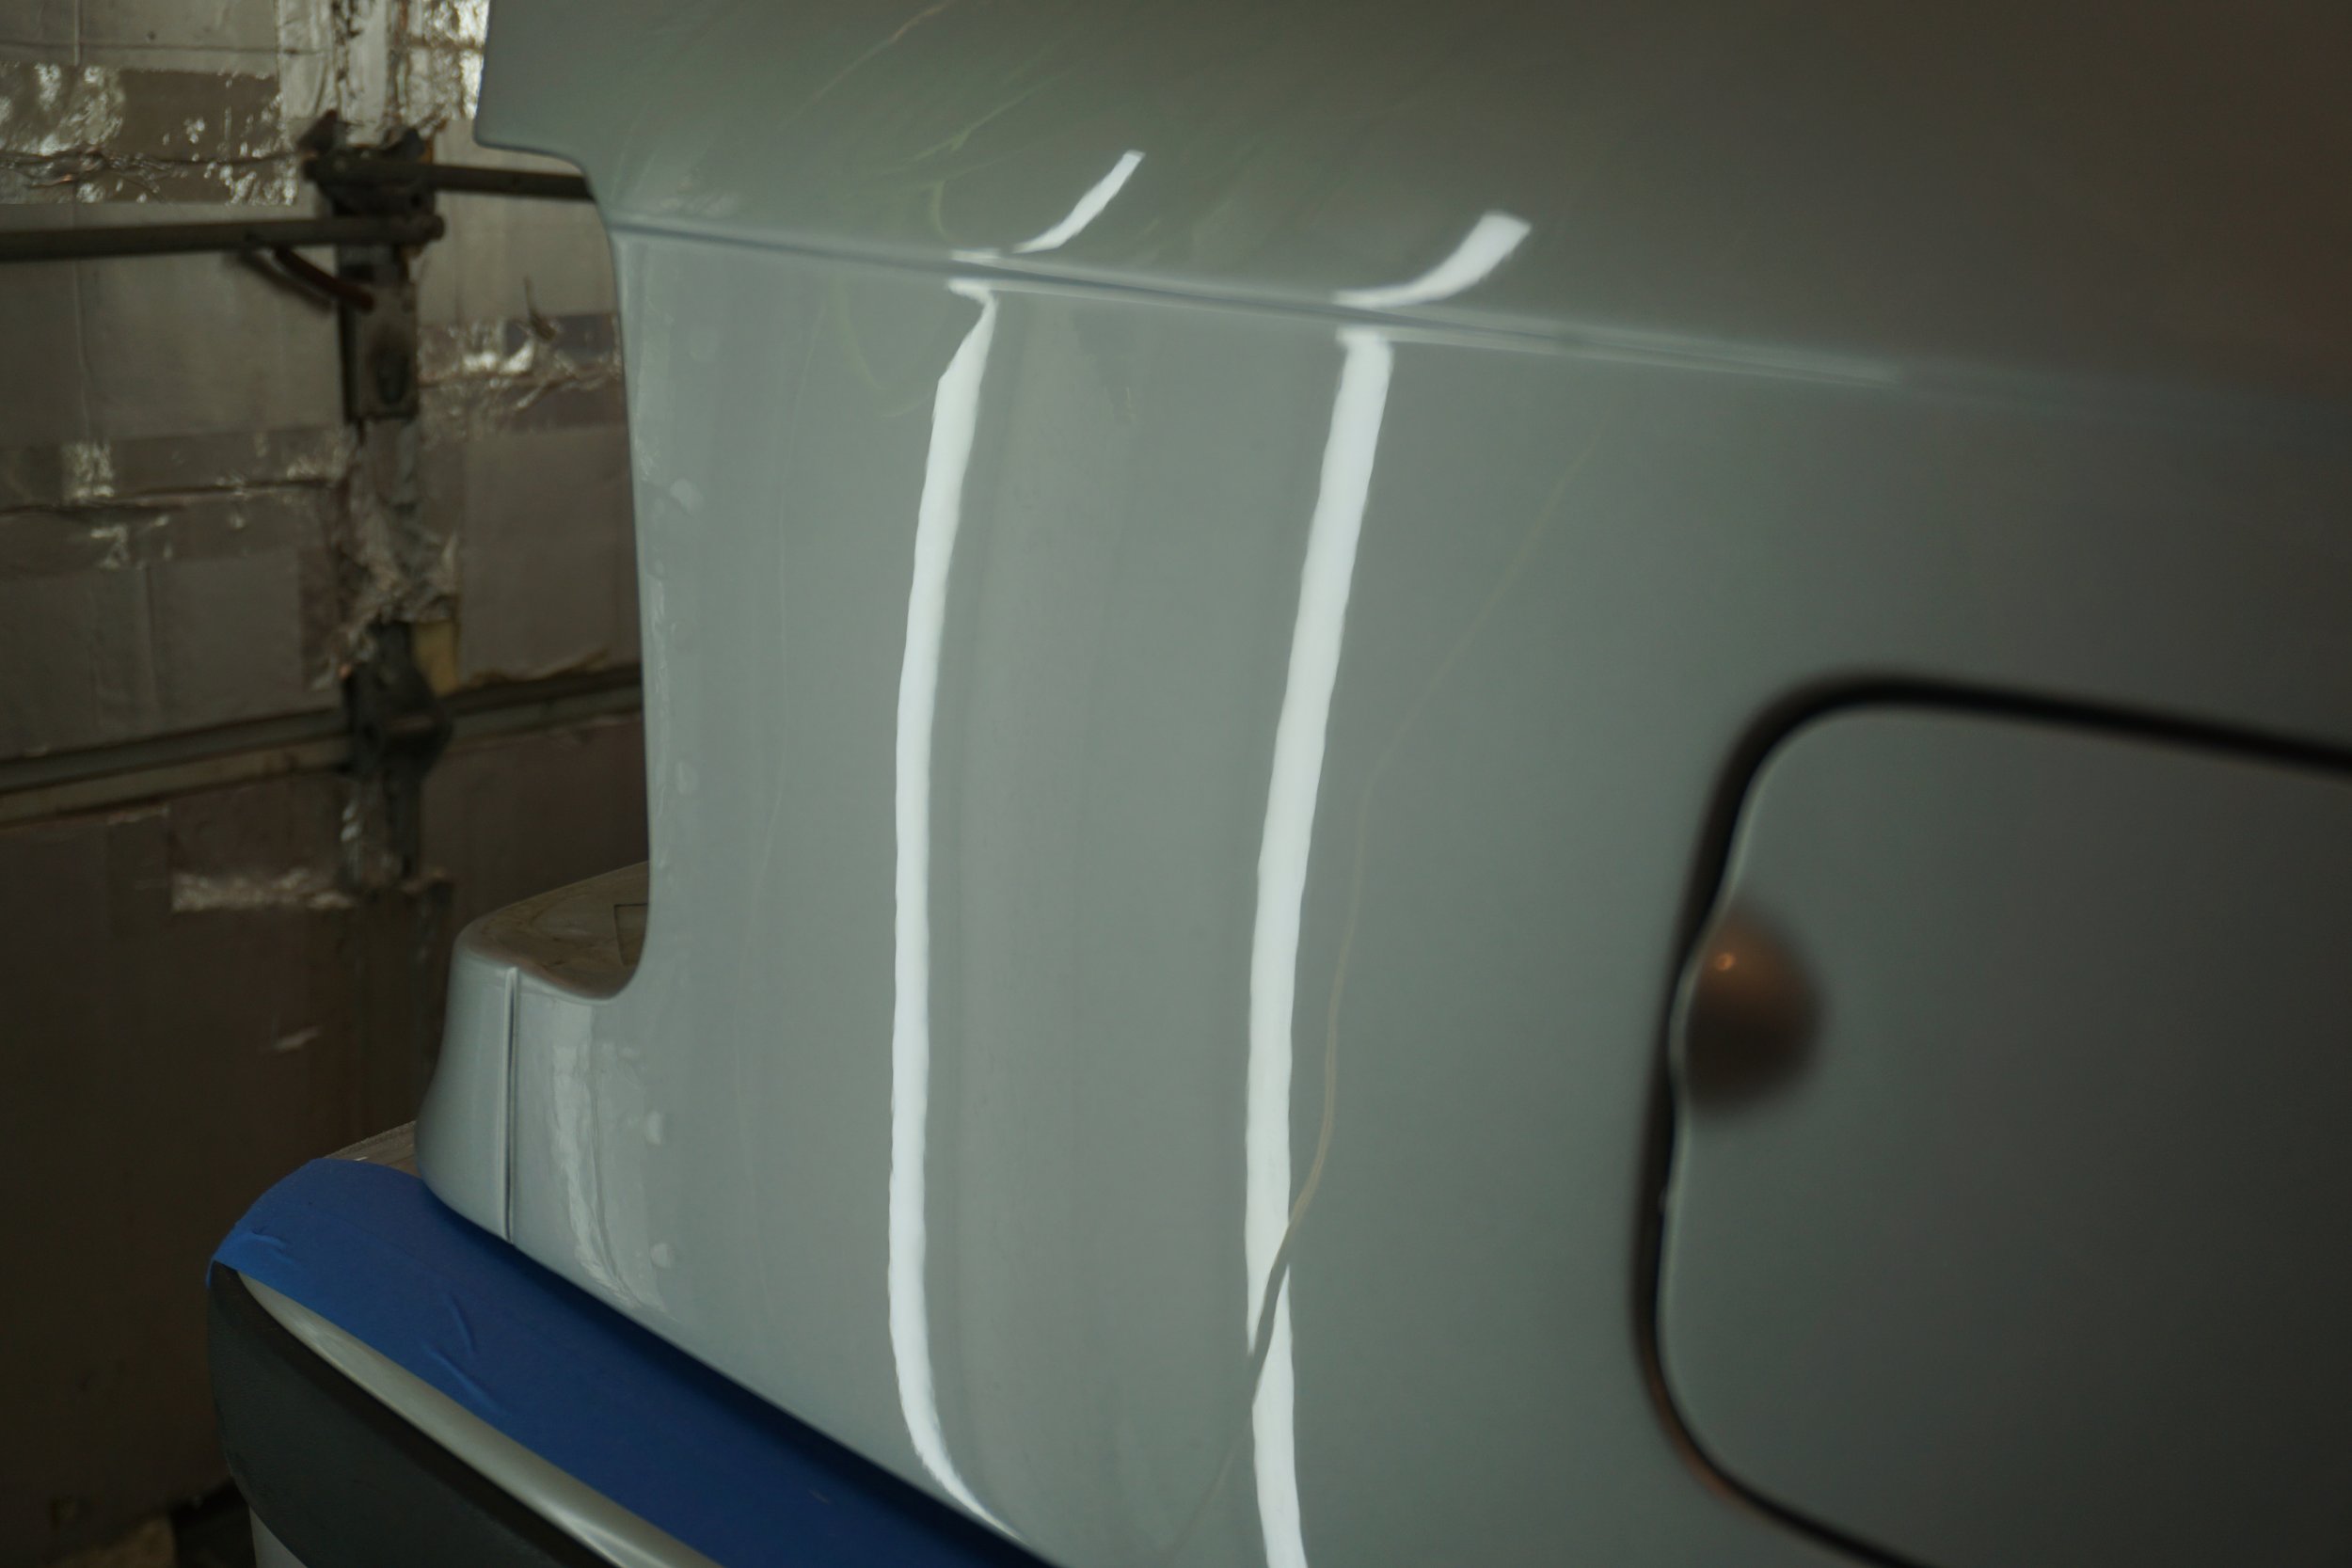
I used the SPI Production Clear and sprayed 4 coats, but it didn't go down as smooth as I was hoping, especially on the horizontal surface of the trunk. There's a lot of orange peel in the finish, and I need to spend a lot of time cutting and buffing it. I thought I was spraying it on wet enough, but I guess I wasn't. How can I fix that in real-time as I'm spraying? If I see my first coat isn't smooth/wet enough, can I immediately lay down another layer on top? Do I need to treat horizontal surfaces different than vertical ones?
In the end, I think I can save it with cutting and buffing, but I'm embarrassed by the initial finish. But I got it done the afternoon before the race, so I'll take the win where I can get it.
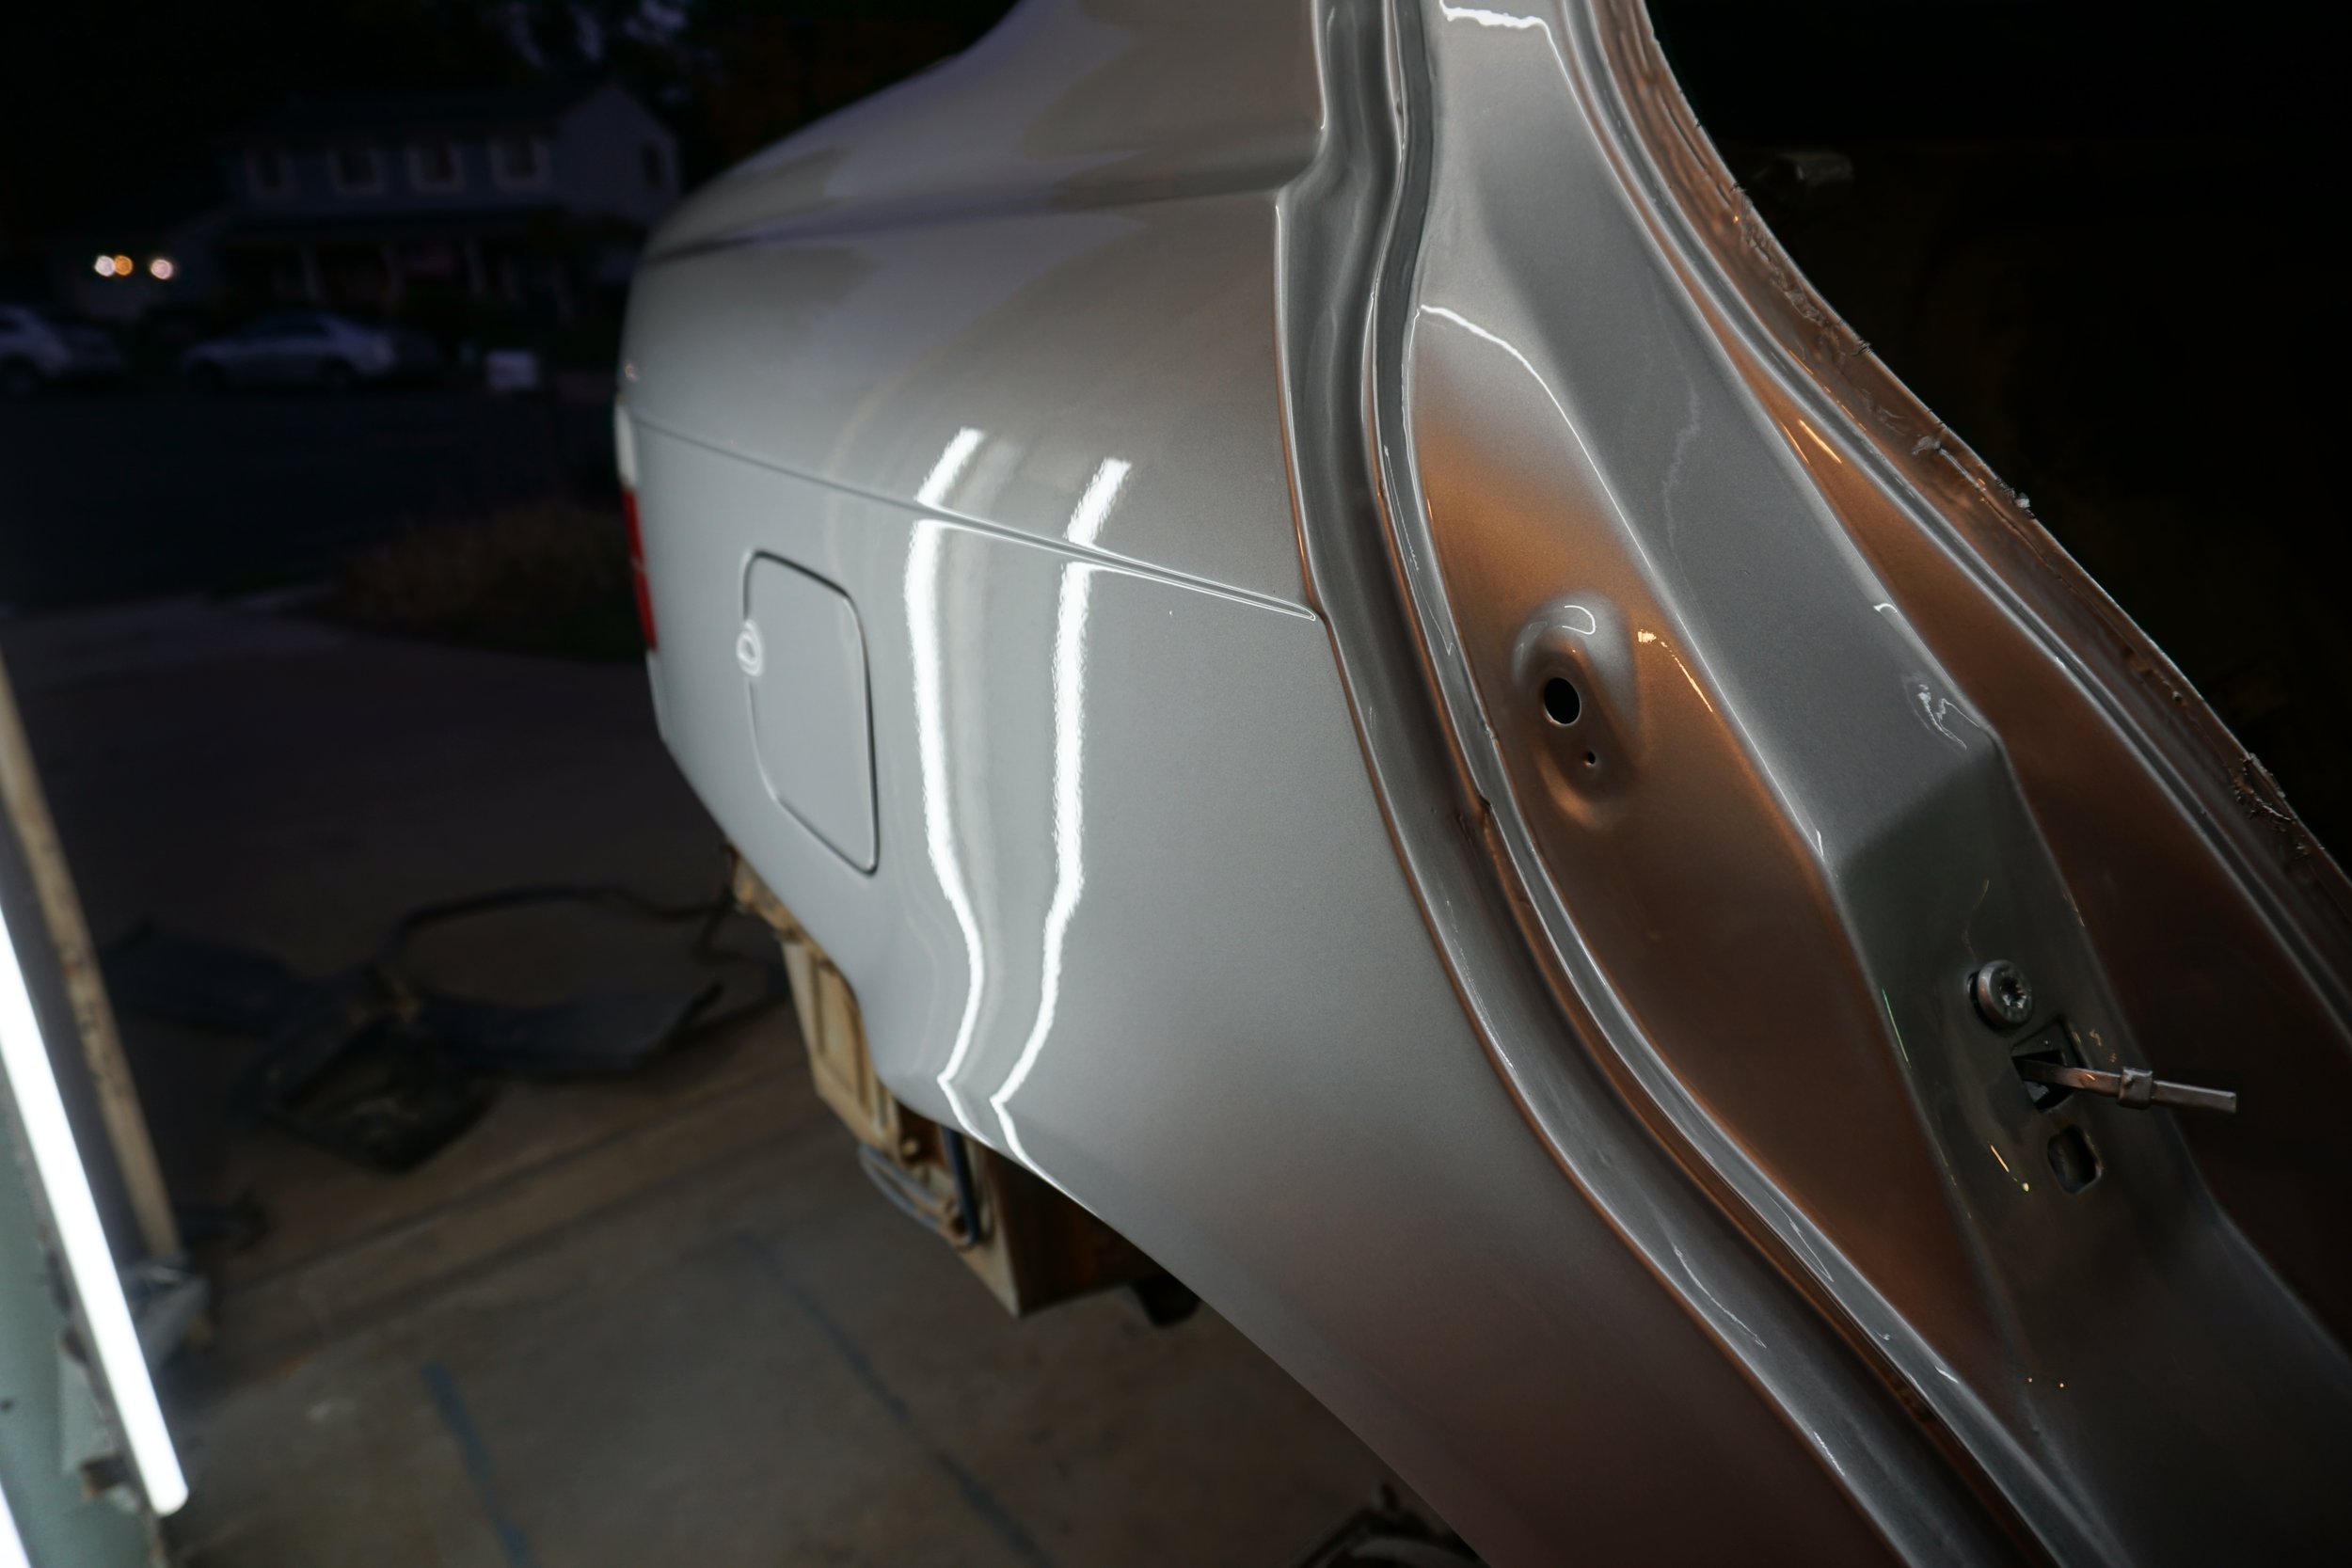
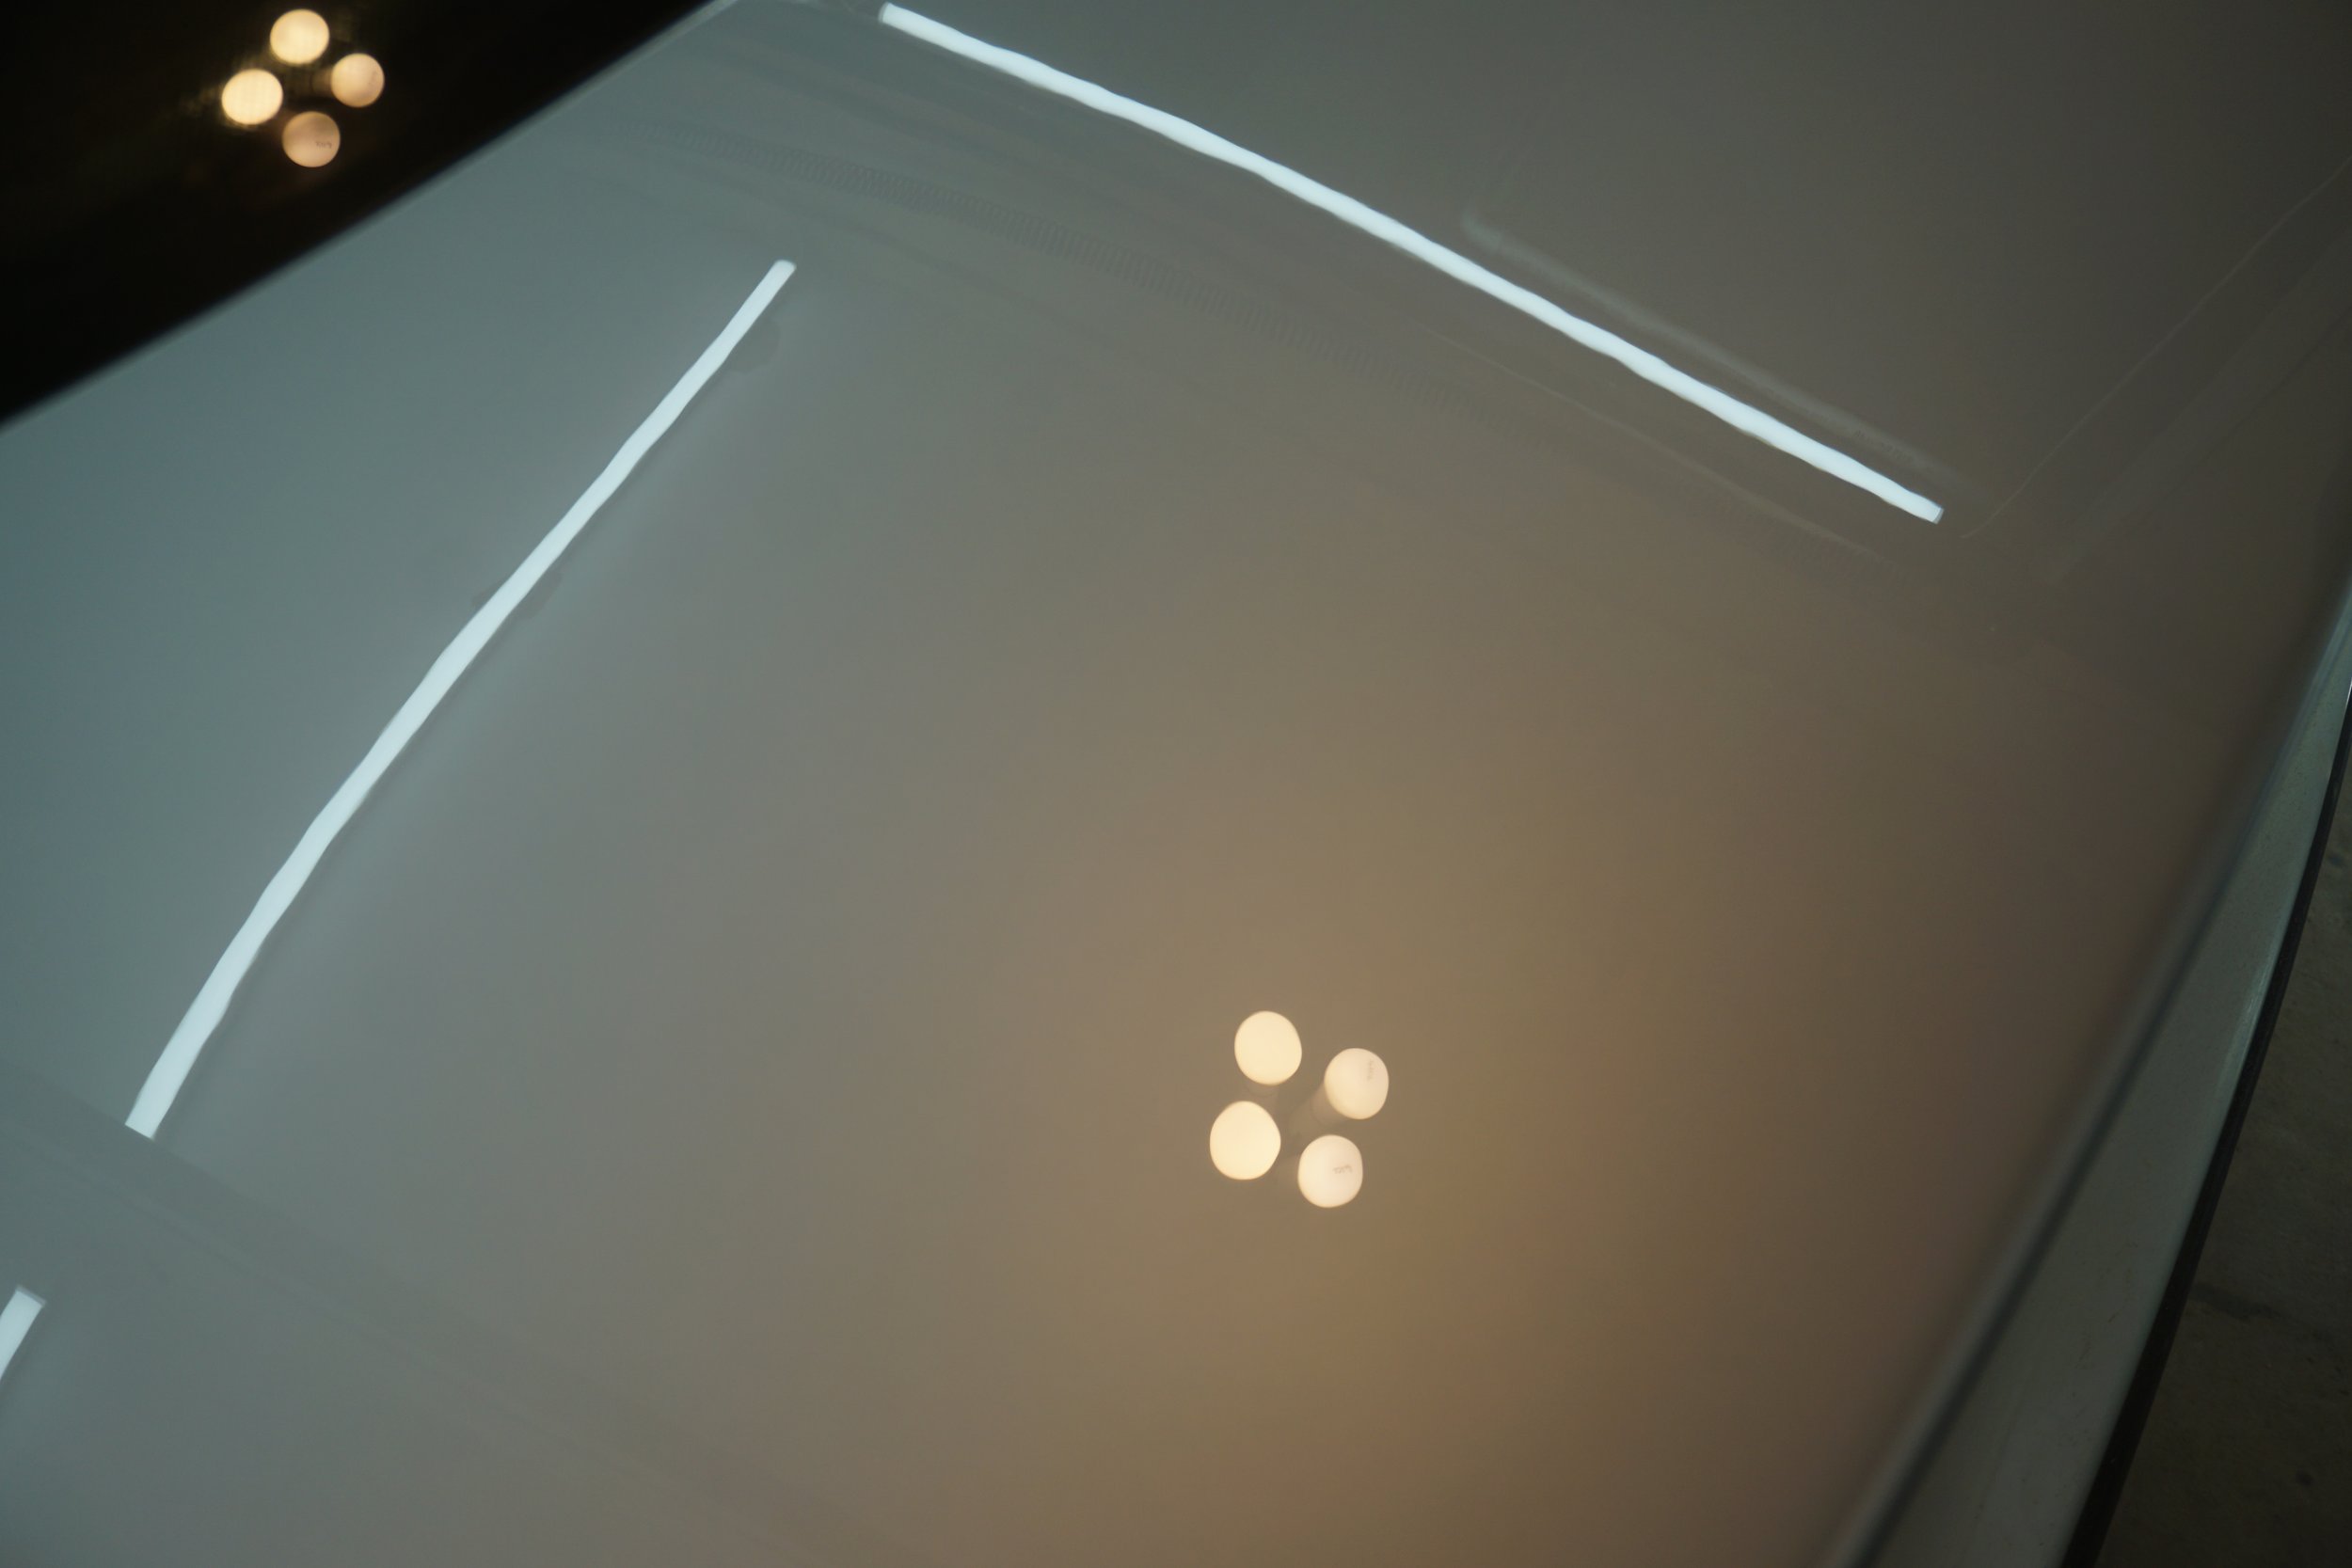
Even with the poor finish, it sure has great shine and depth to it! I'm not sure how people can blend this stuff with older clear coat, even if it's in good condition and shiny, because it just looks so good. Granted, that wasn't the goal on this car, since the paint/CC is shot on the two PS doors, but I'm just curious. This job is to tide me over for a few years until I can respray the whole car in the factory Estoril Blue, like this:

Drool....
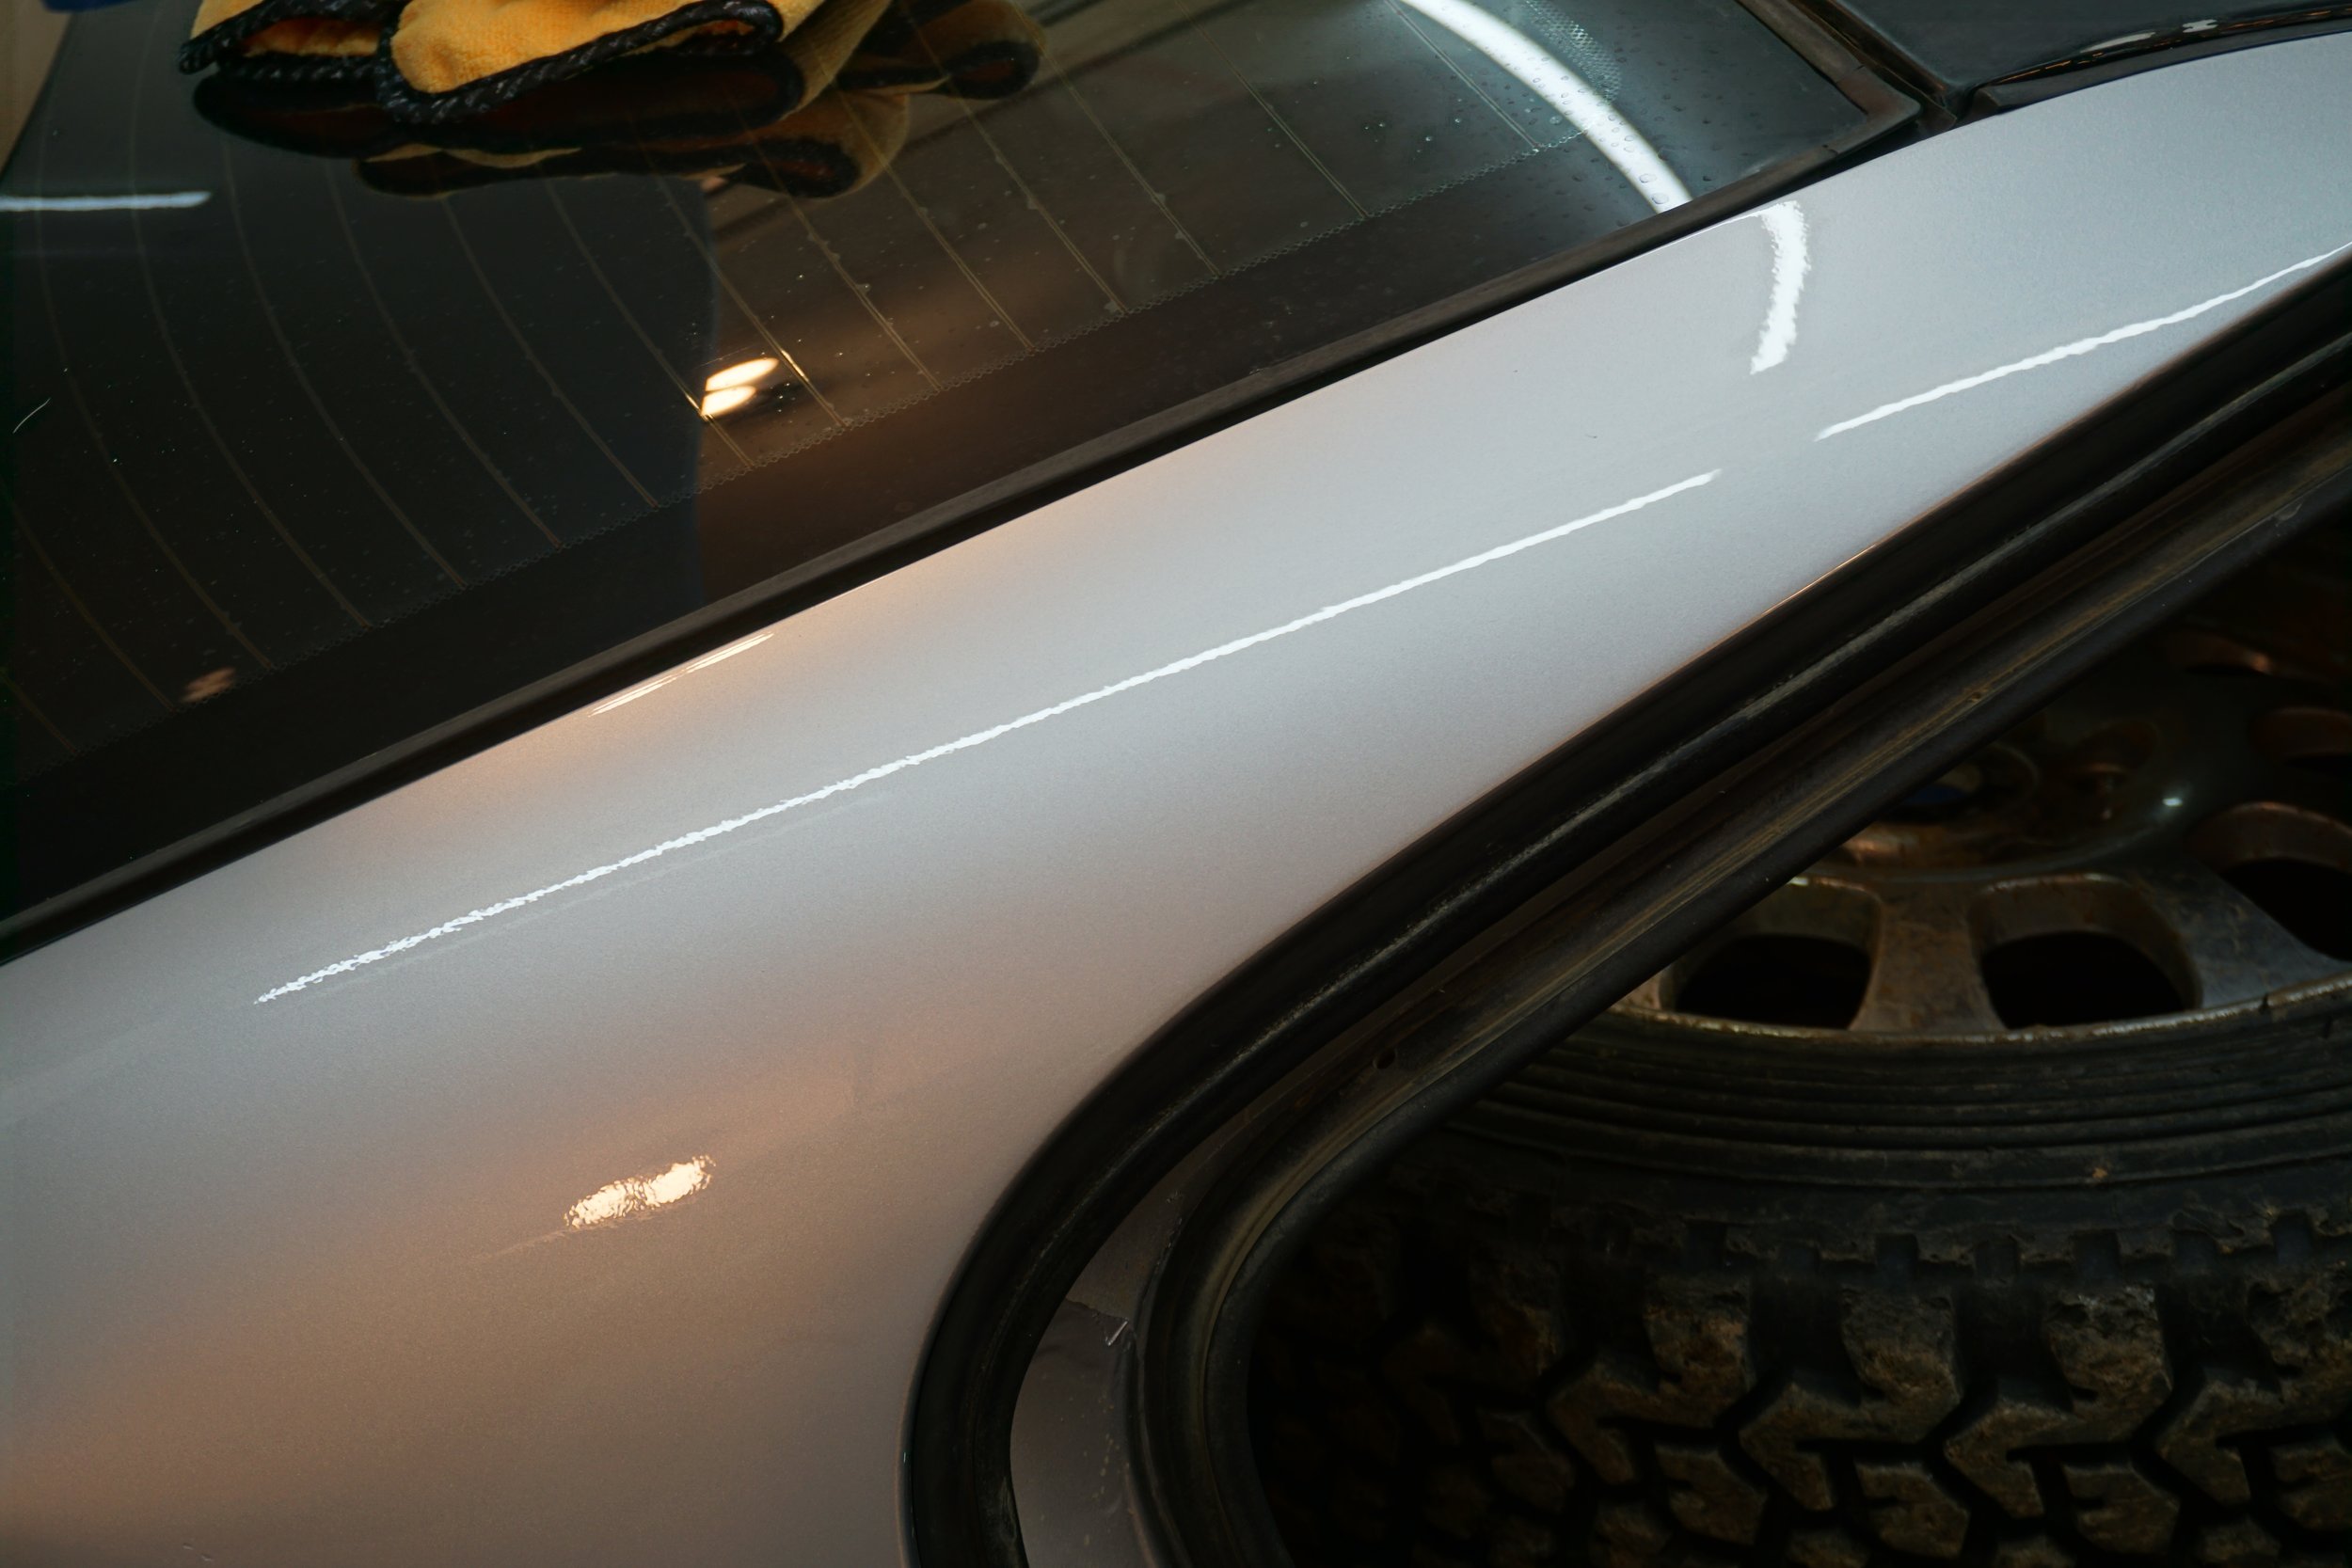
I figured I would wrap up the paint process with pics of the cutting and buffing results. This was my process:
Assilex 1500 dry
Buflex 2500 dry
Trizact 8000 dry
ACA 3D 510 on a foam pad
ACA 3D 520 on a foam pad
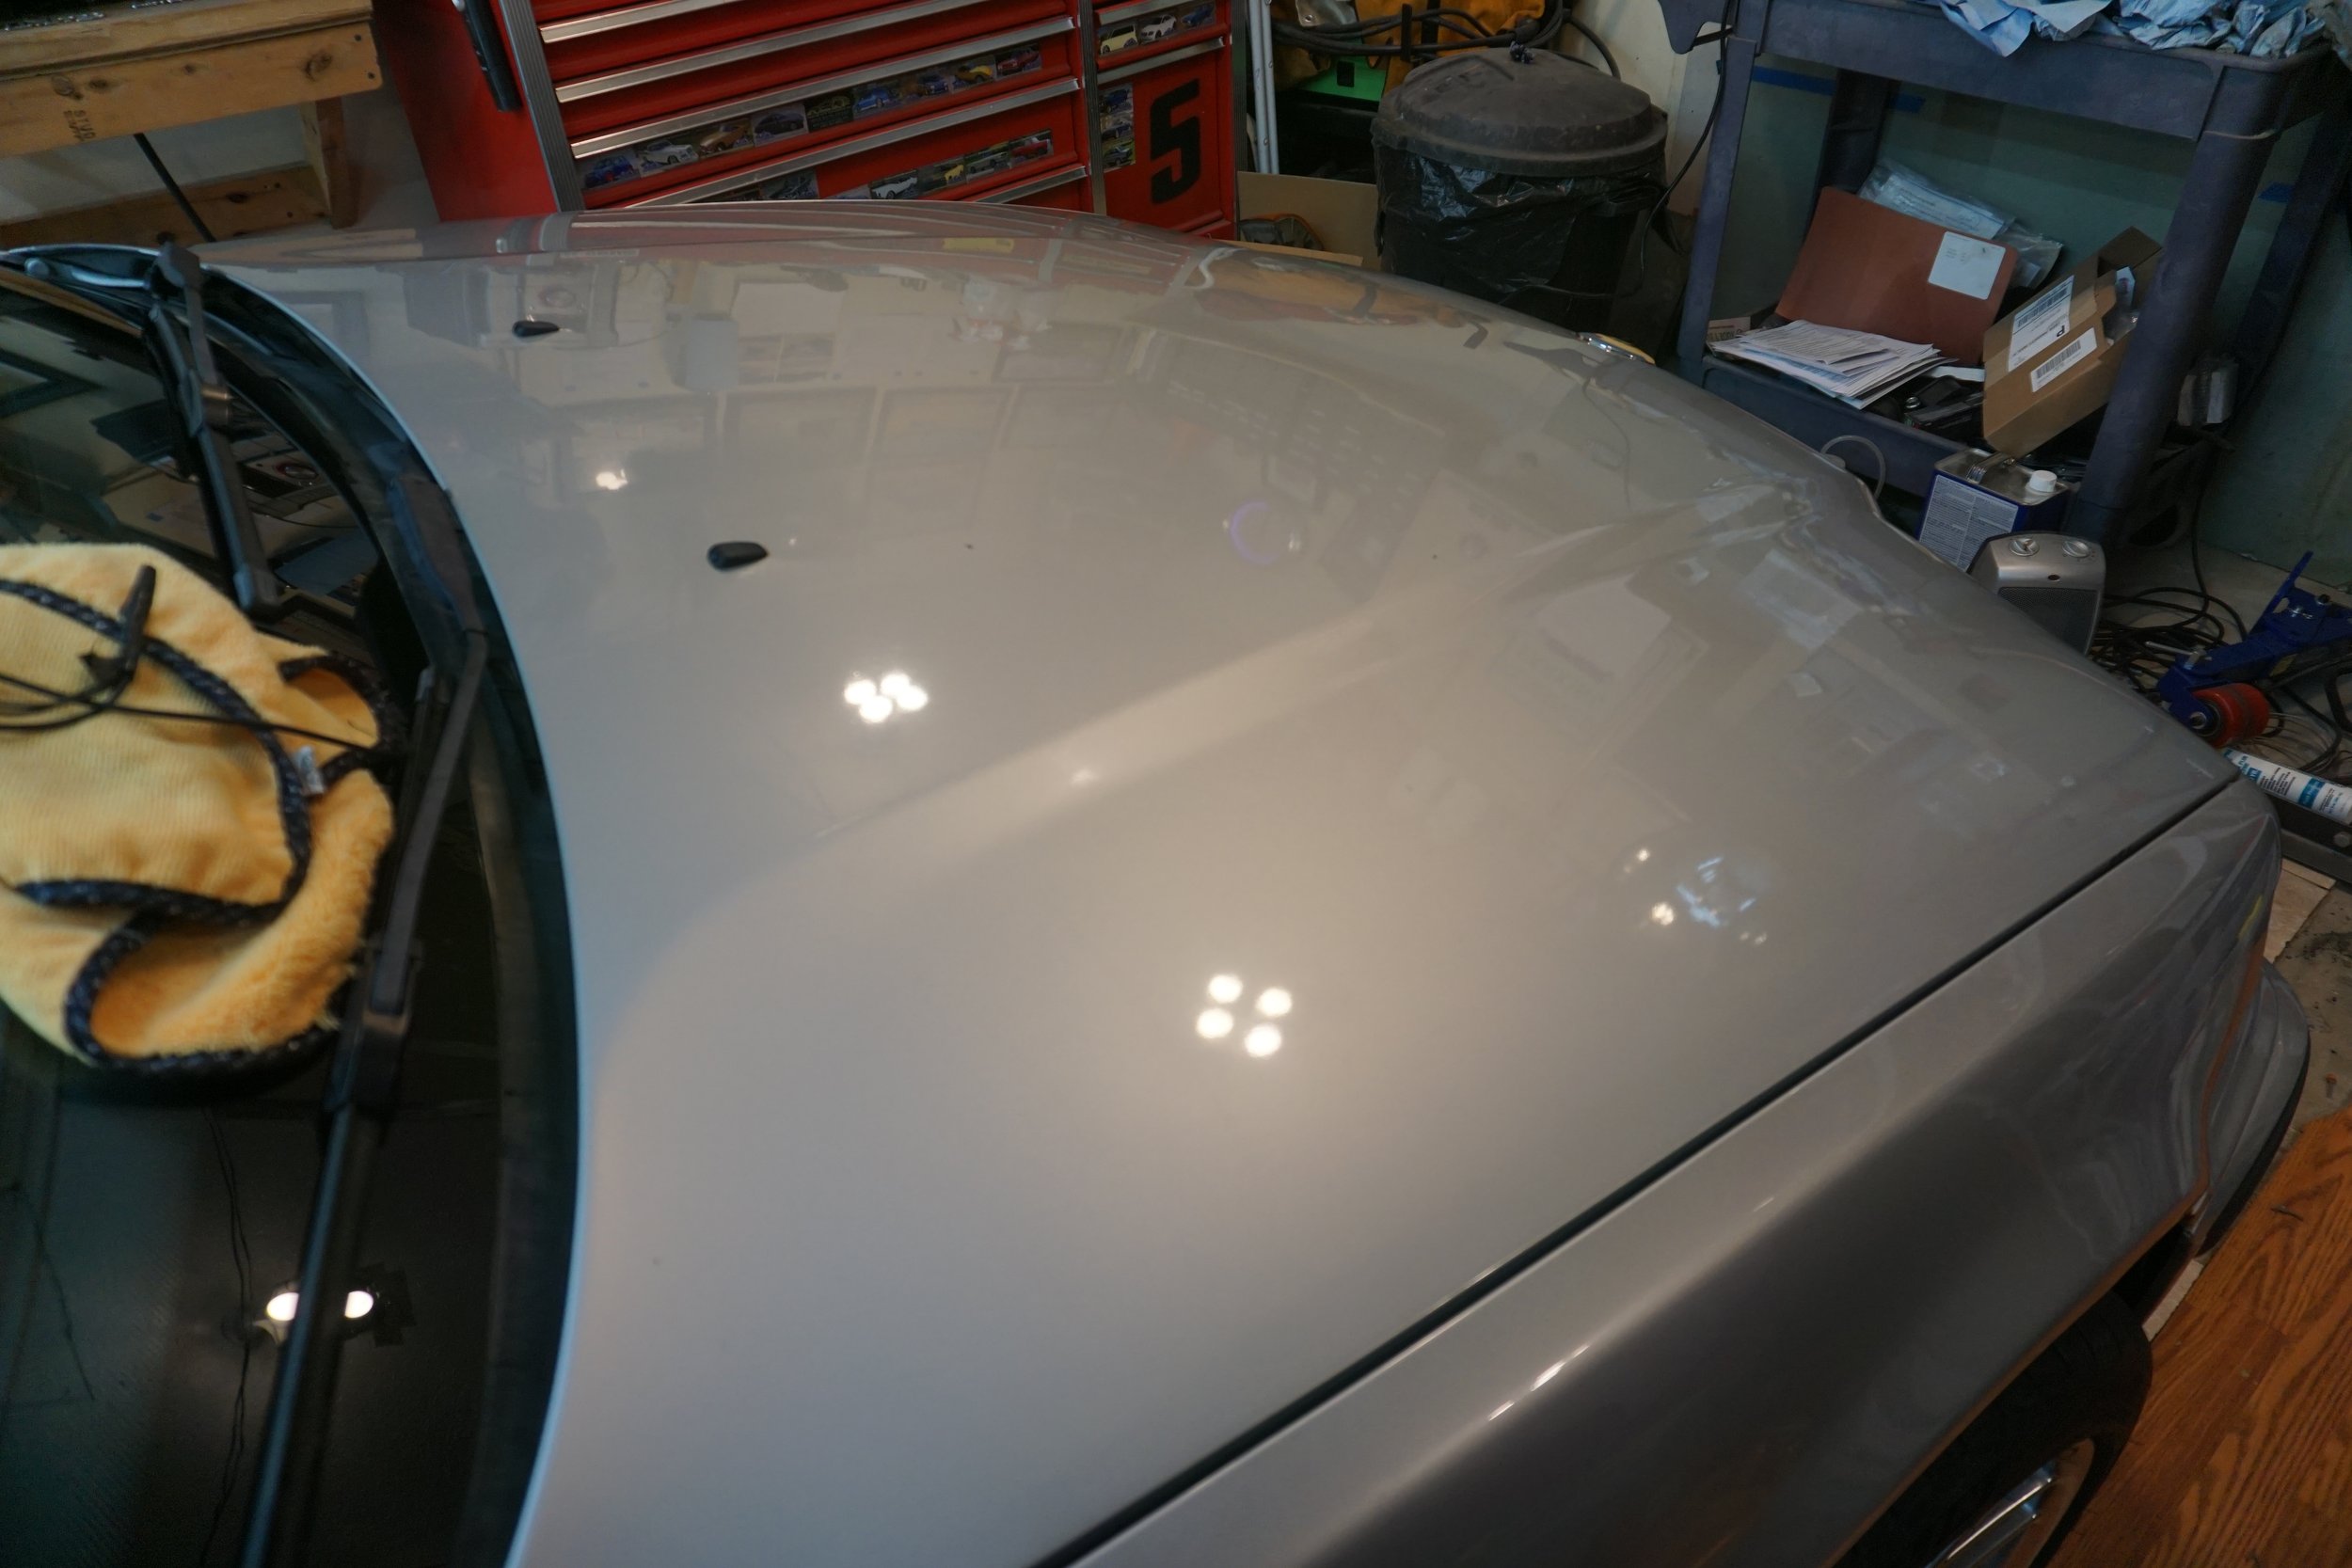
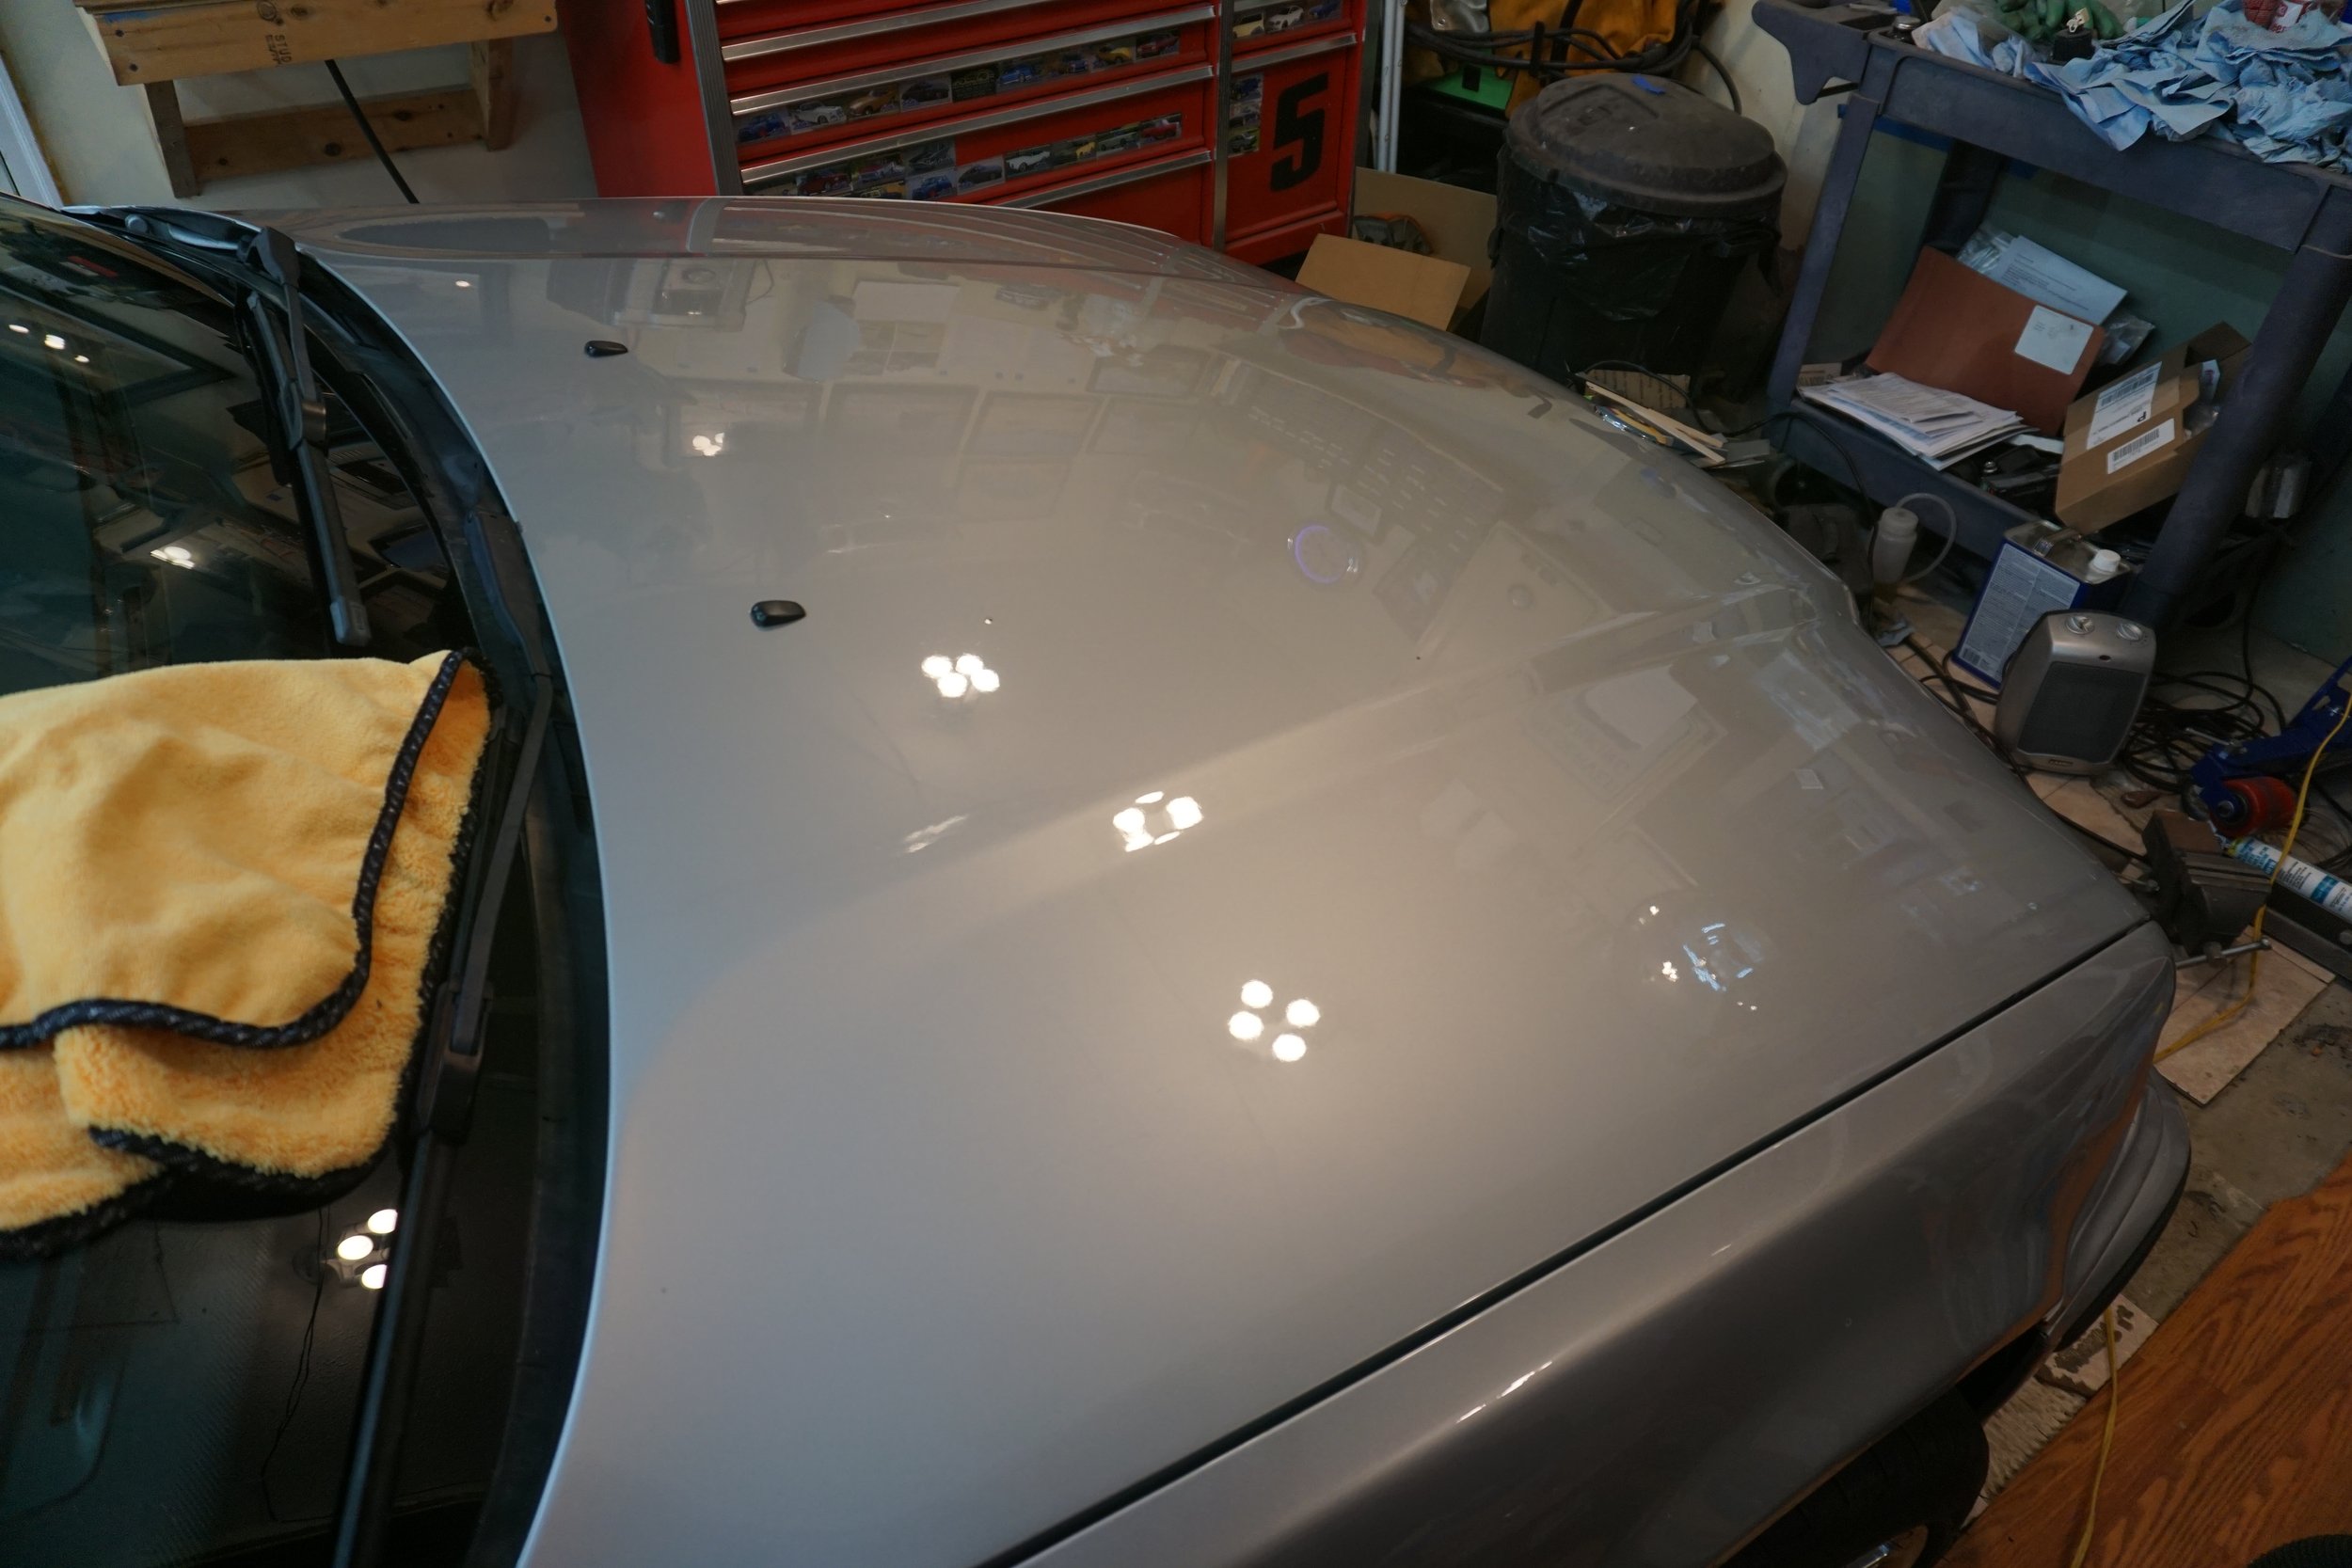
For whatever reason, the orange peel/finish on the top of the trunk was horrible, while the finish on the vertical panels was acceptable. I'm not sure if it had something to do with the top of the trunk getting sprayed last in the process, or the flow from the fans behind me, but it was bad. But since I sprayed four coats of clear I figured I could sand it down pretty close to flat. Although I had done a little cutting and buffing on my first project, this was the first time I was able to take my time and really do it until I was happy. And in the end, I was very happy!
Trunk before:
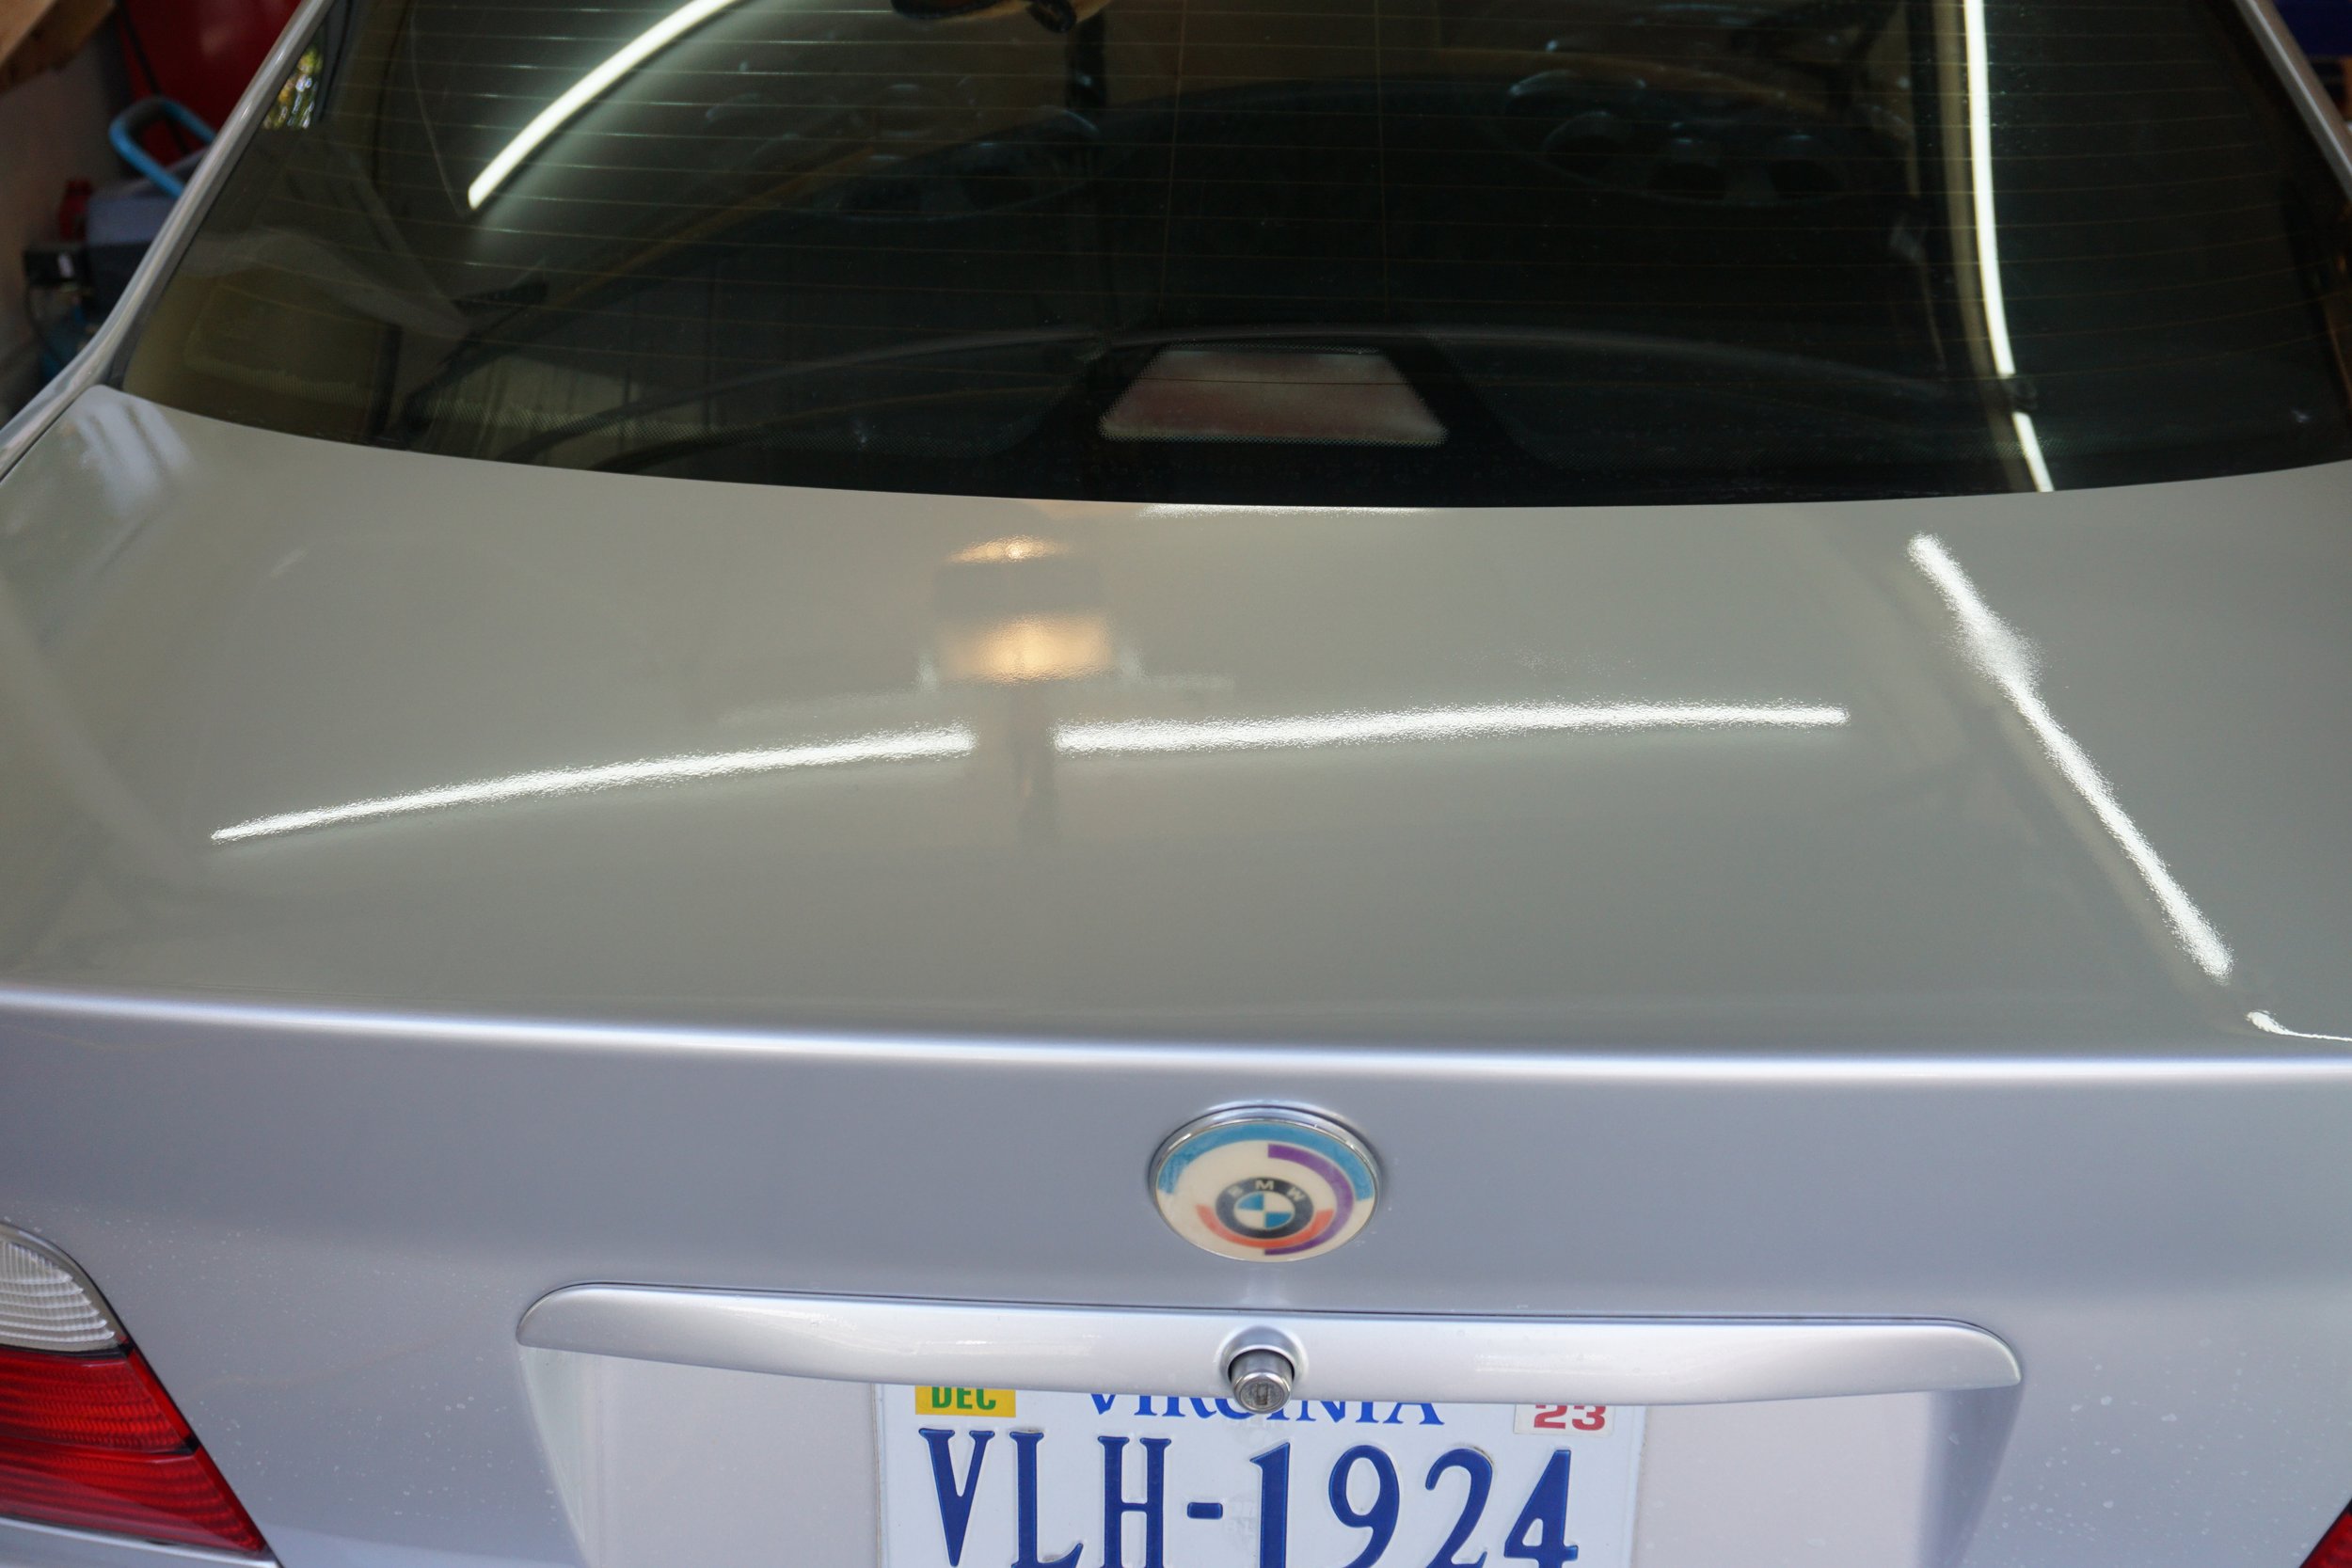
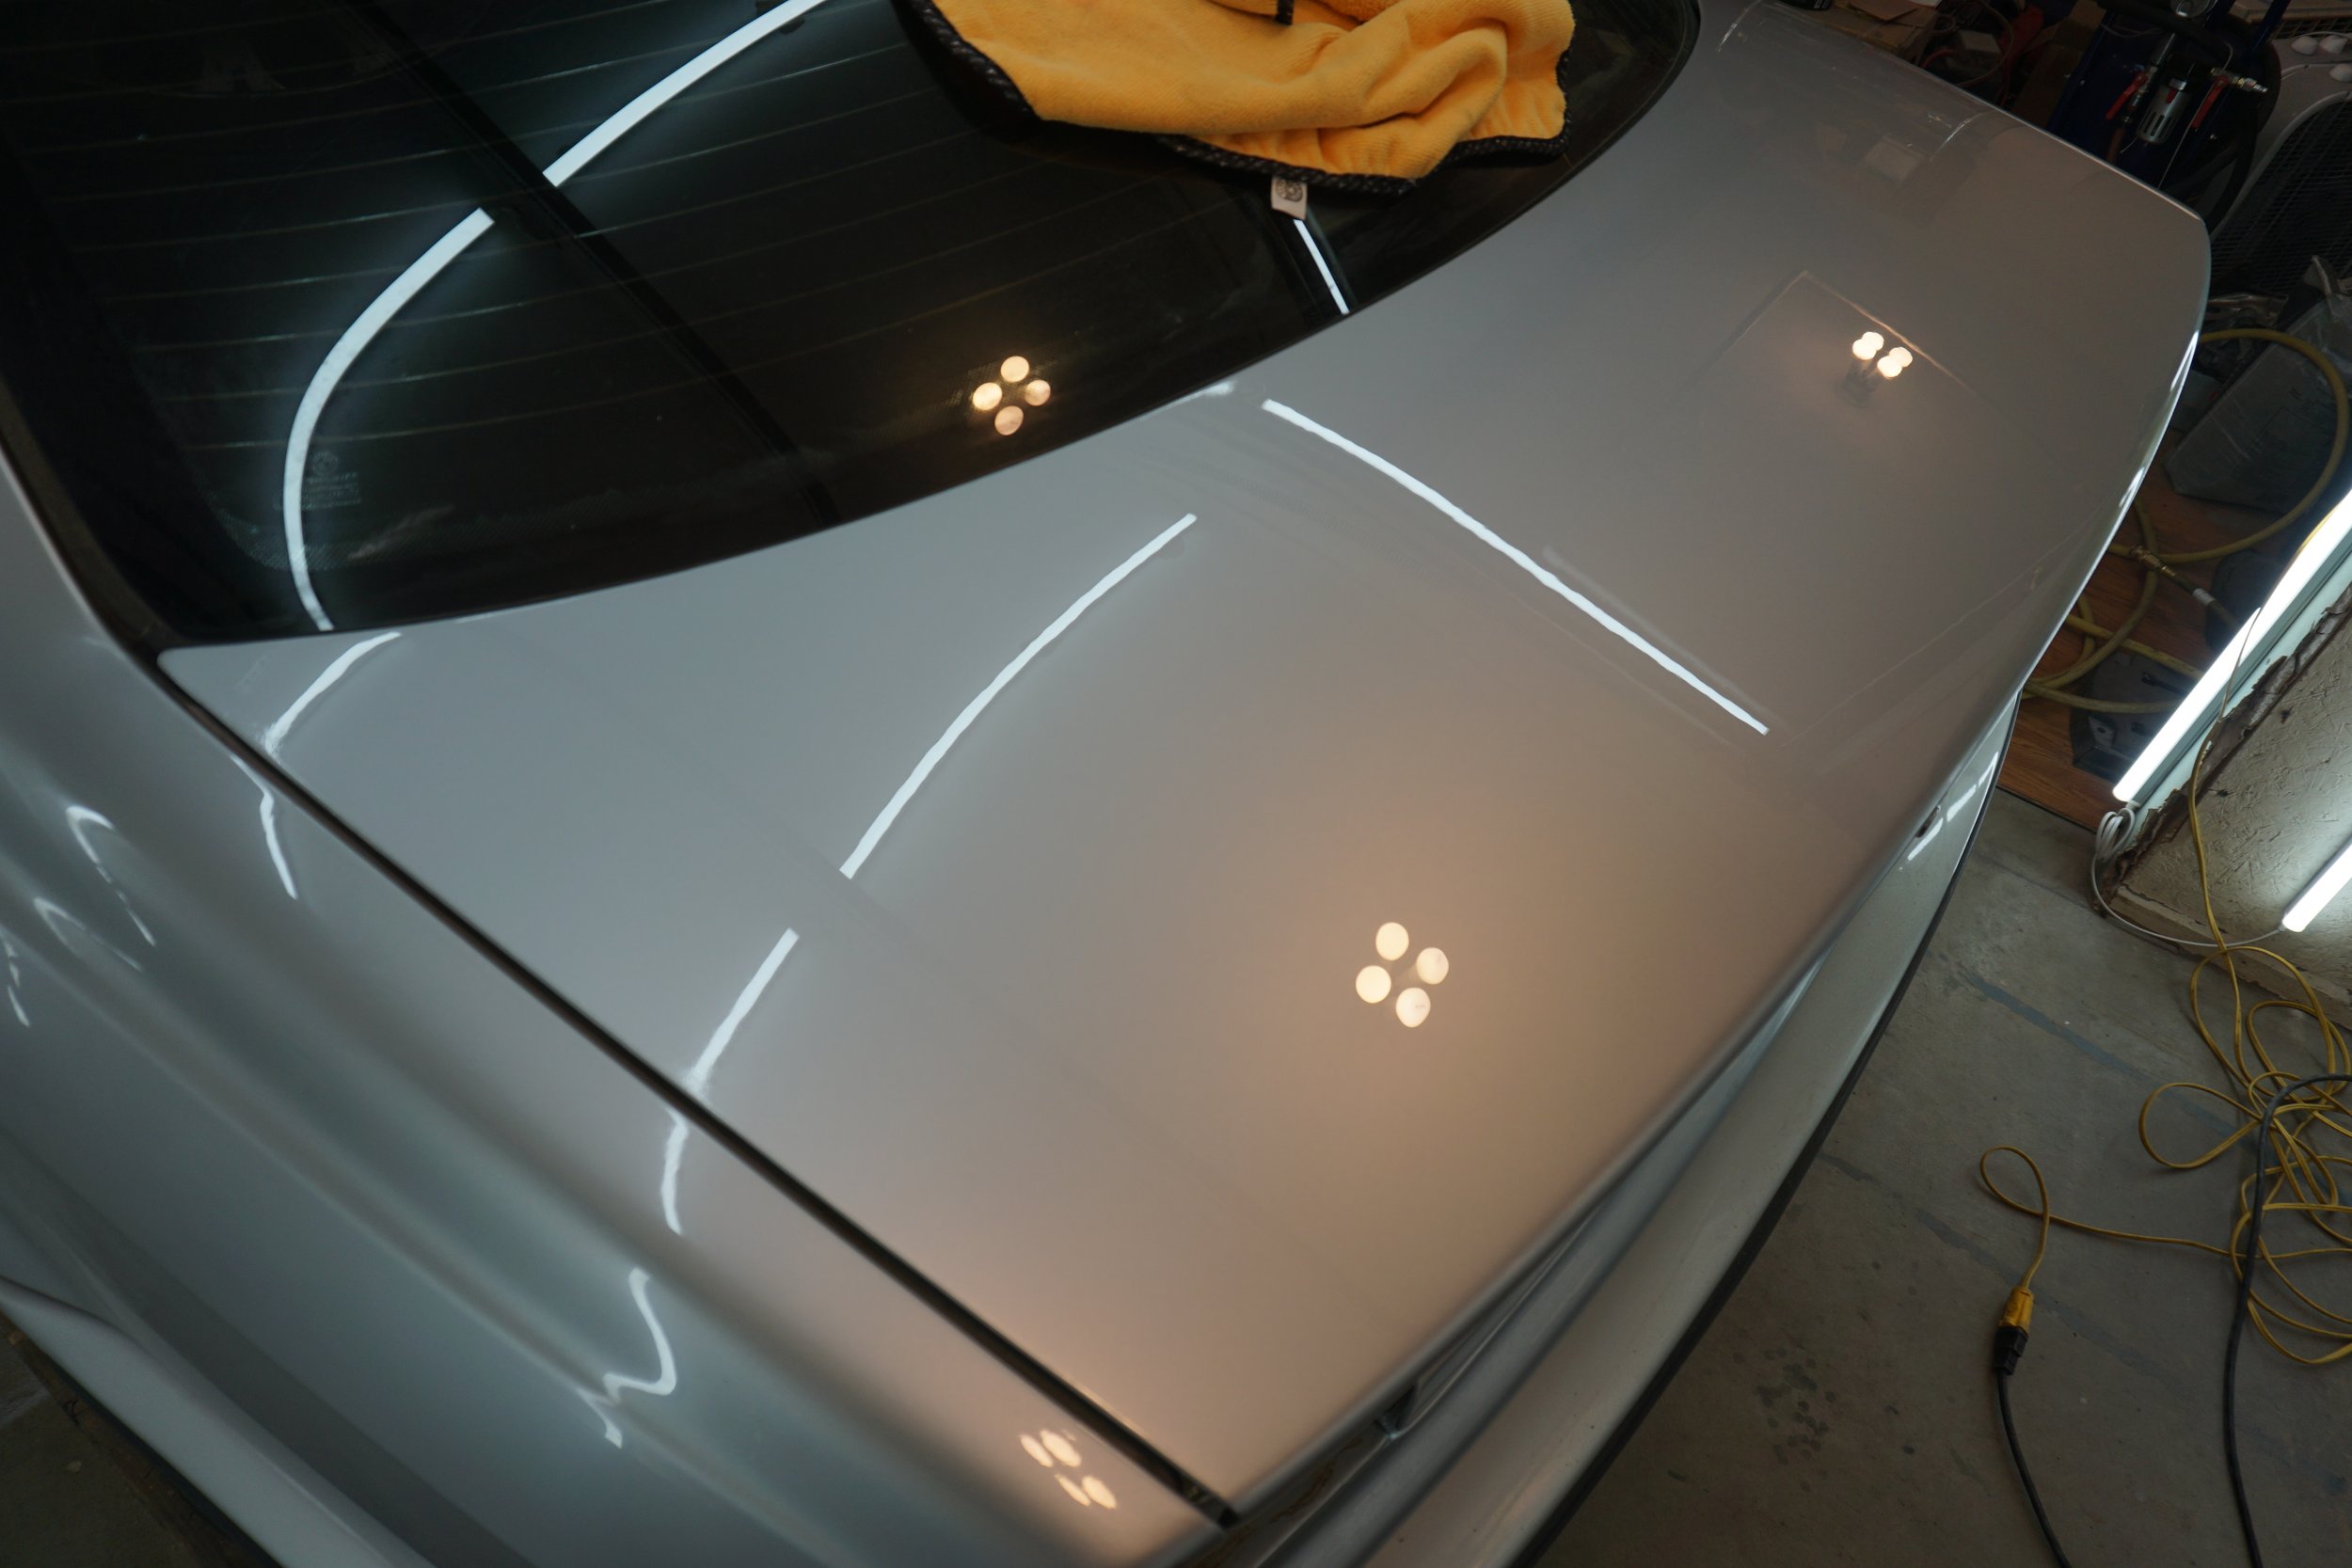
Trunk after:
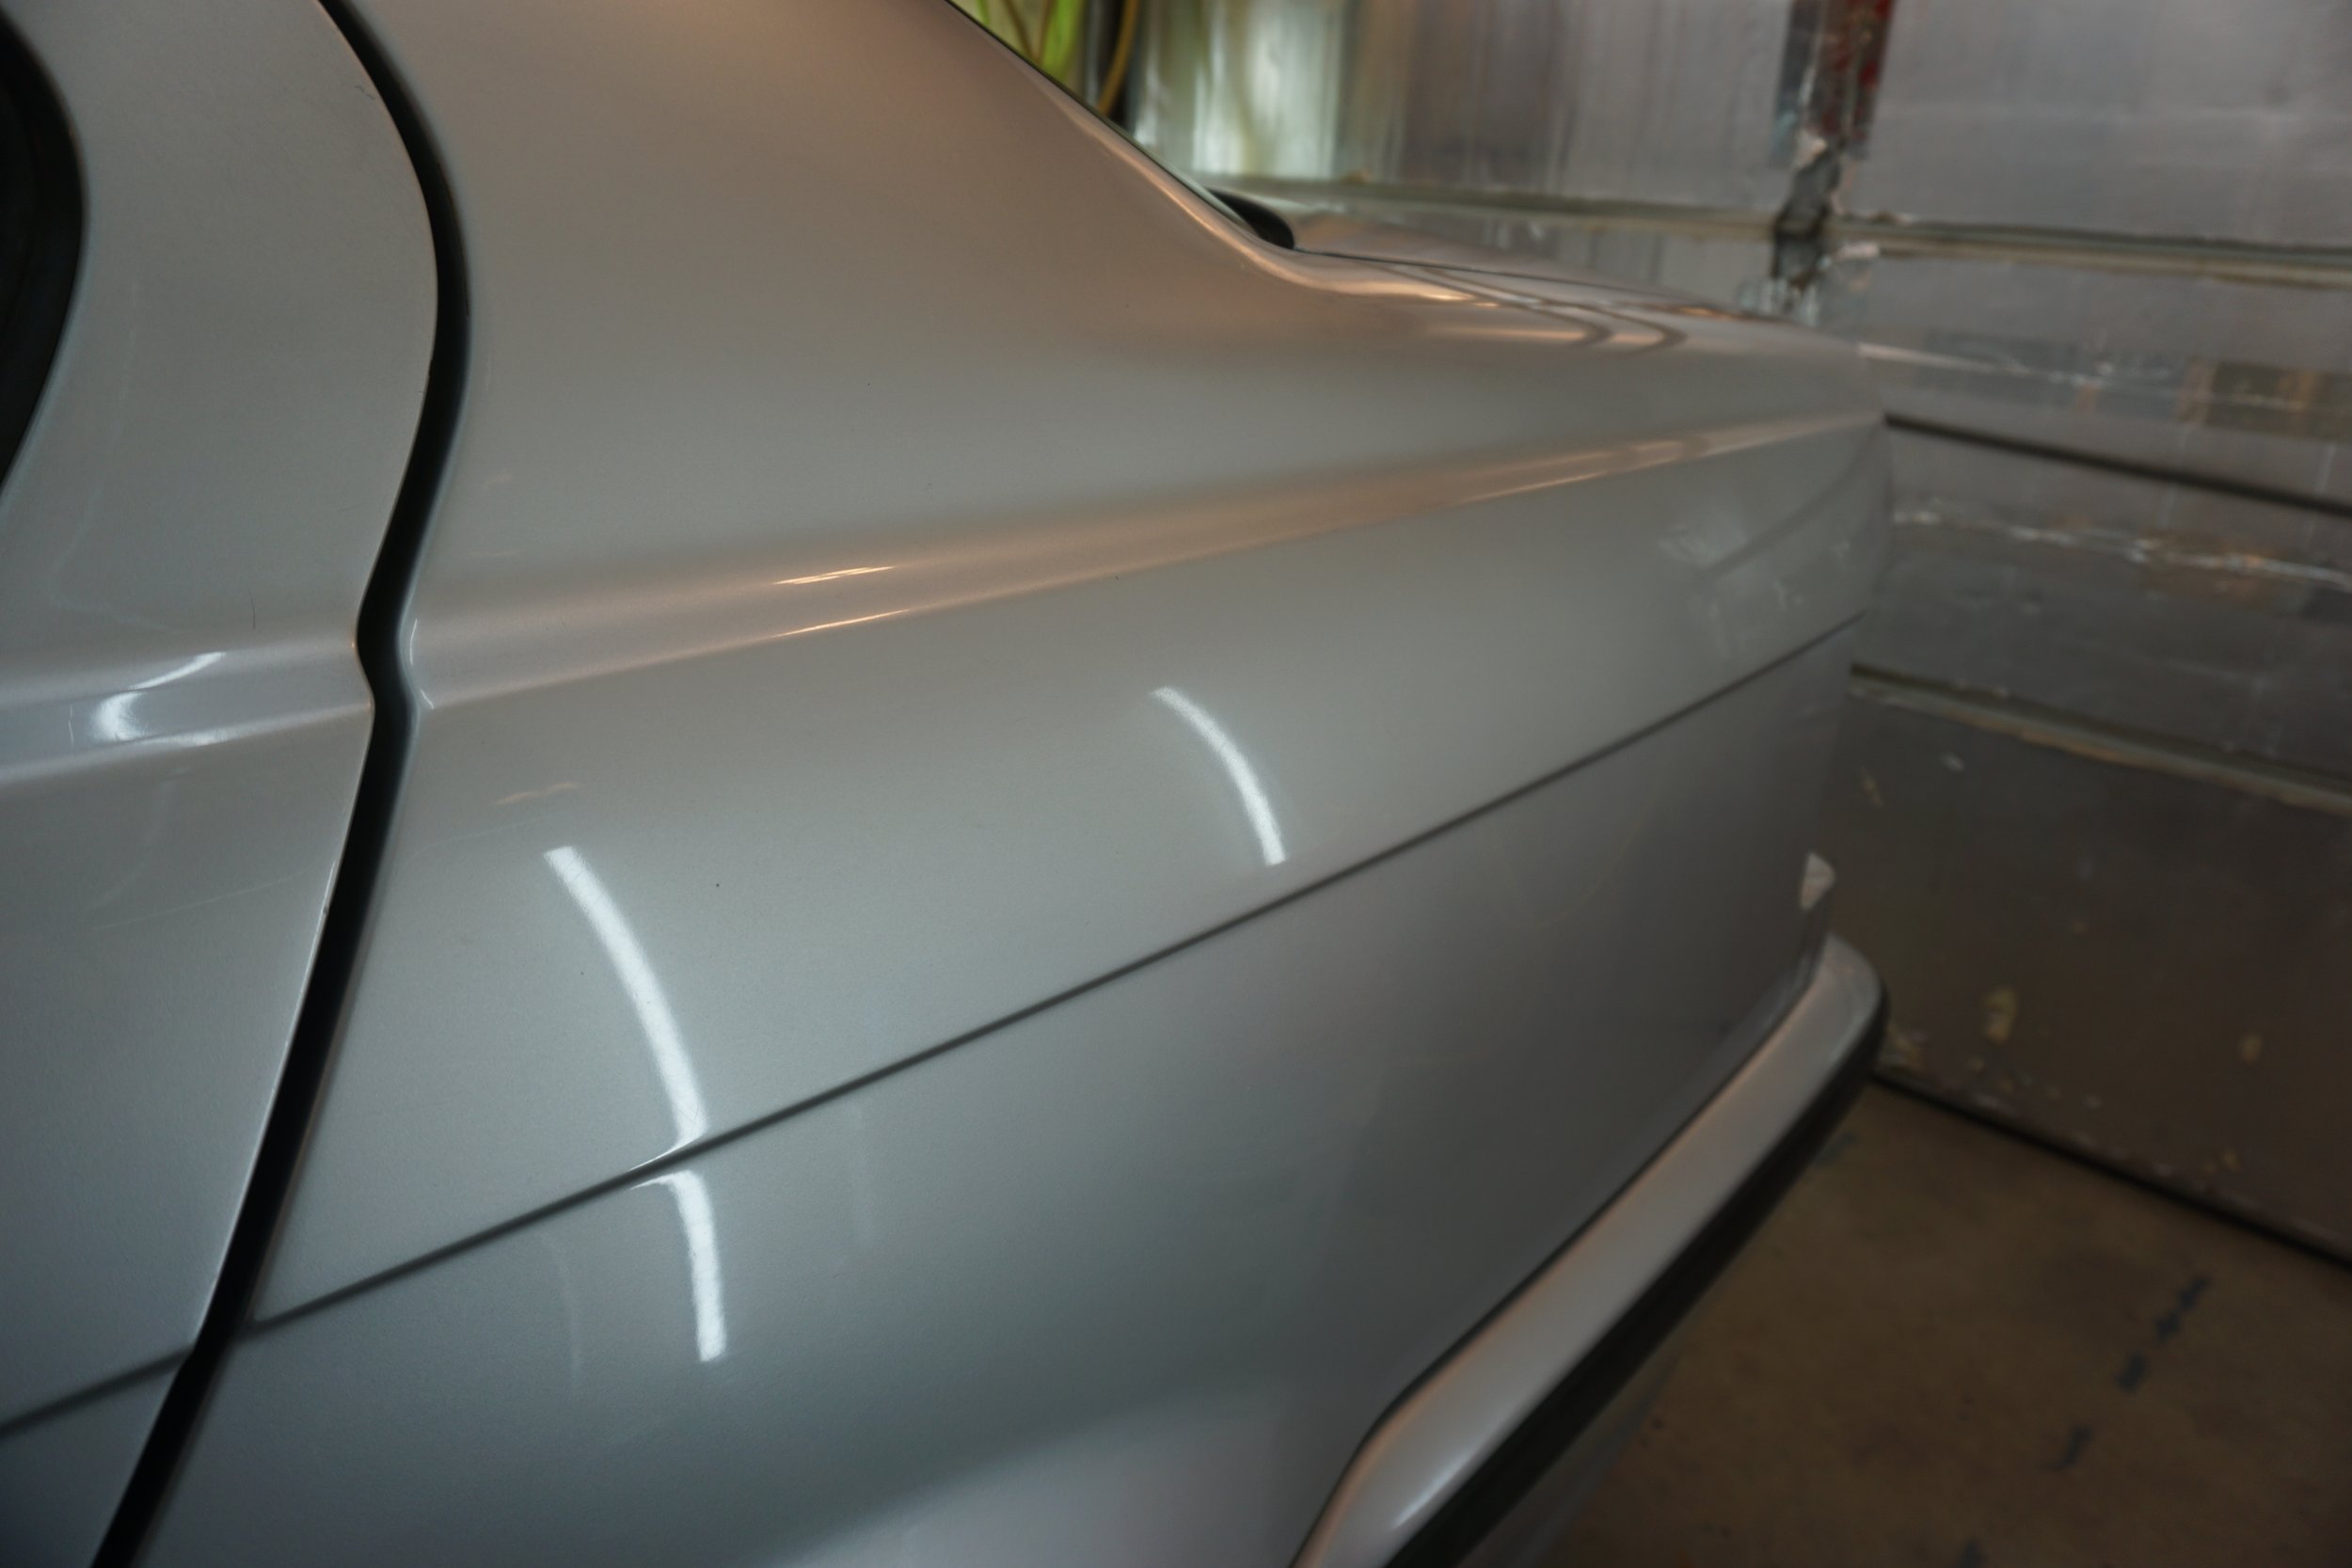
Rear quarter before:
and after:
C pillar before:
and after:
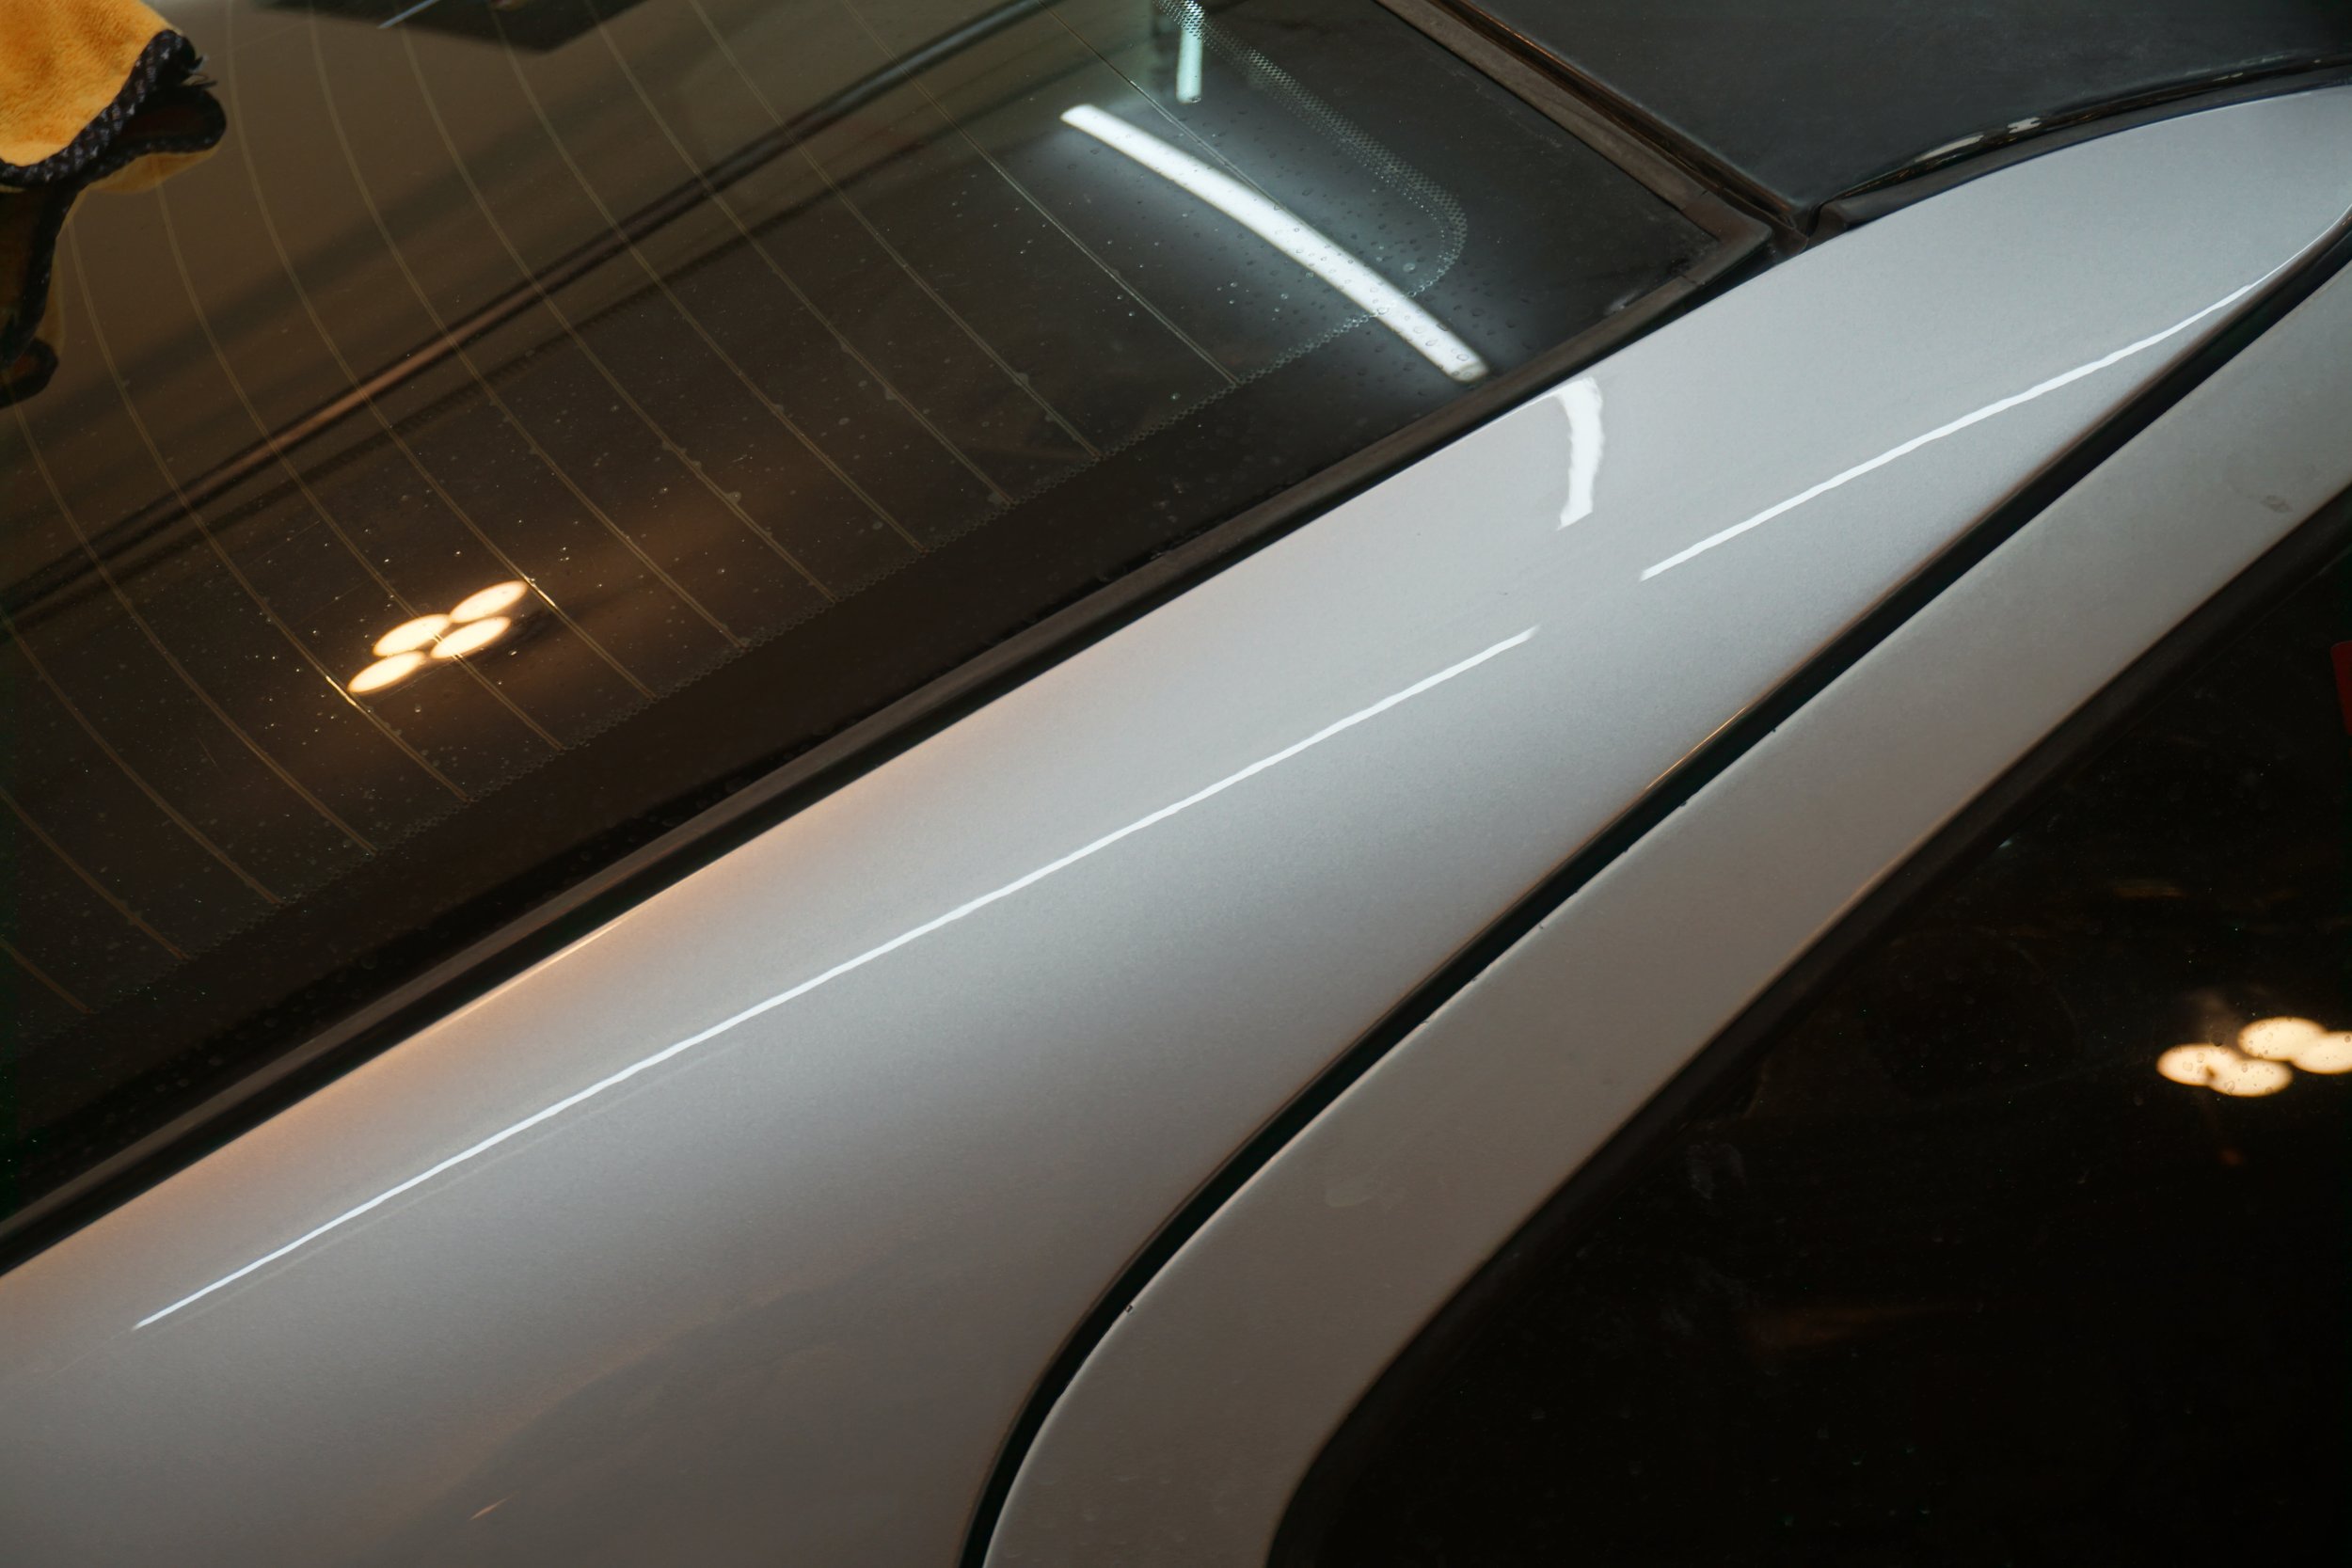
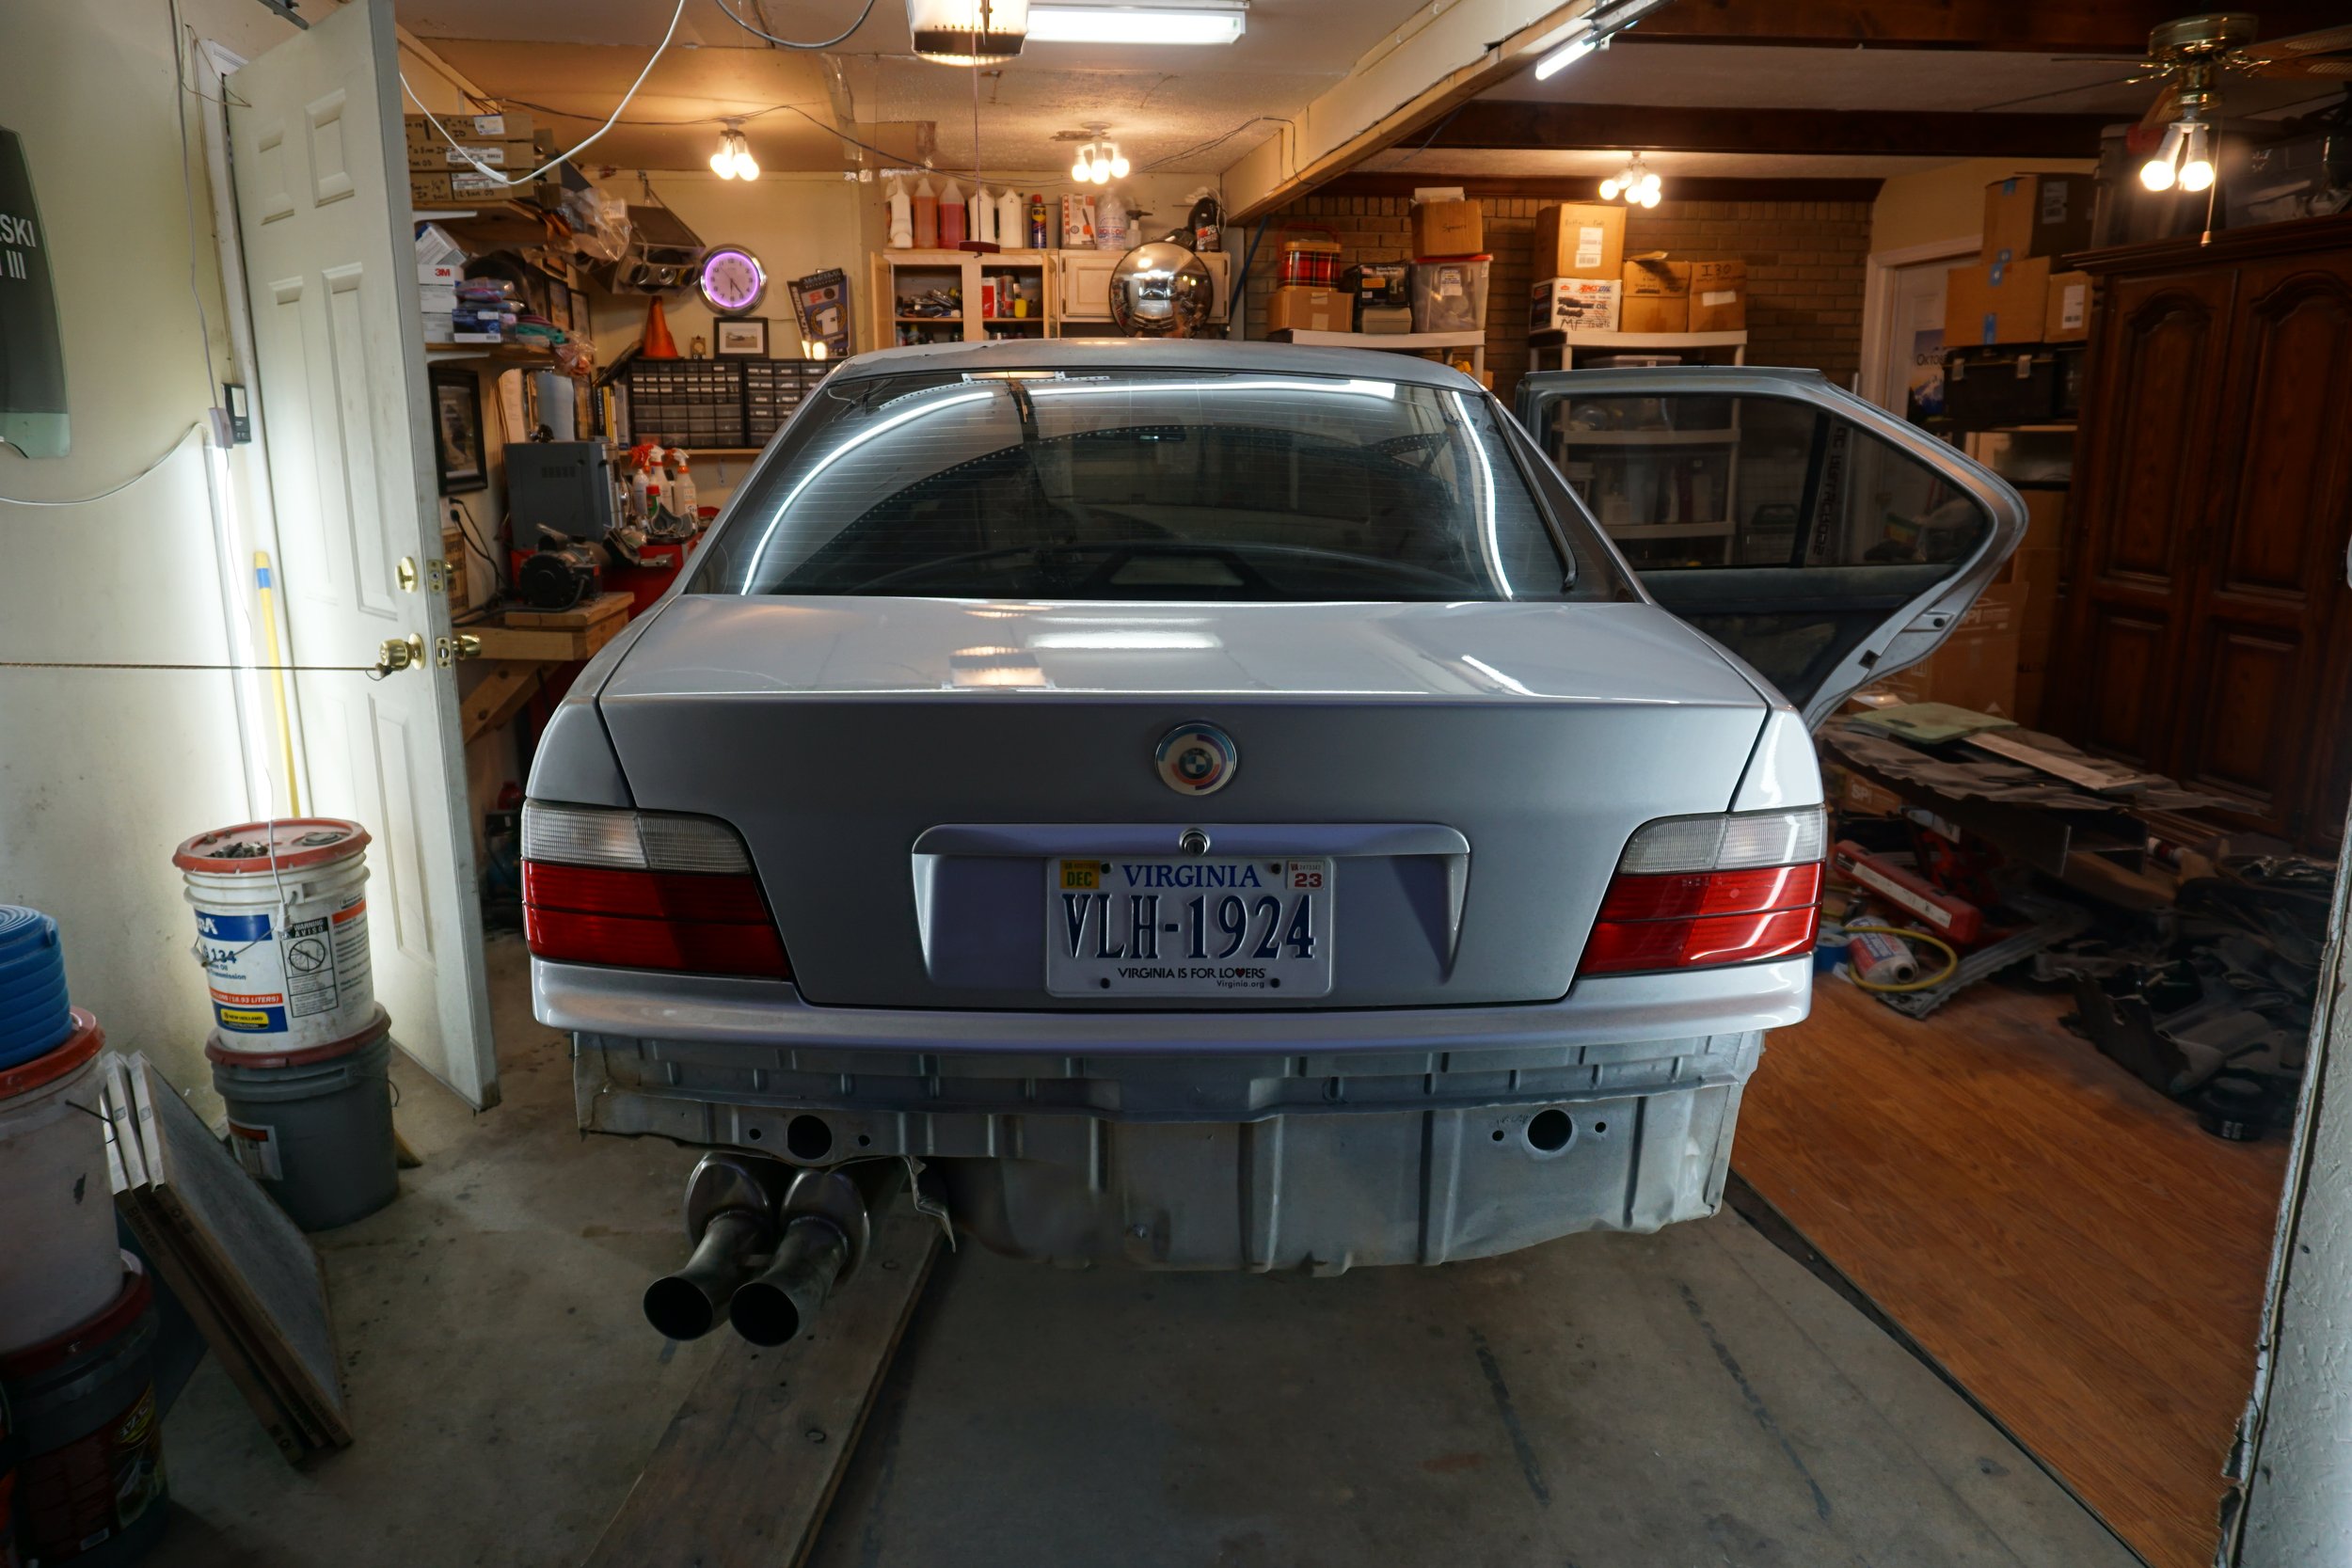
I've owned this car for 8 years now, and its primary purpose has been racing in rallycross, so the appearance has never been a top priority. It didn't help that so much of the paint was trashed, so I never thought it would be worth the effort to do more than hit it with the power washer. But with it looking so good in the back, and with the contrast so great with the other panels, I thought I would finally detail the whole car. The paint on the passenger side is some junky respray, while I think the paint on the driver's side is original. In the end, I was able to bring back a lot of shine, and the new paint doesn't stick out so bad.


So that wraps up this project. I made a lot of mistakes, and learned a lot from them, so my next painting project will be ever better :)
looks great. So good, in fact, that you should probably just go find an old e28 to rallycross next season ;) you don't want that nice detail getting all dirty :)
irish44j (Forum Supporter) said:
looks great. So good, in fact, that you should probably just go find an old e28 to rallycross next season ;) you don't want that nice detail getting all dirty :)
Yeah, you're probably right. But I did put two nice coats of sealant on the car, so all the dirt should just come right off :D


