1 2 3 4

Prior to some big changes in my life in 2012, I owned several AE86 Corollas, and was heavily involved in rallycross and TSD rally, plus did some autocross, trackdays, and high-speed gravel TSD rally.

Then in 2013, I bought a new FR-S as my primary street car. I'm one of the ones who kept saying all through the 2000s that if someone would just offer an affordable lightweight sporty RWD coupe, I'd buy it. Not a convertible, not a pony car, but a sports coupe for the Everyman. They built it, so I shut up and put my money where my mouth is.

I did a few little aesthetic and mildly functional tweaks (fog lights, small deck lid spoiler, de-badge, clear side markers with amber LEDs, LED turn signal bulbs and relay, 4th brake light, anti-glare convex side view mirror lenses, front plate relocation, mud flaps.)

I also did a couple small reliability/performance tweaks (CNC block off plate on the back of the right head, strut tower brace, brake master cylinder brace, door latch braces, lightweight battery) and a few interior comfort tweaks (alcantara instrument hood to deal with the bad reflection on the inside of the windshield, steering wheel spacer as I'm 6'2" and lumbar pillow as the stock seat is pretty awful.)

I drove it around and enjoyed on city streets, twisty back roads, and the occasional road trip. I stuffed way more stuff into the trunk and backseat than intended on multiple occasions.

Adding this pic because I like it; Dad takes his first extended stint behind the wheel; I'm pretty sure he approves!

Eventually I picked up a set of Motegi Traklites and stock-sized 200TW tires, but I kept the stockers for fun at a lower threshold.

In the interest of efficiency plus performance, I started smoothing out the underside of the car with a mix of JDM and aftermarket underpanels.

In large part because of the FR-S, I sold off all the older 86s. The new one had a similar character, plus more performance, better looks, and more civilized manners. It was essentially what I was trying to build my most ambitious dual duty street/track AE86 into. I did one trackday in the FR-S just pre-pandemic that left me thirsty for more. It was a good friends 60th birthday party, and it was one of the best parties I've attended! His two cars are just to the right of my FR-S in the group shot.


This spring is ripe for me getting back into motorsports. Forces at work include a combination of a new job in the automotive sector with weekends off, (my old gig of the past 20 years meant working at least one weekend day, and sometimes both,) plus more events taking place, plus me getting to a middle age where I realize time is short and now is the moment. smiley

Fast forward to 2022, and I've finished off the underside.


I've also been playing around with some different seats from work to get my personal fit dialed in...stay tuned for custom built seat awesomeness a little later this year! wink


I also entered an autocross with a highly-regarded local club and had a blast, even though it was cool, damp, and a bit slippery.

I also splurged and ordered some nice suspension, KW V3 coilovers with the softer spring rate, keeping in mind the OEM+ street car that can also do some motorsports nature of this build. They showed up today, and I'm as giddy as a kid at Christmas!

I intend to install these with the stock rubber strut tops for reasonable NVH and can't wait to give it a whirl.

golfsierra
golfsierra GRM+ Memberand New Reader
4/6/22 12:25 a.m.

Enjoyed reading your story.

Look forward to seeing the journey expand! 
 

Have you noticed any difference in fuel mileage or NVH with added underpanels?

In reply to golfsierra :

Thanks for the comment. The car is a bit quieter at highway speed on really smooth asphalt, but on rougher surfaces, tire noise is still intrusive, especially in areas where 70mph or 75mph is legal. wink I'm planning to add a bit more weight with some added sound deadening in the near future (ugh, I hate heavy cars! sad but should also make it more liveable/useable smiley...what small added weight?) Stay tuned for details!

As for fuel economy, I picked up a bit with the underbody aero. At city speeds it makes no difference that I can measure, but on a highway road trip it is worth as much as a few mpg.

I'm also hoping it makes the car feel a bit more planted in high-speed sweeper corner entry at triple digit speeds, but will need more track time to discern. I should also mention I'm not trying to address a significant lack in the stock car in these scenarios, but more of a case if you can have more, why not?

ian sane
ian sane GRM+ Memberand Dork
4/6/22 10:54 a.m.

Welcome to the modern era!

(I say that and most of my cars are pre-00, so not exactly modern).

I didn't realize there was such an aftermarket for the undertray stuff. That looks really cool.

captainawesome
captainawesome Dork
4/6/22 4:12 p.m.

I've been wanting to do the factory underpanels for a couple years now but there's always something else that steals the money away. I really like the non aggressive Verus diffuser too.  Also like where you are headed with the seats.

In reply to captainawesome :

Thanks! The scheel-mann factory in Germany has my cushion and bolster specs, upholstery choices, stitching colors, and upgrade options, so they are going to get building the seats soon and I hope to get them sometime this summer.


I just bought a used stock passenger seat bottom cushion on eBay to harvest the passenger occupancy sensor from to install in the new passenger seat. Doing so will keep the vehicle safety system happy and functional. I wasn't able to find a way to buy a new occupancy sensor, and my guess is that it is only available in the form of an entire new seat, which sucks, but what are you gonna do? I guess buy a used passenger seat bottom cushion on eBay to disassemble. laugh

I've accumulated a few more items, but haven't installed anything yet. In anticipation of the track day at ORP weekend after next, I got some Winmax W3 brake pads (claims to be a streetable pad, with a warning about dust/noise, plus autocross and short circuit track day capable.) The proof will be in the pudding. Going to install these along with new high-temp brake fluid soon.

I'm hoping to get the coilovers installed soon as well, but don't want to pull the trigger until I have an alignment arranged shortly afterward.

My passenger seat bottom arrived as well, and the occupancy sensor is huge! The mat almost covers the entire seat cushion! In addition, the wiring is routed through a hole in the center of the cushion...could be, uh...interesting to try and install this in my aftermarket seat cushion. That's what I get for trying to play by the rules and leave everything safety related intact.


One of my shopmates kindly shuffled cars around to allow access to the lift, so I planned to spend today working on the brakes before next weekend's track day.

A couple monkey wrenches came up. The first is that on my commute to work on Thursday, I was cut off by a non-signaling last-minute lane-changing landscaping truck/trailer, and as they cut me off, they hit a gigantic pothole squarely with one wheel on the single axle trailer, showering my car with a shotgun blast of gravel out of the trailer and every lawnmower on it! I got to work, checked my windshield, and saw a few tiny chips, which if I was completely honest, I couldn't tell if they were new or old. That evening on my way home, I noted a six-inch crack spidering out of one of the little chips. Friday it was a foot long and turning the corner. sad

I'm pretty sure that won't pass tech at next weekend's autocross/trackday doubleheader. Thankfully the local club came through with a recommendation of a club member who is also a mobile glass installer, and as of Saturday afternoon, I have an appointment for install on Monday afternoon at work!

The second monkey wrench is fitting the FR-S on the two post lift at the shop. I can't make the arms short enough to contact all four jacking points on the seam.

The car is too wide, the wheelbase is too short, and it just doesn't fit! I used to get around this by moving the pads to subframe mounting points further inboard under the car, but that had problems too (arms hit the rockers before the pads on their low setting took up the weight, and on the higher setting with 3" spacers, the car is too low at stock ride height to swing them under the car!) Once I added the flat underbody aero panels, my jacking options are limited.

I spent at least and hour futzing around with the lift before giving up and breaking out jacks, jackstands, creeper, and cardboard, and doing it the old fashioned way.

Before getting the car off the ground, I temporarily marked 16" above the center of each wheel on stock suspension with tape and marker to help assess any ride height changes with the new coilovers.


Then I lifted her up, removed the wheels, and sucked as much of the old dirty brake fluid as possible out of the reservoir.

Then I removed the stock pads, which amazingly still have plenty of meat. I pushed the pistons back, and sucked the reservoir out again. The new pads are gold, which means they must be awesome, right?

Once I had all four corners with fresh pads, I filled the reservoir with fresh brake fluid, gave a few pumps, and set up my one man check-valve bleeder setup on one corner (basically a speed bleeder inline along the hose out of the caliper bleeder to the catch can.) It is actually a motorcycle tool, but seemed to work quite well one caliper at a time to flush and bleed the system by myself. Get the line plus check valve and catch can set up, crack the bleed screw, give a few pumps, inspect the short hose between the bleed screw and the check valve, repeat if needed, and once clear and bubble-free, close the bleed screw and move on. 

Then I decided to tackle the coilover install, then started making a mountain out of a molehill, then half talked myself into putting it off, then had a short conversation with myself about how the car is already up, wheels off, and it will only be as hard as I make it.

I started on the rears, which turned out to be a good choice. I'm reusing the stock rubber strut/shock upper mounts, so I need to remove them. I got one corner out, put the spring compressors on it, took the tension out of the spring, and spent quite a while fighting the top nut. It just kept spinning the shock center shaft and not loosening, even with a barrage of impact tools and techniques. I eventually decided to get brave (or stupid) and slack off the spring compressors a bit to see if the added load helped remove the nut. Long story short, a while later I felt foolish when I finally got it off, removed the spring compressors, and saw how everything sat with the stock spring fully relaxed:

I transferred these tops to the new rear coilovers, and struggled for a minute until I figured out that the purple-anodized upper perch for the coilover helper spring has a top surface that mimics the shape of the rubber insulator for the top of the stock spring, so the rubber insulator gets removed, and then the coilover fits the stock top nicely. 


I got the rears installed, which certainly involved a few swear words and struggling to get all the bolts lined up, and called it a night, to be continued tomorrow.

Following. This is another well done frs build. 

In reply to Professor_Brap (Forum Supporter) :

Thanks Prof. Brap! Along with a few other builds on here, I'm trying to show that not every one of these is a neglected, slammed, salvage-titled car with the battery tie down missing, an annoyingly loud muffler, and knockoff rimz. laugh

Today I returned to the shop and did the front coilovers.

Based on my experience with the rears, I used the impact to run the top nuts up to near the top of the threads with the stock fronts still installed on the car.

Out with the old, in with the new!

These were really easy, compared to the rears which gave me a moderate bit of a hassle. Some of the online install reports I read indicated that the sway bar end links can be a hassle to line up unless both sides are disconnected (problematic when you have to connect one side, then the other) but I had zero issues. I got the coilover in place, and got the three nuts on the engine bay side of the top mount started loosely by hand. With the coilover hanging by the top mount, and the knuckle/upright hanging by the lower ball joint and steering tie rod, I used the full articulation of both ends of the end link, as well as the range of movement in the loosely dangling coilover to get both ends of the sway bar end link aligned with the hole in the coilover and started before moving on.

The upper hole in the coilover is slotted, which allows some camber adjustment without crash bolts, which is pretty sweet. I did the right front first, and had trouble re-installing the upper bolt. It would start, but wouldn't go in all the way, hanging up on the last shoulder.

Then I remembered that when I was reading some install reports, somebody mentioned needing to order a couple extra lower bolts to replace the upper bolts with the fatter shoulder, and I thought, "Crap. I took the train out to the shop on Easter Sunday afternoon. I don't have any M14 fine bolts at the shop. Can't walk to any hardware stores or FLAPS, and even if I could, would they be open? Can't drive the car anywhere as it is...what to do?" I gazed across the shop, and there was grandpa's old Maximat lathe...knew I kept that around for a reason beyond sentiment! wink

The crazy part is that I didn't have the same issue on the left front when I went to check (which I'm glad I did!) The remaining question is, what was the issue on the right front? At this point I just wanted to slam the thing back together and go for a drive, so I didn't investigate. I don't think I tried to install the bolt backwards, but I suppose it is possible. In any case, with all the fasteners torqued, not likely to be an issue before the next time I have it up with wheels off. I pushed both front knuckles to full negative camber, brought both back a little bit, in about the same amount, and tightened. I'm inquiring about an alignment this week.

I set all four corners just slightly shy of maximum upper ride height, and started torquing. The problem I encountered was the upper nuts on the shock shaft. The manual suggests 25 Nm on the front, and I think 18 Nm rear, and on both it says, "use supplied nuts." Out of the box the rear coilovers had a pair of very thin nuts, like a nut and jam nut, and the fronts came with a nyloc. I interpreted supplied nuts as the nuts that came from KW, so I used them both front and rear. The problem is that the install manual from KW also tells you not to use any impact tools, and not to clamp the shock shaft in any way, as both may damage the shock. Not sure how one achieves proper torque within these parameters, but I figured full thread engagement plus 'seems tight' would suffice.

On the rear I jammed the jam nuts together as far down the threads as practical, and on the front I ran the nyloc down as far as I felt practical, and there was lots of me cranking on a wrench, just spinning and spinning the shock shaft. Neither top felt loose on the shock by hand once 'tightened' down.

I figured I'd put the wheels on and take a spin around the block.

Kinda funny to see it up on jackstands right by the lift, but the Traklites with Dunlop Direzzas look as good as ever on there. Still might refinish these wheels from satin black to a dark bronze someday.


I took it for a test spin around the block, plus an attempt at brake bed-in, but the clunking/clattering was very disconcerting, so I cut it short and returned. I could hear each various corner transitioning on and off the helper spring and main, but with accompanying clunks against the chassis, and by the time I'd gotten around the block and back to the shop, was telling myself, all the strut tops are loose.

Sure enough, they were. I ran them down tighter, using, uh...fully approved methods per the manual. wink

I'm undecided what to do with the rubber cap. I guess cut a tightly-fitting hole in it to keep crud out of the bearing, but allow the strut top to poke through? The stock cap won't stretch over the shaft once tightened.


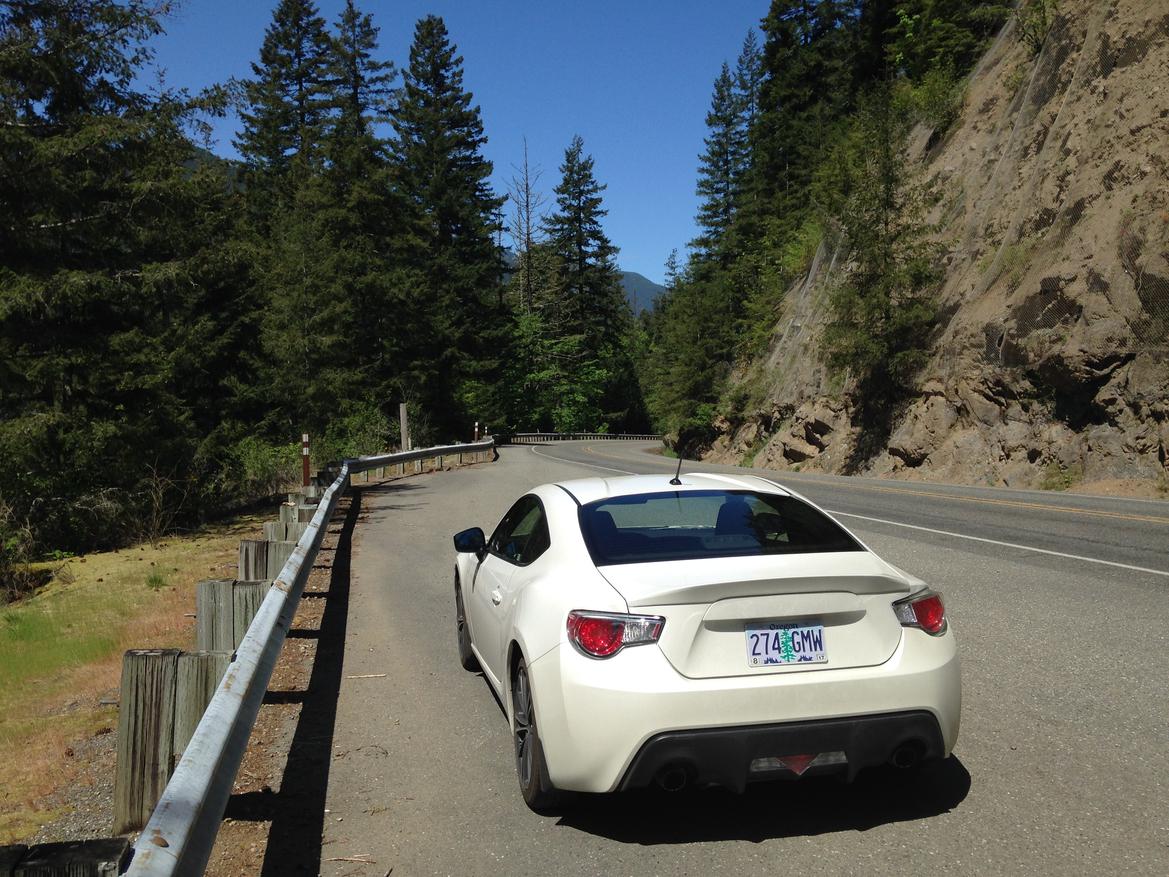
I went out for a little drive and wow! WOW! surprise smiley WOW!! They feel like stock, but with better response and better comfort! Amazing, but true! Couldn't be more pleased on initial impressions. This is the new V3, which is something like 70% stiffer front, 45% stiffer rear spring rate than stock, and softer than the old version of the KW V3. Perfect for me as far as I can tell from a couple short drives.

I also did some further brake bed in on the drive home...Sunday non-traffic. laugh

captainawesome
captainawesome Dork
4/18/22 8:07 a.m.

IIRC the bolt can only go from one direction so that may have been your issue.


The Traklites look great on that car, and glad you like the KWs.

In reply to captainawesome :

Thanks for the kind words.

Minor update; got the windshield replaced at my workplace by the stellar mobile glass guy recommended to me. Very happy with the process and the outcome. Looking forward to the track day!

After a couple months of driving on the coilovers (plus two trackdays) I'm really pleased so far. The car retains the stock character and balance, but with better response and faster transitions. Comfort is no worse than stock, and on some bumps, better than stock! Although the car is lower, it scrapes less often due to slightly stiffer springs, and/or better control, or something. Whatever the explanation, I'll take it!

My only minor gripe is that sometimes after extending to full droop, I get an intermittent subtle clunking noise from the right rear, most noticeable at low speeds on bumpy surfaces. Nothing is loose (I've checked multiple times) and hyper extending that corner by jacking it up (or by taking a steep curb cutout at an obtuse angle) often helps quiet it back down. I suspect the noise is related to the helper spring transitioning from mostly or fully compressed to extended, and will try increasing preload on the main spring and see if that has any impact as a means of further troubleshooting.

I haven't yet played with compression and rebound damping adjustments, but look forward to seeing how they impact the car's behavior.

Trackdays have been a blast. I'm running at ORP with Bridge City Autosports and the track is amazing, devilishly-complex, and so much fun! 2.3 miles, 16 turns, 400 feet of elevation change per lap, and designed to be run either direction. Almost all of the turns are part of a complex of adjoining turns, with very few standalone corners. Tons of runoff and no trees anywhere nearby! It is a great track for a wide variety of cars, including momentum cars like the FR-S. The pre-event track tours, stopping at key corners with Bill for insider info are well worth showing up an hour early!


Further details from the trackdays. The good news is that despite the various changes (coil overs, more aggressive brake pads, slightly more negative camber, and grippier tires) the overall handling balance and experience wasn’t much different. I take this as a good sign because it means I didn’t overwhelm any one system or component.

It feels faster. It’s certainly capable of braking later. It also feels like it handles transitions a little more quickly. I feel like the limits are higher, but the threshold is a little trickier to approach than it was with stock suspension and tires. I also noticed that when on, (I usually switch stability control off) the electronic nannies engaged more frequently than before. I’m guessing the car can’t sense/ calculate that the extra grip from the heavy banking and elevation changes will catch the car with plenty of grip as it weights into the banking, it simply crunches the numbers and determines that that much steering angle plus throttle input at that speed is ill-advised.

At the first event, we got six sessions as promised, over 100 miles on the track, and I averaged 15.2mpg! The second event was run counter-clockwise, which I found more challenging, and harder on the tires and fuel consumption...or maybe I'm getting faster.  Once again got all the track time I could handle, and around 13mpg. 

It started raining during the last couple sessions of the most recent event, which I found really fun! Having grown up in a wet climate, and with the bulk of my early competition driving experience being rallycross and slush series autocross, I love doing the low traction dance. Leveling the playing field and allowing me to play with cars like the 400whp Fiesta ST and the Cayman S made the later sessions really enjoyable. I'm sure it also helped with tire wear.

Speaking of tire wear, things could be worse, but the outside edge was taking a beating, and beginning to shown signs of potential chunking in a few spots. These are slightly older Dunlop Direzza ZIIs, with a few thousand street miles, plus both recent trackdays on them, and will likely be replaced soonish. I also rotated front to rear after one event, so this photo is the current front, but the current rear is worse. ORP is known for devouring tires. I ended up running higher pressures (~44-45psi hot) which sacrificed some overall traction to minimize rolling over on the front. I need to try some more negative camber up front, which I'm completely certain will help on track, and see how it fares on the street, as this is still my daily, and I need to keep it both civilized and useful on track. 

With the edge a little harder to approach after the recent mods, my self-assessment was that I was leaving the most on the table in the fast corners, but I might not be my own best critic; more on that in a minute. Tried my best to hang with a 2022 BRZ Limited on 18" Michelin Pilot Sports, which was fun! He would pull out a couple lengths on each straight, and I could put a little pressure on in most of the tighter stuff, with one exception. He'd gain 5-6 lengths every time on the exit of one of the tighter turns, taken at about 45-50 mph, and a steep uphill that for me is either an eternity in the middle of the 4000rpm torque dip in third, or two extra shifts to drop down to second for maybe one second before nearing redline, then back to third wondering if I gained or lost time overall by downshifting. The extra displacement of the new car with the 2.4 has quite a bit more potential. <sigh>

I love the mix of cars and people in Bridge City Auto, one of the reasons I'm thrilled with the club. There is always someone running similar ballpark lap times and it is fun to go out and ran a couple laps, shuffle the order to get a new perspective on lines or where we each were strong, run a couple more, and repeat. 

On the first event, I ran with the "Group A" or the novice/first time at ORP/low horsepower group. I had typical momentum car frustrations of being held up until the passing zone on the straight, only to be gapped by a few lengths in the passing zone before being held up again afterwards. Much fun was still had, though. I tend to find myself running with the 3-series folks, Focus/Fiesta folks, some Miata folks, and sometimes the slower pony car or Porsche folks. Of the crew I was playing with, the NC Miata and I were the slowest on the straight by a bit. Interestingly, I'd make up time on the faster parts of the track. The "straights" are undulating or hilly, and have some fast kinks and sweepers, and I was gaining via bravery through the kinks, and on the brakes at the ends of the straightaways, which there are four of per lap.

The fact that I was gaining most in the fast sections was puzzling based on my preconceptions. Talking to the other guys, they were impressed that I was taking some of the fast kinks over brows with a confidence lift, which was a nice pat on my back. A couple of them said they figure I need more power to gain much, but with more power, and all of the sudden I've got new braking zones to figure out. 

On the second event I ran with "Group B” which is the trackday-experienced/intermediate group and it was a better match in terms of pace, especially when I requested to be gridded near the back, which resulted in plenty of open track for everyone. Passing was by point by anywhere, and I was still slow on the straights, but wasn't held up, but also wasn't pointing the entire group by, so I think I've found my spot.

Key Takeaways:

-I need to try more negative camber up front and see if that allows me to lower tire pressures. I should also start to play with the adjustability of the coilovers and begin to learn how to use them to fine tune.

-I could always use more power, but the low-hanging fruit is that I probably need to ditch my preconceived idea that I’m fast in the tight stuff and slow in the fast stuff, get analytical about where I can improve, and learn to drive faster in the slow corners.

-Trackdays are awesome and so much fun! I could spend a lifetime trying to get better at driving Oregon Raceway Park, and still have things left to learn. The club I'm running with is great!


My custom seats arrived! It is a 90-some degree afternoon, and we had a 40-foot container arrive at 3pm, needing to be offloaded. At least it wasn't tomorrow, predicted to be 102 or so! I kept checking the boxes, and finally found a pair with my name on the label! smiley Christmas in July!

Here's a mock up with the headrest fully extended and the adjustable lumbar dangling, but damn, looks great!

Can't wait to install them!

I got the driver's seat installed after work, going to tackle the passenger's side later. I sit about 2.5" lower, and have tons of headroom! Better side-to-side support in the corners from my thighs up to the rib cage. Less in the shoulders, but that doesn't matter much, and was the main source of my discomfort, being pinched and forced forward by shoulder bolsters that were way too low and too narrow. The second photo shows how the longer/taller at the front side bolsters are an improvement. The built-in suspension in the bottom of the seat is awesome on potholes/big expansion cracks! smiley

Given that the seat is made of far superior materials, I'm surprised it is only ~4 pounds heavier than the stock setup. The mounting bracket adds another few pounds. The comfort benefits are well worth the minor weight penalty, IMO.

I temporarily ziptied the lumbar pump to the seatbelt anchor in the inboard side and initial impressions are favorable. I'll probably develop a more permanent solution if it continues to pan out over several drives.
 

Likewise I'm initially happy with the seat tilt release outboard only (near the B pillar.) When ordering there is the option of inboard only, outboard only, or both. The outboard lever is accessible from outside the car, and also from the rare occasional back seat passenger, and won't get in the way of reaching into the backseat from the front, or when passing long items through from the trunk forward.

Part of the reason I'm holding off on the passenger side is the installment of the airbag occupancy sensor. It will be tough, if not impossible, to install it as-is without compromising the design of the seat. If I can extend the wiring from the sensor to the plug, it would open up my options immensely. I opened up the plug to see if I could extend the harness, but the "wiring" is the flat-tape-enclosed-in-plastic style, so I have no experience with extending this type of electrical connection. If anyone has any advice, I'm all ears!

I need three 'wires' in the ribbon minimum. Should I try to find an old-school computer to rip the ribbon out of? How would I connect the ends...solder?...I obviously can't crimp. Using wire would be easy in many ways, but no idea how to connect them to ribbon. Ideas welcome.

I've got a road trip planned next week and really wanted both new seats in the car for it, so I decided I was going to make it happen some how, some way after work this evening.

I started by mocking up the passenger occupancy sensor on the outside of the passenger seat to see where the wiring ribbon would need to be routed through the seat.

With the position pictured above, the ribbon would need to come out the bottom through the 'trampoline' on the underside which provides some give/suspension. It can be cut/perforated without running much, but if I can avoid it I would prefer to.

Here's the underside exactly as it came out of the box for reference. Front of the seat is up. Ribbon would come out immediately in front of the three slightly uneven hog rings if I placed the mat in the centralized position.

If I cheat the mat forward a bit, I think I might be able to snake it out in front of the suspension bit. Let's disassemble and see.

There's the gap I'm aiming for, behind the metal seat frame. I took out the central bottom cushion; kinda cool to see the trampoline from the top side.

I started cutting hog rings and peeling back contact cement.

That should give me adequate access with the cover still just attached enough I'm not wrestling it back on with no frame of reference while coated with contact cement. I've struggled that struggle before, and would not recommend. laugh
 

For reference, here's all the safety system wiring on the stock seat I will need to transfer.

I carefully removed the harness on the seat, so I can return to stock if I ever resell, and got to making an incision in the new seat.

The mat is definitely a bit forward-placed, but needs must and all.

Here's the wiring ribbon coming out the bottom through the incision, with the sides already hog ringed back into place.

And here is the bottom cushion back in place with all the upholstery tied down properly. The wiring came out in the perfect spot!

And here is the wiring harness I harvested from the stock seat roughly ziptied in place, along with sliding rails and the U-shaped seatbelt anchor. In short, most aftermarket seat brackets fix the female seatbelt anchor to a middle-of-the-road position that works for almost nobody, so we offer a U-shaped anchor upgrade which anchors the seatbelt to the seat, and then the seatbelt moves as you slide the seat forward and back. Wow; crazy concept! cheeky

Here is the seat bracket mounted to the rails all the way forward and all the way back. I'm not 100% with this, and might tweak details later, but I'm running out of steam for today; hot in the warehouse at work!

Here's the seat installed; looking awesome, feeling super-comfortable, and  the passenger airbag working like stock! Note the lights, airbag on with me in the seat, and off when in out of the seat. Bonus, awesome seats and safety systems intact!


Well, slight bummer.

The passenger airbag control module I attached to the bottom of the seat hits the seat mounting bracket in a no-bueno, gonna-break-something-if-done-more-than-thrice sort of way. I'll post a video soon. Curses of a super-low seat mounting. Gonna have to relocate the module to the floor, and find a way to extend the wiring in between.

I'll repeat my call for ideas and help.

Can anyone ID the Denso connector for me if I post pictures of it, so I can buy the parts to make an extension harness?

Does any GRMer have experience with extending a ribbon type of wiring?

Any other out-of-the-box ideas for extending wiring to allow seat adjustment  and keep the airbags working?

Slippery
Slippery GRM+ Memberand PowerDork
7/31/22 1:27 a.m.

Back in the day when I installed aftermarket seats in my S2000, I bought all the weight sensors and wiring from Honda. 

I had the factory seats stolen so all of the factory pieces where gone with them. The seats back then where close to $10k and I decided to go aftermarket but keep the factory airbag systems working. 

I would check with Toyota to see if the plug or harness is available separately. 

In reply to Slippery :

Thanks for the idea. Toyota would love to sell me a complete seat for 80 bajillion dollars, but if I want to buy individual parts of that seat, I can berkeley right off and get nothing. crying The smallest part you can get to in their system is a seat assembly. The related parts for me don't exist, full stop.

I bought the previous sensor off eBay for a very reasonable $60. Only option on eBay right now is a complete seat for $480 shipped. Nope...

Slippery
Slippery GRM+ Memberand PowerDork
7/31/22 1:51 a.m.

Post a picture of the plug. 

I'll get one as soon as I can disconnect the battery. I'm sure it is a Denso connector. Five potential pins total, split into three and two, but only the three are used. The seat end is male for the connector assembly, but female for the terminals, if that makes sense.

Slippery
Slippery GRM+ Memberand PowerDork
7/31/22 2:38 a.m.

In reply to ae86andkp61 (Forum Supporter) :

Yep, makes sense. 

Is it that black one above connected to the module? The one on the harness with the X7000A part number. 

The black one with the X7000A is the wiring coming out of the module and going to the rest of the vehicle. I need to extend the wiring at the other side coming from the seat into the module, so I can move the module somewhere else. The bit that I pushed through the slice in the seat cushion.

Brace yourselves; it is an ugly clearance issue. I couldn't get my head low enough to see what was happening, so I stuck my phone down there and made a video.


1 2 3 4

You'll need to log in to post.

Our Preferred Partners
Wd3E09abibGUInhWPianMfERRr5Oe8tp4HCdjYvM0duZsT2veDVxMpGfvQ1drmWx