


In reply to Tony Sestito :
Just for troubleshooting. In no way is it considered a fix.

In reply to Tony Sestito :
Just for troubleshooting. In no way is it considered a fix.

In reply to Dusterbd13-michael :
It's more of a rotational sound that increases with vehicle speed, or so it sounds. Leaf springs up front are new and I lubed the bushings well when they were installed, so they shouldn't be making any sounds.
In reply to Russian Warship, Go Berkeley Yourself :
Don't worry, I didn't consider that a fix, although I definitely know some people who would. ![]() Looking forward to getting all of this stuff swapped in... at some point...
Looking forward to getting all of this stuff swapped in... at some point...

Had to do more Truck Stuff over the weekend, and this time, we brought the dogs! Holly, our older lady, isn't a big fan of riding in the car, but she does love her some Power Wagon.
I also hosed both front wheel U-joints down in PB Blaster to diagnose the squeak, and yup, it quieted right down momentarily. So that's the focus area when I can schedule some time to get it done. Looking more like a late summer project at this point. I also need to get the horn working again to pass state inspection, so that's on the list as well. Hoping I can get all the Grant steering wheel stuff working as it should.

In reply to Tony Sestito :
Early on, you mentioned the after market fuel tank. Looks like the company went away in 1982.
___________________________________________________________________________________________________
TRAVEL TANKS TRADEMARK INFORMATION
TRAVEL ACCESSORIES MANUFACTURING CO., INC.
Updated September 4, 2014
Mark Identification: TRAVEL TANKS
Last Applicant/Owner: Travel Accessories Manufacturing Co., Inc.
Serial Number: 81044686
Registration Number: 1044686
Registration Date: July 27, 1976
Status: Cancelled - Section 8 Status Date: December 21, 1982
In reply to CJ :
Back when I bought the truck, I found similar info. Looks like they were based out of California, but are ancient history at this point. I did find evidence of a 2nd tank with lines looped to the original tank and a tank switch in the cab, but I'm not sure how they would've filled the thing, since there's only one filler door and no cuts in the bed floor. The stock tank does fuel tank things now, even though the sender is a bit wonky. At some point, I will reinstall the stock, rebuilt sender, which has the correct float potentiometer (the aftermarket one in the truck has a Ford one which reads incorrectly).

In reply to Tony Sestito :
Travel Tanks seem to be a fairly popular topic on https://67-72chevytrucks.com in case you have any reason to pursue it.
My dad has a pair of them on his '72 K20. Since the OEM tank is in the cab, the Travel Tanks are filled separately via little locking doors on the sides of the bed, like this:

Since your truck doesn't have those, but it does have the filler on the side of the bed, it seems likely that the original filler neck was intercepted to fill both the original tank and the accessory tank at the same time.
In reply to DarkMonohue :
This makes the most sense, since I found clamps missing from the filler neck hose when I bought the truck. Waaaay back in the early part of the thread, I talked about thinking there was a hole in the tank because the first time I went to the gas station, a bunch of fuel ended up on the pavement. Nope, it was due to the lack of clamps on the filler neck hose! They probably took out the splice and plopped it back on without the clamps. It was a plow truck by that time, and they probably didn't care.
Continuing over from the Skinny Tires thread I had going...
I've been "kicking the tires" on replacing my ancient BFG All Terrain T/A KOs. They are about 13 years old now, and one of them has a slow leak I can't find, not to mention they are starting to show evidence of dry rot. While they have been fine around town, once I fix all the front end/U-joint stuff, I want the truck to be fully highway capable so I can take the thing anywhere. I'm either going to stick with the stock 235/75R15 size or go "one up" to a 30x9.5R15. I think the latter would look killer and probably make the truck ride a bit better, especially on the highway with its steep gears. Still haven't decided if I'll go blackwall or RWL; it's a good look either way. I've always been a big RWL guy, so I will probably go that route.
The problem is finding modern A/T tires that won't look completely goofy on an old truck like this. BFG changed the sidewall and tread pattern for the All Terrain KO series and it while it still looks great, I prefer the old style better.

That's what mine look like.

That's what the new ones look like. It's not awful, and I could probably pull it off. They are also a bit spendy these days, and I'd like to keep cost down as much as I can without completely cheaping out.
Another tire I've had my eye on that is a bit less expensive is the General Grabber A/T:
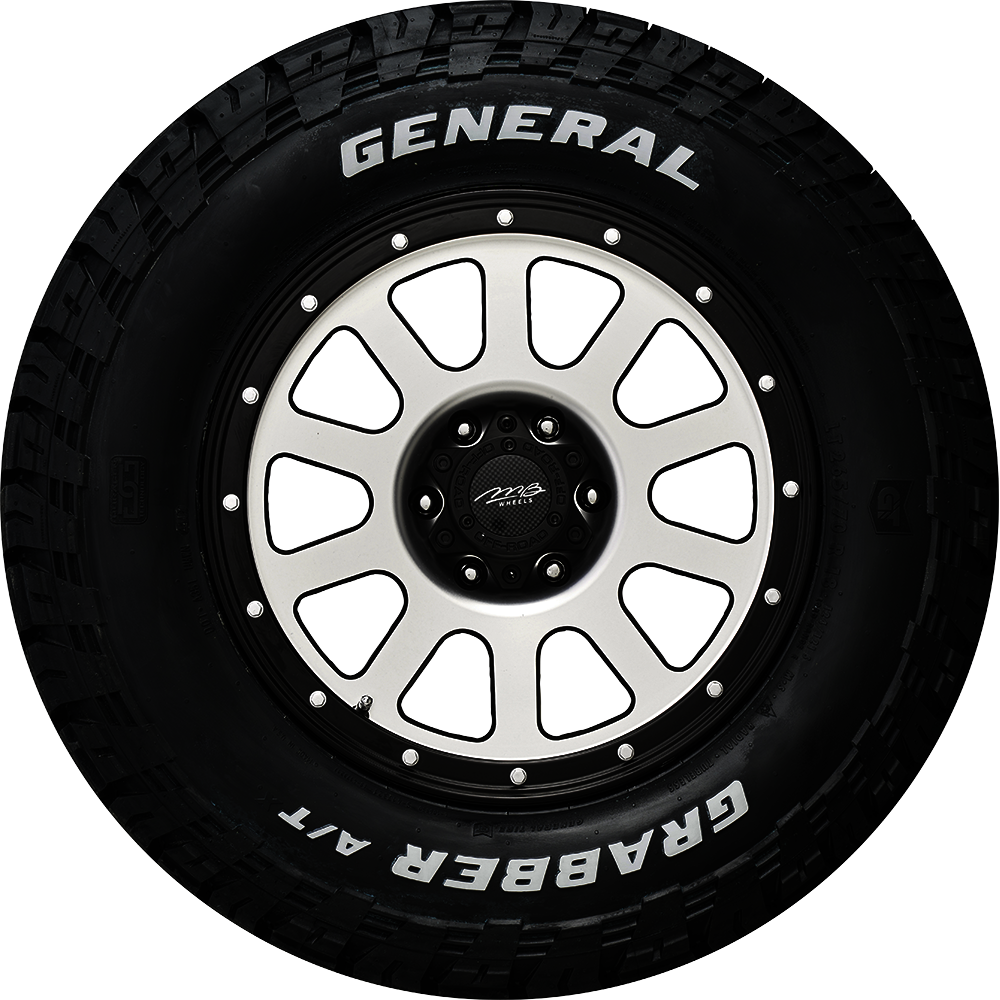
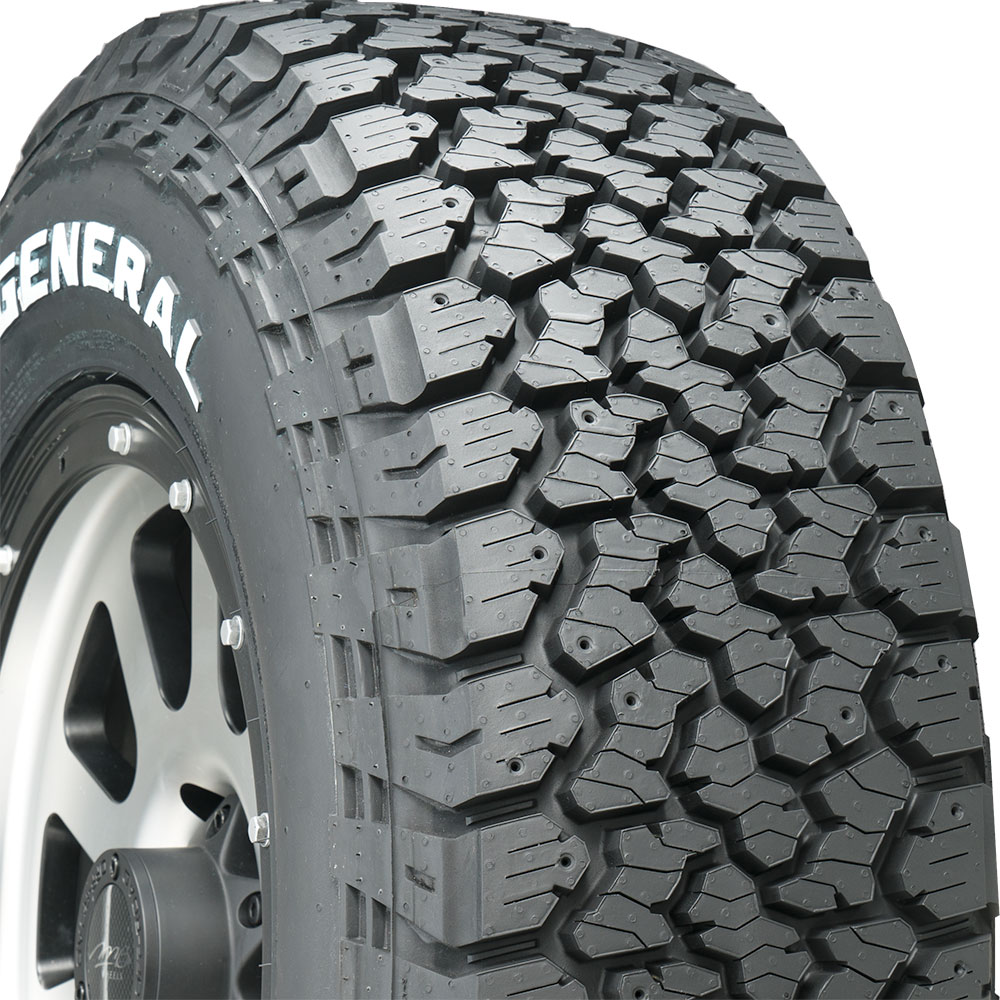
These sort of have that old-school look I am looking for, and I've had good experiences with General Tires before, so I'm waiting for a sale on these. They also make them in the 30x9.5R15 size, which is a plus. They are $30 less each than the BFGs full retail.
I haven't really found any blackwall tires yet that would fit the bill, but I'm open to the idea.
)

We had 33s on my 84 w250 long bed without issue. Stock everything. It looked amazing.
Think taller would be my suggestion.
In reply to Dusterbd13-michael :
W250 would have more ground clearance than my 150, so it makes sense that they would fit. I could get away with a 31 without a lift, but 33's would definitely rub. They would look great though.
30x9.5's are the biggest I can go without a wheel change, since these have the 15x6.5 wheels. I'd like to get a set of the repro 15x8 70's Ramcharger steelies, American Racing Vectors, or a proper set of Macho Power Wagon-style wagon wheels, but not right now.

I ran Bridgestone H/L (highway loser as my brother calls them) on my w150 and loved them for everything. No aggressive tread pattern though.
I don't have any great suggestions. All I can do is commiserate. I went through the same thing with my J20. Really wanted an old-fashioned tall and skinny tire without the forearm-tattoo sidewall tread nonsense. Apparently they no longer exist unless you want to pay a whole bunch of extra dollarydoos on some low-volume bias-ply retro tires from Coker. I ended up going with Cooper S/T Maxx on the Jeep. They do a fine job and are not as gaudy as most, but there's still way more sidewall tread than I wanted, and the tall and skinny 255/85R16 size actually measures out significantly shorter and fatter than advertised. Not unlike me, I guess.
Grouse, moan, etc. Tire selection for old iron sucks and I'm sorry about it.
In reply to DarkMonohue :
Coopers are another option. I've had their car tires in the past with mixed results, but never a set of their A/T tires. I hear great things about them from people all the time. They also make some heavy load range A/T's that I hear are fantastic.
In reply to Tony Sestito :
I do like the S/T Maxx. Very smooth and pretty quiet for a commercial tire. I'm just a little bitter that they are really an inch shorter and probably a full inch wider than their size indicates. Also, although they are studdable, they do not have the coveted mountain snowflake rating, in case that's a factor for you. Snow traction seems very good to me, but they do not carry that rating.
They do offer them in a 30x9.50R15LT with a C load rating, which seems to be the default for that size.
Before I can do tires, I need to finish repairing the front end of the truck. Aside from the front axle u-joints needing replacement, the ball joints also need to be done. I've been plotting and planning this for months, and dreading having to do it. If you've been following the thread from the beginning, you'll recall that I was already in there back in 2019 to do the brakes, which turned out to be a 3+ WEEK fiasco. Most of that time was due to not understanding how the truck came apart and waiting for special order bearings and seals to show up. Thinking of ways to speed things up this time around, I referenced this thread and remembered that there is a way to take the entire hub assembly off without having to separate the rotors. Here's some photos from 4 years ago (wow, I've had this thing that long?):

See that hole on the face of the hub flange? Through that hole, you can access the 6 12pt 7/16 bolts that hold the whole hub/rotor/bearing assembly on the knuckle.

I have no need to separate these or mess with the bearings, so I can just pull this off in one chunk and set it aside.

With that out of the way, you can just pull the axle right out for service. I may order some new inner seals before this, just in case they get tweaked pulling the axle out.
What I haven't really researched much is how to do the ball joints on this thing. That will be a pain, I'm sure. I have the ball joint press (used for the U-joints as well) but I believe there's another specialized socket (ball joint spanner socket?) that I will need for adjusting the ball joints, if memory serves correct. Hoping it all goes smoothly.
Weather permitting, this coming weekend is D-Day for the front end rebuild on the Power Wagon. I've set aside three days to pull it apart, replace the u-joints and ball joints, get it back together, and get a state inspection. If there's any time left, I may also tackle the air horn installation. I was able to get the horn working again recently; scraping paint from the Grant wheel so the horn contact ring makes metal on metal contact did the trick, so I can now worry about making it louder!
I have amassed a pile of parts and made a list of all the tools needed for this extensive thrash session, so I am hoping that it cuts down on time wasted running around looking for parts/tools. I'll be performing the job at my parents' place, hopefully with some assistance from my mechanic nephew. He's never done anything with a solid front axle 4x4, so he's looking to learn. I really hope this goes smoothly. Some of the parts/tool list:
Parts:
-Upper and lower ball joints
-Wheel U-joints
-Front driveshaft U-Joints
-Wheel and axle seals
-Front brake pads (have to pull the calipers anyway, so just in case the old ones are less than good, I'll do a pad slap)
-Jubilee two-tone air horn kit from the late 70's
Tools:
-12 pt socket set (for the bearing retainer bolts)
-Various hand tools and sockets
-Power Wagon Wheel Seal Installer 6100 (a 3" exhaust pipe and a block of wood)
-Ryobi full strength impact gun
-Ryobi power ratchet
-Pickle fork
-Ball joint press
-Bench vise
-Various pry bars and breaker bars
-BFH and BFH Jr sledges
-Dead blow hammer
-Ball joint spanner socket/wrench
...And more. I'll also be picking up a ball joint separator from HF, as I've heard good things on here and otherwise about them. As much of a PITA as this will be, it's a service that is 4+ years in the making and I'm looking forward to not worrying about the front axle blowing apart at speed anymore. All this stuff is original as far as I can tell, and is decades overdue for replacement.
And here we go.
I began my battle with the Power Wagon last Friday. The weather outlook for the weekend was good, but it was hot and humid. I didn't complain, since it has been raining every weekend for the past month+. The site of the battle was a familiar one:

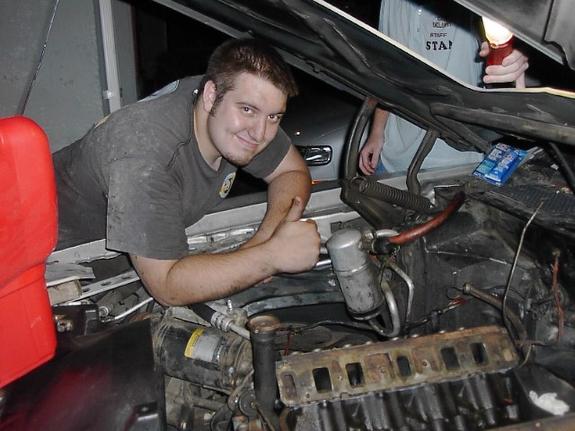
Since my house is under construction, I had to revert back to my old stomping grounds at my parents' place. Here's me 21 years ago almost to the date, wrenching on my Trans Am in the very same spot! The Trans Am is also there, tucked away next to the Power Wagon. Time is a flat circle.
Since I didn't have my garage workshop available, I packed the truck to the gills with everything I would need, including this:

I needed a vise, so I mounted it to this little service cart I had. It worked, although the vise is way too heavy for the cart.
On the docket, as mentioned in the previous post, were replacing the front axle shaft U-joints, all of the ball joints, brake pads, and if I had time, the front driveshaft U-joints and upgrading the horn. Quickly, the outlook was downgraded to just the axle joints, brake pads and ball joints. There wasn't enough time to do it all.
To get the axles out on a 1975-79 NP203-equipped Dodge 4x4, you need to first remove the hub sandwich. I've gone over this before way back in this thread...

You remove the caliper, then the axle nut, then remove the six 12pt bolts that hold the bearing retainer onto the knuckle. If you are lucky, it will come off in one convenient chunk.

To pull out the axle, you first have to pound out the old wheel seal from the backside. Then, the axle will just pull out.

Both of the u-joints were original, and while they could be worse, they were well worn. The passenger side (the smaller stub axle) was a lot worse for the wear.

This one was a big grease nugget, and making most of the squeaking noises.

Did I ever mention I hate doing u-joints? After marking the axle and yoke for proper reassembly and balancing with a paint pen, and removing the C-clips, I started pressing out the joints. The key is you want to press enough to separate the cross, but not to press the caps all the way through. So of course I pressed too much. At this point, you'll need to cut the cap. I didn't have my angle grinder on hand, so I resorted to wasting a bunch of time using a sawzall and some carbide bits to see if I could cut the cap. This is as far as I got before throwing in the towel for the night.

Day 2 arrived, and I picked up more tools from the house, including my angle grinder. That made short work of the cap, as you can see here.

It's not easy to see here, but you want to make sure the old and new joints are the same size. All was good here, so I moved onto installation.

And yup, this happened. Pressing in the brand new joint, the cap failed at the last second as I was massaging the caps to get the clip channel clearance right. Did I ever mention I hate doing U-joints?

After running to the parts store, I had two more joints in hand. After removing the failed joint and wasting more time, I installed the new-new joint. This time, it went a little better.
At this point, my nephew decided to join in on the fun.

He's a mechanic by trade, and offered to help me with the job. Working with him is fun; it's like working with myself from 21 years ago! He offered to pull the knuckles and do the ball joints while I bashed away with the u-joints. He wanted no part of that!

The smaller passenger side axle really gave me a hard time. The caps were fused solid to the yokes, and after treating them with penetrant and heat, they just blew apart. I had to get what was left of them out with a socket and the press. That's a dangerous game; you can easily marr up the bore and/or break the yoke! I took my time and got it done.

While I was working on the axles, my nephew tackled the ball joints. On these, you have to remove the knuckle completely to press them out and back in, so he pulled them and chucked them in the vise. I took a break from U-Joint Fun Time to assist with breaking down the knuckles and pressing the new joints in, which would allow him to re-assemble the truck as I finished up the joints. Here, I'm pulling out one of the snap rings that secure the lower joint in place.

After blasting out the old joints, we were surprised to find that they weren't all that bad, even though they were OEM installed in late 1978 on the assembly line. How in the... Anyway, the knuckles were cleaned up and prepped for reassembly.

And back on the truck, waiting for me to finish.

BAM! Two refreshed axle shafts. See that ring on the ground on the right? We'll get back to that in a minute.

After the axle gets reinstalled, you have to drive in a wheel seal. This sits on the tapered inside ridge of the hub bore, and it needs to be seated properly so the bearing race fits back where it's supposed to go once you reinstall the hub/bearing sandwich.

And to do that, you need a tool that no longer exists from Mopar in the 1970's. So I got creative and made the Power Wagon Wheel Bearing Installation Apparatus 6100. It consists of a 3" exhaust pipe that I bought and wrote those words on. It's a little smaller in diameter than the seal, but with a dead blow hammer, it will get it installed most of the way... carefully.

With that done, you can bolt the bearing retainer back on (make sure to do this in a star pattern) and the caliper. Although the old pads were still fine, I decided to replace them anyway, since I bought the cheapest cheapo bargain basement pads RockAuto had for under $5 last time. These Raybestos pads were a whopping $15 and a big upgrade.

And all back together.

Remember a few comments up when I said I'd get back to that axle bearing cup thing laying on the ground? Those are supposed to be pressed onto the axle. The driver's side one was not, and it was a bit mangled. I tried to bend it back to the point where it would stay on there, but in that, it somehow chewed up the backside of the wheel seal. This happened last time I did these when I replaced the brakes and wheel bearings, and you can see the seal spring poking out here. This seal just rides inside that bore to help grease stay off the brakes, and as long as it's there, it's doing its job. The old one was the same way for 4 years and was fine, so I'm calling it "good".

This is the face of a man who did battle with his truck for 2 straight days... and won. Convincing, right?
So, was it all worth the trouble? Yes, but there's a catch.
The next day (Day 3), I packed everything up and drove it home to drop everything off, and then back to our temporary residence. Immediately, the difference in drivability was noticeable. Going over bumps before was sketchy, and it felt like the truck would break in half at times. Now, it absorbs bumps and feels 100% more solid. And the squealing/warbling sounds... well, some of them are gone, but not all. The low speed rotational ones and the general crunchiness of the axles are gone, but under throttle, I still hear other ones. All this time, there were two sets of unrelated squeaks! I have another set of U-joints on the front transfer case-to-axle shaft to replace, so I'm hoping that helps. While manually moving the wheels, I could see that there was a little play in those joints. Also, as my nephew took everything apart, he noted that the tie rod ends were also original and needed replacement soon. So, while all of what we did was a vast improvement, we just won the battle, not the war.
The culmination of these recent efforts are that the truck passed state inspection again with no issues, and I can drive it regularly again. And it's a lot more fun (and safe) to drive. And I call that a win.

I'm sure having your nephew there made the experience more enjoyable than it would otherwise be. This is also a good bonding experience.
However, one question remains unanswered. Why would a man who "hates doing U-joints" own a vehicle that by my count has eight of them?
There is more to unpack here than meets the eye......
In reply to Jerry From LA :
Pretty much every old truck has them, and I like old trucks, especially the 4x4 flavor. There's really no way around it. Plus, it forces me to get good at replacing them. I'm actually getting better at this, believe it or not. The ones I replaced above were the worst ones I've seen so far, and with the right tools, I was able to get the job done.

Thank you for the detailed post. One of these is on the wish list.

In reply to Tony Sestito :
that was a great write-up. i love the look of [air quote] confidence [/air quote] on your face.
In reply to AngryCorvair (Forum Supporter) :
I was doing my best Hide The Pain Harold on that one.

Walking by the truck earlier this week, I noticed that the right side exhaust pipe was lower than it usually is. I have a Hooker Competition exhaust on the truck that I installed a few years ago, and it's FUNKY. Here's an old pic from when I installed it:

I've been fighting with the tailpipes especially, since getting the exit height to match has been a pain. The pipes both take some wild twists and turns as they make their way out back, and as you can see, the two side exit pipes are completely different. One of them is a straight shot out, while the other has curves and bends. The one on the right was hanging especially low, so I investigated further. Yup, hanger snapped clean off! I'll be repairing that ASAP.
While I was working on the truck recently to fix that tailpipe, I had my face next to the tires. And after seeing that the dry rot is not getting any better and is extending into the tread area more, I felt it was time to get some new ones on order.
After reviewing all the tires available in the 30x9.5r15 size, and looking at what deals were available, I ended up going with the ol' reliables:

They were on sale for a "flash sale" at Discount Tire Direct yesterday only, and were pretty much the same price as those General Grabber ATX's, so I went with these. I mean, the ones on the truck are 14 years old now, and they still have tread and mostly hold air, so going with them again is not a bad thing. I had another set of these years ago that had about 100k on them that still passed inspection! Excited to go a size up, which should help both with lowering highway RPM a little and it will definitely help in the looks department. Only bummer is I'll have to find a replacement spare in the new size, but that's fine.
You'll need to log in to post.


