


I really like where this is going - thanks for the update!

I really like where this is going - thanks for the update!

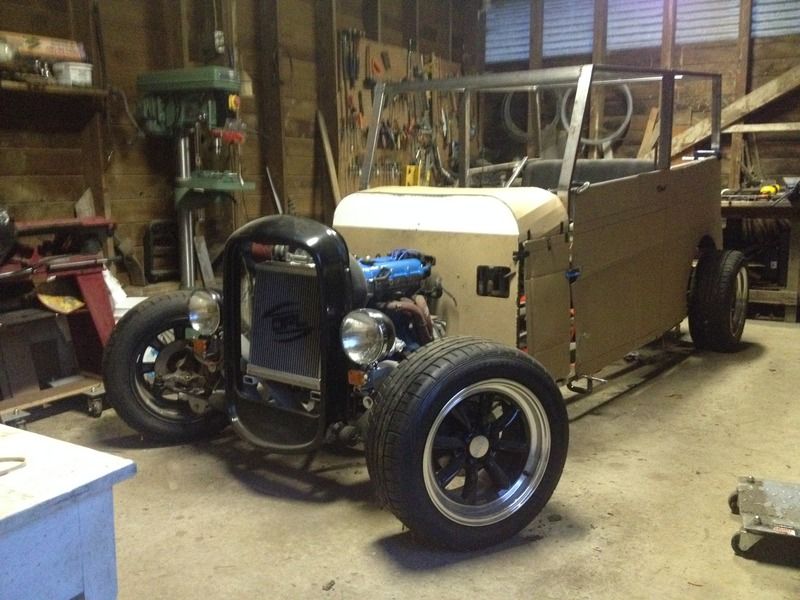
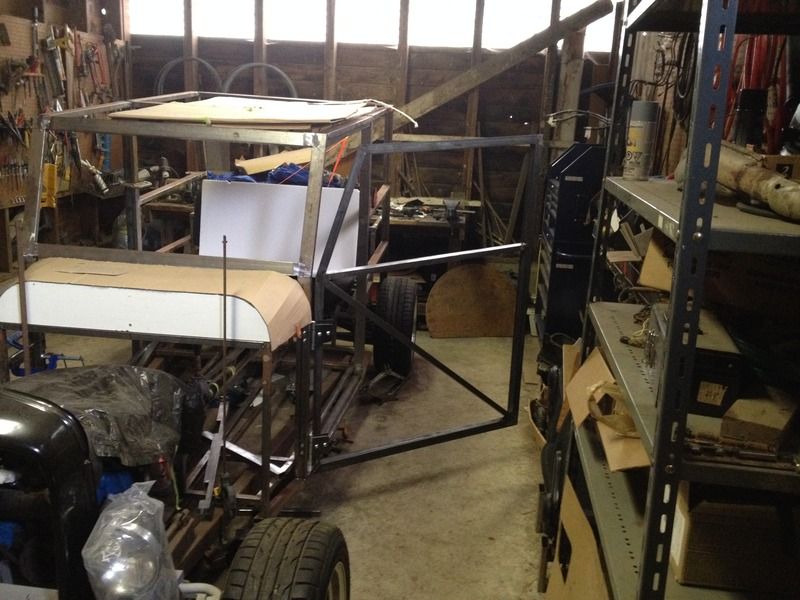
Wow, where has the time gone? I've been slowly plugging away at the car but I haven't had as much time to work on it this past year. Starting to put a bit more hours into it now. Here is a picture after working on it today.

Scratch-building the body? You are a braver man than me. I found my '31 Model A pickup body for only $1,250 on craigslist. It is rough, but probably less work than building new.
maschinenbau wrote: Scratch-building the body? You are a braver man than me. I found my '31 Model A pickup body for only $1,250 on craigslist. It is rough, but probably less work than building new.
That's a good deal. People seem to be asking a lot more for bodies around here, and that's even if you can find one. Also, I've become really into the scratch building thing after I built my Locost, and after I found this e-book for a scratch built hot rod:
http://www.hotrodders.com/scratch-built/Introduction
Or maybe I'm a sucker for punishment! ![]()

Wow, very cool. Curious to see the final bodywork on this.
Time for an update. I've started working on the doors now. I looked for a while for hinges to use, and was surprised at how expensive they can be. Because cost is a big factor, I ended up grabbing these gate post hinges from Home Depot, which were less than $5 each.
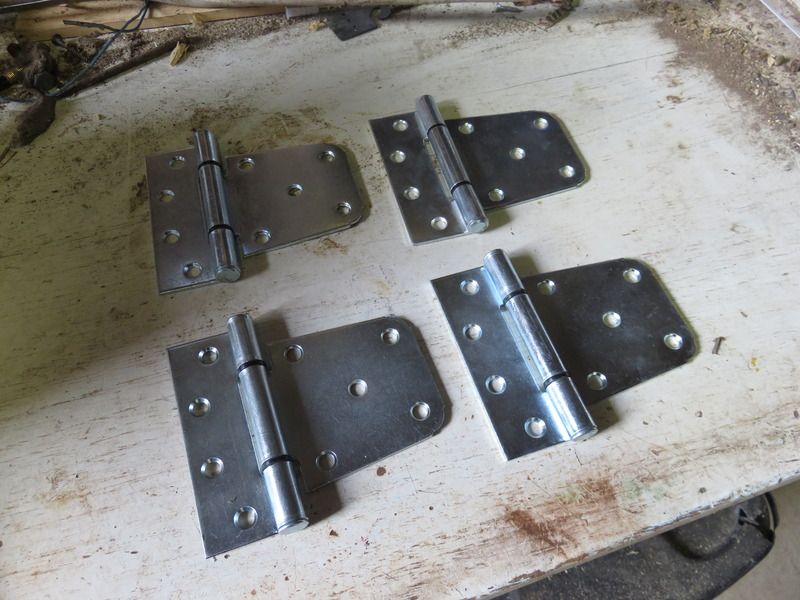
What I like about them is that they have non-removable pins (for better security) and the pins and leafs have no slop in them.
The short leaf will bolt to the inside of the front door jamb and the long leaf will bolt to the outside of the door, similar to the door hinges on Jeep Wranglers. Here are some shots of them mocked in place:

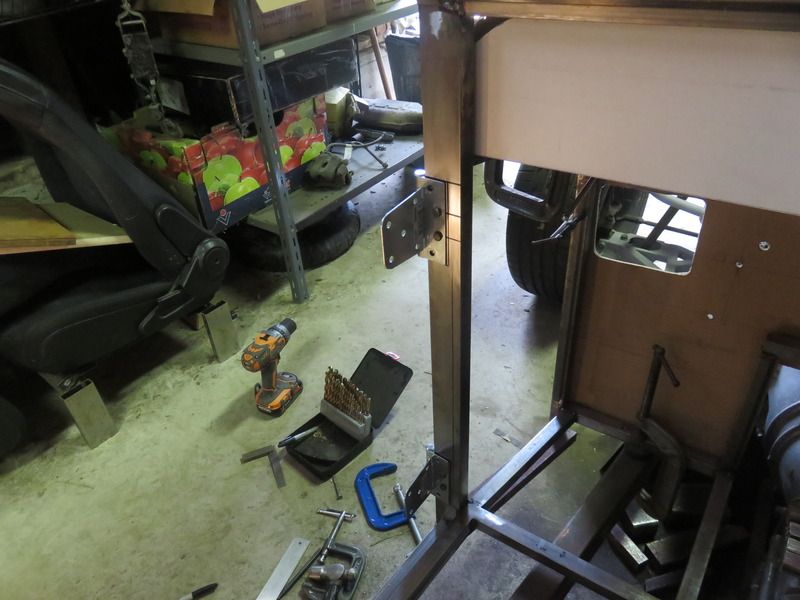
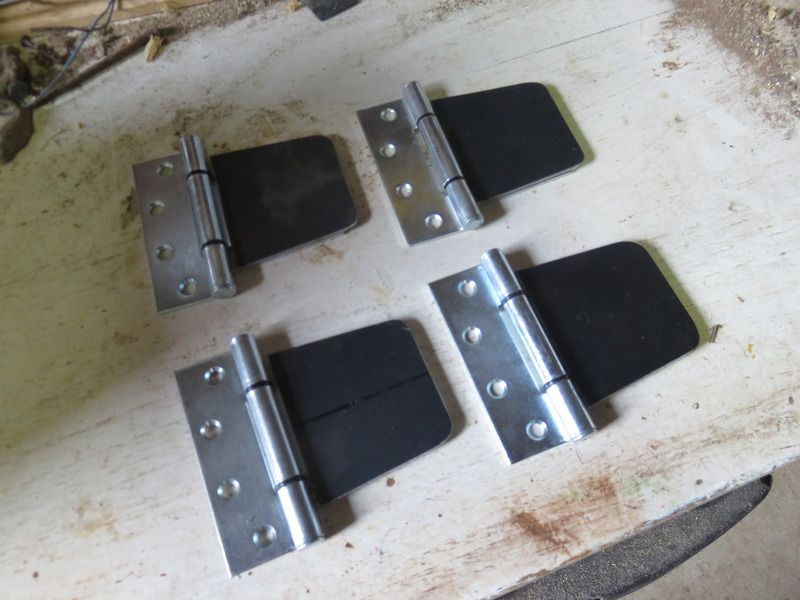
In order to make them look less like the gate post hinges that they are, I made some 1/8" thick plates to cover the pre-drilled holes in the long leaf of the hinge. I will then drill two new holes through the cover plates and the hinges, to attach the hinges to the doors using two hex socket button head bolts per hinge
I got the door frames welded up and hinged. Next step is to install the latches to the door frames and striker pins to the door jambs.
Because a grille insert for a 1932 Ford grille shell is more than I wanted to pay, I decided to have a go at a cheaper solution. I started by buying this grate off Craigslist for $10:
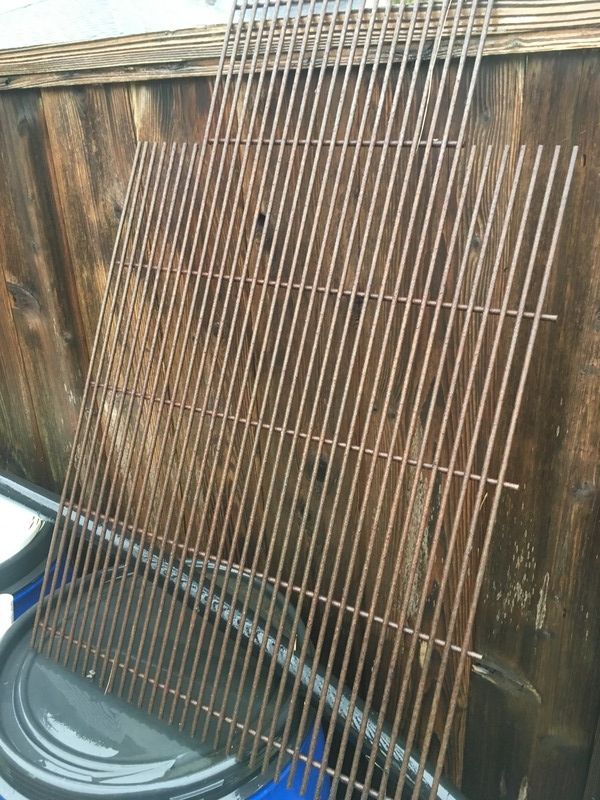
After some cutting and bending, I ended up with this:
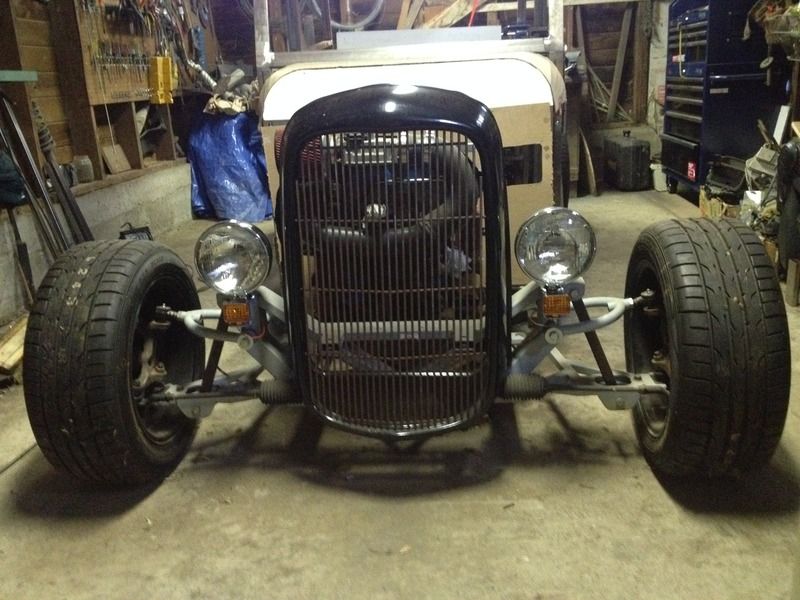
I still need to clean off all the surface rust and paint it, but I'm happy enough with the result.

That grill looks fantastic. Top work!

That grill idea is pretty sweet, I may have to steal that. Those hinges though... I've used quite a few of them and they wear pretty quick and will mess up your gaps pretty fast. Also, they're just stamped, so they can unroll and open up pretty easy.
Got a bit of work done on the back end of the car.

Given it's shape, I'm now referring to the car as the "Box Rod"! ![]()
Got some work done on the dashboard. First I made a frame to bolt to the inside of the car. Then I made tabs to bolt the Miata instrument cluster to the dashboard frame. Since I am not using retractable headlights, I removed the headlight retractor button from the Miata switch before mounting the hazard switch to the dashboard frame. I then made a hardboard panel for the dashboard, which will eventually be covered in black vinyl. Here are the pictures:


absolutely unreal build, and definitely needs to be a feature when its done. just sayin
Thanks MazdaFace!
A small update: after spending weeks modifying the Miata wiring harness, I hooked it up to a battery pack and got the stereo and lights to work! Given how much cutting and splicing I had to do to the harness, I was thankful not to see any smoke when I connected the power supply!


It's amazing how rewarding it can be to get the wiring harness fired up for the first time, even if you basically have only made a flashlight and a radio ![]()

About to follow in your steps with the same wiring job. Good to see it working out.
BTW, I love the fact that someone here could actually comment on the long term durability of Home Depot gate hinges in a car application.

AND you know that ICBC doesn't require you to have fenders, right??
You just can't drive it on gravel roads, or in rain.
More! I need more!
SkinnyG said:AND you know that ICBC doesn't require you to have fenders, right??
You just can't drive it on gravel roads, or in rain.
Good to know. I would like to keep the open wheel look if I can get away with it.
Okay, I've made some good progress in the last couple months, so time for an update. First off, I made a bracket to mount the Speedway Motors radiator overflow tank to the radiator, and then made brackets to secure the radiator:

Next, cardboard and wood templates made for the sheet metal body panels:

Driver's side door skin in sheet metal:

Driver's quarter panel sheet metal with aftermarket locking fuel filler door for a Dodge Ram:


Rear deck plate with rear speakers, and subwoofer box under it:

Still needs to be covered in black carpet or vinyl.
No room behind the dash (plus, I wanted to keep the dash uncluttered) so the front speakers are mounted on top of the transmission tunnel:

Got the outside door handles mounted:

Got the firewall cut out with the holes for the brake booster, clutch master, steering shaft, throttle cable and wiring harness pass through:

Made a bracket that bolts to the valve cover to secure the routing of the unmodified Miata throttle cable:

A few more updates to share. I started running the brake and clutch lines and got the floor pans and transmission tunnel cover done. I also got the front seat belts installed. I then covered the dash panel in black vinyl and added an aluminum bezel around the gauges. You can see by the reflection that I installed a piece of plexiglass behind the dash panel to protect the gauges.


Small update: I finally bought the springs for the QA1 shocks I am using and installed them. They are 450 lb/in rate. Probably could have gone for a lower rate, but we'll see how these work out.


You'll need to log in to post.


