1 ... 14 15 16 17 18
bgkast
bgkast GRM+ Memberand PowerDork
12/13/19 5:55 p.m.

Back on the suspension the front shocks were mounted up.  I am using Viking double-adjustable shocks and some springs I got from a GRM member.

Then it was on to the rear shocks. The triangle in the lower A-arms is plated top and bottom, and the shock mounts attach to the plate on the top. I decided to add a rib to the rear mount that extends down to the bottom plate to add extra stiffness.


On the chassis I used CAD (in the project Binky sense) to design the mounts.

It's a snug fit for the shock between the wheel and my narrowed rear end. The book design uses a wider rear, with the shock mounted inside the body.


Ethnic Food-Wrap Aficionado
Ethnic Food-Wrap Aficionado Dork
12/13/19 6:04 p.m.

Holy crap!  He lives!

bgkast
bgkast GRM+ Memberand PowerDork
12/13/19 6:10 p.m.

Next on the agenda is plumbing and wiring. 


I am using a fuel tank from a US spec Lotus Elise, but it did not come with a fuel pump. After a lot of googling and comparing photos I learned that the S2 Elise tank that I am using fits a 2000-2005 Toyota Celica fuel pump module. There just so happened to be a 2001 in the local junkyard, so I snagged the pump. It fits the tank perfectly.

Oddly a few of the studs didn't align properly with the retainer ring. I think the toyota part has slightly eccentric holes so that it can only mount one way. Some slight grinding to slot the holes fixed that issue.

I also ordred some holly hydramat to replace the pre-filter on the pump, as these tanks are notorious for sucking air on left corners. I'm also going to be upgraing the toyota pump to a walbro 255.

Next will be mounting and plumbing the tank.

If anybody has a rising rate fuel pressure regulator, or AN-6 fittings lying around let me know! I'm also looking for a fuel cut-off switch from a 90s-00 Ford, and some NA Miata axles for mock-up. I put up wanted posts in the parts for sale section of the forum.


Stefan
Stefan GRM+ Memberand MegaDork
12/13/19 6:19 p.m.

Hooray!  Its back!

Hasbro
Hasbro SuperDork
12/13/19 7:22 p.m.

smiley

Robbie
Robbie GRM+ Memberand MegaDork
12/13/19 10:31 p.m.

So happy to see this back!

Ransom
Ransom GRM+ Memberand UltimaDork
12/14/19 9:08 a.m.

If there's one thing more impressive than seeing solid progress, it's seeing a back-burnered project return to a rolling boil!

bgkast
bgkast GRM+ Memberand PowerDork
4/16/20 3:39 p.m.

Overdue for an update!

The fuel pump in the Toyota Module was not up to the flow needed by the SRT-4 Engine, so I upgraded it using a walbro 255 from monkeywrench racing.  They modify the pump so that it drops in place of the Toyota pump.

Open up...

The Hydramat required some modification to the bottom cap.

It turned out good though.

until I dropped it back in the tank...

The hydramat makes the assembly about 3/8" taller than it was originally. I later made up a HDPE spacer ring to fill in the gap. Next came mounting the tank in the chassis. The idea was to do a home-brew copy of the way the tank mounts in the Elise:

The tank is a tight fit, there is no room behind the tank, or at the forward corners between the tank and the chassis. It took a few tries to get an arrangement that let you reach the bolts, did not allow the bolt heads to extend below the bottom of the chassis, and did not block the tank from dropping down out the bottom.   Eventually I got it all installed, and took this picture that doesn't show any of the bottom brackets at all.

You can see the HDPE spacer ring though! 

bgkast
bgkast GRM+ Memberand PowerDork
4/16/20 3:47 p.m.

Next up was wiring the engine for Megasquirt.... but first I had to make a bracket.

From the factory the coil is mounted on the valve cover, making it the tallest part of the engine, and in the way of the future engine cover. They also often have issues failing from heat from the turbo. The bracket moves it forward and down, and also acts as a block-off plate for the stock MAP sensor.

With that out of the way I broke out the rainbow spaghetti and draped it over the engine.

Once I was happy with the routing I bundled each leg of the harness and cut it to length.

I was left with lots of leftover spaghetti.

I had saved all of the wiring plugs with pigtails from the original harness, and was planning to splice them onto the MSII harness. Awhile back after watching the wiring episode from Project Binkey, I decided to take a page from the Bad Obsession guy's book and use factory crimp connectors. I tracked down inserts that fit the factory plugs, as well as the correct seals and crimping tool. This was my first attempt:

Factory is the green, mine is the blue. It took a little practice to get it perfect, but I think it ended up being easier than solder-splicing each wire. The hardest part was disassembling all of the plugs to release the old pins.

I want the engine harness to be able to remain with the engine to simplify removal. To allow this I added a molex plug to the harness for the wires that come from megasquirt and run to the fuse-box or other parts that remain fixed to the car. Cue more crimping...


This left me with an engine harness and the start of a body harness. I added some split-loom to clean everything up.

With everything tidy I reinstalled the harness onto the engine.

I still need to wire up the Engine fuse/relay box and the wideband 02 sensor.

java230
java230 UberDork
4/16/20 3:59 p.m.

Glad to see updates!!!!!

Robbie (Forum Supporter)
Robbie (Forum Supporter) GRM+ Memberand MegaDork
4/16/20 4:32 p.m.

Hey... I totally forgot about those Miata axles until just now. Do you still need them? I can weigh them and get a shipping quote for you.

yupididit
yupididit GRM+ Memberand UberDork
4/16/20 4:51 p.m.

In reply to bgkast :

Damn, I didn't know you were still active here! 

bgkast
bgkast GRM+ Memberand PowerDork
4/16/20 5:14 p.m.
Robbie (Forum Supporter) said:

Hey... I totally forgot about those Miata axles until just now. Do you still need them? I can weigh them and get a shipping quote for you.

Yeah, that would be awesome!  Thank you

bgkast
bgkast GRM+ Memberand PowerDork
4/16/20 5:14 p.m.

In reply to yupididit :

Yep, still alive and kicking

Your repinning and reuse of factory plugs has my brain turning-over.  I've got a lot of extra harness on my TVR project.  That would really clean things up.

wheelsmithy (Joe-with-an-L)
wheelsmithy (Joe-with-an-L) GRM+ Memberand UltraDork
4/16/20 7:14 p.m.

Beauty!

bgkast (Forum Supporter)
bgkast (Forum Supporter) GRM+ Memberand PowerDork
5/3/20 12:19 a.m.


It's been a productive week in quarantine. Parts are arriving left and right and I have been working to get them mounted up on the car. Middle of last week my fuel pressure regulator arrived. It's a nice unit and they even threw in a banner for the garage wall! I also re-did the shift cable bracket that I had borked up 5 years ago. The new one not only works, it looks better and is stiffer too!


Next my silicone intercooler fittings arrived so I put the cold side plumbing together so that I can nail down the intercooler placement. It's a short run from the intercooler to the throttle body, so not much wiggle room.


I finally got a chance to use the flaring tool I made years ago!


And it broke...


Thanks to a $10 ebay coupon from the  GRM staff I bought a set of headlights for the car. They arrived yesterday and I spend the afternoon getting them mounted.


She looks good with "eyes". LEDs to fill the light pods will be here next week!

bgkast (Forum Supporter)
bgkast (Forum Supporter) GRM+ Memberand PowerDork
5/25/20 2:36 p.m.

This weekend this happened:

My tires finally came in and I got them mounted Friday. I went with Yohohama Advin Fleva Flevs or something.  They were reasonably priced at under $500 for the set and should be nice and grippy.

I have been checking off the list of items needed for the first engine start Over the past few weeks I got the intercooler mounted up. I used rubber well nuts inserted in to short lengths of tubing that are welded to the chassis for mounts with a bit of give. 

I had a local welding shop TIG some mounting tabs onto the intercooler and weld my hotside intercooler pipe together.

I also had them weld an adapter onto the thermostat neck so that it is the same size and the hard lines that will run to the front of the car.


I also assembled some custom length spark plug wires to fit the relocated coil. I used MSD Wire and crimp connectors, and the factory Mopar plug boots. They needed some reaming to fit the new wire, which was accomplished with a drill bit.

Even after reaming they were a snug fit. This was the best way I could find to get the wire to slide in.

All done


Next I turned my attention to the fuel system. My original plan to mount the filter didn't work, as the filter was too large, so I found a new (and better) spot for it, and designed and 3D printed a mount for it. 

I need to make a few tweaks to the design and re-print it out of a more heat-resistant material. I have some PET-G filament on order that should be here tomorrow.  With the filter location nailed down I made up some -6 AN lines. I printed some soft jaws for the vise to help with assembly. I was nervous about assembling the fuel lines, but it was WAY easier than I expected.


This has got to be one of the shortest fuel systems, there is only 3-feet of line in the whole thing.

Yesterday afternoon I wired up my LC-1 Wideband controller. Not much to show for that, except the programming button and LED that I put in the fusebox.

Before the first start I need to wire up the ignition switch and starter, check the tune on the MSII and make sure that it is seeing all of the sensors.  Getting close!!!


JoeTR6 (Forum Supporter)
JoeTR6 (Forum Supporter) Dork
6/7/20 9:33 a.m.

I finally made it through this build thread.  It's pretty epic.  Somehow I missed this before, probably because I was just starting mine and working like a madman at the time.

Keep up the good work.

bgkast (Forum Supporter)
bgkast (Forum Supporter) GRM+ Memberand PowerDork
7/3/20 10:22 p.m.
Robbie (Forum Supporter)
Robbie (Forum Supporter) GRM+ Memberand MegaDork
7/4/20 9:15 a.m.

S.W.E.E.T.

dherr (Forum Supporter)
dherr (Forum Supporter) GRM+ Memberand Dork
7/4/20 9:25 a.m.

Awesome! Fireworks indeed

The Beast lives! Nice.

trumant (Forum Supporter)
trumant (Forum Supporter) GRM+ Memberand Reader
7/4/20 10:07 a.m.

Amazing!

bgkast (Forum Supporter)
bgkast (Forum Supporter) GRM+ Memberand PowerDork
7/27/20 5:31 p.m.

Now that it runs I wanted to get the cooling system plumbed so I could run the engine a bit longer.  That meant it was time to get started on the center "console". This is a tight area with a lot if plumbing, cables and wires running through it. The original plan was to keep it 2 inches wide to match the width of the spine that runs down the center of the car and to use gear lever and mount from the SRT-4. After some measuring bit of CAD design I decided to cheat it to be a bit wider in front of the seats, primarily because the shift mechanism was closer to 4-inches wide.


CAD was turned into metal and welded to the cut down shift assembly.


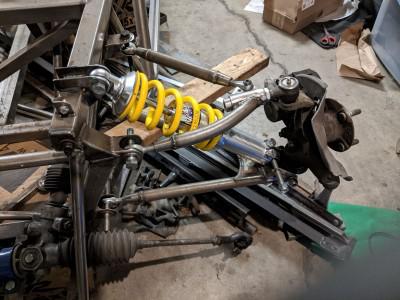
To get the position correct I sat in the car and made vroom noises.


The next order of business was to connect the gear lever to the transmission. I used the part of the original gear lever bracket that was designed to fit the cable ends. It was cut apart and combined with another coolant tube support bracket, welded up and tacked to the chassis.

The stock shift cables are too short to reach with the engine behind you. My plan to avoid expensive custom length cables is to make bolt on extension rods to make up the extra length. I found some 1/2" square tube that was just the right size to fit the ends. The first rod went smoothly after a bit of figuring on the best way to make the ends.

At this point it was about midnight, but I wanted to be able to run through the gears before calling it a night. The second rod went quickly, even though I had to re-do it after messing up one of the ends. I offered it up to the car and....it was an inch too short. I had measured to the wrong cable.  No matter, I cut the end off and used part of the first one to add some length.


Tried fitting it up again, and now it was too long?! Measure twice, cut 4 times! Oh well, I cut and weld again and got it to fit, then went to bed.

In the morning I decided the second lever was a bit too close to the driver's seat, so I cut it in half again and added a half-twist so the cable end was on the opposite side that it was before. That made it fit perfectly.


To complete the forward end of the console I needed to locate the end of the throttle cable, and that meant that it was time for the throttle pedal to go into the car. I wanted to use the pedal from the donor car, but didn't like the sloppy plastic mounting bracket. A couple of bearings and some tube and I made an improved version.

I clamped on some sheet metal for a temporary floor and mocked up the pedal in a location that was comfortable and seemed good for heal-toe shifting. I decided to make the pedal bracket bolt on as it's a bit fiddly pressing in the bearings and I thought it would be a lot easier to do on the bench rather than in the foot well. The SRT-4 pedal had an arm coming off the top that connected to the throttle that pulled backwards when the pedal was pushed. I lopped it off and welded it to the side of the pedal arm so that it pulls forward when the pedal is depressed.


That wraps up the main driver controls.

1 ... 14 15 16 17 18

You'll need to log in to post.

Our Preferred Partners
FlCiXz2kk4QjoMAaxlq096Wwra0BVsqx6GXBVjP90E29ULy5jITgWHuRZInvwCCo