1 2 3
Rufledt
Rufledt UltraDork
5/13/16 1:07 p.m.

In reply to revrico: that looks like a pretty awesome product, I'll have to start saving for 'garage budget' or something. I hope the 2 car package has enough with the pockmarks it has to fill. There really isn't much for damage, just a few square feet that is fairly chipped up, but it's pretty bad right there. The driveway is another story, with heaving and all, but it's not the worst driveway I've seen. At least it's big and fairly level. I'd have a problem with giant chrome wheels and super low profile tires, but I have neither of those on any car so I'm good.

Rufledt
Rufledt UltraDork
5/13/16 1:16 p.m.

In reply to failboat:

Yeah sketch up is awesome for this kind of thing if you like making models of everything (and I do). Best case scenario for model making would be to have the computer in the garage so nite taking error doesn't cause as much trouble, but alas I don't have that luxury. Much of the workbench in my model is from maybe a dozen measurements and looking at pictures, so it's right in the important ways (size and location of shelves, too, etc) but it isn't inch perfect board by board. Also the garage floor isn't perfectly level in real life like it is in the model (slants ever so slightly downhill towards the door, which I assume is intentional).

I'm currently in NY packing everything and I have secured my garage stereo and my GRM collection. I found one article with garage tips and tricks, which was helpful, though it referenced a more extensive garage article from earlier issues I don't have in my collection. I remember Tim gave me a number to call to get those issues but I wanted to check my collection first before bothering someone at work. Maybe I should just order a crapload if back issues to fill up my GRM library. While looking through the contents of every issue I constantly saw articles I thought i should read again. Wel played, GRM, the stuff ages very well.

I also now have to do home projects in preparation for selling that I put off when I lived here, like overseeding the terrible lawn and mulching the garden. As a side note, a 323 GTX makes a surprisingly awesome Home Depot run car. I shouldn't be shocked that hatchbacks are useful, but wow.

paranoid_android74
paranoid_android74 SuperDork
5/14/16 2:01 p.m.

It looks like you are off to a great start! I wish I had a two car garage, but a one car garage is better than no garage. And I'm trying to finish mine with all the E36 M3 already in it. It's a challenge!

I've been to Janesville more than once many years ago. There used to be a place called Grays Brewing Co. that was very good. You are also right up the road from Blackhawk Farms.

Rufledt
Rufledt UltraDork
5/14/16 8:16 p.m.

Yeah Greys is still there, they make root beer I like. I'm actually moving from a one car to this two car so it feels like a massive amount of space. Speaking of e36 m3 already in someplace, I'm at the old place packing and I literally have no place to put things That are ready to load because the whole house and garage are full of stuff waiting to be packed!

I don't pick up the ridiculously too big Penske truck until Thursday, so I guess I have to make room in the garage. The one with my rx8 in it and way too much stuff, most of which will be clogging up the new garage . On the plus side the new house has WAY more storage inside and a small shed in the back, plus a large storage unit elsewhere, so long term storage will be covered without using up garage space. I hope.

Rufledt
Rufledt UltraDork
5/23/16 11:38 p.m.

Remember how i was cleaning out my garage? check it out now:

a tiny bit messier! We are back, the moving truck is unloaded, and now i'm going to pass out for the next a hundred and fifty hours. Or just sleep for 8 hours because i have work in the morning...

I have decided a few things about the garage, namely that those cabinet things with the swinging doors will be coming down. They are crooked (my brother installed them and has no conceptualization of what a level is for) and i can't store anything on top of them or the swinging door can't open. Also I'm not sure exactly how it will happen, but the big blue work bench will have to be removed or altered seriously. of course none of this can happen until after i finish moving the stuff out of the garage and into the house. My back hurts just thinking about it. also my feet and ankles hurt. Also they already hurt. Moving sucks. On the plus side, the S2000 guy helped me move the heavy furniture things out of the truck and i got to take his car for a spin. Those S2000's are awesome.

Rufledt
Rufledt UltraDork
6/1/16 10:03 p.m.

Progress is being made, though slowly:

And same for the planning:

On top is what the garage looks like now, assuming i get the moving crap of the floor, and the bottom is with the useless shelves removed and the workbench also removed. I think i'm going to take that bench out, because look at the space it takes up. With it there, the van is crammed. with it removed, i can walk all around the van easily. This means i'll have to put up another kind of shelving, and probably move the bench. I want a smaller bench probably elsewhere. The fridge is also movable. Thoughts? I'm going to mess with the design a bit more, but i'm liking the idea of running more shelves along the wall to the RX8s left, and also ahead of it. i have more height than the image shows, over 9' to the ceiling from the door to about the middle of the garage.

Still planning, but still very much mid-unpacking of the house. You will notice one major addition- the stereo now resides atop the fridge. I say stereo, ther'es only one speaker. I packed the other one separate and haven't found that box yet. I guess I'll call it the "Mono" instead of the "stereo"

paranoid_android74
paranoid_android74 SuperDork
6/2/16 11:17 a.m.

That is an excellent point about the work bench, it does take up a fair amount of space.

And thank you for making me rethink my plans of adding a counter top in addition to my work bench. In my mind I was excited about the idea of having more space to work on things, but in reality it will probably become a new resting place for more E36 M3. That may be a topic for a new thread...

RossD
RossD UltimaDork
6/2/16 11:30 a.m.

I have a wood working mag that had plans for a tall cabinet/armoire with double doors top and bottom. The bottom doors would support the flip out work bench. There was just deep enough to hang tools on the inside and keep the work bunch inside of it.

Rufledt
Rufledt UltraDork
6/2/16 12:50 p.m.

A flip out work bench is kinda what I had in mind. The garage journal thread with the greenish looking garage and the Porsche had some fold down work spaces. I think that would maximize work space and minimize the tendency to clutter up work spaces. I also like the idea of shelves up high with space for clear totes to store stuff organized yet visible. That's a good idea with the cabinet/folding bench idea in a stacked cabinet, that would be clean looking when shut I think. I could probably use the outside of the doors for something, too.

Is there any white chalkboard style paint? I'm sure kid#1 (and soon kid #2) would appreciate more chalk board space. The driveway is a bit too rough for adequate sidewalk chalk adhesion, and most of the garage floor is too smooth. Thinking white for more light reflection.

4cylndrfury
4cylndrfury MegaDork
6/3/16 7:46 a.m.
Rufledt wrote: I also found a scrabble problem: 2 of every letter. My assumption is these were the remains of something that spelled out 'harley davidson' on a pickup truck. There's a complete "harley davidson" attached to out kitchen fridge. What can i spell with these letters? any suggestions?

SAD DAREDEVIL
DAD IS SO RAD
SORDID LIVES

thats all I have for now, but Im sure there are more in there...

4cylndrfury
4cylndrfury MegaDork
6/3/16 7:58 a.m.
Rufledt wrote: A flip out work bench is kinda what I had in mind. The garage journal thread with the greenish looking garage and the Porsche had some fold down work spaces.

youre thinking of Jack Olsen's 12 guage garage. Its basically a how-to guide to man-cave badassery.

Also, I dont think there is white chalkboard paint (but what do I know, and I didnt search either), but you can get MDF with a melamine layer at many home improvement places. Its basically a 4'x8' dry-erase board that you can cut with a regular saw...if youre going to be buying material for the build anyway, it could be a great option. Not only could kiddos write all over it, but it could also contain to-do lists for projects and such. Just an idea.

Rufledt
Rufledt UltraDork
6/3/16 10:51 p.m.

Progress!

That is, for the first time, 2 cars parked in my 2 car garage. For some reason that statement doesn't seem as awesome as it feels. it's still extremely messy, though:

There is still feet of space being taken up by crap on all sides of the garage that I intend to move. In fact, some of it has already been moved. i'm always days behind on the progress. This mostly catches the thread up, though, because I didn't do anything out there tonight. Instead, I did this:

Anyhoo, back to planning. I shuffled some things around and added some stuff:

Fridge has been moved in this image, high shelves are added, and so are some fold down workbenches. here's a different shot at the work bench idea:

One up, one down. (the far away bench is different, using 4x4's for legs) The idea is the leg section is hinged to the top, the top is hinged to the wall, kinda like in this image:

What that image shows that my model lacks is the board that connects the bench to the wall at the hinge. I'm assuming a horizontal board attached to the studs behind it would give sufficient strength at the hinge in addition to the legs. I also don't have a method to hold the benches up in my model... hmmm... the placement in the model is just to see where i might be able to use them. In theory i could put that kind of bench anywhere, but if i put them everywhere then i don't have wall hanging space available for other stuff. Maybe multiple horizontal boards along the wall and i can move the bench top and legs as needed? i don't know. I clearly haven't refined this plan. the bench tops are made of 3/4" plywood, 2' deep and 4' wide. I haven't found a need for any deeper than a 2' bench, and 3/4" ply in 2'x4' sheets are readily available. Easy peasy.

For this draft i chose bench height of 3', because that is what i had before and it seemed to work. 4' wide because sometimes you don't need a super long one, but 2 next to each other extends it to 8' when desired.

The shelves along the ceiling hold clear plastic totes. I measured the many totes we have, and the biggest (labelled hefty i think) is roughly approximated by the model. Even on the back wall, which is not tall due to roof slope, allows for shelves that would be 6'2" off the ground and still hold the totes easily. I'm 5'11", not quite 6' with shoes even (so close!) so i would have to try fairly hard to hit my head on the corners that don't even stick out as far as the bench tops. I'd probably round them anyway. I also haven't modeled a way to hold them up, but they are long enough that the L brackets under them on every stud should be sufficient. i'm not storing bowling balls up there, thinking more like kid toys and garage miscellany. They stick out 16", but i could replicate that with 2 1x8's or something, probably. Again, not a super thought out design, more trying layouts instead of engineering at the moment, though i do think the shelves above the workbench provides an elegant bench top lighting solution (fluorescent tubes under the shelves)

Speaking of figuring out layouts...

That's the wall facing the house. Floor to ceiling on the left is over 9', so there is plenty of wall space between the compressor and the shelf on top. I'm thinking wall hanging more garage miscellany like this:

Kids stuff needs storage. I think i can store stuff on the wall to the left also (between the garage door and the door to the house). it's larger than it looks in the model, i made the door much larger in the model than the actual door since i didn't actually measure that or even use the other door in the model as a point of reference.

So, thought/suggestions on the plan so far? I'm thinking of leaving the pegboard where it is and perhaps adding more for wall hanging tool storage, but for the most part not placing anything on the floor or sticking out of the wall significantly on that side of the garage to maximize work space around a car/van in that half of the garage. More storage is likely needed, but this is just a start to planning.

Rufledt
Rufledt UltraDork
6/3/16 10:56 p.m.

In reply to 4cylndrfury:

I TOTALLY would go with "DAD IS SO RAD" but i only have 2 D's. It's SILVERADO twice, though the O's kinda look like D's. I could combine it with the "HARLEY DAVIDSON" lettering that is currently falling off of my fridge..

actually, yeah, new scrabble problem everyone: You have the following letters: AAAA DDDD EEE H III LLL N OOO RRR SSS VVV Y
(silverado twice and Harley Davidson once)

And yes, the 12 gauge garage is EXACTLY what I was thinking of there. Thanks for the link! Also fun fact i learned from looking at that again, my garage is bigger than his! woo!

Also i looked up the chalkboard paint, no white but there is a clear and tintable paint available. Not sure how/if that ties in now with this new fold down bench design. Maybe it doesn't. don't know...

failboat
failboat UberDork
6/6/16 7:25 a.m.

liking your planning. im moving to a 19x20 space soon, having a hard time deciding whether to try and make it work for 2 cars or just give up and make it a 1 car garage with more storage and some decent work space.

because there is definitely going to be a need to store my stuff and kid stuff.

And I have a lot of stuff. or Crap, as my wife likes to call it.

if your goal of chalkboard paint is to write on it, there is paint you can use to turn walls into a dry erase board. something to think about.

Rufledt
Rufledt UltraDork
6/6/16 10:49 a.m.

Fortunately for me, Mazdas aren't very huge, but my main project car is going to be the van so I need the space. This 21 x 24-ish garage is barey big enough for an econoline, so I'm ditching the fixed work bench to buy me some length. Even so I bet at some stages this will become a 1 project van garage. Like I said earlier, I have a storage unit I can put the Mazdas (or van) in over the winter if I need to, as well as store other stuff, so I want to keep storage in the garage to a minimum. Still, I can't store summer kids toys at a storage unit in the summer, how will they play!? Somebody think of the children!

I think I'm abandoning the chalk/whiteboard paint idea. I'll get a whiteboard instead. I have a couple already.

Rufledt
Rufledt UltraDork
6/27/16 11:10 p.m.

Minor progress! I have adjusted the design a bit:

More shelving and a spot to hang my bike. Here's a slightly different angle:

The guy is roughly my height (about 5'11"). The door opens into the house (away from the garage) and the hinge is on the right. This means the bike wont interfere with the use of the door, same goes for the shelves on the left. In fact, due to the unique way our move in is progressing, both of those areas have crap stacked on the floor, and yet we can still enter the door very comfortably. It should also be noted that my wife is considerably shorter than me, so she probably couldn't accidentally ram her head into the shelf if she jumped from the open doorway

The space on the wall under the shelves on the left will likely be kid stuff storage as mentioned before, but for the wall above the air compressor i'm looking at these kinds of things:

Not that exact thing, but shelves of that nature. The boxes are available at Menards, and if needed i could make some kind of wall cabinet sortof like this to double the storage potential:

In my case it would be a wall cabinet, not a standing cabinet. I gotta put that giant compressor somewhere, and since the cabinet wouldn't stick out any farther than the compressor itself, i won't lose usable space. They would have to be a little awkwardly high because the compressor is also kinda tall, but so be it. I havne't put that plan into action anyway, it can change.

Here's an area that didn't change with the guy for scale:

You can see none of the shelves are withing skull cracking range, all are a couple inches above my head or higher.

I also had yet another conversation with my contractor uncle about running 220 to the garage, who knows what will come of that, but he could conceivably get a 220 line from the main switch box without a huge hassle. We did some scoping around in the finished ceiling in my basement, but my brother punched enough holes in the wall to run cables that a few more wouldn't be noticeable. My parents know I'm keeping my eyes out for a mig welder as well, and I was sortof told that they finally after many years know something to get me for Christmas, so i damned well better not go buy one before Santa makes his rounds later this year.

Looks like things are falling into place...

This isn't just idle planning, however. I have acquired the wood for the shelves (I went with solid wood because fancy, but pine because broke), The heavy duty L brackets (though white, not red), screws to mount and assemble everything, a stud finder because my old HF one is all screwed up, some white paint for stuff, and some red rustoleum. My plan with the red was initially to paint the L-brackets and the edges of the work bench for visibility (don't want to smack into them, i've done it before). The white would paint the pegboards, the 2x4's used to build the work benches, and anything else that caught my eye. The white paint i found in the garage is getting pitched. It's toast. New paint isn't expensive. Look forward to that soon, I've spent enough time on the garage tonight, gotta get back to unpacking...

Rufledt
Rufledt UltraDork
7/5/16 1:10 a.m.

Progress! As much as i love planning, planning sucks. Time to get to work.

Drink, check:

Tunes, check:

Shopping stuff, checkity check:

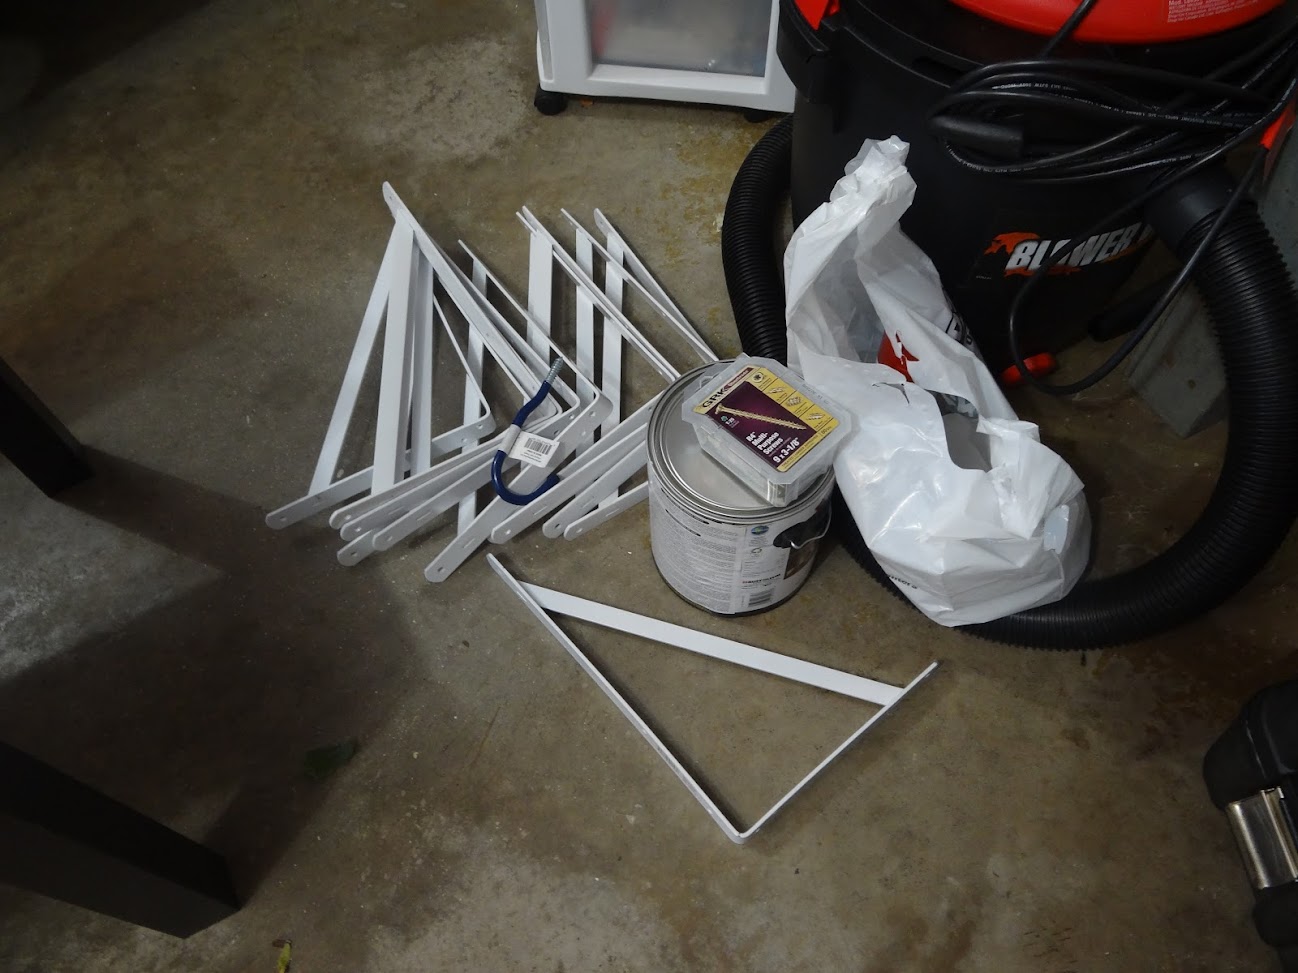
Pile of lumber which proves I can't count. These are pine 1x8s, S4S, select or good quality (i forget) available from menards, also literally any other home improvement store. There are 2 8' boards and 4 6' boards. I should've gotten 8 6' boards. I guess i'll have to go back. Oh darn.

The goal is to make the shelves found in the sketchup model above. OK, lets get started:

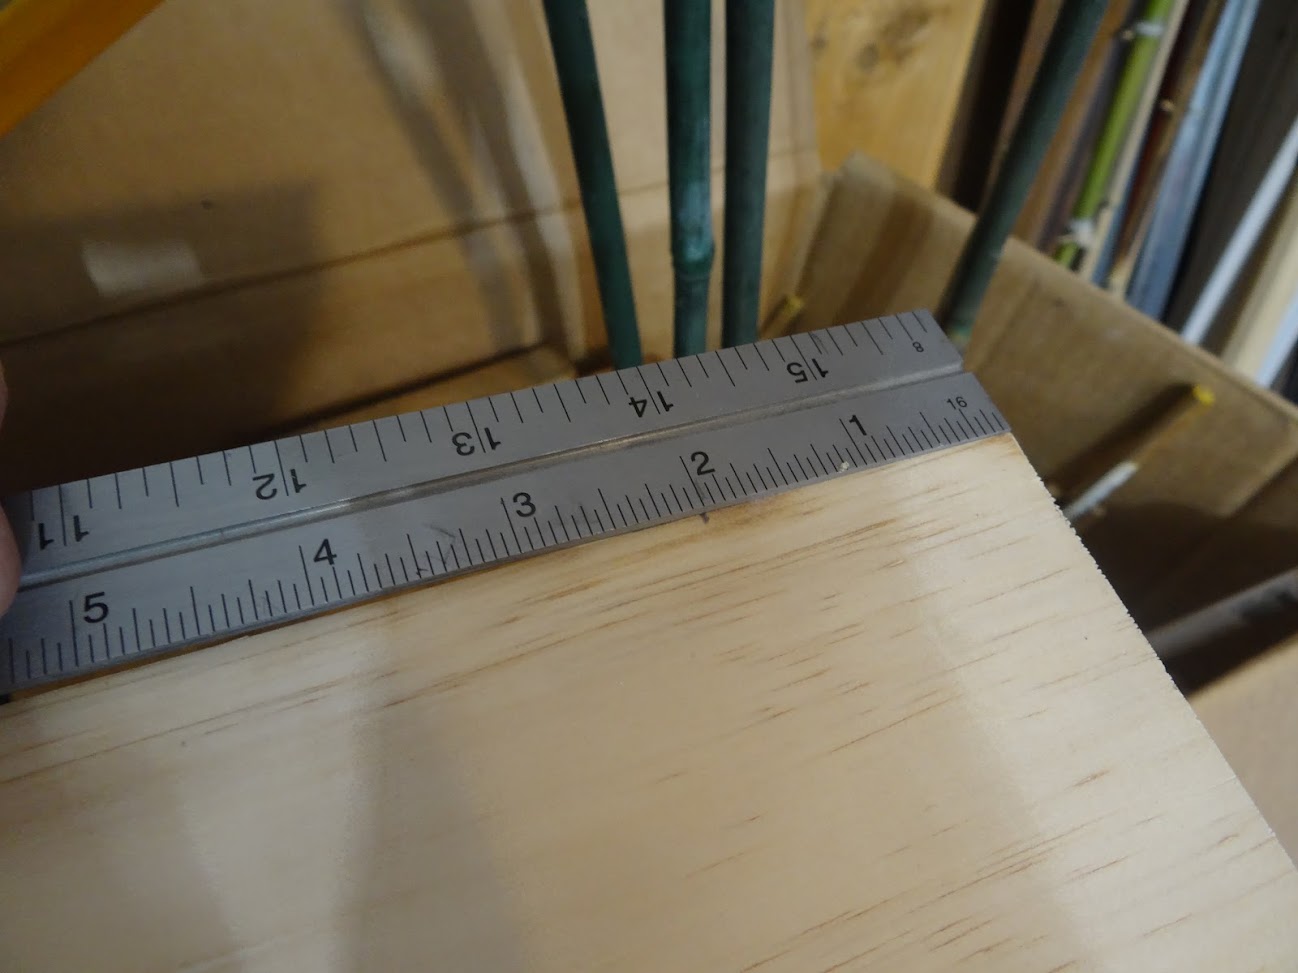
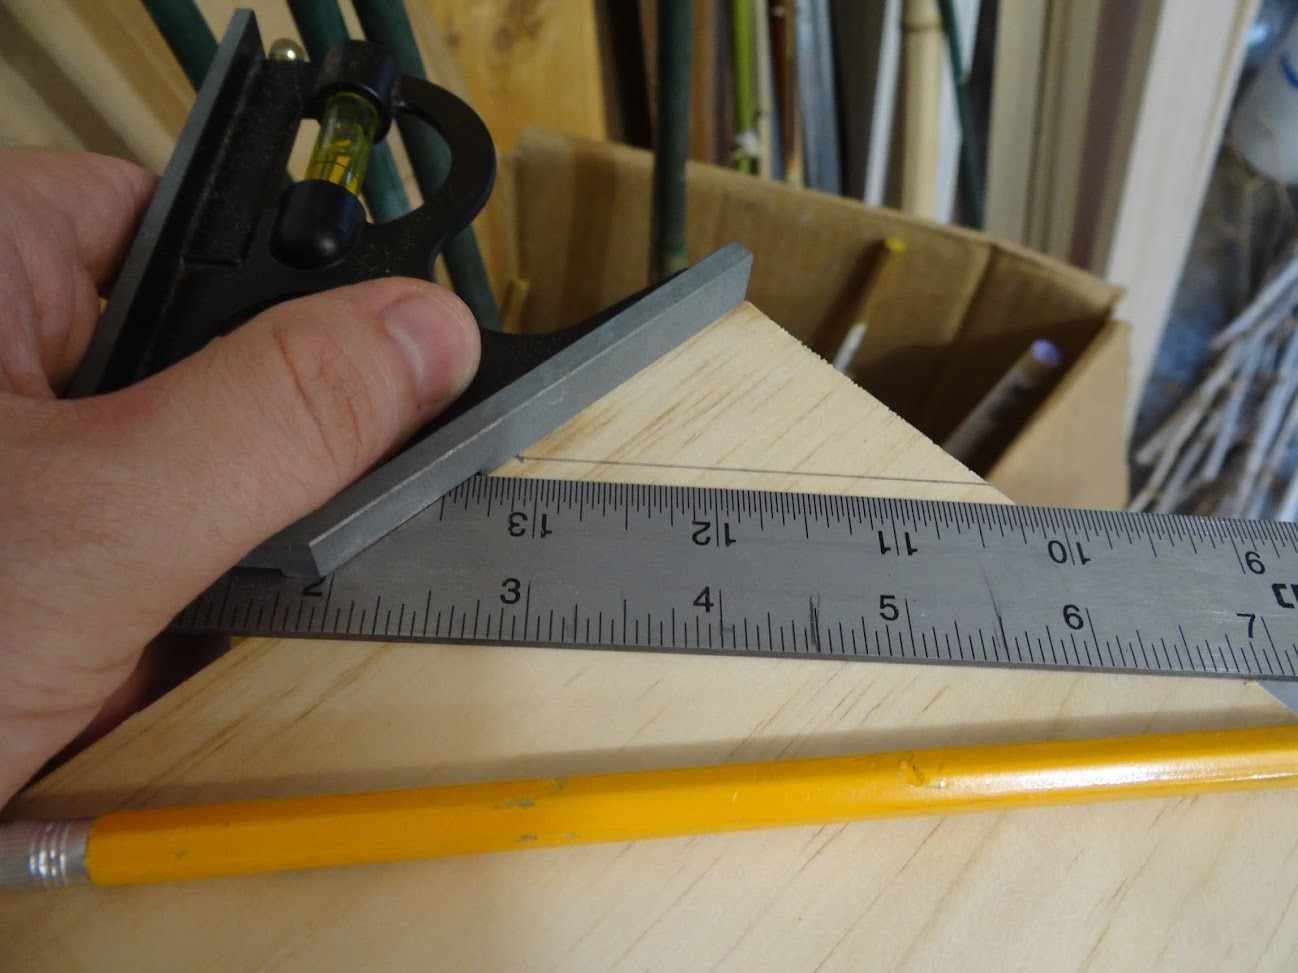
First, i'm going to cut the edges at an angle, specifically the ones that stick out the farthest. This is to prevent head bonking damage, and also to make it look kinda nice. I marked a dot 2" in from the edge, drew a 45 degree angle:

...and pulled out my pull saw:

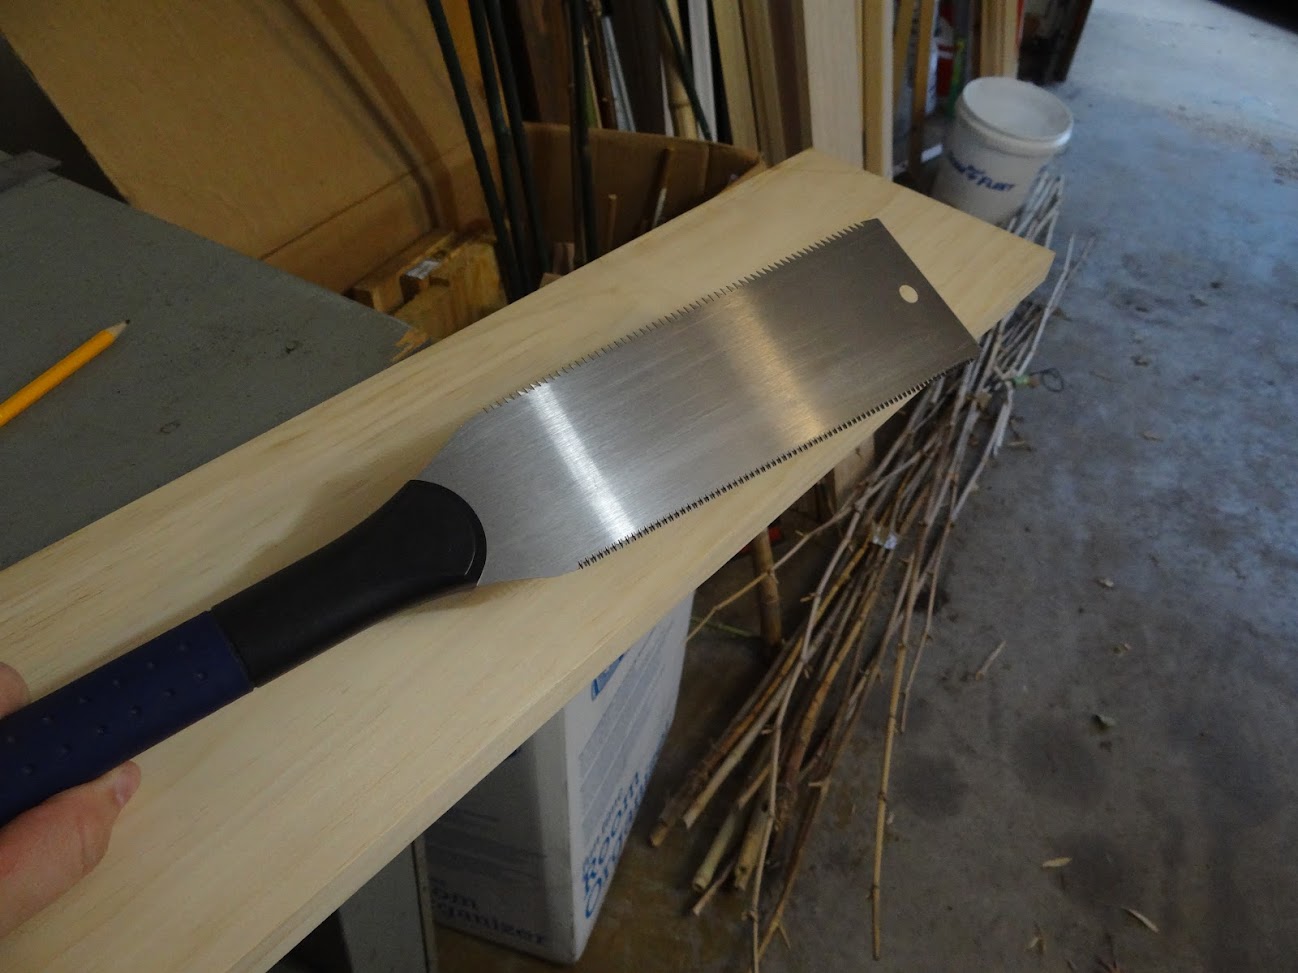
I have very few of my wood tools unpacked, but this is one of them. It's a basic japanese style pull saw from home depot. It's not fancy, but it does have 2 edges (one cross cut and one rip) on a single saw. Since i'm a cheapskate, i like 2 for 1 saws. I haven't done any woodworking in a while, but I can share a few tips with you if you are interested. First off, with hand saws (and any saw, really) you have to be aware of the direction you are sawing in relation to the grain:

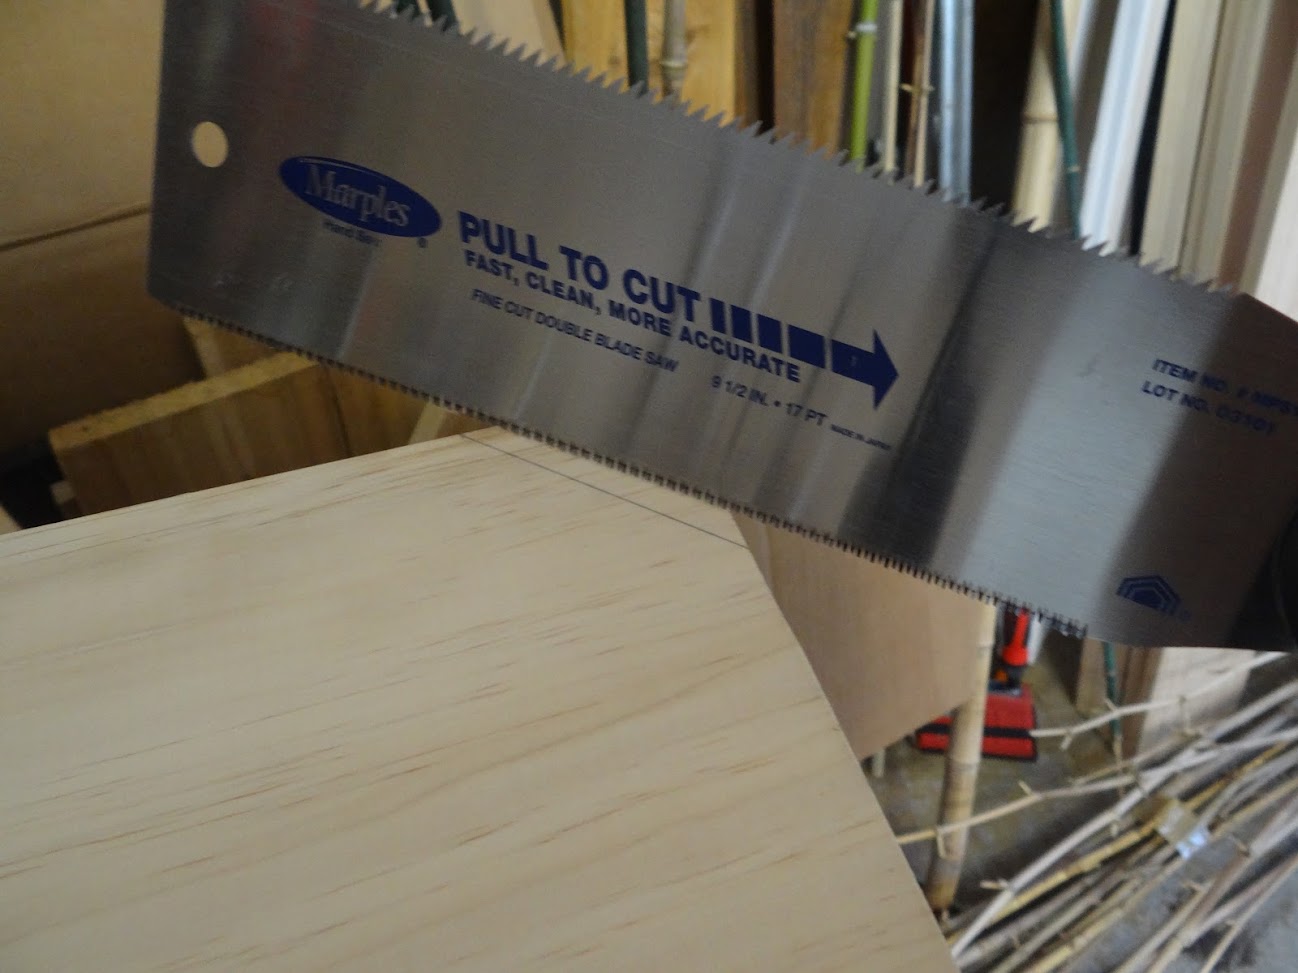
That direction, at a 45 degree angle pulling toward the end grain (as opposed to the side) is the correct angle in this case. If i was using a push saw, the saw would still move in the same direction, i would just be pushing from the other side. The reason for this is grain splintering. If cutting this way splinters the grain, it will do so on the part that gets cut off, not the part of the board that remains. Tip 2 is using a guide:

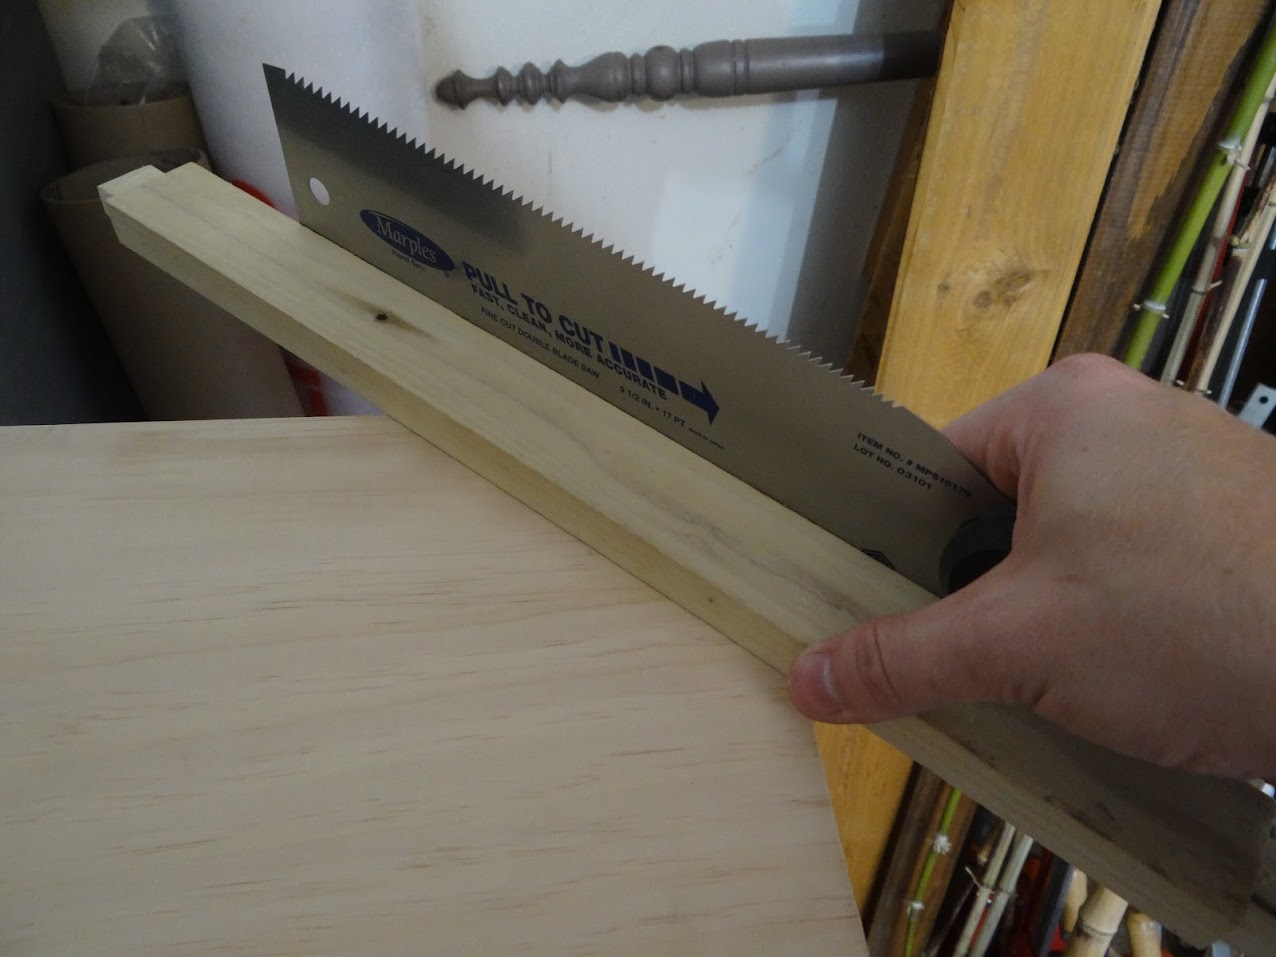
Using another block with a known square angle as a guide can help you cut straight down through the wood. Obviously you don't hold the guide block with the saw, i was just holding it for a photo. You cna use the same trick to get straight cuts with a chisel. I use the guide block with a chisel, but not a saw usually. Tip 3 is the angle i cut through the wood:

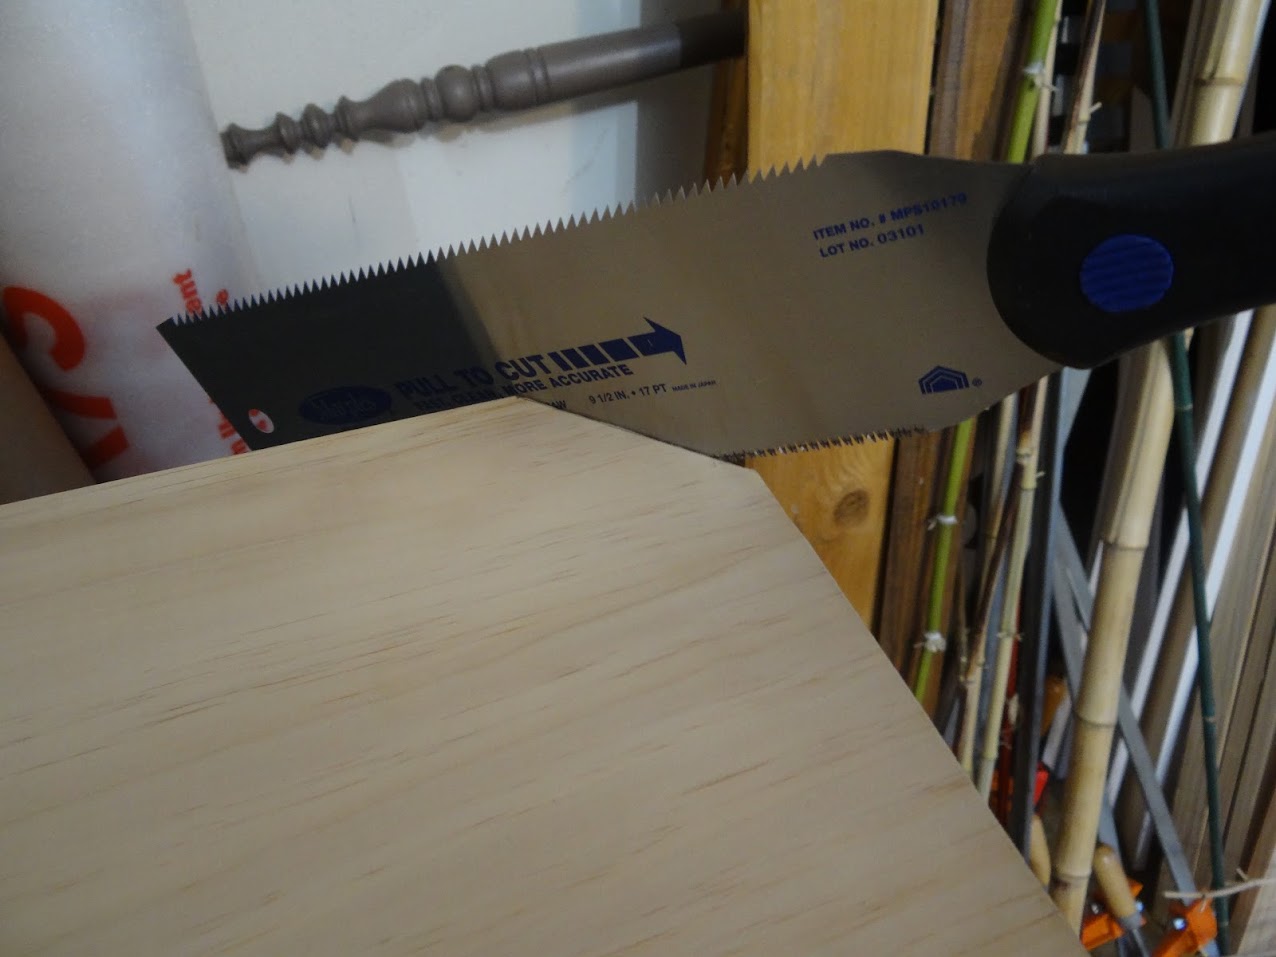
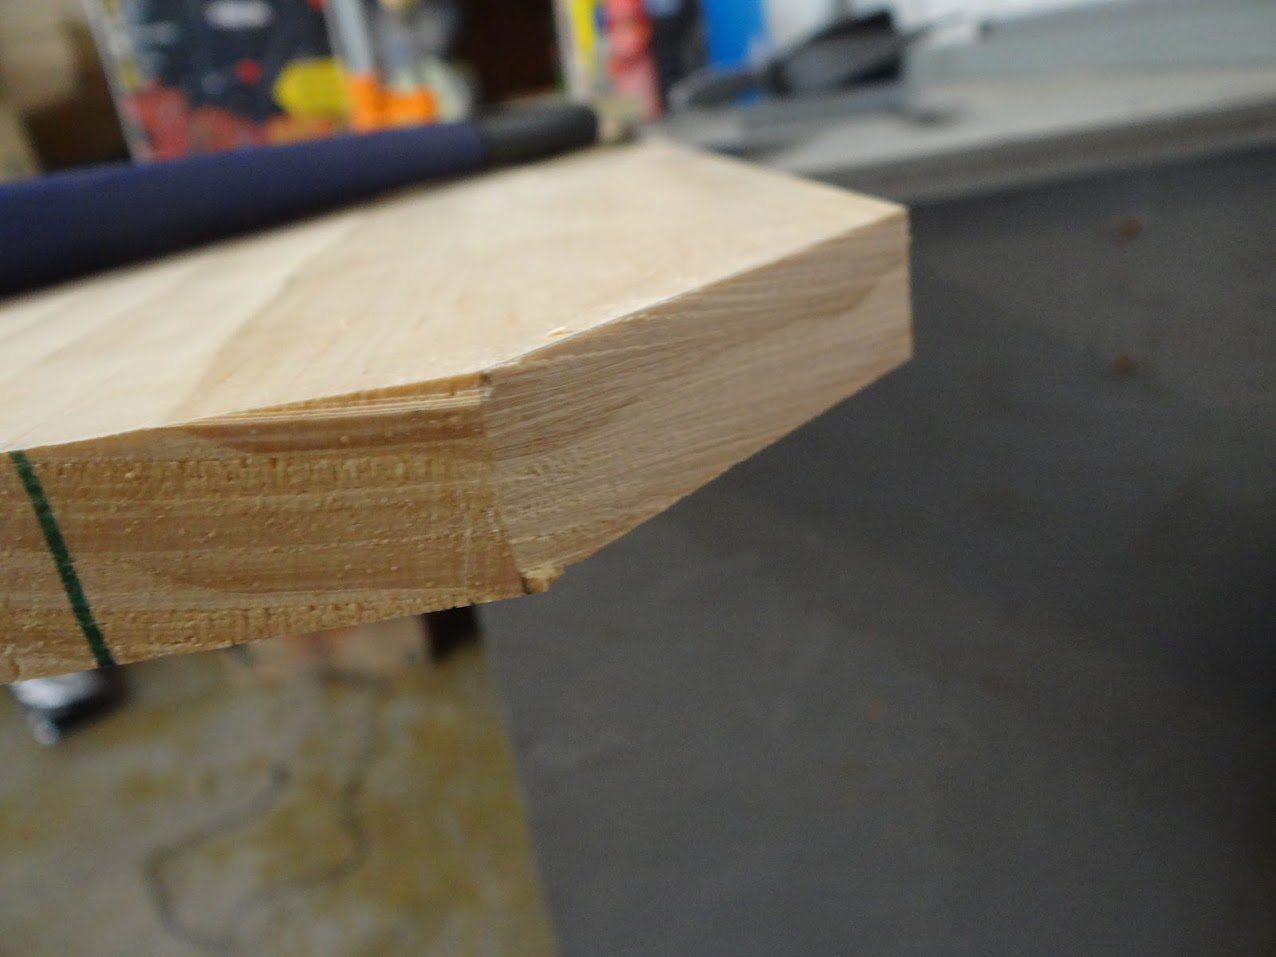
This in particular is not easy with a push saw. I'm pulling upwards to prevent splintering again, but it's not that simple. I first cut a line along the top just outside of the pencil line i drew. This cuts all the wood fibers on the very top of the board. Then i dig in as shown in the picture, pulling back but also up. As the saw cuts into the fibers on the bottom, they are pulled up into the wood and will not splinter out. The wood on top (being pulled away from the board) won't splinter either, because i've already cut the fibers on the top 32nd of an inch or so. When fibers below try to pull up, they are held down by the top fibers. In the end, i usually end up with a small nub at the very last point of the cut:

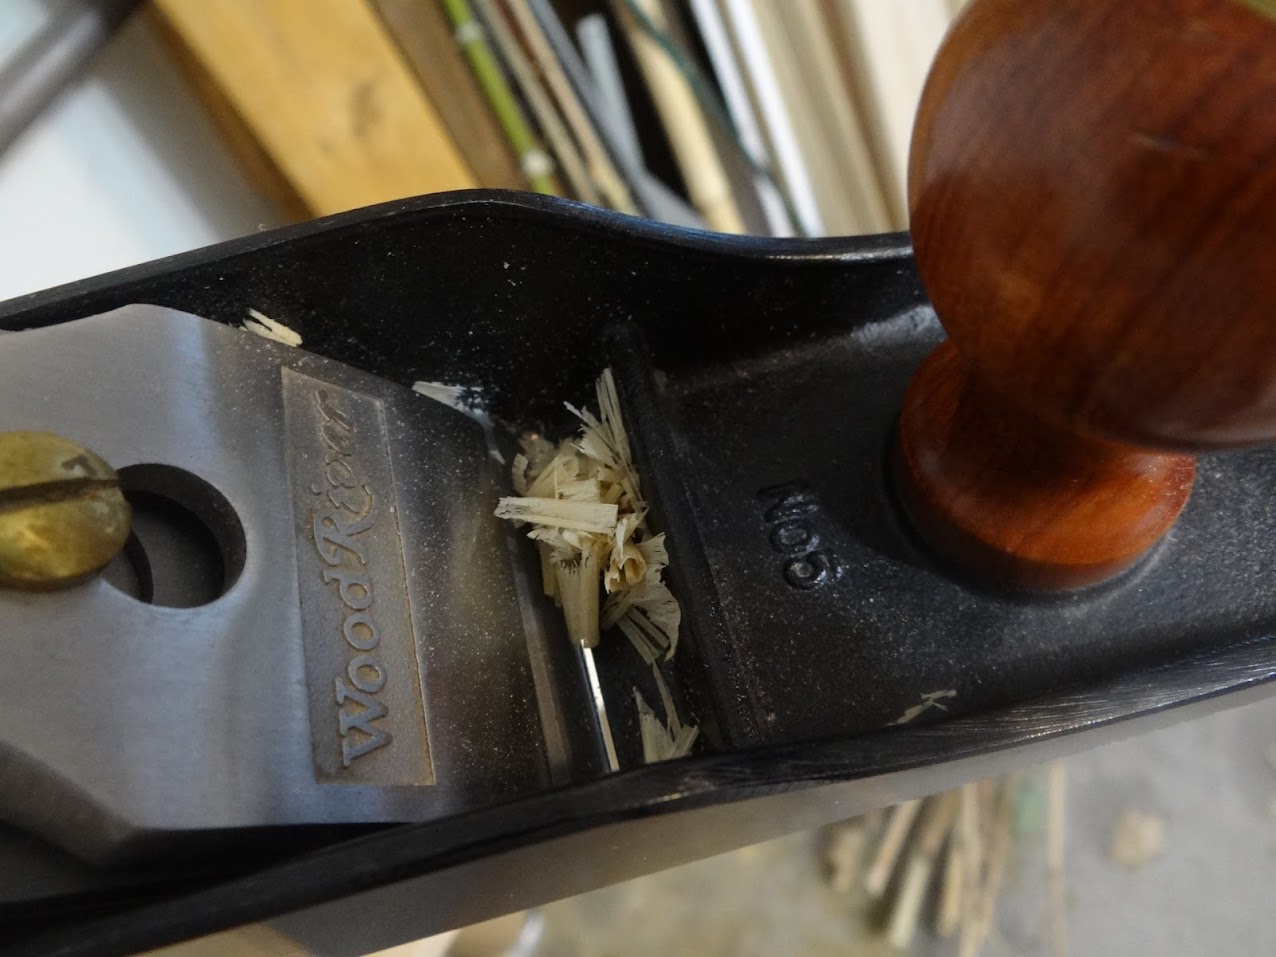
I make short work of that (and the saw marks) using the other tool i unpacked, my #5 jack plane:

Really this is more of a block plane job, but my block plane isn't unpacked. Some pretty shavings later...

and i have a smooth cut:

Now for the end grain (cut by the lumbermill, not me)

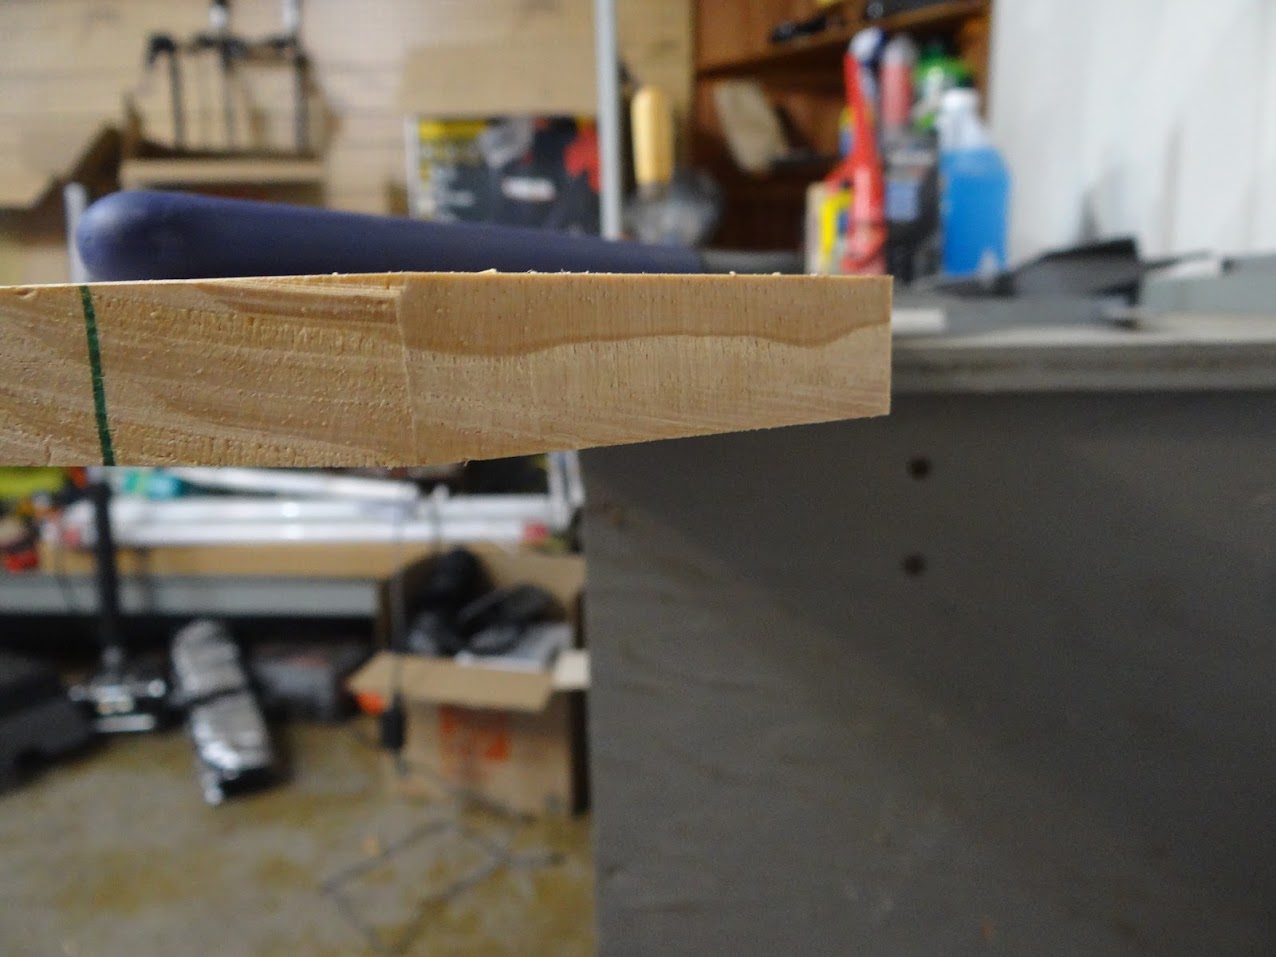
Note again the direction. Also this is more of a block plane job, but whatever. Going the way i am going, i will get to the end and the cut will end nicely. Going the other way, i would blow out the grain at the square edge because there is nothing holding it on. This is usually handled by planing in from the edge and stopping before going off the other side, turning around and planing back in from the other edge. I don't have to worry with the 45 degree angle. Near the end of the smoothing i noticed a problem:

While a better looking edge than it was, there is some crushing of the wood and not a smooth cut. This is for a couple reasons, primarily because pine is very soft, but also because my plane isn't super sharp. Again, it's also the wrong plane. Cutting smooth end grain pine is the go-to test to see if a chisel is honed perfectly. This plane fails this test. These are garage shelves, i don't care.

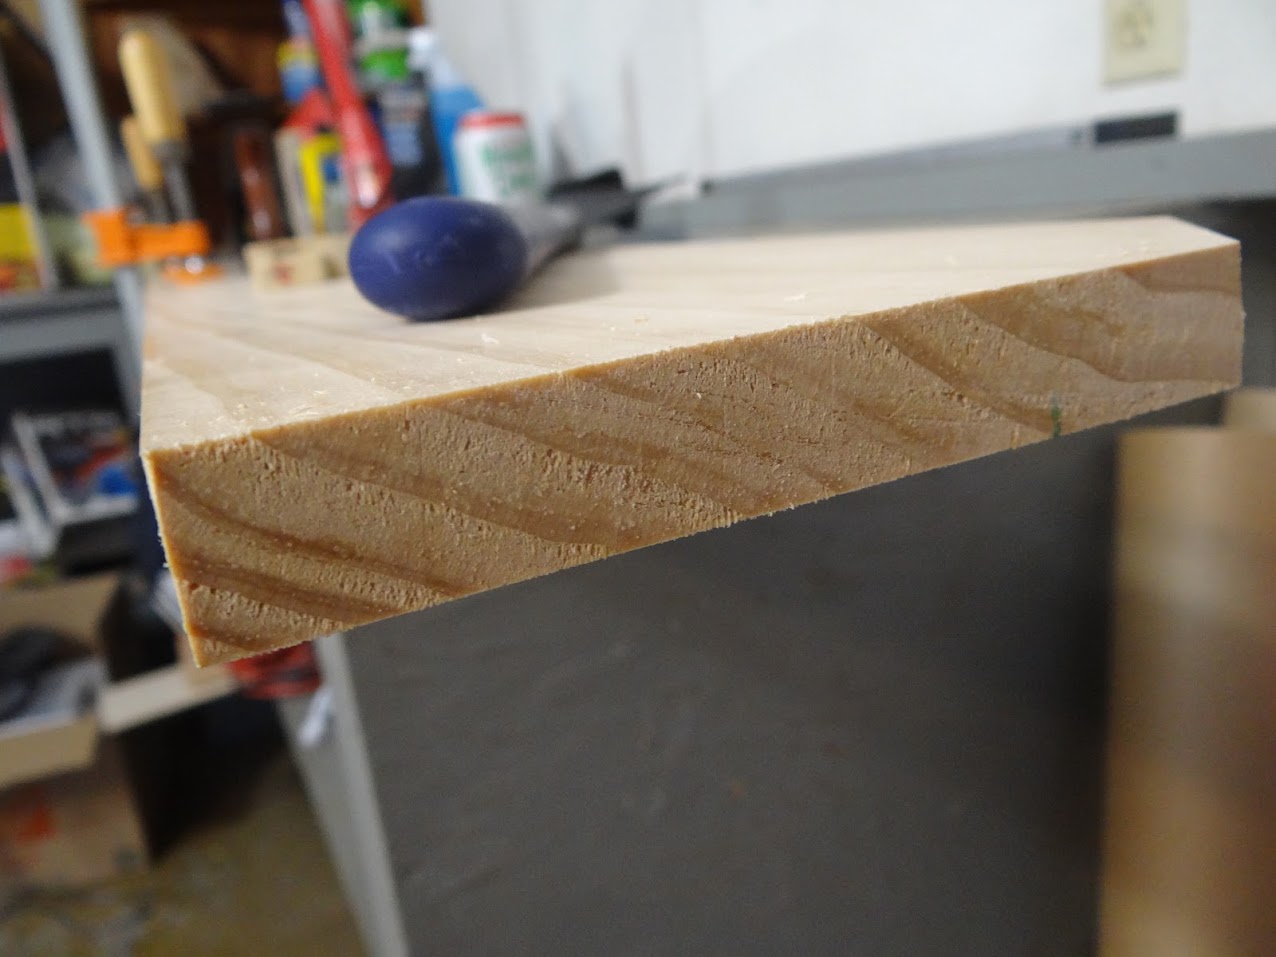
One nice thing to have on shelves is a 'soft' edge which i achieved via chamfering the edge. Basically, chamfering is just putting a small 45 degree angle on the edge of the board, which i did using the jack plane again:

After this pic, i ran a chamfer along the entire leading edge of the board, giving me some nice super long shavings of wood:

Now, i only did this on the outer board, the one i will touch (chamfering helps prevent some splinters in hands, too). the inner board i just left along. i won't be running my hand along the edge, i don't care what it feels like.

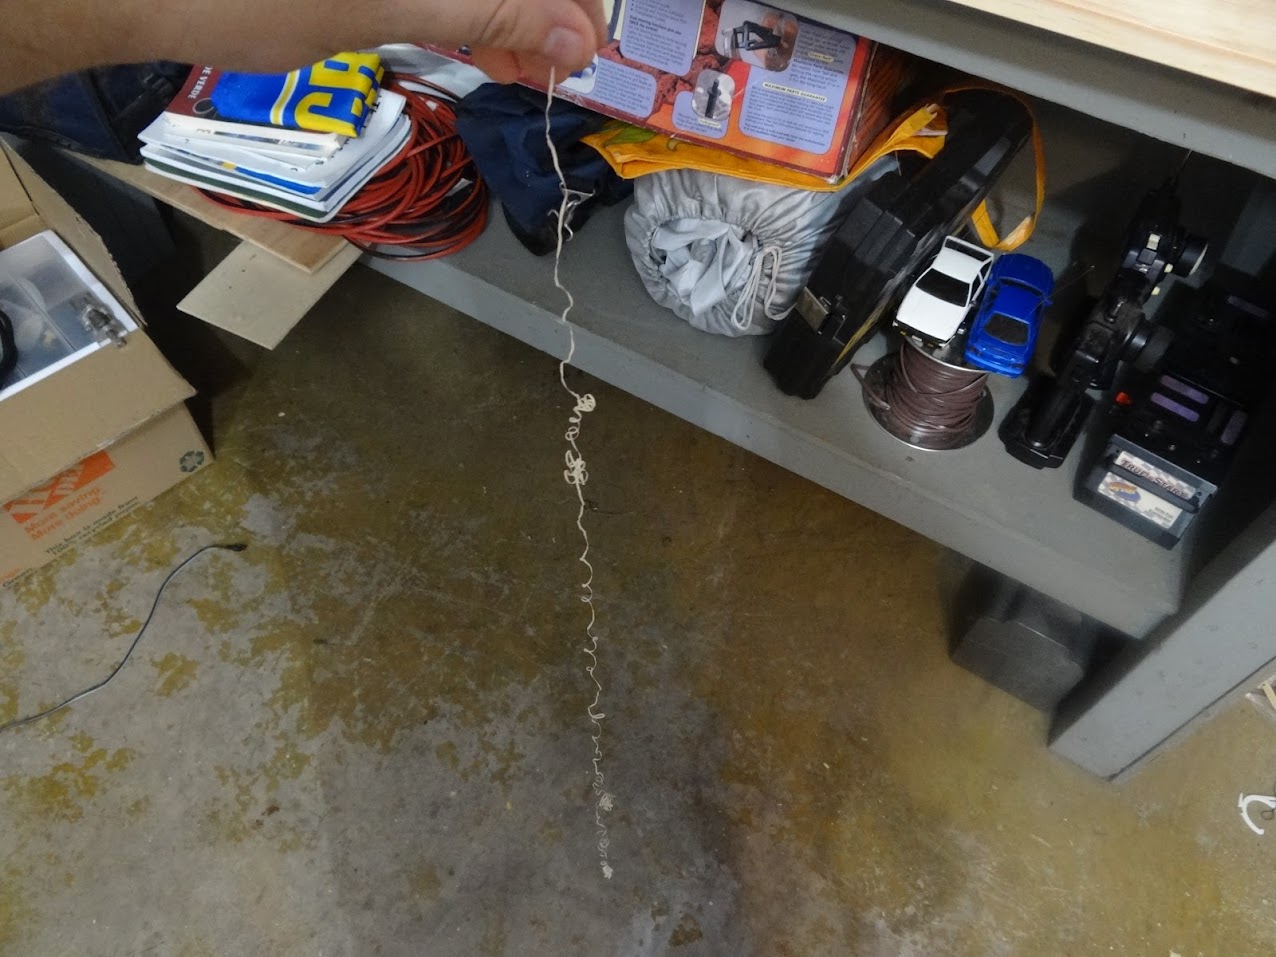
I also don't have to care so much about the drywall, because this is what it looks like:

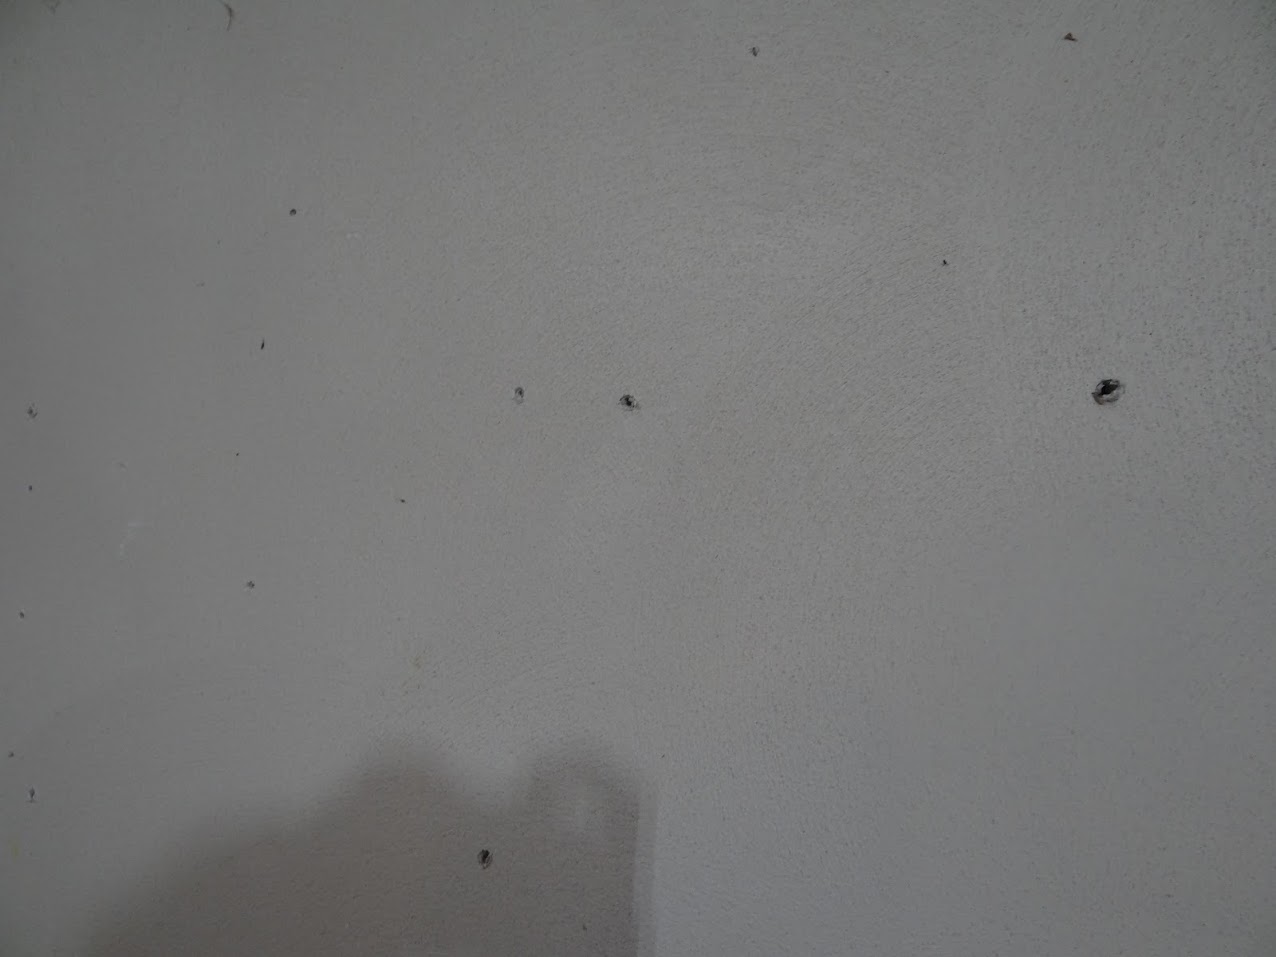
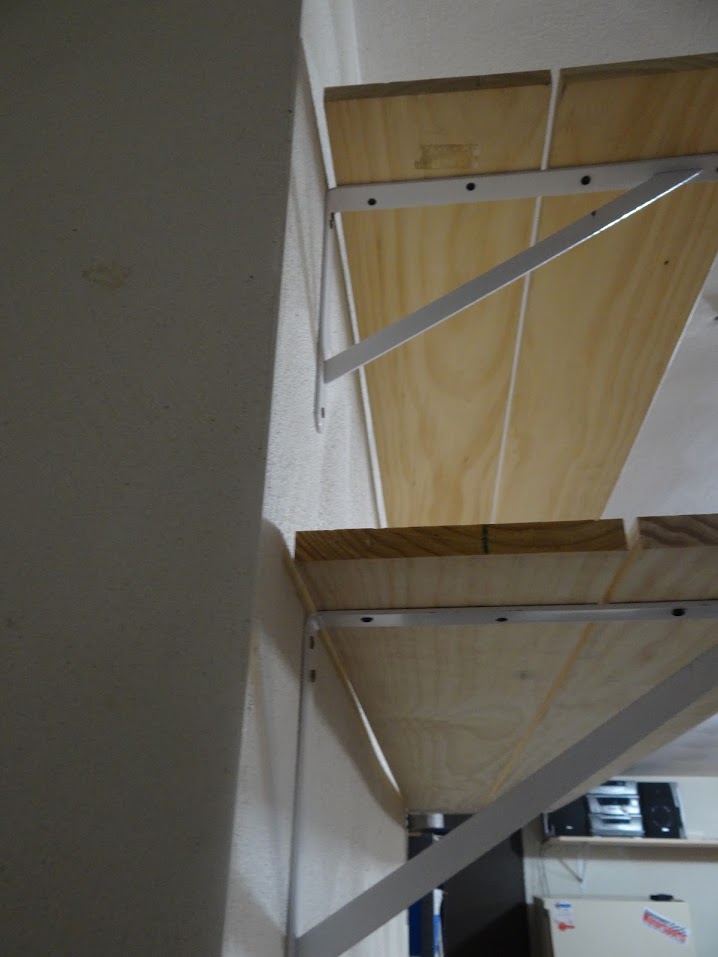
4 holes per square foot. So, onto the brackets. I immediately noticed a problem:

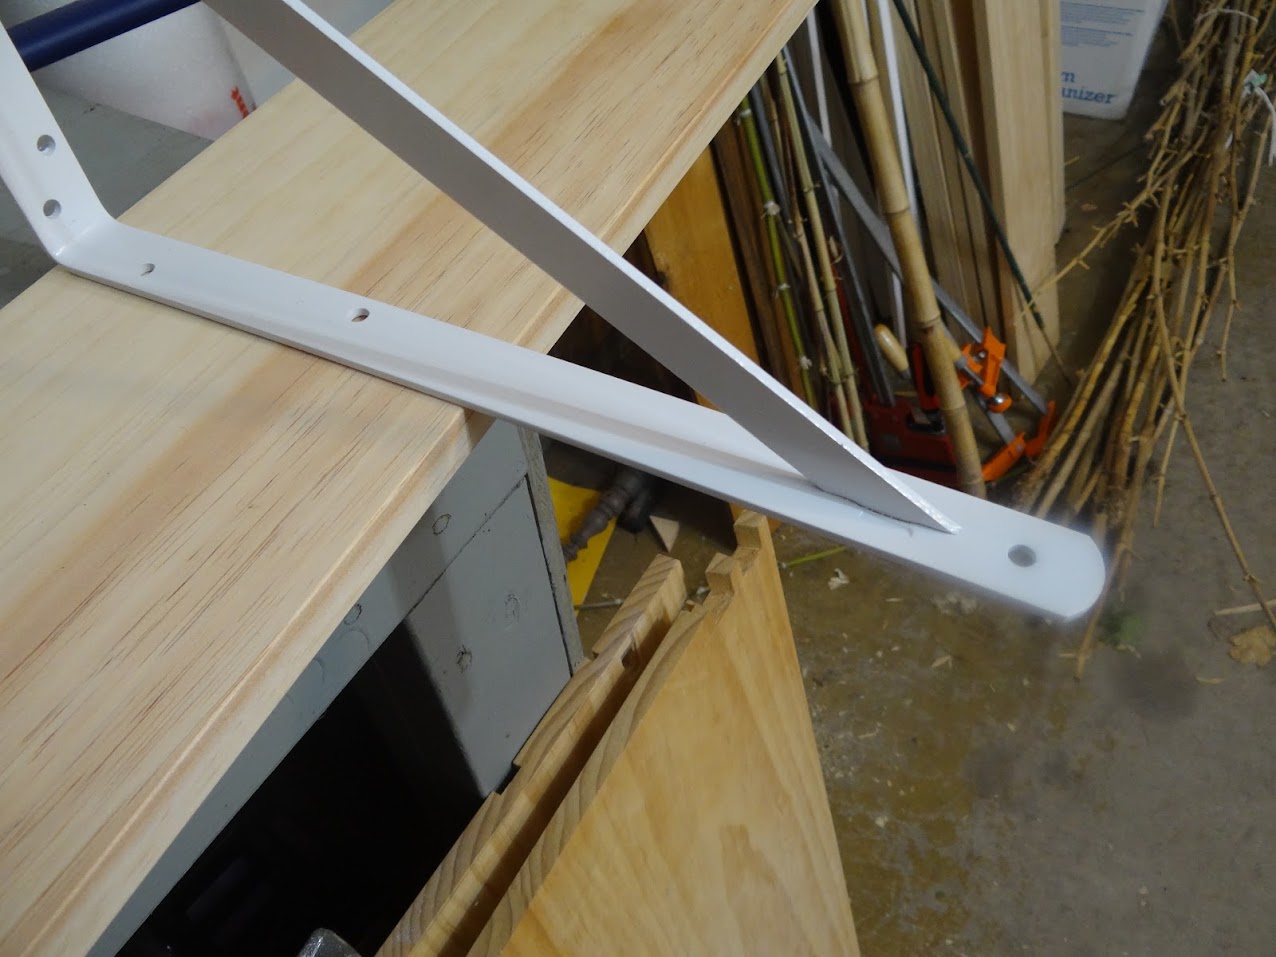
2 holes for inner board, 1 for outer board. hmmm...

Fixed! Now, studfinding (off camera), long mounting screws, and bam:

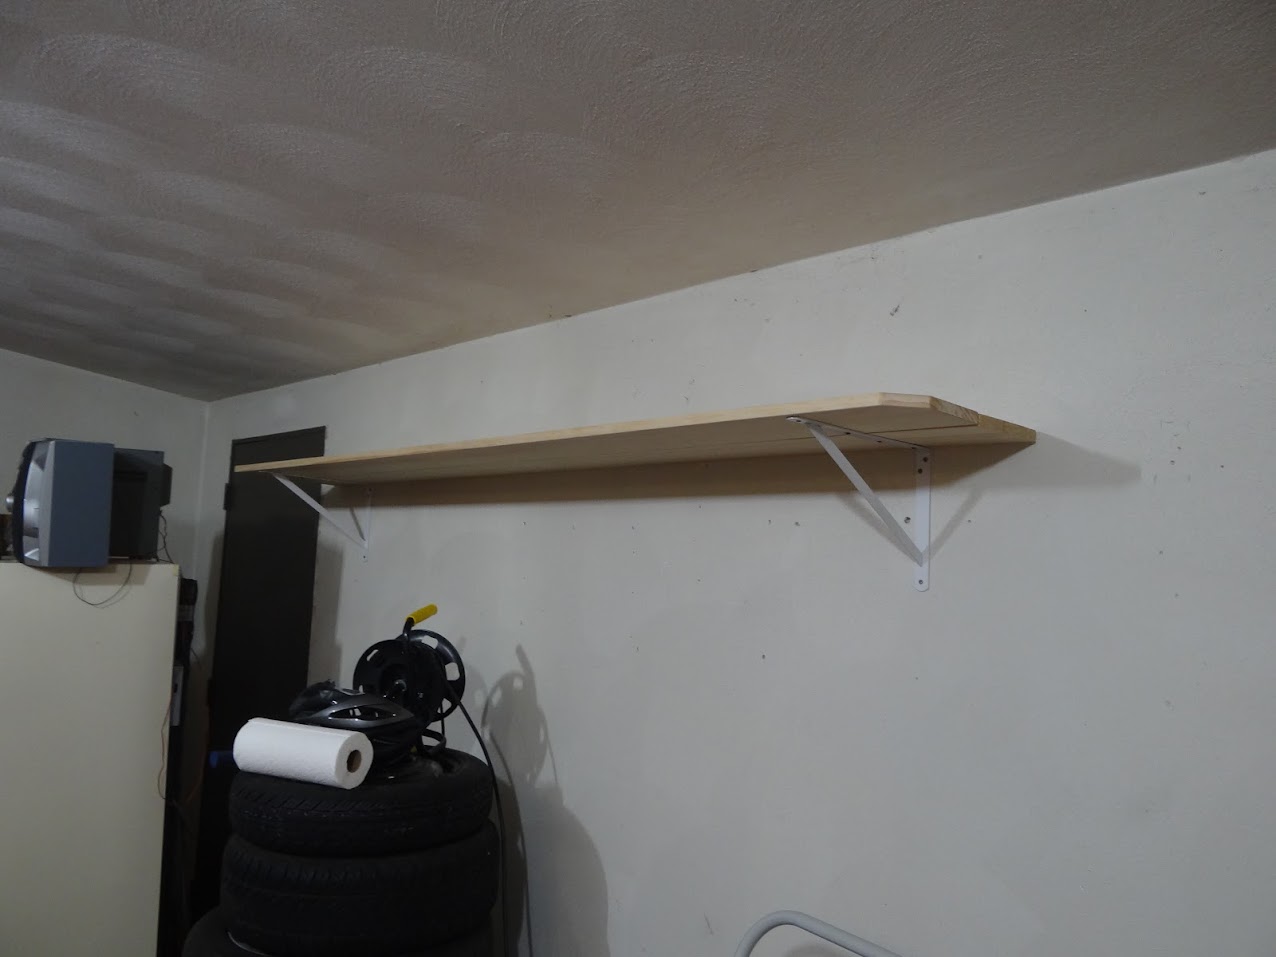
I would particularly like to point out this gap:

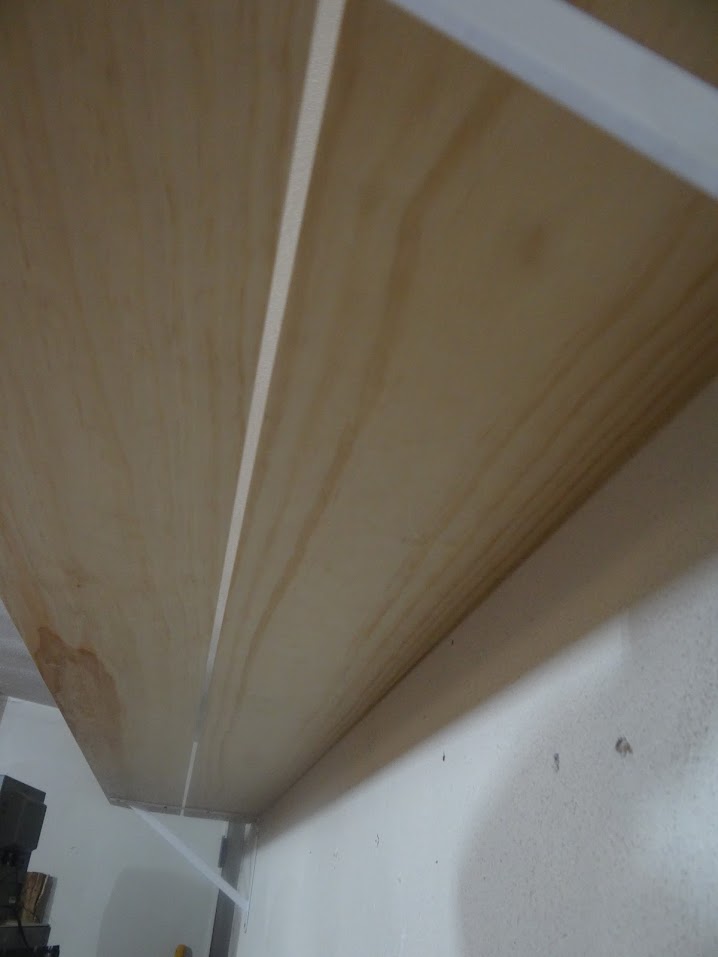
1/4" between boards, and between board and wall. I achieved this using some 1/4" thick wood as spacers.it's quite nice having a consistent 'panel gap' on a shelf. Minor confession, this is the first ever shelf i'm put up on a wall. Ever. I've made shelves in stand alone furniture, or on a work bench, never ON a wall. Feels good.

I didn't put a 3rd brace in the middle like in my model, primarily because there isn't a stud in the middle, but also because it doesn't seem to need one:

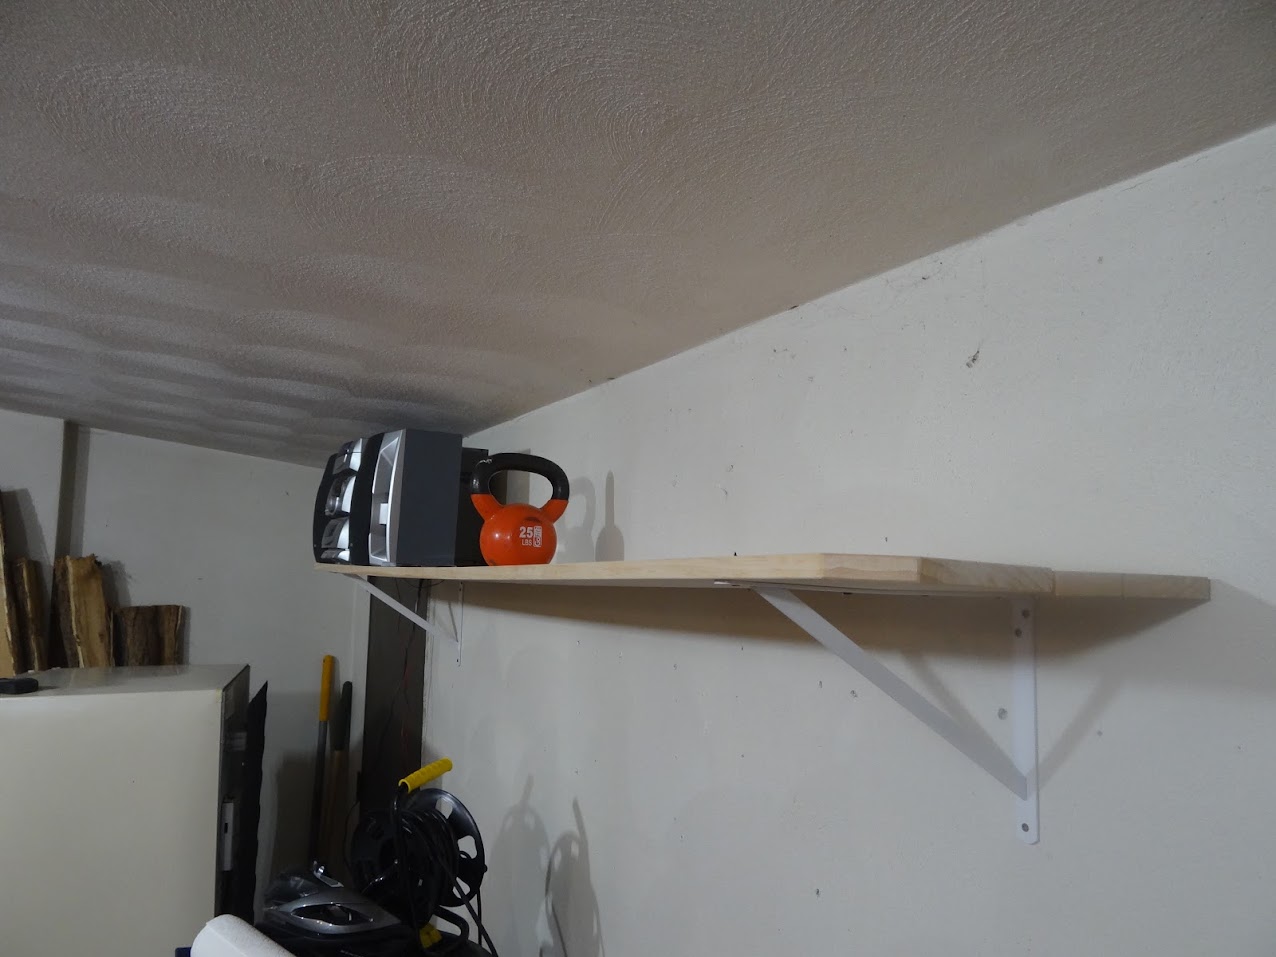
That's not alot of warping across the 7 feet or whatever between studs with a 25lb weight dead center. Also FYI the stereo won't live on this shelf, i just put it there to stop it falling while moving the fridge.

Repeat all steps on other wall:

Always check the length of the wood you buy. It all says the same length, but if you don't check, this will happen:

Garage shelves. Don't care.

Repeat a 3rd time:

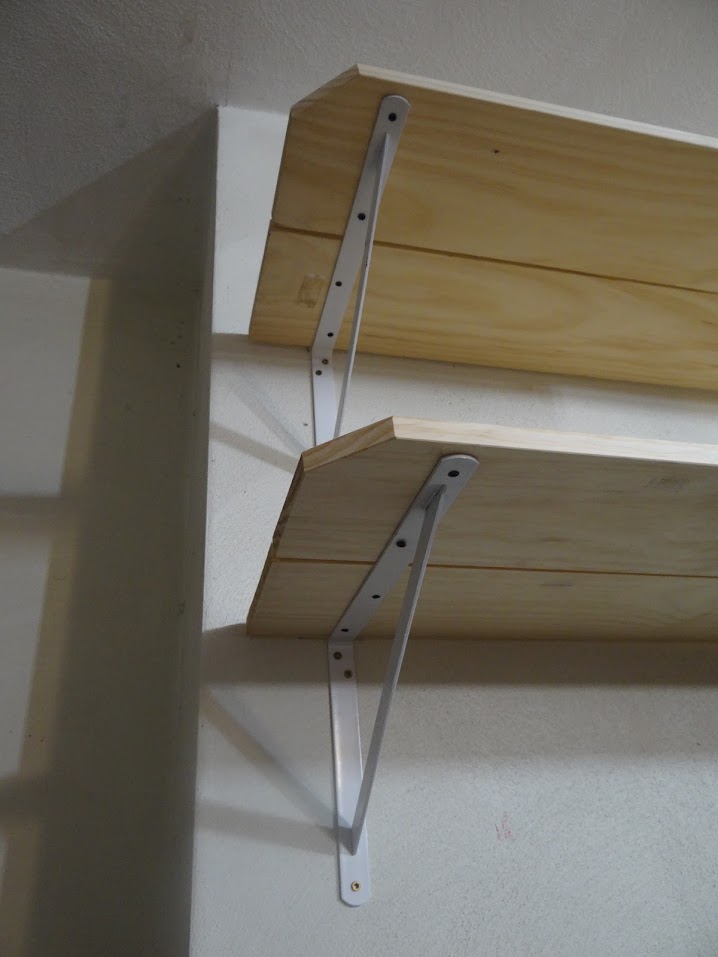
Admire more panel gaps revealing just how not straight the wall really is:

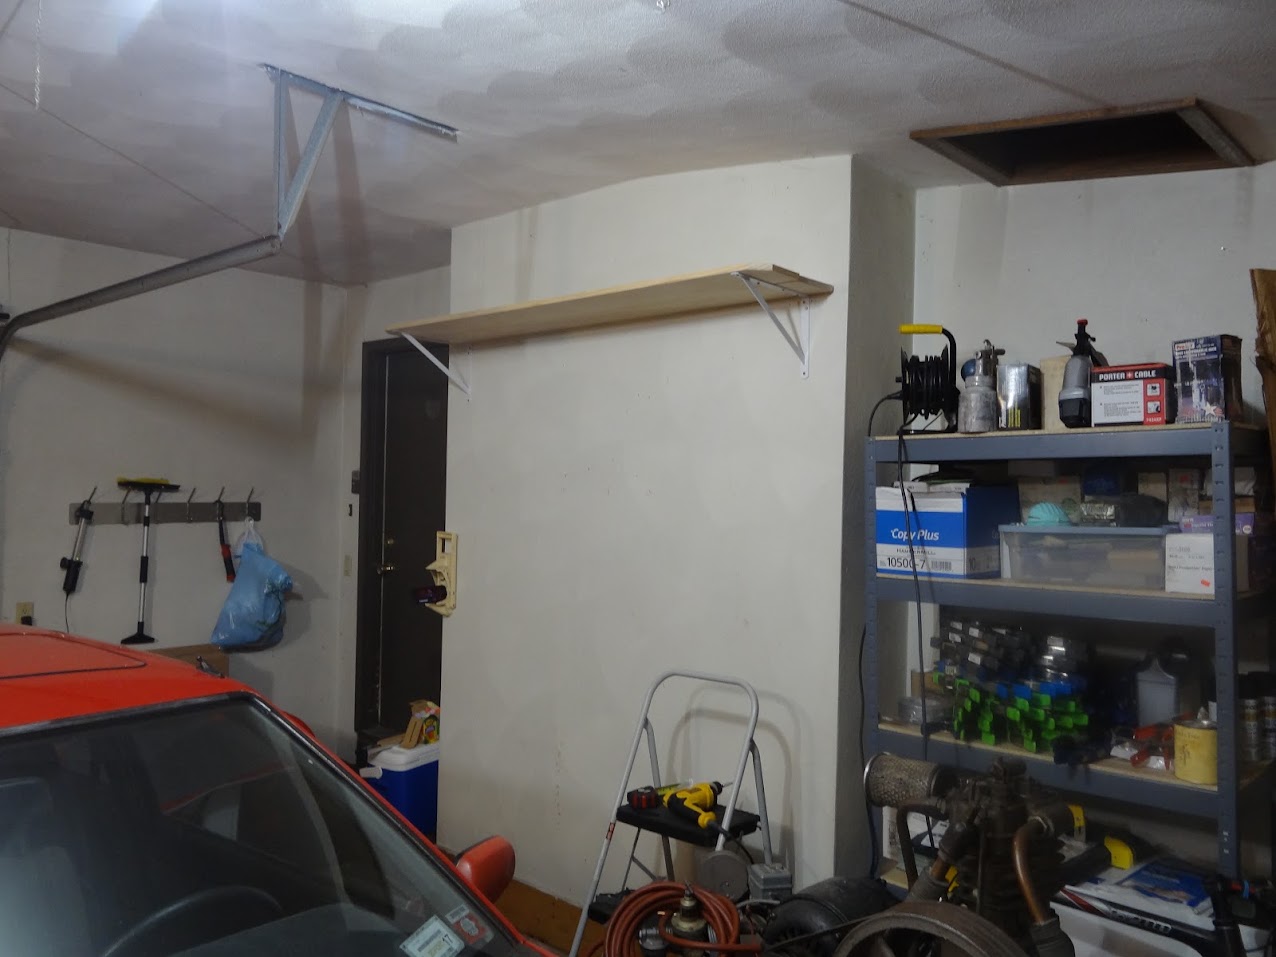
I then sat back and enjoyed the view of my work:

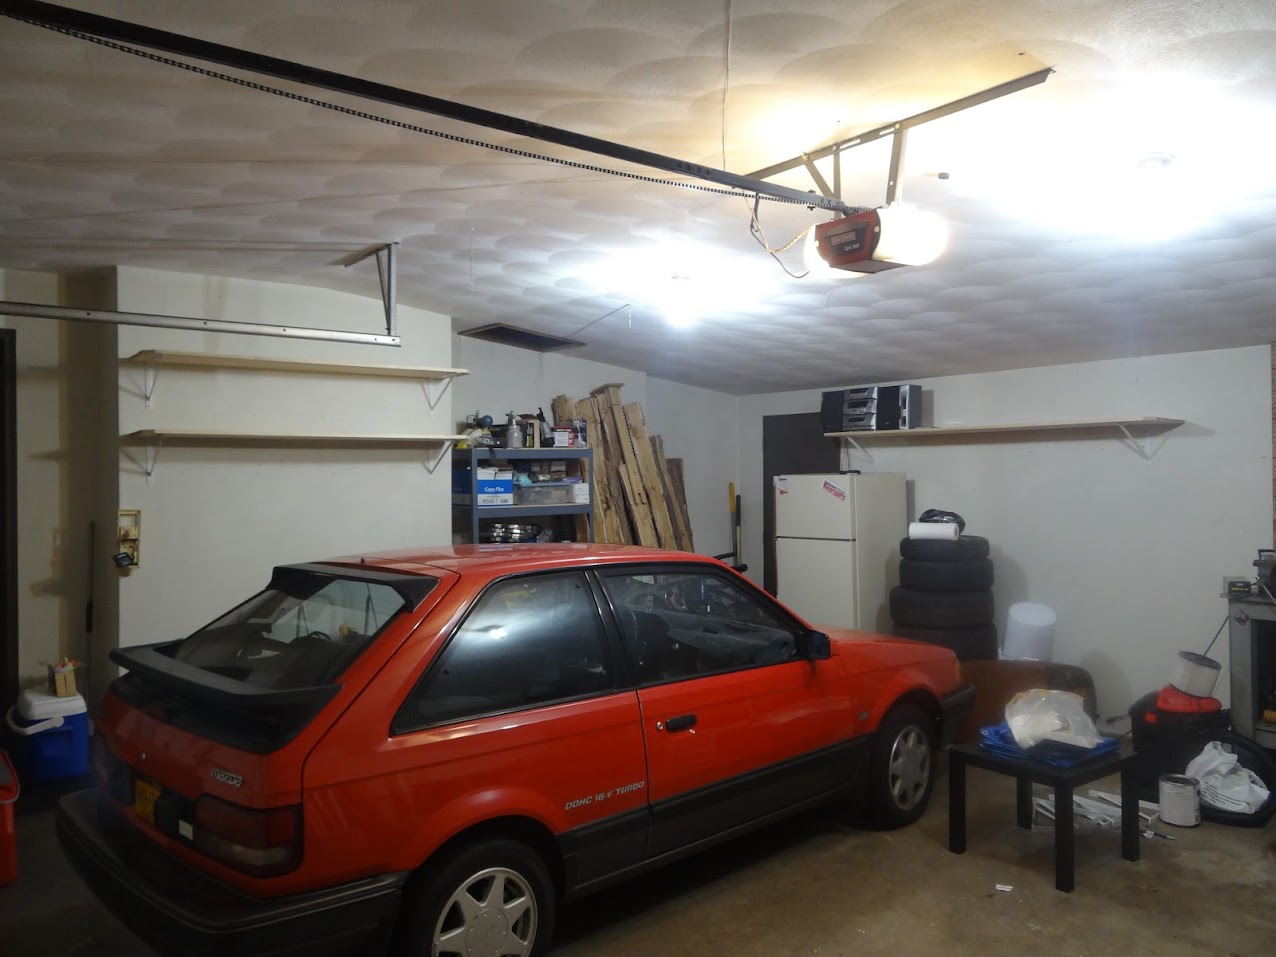
At this point i ran out of wood, so i stopped.

Rufledt
Rufledt UltraDork
7/5/16 10:53 p.m.

Incremental progress ahoy!

Drink time:

Now fully caffeinated, it's time to attack this:

Or more specifically, the pegboard. I had planned to paint the pegboard white, and now is the time. First, i have to clear off the bench. In doing so, i found this!

Literally the only car i have with carbon fiber and a ridiculous power to weight ratio. It's between 3 and 4 pounds, but has something like 1.8hp @ 40k rpm. Pretty nuts.

Further in the pile, I found the paint i bought for this:

Some masking and sanding later:

Now it's time for paint!

Behold, the difference!

Aaaaand done:

Made a couple errors and nicked the previously perfect wall:

By perfect i mean the one full of holes, some of which are basketball sized.

Some careful paint brush work helped get paint into the grooves, and a few passes over everything with the roller after getting everything painted resulted in a fairly consistent texture:

I'm not a big fan of super thick, slopped on latex paint with visible brush marks. I know, it's a garage so who cares, but i'm oddly OCD about that one thing. It could probably use a second coat just to get everything looking better, but for one coat over very dark paneling, i'm quite happy with the results.

I don't know what i'm going to do next, but it will probably involve more of those shelves and some more paint. Or something totally different, i don't know the future. If i keep chipping away, it'll get done eventually!

Javelin
Javelin GRM+ Memberand MegaDork
7/5/16 11:14 p.m.

Dude, I love this thread.

Rufledt
Rufledt UltraDork
7/6/16 3:45 p.m.

In reply to Javelin:

Thanks! Glad someone is enjoying my slow and not at all steady progress!

Tonight will probably be a shopping day, need more lumber and bins and stuff, but who knows. I don't plan this crap!

Enyar
Enyar Dork
7/6/16 4:58 p.m.

Looks good but I'm thinking in a couple years you're going to want that middle brace.

Rufledt
Rufledt UltraDork
7/6/16 7:03 p.m.

In reply to Enyar:

You're probably right, but i have a plan. I can't do a middle brace, since there is no middle stud. The middle of the shelf is between 2 studs, not on a stud, and i'm slightly too OCD to have an off center brace.

My plan is to add a bass bar type thing from a violin. I play violin and once i wanted to build one. I still have the stuff i bought to do so, but never got around to it. A violin has a carved arched top (and bottom), with a post held between them (called the sound post) under the higher strings, sorta, and a bar under the low notes side of the top called a bass bar. Here's a pic of a soundboard removed from the instrument:

The soundpost isn't there because it isn't glued in. it has to be installed once the body is glued up. The bar you see there is carved to match the arch, sortof. It has to arch, but often it is carved to arch even more than the top. When it is glued in place, it pushes up on the middle of the top to help resist the string force pushing downward. The ends of the bass bar of course pull down (because physics) but they are so close to the ends of the top it doesn't pull them down. This simple system helps prevent the top from caving down under a hundred or more pounds of pressure on the few millimeter thin top, and it does so for hundreds of years. I can plane a long board into an arch, glue (and screw why not) it underneath the flat shelf, creating a spring that pushes up. Under the long shelf i could even use that to attach lights or something. Maybe. That's my theory anyway.

Edit: the red one is what i'm talking about:

only i would be creating an arch and gluing it under a flat board to prevent sagging in the middle of a long span, instead of an arch under a slightly flatter arch.

Rufledt
Rufledt UltraDork
7/6/16 11:55 p.m.

As promised, tonight was more of a shopping day than a working day. behold!:

8 plastic bins for storing things up on the shelves, the remaining 4 boards for the 2 shelves i never built, my drink:

aaand 2 2'x4' sheets of 3/4" plywood to use for the fold down work benches:

And some ghetto air conditioning:

I know what you're thinking: "hey idiot, that's only 7 plastic bins!" Well, yes, i was 'test fitting' one of them:

It fits! who would've thought a plastic bin fits on a shelf designed to hold plastic bins.

Time to do a real shakedown:

A bunch of car detailing stuff. Much of it fits, including a bunch of my too many cloths, previously held in plastic bags to prevent dust build up. And up on the shelf:

Why isn't it on the end of the shelf? Well... confession time. On the right is a screw from the package i bought tonight, on the left is from a box of screws i found in the garage when i was putting up the shelves. The right is 3/4" long, the left is 1 1/4". the board is 3/4" thick, the bracket is maybe 1/8".

Yeah, they were sticking out the top. I knew they were going to do that before i put the first screw in, but i continued anyway. you know what they say...

Correct screws put in all the shelves (took a lot of non-picture-worthy time) and...

Perfect. Some holes, but garage shelves, don't care. At this point this happened:

and SWMBO sent me a text. Kid 1 isn't going to bed, which means it's my work in the garage is over. I wasn't keeping her awake, but it's my turn to try and child care > garage. i spent probably an hour on the menards trip which i won't have to do again tomorrow, maybe i'll get some more done. who knows.

Enyar
Enyar Dork
7/7/16 11:49 a.m.

What about just a couple of small L brackets on the two middle studs? You don't really need something to carry 100% of the weight, just something to keep those boards from bending.

Also I love those Japanese pull saws.

Rufledt
Rufledt UltraDork
7/7/16 1:06 p.m.

That would be easy, efficient, and work perfectly with no fiddling or maintenance required. Where's the fun in that?

now that I mentioned springing the shelves I kinda want to try it just for kicks. I even came up with a way to make t with adjustable preload and spring rates. The nerd is strong with me today.

Yeah those pull saws are great. I like the old school push rip saws and dovetail saws but for everything else I like pull saws.

1 2 3

You'll need to log in to post.

Our Preferred Partners
sLpMhYFTvgcajawL7UJfNoAYIrCC1D36QUJYKXAblymdtu8bcbEM1gFsN2cTh8ws