1 ... 10 11 12 13 14 ... 16
slantsix
slantsix HalfDork
4/12/22 4:33 p.m.

4/12/22

Hitch Install - Ready to Pull the ValianTrailer to a race.

I got a Great Deal on a Hitch - Craigslist $tyle for $20....  It's catalogue application lists it for a VW golf.  @ 39 Inches it was 3" too wide for the 'ol MoPar A body Frame rails... which are Dead on 36" Wide Centers.

This receiver hitch also had some mounting ears at different elevations... So I had to solve that as well.
No Before Pics, but Here is what CURT MFG says they look like new:

Designed to fit this Generation of the VW golf?  MK VII Maybe?

So after Relocating the Mounting ears and Taking 1 1/2" out of each side of the tube to the uprights I Broke out the hot Glue Gun and stuck it all back together.
Some Test Fits for Marking Hole Locations:


Carriage bolts, Mount Plates and Fishwire is all that's needed here.. and they are home in the frame rails.


Bolt up / Mock Up required a re-do of the Battery shut offf switch too.


10" of ground clearance - and maybe some sort of future rear aero Expander frame?  who knows?


Not a great Picture, But the Painted version came out nice - and it Towed the empty 800# ValianTrailer flawlessly.

Maybe it serves as a rear Tow Point for the Road Racing Track days too?

slantsix
slantsix HalfDork
4/19/22 2:26 p.m.

4/19/22:

Hitch install..

went...

off..


without a hitch.

We'll see how it handles a more serious load soon.

slantsix
slantsix HalfDork
4/27/22 8:36 a.m.

4/27/22:

Grüne Hölle does a few Mountain trips, HPDE, Lemons Tows a trailer and Has a lot of fun whilst doing it.


Got all prepped for a trip to CMP in Kerschaw SC for a Track Day and a 24 Hours of Lemons Race.
Left Before Sunrise.... Towing the ValianTrailer

I decided to leave very early as I had not towed the freshly Fabbed Trailer More than say ~15 Miles since I built it... along with the Hitch I just Fabbed for the '64 Dart as well.  
I had the Trailer Loaded with Tools / Generator, 4 Wheels and Tires, An LA short Block, Racing Scales,  Camping gear etc. Tongue Weight Was at 250# - 50# over what it was supposed to be.

I expected to have some sort of towing related maladies so I budgeted extra Time.
That never Happened - Trailer was Smooth, and Stable - Loaded or Not  - even up to 90 Mph.. so. Up the Mountain I went - for a little detour to my first stop in Blacksburg, VA.

One of my favorite Routes... VA 311 From I64 to Catawba, VA was the route du Jour..


Lots of Beautiful Bloomin' Purple Tree Flowers this time of year!


Potts Mountain Waysides are excellent Spots for Glamour Shots...


I usually Blast over these Mountain Twisties so Fast that I have never stopped or slowed to appreciate the the Beauty here. But Pulling the trailer I had some time, so that was all good.

Back on my way Down the Mountain, There were lots of Cyclists Heading Up the mountain. - I hope they liked the car and Trailer.

Picked up the Lemons Car and Drove in Tandem to the track:

Stopping for some Custard:

Did Some HPDE and Lemons Racing / Testing:


Block Party with Lemons:

Metup the The EVR Race Team and Swapped Slant 6 Stories..

Got Prepped for some Laps:

Packed up, Ready For Home:

Metup With Michael in Albemarle, NC - He treated us to Lunch! and Showed us his '70 Duster.


Took US 52 and US 601 To I 77.. It was fantastic.

The Blue Ridge Lies ahead of us..

Towing the Trailer up the Mountain Switchbacks on US 52.. The Car did not complain and took the corners at speed.  - The Slant 6 was great for track day and Trailer Duty - Custom Oil pan And baffles did it's job - No issues.

At the Top, Crossing Under the Blue Ridge Parkway:

On the Way Home - Made it to the Route 19 Wayside / overlook in the mountain cut.. Another Nice Spot for Glamour Shots - Especially at the end of the Golden hour - I timed it just right on this trip.


All in all Good Trip, and Grüne Hölle, ValianTrailer  did not have any problems during the travel..  I call it a win.

'Till Next Time..

buzzboy
buzzboy SuperDork
4/27/22 9:02 a.m.

Love this post so much. Those back roads from VA down to NC are lovely this time of year. I did them in my Lemon years ago. And the Red Buds are in full bloom! I drove from Lancaster county down to NC yesterday and it was glorious

slantsix
slantsix HalfDork
4/27/22 9:22 a.m.

Thanks for the Kind words!

Yes It was Fantastic.


Cheers to you on your adventures!

slantsix
slantsix HalfDork
7/1/22 11:08 p.m.

7/1/22:

Been Busy lately Driving and running some errands, finally got back to doing some maintenance and replacing broken stuff or upgrading other things..

I took a 900 Mile trip  one way to Pick up some Slant 6 Parts, meetup with friends and explore part of the country that I have yet to experience  thoroughly. I took my copilot along for 4 days of camping, and road tripping in a car with no A/C or Radio, and Virtually no screens.  For me it was epic.

For this Trip It would Take us to the Midwest, I had My Mostly empty ValianTrailer (with the Needed Camping Gear.) and My Copilot.
The Route Would Take us Through 3 Major Population Centers: - Columbus OH, Indianapolis, IN, and Saint Louis, MO.
I timed the Driving so that I was mostly driving at Night and At the Campsites During the day. - It worked well with The Camgrounds Allowing us Some Early Check ins as needed.

First Leg of the Drive was from Pittsburgh Metro to Terre Haute, IN.
Starting Mileage on the Odometer:

The Copilot was Awake by our First Fuel Stop Outside Columbus, OH..

I Like this Exit Just over the OH/IN State line for a quick Respite before getting into the Indianapolis Metro / I465 Beltway.

A total Traffic Stopage on I465West at 06:30 took us around the Southern Metro Indy Area Before Finding I70 West again.
We Made it to Terre Haute and found our campsite by 09:00

Fire up the Griddle, Make some Pancakes, then Naptime for me whilst the copilot finds the pool and playground and feeds the donkeys.

We Hit the Road again Early The Next day and Made it Through Saint Louis before Most humans are awake and Driving. Helps that We were still on eastern time as well!

Stopped off for some Breakfast and Fuel, and the Historic Route 66 Signs were Calling, But Alas, A few more hours of interstates before Driving on some of the "Mother Road".

Had Never Benn through the Ozarks... Reminded me a bit of Home, just less windy in general.

Finally Historic Route 66:

Cool Stuff is found near the population centers. 

Metup with my Buddy, Swapped parts and stories, and began to head back home.... but not without taking in some of the local culture and glamour shots.


Well I guess I lied a bit... we did see one screen - the silver screen before leaving town... I mean it's on the National Register of Historic Places.. So I recommend you check out a Movie there someday as well.


Got a Sticker..

On The way Back - Daybreak somewhere on I70 in Illinois 

Before Hitting our Last Campground on the East Side Of the Indianapolis Beltway.. It was a bit Buggy....

Checked in and setup.. Ready to Nap the day away.

odometer and GPS Do not match.. Speedo Is Correct when driving however.

A Fun 28 Hours of Driving in four days.. 

The Car developed a bearing Noise in the Axle during the Trip... the Right Rear was all hoopajooped.. Got new parts on the way.

Upgraded the Alternator Charging Wire to 8Ga and Bypassed the Factory Firewall Bulkhead connection and Ammeter.


Also Added a SPAL 16" Fan and Removed the OE 4 Blade Mechanical Fan - Hoping that on a Hot summer day when the car is idling and not moving in traffic that it will not get too hot and bothered.


Will be back on the Road Soon for More adventures this summer  - Carlisle, PVGP, and maybe a TNiA or a Local autoX
(I really need to get the fuel spill out of the filler cap solved before the Track or Cone events.) - it's on the to-to list.

MadScientistMatt
MadScientistMatt UltimaDork
7/3/22 9:48 a.m.

How's the clearance on that fan? In case I have to redo the monstrosity I cooked up with a cookie sheet.

slantsix
slantsix HalfDork
7/3/22 5:10 p.m.

Clearance is good.   My Rad is not centered on the engine or core support. That helps alot. Rad is offset maybe 3-5" to the right. Fan is also set off to the right and low.  If the Elect fan was centered to the water pump pulley then it would not clear.


slantsix
slantsix HalfDork
7/4/22 5:28 p.m.

7/4/22:

Happy Birthday USA.

I got the Axle Bearing in the mail yesterday - I got it Pressed on and Lubed up, I Decided to replace the Outer Axle Seal as it had a Funny Wear Pattern on the Seal....  and The bearing Had to come off to replace the seal anyway.

I got the Axle slammed back home and Filled with 2 Quarts of Axle Juice.

Got a Proper Filtered Vent for the Axle Juice installed - Hopefully it will keep the axle a bit cleaner under there.

I got to Replace My Old Autometer Analog Oil Gauge With An AEM one - 

Before:

After:


I still have other Stuff on my List of make the car suck less, but trips and other events and projects are beginning to eat away into my " work on this car time"
None of it is critical, just elective cases... I'll get to it sometime..

- Figure out anti fuel slosh out of the filler neck/gas cap
- Install New Steering Box
- Install New / Better Motor mounts
- Replace one of the headlight Frames that is cracked.
- Upgrade the Gauge Pod Below the dash to a 3 Holer.. and Add an AEM Voltmeter.
- I am sure there are other things too, Just can't think of them now

slantsix
slantsix HalfDork
7/15/22 11:21 a.m.

7-15-22:

I went to the bike trail... had an hour between dentist appointment and daycare pickup so ..toss the bike on the 'ol dart..

Then out to Canfield Ohio yesterday to pick up a sand blaster..
Copilot approved...

At carlisle For a few days.. Fun stuff.
The drive over the mountains to Carlisle... Adds 1 Hour to the drive time, but is more inspiring in Grüne Hölle than on the interstate. 
PA Routes 164,994,641 feature epic twisties to get to the cumberland valley.


Dusterbd13-michael
Dusterbd13-michael MegaDork
7/15/22 11:59 a.m.

I love seeing you use the car so much

slantsix
slantsix HalfDork
7/15/22 3:10 p.m.

In reply to Dusterbd13-michael :

Thank you sir.

I have probably put ~4000 miles on it since we had lunch.

slantsix
slantsix HalfDork
8/8/22 3:01 p.m.

8/8/22:

Car is  out of commission  for  a while as I was  Not happy with clutch actuation / pedal feel  while I had the car  at Carlisle in  the middle of last month.

I returned from Carlisle (180 Miles from me)  and took the interstate  so that  I could  just put the thing in 5th gear and  not  use the clutch pedal for  the better  part  of  a 3 hour drive.

I made it  home successfully without the use tow truck or a flatbed.

I first  suspected  a Linkage /Z Bar failure  beginning to happen.
Took all  of those  apart  inspected everything, Fork arm, Linkages, Z bar etc.  Could Not find  anything amiss, so I reinforced the Body  /Frame Rail   Ball Stud Pivot.

Put it all back  together  and adjusted  up the clutch   -  It  was  worse!!..This is crazy, so  the Transmission had to come out for some inspection.
My next suspicion  was a broken Input Bearing  retainer /TOB  Support -Known to break on the T-5's
I ordered up a  steel  one.

Got the trans pulled out and  found the  culprit to  be  a  broken finger on the  Pressure Plate.
I will rebuild  the  Pressure  Plate  myself. I have about 7  Core  /Stockish  9 1/4" Borg and  Beck Slant 6  Pressure Plates in stock  from various cars  and Projects.
I  wanted to keep the pressure of  this  one and found some interesting variations, which  I will share elsewhere.

Broken  Clutch Fingers do not allow shifting to  occur:   :shock:  :(  :(

Also found  Stress Cracks on the other 2  fingers: :(  :(  :shock:

Hot Rodders seem to keep parts around for that time of  need..

Found that some Borg&Beck PP's have Solid Fingers,  while others are  slotted:

The one I  am working with had the Spring Pressures and Other Trick Parts setup By McLeod Back in the Day. This would be  a long gone Part #/ Application that would be difficult to get again, Since  the  ownership Change in  2008.

I found that  the Pressure Ring  is thicker than the  stock replacement PP as well as utilizing Larger 7/16"-20 Clutch Eye Bolts (like in the  V8  Borg & Beck Pressure Plate) vs the Standard 9 1/4" Pressure  Plate which uses 3/8" eyebolts  and  Nuts to  set  finger  height.

3/8" eyebolts on the Left, whilst 7/16"  eyebolts on the right.

The ones I had to  take out were pretty crunchy as the  rebuilder had  welded the fingers  to the adjustment net  to  keep the finger  heights  from changing, like this:

So I  had to really  Grind a bunch of material  off to get the  nuts loose to disassemble the pressure plate from the cage.
Usually they are peened over to keep the adjustment, But I suppose that cann come loose over time.

I called Kentucky Clutch and they had  spares of the 7/16"-20 Eyebolts and Nuts (shared with  V-8's) to sell  me. - The  3/8" ones are no longer in  production, from what the  gentleman on the  phone had told me.

The Larger 7/16"-20 Eybolts and lever height adjustment nuts can also be found on the Slant 6 10" Pressure Plates - Listed for the Truck Application.

Getting things cleaned up while I am waiting on the Parts to arrive:


Greg

slantsix
slantsix HalfDork
8/16/22 10:40 p.m.

8/16/22:

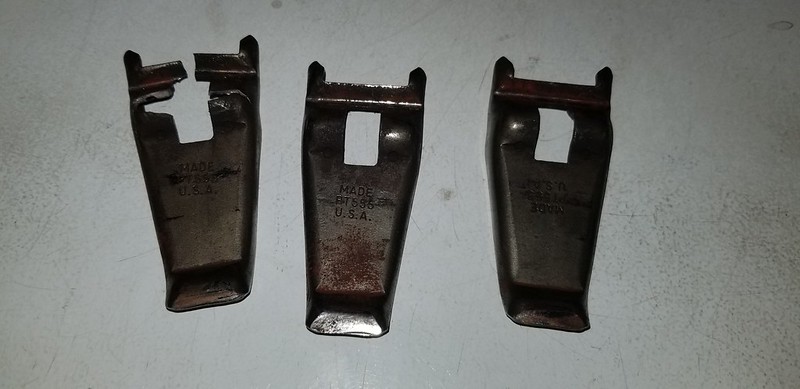
Last Week the Clutch Eyebolts Arrived in 2 days From Kentucky Clutch:


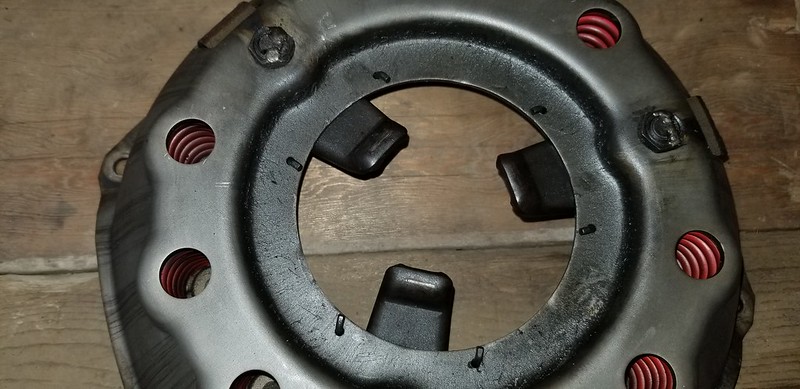
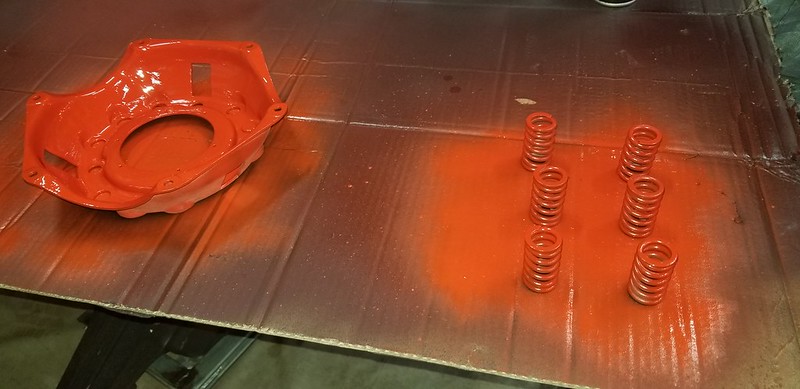
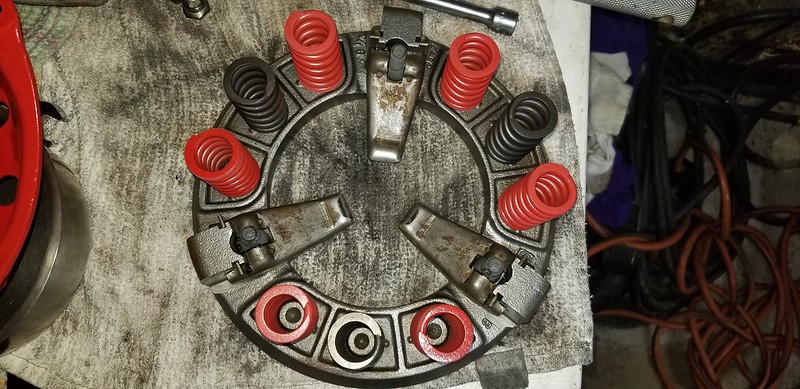
I hand Surfaced the Pressure Ring with a Diamond Stone as it was Not wrecked enough After say 8000 miles to warrant sending out to be blanchard ground.

The parts allowed me to put the pressure plate all back together, hopefully the Fingers will not fatigue, or crack etc. (fingers crossed) if It happens again I have one of the "Spec" Brand Fiero diaphragm Pressure Plates to try next, as they are a direct bolt in  / replacement for a 9" slant 6 Borg and Beck Finger / Spring Style Pressure Plate.

Pressure Plate Reassembly:


Every gearhead's household basement should have a 20 Ton Press next to the water heater, makes those pesky bearing and seal jobs at 1AM oh so convenient. :D  :D 

Push it all together with a somewhat close to proper thickness clutch disc, set the finger height, lock down or weld the nuts for the clutch eyebolts... call it good to go.

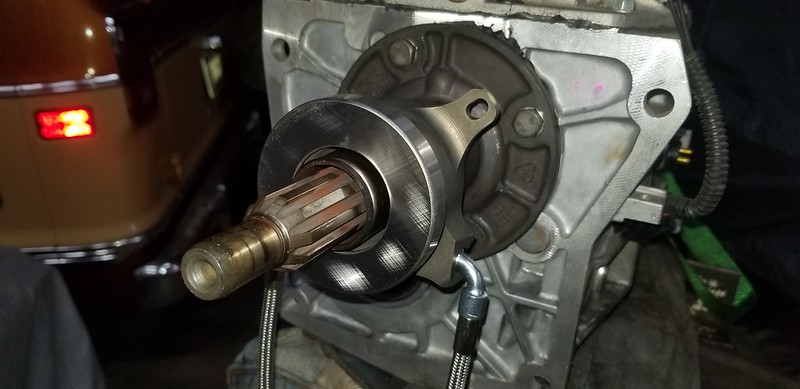
While I had the Pressure Plate and clutch disc removed from the flywheel I found the input bearing adapter to have dislodged from the back of the crank - I knew It was a light Press fit, but it was too light. 
Fortunately It did not do any real damage, just was not supporting the input shaft correctly and was running against the clutch disc.  I put it back in the proper place and used some Red Loctite 242 to hopefully hold it in place properly.

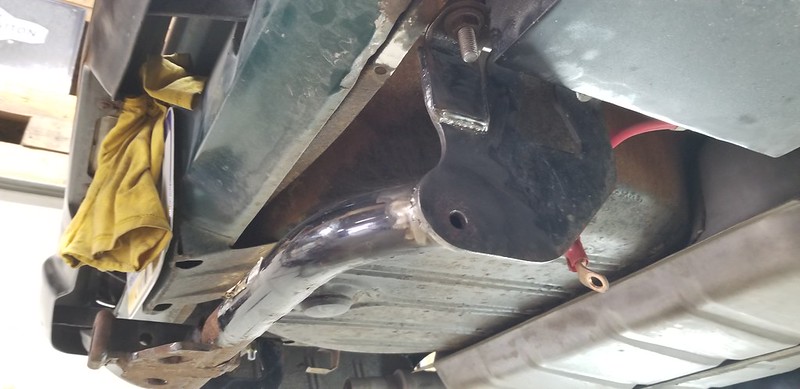
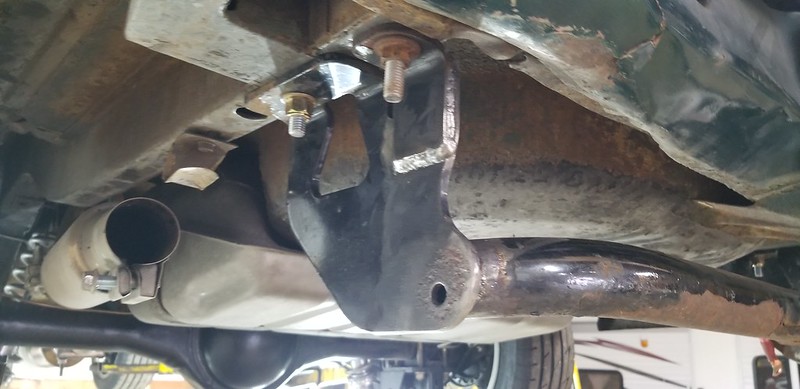
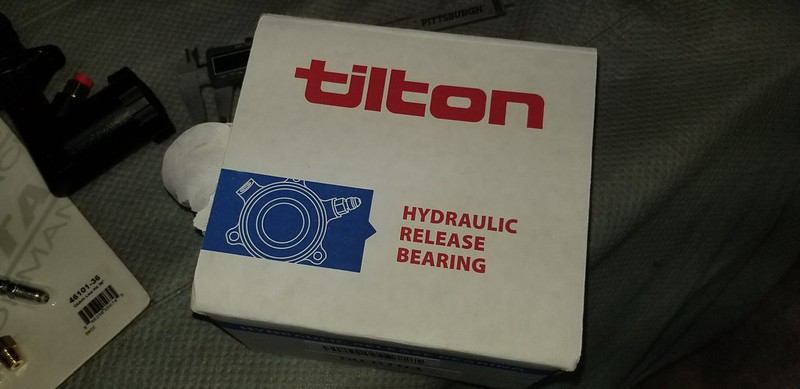
I figured this was a good time to make the switch to a hydraulic throwout bearing and get rid of the bulky clutch linkage, Z bar, clutch fork and other associated rods. I had already spent some considerable time reengineering the linkage and reinforcing the Z bar and other parts of the linkage to make it Skookum as Frig, but I was unhappy with how much flex there was in the dash with the clutch pedal pressed down, hopefully this will be better. 

Because the Transmission is T5/Ford Parts are readily available and ubiquitous.. Not Something I am accustomed to with Slant 6's and Early Non B/E Body Mopars.
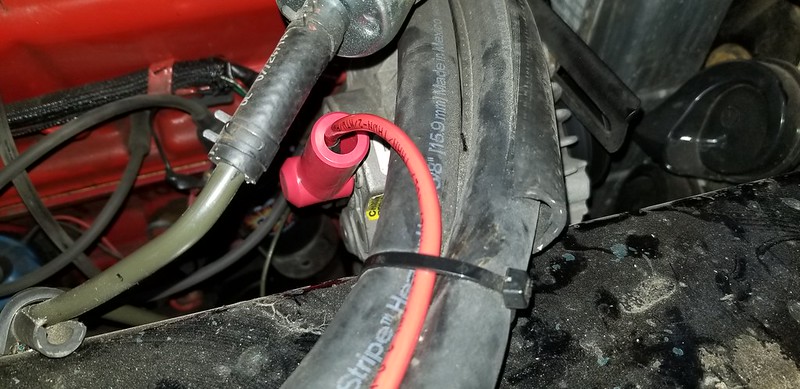
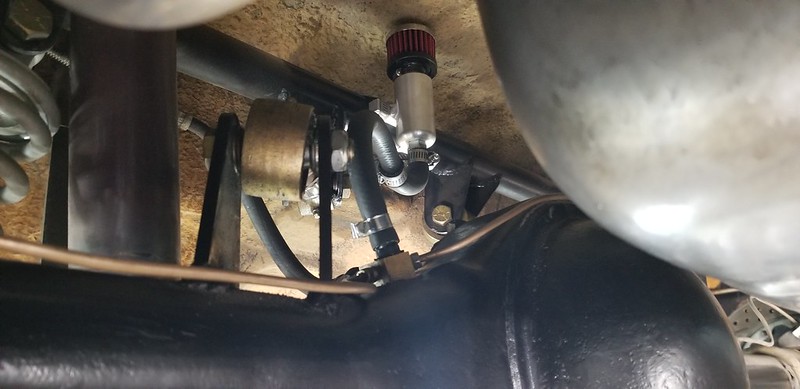
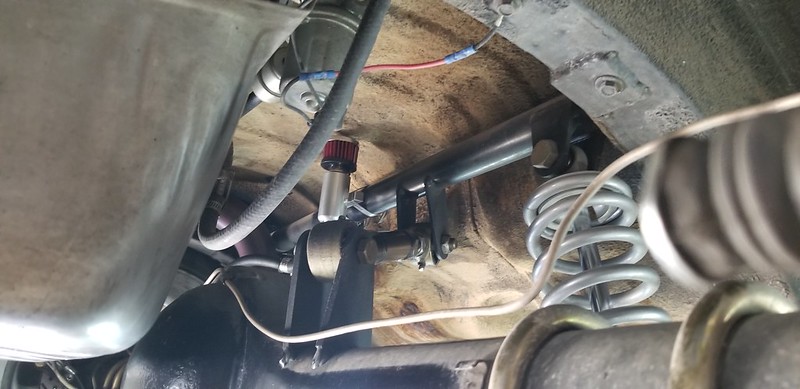
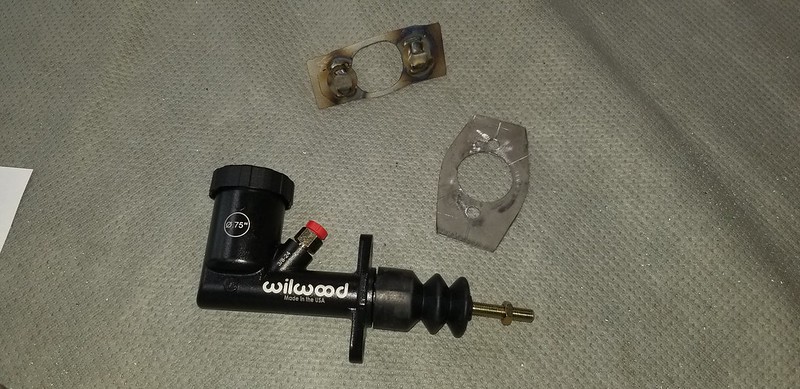
Hydraulic TOB - I used A Tilton 60-6104 - Literature says it's for a Diaphragm Pressure Plate, But it seems to work fine with the 3 Finger one as well.  It has a little "finger stick" that replaces one of the input bearing retainer bolts.. this stick is used to keep the bearing body from spinning, some of the hydro TOB's I investigated just used the supply and feed lines for the anti rotation. - This method seemed like a better engineered idea to me. 


I am actuating it with a Wilwood GS Compact Master Cylinder 260-15098. They make these in a variety of bore sizes and intergal as well as remote reservoir versions.

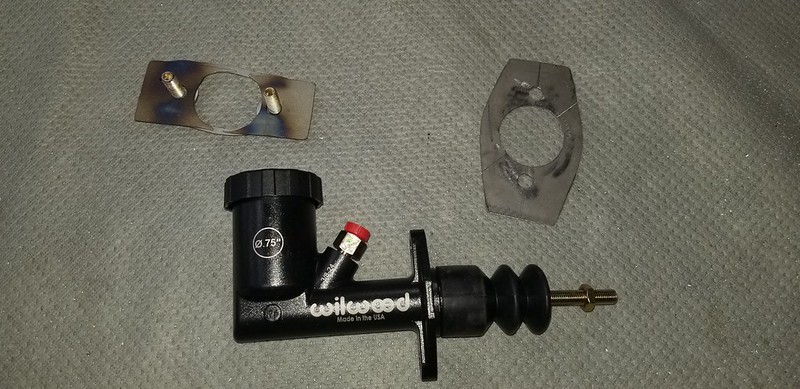
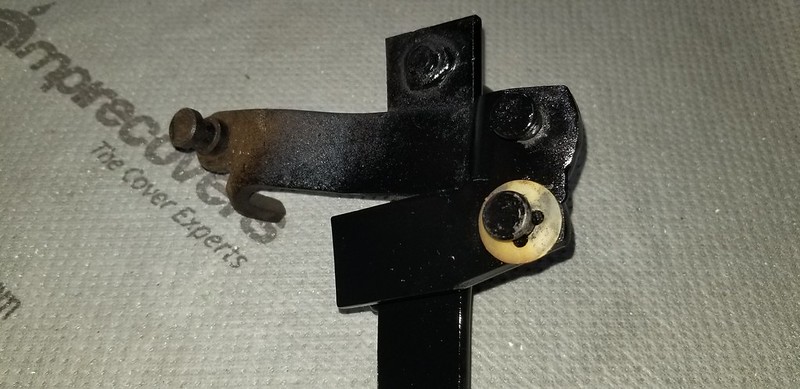
Made up some quick mounts and firewall reinforcement plates from scrap metal.

To get somewhat decent geometry to actuate the new clutch master I welded another actuator "nub" on the clutch pedal below the original one. If I ever need to revert back to the linkage and rod system I could do so without much trouble.

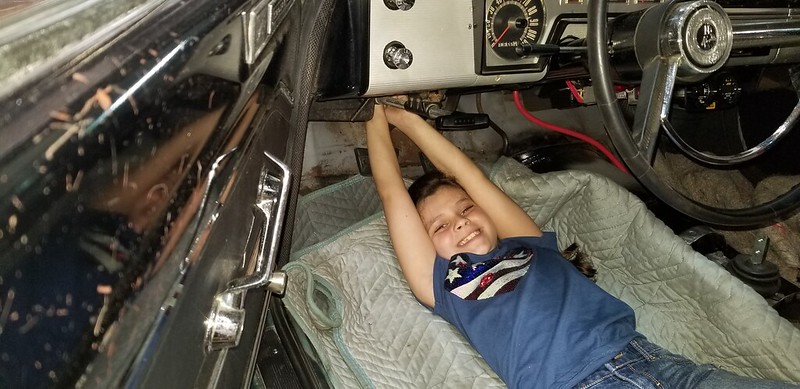
I had a helper at the shop help with a bit of the install.

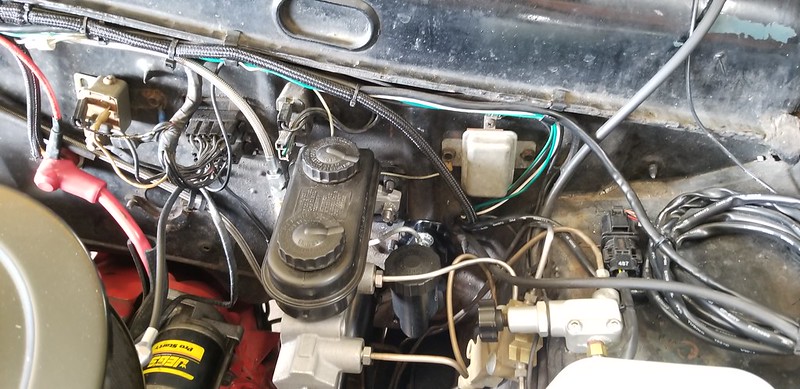
Done, with a pedal stop added on the floor.

Clutch cylinder tucks in nicely next to the brake master, with just enough room to spin the cap off for fluid checks and fill.


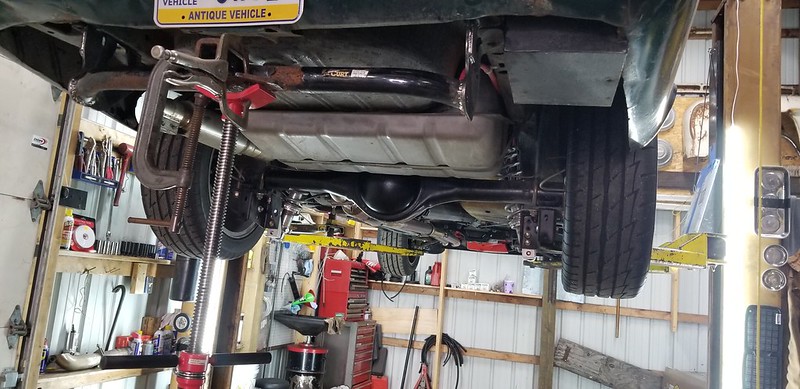
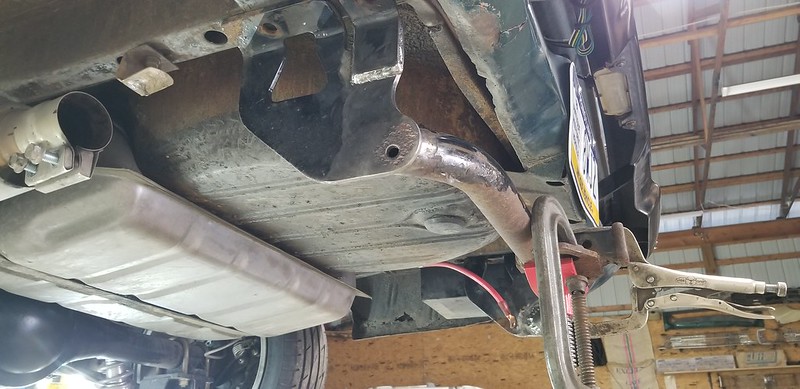
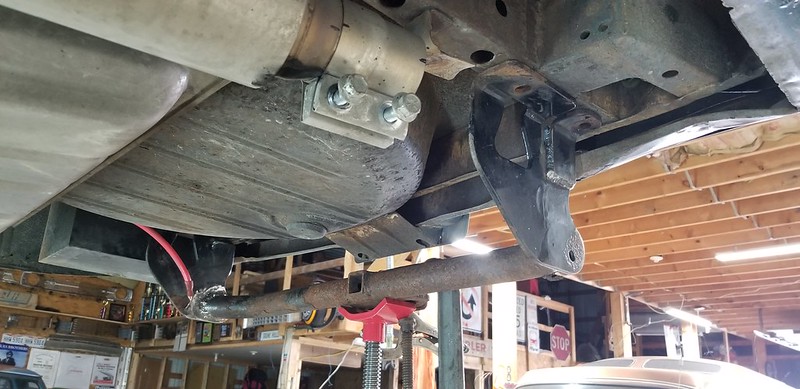
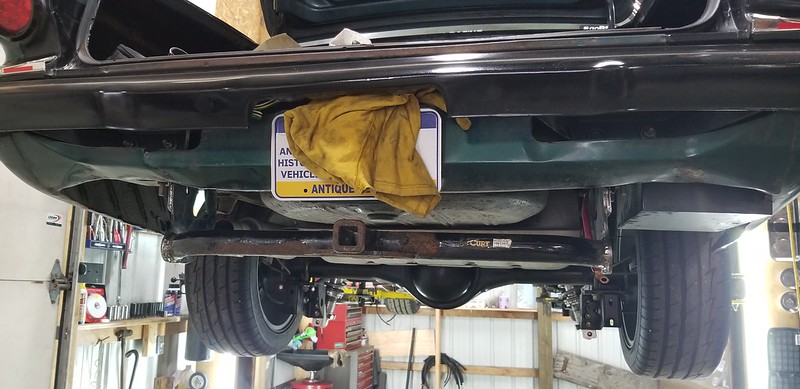
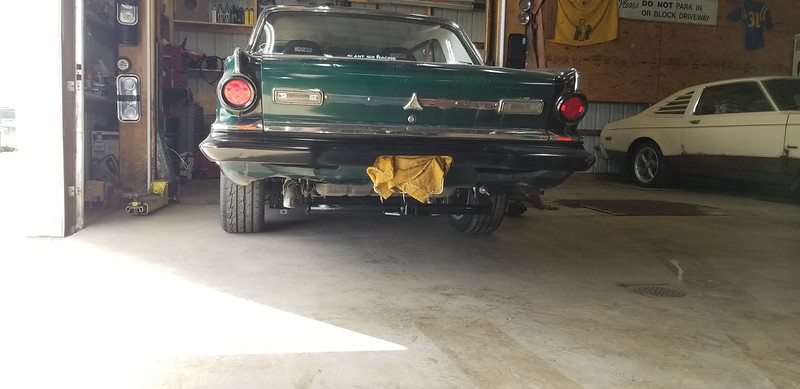
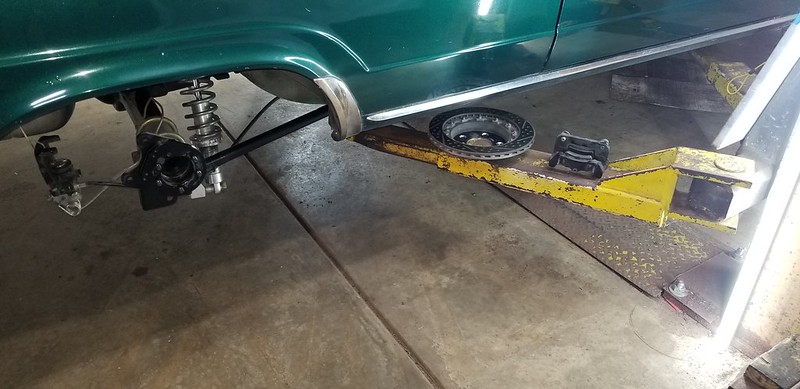
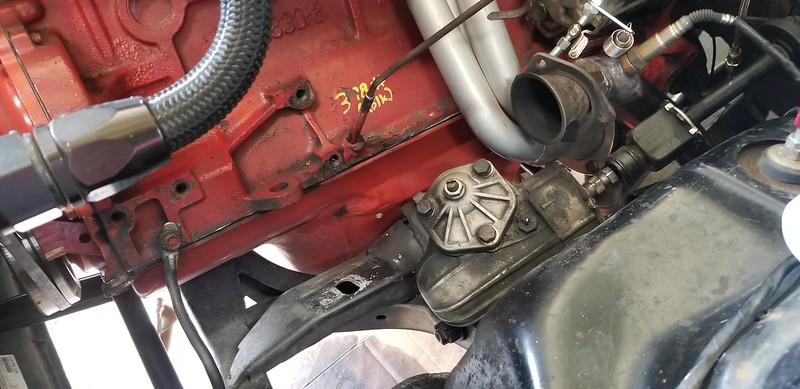
Since I had the Car on the Lift and the Trans out to Rebuild the Pressure Plate, I also Accomplished a few other things on my to do list for the car:

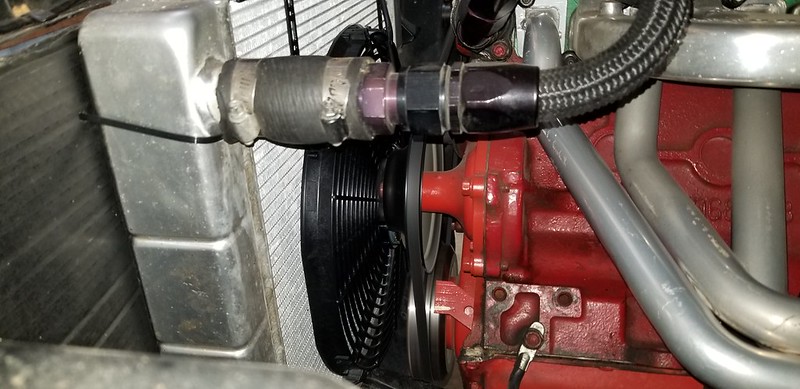
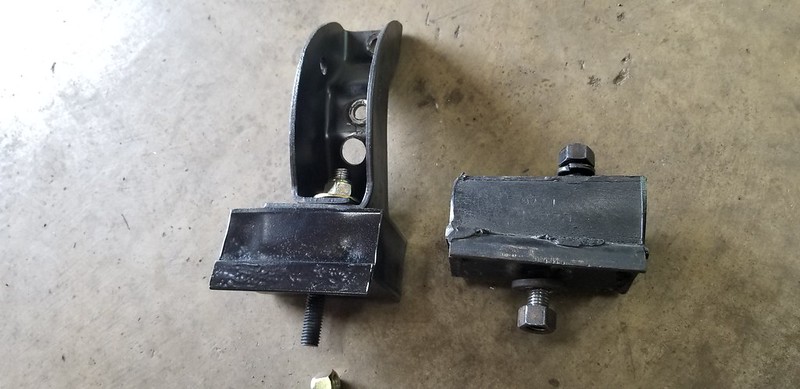
 - Install the new Polyurethane Motor Mounts from www.polybushings.com
Old Mount on Right, Poly on Left. - The old Rubber Style Mount Was A Recent Parts store Replacement and Was already Moving around a bit.

- Swap to a new steering box - front header needs to be removed to do this swap, and since it was out for the motor mount swap already, it made sense to do it now.

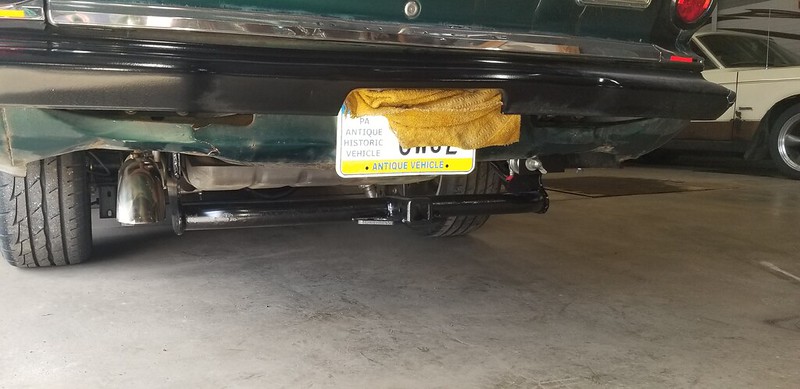
- And lastly, fix the god forsaken '60-'66 Mopar A Body Fuel Cap / Filler Neck Issue.
The left quarter panel on my car **had** nice paint on it until April 2022 when I took it to CMP, there it's a clockwise flow to the track layout meaning lots of repeated long / hard right turns.. Well on those right hand turns the gas sloshes back up the filler neck quite a bit, it ends up coming out of top of the filler neck and the cap can't hold it back, so it ate my paint away.

I have been thinking of a solution for a while, tried better / more / thicker gaskets on the cap, that failed, thought about relocating the filler inside the trunk, then I came up with this...
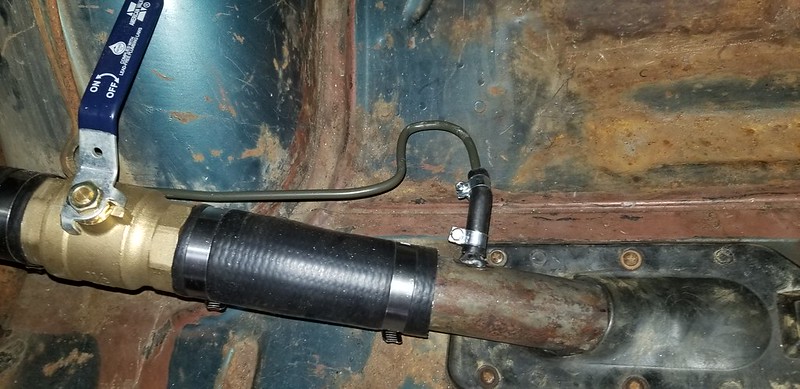
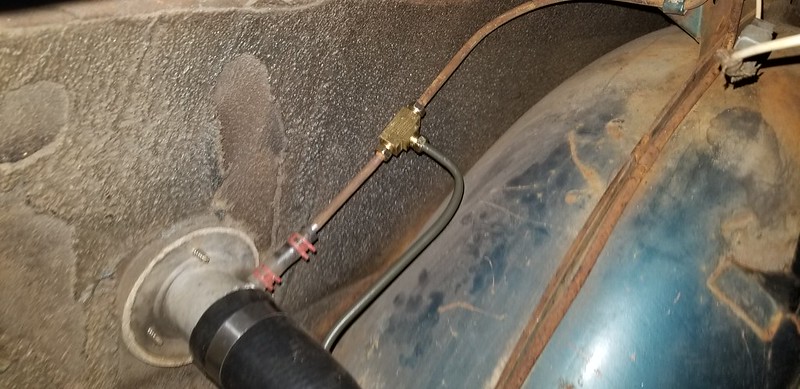
Get some 1.75" Inside Ø  Fuel Hose... Continental 59211 will work.. 

And a 1 1/2" Ball Valve with 1 1/2" x 3" Pipe Nipples threaded on both ends.

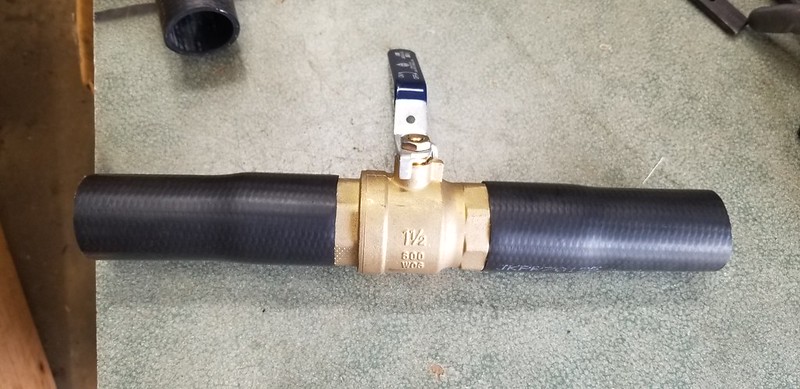
Cut out the appropriate amount of fuel filler neck:

Replace the Removed section with the valve.

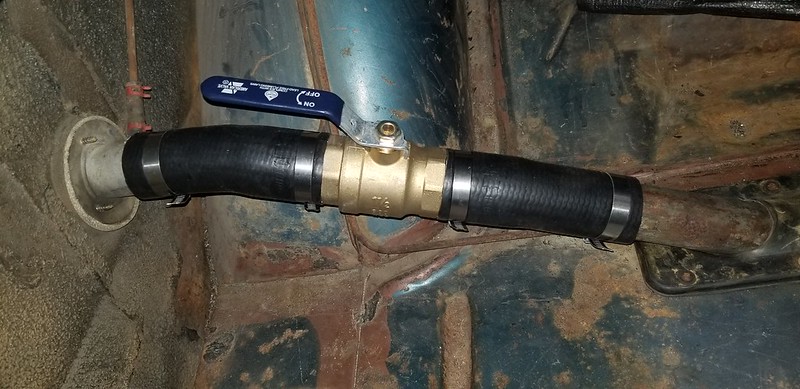
Close valve for track day, AutoX, or spirited mountain driving.

' Till Next Time!

Shavarsh
Shavarsh HalfDork
8/17/22 12:39 a.m.

Cool solution, any concerns with venting while the valve is closed?

slantsix
slantsix HalfDork
8/17/22 5:08 a.m.

In reply to Shavarsh :

Thank you, Yes. I need to work that out, routing the vent line ahead of the valve. For now the valve does not get closed all of the way allowing the existing vent to still function.

DrMikeCSI
DrMikeCSI New Reader
8/17/22 5:27 a.m.

Maybe you could use an anti rollover check valve to prevent the fuel sloshing out. 

Dusterbd13-michael
Dusterbd13-michael MegaDork
8/17/22 7:47 a.m.

The later a bodies had this problem too. 

Im definitely interested to hear results! Filling changes, operation, etc. Its a solution i hadn't thought of.

slantsix
slantsix HalfDork
8/17/22 7:52 a.m.

In reply to Dusterbd13-michael :

Hi MC,

I never really had that problem on my '69 Dart.

I have driven it hard around the twisties but it's not setup anywhere near this car for grip.

My other A bodies (2)  '62 both have this problem and the '68 Valiant does not have a stock filler or tank..it was replaced with a 5 gallon fuel cell.

slantsix
slantsix HalfDork
8/17/22 7:54 a.m.

In reply to DrMikeCSI :

It is sure possible and not out of the question, but i am not totally aware of where to source them and does it need to be inside the tank?

Dusterbd13-michael
Dusterbd13-michael MegaDork
8/17/22 8:01 a.m.

In reply to slantsix :

My 70 will do it on the street,  and was no longer welcome at autocross due to it. Same with another guys 73. So maybe its a crappy duster design issue? Either way, id love to solve it. Years ago, i didn't but a fuel neck restrictor. Ot was a sheetmetal olate with a spring loaded flap like new cars intended to be retrofitted to old ones. This was when i worked at napa or pep boys in the mid to late 90s. Never seen them again,  but i think it would be the easy button solution. 

MadScientistMatt
MadScientistMatt UltimaDork
8/17/22 12:34 p.m.

Interesting trick on the fuel filler. I've been contemplating a different gas cap myself, maybe the one on current Challengers.

pres589 (djronnebaum)
pres589 (djronnebaum) UltimaDork
8/17/22 12:41 p.m.

I wonder if a check valve like previously mentioned or maybe a PCV valve could be used in a small line at the highest points before and after the ball valve to allow pressure to be equalized inside and outside the tank without allowing actual liquid fuel to pass up and against the cap.  Would require adding a couple sleeves with small hose barbs on each to either side of the valve. 

I don't think the tank is going to like being drawn down by the fuel pump when that valve is closed.  Might work for a little while...

slantsix
slantsix HalfDork
8/17/22 8:31 p.m.

In reply to pres589 (djronnebaum) :

For sure. The tank will not be happy without the vent. For now until I get it properly sorted the valve will not get closed all of the way, allowing the vent to pass to the liquid side of the valve.

slantsix
slantsix HalfDork
8/21/22 10:04 p.m.

8/21/22:

I got the vent sorted out. Added a Vent nipple on the Filler neck below the valve, and Teed it into the existing Vent tubing.

I have yet to close the valve and drive a bunch, or throw it into severe RH turns, to test the idea of the valve preventing gasoline draining out of  the cap and onto the quarter panel. Maybe next week.


1 ... 10 11 12 13 14 ... 16

You'll need to log in to post.

Our Preferred Partners
rPI3SMe8LRWbXtbTyANRe6whlne7h6XyFP5bA2lCWA8LB62qEv6La8LViv7C55kL