1 2 3 4 5
Keith Tanner
Keith Tanner GRM+ Memberand MegaDork
1/23/22 12:14 a.m.

Spent some time dinking around with this today after considering the best plan of attack. Step 1: figure out how long the throws should be. Which means starting at the front of the van with the ergonomics. And that means...shift lever!

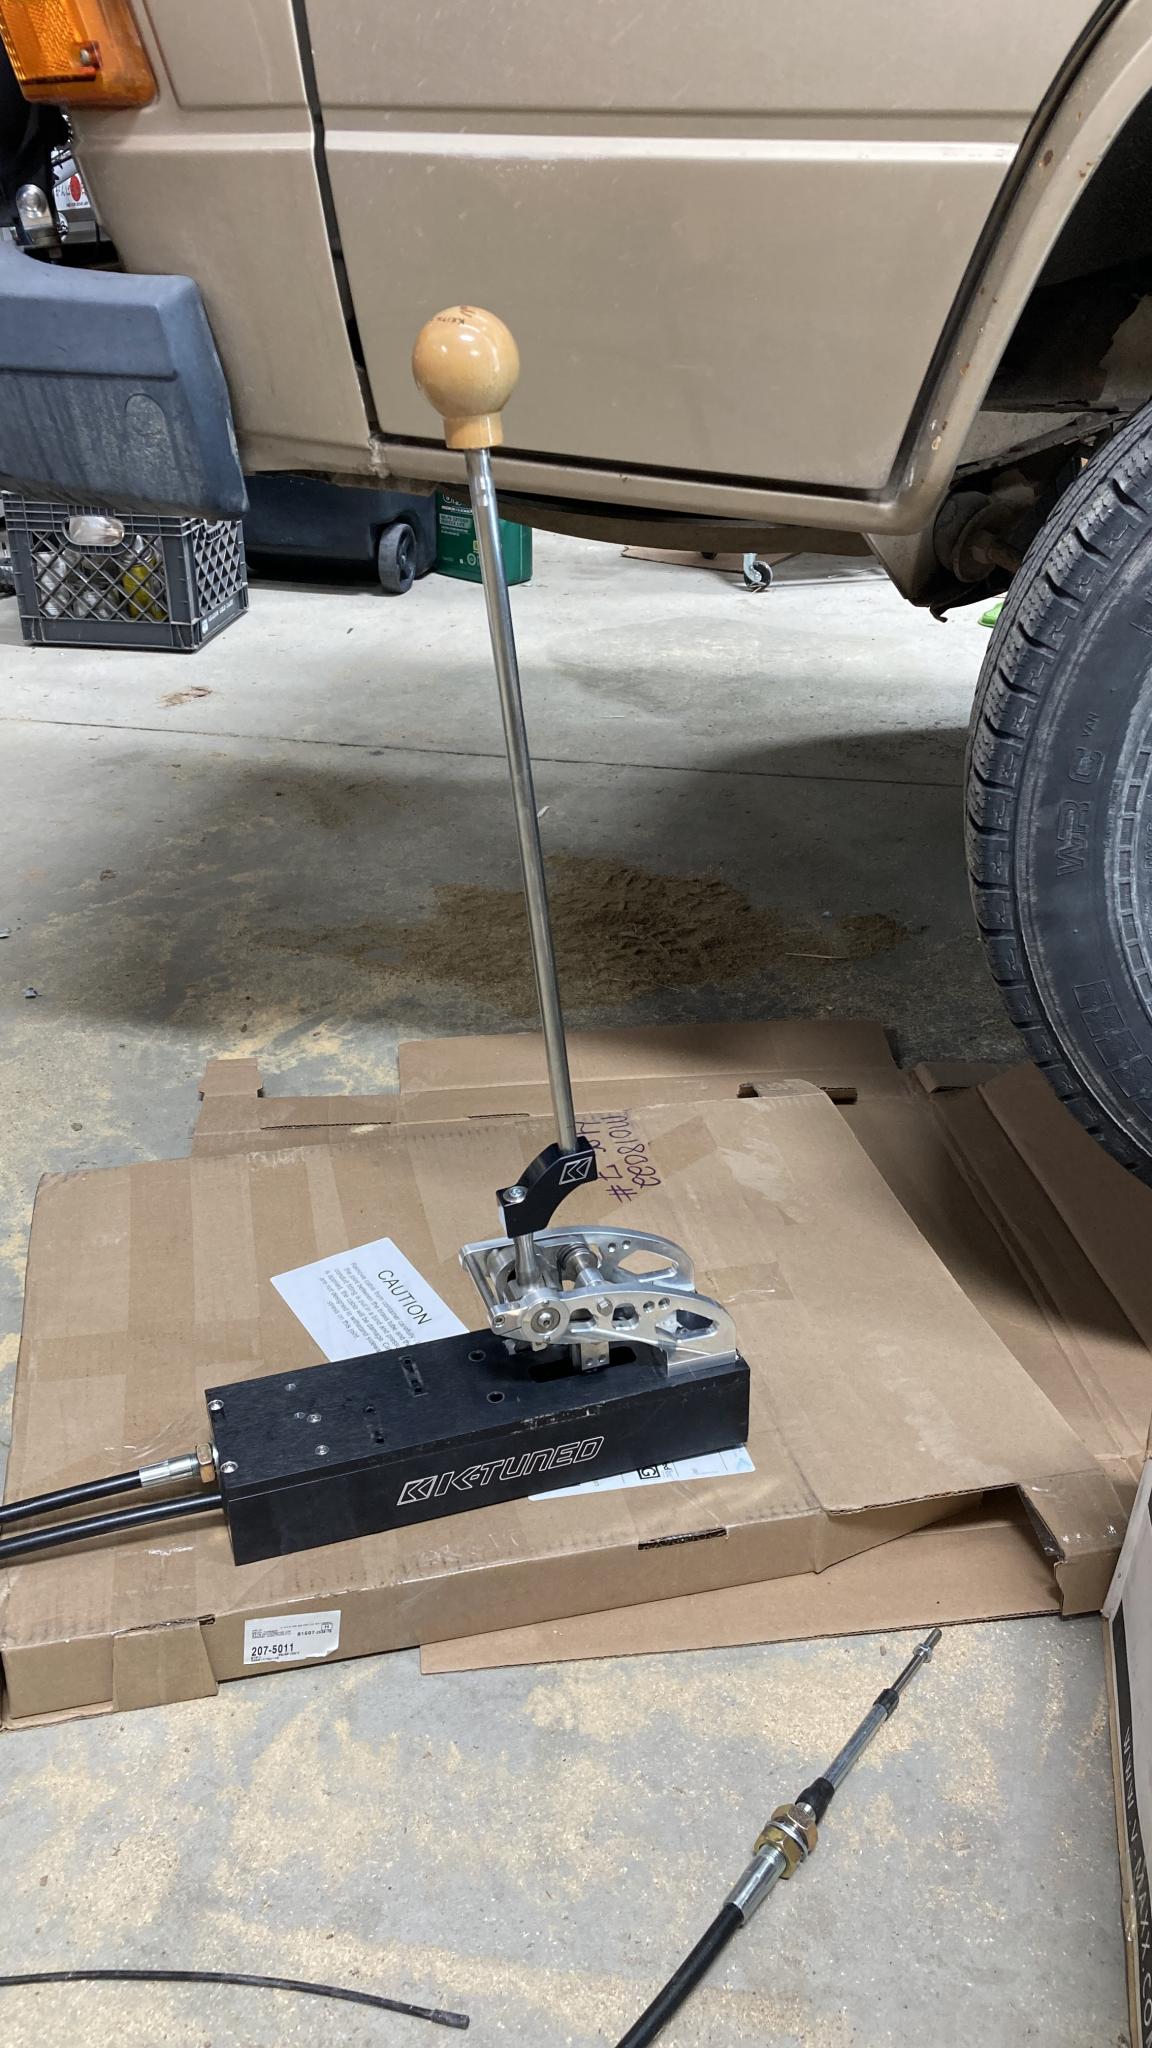
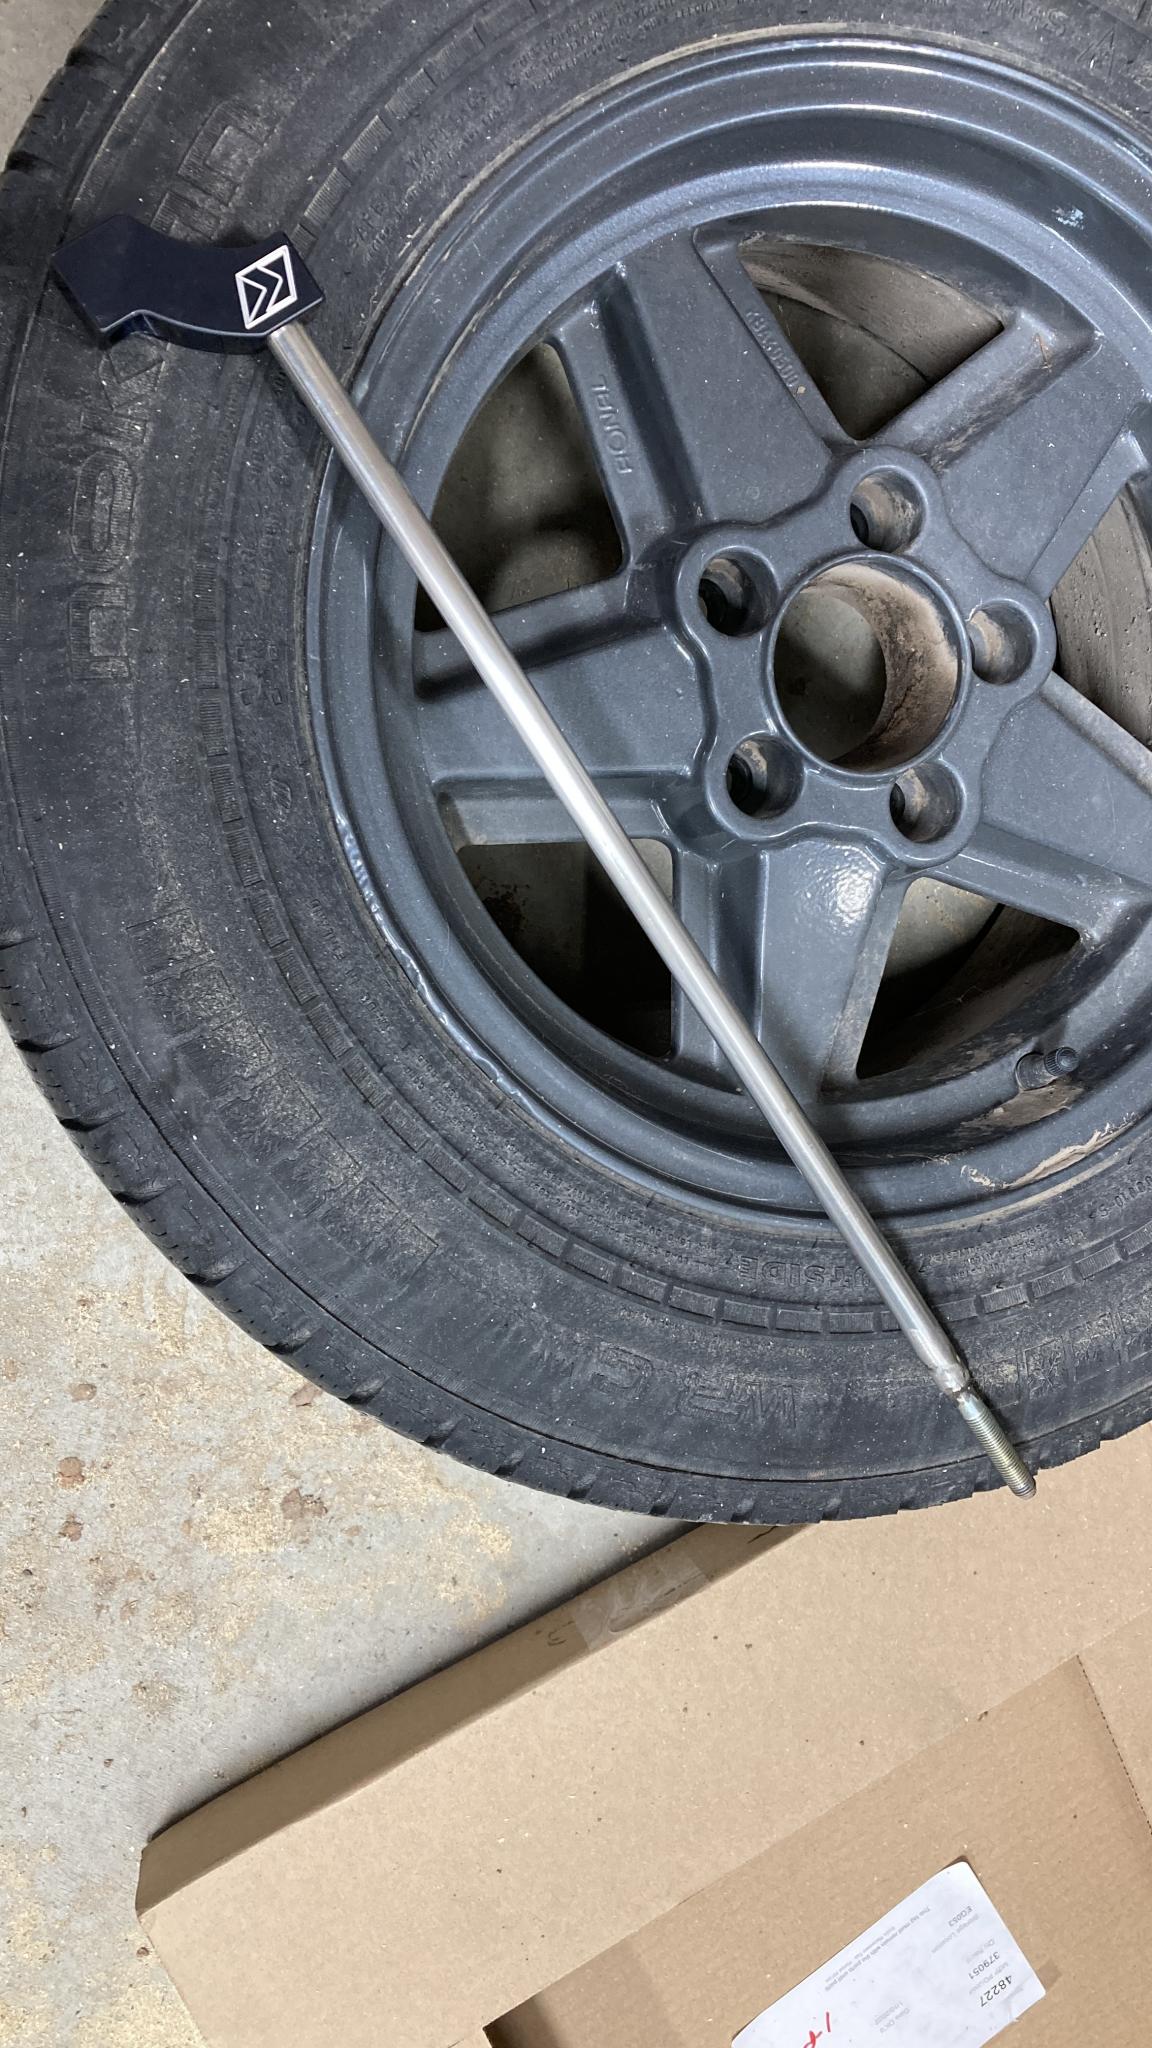
I actually have a shift lever extension on my van to make it easier to reach while driving, so I figured I'd match that length. Luckily, this is easy to adjust later because the shaft is held into the mount by some set screws and an interference fit. I had a piece of 1/2" stainless tubing that was nice and stiff and the perfect size to slide into the shifter. Welded a long bolt to the end to mount a shift knob and voila, an 18" shift lever.

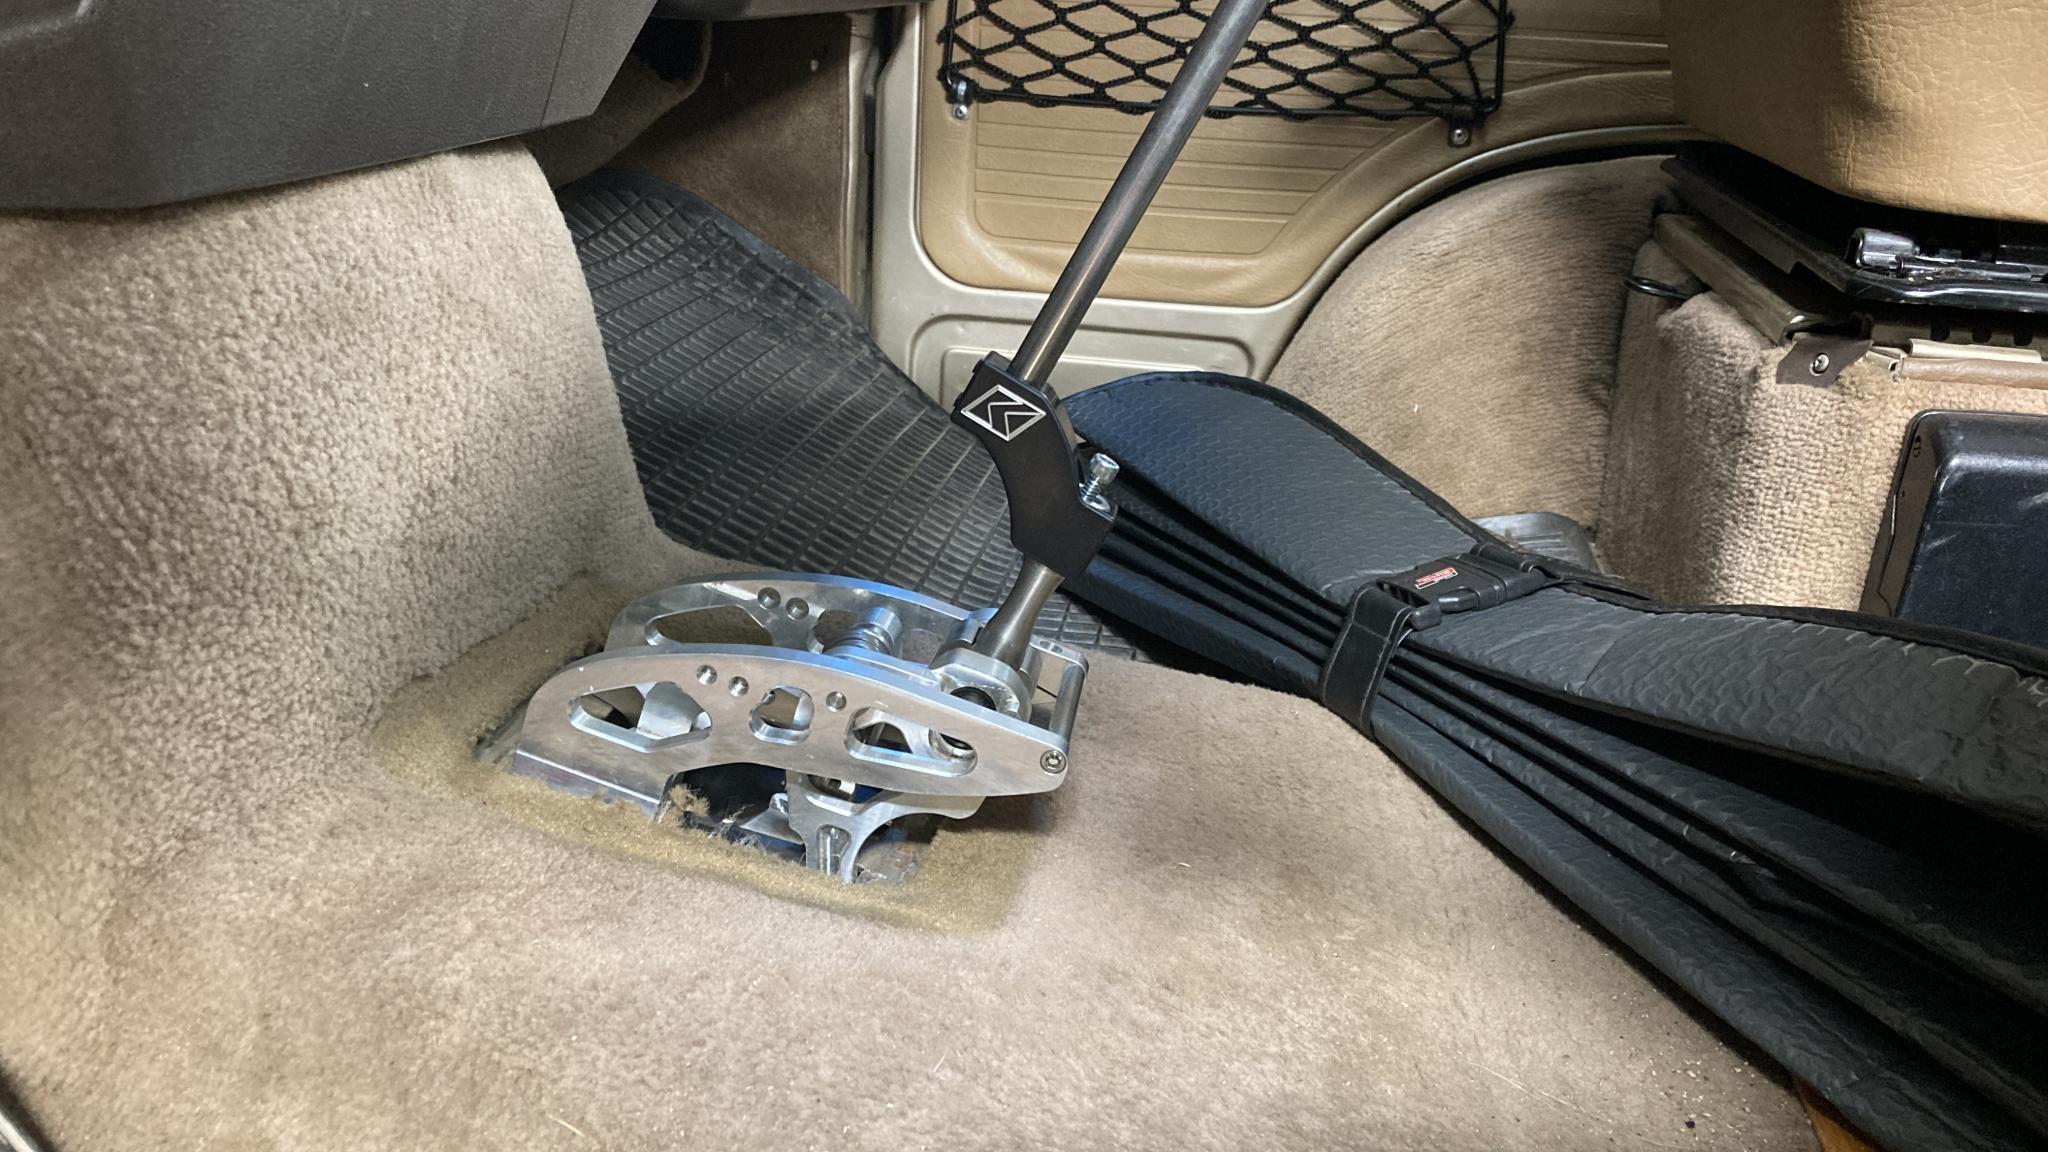
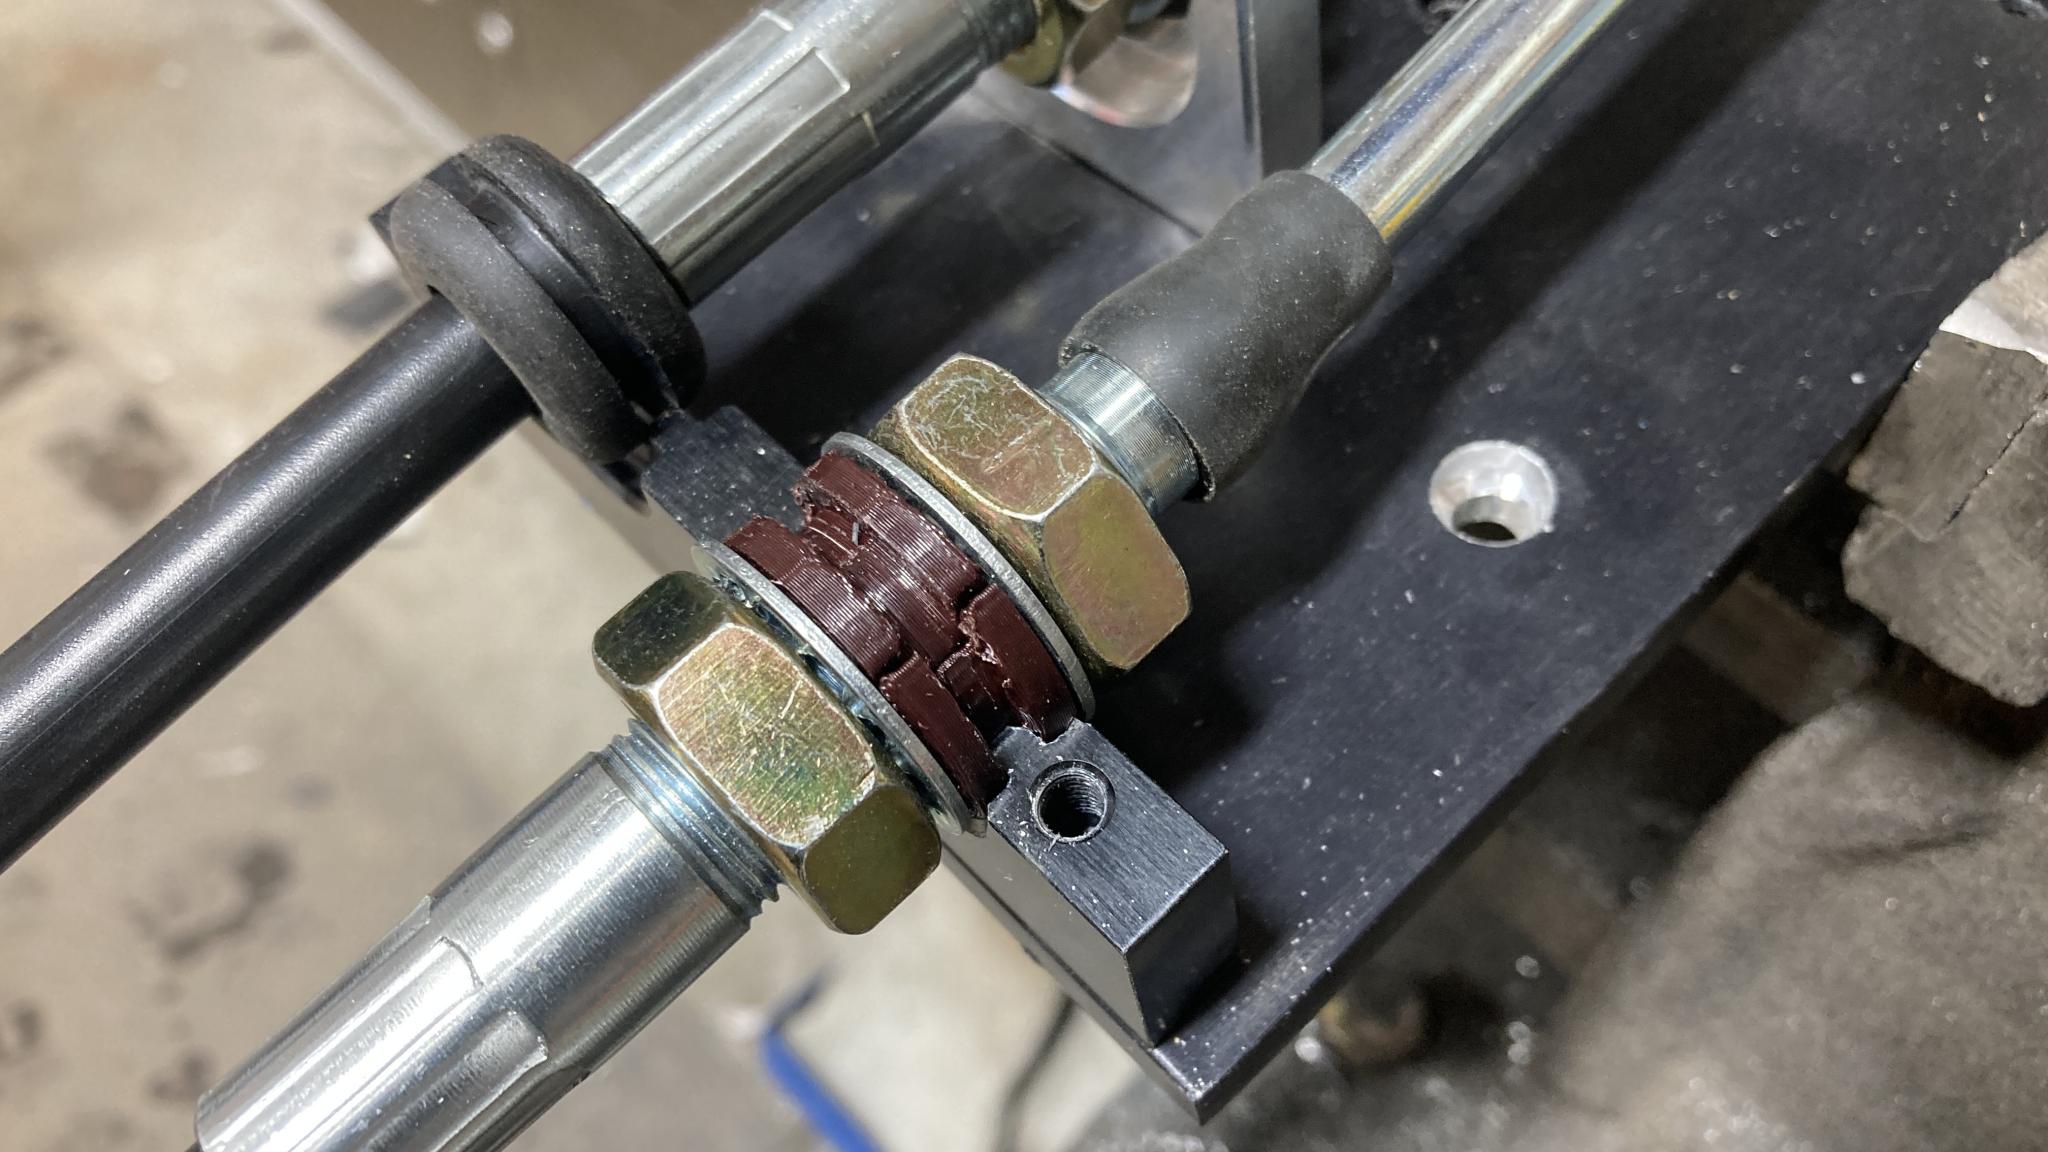
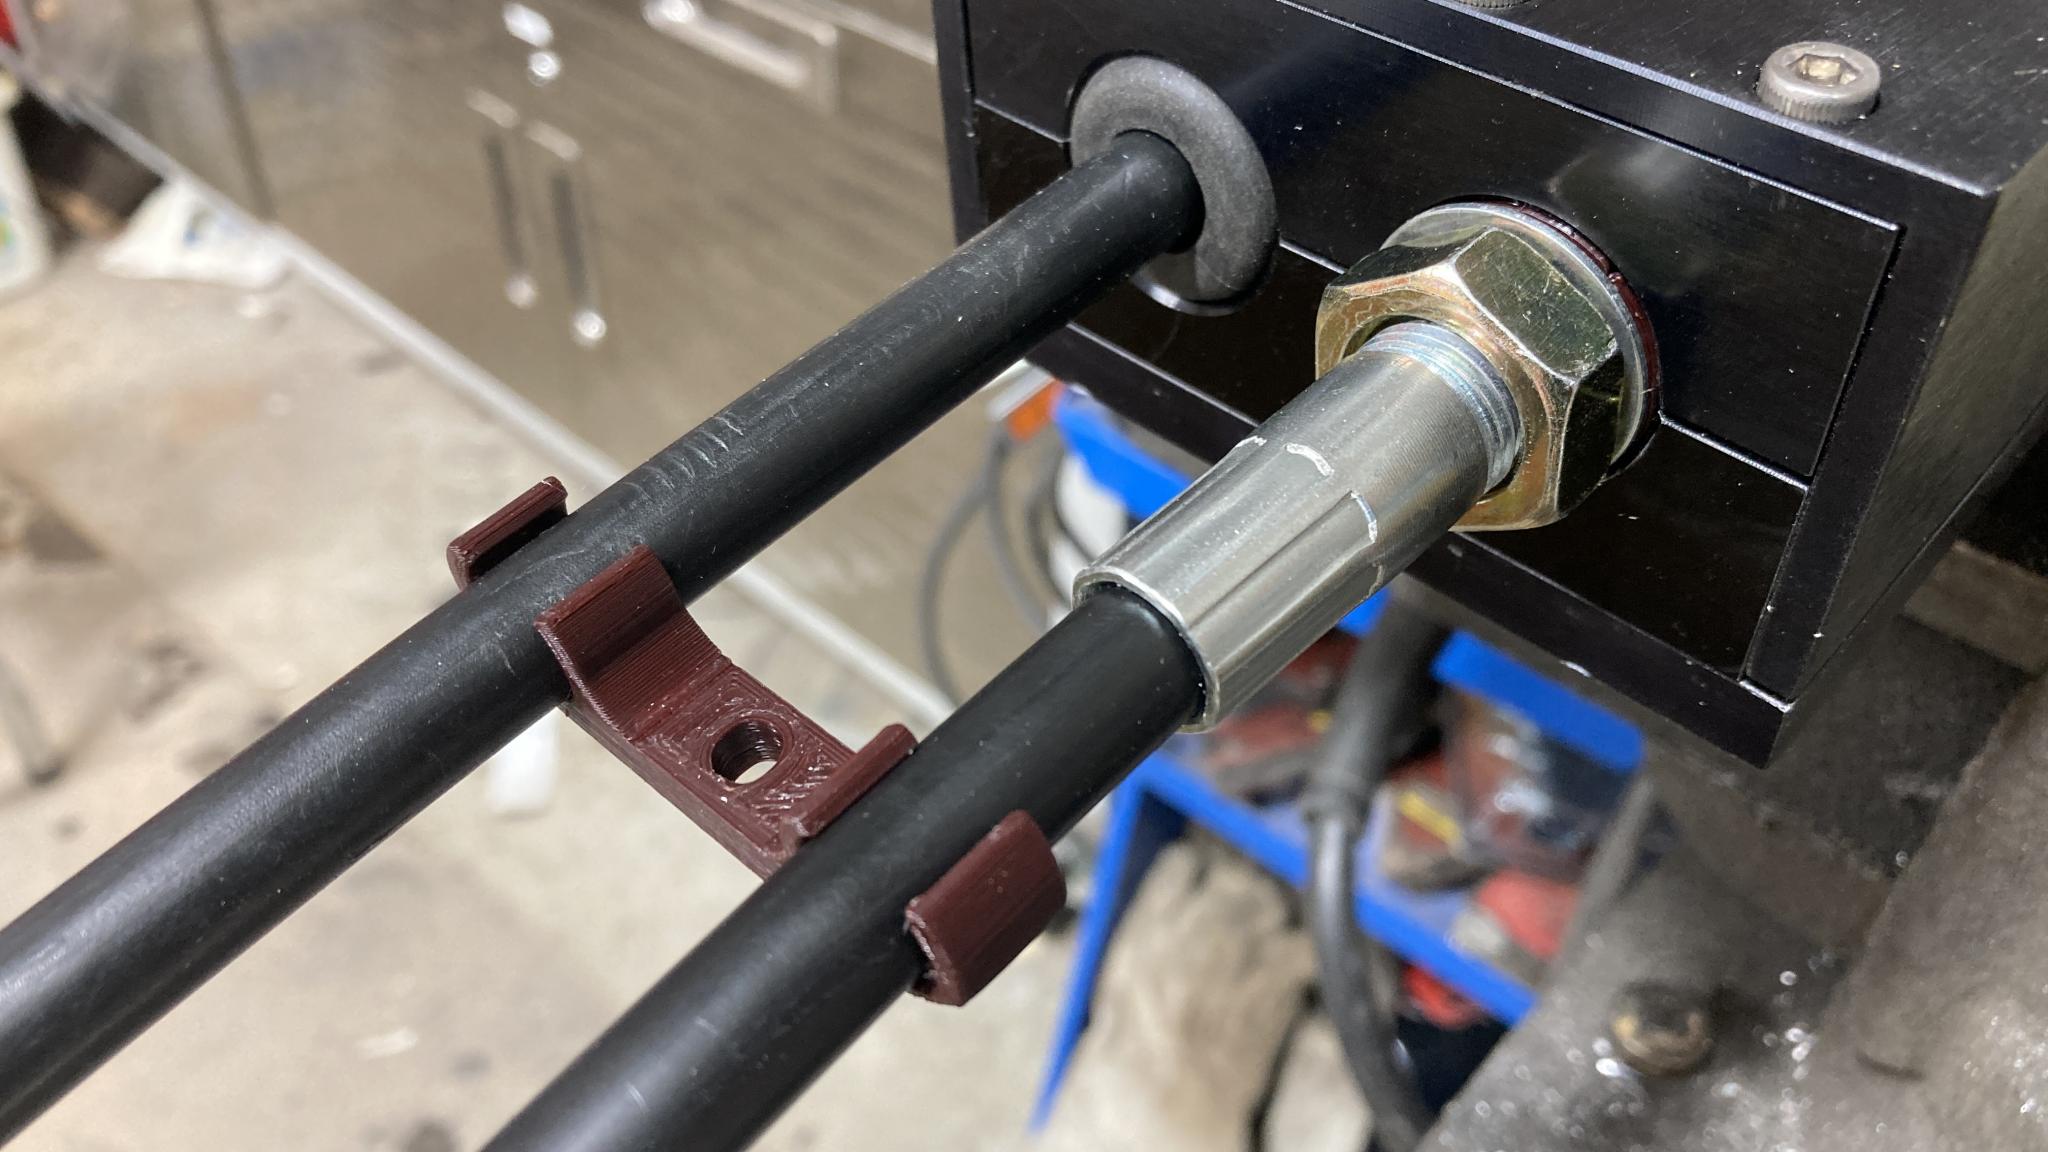
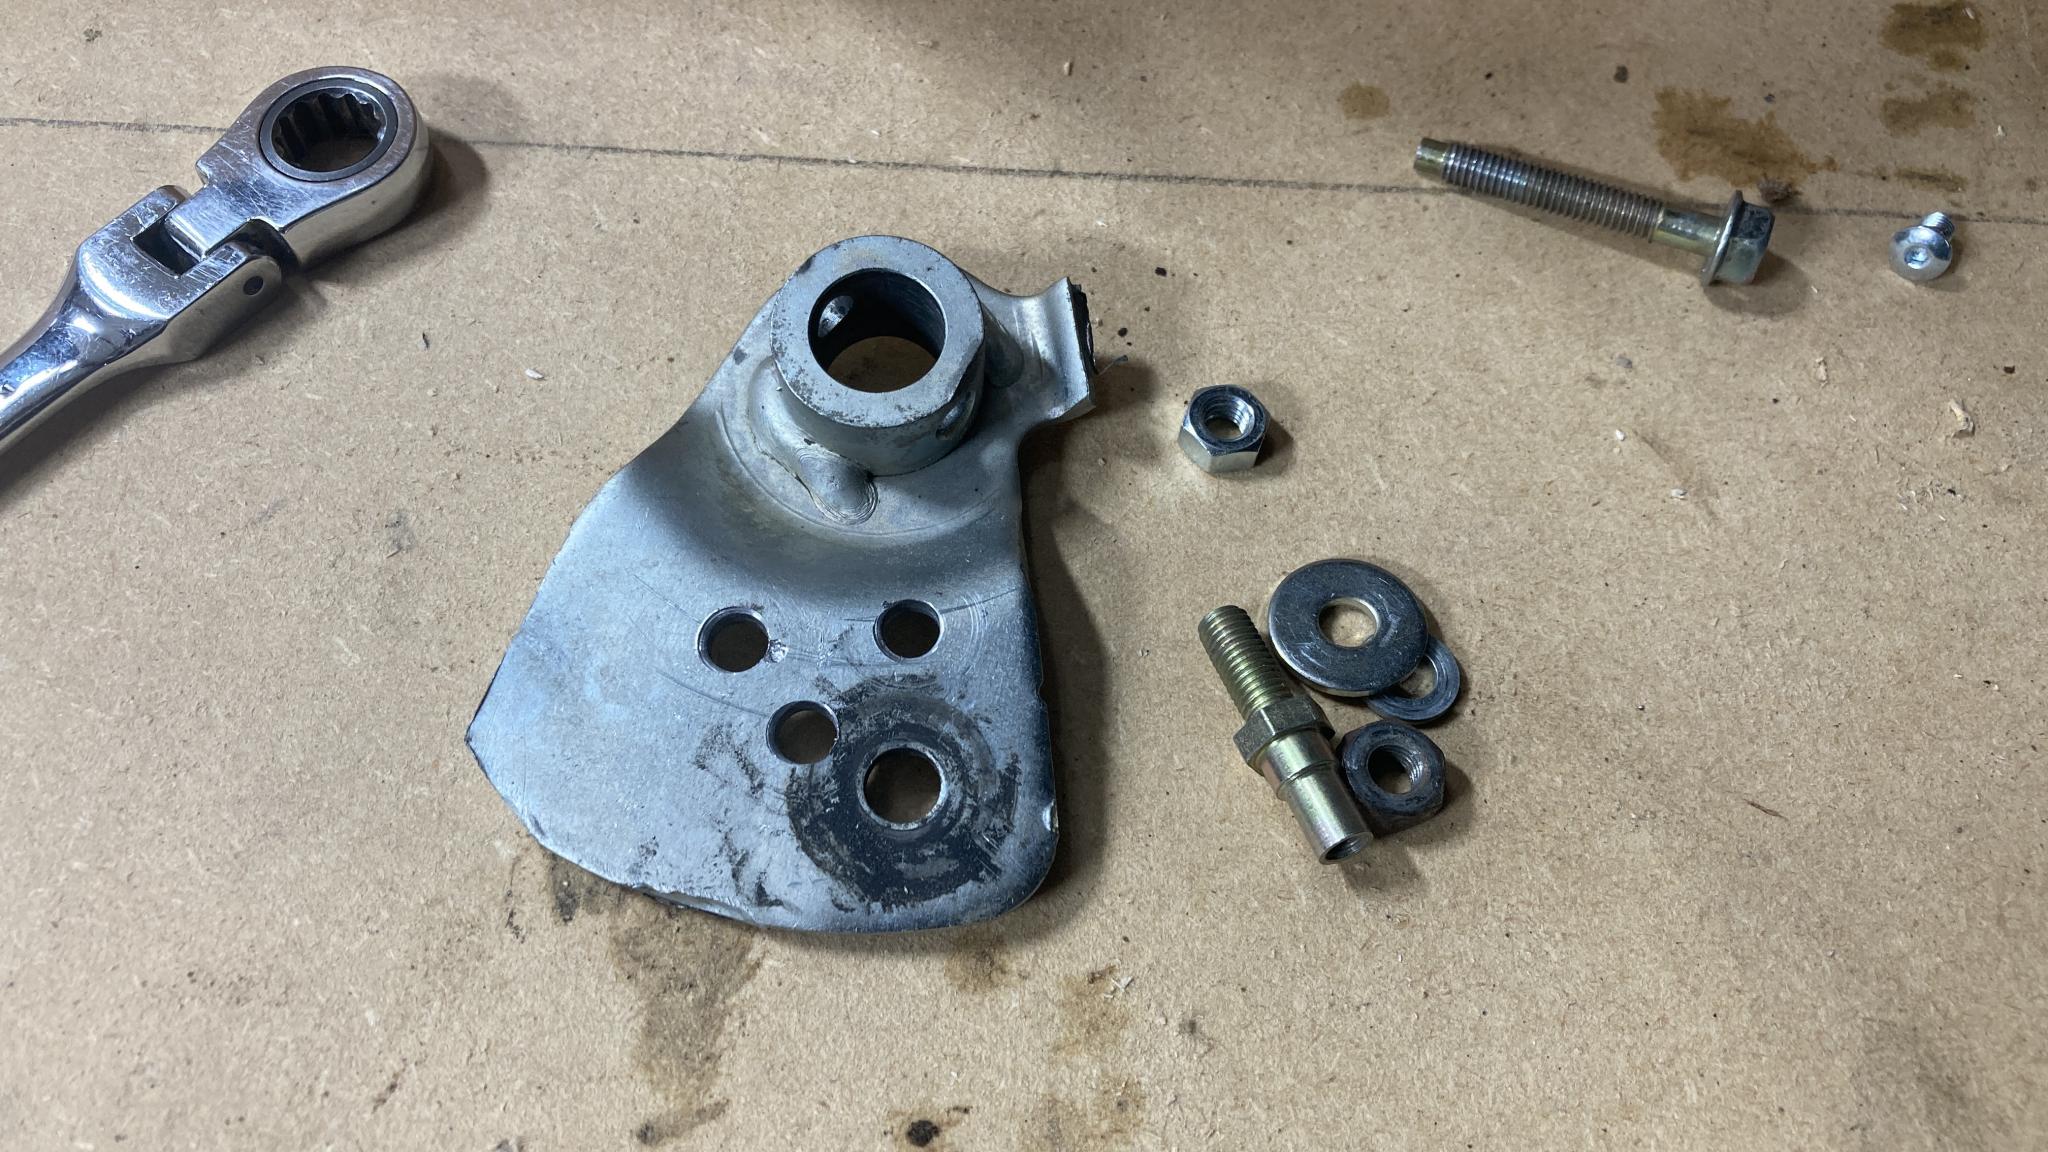
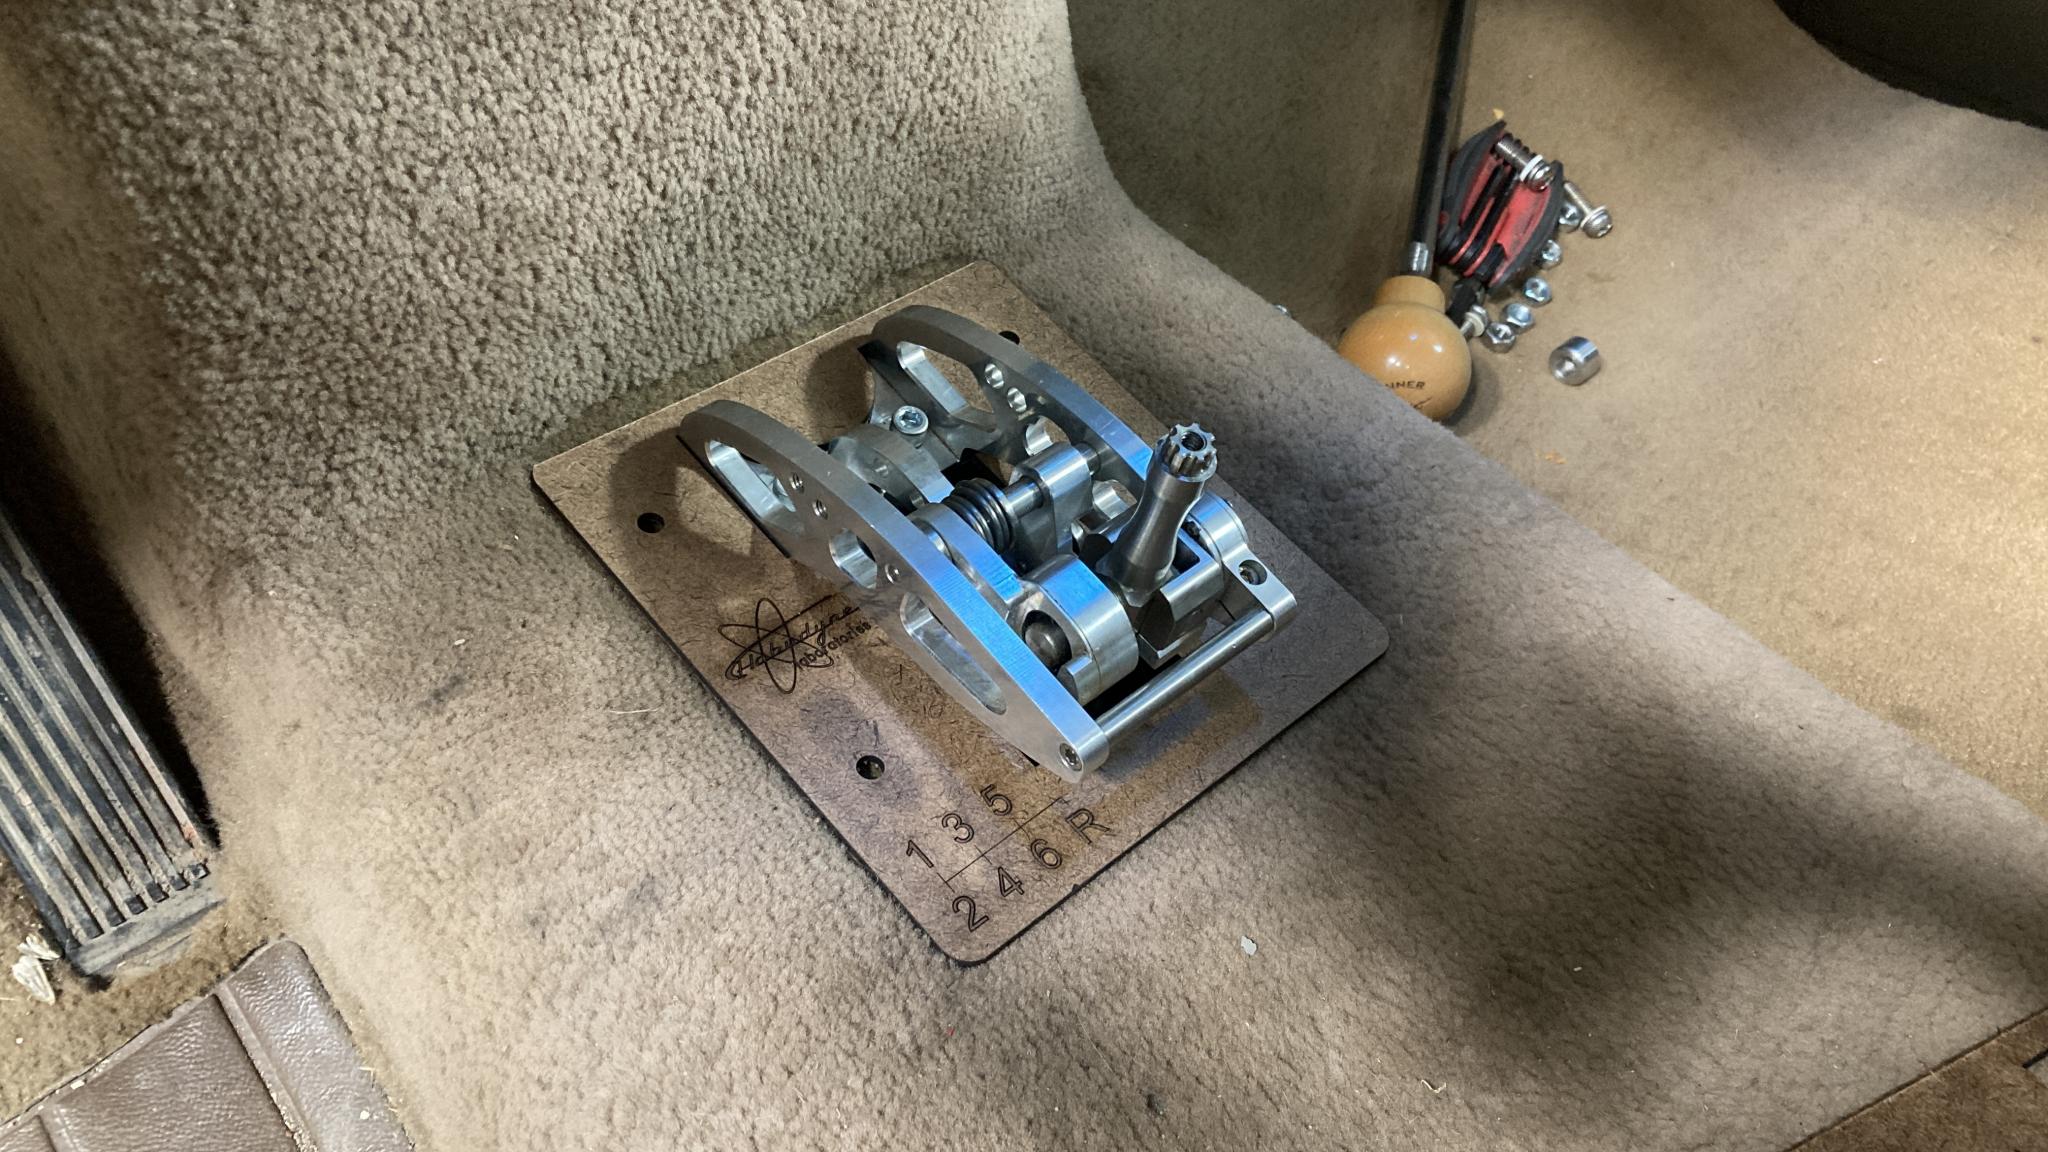
The first test fit - which was not photographed - told me that I had to turn the shift mechanism around because it put the lever in a bad place. So I took apart the cable box, drilled some new holes, lengthened a slot, drilled some more new holes and generally made a mess of my beautifully machined and anodized unit. This is most of the way through the result - the black box will live under the floorboards. Pretty sexy shifter for an old van.

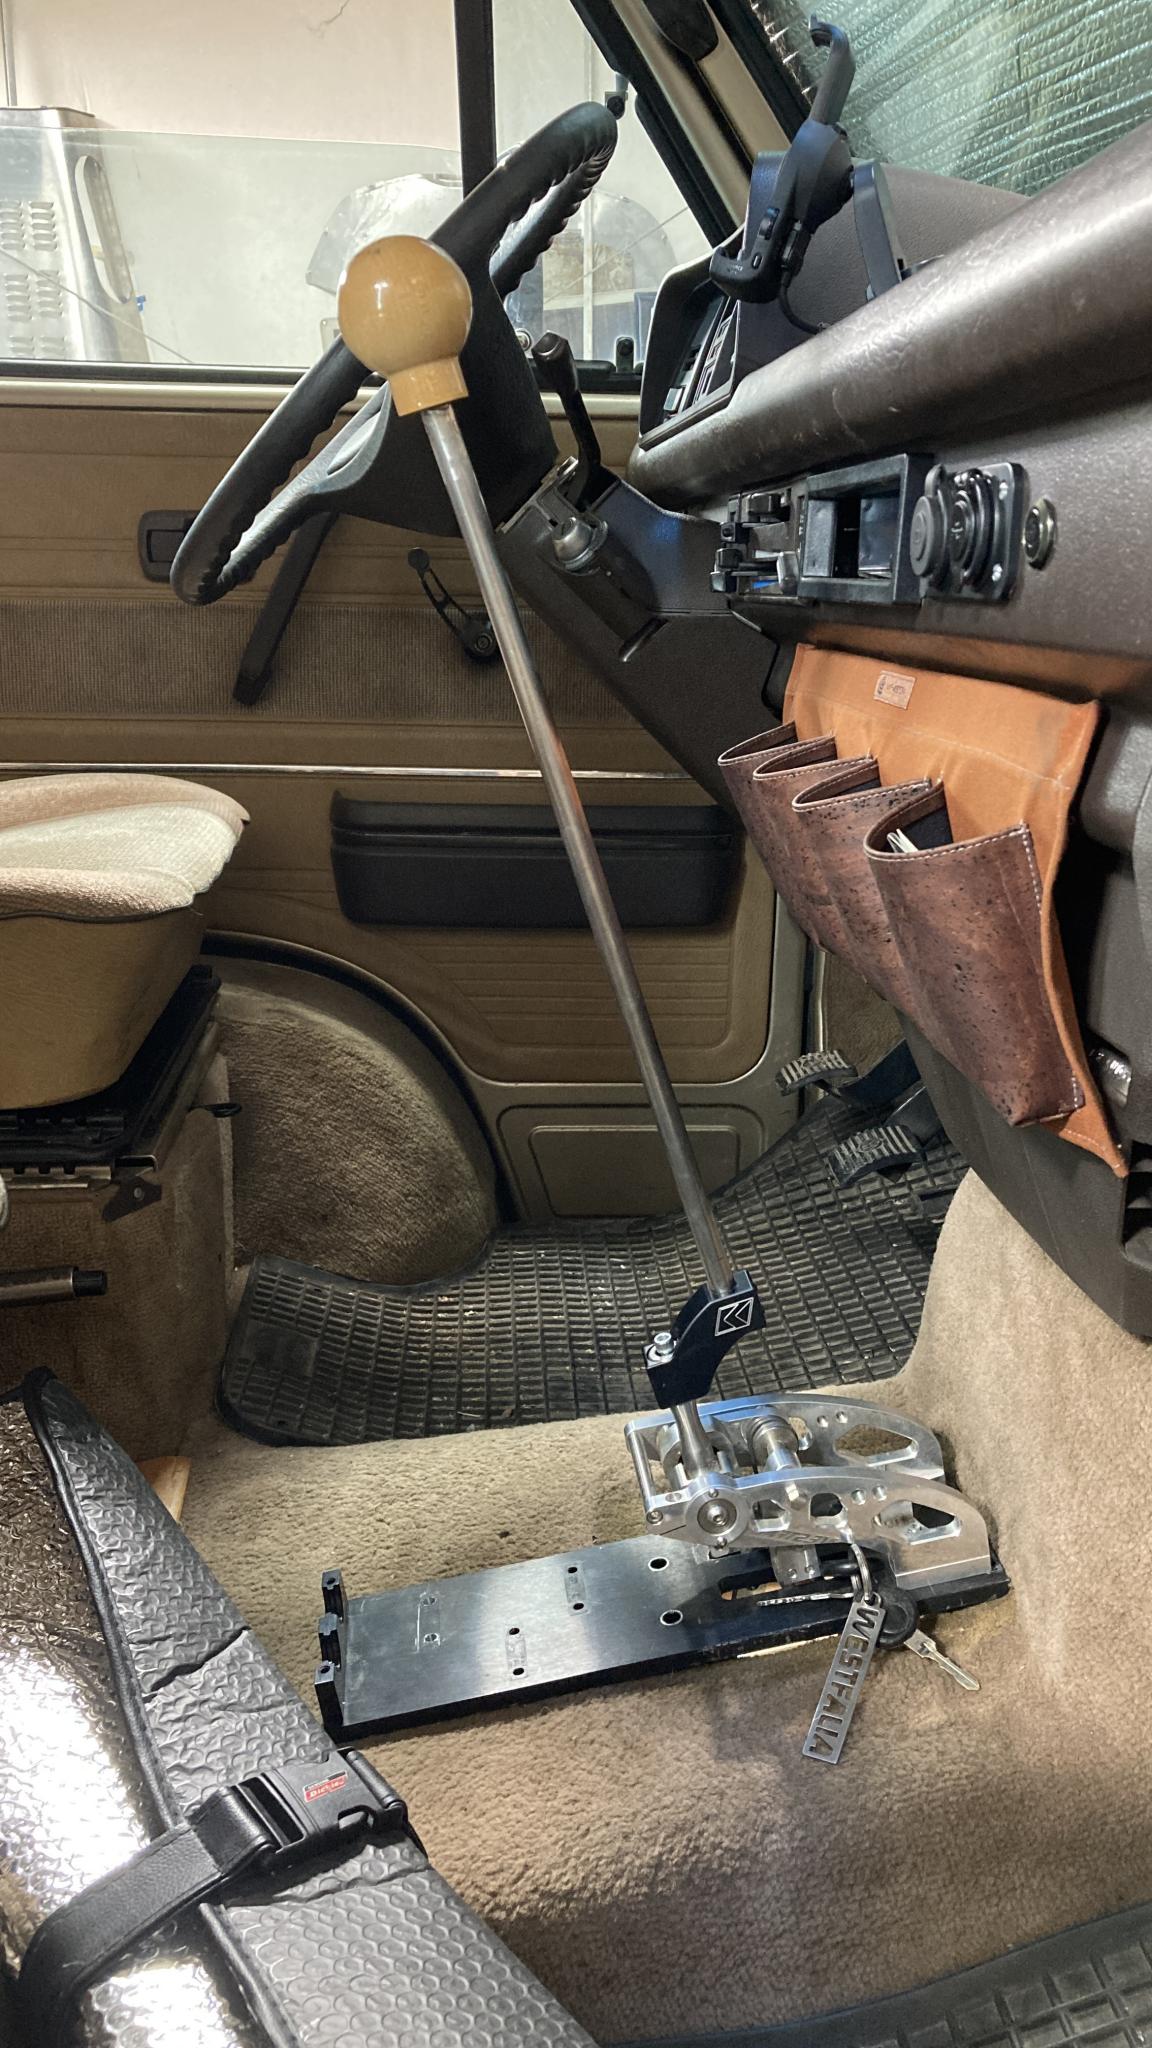
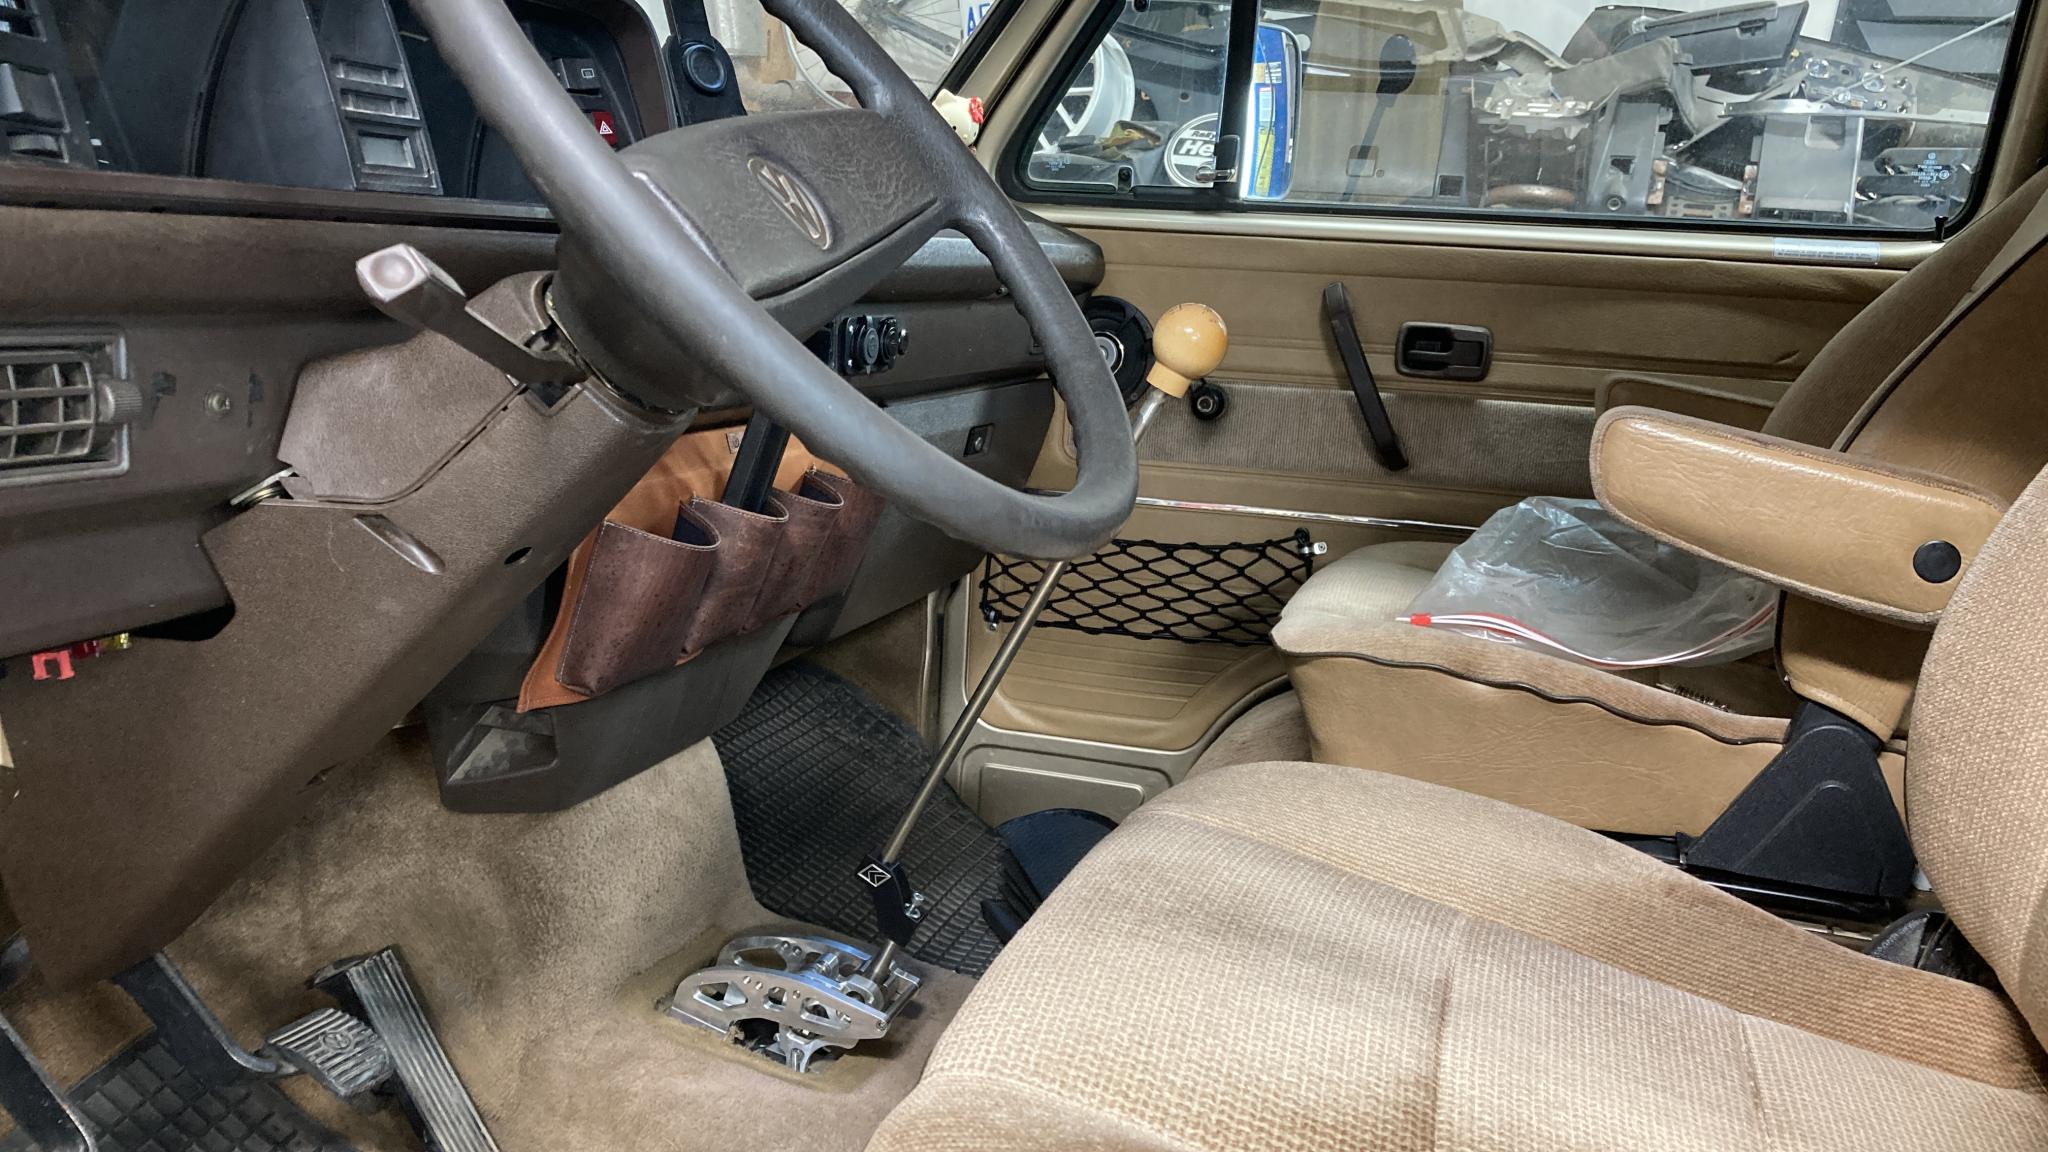
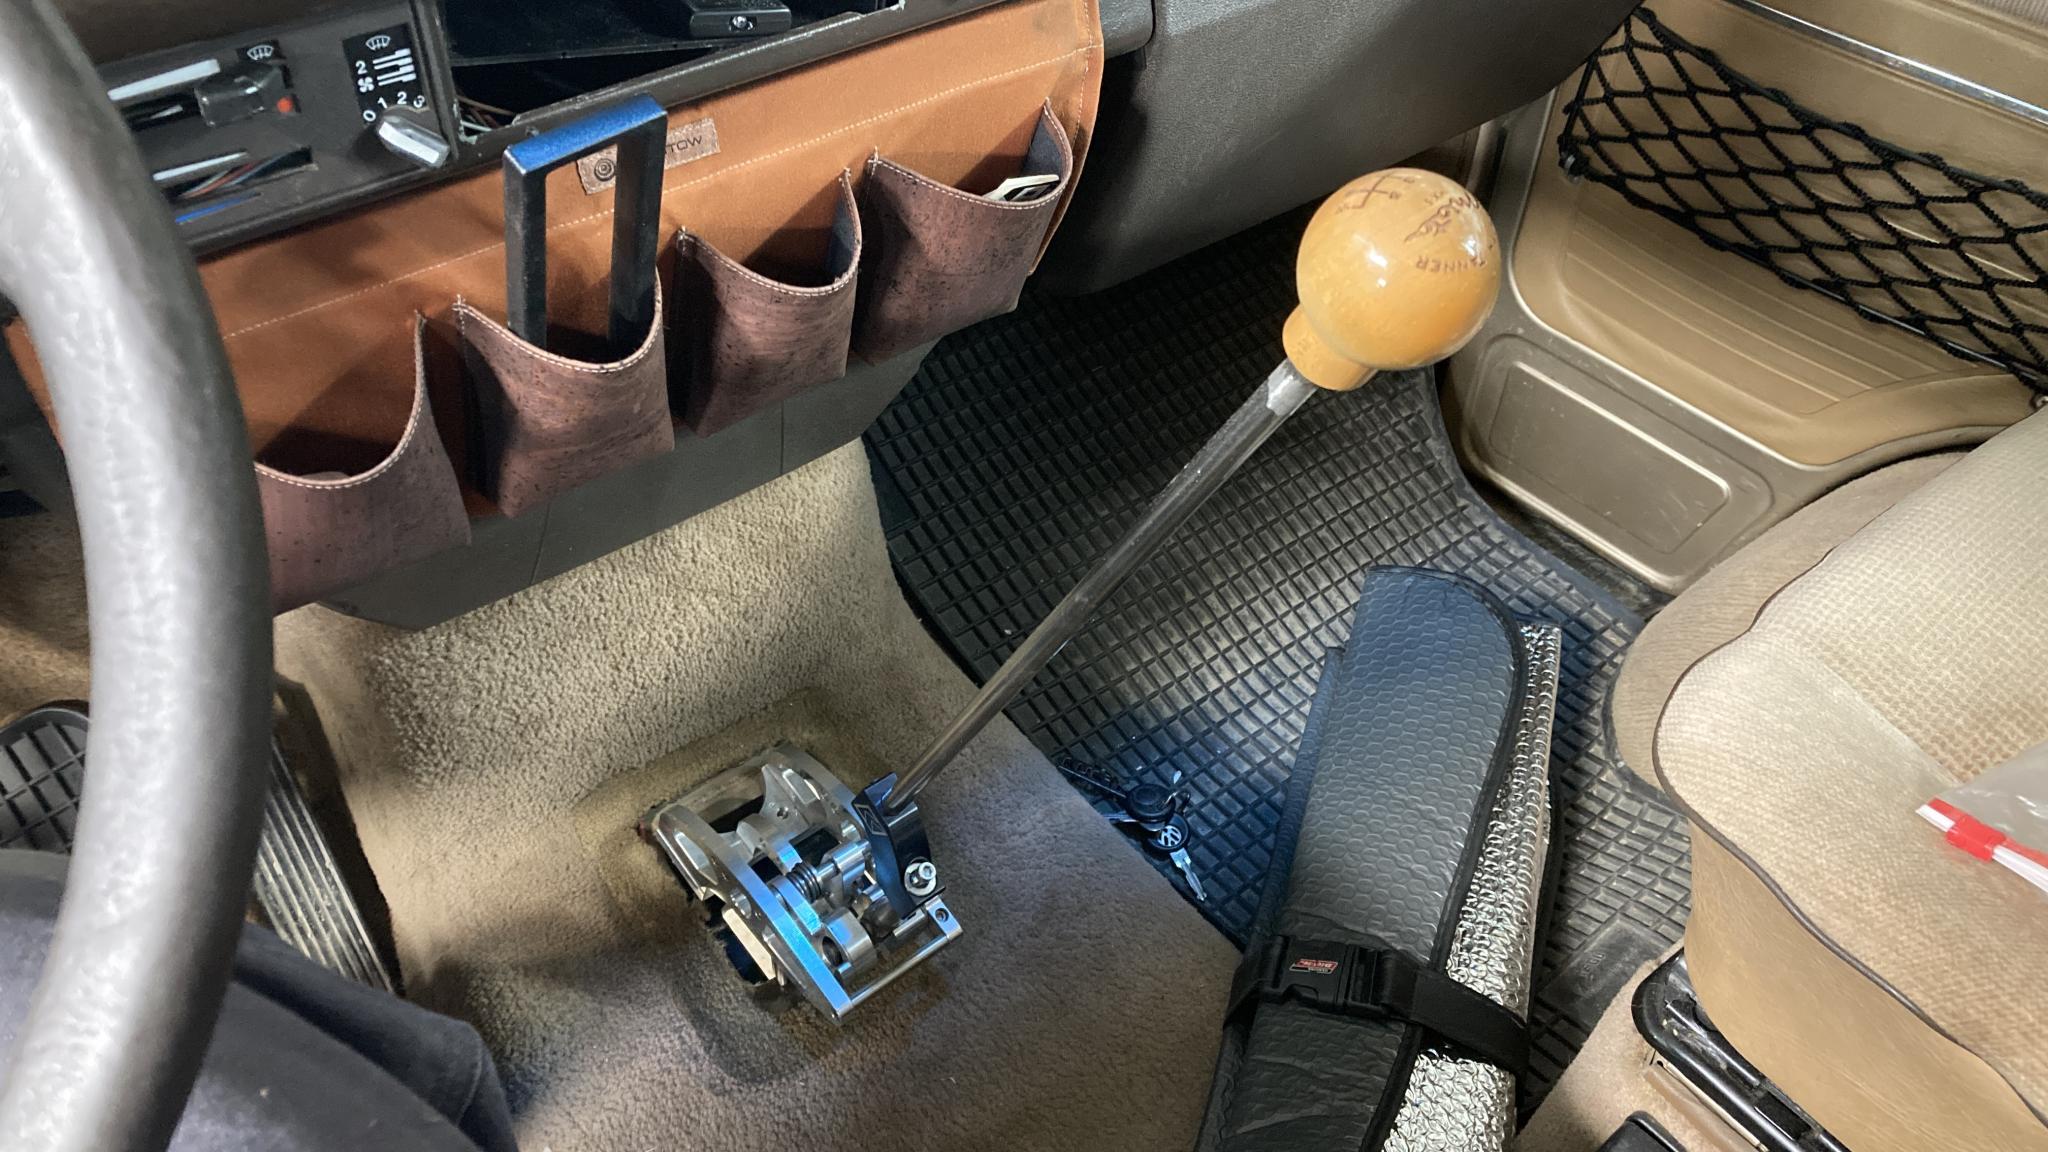
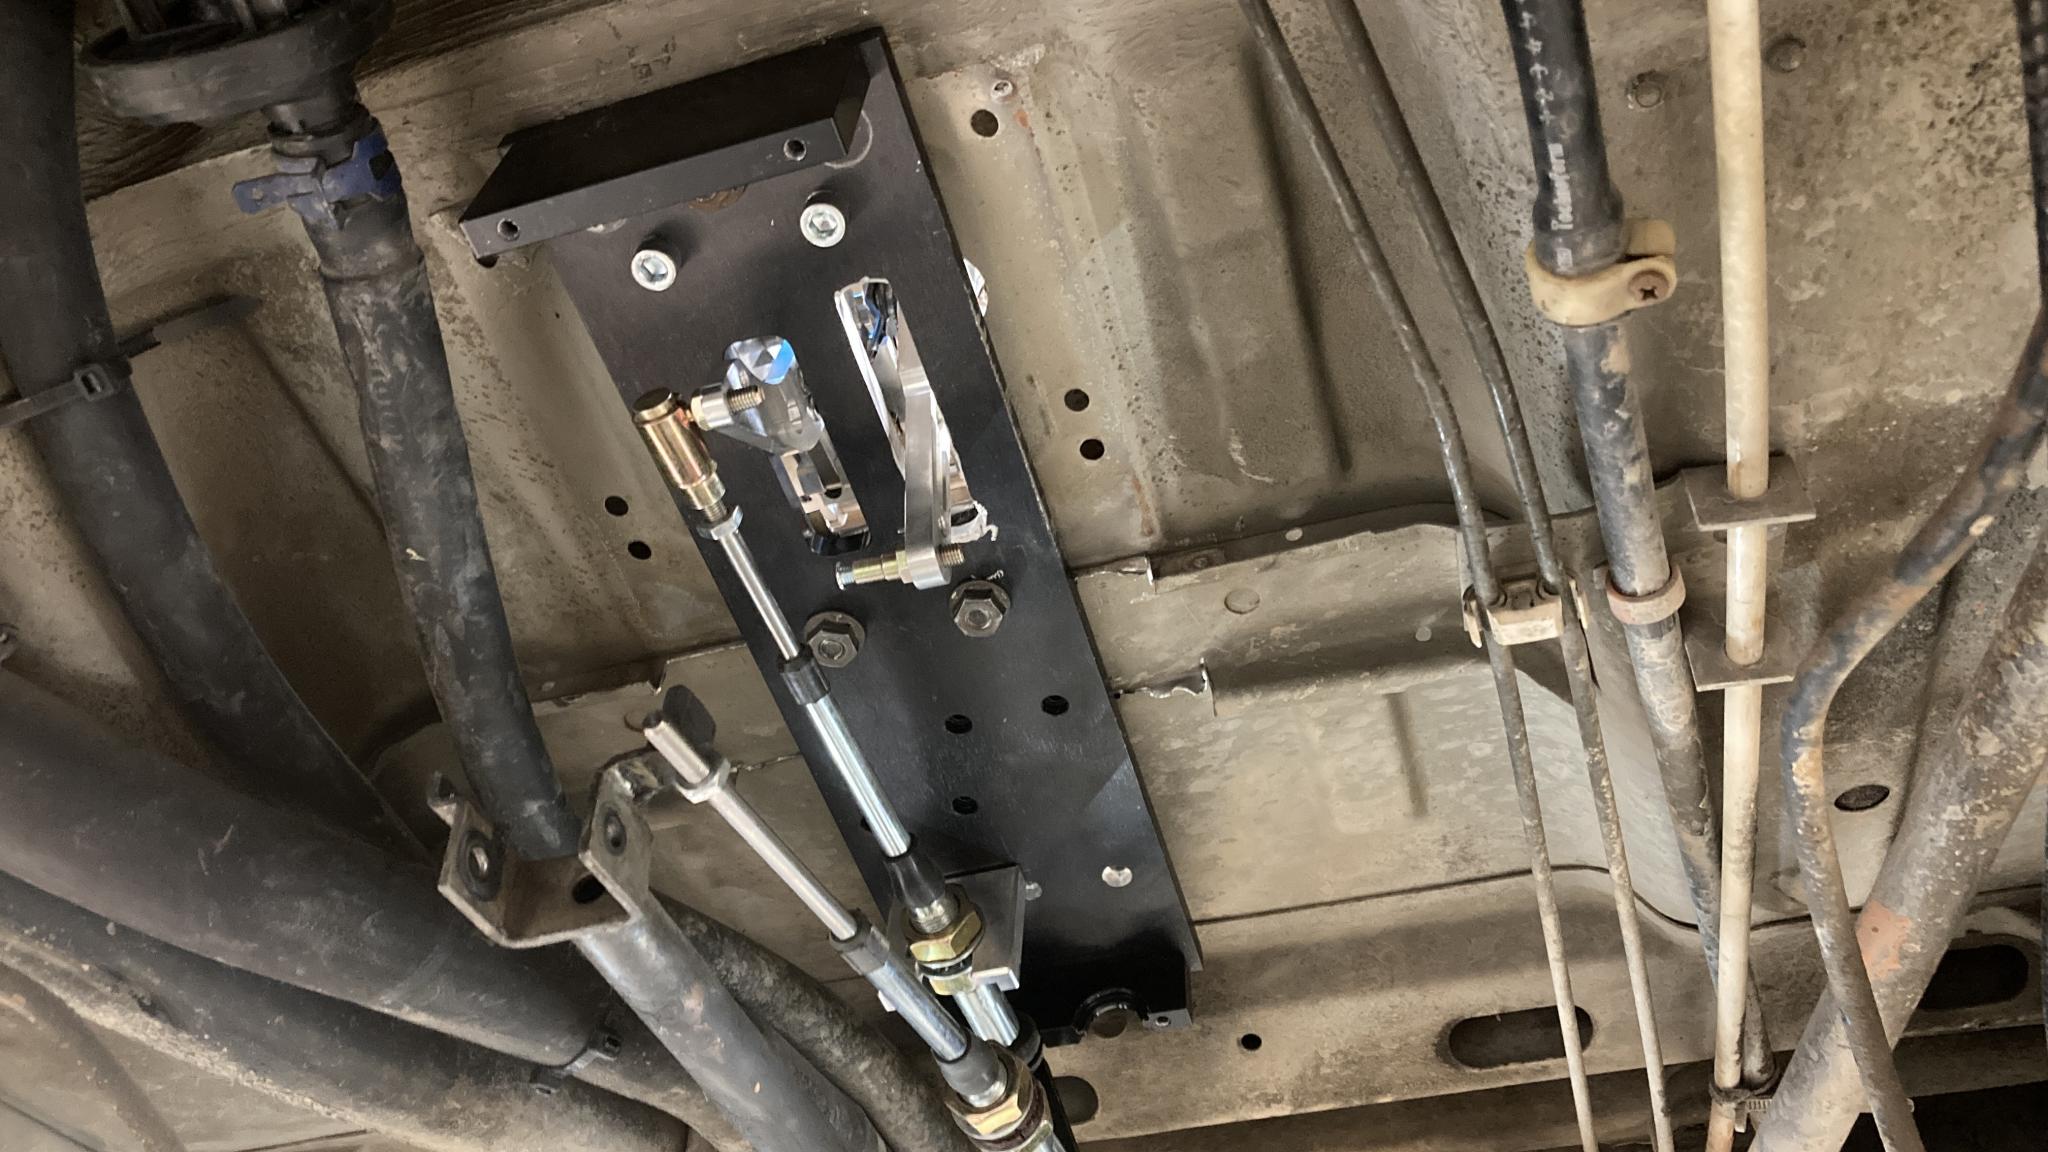
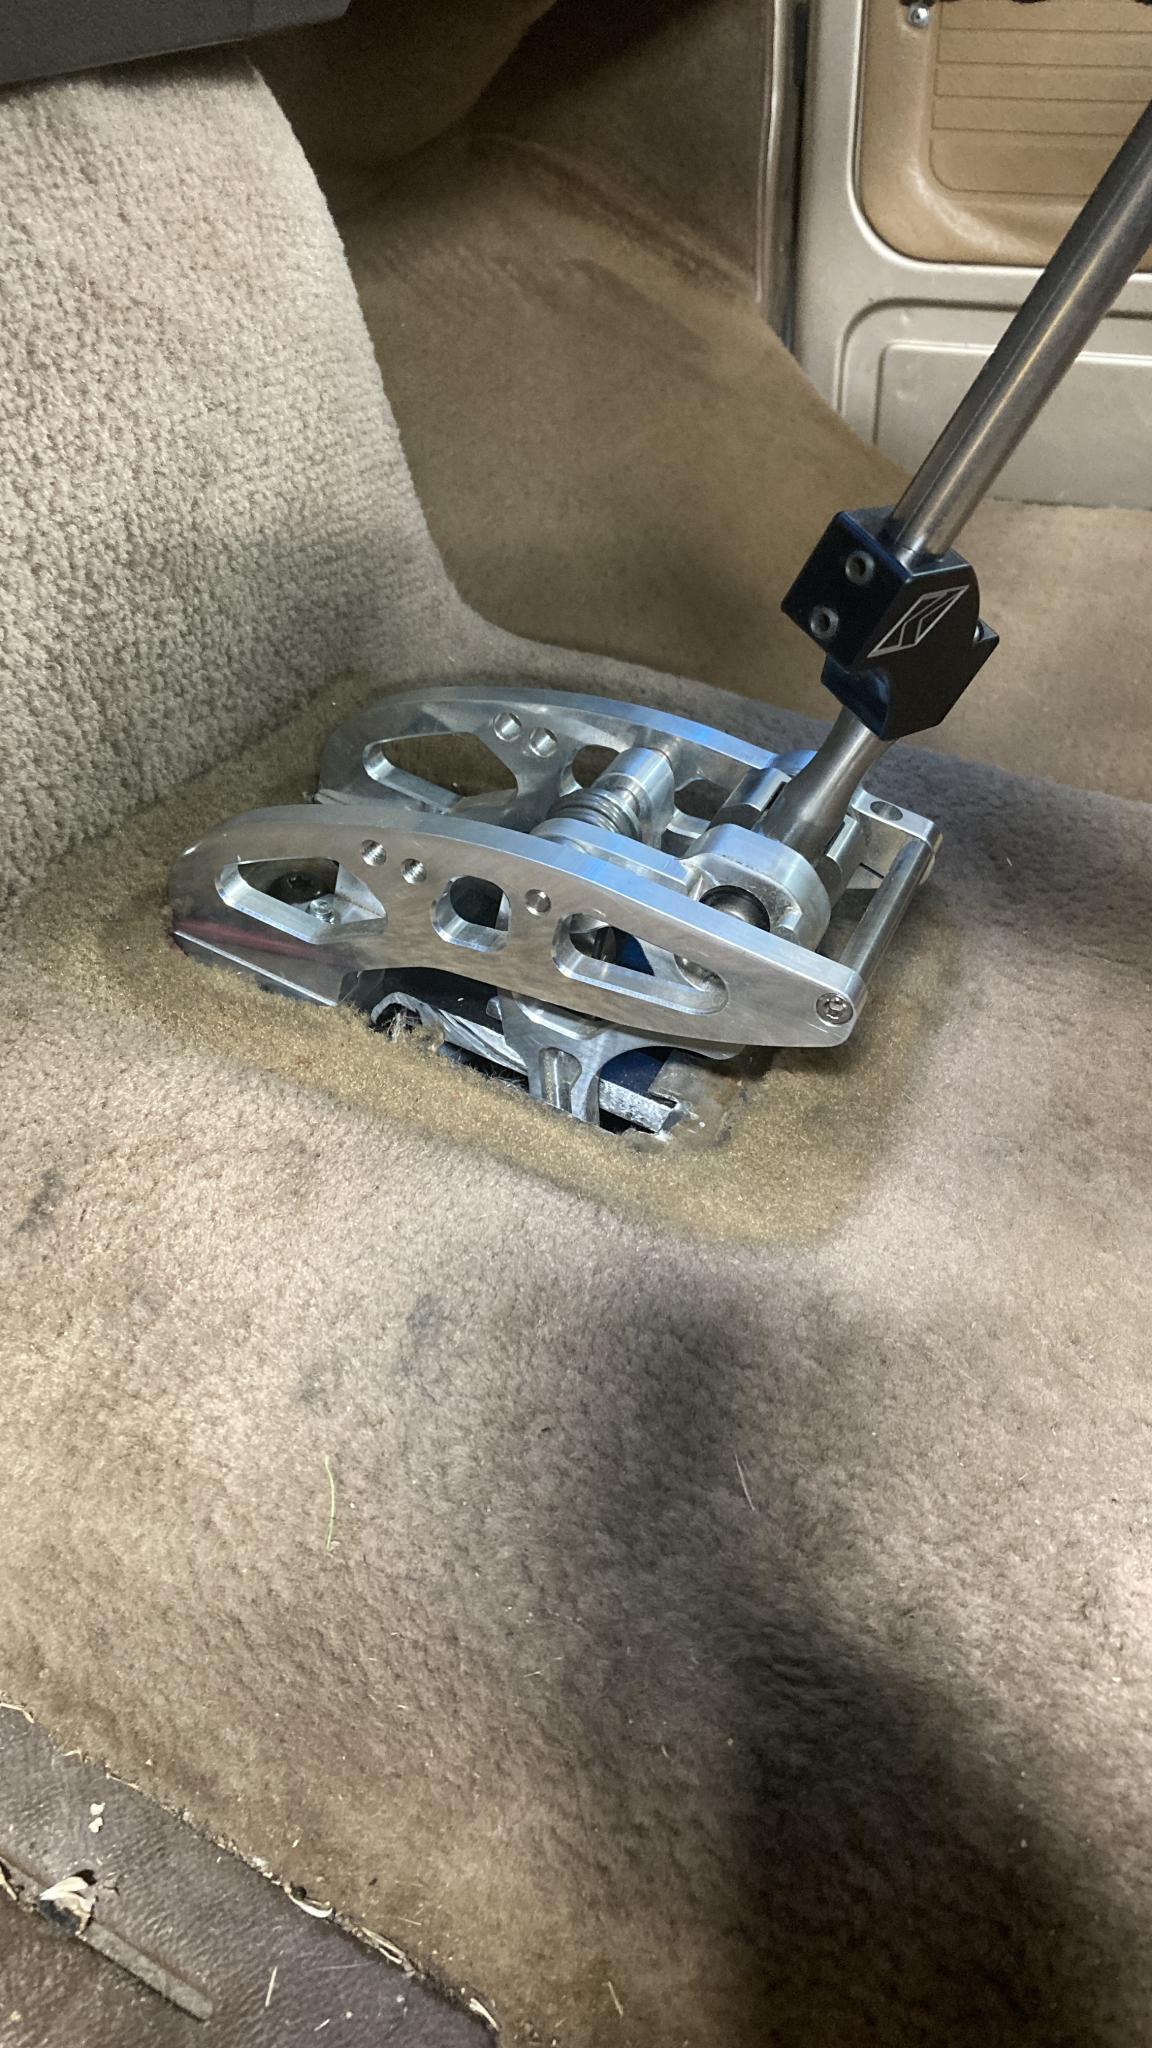
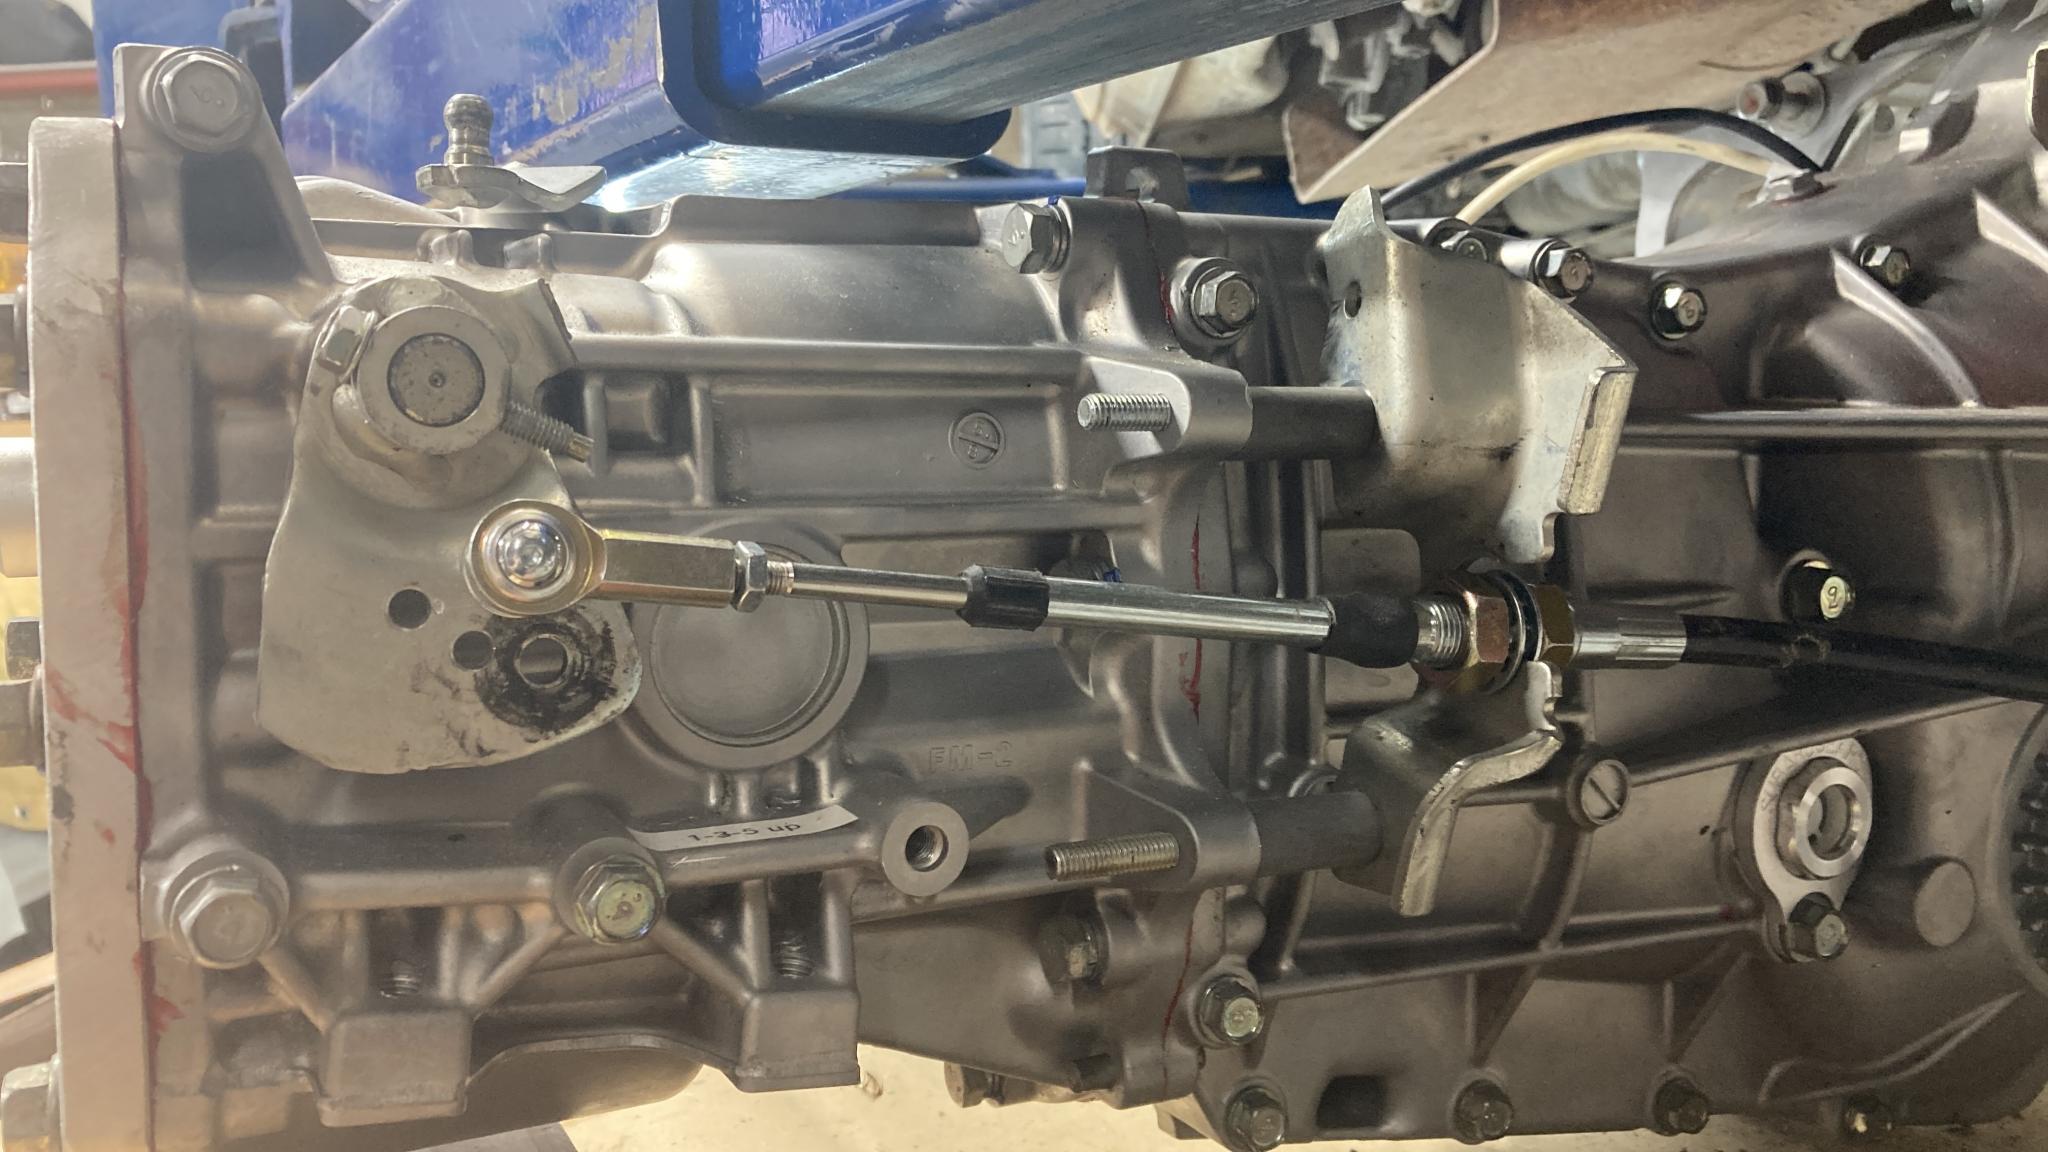
Here it is complete and actuating cables. The wooden shift knob is an old Miata one that has my name engraved on it by a friend. A little weird for a VW especially since the shift pattern is wrong and it actually says Miata on it, but I dig the look. I can rotate the black offset piece of the lever so it can be moved closer to the driver or the dash, and I might put a bend in the lever. Tomorrow I'll bolt this into the van to get a feel for the action. But now I can figure out what the throw should be at the trans and if I made any terrible mistakes in my shift cable length estimate.

Keith Tanner
Keith Tanner GRM+ Memberand MegaDork
1/23/22 6:58 p.m.

A better view of what it should look like when done. Had to take some small braces out to get this far and it's just clamped in place, but initial ergonomic tests feel really good. 

This shiftier is the sexiest thing in the whole van.

I did a couple of quick 3D parts to hold the cables where I wanted them. The brown just happened to be the first spool of ABS I found, but it's about right for this vehicle.

Next step is to solidly mount the shifter, then start working on cable routing and length of shift arms to get the pattern I want. 

GasTungstenArc
GasTungstenArc Reader
1/25/22 7:52 a.m.

With that super duper long lever, how is the return to zero position?  Sluggish, but it gets there?  

Keith Tanner
Keith Tanner GRM+ Memberand MegaDork
1/25/22 9:48 a.m.

The lever isn't all that heavy - it's hollow, and the knob on the end is wood. I am concerned about the amount of internal friction in the cables causing problems with centering. I'll have to get the remaining fittings in hand and see. Some extra springs might be necessary.

Spent some time talking to a Subaru-powered Vanagon owning coworker and the subject of gasketing the opening below the shifter came up. I'd been thinking of that to cut down on noise and junk getting into the cabin, but the opening goes into a pretty well-sealed box (other than my extraneous holes). Brandon pointed out that I didn't really have to prevent the outside from getting into the cabin, but from junk falling into the shift box. Excellent point. All I really need is some rubber sheet with slits in it, I just have to remember to do it.

Ian F (Forum Supporter)
Ian F (Forum Supporter) MegaDork
1/25/22 10:24 a.m.

Neat project. That shifter does look neat, although I'd probably end up covering it with a gaiter or something.

GasTungstenArc
GasTungstenArc Reader
1/25/22 10:55 a.m.
Keith Tanner said:

The lever isn't all that heavy - it's hollow, and the knob on the end is wood. I am concerned about the amount of internal friction in the cables causing problems with centering. I'll have to get the remaining fittings in hand and see. Some extra springs might be necessary.

I get that it doesn't feel heavy in the hand, but down at the fulcrum I imagine it still presents quite a lot of inertia for the transmission to push back into place.  I'm not saying that I think it's going to be a problem; I'm only curious how well it returns.  

As for friction in the cables, these are the best that I have ever used: Silver Jacket Cables from Chassis Shop.  You can drag them around tight corners and they are still effortless.  I used them on the X1/9 K20 conversions I used to build.  

Keith Tanner
Keith Tanner GRM+ Memberand MegaDork
1/25/22 12:35 p.m.

I understand the inertia idea, but at least with the light shift knob the center of mass is much lower than it would be with a more traditionally weighed unit. We'll just have to wait and see.

I've already got cables, but if it turns out I really jacked up the length estimate I'll look at the silver jacket ones. They look identical to the ones I have other than the silver jacket so it's tough to evaluate relative friction. I think the problem is just sheer length.

Keith Tanner
Keith Tanner GRM+ Memberand MegaDork
1/26/22 8:36 p.m.

Spent some time on this today.

Step 1. Get the shifter properly mounted. I had to cut a support and remove a doubled skin around the hole, but that's there to give the stock shifter something to lean on. Since mine is encased in a billet box that's got 10mm thick aluminum walls, that's less of a concern. It feels solid. Here it is from underneath with the box open.

From inside.

This allowed to actually do pretend shifts. One thing that became immediately apparent is that the side-side return spring is in the shifter, not the trans. Same as with the stock Subaru unit when I checked. So I have some control over that.

Step 2. Play with throws. I started with fore-aft because the shift arm for that one is removable. And interestingly, it has some massive (literally) counterweights. Unfortunately they would interfere with the rear bulkhead of the van so they had to go.

I drilled multiple holes in the arm so I could evaluate shifter feel and throw.

With that done, I temporarily bolted on a stock Subaru bracket with some spacers to get into the right range for my cables and attached the arm with a bolt instead of a PITA roll pin.

Slid the transmission under the van, hooked up the cable and did some pretend driving.

The shortest arm felt good. Mechanical, but not too much effort and about a 6" fore-aft throw. That felt right - it's no Miata, but it's tighter than I remembered it (I wasn't smart enough to measure before). I think it's tighter than my Dodge truck.

Midwest Controls hasn't yet sent me the missing fittings for my cables so I can only test one axis at a time. Next step is to do the side-side gate and see how well the return spring copes. I think I've come up with a reverse lockout idea as well. This is for a future post.

iansane
iansane GRM+ Memberand Dork
1/27/22 10:26 a.m.

That looks pretty 'race car' for a vanagon.


I love it.

Pete. (l33t FS)
Pete. (l33t FS) GRM+ Memberand MegaDork
1/27/22 5:49 p.m.

6" sounds like a lot shorter than the last van I drove.  Neat!

Keith Tanner
Keith Tanner GRM+ Memberand MegaDork
1/29/22 8:15 p.m.

Given the way the side-side gate works, I think I need to have both cables hooked up to evaluate the throw. But I can't do that until I have two complete cables. I called Midwest about the missing parts for the cables, but do not have strong confidence they'll get here anytime soon. I think the custom cable business is a side gig for a bigger company. So I decided to order some for myself from McMaster. I can always use rod ends.

While I was waiting, I did something else.

Kinda cool how that's a complete drivetrain right down to the exhaust. Held in by 5 bolts and I even found the secret second ground strap before doing a stress test on it. Next step is to bolt the Subaru transmission to the Subaru engine - I predict this will be fairly straightforward - and see if I can wiggle it in there. I think clearance to the rear bulkhead is going to be very tight. I'm also worried about some of my cable lengths being off by about 6" - the short one too long and the long one too short - but I'll get the final runs figured out first and then decide if it's worth spending another $150 or so on a second set. It's going to be close.

I may also build a new exhaust, this one's pretty rough and consists mostly of weld boogers in some sections. The muffler looks like it's about to rust through. That's not going to prevent me from moving forward, though.

Keith Tanner
Keith Tanner GRM+ Memberand MegaDork
1/30/22 10:50 p.m.

It took me an embarrassingly long time to get this off. Why was it embarrassing? Because I had it off when I rebuilt the engine, but I'd apparently completely forgotten the method. In my defence, it all hinges on a little access plate that's very obvious when you're working from below but which is almost completely inaccessible when the whole shebang is sitting on a table with the exhaust installed. Finally, victory.

At this point, all I had time to do was offer the Subaru trans up to see if there were any obvious gross problems. There are not. So I'll start doing the final install of flywheels and clutches and stuff. I'm also considering changing out my motor mounting to a Kennedy unit instead of my Small Cars version, as it would improve serviceability in the future and it would give me a complete Subaru mount kit to sell. It also is less sketchily mounted but the sketchy part is the OE VW stuff that's been working for nearly 4 decades, so maybe it's not as sketchy as I tell myself. When I think about it, I think that might require dropping the oil pan and that is NOT part of this project. So never mind.

There is one good thing about Subaru engines. Almost everything engine management related is on the intake manifold. This makes dropping the engine far easier if you can leave it behind and hooked up.


Keith Tanner
Keith Tanner GRM+ Memberand MegaDork
2/8/22 1:21 p.m.

Yesterday the motor went back in the motor hole!

Well, temporarily. I positioned the drivetrain under the van and slowly lowered the van down, measuring and eyeballing and tweaking to see how everything fit. And eventually, I squeezed it into place. I did end up cutting off the rear part of the exhaust prematurely because I wasn't sure it was going to fit, but that lets me put a joint at the cut which will make future servicing much easier.

The good news is that the front-rear engine position will be the same! It's actually the perfect position. I was expecting that I might have to push it backwards. Check out that clearance to the rear bulkhead.

Here's the view from inside the engine bay. The throttle cable is in an awkward place so I'll move that over. I could go to my DBW solution - it's very close! - but I think I'll concentrate on one major change instead of two.

Close but clear. I'll take that!

I can even use the stock transmission mount. It's a bracket bolted to the back of the transmission that attaches to this bushing, which is bolted to the crossmember. I've got 1.75" of clearance to build my own bracket and attach it to the trans using either the bolts on the back plate or the Subaru mounting points a little further forward - you can see the threaded holes on the trans in this picture, level with the bottom of the bushing. I'm concerned about the cantilevered loads of the latter, so I think I'm going to use those 4-5 10mm bolts on the back of the case. I think it'll be strong enough, especially with that 1/2" plate to spread the load across the entire housing.

This also gave me the chance to come up with final cable lengths. I'm going to have to run them through the crossmember, and it looks like my long one is way too long. My short one should work for the side gate and I've ordered another that's 10" shorter for the forward gate. It would have been nice to know the exact length of the cables magically before this point, but really all I could do was come up with a reasonable estimate. The extra cost is fairly small, Midwest is an affordable option. 

I also took a good look at slave cylinder plumbing. It's a weird mix of hard and flex lines. VW seems to like this - you can see the first hard-to-flex junction on the crossmember in those first two pictures. It's in an awkward place for the shift cables.

I think I'll have a short piece of flex to a hard line down the side of the trans, then a short piece of flex to the body. I'll have to reflare the body line to use double flares instead of the weird VW design, but that's okay. Then I can use off-the-shelf Miata lines, as I have a large stash of them. This is the initial flex line running to the side of the trans, where it will be picked up by a hard line that goes to the back of the trans. I could possibly run a single flex line all the way from the body to the slave, but this will be a bit easier for pulling the engine and it uses what I have on hand. IIRC I will end up using an NA/NB right rear brake line and a clutch line :)

Pete. (l33t FS)
Pete. (l33t FS) GRM+ Memberand MegaDork
2/8/22 8:53 p.m.

Wow, a Subaru trans fits a VW way easier than it fits in a Mini. wink

I have used a brake flex hose as a clutch hose on an RX-7 before.  It wasn't a case of needing the length, it was a case of needing to make a car mobile and that was what was immediately available to get brake fluid from point A to B.

Keith Tanner
Keith Tanner GRM+ Memberand MegaDork
2/13/22 5:52 p.m.

Progress...

First, I built a bracket for that rear mounting point. I think it worked out pretty well. Note: if you put a copper ground strap in the bead blaster even for a moment, it comes out really nicely :) Don't worry, that stud has a nice clean electrical connection and there's no measurable resistance between the strap and the transmission.

Then I spent some time building a bracket for one of the shift cables. I'm pretty happy with it, it's nice and solid and mounted in two axes. This is the easier of the two cables because it can slide under the crossmember. The other one has to go through the crossmember and has to turn 45 degrees or so. I'm still trying to figure if there's something I haven't spotted yet.

With that done, the obvious next step was to actually fully mount the drivetrain.

The front mount (I keep thinking of it as the rear) worked out pretty nicely. It's not perfect, but it's close enough.

It's not all victories, unfortunately. I have hard contact on the rear (no, the front, sheesh) of the trans on the rear bulkhead. Not enough to keep me from putting the drivetrain in, but it's taking paint off the bulkhead and it would be quite audible. I think a big hammer is the right solution here, there's nothing too critical on the other side and I only need about 1/4". I might do a little grinding on that rear plate as well.

Keith Tanner
Keith Tanner GRM+ Memberand MegaDork
2/13/22 10:29 p.m.

I must have done something good in the past. Right where I decided I needed to drill to pass the upper cable through, I discovered a plastic plug hidden underneath the crud. (note, the wire insulation is okay it's just the plastic sheath for the bundle that's cracked)

I had to drill a hole on the other side as well as on another single wall crossmember, but I'm calling that a win. Looks like this cable will be just barely long enough. I'd be happy if it were 1" longer, but it's working. There's enough centering spring tension on the shifter to pull the cable to a neutral position - it's not super-strong, but hopeully it'll be enough for me to find the center gate. I have to build a crazy looking cable bracket to make this work, then I can do test shifts finally.

I jumped in my coworker's Subaru-powered Vanagon with a VW trans and measured the throw. Looks like 11". I might open up my pattern slightly. His also has the shifter passing under the steering wheel when he goes for reverse, which mine never did. It's highly non-ergonomic. The stuff we put up with...

Keith Tanner
Keith Tanner GRM+ Memberand MegaDork
2/28/22 12:29 a.m.

I have been working on this, but not taking pictures. 

While waiting for the new cable, I came up with a routing and bracket for the side gate cable (which goes to the top of the trans, not the side). Then I pulled the drivetrain out so I could properly locate the arm for the side gate and spend a little quality time with a hammer on that rear bulkhead.

With the brackets in place, I was able to do a shifting check on the whole thing. The side-to-side range of the shifter was awfully tight, so I changed the lever ratios and got a good range of motion. I also learned how to set the cable up so the shifter spring would return everything to center, and it worked pretty well. Well enough to keep moving forward.

The new cable arrived, and  it was just barely long enough :) In fact, it was a couple of inches short. So I built a 2" extension for it - pics to come later. Cleaned up the bracketry a bit and was then able to stick the drivetrain in again for a "now, will it actually really fit?" test. And woo, we have a pretty good feeling shifter! I'm not excited about the route the side gate cable takes but it seems to work. The lever returns to center nicely and the shift pattern is a good size - not super-tight so it's easy to find the right gate, but tighter than it was and with a very positive feel. So yay.

I also had to rework my clutch hydraulic routing - I've got a flex line running from the body to the trans, then a hard line up the side of the trans, then a flex line to the slave. It's based on how VW did it. But weirdly, VW also used a 1/4" hard line for the clutch line. I found that out after I'd cut the stock hard line on the body - I had to do that because I was trying to move away from bubble flares. Some screwing around and headscratching and I ended up brazing a stub of 3/16" line onto the end of the 1/4" to step the line down to match my hydraulics.  I'll be keeping a close eye on that.

While looking at what else I had to do for final installation, I realized that the stock VW battery cable going to the starter is massive - the stud on the starter has to be 1.5" long, and the fitting on the end of the cable takes up nearly half of it. The Subaru starter has a more normal stud length and the VW fitting won't fit at all. So I have some thinking to do about how to deal with that. Some sort of power distribution stud, I think, because the starter is clearly being used as a distribution point given the number of wires attached to the starter post. 

Pulled the trans out again so I can do some final fettling, including new engine bay sound/heat insulation and address a few Vanagon things like replacing the brittle plastic bulkhead fitting for the fuel line. I'm also working on cleaning up the area around the actual shifter both aesthetically and functionally.

We're getting close to permanent installation here. Wooo!

APEowner
APEowner GRM+ Memberand SuperDork
2/28/22 9:58 a.m.

This is all very cool but I'm a little bummed that the engine and transmission are oriented the way that they are.  It would be even cooler to have the end of that race car looking transmission peaking out from below the bumper.


Keith Tanner
Keith Tanner GRM+ Memberand MegaDork
2/28/22 10:08 a.m.

Ha, like a Lotus Europa. I once met a Europa owner on a club drive who had to have his girlfriend get out and kick the exposed shift linkate every time he wanted to shift into reverse...

Keith Tanner
Keith Tanner GRM+ Memberand MegaDork
2/28/22 12:01 p.m.

One thing I realized last night - there's no neutral switch on the VW trans. Of course, the Subaru ECU is expecting one. That might explain some unsatisfactory idle behavior the van's always had.

There's also a mystery toggle switch in the engine bay - did the shop that did the conversion put that on the neutral switch? Based on some of their other solution, it would not surprise me at all. I'll chase down the neutral switch in the Subaru wiring diagram and hook it up.

Keith Tanner
Keith Tanner GRM+ Memberand MegaDork
3/3/22 12:06 a.m.

Still waiting for my new power terminals, I I can't start final installation. But I did spend an inordinate amount of time today figuring out how to deal with the shifter surround. I could just plop the stock brown rubber shift over top but that would be a crime. I have to deal with carpet, underlayment, some steps in the sheetmetal and various other challenges. After a surprisingly long time, I came up with this, supported by some spacers. As so often happens, there's a lot going on to make it look that easy.

This is a test cut but I think that's what I'll go with for now. Just trying to think of ways to handle some of the graphics a little better. 

The carpet looks patchy because of shadows, it is not disgusting.
 

maschinenbau
maschinenbau GRM+ Memberand UltraDork
3/3/22 8:28 a.m.
Keith Tanner said:

Ha, like a Lotus Europa. I once met a Europa owner on a club drive who had to have his girlfriend get out and kick the exposed shift linkate every time he wanted to shift into reverse...

...keeping that in mind for my Europa build...

I like that trans mount

Ian F (Forum Supporter)
Ian F (Forum Supporter) MegaDork
3/3/22 9:09 a.m.

In reply to Keith Tanner :

Nice. yeah... does seem like it'd be a shame to hide all of that nice machining work.

APEowner
APEowner GRM+ Memberand SuperDork
3/3/22 10:52 a.m.
Keith Tanner said:

Still waiting for my new power terminals, I I can't start final installation. But I did spend an inordinate amount of time today figuring out how to deal with the shifter surround. I could just plop the stock brown rubber shift over top but that would be a crime. I have to deal with carpet, underlayment, some steps in the sheetmetal and various other challenges. After a surprisingly long time, I came up with this, supported by some spacers. As so often happens, there's a lot going on to make it look that easy.

This is a test cut but I think that's what I'll go with for now. Just trying to think of ways to handle some of the graphics a little better. 

The carpet looks patchy because of shadows, it is not disgusting.
 

I think leaving the shifter exposed is  the right choice. 

How about a multi-layer plate for the surround?  I'm thinking maybe aluminum or stainless with a black acrylic on top with cutouts for the graphics.  Or, black on the bottom and aluminum on top to match the shifter?


maschinenbau
maschinenbau GRM+ Memberand UltraDork
3/3/22 11:08 a.m.

Voice of dissent - I don't like the look of the exposed shifter for this van. A brown leather boot would look nice.

1 2 3 4 5

You'll need to log in to post.

Our Preferred Partners
HCecXU0bowJc9t8ly5yQxAc4N2L0M9lCaYd69Xg3wLub3cWrYzR5Q1yEvliSGcyR