1 2 3 4
JohnyHachi6
JohnyHachi6 Dork
3/19/13 12:17 a.m.

So, SWMBO and I decided that we'll give up our auto-x season this year, campaigning her RX-8 in C-Stock, and save up the money and time to run some HPDEs (and maybe a TT event by the end of the season). I've had the good fortune to be able to get out on track a few times through the Wreck Racing team, and ran a 24 hour Lemons race a few years ago and have really enjoyed it (who wouldn't?), so now it's time for me to put together my own track car.

The answer? Miata of course!

I have never really liked convertibles, but since the goal with this car is the most fun for the least money, I found it hard to come up with anything better than an NA Miata. I've always loved driving them and the cost of consumables is just dirt cheap.

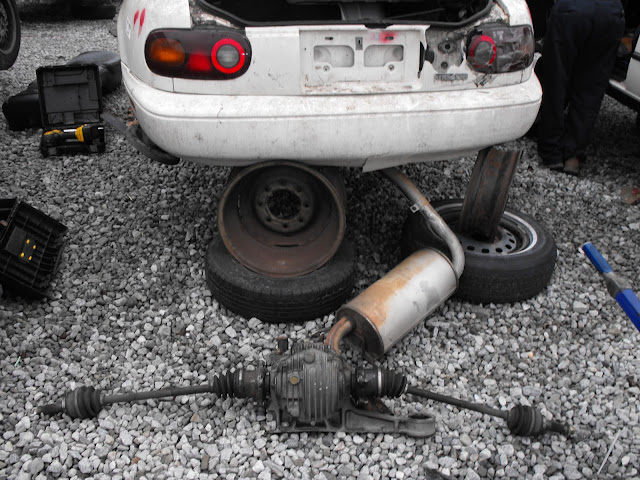
After searching the local (Atlanta) Craigslist for a few weeks I came up with this:


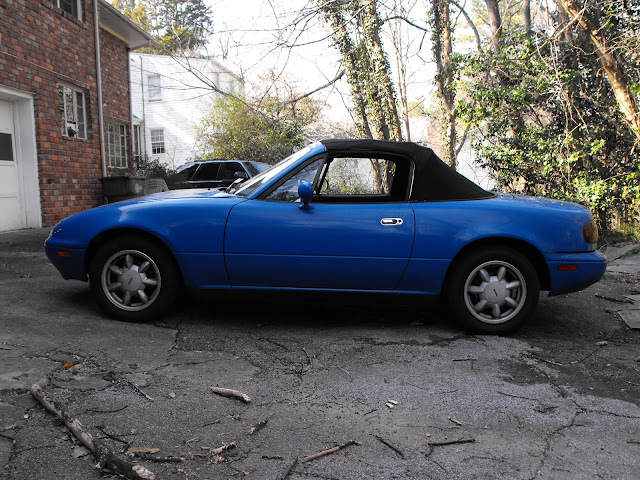
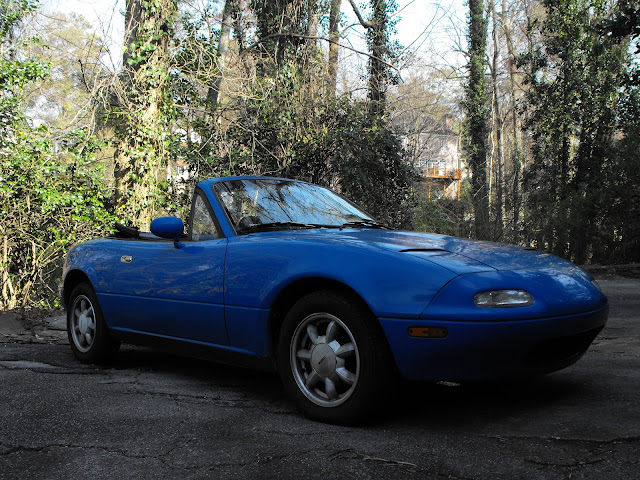
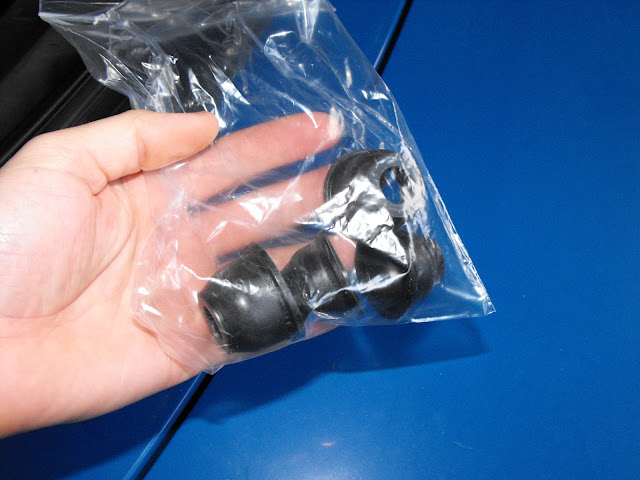
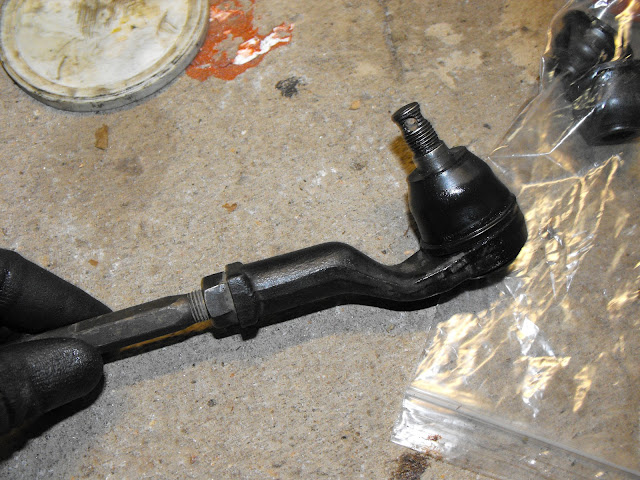
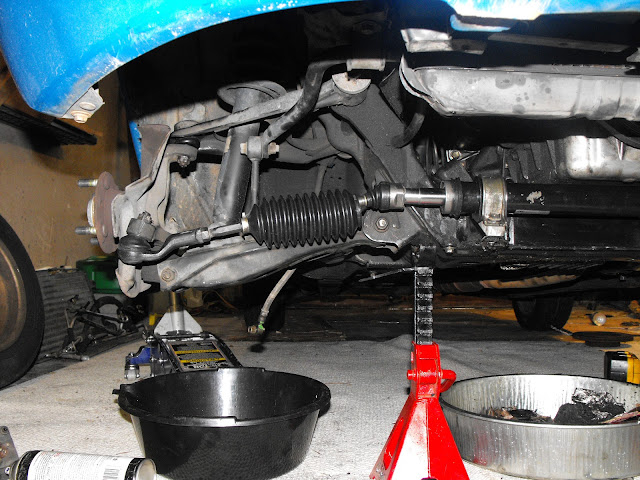
She's a 1990 in pretty decent shape. I picked it up for a decent price (below challenge money). The chassis has 257k miles and it needed the crank pulley replaced (hence the low price). The previous owner had just replaced the tires and had the head gasket redone. She had the timing belt and water pump + pullies replaced and when the shop when to put everything back together they found the worn keyway and told her she needed a new engine. The crank was hardly worn, so I decided to pick up the car.

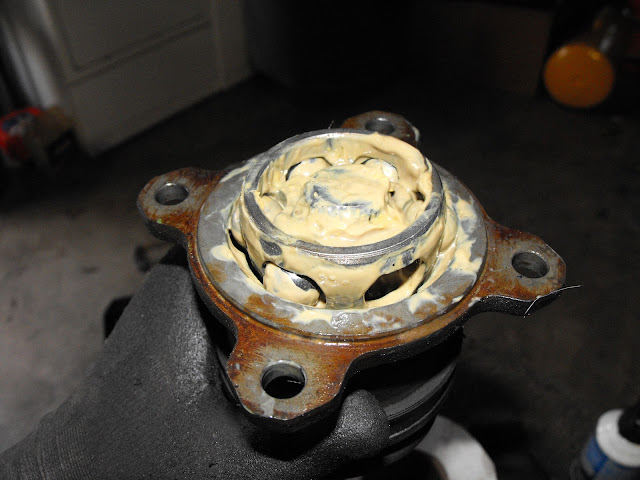
After replacing the crank pulley and key, and applying some super Loctite (as suggested on the Miata.net thread about worn keyways: http://www.miata.net/garage/hsue/LoctiteCrank1.html), I fired it up and had a great running car!

JohnyHachi6
JohnyHachi6 HalfDork
3/19/13 12:24 a.m.

Next was to budget out the parts I'd need for getting out on track. I made up a spreadsheet with my actual expense to date and expected expenses. Major items included:

  • The car
  • Torsen swap
  • 1.8 brakes
  • Racing Pads
  • Rollbar, harnesses, seats
  • Racing wheels and tires
  • Koni yellow shocks and racing springs
  • Quick disconnect racing wheel
  • Some other maintenance and misc. items

To date, I have $1,566.20 into the car with the racing brake pads (gonna go with Hawk DTC-60s) being the last big ticket item that needs to be purchased soon.

The budget for hardware for the season (including what I've spent so far) is just a hair over $2,000 as the plans stand now, so I'm not expecting to put a lot more into the car this year.

JohnyHachi6
JohnyHachi6 HalfDork
3/19/13 12:40 a.m.

In order to make this all possible on such a tight budget, I've purchased some of the major parts used (koni's, torsen, tires), will fabricate other parts myself (roll bar, seat brackets, probably tophats), and will use some parts I have from past projects (seat, harnesses).

I got a huge lucky break a week or two after I purchased the car when the local Pull-A-Part yard received a `95 Miata on a Friday afternoon. I noticed the car on their website that evening and got there first-thing on Saturday morning.

I was able to pick up the following parts:

  • Complete torsen, axles, driveshaft, bushings
  • 1.8 rear subframe brace
  • 3 Hollow-spoke wheels
  • 1.8 Brake brackets, hardware and prop valve
  • Behind-the-seats chassis brace
  • Misc trim

I also pulled a 4.778 ring and pinion from a Kia Sportage

Here's the haul:


The bill came to $193.41. Man do I love Pull-A-Part!

I ended up trading some of the trim I didn't need to a friend for the 4th hllow spoke rim so I ended up with a full matched set of wheels, which will replace the daisies for street use.

JohnyHachi6
JohnyHachi6 HalfDork
3/19/13 12:48 a.m.

Funny story, I actually though this dif was likely to be an open unit, and originally planned to pull an RX7 clutch-type lsd to install in it. When I got it home I pulled out the axles and realized it was a torsen - made my week!

If you looked closely at the above pictures, you can see that the diff housing was busted (one of the arms was broken off, presumably when the car was in the front-end collision that landed it in the JY). I took it into the shop and welded the arm back on, then welded on some additional plates to brace the arm. I was really happy with how it turned out. I haven't always had great luck with welding old cast aluminum, but this went well.


JohnyHachi6
JohnyHachi6 HalfDork
3/19/13 1:01 a.m.

After the housing was repaired, I disassembled the Kia center section and pulled the R&P gears, then did the same with the Miata unit and swapped over the gears.


Everything was reassembled and set to spec.

I checked the tooth contact patches and that looked good.

So, I sealed it back up.

It's ready for fluid (I have a bottle of Royal Purple left from the RX8 that I'll put in there), and then installation in the car.

FYI, there's a decent walk-through on spec'ing the diff here: http://www.miata.net/garage/diff_rr.html

Also, some great info including stuff about the gearsets here: http://www.solomiata.com/Drivetrain.html (EDIT: Thanks to RandyS)

As a side note, the last differential I did this on was a Ford 8.8 IRS unit and by comparison, the Miata setup makes everything infinitely easier (especially adjusting the gear lash and bearing preload). I was able to finish the job in a few hours of work.

JohnyHachi6
JohnyHachi6 HalfDork
3/19/13 1:10 a.m.

After finishing up the rear end, I started working on removing interior bits, modifying the seat rails and installing the racing seat, all in preparation for working on the roll bar.

The seat was an X-mas present from my brother (came out of his old Lemons car). It's a composite Momo fixed-back bucket with FIA tags. It had momo rails, but I ended up using the OEM miata rails, with some modifications to get them as low in the car as possible.

I would have liked to mount the seat with fixed brackets but SWMBO is much shorter than I am (I'm 6 ft 0 and she's somewhere around 5 ft 1), so we really needed the adjustability in seating position.

Here's the seat in the car:

I'll try to remember to grab pictures of the seat brackets next time I have it out of the car.

A note of caution to people thinking about racing miatas; I spent a lot of time massaging the brackets, removed all the foam from the seat, and reclined the seat as much as I could and I can only just get my head under the top with my helmet on. So, yeah, not for tall people wearing helmets.

JohnyHachi6
JohnyHachi6 HalfDork
3/19/13 1:37 a.m.

With the seat in and the OEM seatbelts and surround trim/carpet removed, I started measuring and sketching up the bar. I also spent a lot of time looking at the existing aftermarket bars.

One of the suggestions I got from folks on this forum was to consider the possibility of modifying the bar to a full cage down the road. I really liked this idea, so that ruled a hard-dog-type bar, because I would need a main hoop that mounted on the floor (in order to accommodate the door bars).

After measuring the critical dimensions (lots of flipping the top up and down, moving around the sea, etc) I drew up some sketches. I ended up using Solidworks which makes the math real easy and can give me the centerline lengths of the sections of the main hoop tube based on the overall outside width and height of the cage, given the tube OD.

I have access to some Chromoly tubing from a craigslist deal that's been just sitting for a few years, so I'm planning to use that. It's 1 3/4" OD and 0.095" wall. We have a great JD squared Model 4 hydraulic tubing bender at the shop and it makes tube bending quick and easy.

After finishing up the drawings, I decided to make a practice hoop and check the fitment.

I marked all the section lengths and bend start/end points on the tube.

Then, went to town with the bender.

I don't have a picture of the finished bar (will grab one later this week), but it turned out pretty well. I left the "legs" a little long so that I could cut them down to just squeeze under the top. It fits pretty good, but I think I could make it another inch or so wider, which would make fabricating door bars much easier down the road. So, I will probably cut this hoop up and use the straights to make the rear braces and/or diagonals.

JohnyHachi6
JohnyHachi6 HalfDork
3/19/13 1:47 a.m.

I wanted to bring the car back to my apartment to check some of the seating position stuff with the GF before making the final hoop, so the bar was put on hold.

Last weekend while I had it home I pulled out the steering wheel (will be replaced with a 280mm aftermarket wheel and a quick release).

I also ordered new boots for the steering rack, upper ball joints, and tie rod ends, which were all getting pretty beat.

Next, I decided I should remove the rack to inspect and depower it (I would just loop the lines, but I wanted to take out the seals to make it as easy to steer as possible, since the small wheel/girlfriend-driver combo might be kinda tough).

I pressure-washed the engine bay first, including the rack to remove the massive amount of crap that had built up on everything over the last 24 years.

Before:

After:

JohnyHachi6
JohnyHachi6 HalfDork
3/19/13 1:55 a.m.

I removed the rack and depowered it following the Flyin' Miata "How To": http://www.flyinmiata.com/tech/depower.php
(Thanks Keith)

I'll post up some pics of the rack rebuild later.

I'm going to make some rack spacers to reduce the bump-steer issue (EDIT: Thanks to RandyS, http://www.solomiata.com/swaybar.html)

I'm going to make these out of 1/2" aluminum though, since I won't be using the 93 LE or 94 R tie rod ends, and want to get the rack up as high as possible.

Here's what I plan to make:

While I'm at it, I'm also going to need to replace the inner tie rod washers, which didn't survive removal. I forgot to order those with the steering boots, so I'm just going to cut some out on the water-jet we have access to at GA Tech (I'll make the rack spacers the same way). Here is the model for the washers:

JohnyHachi6
JohnyHachi6 HalfDork
3/19/13 1:56 a.m.

And this brings things up to where they stand now. I'll try to keep the posts current with progress, but it's likely to come in fits and spurts.

Any feedback you guys have based on your own Miata projects would be great to hear.

Keith Tanner
Keith Tanner GRM+ Memberand MegaDork
3/19/13 9:14 a.m.

I don't get credit for solomiata, that was Randy Stocker - RandyS on this forum.

About bump steer - you want the rack in the right place, not just the highest spot. Since you've got a dial indicator, it's really easy to rig up a bump steer gauge and measure it for yourself. Either make a stack of shims using your water jet (sales opportunity!) or just use washers until you find the right height, then make your monolithic spacer.

You can certainly have door bars on a "hard dog type" roll bar. That's what the Hard Dog cages do.

My own Miata has a welded up diff arm. Works just fine. Although I went the other way on gearing, mine's got a 4.1 now instead of the 4.3. A 4.7 is going to be a rev-happy critter!

Looking good, I'm enjoying this. It's been a while since I built a cheap track car, they're fun.

JohnyHachi6
JohnyHachi6 HalfDork
3/19/13 9:35 a.m.
Keith Tanner wrote: I don't get credit for solomiata, that was Randy Stocker - RandyS on this forum. About bump steer - you want the rack in the right place, not just the highest spot. Since you've got a dial indicator, it's really easy to rig up a bump steer gauge and measure it for yourself. Either make a stack of shims using your water jet (sales opportunity!) or just use washers until you find the right height, then make your monolithic spacer. You can certainly have door bars on a "hard dog type" roll bar. That's what the Hard Dog cages do. My own Miata has a welded up diff arm. Works just fine. Although I went the other way on gearing, mine's got a 4.1 now instead of the 4.3. A 4.7 is going to be a rev-happy critter! Looking good, I'm enjoying this. It's been a while since I built a cheap track car, they're fun.

Thanks for the comments Keith!

Updated the credit on the solomiata links - sorry about that Randy.

As far as the bumpsteer goes, I'll definitely check it out once I get some spacers made up. I was able to just hold the rack in place when doing a test fit and it looked like even with the rack almost touching the oil pan, I still couldn't get the angle from the outer tie rod end to the inner tie rod joint to match the angle of the a-arm. I'll need to check it again once I get the car lowered though. I'll definitely keep what you said in mind and make up some shims of various thicknesses.

About the cage - I did see the Hard Dog full cage: 
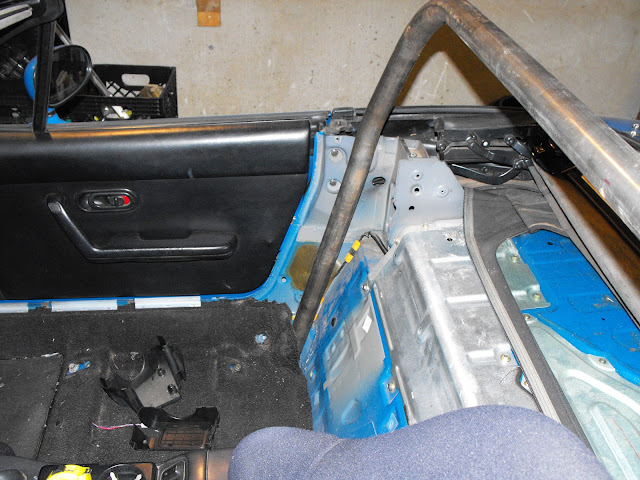
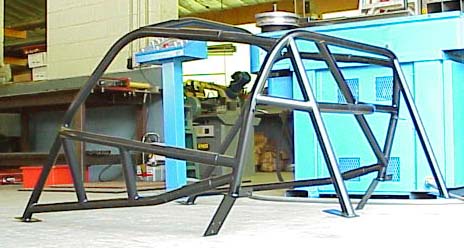
I didn't like the position of the door bars (the lower bar just screams shattered pelvis to me). I'd prefer to run the lower bar pretty much parallel to, and just a few inches above the door sill.

About the gearing. Yeah, I almost didn't do it when I calculated the rpm at freeway speed. I'm sure it will be really buzzy. It looks like it will be pretty much perfect for the track though with my theoretical top speed (redline in 5th) only being a little higher than the top speeds I expect the car is capable of at most large road courses. I guess if I ever put on a turbo or supercharger, I'll want to swap gears again, but considering how easy it was, I won't worry about that now.

Anyway, thanks again for the input.

JohnyHachi6
JohnyHachi6 HalfDork
3/19/13 11:19 a.m.

A few more items I forgot to mention. I found a pretty good deal on some used Koni Sports on Ebay. Low miles and look to be in excellent shape mechanically (no leaks, scoring, bent rods, stripped threads, etc). They're NBs so I'll have to redo the tophats, but that shouldn't be a big problem. I called Koni before picking them up and talked to their tech for a while. Sounds like they'll be good for spring rates up to 650-700 lb/in which should be plenty. I ended up paying $225 shipped for the full set.


Keith Tanner
Keith Tanner GRM+ Memberand MegaDork
3/19/13 11:34 a.m.

You'll need NB springs to go with those.

About bumpsteer - it's not necessarily as simple as making the arms parallel. Measure it.

JohnyHachi6
JohnyHachi6 HalfDork
3/19/13 11:39 a.m.

Also, picked up some Hoosier R6s the weekend before last. Found them on Craigslist and picked them up from a local club racer who moved to larger wheels to clear some bigger brakes. Ended up paying $80 for the set. Here they are stacked up on the 275/35R18 A6s that we run on the GF's RX-8:

They're 205/50R15s. I 'm hoping I can make them last for most/all of this season. They're 22.8" OD, so with the gearing I'm using that gives a top speed at 7200 rpm of 125.6 mph. The fastest spec miatas seem to be hitting ~115 mph on the long straight at Road Atlanta, so this should be great. At AMP, I was doing a little over 115 mph in a 1990 318i over the summer, so it looks like it will be good there too (I think spec miatas are closer to 110 mph max there).

Hoosier recommends a 5.5-7.5 in. rim width for this particular tire, with 6.5 in. being the relaxed width of the bead surface on the tire. Another stroke of good fortune here as I have a nice set of Enkei GF1s in 15x6.5 that came off my CRX Si when I sold it (still miss that car sometimes - just exceptional steering/suspension). The GF1s are 38mm offset, so I'm hoping that won't cause any fender interference - looks like it should be about perfect though. I might even cut out some wheel spacers to get a little more track width if needed (this might not be a bad way to adjust the understeer/oversteer balance easily).

JohnyHachi6
JohnyHachi6 HalfDork
3/19/13 11:46 a.m.

And finally, I got in the tie rod end and upper ball joint boots. They were all just starting to crack, but luckily there wasn't any play in them that I could discern. I ordered these from Arlington Miata (http://parts.arlingtonmazda.com/), who I've used for RX-8 parts, they tend to have excellent deals, though I just got my Mazdaspeed Parts Program Membership and they're a little cheaper (didn't include shipping though).

alfadriver
alfadriver PowerDork
3/19/13 11:47 a.m.

If I may be so bold...

If you, a reader to this thread, want to do a challenge, this is a good recipe to start with. IMHO.

And actually, it reminds me that it would be interesting to see how good a CSP car can be built with Challenge kind of money. Some may recall the argument I got into over on the miata forum about cheap CSP cars, since they all bowed down to the $20k cars and prep.

Anyway, great car, great thread, and good luck!!!!

JohnyHachi6
JohnyHachi6 HalfDork
3/19/13 11:52 a.m.
Keith Tanner wrote: You'll need NB springs to go with those. About bumpsteer - it's not necessarily as simple as making the arms parallel. Measure it.

I'm planning to use some adjustable perches (coilover sleeves) and aftermarket springs, so I won't be using the NB perches shown there. I'll make up a big washer/mount to fit on the Koni Perch ring then put the sleeves over that.

With the bump steer, I measured the articulating length of the lower A-arm and tie rod - they are identical as far as I can tell with just a tape measure. If that's the case, it really should just be a matter of making the tie rod and A-arm parallel, shouldn't it? (Keith, I don't doubt you experience on this, I just want to try to understand the implications of the geometry.)

Either way, when I put it back together I'll check the bumpsteer and shim it as necessary.

JohnyHachi6
JohnyHachi6 HalfDork
3/19/13 11:53 a.m.
alfadriver wrote: If I may be so bold... If you, a reader to this thread, want to do a challenge, this is a good recipe to start with. IMHO. And actually, it reminds me that it would be interesting to see how good a CSP car can be built with Challenge kind of money. Some may recall the argument I got into over on the miata forum about cheap CSP cars, since they all bowed down to the $20k cars and prep. Anyway, great car, great thread, and good luck!!!!

Thanks! I've actually got a potential Challenge car in the works as well, but it's super secret , and won't be ready for a few years.

monark192
monark192 HalfDork
3/19/13 12:40 p.m.

Great thread - motivates me to get back to my stalled 1.8 swap in my Miata track build.

slowride
slowride New Reader
3/19/13 1:03 p.m.

Thanks for posting this!

I'm going to bookmark it for when I start with my own Miata (if thing go according to schedule, 3 years from now... sigh)

JohnyHachi6
JohnyHachi6 HalfDork
3/19/13 11:20 p.m.

Thanks for the encouragement, guys.

Here are some of the photos I mentioned earlier. Depowering the rack and cleaning/repacking all the internal parts:
Here's the seal that was removed:
And here it is reassembled and ready for fresh boots and installation:

JohnyHachi6
JohnyHachi6 HalfDork
3/19/13 11:25 p.m.

Here's the "practice" main hoop I made. It's just resting against the bulkhead, so it's a little more reclined than it would be if installed as intended. As is, it just clears the top - the bends and height are spot on. As I mentioned earlier though, it's not as wide as I'd like so I'm going to make another hoop that's about two inches wider.

JohnyHachi6
JohnyHachi6 HalfDork
3/19/13 11:45 p.m.

So, on to the project from this evening. After work, I decided to install the Torsen diff and all other parts required for the swap. The first step was to remove the 1.6 axles, then the carrier, and finally the driveshaft.

When I got the 1.8 axles at the junkyard one of the inner CV caps popped off and I managed to loose one of the ball bearings. You can get replacements ball bearings from McMaster (looks like 21/32 in. steel balls will work), but I decided to just pull one out of the 1.6 axles that I removed. To get to the ball bearing races, you can pop off the steel cap on the end of the CV and just compress the boot to expose the races. Here's where the missing ball bearing should be:
You can just pop in the ball and extend the boot again to move the races back down into the housing.

Here are the two diffs side by side. Note the extra length of the 1.8 snout (left).
To accommodate the length difference, the 1.8 has a shorter driveshaft:
I noticed that the 1.8 driveshaft also uses significantly larger diameter bolts at the diff flange, so if you're doing one of these swaps, don't forget to upgrade these (don't reuse the 1.6 bolts).

With all the 1.6 parts out, I installed the 1.8 driveshaft, then filled up the 1.8 diff:
I got the diff in the car with a minor struggle against gravity. I was worried that the 1.8 mounts might not line up well after welding the broken arm back on, but the fitment was fine.

With the diff bolted in, I installed the 1.8 axles, torqued everything down and applied some torque seal so that I can easily spot any nuts/bolts that are backing out with a quick inspection.

Here's everything in place and ready to go (once I finish with the rack, that is):

JohnyHachi6
JohnyHachi6 HalfDork
3/25/13 10:41 p.m.

Ok, update time again!

I've received most of the parts I'll be needing (hopefully), including some steering, suspension and brake parts among other things.

I'll start with the steering/suspension stuff. I mentioned that the tie rods and ball joints needed the boots replaced. I got those in a week or so ago and after rebuilding the rack, I started working on those. I took off the old boots, cleaned out the old grease and repacked the joints. It was tricky to install the new boots as they have some kind on metal ring molded into the rubber boot and it needs to be pressed on to the joint. I didn't want to take them into the shop, so I ended up using a big pair of tongue and groove pliers to gently squeeze them on. It required some care, but worked out great. Here's one of the tie rods with the new boot:

The upper ball joints were a little more of a pain because I didn't want to pull the whole upper A-arm. I was able to do them on the car with a little finessing though.

After replacing all the boots, I moved on to the rack. I had cut out the parts I needed on the waterjet using the CAD files shown above.

Here's one of the rack spacers sitting on the rack bushing and retainer. I spent a little while measuring the width and length of the retainer so that the spacer would fit just right. Looks good.

Here's the rack reinstalled with the spacers under the mounts.

And here's an image of the A-arm and tie rod. I'll have to measure the bump steer when I get everything put back together (as Keith suggested). It looks pretty good, but it's not something I can eyeball with any precision. If anything the mounts are perhaps a little too tall. (They're 1/2" aluminum)

While I was working on the front suspension and steering I noticed a few other issues that needed to be addressed. Turns out the lower ball joint boots were ripped after all (I inspected them initially, but when I had everything apart I took a closer look and found the issue). Rather than replace the boots, I ordered entire replacement ball-joints, which were only a couple more bucks. I also noticed that one of the front calipers was leaking a little brake fluid from around the piston.

Got in the replacement parts today. I ordered these (and many of the other replacement parts for this build) from RockAuto. Good site, but I wish their shipping was a little better (flat rate would be nice), AND they stopped sending me the sweet car magnets - what gives!

Here are the old vs new lower ball joints. The older castings look a little beefier, but I'm not worried about these breaking, so looks like some weight savings!

And here's all the new parts installed and ready to go.

Something else I noticed while I was in there - the sway bar bushings front and back are a little worn. I'm not super concerned about it at the moment but I'll be thinking about it down the road. I did pick up some 2-part liquid urethane for casting bushings so I might give this a shot. I also have some poly sway bushings from my 280ZX that I never put on, so I might see if those will fit.

1 2 3 4

You'll need to log in to post.

Our Preferred Partners
Va7jBk4hKUiOLkNGxQtNVM32h214IQ5BvX69VgckZy9HJq2FtgE2bosnx7fcaVyw