1 2 3 4 5 ... 11
Rabbit Farmer
Rabbit Farmer New Reader
2/24/19 8:38 p.m.

Aug 27, 2010

Yawn......

Was able to make tonight's goals... install the pistons, water pump, T-belt tensioner.  I would have installed the oil pump, oil pan, flywheel/clutch, but I didn't plan ahead and purchase a bolt (head was stripped) for the oil pump gear; I'll have it on Friday.  After that is all together, address the broken stud on the exhaust manifold to turbo and then put the head on the block and complete the engine.  That will be a great step in this project to be able to check off as complete.

A couple of pictures for those of us that have Forum ADD.

Rabbit Farmer
Rabbit Farmer New Reader
2/24/19 8:39 p.m.

Aug 30, 2010


Not too bad for one day......

Back out the pistons come.  Since I value the input, ideas, and opinions of those that I race with, I took out the pistons so that I could verify that the ring gap was correct (thanks Sherman!).  Once the rings are 100% good (e.g. gap is wider than it is presently) I will put it all back together and then button up the lower part of the engine.

One of the pistons rings on the old piston set was broken and the piston was burned (hence the reason for a new set of pistons since I couldn't purchase just one).  One injector was black while the others were nice and shiny so I sent them to EFI Express (Marc) to have them flow tested.  Turns out there is nothing wrong with the injectors.   Sooooo, perhaps the piston wasn't burned and the ring broke because of the bad injector/lack of fuel, perhaps it was the other way around; the ring expanded and buckled because the ring gap was too tight, the ring broke, burned the piston, and turned the end of the injector black.  Good a theory as any.

Picture is worth a 100% words; and a lot of completed tasks.

1. Installed A/C condenser and radiator.
2. Installed 034EFI "Race" mount mounts (both sides).
3. Installed the two A/C lines from the condenser to the fire wall.
4. Trimmed sheet metal from parts car to complete the rain tray that was missing since the cage build.
5. Installed stock plastic wire harness conduit; the original one was broken and did not mount properly to the fire wall.
6. Installed last hard brake line and steel braided flex line; all four corners are now done.
7. Started going through the old damaged wiring harness to figure out what needs to be replace.
8. Wiring harness from parts car that will be used to fix #7.
9. Installed wheel studs on both sides.

Done for the night.... whew!

Rabbit Farmer
Rabbit Farmer New Reader
2/24/19 8:39 p.m.

Sep 11, 2010

Back in the saddle.... I was waiting on one part that I couldn't get local to continue with this; lost 5+ days in the process.

Picked up Motul RBF600 brake fluid (used for clutch also), Motul Gear 300 transmission fluid, and Mo-Cool (like WaterWetter) at KalesCustom.com.  I already have a 5Q container of Motul oil.... seems I'm 100% Motul at the moment.

The missing part... a connecting rod.  I never use air tools to put stuff together, always careful to get bolts started (go as far as I can by hand, use socket, and then use wrench), and always use a TQ wrench.  So, how in the world a bolt got stuck in the connecting rod is beyond me.  I put all the bolts in hand tight (just a little ways) so that the piston didn't fall out the engine while installing everything (naturally, the piston rings have enough friction that they aren't going anywhere, but why take chances).  I then tried to remove one of the bolts... it just turned and turned and turned.  Huh? So, tried to remove it with hand tools (even applying prying force underneath the head).... no luck.

So, enter bolt cutters...

Darn, doesn't quite work (of course, has me wondering if I can use bolt cutters on these hardened bolts)

Feel like I was doing open heart surgery by localizing the part I was going to operate on.  Enter Mr. Dremel (love the commercial for these things.... cut cut cut then they show a nail to pound in.... "did we mention it cuts" while cutting off the head of the nail).

Done.

Finally, time to get rolling again.... lots of progress.  New connecting rod installed, oil pump installed , turbo mounted to head, head mounted to block, flywheel bolted (need new bolts) to crank, entire timing belt assembly top to bottom, motor mount, new accessory mounting plate (holds alternator, A/C pump, and power steering), installed alternator, A/C pump, and power steering pump, hard water line, etc.

The impact actually cracked the accessory mounting plate where the power steering pump mounts... nothing major, but no reason to cut corners now.  Replaced the power steering pump with the one from the 20AE Golf.... might be a good thing as it is different from the original pump in the car AND since I am using the PS lines and PS rack from the 20AE Golf, it just made sense.  I hope everything is compatible.

Just need the six flywheel to crank bolts to finish the transmission end; will be able to bolt on oil pan once transmission is attached (bolt oil pan to transmission and then do all the little oil pan bolts)

Pretty....

Had enough for the night....

Rabbit Farmer
Rabbit Farmer New Reader
2/24/19 8:40 p.m.

Sep 13, 2010

Progress..... worked on it about 4 hours on Saturday and 3 hours today.  Slow and steady as I'm getting worn out.... someone call the Waaaaamulance.

BEFORE....  Four silver rims and one black rim; the black rim is broken from the "incident" and I plan to make a set of 7 black rims instead of 3 black and 4 silver.
(AFTER is pending....)

Had some folks ask me in the forums and via PMs about the turbo kit.  Turbo is GT2871R with ATP exhaust manifold.  Came with oil feed (oil flange on front of engine to turbo), oil return (bottom of turbo to stock location on oil pan), coolant line from turbo to passenger side of the engine, and coolant line from turbo to back of the block.  In addition, it included the v-band turbo to down pipe (3"); it is actually two parts that connect in the middle with a three bolt flange, but I added another v-band (love 'em!).  One issue is that the turbo/downpipe are not supported enough... KalesCustom.com added on a brace on the back of the block.

Pictures of kit.... note oil and coolant lines going to stock location.

Three hoses/tubes: Oil feed (left), waste gate (goes to N-75 valve; center), and coolant feed (right)

Picture of waste gate to N-75 to intake manifold.

Oil feed going to oil housing.

Anyway... that will catch some people up on the kit instead of reading through all the pages of blah-blah-blah.

Speaking of blah.....  engine installed!

Rabbit Farmer
Rabbit Farmer New Reader
2/24/19 8:41 p.m.

Sep 13, 2010

Its great following all this Steve and I love all the pics.

Question.

How do you take pics like this?  3 hands?

Rabbit Farmer
Rabbit Farmer New Reader
2/24/19 8:41 p.m.

Sep 29, 2010

Since I wasn't ready for the Ascutney hillclimb (my favorite of the season), I lost my motivation after the event.  Tonight is the first time I have have worked on the car since my last update.

Measured for DriveShaft Shop 6-speed axles; they shipped on 9/27 so they should be here soon.

Through hub....

Inner right side (the point to measure from)

Inner left side (the point to measure from)

Flange on the transmission

Pressure testing intercooler.... doesn't seem to have any issues.  Darn thing is strong... think about it... this was on the front of the car; think about how the rest of the car came out.
I did spend some time straightening out some of the fins.

VW Part # H4cK

Cutting the inner lip on the new bumper beam to allow the intercooler to sit flush with the front surface.

Weld-in rivet nuts... a new favorite for mounting stuff.

One installed.... still need to weld around the mounting surface.

Intercooler installed.

I ordered some sunflower seeds online... these things are large and the perfect amount of salt.  I will definitely buy these again.  3.25 oz bags, 16 per case, $20 shipped.  Perfect!

Rabbit Farmer
Rabbit Farmer New Reader
2/24/19 8:42 p.m.

Long night with a non-happy ending.  

In short... I blew the motor.  

Up in a cloud of smoke.  I don't understand why as it is built to handle really high RPMs.  I didn't have a load on it and was revving it to the normal 8000 RPMs with no issues then BAM!, a flash, and a lot of smoke.  Crap.

Let's talk about the positive progress that I was able to make this week.

Jason (http://www.vems.us) came over one night to check out the stock wiring harness to see what needed to be replaced.  I didn't have all the tools and parts needed to take care of some of the harness.  He had to replace the shielded wire that goes from the crank sensor to the ECU.  He had 500 feet of it.  I did a wonderful job stupidvising him and ensuring that the beer didn't get warm.

Jason is also going to install VEMS on the turbo Cabriolet once I get that back together. (Hey, one project at a time!  I'll get to it.)

As most people know by now, I am a great fabricator when it comes to toothpicks, duct tapes, and zipties.... so, when it was time to make a "thing" to hold the coils, I had 1000 ideas.  Unsure if any were good, but I had ideas.

I used 1/8" aluminum band to make a box (actually came out pretty good figuring my metal brake was a vise and a sledge hammer) that would act as the retainer of said coils.  Using 1/8" aluminum 90-degree (1-inch) pieces, I formed the legs and base.  I used pop rivets to hold it all together (one per corner) until I could have the "thing" welded.  After that, out come the pop rivets from the upper band so that I can drill holes for the threaded rod.  For now, the rod with coils is zip tied to the top so that I could put it in the car to try to start the engine.

Did I mention the engine turned over just fine?   Before even trying to start it, I unplugged the coils and injectors to turn the engine over to pump oil into the turbo.

Next, I needed to replace two spark plug wires.  I picked up a "034 Motorsport" 16-V wire set from Axismotorsport.com (Joe) that had the deep well spark plug ends and do-it-yourself coil ends.  No problem... I did these before.... except, 034's kit doesn't include the wire cutting tool.  Luckily, I had one from when I had to make the custom wires for the turbo Rabbit (Tub II).

For those of you interested in how to make your own spark plug wires... I share the following images.  Otherwise, proceed to door #2 where your adventure awaits.

Oh, did I mention that I tried to start the engine?  Wouldn't start.  Went through all the fuses (surprising every single one of them are good.... AND the radio doesn't work) and checked the grounds.  Everything seemed fine.  Tried again with no luck but could smell gas... at least the injectors were working.

Back to positive progress.... axles arrived from the DriveShaft Shop.  I installed the driver's side, but had a question regarding tolerances so I held off on doing the passenger's side.... sent an e-mail to DSS with my questions.

Driver's side installed.... nice and shiny axle and control arm.  Good geometry on the control arm for handling.  Installed 034 "race" dog bone.

Tried to start the engine again..... hmmmm.  What is wrong?!?

Worked to line up the fenders, hood, and front bumper (not quite there... turns out fender alignment skills are along the lines of being able to fabricate).  Spent a long time cutting away the bumper cover to allow intercooler fitment.

Buncha intercooler tubes (note the damaged section) and all the extra connectors and t-bolts that I have in my inventory.  Almost ready for KalesCustom.

So.... after dinner tonight I tried to start engine again.  Fired up first try!  Must have scared the evil Volkswagen demons after eating Mexican.  The engine ran great.  The turbo exited next to the coils (old battery box location) as the rest of the IC tubing is still in a box.  I taped a section of air filter to the throttle body.  A lot of smoke came off the exhaust manifold from the red high-temp loctitle that will hopefully hold that sucker on.  Let it run for a couple of minutes and shut if down for the night.

Oh, and I'm going to miss my Dremel.  RIP.

Rabbit Farmer
Rabbit Farmer New Reader
2/24/19 8:44 p.m.

Oct 18, 2010... new car in the fleet!

Back up car.....

Rabbit Farmer
Rabbit Farmer New Reader
2/24/19 8:45 p.m.

The hood needs to be fixed to be returned to its former glory; it was cut up adding caster to the front wheels (something that I will undo to return back to its original setup).

1.8T, light, wide, fast, and very functional.

Article (when it had the 16V engine) in [b]Golf magazine (clicky clicky)[/b]; (big file, slow loading).

Steve

Rabbit Farmer
Rabbit Farmer New Reader
2/24/19 8:46 p.m.

Oct 22, 2010

Well, some artsy-fartsy pictures when picking up the car from Bill's.  I'm sure he was sad to see it leave as he poured countless hours into designing, building, engineering and racing this incredible car.

It took a little while to get it started as it has sat for a while.... I was using a (too small) Odyssey battery, battery charger (10 amp), and jumping from the Jetta.  During the starting phase I was able to figure out all but one button.... I'll have to do a little wire chasing to figure it out.  Anyway, when it finally started, I noticed quite the pile of rust, acorns, and seed shells that came out of the side exhaust.

Pictures are worth a 1000 words... in this case, worth a 1000 modifications.  Driver's side is wider as everything was moved over 6-8 inches from the side including seat, steering wheel, pedals, center tunnel, shift, etc.  Note the cups in the floor for the driver's feet.... makes it really easy to control the pedals.  Shifter is raised (you don't need to have a 4 foot arm to shift).

Another view that shows how the driver's side takes up most of the width of the car.  The passenger seat is much skinnier.  Bill said that to expand the width of the passenger seat, he sat in it and then threw himself left and right until the aluminum seat was stretched to his liking.  Sometimes the simplest things just work!

1.8T power plant... non-stock turbo.  Standalone engine management, etc.  020 transmission with non-stock gears and 4.25 final drive.  Quick!

The pictures show the minor stuff..... the amount of thought and engineering that went into the cage (i.e. splitting open the rocker to insert square tubing to stiffen the sub-frame), body work (I have some fixing to do), and especially the suspension.... incredible work.

More to come later.  Hopefully the car runs fine at the autocross on Saturday.  Tires are old and hard as rock, but it will be an opportunity to drive it a bit to get a feel for it so I can determine what I want to change on it to fit my driving style.

Steve

Rabbit Farmer
Rabbit Farmer New Reader
2/24/19 8:46 p.m.

Nov 6, 2010

Fall is here and winter is next.  This is usually my slow season for working on the cars and then I get back into it around March to prepare for the first hillclimb in May.

Well, not this year.

Golf
1. I just sent back the driver's side axle to the Driveshaft Shop so that they can make the correct length version.  Once I get it back I'll be able to move forward.
2. Back to body shop to make one modification to the front end.
3. KalesCustom for IC tubing
4. (I think) Kalescustom for modification to cage for Mt. Washington Hillclimb (I'm hopeful that I can get in)
5. 034EFI for tune
6. Align

Scirocco
1. vwjodi to work on fenders and hood
2. New harness and different seat bracket
3. Figure out rim and tire combination
4. Tune
5. Remove old stickers (except Mt. Washington Hillclimb) from exterior
6. Replace plastic side/rear windows with glass so I can put this on the road (need to learn how to drive it)

Cabriolet
1. Build new engine
2. Install hydro clutch setup (mechanical version right now)
3. Install different 02J with LSD
4. Install VEMS / tune

So, time to get started.  Spent the past week getting ready for winter.  Changed the oil on the WRX and the Jetta.  Put the Cabriolet and Scirocco in the garage sideways (wife needs to be able to part in the other bay).

Before and after picture of rims.... the powder-coated ex-silver rims are a pretty close match to the three gunmetal rims.  I now have 7 rims the same color.

Give you an idea how low and short the Scirocco is compared to the lowered Cabriolet.

Rabbit Farmer
Rabbit Farmer New Reader
2/24/19 8:47 p.m.

Mar 12, 2011

I understand the Mt. Washington Hillclimb (http://www.climbtotheclouds.com) letters are coming out soon.... looking forward to the event.

Golf gets its final body tweaking next week then I just have to wait my turn for the IC tubing (not a lot of work as only a few parts need to be replaced).

I woke up this morning and determined that I was motivated to start working on cars since the driveway was clear of snow.  So.... tore down the replacement engine for the Cabriolet.  Will bring block and head (and misc. parts) to the machine shop on Friday morning for cleaning.  I'll ask them to check things out while it is there to make sure there is nothing wrong with the parts.

Plan is still to put the 02J with LSD in the Cabriolet along with VEMS for standalone.

Scirocco.... I have the switch (used to start the car).... just need to solder it in.

A little progress.

Rabbit Farmer
Rabbit Farmer New Reader
2/24/19 8:48 p.m.

Mar 15, 2011

Car is sitting in the garage.... getting quite full in there.

Figured it was time to stop taunting mother nature and get rid of the "Tree 1, Car 0" score card on the side of the door.  When I picked up a four door Golf of the same color two summers ago, it included three doors.  When the front fenders, hood, bumper were being painted at the end of last summer (during the rebuilding), I had them blend in the door so that it matched with the fender.  (matches old vs. new paint).


Removing the door required the removal of parts of the passenger side dash to access the inboard bolts.

No power to roll down the windows?  No problem!  Enter Volkswagen Special Tool #1972

I plan to shorten the bolts and put one through the center (original shaft is in there now); figured an allen head bolt of the same diameter head as the shaft would be a good replacement).

2AM.  All back together.  Still need to adjust the front fender.  Leaving the front bumper off for now as it needs to head back to the body shop this week for some final tweaking.  Body will be done at that point.

Plan is to bring to KalesCustom for the IC tubing, etc. next week.

There is a little bit of binding in the front end... need to figure out what that is.  I'm hoping there are no issues with the transmission.  It going through all the gears just fine, but turning the wheels all the way in one direction makes some noise.  Darn.  I'll worry about that after the car is together 100%.

Rabbit Farmer
Rabbit Farmer New Reader
2/24/19 8:49 p.m.

Mar 17, 2011

Busy week.

Finished installing the door, door card, assembled dash (both sides), made a bracket to hold the ECU, installed the replacement A/F gauge, aligned the passenger fender and door, installed a second fire extinguisher on the passenger side tunnel, and brought the car to Jct. Motorsports (Chris Putzier) to have the frame rail tweaked a little.  Off to Kales Custom on Friday or Saturday to wait its turn in the queue (assuming that I am not going to RI; have a bit of a cold [i]and[/i] have a lot to do... can't win).

Plan tonight (if I feel up to it) or Friday (if I don't go to RI) is to complete the Cabriolet engine tear down and bring it to RPM machine shop for testing and cleaning.

Received a pleasant letter in the mail today.  The letter told of my driving prowess, how women flock to me, along with the winning lottery numbers for next week's drawing.  In the voice of Kevin Malone (the office), "Nice!"

Rabbit Farmer
Rabbit Farmer New Reader
2/24/19 8:49 p.m.

Mar 26, 2011

Before (May 2010)

And now... (March 2011)
Sitting at Joey's (http://www.KalesCustom.com)

Rabbit Farmer
Rabbit Farmer New Reader
2/24/19 8:50 p.m.

Apr 13, 2011

I haven't been sleeping....

Should have a lot of updates by the end of this weekend (if not sooner).  I have been working on the Cabriolet, Scirocco, and the Golf.  Well, actually someone else is working on the Golf.

Figured out the binding in the front of the Golf... axle is too short.  It is going back to DSS tomorrow. That is good news... it isn't the transmission.  (round of drinks, please!)

Working on building a pretty stock 1.8T tonight.  Not posting pictures as it isn't exciting.  Engine is for the Cabriolet.  Grabbed boxes of new piston rings off my shelf and noticed they were 82.50 instead of 81.00mm.  Looked in the ol' Bentley and noticed that 82.50 is for the 2.0 liter engine while the 81.00 is for the 1.8T.  Crap.  I purchased these 3 years ago.  Noticed that one box had 81.00mm printed on the side... figured that I had only one 82.50 odd ball. Nope, they all said 81.00mm on the side.  Turns out I paid $82.50 for them... what are the odds?

Anyway.... lots of progress.  Hopefully some pictures posted this weekend with the updates.

Steve

Rabbit Farmer
Rabbit Farmer New Reader
2/24/19 8:51 p.m.

I'm so weak... so weak!

Price of rings for stock pistons is not cheap.  Hmmmm.... I have a set of Wiseco pistons from the Golf wherein one was damaged on startup (valve failed) when bringing to dyno two years ago.  Ordered one piston today from http://www.wiseco.com.  Looks like I can run all the boost I want in the Cabriolet now.  Yes, I will need the 20mm pin connecting rods, but such is life.

I still have an extra engine at the machine shop right now.  I guess I will make [i]that[/i] one stock.  (thinking ahead for the Jetta this summer).  End goal is to have a spare block that is partially assembled (crank, seals, etc.) but missing rods and pistons.  Back up since I have four 1.8T cars.  Planning to sell the Jetta this summer.

Now... since the rods and pistons are upgraded..... the turbo is starting to look small.  The wife is all for more power.

Bigger turbo means I have to verify that everything else in the equation is up to snuff (fuel pump and injectors).  Sigh.

Heading out to the garage to change the snows on the Jetta, install glass on the Scirocco and finish removing the old Cabriolet engine.

Cabriolet 02J transmission is perfect, put I'm putting the old 02J transmission from the Golf (what I had before the 6-speed swap) as it has an LSD installed already.

Big thanks to Pete (almstVW) for helping me to source a lot of the misc. engine parts.

So weak......

Rabbit Farmer
Rabbit Farmer New Reader
2/24/19 8:51 p.m.

Apr 17, 2011

It seems that I procrastinated this winter on everything except the Golf.  Guess I was a bit lazy and the garage is a bit hard to work in with three cars.... didn't want to leave the wife's DD outside in the snow.

Going full speed ahead on the Cabriolet.... goal is by Wolfsgart 2011 in Vermont (July).  Should be doable, but only after I figure out exactly what and how I am going to do everything.

Still researching a good turbo option.  Thinking 250wHP would be crazy.  200wHP might be a better option with a smoother TQ curve so I don't have instant wheel spin.

So, here I am thinking about how to do a hydraulic clutch setup for the 02J and sell the mechanical.  Nothing wrong with the mechanical for me, but a little hard on the wife.  It is her car.

Looking at this for ideas [url]http://www.funksoulkitty.org/[/url] then came across this:
[url]http://www.cncbrakes.com/hcpp.asp?grp=hcpp&subgrp=all&series=360[/url]

My thought is that I wouldn't have to make much of an impact on the firewall (i.e. reinforcing the metal to take the back and forth motion needed to support the master cylinder use nor would a large hole be required).  Essentially, all the work would occur under the dash with only the hydraulic line going through the dash.

This, of course, would require some folks good at engineering and such to determine if and how this setup could work. Then those good at fabrication marrying this to the current pedal cluster.

Just my thought process right now.

Rabbit Farmer
Rabbit Farmer New Reader
2/24/19 8:52 p.m.

Apr 26, 2011

[whine]Not a happy camper.  Ordered Scat rods for the Cabriolet and couldn't get the wrist pins to work.  Hole was too small on the wrist pin end.  Contacted vendor and he told me "All rods may need to be lightly bored or clearanced for a proper toleranced fit."  Really?  I would have expected Scat to be able to make a round hole that would accept a 20mm wrist pin.  Funny part is that the pistons I am using used to be mounted to Scat rods so I know they worked in the past.  Sigh.[/whine]

So, perhaps I have been lucky with the other three sets of Scat rods that I have used and finally ran into the 'norm' of having to bore the rods to use them.

Grumble-grumble-grumble.

On the good news front... Golf is ready to come home.

Still waiting on axle to come back from DriveShaft Shop.  ECU is sitting with 034 today for 4 bar MAP sensor and firmware update.

Getting there.

Steve

Rabbit Farmer
Rabbit Farmer New Reader
2/24/19 8:53 p.m.

May 16, 2011

Credit card bill hasn't arrived yet... means I can spend more money. 

Cabriolet

Had a turbo on order.... GT28RS with T25, internal waste gate, 5-bolt discharge to V-band exhaust.  Turns out I actually have a T3.  It is larger than what I'm using on the Golf.  T3 is not available with internal wastegate and 5-bolt discharge to V-band.

Similar turbo is now on order.... T3, external waste gate, and V-band exhaust.

Finally got the Cabriolet out of the garage; currently at someone's shop (Cyrus) to convert mechanical 02J clutch mechanism to hydraulic.  Mechanical 02J kit will be for sale when I'm done along with the original turbo, fuel pump, etc.

Bosch "044" will now deliver the fuel.  Fixed some holes in the intercooler.

Some assembly required: Scat rods with 20mm wrist pins, Wiseco pistons, etc.

Done as much as I can do until I get the Cabriolet back.... I had to leave a lot of the external stuff on the engine so that engine block (headless) and transmission could remain in the car for the hydraulic clutch fabrication.

Golf

A lot of progress with the Golf.... a lot of small stuff too.  (Devil is in the details... he is also in canned chopped ham)

In short, installed a lot of small stuff, adjusted some other things, cleaned, and.....

Finally got the axle back from the Driveshaft Shop.  What a long strange trip that has been.  For those of you that have been following that saga, keep in mind that this started in August 2010.  Everything seems to fit.  Fingers crossed that there aren't any issues.

The ECU was with 034 to have the 4 bar MAP sensor installed (currently have 2 bar) and a firmware update; should be in my hands on Tuesday.  Big thanks to everyone (Christian, Paul, etc.) that took the time to answer my plethora of questions.  

Have to work out schedule with Marc ([url]http://www.efiexpress.com[/url]) for tuning.

Mounted old tire on newly painted rim (rim trashed in off-road adventure).... now have four matching rims with R888's installed.  Car is finally rolling on all race rubber and two axles.  Planning to order four new rims; waiting on BFG 225/45x17 A01 from Libra Racing (John Buffum's shop); he is hoping that there will be an extra set available for me.  (fingers crossed)  If not, backup tires will be another set of R888.

Well, my fabrication skills produced this aluminum box.  Pop rivets are present to hold it together before welding.  Functional, but not something that you'll see on e-Bay anytime soon.

Installed.  Mounted to the stock battery tray.

New breather and oil separator.

Very solid skid plate.  Aluminum is much tougher than the original "Panzer Plate" that I had on there, plus (and more importantly, as the Diesel Geek panzer plate was deposited out the rear of the car during the May 2010 off road excursion) it is fully braced in the front and along the length of the plate.  Still need to paint braces...

Where I left it tonight.....  Thursday it gets an alignment.  Hmmm, still need to charge the A/C.

Scirocco

Nothing exciting.  Ordered flip down visors like I have in the Golf.  Better than the tape/paper that is currently being used as a sunvisor in the Scirocco.  Planning to start removing the plastic windows and install glass once I'm done with the Golf.  Can't do anything with the Cabriolet until I get the car back, so my "extra" time will be back with the Scirocco.

Yawn.  Enough for one night.  Been working on the Golf from 1:30 until 10:30. 

Rabbit Farmer
Rabbit Farmer New Reader
2/24/19 8:55 p.m.

What a busy weekend. Literally, I was outside from 9:30am until almost 10:00pm (save a short lunch and dinner) trying to get the Golf 100% ready for the season.

In short, Golf is 100% running and driving (tune is tentatively scheduled for Wednesday with EFIExpress.com).

Replacement 6-speed (a buddy of mine at 6-Star Motorsports did the work this time as my schedule was full.... big thanks to Charlie) works great.

He also lent me a Flux Capacitor Tester to help me figure out why my fans weren't running.

I hit some dead ends as I am not an electronic genius so Jason from Vems.us came over and got everything figured out (we hope); new large fan and thermo-switch.

Rain or shine.... I was going to get the Golf done!

Painted the skid plate bracket.... looks purty.

Removed the bomb from the backside of the airbag....

Always loved this sticker so I had to get one...

Accomplished:
Swapped harnesses and seat/bracket/sliders from passenger side to driver's side; removed a lot of the air bag wiring and sensors from each side of the car (wiring runs along the sill and goes to the side of the car and the seat); wire loomed from dash to the back of the car any wiring that I hadn't addressed in the past; painted misc. parts associated with the window net; tested fans, tested wires, hand drew wiring diagram to make sense out of everything.... called Jason at Vems; spent a little time trying to fix the hatch (it isn't latching); did a lot of other things.  Ready for a nap...

Cabriolet....

Turbo came in from KalesCustom.com; hanging on the back of the engine for now.  Good conversation with Joey to figure out what to run for external wastegate spring, fabrication needed, etc.  Once the Golf is done, I will get back on the Cabriolet.  Planning to have it at Wolfsgart.

Waiting on pictures from Cyrus (he fabricated the hydro clutch setup) so I can post those.  Really nice work.

Strange collage of pictorial update, but you get the point.

Steve

Rabbit Farmer
Rabbit Farmer New Reader
2/24/19 9:00 p.m.

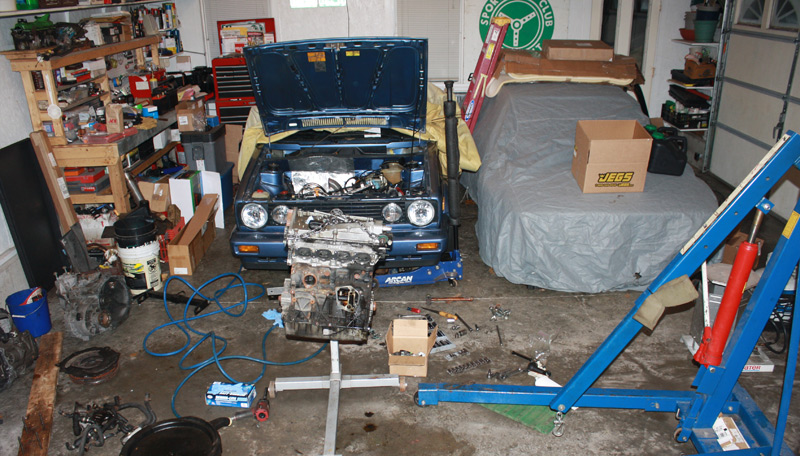
Well, I should go to bed, but the no-doze, red bull, large diet Pepsi (like Coke better, but KFC was close to the exit) says that I should type up today’s events… So, without commercial interruptions (pictures), we present:

The Day that MotorGeek “Timmy” Stopped By the Dyno
(insert dark and stormy night theme music)

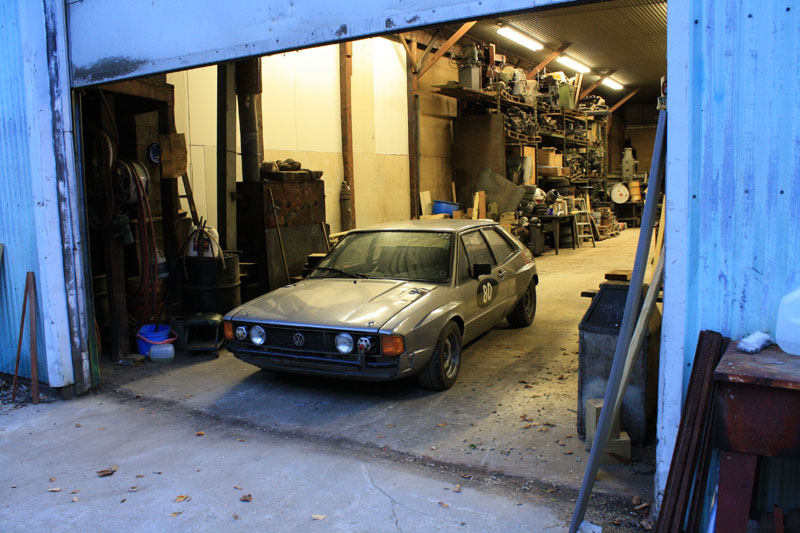
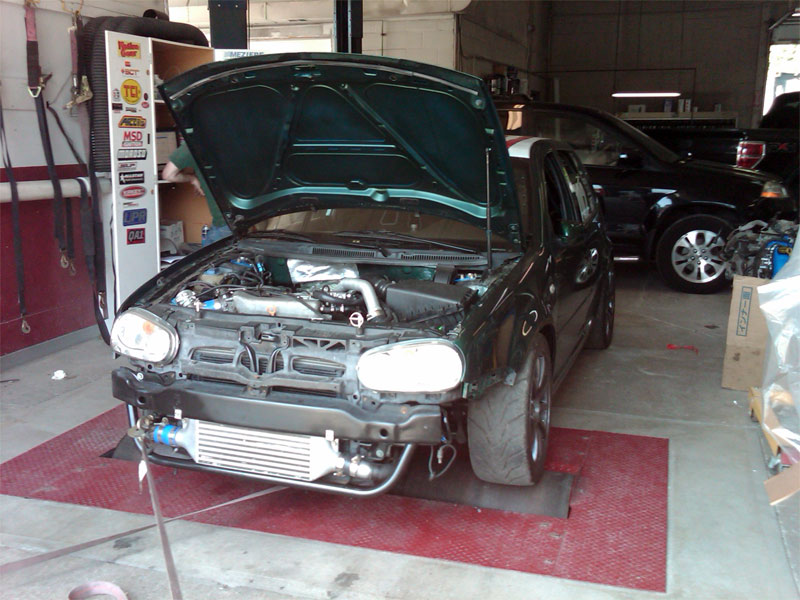
Left the house at 7:30am to drive 3.25 hours south to Hudson, NH.... of course, with all the construction in VT it took almost four hours.

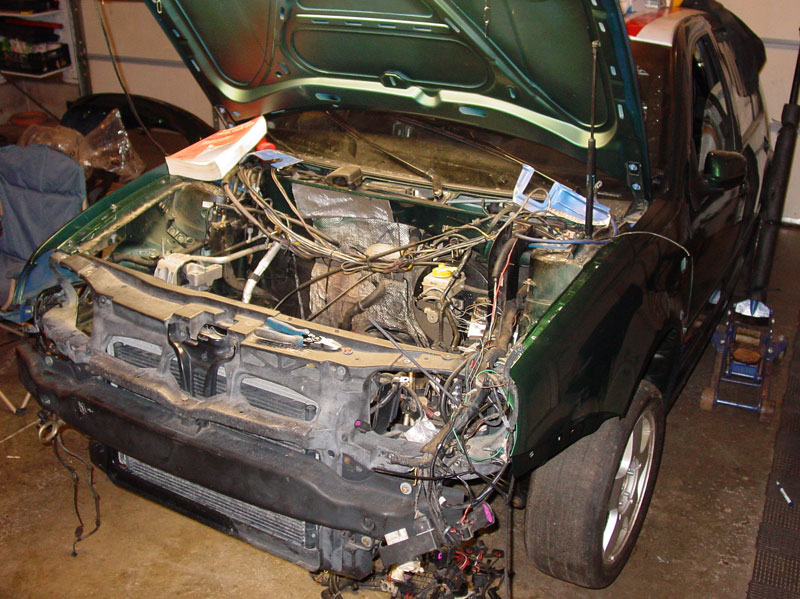
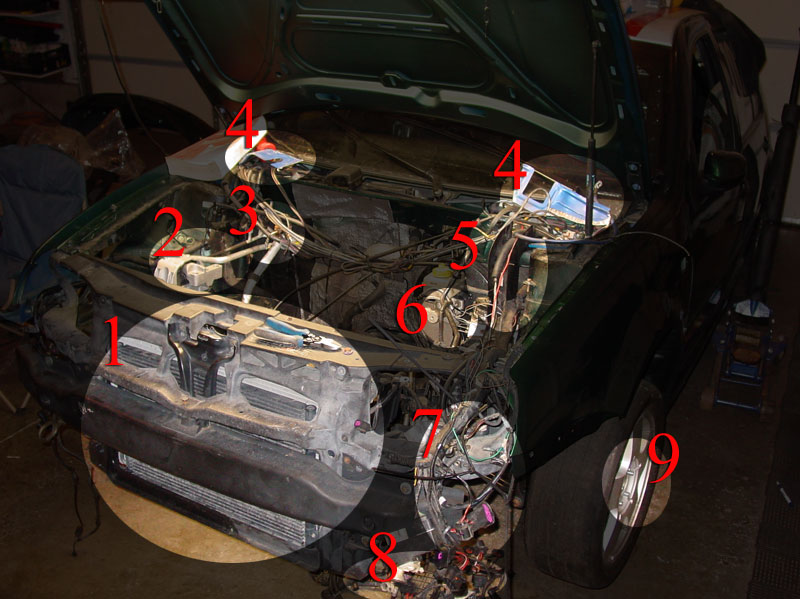
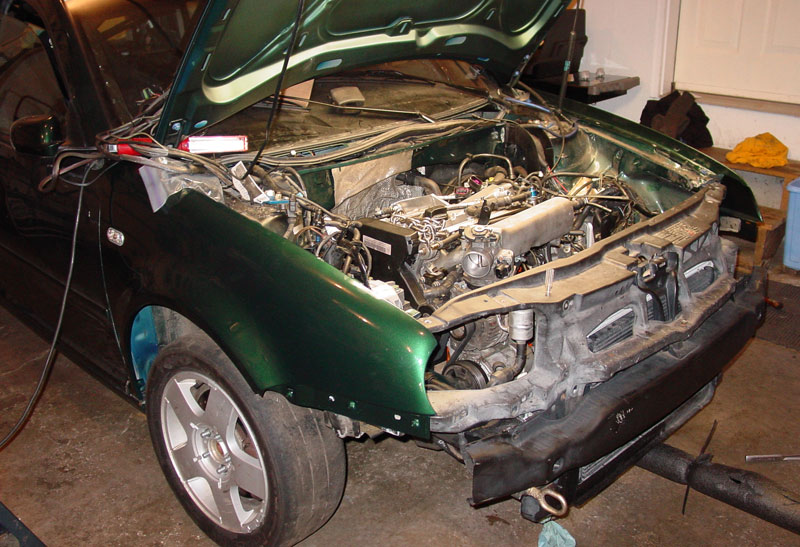
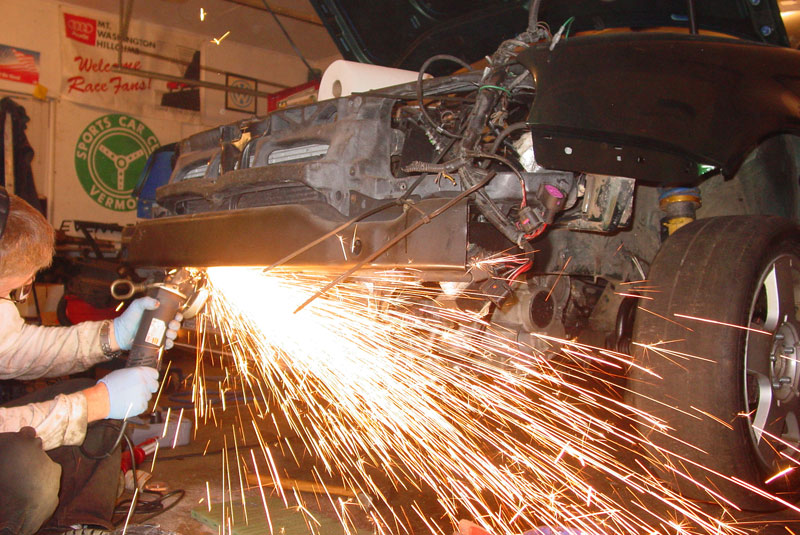
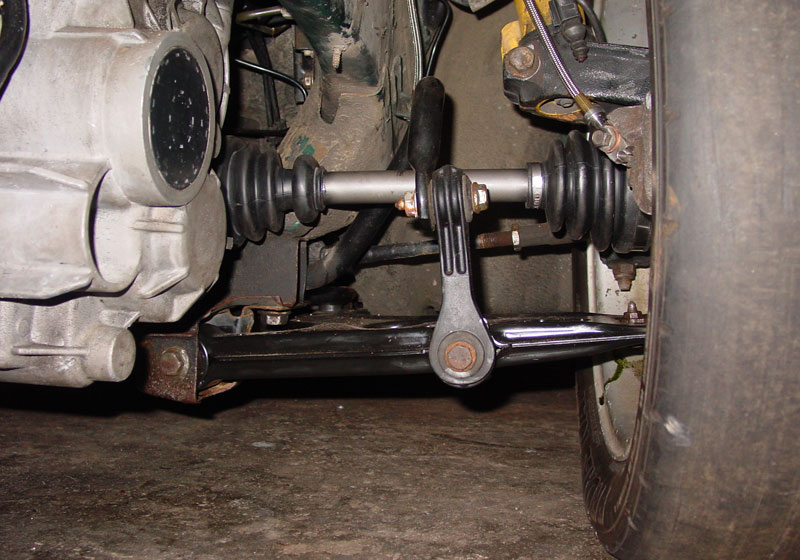
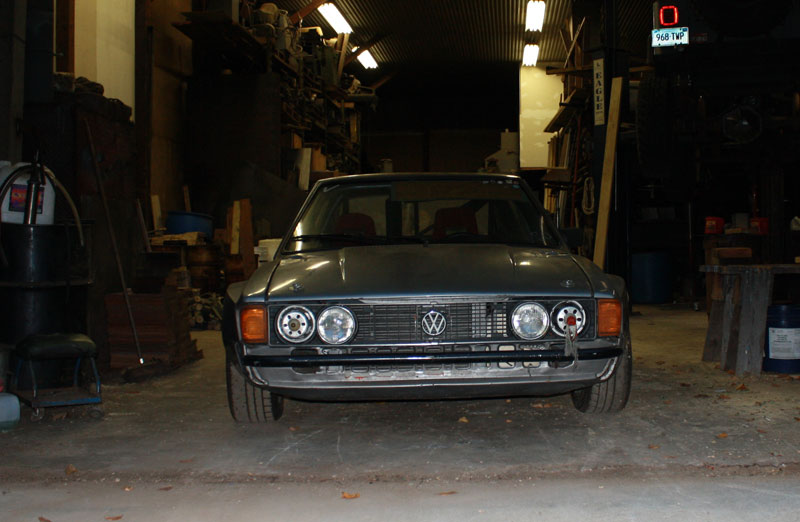
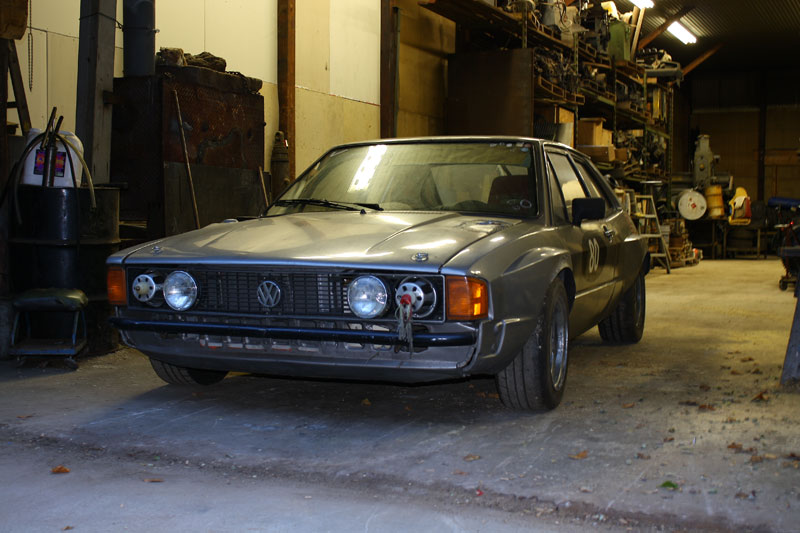
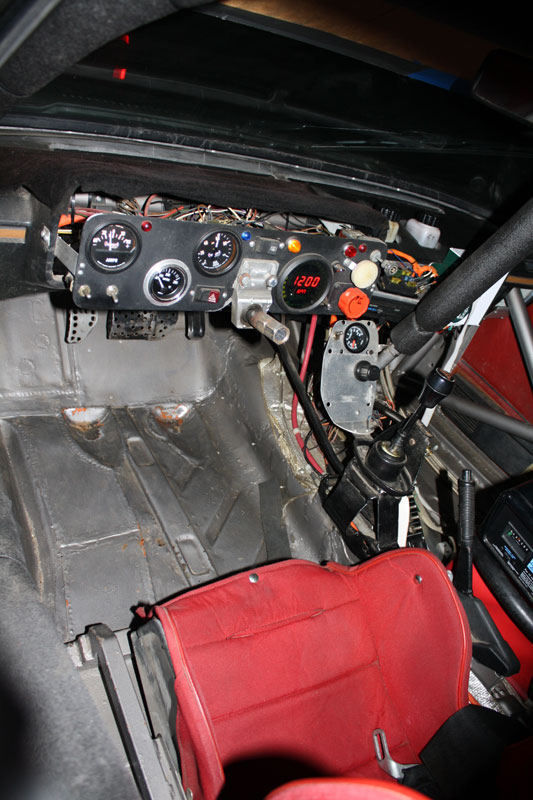
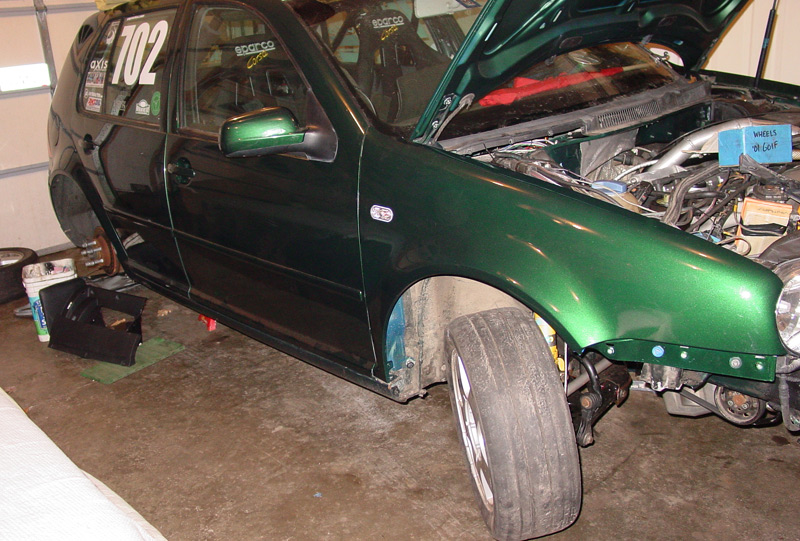
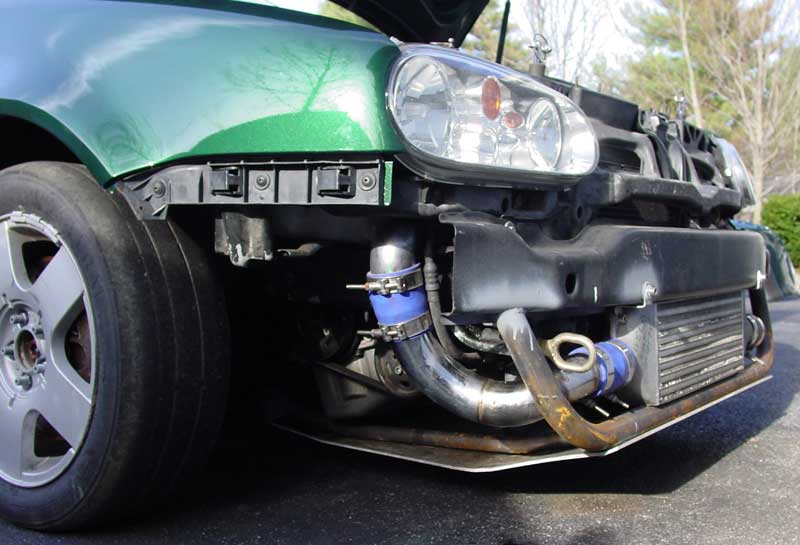
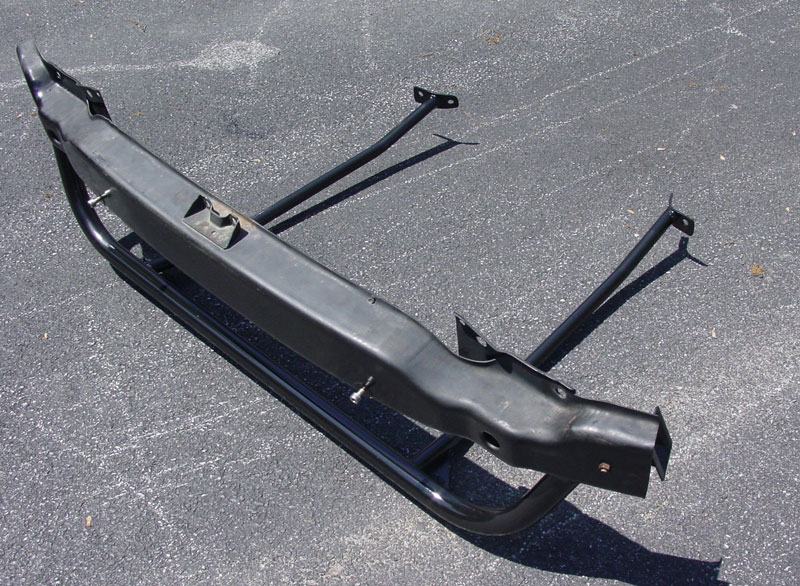
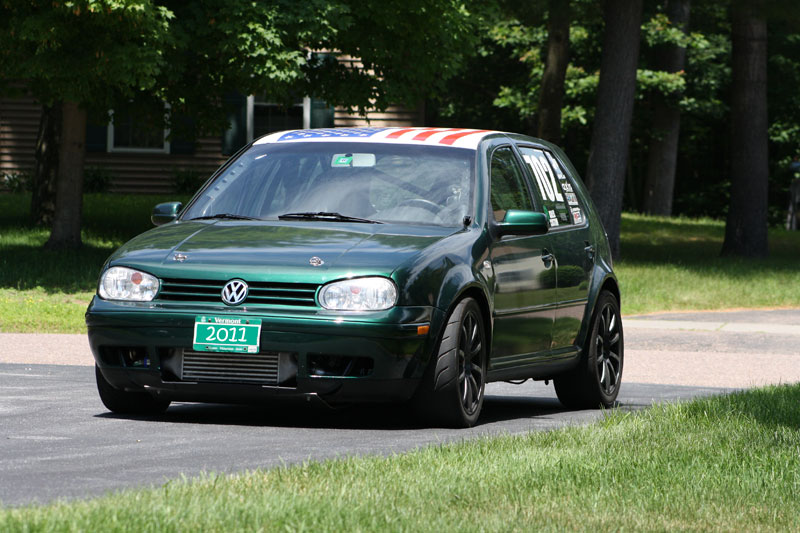
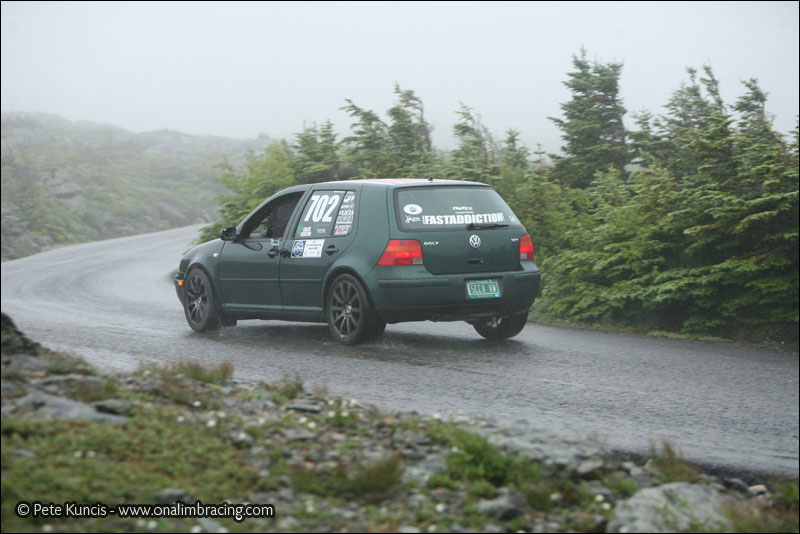
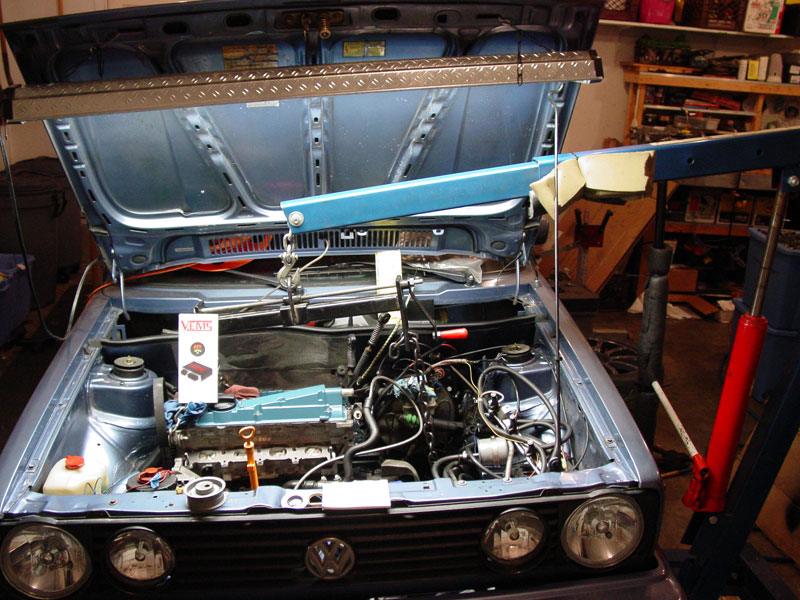
Prettier front end... still need to figure out a better way to attach the bumper skin with the skid plate bracket slightly in the way.

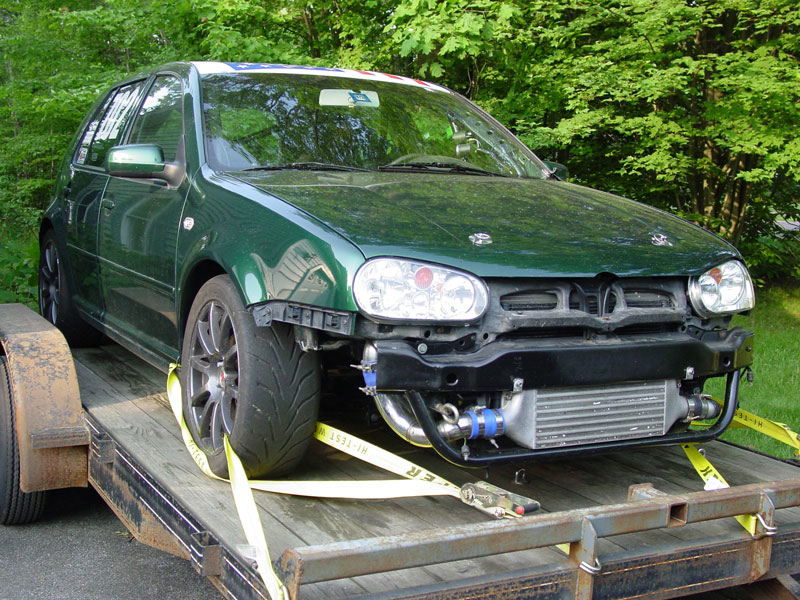
Arrived here at 11:15 with Marc (http://www.EFIexpress.com) arriving shortly thereafter..... Fashionable late (his words).

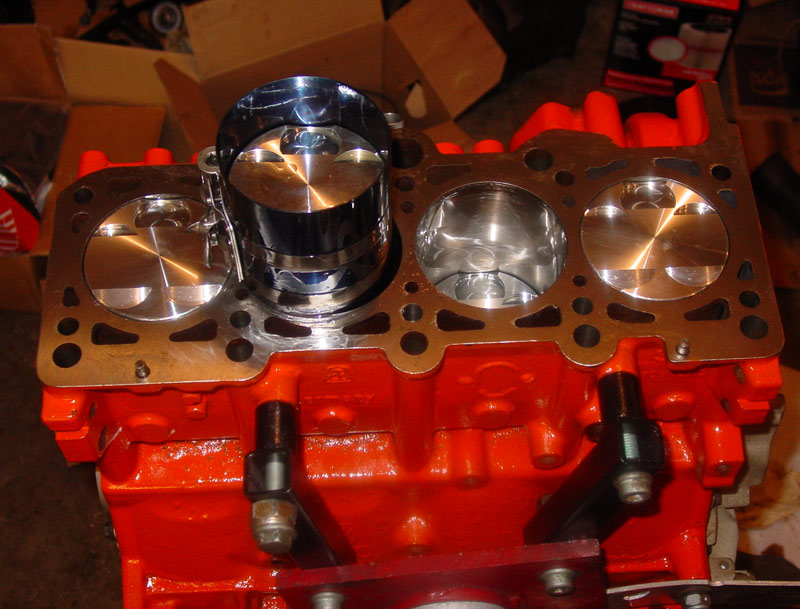
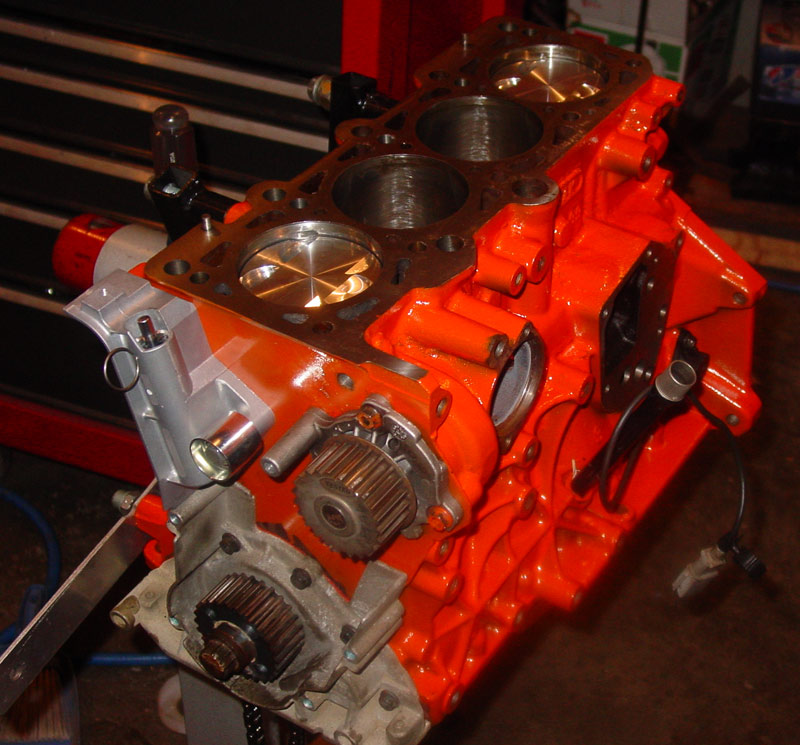
Dyno time was set for 12:00 giving us 45 minutes to talk about issues since the past tune (pistons were porous from excessive heat), talk about the exceptions for the next tune (foot to the floor for 7.5 miles up Mt. Washington, more fuel, etc.), and giving Marc time to convert the old 2D map to the new 3D map setup.

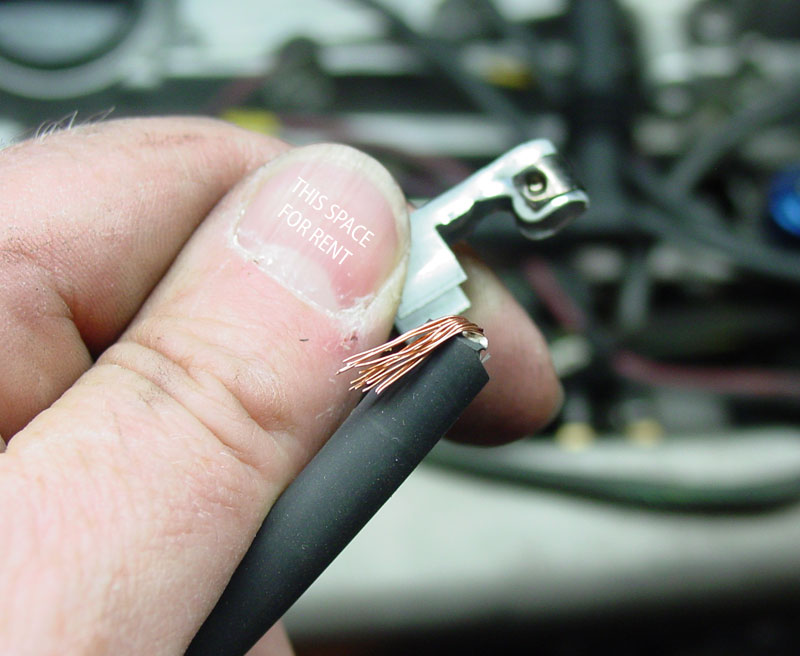
We started the car and things didn't sound right.... I had thought it was because of the new ECU (updated firmware and 4 bar MAP sensor) wherein not all variables were set so it was running funny.  Turns out that the car had been running on three cylinders since I put it together… it was actually pretty peppy for three cylinders.  It turns out there was an issue with the 034 wiring harness that we fixed after the “incident”; problem corrected and the car was finally strapped down by 1:30.  Ugg… Behind schedule.  Another car was supposed to come in at 3:00 so we had to be quick.  Soooo, we did want normal people would do during crunch time… We went next door to the Dairy Queen and had lunch.  Great shakes!

Meanwhile, back at the ranch…

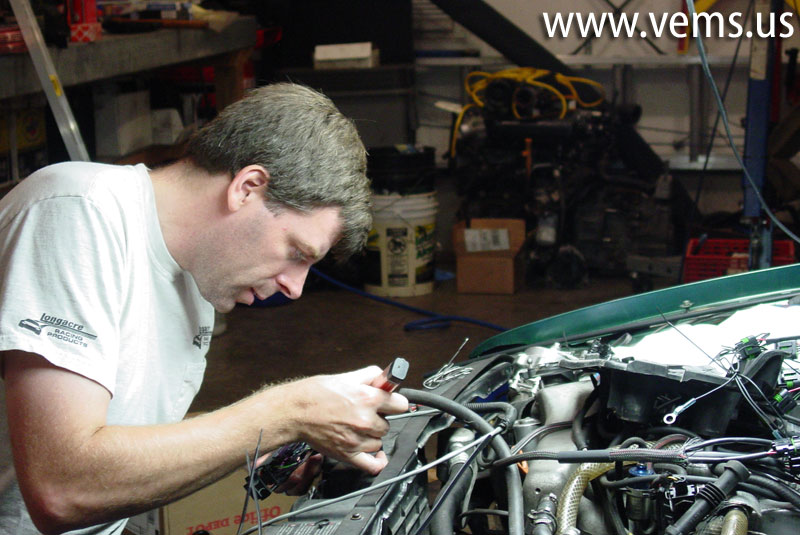
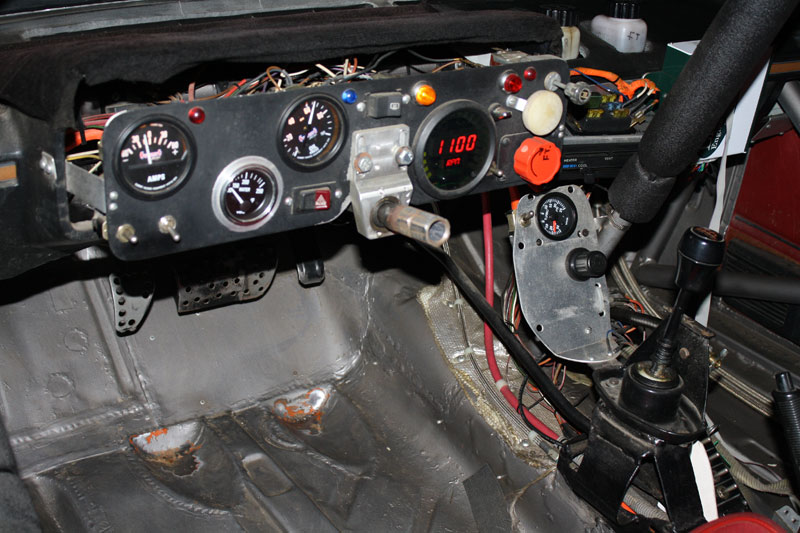
We got situated in the car with Marc in the passenger seat and me in the driver’s seat… this is a first, I would be doing the driving on the Dynojet dyno instead of the dyno owner.  Even better, the owner handed Marc the controls, explained how to use it (get roller started in 1st, go through 2nd, and then 3rd  up to 2000 RPM, then push the green button, floor the car up to 5000 RPM (the limit we set for the first pull to determine a baseline), let off the gas/push in the clutch, and FOR THE LOVE OF GOD DON’T TOUCH THE BRAKES!.... and then push the red button (dyno brakes).  Oh, and two hands on the wheel.  Pretty easy… lots of pulls.  Because I was driving, I couldn’t take pictures so go search the internet for a rabbit with a pancake on its head and call it a day.

Well, the next two hours were a real learning experience.

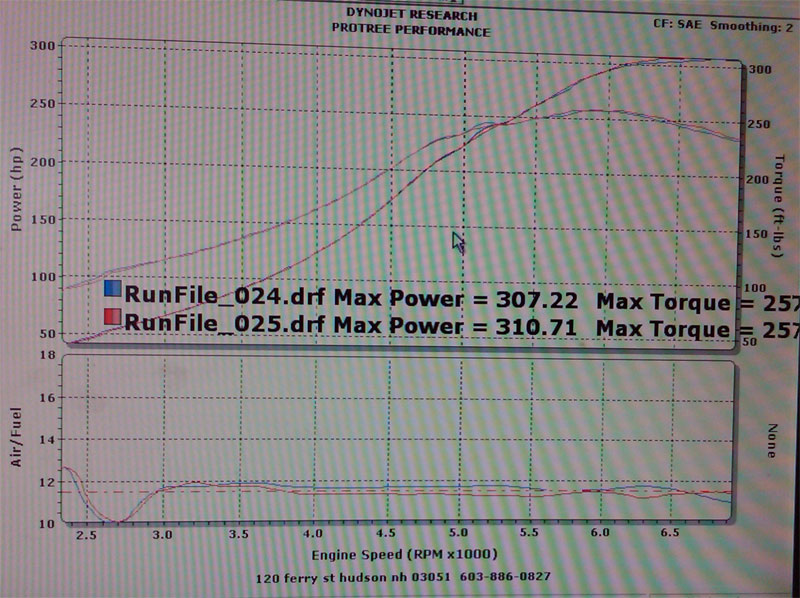
First mild pull was 305 wHP; this shows us that the Dynojet dyno shows higher numbers than the KTR dyno from last summer… this was expected.  Regardless, this is not a game of the highest wHP numbers win the game and gets to bring home some giant pink elephant that will sit in the basement until a suitable time to sell it at a yard sale for 25-cents.  The intent of the dyno is to have something consistent, repeatable, and provide a load so that we can get the best performance out of the engine.  No kidding, huh.  (Well, you should have seen the look I got last summer when I was talking to a guy with the Honda with the big wing about wheel HP vs. crank HP.  Yes, VTEC came up in the conversation many times)

The plot thickens…

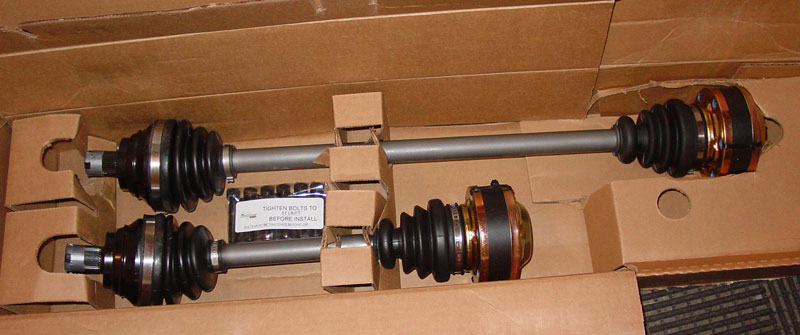
The stock redline is somewhere around 6800 (either 6750 or 6850; I don’t  recall); I had the redline set at 6500 since day one because I wasn’t sure what all the components could take for horsepower before things started failing.  You know, like 5-speed gearboxes.  Since I have the stronger 6-speed in there and DriveShaft Shop axles (that was a saga), we turned the redline up to 7000.  Yes, I know we can turn it up more, but I’m okay with 7000 for now.  Everything worked up to the old redline… no problems.

After a series of 2000 to 5000 RPM pulls to setup the fuel tables, we went for the gold and tried a 2000 to redline (using the rev limiter at 7000) pull.  After the pull, Marc was reported as saying “Steve, why did you let off at 6500?”…. a meek response of “I didn’t…”

(insert picture of two very confused people…. One person probably had a better idea what could have happened and while the other was daydreaming about having another DQ milkshake because it was hot as hell in the dyno room; naturally, Marc still had his shake)

Looking at the numbers, the boost kpa went from 220 to 70 (something like that)… you know, manifold pressure… even with the throttle at 100%.    Hmm, we must have blown a boost hose.

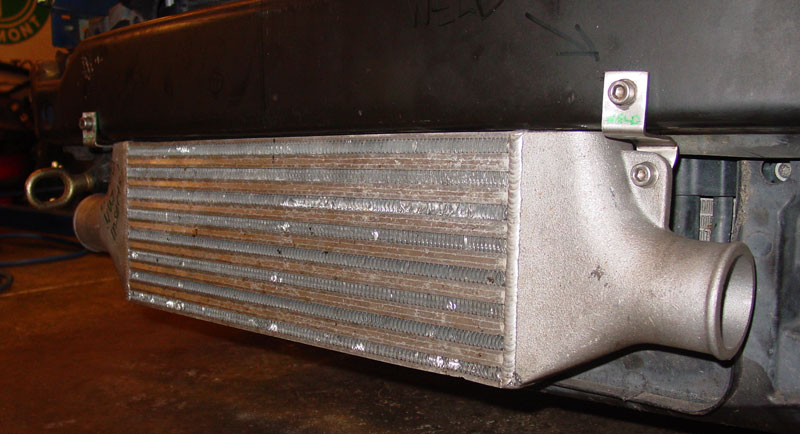
Non-DQ guy got out to check the intercooler hoses… nope, they are all intact.

Intermission: Dyno owner tells us the 3:00 cancelled so we have until 5:30.  Whew!

Dyno 2000 to redline again just in case it was a fluke.  Same thing.

Dyno 2000 to redline with Marc staring at the blow off valve… nope, that did not open prematurely.

Dyno 2000 to redline with Marc staring at the armature of the wastegate... nope, didn’t move.

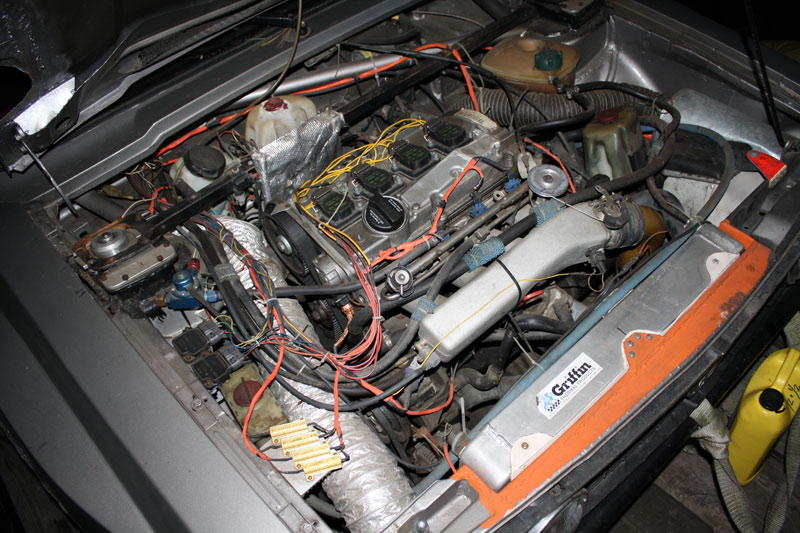
Must be something with the intake/airbox with something plugging the air from going in.  Removed the stock airbox and it seemed to work. But…. Dum dum dum duuuuuuum…. We found problem #1.

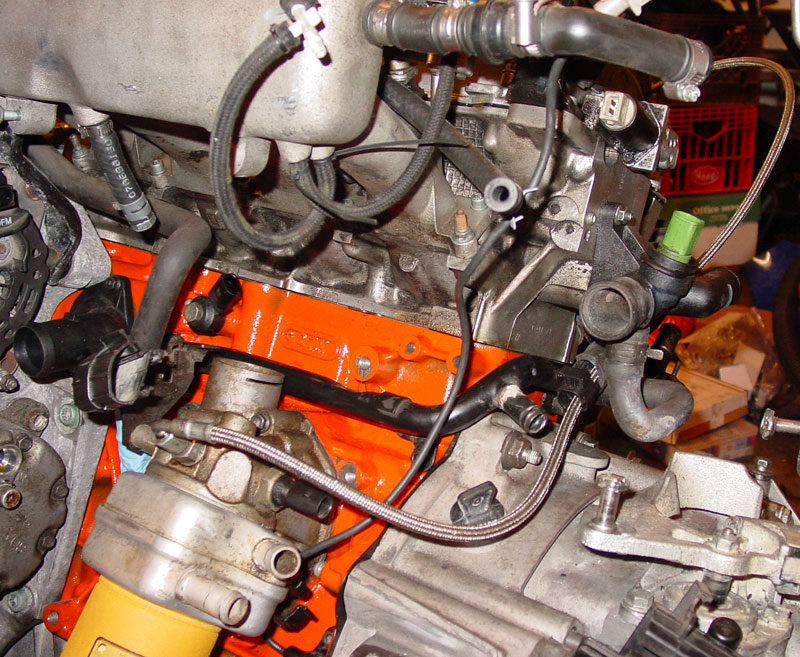
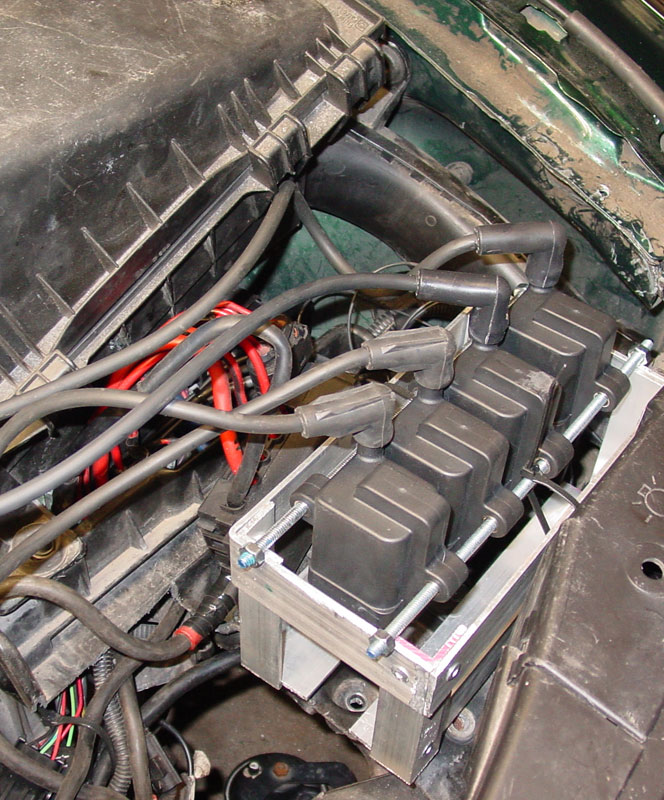
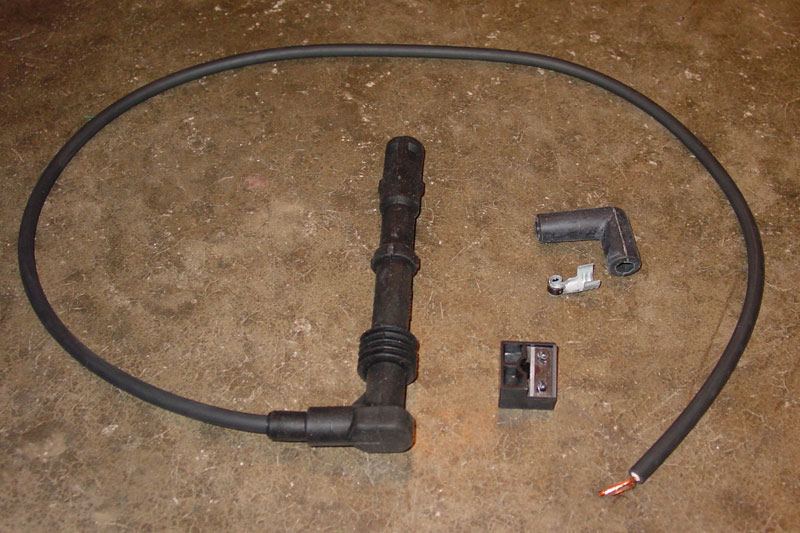
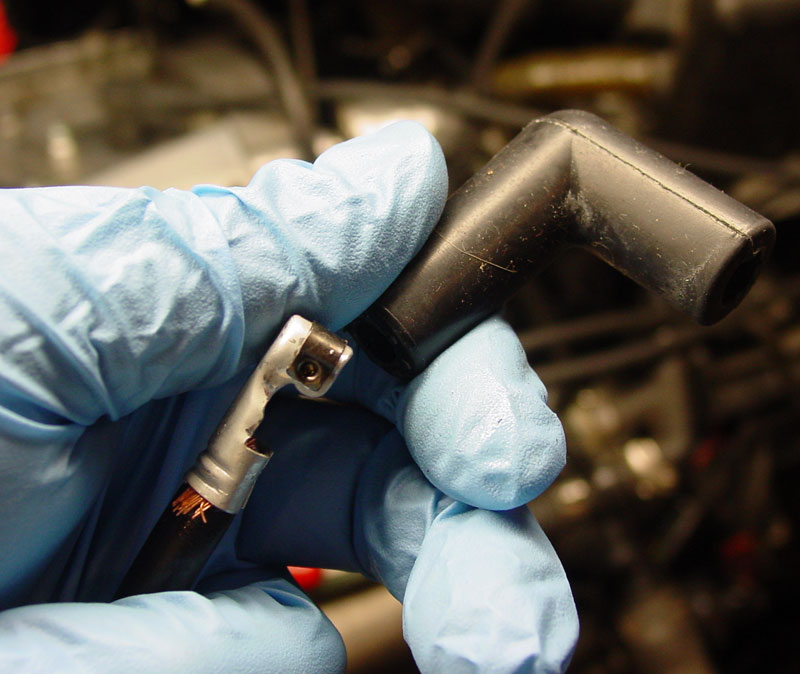
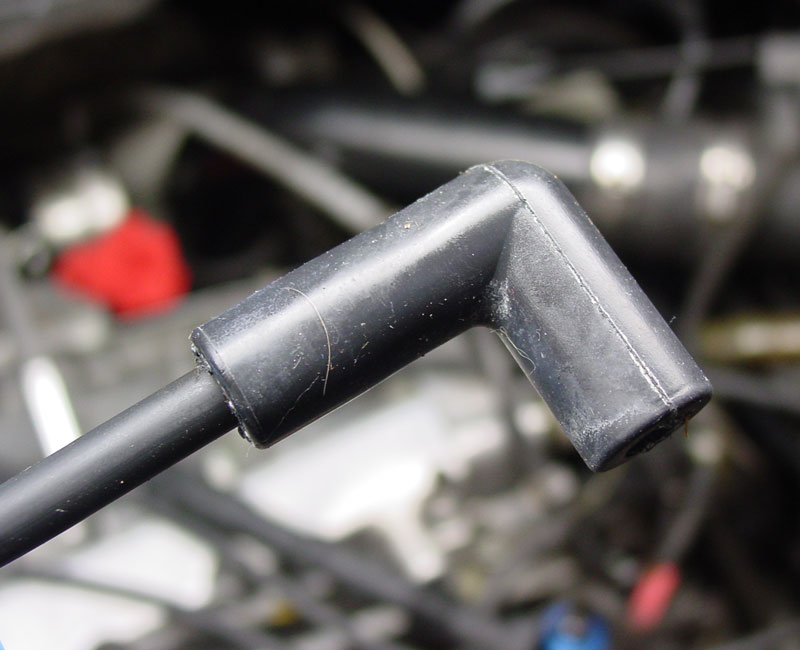
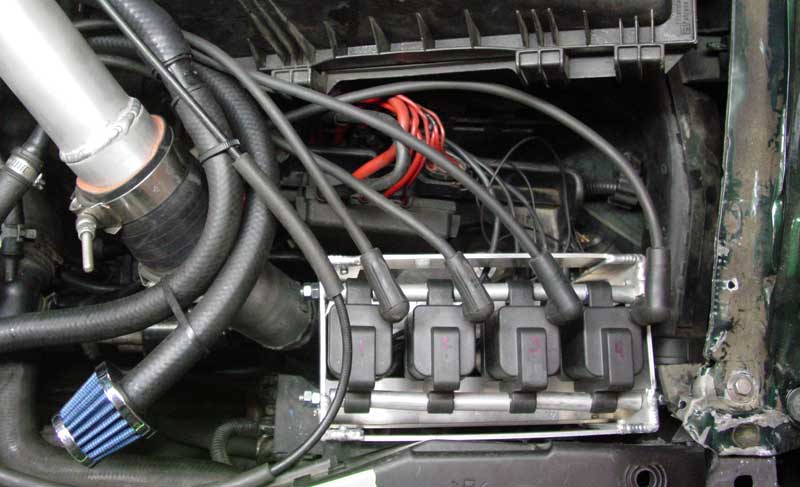
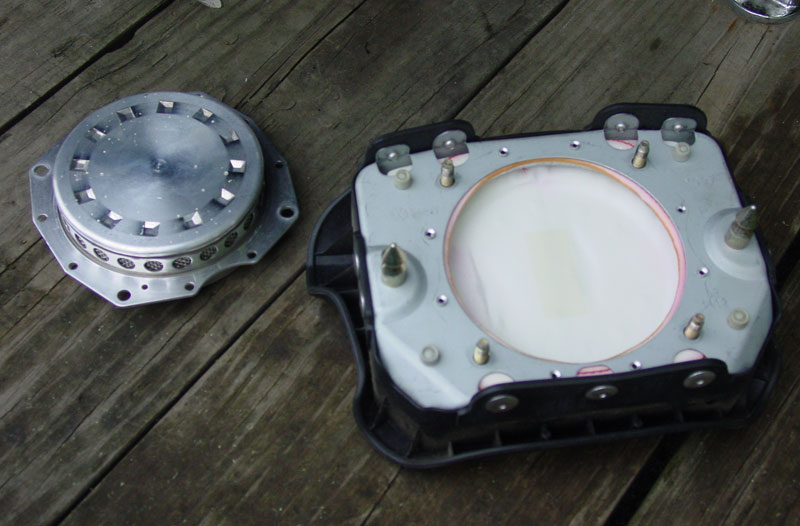
Issue #1: The rubber elbow mounted on the turbo inlet was very soft and was collapsing, thereby, cutting off the airflow.  In the words of Dr. Roof (Robin Williams), “Damn straight, baby.  You can’t make butter with a toothpick!”  That would have to be replaced.  Marc said he could compensate for the restriction at higher RPMs by adding more fuel (the compensation would be needed for after I replaced the elbow with something that didn’t collapse).  By leaving the airbox off the setup, the elbow did not collapse a lot so we were able to continue as we were able to get up to the 7000 RPM redline.

Because of some anomalies (thanks, Geordi La Forge) in the air/fuel numbers (lean condition) we increased the baseline fuel pressure from 50 to 60 psi (or perhaps it was 40-50; whatever, it went up 10 psi) via the FPR. (gotta love those TLAs..... three letter acronyms)

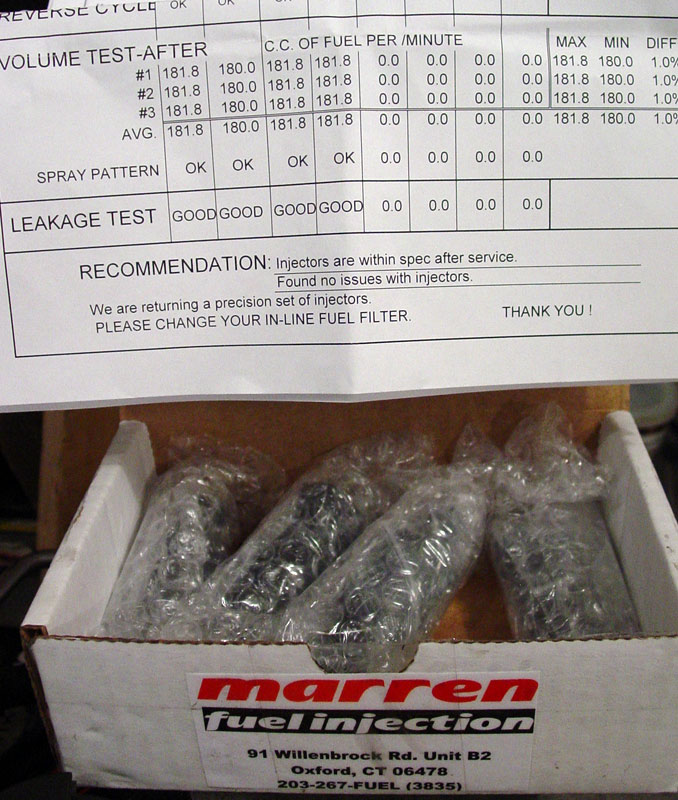
A couple more pulls wherein the anomalies were still present…. It was like the increased fuel pressure did not improve the A/F numbers at the higher RPMs.  Checked the injectors and they were running at 90%... they are still big enough for the HP numbers I want.

“Timmy” popped in to talk about super secret turbo stuff, talked for a while, helped stare at the wastegate to see if it opened prematurely… it didn’t.  Premature wastegate opening is embarrassing at any age… but she will understand.  She’ll read a book while you stare at the ceiling trying to figure out what happened.

Last run of the day and enter…. The Show Stopper

(damn… I hope the caffeine wears off soon)

Let’s stare at the fuel gauge while running it 2000 to redline.  With a 1:1 relationship with boost to fuel pressure, the expectations were for the boost and fuel psi to mirror each other.  As we got closer to 6500 (the old redline where we did not have any issues), the fuel hit 80 psi and the boost was 20 psi (something like that) on its way to 25 psi and then… fuel pressure dropped to 60 psi.  I let off the gas.  Oh oh...

Issue #2: The #$%#$@#& Walbro 255 pump was not up to the task.  This explains the porous pistons.

Interestingly, when I was researching fuel pumps for the Cabriolet last month (same engine as the Golf, but a slightly smaller turbo), I ended up with the Bosch 044 because of the warnings on 034’s site that there was no warranty on the Walbro pumps because even the manufacturer did not stand behind them.  Marc even said that the pumps were known for failure… why wasn’t I aware of this years ago when I was building this car?!

Well, the good news… my fuel mileage on the way home was a lot better than on the way down.

The bad news… this is because I left the car at Marc’s shop instead of bring it home; great news would be that everything on the car worked perfectly today, the car was ready for the Burke hillclimb, and I could somehow explain the dead hookers in the trunk.

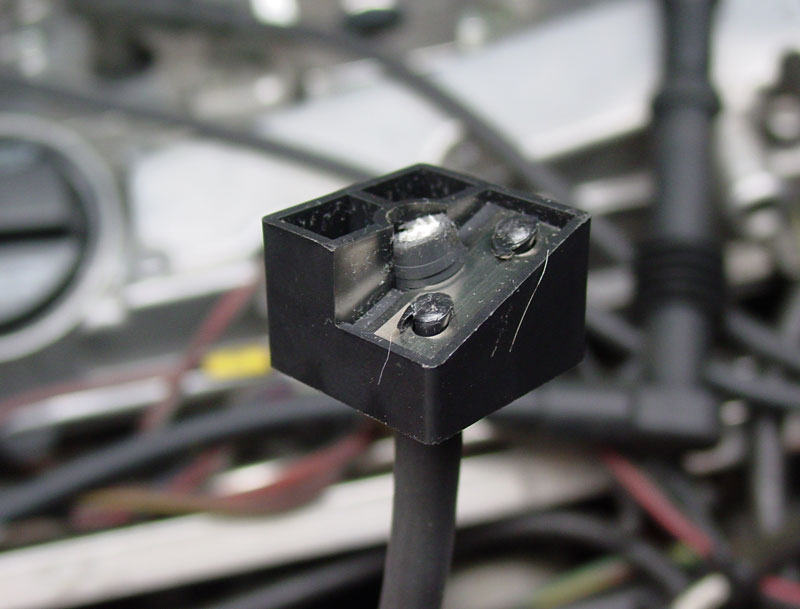
Marc is researching pumps (something mounted in the tank), will install the pump, install a new elbow, make some changes to the coil wiring harness, and tune it.

This means that I will miss the Burke hillclimb this weekend (as a driver).

The really great news is that we discovered the issues today on the dyno as opposed to on the hill.  This is a much cheaper alternative.  The 313 wHP number with no fuel above 6500 was pretty good.

I should be tired, but I feel like going for a bike ride, cleaning the house, putting the engine in the Cabriolet, catching up on some old movies, ripping all my CDs to MP3s, and...

Posting this story.

Rabbit Farmer
Rabbit Farmer New Reader
2/24/19 9:03 p.m.

Welcome to downtown Hudson, NH... home of Pro Tree Performance and Dyno (http://www.protreeperformance.com)

I got the call at 9:00am that the dyno was scheduled for 2:00 and I should be there by 1:30.  Good thing I was up at 7:00 to pack all my tools (just in case) and get everything else and order waiting for such a call.  What a good boy scout... be prepared.  It is 200 miles one way with constant construction in Vermont.  Trip actually went pretty well.

But, let's back up and tell the story of what happened between dyno tune #1 and tune #2.  Marc and company (http://www.EFIexpress.com) installed the Bosch 044 fuel pump, cleaned up the wiring harness to the coil packs (one 12 pin connector instead of four), and installed a 90-degree turbo inlet elbow that didn't compress like a cheap funny straw.

Meanwhile, back at the dyno... I got there at 1:30 and Marc was still about 15 minutes out, so I did what anyone with a Dairy Queen across the road would do..... get a medium vanilla shake.  That was lunch.  Tasty highlight of my day.

Dana (the owner of Pro Tree) was out sick so Marc and I had to tie the car down, hook up the A/F sniffer, fire up the computer (glad to know that I wasn't the only person still running XP... I have Win7 now), and get everything else in order.  We are getting pretty good at it.

Tune, tune, tune, tune.... 320 wHP at approx. 25 psi of boost.  That is enough for a FWD car used for hillclimbing that wouldn't be able to put down the full potential of the turbo (though, there is only a little bit left in it... I understand it is good for about 400 cHP)

After we get that all figured out, we turned up the fuel a bit to keep the A/F number rich to take into account the foot to the floor dynamics of a hillclimb.  Hillclimbs great a lot of heat in the engine as it has a lot of load due to the hill, plus there is a lot of foot-to-the-floor without the cooling affects from shifting (like you would see on the 1/4 mile or a track).  Nature of the game.

Anyway, after adding more fuel, we ended up with 311 wHP and 257 wTQ.  I'm good with that.  The goal wasn't even to add more power, just add more fuel to survive the 7.5 mile Mt. Washington hillclimb.

I hope to drive the car around the next three days to get familiar with the car again.  It is a bit loud when running full out so I'll have to keep the driving at mild instead of wild.

Hopefully, nothing exciting happens and the next update will be at, or during, the Mt. Washington hillclimb.  Though, I might start working on the Cabriolet... maybe.

Non-over-caffeinated Steve signing off.

Rabbit Farmer
Rabbit Farmer New Reader
2/24/19 9:03 p.m.

Jun 22, 2011

Picture (sans new VW OEM mud flaps) of the car as prepared for the Mt. Washington hillclimb (aka Climb to the Clouds).  The bumper doesn't fit perfectly with the skid plate and intercooler/IC tubing in the way, but between the zipties connecting it to the skid plate support bar and the fender liners, it is pretty well supported.  I purchased a set of OEM mudflaps to protect the underside from the dirt section of Mt. Washington; I did plan to do something across the whole bottom of the car, but didn't have enough time.  Surprisingly, this event took forever to prepare for....

Anyway, hopefully this isn't going to be a "before" and "after" shot of the car.

Hope to see everyone at the hillclimb.

( next event is Okemo on July 9-10.....http://www.hillclimb.org/events/event_okemo.html )

Steve

Rabbit Farmer
Rabbit Farmer New Reader
2/24/19 9:04 p.m.

Jul 05, 2011

Yawn.... more days working on cars.

Mt. Washington was wet and a little cold.  I figured out pretty quick that I "need" an AWD car with gummy-bears for tires in the wet.  Perhaps next year.

We had some smoking issues during the two runs on Friday so I brought the car home on Saturday morning at 4:30 am; Charlie (Six Star Motorsports) was nice enough to lend a hand from 9-11 trying to figure things out.  Decided that it was more than I wanted to get into that day so we headed back to Mt. Washington to eat, drink, hang out, and take pictures.

Back in the real world, I started hammering on the Cabriolet so that I could get it to Joey at http://www.KalesCustom.com for the fabrication to hook up the turbo and external wastegate.

For those of you interested in the mounts needed to swap the 1.8T engine and 02J (the matching model/year transmission for the engine)....

I figured out a real easy way to connect the transmission to the engine.... literally took 10 minutes to get everything aligned and bolted together.  Also, allowed easy access to the oil pan bolts that I needed to tighten after the transmission was bolted up.

Car up...

Engine in...

Hopefully, Wednesday night everything that I need to complete before going to Joey's in done.... all motor mounts (just engine and transmission side are mounted at the moment), axles, timing belt (need longer 16-valve tensioner stud), etc.  Getting there.

Steve

1 2 3 4 5 ... 11

You'll need to log in to post.

Our Preferred Partners
EIhwK31xhD7Nyv6btuLhmxdfJznH8H8ElWLF4NrzAnywnhgRkFnWAFIFzhljfkcE