1 ... 5 6 7 8 9 ... 11
Rabbit Farmer
Rabbit Farmer Reader
2/26/19 8:59 p.m.

Jul 11, 2018

DAY TWO

So far I am on schedule.

Day one to remove all the excess parts that I am accumulated over the years in preparation for when I was ready to restore the car. (Done!)

Day two, as expected, took a very long time. I just wanted to capture all the neat modifications (and everything is modified!) in the car to set a base for the project. It is always nice to go back to photos to see where one started and to help putting everything back together.

I took a lot of photos and saved them HERE

Below, I captured a lot of the details that warrant sharing at this time.

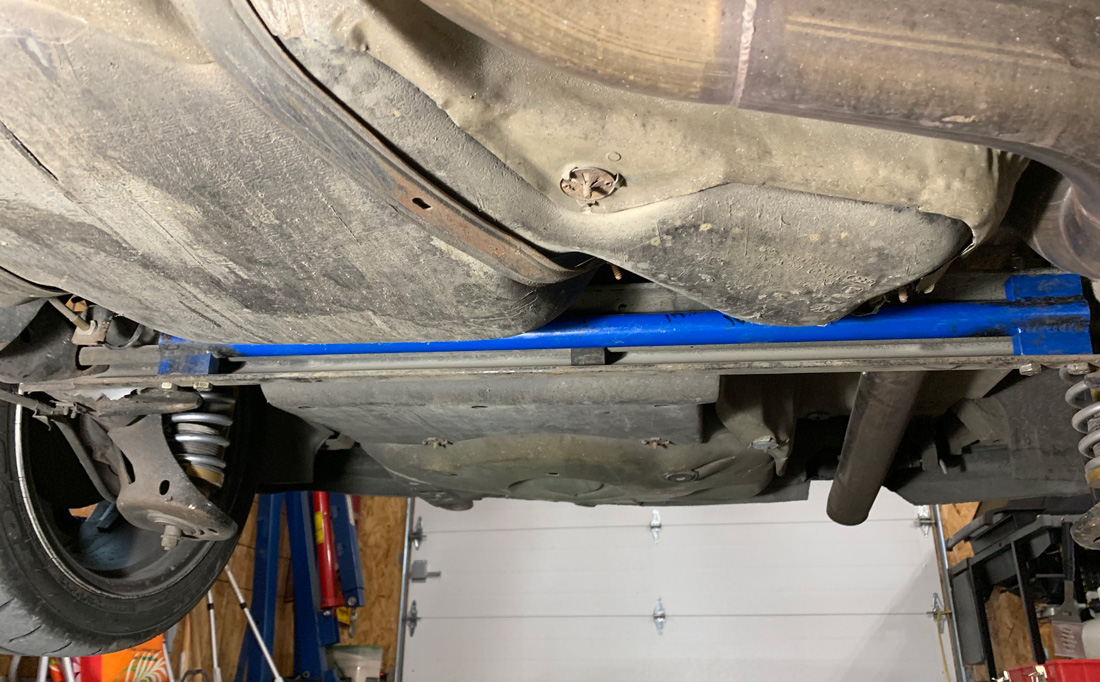
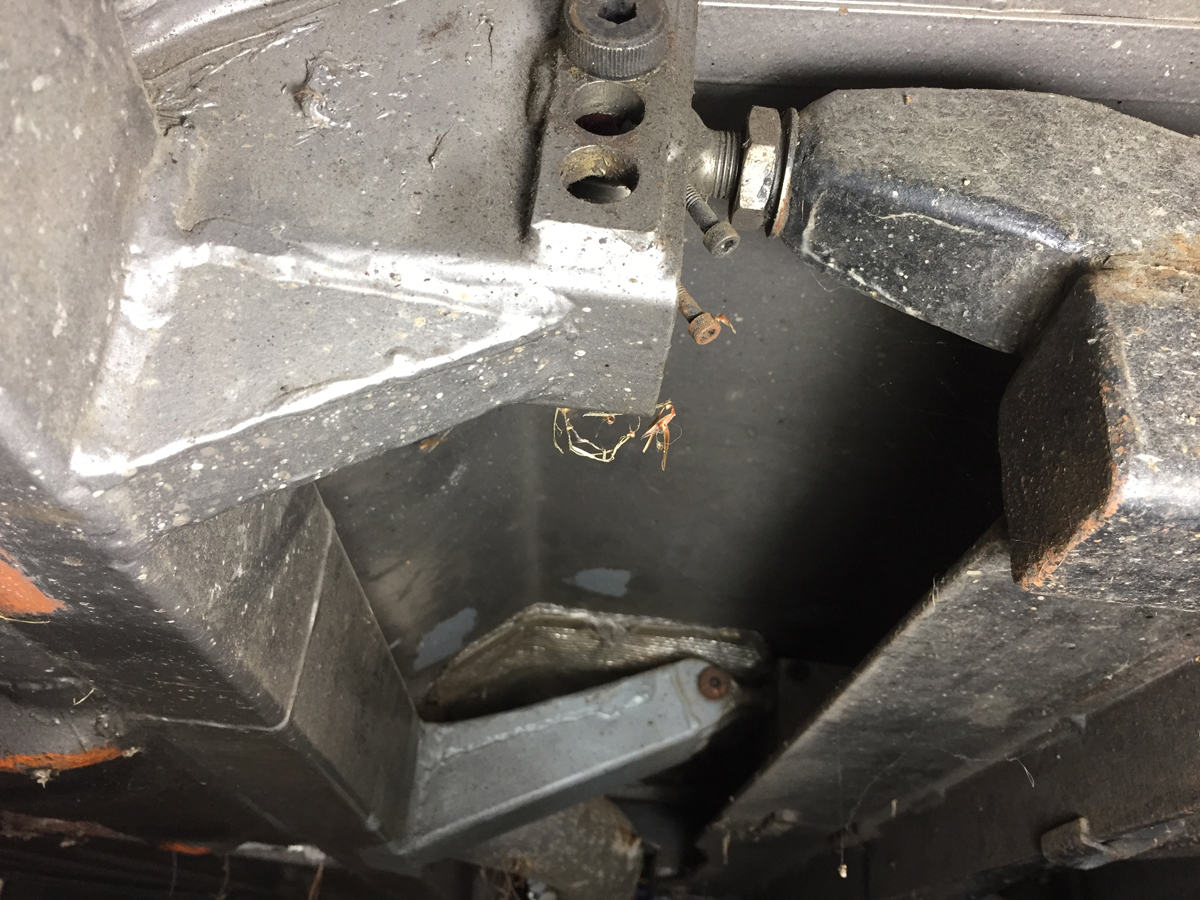
I am still guessing how the rear suspension currently works.  Wow!

I do wish I noticed that the car had grass clipping hanging from spider webs so that I could have cleaned up before taking the pictures.  Oh well… one day I will have this on the lift to be able to get much better photos of the underside.

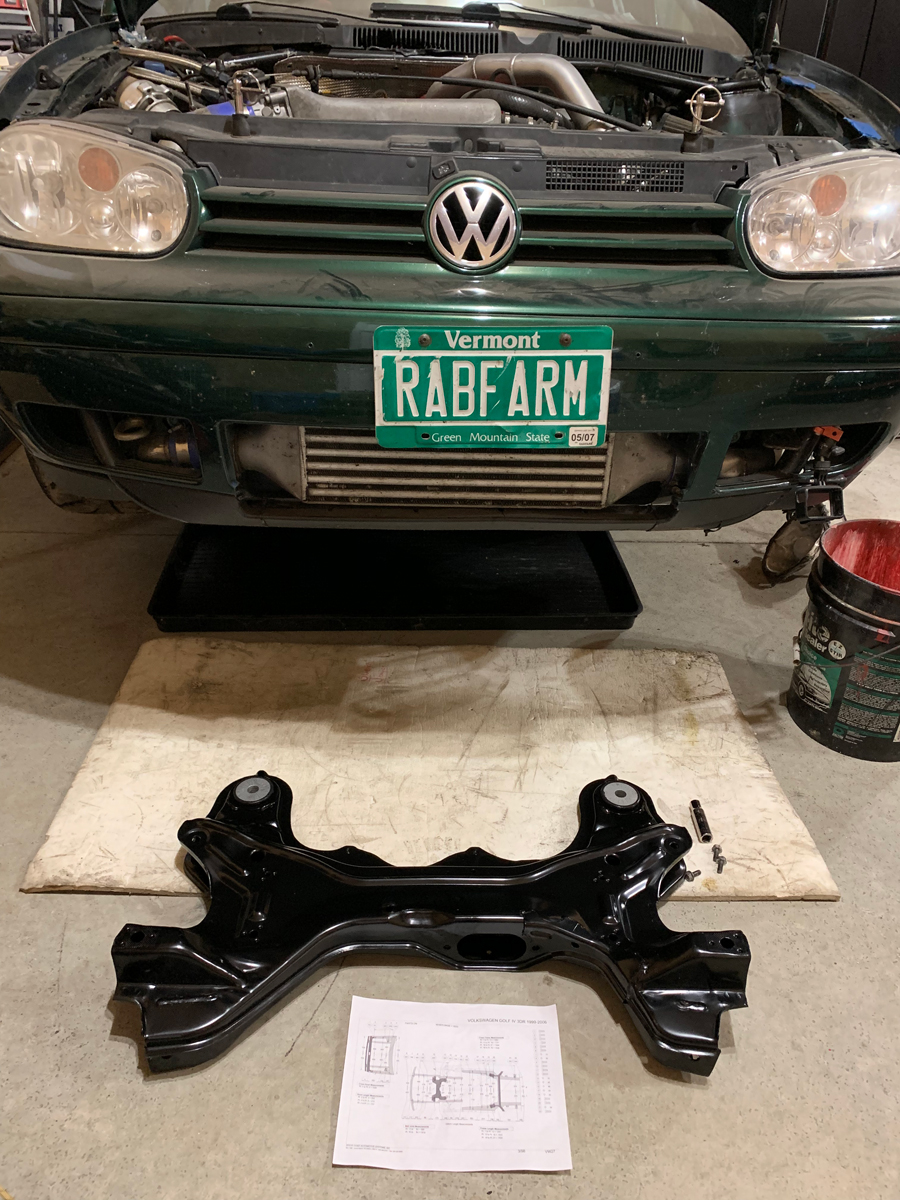
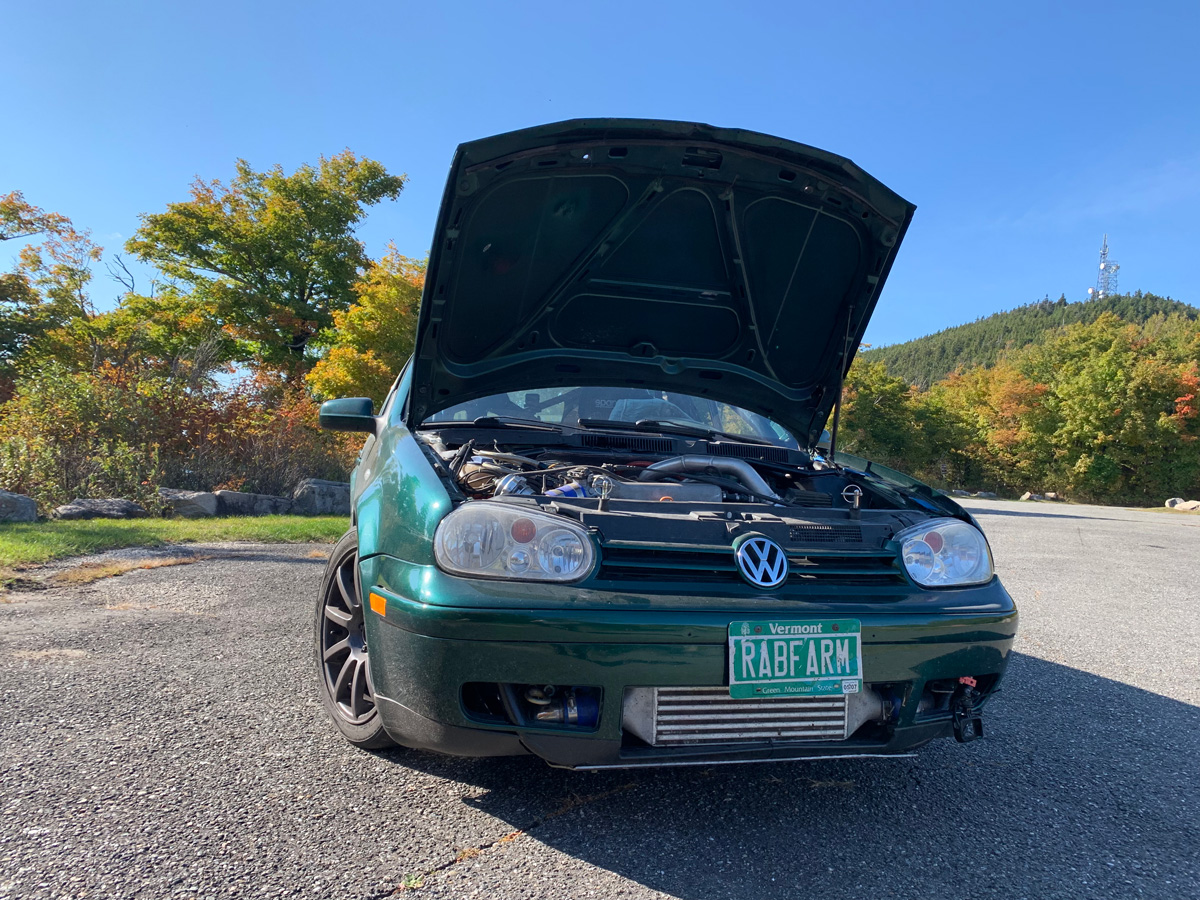
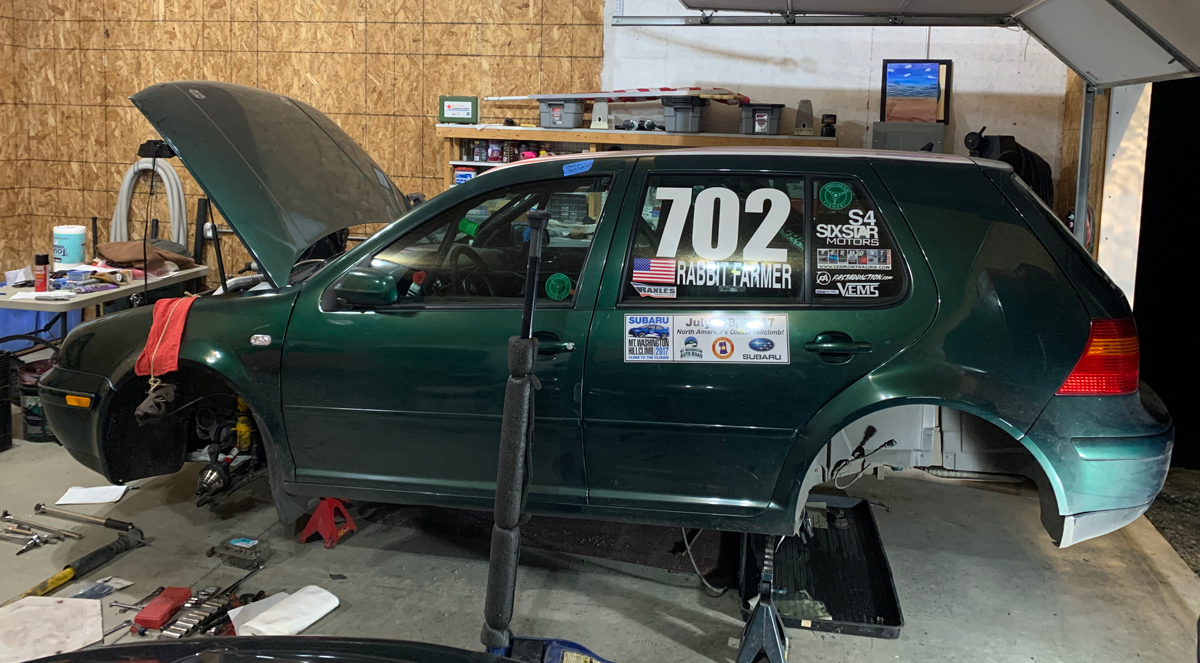
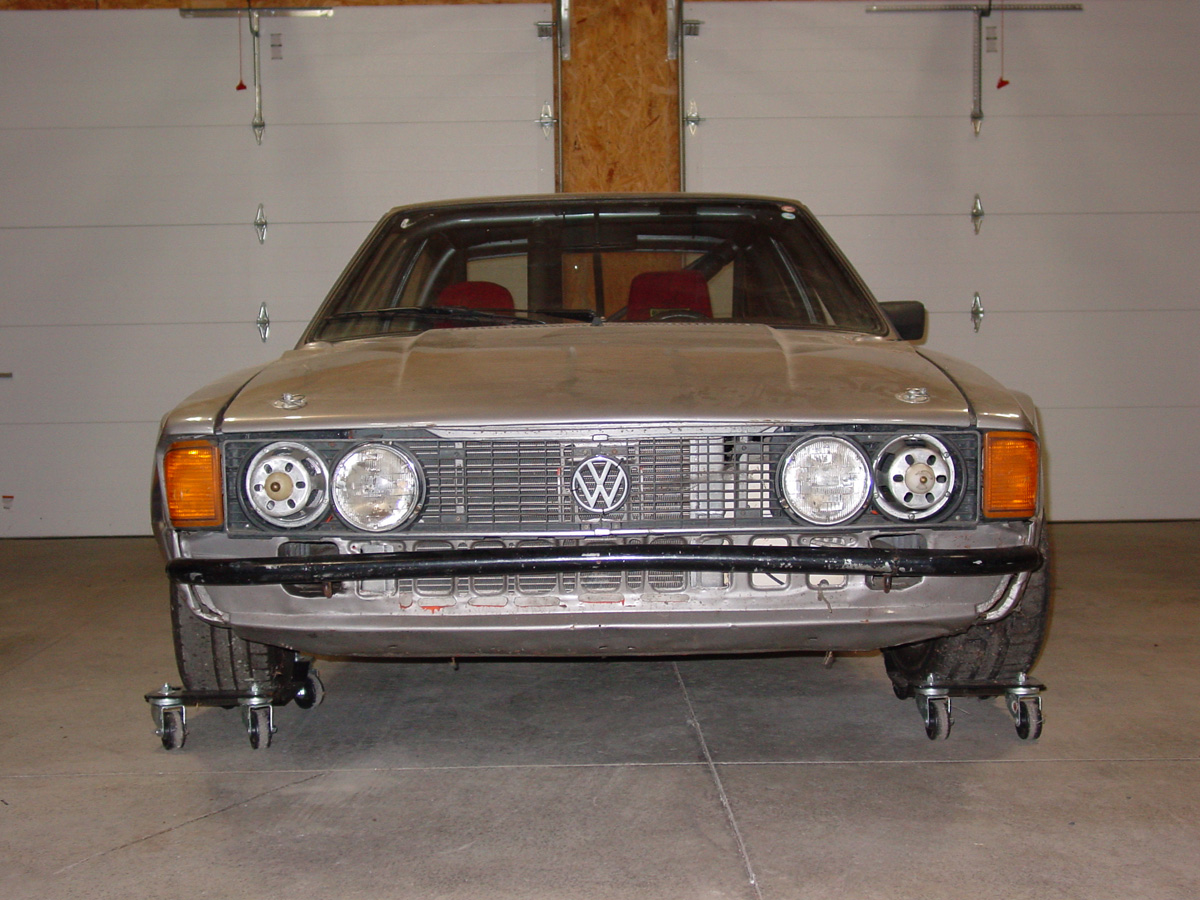
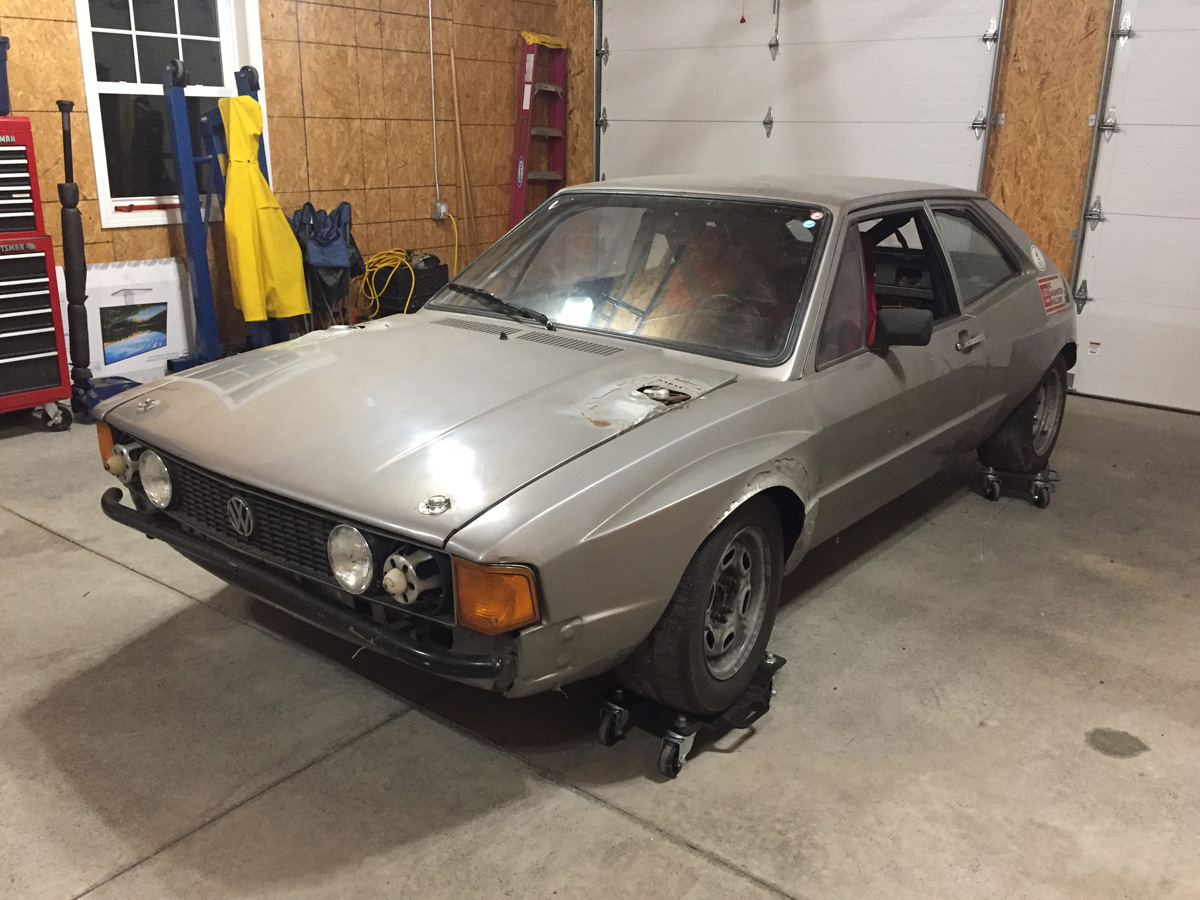
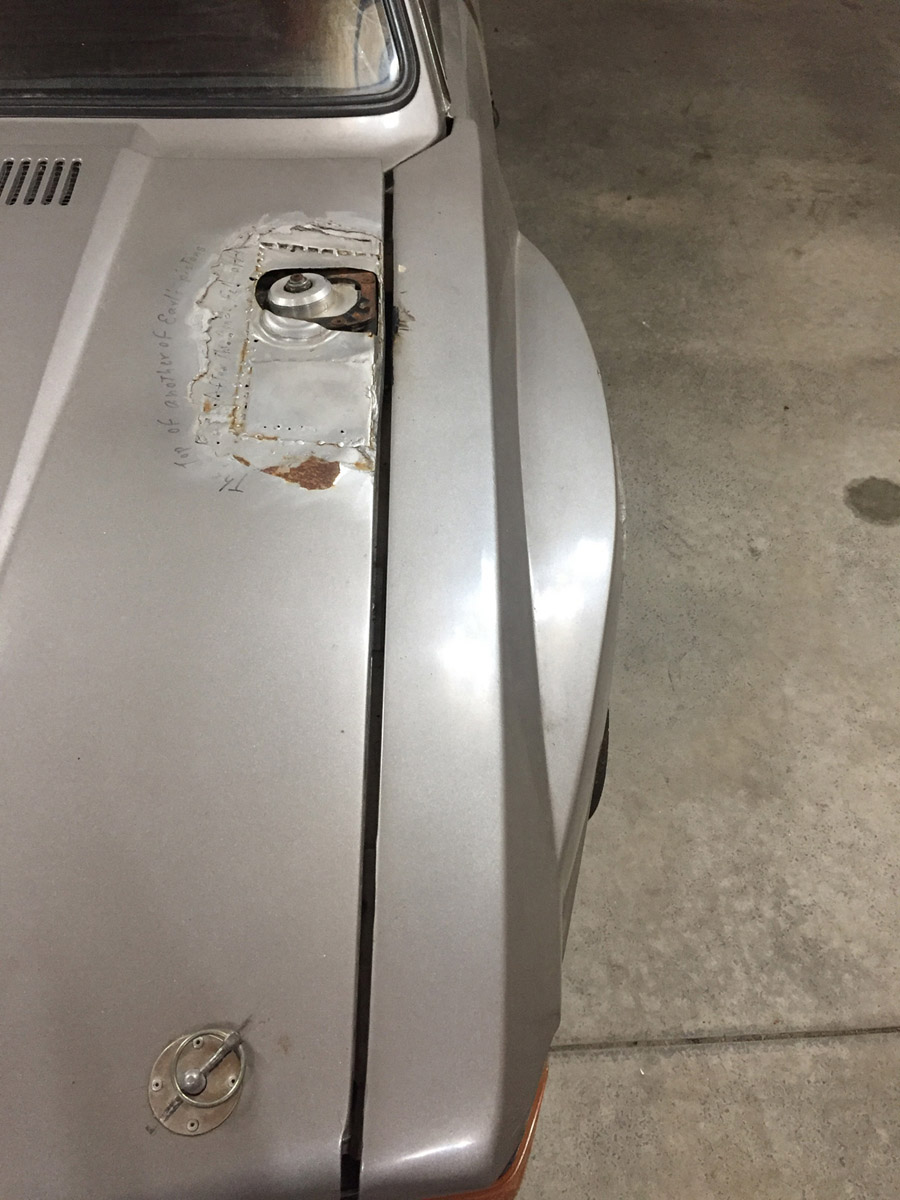
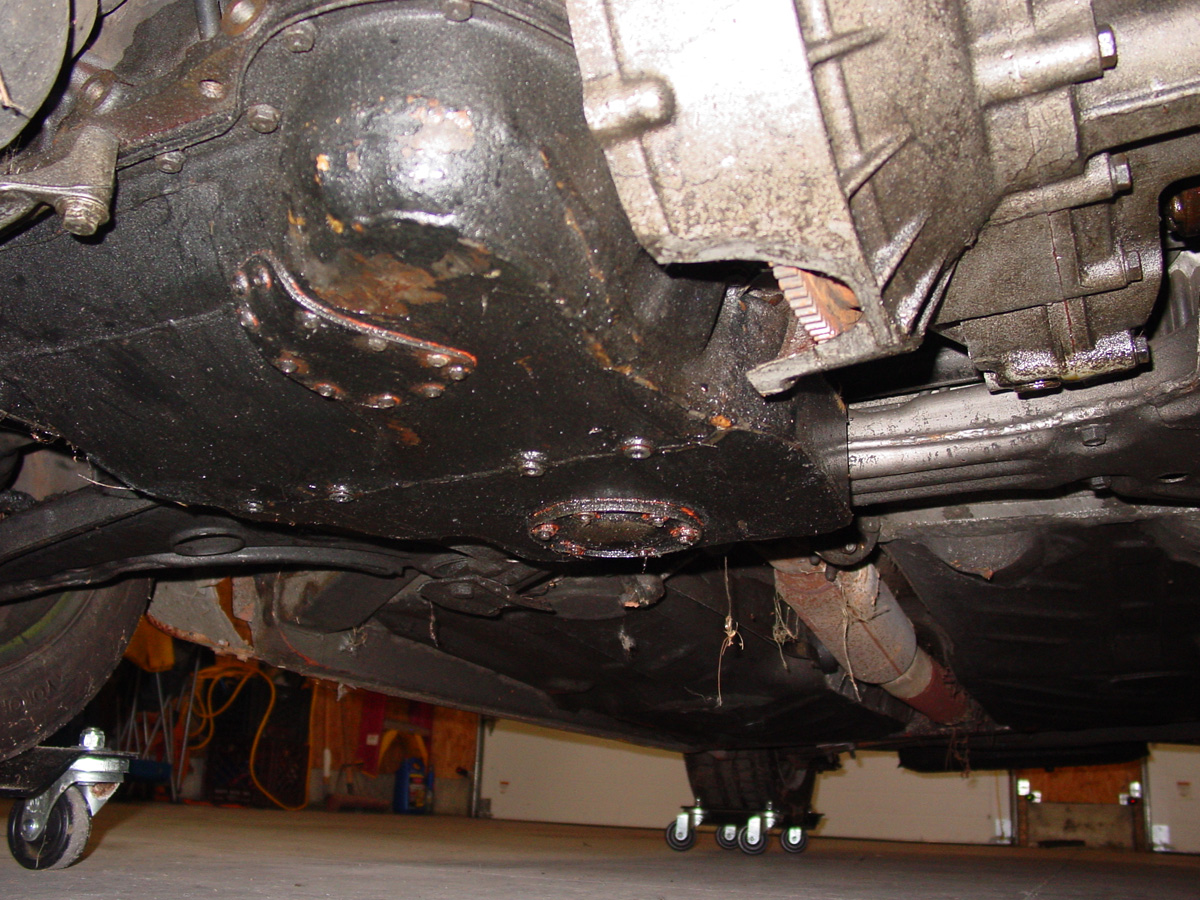
Front shot of the car.  You can’t quite get a feel for how low the car is because it is on caster dollies, but I did measure from the bottom of the transmission (while car was on the dollies) and it was approximately 7.5” to the ground.  The dollies raise the car approximately 2.75” for a difference of… carry the two and divide by zero… about 4.75”. You will see in the images below that the bottom of the transmission bell was cut off and there is a custom oil pan to give the car some ground clearance.

Of course, this will be a challenge with doing the 02M… assuming it is even possible with trying to keep the look of the car and not having a transmission 1” off the ground.

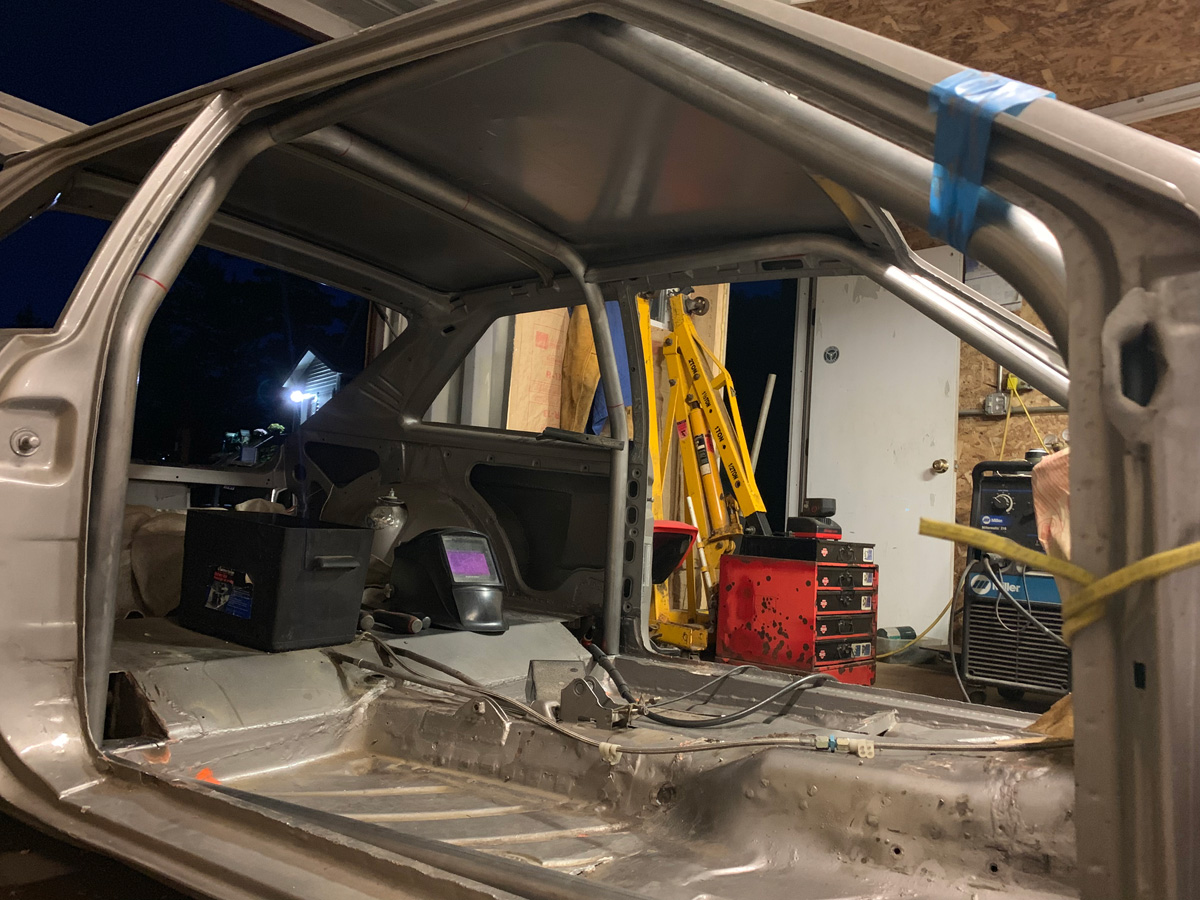
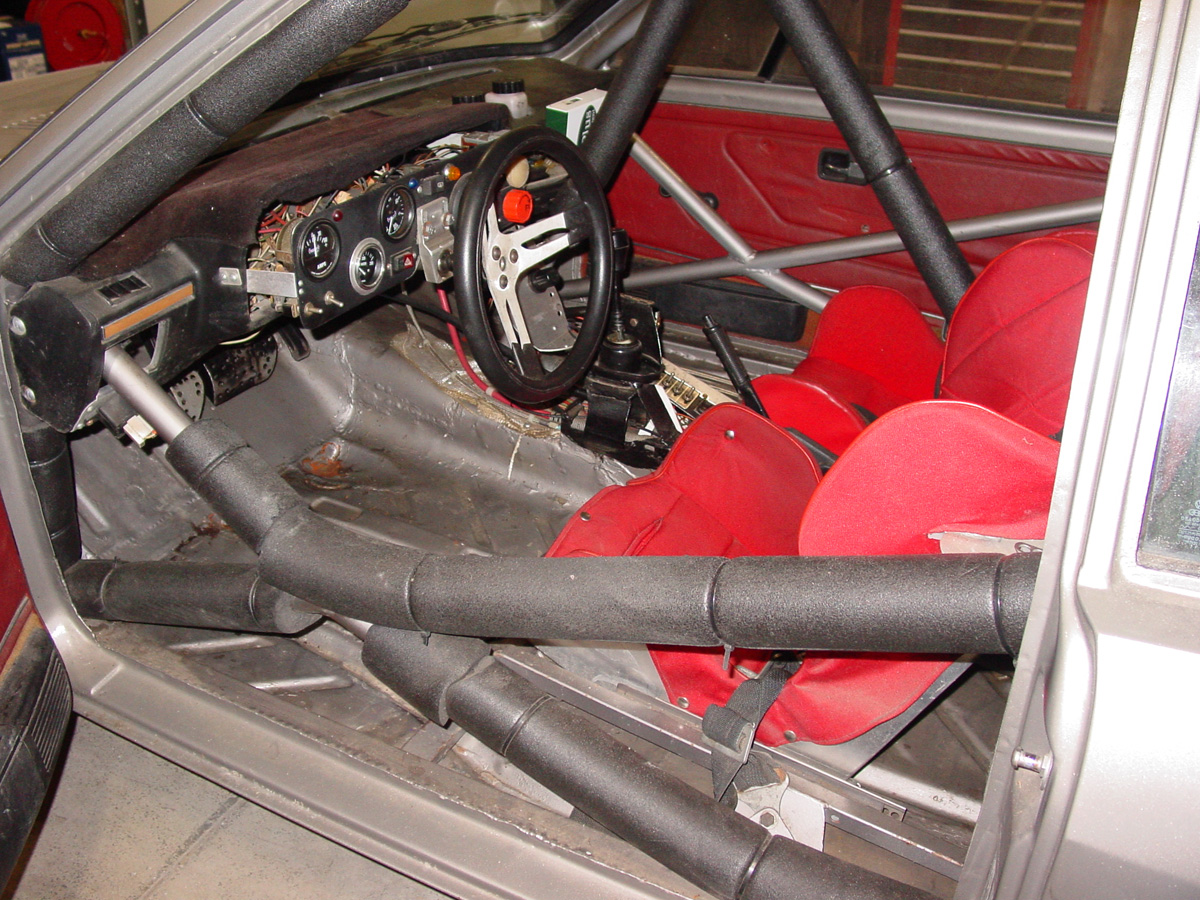
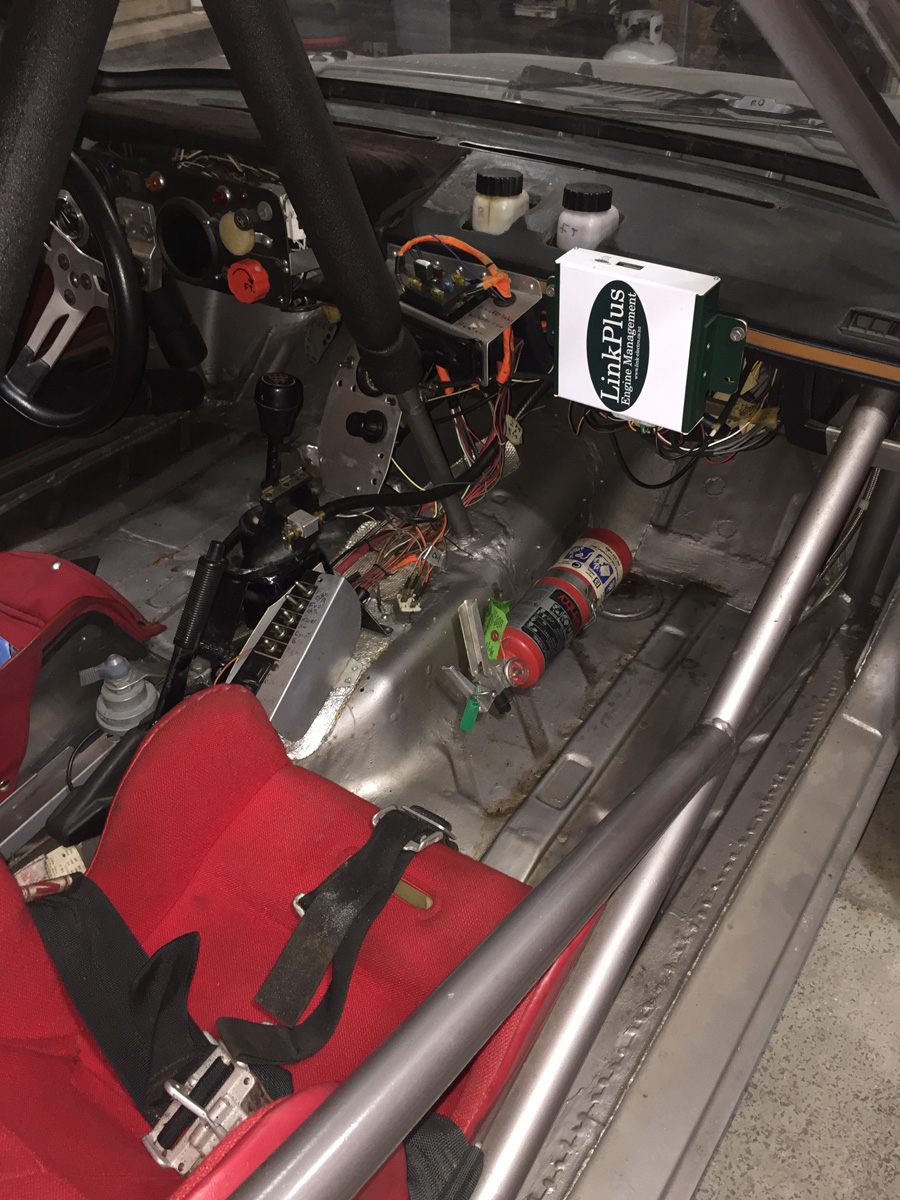
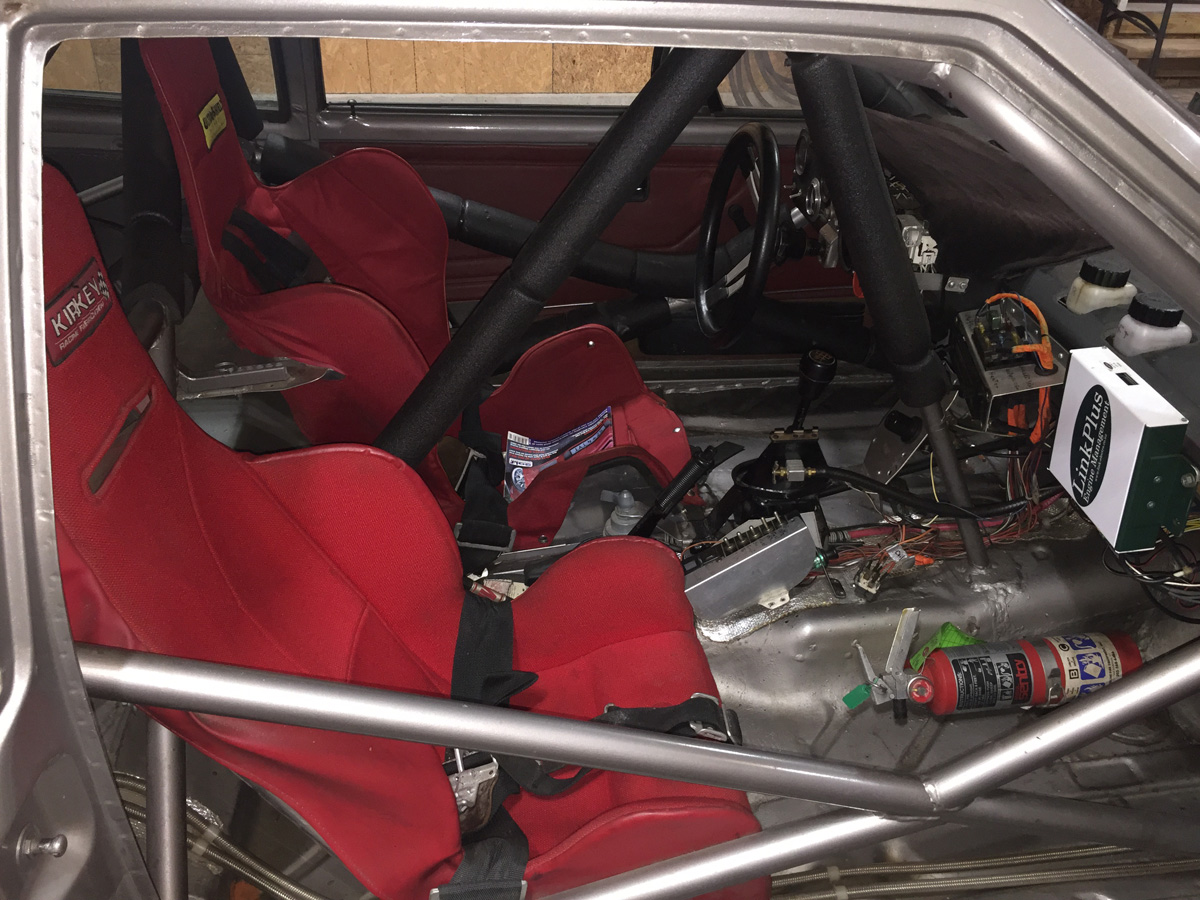
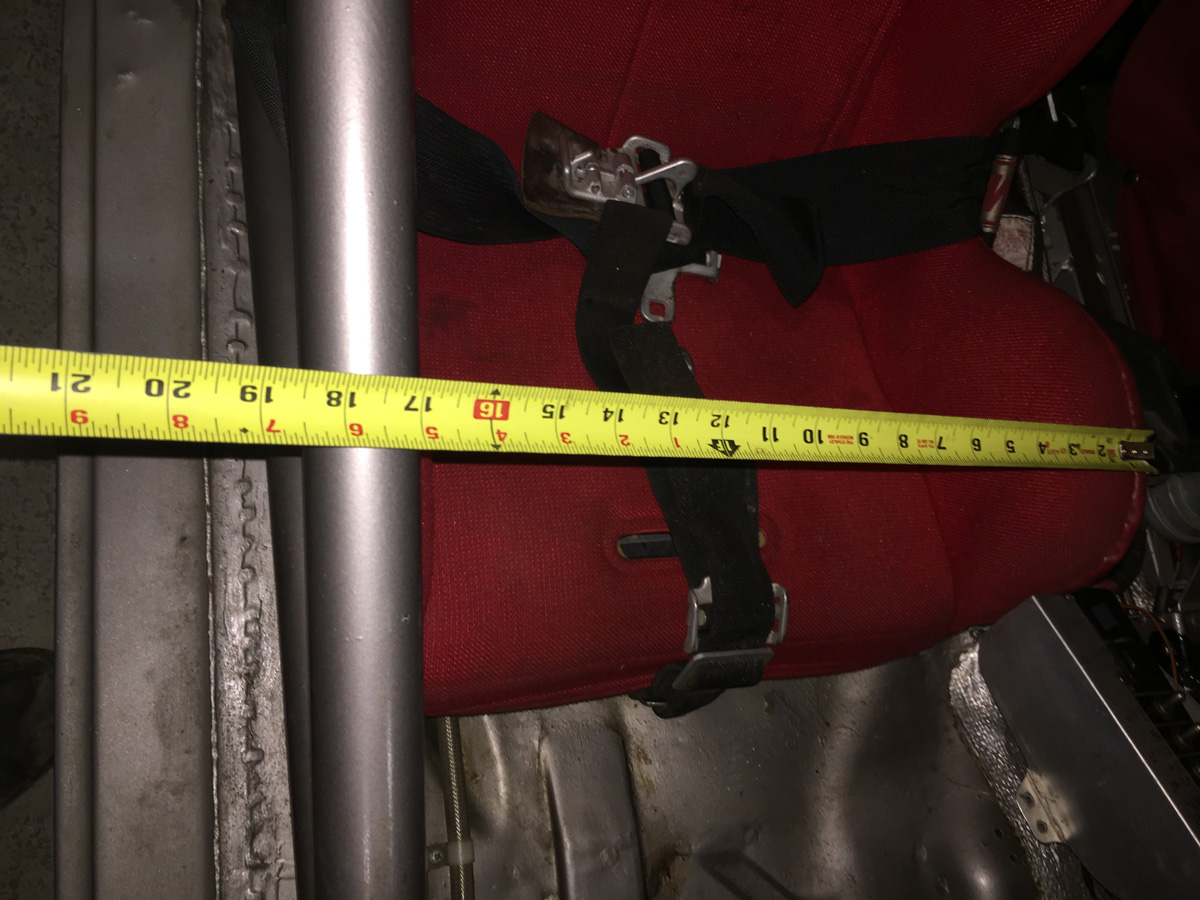
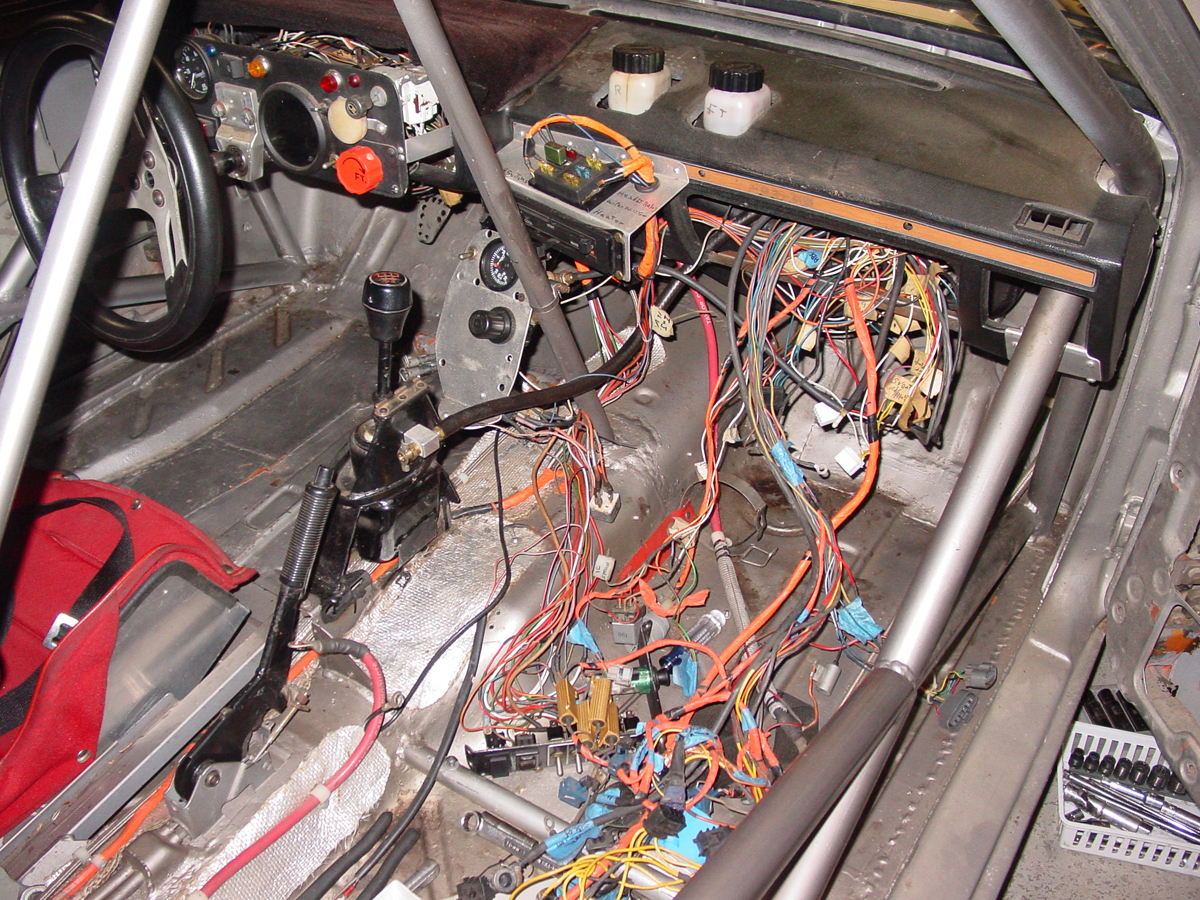
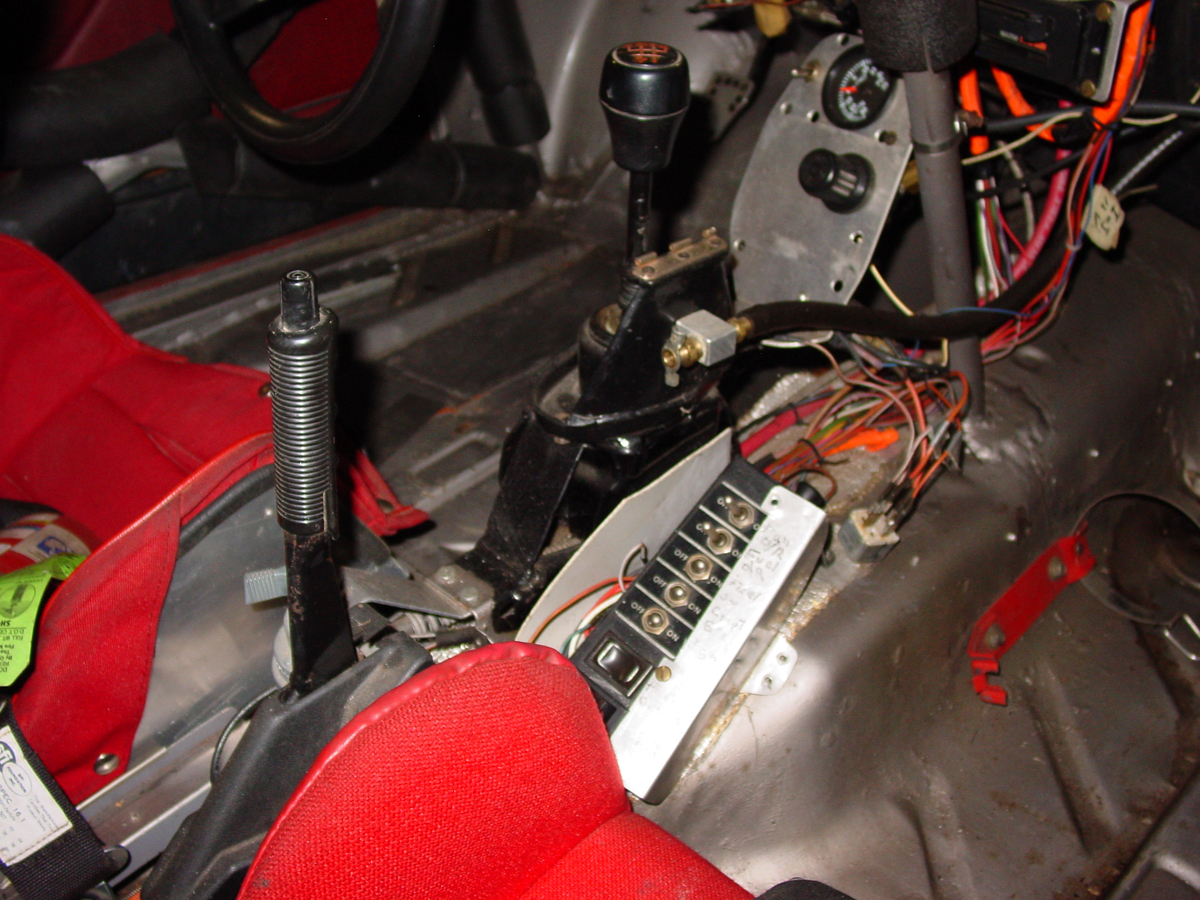
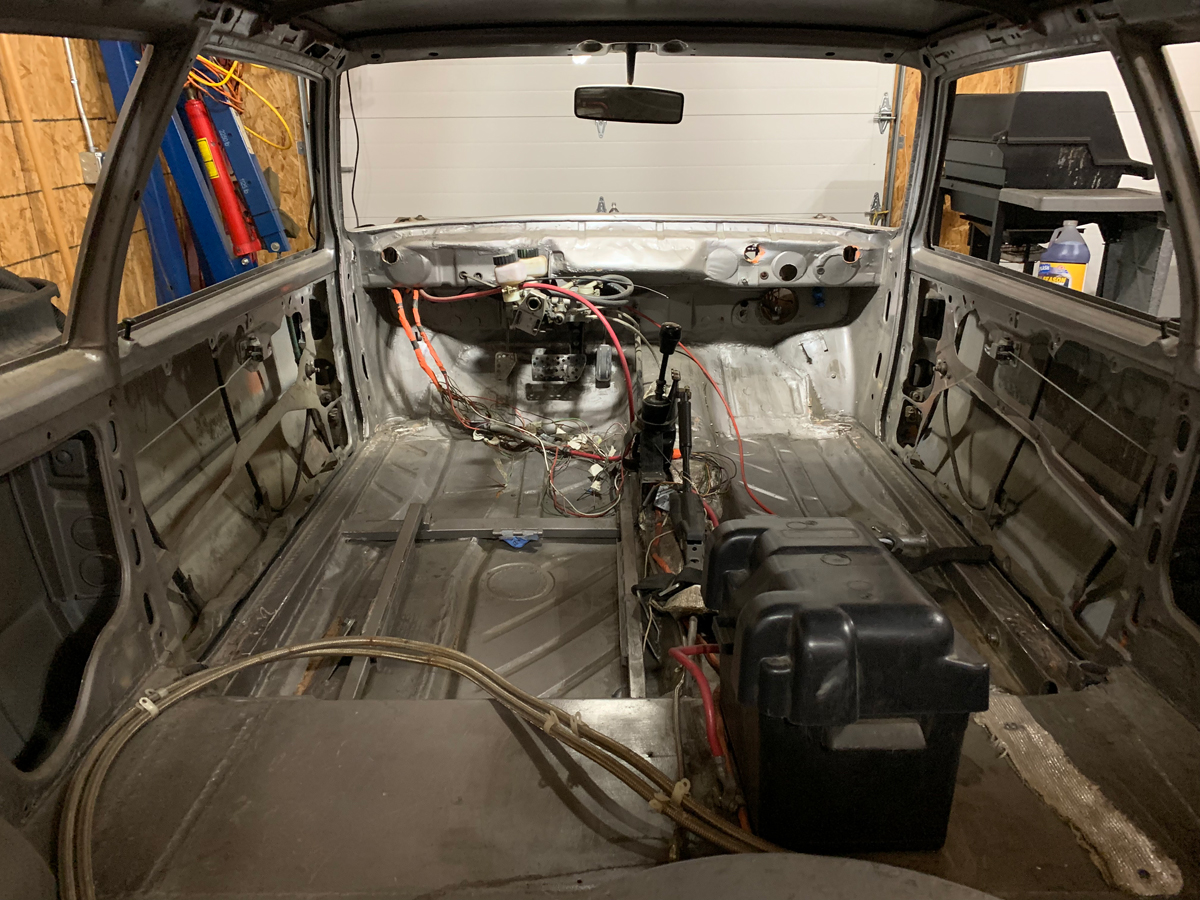
I will try to show in the pictures that follow how much the interior of the car has changed to move the driver closer to the center.  The center tunnel has been moved towards the passenger side.  You know, minor stuff like that.

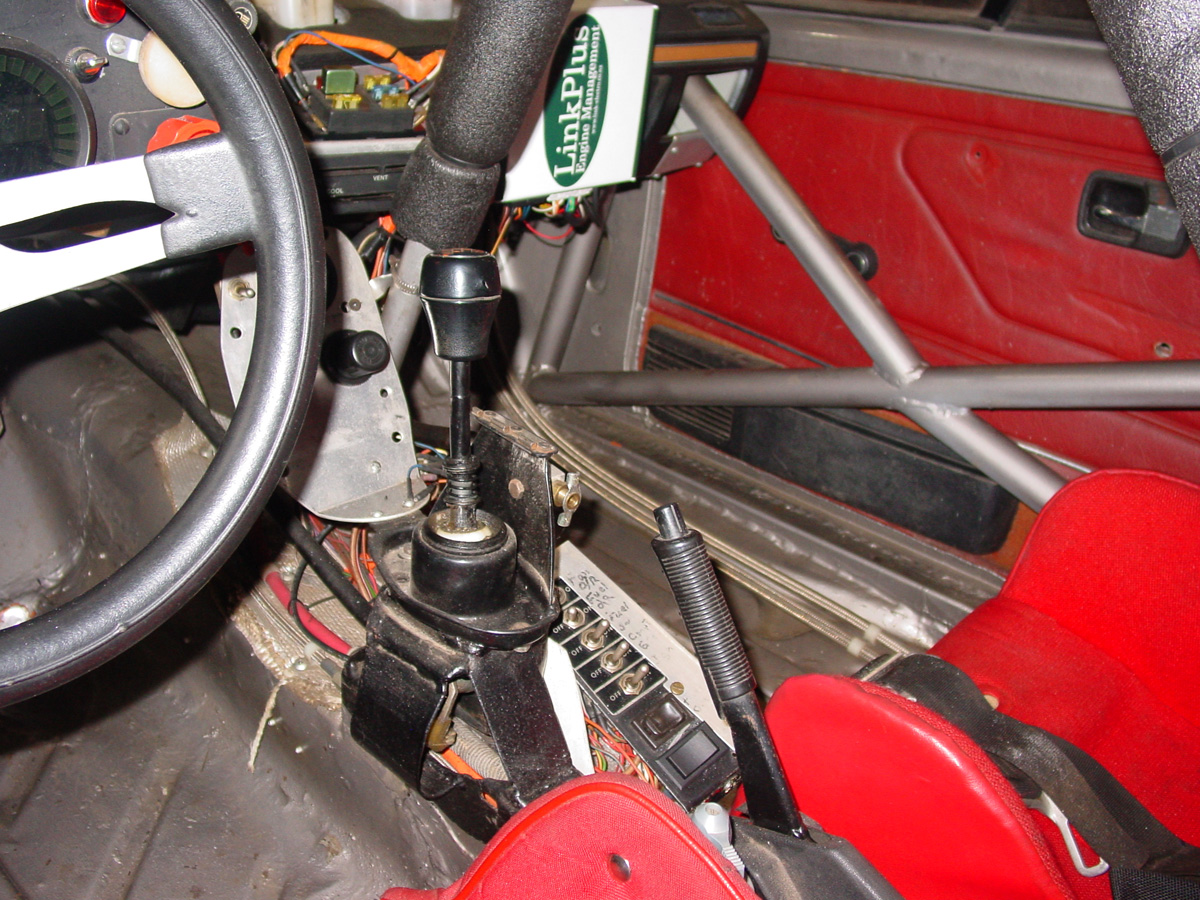
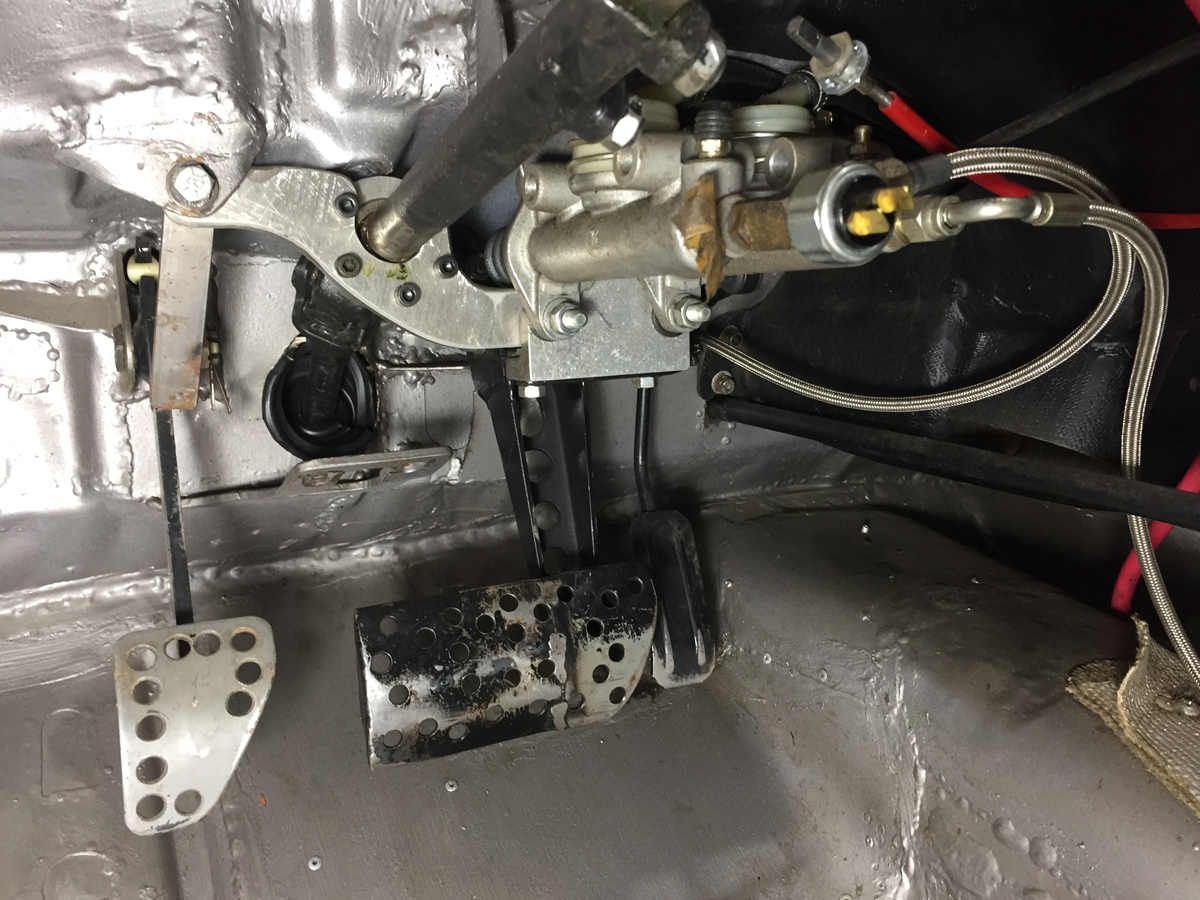
Transmission is a 020 (typically Scirocco or Rabbit 5-speed) with the usual crazy spherical bearings for all connections from shifter to transmission.  The shifter is also raised

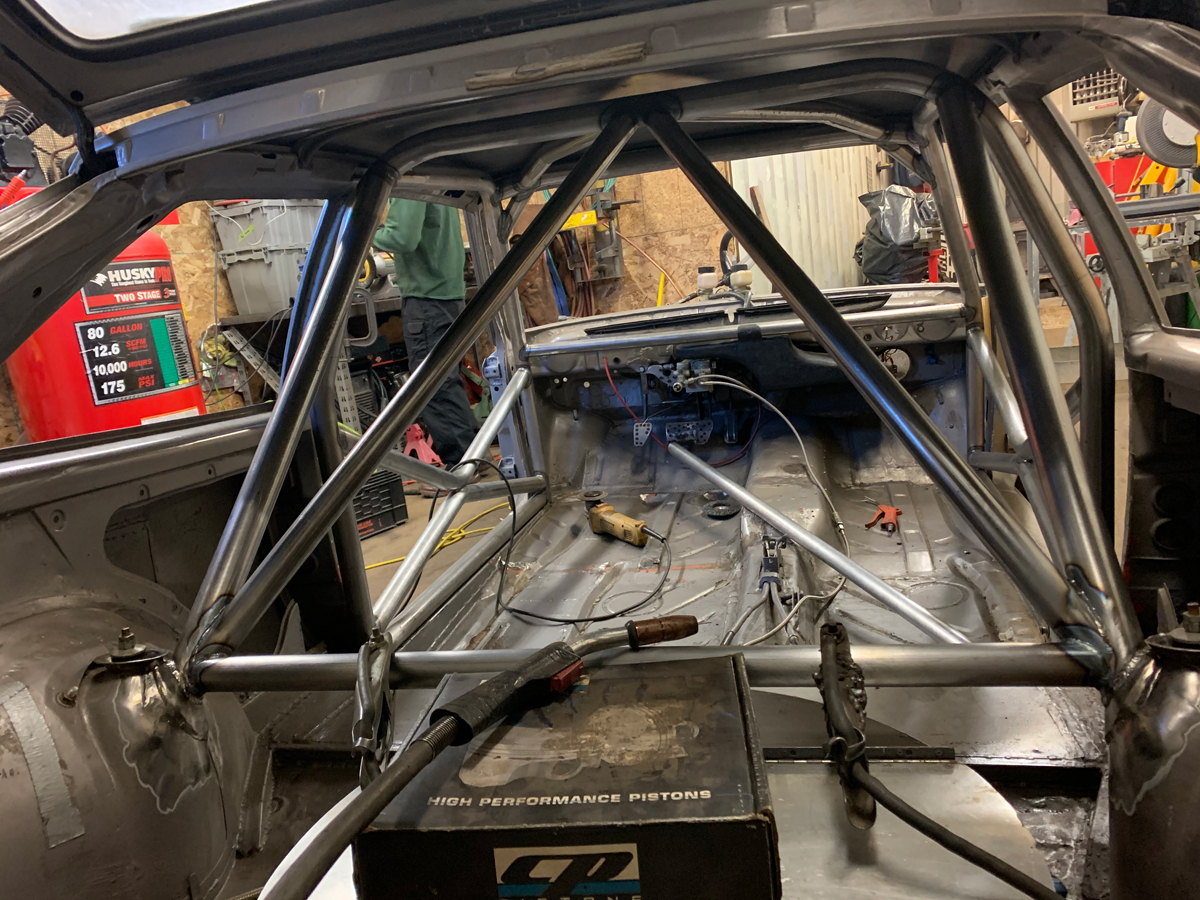
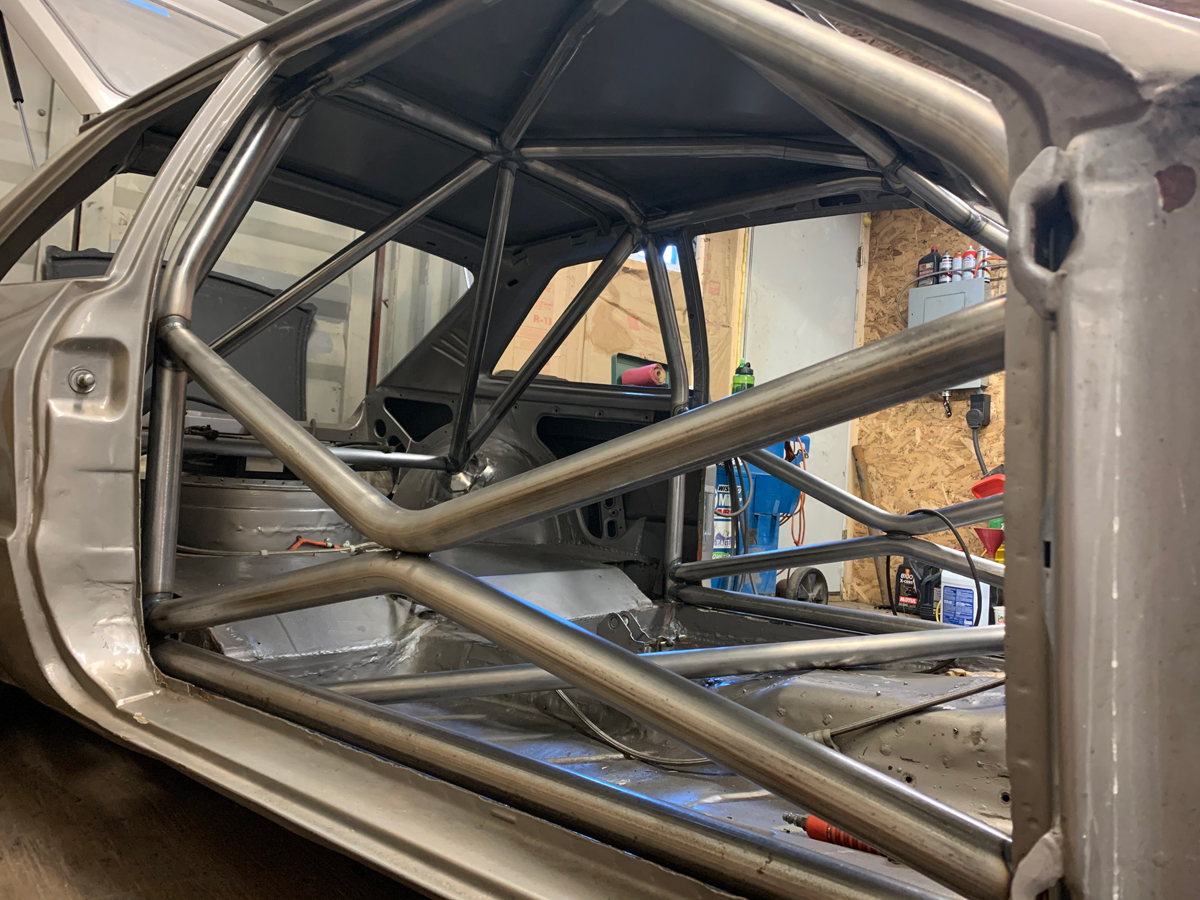
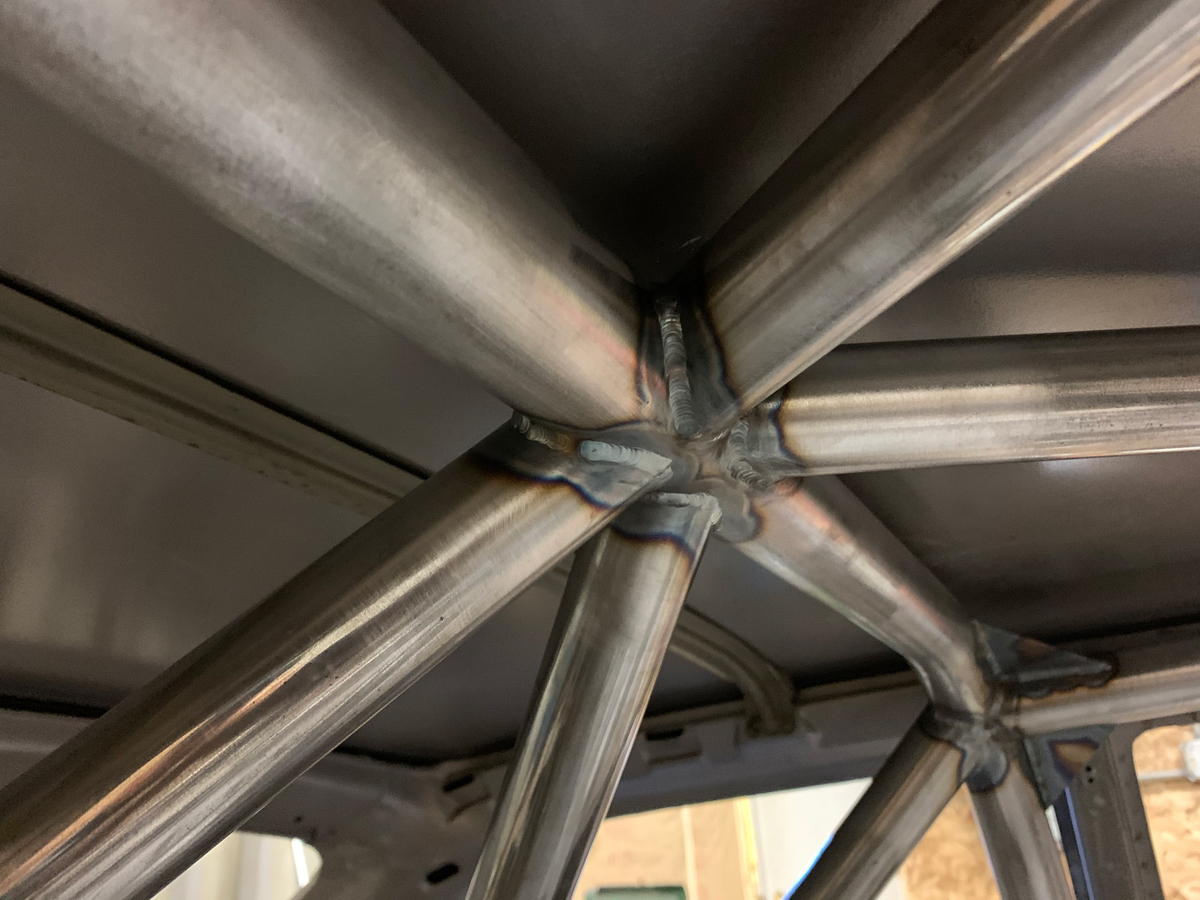
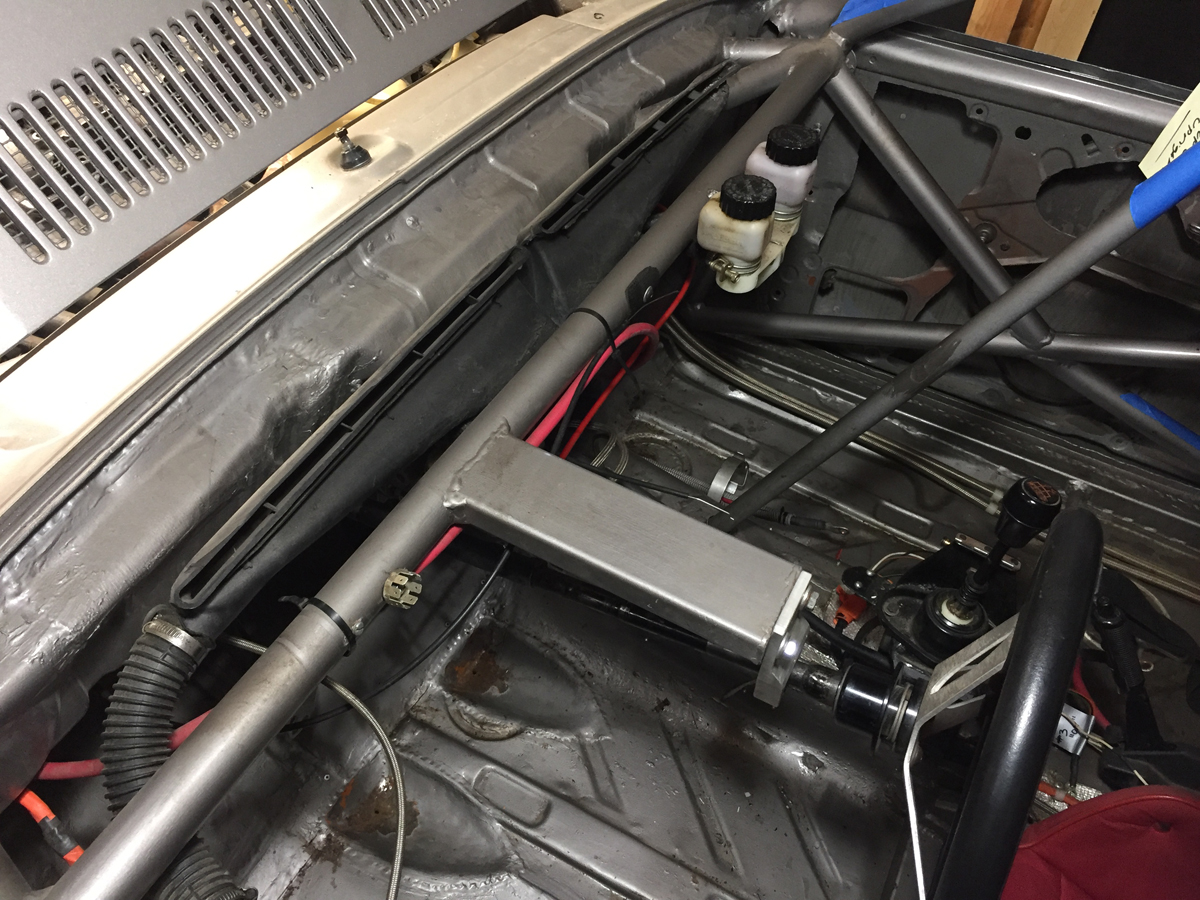
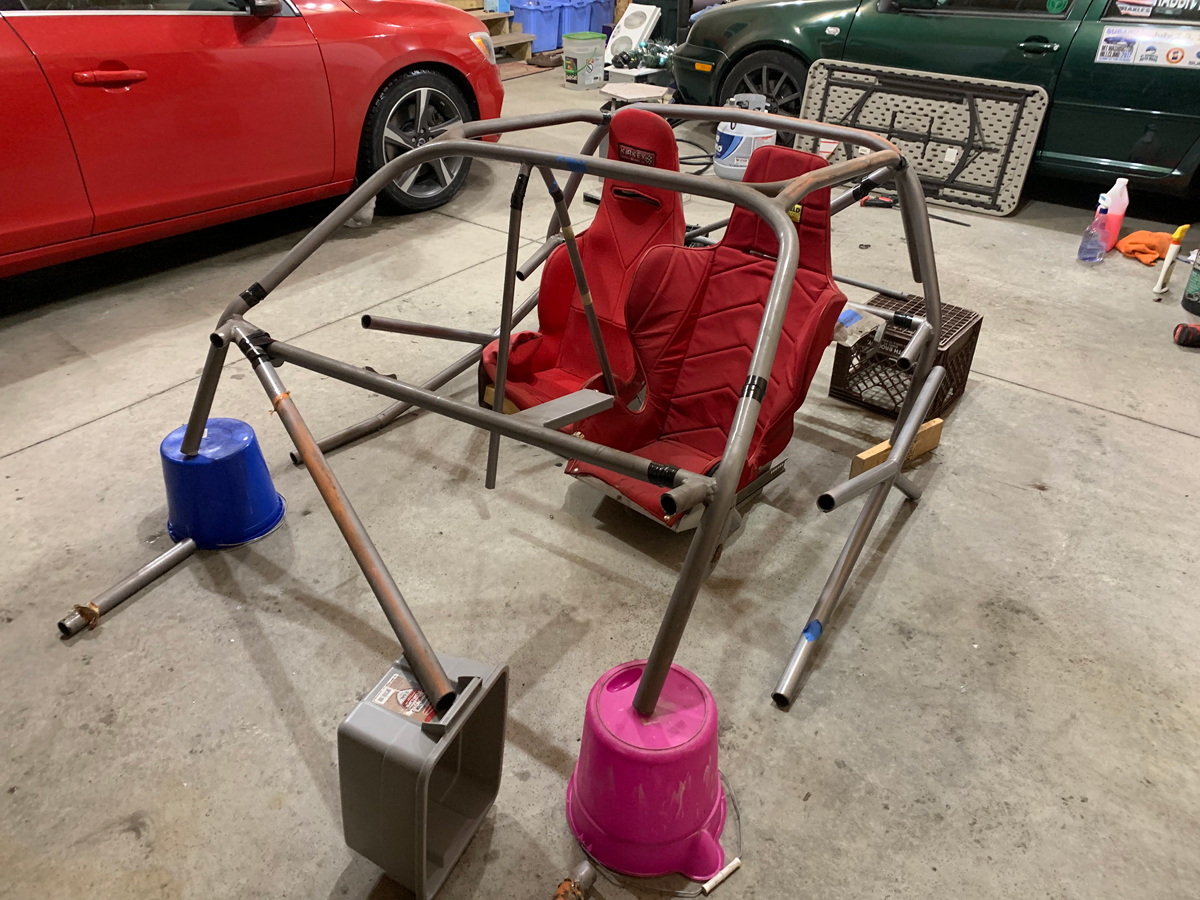
A little help in the survivability department… additional bar in the (modified) center of the car.

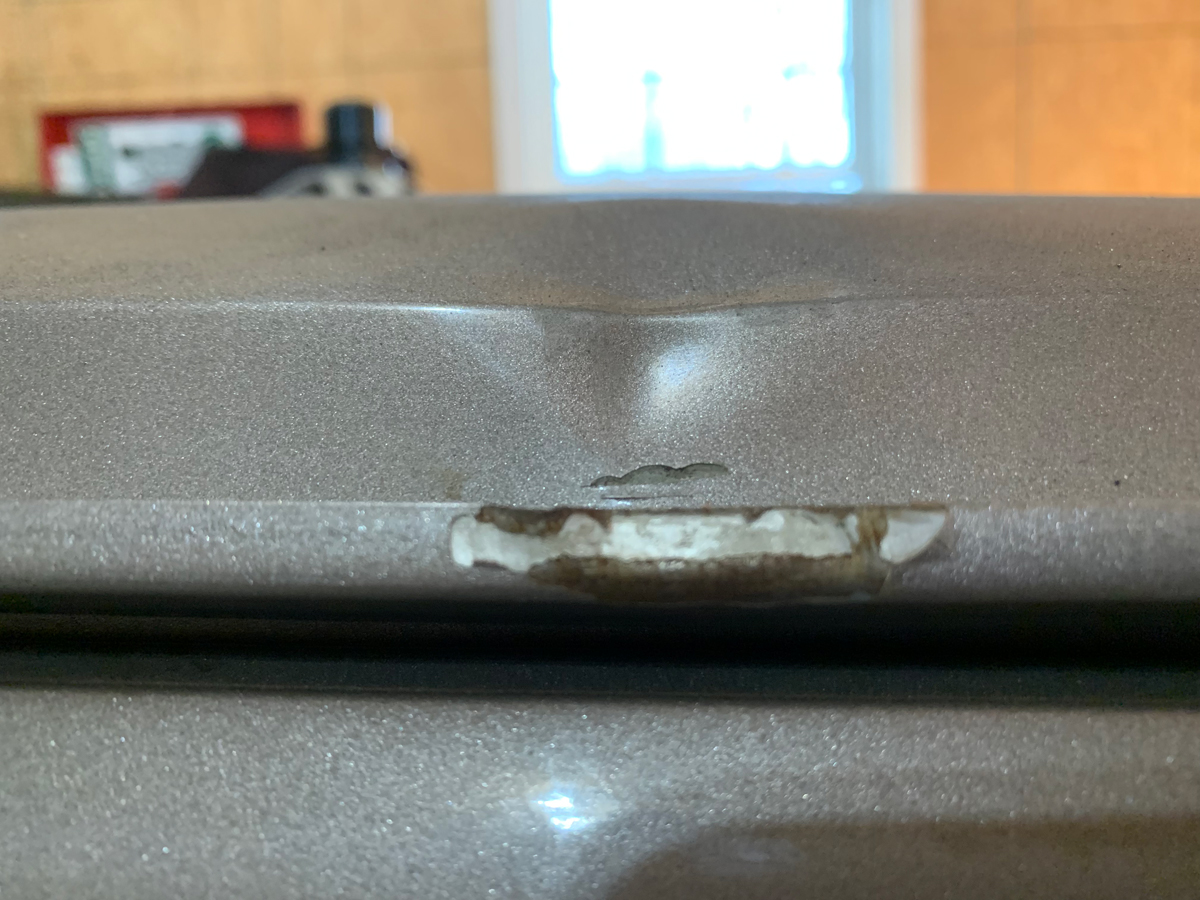
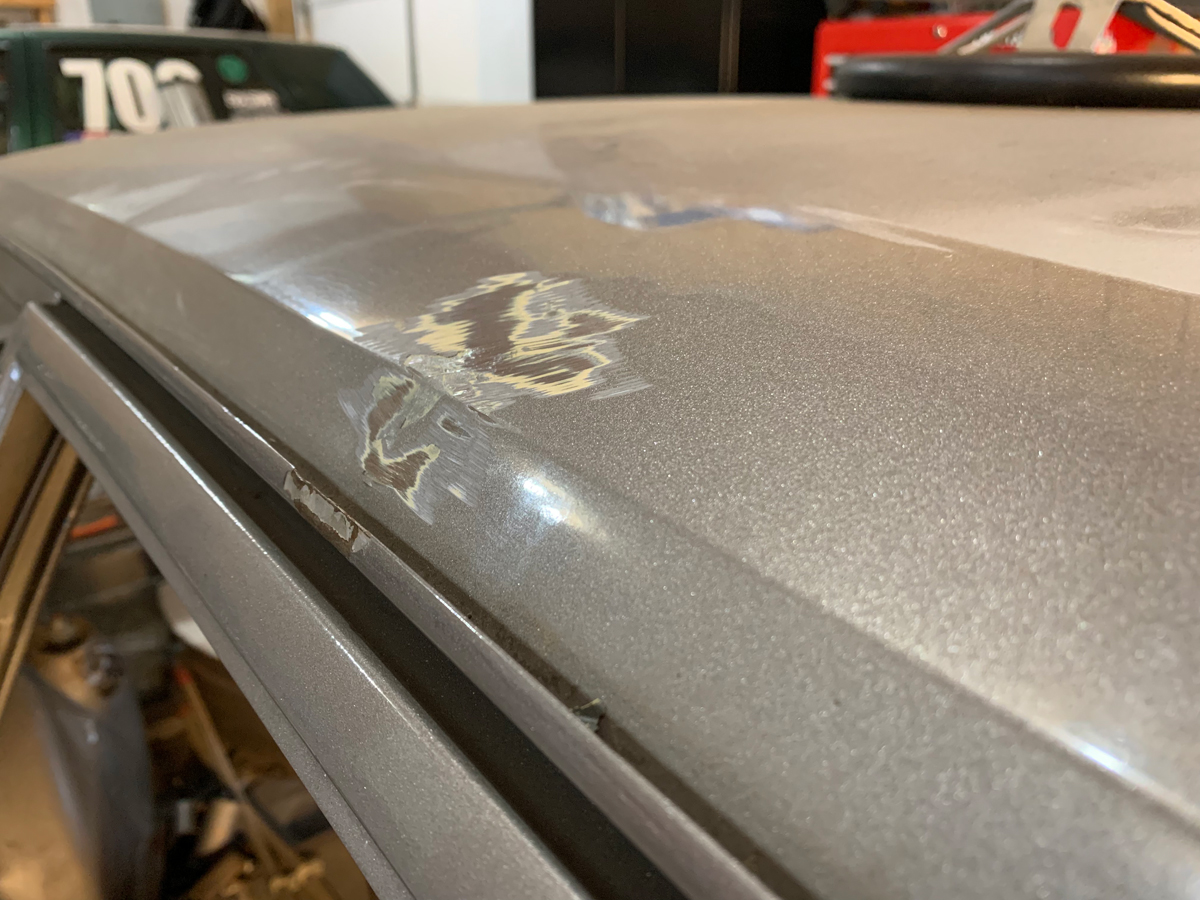
Showing off the sexy fenders. Assuming I remember this correctly… the neat thing about the design of the fender was to allow this car to fit into the current rules that stated that the fender had to look stock from the side (stock profile, something like that).  So, sure, looking dead-on 90-degrees at the side of the car, the straight out fender extension would technically not be visible, therefore, it meet the rule; it would not be considered modified/widened.  Tricky.  That lasted for one year.

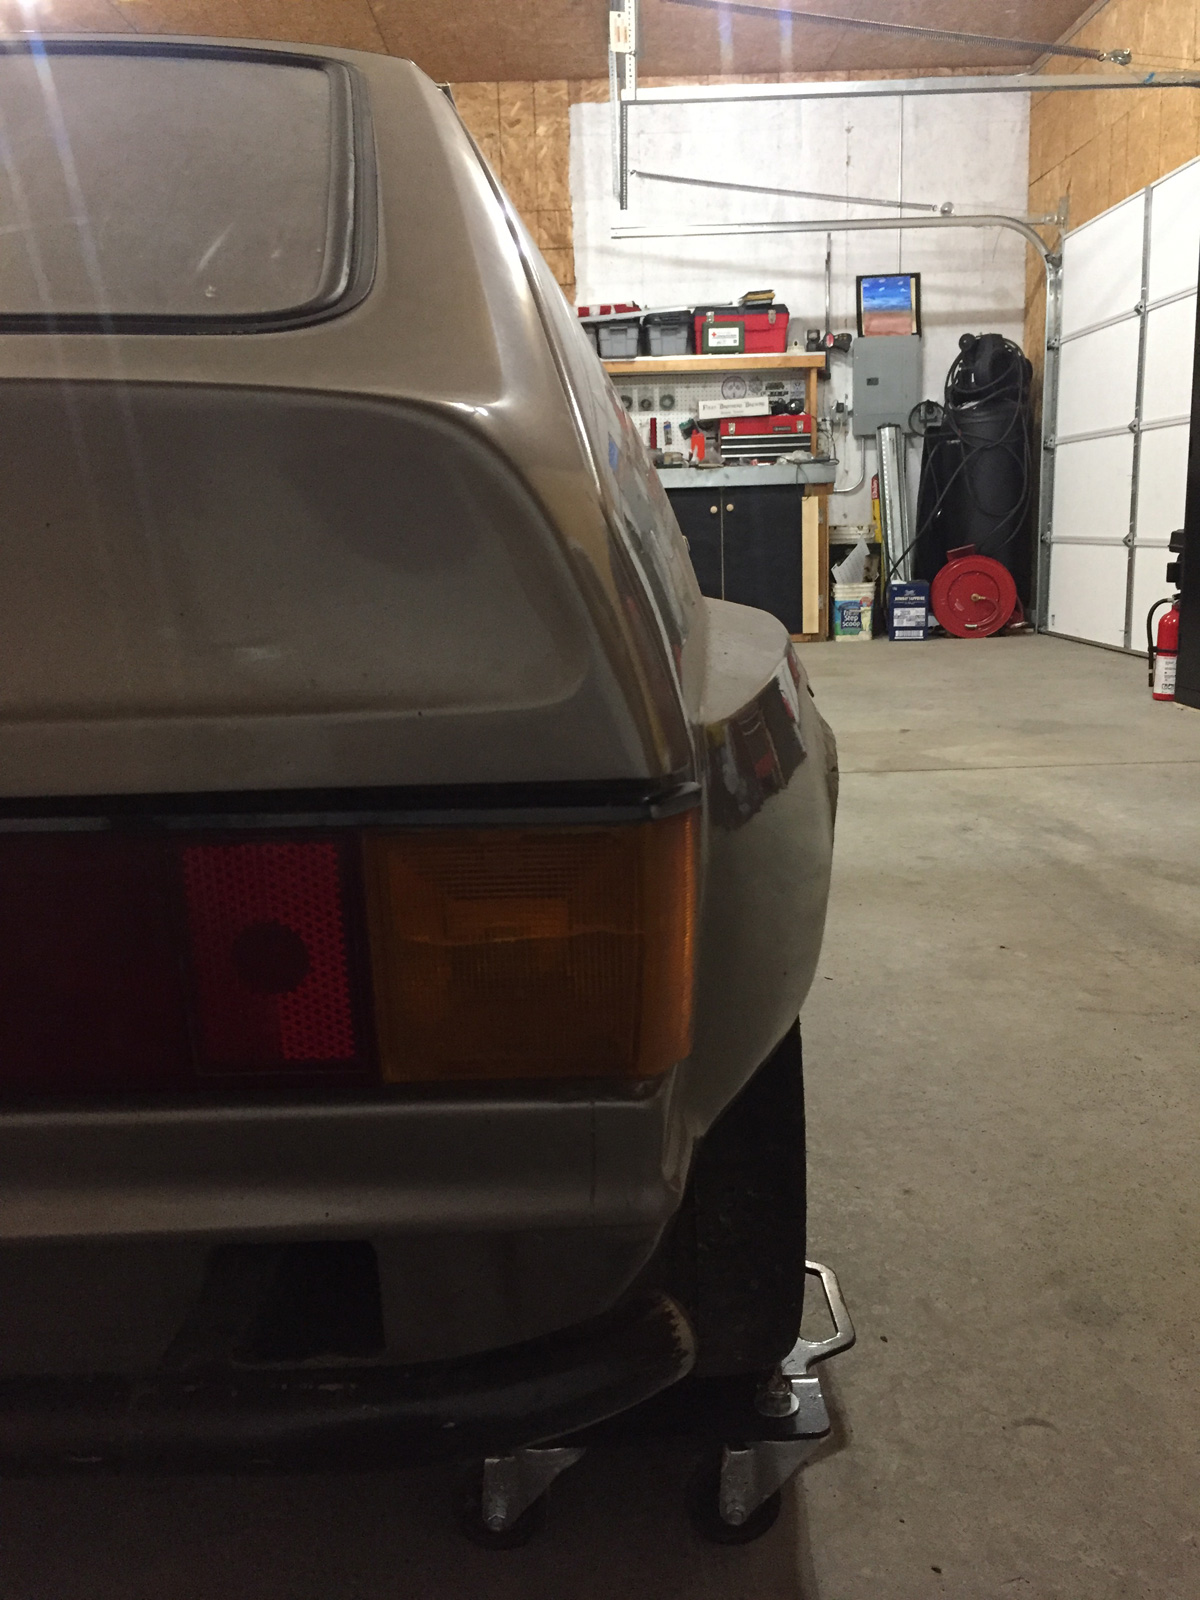
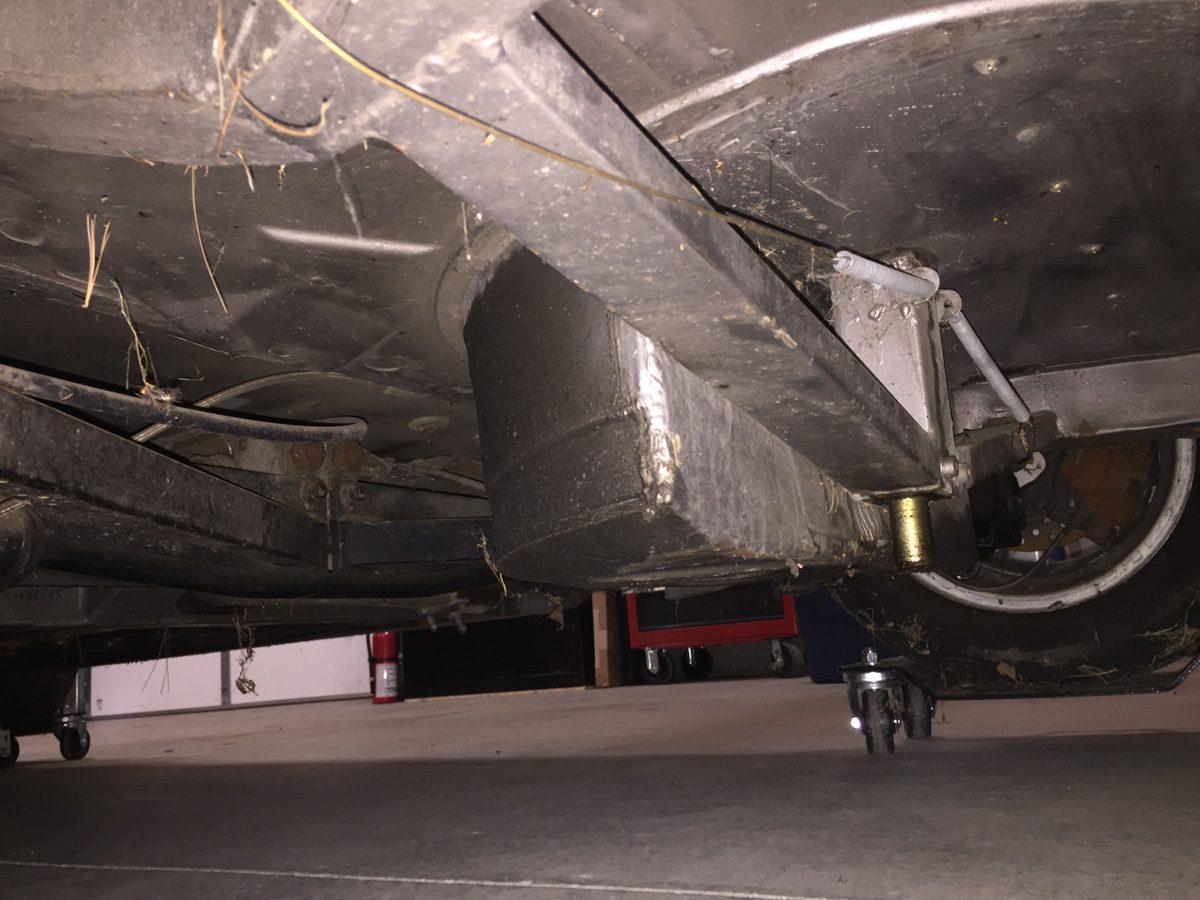
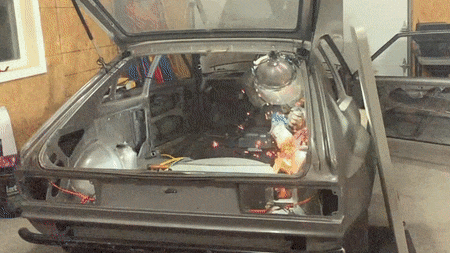
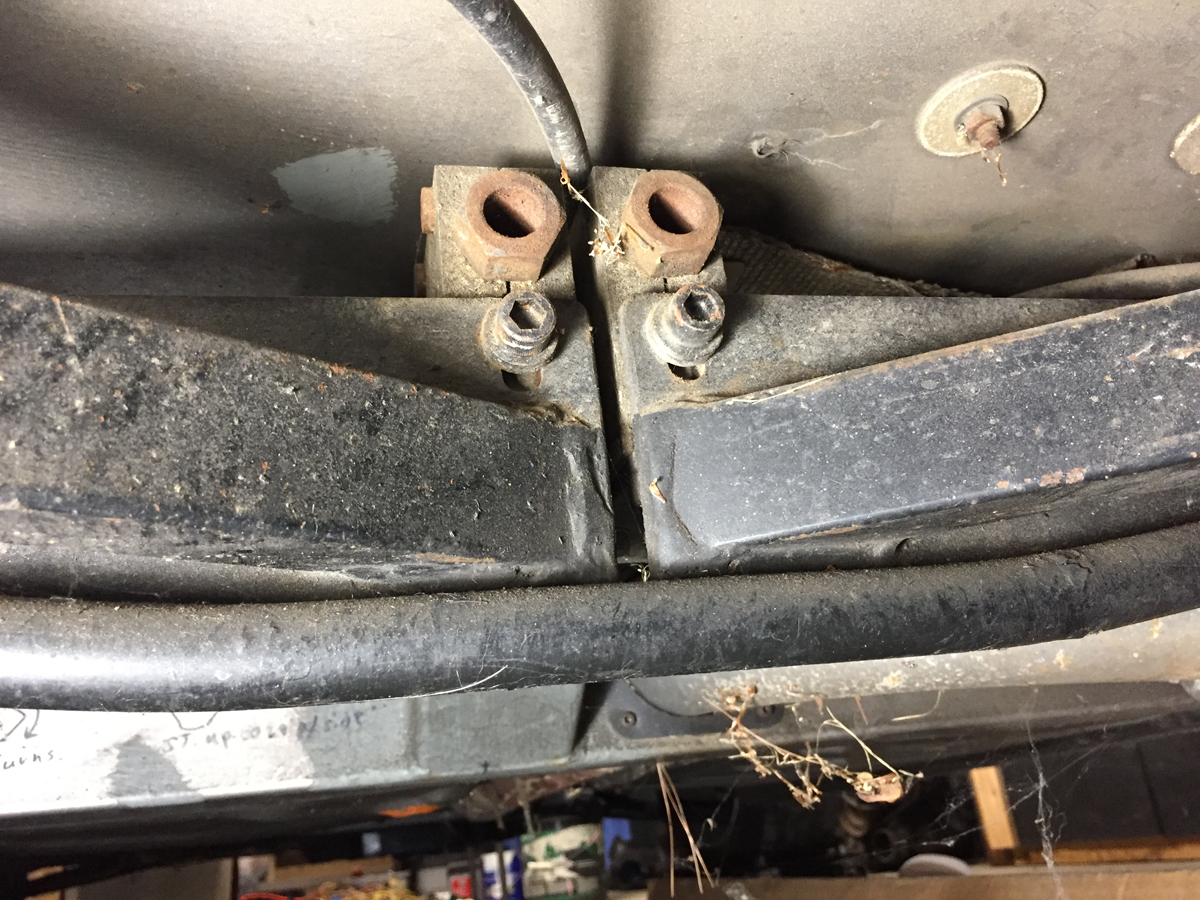
Let’s move around to the rear. Lots of cage work and reinforcement (notice the added braces on the floor between the bulk head for the fuel system and the wheel wells.

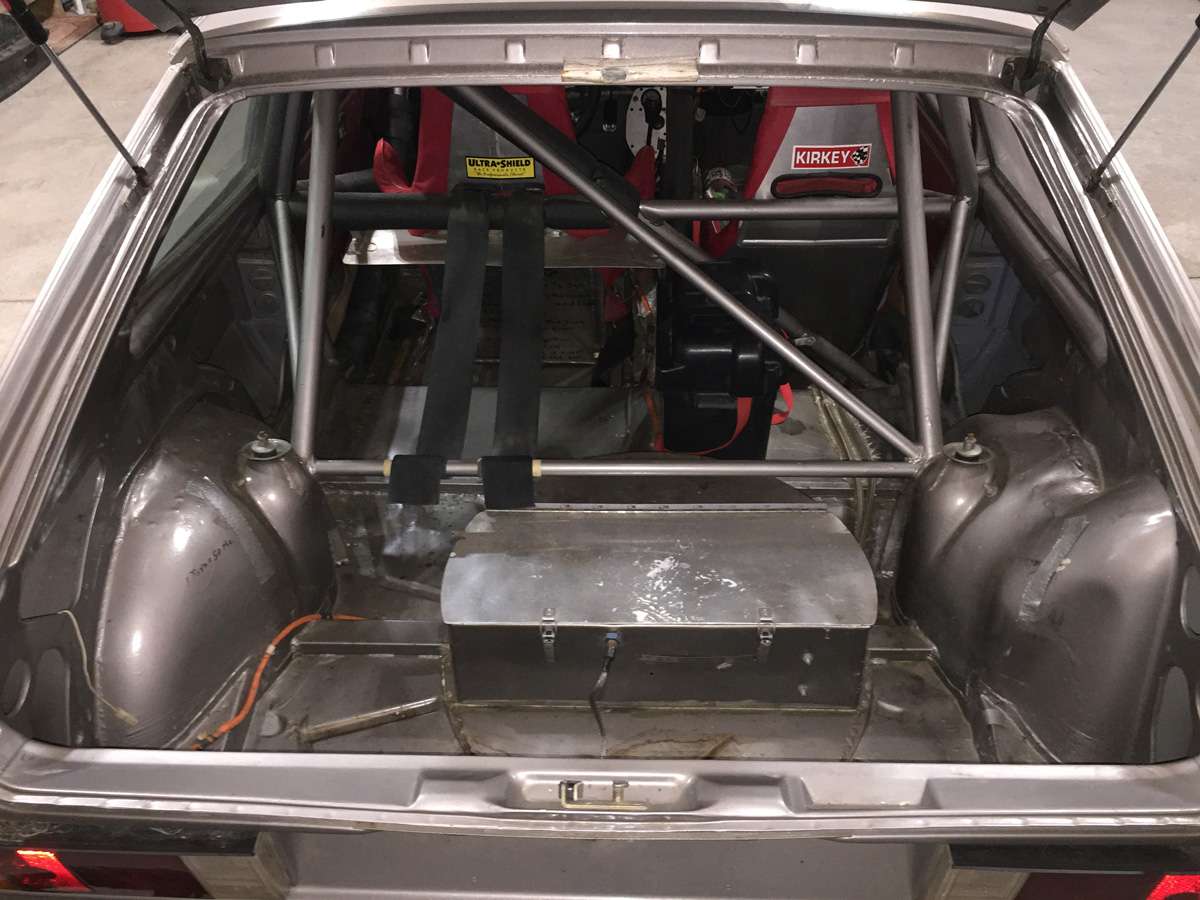
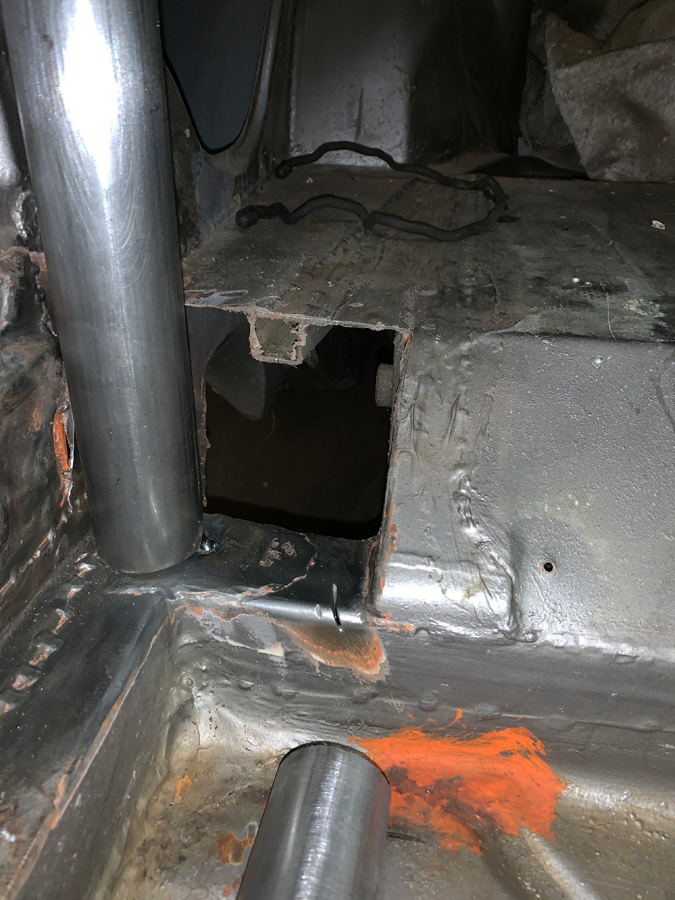
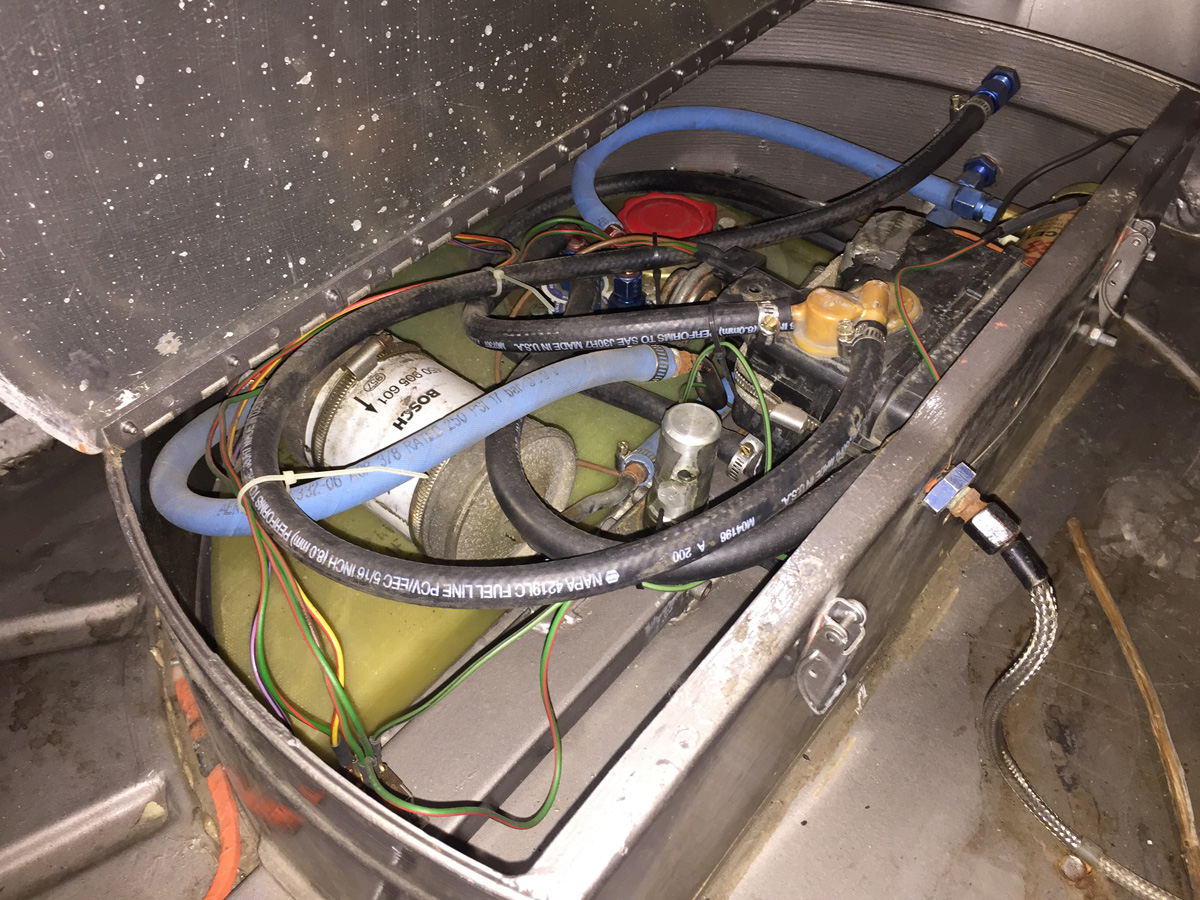
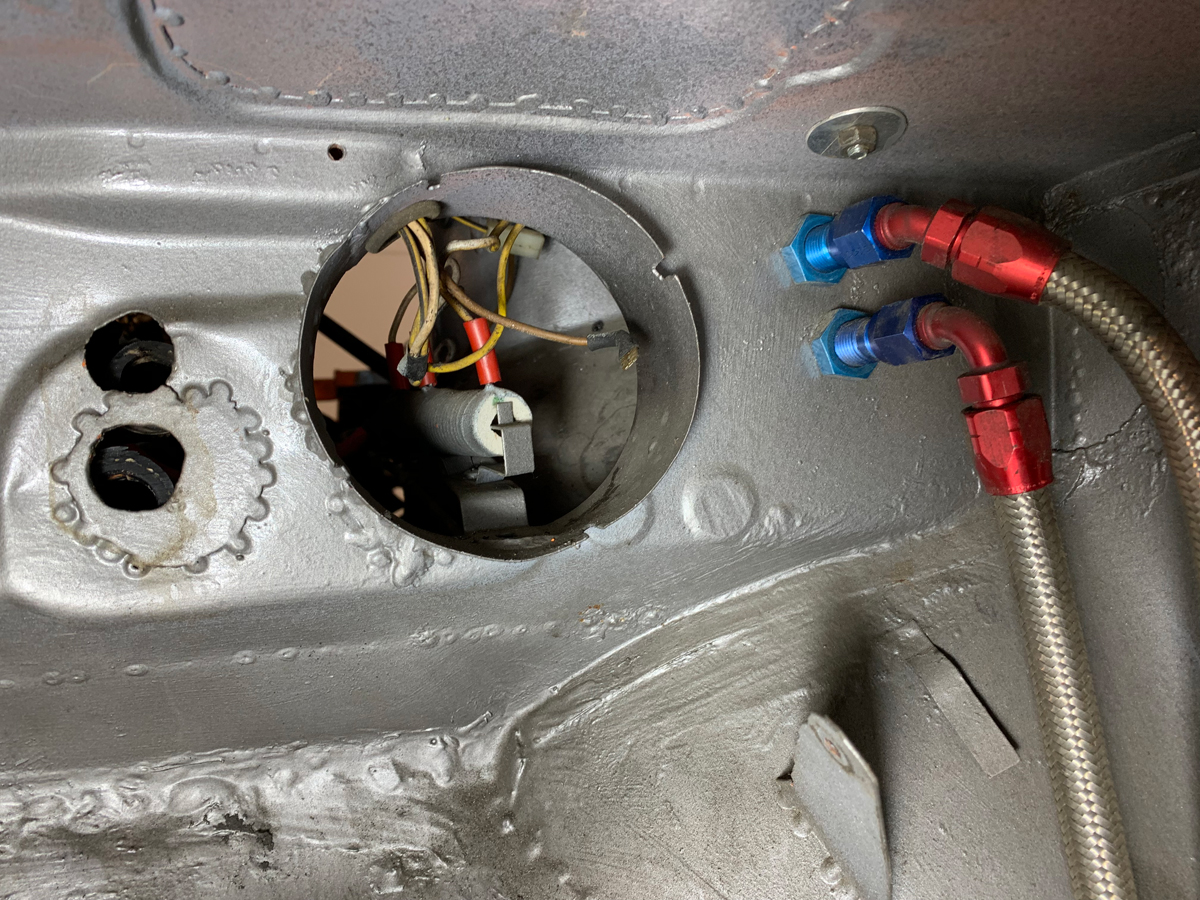
Fuel system bulk head. I might add rubber seal to edge/lip.

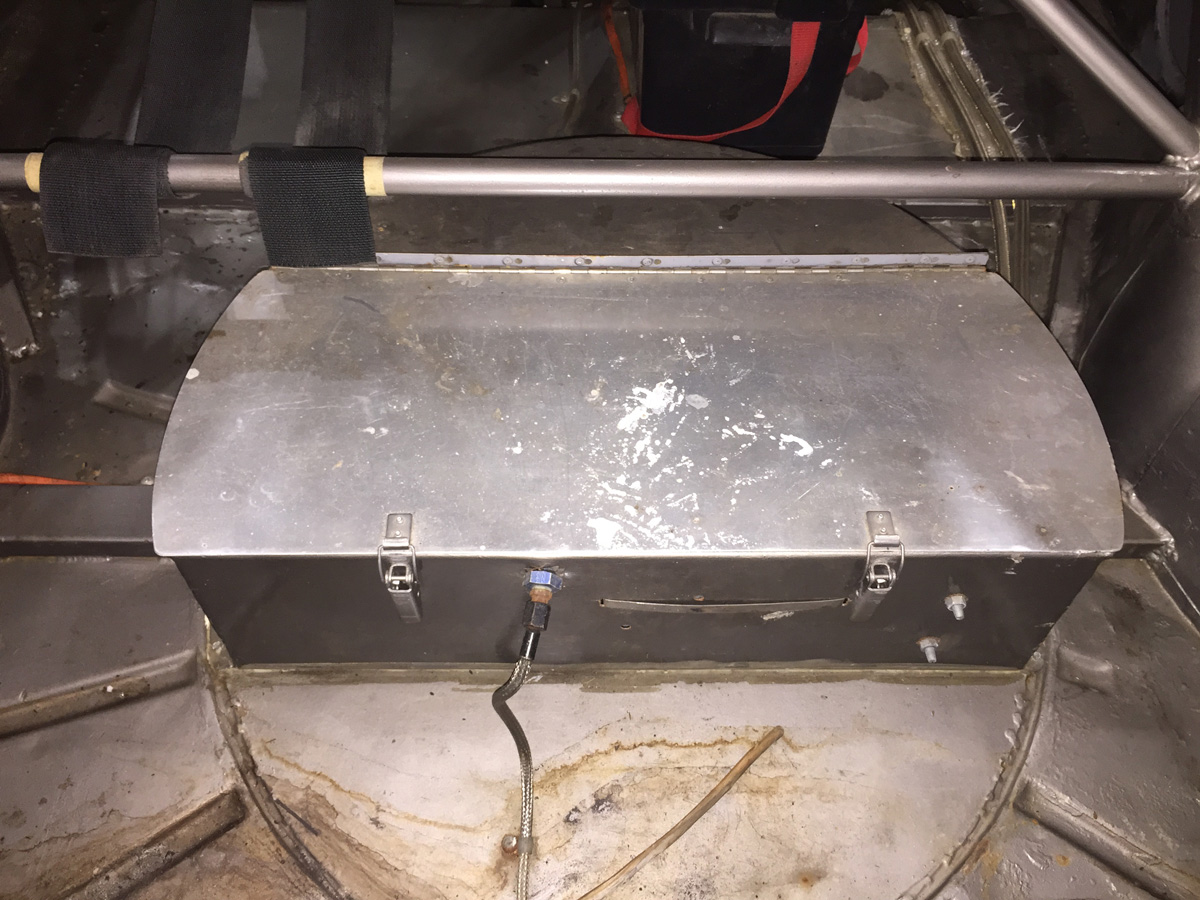
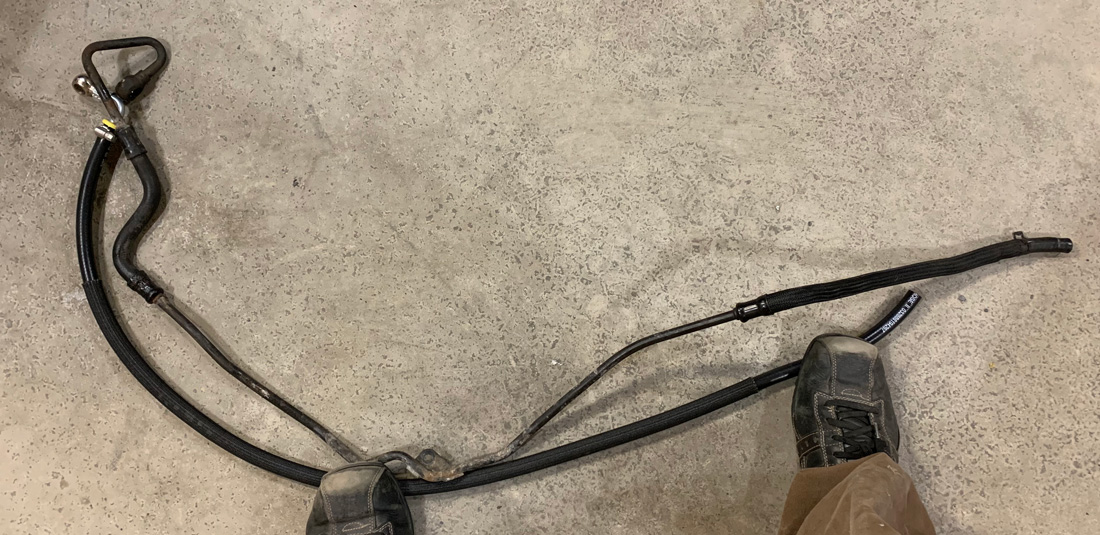
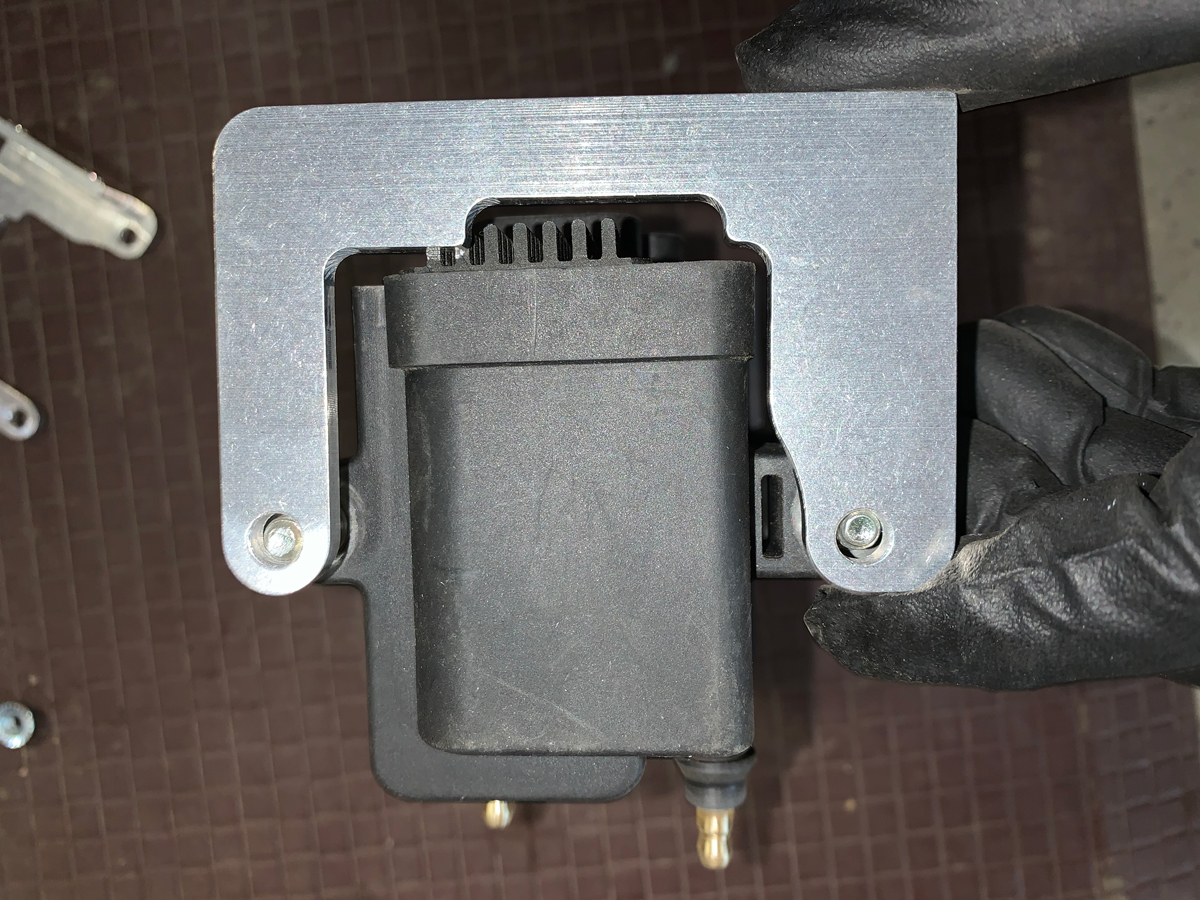
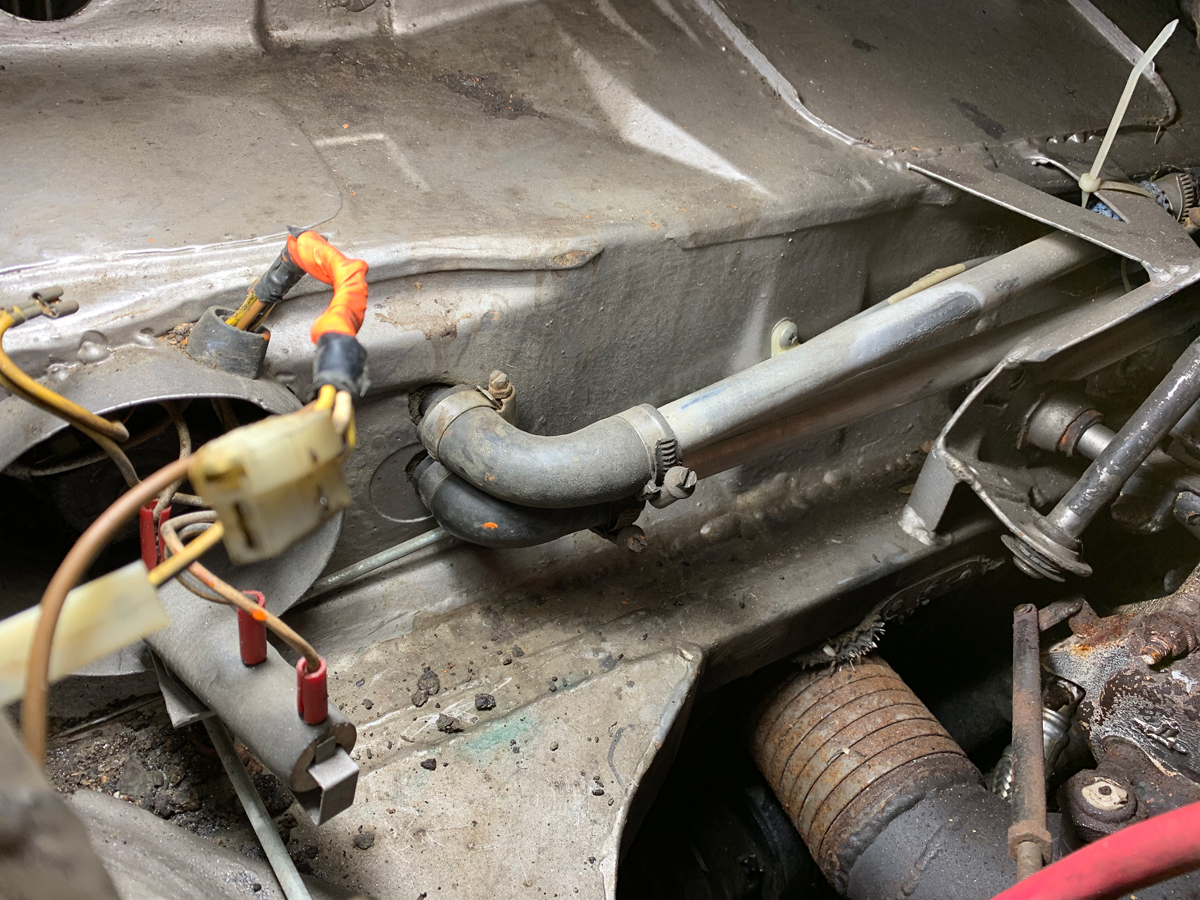
Stuff inside that I need to determine exactly what is needed with my future setup.

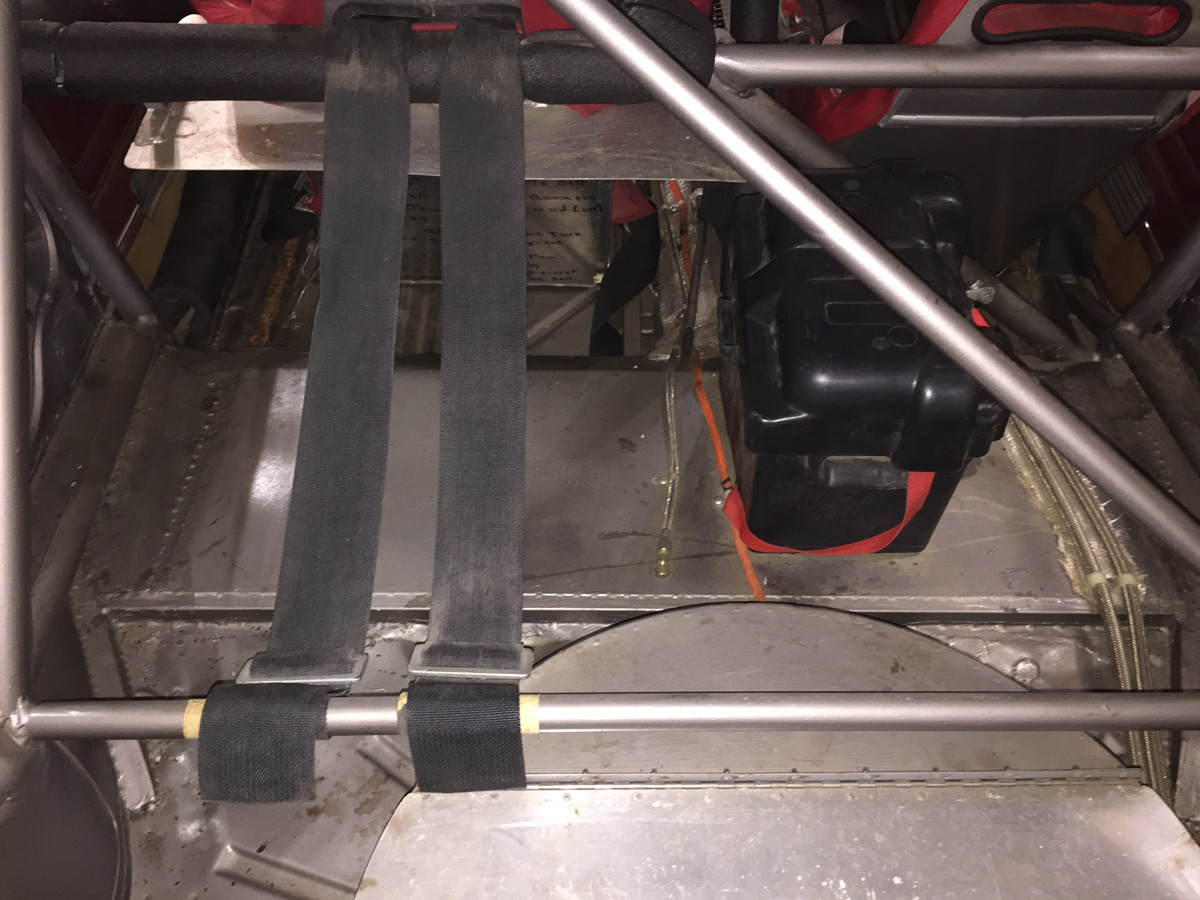
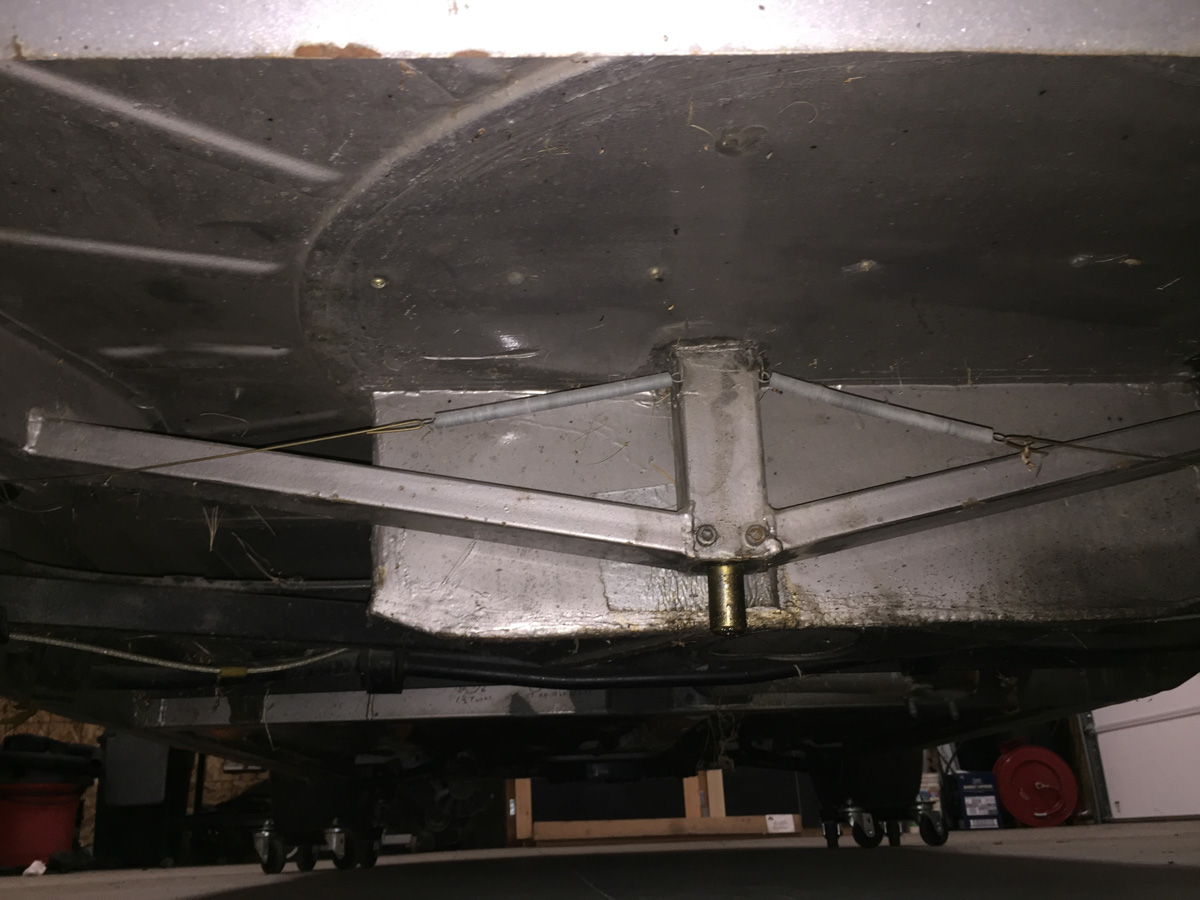
Okay… what are we looking at here?  Where the rear seat would normally go, the section is now flat and very structural.  Hmmm… might have something to do with rear suspension.  More below.

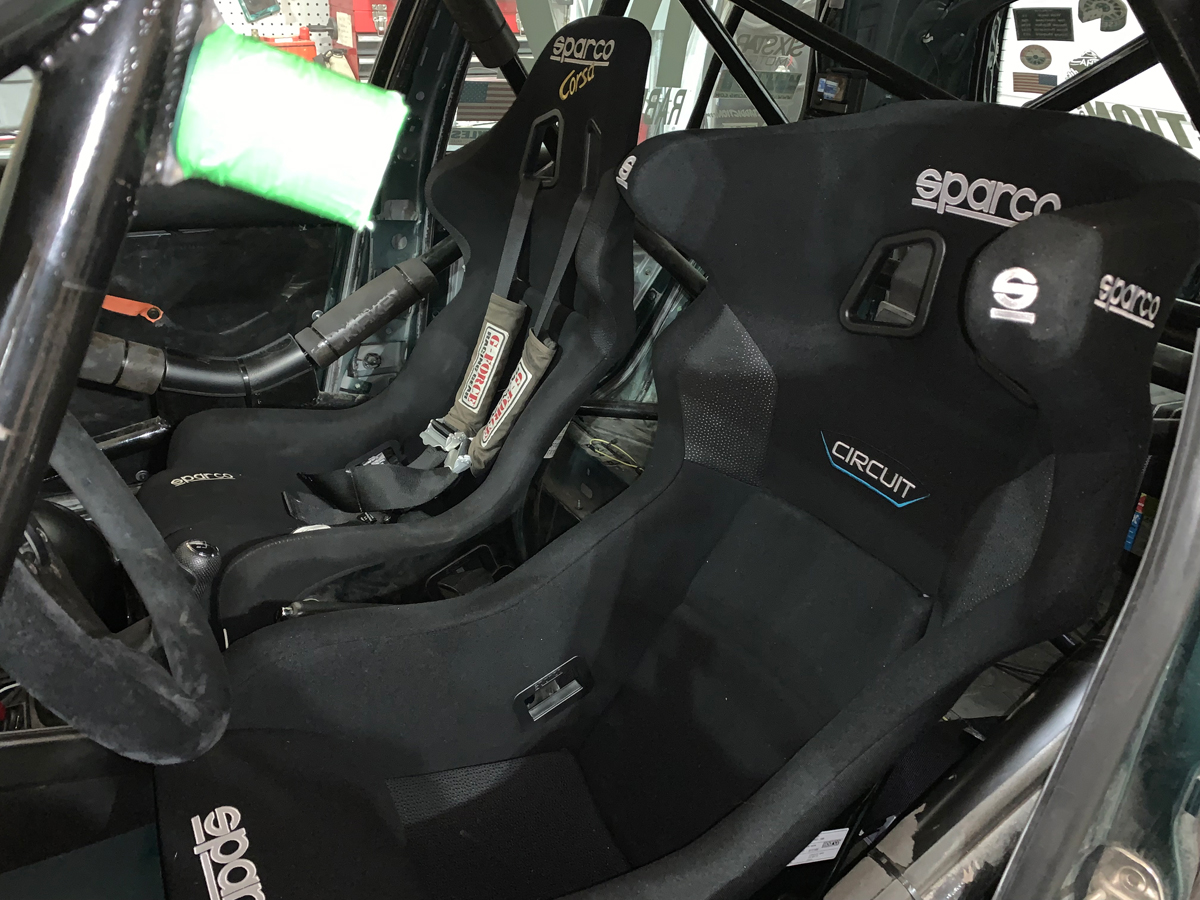
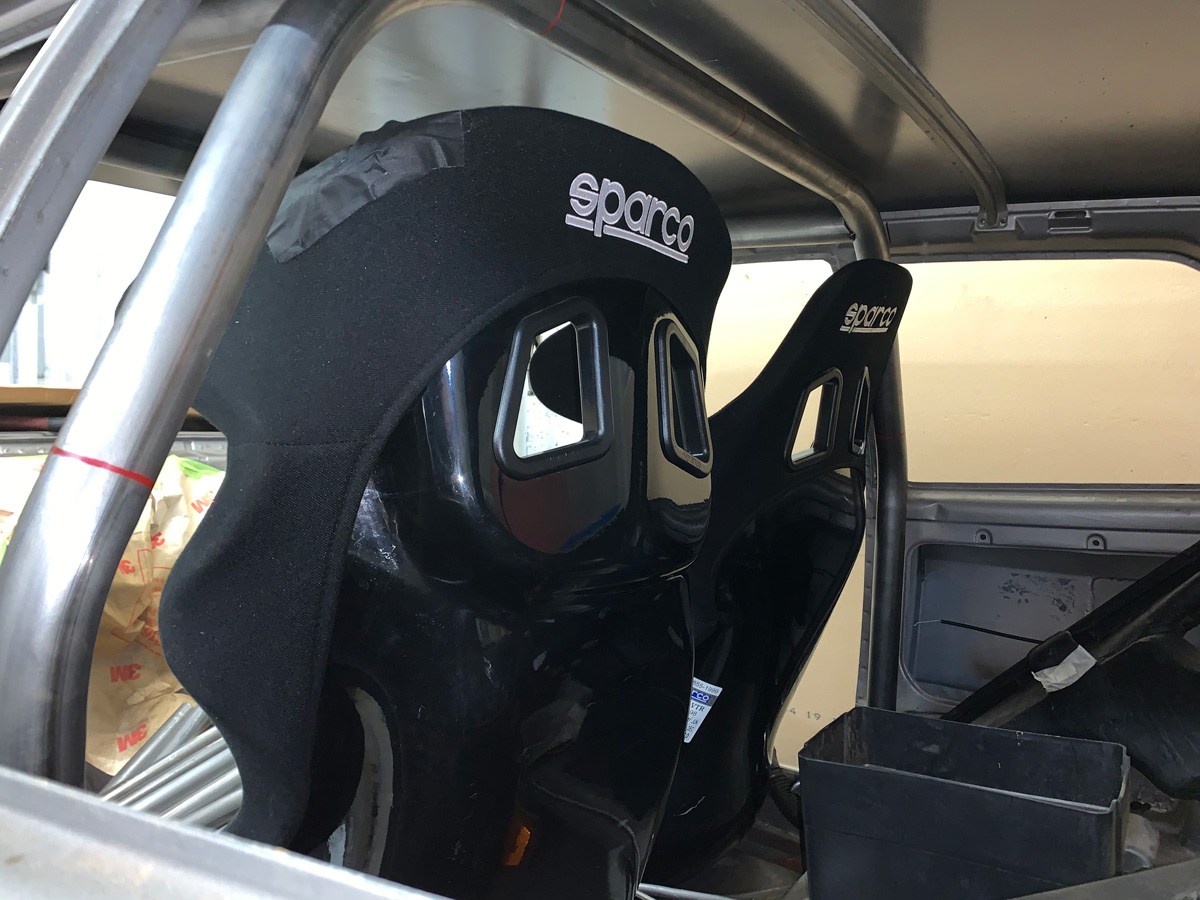
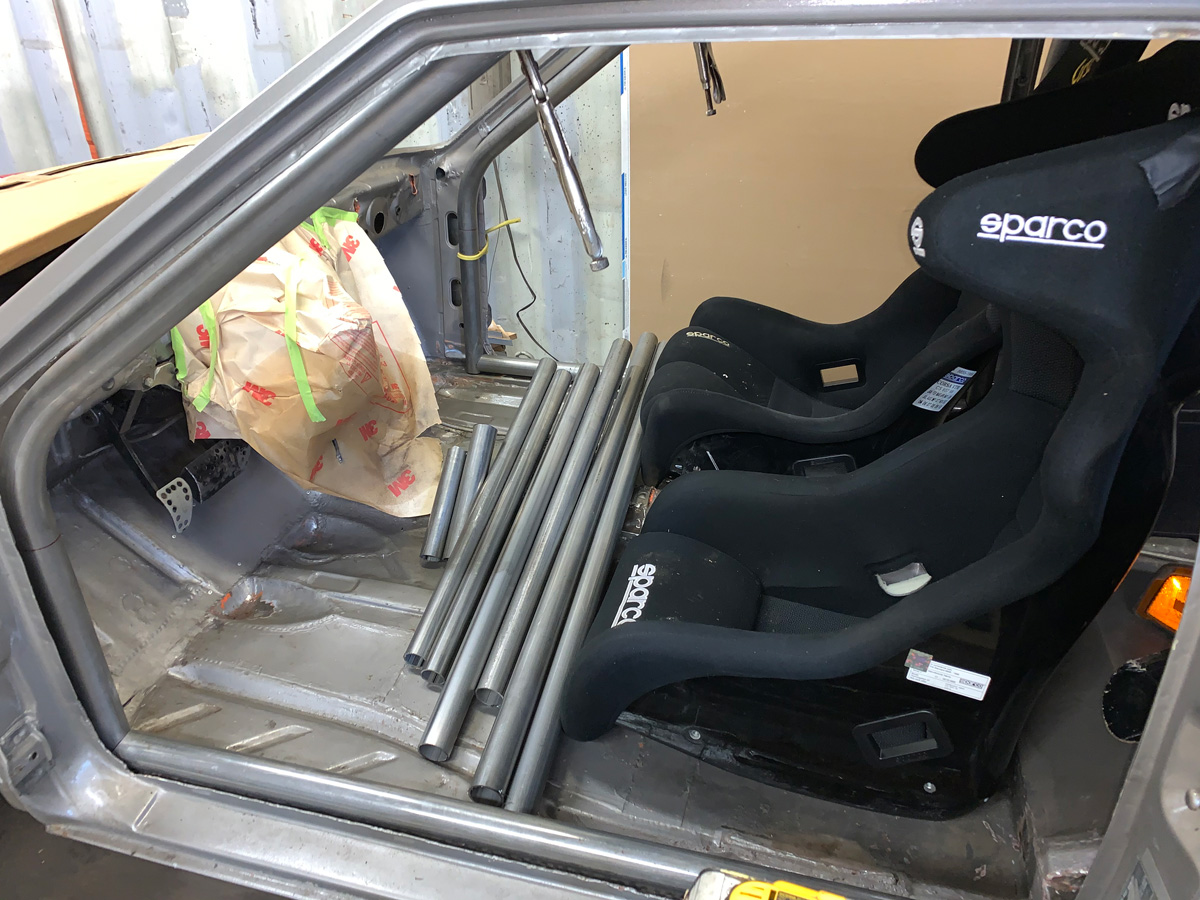
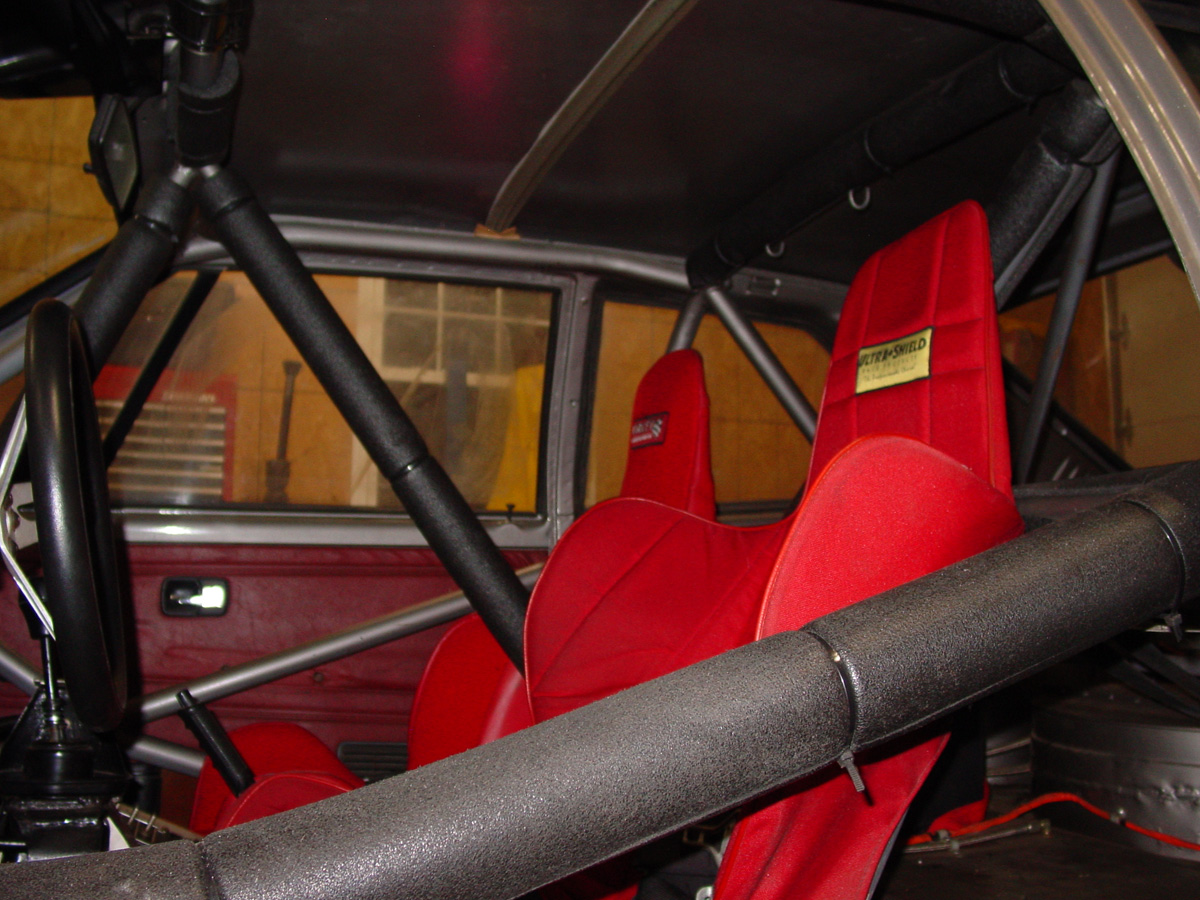
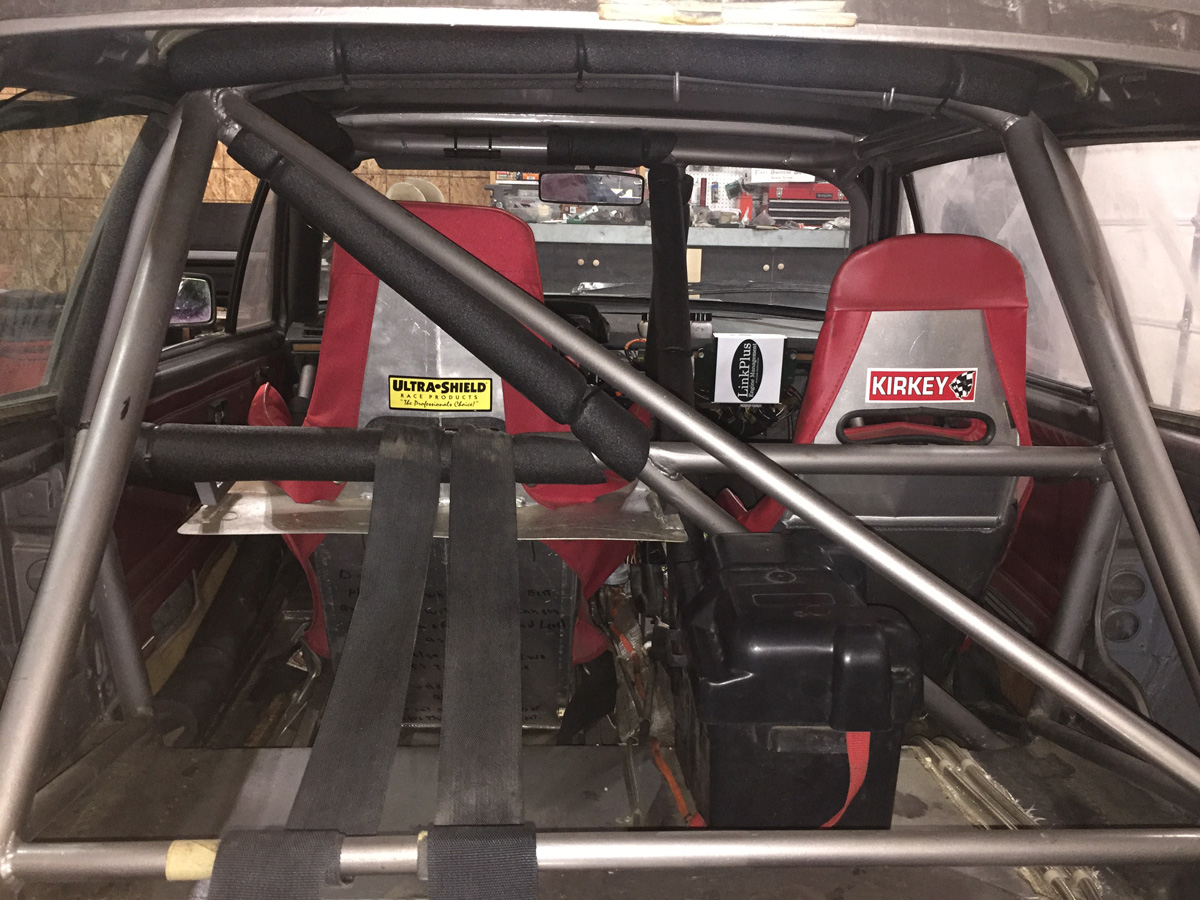
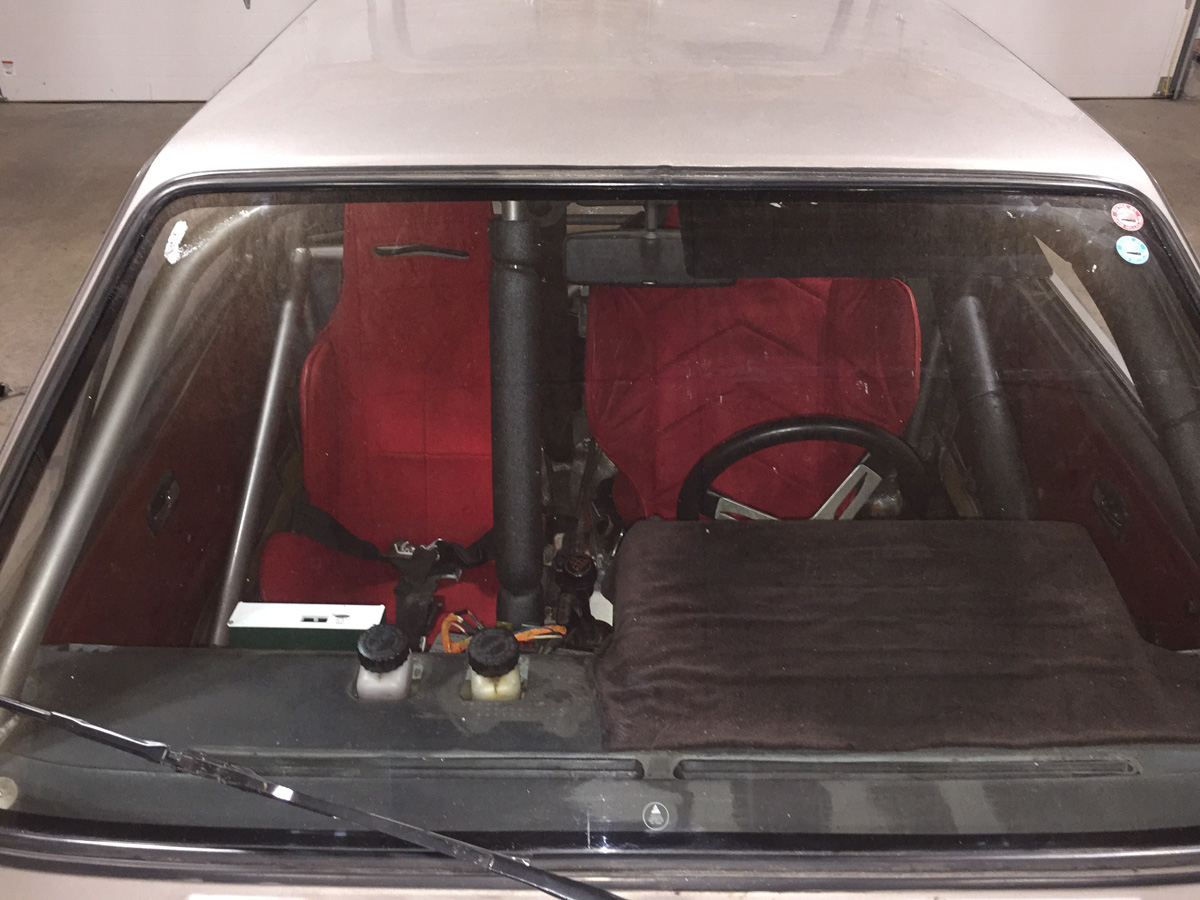
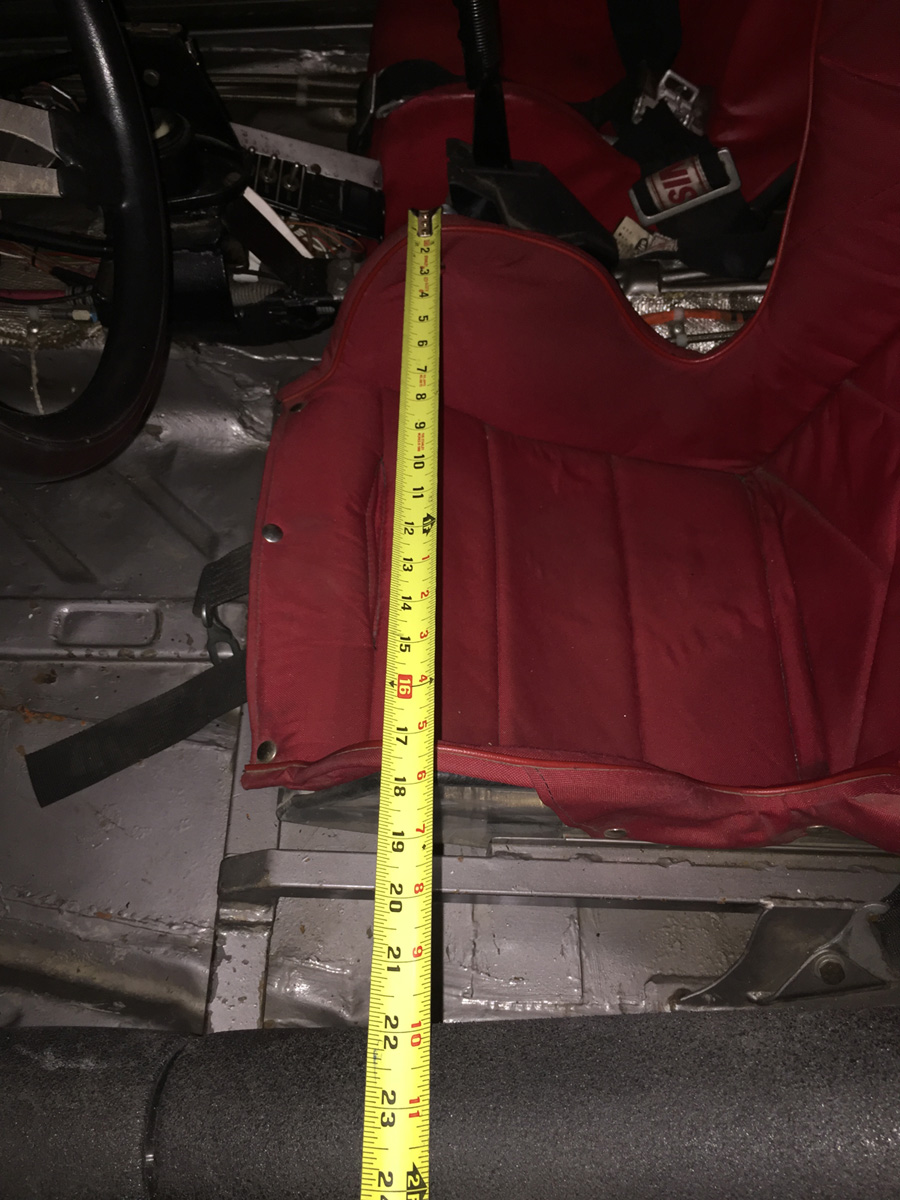
Another photo showing the location of the driver’s seat vs. the passenger seat.

Small passenger seat.

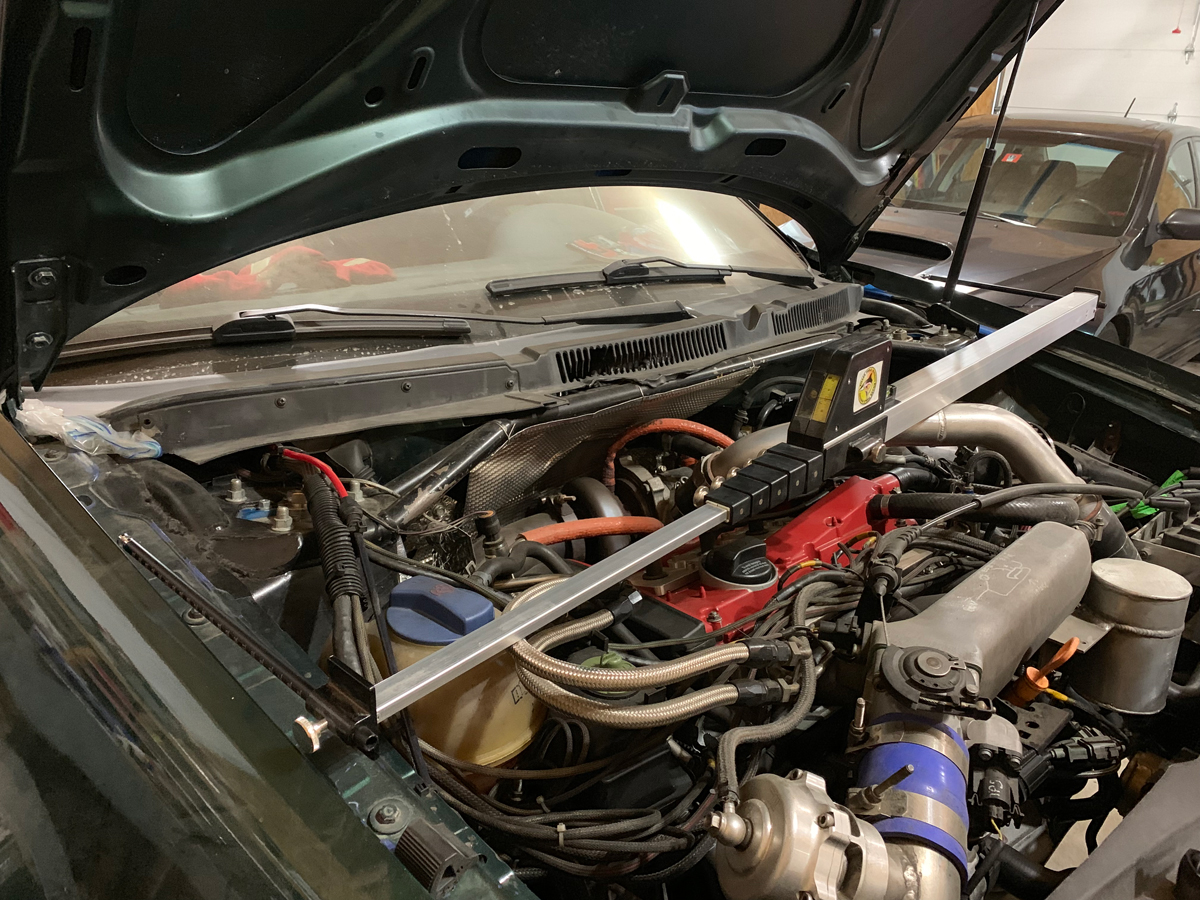
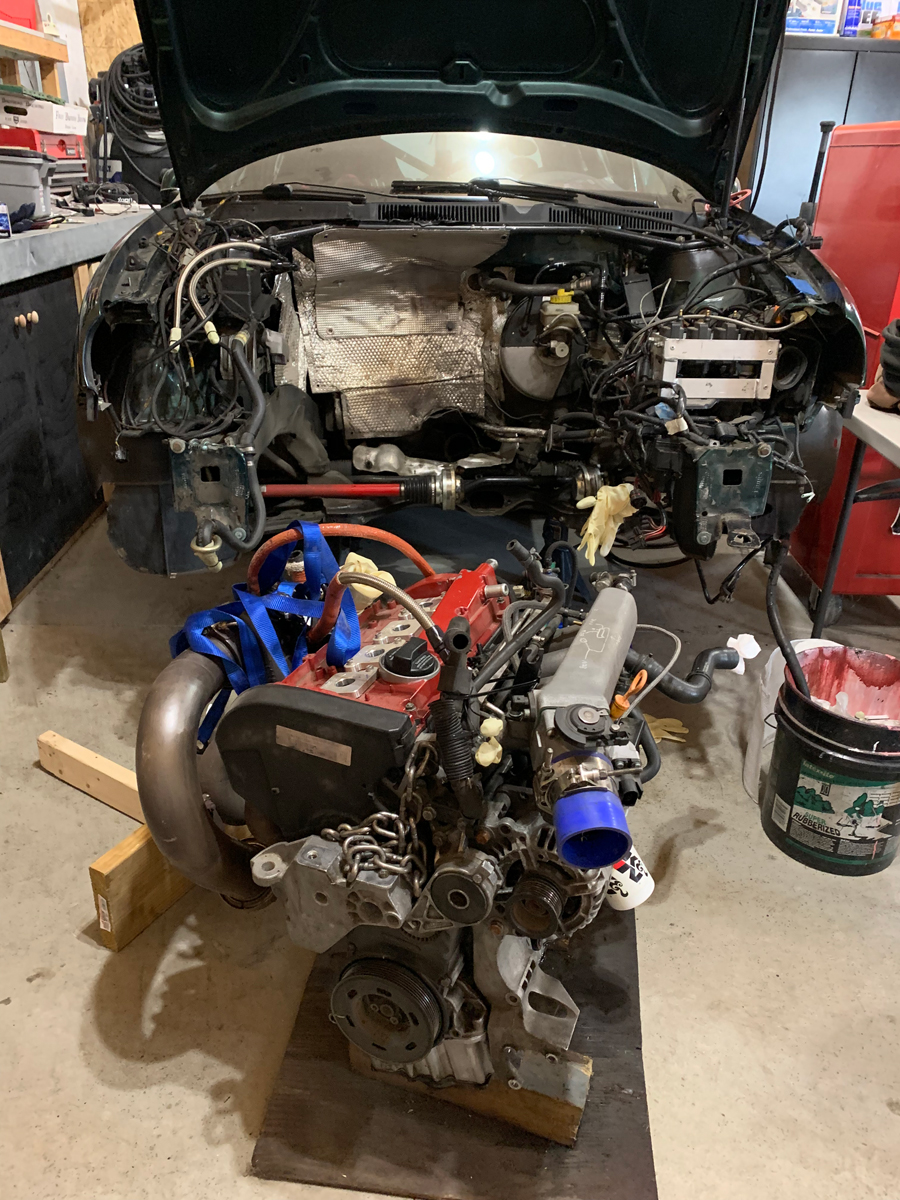
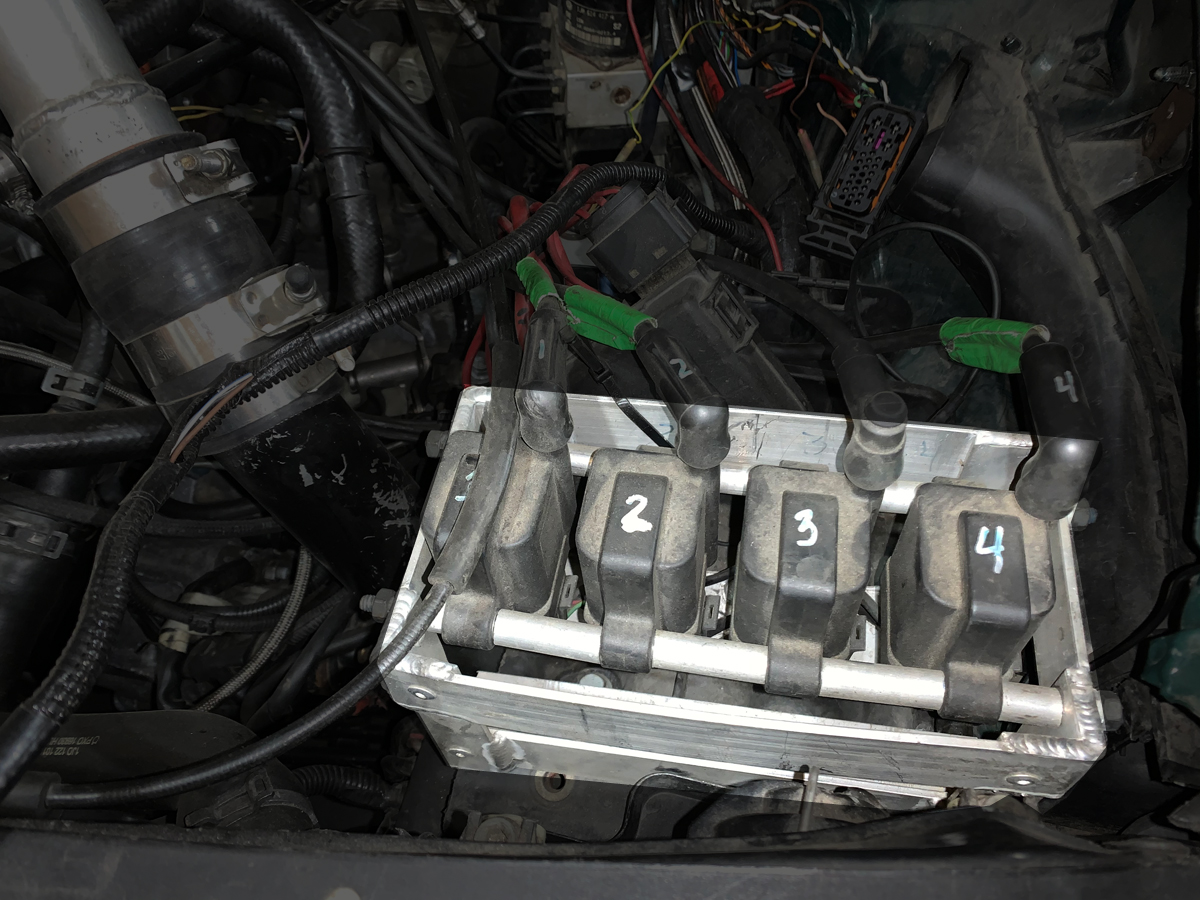
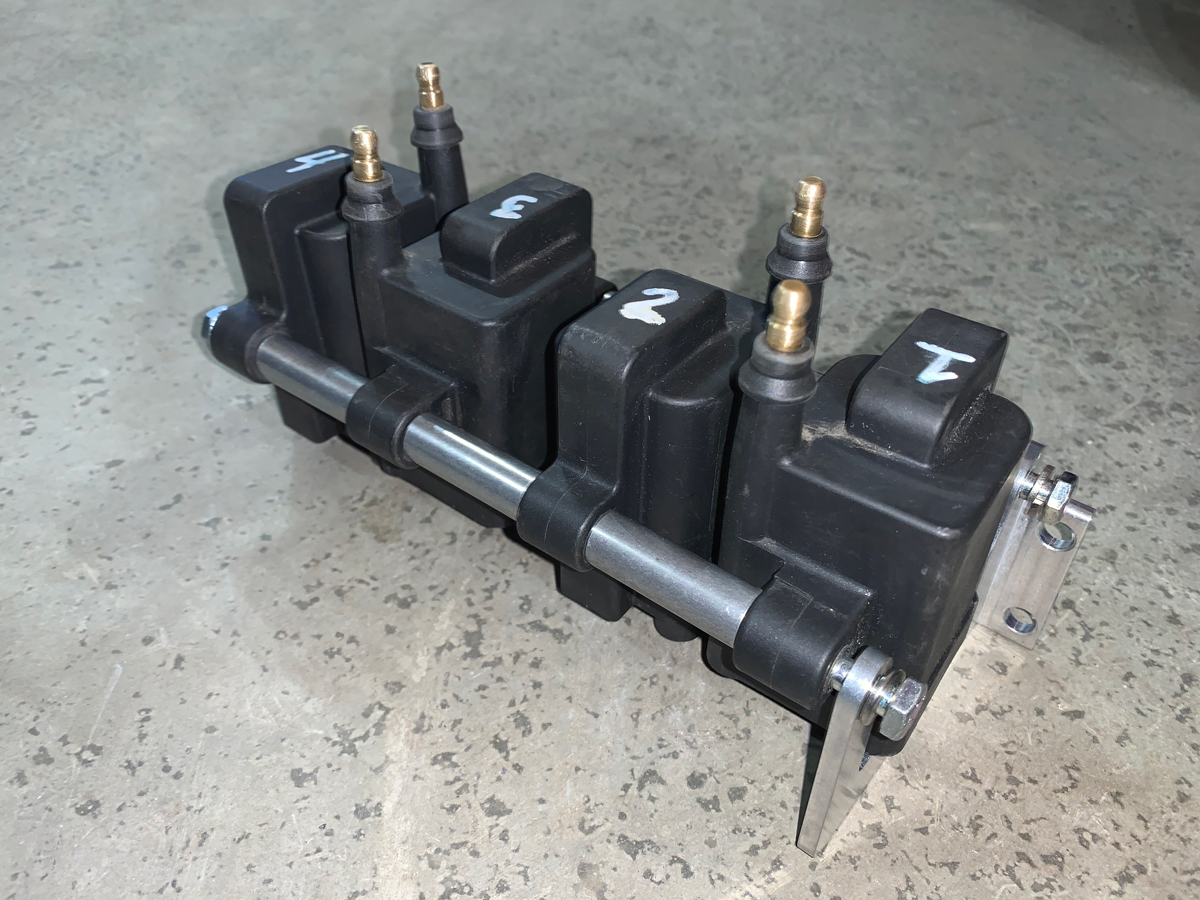
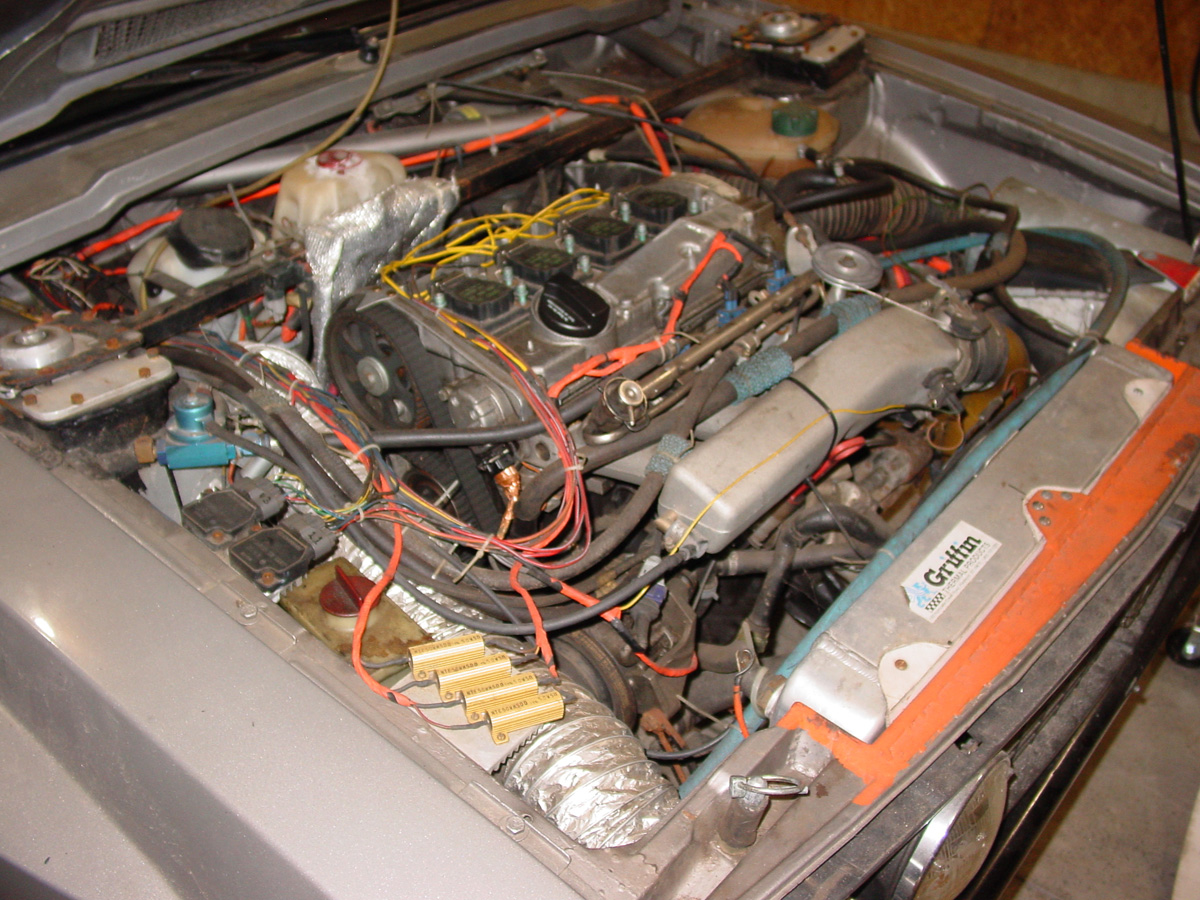
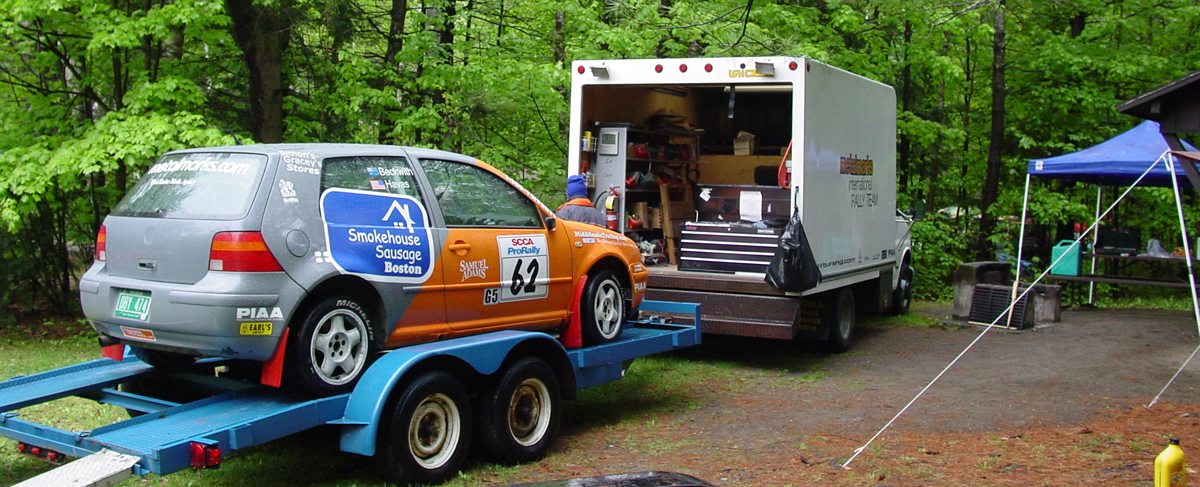
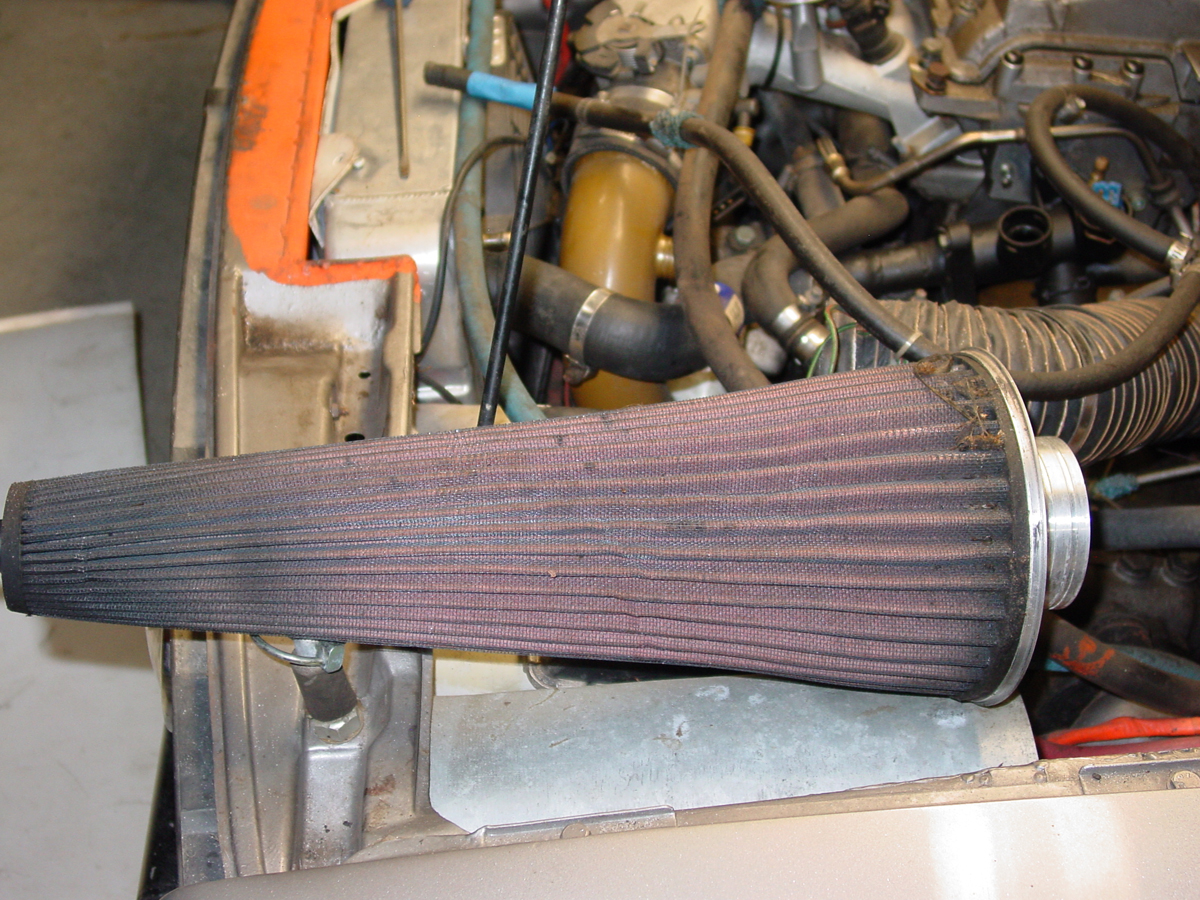
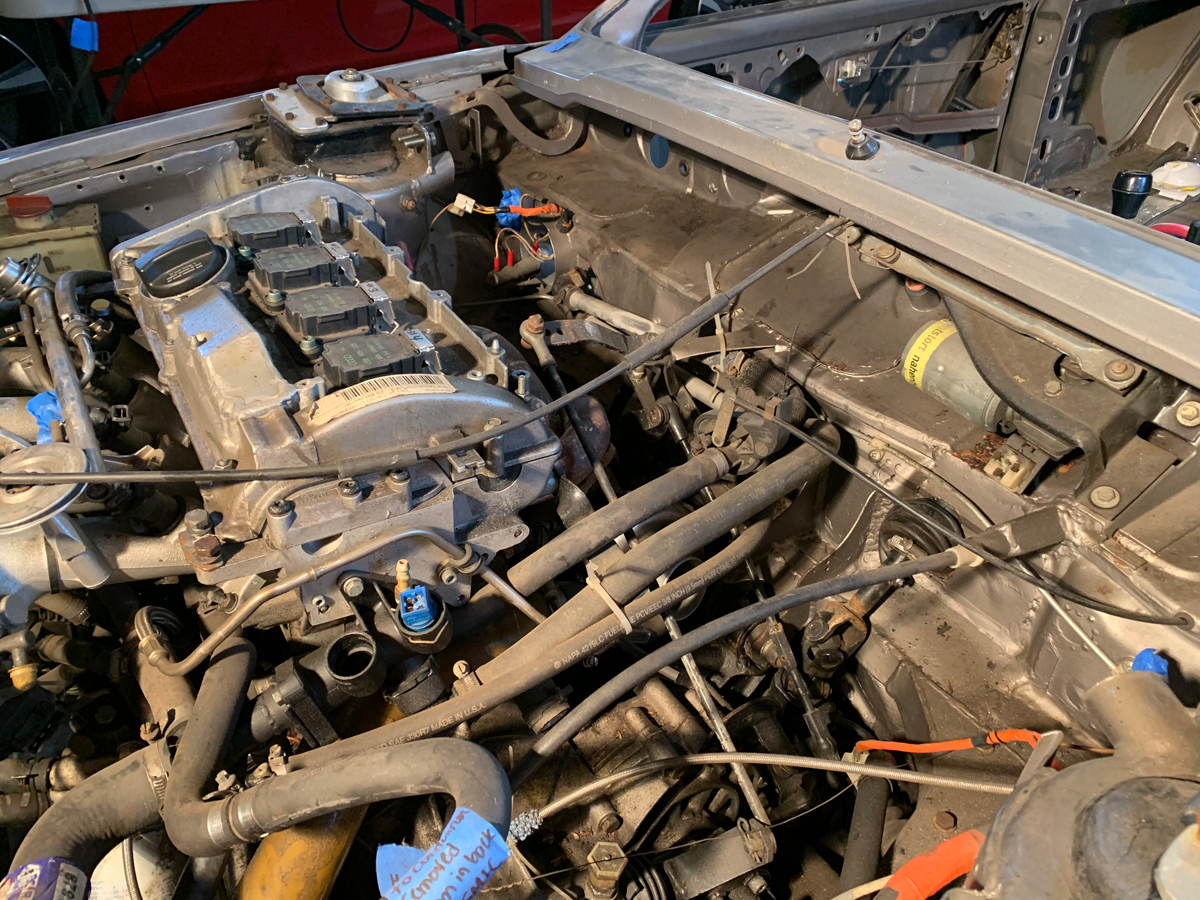
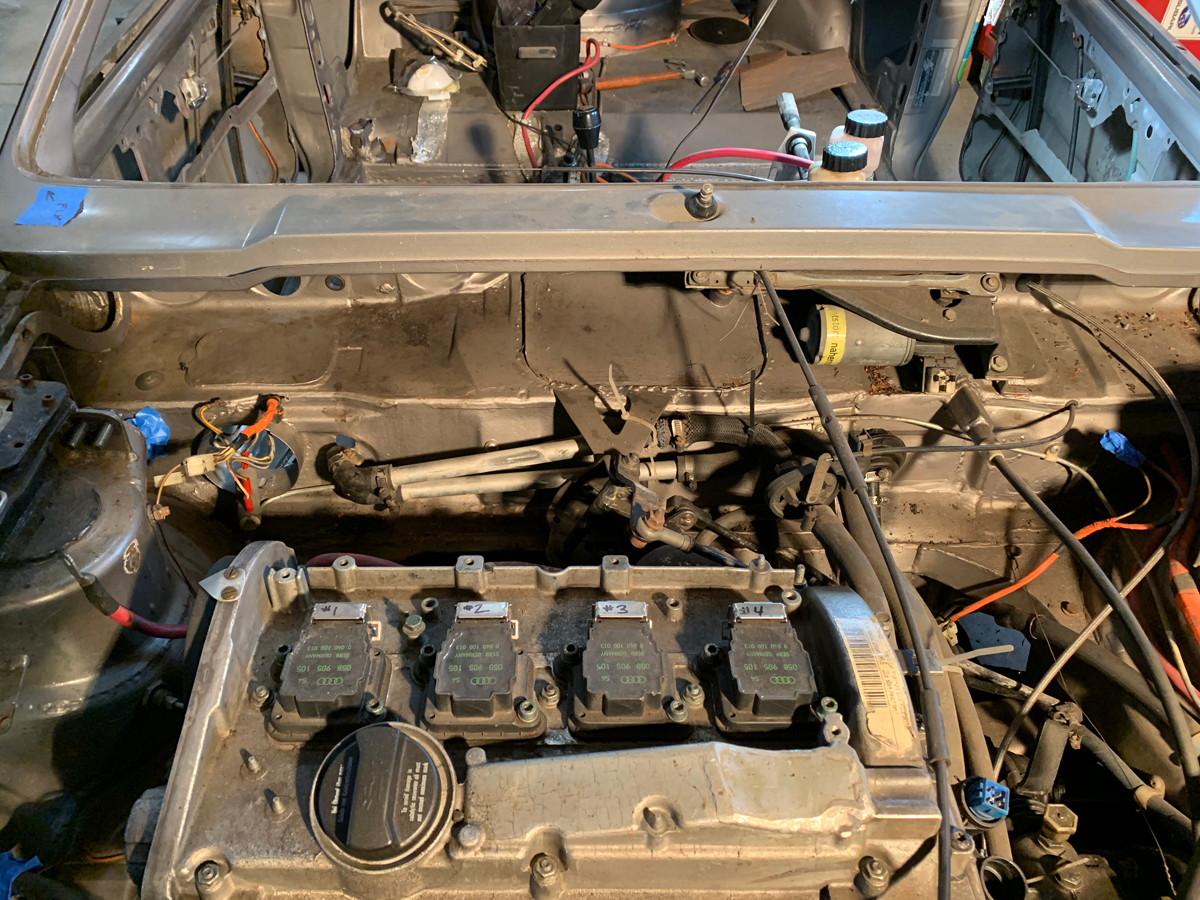
Let’s move to the engine.  When Bill built this 1.8T MK1 Scirocco, it was the only one I knew of at the time.  I am not saying he was first, they just weren’t on my radar.  The point is that because putting 1.8T engines in MK1 was relatively new, resources for mounting the engine and making it run were very limited.

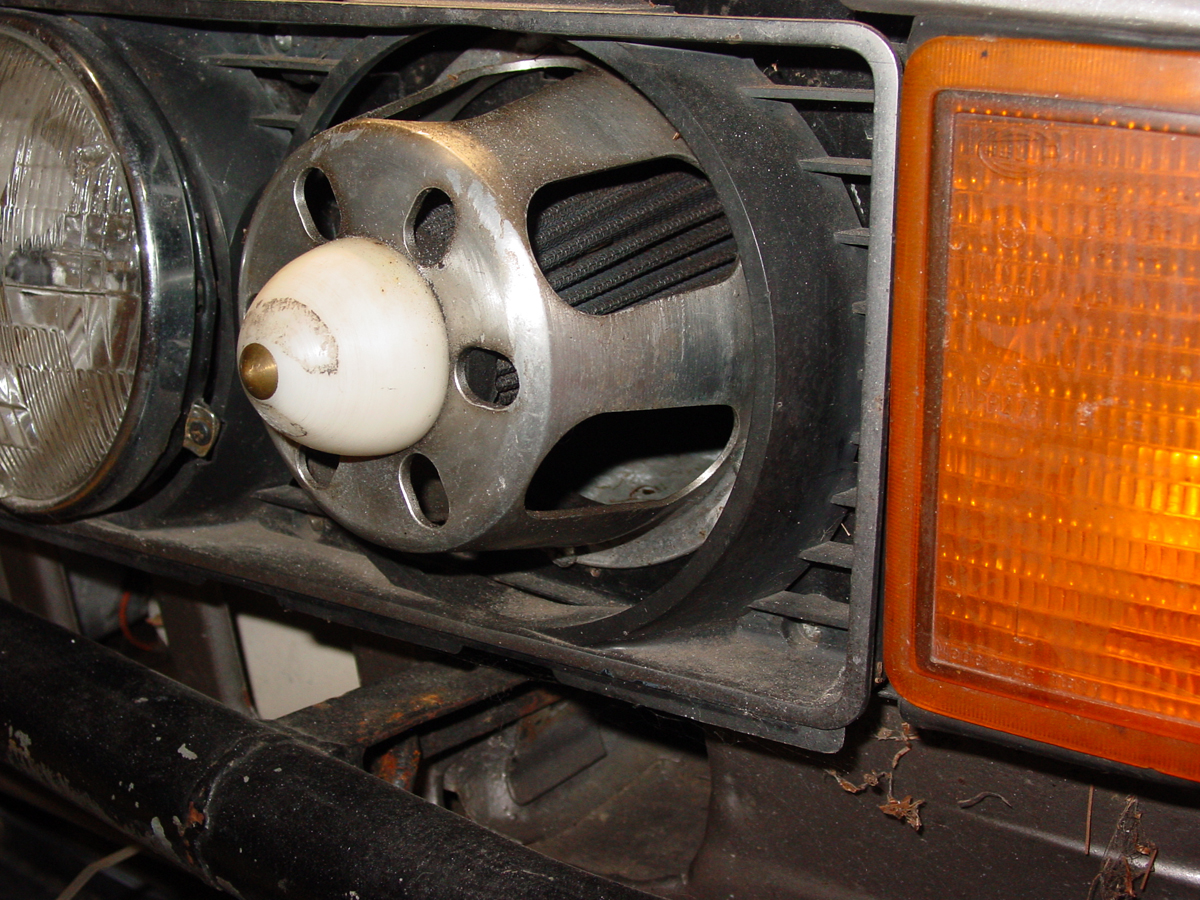
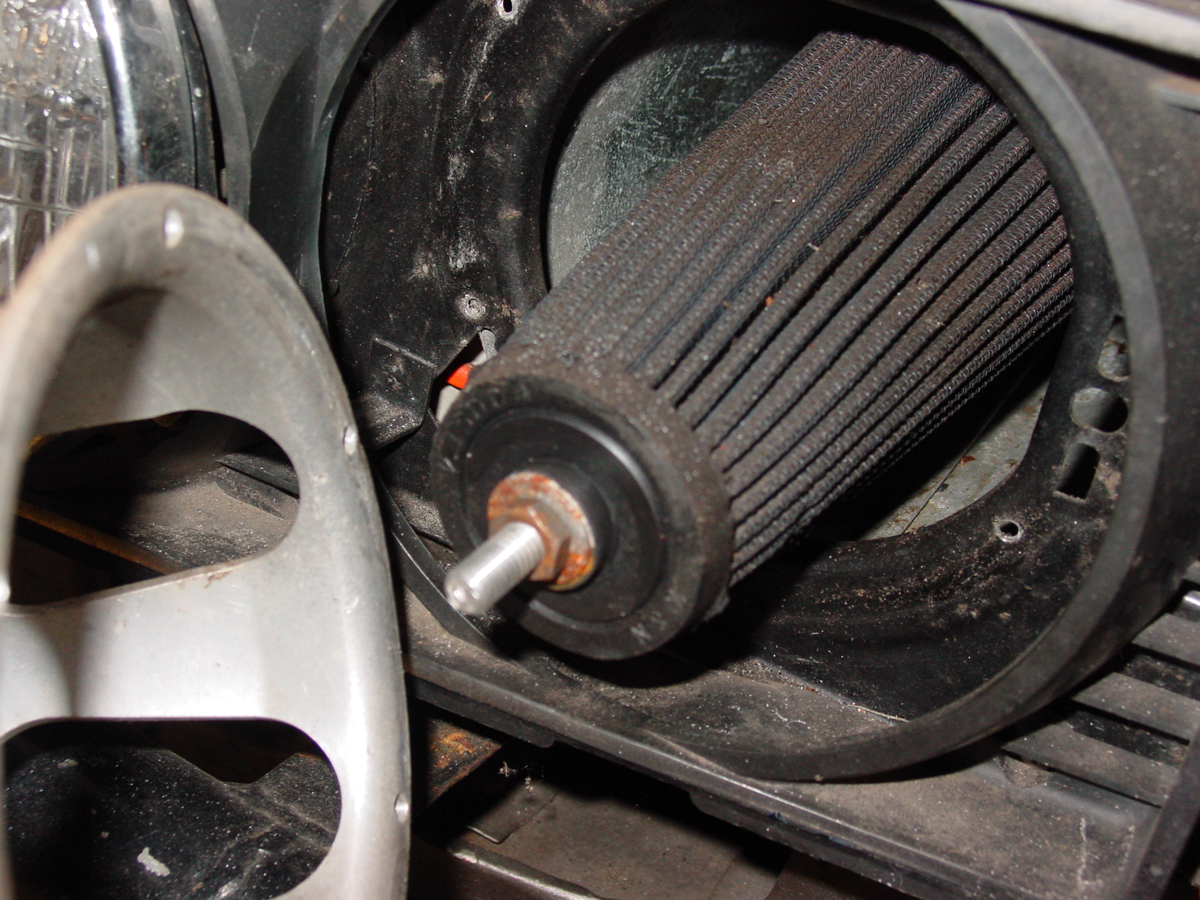
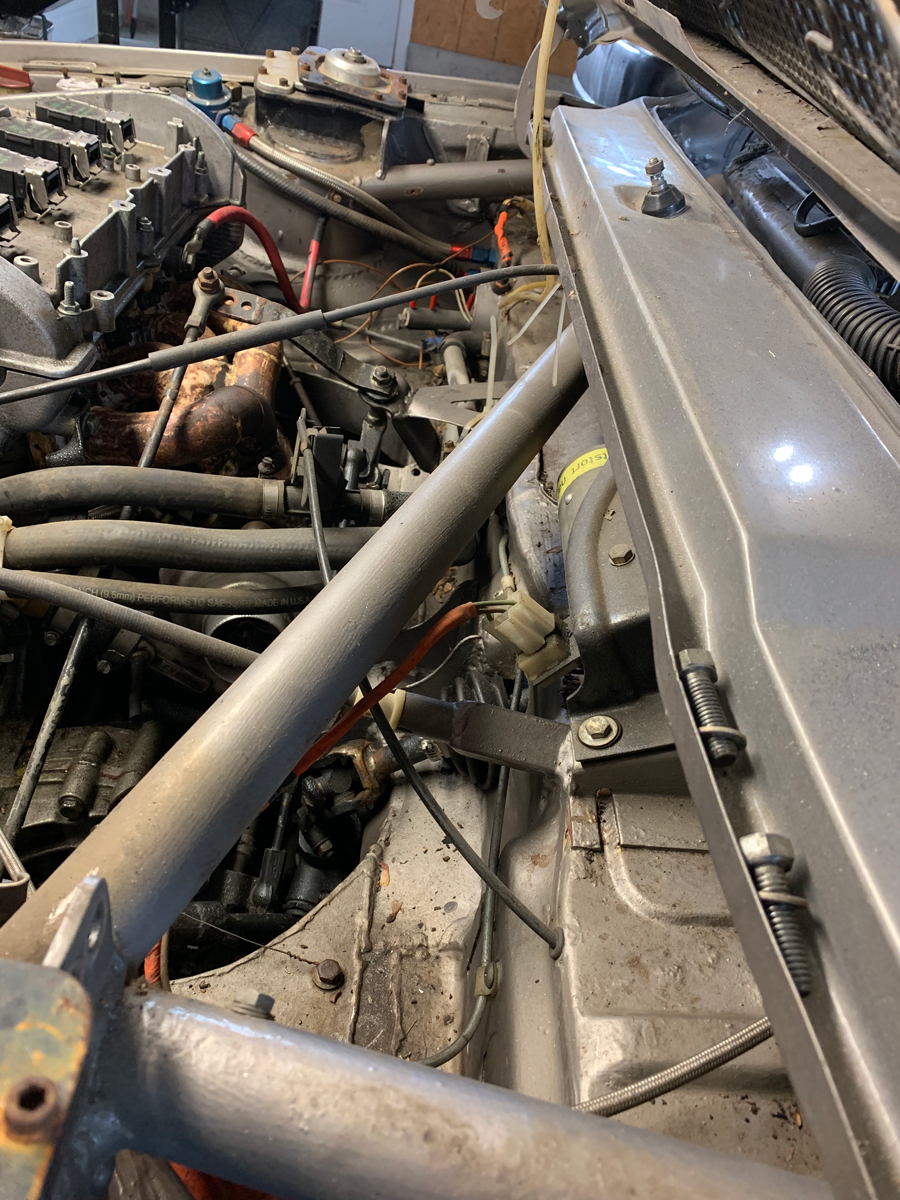
Notice how the extra large radiator is mounted… more body modification that serves a function.

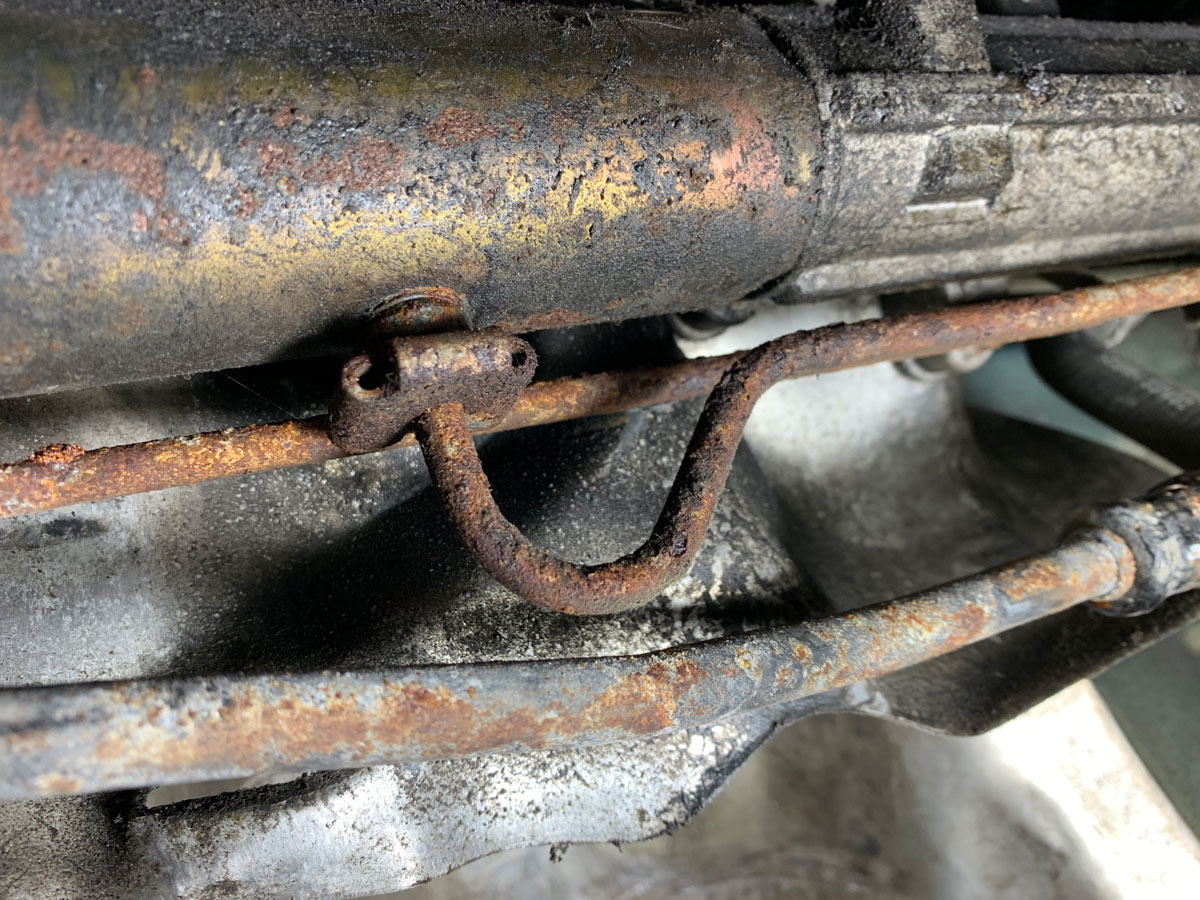
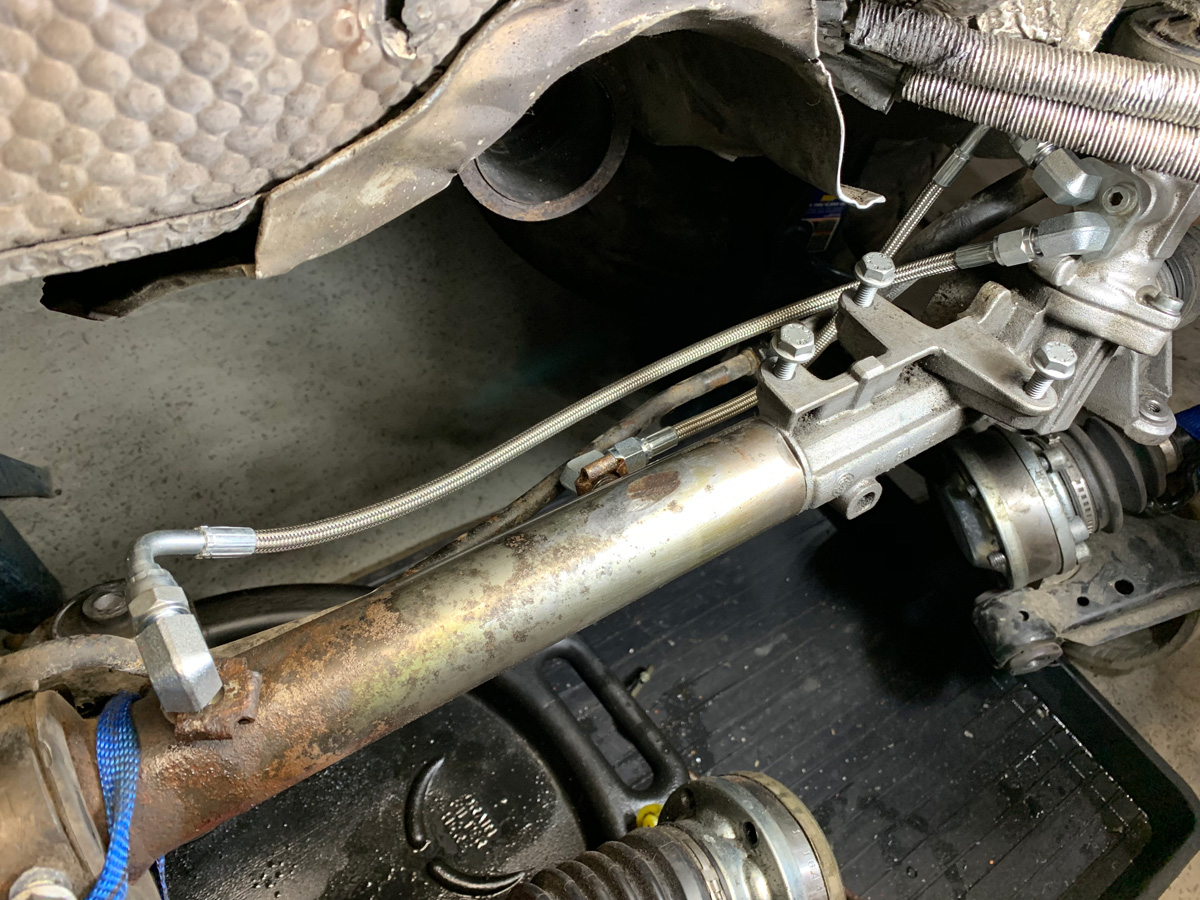
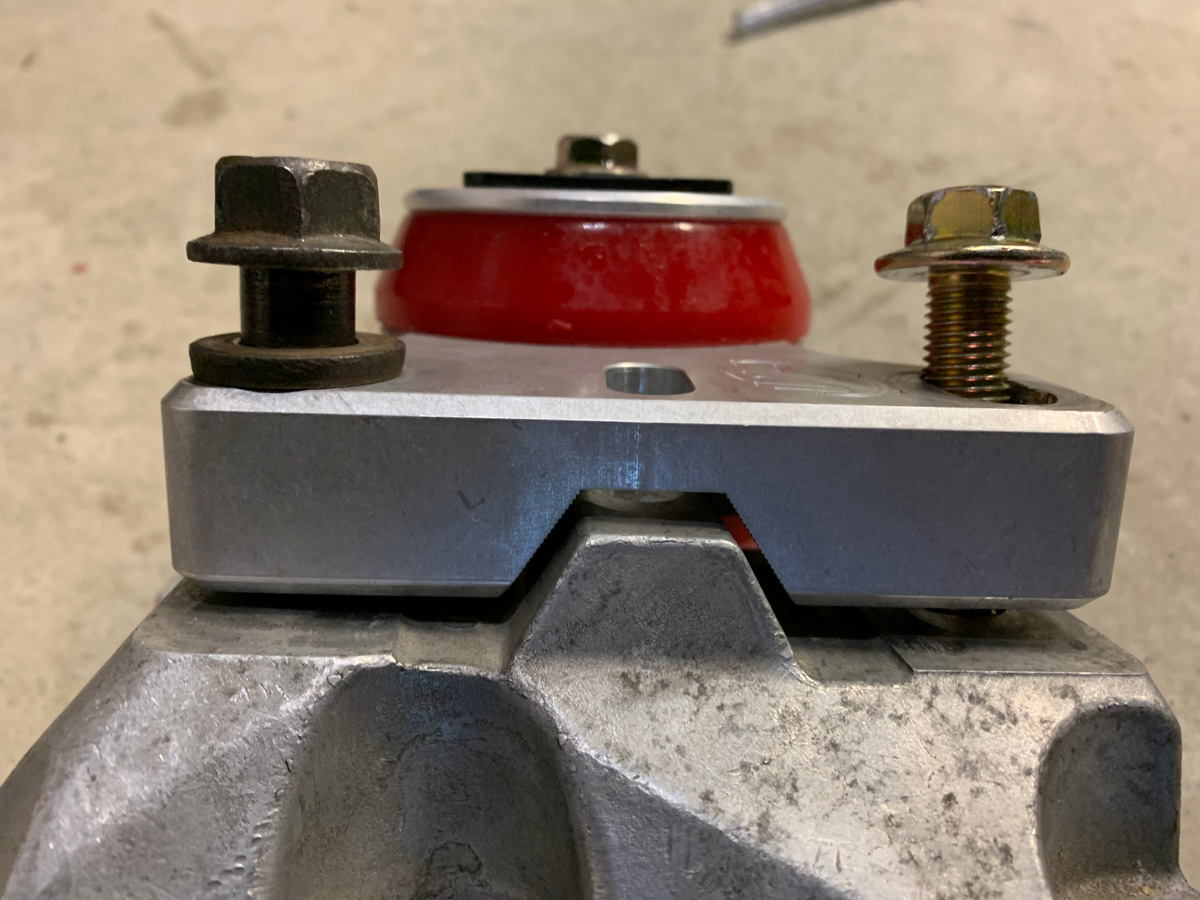
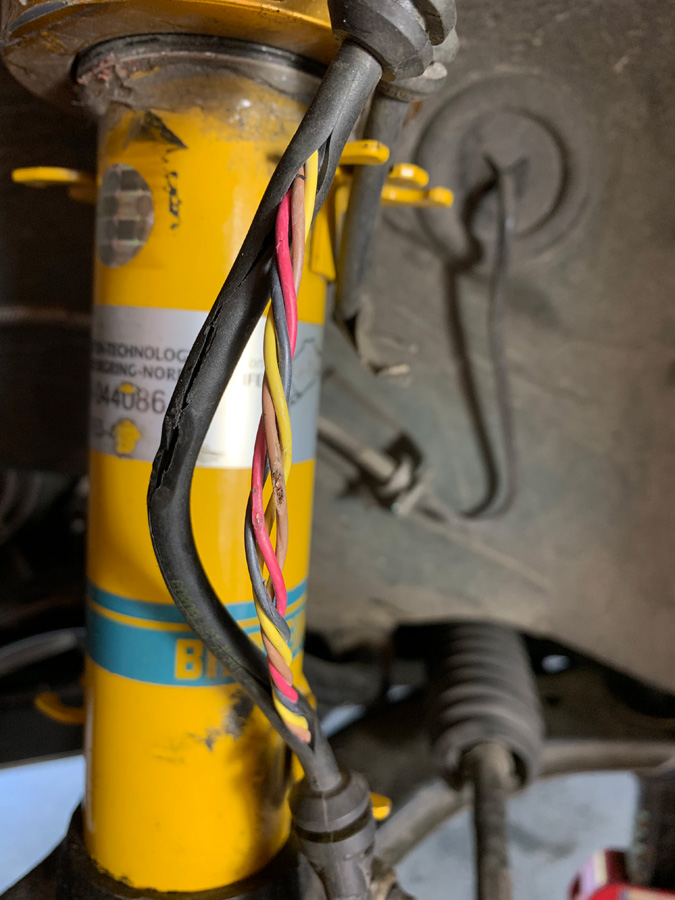
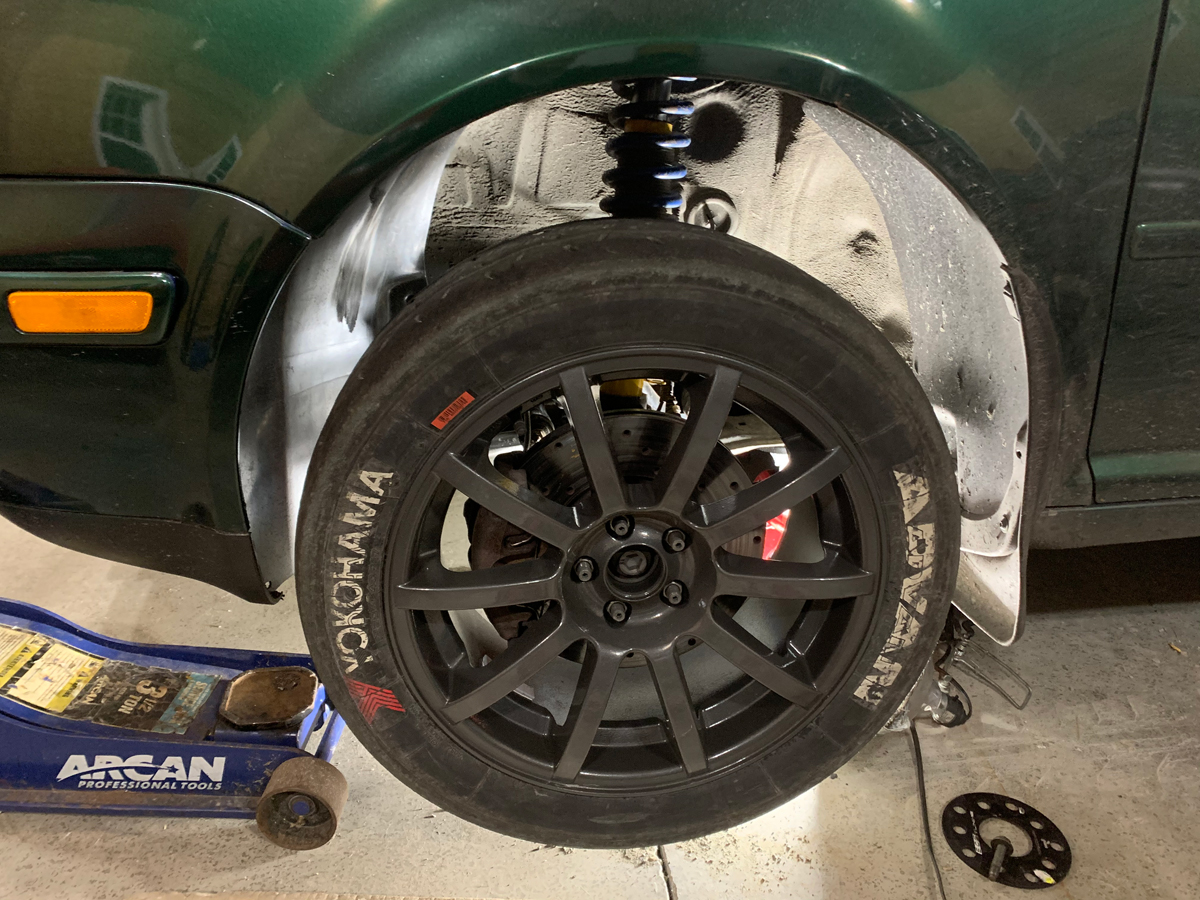
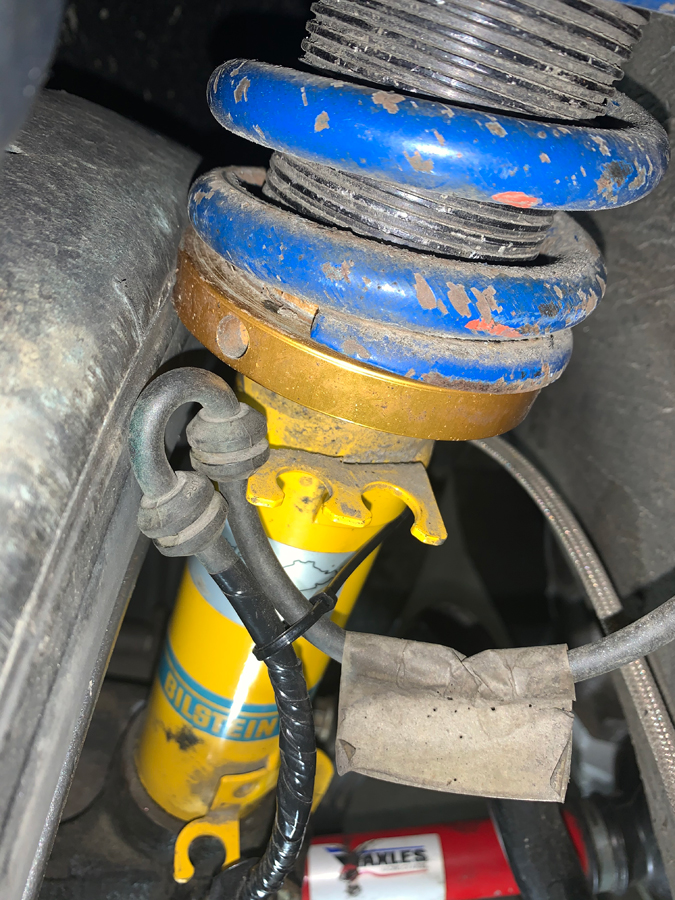
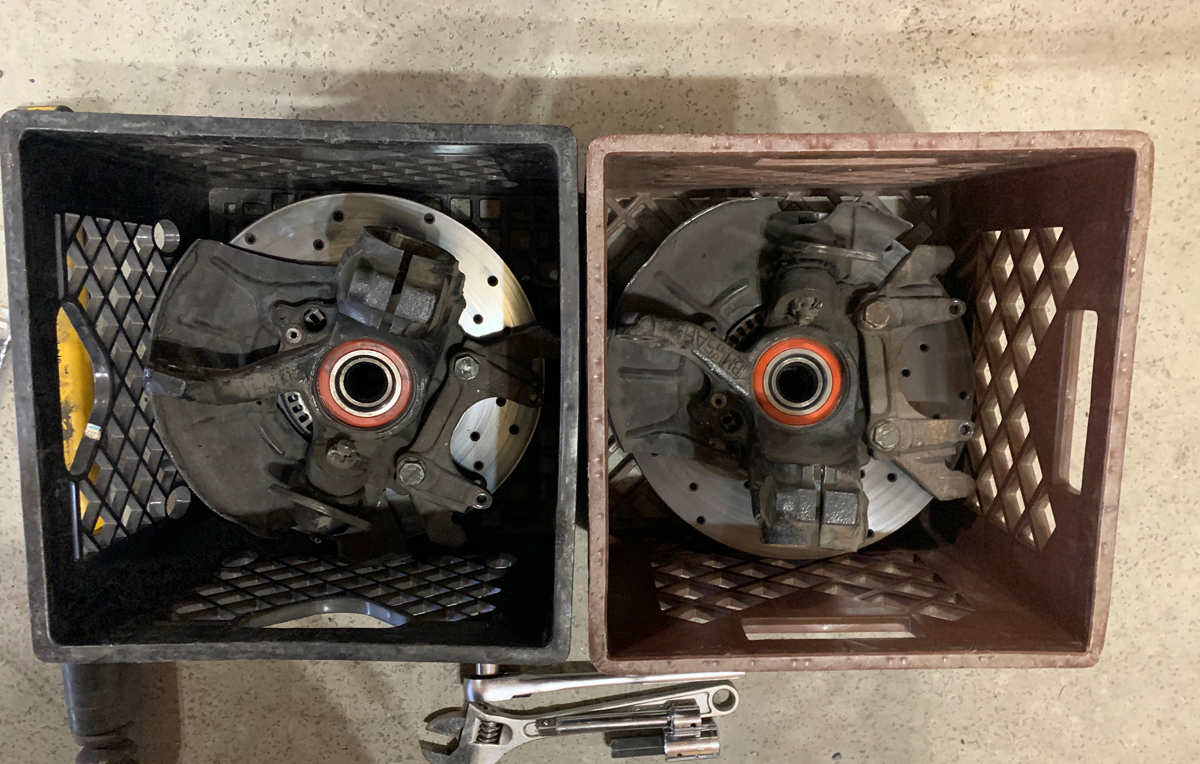
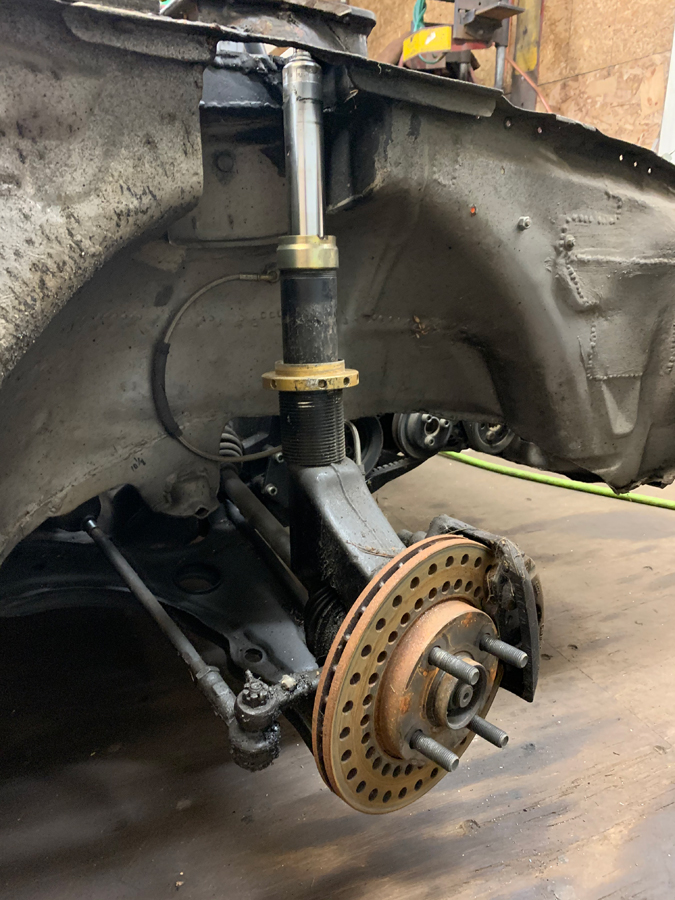
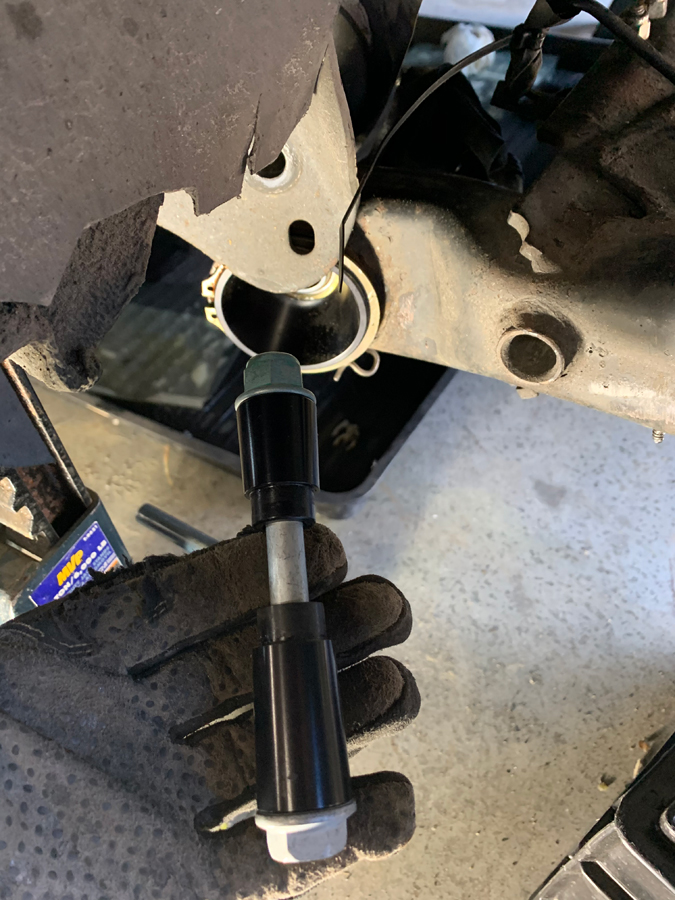
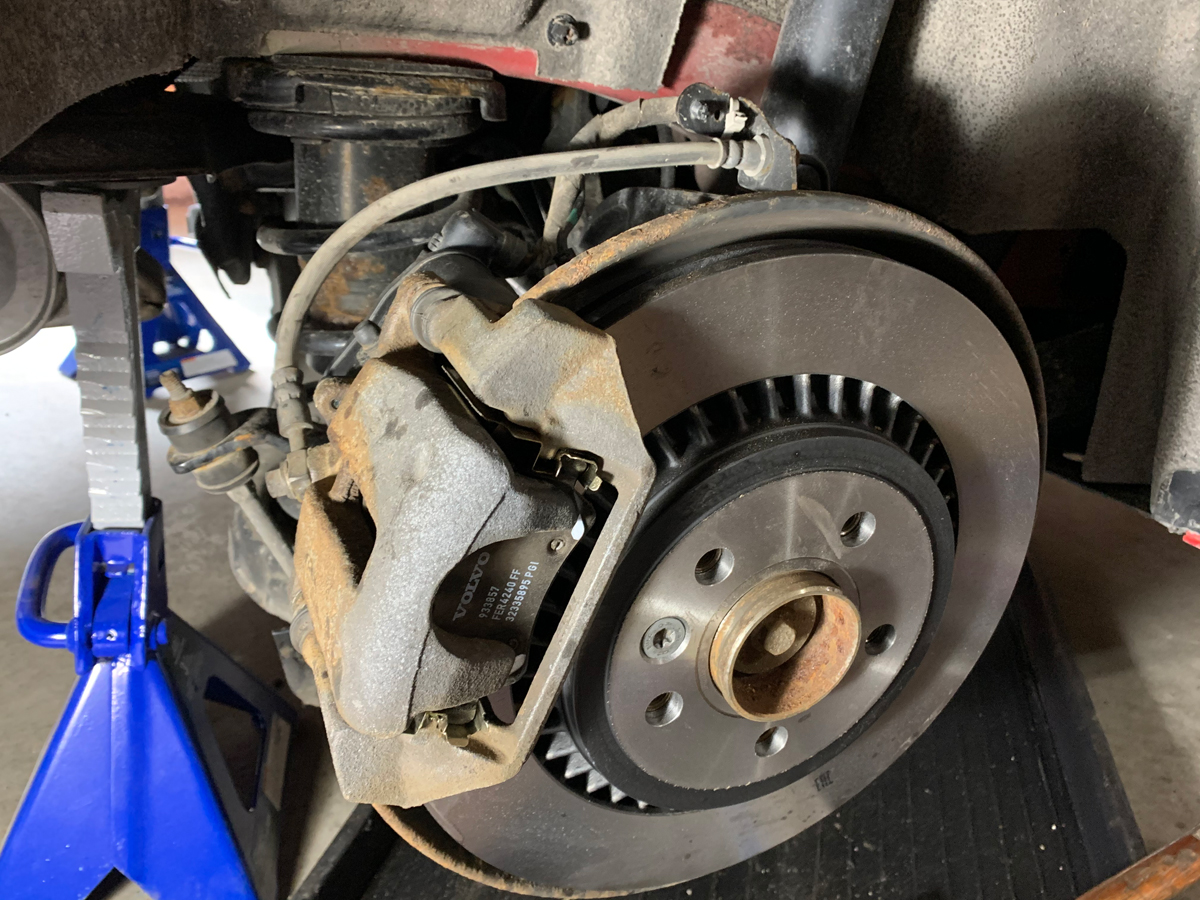
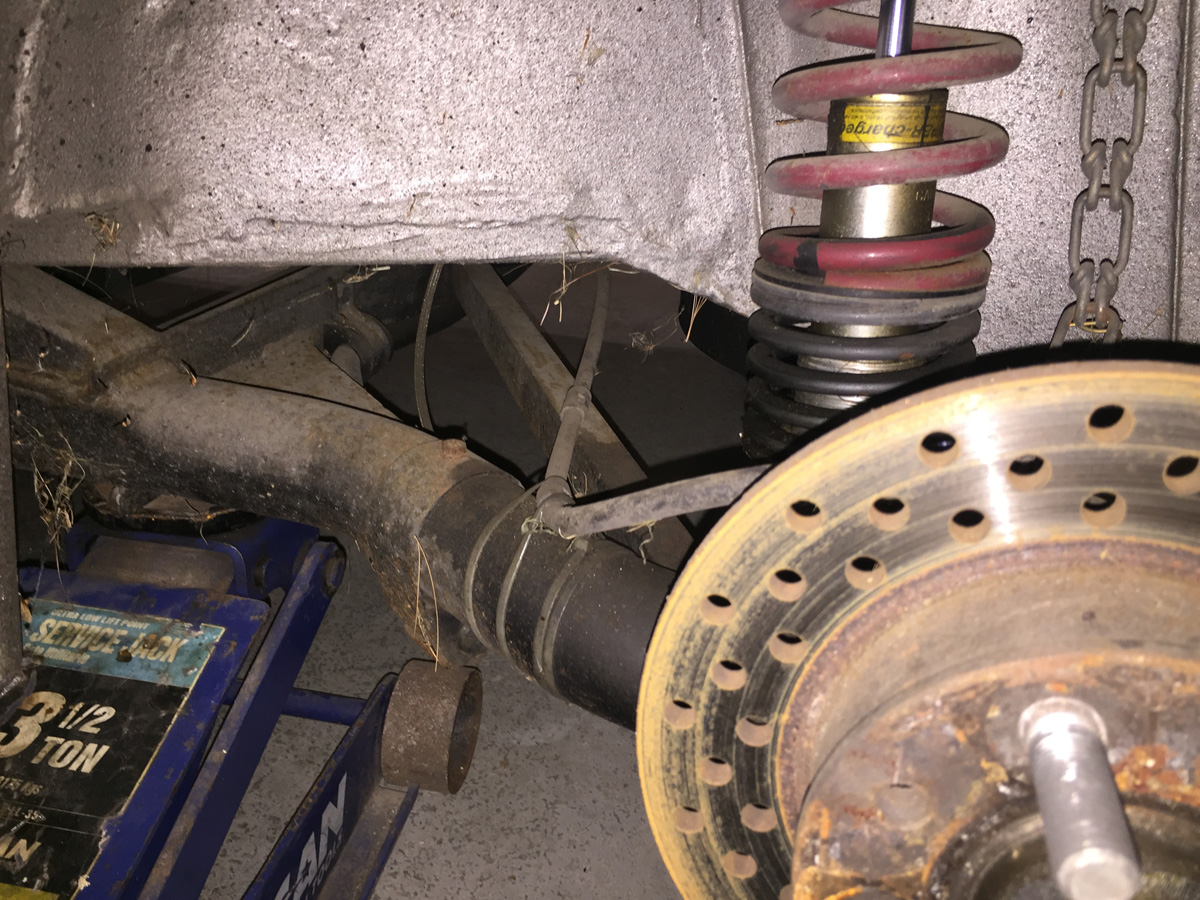
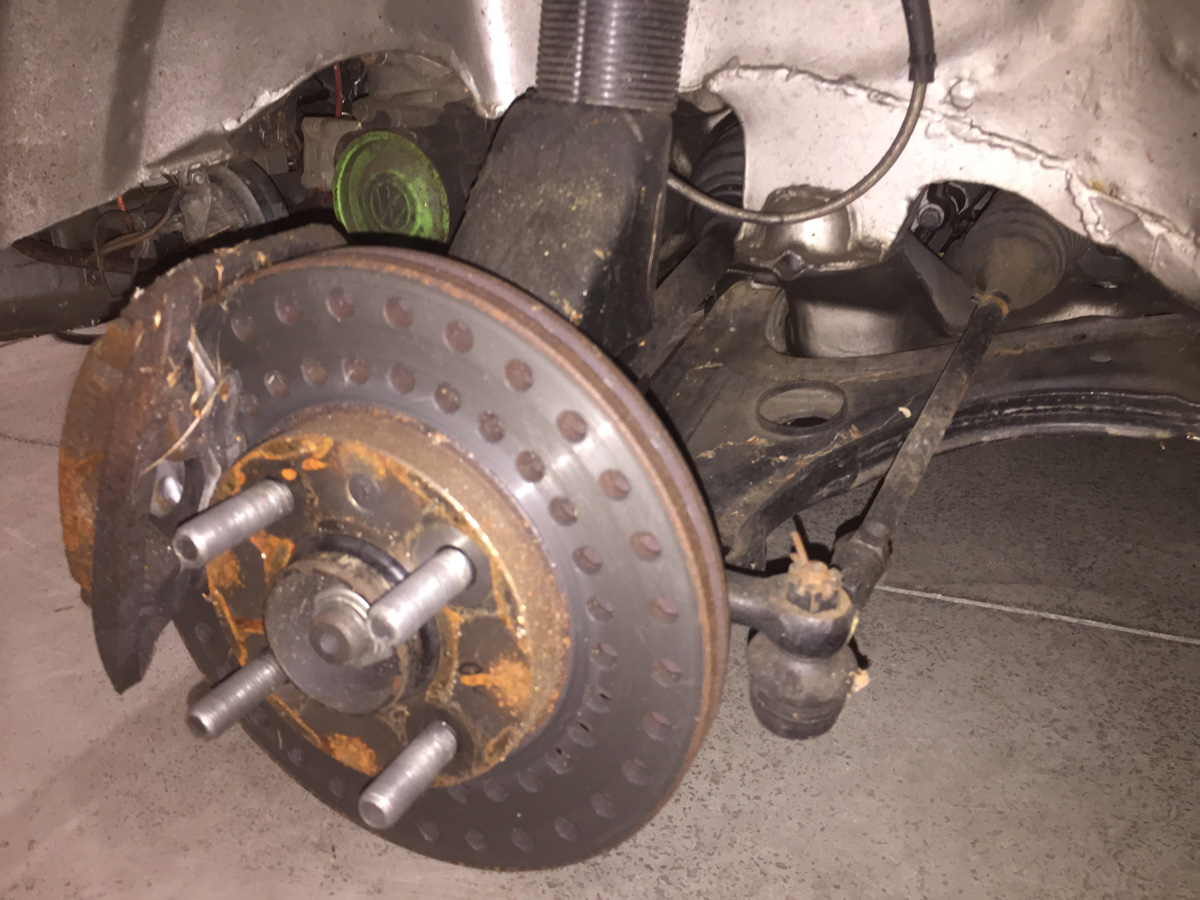
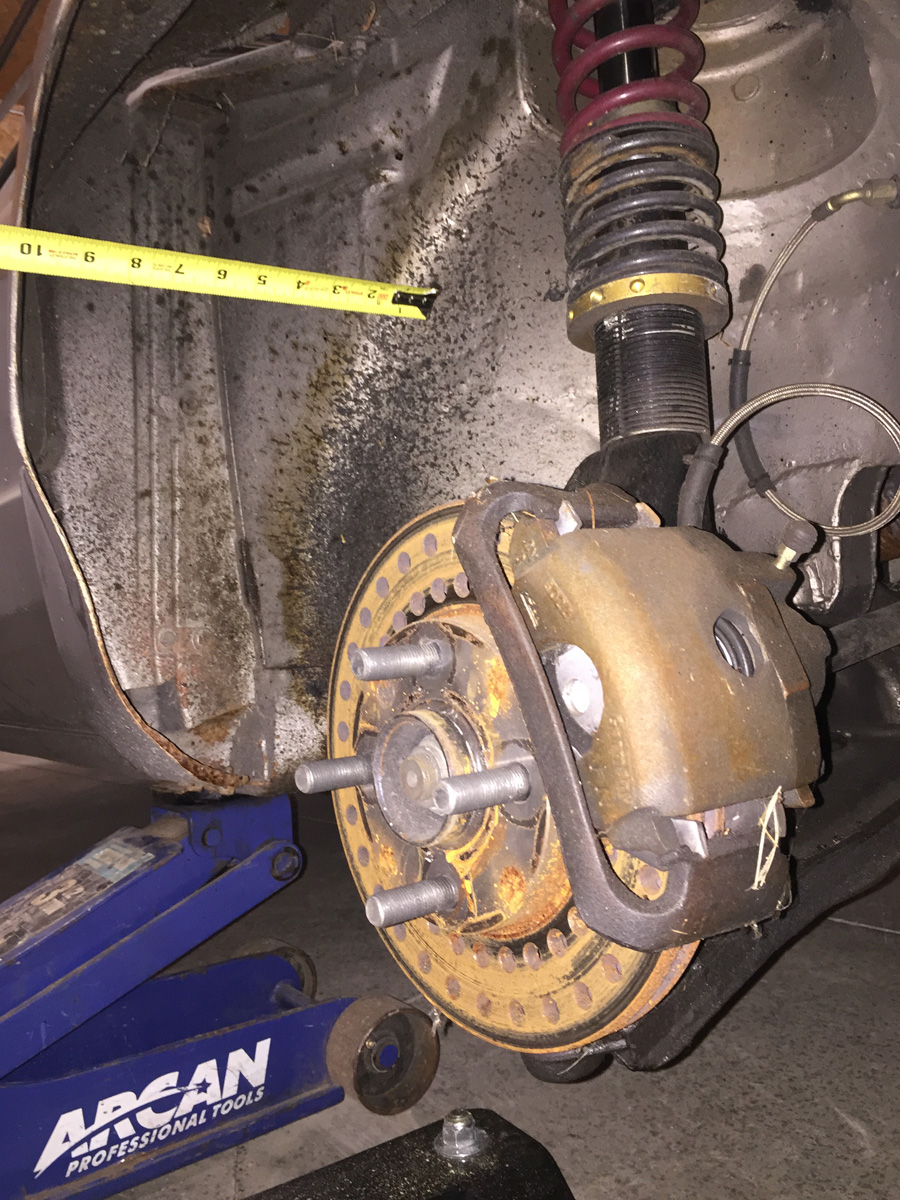
Brakes and suspension.  I am unsure if Bill modified existing vented brakes or purchased them… I have never seen cross drilling holes this large.

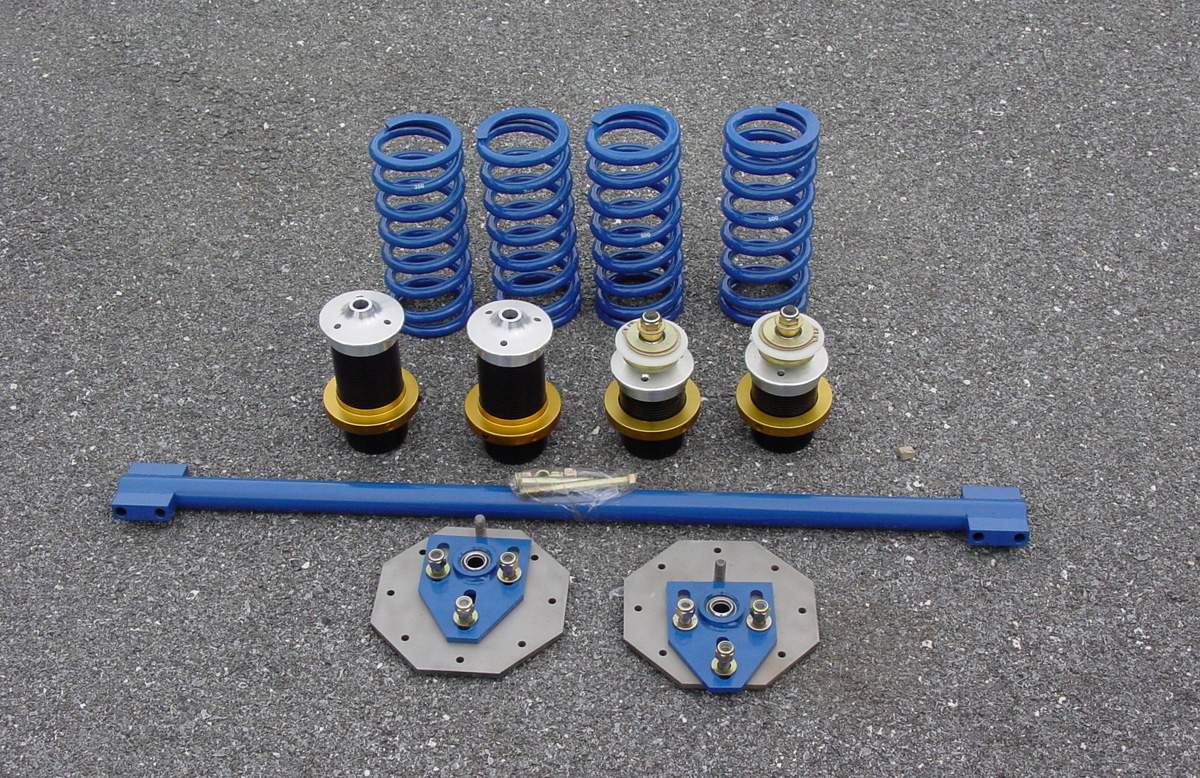
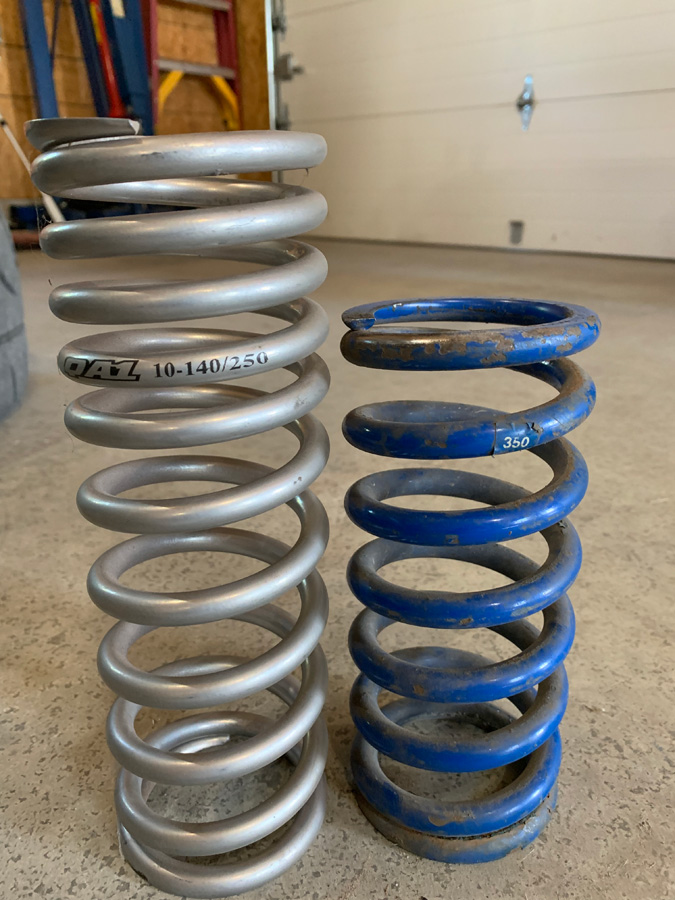
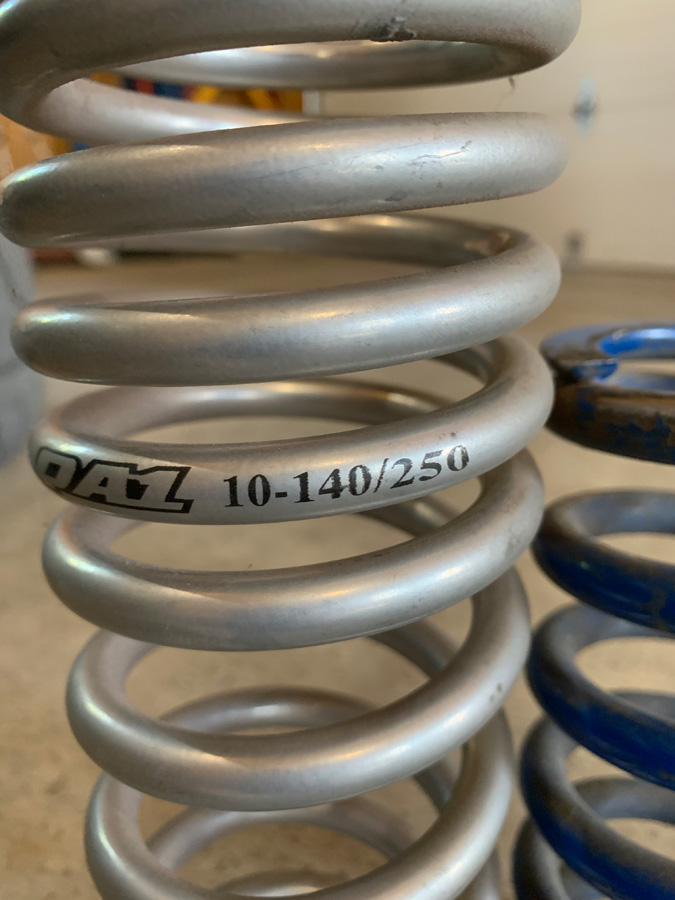
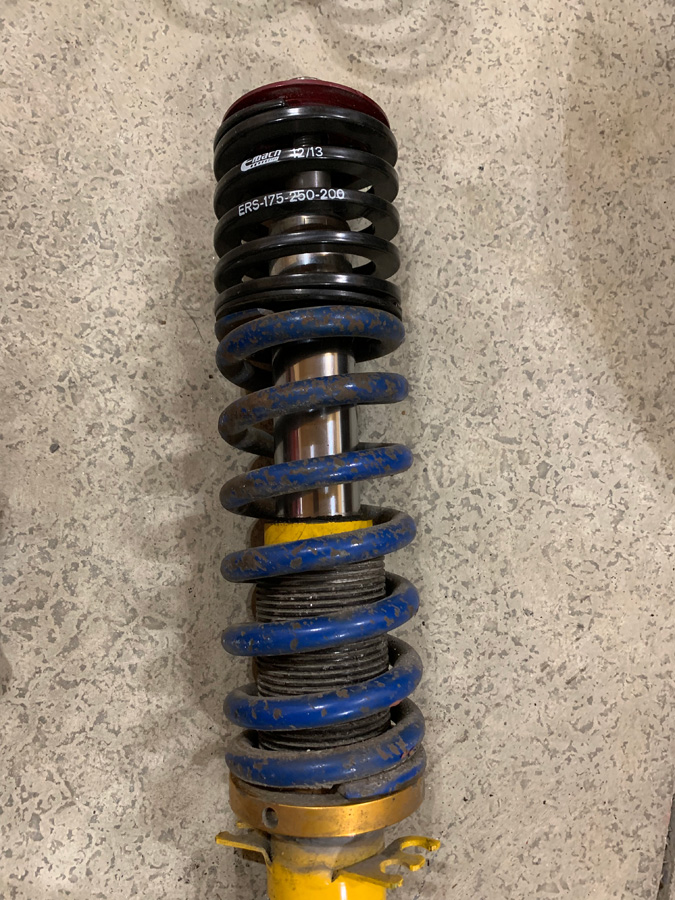
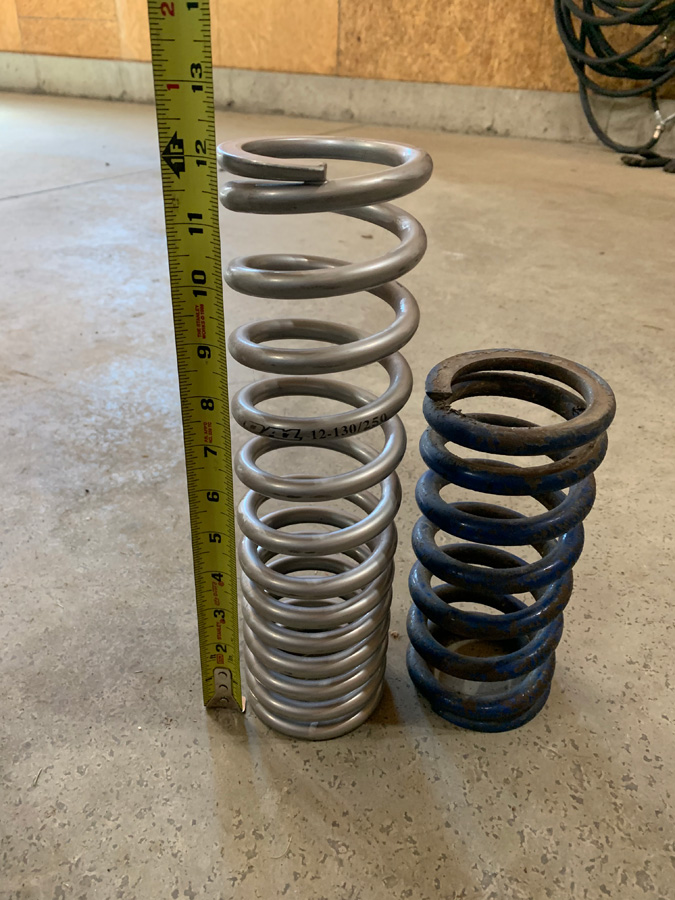
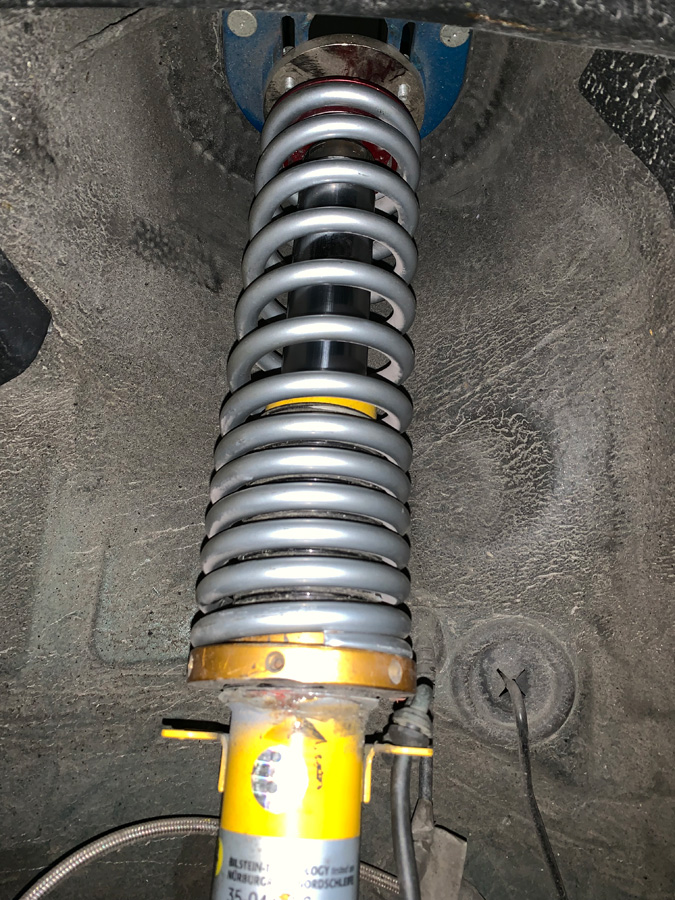
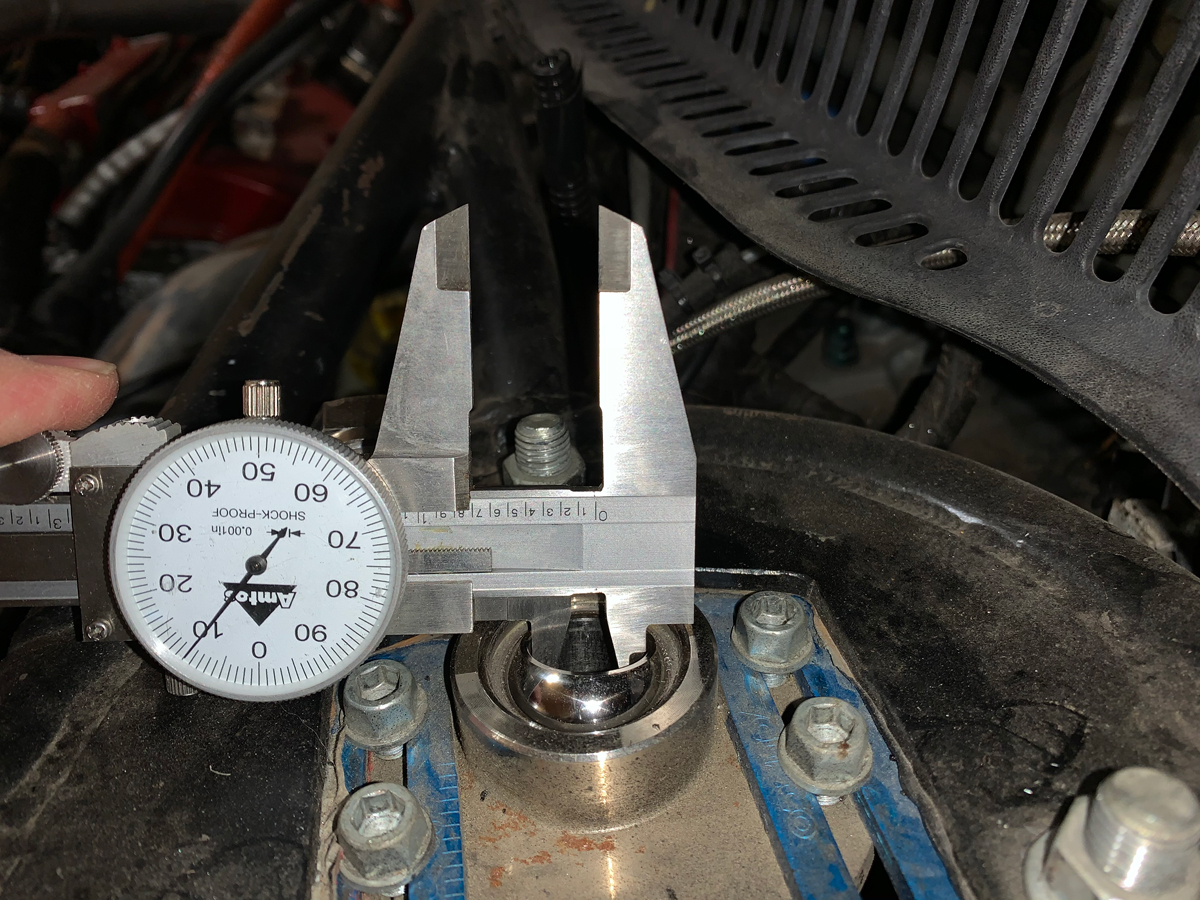
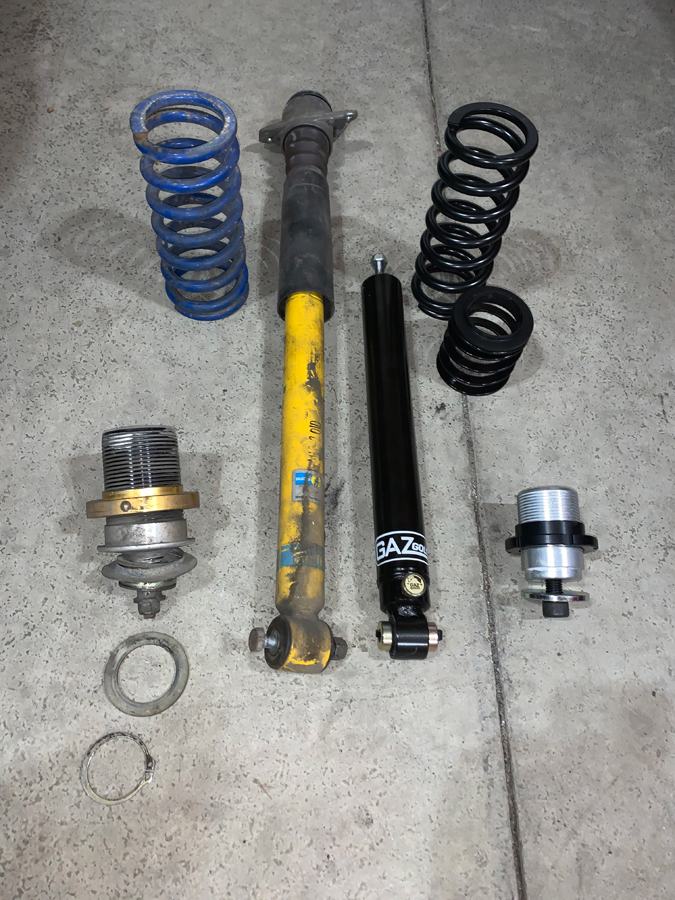
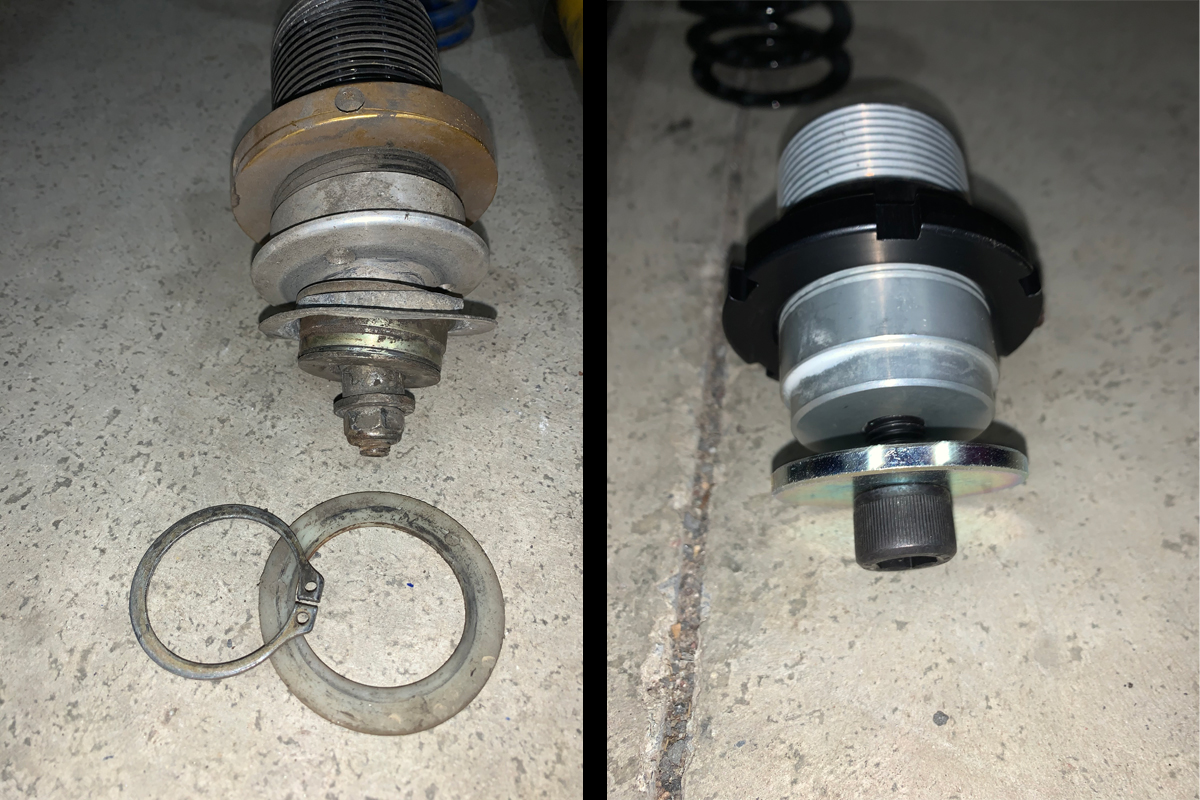
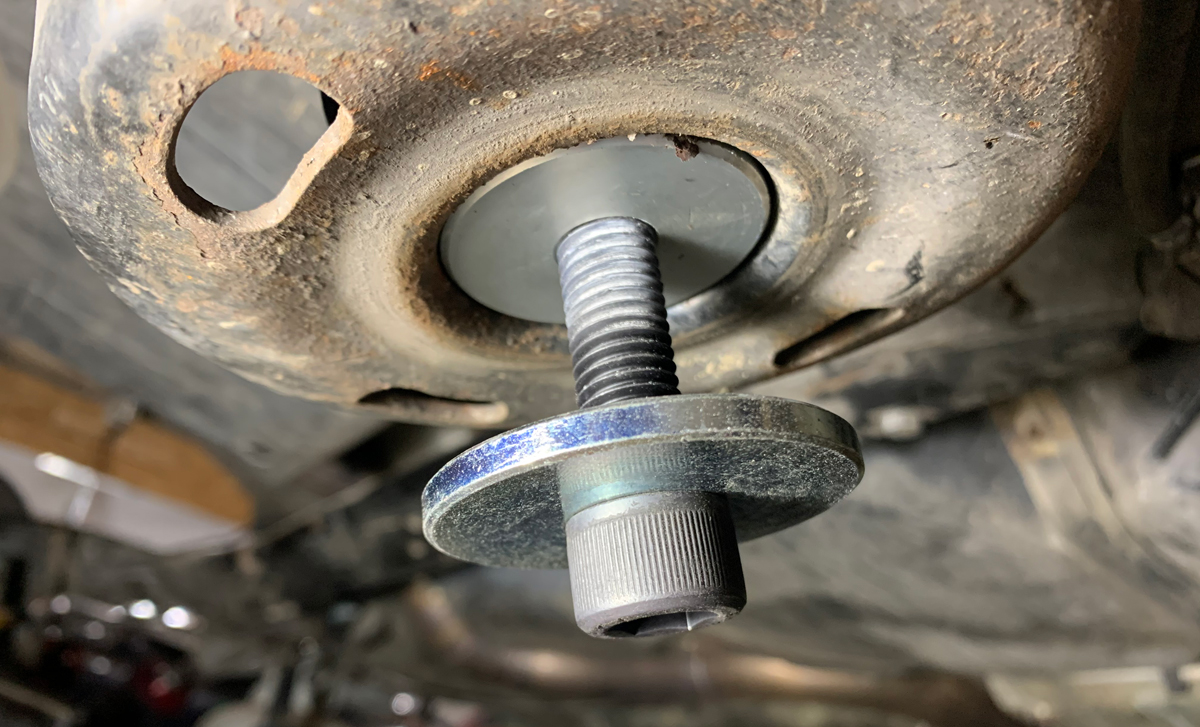
Suspension is the typical two step springs.  I forgot to check spring rates when I had the wheel off.

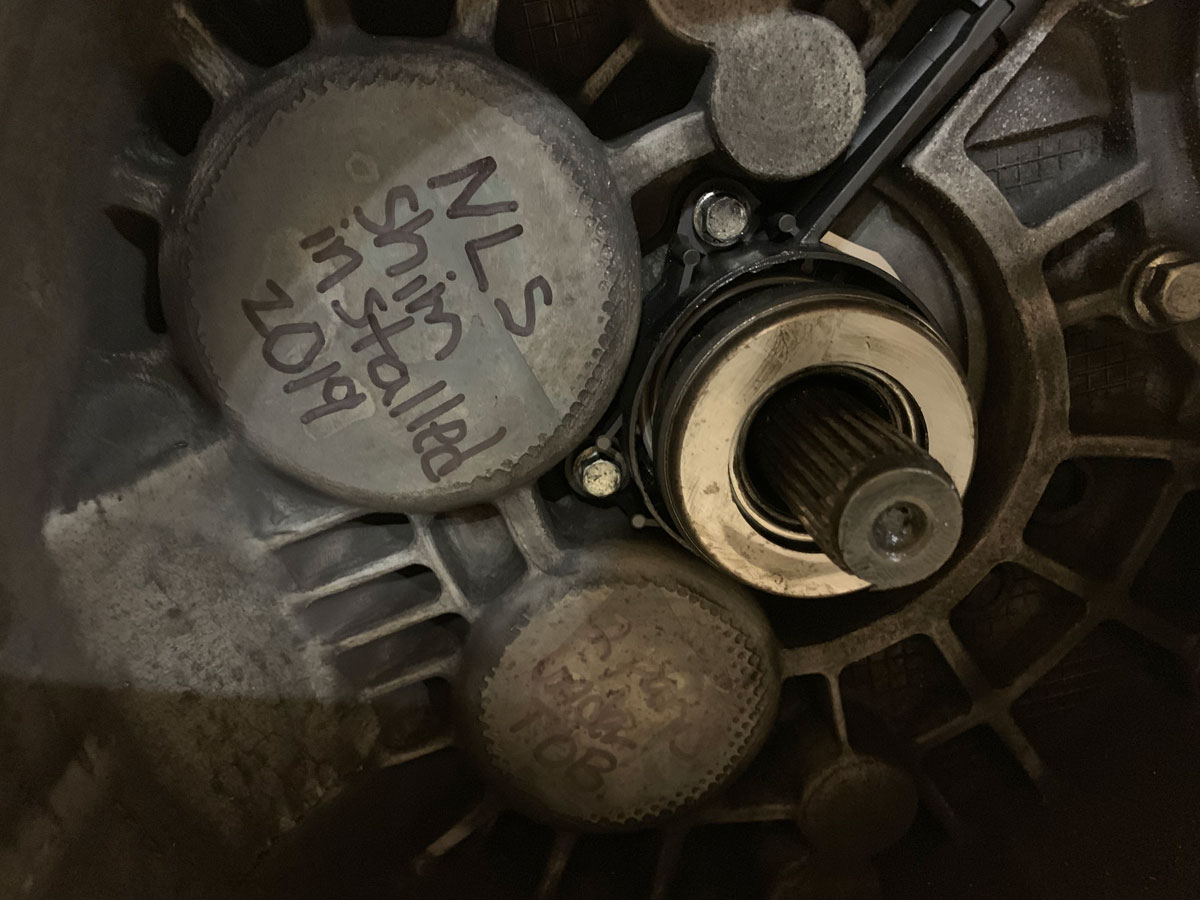
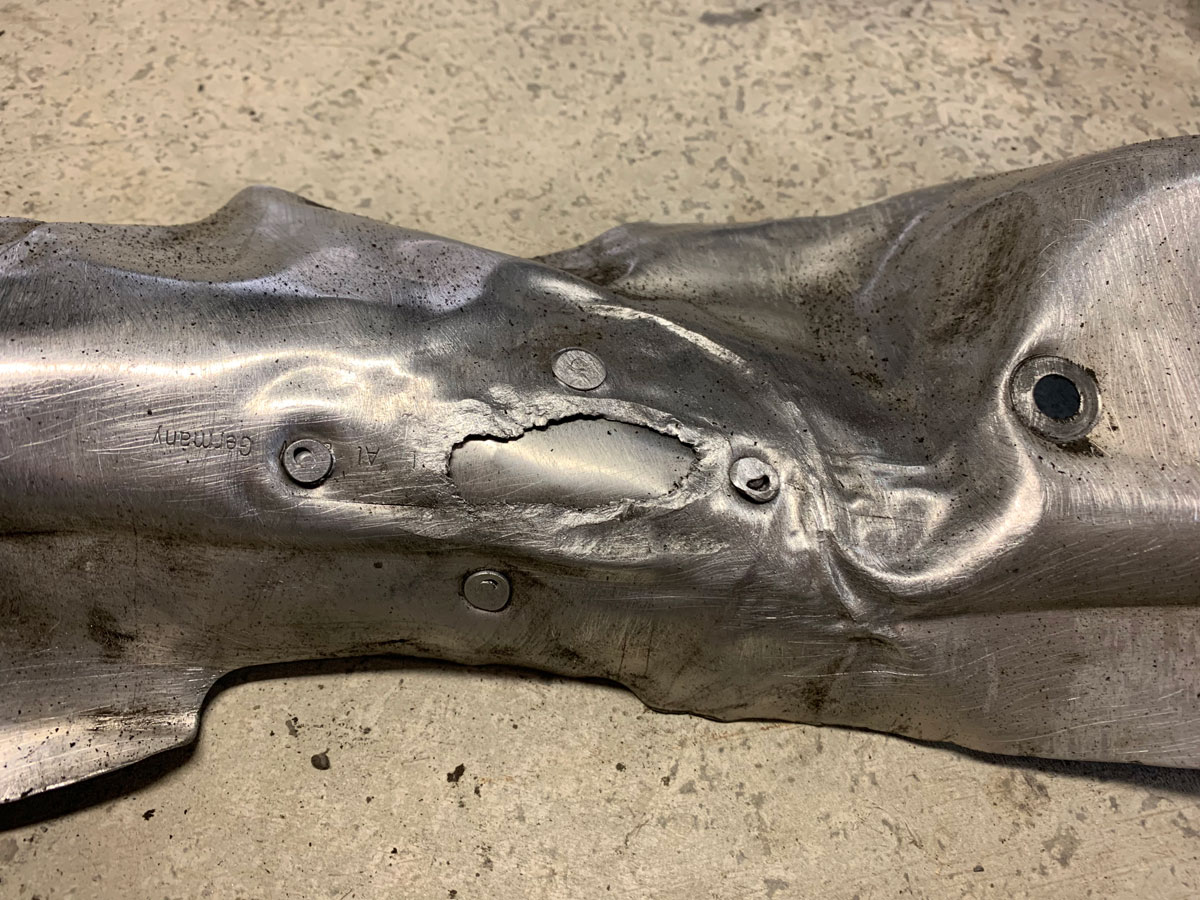
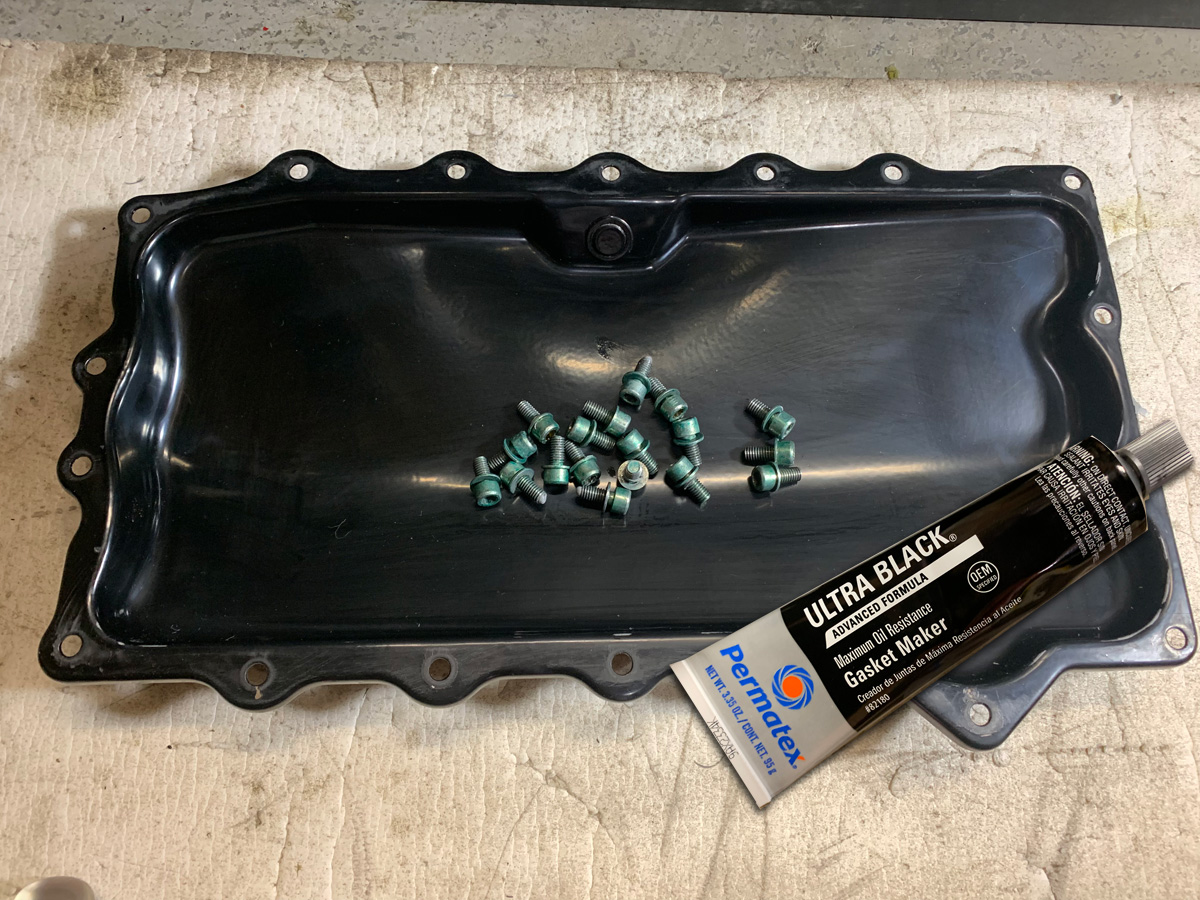
The crazy modified oil pan and transmission.  I am surprised that he did not have a skid plate.

Now things get interesting.

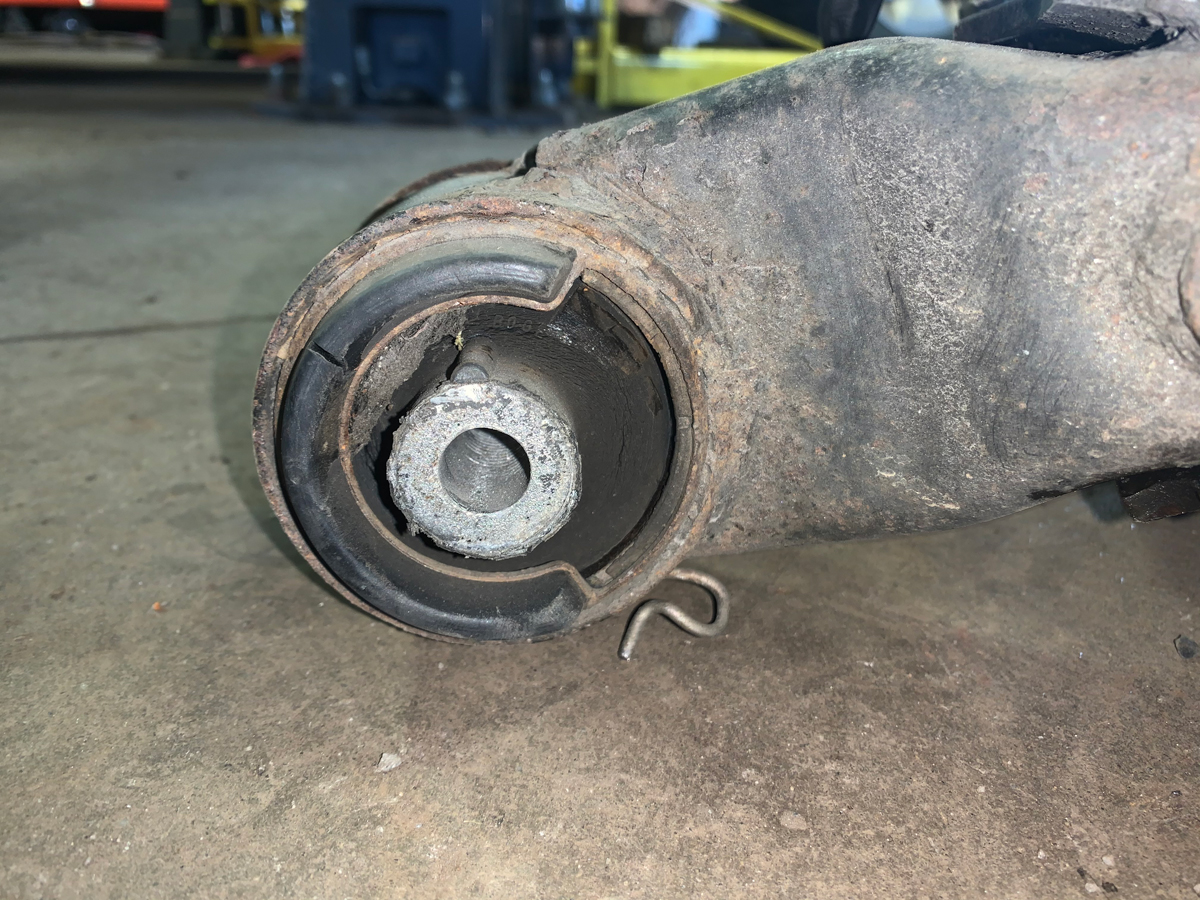
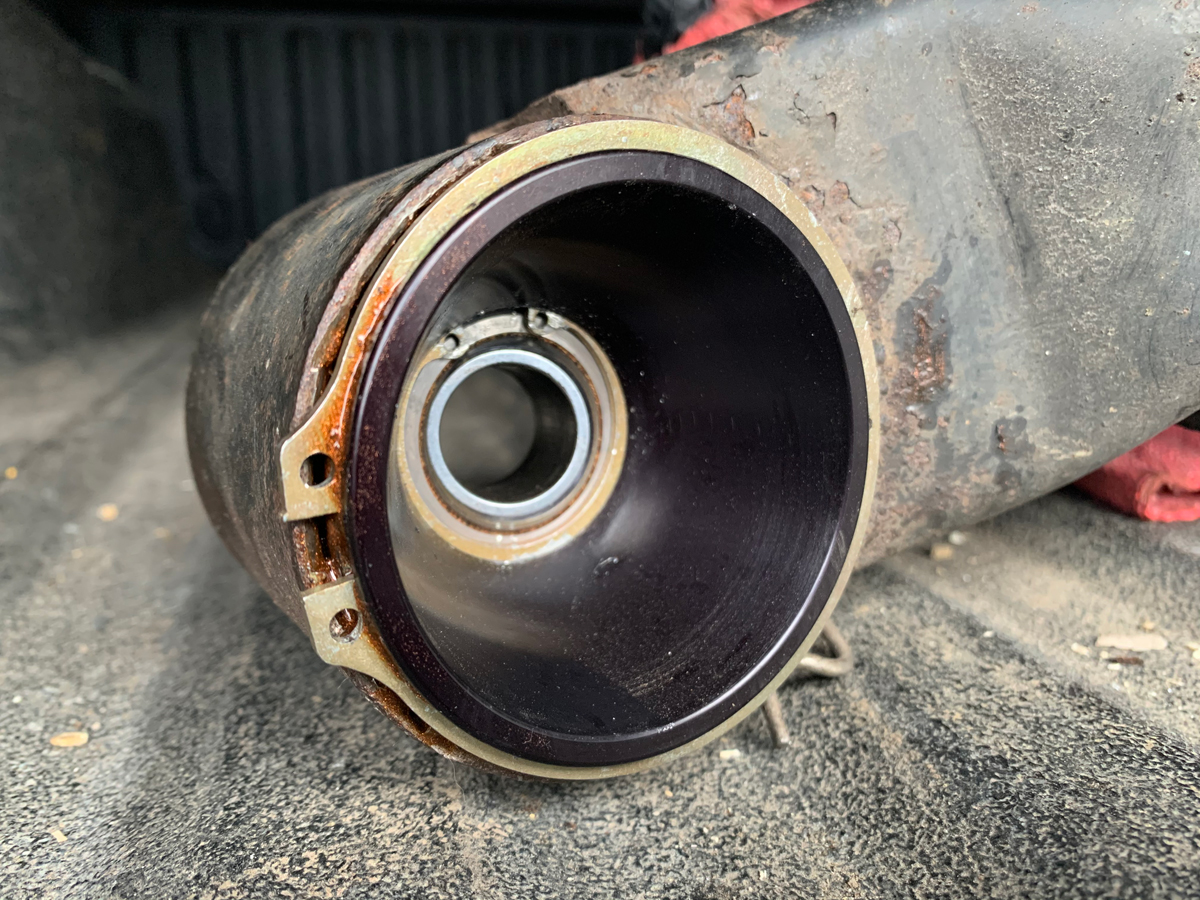
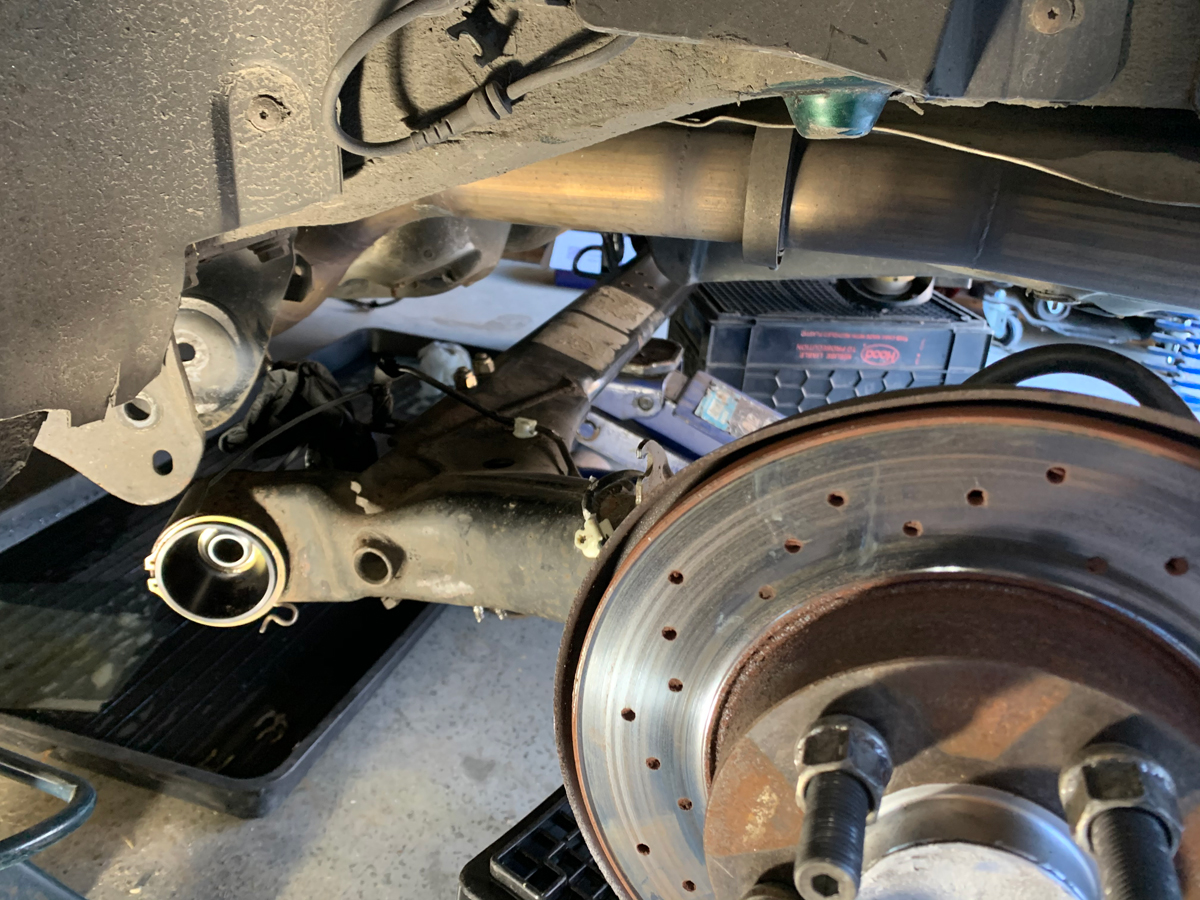
Equal length driver and passenger axles. Carrier bearing addresses the distance issue.

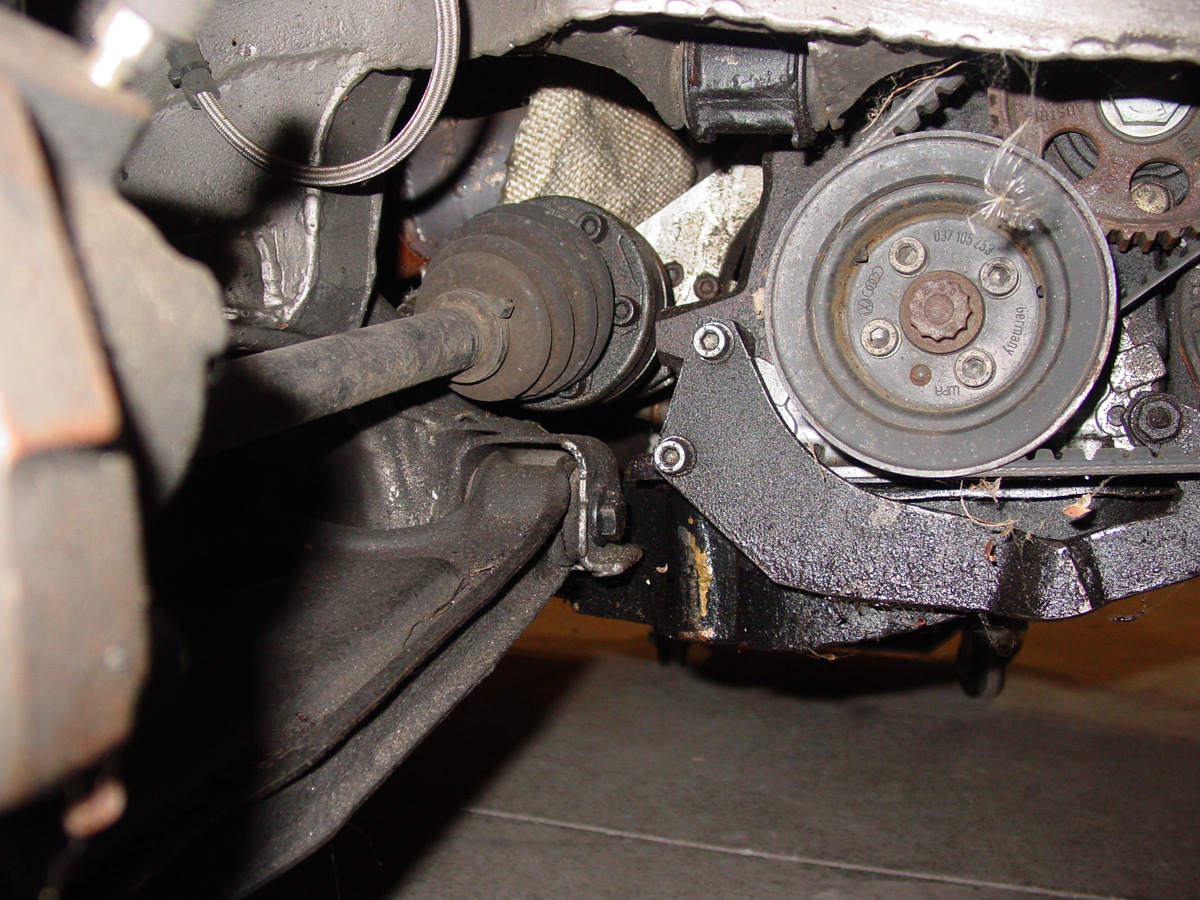
Not the best picture… I am trying to show the sub-frame.  This should be helpful with the 02M installation as we can mount the dogbone (MK4 rear transmission mount to keep the engine in place) to the sub-frame.

And now to the rear of the car.  I do recall that Bill used to run full independent in the rear.  I thought he did away with that with future modifications.  I’m still not quite sure how everything works at the moment.  When I get the car on a lift, I can get a much better understanding.

Got the tape measure to show distance from the inside edge of the seat to the outside edge of the roll bar.  (approximately) Driver 23” passenger 18”


More shows of the suspension, brakes, control arms, and flipped tie rod.

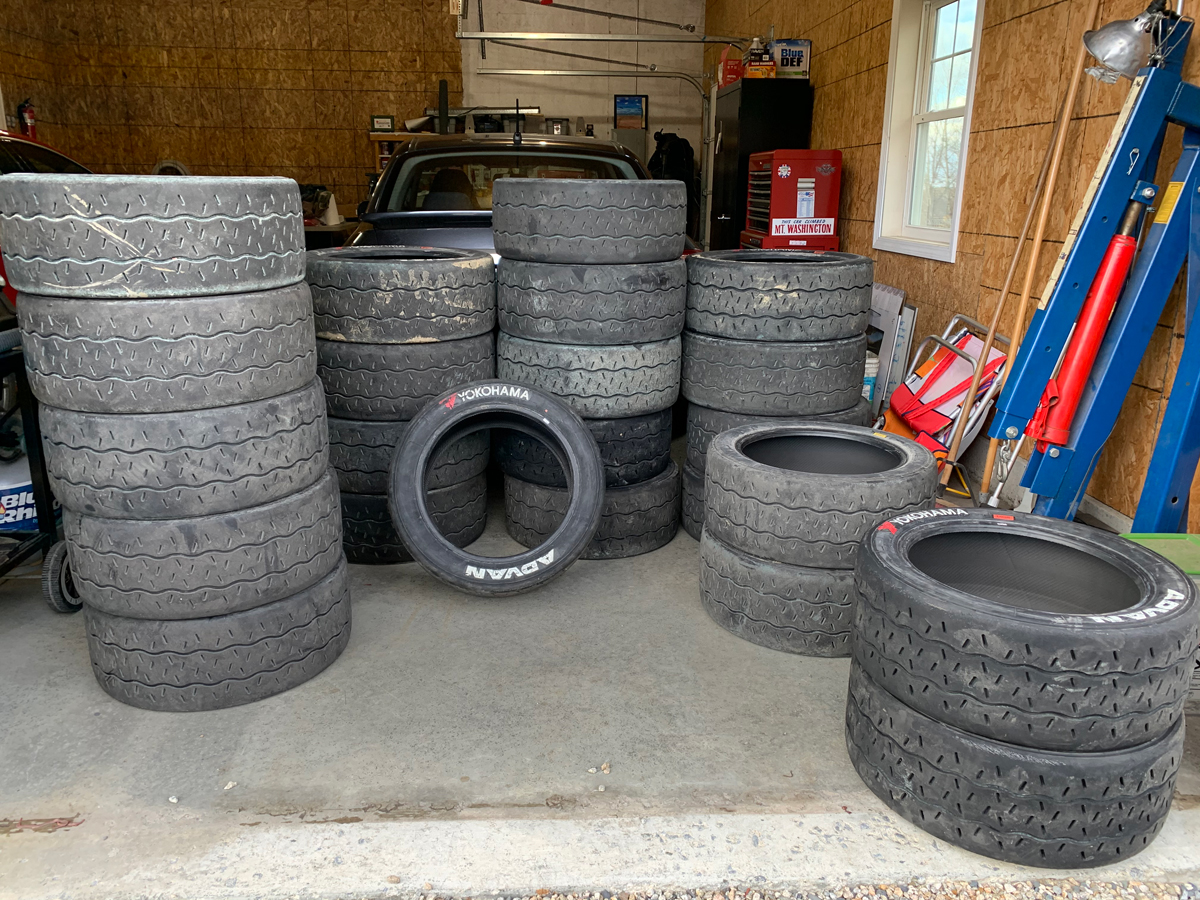
There is a lot of distance between the unibody and the edge of the fender.  The car has 215 wide tires in the front. I think the rears are 185.

Well, that is about it for the night.  

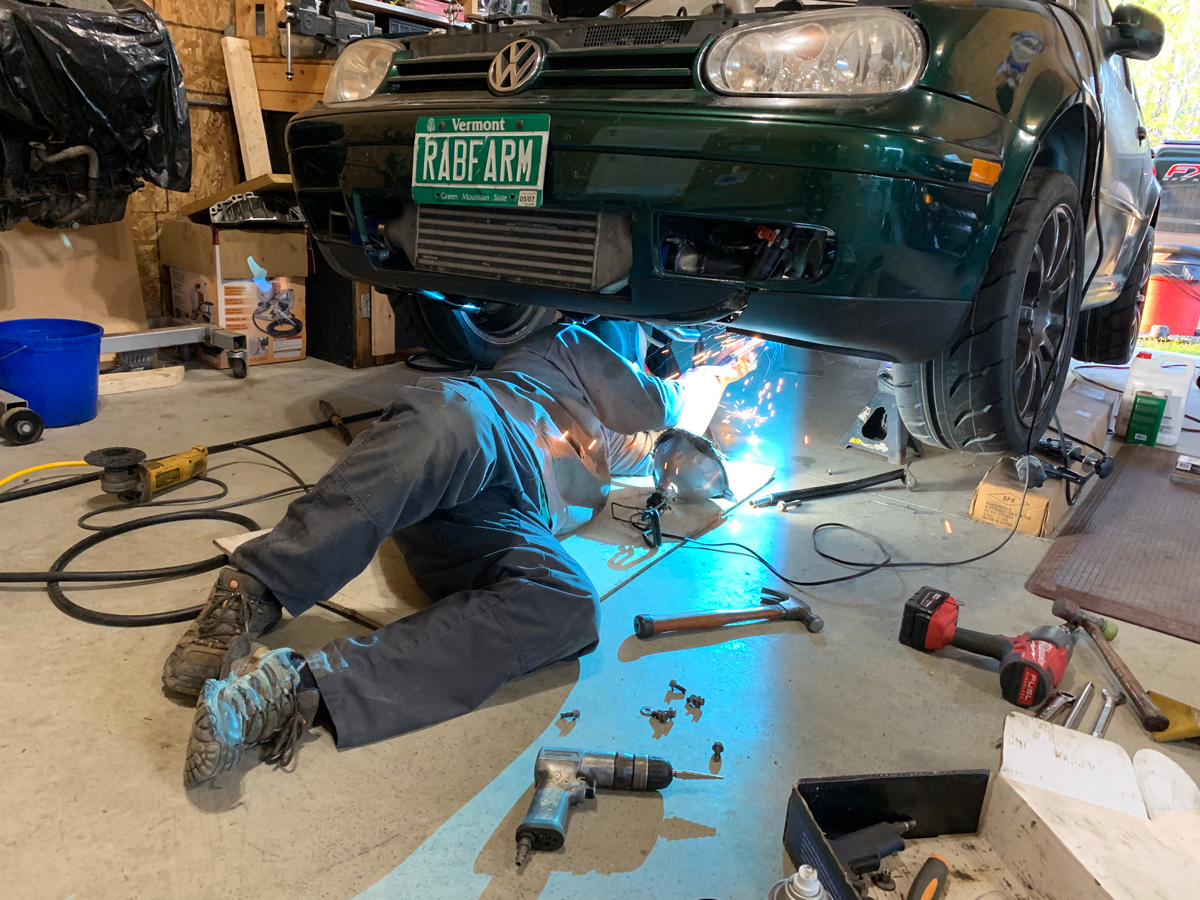
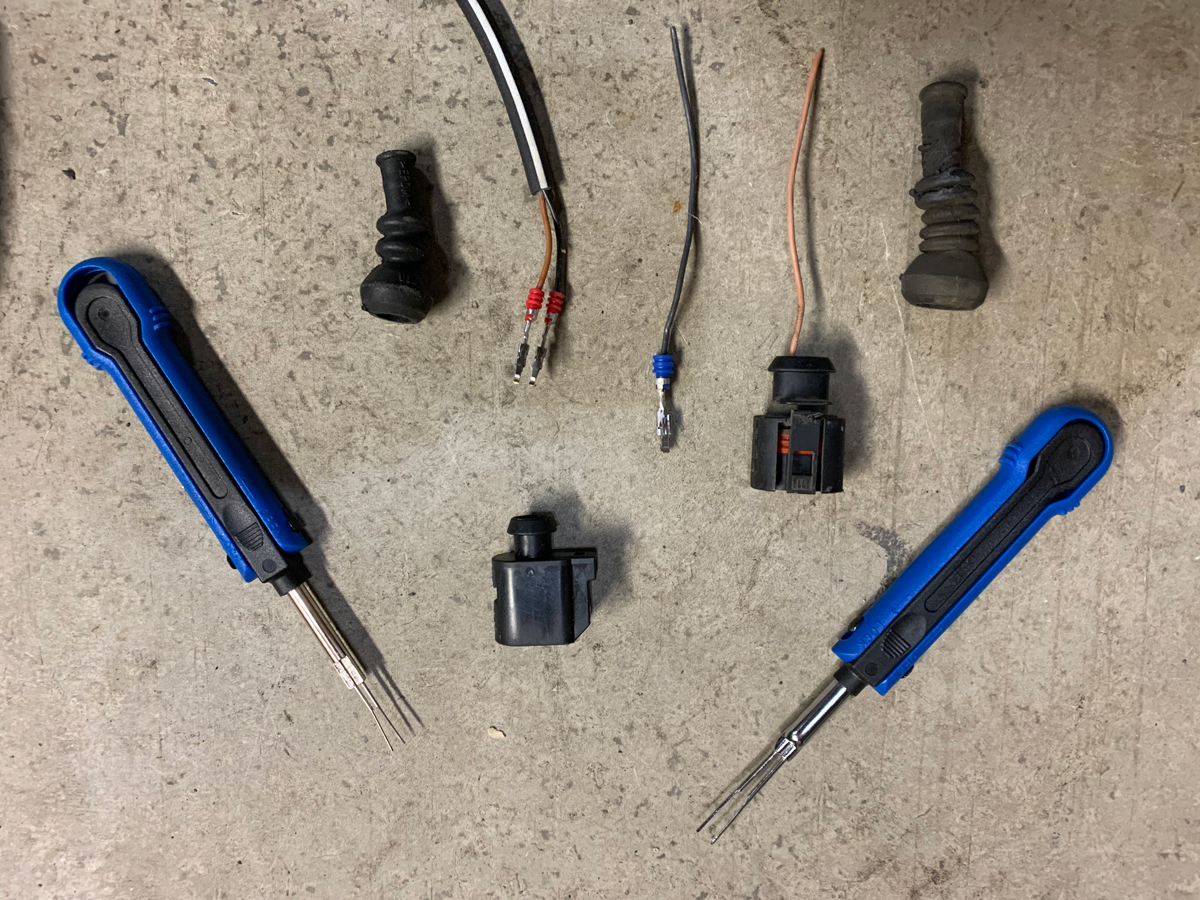
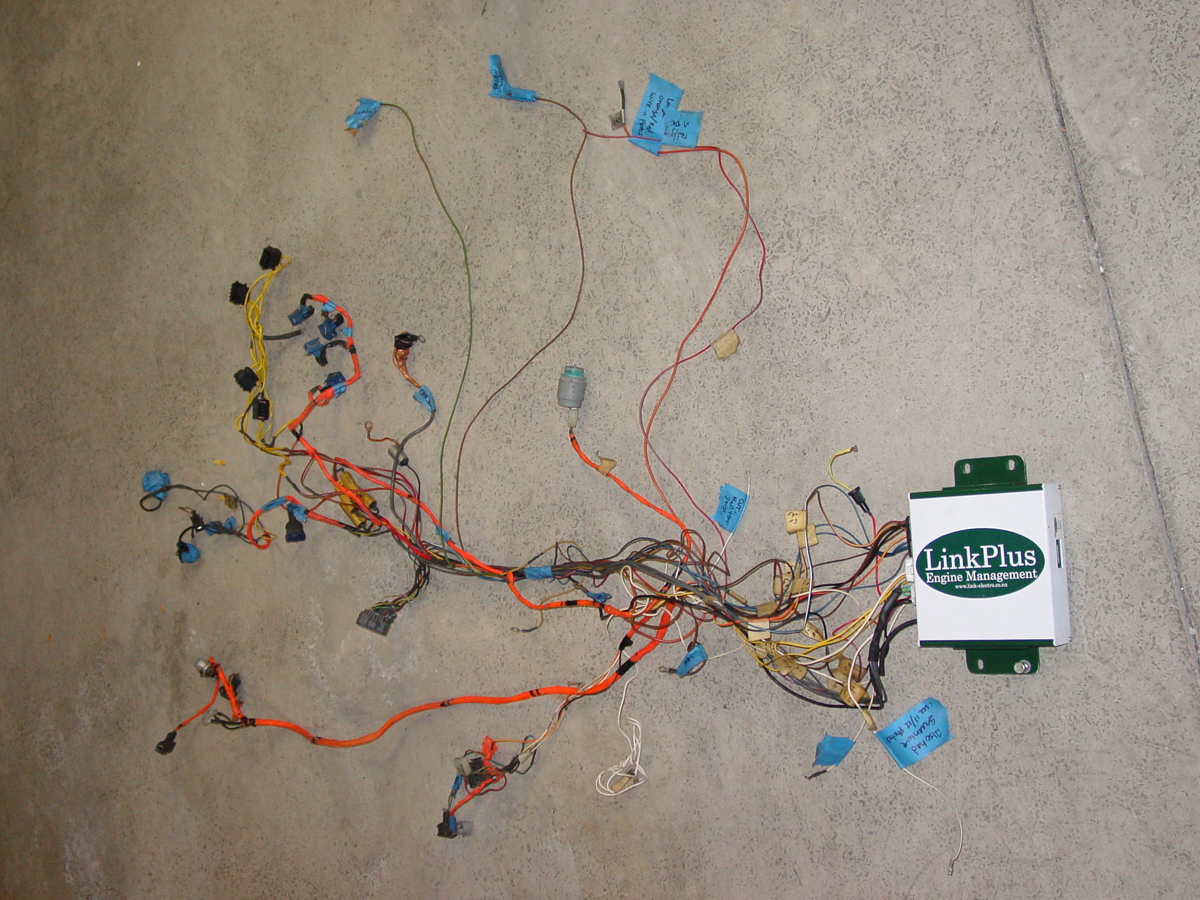
Thinks will get a little slower as I have to remove all the current wiring harness, take pictures and take notes, etc. to get the car rear for the fabrication and bodywork process.  That will be a major stepping stone for this car.

Looking forward to it.

Oh… and the pictures should be uploaded “soon”… I’m on slow DSL and it will take some time to upload all the pictures.  

First world problems, I know.

Enjoy!

Steve

Rabbit Farmer
Rabbit Farmer Reader
2/26/19 9:01 p.m.

Aug 03, 2018

Been a while since I did a video.

The Burke #1 hillclimb on July 27-29, 2018 was a blast. As always, a great group of people, well organized, and good times. Thank you to all the organizers and volunteers that make these events both possible and successful!

The setup of my Golf makes it hard to do well at Burke because I am waiting soooo long for the power to come on after a sharp and steep corner that I slow down a lot... then the power comes on too much/too late, just in time for be to get off the throttle before the next turn.

Yep... there is a solution for that... a smaller turbo. We did try that route, just not enough.  Without redoing all the exhaust work, our only (known) option was to get a small hot side to the turbo.

Car did very well at the bottom of the hill where speed was involved.  

Anyway... Burke #2 is on August 17-19, 2018. (then Ascutney, Okemo!?, Philo)

Make sure to watch in 720 or 1080HD.  Yep, the PIP video is slightly off from the main video.  I couldn't figure out how to nudge the PIP video to sync them.  Oh well, keeping my day job.

Enjoy
Steve

https://www.youtube.com/watch?v=GU29fIpQCK8

Rabbit Farmer
Rabbit Farmer Reader
2/26/19 9:01 p.m.

So… we have a lot of catching up to do. Just closing out the 2018 season.

**SEP 2018**

Spent a fun and relaxing weekend at the Canaan track in New Hampshire on September 1-2, 2018 with the Sports Car Club of Vermont.  The event is essentially an autocross using the full track. Saturday we cut out a section of the track (ran it counter clockwise), but used the entire track on Sunday (clockwise).  I was told it wasn’t that big of a track, but the person that told me has been to Lime Rock, Watkins Glen, etc.

I brought my Subaru WRX for two reasons. I understood it was a small track and that my high-end turbo breathing FWD Golf might not have been best for the event.  Turns out the Golf would have done just fine.  The other thing was the plan to travel from VT with truck, trailer, and Subaru to NH for the weekend, then leave on Sunday with everything, parking the truck and trailer at a friend’s in NH, and then driving the WRX to RI for the next three days for a family visit.  Naturally, a drive from NH to RI and back with a non-street legal, $12 a gallon race fuel, etc. car would not be the best answer.  So… the WRX it is.

Link to track: [url]http://www.canaanmotorclub.com/the-track/[/url]
There is a great video on that page of someone driving the entire track at speed.

Had a great time at the track, but left early for the trip to RI.

Looking forward to getting back there again in 2019.

**OCT 2018**

Last hillclimb of the year was the Historic Mt. Philo Hillclimb sponsored by the Sports Car Club of Vermont. I have been helping a great group of people make this event happen since 1999 (when I started hillclimbing… the event was around since 1975).

I drove about half of the runs, but was very limited with how well I could do because the tires were so thin.  I was spinning in 4th in the straights.  Decided to get some good times and park it early on both days… wasn’t going to improve much with limited traction from the tires that saw their first event at Mt. Washington in 2017. New tires in 2019!

Had a great time.

We are working with the state of Vermont to move the event to May in 2019.  The first hillclimb at Philo was in May 1975.  I guess we are getting back to where we started. Hoping that the weather in May is warmer than October.  We will see.

Video from Philo… yep, that is snow in the video!

Make sure to watch in 1080.

http://www.youtube.com/watch?v=mMfpLgCr3YU

Car was great all year with the exception of a problematic wire going to the fuel pump and a broken axle; both at Ascutney. Not a bad year.

Next update: The Scirocco

Rabbit Farmer
Rabbit Farmer Reader
2/26/19 9:02 p.m.

Feb 09, 2019

Rabbit Farmer
Rabbit Farmer Reader
2/26/19 9:03 p.m.

Dec 2018 through Feb 2019

Progress on the Scirocco.

Sometimes you have to go backwards to go forward.

Short version is that I labeled and removed the entire wiring harness and removed the cage.

Long version with some pictures of some of the cool stuff along the way and did some exciting reading of the FIA 253J specs for cages. Exciting, I know!

-----------------

When looking through my photos trying to find images of when Bill first showed up with his car, I came across a few neat photos to share.  Regarding photos of Bill’s car… I think they are real photos and before I had anything digital to take a picture.  One day I will scan the old stuff in to share.  Until then… sit!

One of the other Sciroccos at the hill was Dan’s MK2 (Bill’s son).  This was a lot wilder than Bill’s MK1 as it was a V6 N/A AWD car (used to be 5 banger Audi turbo).

Next… and unrelated, just happens to be the same event where I found the MK2, is Chris Havas’ MK4 rally Golf.  He built the cage in my Golf.  There… I tied it (loosely) to the verbosity induced story.

And… same event.  My old MK1 Rabbit 1.9 liter 12:1.  First car I raced with a cage… yet, Chris did that cage also.

…And now back to your regularly scheduled program…

There were some things that I have always been curious about this car. I looked over the car over the years when Bill owned it, but never really got to examine and try to understand what he did.

On the front of the car were two… well, nipples… where the outer headlights would normally mount.  Bill actually had tassels on them.

One went through a flat grate, through what looks like a standard clothes dryer tube, to the custom interior fan system (more to come below).

The other was the air filter for the engine.

Unscrew the nipple to remove the cover to access the end of the cone filter

A very large cone filter.

Labeled and removed the entire wiring harness. Generally, it seemed the orange wrapped wires were to connect the stock lights, fans, alternator, etc. in the car while the non-orange wires were for the Link Plus Engine Management system.

The Atari 2600:

Let’s take a look at that rear suspension.  When I get it on a lift and clean it up, I should be able to get a better understanding how it did work when independent and how it currently works (solid beam).

This is the point on the driver side where it mounts to a very reinforced frame (same on passenger size).  This frame continues to the front of the car going through the rockers (they were split open).  I am unsure if the frame in the rocker panels is the same size as what was used in the rear.

Center mounting mount.

Showing how the independent suspension worked.

Moving back inside..

Custom mounting of the steering column (does not pass through the firewall in the stock location… and goes to the power steering rack mounted on a MK2 Golf subframe); brake master cylinder (there is no brake booster); giant brake pedal, etc.

Steering column upper mount and indentions for feet on the floor.

Inside there is the raised shifter with the rod going through the firewall… this is normally under the car in the tunnel.

The following pictures do not do this justice.  When I remove the engine, I will make sure to get photos of this excellent engineering.  This creates a very solid feeling shifter.  Think about the level of effort and creativity that went into this!

The plan right now (and I need to do some measuring to make sure everything fits; especially with ground clearance) is to use the 02M 6-speed cable shift transmission.

Moving under the hood gives a lot of stuff to look at… the stock interior airbox/fan location is blocked off; the interior heater lines go through the firewall in a different spot, and what is the large hole in the fire wall with all the wires?

Another picture of that hole… this is where that dryer vent tubing mounted to bring fresh air into the car.  I don’t know what that thing is with the three wires with red covers is.

Inside is the fan…

And a custom airbox.

The fuel lines come from the back of the car, runs along the floor, and then goes through the firewall.  Pretty slick.

Time to cut out the cage…

Removing the large sections of the cage was easy with the new AC/DC 7” angle grinder with a cutting wheel.  Wood is there to protect the car when the cutting wheel jumps while cutting.

The hard part was dealing with where the cage actually mounted to the car as it was difficult to get the cutting wheel in there.  I had to keep sectioning the tubes until they were down enough to use the 7” grinding wheel to make it flush with the body.

Done!

A dent in the roof.

Since the cage was out, Jodi (Creep), who is doing the body work and a lot of the fabrication to make my modern stuff work in an older car, fixed the dent. Not too exciting, but this is actually the FIRST step forward in this project.

What happens when the wife goes to bed early and I don’t want to do anything that makes a lot of noise. No alcohol was involved in this little adventure.

Coming in the next exciting issue of Rabbit Farmer Chronicles:

The Golf IV gets a Nothing Leaves Stock (NLS) clutch slave shim kit and a Luk metal clutch slave cylinder/throw-out bearing (from USP Motorsports)… and perhaps a new clutch (we will see)… to help address the dragging clutch issue.

The Golf IV also gets an electric vacuum pump to provide vacuum to the break booster to avoid the turbo induced hard pedal issue that I had at Mt. Washington (where I got very creative with my parking on the edge of a cliff… well, it wasn’t a huge cliff, but I could have twisted my ankle in it or something like that.)

Rabbit Farmer
Rabbit Farmer Reader
2/26/19 9:06 p.m.

So, GRM peeps, you are all caught up and can expect regular updates as I work though the 2001 VW Golf MK4 1.8T and 1980 VW Scirocco MK1 1.8T... plus the occasional 2015 Volvo S60 Polestar-wannabe R-Design and 2009 Subaru WRX.

Enjoy.  Always looking for advice and ideas along with sharing information for everyone's benefit.

Steve

"Rabbit Farmer"

Addicted
Addicted New Reader
2/27/19 6:50 a.m.

Looking at the photo's of the rear suspension it IS still independent, its a solid rear beam that's been cut in half to make it a pair of parallel trailing arms.. it appears the only thing connecting the two sides is the rather beefy anti roll bar. Or are these old photos?  There are so many cool engineering touches thoughout this car!

Rabbit Farmer
Rabbit Farmer Reader
3/3/19 3:59 p.m.
Addicted said:

Looking at the photo's of the rear suspension it IS still independent, its a solid rear beam that's been cut in half to make it a pair of parallel trailing arms.. it appears the only thing connecting the two sides is the rather beefy anti roll bar. Or are these old photos?  There are so many cool engineering touches thoughout this car!

All current photos. I'm going to look at it again... will be a while as it is sitting in the trailer with the next stop the cage builder. I had thought that Bill bolted the two halves back together.  Now you have me wondering.


vwcorvette
vwcorvette GRM+ Memberand SuperDork
3/3/19 8:52 p.m.

That thing with three wires is a ballast resistor for fan speed control.

Keep up the the updates.

I missed who is doing the cage?

Rabbit Farmer
Rabbit Farmer Reader
3/4/19 9:51 p.m.
vwcorvette said:

That thing with three wires is a ballast resistor for fan speed control.

Keep up the the updates.

I missed who is doing the cage?

Joey is doing the cage.

And... what does a ballast resistor do?

Addicted
Addicted New Reader
3/5/19 6:00 a.m.
Rabbit Farmer said:
vwcorvette said:

That thing with three wires is a ballast resistor for fan speed control.

Keep up the the updates.

I missed who is doing the cage?

Joey is doing the cage.

And... what does a ballast resistor do?

3 screen blower fan speeds....

Ovid_and_Flem
Ovid_and_Flem SuperDork
3/5/19 8:13 a.m.

60 years ago...Bill Rutan special

Rabbit Farmer
Rabbit Farmer Reader
3/5/19 9:53 p.m.

Yep, the original "Bathtub".  I saw Bill racing with it at Equinox (when it was not shiny like it is today).  Bill sold that bug around the same time I purchase the Scirocco from him.  I don't think he liked how shinny it got on the restore... likes his cars a bit more "grassroots".

tjbell
tjbell HalfDork
3/11/19 8:16 a.m.

Dang I love this thread, and older VW's. nicely done and keep it up!

Rabbit Farmer
Rabbit Farmer Reader
3/19/19 10:21 p.m.

Lots of activity, but not a lot of progress.

We headed to... well, time for a joke.

Did you know that CAN was the original spelling for Canada. Yep.  It was just call CAN.  Then someone from CAN spelled it for someone else. It was C-ah N-ah D-ah, which finally ended up being Canada.  True story. Look it up.

Anyway, we headed up to Canada to visit Ikea.  Pretty cool place when you have a free 3 hours.

Next, we headed over to Fred's place (Tech-53; http://www.tech-53.com/) to check out his cars.  Fred has a full time job in the real world, but has a big shop where he builds the cars that he races and loves to fabricate.  Lots of MK1 performance parts on his site... check it out.

Julie (the little woman) loved the place and enjoyed the conversation.  Good times.

Meanwhile, back in the states, (and not car related) we headed down for some Mumord and Sons.  Excellent show at the Dunkin Donuts Arena in Providence, RI.  Loved the show!

Later, when the unicorns ran free in the fields, a rally MK3 showed up for dinner.  

Back at the ranch working on the MK4.  I have a few things to do to the car to get it ready for the 2019 hillclimb season.

First... let's make sure it is a straight.  The body was straightened out last winter, but for some reason I could not dial in the correct negative camber for the driver's side.  Something MUST be bent.  Thinking back to the 2010 off road excursion (not mentioning any names), it seems that I did not replace the subframe.  Good place to start in 2019.

So, based on the MK4 dimensions that I got from Fred (Tech-53), we measured the car.

The fancy bodywork measuring tool thanks to friend/neighbor Kyle.

Based on our measurements, the driver's side subframe was bent inward by 3/8".  Seems to be the reason I cannot get my negative camber dialed in correctly on that side.

So, ordered a complete/loaded sub-frame from Pegasus Racing.

I also have to deal with a dragging clutch. Removed the engine/transmission for the aforementioned NLS shim kit and metal/composite throwout bearing.

Seems the Kales Custom exhaust manifold is holding up after all these years and still looking fantastic. Perhaps I will polish it up a bit if I have free time.

And... new halo style seat from https://www.murraymotorsport.com/.  Half price of what I could find locally, $46 shipping for seat and two sets of brackets, and arrived within 8 days.  Sweet.

Shown in picture are the new and old seats. I am hoping the old driver's seat will fit into the Scirocco (tight fit, we will see) and the new seat (which is actually for the Scirococo) will work in both the Golf IV and the Scirocco I.

If it works, I will purchase another seat.

Rabbit Farmer
Rabbit Farmer Reader
4/8/19 10:59 p.m.

The Historic Mt. Philo Hillclimb is in May this year… this means that I have a lot to do to the car… unexpectedly… and help organize the event.  Yay!


As with any project, you start out thinking that you just need to replace a light bulb, but then you notice you have to fix the shelf, fix the drawer, get a can of WD-40, and then replace your car engine.  It is all related. Search the magical Youtube for “Hal replacing light bulb” get caught-up with the joke.


My light bulb was supposed to be the subframe and hanging clutch… you know, minor stuff like that.


-- The SHELF --


When I had the engine out, I noticed the engine mount (passenger side) was about as loose as throwing a hot dog down the hallway. The good news was that I had an extra 034EFI Track Density motor mount (same as what was already in there) as I replace the transmission mount (also 034EFI Track Density) in 2017 and they were sold as a pair.


I decided to check the transmission mount (driver’s side) and that had a lot of movement.  What the @#$%?  I just replaced it in 2017.


I decided there had to be a better option out there that did not require an expensive replacement of the entire mount when it failed prematurely.  I purchased the VF Engineering transmission mount from UroTuning.com.  Very quick turn-around with order and replied exceptionally fast to my technical questions via email.  Major thumbs up!


Back to the light bulb.  I installed the Nothing Leaves Stock (NLS) 02M 6-speed shim kit (very straight forward) and the new Luk brand more-metal-than-plastic throw out bearing/slave cylinder that I got from UroTuning.com.  Turns out that I already had this in my car… but, while in there, out with the old and in with the new (or regret it later).


Installed… nothing too exciting, but I will remember it in the future when I have the transmission out of the car.  It will happen… I have heard of it happening before… once or twice.


Naturally, since the transmission is off, we might as well check out the Spec 2+ (I always thought it was 3+, but I’m pretty sure it is 2+) clutch, pressure plate, and flywheel that was installed in 2010.  Wow!


It looked awesome!  So, just need to reinstall it.


-- The DRAWER --


But, since I noticed that the non-stretch bolts were looking a little rounded (they are hex heads), I decided to hunt down six new bolts.


They are M8 (8mm), 1.25 pitch, 16mm long (bottom of head to end of bolt), grade 12.9, DIN 912 (socket head screws), and black-oxide steel.


Of course, I know what all this means now as I head to search to the ends of the internet to find them. (DIN was new to me and I wasn’t sure how grade 12.9 compared to the 8.8 that I was used to for seat belt bolts)


I ended up getting them from the Nutty Company in CT (www.nutty.com) as they had a good price on 30 bolts and the shipping was reasonable.  It was cheaper than purchasing locally from Fastenal.


-- The WD-40 --


I replaced both fender liners in the front.  I have done this in the past, but when there was an issue with securing them properly, the tires wore them out due to contact.  Opps. 


I also noticed that the plug that goes to the radiator fans was broken (been ignoring it for a while), so I ordered a new one (guaranteed for life!) from FCP Euro (www.fcpeuro.com).  Quick, efficient, and pleasant ordering experience.  Recommended!


There is a great article on GRM here: https://grassrootsmotorsports.com/articles/fcp-euro-biggest-little-parts-store-world/


-- The ENGINE --


Thankfully, when I had the subframe off, I checked out the power steering rack.  The hard lines were very rusty.  I checked with the local VW parts place and they said the lines are not available individually (nor are the little metal clips that hold them one). New rack was over $800.  Nope… manual steering would happen before I spent $800 here.


Refurbished racks weren’t too expensive, but were a bit more than I wanted to spend.


Plus, I wanted to solve the problem, not just delay it for… heck, I guess for 18 years isn’t that bad.


Internet searching brought me to EAA Engineering (www.eaaengineering.com)... Again. Yep, I was there before looking at these lines. Now, it seemed that I needed them.


This kit would take care of the hard lines that needed to be replaced.


This took care of all the other lines. I will be nice to not have to worry about them in the future.


Plus, I noticed they have a “1.8T engine swap with the MK2 power steering rack” kit, which will work quite well with the Scirocco as it has the MK2 rack.  Well, that is my understanding anyway.  More to come a bit down the road.


Anyway, engine and sub-frame are sitting on the floor pending the arrival of the hoses.


I fixed the beat to hell heat shield that is over the power steering rack.  $27 for a new shield (that will get beat to hell) or four rivets (hammered flat) and some sheet metal.  Done.


Rattle rattle rattle goes the heat shield under the car.  Enter some do-hickies to rectify the problem.


Seat is kind of installed.  I mounted the new Sparco side mounts.  The new mounts are slightly different from my older Sparco mounts… I swapped them because the new brackets allowed for the correct width to mount the seat.


Everything on the mounts and seat are loose for the test fit. It will all come out as I change the mounting points for the 6-point harness submarine belt.


The new seat is a bit lower (I have it at the highest setting on the side mounts).  I need to put the seats side by side to see why they are so different.  It will work, but a change to the mount on the car (the welded in tubing that forms the base) might be in order.


Also, with the halo style seat, I now wish I got a removable steering wheel to help with entry/exit.


Of course, with all the times that I had to access my tool boxes and head out to the shed or trailer to get parts, I finally ordered matching locks for my toolbox (instead of having two different keys) and fixed that @#$%#ing blinking exterior light.  I got a quick education from www.ledsupply.com (great site, good information, quick turn-around) on what was wrong and how to identify the exact driver I needed to fix the light.


That is all for exciting news.


Next update should have car 100% done with the exception of needed to add back the mounting points on the subframe for the skid plate (threaded inserts x 4) and ordering new tires (that won’t be cheap!)

Rabbit Farmer
Rabbit Farmer Reader
12/8/19 6:53 p.m.

How about a whole season in one post!

I am happy to report that we seemed to have a pretty smooth season this year… nothing broke.  (or I am just very forgetful)

---- To catch up with the 1980 MK1 Scirocco ----

Thanks to a lot of expertise and advice from the members of the New England Hillclimb Association (NEHA), especially John Reed for the information on the different properties of some of the typical roll cage tubing, we settled on using the Rocal R-8.

Joey Kale (who is doing the cage) said this has been some pretty tough stuff to bend.  Very impressive.

The Scirocco at Joey’s shop in June 2019

Some updates throughout the summer… main hoop installed.

The new halo seat (that I used the entire 2019 season in the Golf) is made to fit and the old Sparco seat (my old Golf IV seat) is being used for the passenger side after some modification to the center tunnel to make it fit.

I plan to buy another halo seat so that both the MK1 Scirocco and MK4 Golf have the same seat.

Cutting out some of the light sheet metal to mount the main hoop to the non-stock framework that was built into the unibody of the Scirocco to stiffen the chassis and create better platform to build the original cage.

A lot of the tubing is cut and ready to install in October 2019.

The time to get a spare part is when you don’t need it and there is a deal.  My brother (Andy… still plays with cars) ordered three new M1 Scirocco windshields… of which I purchased one of them.

Pretty cool custom “Rabbit Farmer” badge that I plan to install on the Scirocco.  It looks identical to the stock MK1 Rabbit badges.  Very good quality. I highly recommend.  

Vendor:
Pop Zombie Laserkraft
www.facebook.com/PZLaserkraft
pzlaserkraft@gmail.com

---- Updates to the MK4 Golf ----

The earlier posts showed the power steering lines that I planned to install.

Here is what arrived for the complete kit for the Golf.

Two braided steel lines for the rack
One braided steel/rubber line from the rack the power steering pump
One rubber line from the rack to the reservoir

The lines on the actual power steer rack seemed to fit good.  Great quality.

The lines almost installed on the rack.  I did grind the rust and repaint the clips that hold the lines to the rack.  These are parts that do not seem to be available on the aftermarket.

Kinda like the power steering lines… you need to purchase the entire complete rack to replace the lines.

For some reason, the line that went from the rack to the reservoir seemed to be too short.  I spoke with the company and they tell me that the line was the correct size, but I didn’t see how it worked.  

With the limited time before the first event of the season (first time since the 1970s that the Mt. Philo hillclimb is in the spring) I ended up not using that line.  I also returned the line that went from the rack to the pump as it wasn’t needed as what I had was in good condition.

For the original line that went from the rack to the reservoir, I sanded the metal surfaces to remove the rust, painted with high-temp black paint, and put a Cool It / Thermo Tec heat shield around the line from the rack up the firewall.


Since the last time that I purchased tires was for the 2017 Mt. Washington Hillclimb (I normally purchased a set every 1.5 seasons… they were getting VERY thin mid-2018 season), I purchased another set of Toyo R888R tires 235-40-17.

I noticed that there was a still leak under the engine (noticed it last season also thanks to the skid plate catching everything). In 2018, it seemed to be some loose bolts on the metal part of the oil pan (this is the hybrid aluminum/metal pan).  I torqued them.

At the start of the 2019 season, I removed the metal portion, cleaned it along with the bolts and engine block, and reinstalled everything using Permatex Ultra Black.

It still seems to be leaking a bit come the end of the 2019 season, so that will be another project over the 2019-2020 winter.  I might just return to the all-aluminum one-piece pan.  I have a robust skid plate to protect the pan.  We will see.

I noticed that one of the holes in the transmission mounting bracket was a little stripped.  It must have been a little stripped by the constant removal/reinstall over the years, but it was never noticed until I install the VF Engineering mount that uses shorter bolts.  I guess the threads that actually worked were at the bottom of the hole.

Since I did not have a spare bracket that mounts to the transmission (well, at least not for the 6-speed), Joey Kale was going to install a HeliCoil to rectify the issue.

Turns out the HeliCoil thread was exactly the same as a bolt he had, so we just used the larger bolt.

Time for some new front brake rotors.  In the second image you can see the ridge on the edge of the old rotor.

And the final thing needed for the 2019 season was the reinstall of the skid plate threaded mounting points on the subframe… I replaced the subframe earlier as it was 3/8” out of true.  That is Joey under the car doing the welding.  Thanks to my friend Chris Achilles for coming over to install a 50amp outlet in the garage so that we could plug in the welder.  Good thing I had a 100amp panel installed in the garage shortly after moving it.

And… the first hillclimb of the year! Mt Philo in the spring.  (same for 2020)

The season progressed with zero (recallable) issues.  We heard that the Mt. Ascutney hillclimb in the fall was going to run the full 3.6 mile hill course.  

My favorite hill of the NEHA series, but over the past 10 years +/- it has gotten very bumpy between checkpoint 7 and the normal finish line at the 2.8 mile mark.

The fall 2019 event will bring us to the very top of the course at 3.6 miles.

My suspension was built back when the hill was a lot smoother.  I believe that the bumps, a little airborne with the hard springs with some wheel spin, followed by the shock to the drivetrain upon the wheel making contact again (lots of grip) has been the cause to transmission and axle failures over the years.

Digging up an old photo from 2006 that shows the Shine Racing suspension prior to install.

Front: 8” 500# spring
Rear: 8” 350# spring

I borrowed some springs from Chris Putzier (he does a lot of rallying since… well, forever ago) to try.

Rear: 10” 140# spring replaced the 8” 350#

Originally, before Chris offered the loan of the softer springs, I looked at some alternative tender spring options for the springs sitting in my tool box.

The current setup was the 8” 500# spring with a helper spring (0# spring rate).

I had a 3” 200# tender spring that I thought of trying (remove the helper spring), but it seemed that it was too long.

Front: 12” 130# spring replaced the 8” 500#

Fronts installed.

Because I now had softer springs, there would be more body roll… so, I reinstalled the Shine Racing anti-sway bar.

I originally removed it during a HPDE day at New Hampshire Motor Speedway (NHMS) where it was raining and the combination of stiff springs and the big anti-sway bar created some undesirable oversteer.

When installing the tire, I noticed that the wire that goes to the wheel speed sensor (used for ABS) was damaged as it was making contact with the rim.  Something that I will replace during the 2019-2020 winter.  For now, addressed the wires with issues and wrapped it in electrical tape.

Both sides of the front now have wheel spacers.

During the fall Ascutney event. Nothing broke.

Even though I thought the new softer suspension would help suck up the harsh bumps (and protect my axles from breaking), I did take it easy as I only had one replacement driver’s side axle.  My times show slower times to the traditional finish at the 2.8 mile mark.

Best time 2:56 (2016)
Fall 2019 3:02.17 (traditional) and 3:49.27 (full hill)

I got into it on Sunday after a few easy runs, but put it in the trailer early as I had to get home to my lovely wife.

While the softer springs did help with the bumps, they were actually too soft.

Winter 2019-2020 will provide a new suspension that has a better spring rate that will work for all the hills (I will keep the stiffer springs for the track) and adjustable shocks/struts.

Rabbit Farmer
Rabbit Farmer Reader
2/5/20 10:58 p.m.

The research continues on the upgrade for my suspension.

Something with good suspension travel, adjustable struts/stocks (two way), beefier construction, etc.

I looked at some brands and after contacting the company found they were outside of my racing budget.  (i.e. Ohlin and Reigers)

Great quality, but I need to eat also!

My research for "racing coilovers" kept bringing up brands that use "racing" in their names (i.e. BC Racing) that might not have meet my needs.  

KW Competition did come up in my research, but I am unsure (like I don't know) about the quality of the product.  Anyone with insight?

So, three options that did come up were:

D2
https://d2racingsport.eu/
Rally Asphalt Coilover Kit - #D-VO-23-RA - Volkswagen JETTA 4-MK4 (2WD)

K Sport didn't seem to have anything that fit my car.
https://ksportusa.com

And finally...
Gaz Gold Coilovers
VW Golf Mk4 2WD Gaz Gold Coilover Suspension Kit
https://gazcoilovers.com/vw-golf-mk4-2wd-gaz-gold-coilover-suspension-kit-96-p.asp

I sent an email to Gaz to start that conversation.

What I like, so far, about Gaz, is that they seem to be speaking the language of "racing" while they still seem to be in my budget (assuming I'm converting that crazy looking L to the $ properly).

They also have the cheaper GHA coilovers (and this is what peaked my interest), but they stated:
"The GHA kit is not recommended for cars running semi slick track day tyres or full racing slicks as they are not designed to accept the high side loadings the extra grip of these tyres exert on the main seals and bearings within the dampers. If you run these tyres, you will be better served by our Gaz GOLD coilover range."

Great... so, the Gold is the better option for racing.  They recognize side loading and the strength of the suspension.

What really caught my attention with the Gaz Gold are all the options available to setup the coilovers right down to their assistant with picking the correct spring rates for the type of racing you do.  Sweet!

Going back at little bit in time, I was having a conversation with MurrayMotorsport.com (great company!  highly recommend them) about Gaz coilovers, but the Gaz brand doesn't seem to be on their site anymore.  I do see in their 2019 catalog, that they have Proflex, Ohlins, Gaz, Koni, Bilstein, etc. available.  Unsure which is current.

Research continues.

Lots of upgrades to various parts throughout the car.  Going to be a busy winter/spring in preparation for the first hillclimb of the year in May.

Lots of snow forecasted for the next few days.  Good excuse to spend some time in the garage working on the car and doing research for parts.

Still having an issue finding good lightweight rims (17 x 8) that aren't crazy expensive.  

Steve

Rabbit Farmer
Rabbit Farmer Reader
2/22/20 11:24 p.m.

A few updates, but no real progress on the Golf.

Planned for this weekend is a compression and leak down test.  I haven't used the lead down tester yet, but I get the general idea.  I might be a YouTube-certified Master Leak Down Tester by tomorrow.

The few things that I have been researching are spare rims (perhaps a little lighter) and a better coilover suspension.

Rim research continues, but I haven't narrowed it down yet.

I know it will be 17x8, 5x100, ET35, around 22-23 pounds, and around $150.  And a dark color... I like black and gun metal.  There are a number of options on Tire Rack that caught my attention.

The current rims that I purchased back in 2003 are quite heavy coming in at 26.8 pounds.  The company that made the rims hasn't been around for a very long time. Edge Racing.  I purchased them because they were $99 each.

Part of getting ready for the 2020 season is to make sure that I have extra parts and purchased some basic maintenance parts.

HANS replacement tether (dated 2020) from Summit Racing.
Simpson model number TK 1231.4

Extra 2.5 and 3.0 silicone couplers and T-bolt clamps from Mishimoto (New Castle, DE)


I often thought that if I dropped just one lugnut that I would not be able to drive. So... I ordered 20 new nuts from 034 Motorsports.

From FCP Euro, new bolts for the trailing arm bushings, new wheel bearings, speed sensor wire (front left was damaged), and rear spring rubber perch are all going in now.  The ball joints are spares.

For tools that love to fly across the garage when in use, the strut spreader is one of those.  The current tool I have is just the bit that I have to insert into a 9mm (or so) socket to use it.  Enter the Metal Nerd strut spreading bit with a larger end for easier handling.  I might glue it into a socket since everything at Sears is (was?) on sale.  I picked up two of these tools due to the likelihood of them taking flight.  Ordered from UroTuning.


Now the fun stuff.... Rear trailing arm bushings with spherical bearings from 034 Motorsports. (that's what I needed the new bolts for)

One problem that I have experienced over the years is that the brake pedal was a solid rock when it was used during or shortly after full boost.  Bit me at Mt Washington in 2017.

Enter an electric vacuum pump from Leed.

This is the Bandit pump in black.  It is approx 8" tall.  I thought it was a bit smaller when ordering it as I had plans to install it under the hood, but since it is quite large, it will end up in the back of the car.

Ordered from Summit Racing.


I settled on Gaz Coilovers "VW Golf MK4 2WD Gas Gold"

https://gazcoilovers.com/vw-golf-mk4-2wd-gaz-gold-coilover-suspension-kit-96-p.asp

9" springs.  Front 400# and rear 350# with everything valved accordingly.

Able to adjust the rebound and compression damping.

I had to measure the current spherical bearing in the Cusco (part number 566-410-A for "Mitsubishi Lancer Evo X (08-13)"... reminder for myself when I am trying to recall what I have) pillow top to ensure the Gaz shaft was machined to the correct spec.

Rabbit Farmer
Rabbit Farmer Reader
3/8/20 9:00 p.m.

A few MK4 and MK1 updates.


The 2020 hillclimb season is fast approaching and I just realized that are a number of general maintenance things that I need to do to my car plus some bigger stuff… like a new suspension and rims.


Rims should be minor, but a new set of tires are in the mix and it is impacting a few things.


So… the car is off the ground with the front and rear suspension completely removed.


In the front, I am trying a new set of tires.  Yokohama Advan 230/640-17


They are “take offs” from Vermont SportsCar… I’m sure someone much faster had them before.  But, the price was right; I grabbed two sets.


They are the same width when mounted on the same rim as my Toyo R888R tires, but the shoulder is more square and they are taller.  Toyo height 24-1/2 and Yokohama 25-5/8.


This means they are severely rubbing against the current coilovers even with the 3mm spacer.  The rims are 17x8 ET35.  I plan to purchase a new set of rims after I get the new suspension in.  Either I will have an offset that allows the Yokohama tires to work or I will get the same offset (35) and just use spacers.


I removed the rear beam to replace the 2001 stock bushings… yep, I never changed them.  And they always squeaked.


The fronts and rear headed down to the Cheese Factory in Colchester, VT for some bearing and bushing pulling and pushing.  Chris did a great job as usual!


While I had the rear beam off, we also did the original 2001 wheel bearings in the rear.  Brake pads and rotors looked good.


I ordered some misc. parts to address some of the old bits and pieces… plastic retainers that hold the solid brake lines to the beam, wheel speed sensor (and new plugs for both sides as those where checking out soon), e-brake clips, new bolts and nuts for the bushing.


Enter the solid 034 Motorsport solution.  Not all the parts are included in the picture.


New front wheel bearings.  I have to bring one back as it needs a new hub (Chris couldn’t source one locally).  I also ordered a new set of brake pads for this season.


Next on the Golf is the oil pan (ordered aluminum) and power steering leak.


Interesting thing about the oil pan.  I am changing from the hybrid pan (aluminum body with bolted on steel bottom).  The bolts were all loose on the pan.  I tried to address the leaking by removing, cleaning, and sealing everything, but she is leaking again.


The aluminum pan should be fine as I have a really good skid plate.


One thing I did recall when getting the hybrid oil pan is that ECS Tuning (where I purchased it) included the oil pickup tube as it was different from the aluminum pan.


So, going back to the aluminum pan, I needed to get the older pickup.


I was stuck on model year split for the new vs. the old pan, but it wasn’t just the model year, it was actually the year they went from aluminum to the hybrid.  I recall our 2004 Jetta IV 1.8t came with the hybrid pan.


VW part 06A115251 | 2003 and prior (because it has the aluminum pan)

VW part 06A115251G | 2004 forward (because it had the hybrid pan)


I’m going to try to remember to get some side by side pictures and measurements of the two to see the real different.


Well… I guess that oil pick tube story wasn’t all that exciting… but, I will need this information in 5 years when I am trying to remember what I did to the car.


Blah blah blah…


Let’s check out Joey’s progress on the Scirocco.


Joey took a lot of great pictures that detailed the progress and the details; for now, I will just present some of the images I took this weekend.  I will post up his pictures later.


Once the seats are in, we will determine which steering column to purchase.  I am unsure of the size, brand, design, but it is something like this:


Also part of the work that Joey is doing is trying to address the camber plates.  I want something similar to what I have on the Golf.  Something that I can purchase off the shelf in the future (should I need to replace them) instead of a fabricated piece.


I am also currently researching tubular front control arms and purchase different knuckles… we will see.


Rabbit Farmer
Rabbit Farmer Reader
3/23/20 9:22 a.m.

Not a whole lot to report…

Both sides…. new plastic clips for the hard brake lines on the beam plus the metal hangers for the e-brake cable.

Rear beam went in very easy on the left side of the car.

There weren’t any instructions from 034 (other than “coming soon”) so I had to figure it out myself.  It isn’t that difficult, I just would have liked to have the instructions to make sure I did everything correctly.  A little “tool” of some sort was included with the kit… not idea how we were supposed to use it.

I greased all the parts before assembly, figured out that the longer of the two bearing spacers went on the outside.

The right side of the car seemed a bit problematic.  

I removed the bracket from the car as it seemed a little bent.  “A little” didn’t do it justice.  Enter hammer and anvil to make it look pretty again, installed the rear bear, torqued bracket bolts to 55 lb/# and the bearing bolts on both sides to 59 lb/#.

Installed both rear brake lines… and that is how everything suspension related will sit until the new coilovers arrive from England.

Time to check out the engine to see what shape it is in for this season.  Naturally, I should have done this back in October, but life was busy back then.

I picked up a leak down test kit from Summit Racing a few years ago.  It is a lot easier to use than I expected.

I understood the general concept… pressurize a cylinder and see how much air gets by the valves, rings, etc.

I pressurized the tool, turned the yellow knob until the right gauge was in the middle of “Set”, connected the hose to the #1 cylinder, and connected the other end to the tool.

And… HIIIIIIIIIIISSSSSSSSSSSSSSSSSSSSSSSSSSSSSS with 100% leak down.  I passed! I got 100%.

Nope… that would be very, very bad to have 100%

Oops, forgot about the whole top dead center thing.

I turned the crank to get TDC for #1 and #4 and tested those and rotated it 180-degrees for #2 and #3.

In addition, I did the standard compression test afterwards.

Here are the results (both test in each picture… pretty snazzy)

My helper (Julie) holding the engine in position so that the piston doesn’t go down when pressurized.

Suspension-wise, the car is done.

Left to do:
1. Power steering hose on the rack is leaking (hopefully, just need to tighten it)
2. New oil pan
3. Figure out what offset works with the new taller tires and the new suspension (when it arrives) and order another set of lighter rims
4. Install the new suspension (hopefully, in two weeks!)
5. Install seat… currently it is sitting in the MK1 Scirocco as I will be running the seat in both cars (well, each car will have its own seat, but they will be the same brand/model)

brad131a4
brad131a4 Reader
3/23/20 10:54 p.m.

The knuckle on the scirocco looks to be from a audi 4000/80/90 or older fox. Could even be from a early 80's coupe as they were 4x100.

Rabbit Farmer
Rabbit Farmer Reader
4/15/20 12:17 p.m.

A few Volvo and Volkswagen updates…


In this exciting episode of “Finding more time to work on my cars since I don’t need to commute to work” Garage:


2015.5 Volvo S60 T6 R-Design

Rear Brakes

Misadventures of Trying to Replace the Power Steering Control Module (Snipe Hunt)

Clean and Ready for Summer


2001 Volkswagen MK4

Wheel Speed Sensor Replacement and Removal of Pad Wear Sensor

Coil Relocation

New Coilover Suspension is Here!


---------


I thought there would be Subaru WRX updates also (other than putting on the summer tires!), but everything looked good including the brake pads and rotors.  It is getting close to the time to sell the WRX and purchase something new for my daily.


Though… I do love having an older car like this (2009) to navigate the winter roads and bring it to car events from time to time (Autocross, track, etc.). Don’t race a car payment!


Let’s start with the Volvo.


This is my first time doing anything to this car other than the basics; swapping summer and winter tires, changing engine intake filter, and changing (what a pain!) cabin air filter.


Since the car isn’t needed as a daily commuter right now with all this stay-at-home Zombie stuff, I was comfortable digging into this car to replace the Power Steering Computer Module (or so I thought) and the rear brake rotors/pads.  I did not want to take the car apart when it was needed for the daily commute as I was worried I would need to order parts that I hadn’t thought of when planning the projects, which would have put us down on car.  In the summer… no big deal as I can drive my truck, but I try not to drive my all season tire truck in the winter (because of the salt).


Rear brakes…


Very easy as the design of the rear brakes is very similar to what I normally see on the fronts of cars.  Remove caliper and remove bracket.   Since the Golf has been on jackstands for a while, I had to buy another set of four jackstands to do other projects.


Basic hand tools (13mm and 15mm sockets) plus T30 (long) to remove the Electronic Parking Brake (EPB) motor, T40 to turn in (reset) the EPB, and T50 to remove the screw the holds the rotor to the hub.


Good thing I addressed the pads; very thin. Image shows the old pads installed with a new pad next to it.  Wow!


All installed.  The pads came with new 13mm caliper bolts and sliders and the rotors had new 15mm bracket bolts, but I do wish I replaced the T30 head EPB bolts.  Normally, you reset the EPB via putting the car in service mode, but I don’t have a scanner to do it electronically.


Next, diving into the front end to address an intermittent power steering issue.


Sometimes, when we start the car we can feel in the steering wheel (without even going anywhere) that the power steering is not working.  Turn off the car and restart it… might take a few tries… and everything is back to normal. 

This issue has never occurred while driving.  If it does occur after we first start the car and we don’t restart the car to correct the issue and just drive it, the issue does not go away.


It was suggested to me to replace the Power Steering Control Module (Volvo part number 31360217) as it is an inexpensive part ($150 +/-).  Looks like a typical relay, but I could not find any information on where it goes on the car.


Going to some of the Volvo forums or Facebook, it was suggested that the PSCM is located on the pump that is located behind the front right bumper corner.


The power steering on this car is an electric hydraulic pump. 


I did over complicate accessing the pump.  It is as easy as removing the front right tire, removing the fender liner, removing the two pins that makes it very easy to remove the entire headlight housing (wish all cars were like this), unplug the headlight, disconnect the power steering reservoir to make it easier to move the pump, and then remove the four nuts from the front (accessible because the headlight was removed) and back (removed fender liner) of the pump.  Bam!


The power steering pump.  The pump itself looks easy to change, but my goal was to replace an inexpensive part to see if that fixed the issue.


Talking through a friend to his friend who is a Volvo tech, I am told that the PSCM is part of the pump… so, I have no idea what the relay looking thing belongs.


So… I put it all back together.  If I need to replace the pump, at least I now know how to access and replace it.  A waste of my time, but it was a learning experience.


Yuck!


Un-yucked!


All back together with the summer rims and tires and a car wash.


Switching gears to the 2001 Volkswagen Golf MK4 that I race.


I ordered a replacement wheel speed sensor wire for the front left wheel.


I ordered 1J0927903E (excludes the pad wear sensor) accidently instead of 1J0927903R (includes the pad wear sensor) from www.FCPEuro.com (great place… I highly recommend them!). 


The front left corner is supposed to have the pad wear sensor, but I have had it disconnected for years and had it ziptied to the strut.


So, it seemed like a good time to just remove the pad wear sensor from my car.


This shows the new (no pad wear sensor with only one plug) vs. the old pad sensor version with two plugs.


Of course, it can’t be that straight forward.  The plugs are different.


The wire gauge is the same, but the terminals are different, so I will have to replace the terminals (able to reuse the Weather Pack seals); ordered terminals from www.ecstuning.com along with some other parts (coming in soon).


Reuse Weather Pack seals and boot; just need terminals and a proper crimper.


Next… trying to address this piece of crap that I made a few years ago to hold the coils.


This is what I removed… the stock battery tray and the bracket I made.


The issue with this design is that it is hard to unplug the coils (if trying to address an issue) and I have to remove this entire contraption to access the ground wires on the car.  Bad design all around when trying to access things to try to address issues.  This I discovered one year when I had an issue with the fuel pump… what a pain.


Enter the replacement.  Something that I am planning to mount in the engine bay to the fender-side wall.


ICT Billet Remote Mount Ignition Coil Relocation Brackets (part number 551588) from www.SummitRacing.com.


There are two of them in the package for $60.


Coils mocked up. 


I have a few choices here how to mount them.


Bracket-coil-coil-coil-coil-Bracket


If I mount them all between the two brackets, the coils need to alternate as the #4 coil cannot be oriented so that the plug on the bottom is on the outside as it will interfere with the bracket.


I would also need to grind down the relief for the heat sink to mount it this way.


The actually instructions show the final coil after the bracket end.


Bracket-coil-coil-coil-Bracket-coil


I will figure out what works best for me.  Key part is that the coils and ground wires will be easier to access and service AND will look soooo much better.


Now the good stuff.


The VW Golf Mk4 2WD Gaz Gold Coilover Suspension Kit arrived!


https://gazcoilovers.com/vw-golf-mk4-2wd-gaz-gold-coilover-suspension-kit-96-p.asp


I did get a spammy looking text message that stated:


DHL Express Shipment (tracking number): Your shipment is ready! To complete delivery please pay required US import duties/taxes here: https://del/dhs.com/US/(with-a-unique-link)


Riiiiiiiight….


I figured it was spam, but I did check the tracking number supplied in the text to the DHL website and was able to verify that it was my shipment and it was pending payment for duties/taxes.  Followed the link in the text message and got my package (which was sitting in the US) moving forward.


My conversation with Gaz Coilovers was about how rough our roads are and I needed something to suck up the bumps.  They suggested their gravel setup with 9” springs and 400lb front and 350lb rear.


Looking at what I actually received, it looks like I have 7” front and 8” rear.  Springs are cheap and easy to swap out.


Old vs. New Fronts


Rears… One question about the rears is how do I make them operational; currently they are complete compress and do not come out on their own.  I read online that if the shocks are sitting on their side or upside down, the gases end up at the wrong side of the piston.  So, the two choices offered were to install them and they would start working over time (not going to do this) or pull them out and push them in until they start working.  Also, recommended letting them site upright.


Still doesn’t seem to be working… Hmmmmm.


Old vs. New Rears


The new setup does need the upper stock mount.


The old lower mounting point for the spring was pretty beat up.  The old version did pivot while the new one does not; hopefully, this all works out when the rear beam is in its operating limits (right now it is dropped low as nothing is connected).


The new lower mounting point fits nicely into the perch and has a huge buttocks bolt holding it all together vs. the PITA snap ring setup.


Rabbit Farmer
Rabbit Farmer Reader
4/15/20 12:20 p.m.
brad131a4 said:

The knuckle on the scirocco looks to be from a audi 4000/80/90 or older fox. Could even be from a early 80's coupe as they were 4x100.

Thx. I got a similar response from my local VW/Audi friends.

orthoxstice
orthoxstice New Reader
4/15/20 12:42 p.m.

Strange question; is that MK1 Scirocco pictured above at your friends house a Calloway Turbo car? It looks just like one a guy I knew in NJ owned probably 10 years ago.

1 ... 5 6 7 8 9 ... 11

You'll need to log in to post.

Our Preferred Partners
DyXHiRFD0CfSMZr9o7xBYcQszeyBWl5bw4nLcm8c8AQ6tUtxDNfB9hme3BGTaHvN