1 ... 6 7 8 9 10 11
Rabbit Farmer
Rabbit Farmer Reader
4/15/20 4:05 p.m.
orthoxstice said:

Strange question; is that MK1 Scirocco pictured above at your friends house a Calloway Turbo car? It looks just like one a guy I knew in NJ owned probably 10 years ago.

This was built and raced by a guy in CT; I purchased it from him.  Not the same car.

This car has been heavily modified from stock... I don't mean it has an aftermarket exhaust of different engine, it has a redesigned floor pan, independent rear suspension, MK2 subframe, etc. etc. 

I has been so much fun looking through this car since I purchased it and see all the changes.

Rabbit Farmer
Rabbit Farmer Reader
4/17/20 8:55 p.m.

It took a surprising amount of time today to get things accomplished on the Golf today.


Spent a lot of time cleaning parts and attending to the small details. The day went by waaaaay too quickly.


-------


I should have ordered one of these years ago to protect the pinch weld when jacking up the car.


Powerflex Black Series “Universal Jack Pad Adapter” that has 14mm wide x 15mm deep and 10mm wide x 15mm deep slots in it. 


I don’t need it for the Golf as the pinch weld is flattened, but will be very useful for the Subaru WRX and Volvo S60 and whatever future car we get.


Purchased at www.ECStuning.com (ES#4006979)


Today’s goal was to install the front coilovers.  The rears are on hold for some hardware that should arrive next week.


The Golf currently has the nut pictured on the left (Cusco kit); this is what goes though the 18mm ID spherical bearing on the pillow ball mounts.


On the right is what came with the Gaz kit; one piece goes on either side of the bearing.


I don’t like the two piece design from an installation point of view… is one design better than the other in terms of properly supporting the suspension on the bearing?  Don’t know.


Both versions sitting on top of the strut.  The old threaded nut version requires only one nut to handle both the attachment to the strut and working with the bearing.  The Gaz version has the nut for the strut and the two pieces for either side of the bearing.


I did notice that it seemed the Gaz version doesn’t allow as much of an angle change from horizontal as compared to the Cusco version.  


Gaz version:


Cusco version:


Probably doesn’t matter if both are within the operational range.


I noticed that the pads were wearing uneven in the front right.  Inspection of the 2001 calipers showed that it was time to redothe seals, slides, etc. 


Well, these remanufactured “Power Stop” calipers purchased from www.ECStuning.com (part number ES#3148871) were the right price, came with the bracket, and both were powder-coated red.  I would have preferred black, but that is what they had.  I really like that they were powder-coated so they don’t turn into a rusty looking mess… after nearly 20 years.


Big brakes aren’t needed for hillclimbing; the pads are still high temp (Hawk Blue 9012 Compound for the track) with good bite.  For the rear pads, I use Hawk HP Plus as they heat up quicker; they did not need to be replaced yet.


Near caliper, new pads, new ball joint, new wheel bearing, new hub, and new suspension.


Sweet!  Still need to torque everything.  Of course, I will have to remove the pillow ball mounts next week as they go back to Joey’s to fabricate the Scirocco to use the same mounts.


I couldn’t work on the rear shocks (waiting for parts), but I did install new e-brake hangers (1J0609745G - left and 1J0609746F - right), brake line clips (191611715), and two pin connector for the ABS/wheel speed sensor (6N0927997A). 


Long day without a lot accomplished.  I hope to finish the front suspension 100% this weekend along with addressing the leaking power steering line on the rack and replace the oil pan.


When parts arrive, install the rear suspension during the week.


I do need to order new pillow ball mounts for the Scirocco so that I can reinstall the current mounts that are currently shared between the two cars.  And the seat… the Scirocco still has the Golf seat.  (I will have to order a new seat later this summer)


Also, once the suspension is together, I get to break out some measuring devices to figure out what rims to purchase to that I can mount the “new” Yokohama Advan tires.

Rabbit Farmer
Rabbit Farmer Reader
4/30/20 11:15 p.m.

Very slow progress as I don't seem to be in a rush as the race season keeps getting postponed due to all the issues with Zombies and such.

To race this car this season...

TQ all the bolts on the suspension
Address loose (I hope) power steering line on the rack
Replace the leaky two-piece hybrid oil pan with a stock one piece aluminum pan.
Reinstall race seat (currently with the Scirocco)

I do want to order another set of rims to work with the "new" tires.  Can't show up at a $900 event with only one set of rims/tires (going to file this under "wheels") and spare parts.

The progress... and I learned a lot thanks to Kenji at Cusco USA. ([url]www.cuscousainc.com[/url])

The ECStuning.com parts arrived.

The "ECS Heavy Duty Rubber Rear Shock Mount Kit" was advertised as:

"The ECS Heavy Duty Rear Shock Mount Kit offers significant performance to your vehicle's handling and long term durability as compared to stock shock mounts. With the increased durometer over the OEM 50A foam-filled shock mounts, the ECS 80A durometer void-free rubber shock mounts will better resist deflection and premature wear that commonly plagues the OE mounts without sacrificing ride comfort. This is a must have if you are installing sport springs, coilovers or when replacing rear shocks."

We will see...

I also ordered some sockets that make it easier to user Allen wrenches to tighten the struts/shocks... worked fine in the rear (17mm), but the original Golf fronts were 21mm while the Gaz are 22mm.  Opps.

Rear coilovers installed.

So much better than my non-adjustable Bilstien setup.

All the bolts that I need to torque on the front and rear suspension... took me a while to catalog all the torque specifications.

And finally, I ordered pillow ball mounts from Kenji at Cusco USA. ([url]www.cuscousainc.com[/url]).  He was a very helpful with getting me to understand all the parts of a pillowball mount.  The image below was the biggest help as I did not quite understand the collar part.  This is because it is actually missing from my Golf, which would explain why the nut had scrapping damage from moving within the bearing.  Something that we will address later.

The new Cusco plates will go on the Scirocco (same plates as the Golf).  Unsure what I will be running for suspension on the Scirocco. We will see.

Rabbit Farmer
Rabbit Farmer Reader
5/6/20 5:31 a.m.

Another hillclimb was cancelled this year because of zombies... this one is the biggest event of the season for me.

The Mt. Washington Hillclimb in New Hampshire is normally every three years... it was moved to 2021 (instead of having to wait 3 more years).  Some good news in there.

I really need to finish the Golf so that I can do other projects in the garage since warmer weather is here.... was here... and back again (gotta love Vermont weather).

Rabbit Farmer
Rabbit Farmer Reader
10/13/20 10:13 p.m.

First update since May 2020.


Grab some coffee and internet bandwidth… this is 8 pages of text without the pictures.


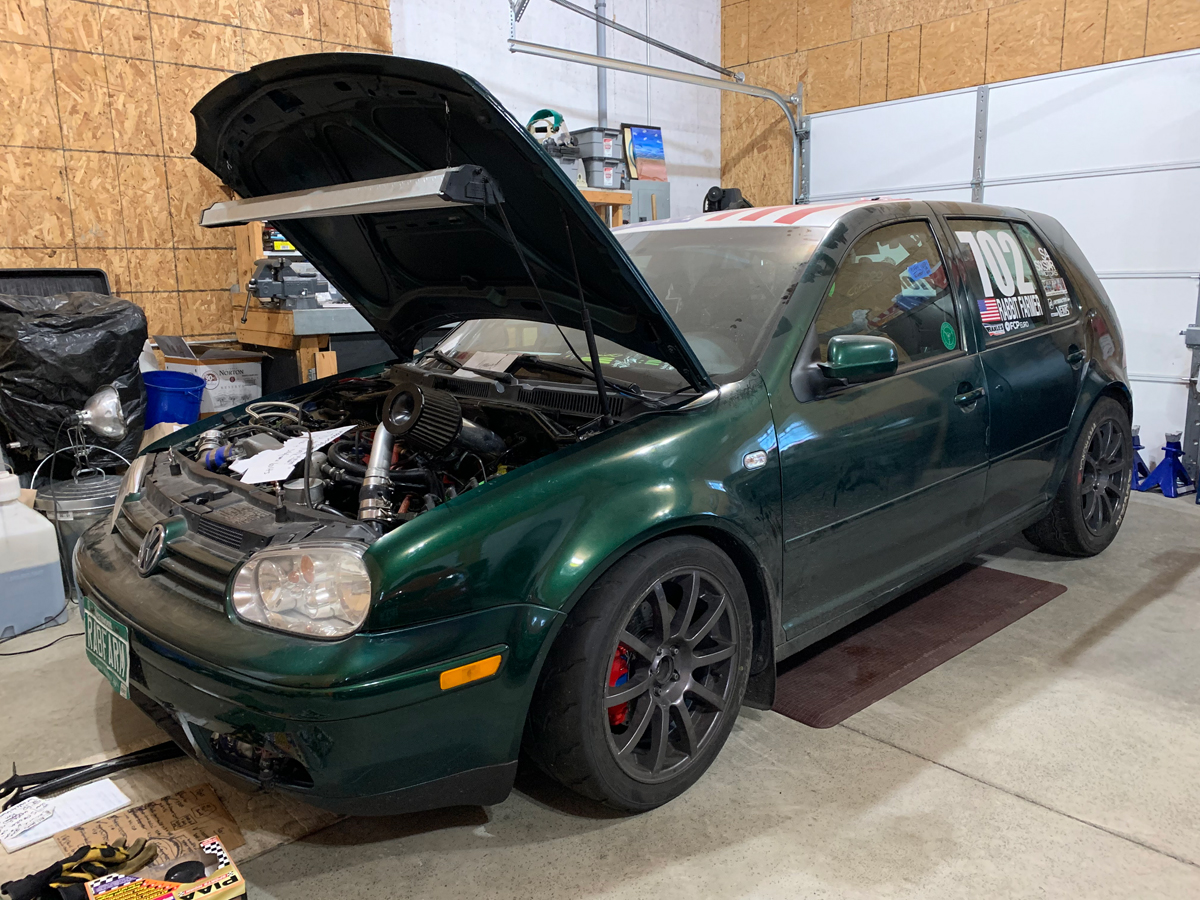
2001 VW Golf, 2009 Subaru WRX, and 2015 Volvo 60 news… and a 1980 VW Scirocco.


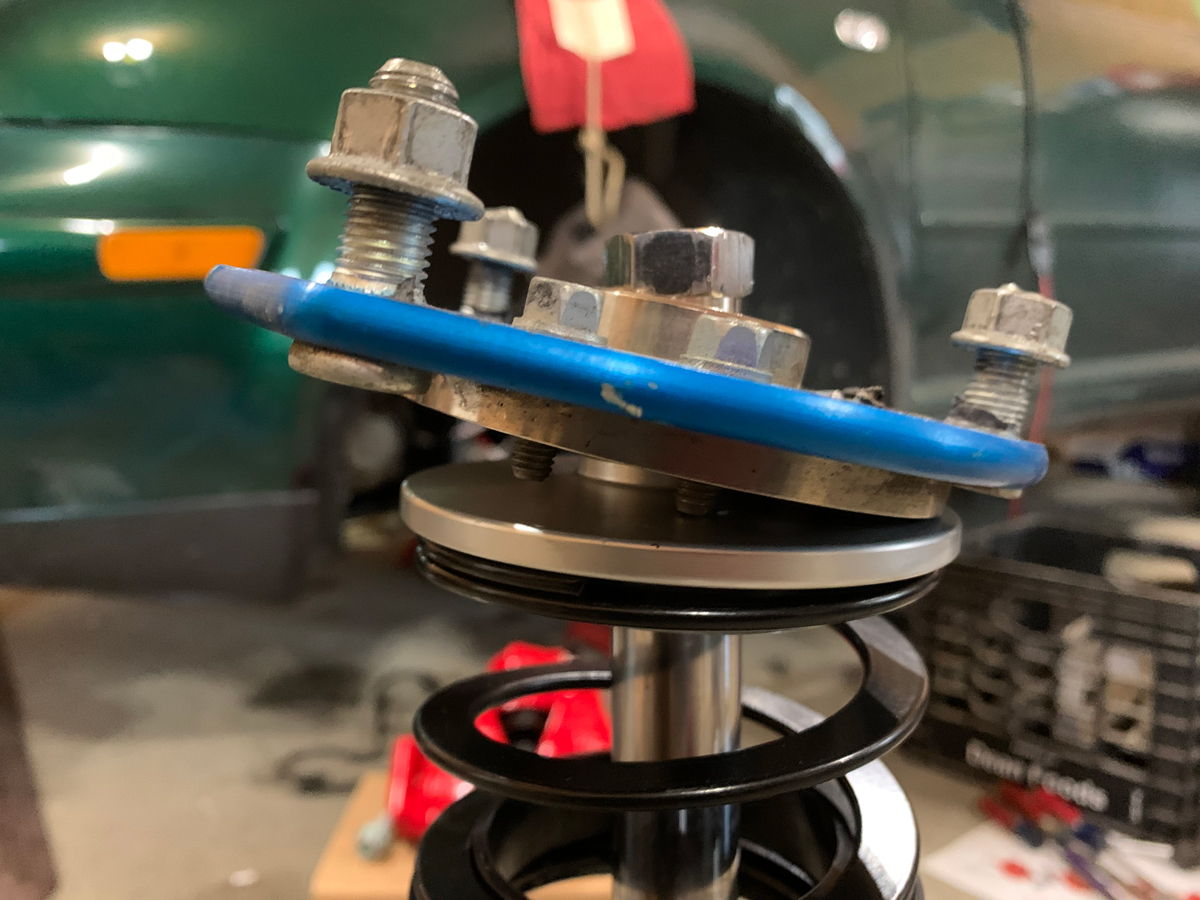
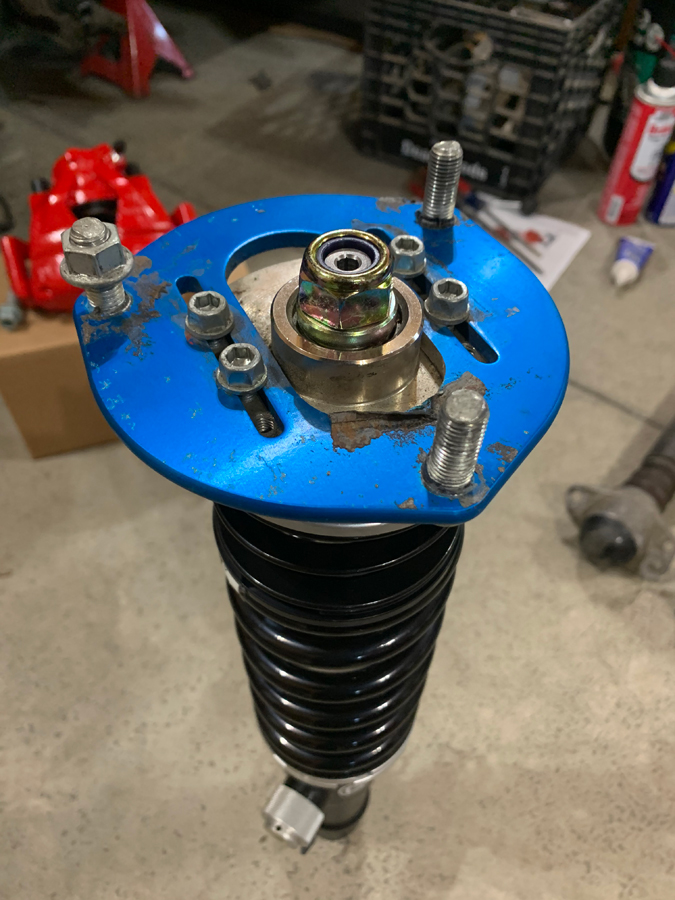
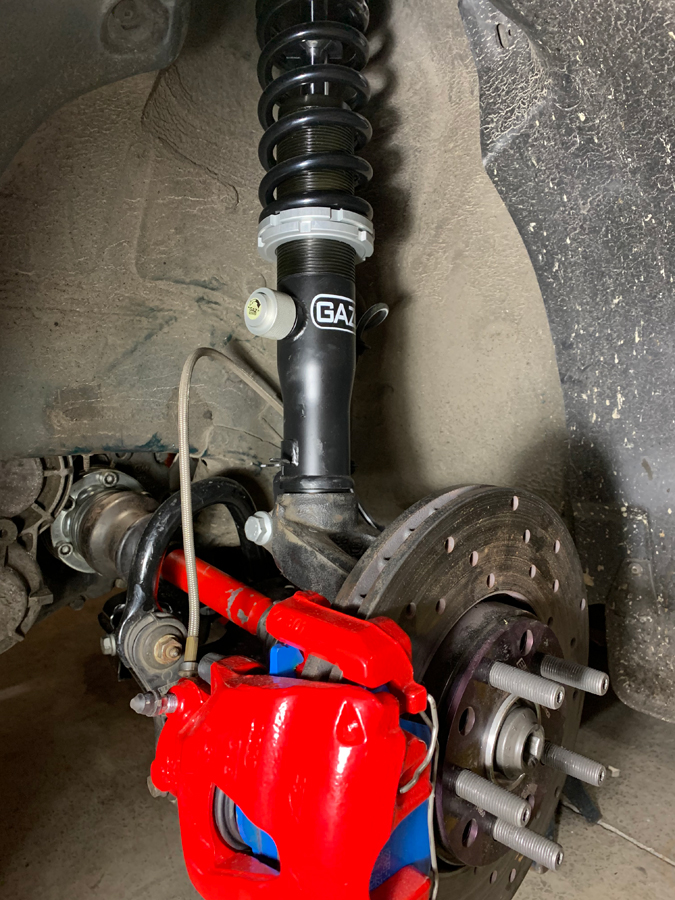
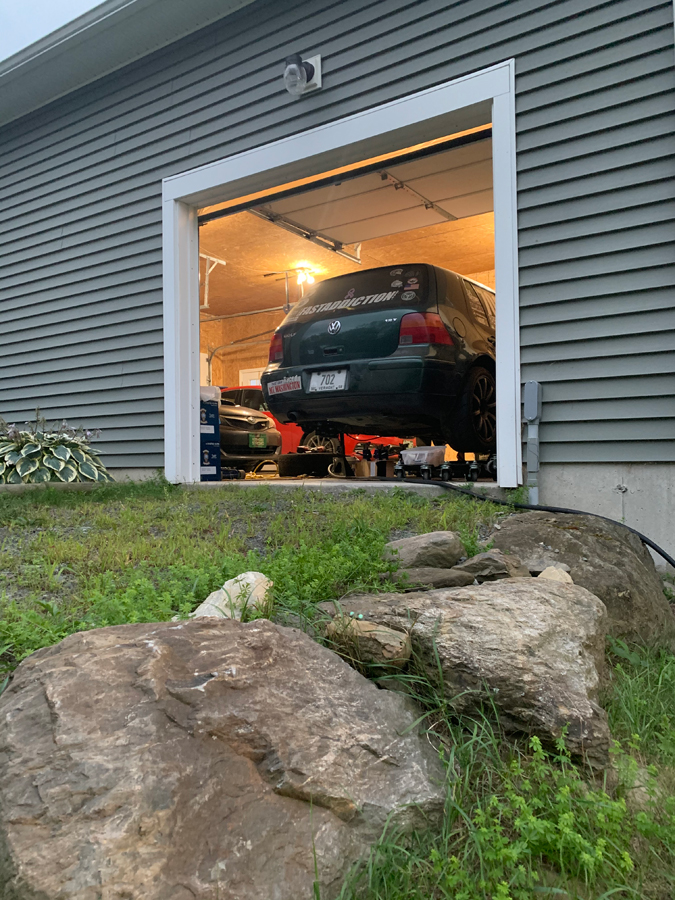
Where this dramatic story left off, the German mistress gained a new suspension and is still, to this day, sitting on jackstands.


And includes a love story. (well, a very “strong like” at the very least.. save the love for family, friends, and small animals)


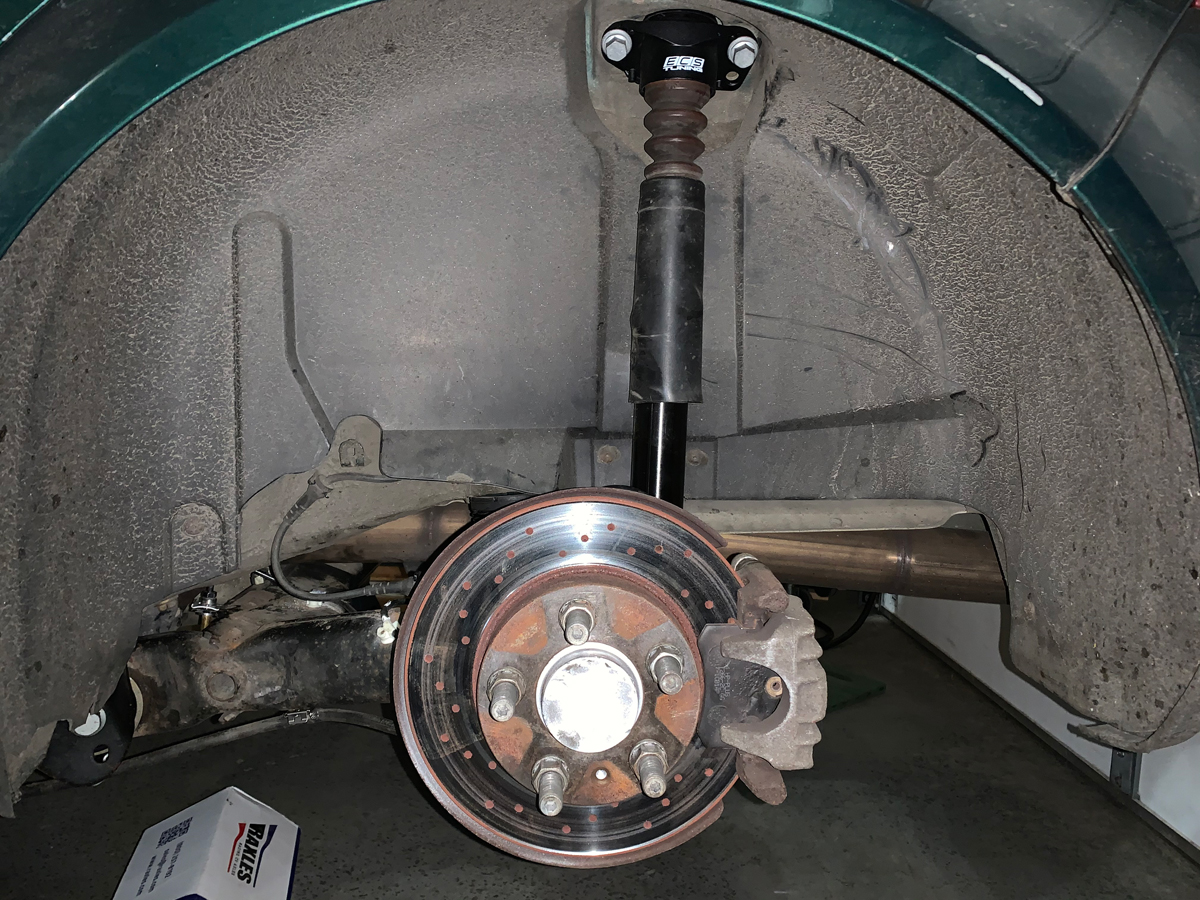
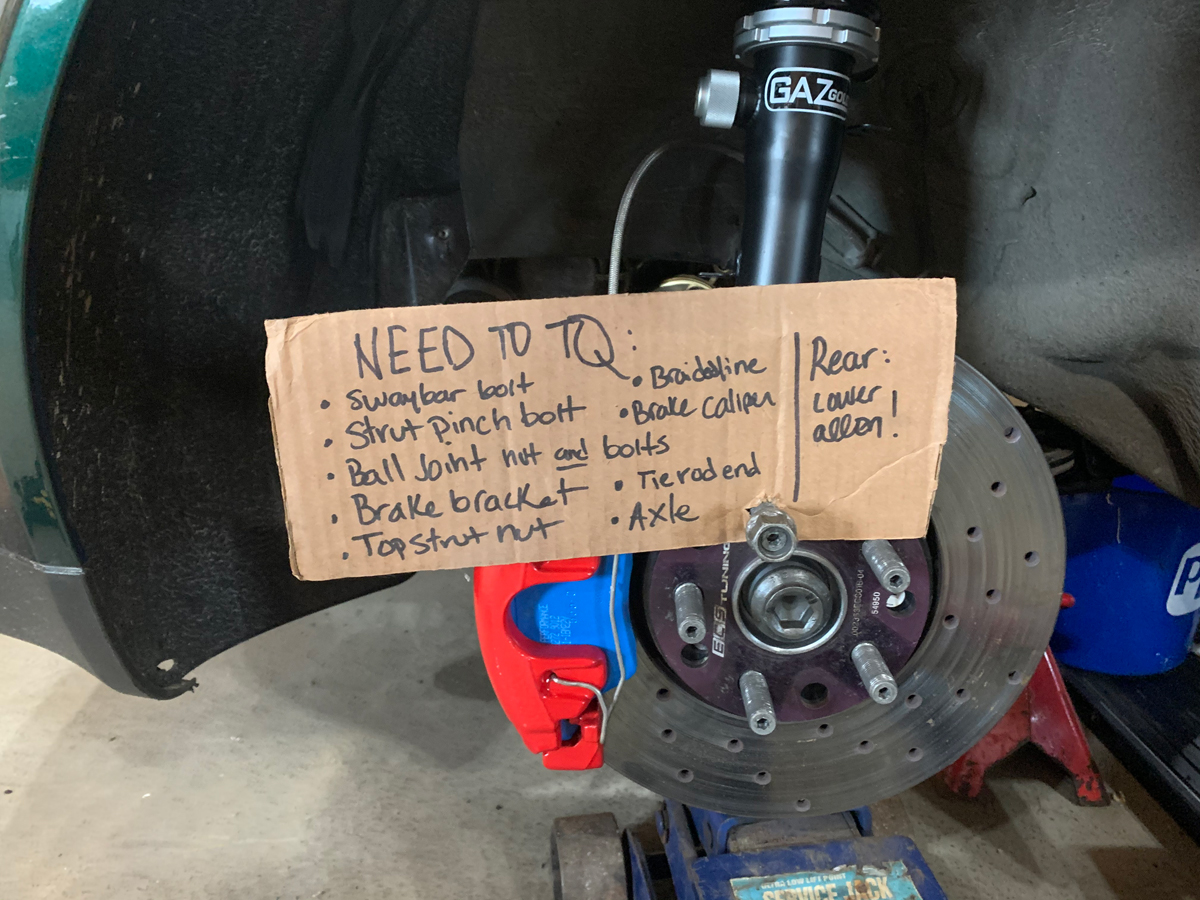
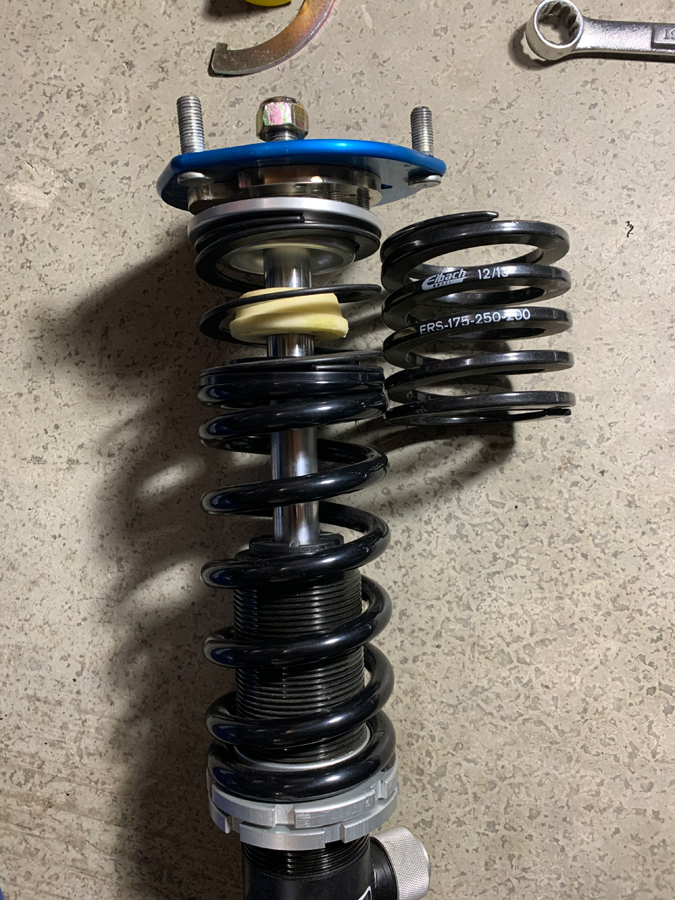
All the nuts and bolts on the suspension were torqued and pretty much ready to hit the ground to finally stand on its new suspension.  I will have a lot of adjustments to make at that point… ride height, setting on the struts/shocks, and perhaps some corner weighting (maybe).


Star date 11237.5… I mean, Chapter 1: Next in line is the leaky hybrid oil pan.  Stock for my year car is an all-aluminum pan that doesn’t play nice with objects that might be introduced at speed.  When I did some creative parking at the Mt. Washington hillclimb in 2017, I managed to get a hairline crack in the pan.


I replaced it with the hybrid oil pan that is an aluminum base with a steel bottom.  This is the stock oil pan for 2004 forward on the 1.8t.


It leaked last summer, so I removed the steel bottom, cleaned it up, sealed, and reassembled.  I guess I didn’t do it good enough for leak free service in the long term.


Oh, well, off comes the hybrid pan and back on is a new aluminum pan (part # 038-103-601MA).


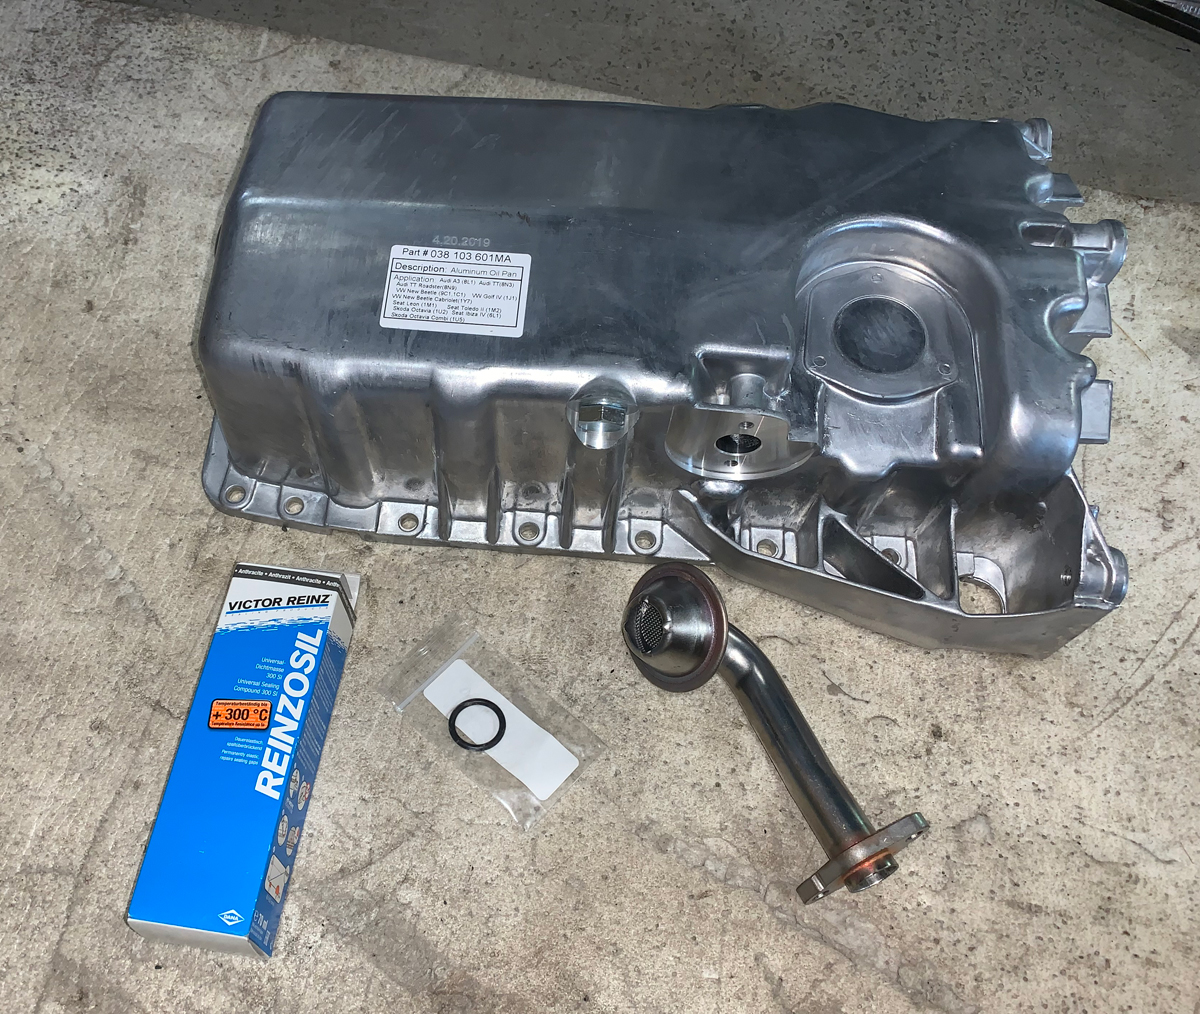
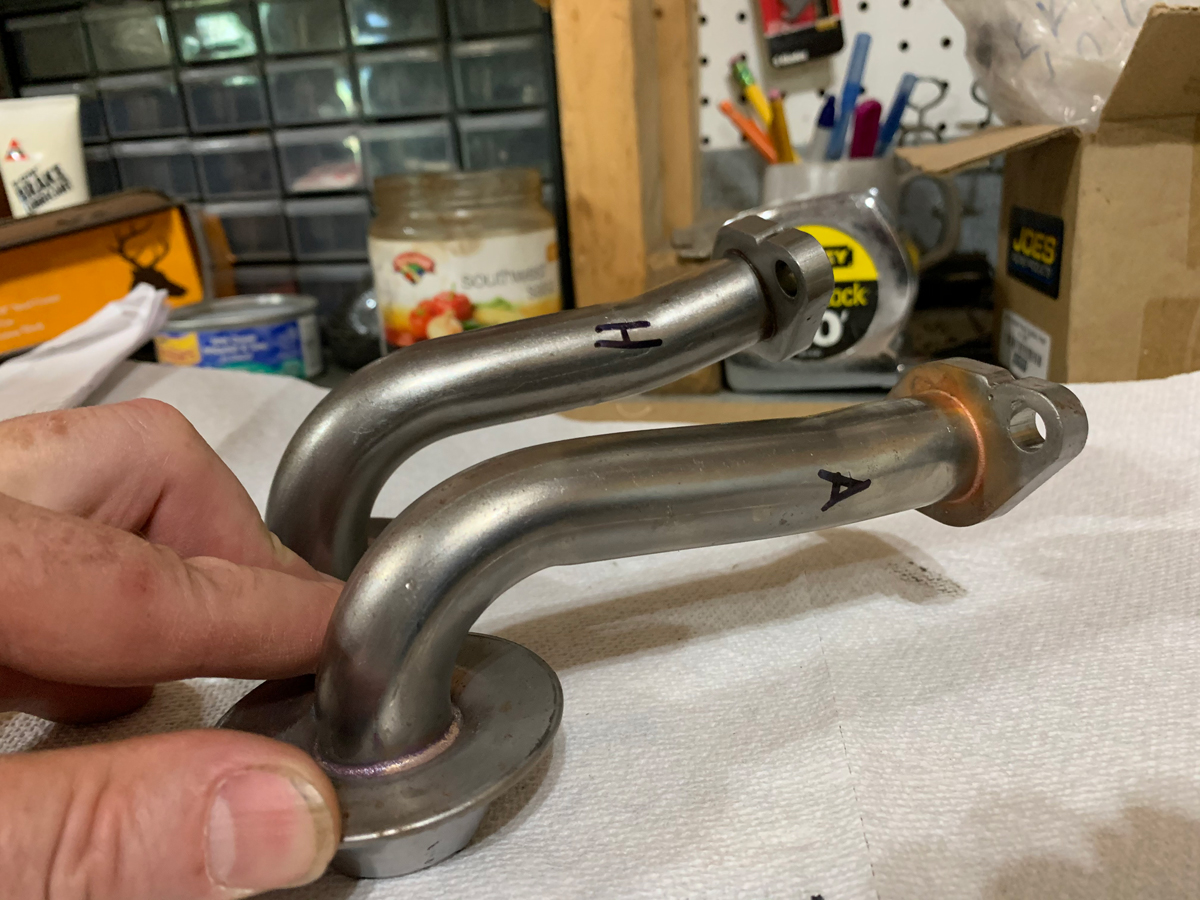
I ordered the oil pickup that goes with the aluminum pan to make sure I was using the correct one.  There is a slight difference.  “A”luminum vs “H”ybrid.  The hybrid version goes deeper into the bottom of the pan.


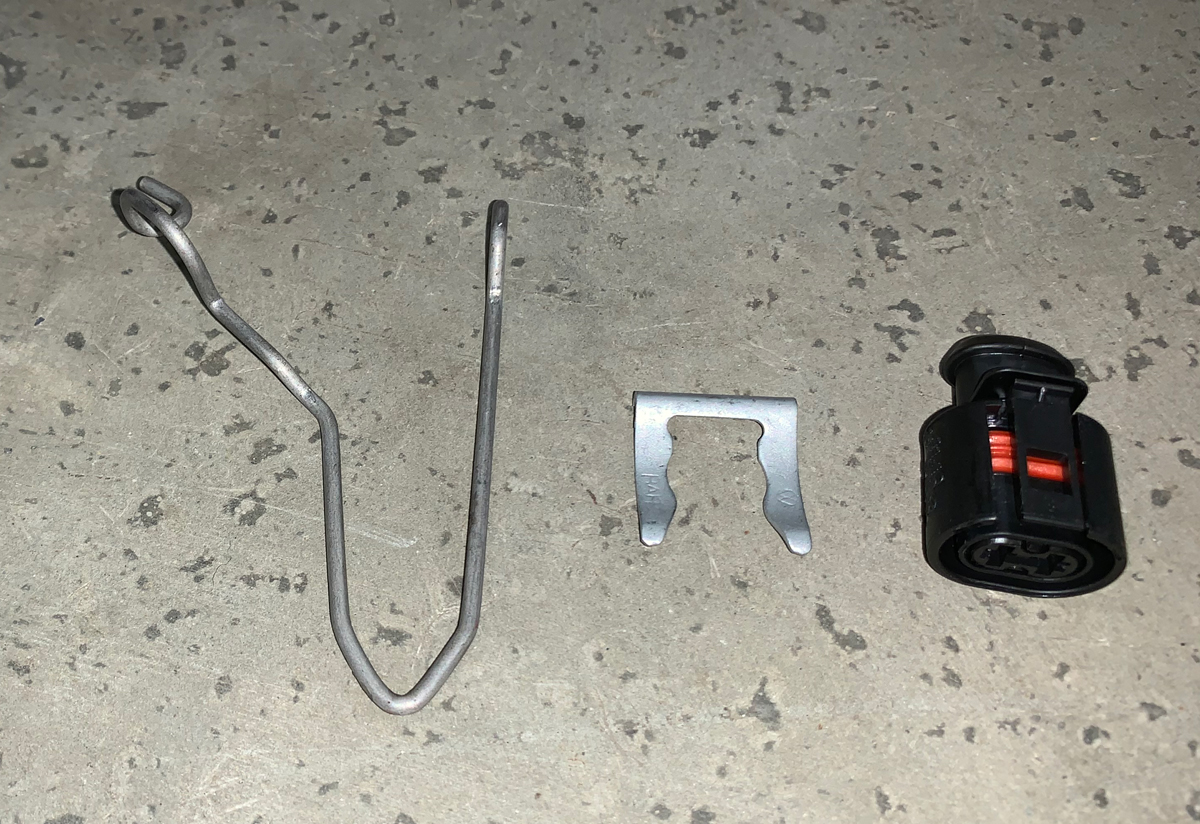
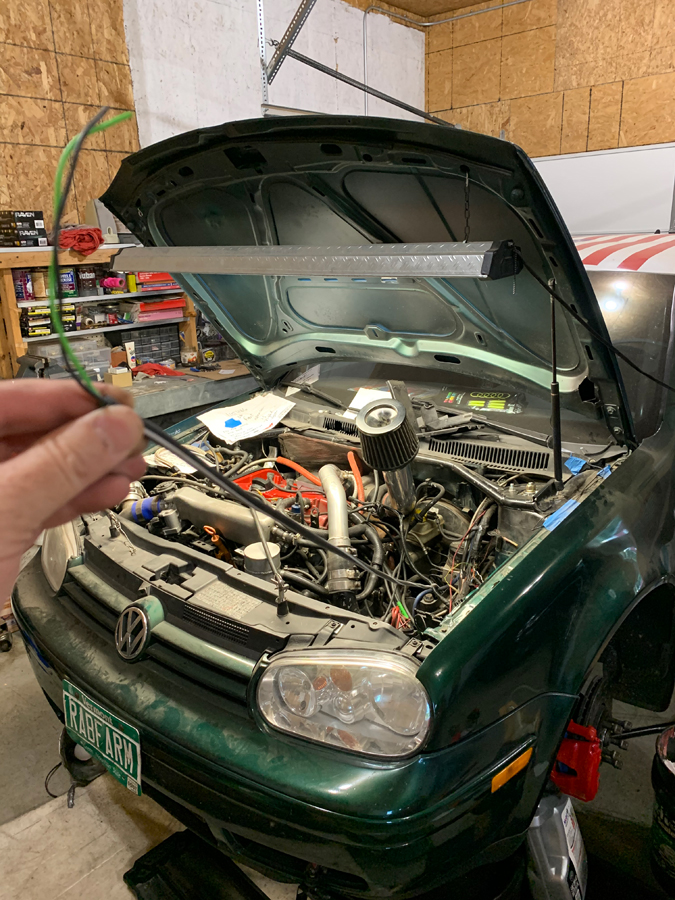
Chapter 2: Next, time to focus on the driver’s ABS wheel speed sensor wire that was damaged.  I tried to order the non-brake pad wear sensor version (what I pictured in earlier posts), but it turns out that I ordered the wire for a Passat instead of my Golf.  Opps.  FCPeuro allowed me to make the exchange even with some time passing since I ordered the part.  Nice people!


I tend to order all the parts for the various things that I will do to my car well in advance to when I actually need them. 


The non-brake pad wear sensor version is just the passenger side wire, therefore, it is quite a bit longer.  The outside coating is very hard to slice to expose the wires to attach the terminals.


I ordered the proper terminal crimping tool (does the terminal and weather seal).


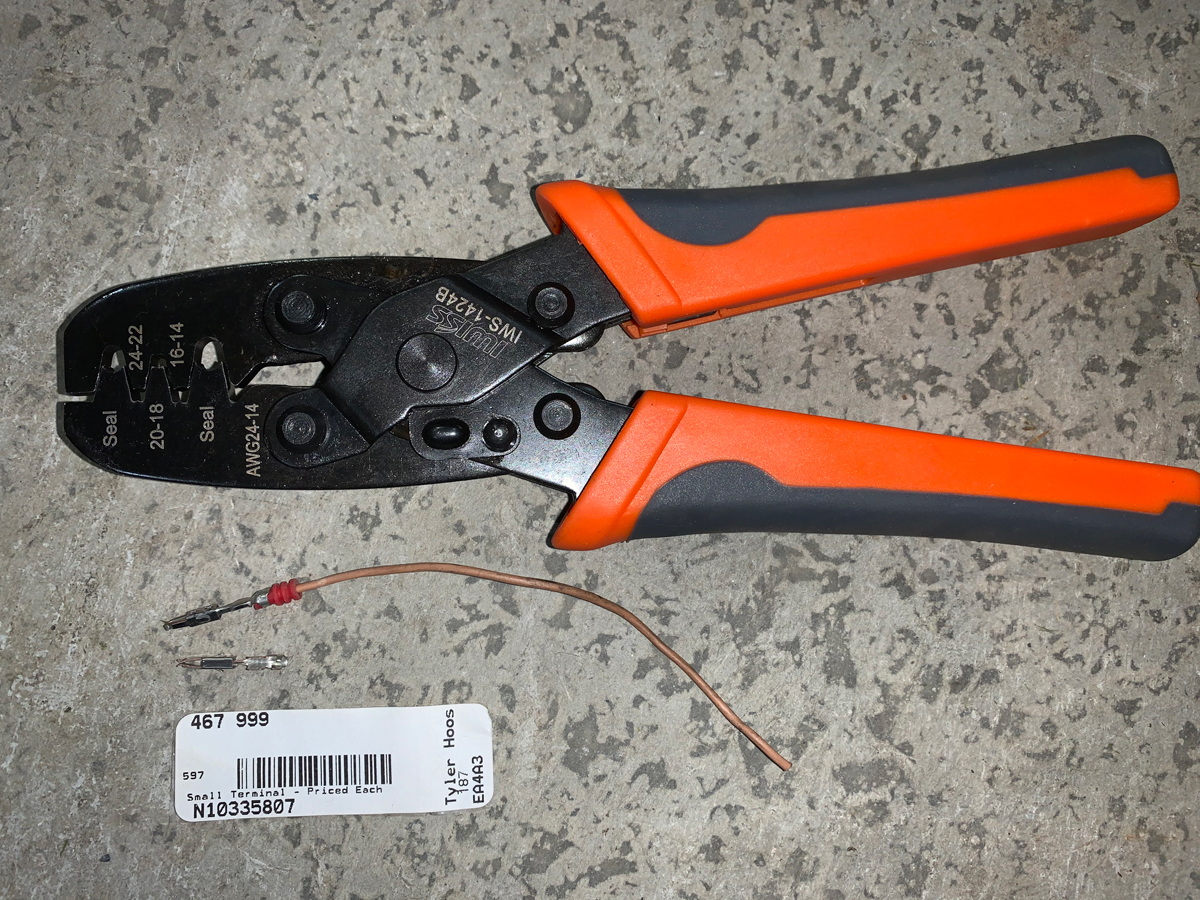
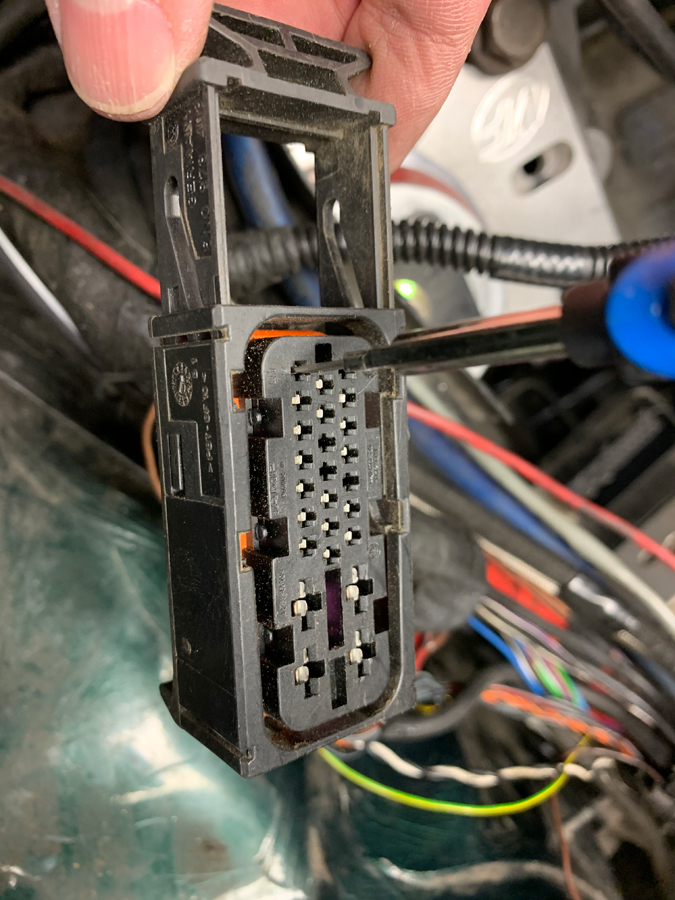
Removed the two terminals from the plug, installed the two new wires, connected the brake pad wear sensor wires together (from the ABS module to the ECU to complete the circuit).


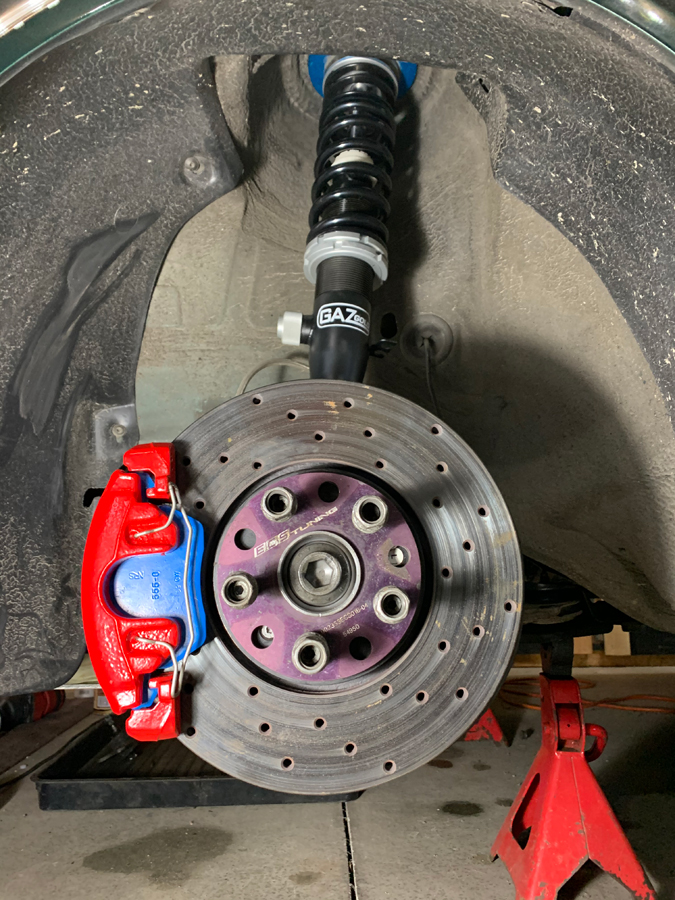
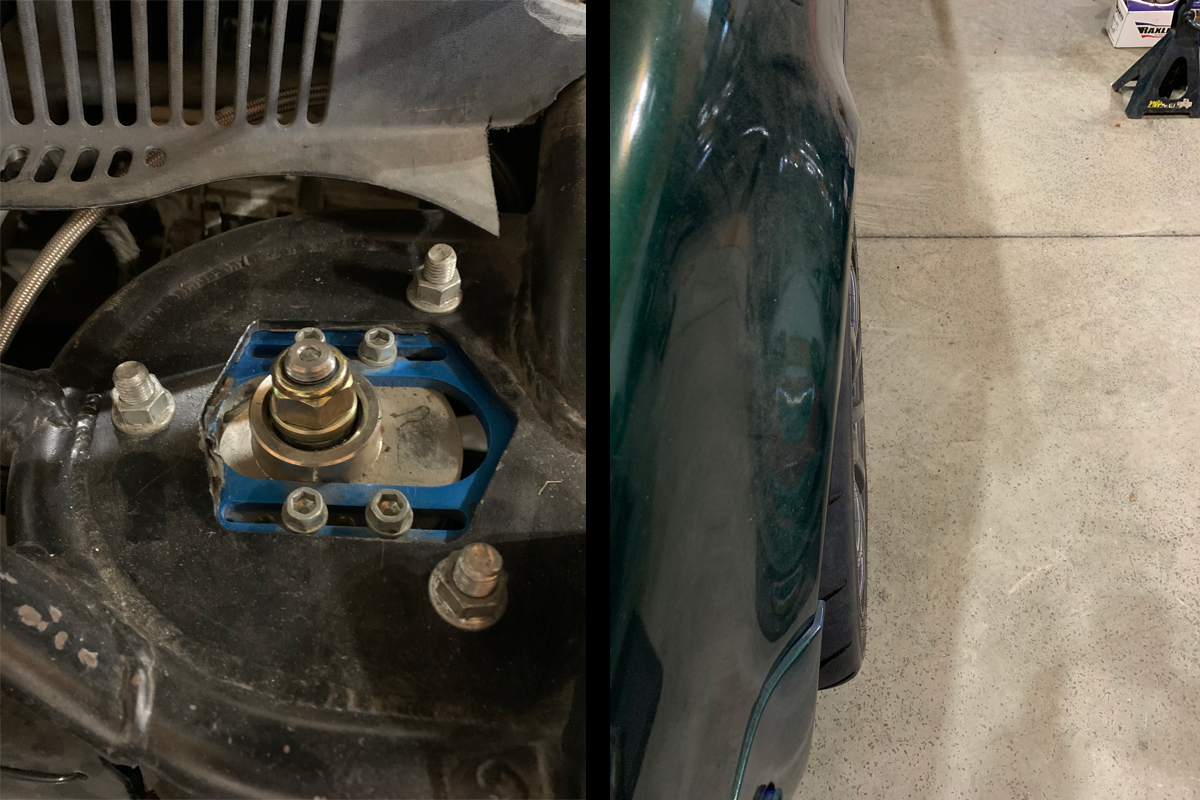
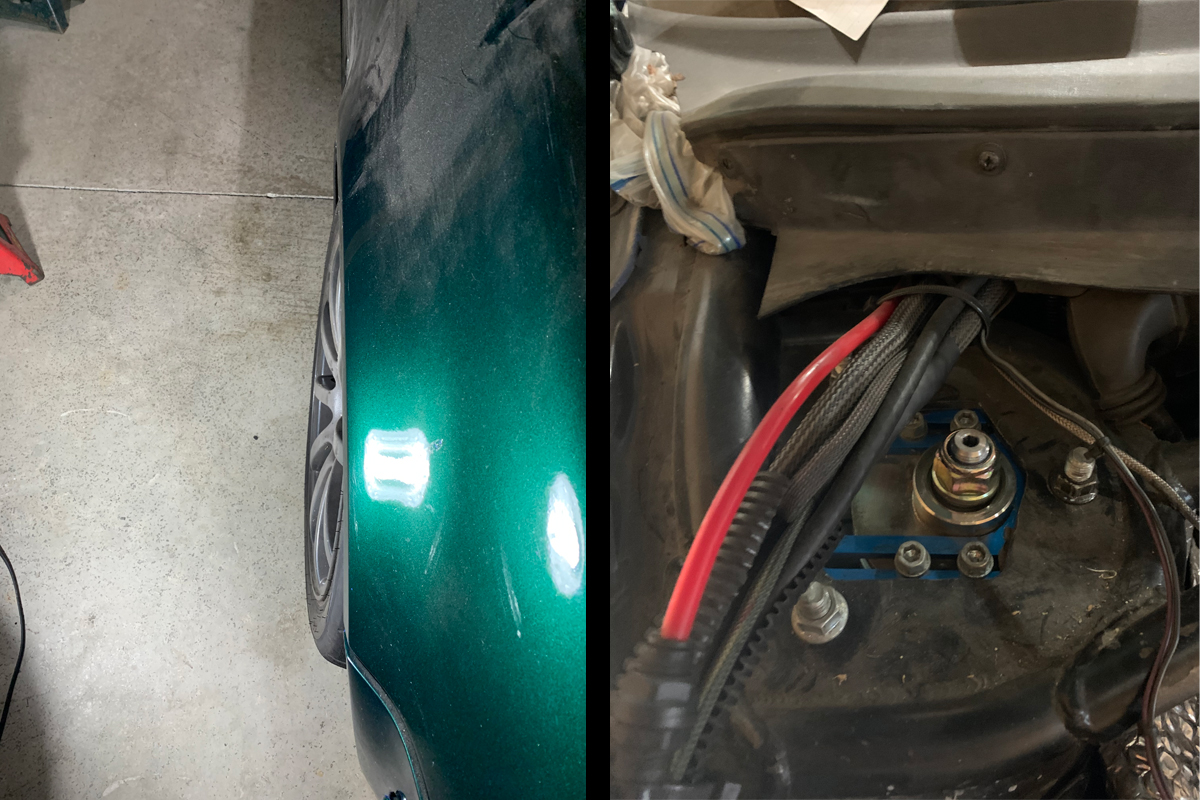
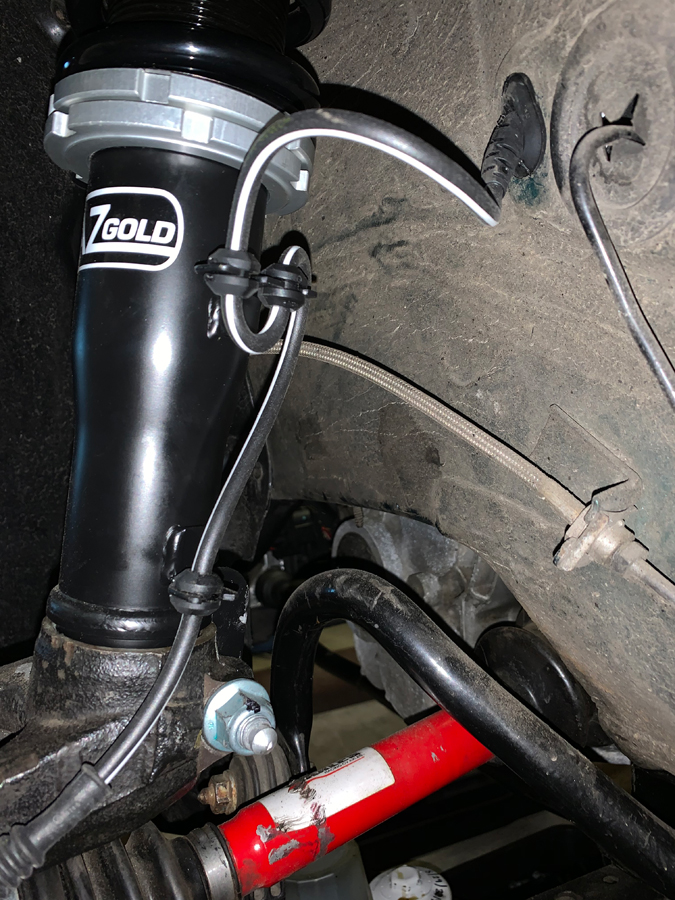
I ran the wire a little different than stock.  From the wheel, I went to the back holder on the strut, then the front, and through the fender.  I am hoping that doing it this way will keep the wire away from the rim (how the wire was damaged in the first place).


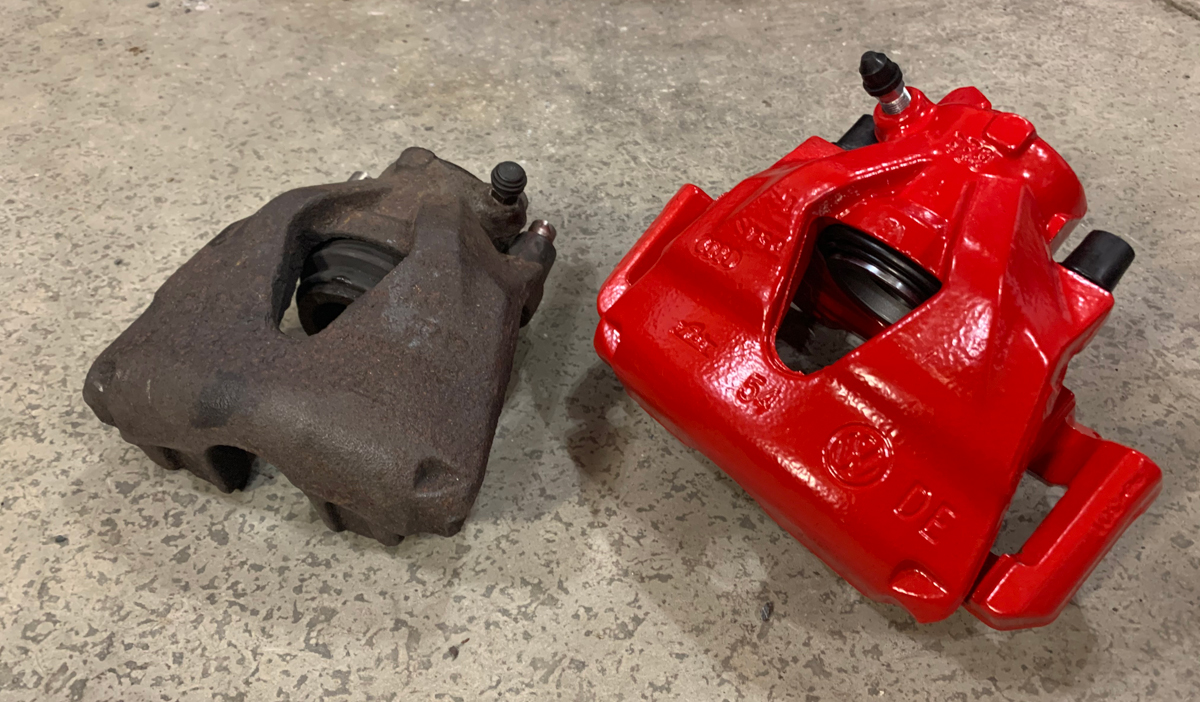
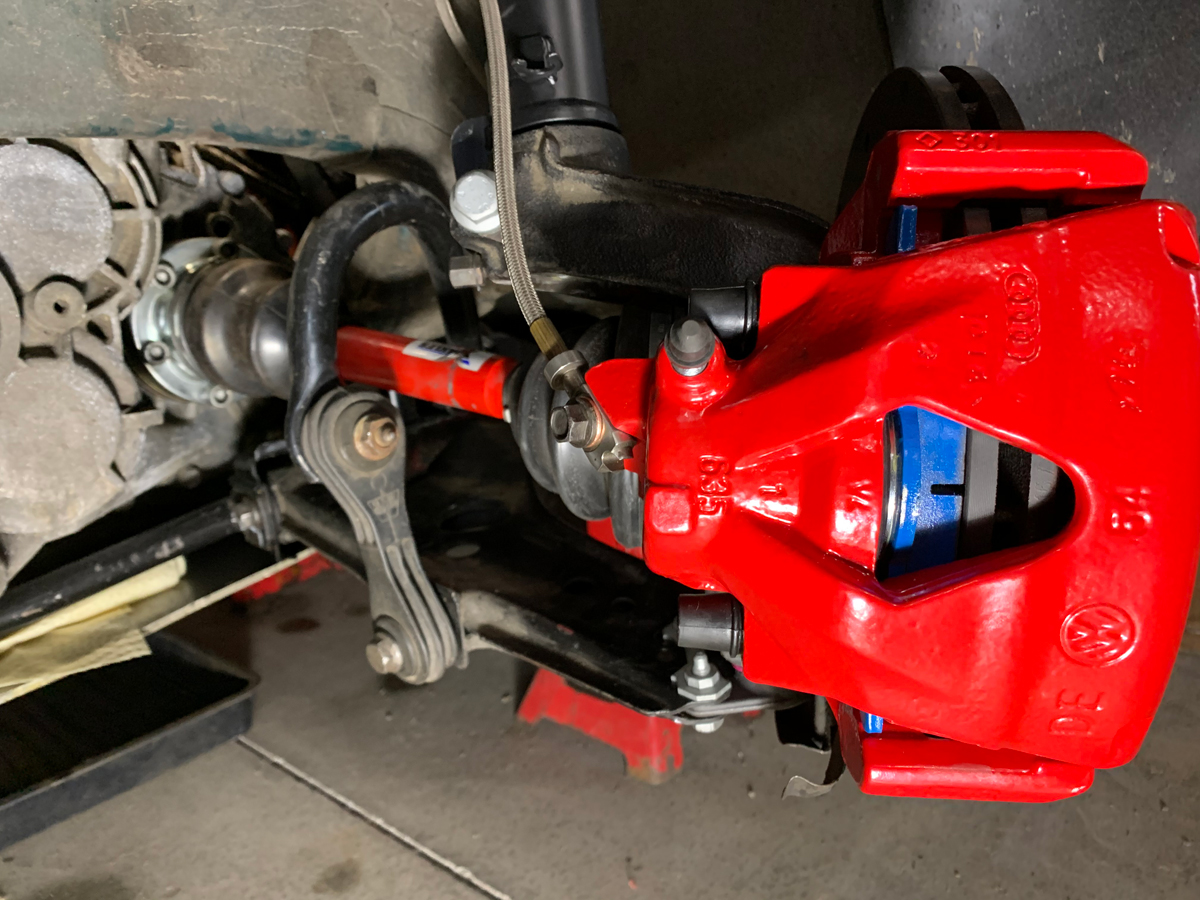
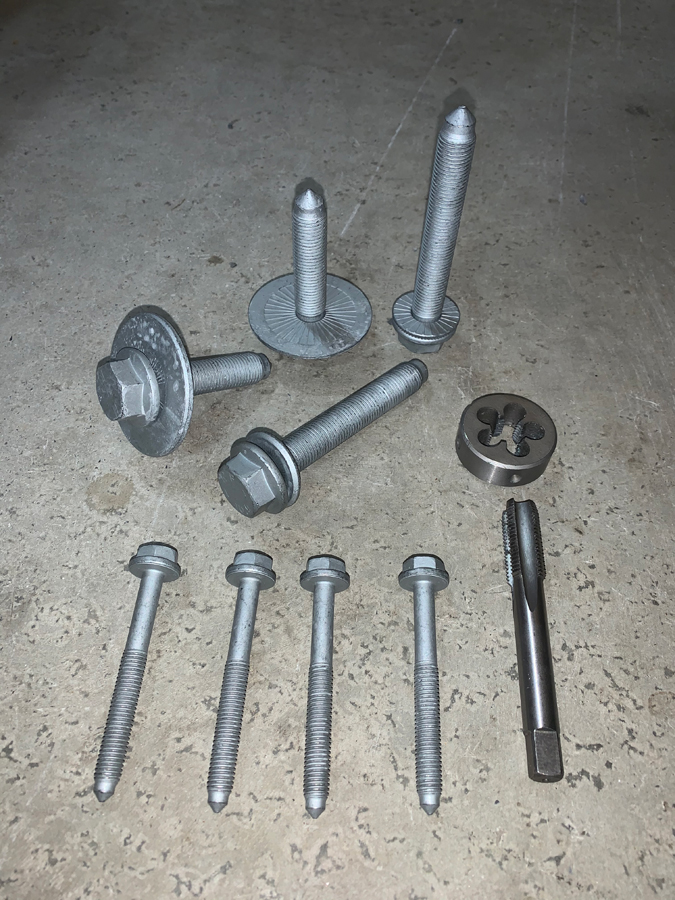
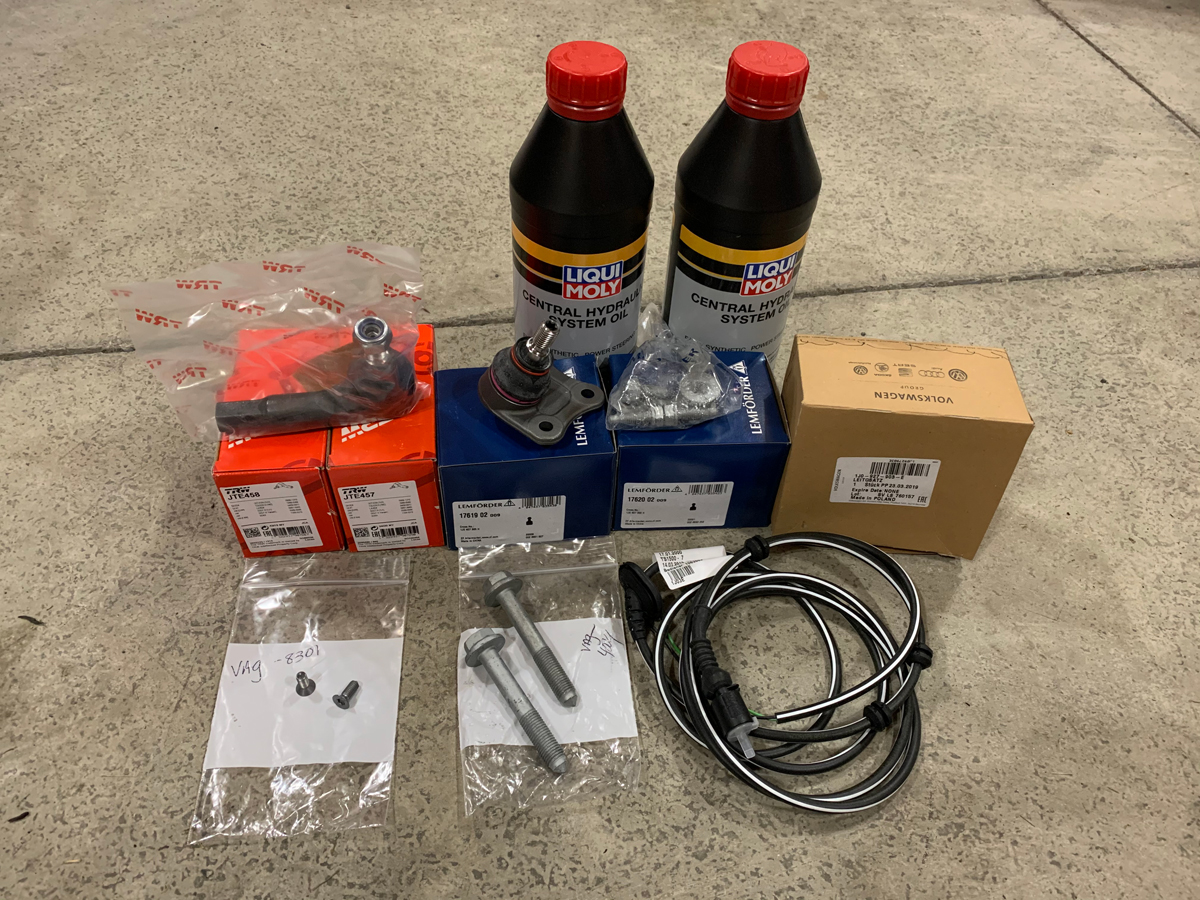
The order from FCPeuro included the ABS wire, front control arm bolts, rear brake disc retention screws (torx heads), two ball joints and outer tie rod ends (I always have an extra two in the trailer when racing), along with two bottles of power steering fluid… that will be part of the major pain in the buttocks story in Chapter 3.


Advantage of cooler weather later in the season… side door open instead of running the AC.


Chapter 3: Uggggggghhhhh!  I hate working backwards.  I had to address a leaky power steering rack.  The rack came from the 20AE when I rebuilt the frontend of the Golf after an incident in 2010.  I used the transmission, engine, PS rack, etc. etc. from the donor 20AE.  Last time that I am going to use old parts… yeah, riiiiiggghttt.


I filled the power steering reservoir as it was completely empty, started the car, and turned the wheel back and forth.


I spent a lot of time crawling under the car and taking pictures as my camera could get in a better angle to see the rack.  I thought for sure it was the new flex lines that I installed on the rack since that was the last thing that I did prior to it leaking. 


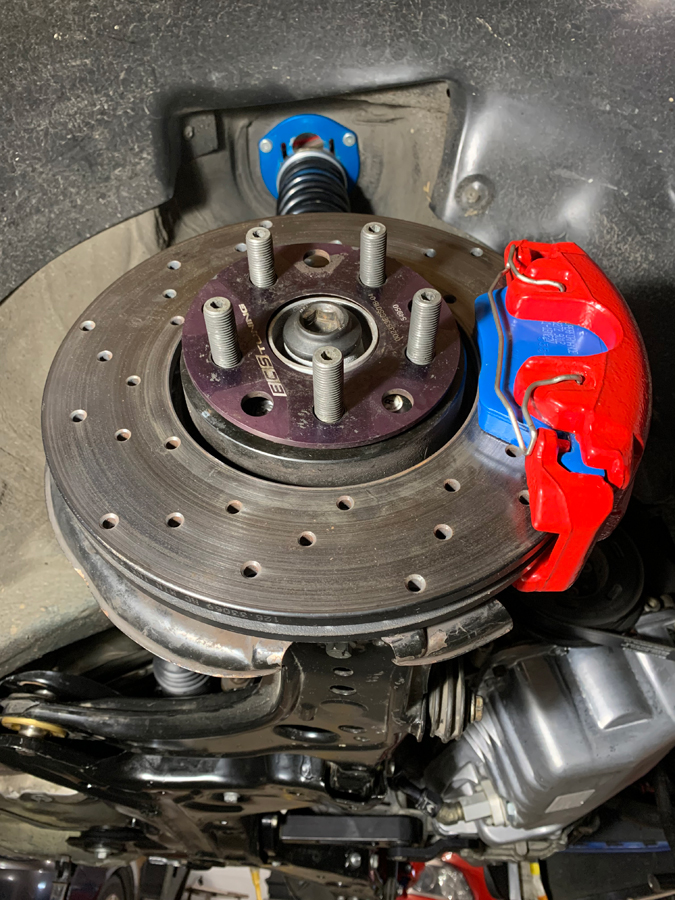
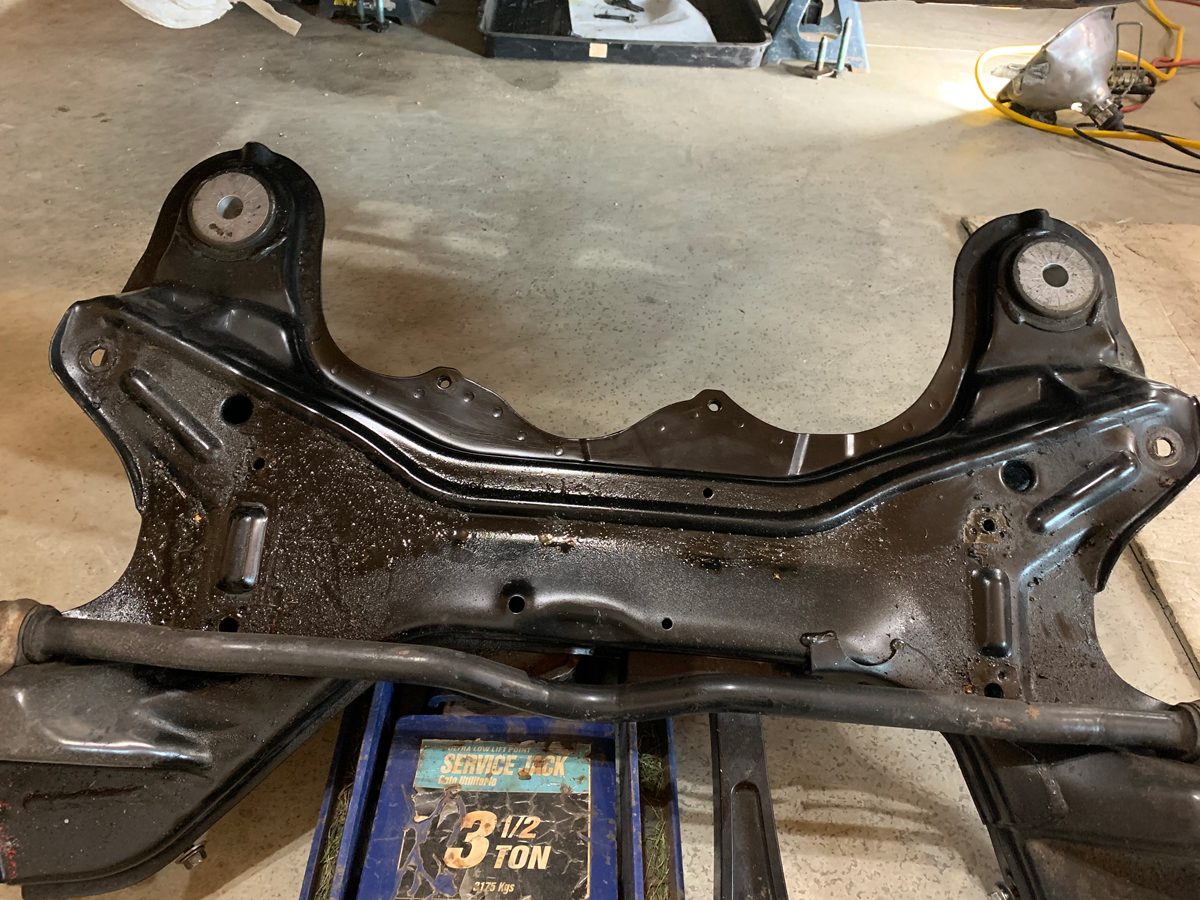
The pain in the buttocks… remember in introduction when the suspension was all tight and ready for action?


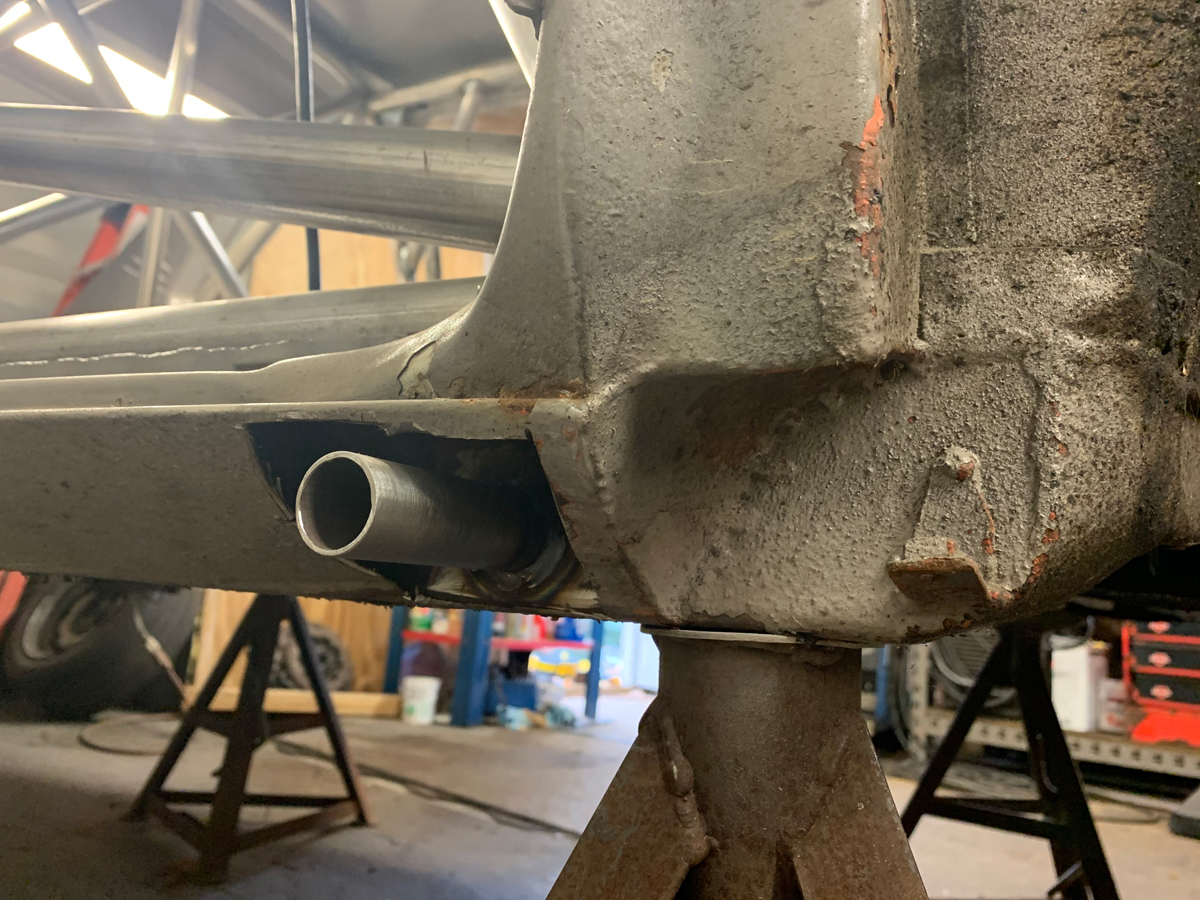
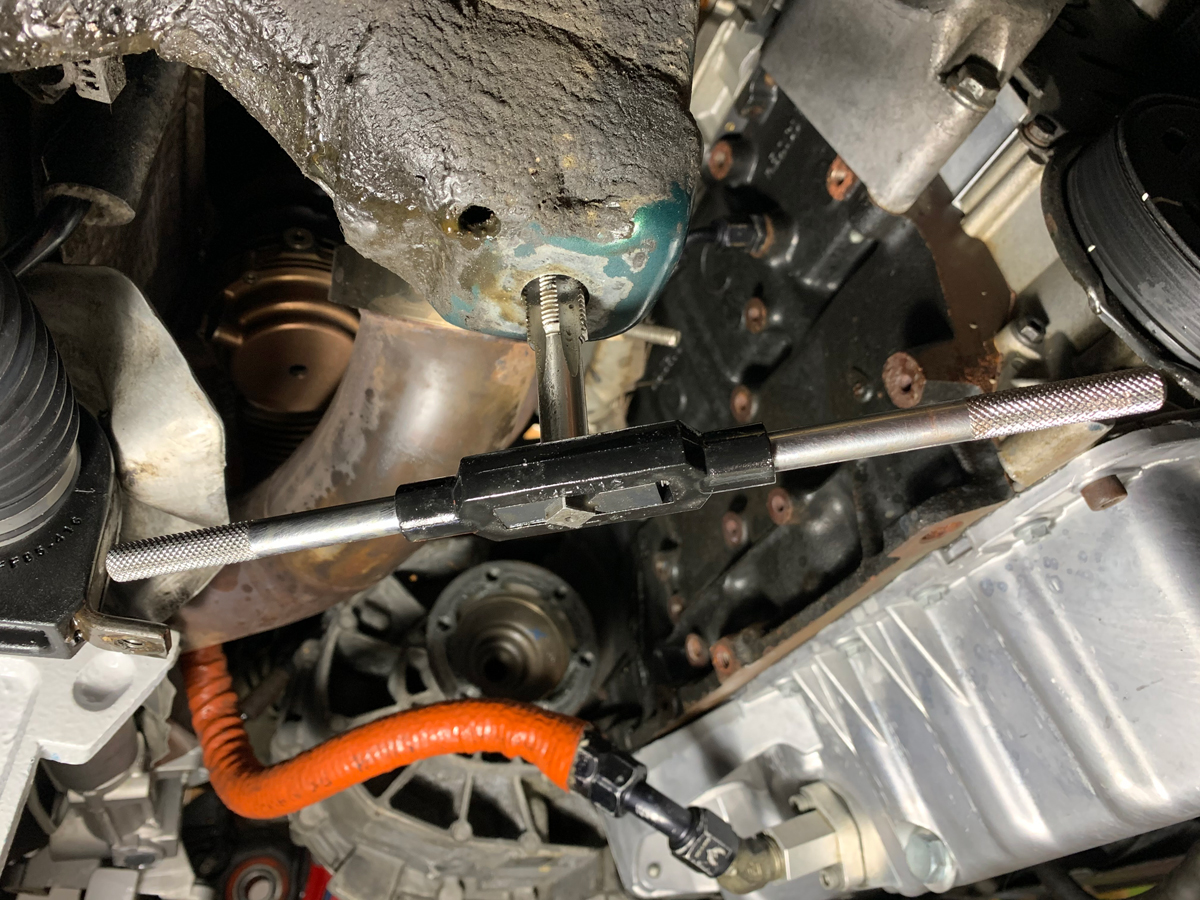
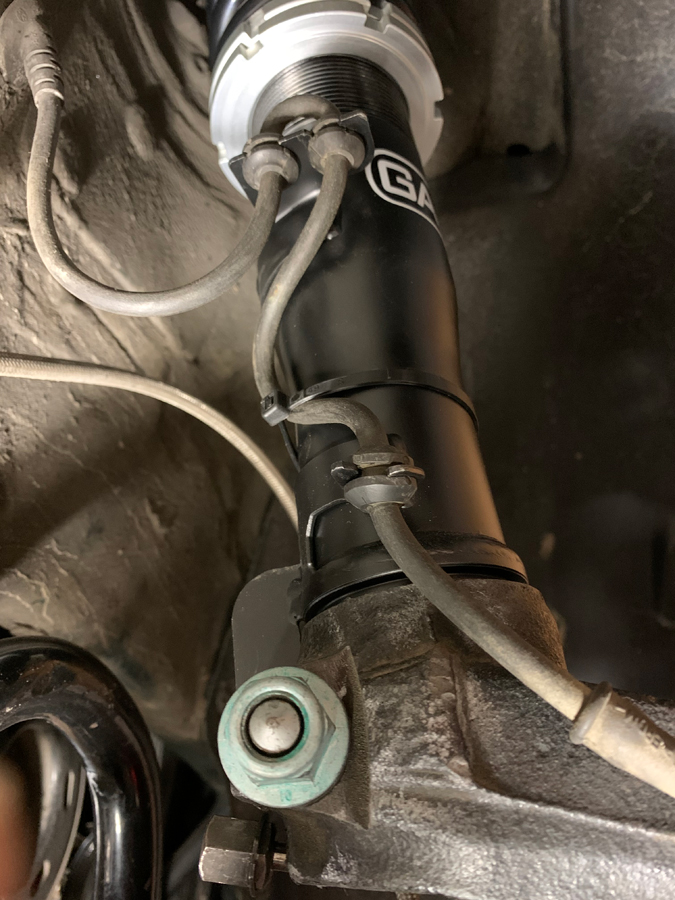
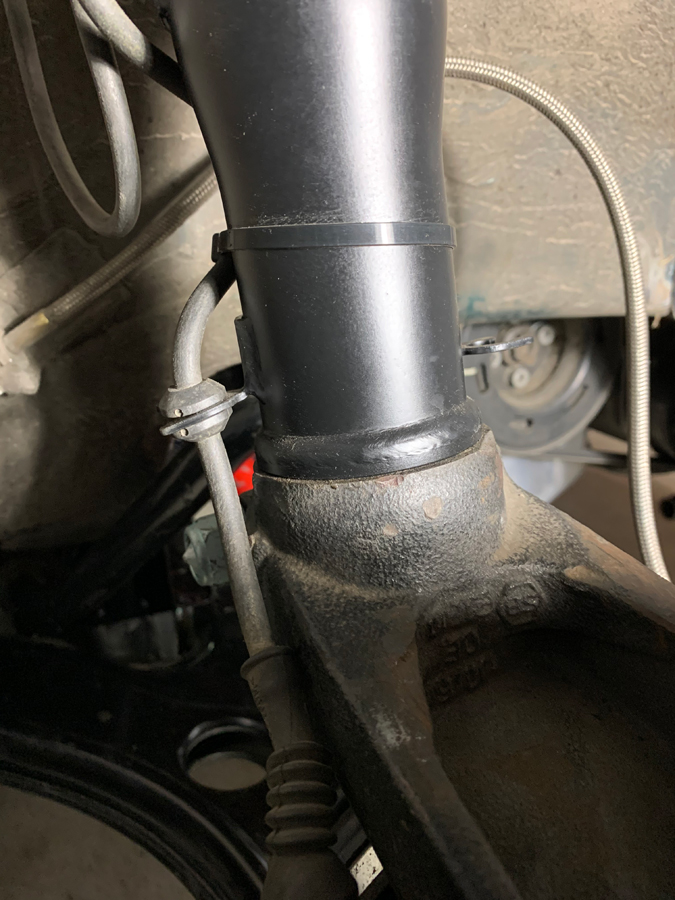
Time to backtrack and drop the subframe to access the power steering rack.  Fluid all over the top of it.


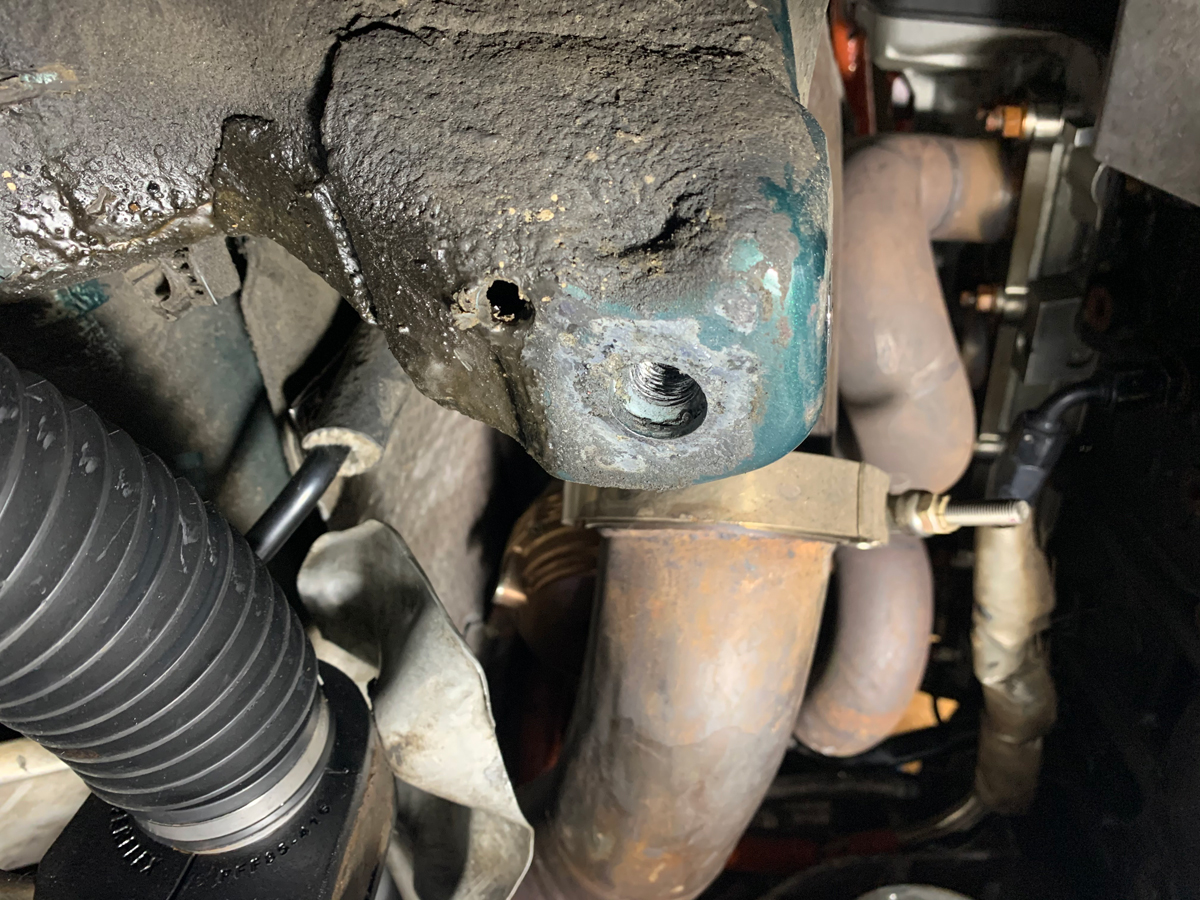
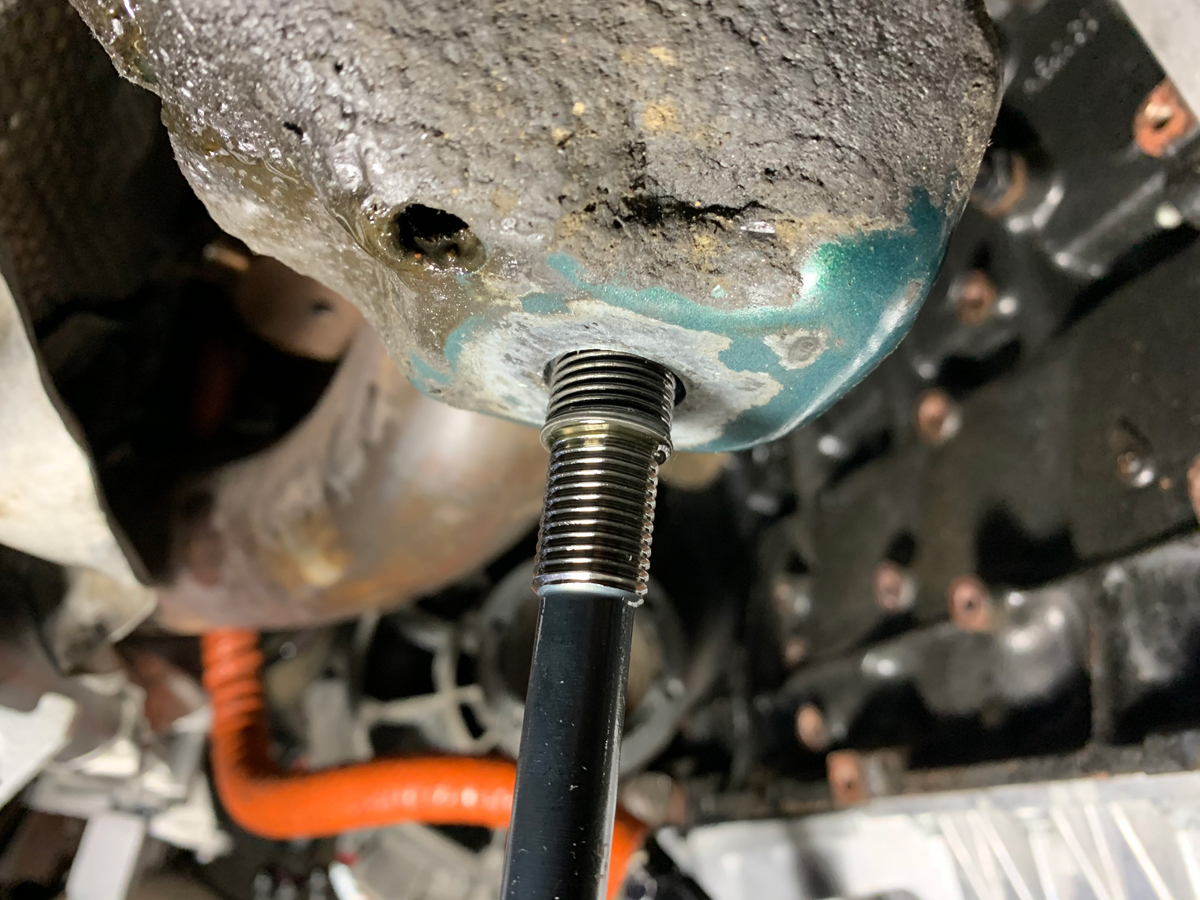
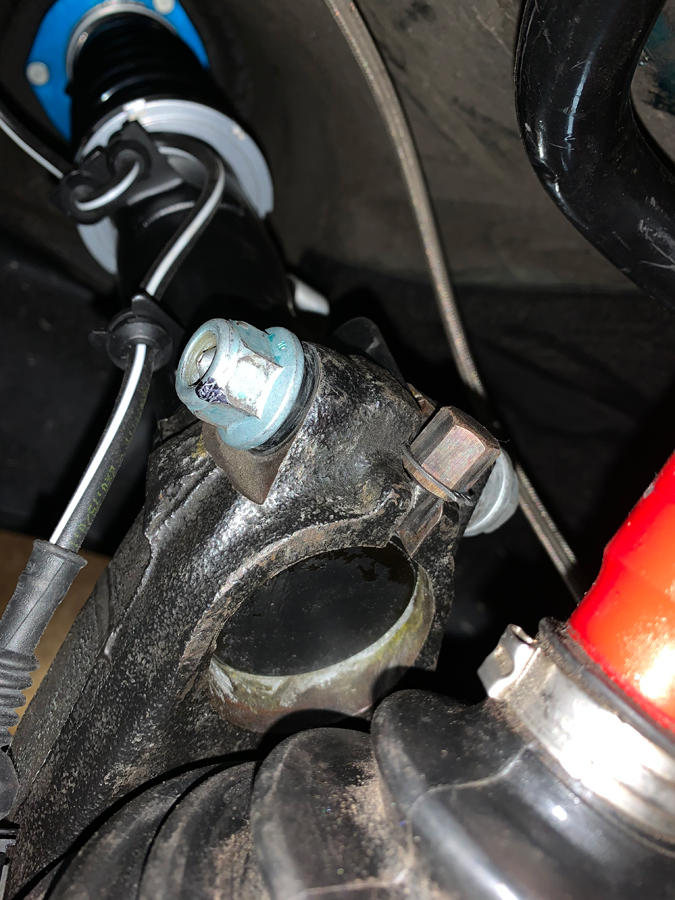
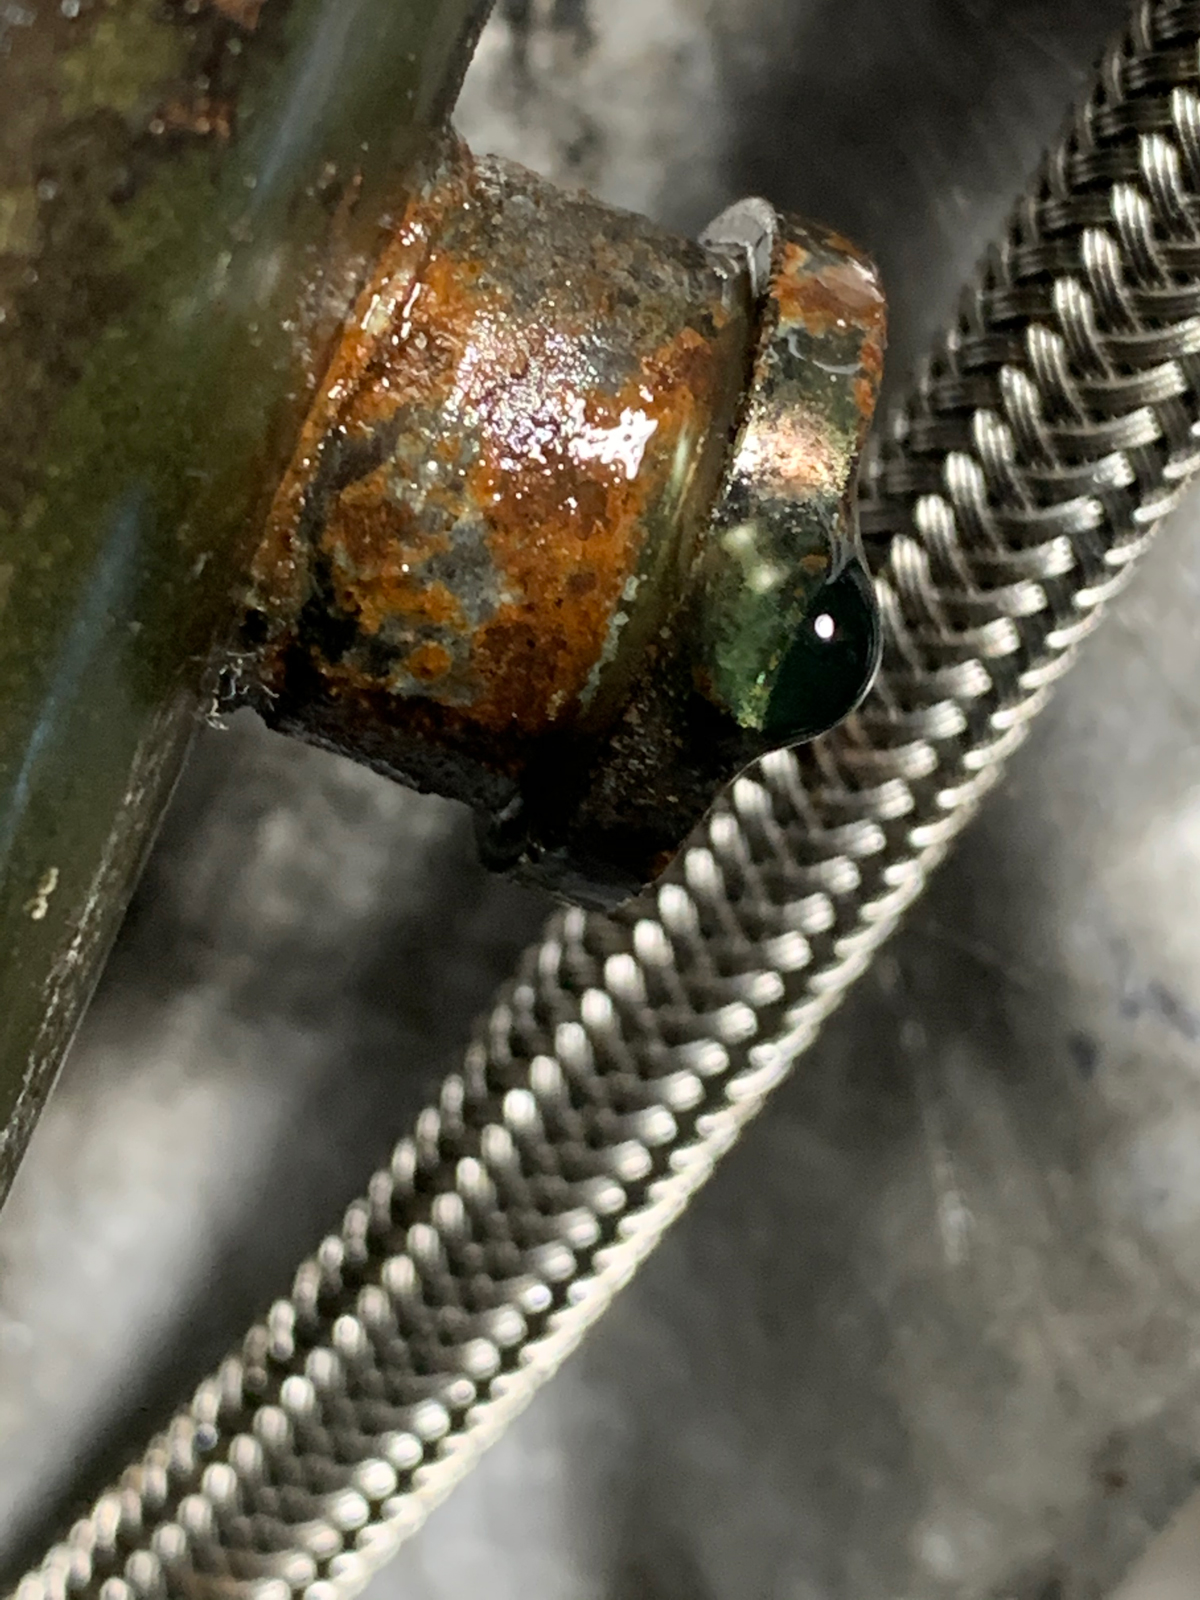
This is the source of the leak.  It is actually the nipple from the rack that is leaking, not where the hose connects to it.


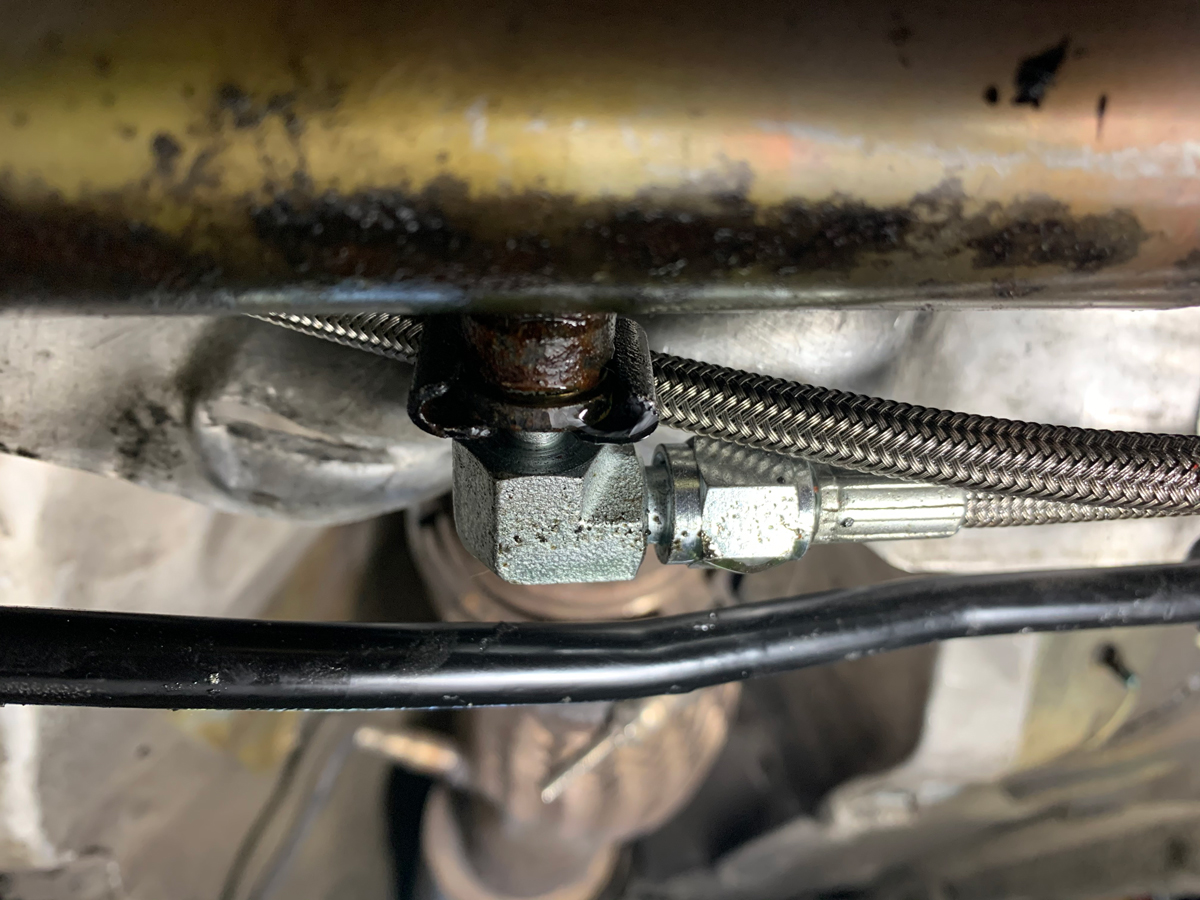
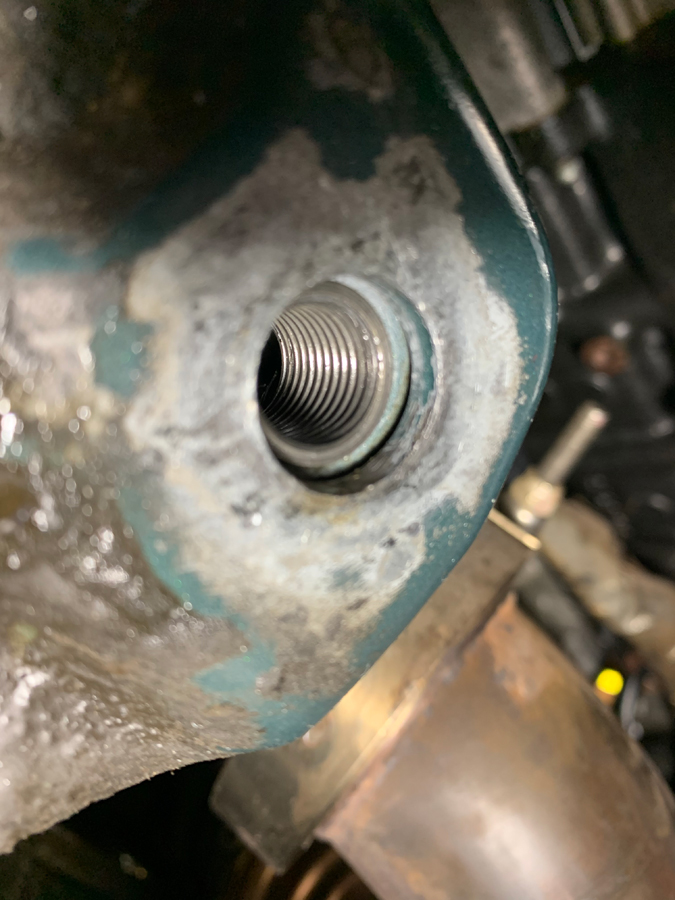
Close up.  The “drip” is because I removed the line, but look at the metal on the rack.  The source of the leak.


I ordered a remanufactured Bosch rack from FCPeuro… my favorite go to for our Volkswagen and Volvo parts… wish they also had Subaru parts.  I figured that someone mentioned that she could see Russia from Alaska, so I figured Japan must also be pretty close to Europe. Nope.


…the “strong like” story…


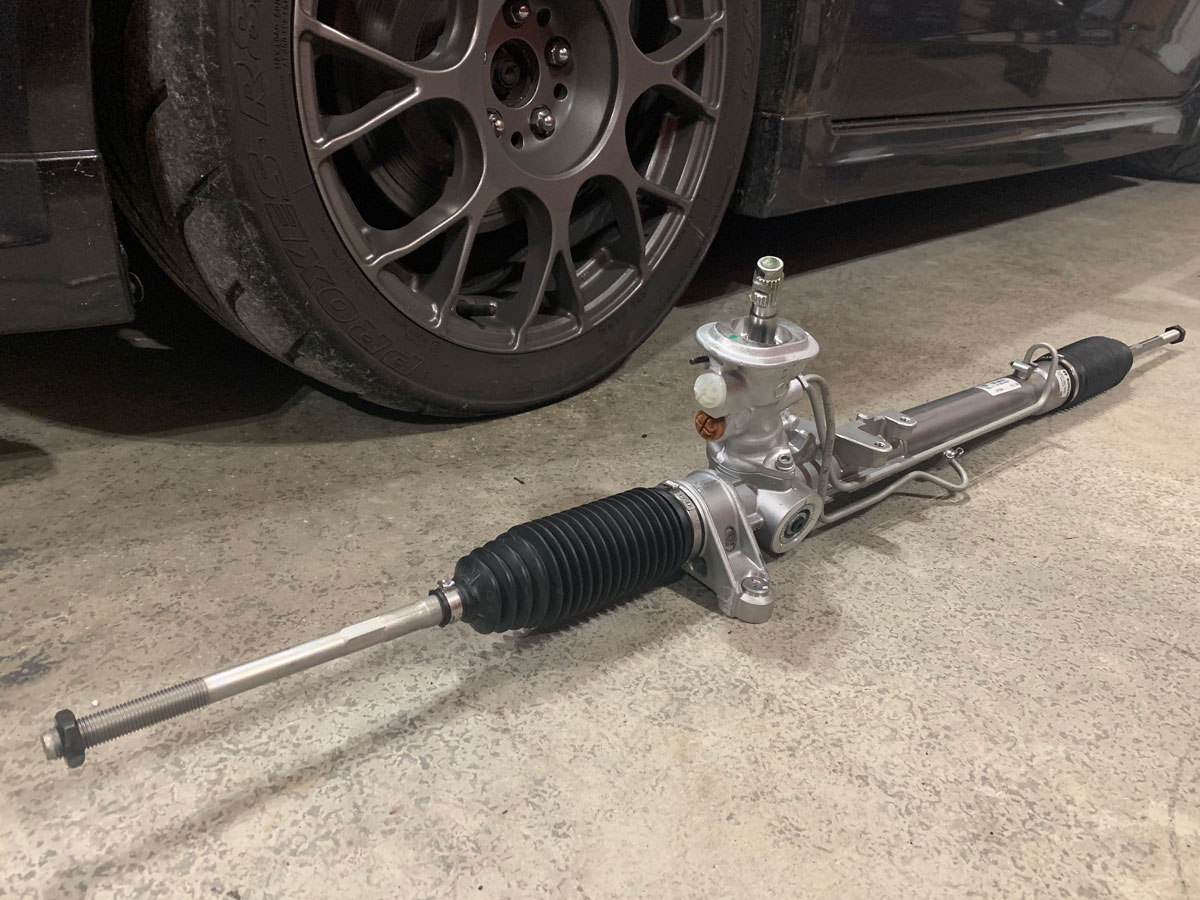
Pictured on their site when I ordered Bosch 1J1422075P was a fully loaded steering assembly.  The rack/pinion, inner tie rods, boots, etc.


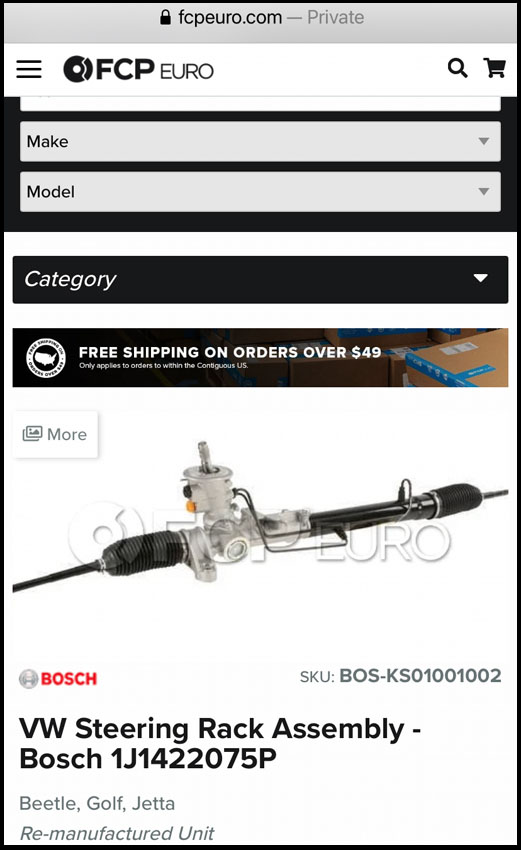
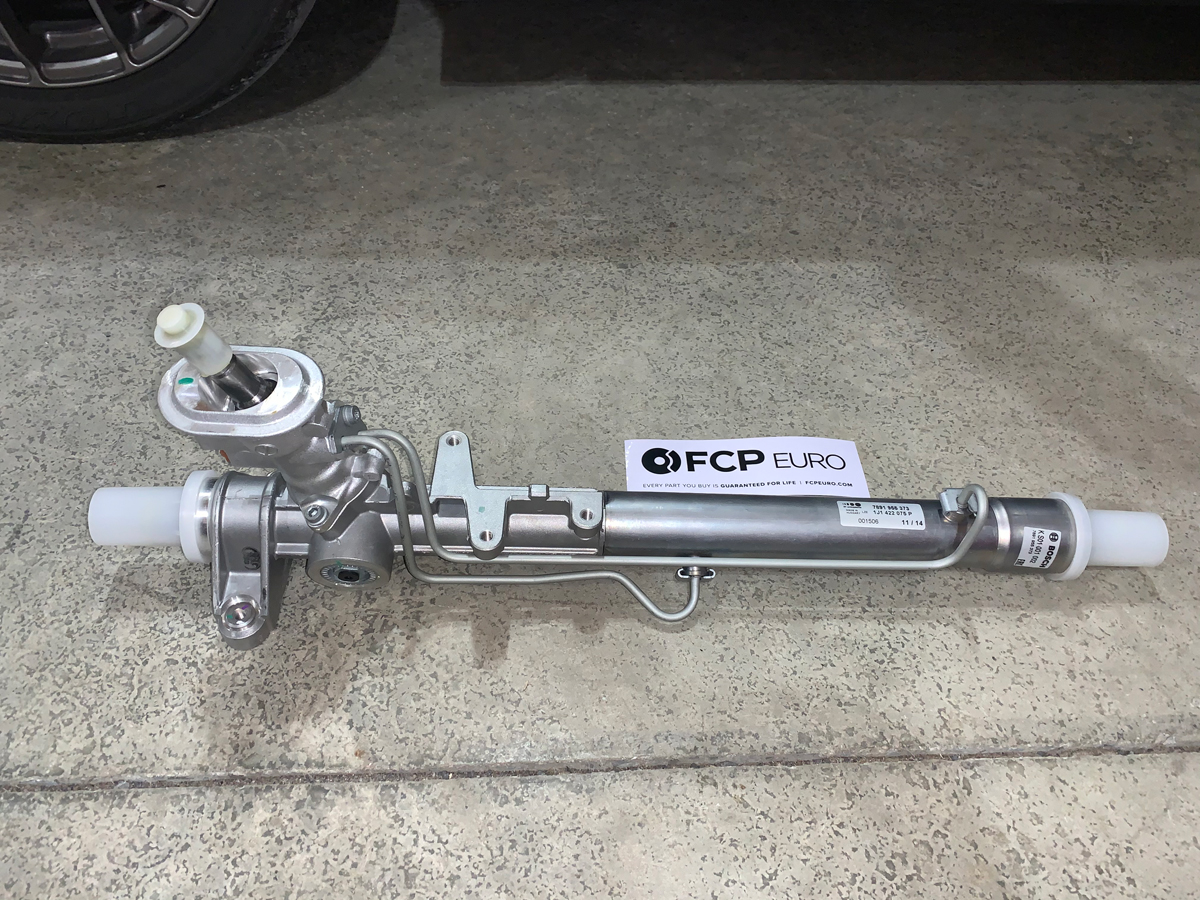
What arrived was a little different… though, a nice looking unit.


I sent them an email, had some good constructive conversations with Gus at FCPeuro, and it seems the image on their site needs to be updated and I did get what I ordered.


Okay, I asked if they had the fully assembled rack (less work for me!) and he put everything that I needed together in my cart so that I didn’t have to fish around for what I needed.  Big help.


I understand that the website images might not always be correct.  No biggy.


Let’s just say that FCPeuro did a solid and handled the whole situation very professionally and beyond my expectation.  It might be because I was so nice during this exchange (that was not supposed to be sarcasm.. I was very nice) or it is just because of their business ethics.  I have always said that people make mistakes; what they do after they are aware of the mistake is what defines them.


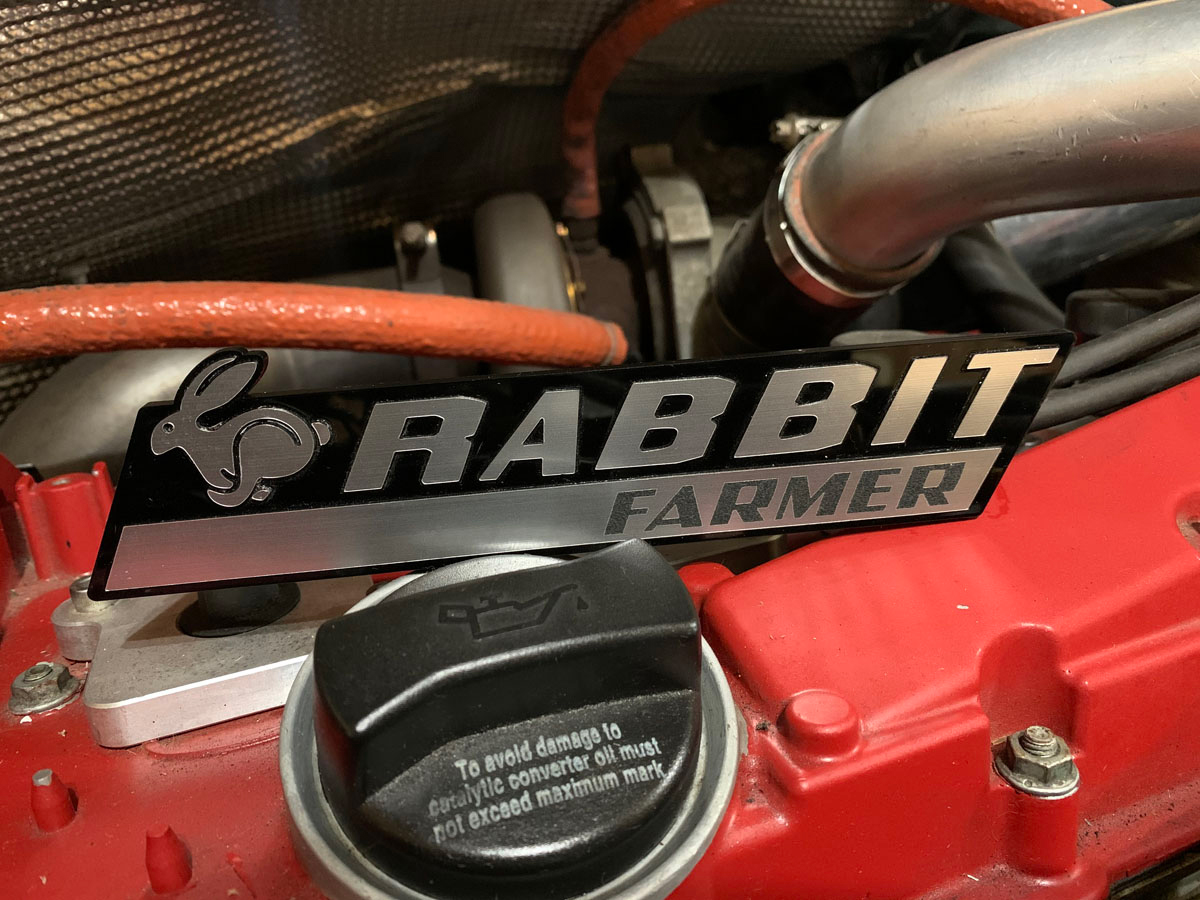
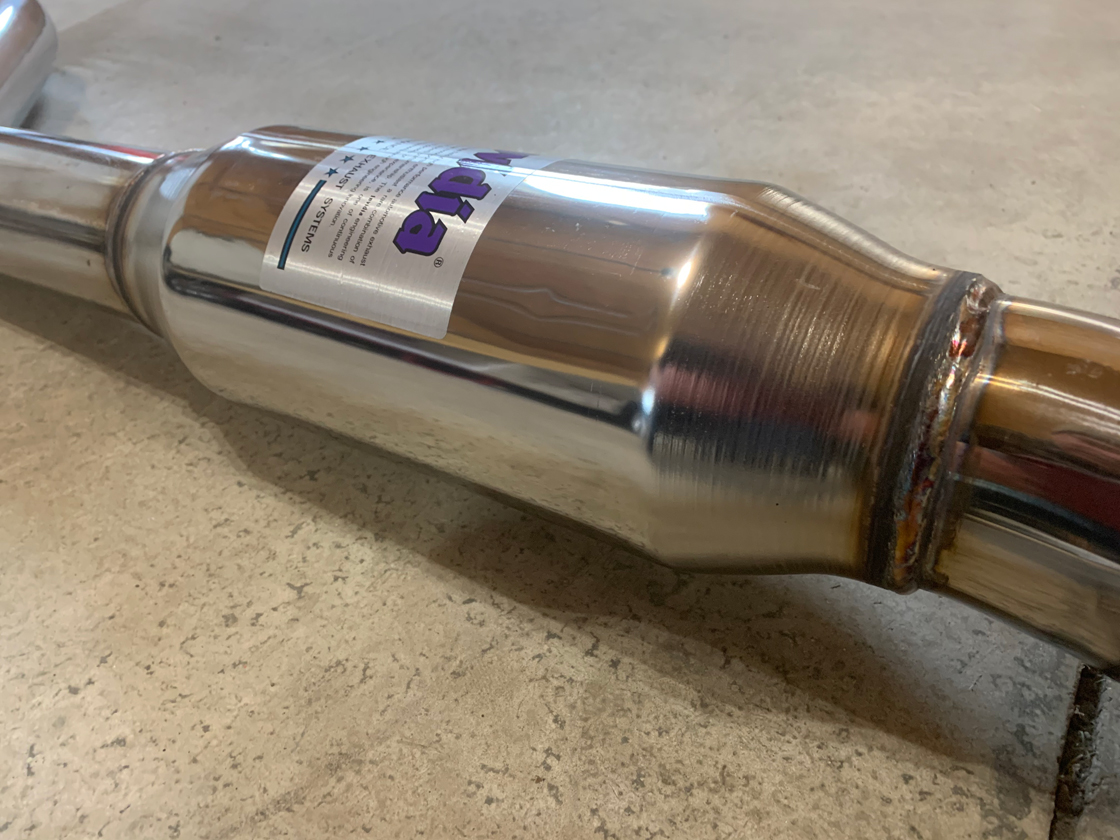
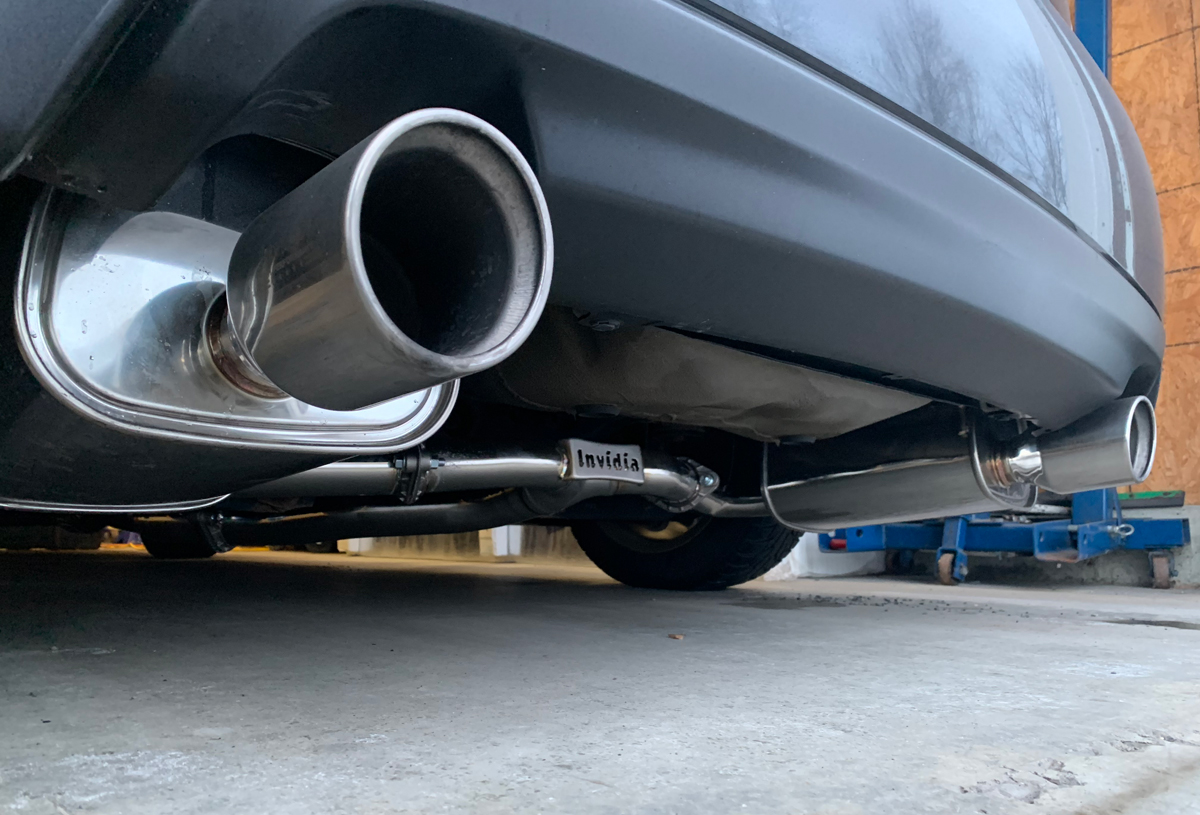
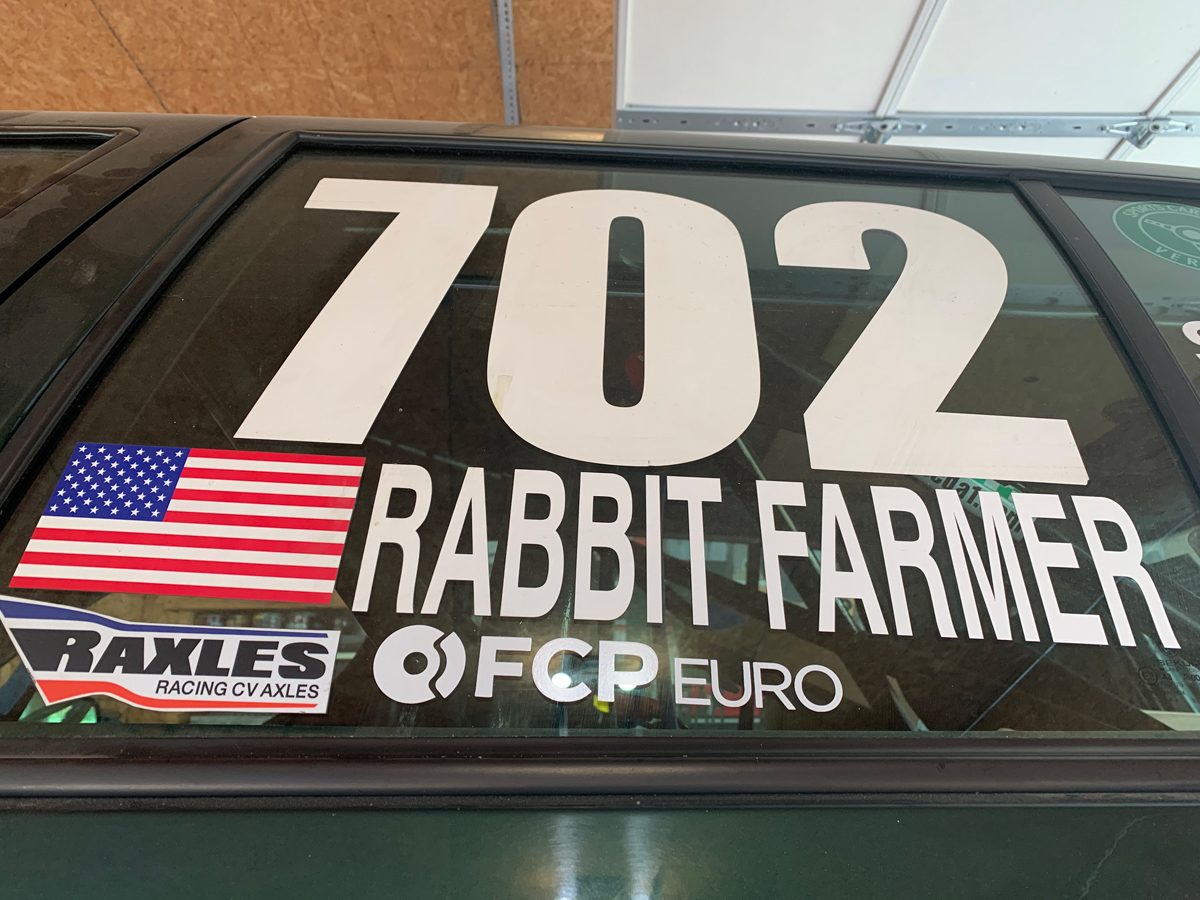
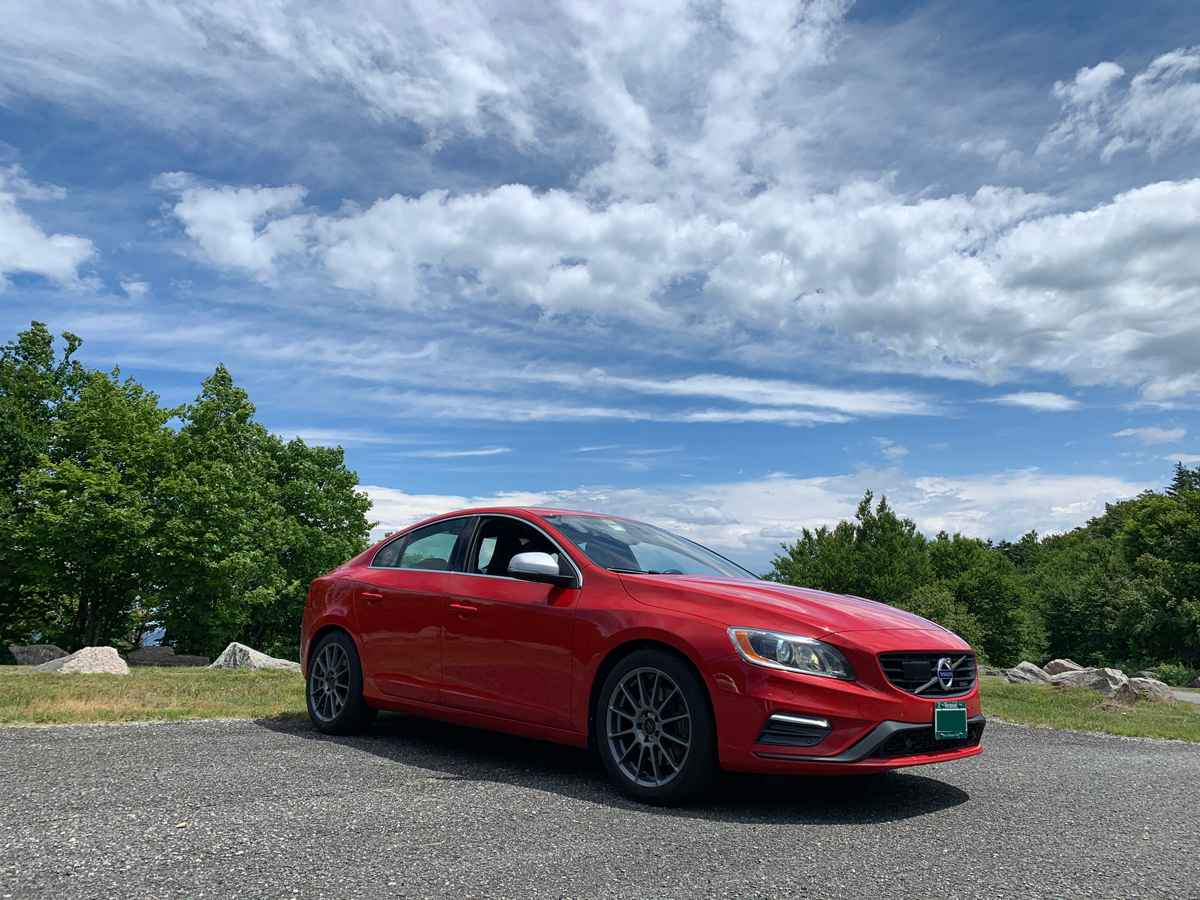
I “strong like” FCPeruo.  Enough where I proudly included their sticker on my car.  Not something that I take lightly.


I don’t have stickers for brands of parts because I use them.  Stickers are on my car because of people.  People who helped make racing possible.  FCPeuro is a good company with great people… I will continue recommending them.


The gang is (almost) all here.


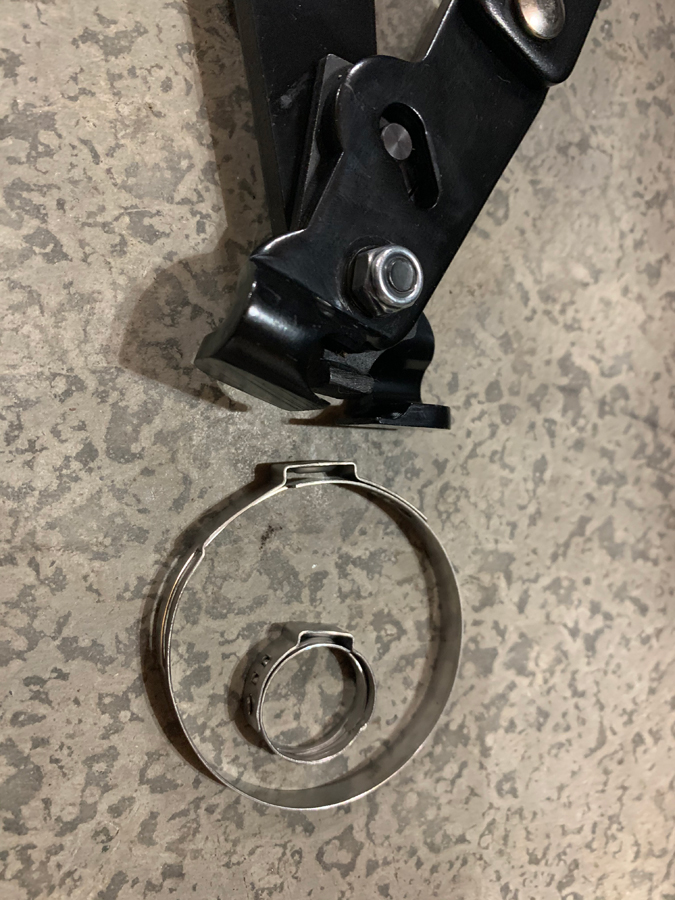
I realized that I needed the clamps for the boots.


I ordered the clamps from ECStuning

N90834901 (large inner clamp)

N10197601 (small outer clamp)


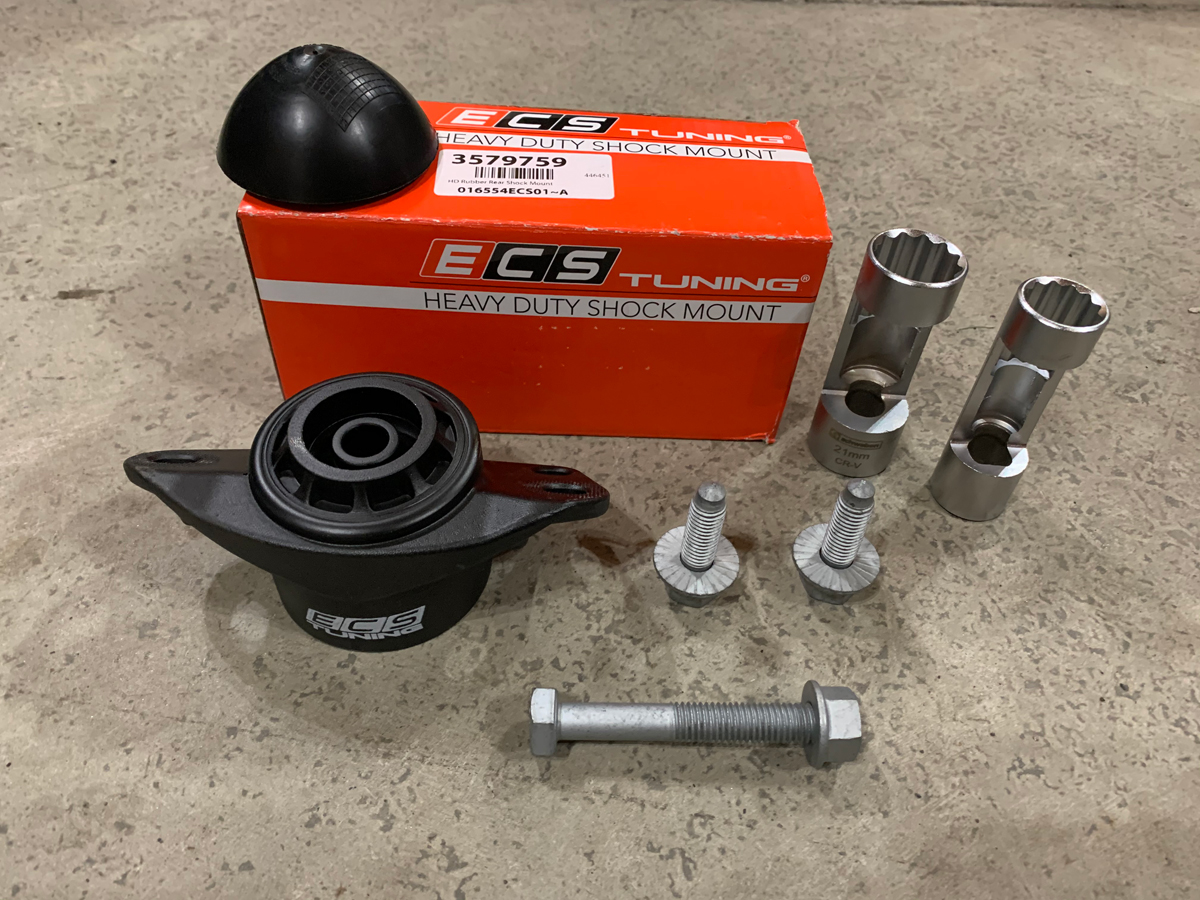
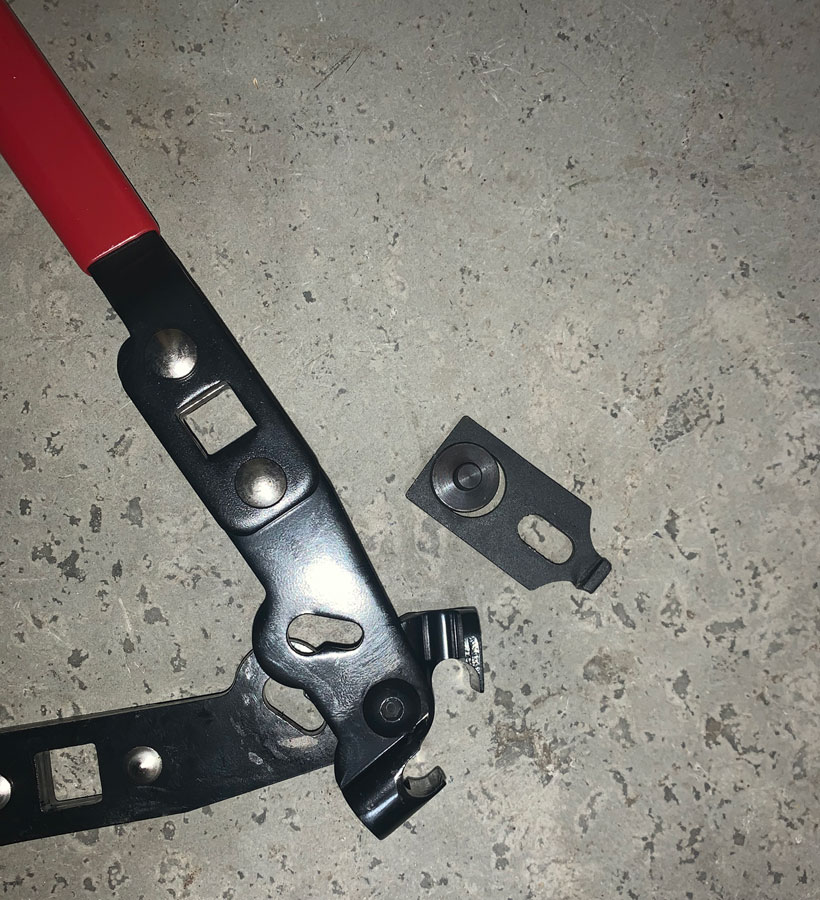
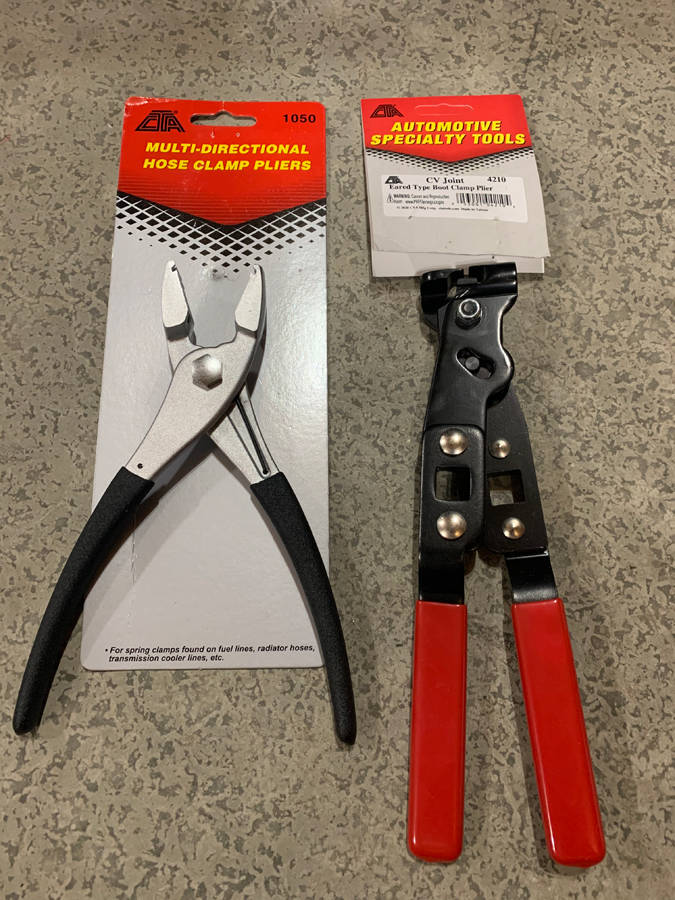
I noticed that I had a credit sitting at FCPeuro (might have been from the Passat ABS wheel speed sensor that I returned) so I ordered the tool to use on the power steering rack clamps (same as CV joints, it seems… good tool to have) and the tool for those PITA clamps on MK4 coolant lines where I have struggled with channel lock pliers.


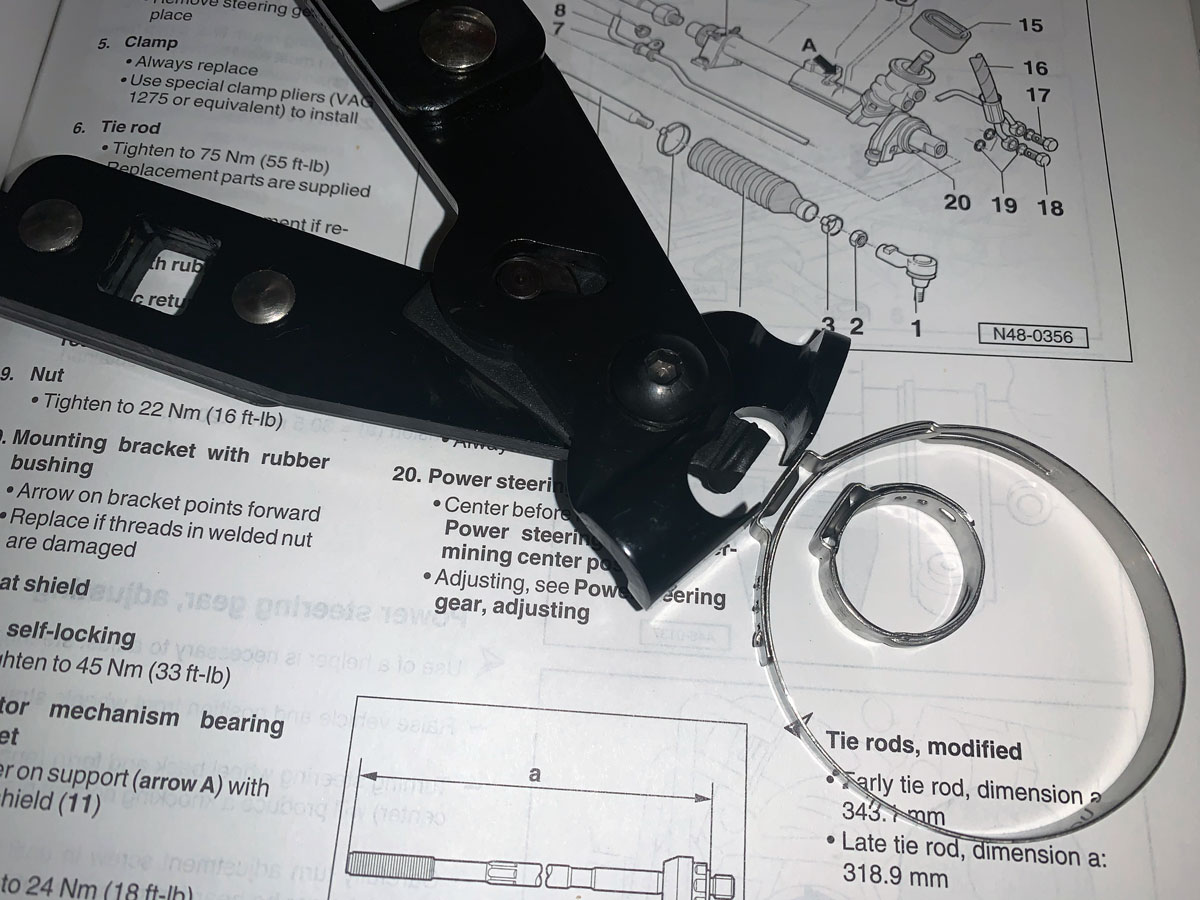
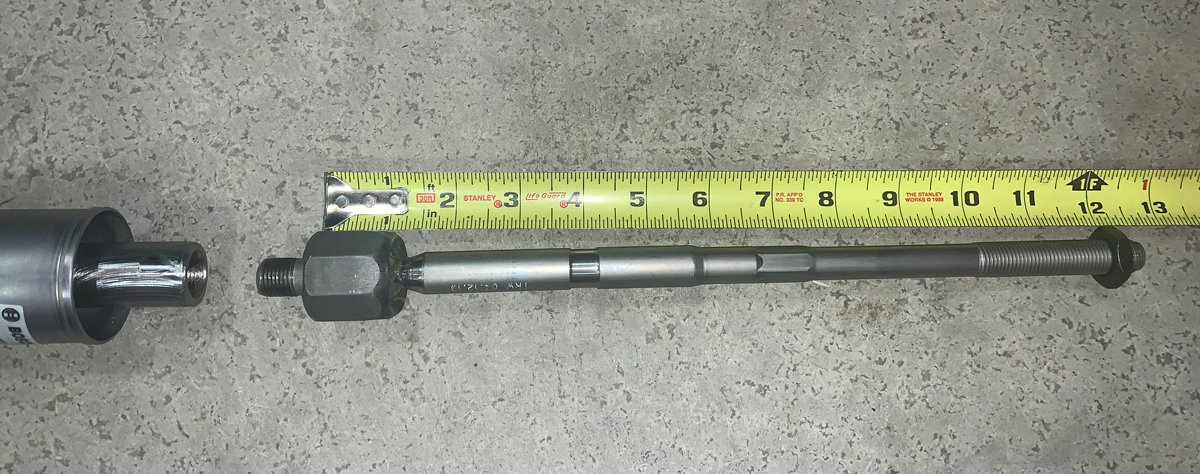
I noticed the distinction between “early and late” tie rods, but I do not know if it is driven by model year.


343.1mm is approx. 13.5” (early)

318.9mm is approx. 12.5” (late)


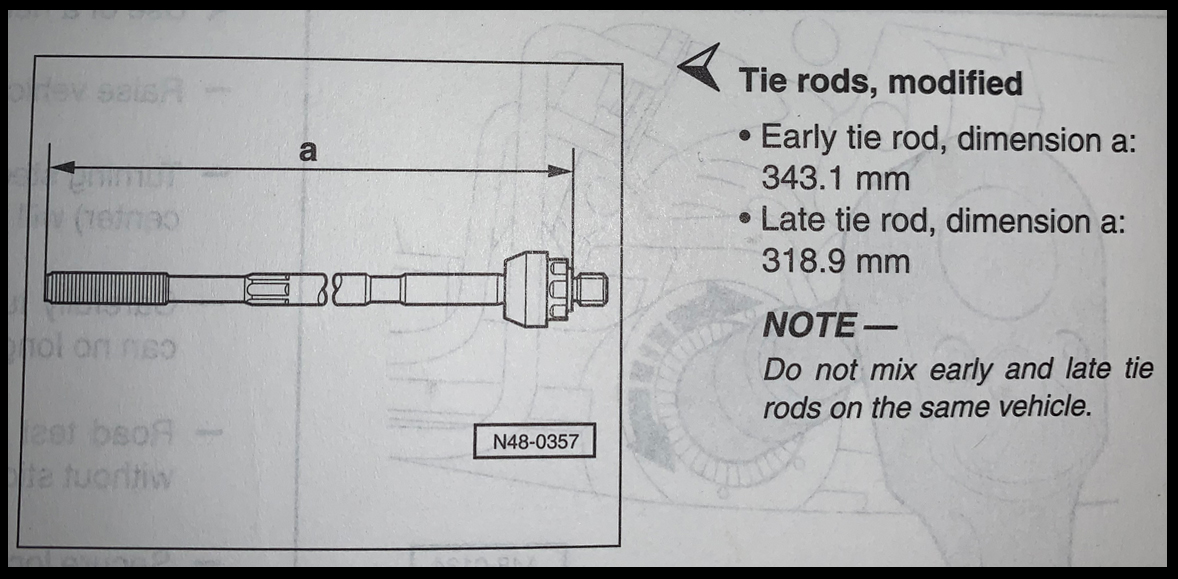
Gus at FCPeuro looked up the inner tie rods based on my VIN just to make sure I was getting the correct rods.


It is interesting that the “late” version includes 2001 (my actual Golf) and the 2003 (20AE donor rack).  What the heck is “early” then (assuming it is by model year)… the MK4 came out in the US in 1999.


Chapter 4: I still haven’t installed the rack yet because of a track day coming up that has me focusing on the Subaru WRX. More unexciting news on that.


But first, let’s have a word from our sponsor and flashback to June 2020.


The hillclimbs in Vermont (and Mt Washington in New Hampshire) were naturally canceled this year.  I had to make a trip to see a friend to pick up some “car parts” (inside joke, and no, it isn’t drugs) so I stopped by Mt. Ascutney.  To my surprise, the access road was open.  It just so happened that I arrived on the very first day that the parks were open in 2020.


Ascutney being my favorite (minus the bigger bumps growing at the top of the hill) hillclimb, I paid the day fee and headed up the hill slowly.


Beautiful views.  I got FTD as no one else showed up… same scenario is needed for me to get FTD during a real hillclimb.


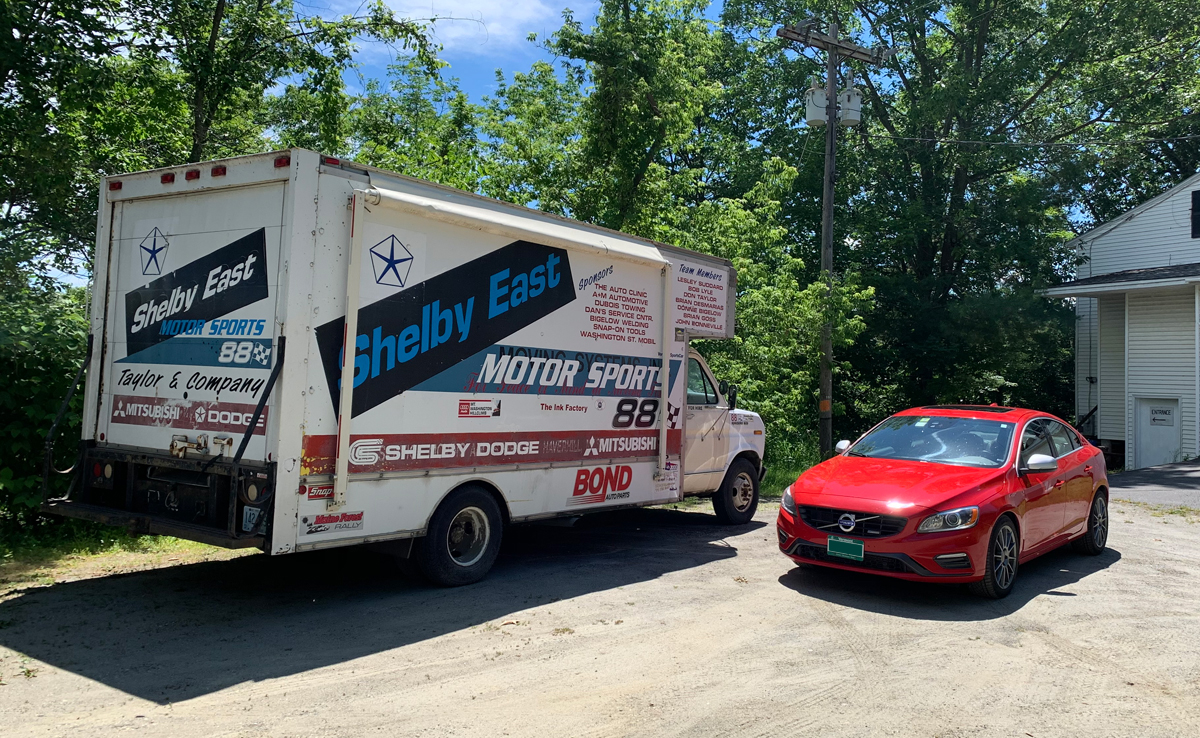
Picking up those car parts at a secret location in New Hampshire.


And now back to our regularly scheduled program that is in progress.


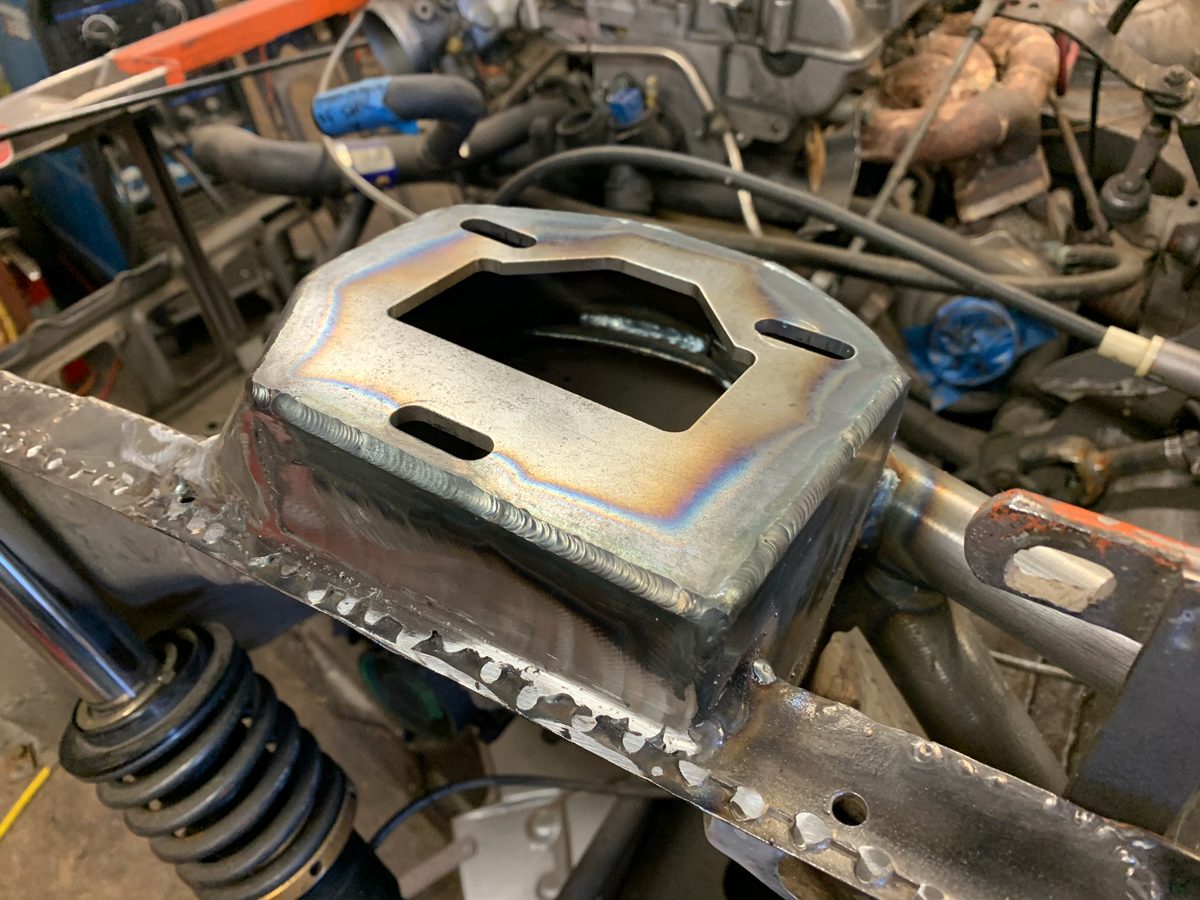
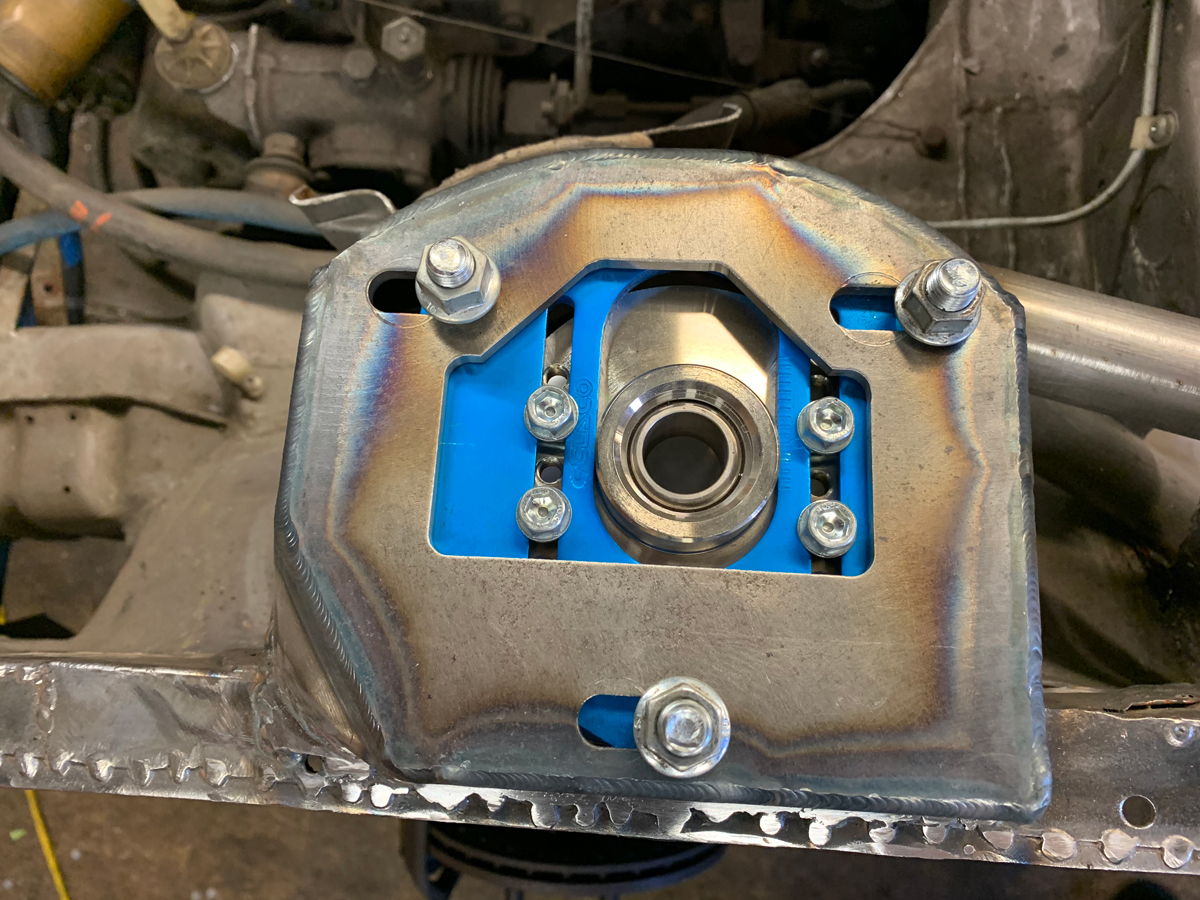
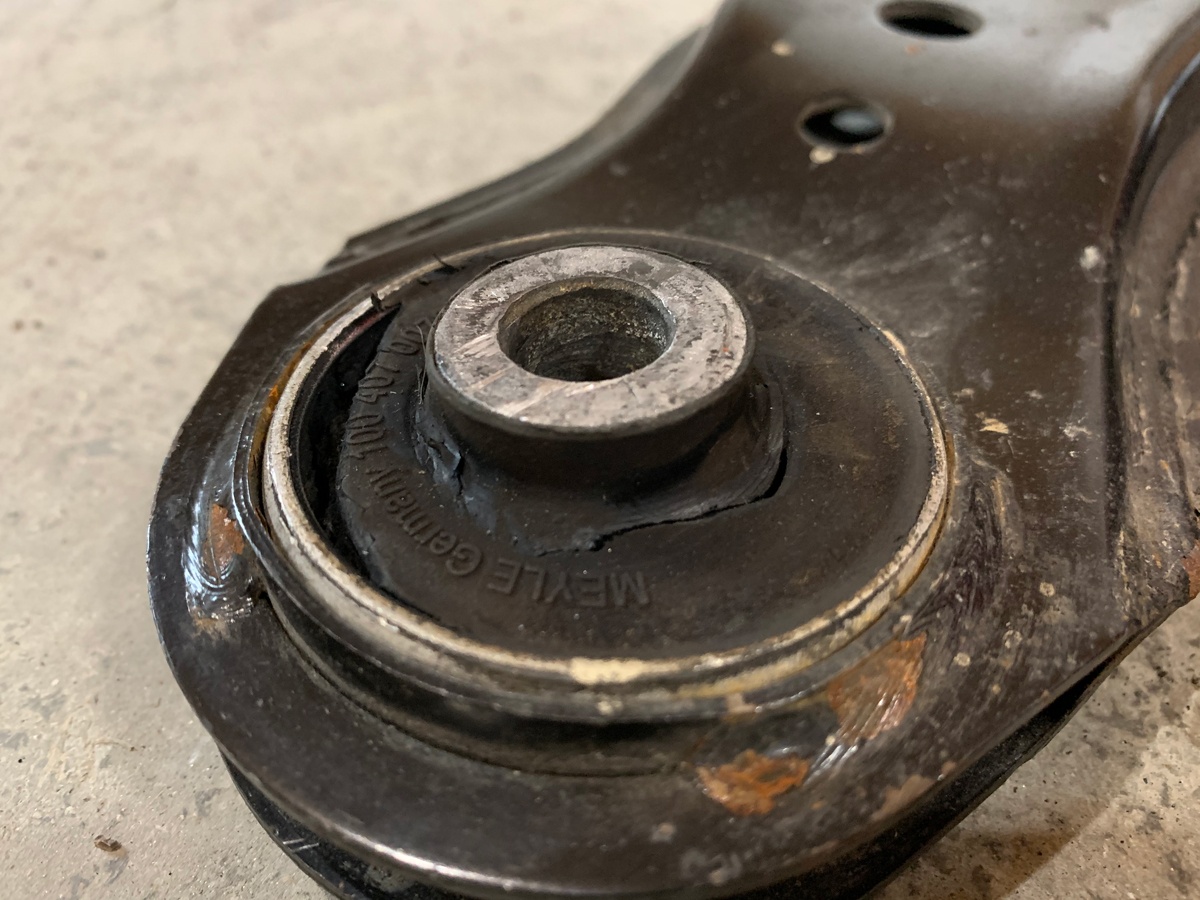
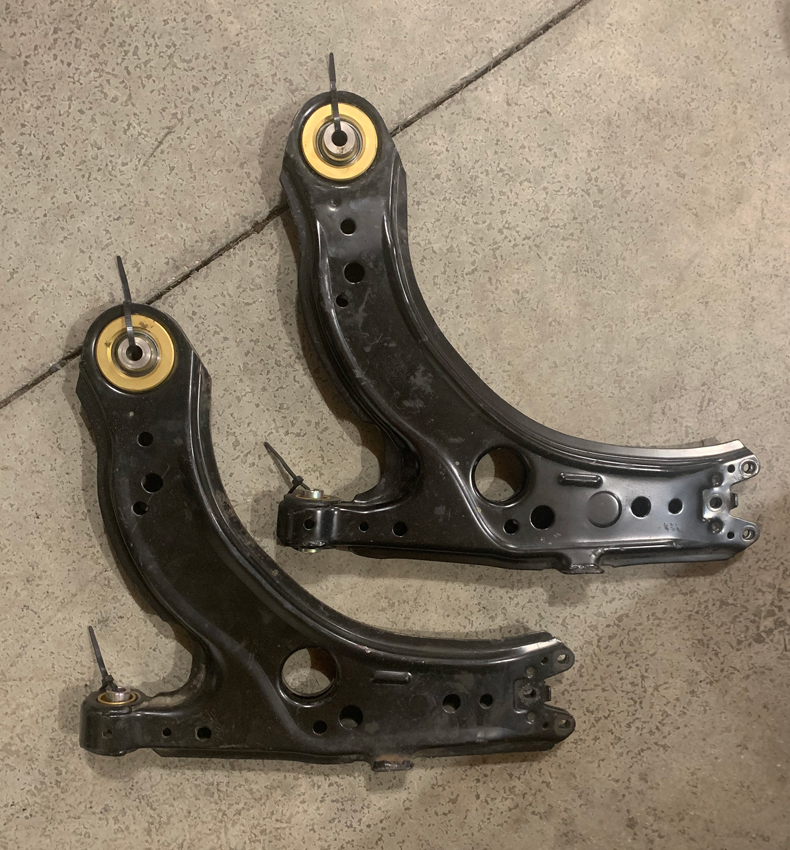
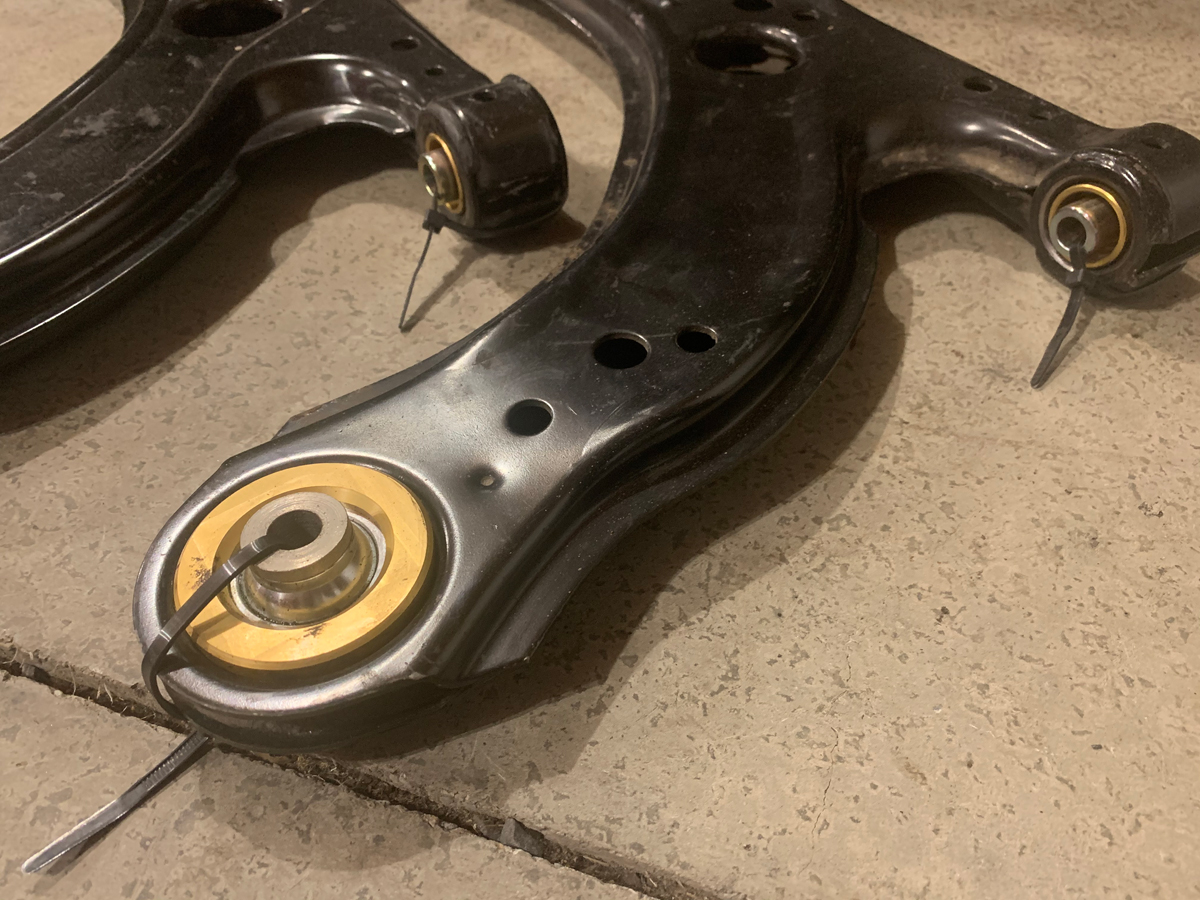
I replaced the passenger side control arm with a BFI complete control arm with VW R32 bushings earlier this year.  I noticed that the driver’s side was also bad.


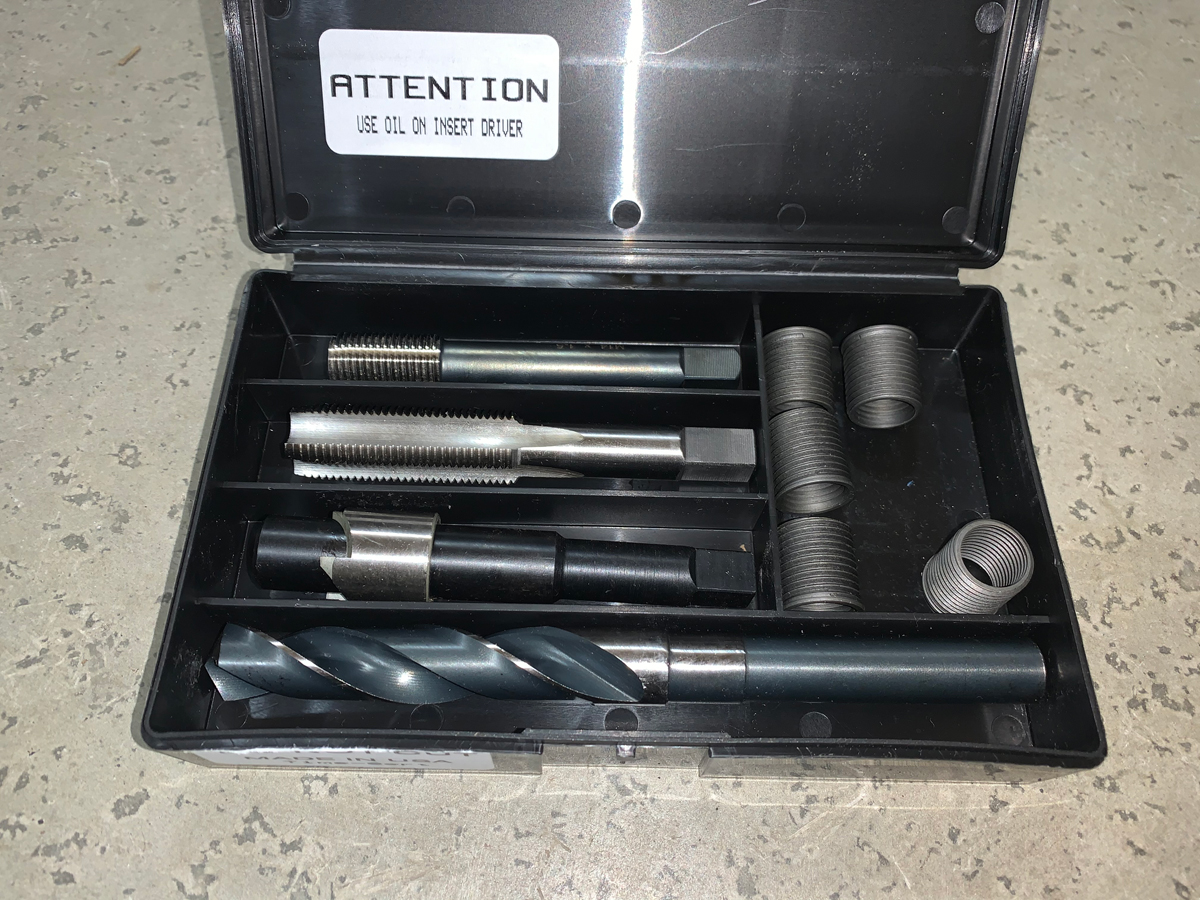
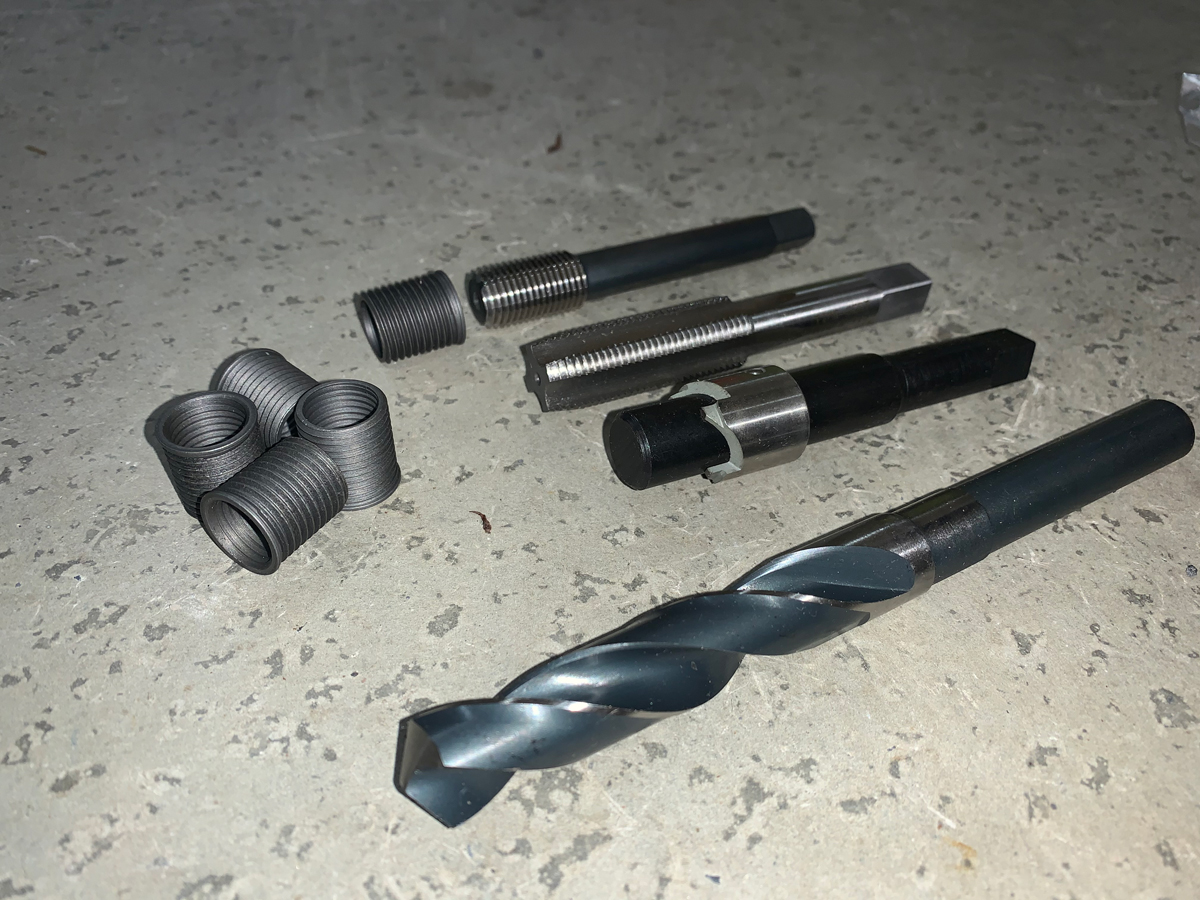
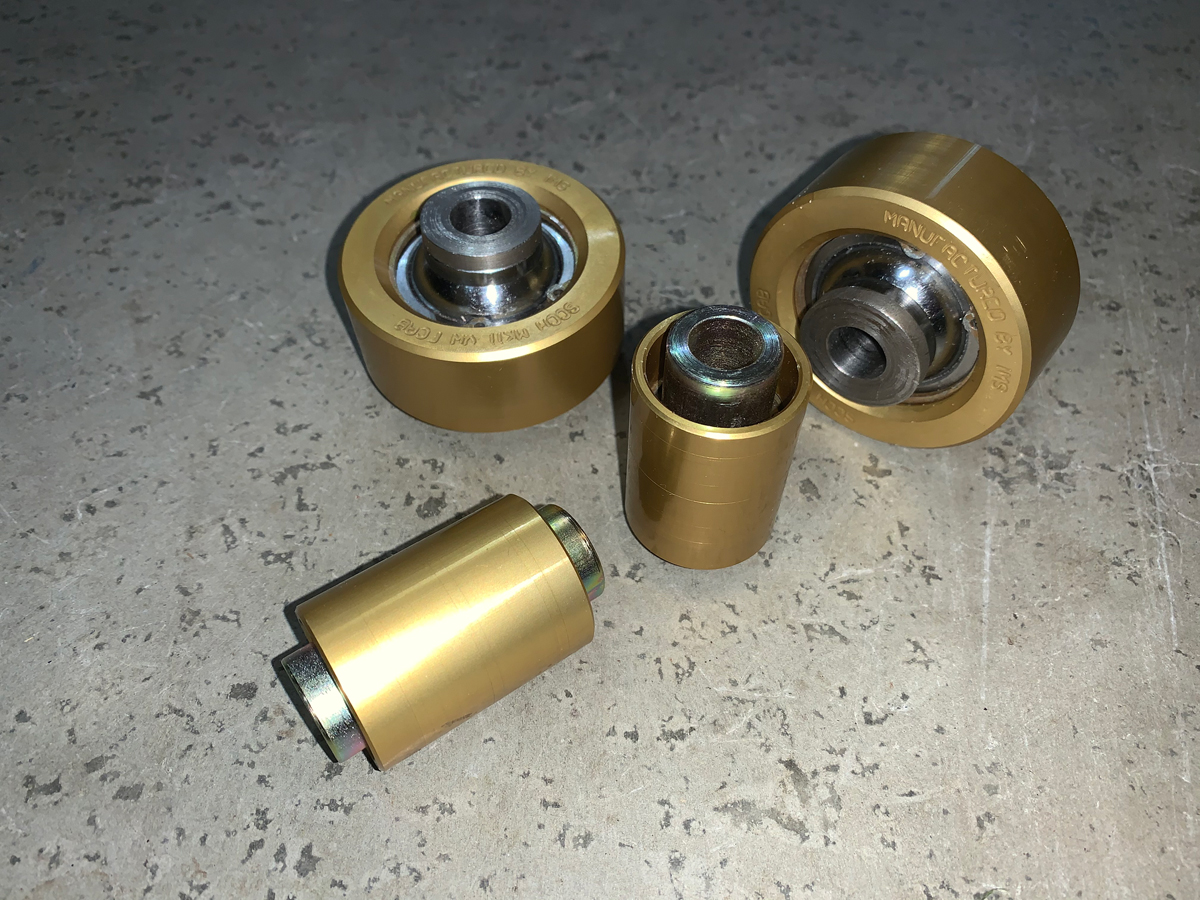
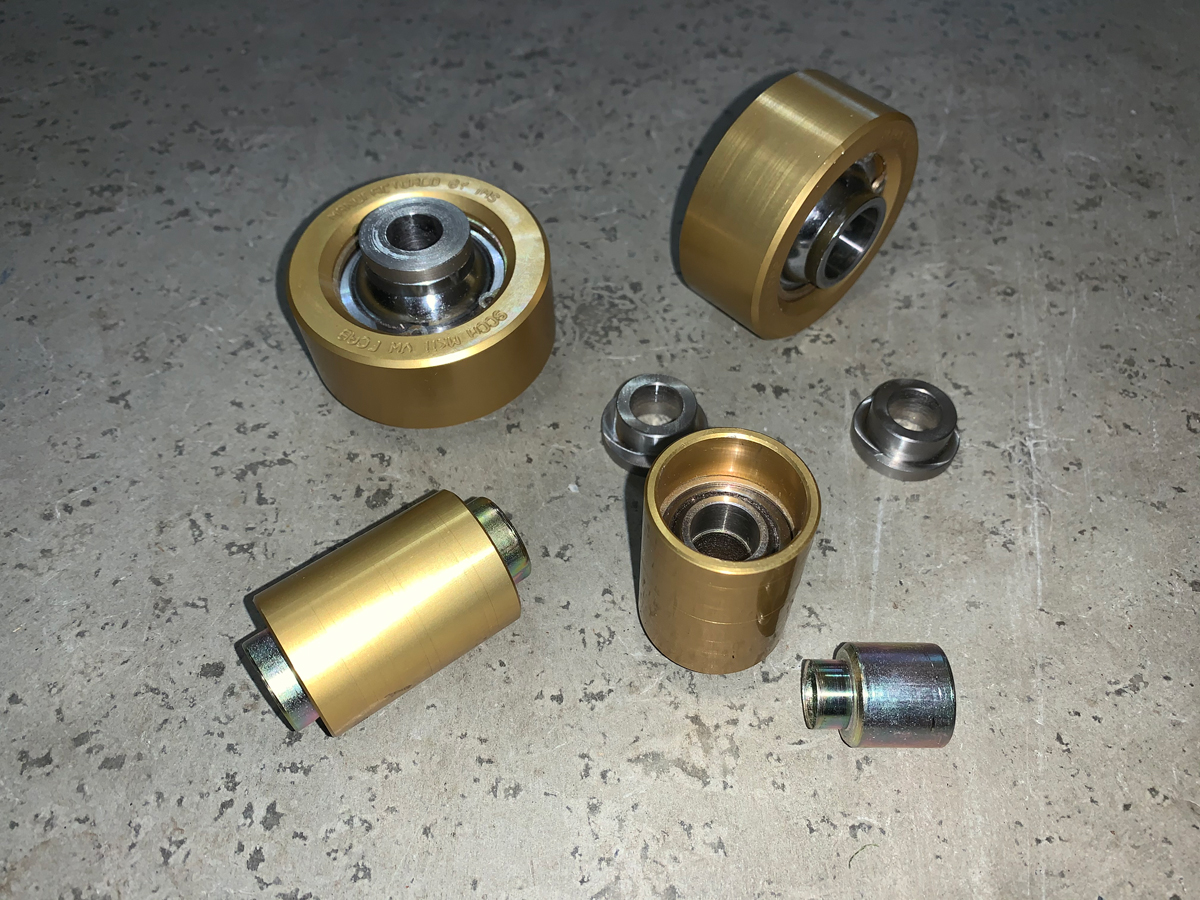
So, I decided that I didn’t want to find another dead bushing while at an event and ordered the SCCH front control arm bearings.


I’m a little confused who makes them and what SCCH stands for…


The instructions with the bearings show “SCCH: Suspension Components & Cylinder Heads” and provides a link to www.SCCH-Heads.com, but the actual website states “SCCH: Southern California Cylinder Heads”… don’t know.


The instructions also show “Innovative Motorsport Solution”.


Regardless, I purchased the bearings from MRP (www.performancemrp.com) and Chris (Cheesefactory Auto in Colchester, VT) did the pressing.  Thanks Chris!


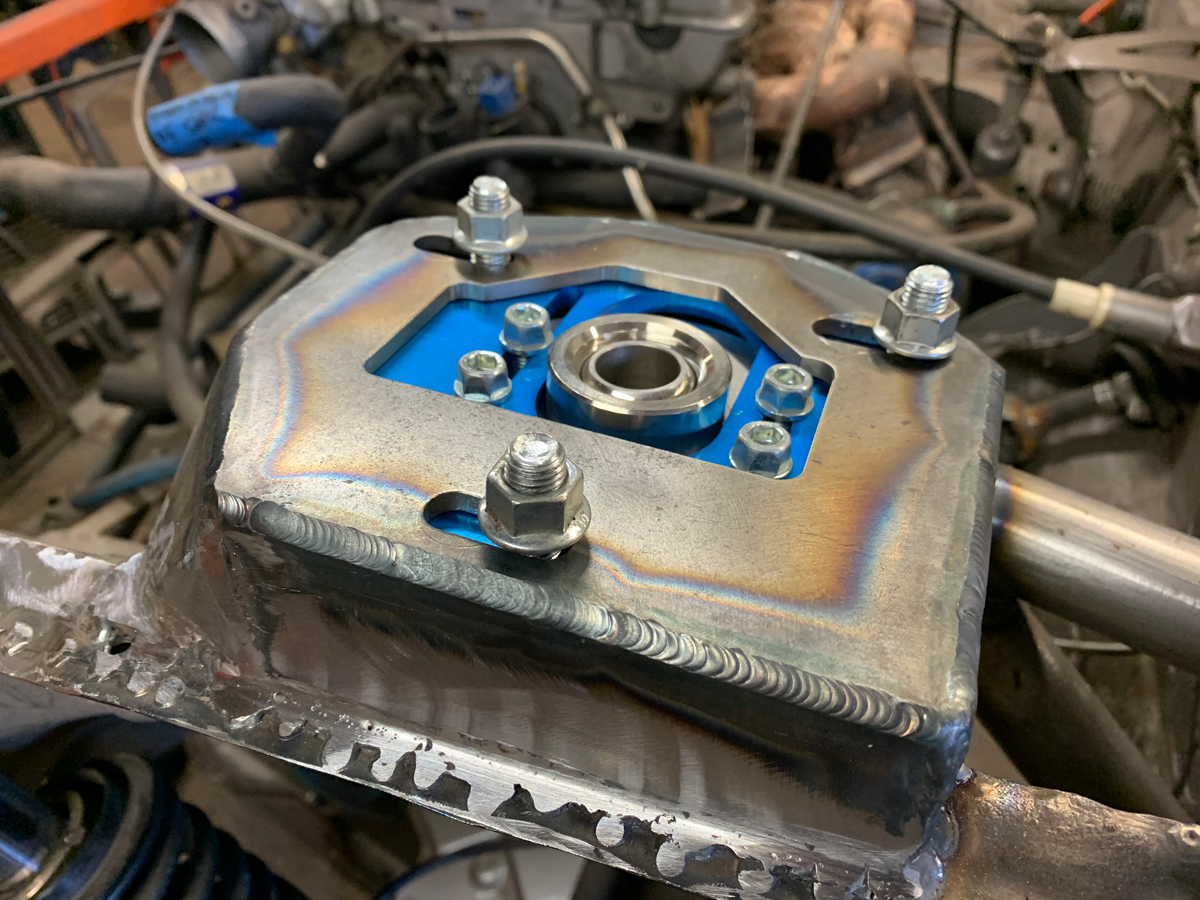
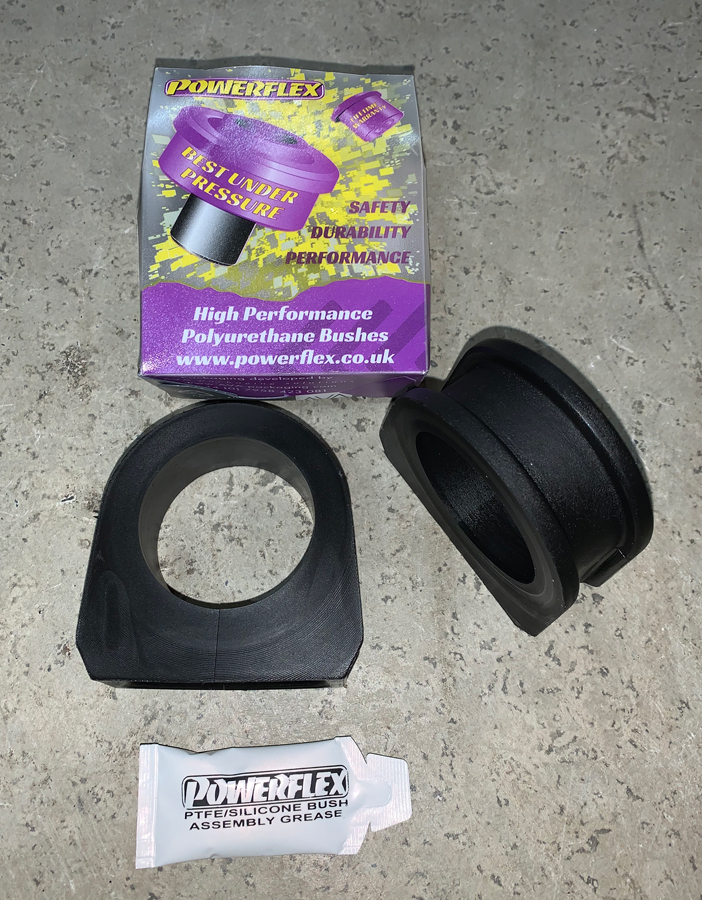
I have the steering rack out of the car, I might as well replace the old stock bushings with Powerflex polyurethane.  I looked at the solid metal bushings (brackets at this point?), but could not justify the price.  I lived this long with rubber.


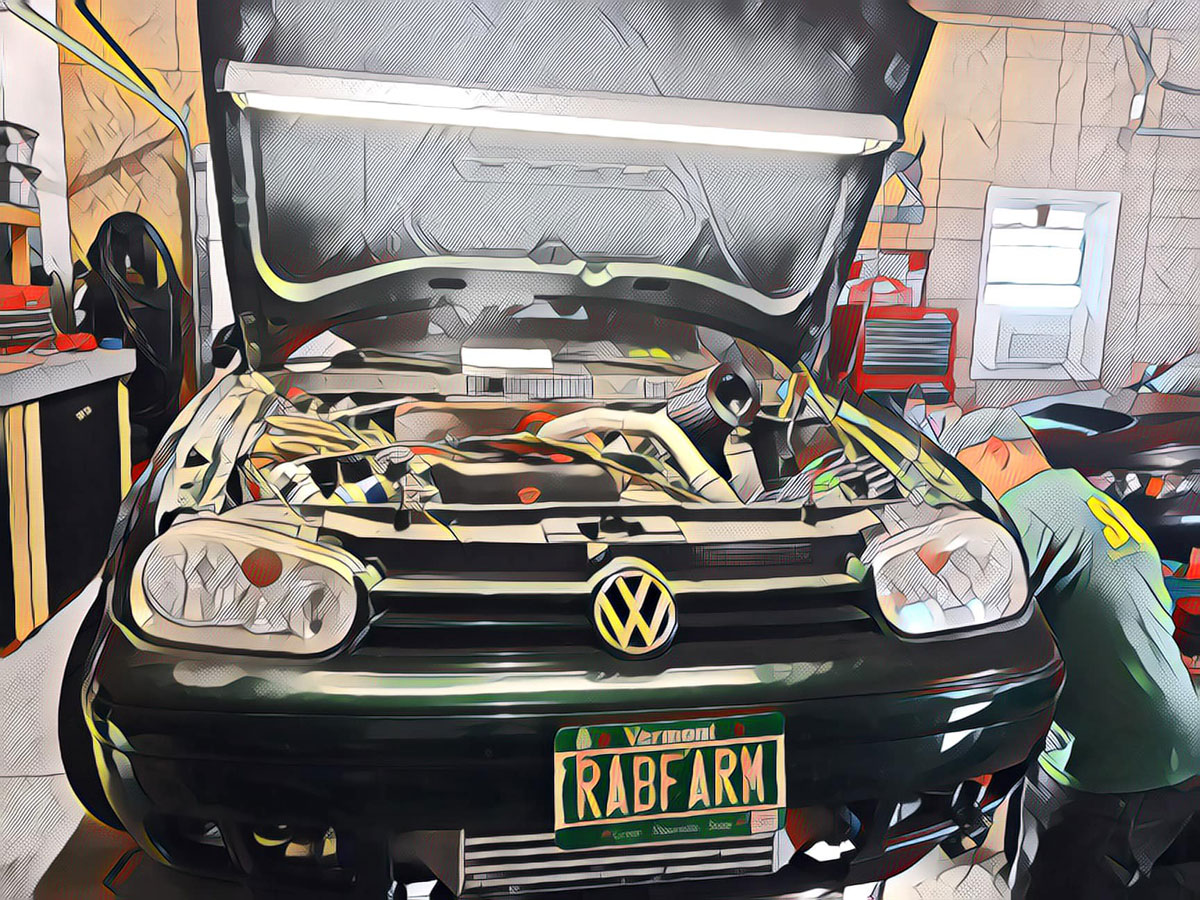
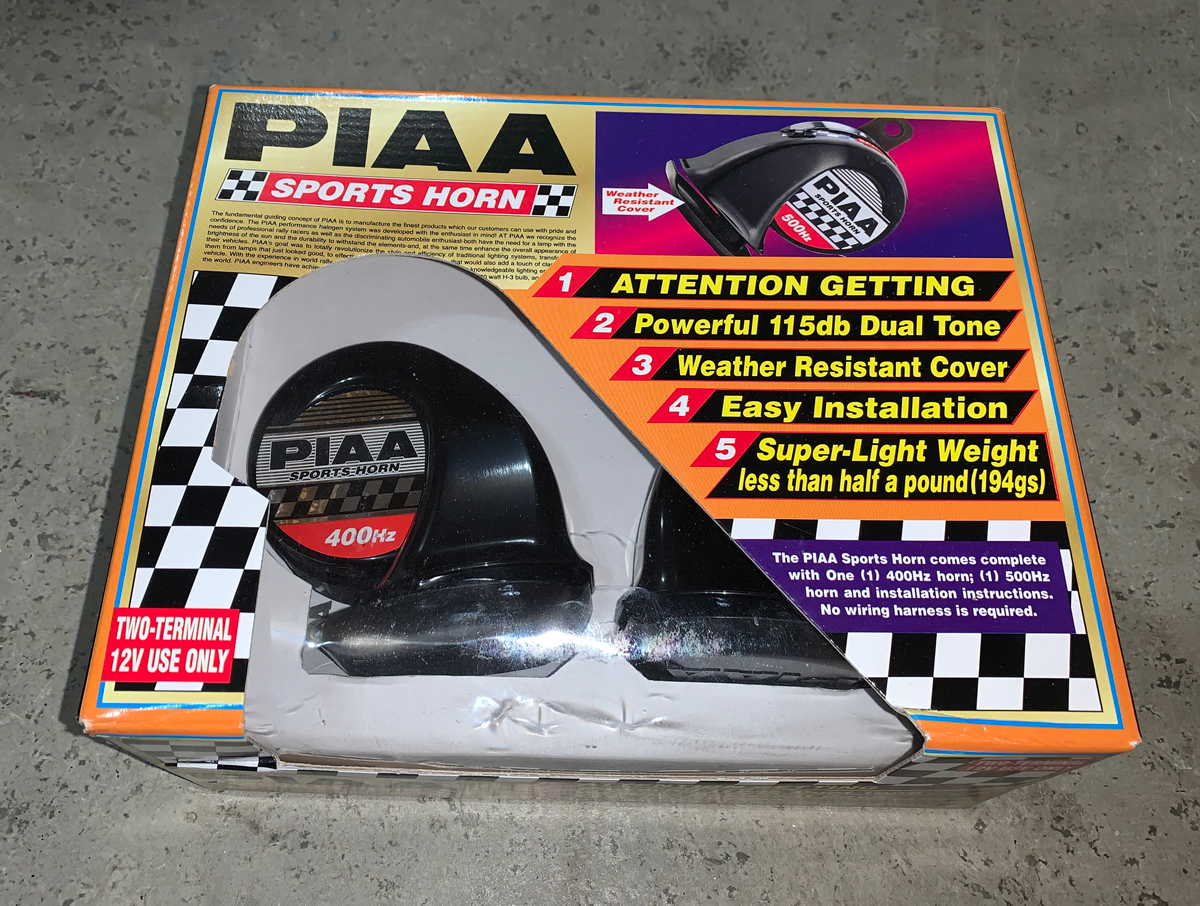
Might now seem like much of an update, but I needed a horn.  I am missing the high tone (didn’t replace it after the 2010 front end modification incident) which left me with the dull and muffled low tone. 


At the hillclimbs, we are required to have a working horn to communicate with the checkpoint workers if something happens unexpectedly… could just be a mechanical issue and the car doesn’t run (one honk) or we hit something and need help (two honks). (removed verbosity soaked attempt to explain the complete rules that you just don’t need to know… you’re welcome)


Anyway, the PIAA horns were inexpensive and louder.  I plan to mount then inside the engine bay as I figure the stock location of the horns (front bumper) would make them useless in a frontal impact. Plus, it will make it easier for me to remove the bumper in the future as I won’t have to play with the horn wires.


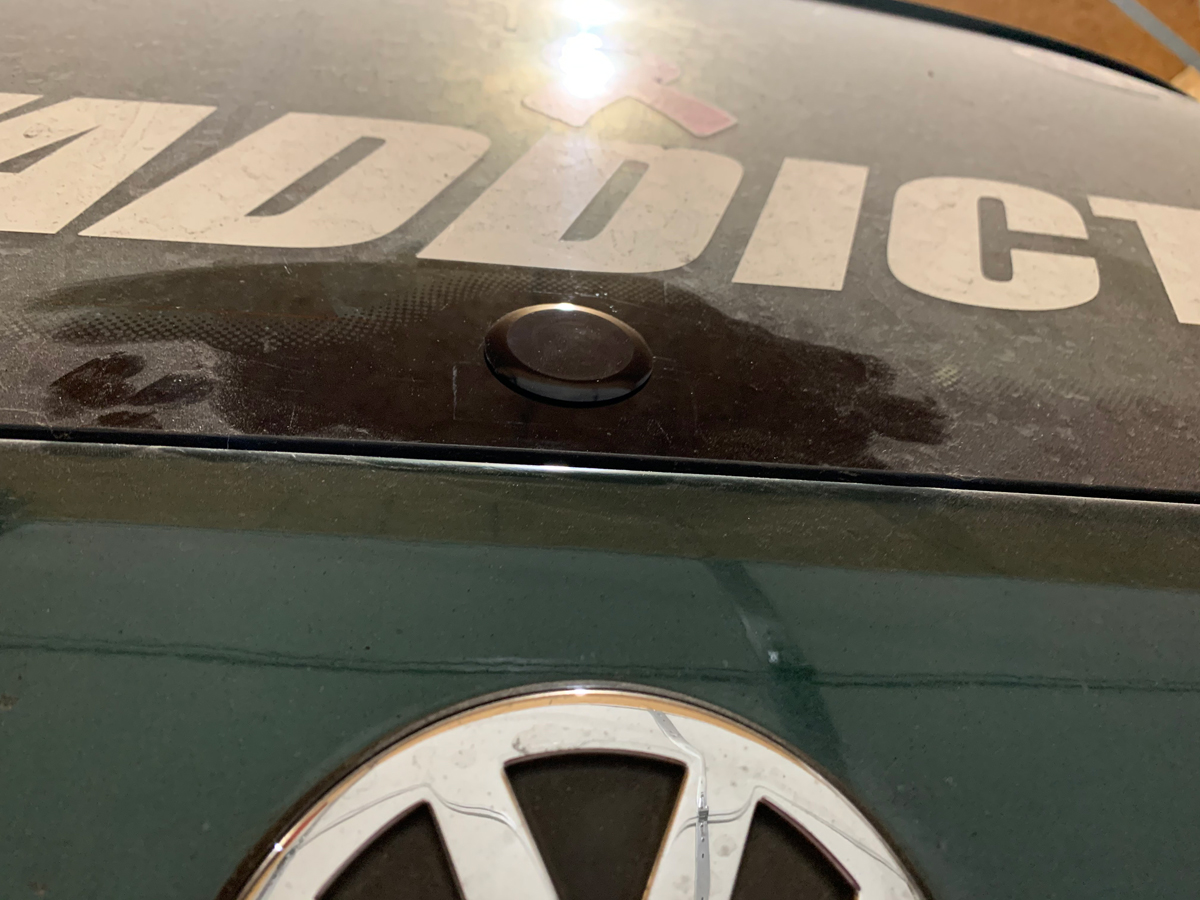
When I removed the rear wiper blade so that I didn’t accidently turn it on and scratch the back window and damage the stickers, I just put black electrical tape over the hole.


It worked okay, but I wanted something a little better than tape.


Heck, I even graduated from zipties in some cases.


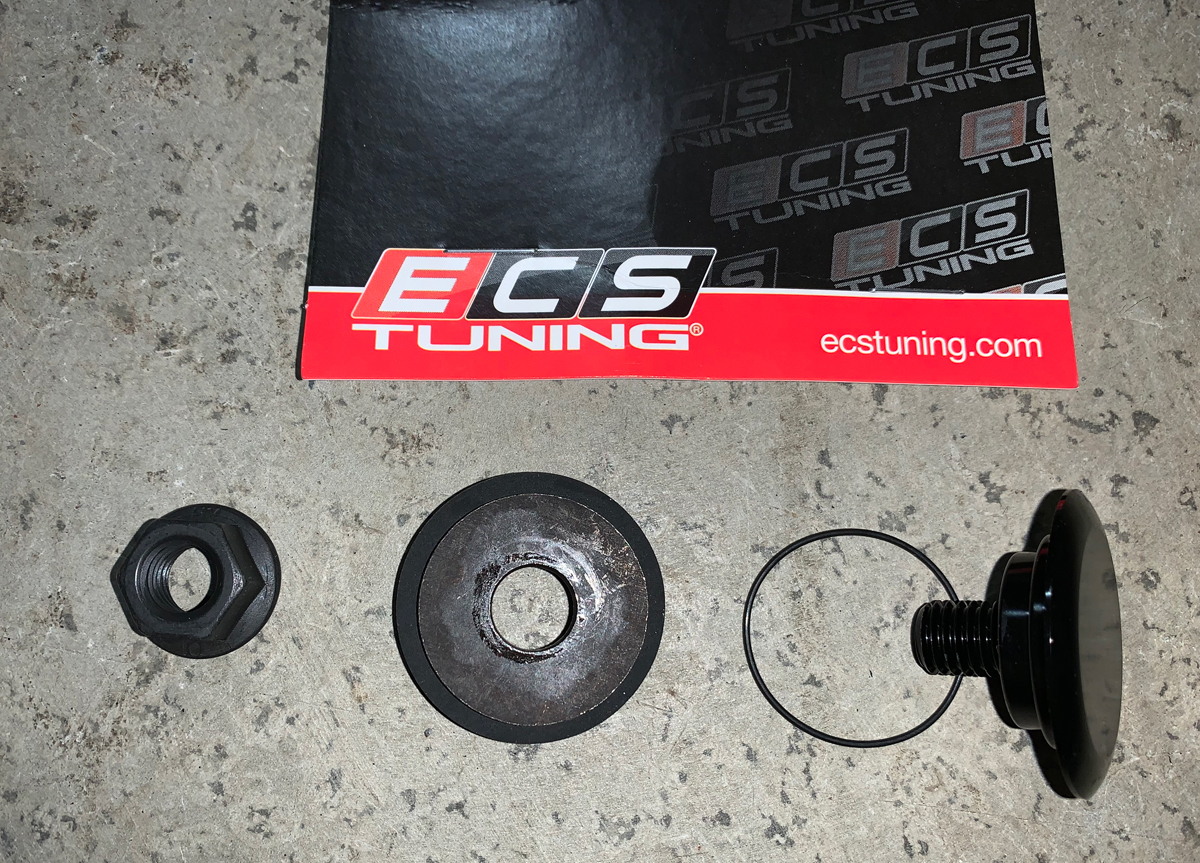
Ordered the rear wiper delete plug from ECStuning (part number ES#3170849). 


The description: “The exterior cap is made from Type-6463 Billet Aluminum to achieve the ultra-high gloss bright dip anodized finish to match the rear hatch glass and to maintain protection against ultraviolet light”


And I’m just thinking, “plugs the hole and looks pretty”


Installed…


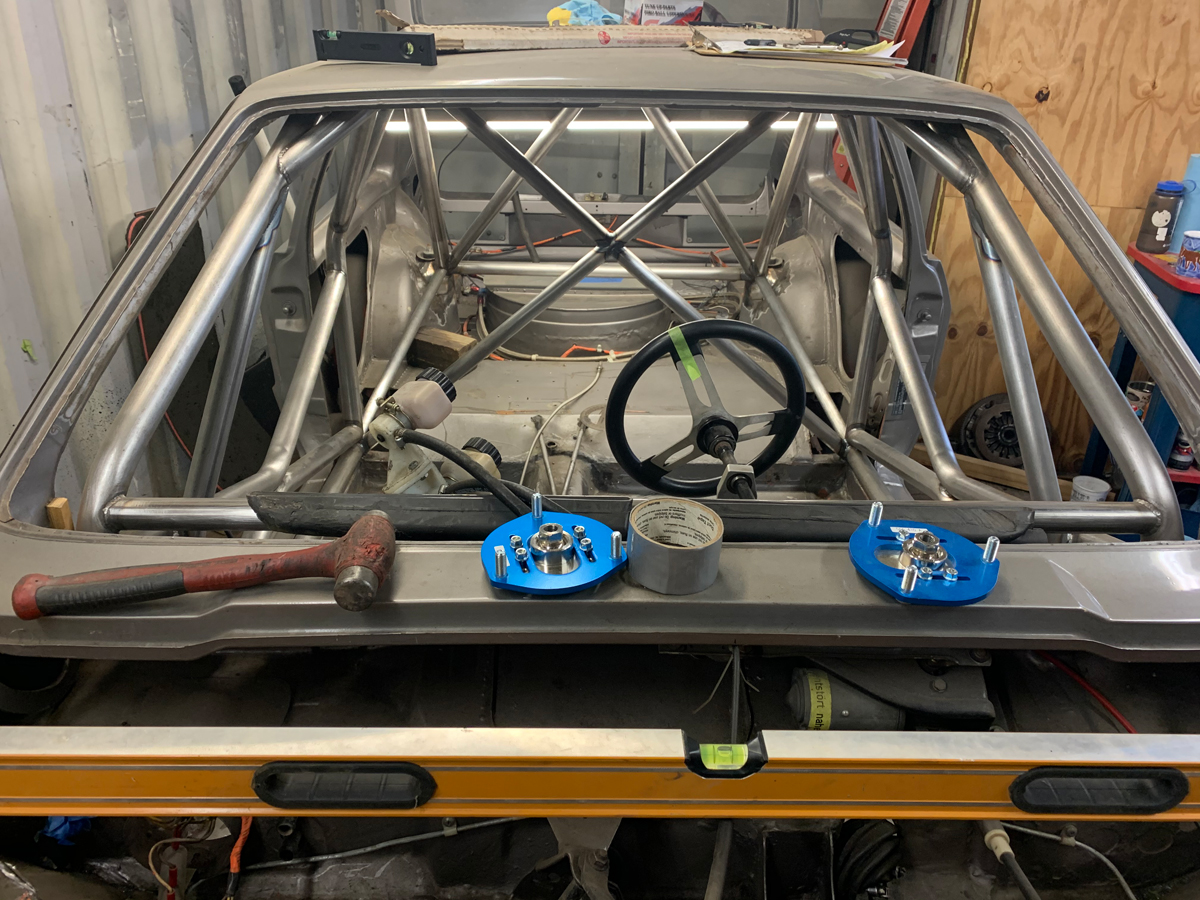
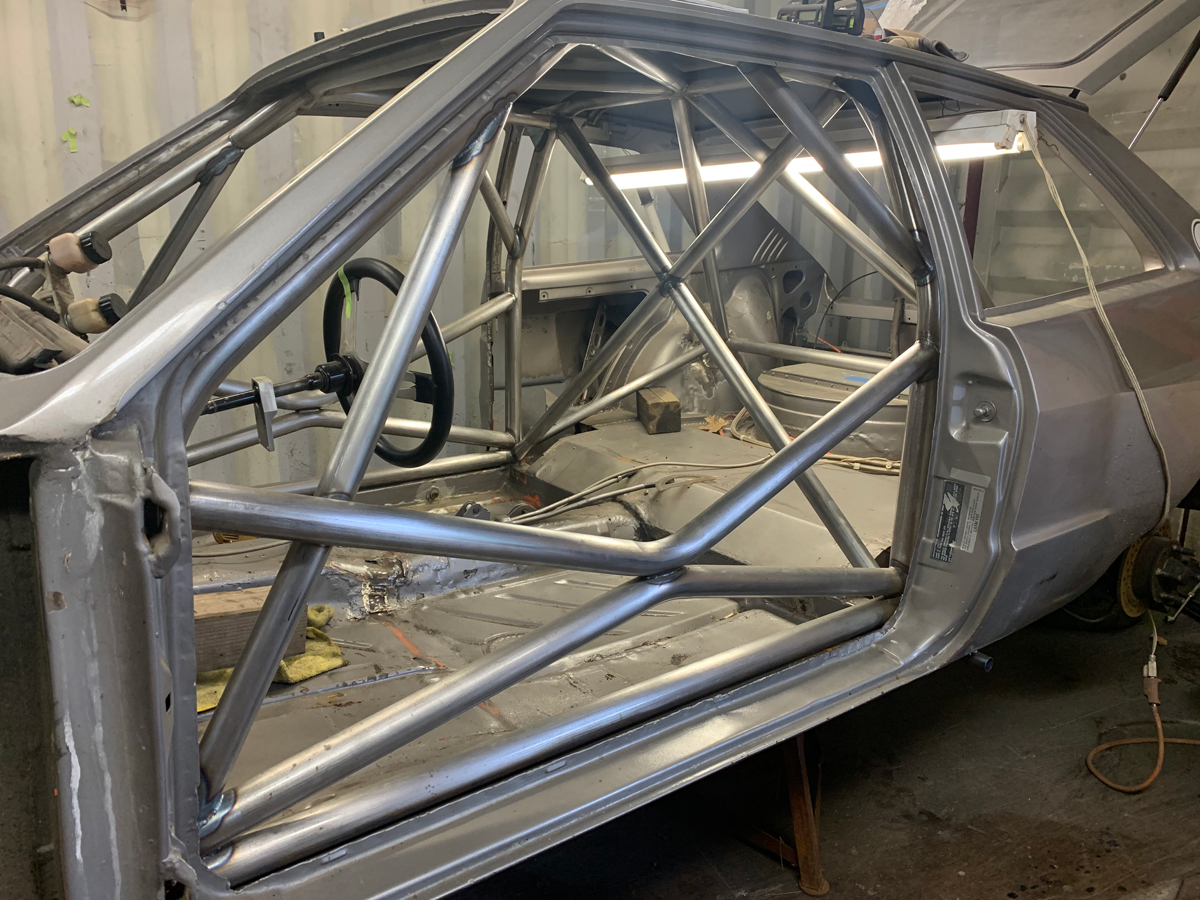
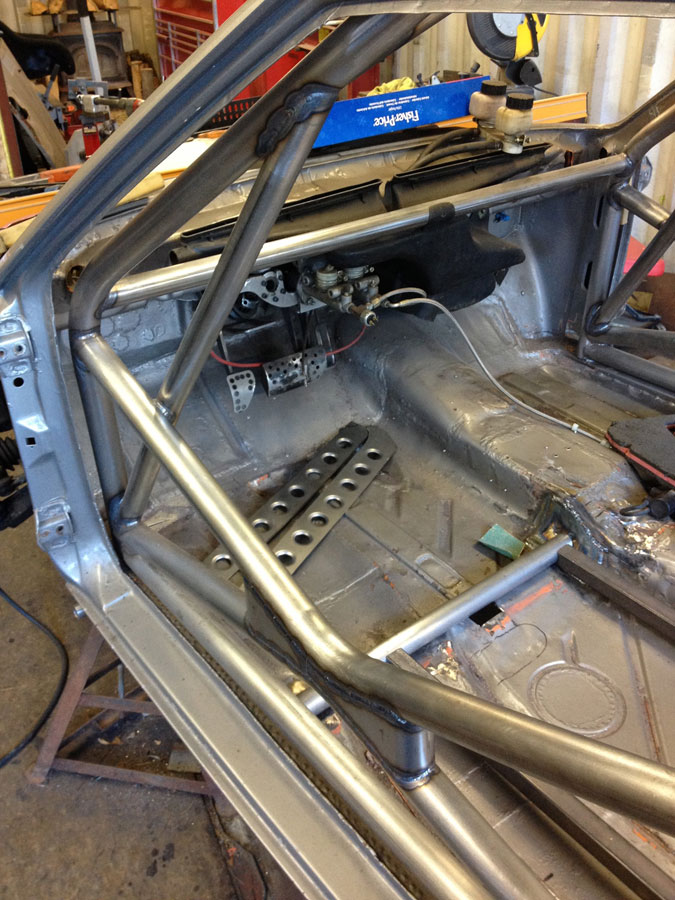
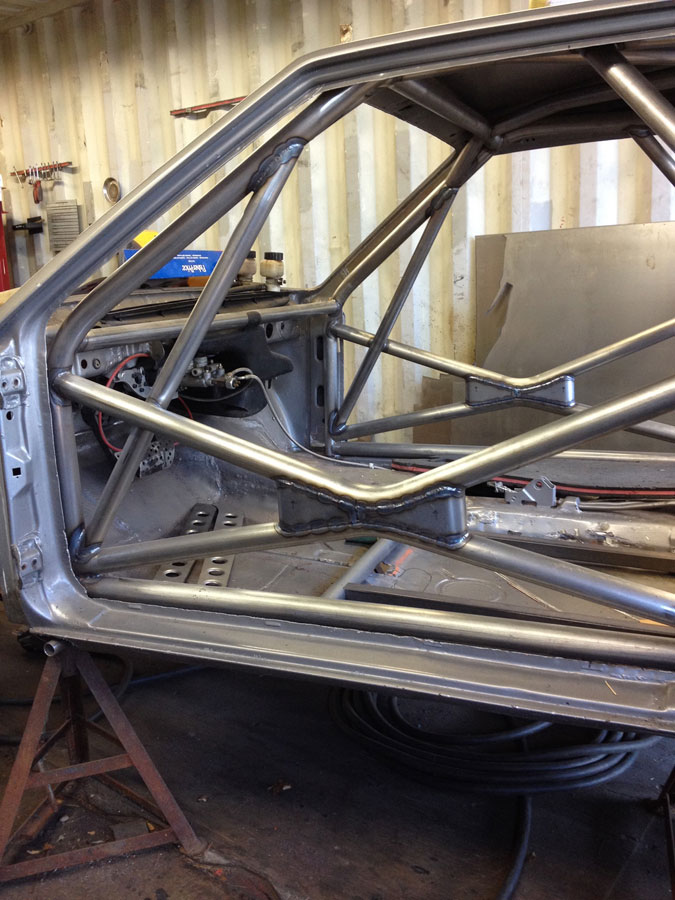
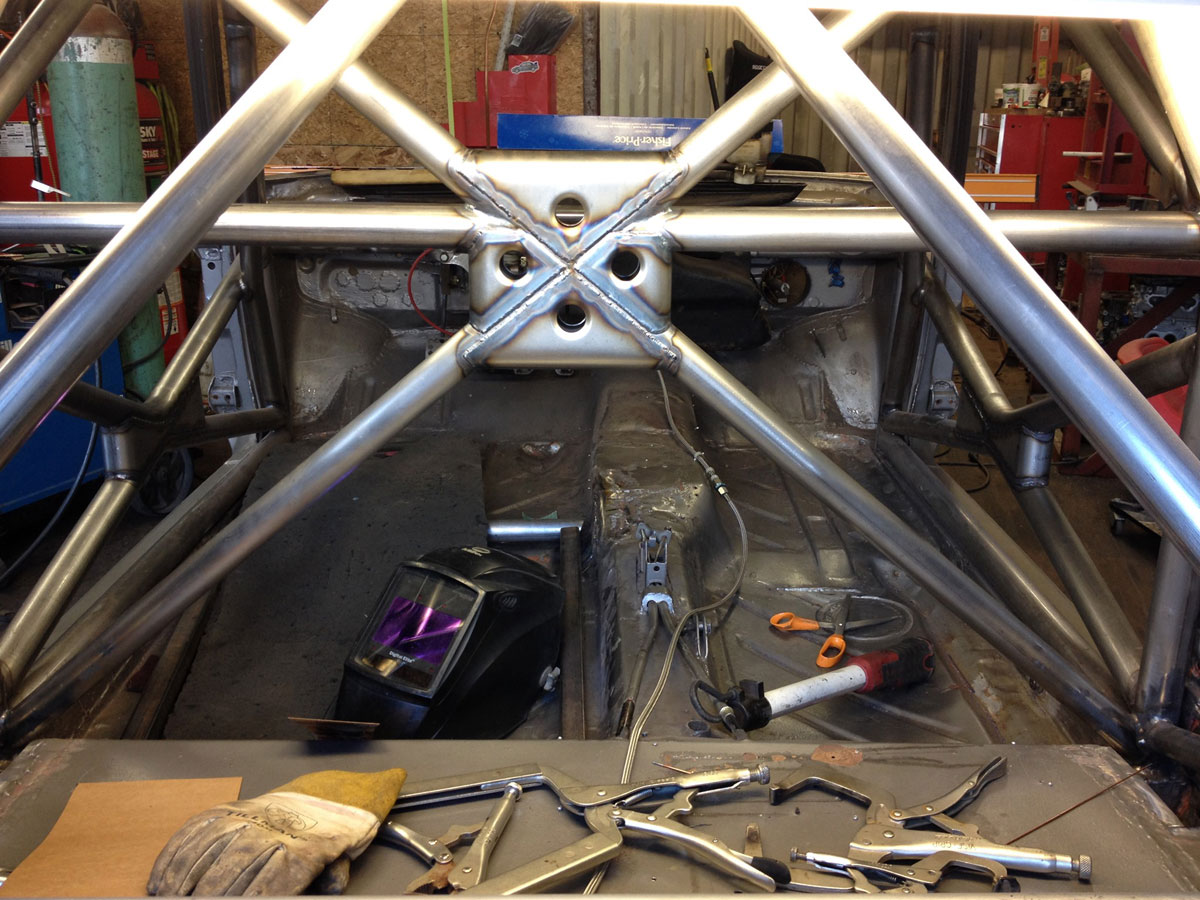
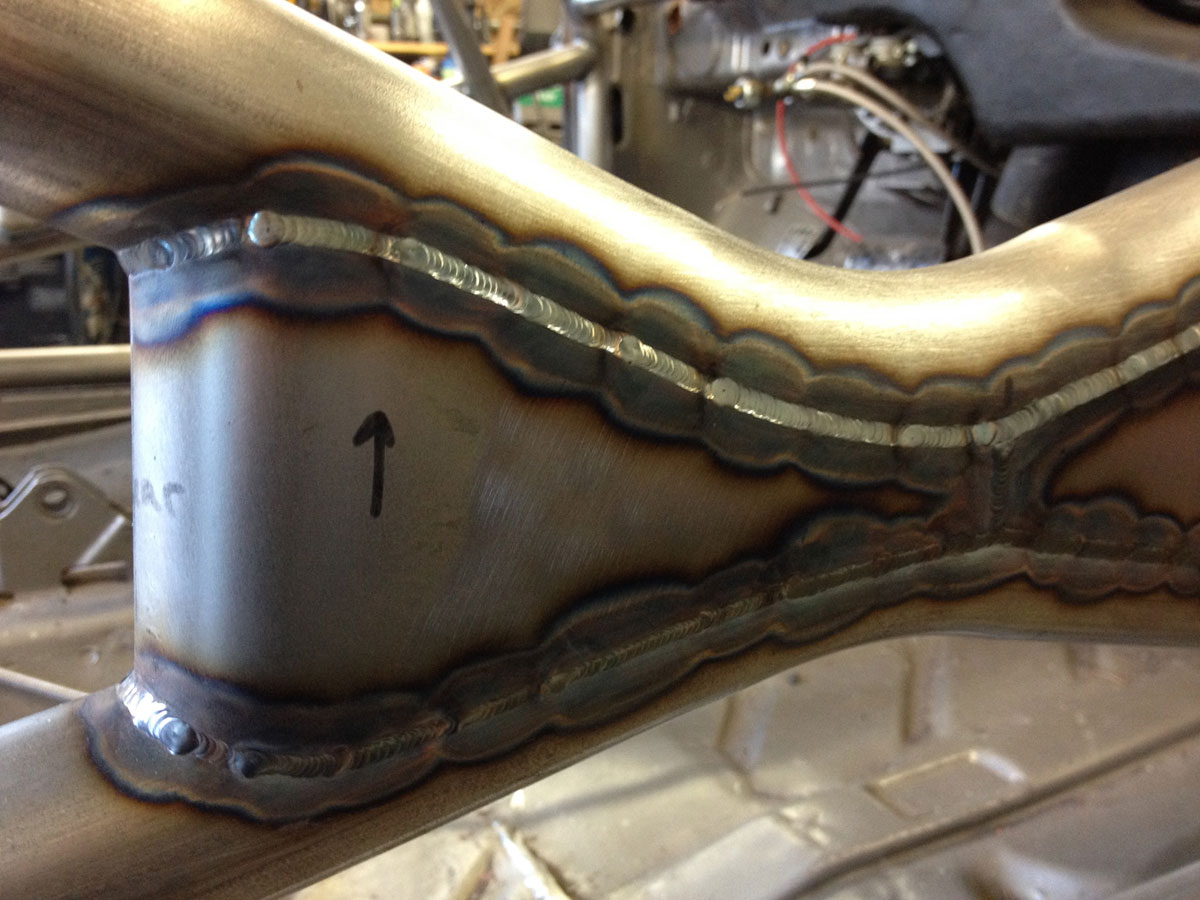
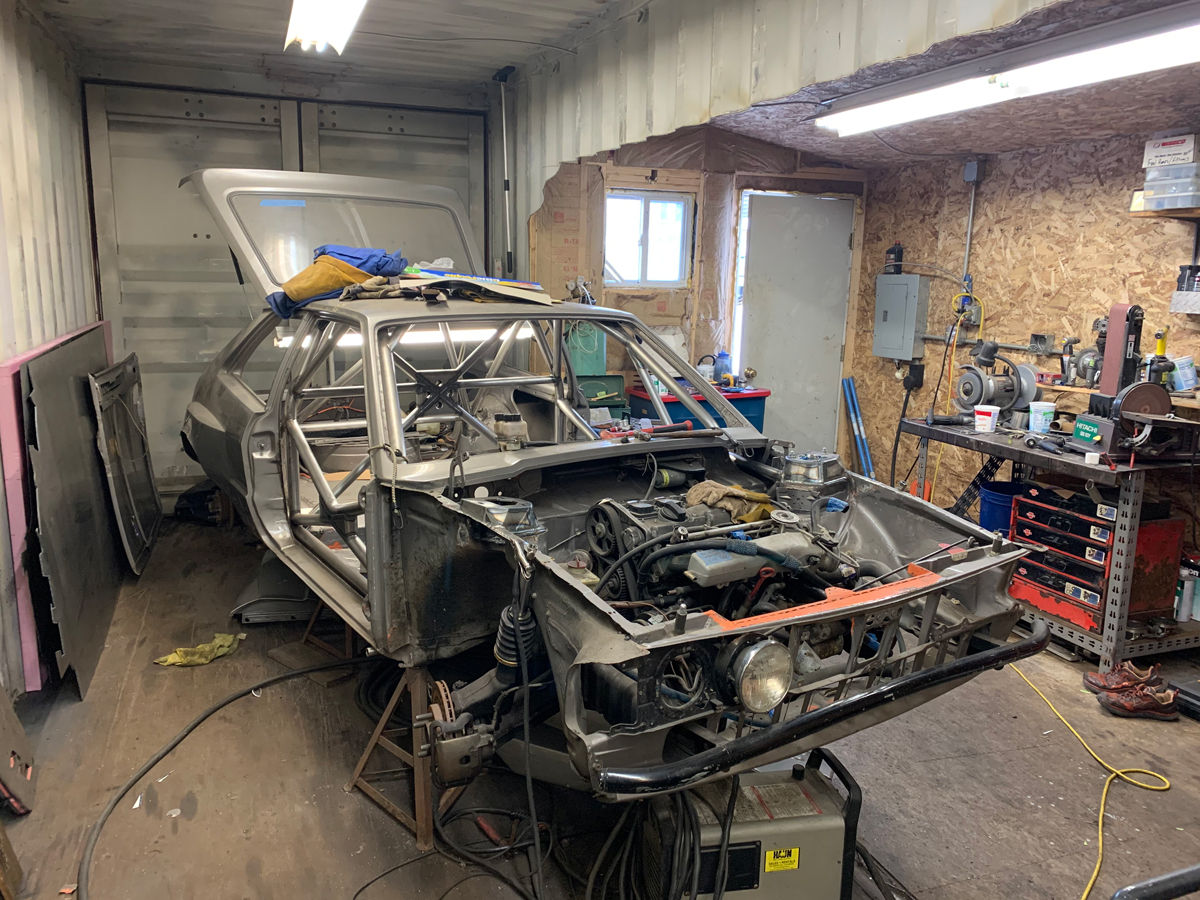
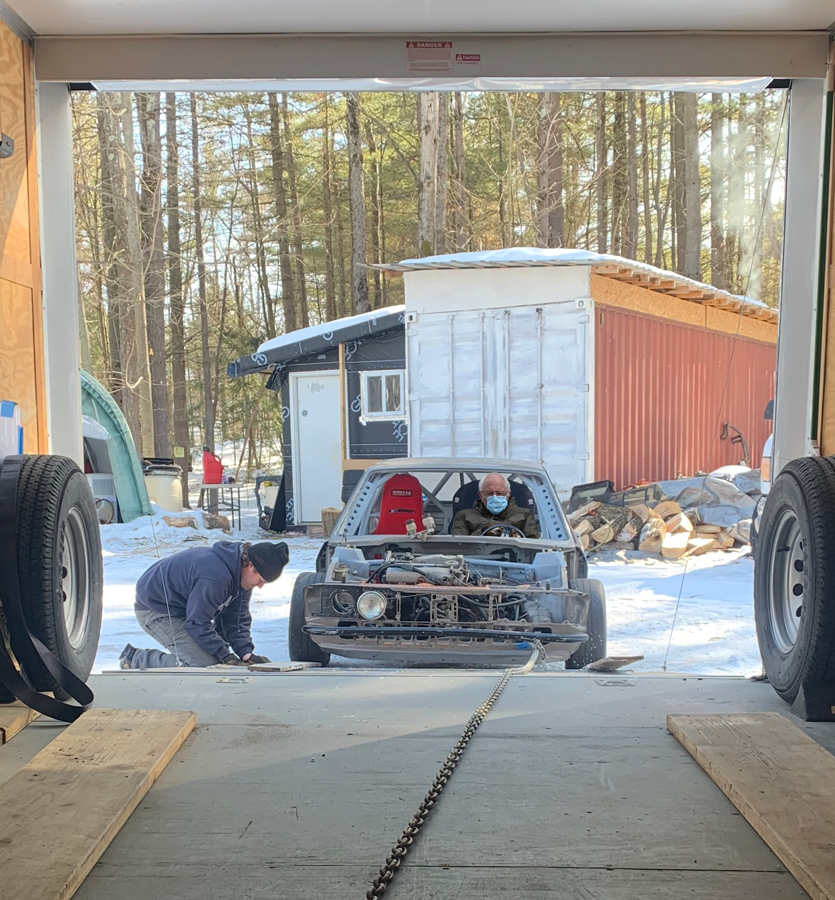
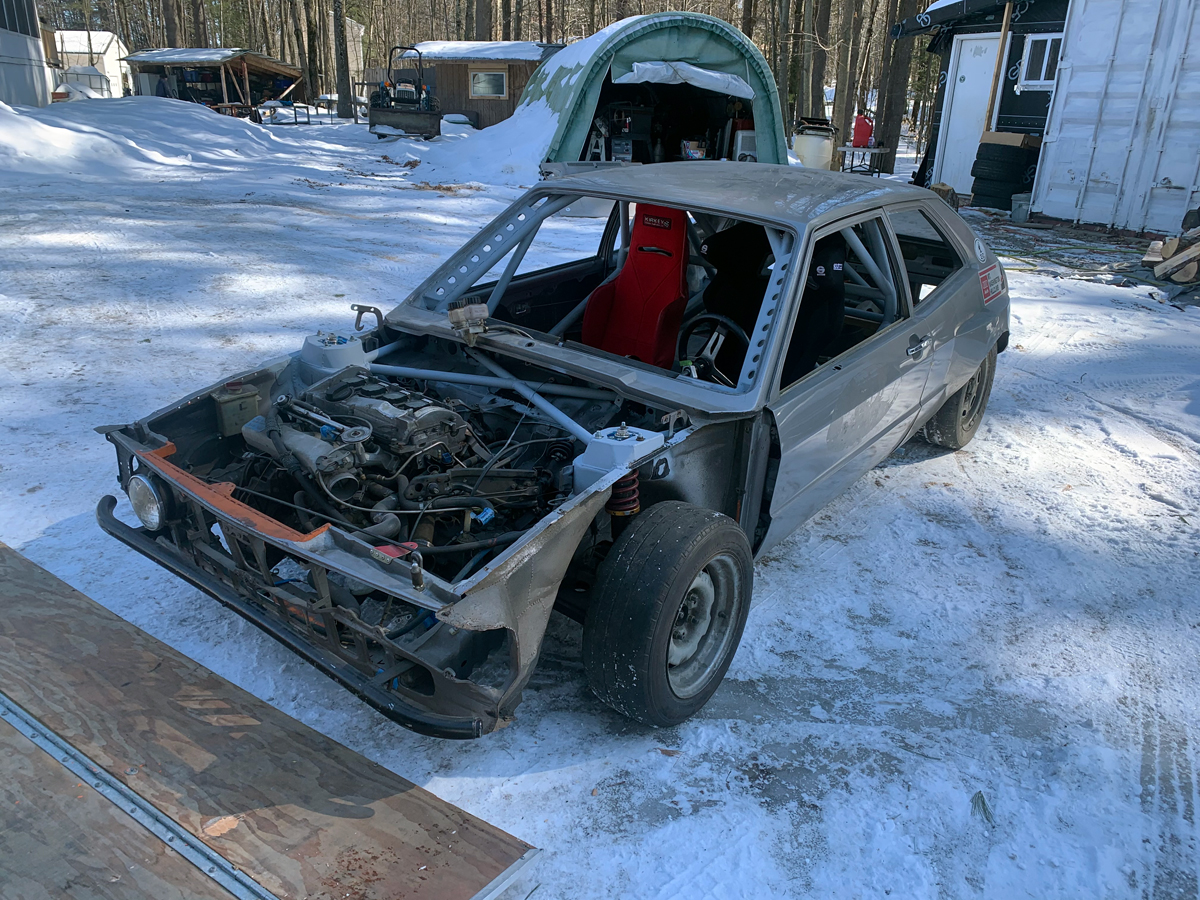
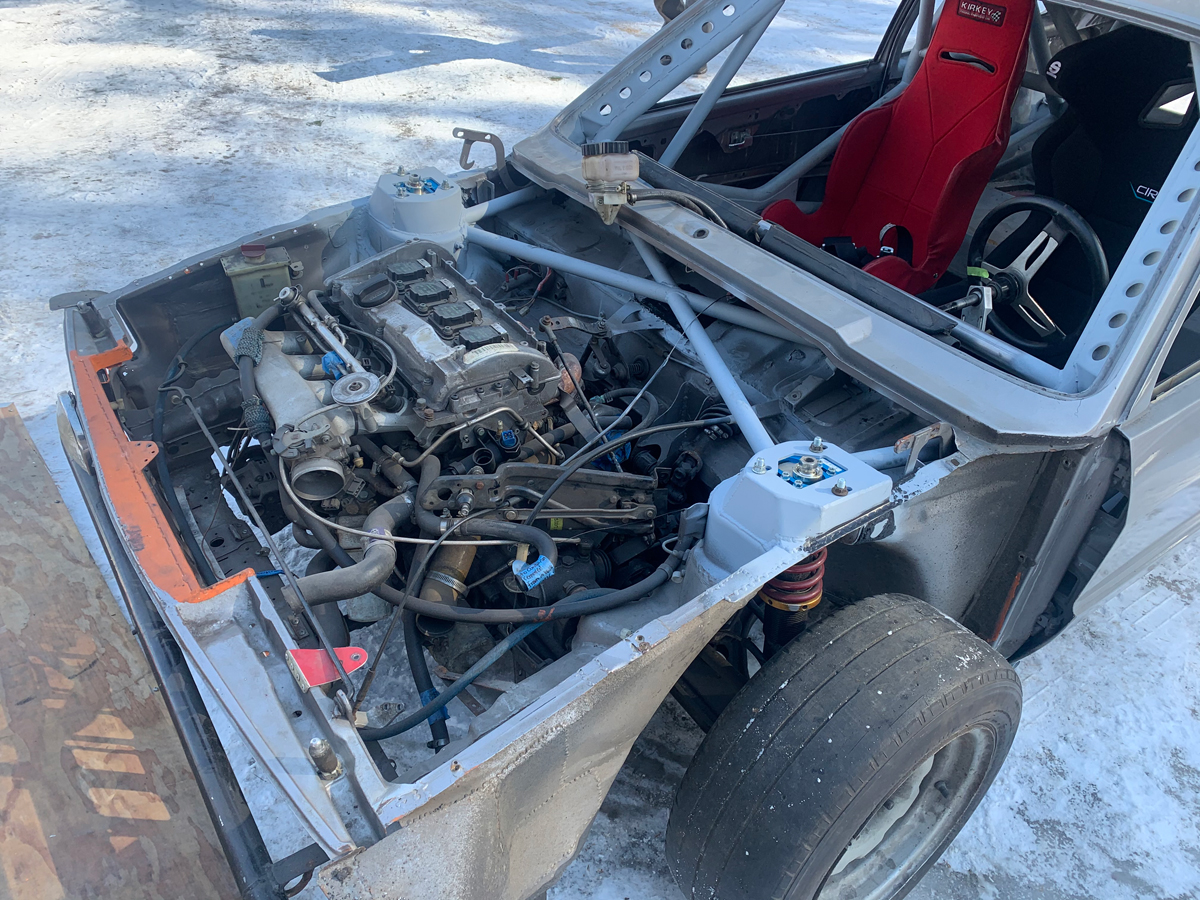
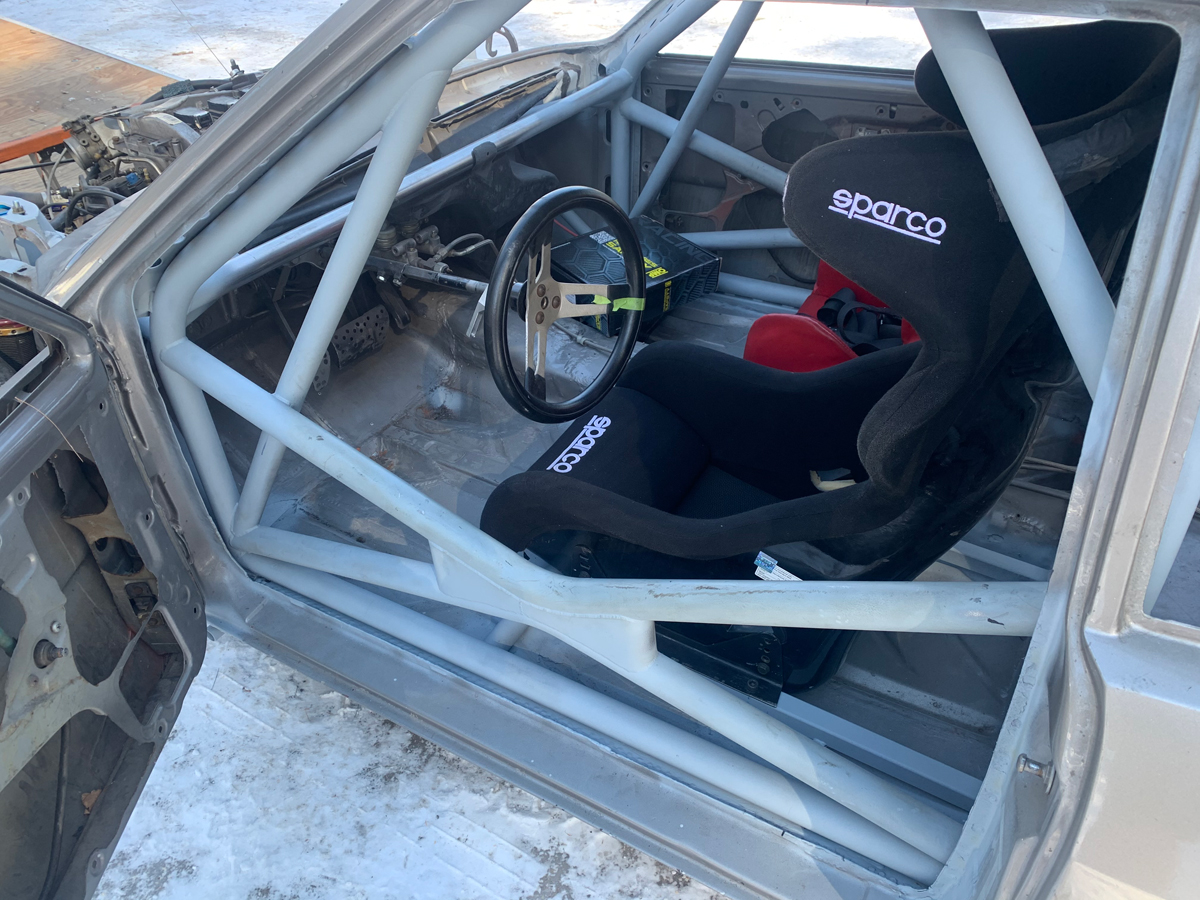
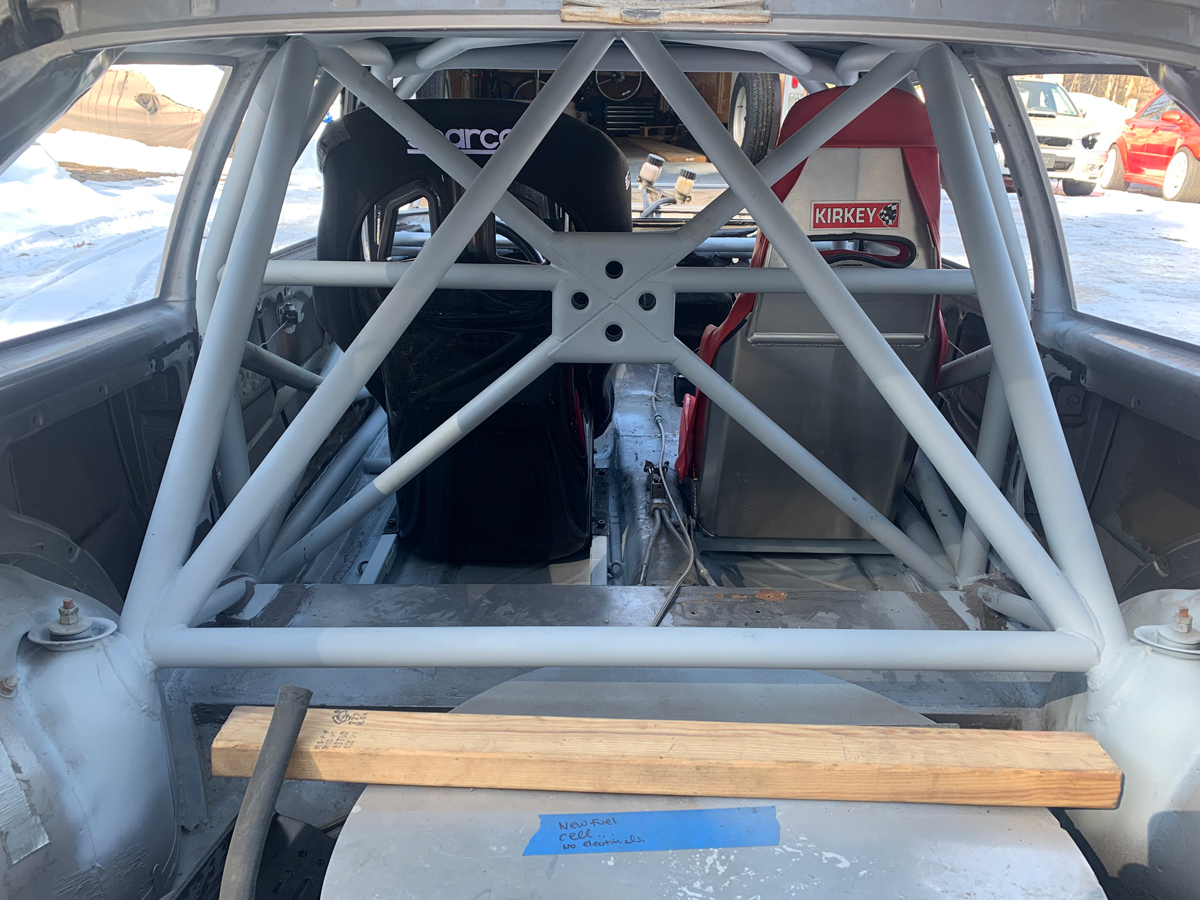
Chapter 11teen: Reported from Joey at Kales Custom, the cage on the Scirocco is done!  I am heading over there on Friday so that we can determine the proper location to mount the fixed seat (no sliders this time).  Gotta remember to bring my helmet.


That is it for Volkswagen news…


Time for the Subaru WRX.

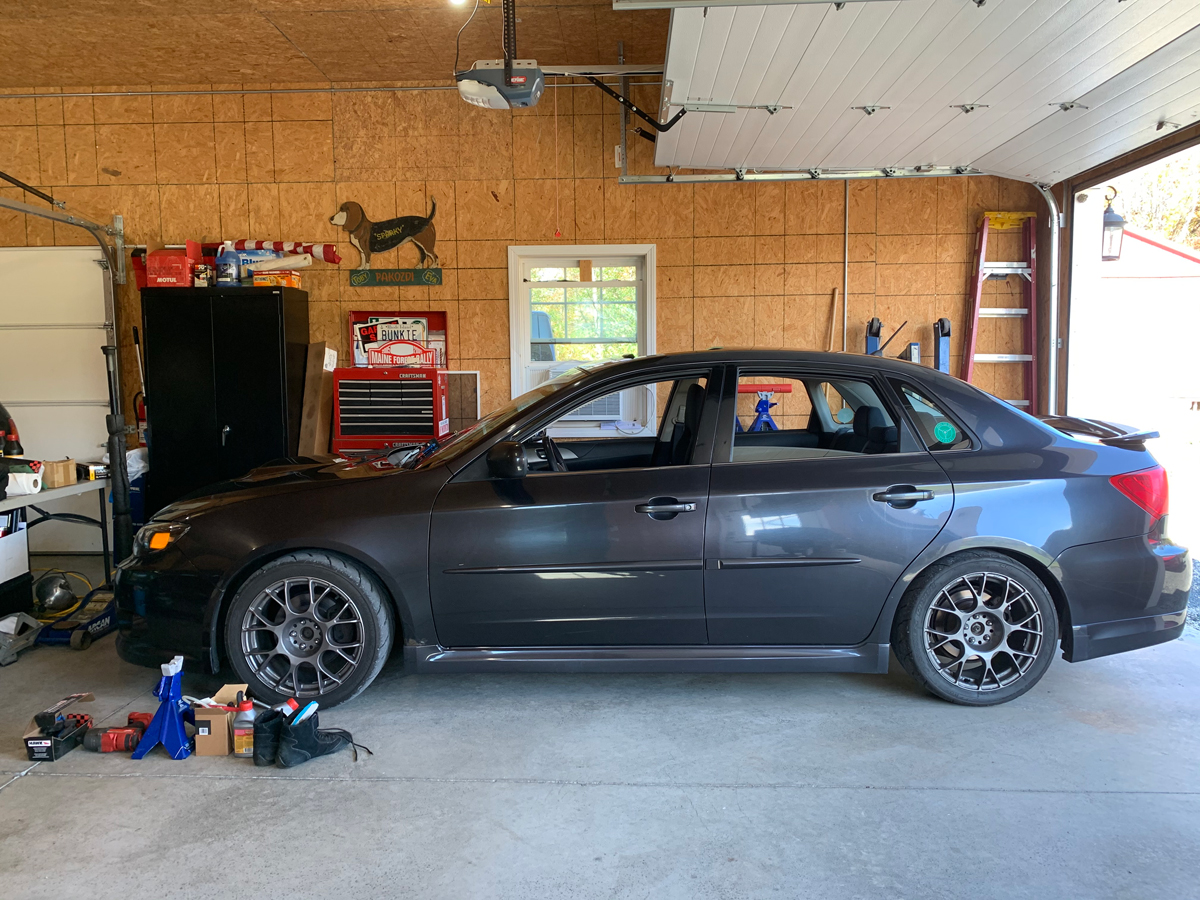
Trying to adjust the hover mode…


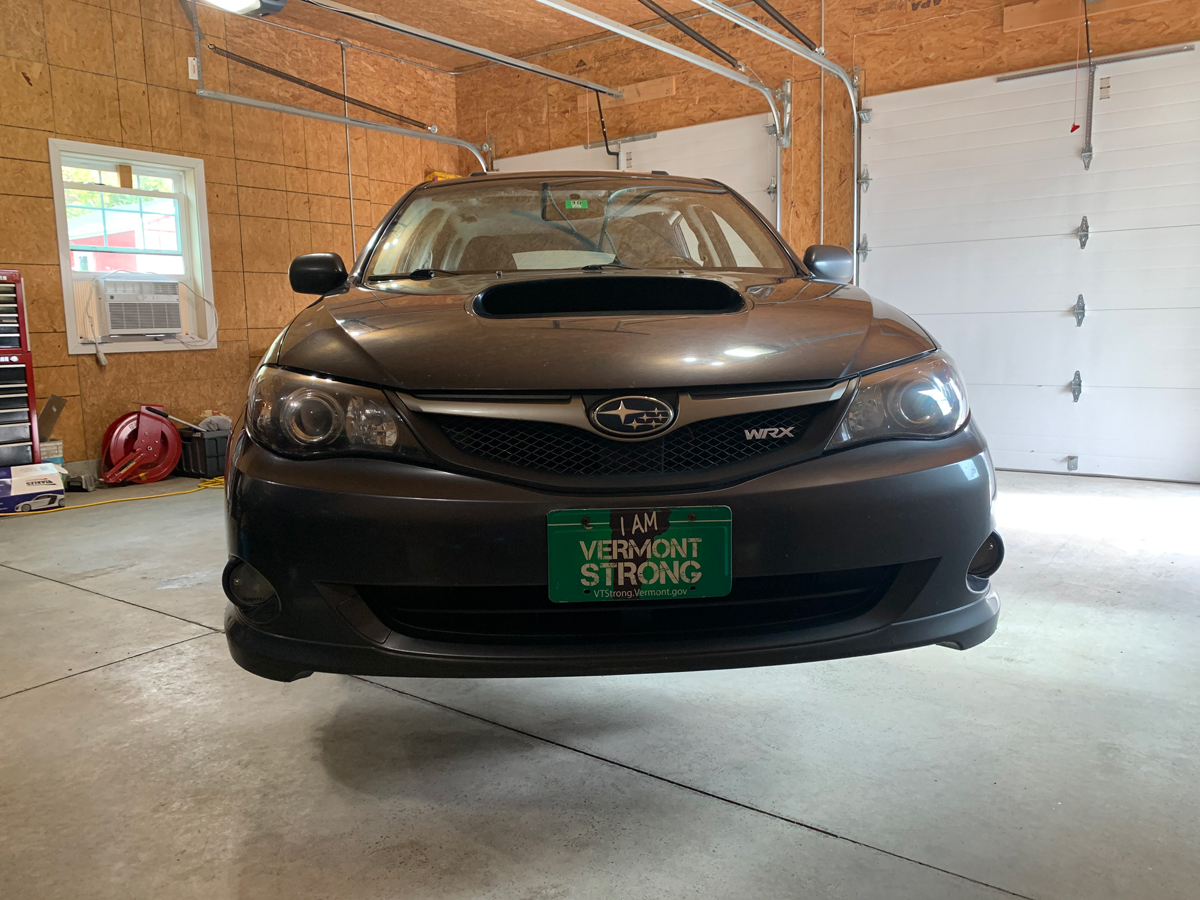
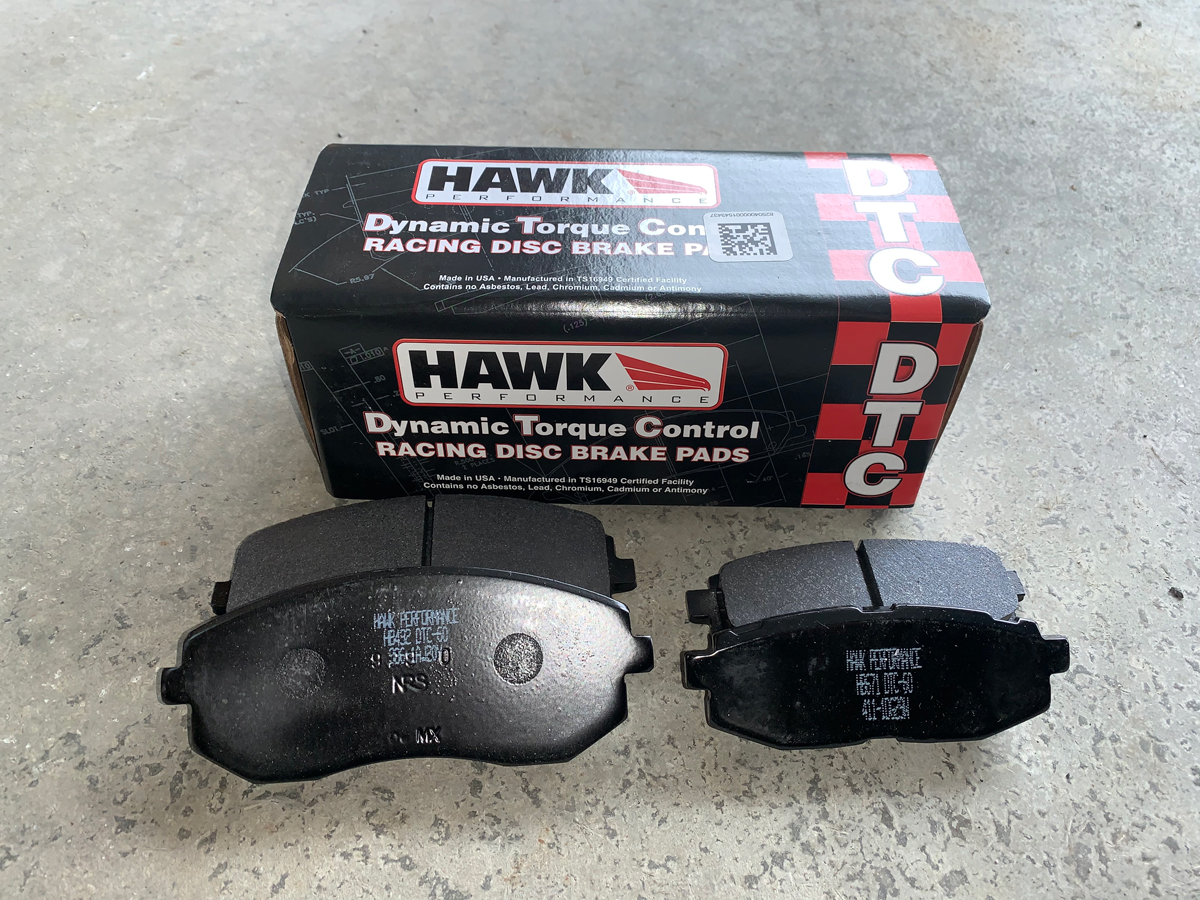
Or, I just have it on jackstands to install the “track only” brake pads and the Toyo R888 tires for the first (and only?) car event for me this year.


I am currently running the Hawk HP Plus if I bring the car to a small track (and I love them for daily driving), but I noticed at a track event at Canaan (http://www.canaanmotorclub.com/the-track) last year led to hot and fading brakes.


I went with Hawk DTC-60 pads front and rear for the 2020 track event.


Back on the ground with new pads and rubber (the Toyos were already mounted on my “race” rims… easy swapping)


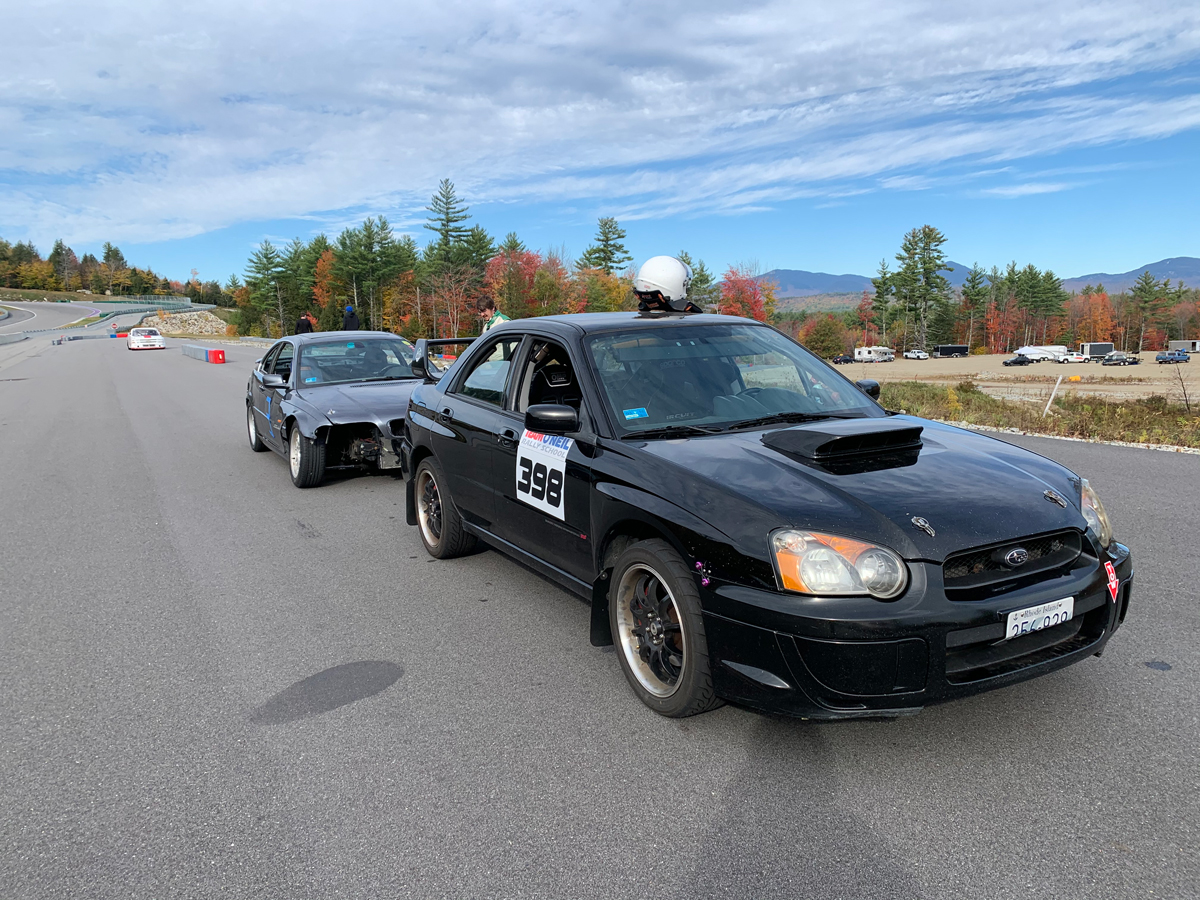
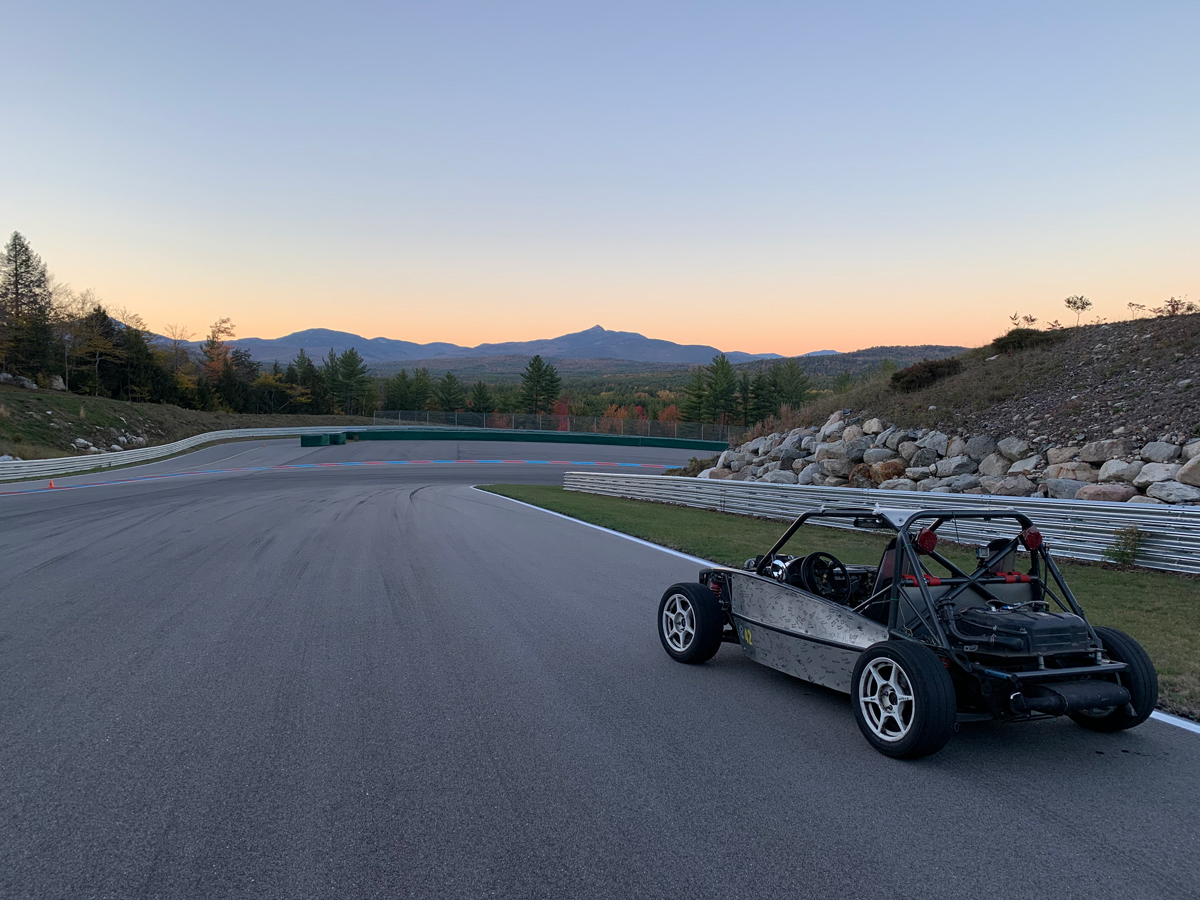
Headed off to Club Motorsports in Tamworth, NH (USA) for a time trial event with some open track on Oct 12.  Great track… lots of fun and still so much to learn.


Here is a video of part of the open track session. Because the car doesn’t have a cage or harness, and I didn’t know the track, I did spend a great deal of time coasting into the brake zone and not trying to go as fast as I could.  Normally, I would drive in deep and put the brake pads to work.  Don’t get me wrong, I was trying to be quick in the corners, etc., but I was cautious with my top speed and how deep I went into corners before hard braking.


Video here: https://www.youtube.com/watch?v=0O4wpXlvHhs


The folks that I race with in the New England Hillclimb Association (NEHA) series organized this great event.  Very little sitting with a lot of driving.  40ish drivers with a car leaving the start line about every 30 seconds.  Kudos!


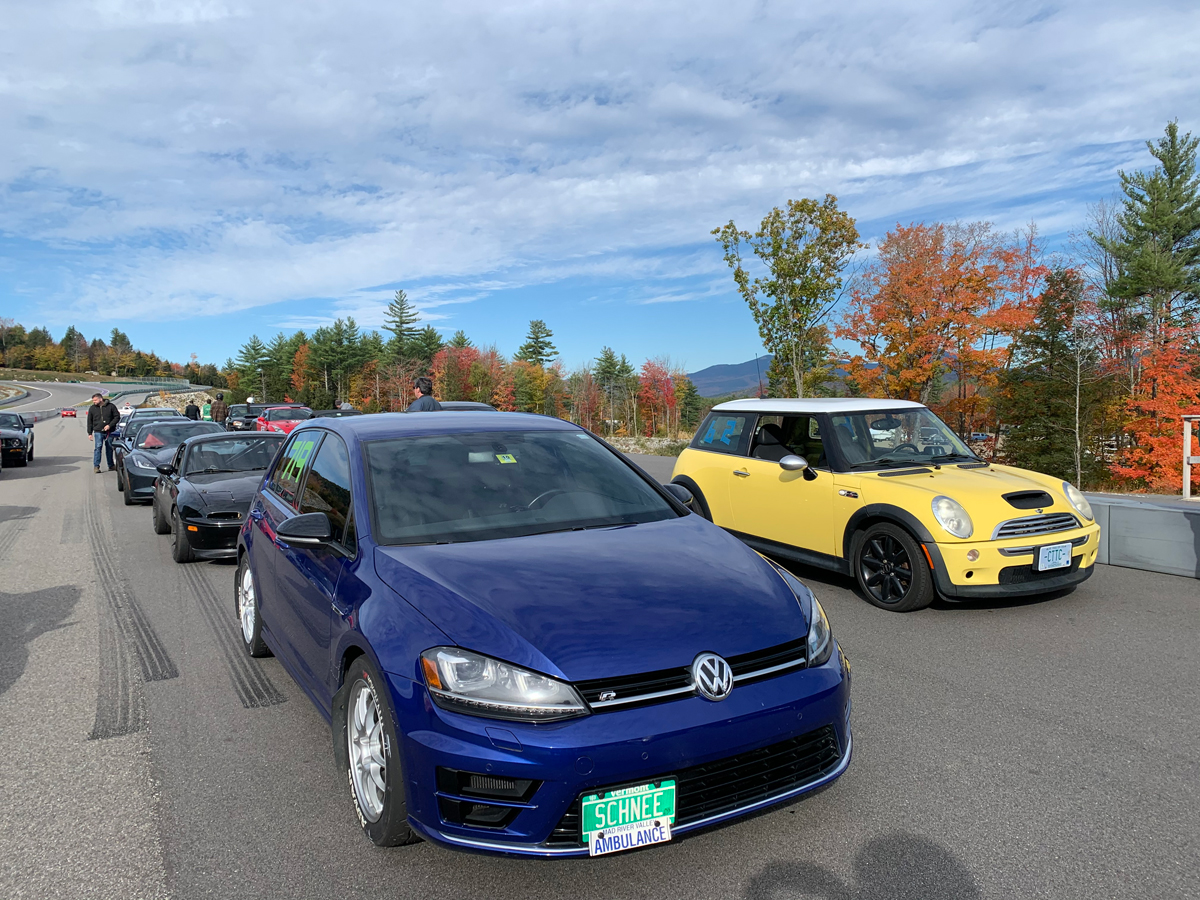
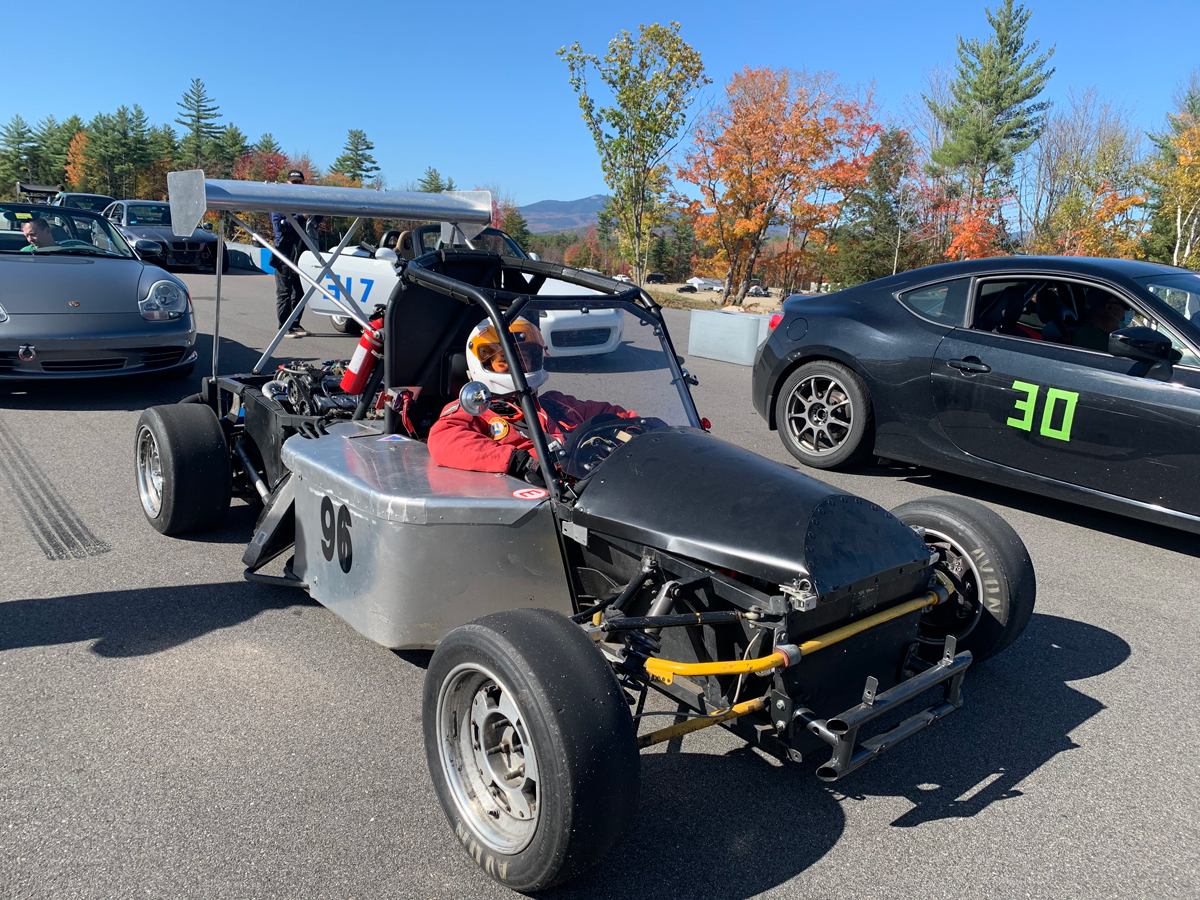
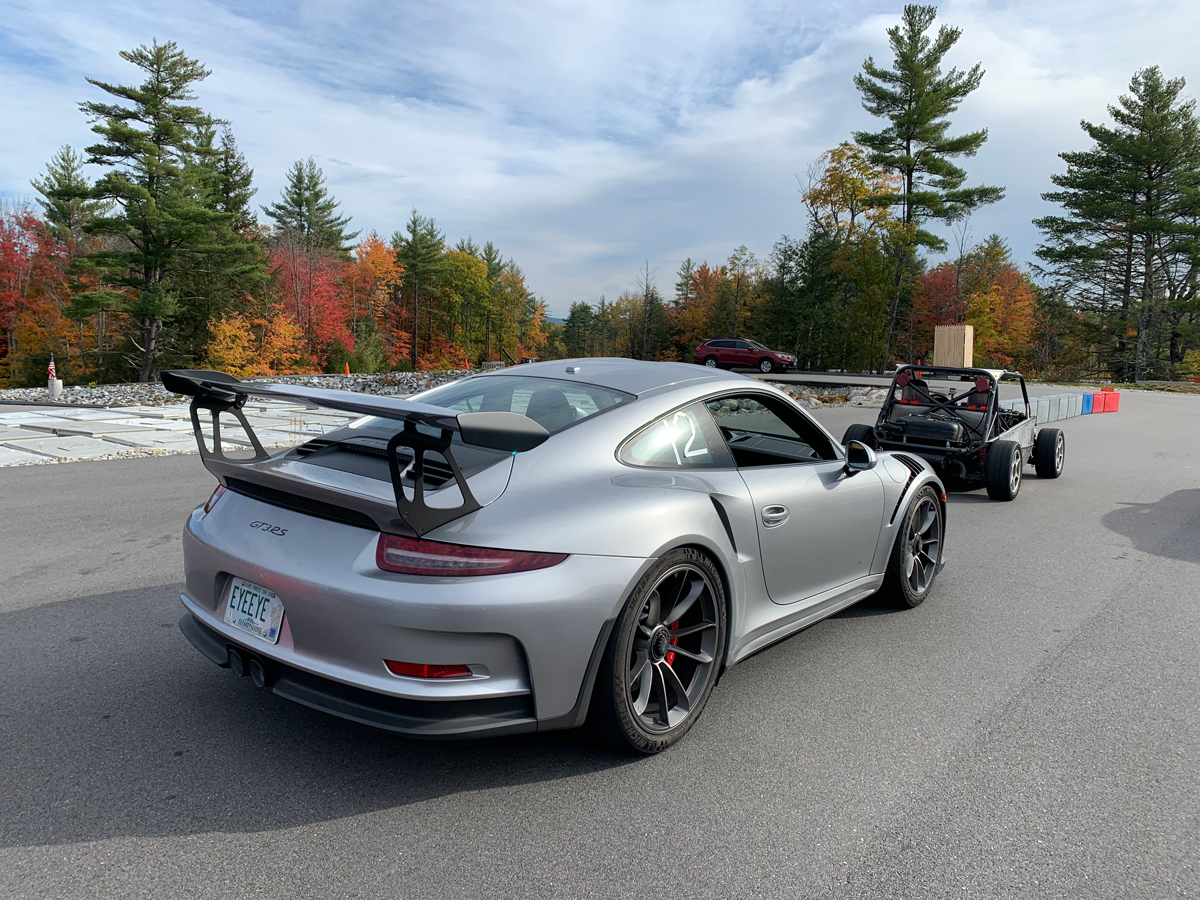
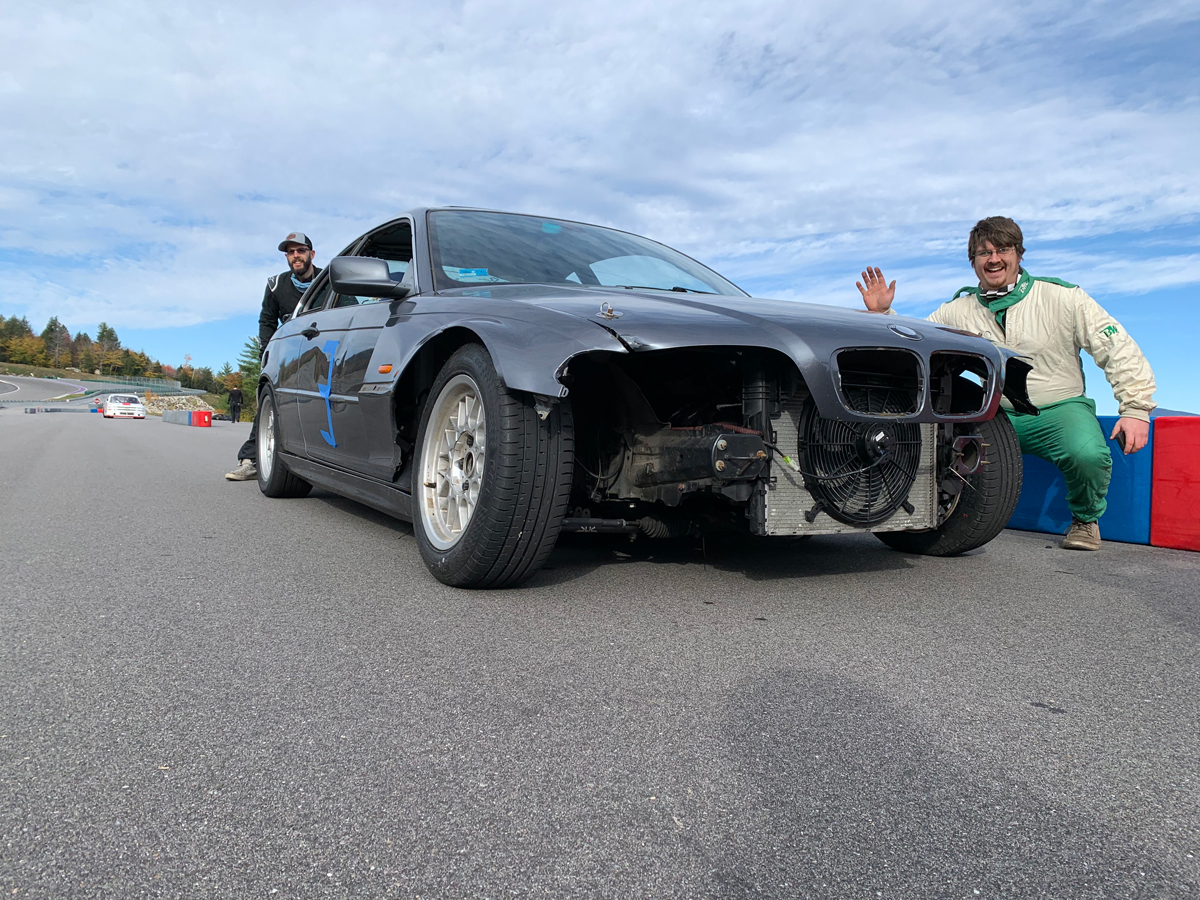
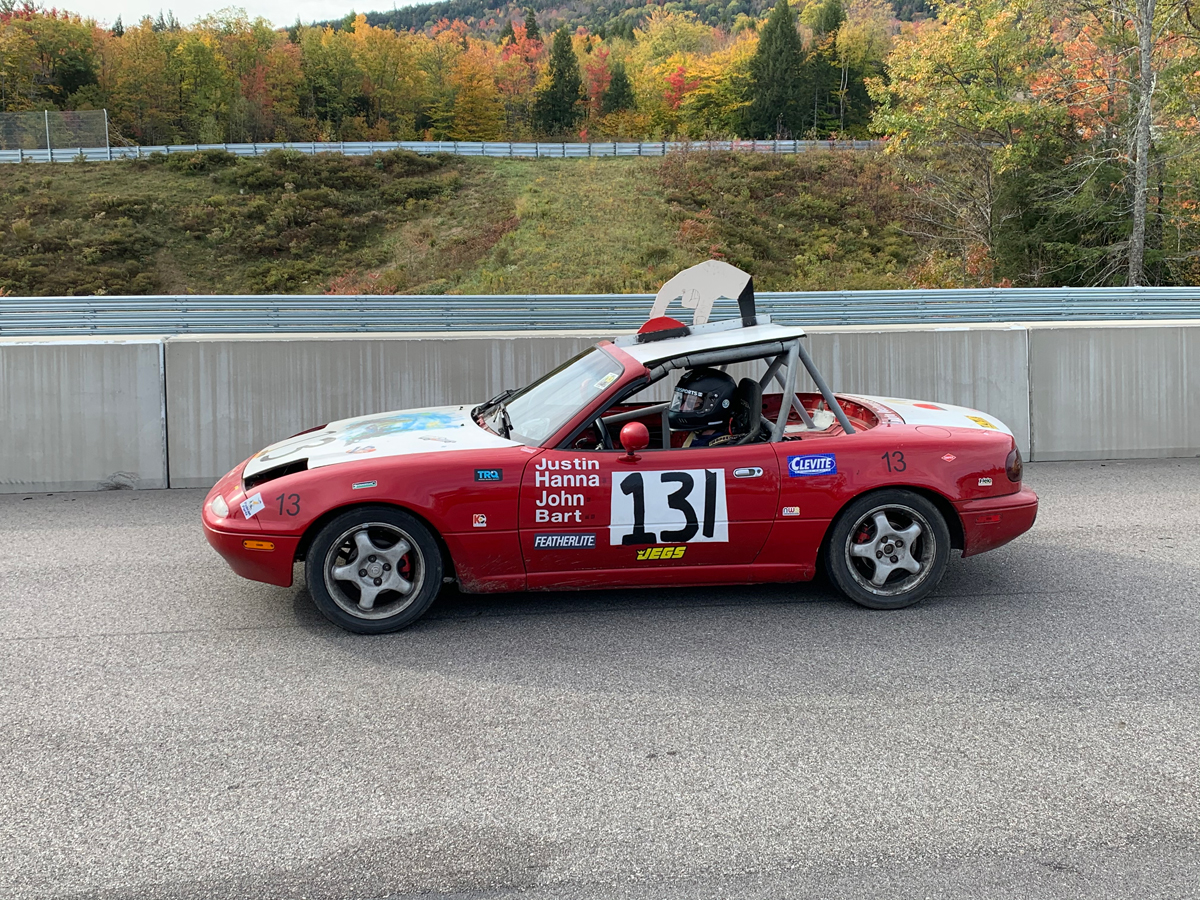
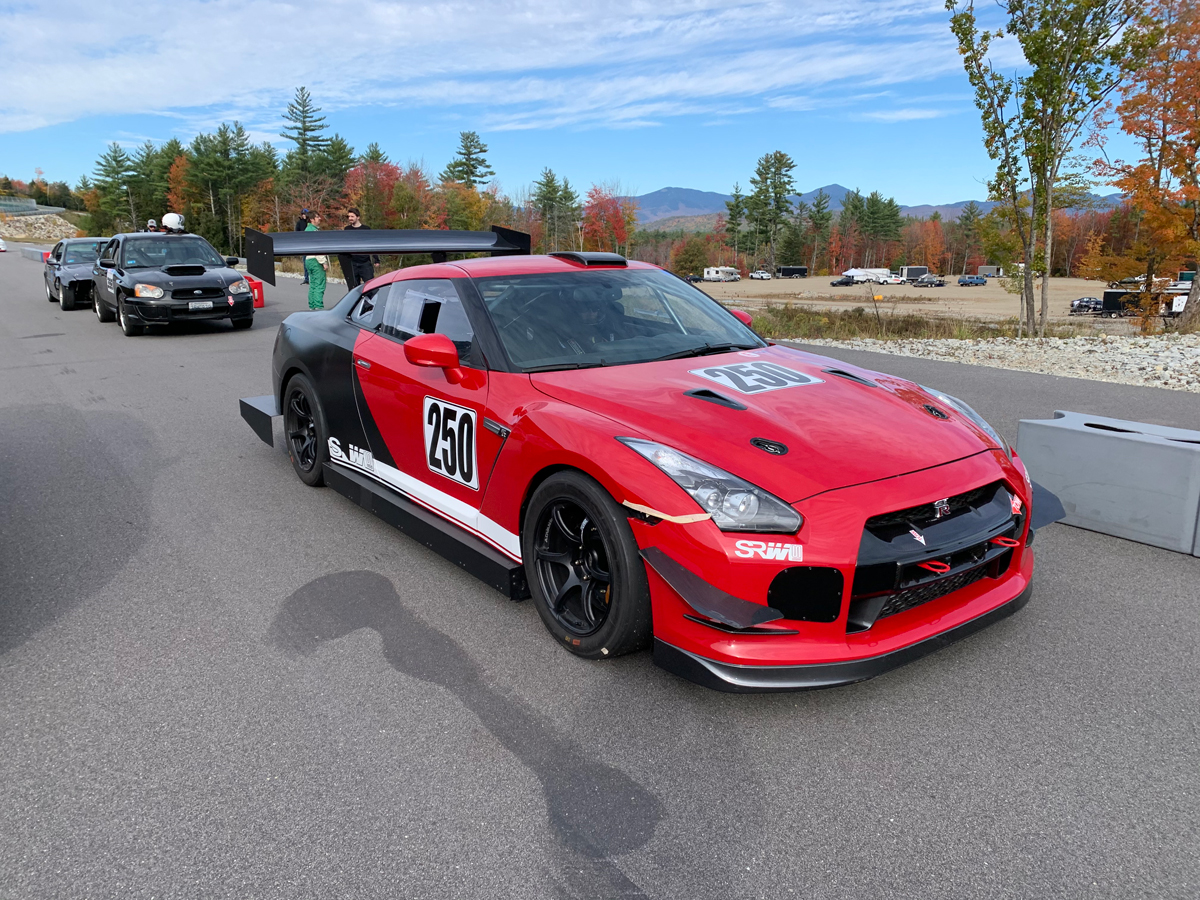
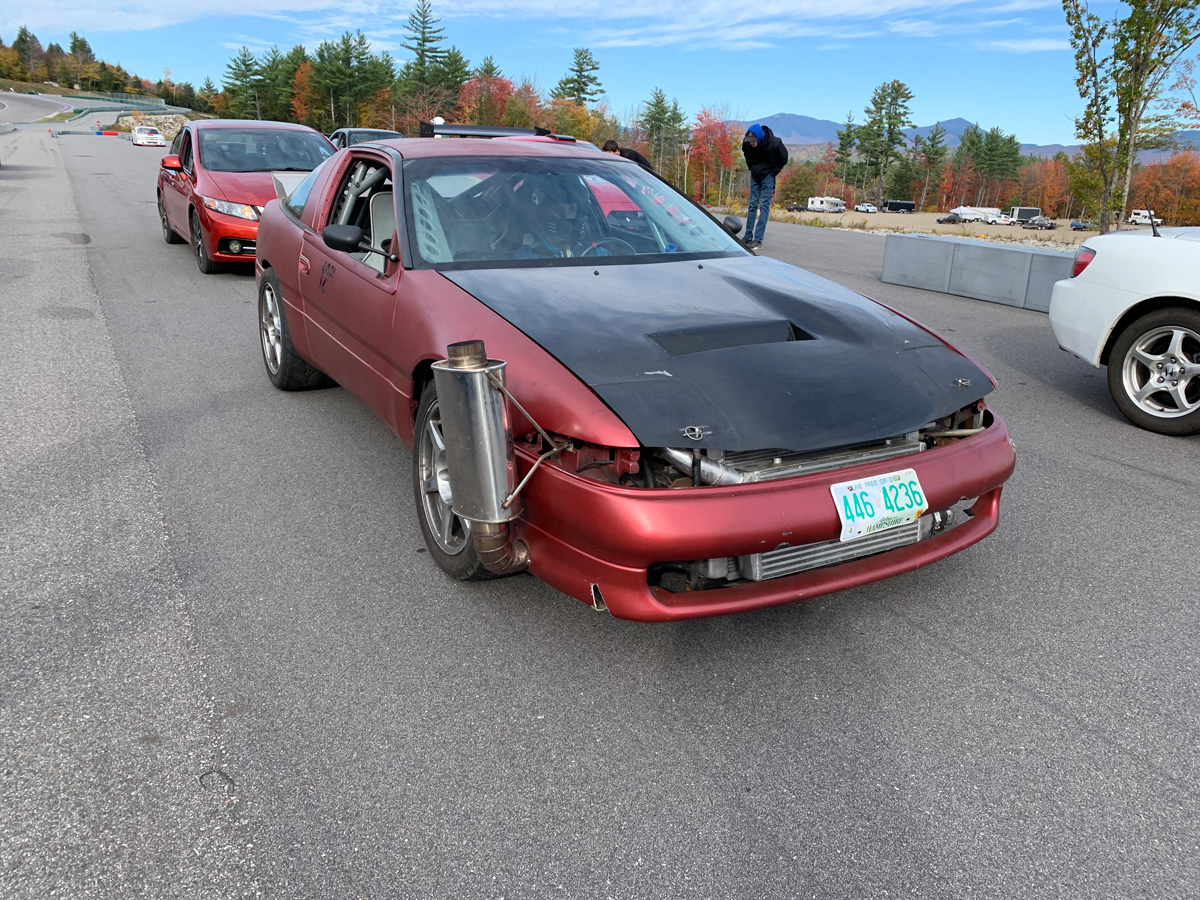
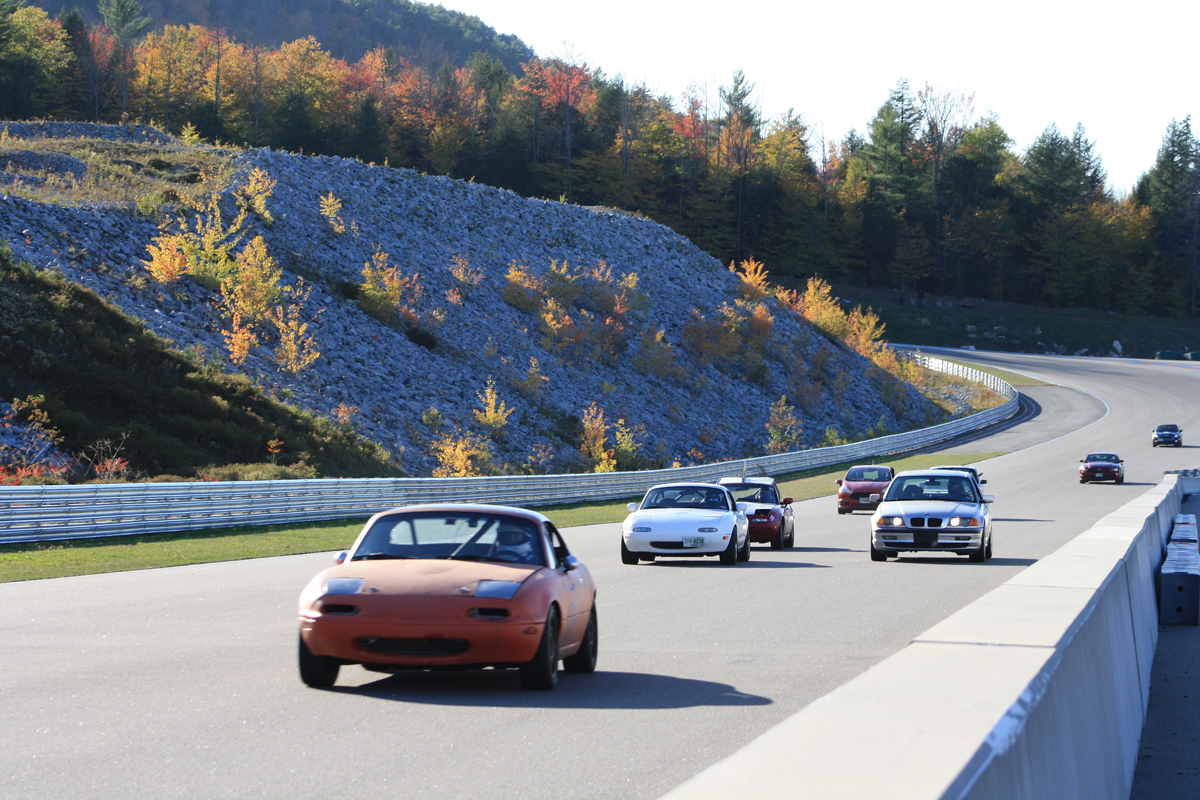
Some photos from the event… diverse group of drivers and cars.


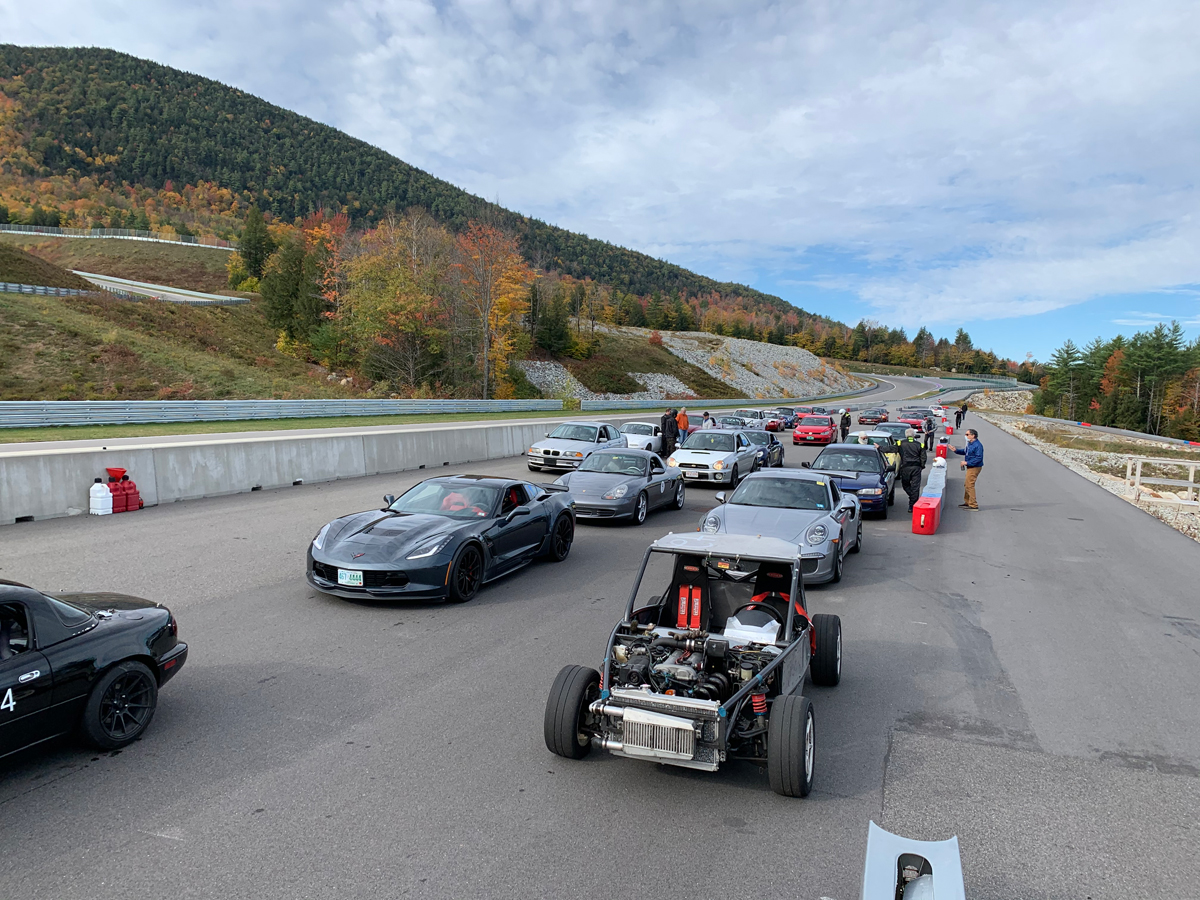
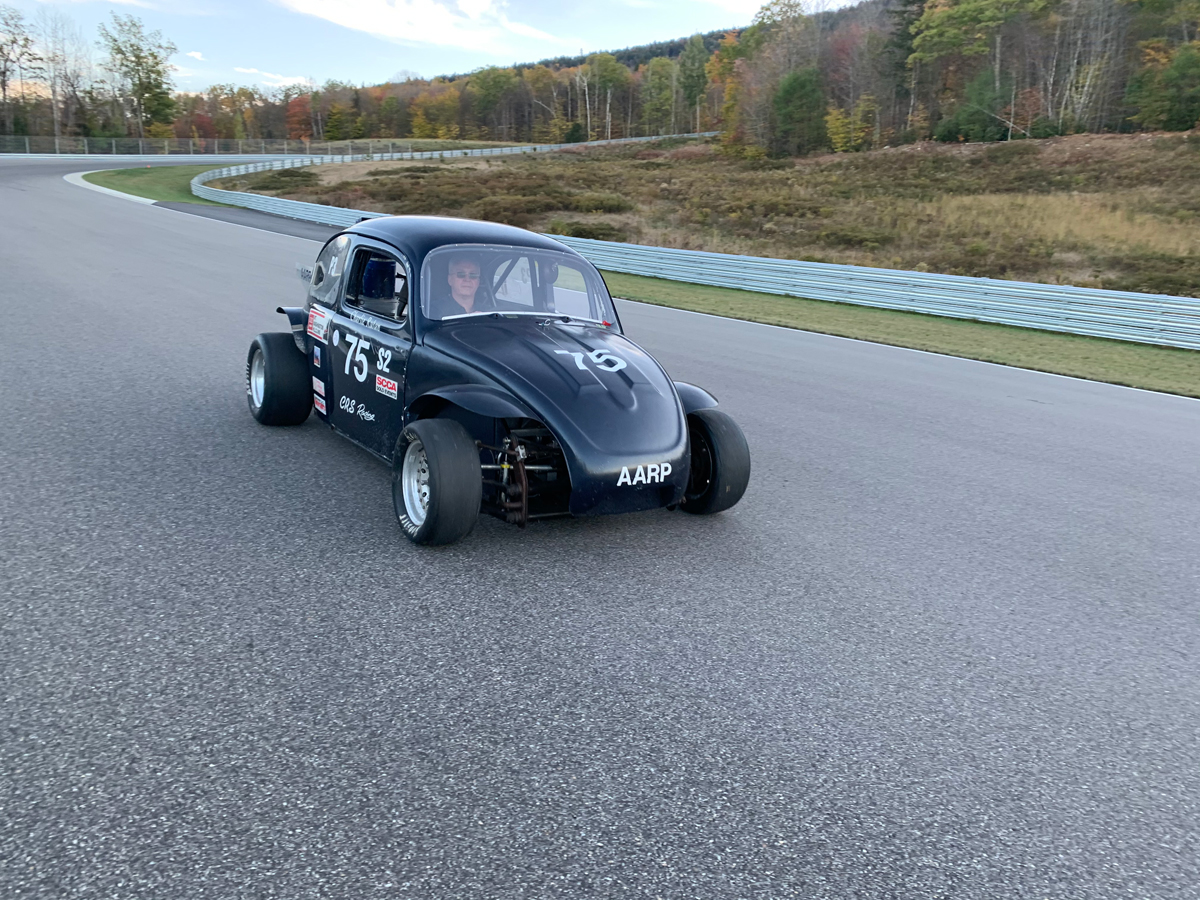
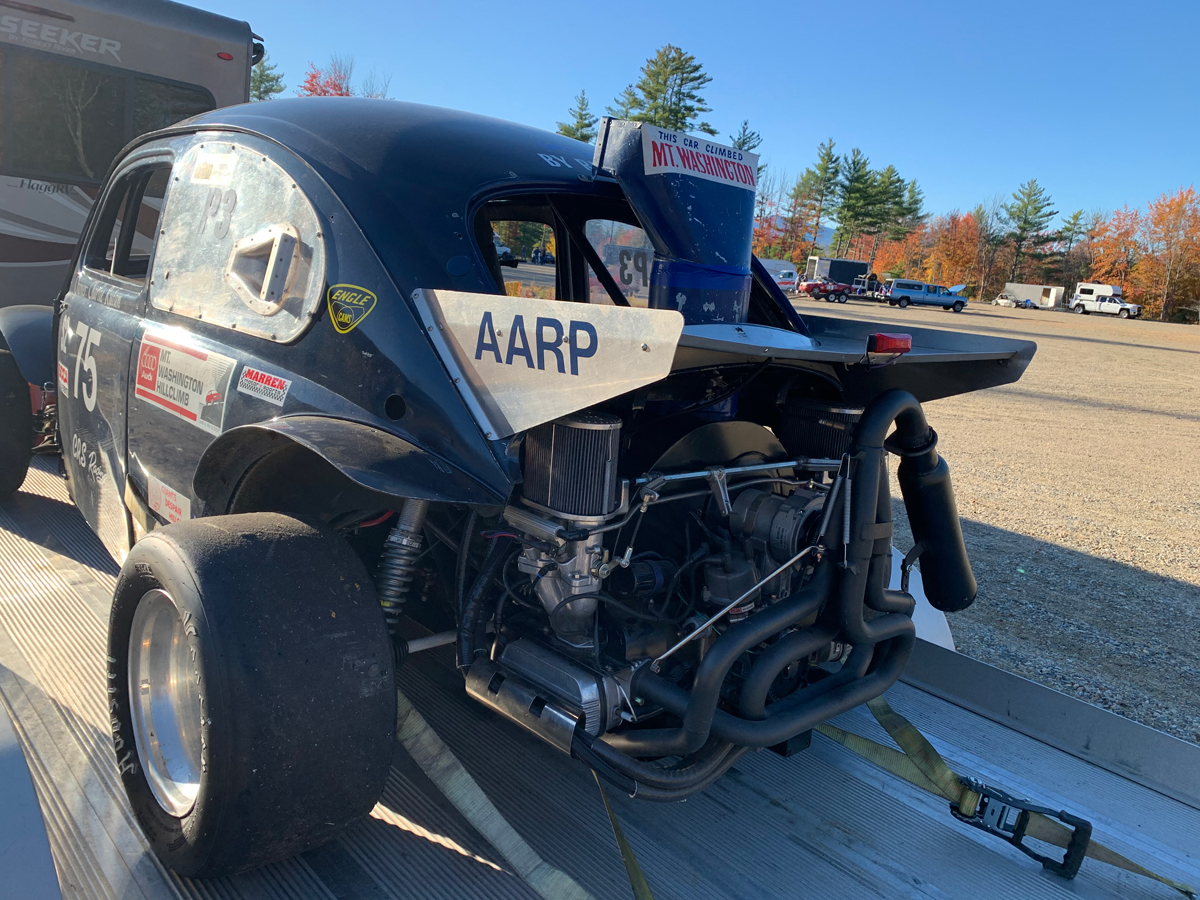
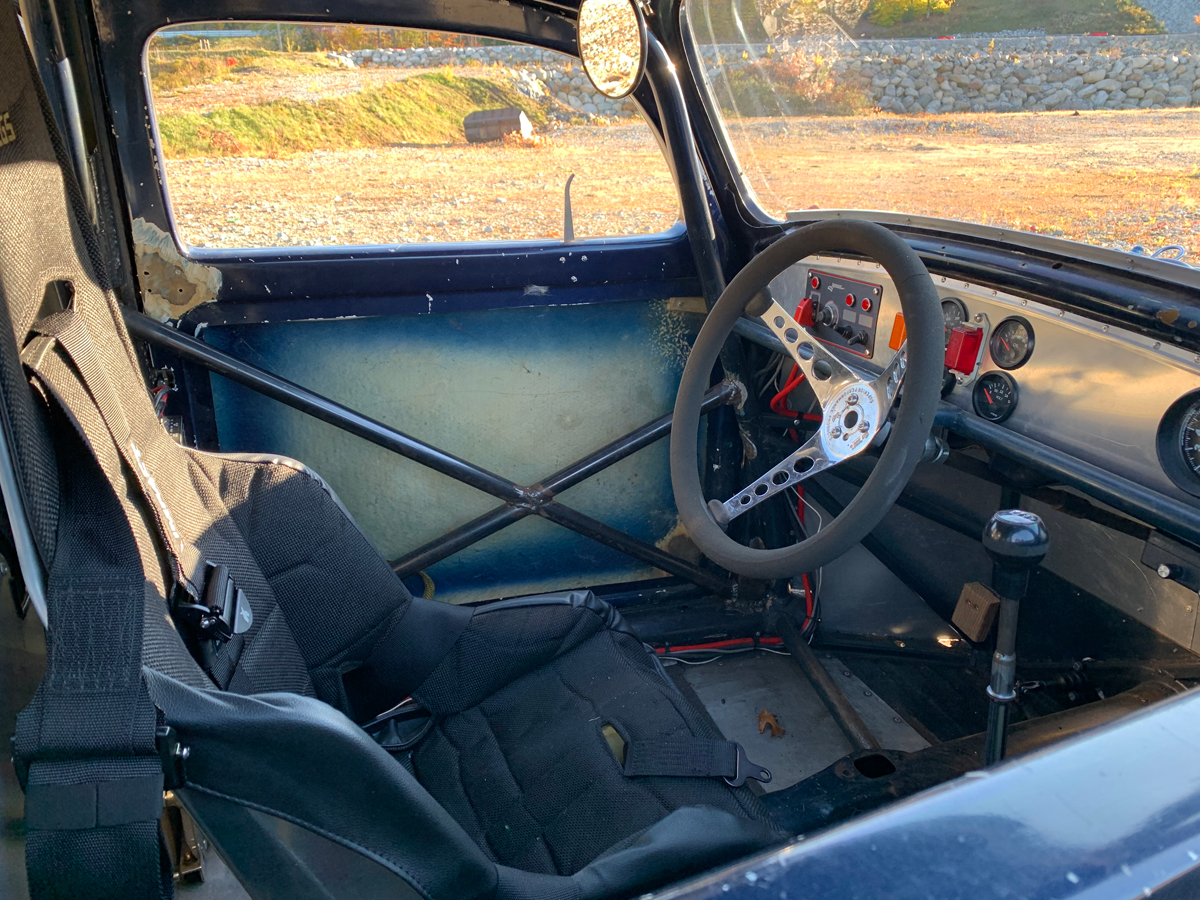
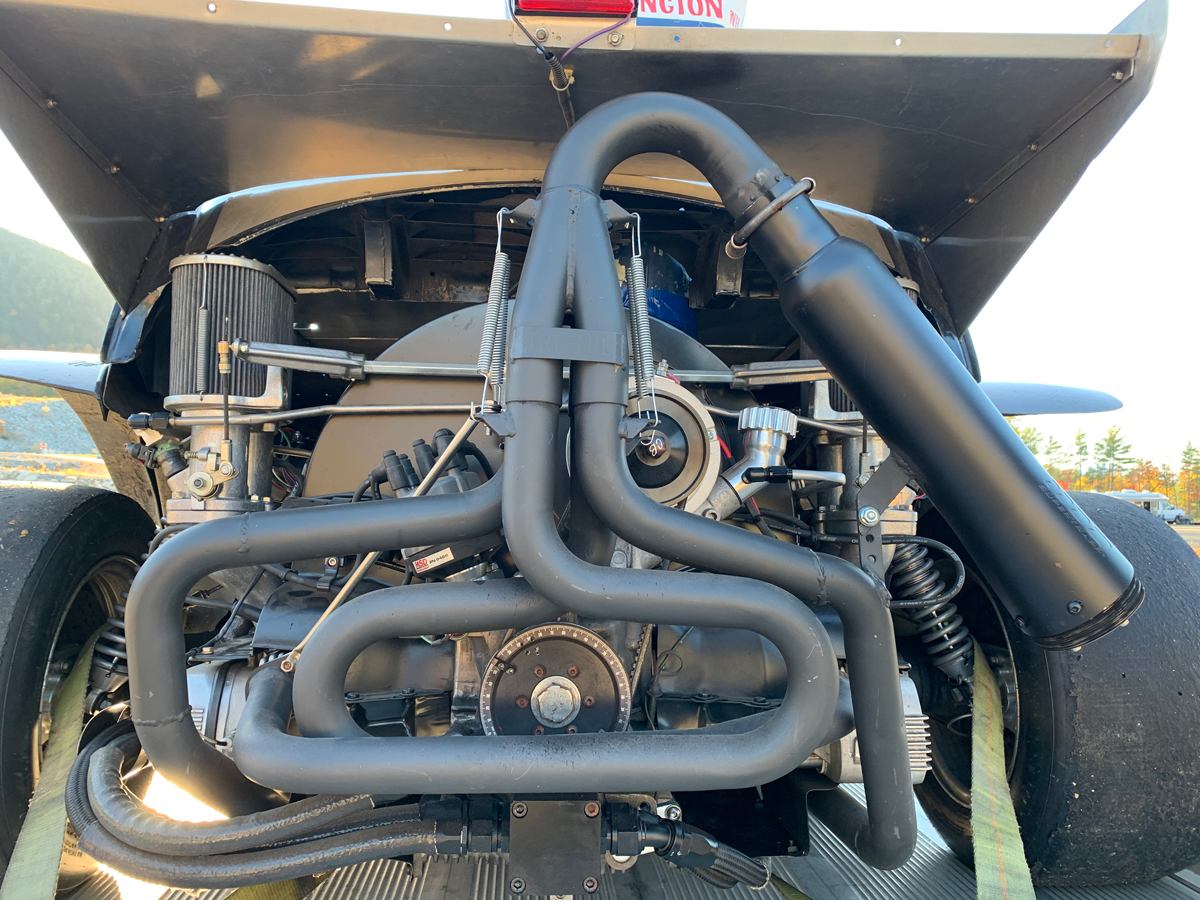
This is a cool car to have back in our ranks.  Charlie Rutan (brother to Bill Rutan who built the Scirocco that I have now) built this fast 1964 VW Beetle and raced it (at the very least) in the NEHA hillclimbs for many years.  He retired from racing in 2000.


Somewhere along the lines, his son autocrossed the car and then ended up trying to sell it in 2016.  Sometime between 2016 and the Oct 12, 2020 event, the Beetle was sold, rebuilt, and was ready for a track event.  Very nice seeing this car back in action again.


Rabbit Farmer
Rabbit Farmer Reader
10/21/20 2:52 p.m.

2009 Subaru WRX... ordering performance exhaust (still planning what I want) to replace the original 150,000 miles stock system.  It is my daily driver that sometimes finds itself on a track.

Before it hits the track again, I want to do through all the suspension bushings to freshen the original aging parts.

2001 VW Golf... on my list this weekend is to finish the power steering rack, install control arms (with new fancy parts), and get all the suspension 100% assembled.

That will leave the horns, coil pack mounting (will need some fabrication assistance to do this correctly), and electric brake booster install

1980 VW Scirocco... well, I think it is a 1980.  Perhaps I should check.

Progress on cage.  I went over to Joey's last week so that we could determine proper mounting location for the seat.  It is a little strange sitting more in the center of the car than normal.

Talked about how to mount camber plates to give me camber and caster (via slotted mounting holes where the camber plates mount to the car).

Some jack pins to avoid dorking up the rocker panels.  Plus, will be more secure when working on the car in the field.  Some tripod adjustable jackstands in the future.

Rabbit Farmer
Rabbit Farmer Reader
10/22/20 7:31 p.m.

Artsy-fartsy image from wife of me working on the car.

Big plans turned into little time tonight.

After dinner (at 6:30) I headed out to garage to assemble the new rack (inner tie rods and new boots), remove old, and install new rack.

At 6:31, upon opening my tool chest drawer to retrieve a tool, I realized that this is going to take me a while to get READY to work.

All my tools were still in the enclosed trailer; I didn't unpack them after the track event at Club Motorsports.  Oops.

7:00.  Rack mounted on workbench, installed inner tie rod ends, and got ready to install boots.

Glad I assembled everything before attempting to tighten the clamps as the clamps need to be around the inner (large) boot before installation.  Hey... this is new to me.

Excited to graduate from zip-ties and hose clamps on the boots.

Got everything together and ready to use my new fancy CV clamp tool.  Perhaps CV clamps have different size starting position on the clamp because the tool was too small to get over the clamp.

I got creative and took the tool apart to extend its reach for the initial clamping and then put it back together to complete the clamp.  The part that I removed pushes down on the head of the clamp.

I'm sure all you engineering and mechanic types out there are cringing at what I am naming all the parts of... stuff.  But, you get the point.

All assembled and called it a night at 8:00.  Long day... I needed a break.

Rabbit Farmer
Rabbit Farmer Reader
11/30/20 8:58 p.m.

Rack is back in and mounted to the subframe.  Next step is to install the four bolts... one of the 14mm x 1.5 bolts did not seem correct so I want to chase the holes first.

Got me thinking... they are TTY bolts on subframe and steering rack.  Decided not to cut any corners and ordered all new bolts.

So... PAUSE for a few days while I source a tap and wait for the bolts to arrive.

Progress is progress.

I recall having to turn the steering wheel to about six o'clock to access the bolt to disconnect the steering column from the rack.

Putting it back together I tried to do a little too much deep thinking.  What do I need to turn the steering wheel to while connected to the rack to be able to get the bolt in an easy to access location while not losing "center" on the rack.

Well... that math wasn't needed.

Just put the column on the rack spline and correct the orientation of the steering wheel.  Lots of splines there to be able to center the steering wheel.

I'm now thinking my rack wasn't exactly centered before.

Proper install here with easy to access bolt.

Steering wheel is confused.  Will adjust when car is rolling around to ensure it is centered properly.

I ordered a new FIA (2025 expiration) OMP Sedan 2/3x3 FIA Harness, 2/3" Shoulder, 3" Lap, Pull Up, 6 point harness.  Just one for now... passengers be damned!

The 2/3" for the shoulder harness has 2" at the top to work with my HANS, but widens to 3" below that point to the cam lock.  (same as what I have now vs. the other option of all 2")

I made sure to get pull up lap belts to work better with my seats. (same)

Also new is the camlock is attached to the sub-belts instead of the lap belt.  We will see how I like that setup.  Present harness has it on the lap belt.

If I like the harness, I might order one for the passenger side, though, the rare passenger makes it hard to justify the approx $300 price tag.  Could start charging $4.28 per fun run... trust me, some deep thinking math went into that number and it actually could work out.  I even carried the two.

After I get subframe situated, install the control arms (new fancy solid bushings!) and the rest of the suspension.  I would be able to drive the car at that point, but I still have a few things to work on.

Installing vacuum pump for the brakes (plug brake booster vacuum hole) and trying to determine if my racing budget will allow for removal of old 034EFI engine management in favor of modern VEMS setup.

We will see.

Steve

matthewmcl (Forum Supporter)
matthewmcl (Forum Supporter) HalfDork
12/1/20 9:57 p.m.

Early vs. late VW tie rods. I went to measure my Mk2 tie rods in hopes that there might be something longer, but my Mk2 tie rods are 13 1/4, which is a lot closer to 13 1/2 than 12 1/2, so "early" likely starts some time before the Mk4.

Rabbit Farmer
Rabbit Farmer Reader
12/2/20 2:23 p.m.

Progress on the 1980 Scirocco.

Joey Kale (Kale's Custom) is finalizing the cage, seat mounts, and camber plates, etc.

Here are some images that Joey posted on his Facebook page to show the recent progress.

I think the quality is top notch.

We are using the exact same camber plates as what we used on the MK4 Golf.  Joey is building a structure on the strut top so that the camber plate is mounted underneath this structure vs. the camber plate being mounted to the topside of the strut tower.  Should be much stronger.

Added in slotted mounting points to allow some caster adjustment as we are trying to dial in the alignment.

Some photos of the cage work...

Good progress.

Yep... I need to get the Golf done as the Scirocco needs to park in the garage where the Golf is sitting.  Golf to the trailer for winter storage.

More progress!

Steve

accordionfolder
accordionfolder SuperDork
12/2/20 2:36 p.m.

The "artsy fartsy" image is bad ass! Love the thread!

Rabbit Farmer
Rabbit Farmer Reader
12/20/20 5:30 a.m.
matthewmcl (Forum Supporter) said:

Early vs. late VW tie rods. I went to measure my Mk2 tie rods in hopes that there might be something longer, but my Mk2 tie rods are 13 1/4, which is a lot closer to 13 1/2 than 12 1/2, so "early" likely starts some time before the Mk4.

I just noticed your comment... hidden in the sea of white on this forum post.  The early vs. late reference comes from my MK4 Bentley, so I assume that means both are within the MK4 generation.

Rabbit Farmer
Rabbit Farmer Reader
1/19/21 12:35 p.m.

First update for 2021.


So much was accomplished since November, but would have been completed back in November if I didn’t have one #$%^! hole that was dorked up.


Back in November, the new steering rack was attached to the subframe and the subframe was in place and ready for the four M14 bolts to attach to the car.


One hole wasn’t quite right… I could not easily tighten the bolt by hand and wanted to chase the threads.


I tried a chase, but it would not work as the threads were too messed up.


I ordered new TTY M14 x 1.50 pitch bolts for the subframe and new TTY bolts for the power steering rack along with a M14 x 1.50 tap and die.


With the subframe still in place, I used the tap on the threads (everything felt good).


But… when trying to torque the bolt, I got that terrible feeling when you know the threads checked out and headed to Florida for vacation.


Off came the subframe (power steering rack on jackstands).  One step backwards.


This is the front right mounting point for the subframe.  Per the Bentley manual, the front mounts, which is a captured nut, is not serviceable with a helicoil unlike the rear mounts.  Bentley states to replace the entire assembly, though, I would think cutting a hole and replacing the nut would also be a good option.


I had a conversation with my hillclimb racing cohorts about Heli-Coils; are they a good option for a captured nut, are they strong enough, etc.  The responses were very positive.


Then someone mentioned Time-Serts as another option.  Hmmmm, internet research of Heli-Coils vs Time-Sert showed both were good options, but I really liked the design of the Time-Sert (a threaded barrel with a lip on top as a stop) for fixing the subframe threads.


Ordered M14 x 1.50 kit from Amazon.


The kit includes a 57/64” S&D drill bit, counterbore, tap for the Time-Sert barrel (unsure of the actual tap size), driver, and four inserts.


Thankfully, I purchased a 1/2" drill back in 2001, used it once to drill three holes in my open trailer, and haven’t used it since.


Drilled the hole for the insert slowly with lots of oil.


Normally, the next step is to use the counterbore to allow for a flush install of the insert as the top has a lip, but it wasn’t needed in my case as the hole in the unibody was adequate.


Tap for the insert.


Installing the insert using 30W oil (per the instructions)


The new threads.


Installed the subframe (new threads worked!), control arms, axles, etc.


This picture captures everything that I did to the car over the summer… obviously, in no rush as there were no events.


* New power steering rack with harder poli mount (there is only one as the second is all metal)

* Control arms with metal bushings

* New ball joints and outer tie rod ends

* New oil pan

* New brake calipers and pads

* New wheel bearings and hubs (right side didn’t need a new hub)

* New suspension

* Changed left front wheel sensor to a non-brake pad wear sensor version (had to depin at the ABS module)


Close up of the rear control arm bushing.


I noticed that I had to full seat the new struts.  Was not able to do when installing; had to wait until I was able to put the full weight of the car on it.


Loosened the strut bolt.  I also used a strut spreader on each side; unsure if it was necessary.


Good thing I purchased two of the Metal Nerd (MN3424) strut spreaders.  I ordered two as I was worried about misplacing the small tool.


Properly seated and everything is tight again.


Torqued inner and outer axle bolts.


I noticed that the right wheel had a heck of a lot of negative camber.


Prior to the new suspension, I had set the right camber plate all the way negative to match the left side that was more in the middle.  Something was off with right vs. left.  Whatever it was, the changes I made this summer corrected it.


Top view of left and right wheel and camber plate to show the difference.


Car on the ground.  I still need to determine ride height (pretty close to stock height), adjust the strut/shock damping, and align the front end.


I forgot that I had this little gem.  Custom made “Rabbit Farmer” badge for the back of the Scirocco.


Then there is the 2009 Subaru WRX.  It didn’t pass state inspection back in October due to a leaky exhaust system. It is the original… can’t expect it to last forever, especially with the salty winters in Vermont.


I have been trying to find the Invidia Q300 cat back exhaust (model number INVHS08SW4GT3) since October, but it was back ordered on every vendor’s website.  I finally ordered it from RallySportDirect for $726 (with taxes) on Black Friday to get 10% off knowing that it was still on back order.  The estimate at that time was early December, which changed to late December, then mid-January.


It arrived on January 18.


Based on reviews, the Q300 is not loud and doesn’t drone.  I was looking for something a little better than stock and cheaper than an OEM Subaru exhaust.  Oh… and stainless steel.


I would install the exhaust myself, except I know that I have to address a leaking shifter shaft seal on the back/top of the transmission.  I plan to bring it to a shop for the transmission leak and exhaust install.


Then to Subaru for alignment and inspection.


For my information for the next time I am taking everything apart at a race should I need the torque specs and forgot the Bentley at home:


Powersteering rack to subframe: 15 ft/lb + 1/4 turn

Subframe (all four bolts) to body: 74 ft/lb + 1/4 turn

Ball joint bolts to control arm (3 bolts): 15 ft/lb + 1/4 turn

Outer tie rod to hub: 33 ft/lb

Control arm (front bolt): 52 ft/lb + 1/4 turn

Control arm (back bolt): 52 ft/lb + 1/4 turn

Dogbone to bottom of transmission (2 bolts): 37 ft/lb

Inner axle bolts: Control arm (front bolt): 59 ft/lb

Axle bolt to hub: 184 ft/lb + 1/4 turn, back off 1/2 turn, roll car to rotate wheel 180-degrees, 184 ft/lb + 1/4 turn


Rabbit Farmer
Rabbit Farmer Reader
1/20/21 9:33 a.m.

Invidia Q300 cat back exhaust (model number INVHS08SW4GT3) from www.rallysportdirect.com/ for the 2009 Subaru WRX.

Unpacking to check out the construction. Only one small dent in shipping; there was some metal to metal contact in the package... there was more packing between the exhaust and the outside of the box than between the exhaust pieces.

Seems to be a nicely constructed exhaust system.  Looking forward to getting it on the car.  Included bolts and gaskets for the three-bolt flanges.  I need to determine what I am going to do with exhaust hangers (stock or aftermarket).  The car is pretty stock.


Rabbit Farmer
Rabbit Farmer Reader
2/5/21 4:31 p.m.

More progress.


More pictures than words.


1980 VW Scirocco MK1 with 1.8T


Getting closer with cage, camber plates, jack points, etc. at Kales Custom (Joey Kale)


Body plate to support the camber plates almost done. Very strong and functional. Will have to get a little creative with the hood to work around these.


2001 VW Golf MK4 with 1.8T


Smaller hotside to the turbo.


Turbo is GTX2863R with 42mm external WG / 6852 housing ; previously it was the 3652 housing. Just purchased the 2552 housing to spool quicker. I believe this is the smallest I can get for my turbo that is a direct replacement.


I had to get schooled how to read these numbers on the housing as they didn't make sense to me. Hopefully I was paying attention.


Essentially, just reverse the first two numbers for the A/R.


Previous 3652 (.63 A/R)

Current 6852 (.68 A/R) which is larger... I actually wanted to go smaller from the .63

New 2552 (.52 A/R)


Smaller A/R should make things spool up a little quicker. Fingers crossed.


I am still looking to replace the 034EFI engine management and go with VEMS.


With the new .52 A/R hotside, desire to go with pump fuel, and VEMS, we will have a very different driving car this summer. I assume we will have lower power numbers (less speed in the straights), but hopefully have better acceleration out of the corners.


I thought of trying 15" wheels this summer (better gearing.... I hope), but with the excess supply of 17" take-offs from Vermont SportsCar, I will have to stay with 17" for now.


2009 Subaru WRX Impreza 2.5


I would have installed the new cat back exhaust myself, but I also need the seal on the shifter rod (unsure exactly what it is on this car) is known to leak. Since I wasn't sure what was needed for that project (or how to do it), I brought the car to Cheese Factory Automotive (Colchester, Vermont) for the exhaust install and address the transmission leak.


Done quick and correctly. Very happy with the result. Now to get that inspection sticker that expired in October.


Shavarsh
Shavarsh Reader
2/5/21 4:50 p.m.

That scirocco is pure beauty, love the work being done. This thread continues to deliver!

preach (fs)
preach (fs) GRM+ Memberand HalfDork
2/5/21 4:53 p.m.

Nice to see Joey is still cranking out beautiful work.

And you RF still building crazy VWs!

Rabbit Farmer
Rabbit Farmer Reader
2/12/21 10:56 p.m.
preach (fs) said:

Nice to see Joey is still cranking out beautiful work.

And you RF still building crazy VWs!


We are both trying. I think this Scirocco will be the best performing car I have owned by the time I'm done.  Looking for reliable power, easy to work on, pump fuel, etc.  We will see what happens.

preach (fs)
preach (fs) GRM+ Memberand HalfDork
2/12/21 11:20 p.m.

My next money pit is 07k powered. Might ave to talk to Joey about the cage but have no way of getting the car to him from NH right now.

Rabbit Farmer
Rabbit Farmer Reader
2/14/21 4:48 p.m.
preach (fs) said:

My next money pit is 07k powered. Might ave to talk to Joey about the cage but have no way of getting the car to him from NH right now.

Cage in NH.... Wicked Performance Group.

http://www.wicked-performance.com/

They are good. Very experienced with racing, etc.

Rabbit Farmer
Rabbit Farmer Reader
3/9/21 9:00 a.m.

Volkswagen MK1 Scirocco


In the words of Ozzy… “Mama I’m Coming Home!”


Joey laying out some boards to make the transition to the ramp easier (the car was too low).  Jumping on the internet bandwagon with Bernie doing the assist.


Joey took lots of pictures during the build. I will share after I get them.


Volkswagen MK4 Golf


I ordered the replacement FIA 6-point harness (driver’s side only).  I think I must have missed the part in the description that stated these were for harnesses that mount to the bar in the back of the car. 


No problem… I will just roll up the excess and put a ziptip around it.


The difference with this harness is the release is attached to the two anti-sub straps. 


My concern with this is having the bar that connects the two points being uncomfortable on top of my legs.  I will have to pay attention when adjusting (the installation process) to ensure it is in the correct location.


I have the old race seat in the Golf at the moment as the new seat is in the Scirocco for the cage building.  What I did notice is that the release does not fit through the hole on the bottom of the old seat… means that I have to partially uninstall the race seat to bring the anti-sub straps through the top of the seat vs. installing the straps and feeding the release through the hole in the mounted seat.


The good news is that the new seat (which belongs in the Golf) has a huge hole in the bottom to make the installation much easier. Whew!


Next… I have to adjust the height of the suspension in the Golf. 


I realize that I was cranking the coilover collar up (raise car) a lot trying to get to stock ride height.  I want to start with the stock ride height to get the suspension geometry correct.


Stock is 15.5” front and 15.25” rear measuring from the center of the wheel to the lip on the fender.  (I have also seen 395mm front and 390mm rear which makes the rear a little greater than 15.25”)


It seems that I was wasting a lot of spring travel (compressing the single spring trying to get the height correct).  So… I decided to add a second spring to the mix.


I changed the setup from a “main and helper” to a “main and tender”.


New spring is ERS-175-250-200 (number printed on spring)


(3.05” free height) - (2.5” diameter) - (200 #/in spring rate)


I had a hard time trying to determine how the first number worked on the Eibach springs.


Eibach part number: 0175.250.0200

(175) Load at block height: 350 pounds, travel is 1.750 in.

(250) Coilover spring inside diameter (in): 2.50” (63.50mm)

(200) Spring rate: 200 lb/in

Spring is 3.05” (77.47mm)


Things I need to further research:

* Block height (I think this means fully compressed spring)

* Preload (excessive preload of the coil spring increases the force to start shock movement)


UngluckInc
UngluckInc
3/23/21 1:19 p.m.

Really love this thread. I can't remember if you're on the vortex. Do you have IG?


 Also....get rid of those IE cams, they're junk. Go cat 3660


  Can't wait to see the final product!!


 - Ungluck aka Vegeta Gti

Rabbit Farmer
Rabbit Farmer Reader
4/2/21 7:05 a.m.

Good article that talks about Docol R8 tubing.  This is what we used in my MK1 Scirocco cage.

https://www.rcnmag.com/tech/docol-r8-a-new-standard-in-chassis-fabrication

vwcorvette (Forum Supporter)
vwcorvette (Forum Supporter) GRM+ Memberand UltraDork
4/2/21 9:10 p.m.
Rabbit Farmer said:

Good article that talks about Docol R8 tubing.  This is what we used in my MK1 Scirocco cage.

https://www.rcnmag.com/tech/docol-r8-a-new-standard-in-chassis-fabrication

Steve, how much more expensive than chrome-moly or mild steel is it?

Rabbit Farmer
Rabbit Farmer Reader
4/19/21 9:19 a.m.

Geo.

The more you order the cheaper it is.  In 2019, we ordered enough to do three cars... worked out to be around $9.50 per foot with shipping.

Earlier in this project thread, I posted a table that showed the elongation and strength of different tubing options... something else to look at.

Best way to compare price is to get quote from vendors. 

Steve

1 ... 6 7 8 9 10 11

You'll need to log in to post.

Our Preferred Partners
aRbLtc64HgvdhMrc2LZJp94khlirGcnQxmhcm5vztOCo3SwTNVVHQRo4mDwuzO8y