


So many cool options for this setup...

GasTungstenArc said:Rabbit Farmer--weren't you the one on Motorgeek in days of yore who had a hillclimb Scirocco with a 4.3L V6 taken from a Winston Cup car?
Just noticed this comment 5 months later... hidden in the middle of my posts.
The lime green MK2 Scircocco that was all wheel drive, had a the V-6 engine (I don't know the size... I thought it was a Busch series), was driven by Dan Rutan. His father (Bill) built the MK1 Scirocco that I have now.
Steve
I should be able to pick up the Golf tomorrow, but with a snow storm coming in, I will wait for clear roads.
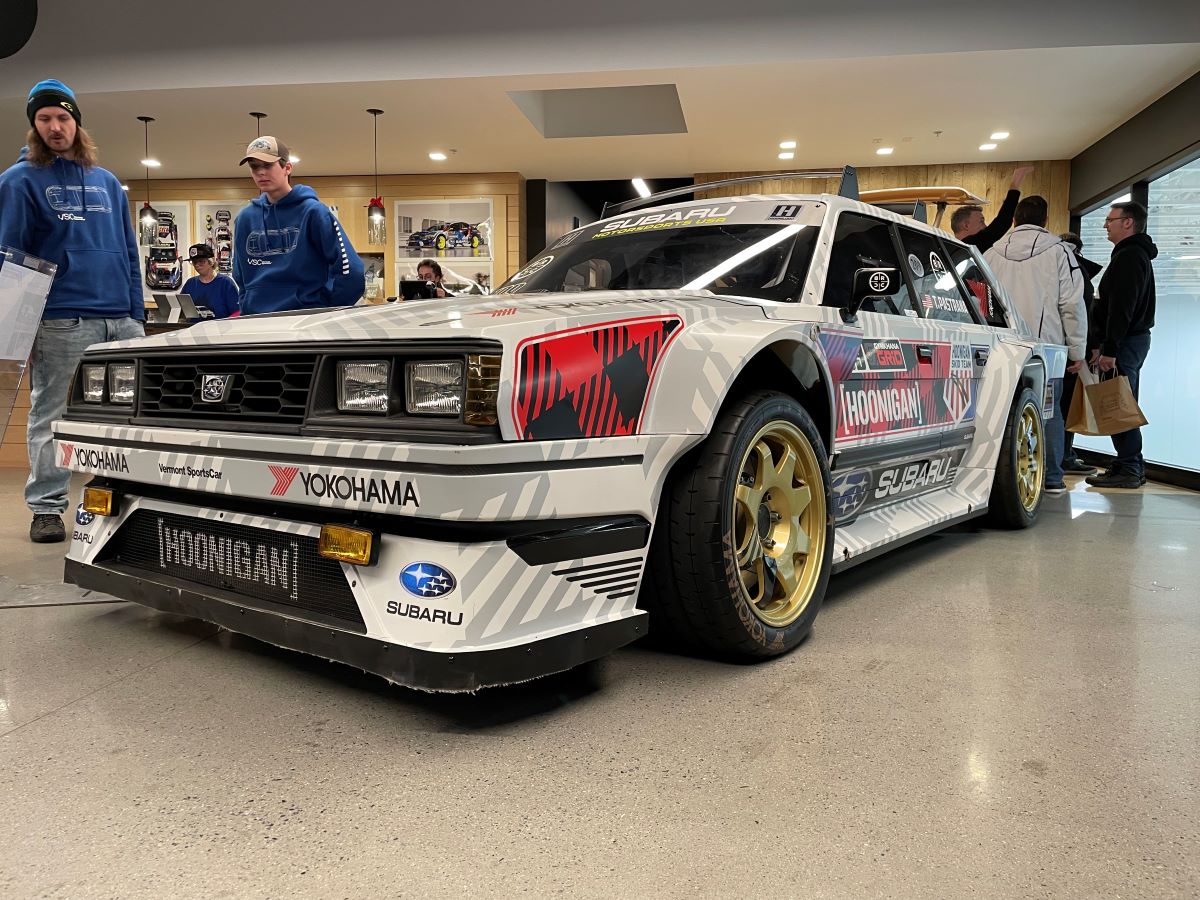
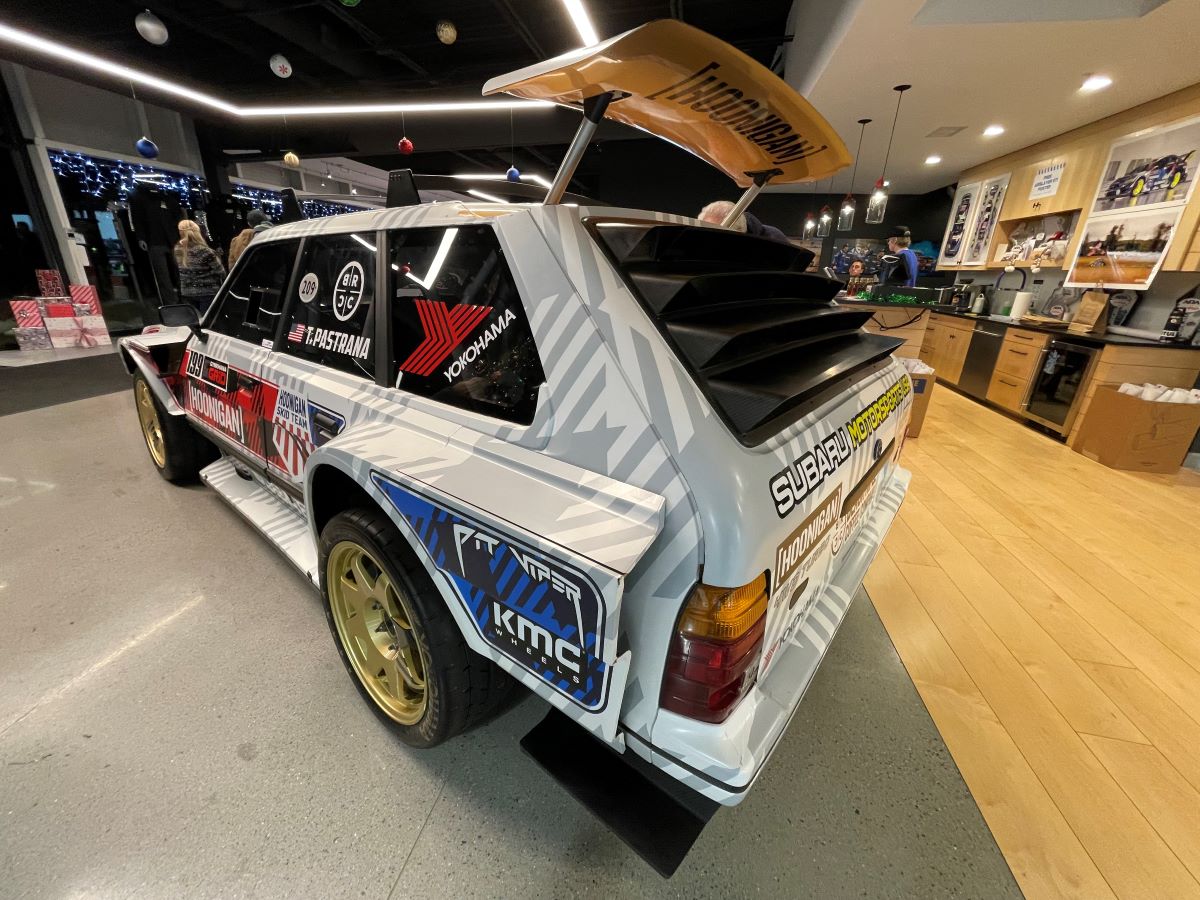
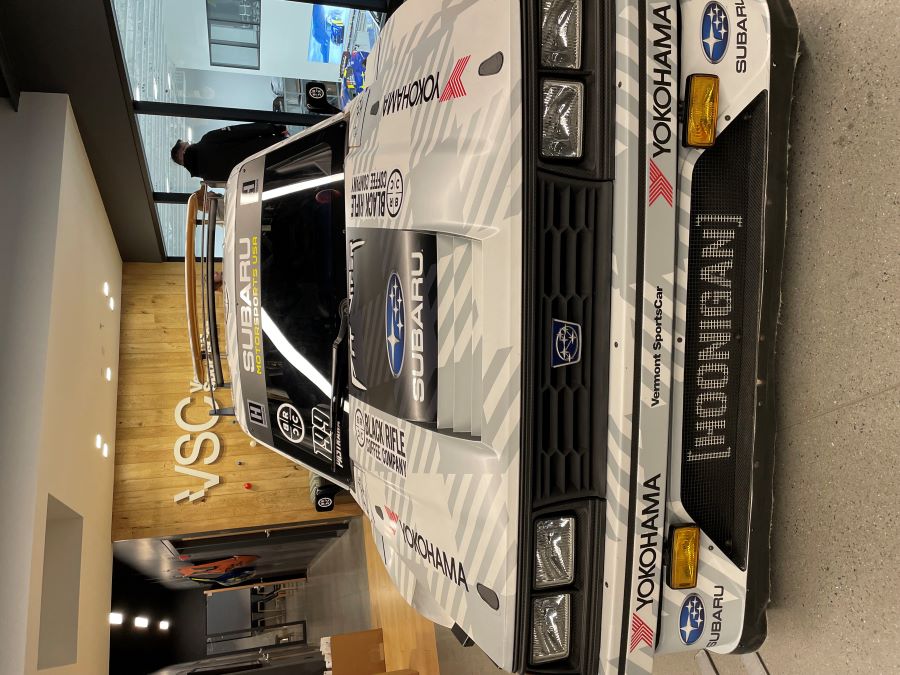
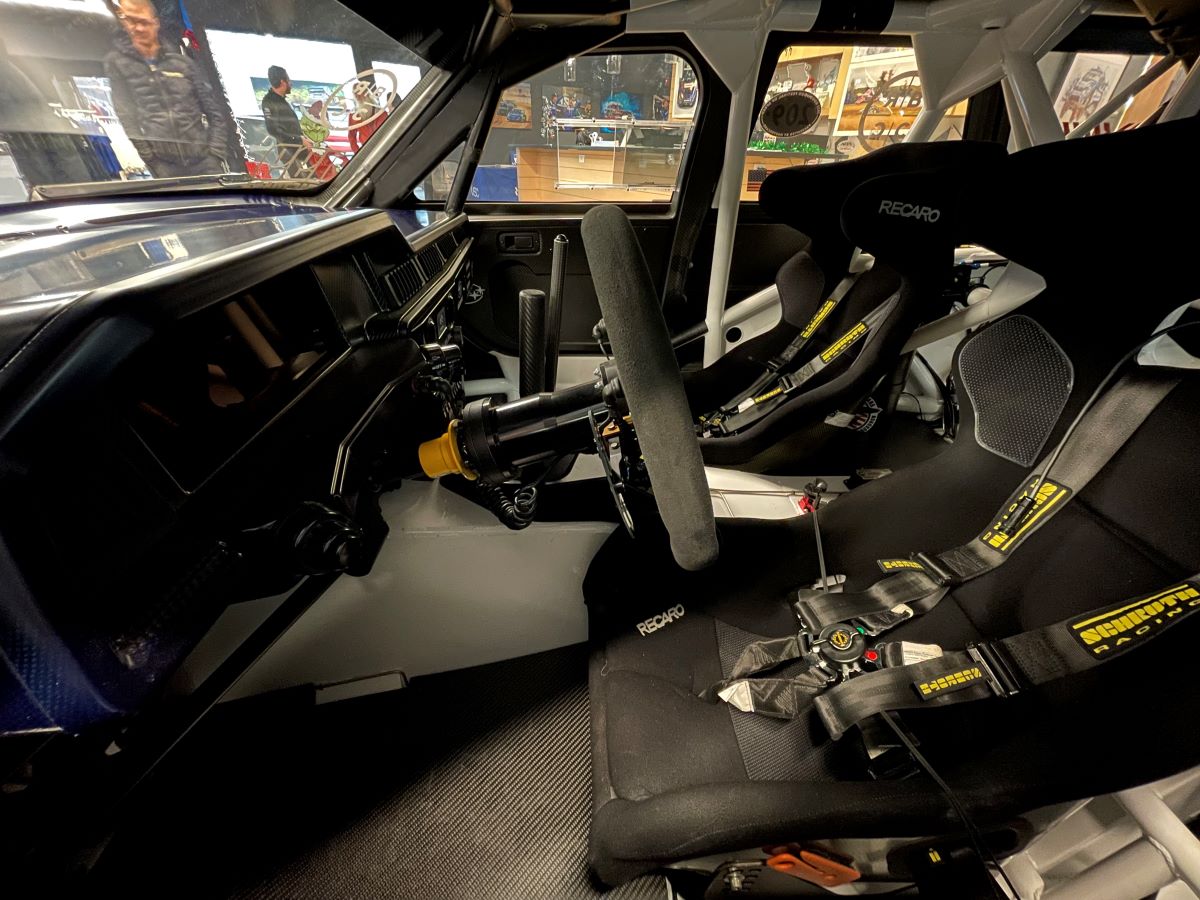
What to do in the winter when there is no racing going on (for me)?
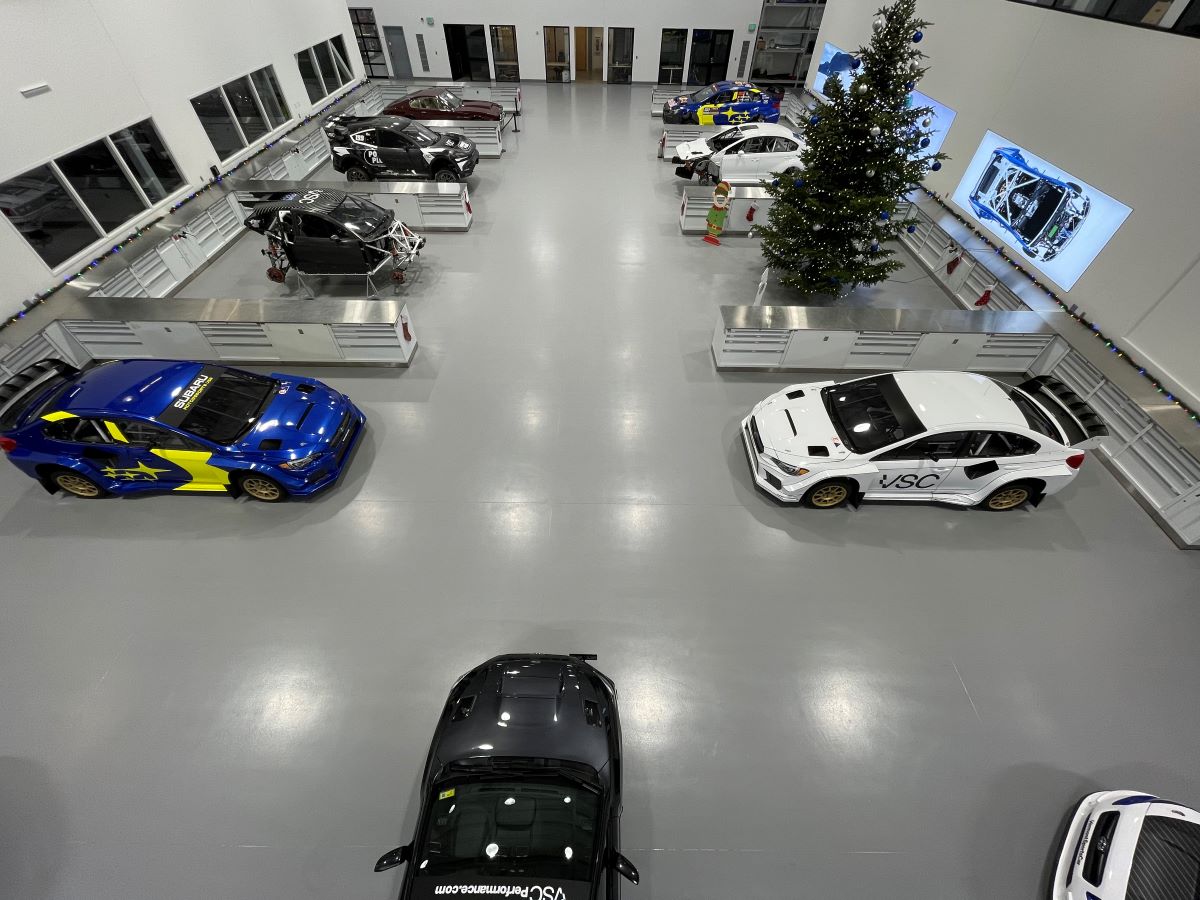
Head a few miles down the road to the "Turbos, Tacos & Tinsel" at Vermont SportsCar.
The shop continues to impress, plus everyone there is down to earth.
Taco truck (well, a trailer) was inside the building serving tacos and there was a beer/wine booth.
Fun seeing a few people that we know. Good times.
You might recognize this car.
Plus they had a Simcraft racing simulator there... not running, just tucked in the corner.
After a friend with me said the thing probably cost more than the Subaru he races (the Mutt)... I looked at these online when I got home... $129,000 complete.
[URL unfurl="true"]https://www.simcraft.com/professional-racing-simulator-apex6-pro-6dof-full-motion-racing-simulator-yaw-pitch-roll-sway-surge-heave-full-motion-racing-sim-full-service/[/URL]

I would love this space...
Car is home, but going to the next shop (Joey Kale) for some changes. More to come when I get better pictures (hard with car in the trailer).
Short version: Old 034EFI ECU out and more modern VEMS ECU in.
VVT will be part of the new tune (and on pump fuel!) to spool quicker. VVT gives option for 20% for air... just need to tune it to the right RPM. Sweet.
Very happy with install. Smiles x 100
Steve
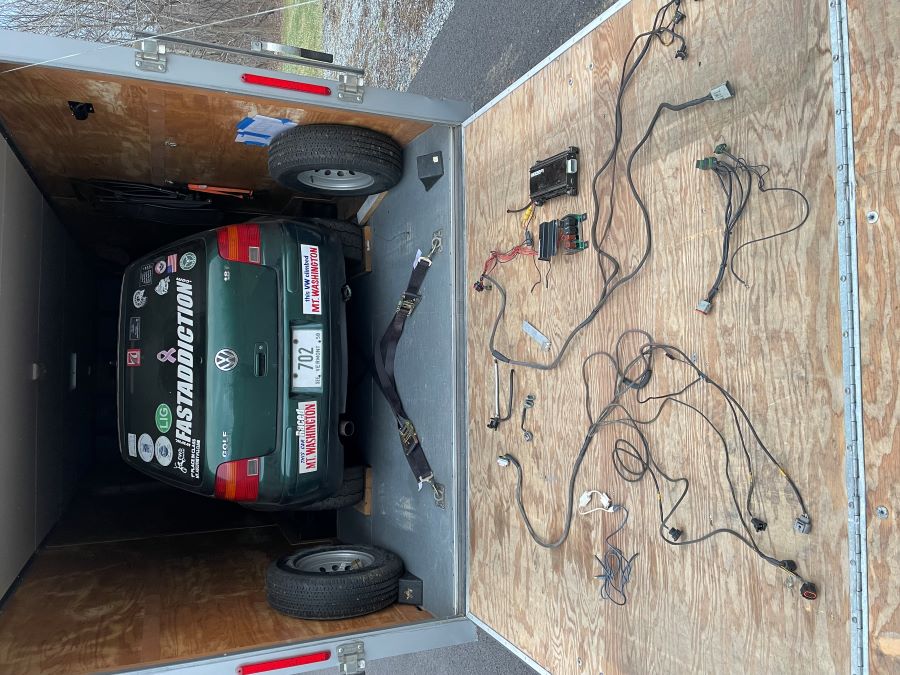
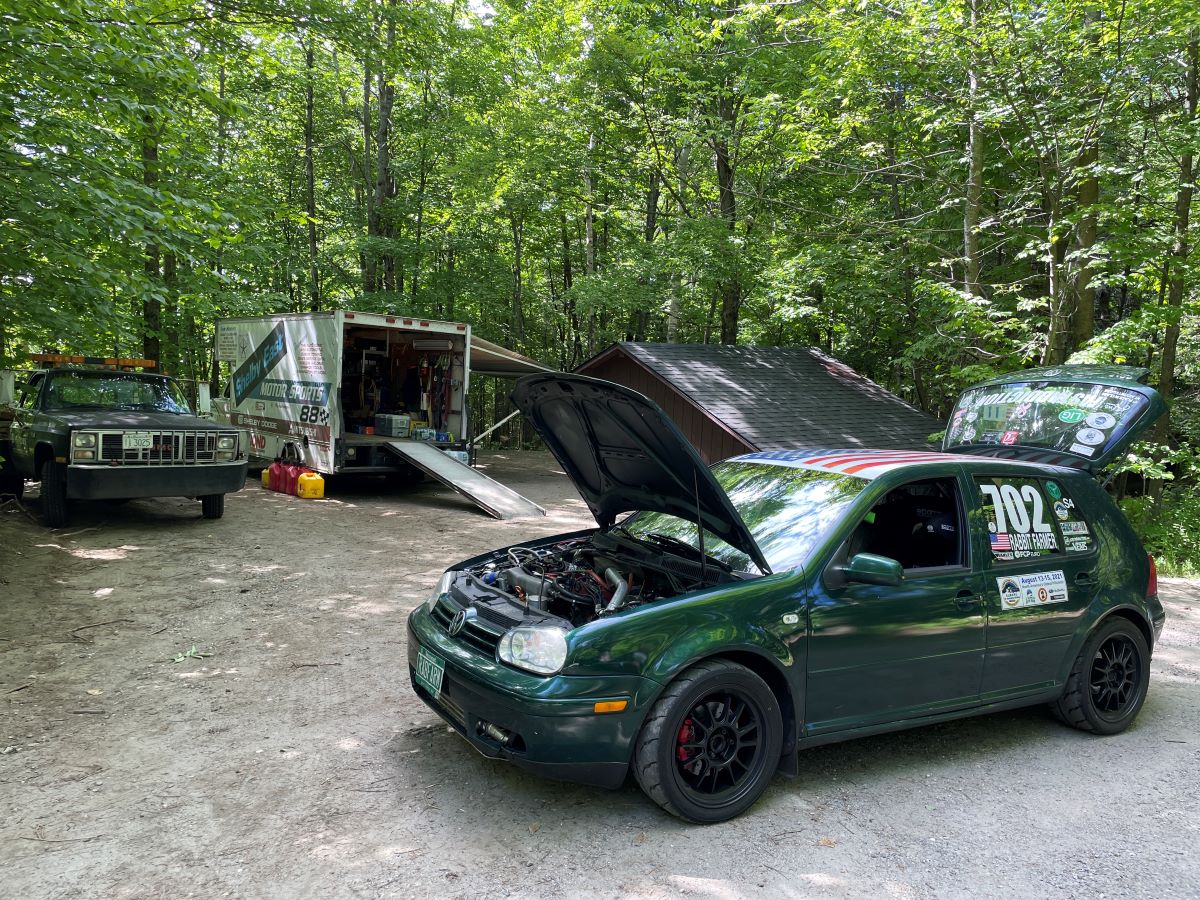
==== 2001 Volkswagen Golf 1.8T ====
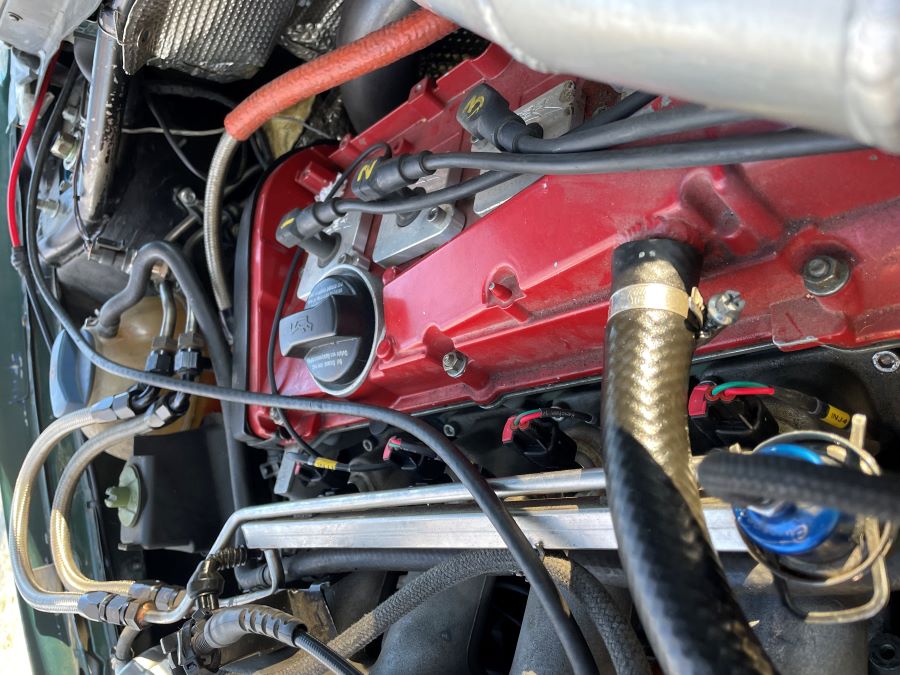
VEMS ECU and complete wiring harness is installed and the car has moved to its next destination (Joey Kale’s shop) for changes to intercooler tubing (currently goes by starter), fix leaking exhaust flexpipe, install rear tow hook, and (later) a redesign of the skid plate so that it isn’t mounted off of the subframe.
Car is back from VEMS in Colchester, Vermont (https://www.facebook.com/vemstuning/). Great job as always from Jason and Nick.
Pump gas tune in the future! No more expensive race fuel. I plan to use pump gas on the MK1 Scirocco also. Makes racing so much more affordable... if there is such a thing.
New gauge that will have both air fuel and exhaust gas temp (AF/EGT) on it; will get the info directly from the ECU after we fix the EGT probe.
What was removed:
* Volkswagen OEM electronic booster controller (EBC); called N75 valve
* 57 lb injectors at 3 bar
* 034EFI wiring harness, ECU, etc.
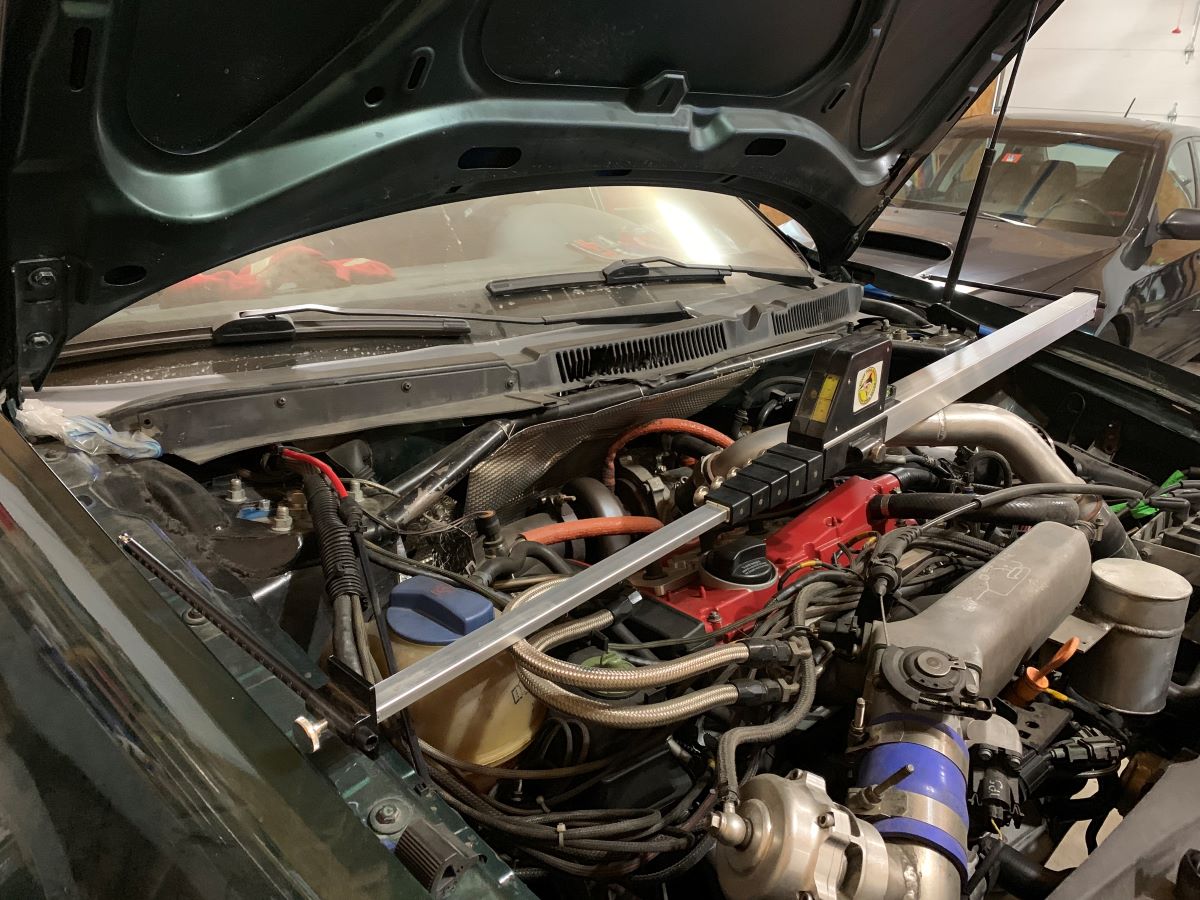
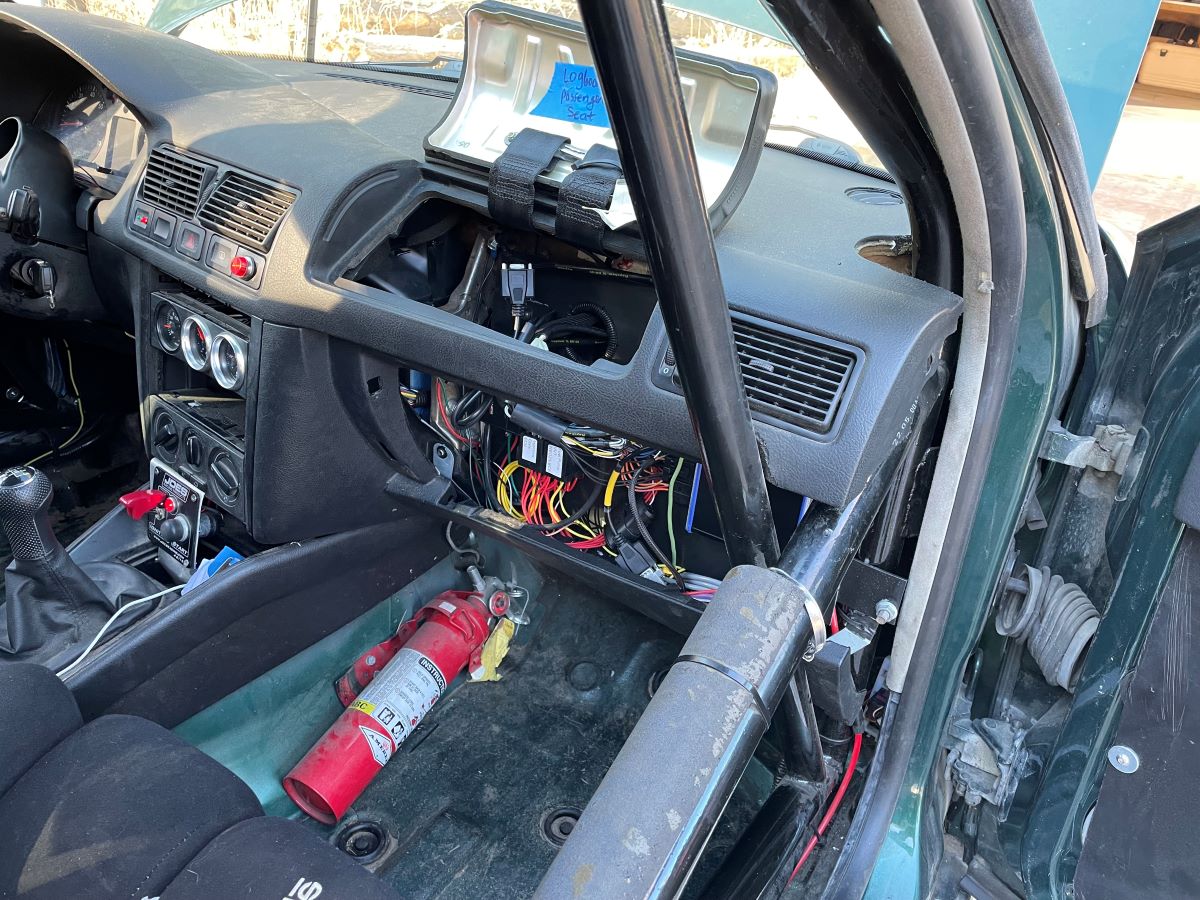
Earlier picture of car showing cluster of wires running over the passenger side strut tower.
What was installed:
* VEMS V3 Standalone ECU
* 3 port EBCS booster controller solenoid (part MAC 46A-AA1-JDBA-1BA); we still need to hook up both ports
* ID1050X injectors (part 1050.60.14.14B.4) from Injector Dynamics / Bosch Motorsport
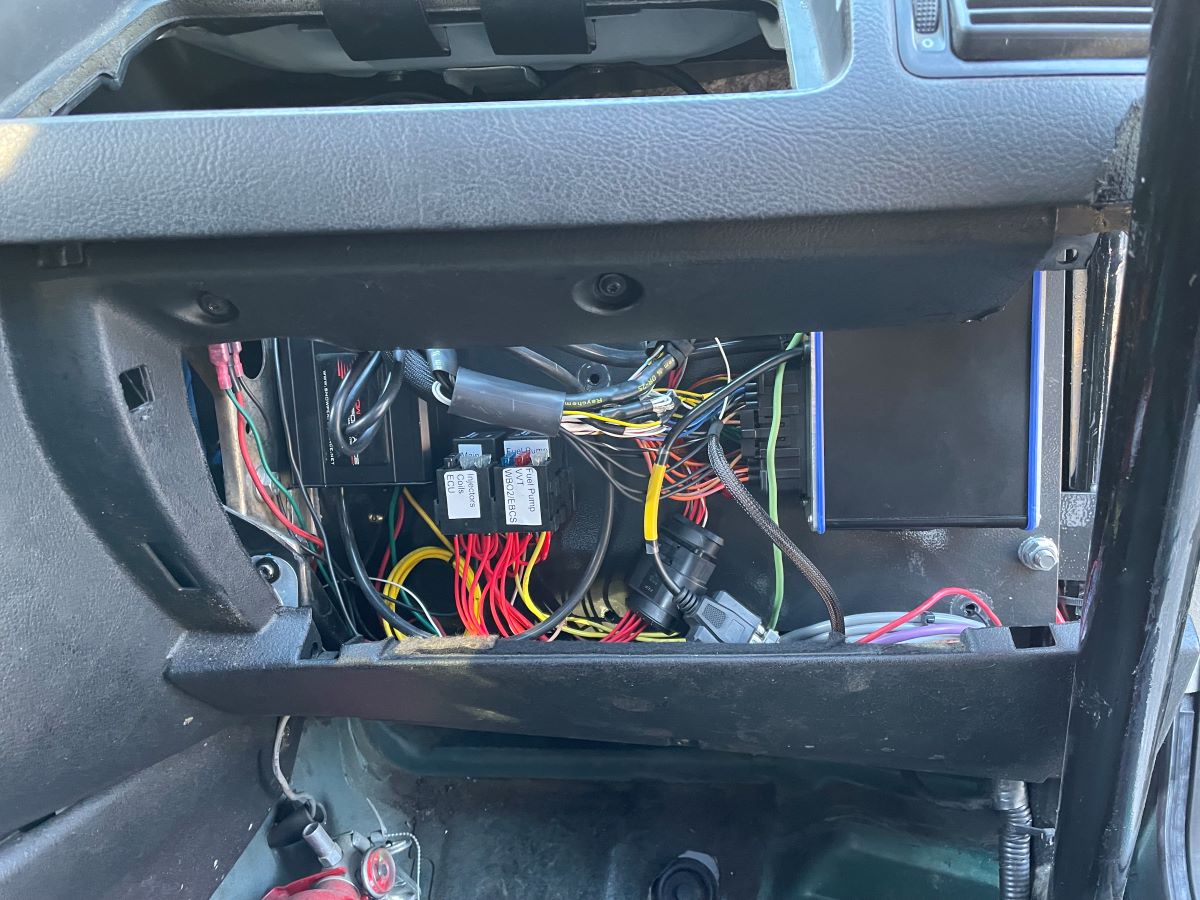
* Complete wiring harness and all supporting bits (relay block, canbus module, etc.)
Big advantage for low end turbo spool is the intake variable valve timing will be utilized by the VEMS tune.
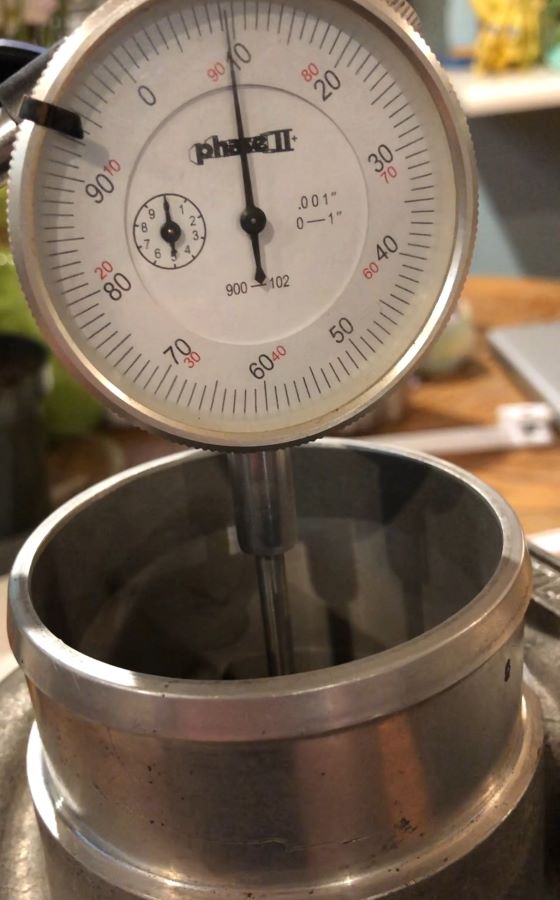
Speedometer and tachometer are working again!
Much cleaning in the engine bay as all wiring makes it way to the driver’s side of the car to use the stock wiring channel to get into the rain tray, makes its way across to the passenger side, through the fire wall, to where I had the old ECU mounted on a metal plate that I installed a few years ago.
Lots of additional grounds were added for this setup... I will have to pay very close attention when taking engine out in the future to ensure I know where everything is installed.
The car still has the cluster of stock wires under the hood that I would love to get rid of. Not a project for this winter.
Everything under the dash to protect it from the elements. Easy access via the airbag cover.
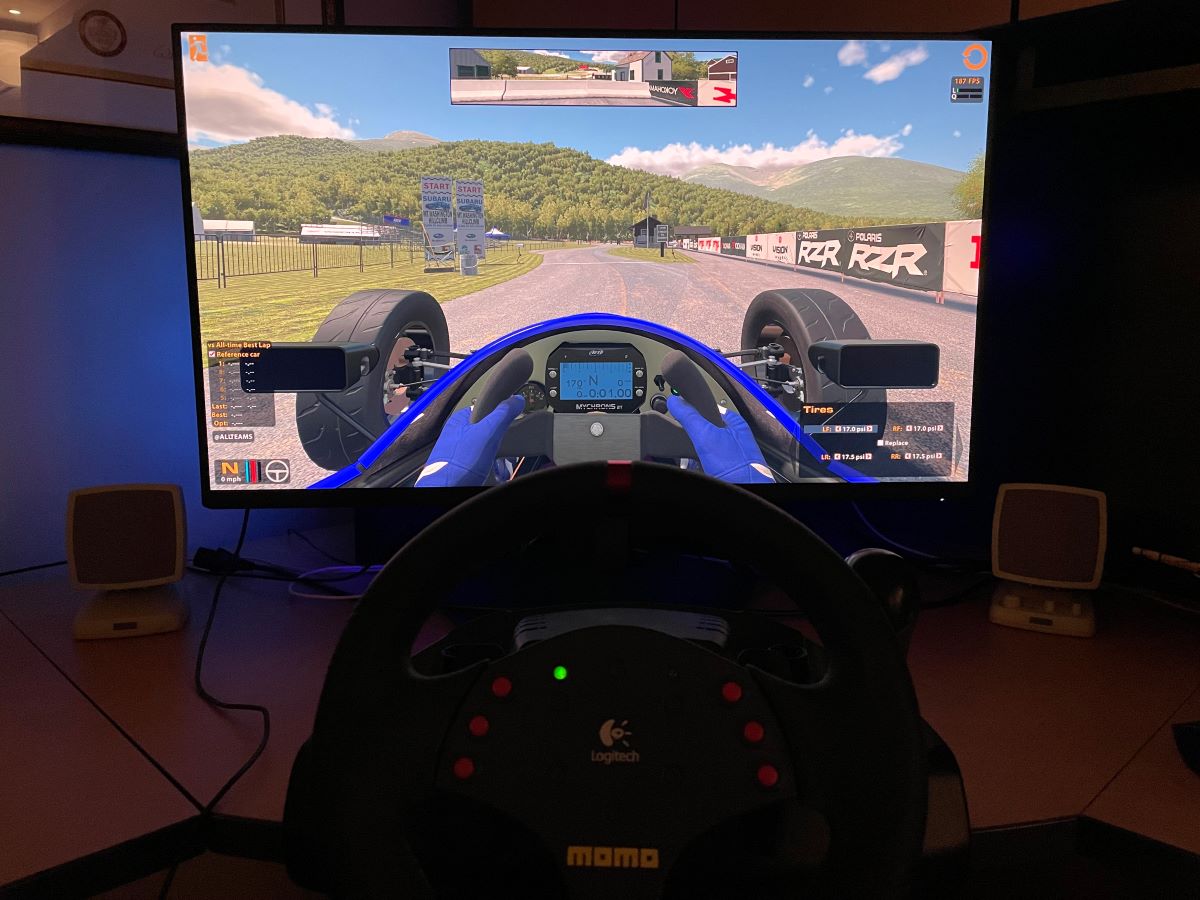
Unrelated.... iRacing was on sale for $99 for two years. I purchased the game (simulator) along with the Mt. Washington hillclimb. Using my very old and basic steering wheel / pedals.
I spent more time spinning around like I was driving on ice than actually being able to zip up the hill.
More practice and different car setup is needed.

In reply to Rabbit Farmer :
Glad to hear I'm not the only one who can't drive in iracing - I hate their tire model. I started using Assetto Corsa for off season practice and it feels much closer to what I'd expect, but I still struggle.
A short story where I discovered a new favorite tool.
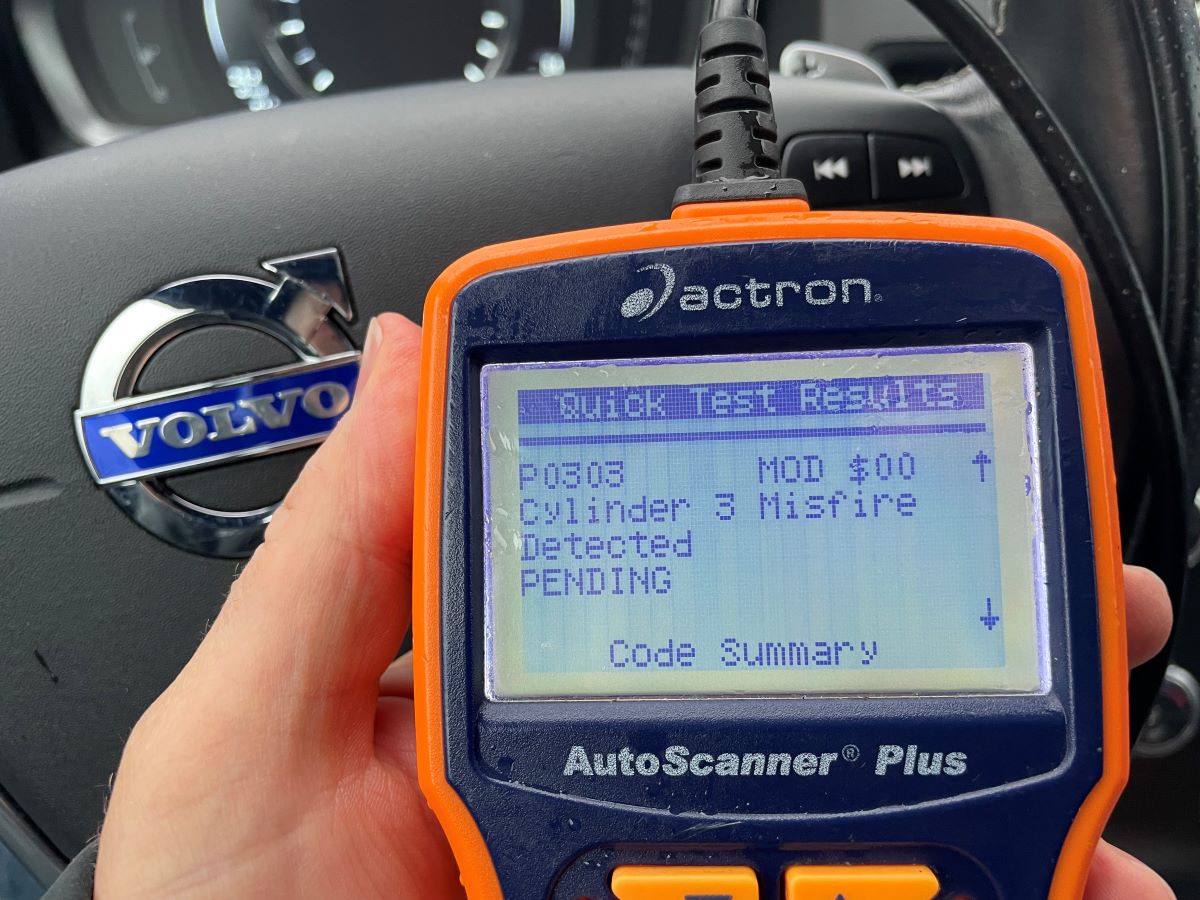
We drove the 2015.5 Volvo S60 R-Design AWD... anyway, 6 cylinder turbo all wheel drive sedan that hauls donkey... to Rhode Island for the holidays.
Dealt with hard rain for the first 150 miles and worrying about the flash freeze that was supposed to happen in the late afternoon. Then we noticed that the engine would break up with moderate acceleration (I was taking it easy on the throttle with the rain) and the check engine light would send me happy notices under full throttle. A little worried with another 150 miles to go.
We found an Advanced Auto in Hooksett, NH and borrowed their code reader.
Misfire on cylinder 3. I assumed it was a bad coil pack and wasn’t sure how easy it was to replace as I wasn’t even sure how to remove the plastic engine cover. (was easy to remove... just pull up on it; no tools needed)
A little internet search wasn’t too helpful, but I was finally able to determine what tools I needed and purchased them at Advanced Auto.
Seems a mouse took up residence on cylinder 6 with a rest room on cylinder 3.
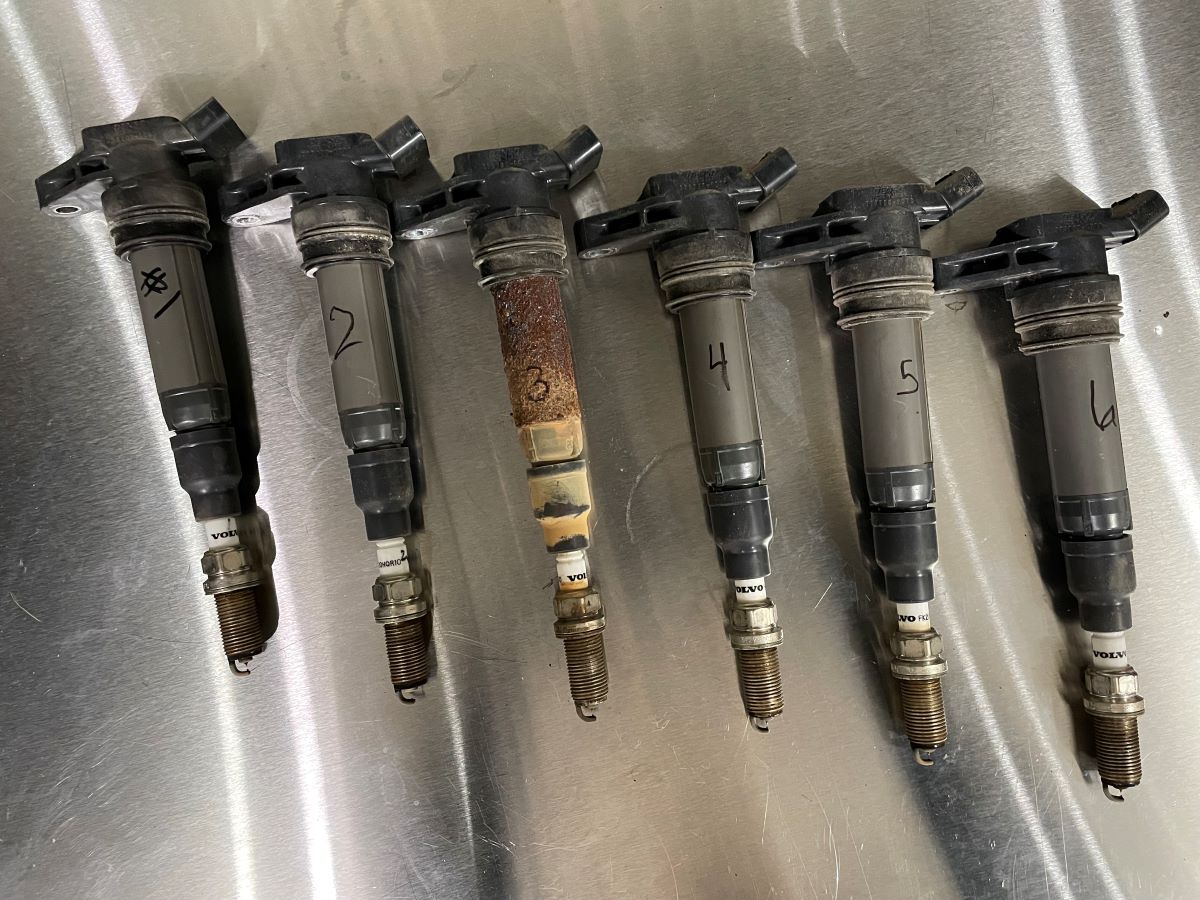
Thankfully, the Advance Auto had one (and only one!) coil pack.
Tools needed (that I already own a few times over, but they were 150 miles away):
* 8mm for the nuts on the coil packs and ground wires in the general area
* 3/8” drive
* 3/8” extension
* Spark plug socket
Pictured with six new coil packs from FCP Euro that I received after we returned home. I replaced all the coilpacks and will keep the Advance Auto purchased unit as a spare.
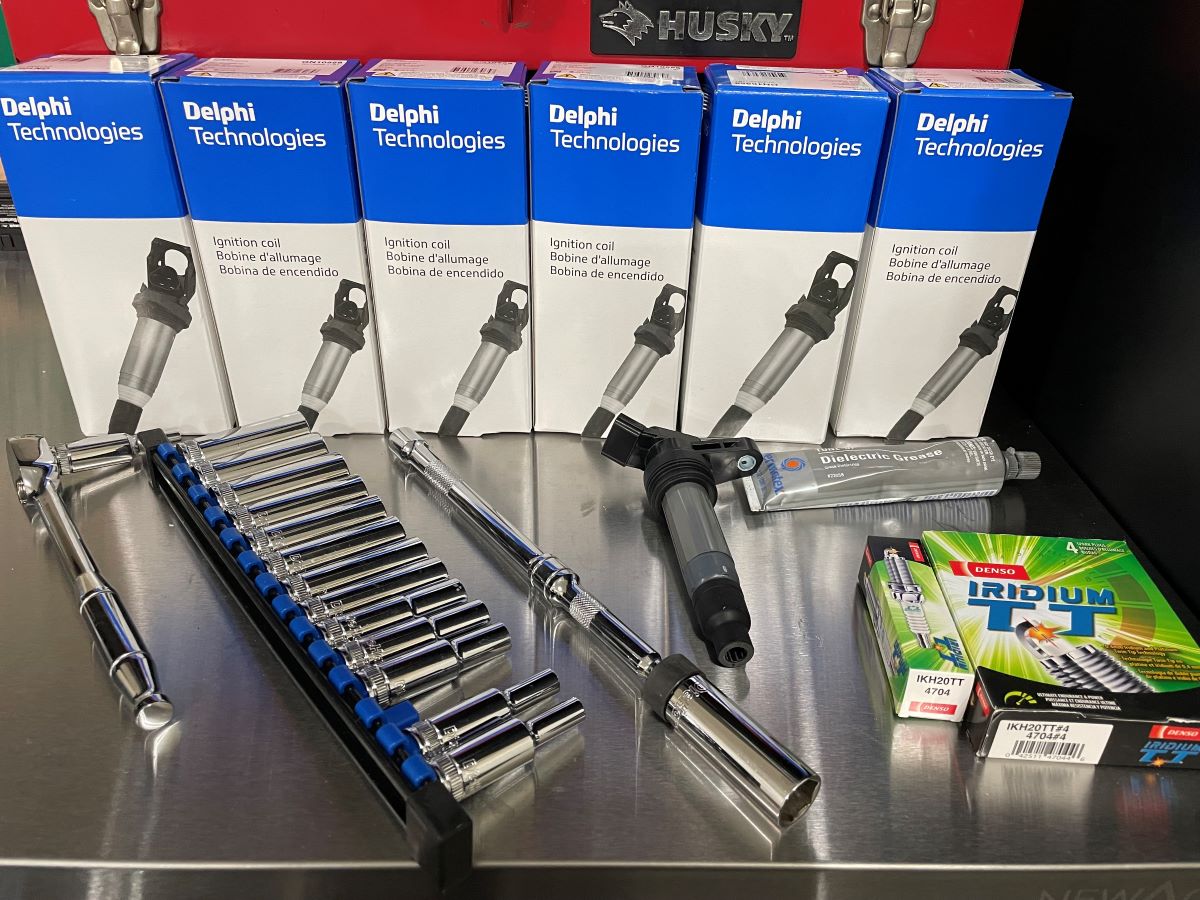
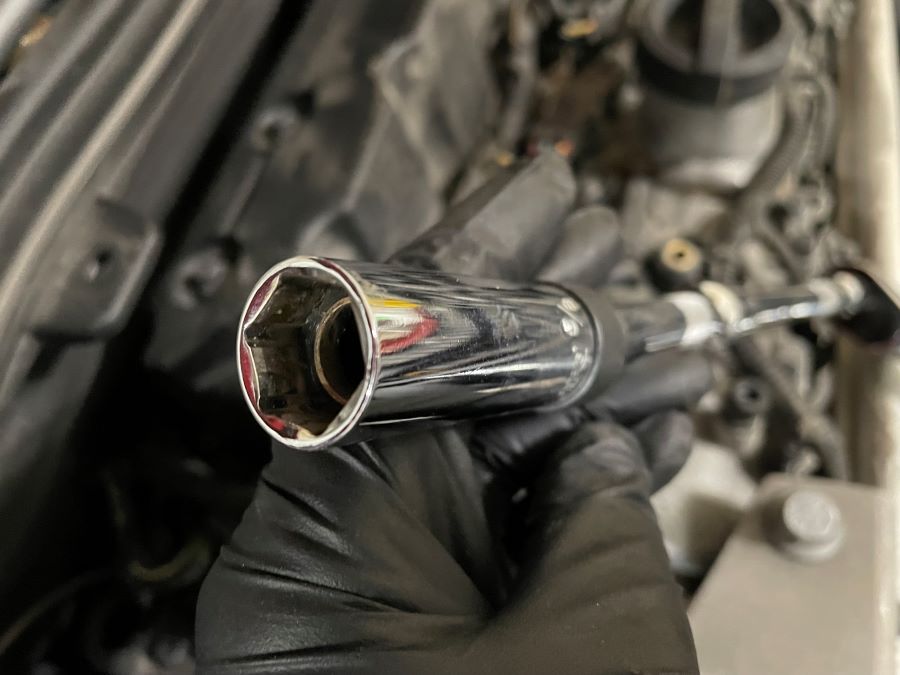
And my new favorite tool.
For deep well sparkplugs on my 1.8T Golf, I have a socket with the rubber insert and remove the plug into the engine, similar socket without the rubber that I use for tightening the plug (as it doesn’t get stuck on the plug), and long needle nose pliers to remove the socket when it gets stuck on the plug. I have a system and the tools and it works.
Well... how about JUST a sparkplug socket with a magnet in it? This socket will make things a lot easier with my Golf.
==== 2001 Volkswagen Golf 1.8T ====
The first hillclimb of the year is scheduled for May 6-7 and I have a bit to do to the car to get ready.
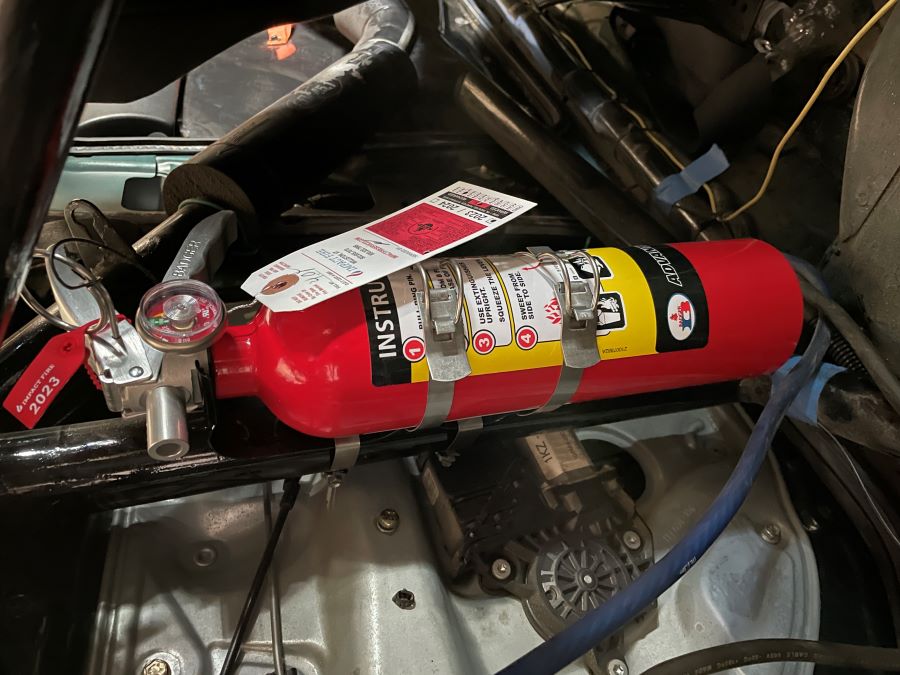
- Buy a new 2.5# fire extinguisher
- Buy new tires
- Install shifter bushings
- Install control arms and Gaz struts (reinstalling what I had to remove last summer)
- New sparkplugs
- Oil change
- Brake fluid flush
- Install manual timing belt tensioner to remove the prone to failure hydraulic tensioner
- Install new water pump and Gates timing belt
- Install parking brake cables
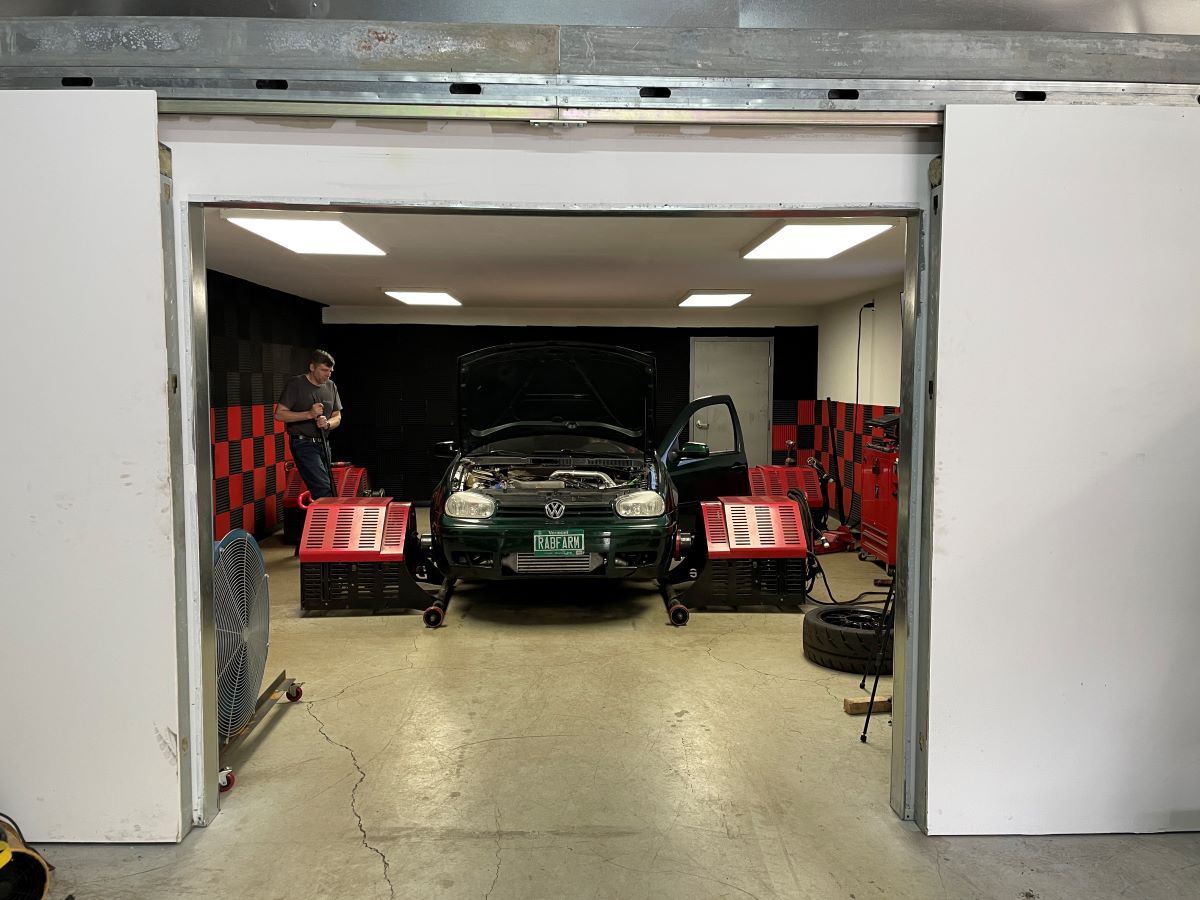
- Tune the car at VEMS on pump gas (after pumping out the race fuel from the tank); they will also install the multi purpose EGT and A/F gauge.
I had to postpone bringing the car to my friend to put it on the frame straightening rack followed by alignment. He is too busy this time of year. Soon.
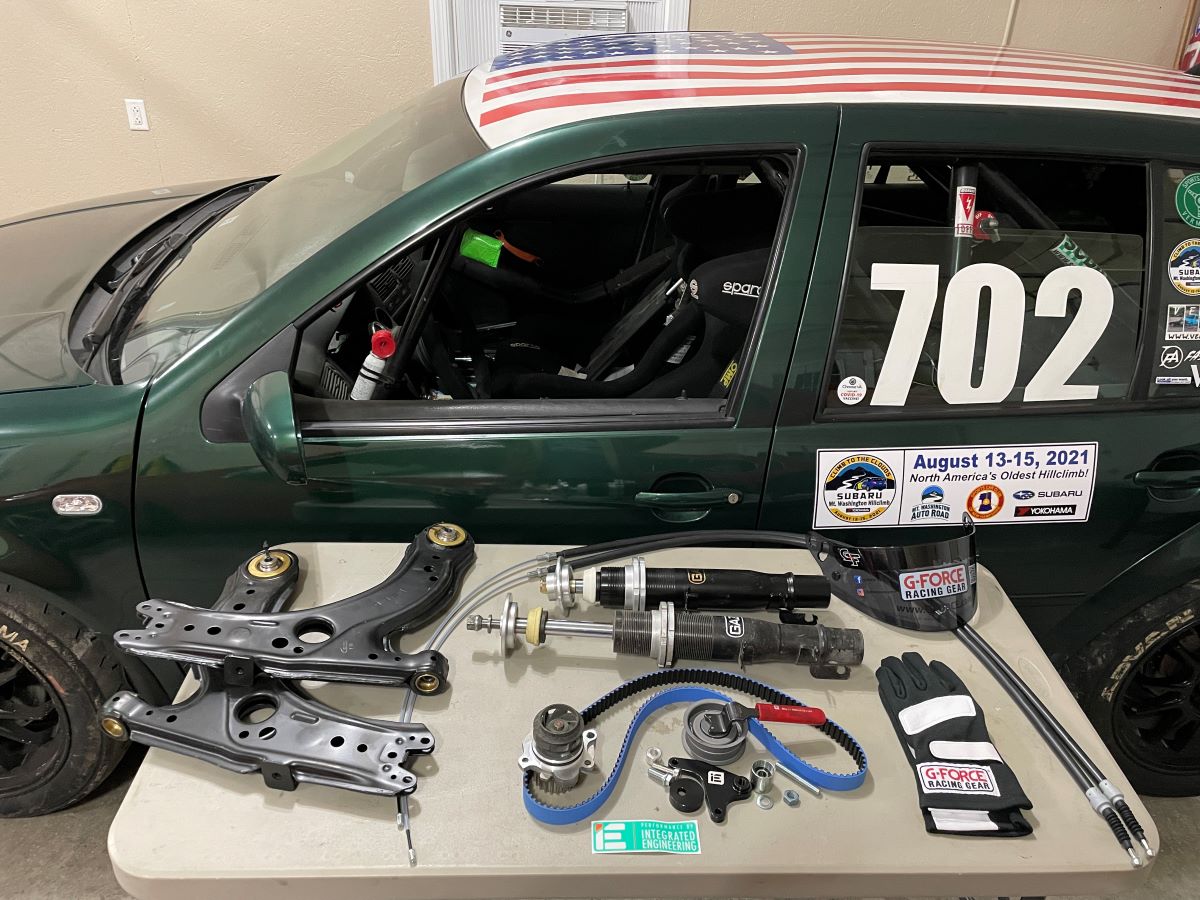
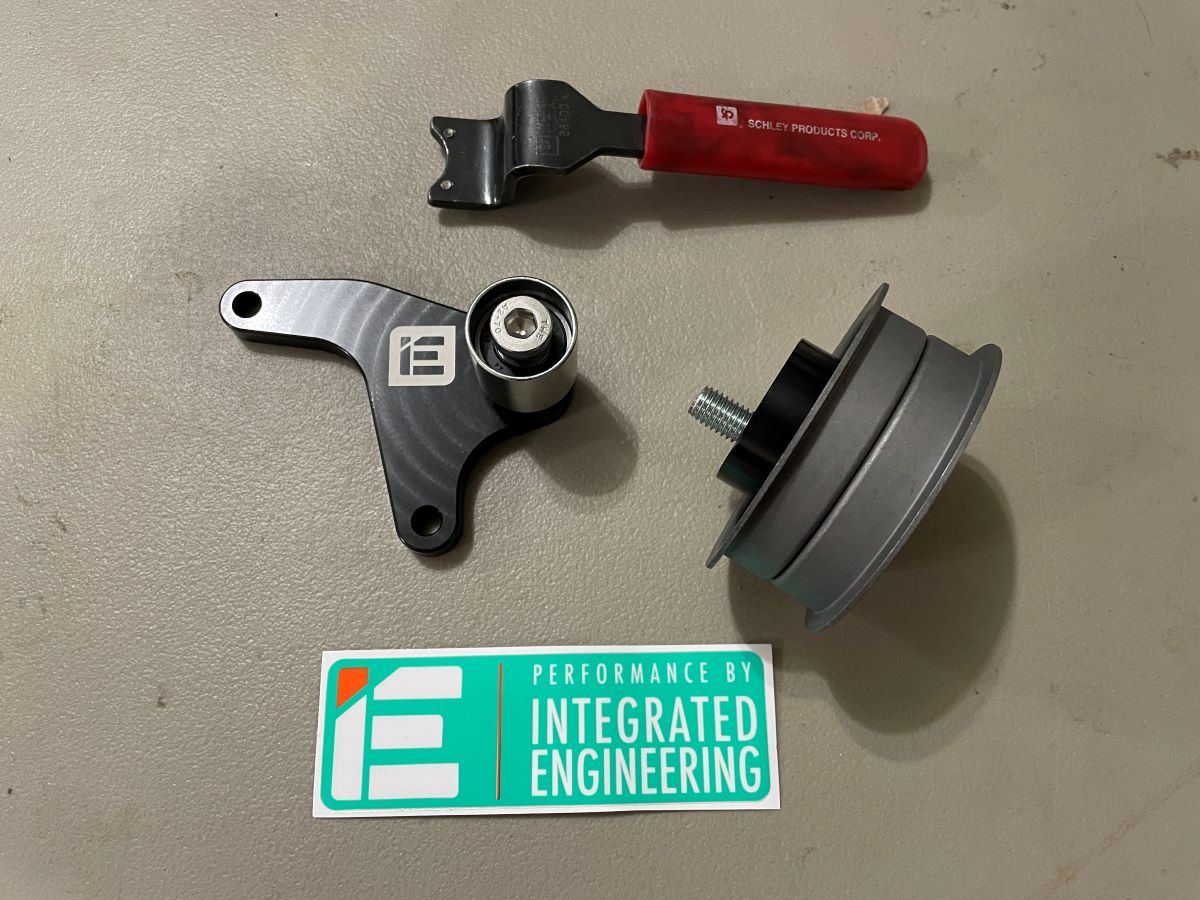
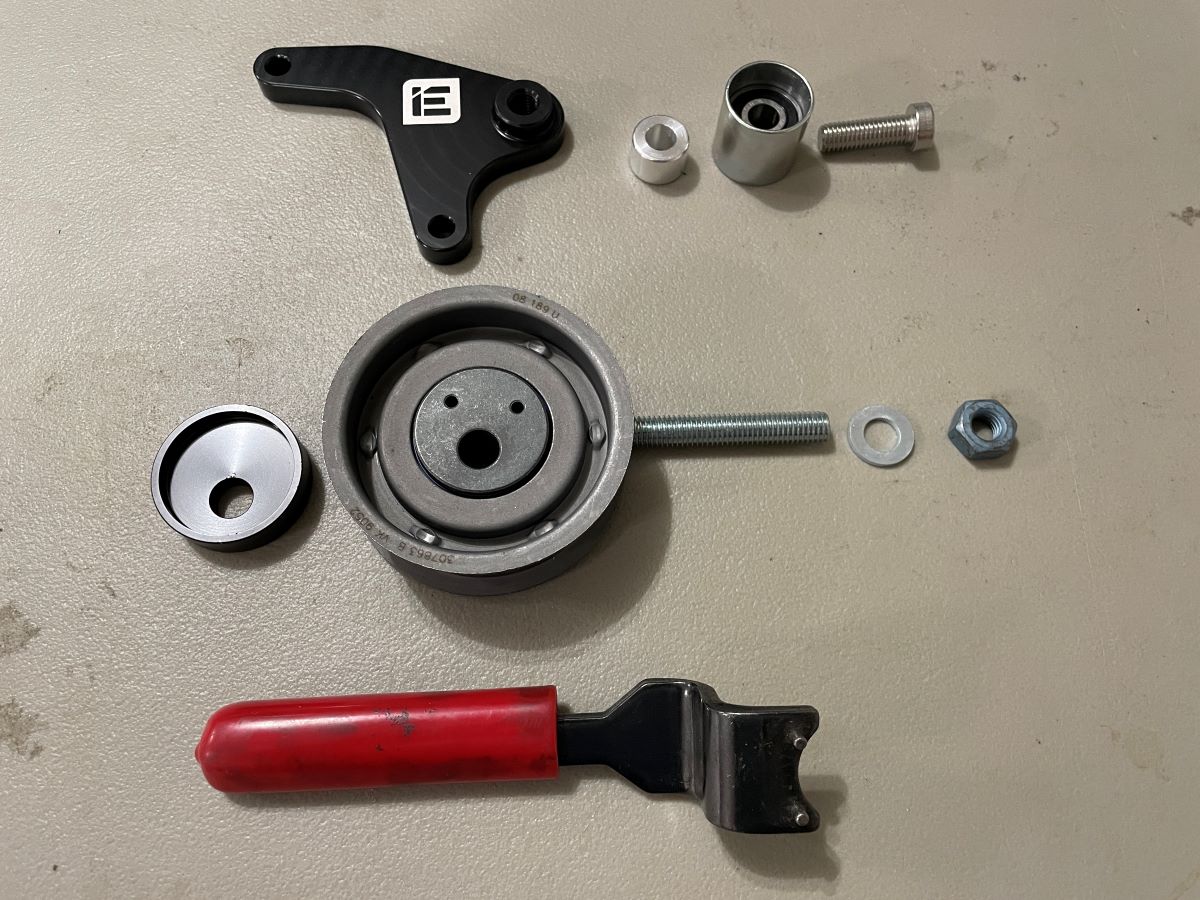
This is the manual timing belt tensioner from Integrated Engineering.
The red handle tool is from my old MK1 Rabbit days... good thing I still had the tool.
This will remove the prone to failure hydraulic tensioner and utilize the simple MK1 Rabbit era tensioner. Pretty simple. I will change the water pump and timing belt (naturally) at the same time. It has been a long time since I have done this work while the engine is still in the car.
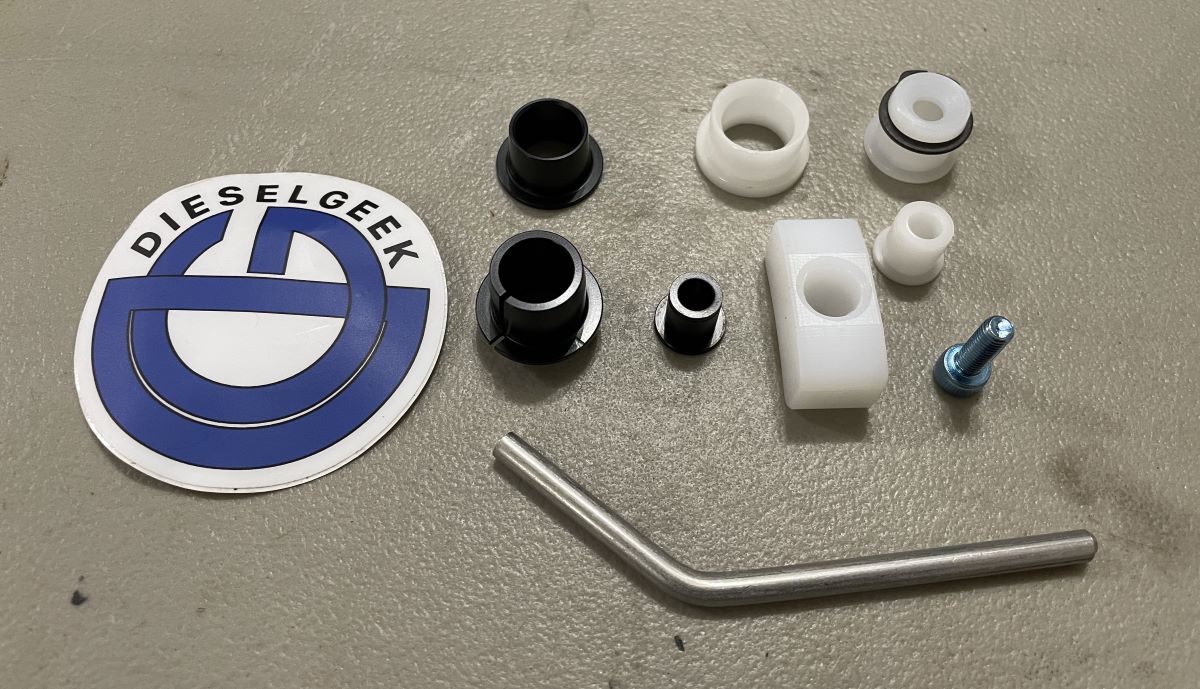
DieselGeek shifter bushing kit was on my list of ‘to do’ at the end of last season with some of the challenges with shifting.
Some of the work by Joey Kale in March 2023.
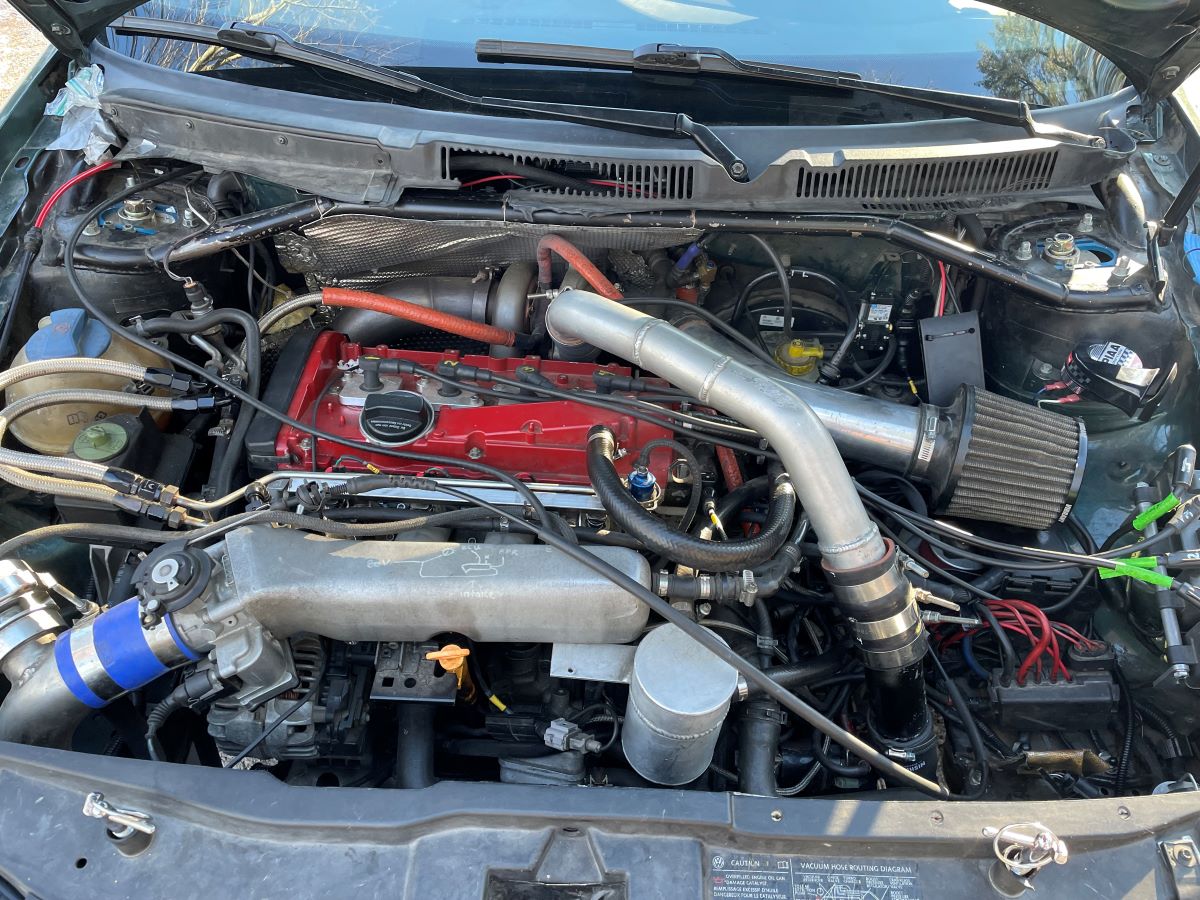
This is the before picture with the hot side intercooler tubing making its way to the FMIC and making contact with the starter. I had issues with the car starting last summer where I had to wiggle the wire on the starter to get it to work. I’m unsure if this is because the IC tubing was pushing against the starter or because of the heat from the IC. Reminds me... I’m going to ensure I have a spare starter with me this season.
This moved the IC tubing away from the starter (and allowed easier access to sparkplug #4).
Another difficulty was how the IC tubing connected to the FMIC... it was tight and a weird angle with the skid plate frame. It would help if I stopped hitting stuff with the corner of the skid plate frame... it pushed it in a little. Better angle of approach will make it easier to do maintenance without fighting with the IC tubing coupler.
When I was at VEMS, Jason mentioned to be that there is an exhaust leak at the flex pipe. Normally this would not have been a concern as the 034EFI ECU use manifold pressure and didn’t care what was going on with the exhaust.
VEMS needs the O2 sensor data for the tune. The flex pipe is before the O2 sensor... so, we now have a new flex pipe. Ain’t she pretty?
This was a far as I got last night... inventoried what I needed to do, laid out all the parts, and jacked up the car/removed the wheels.
Tonight... real progress.
==== 2001 Volkswagen Golf 1.8T ====
Complete:
- Buy a new 2.5# fire extinguisher
Well... this one took an astronomical amount of time.
The two new fire extinguishers did not work with the old brackets.
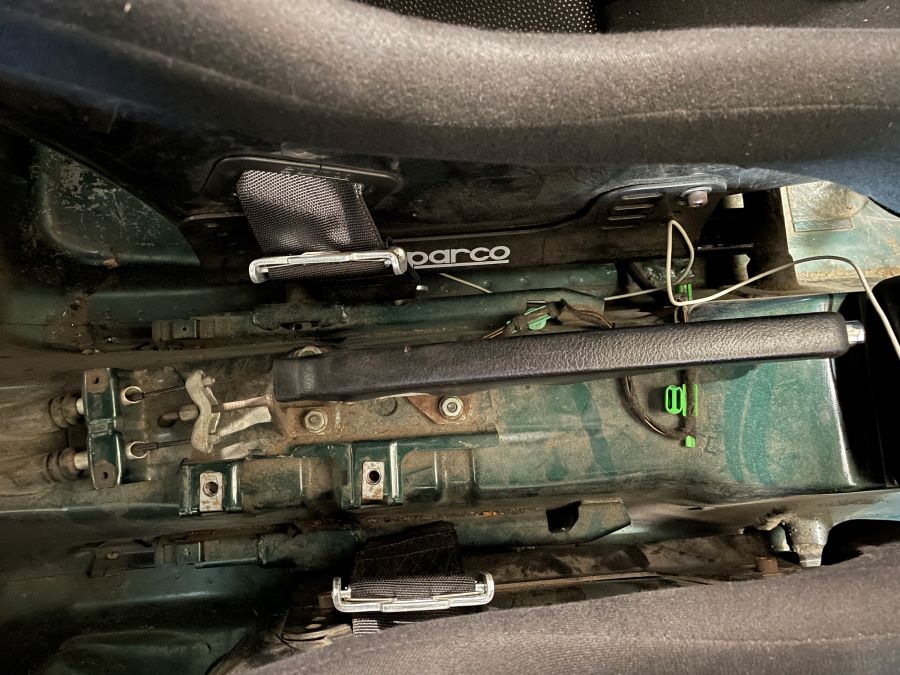
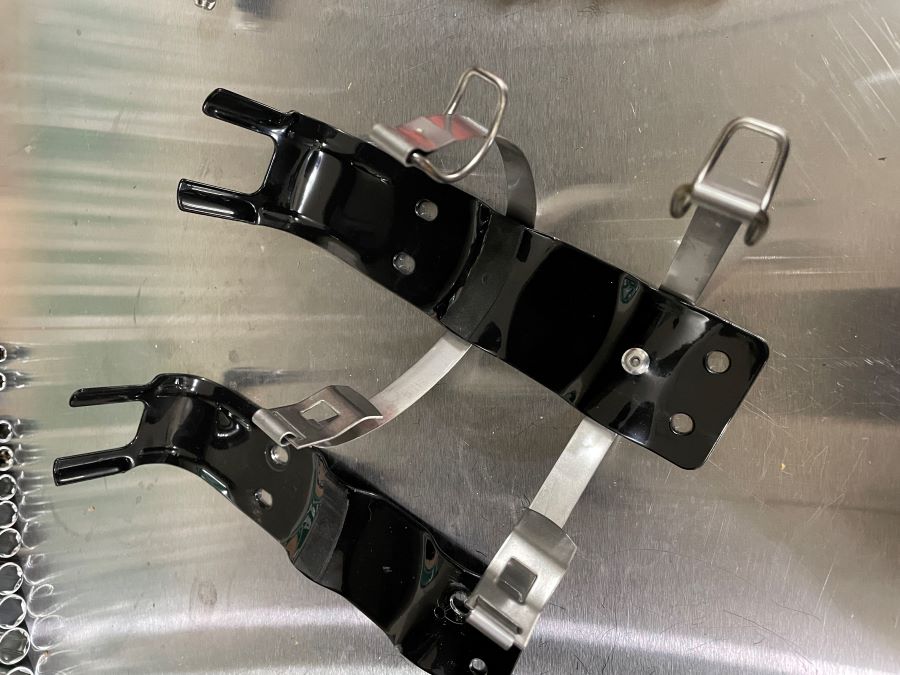
Pretty easy solution for the unit installed on the main hoop of the roll cage, but the old unit “within reach of the driver” is mounted to the passenger side of the tunnel. And... the bracket was installed when the heatshield under the car in the tunnel was not installed.
No easy way to remove old and install new bracket on tunnel.
Worked on Plan B... which I think is a better solution as the fire ext is closer to me where I get access it while still in my harness.
Next to the emergency brake are two mounting points for the original interior/arm rest.
Holes are 8mm x 1.25 pitch.
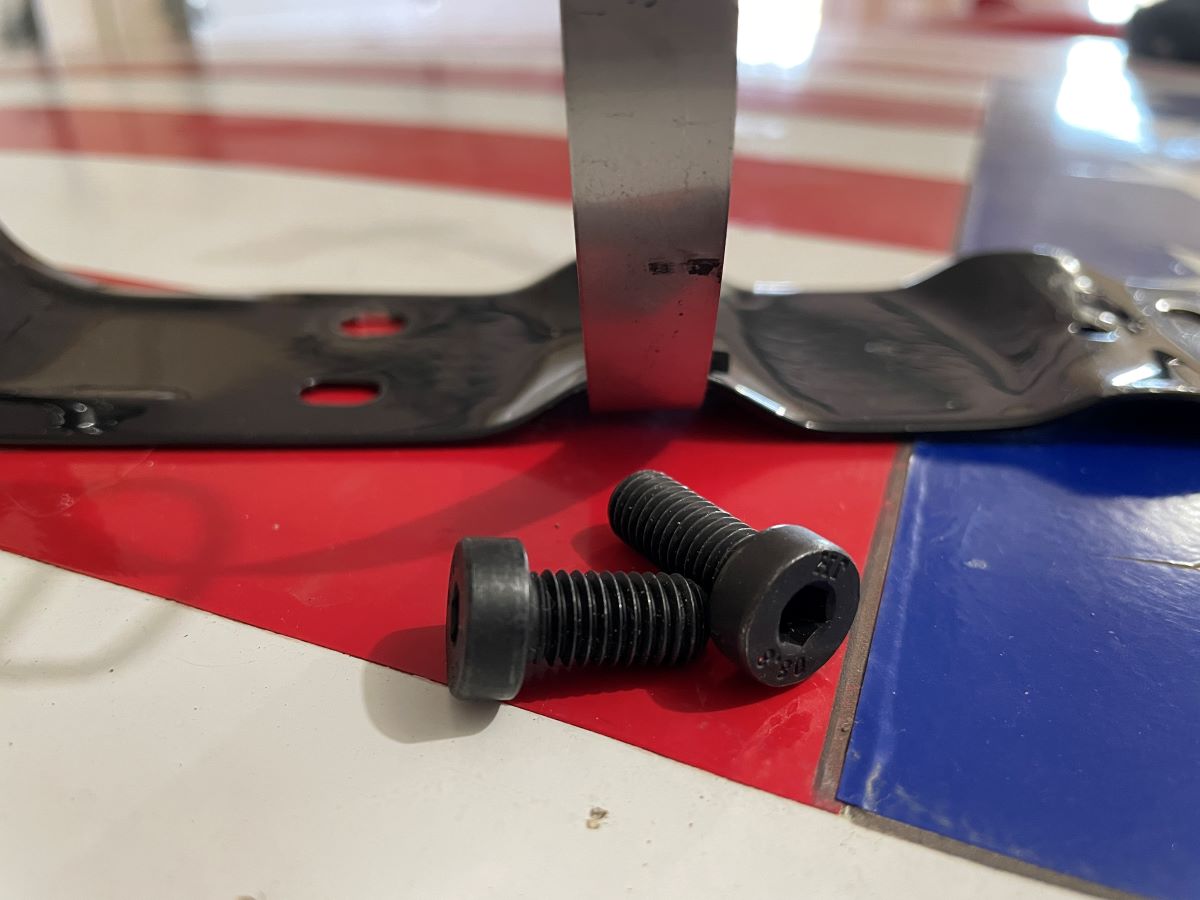
I originally tried using the new fire ext bracket, I did not like how easily it would pop open... touch it like a mouse spring trap and it would open.
I purchased some low profile hex drive bolts; 8mm x 1.25 x 16mm and 20mm long. The longer bolt was needed for the new bracket, but 16mm would have worked for both mounting points on the old bracket.
Installed bracket
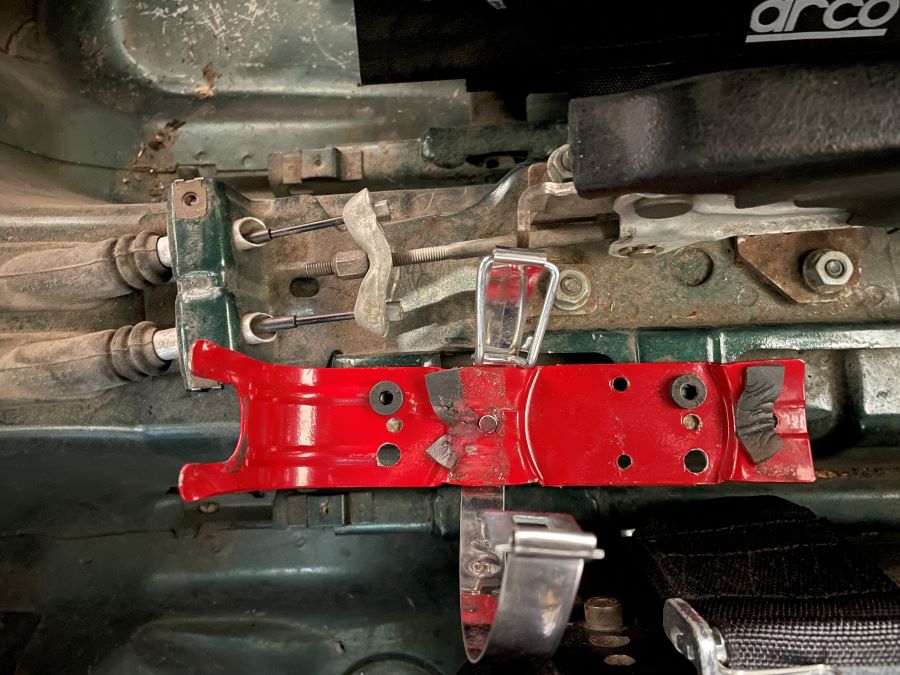
Fire ext mounted
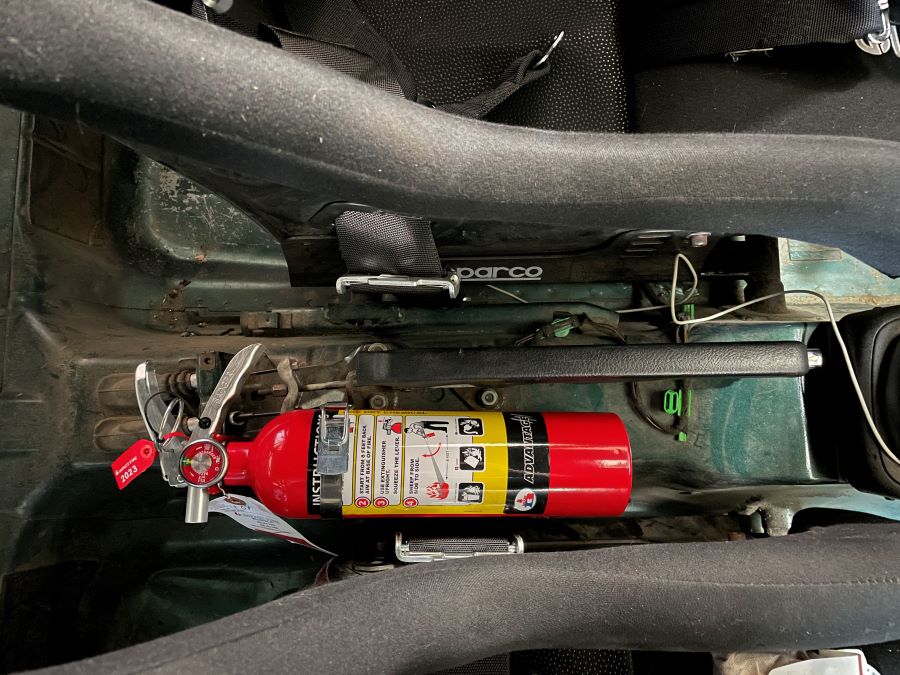
Because I didn’t like the fire ext retainers... how they seemed to pop open, I removed the retainer from one of the brackets and installed it on the other. This provided two retainers on the B hoop mounted fire ext.
Done with fire ext project.
==== 2001 Volkswagen Golf 1.8T ====
Made some good progress, but realized my “to do” list that outlined goals for each night this week is on a sliding scale. Wednesday night showed completion of Tuesday work... hopefully Friday is a good day to catch up.
Complete:
- Buy new tires (mount them on Friday... along with STI summer tires)
- Install control arms and Gaz struts (reinstalling what I had to remove last summer)
- New sparkplugs
- Remove skid plate (for timing belt change and oil change)
- Remove race fuel
It took a little longer than expected to reinstall the Gaz struts and the control arms with the SCCH control arm bearing kit.
The front bearing was dorked up due to my off road excursion at Okemo in 2022. I didn’t notice it until I was trying to install the spacers. Darn it.
Thankfully, the person who makes the bearings is pretty local (next state over... you need to live on the East Coast to understand how small the states are). Jacob of Innovative Motorsport Solutions made the parts I needed and had them in the mail over Easter weekend so that I had them on Monday. Thank you!!!
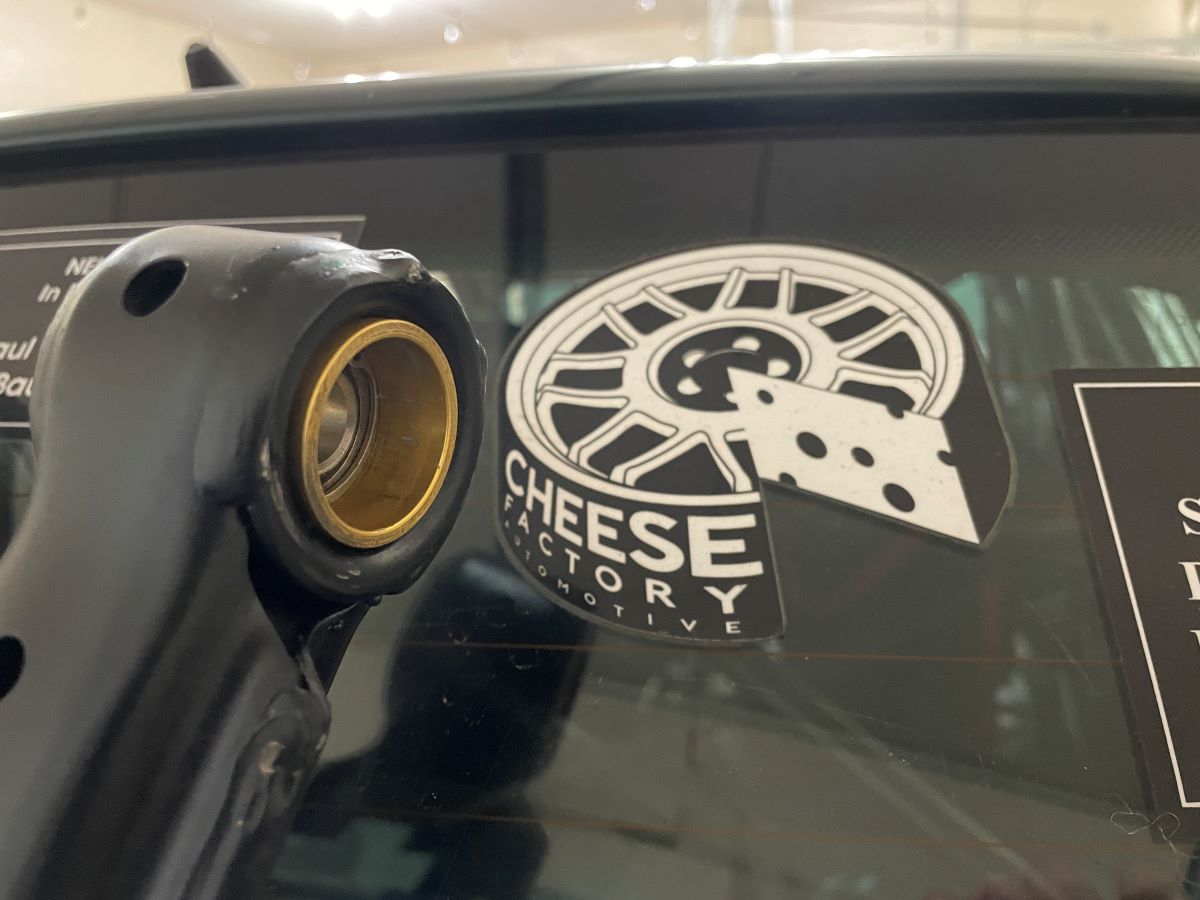
Extra bonus... it was late in the day on Monday, but Chris Cheeseman of the Cheese Factory in Colchester, VT (bring your VW and Subaru there) was able to swap out the insert and bearing.
Strut assembled... Just used the “gravel rally” soft springs and a helper spring (to retain spring tension on droop). Pretty easy after I learned to remove the whole assembled via the three nuts on the camber plate instead of the single nut on the strut. Much easier assembling it outside the car.
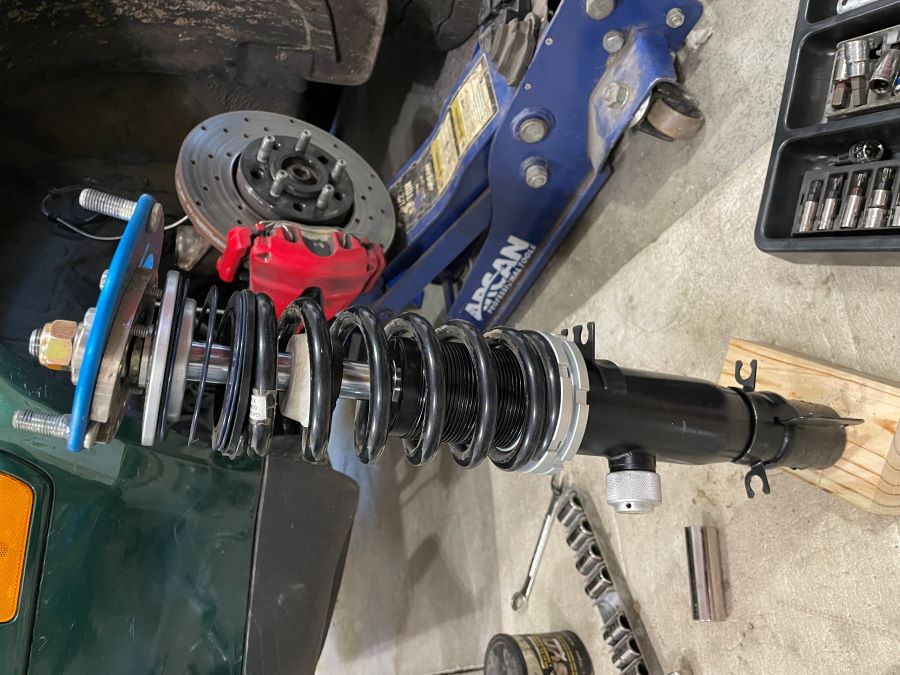
Done with both sides.... Driver’s side fought me a bit (will have to check everything out during the “frame” straightening process this summer), but passenger side was easy. Julie helped me with the CV axle bolts... she is a good brake pedal pusher.

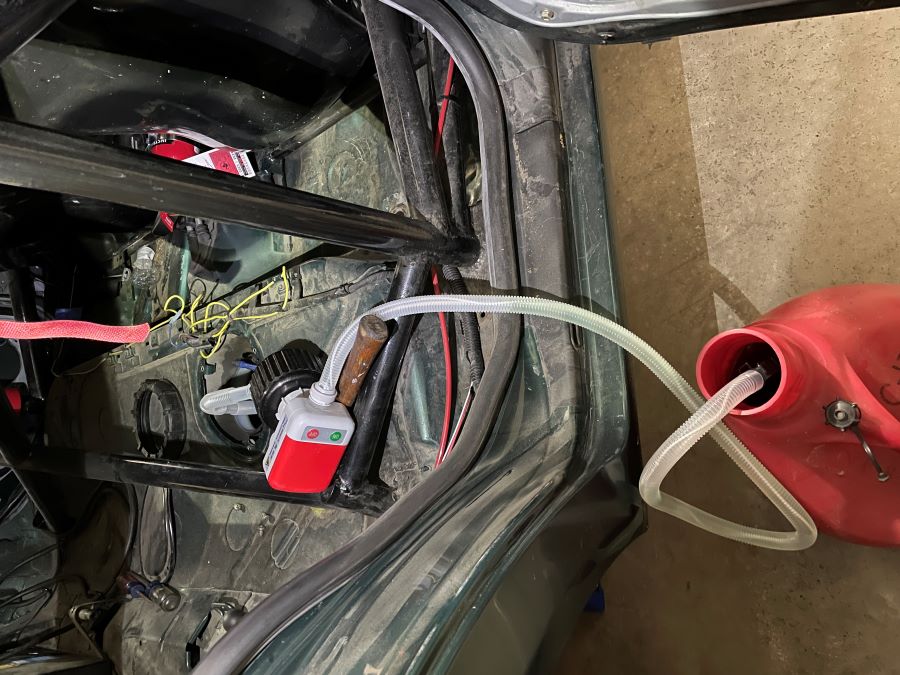
The new VEMS tune is going to use pump gas to make racing much more affordable. This does mean a bit less HP, but I am hoping to still have some low-end power with the VVT (variable valve timing). So... out with the VP Racing 110 octane leaded race fuel that cost $21 per gallon. Yikes... I have 10+ gallons for sale!
The electric pump made the process very easy and quick. Highly recommended.
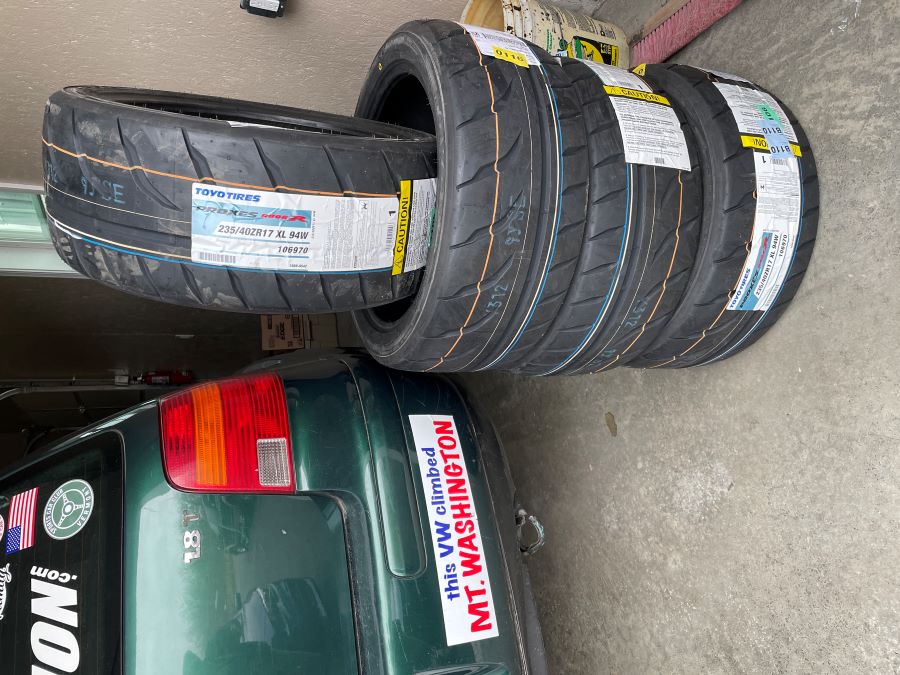
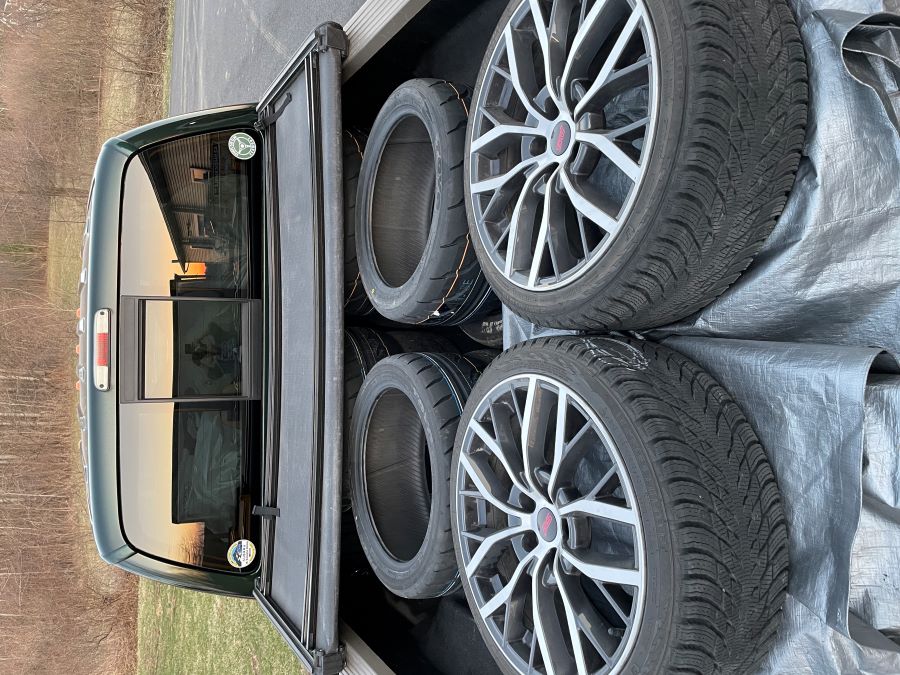
Finally... tires have arrived from Phil’s Tire Service (www.philstireservice.com). I have been buying tires from them since 2015 at least... starting using Vermont SportsCar used tires for a number of seasons, but went back to Phil’s this year for a new set of Toyo R888R in 235-40-17.
I have had good success with the Toyo tires.
It seems the COD MW2 season 3 update is done downloading... time to do some relaxing pew-pew’ing.
Steve
Busy night... though, still a day off of my original plan this week for getting things done.
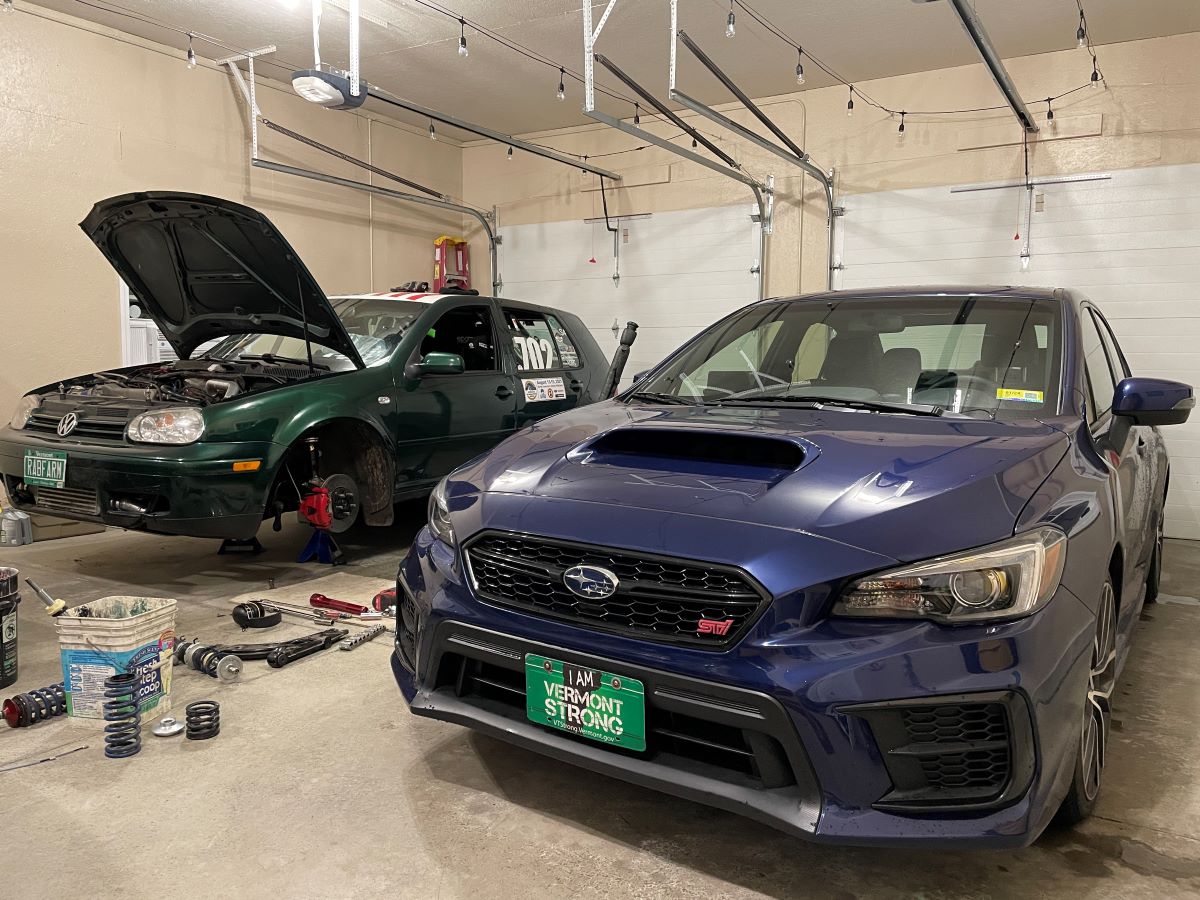
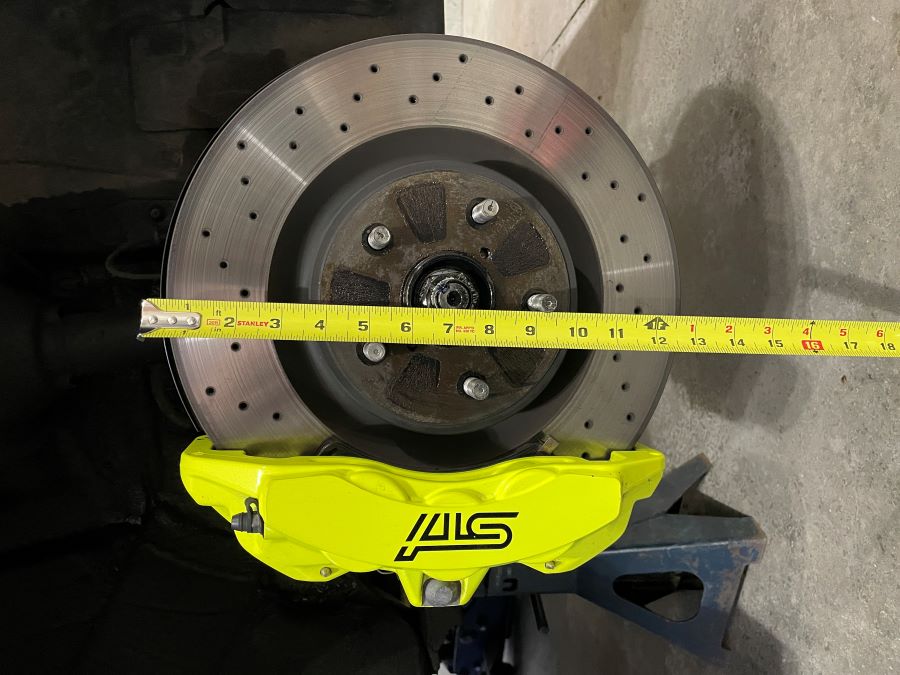
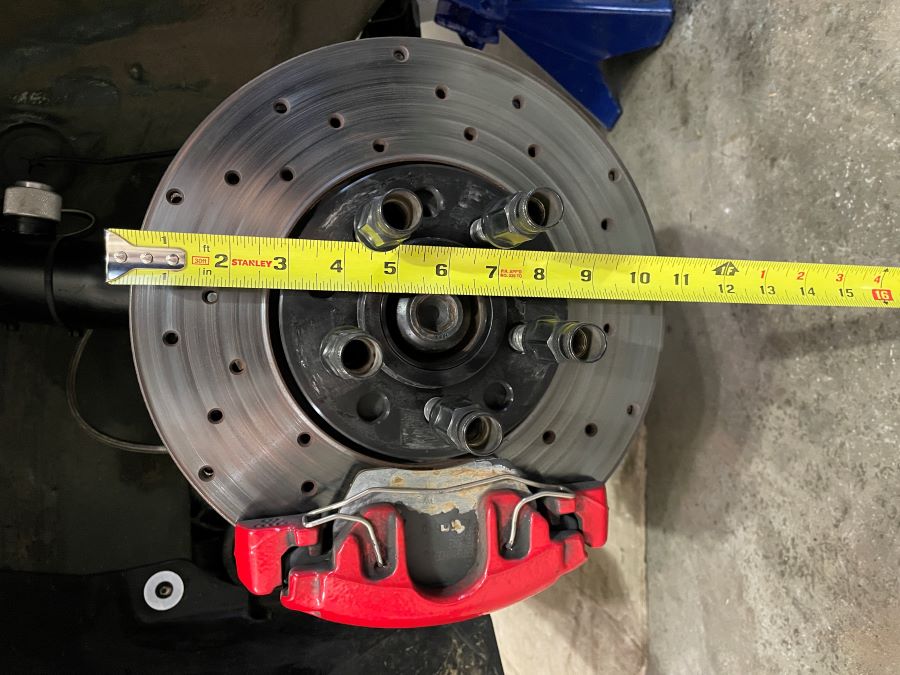
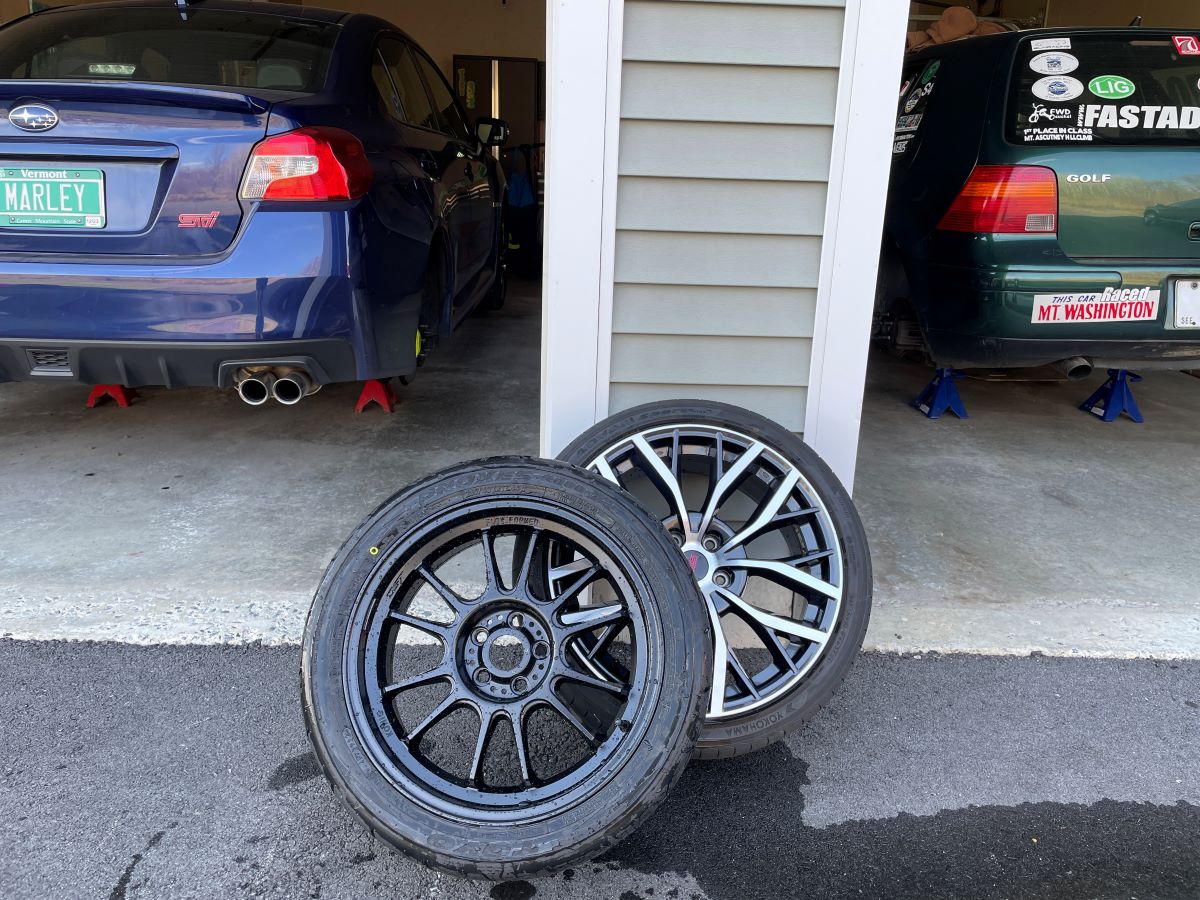
Subaru STI needs its summers back on. I never had brake calipers that were worth cleaning... well, the STI is the exception. Cleaned them up a bit after removing the wheels for the winter/summer swap.
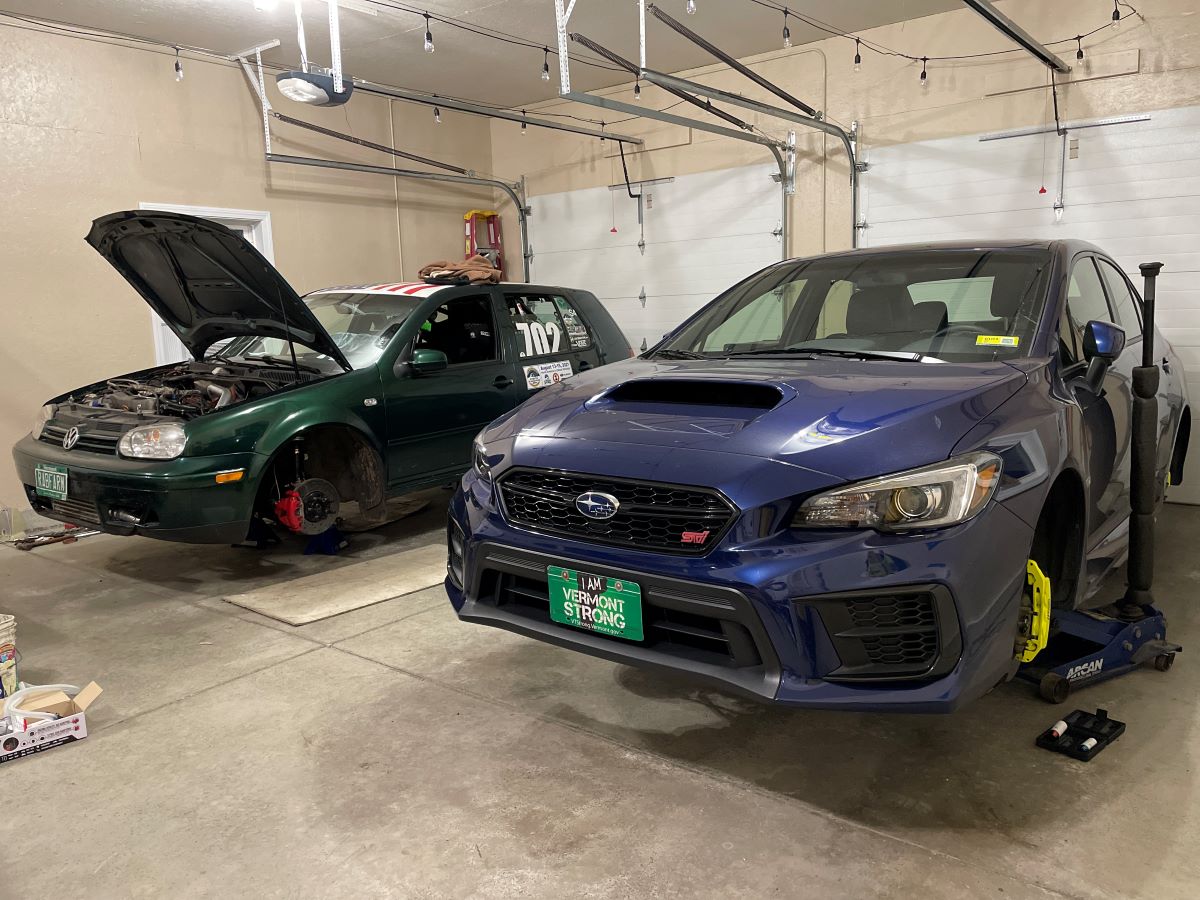
Lots of tires in play on Friday. Heading to Green City Garage to swap the STI tires and mount the new Toyo R888R races tires. Short bed filled with wheels and tires along with four summer tires in the back seat.
As I was cleaning the Subaru STI brake calipers, I could not help but notice the size of the brake rotors and calipers. I guess the family hatchback from 2001 didn't need large brakes. Impressive.
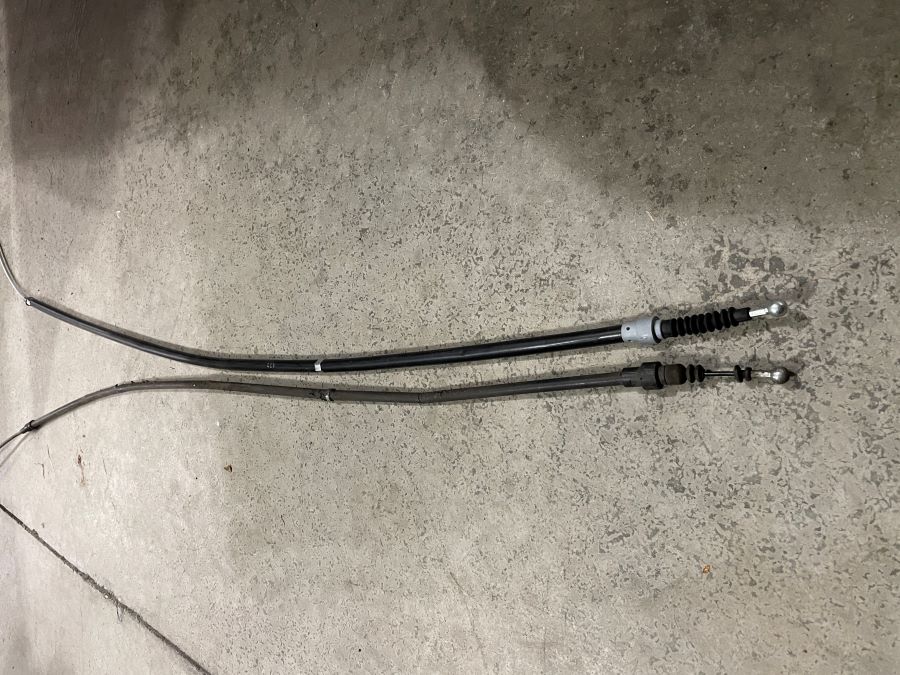
My only real accomplishment tonight (other than removing the STI wheel) was to install new e-brake cables. Not too difficult, but it did take time.
The STI rims go on the Subaru; the black rims with race tires go on the Golf.
Completely different offset bolt spacing... and running 19" on the Golf for racing would be terrible.
Not a productive weekend for the cars... I just finished some of what was on my Friday list.
I went to the local junk yard (been going there since I was 15) to wander around the yard to check out manual window options for the Golf.
Found out they don't let people in the yard anymore... since COVID-19. That kinda sucks as I can't go exploring to figure out what will or will not work. Plus, I want to take it apart myself so I understand how it goes back together. Darn it.
I picked up the Golf and Subaru tires at Green City Garage.
Spent a lot of time cleaning the nooks in the Subaru rims. For the Golf... since I like simple spokes, I was able to clean all four Golf rims in the time it took me to clean one Subaru rim.
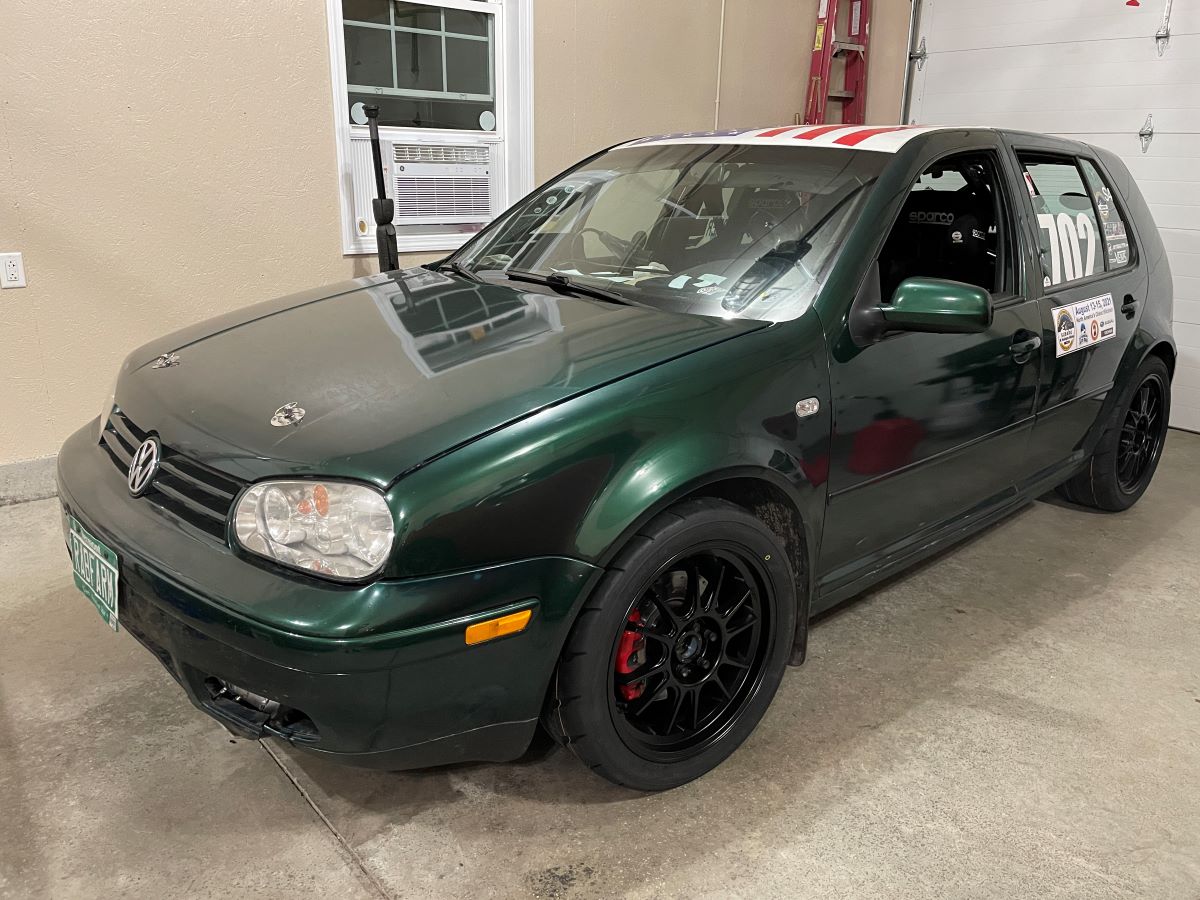
Golf with the new tires... Toyo R888R 235-40-17

The trusty enclosed trailer... It has wheels and is involved in my racing habit, so here are some updates.
Love getting home after an event and not having to unpack in the pouring rain.
Early on, I built simple shelves in the front. Deep bins held my car parts (hard to find stuff), no edge on the shelves, and everything kinda piled on top of each other.
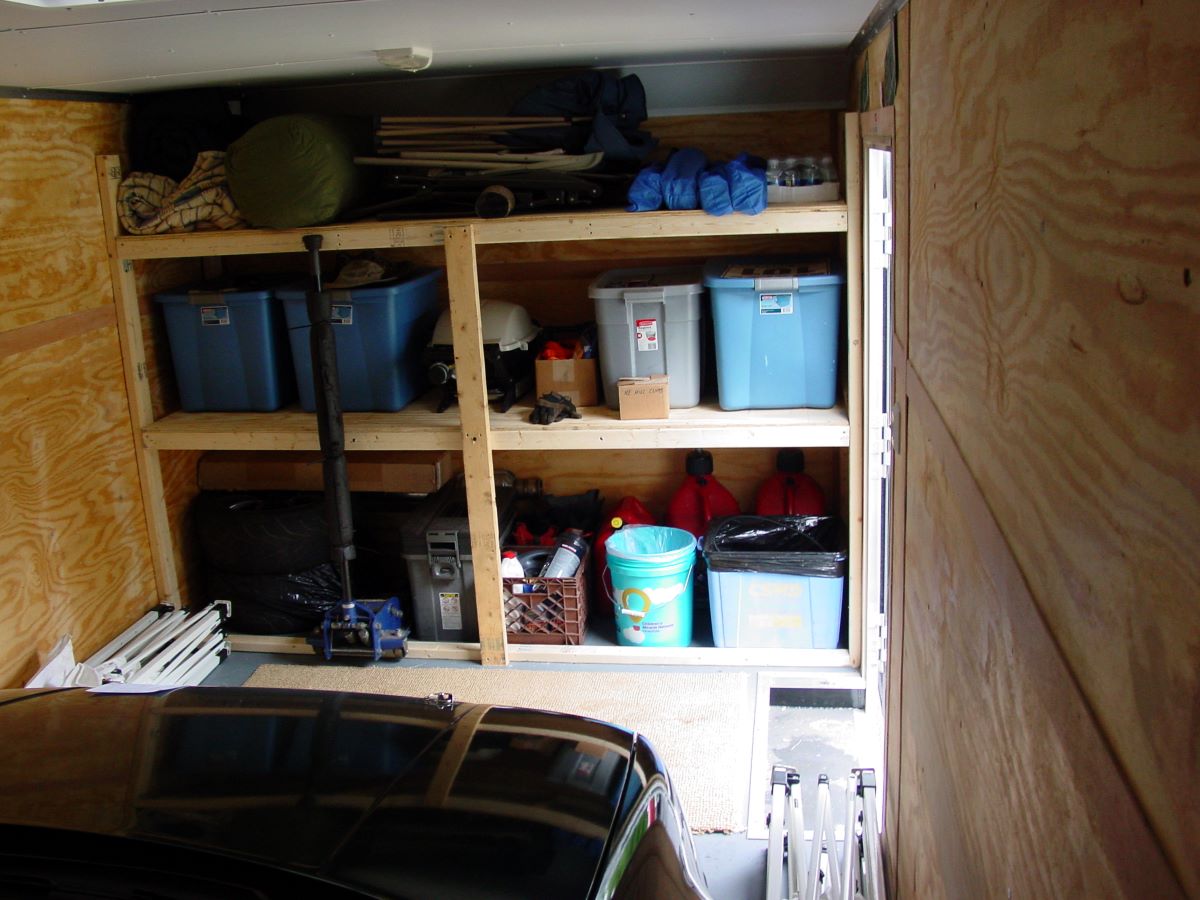
Later, I added some sub-shelves for shorter bins along with a tool box. Still everything was a cluster. Adding aluminum angle for the shelf edging... that actually worked very well and looked good.
The tool box was a great addition, but I didn't take into account the height that was needed to fully open the cover (which would unlock the drawers). It worked, but could be better.
I still had a lot of stuff on the floor in front of the shelves such as the cooler and tires.
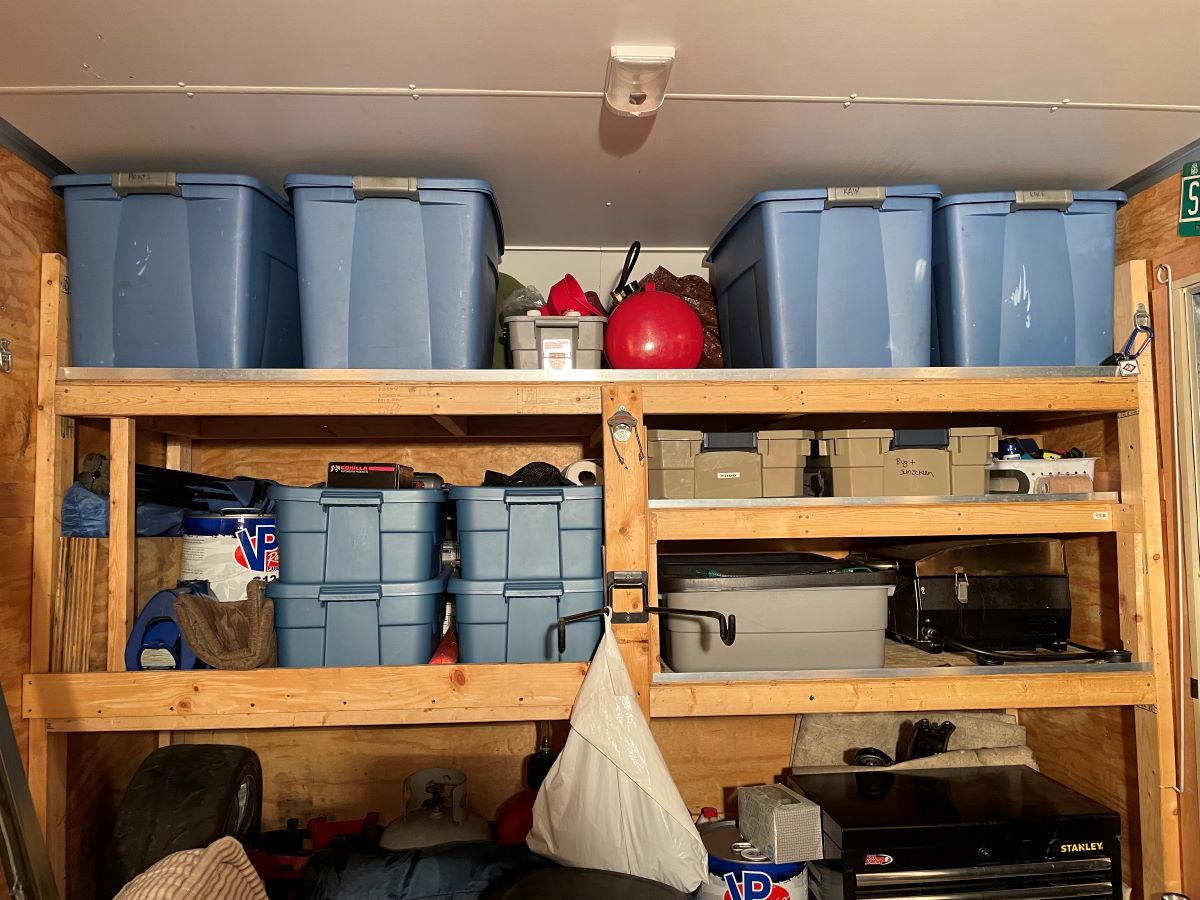
For the 2023 season, I fixed some of the issues.
Proper storage for 5 wheels, the jack, a shelf for the LP tank and jackstands, and a more functional tool box (was my original toolbox bottom from the garage), shelf for the fuel cans (holds 3 cans), a spot for the cooler... and nothing on the floor.
I am still looking into cabinet options for the right wall of the trailer. Definitely need interior illumination.
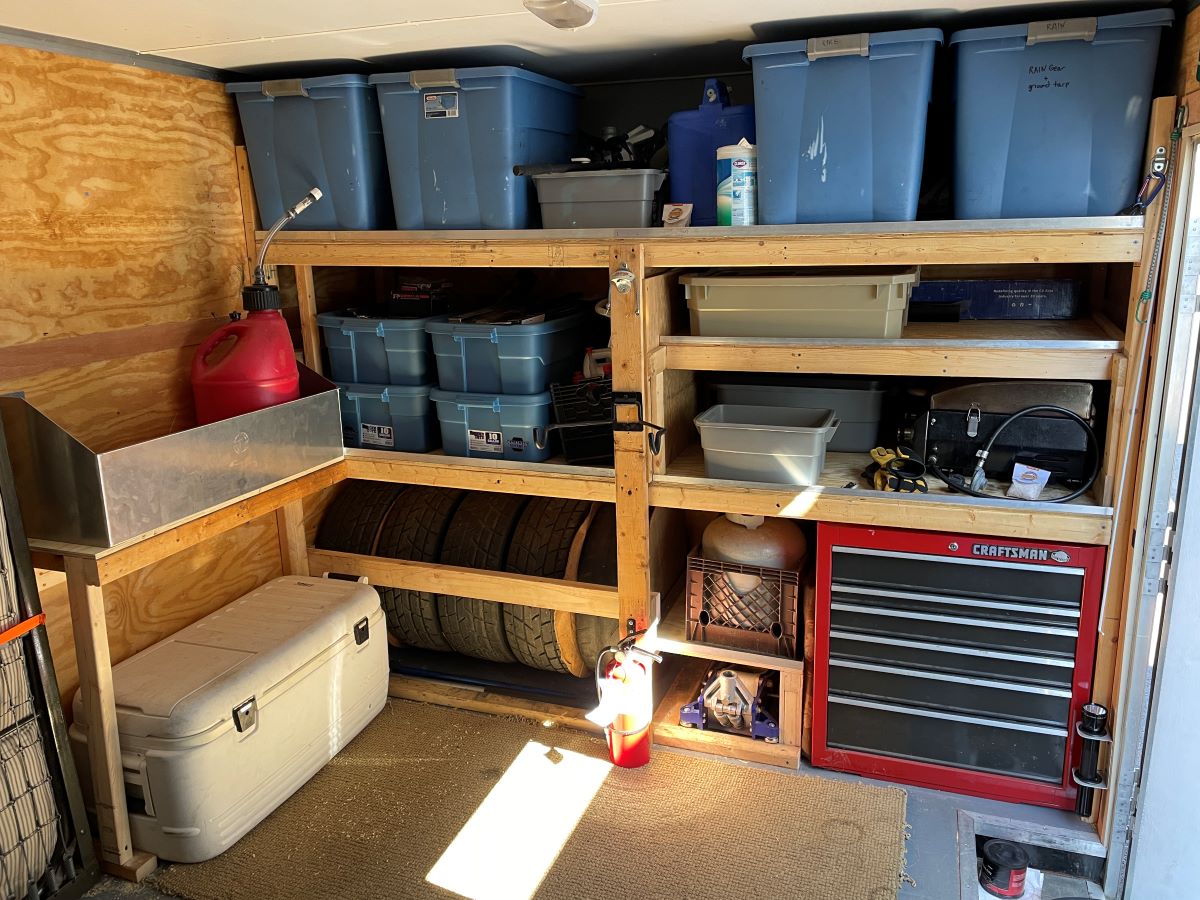
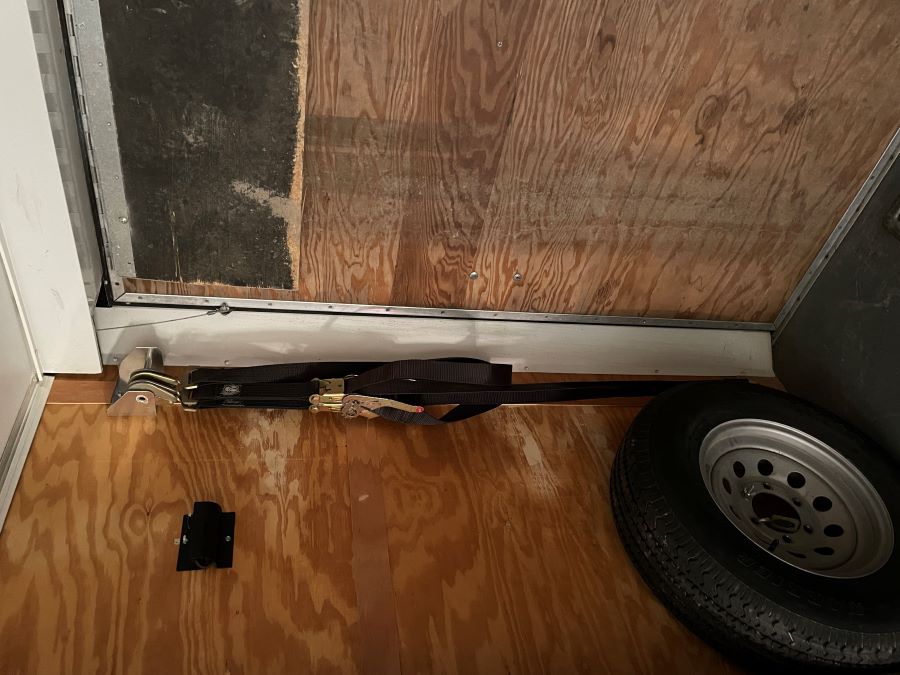
Finally, I got two racks to hold the tie down straps; one in either end of the trailer.
Installed the parts that I thought were needed replacement on the shifter.
I have seen some videos that showed using a hole saw on the side of the shifter box from inside the car to be able to access the cable bushings inside the box.
I opted to drop the exhaust (two V-band clamps), remove the heat shield, and drop the shifter box out the bottom of the car.
Picture from DieselGeek site:
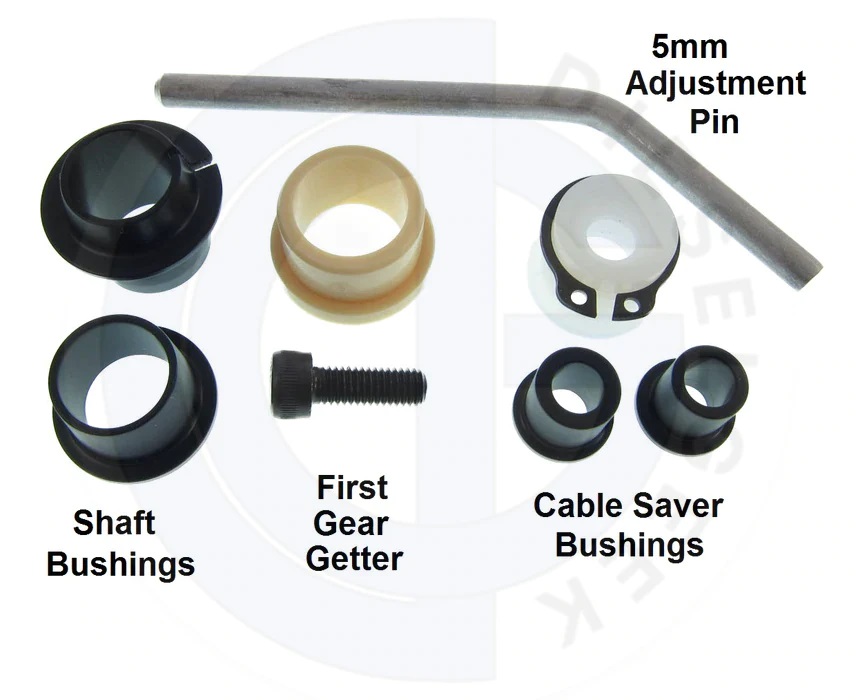
I replaced the shifter shaft bushings (on actual shifter level).
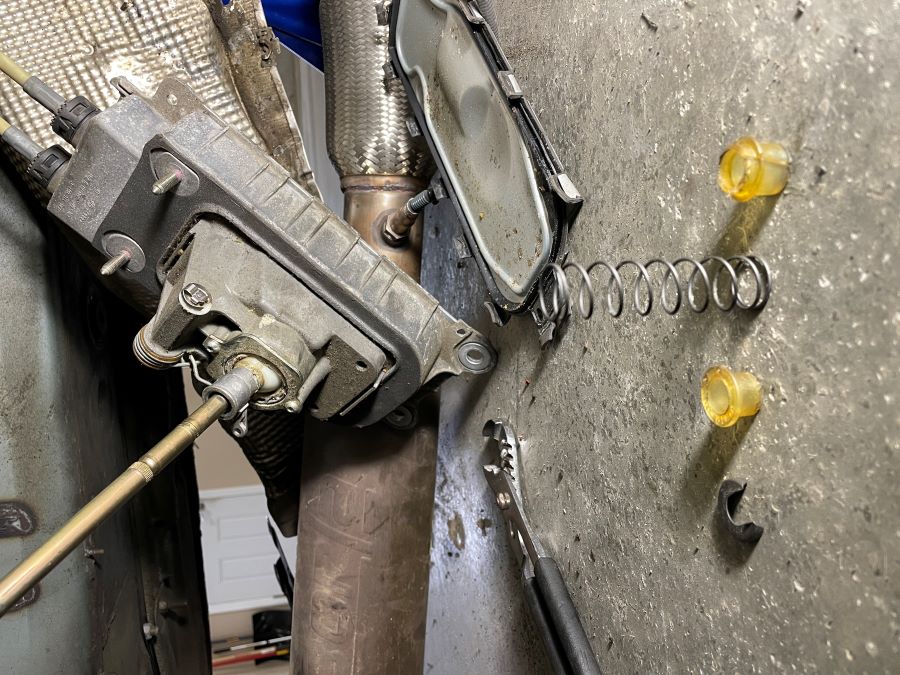
After removing the bottom of the shift box, I reattached it to the car so that I could see what parts actually had play in them.
It seemed the Cable Saver Bushings were very good; did not replace them.
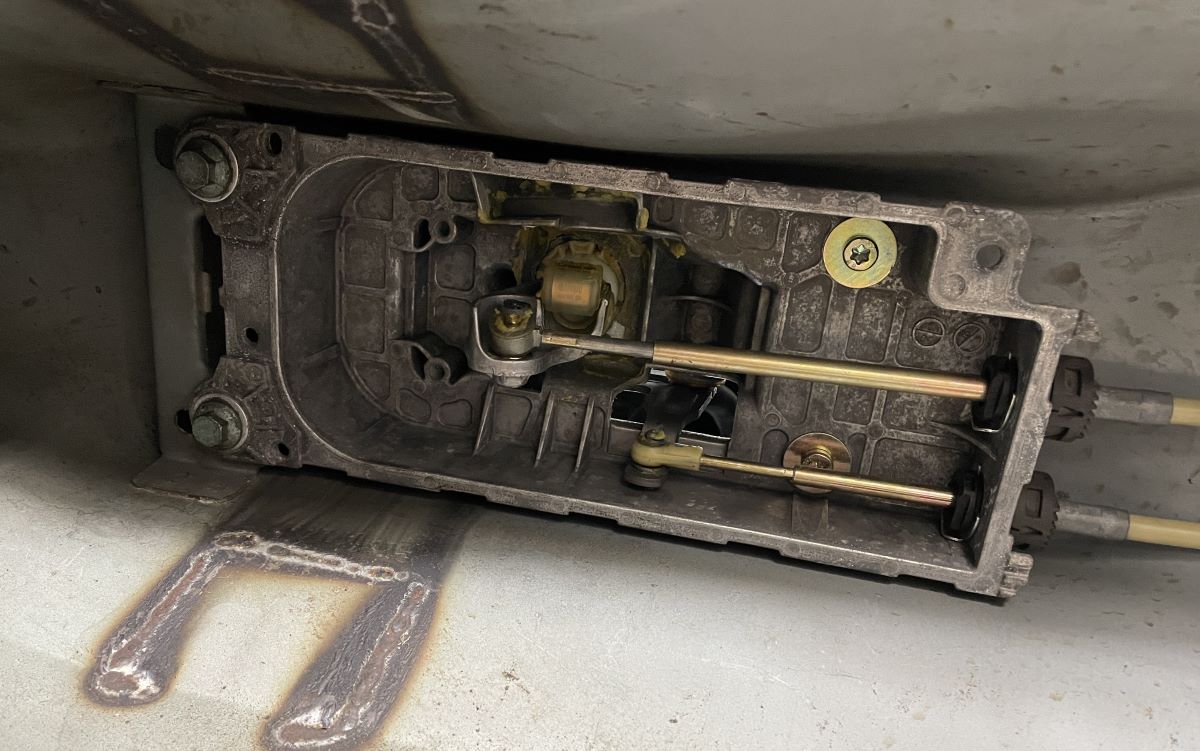
I also replaced the First Gear Getter. Requires removal of the stock soft rubber part. To avoid damaging the hard plastic under the soft rubber, I did an "x" cut at the end of the soft rubber (vs. cutting the length of the soft rubber) and pried it off with a screwdriver.
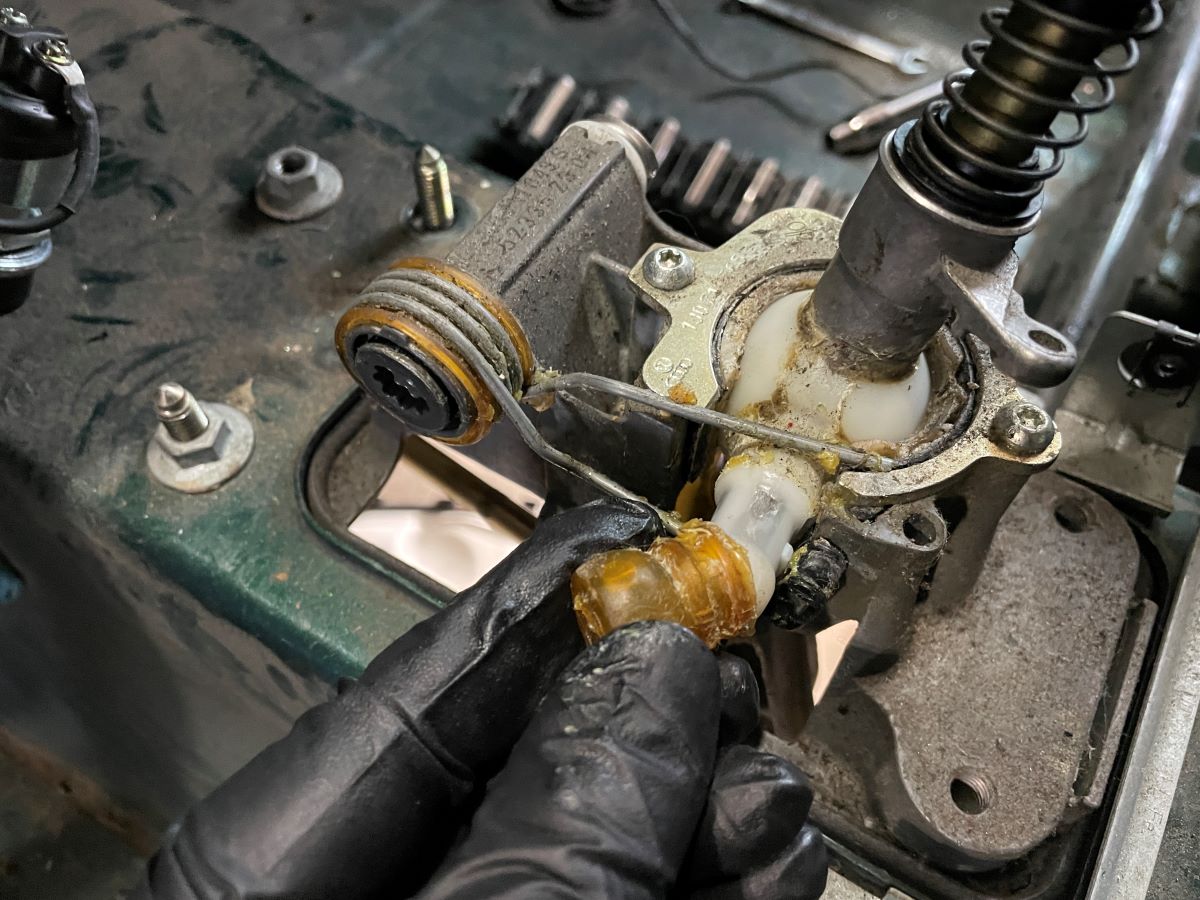
And done... I will clean the surfaces of the shifter before buttoning it all up and adjust the shifter.
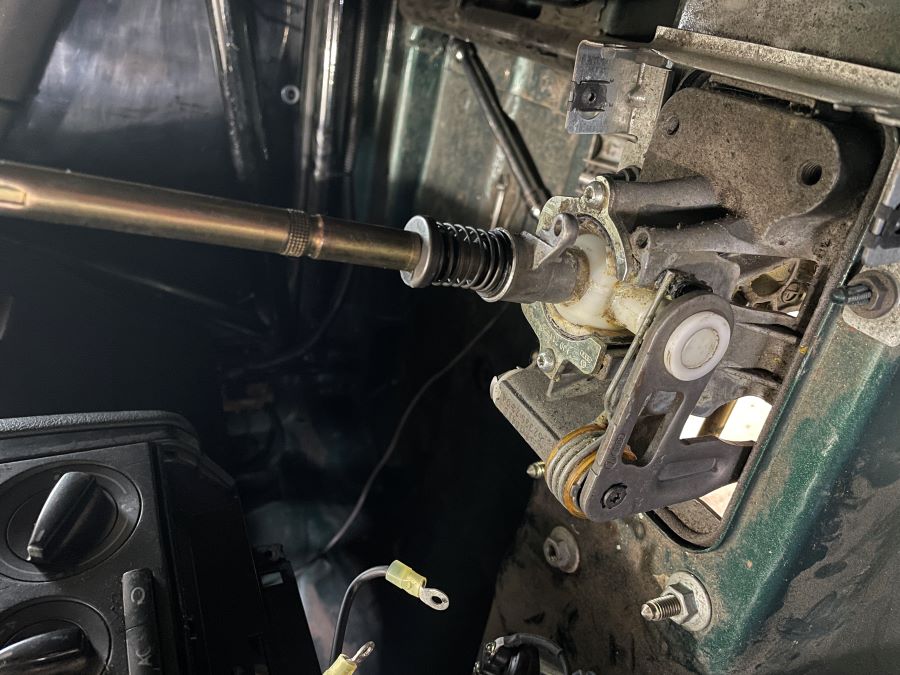
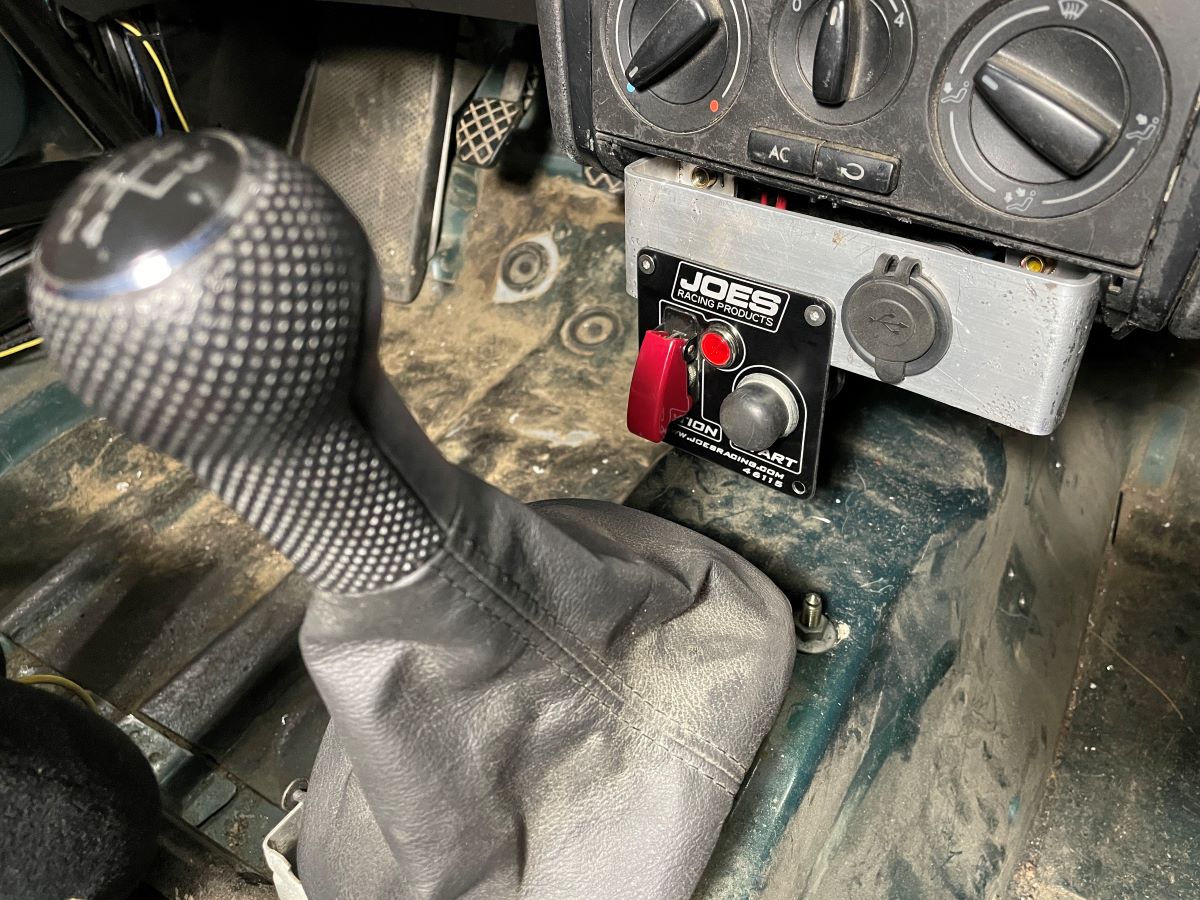
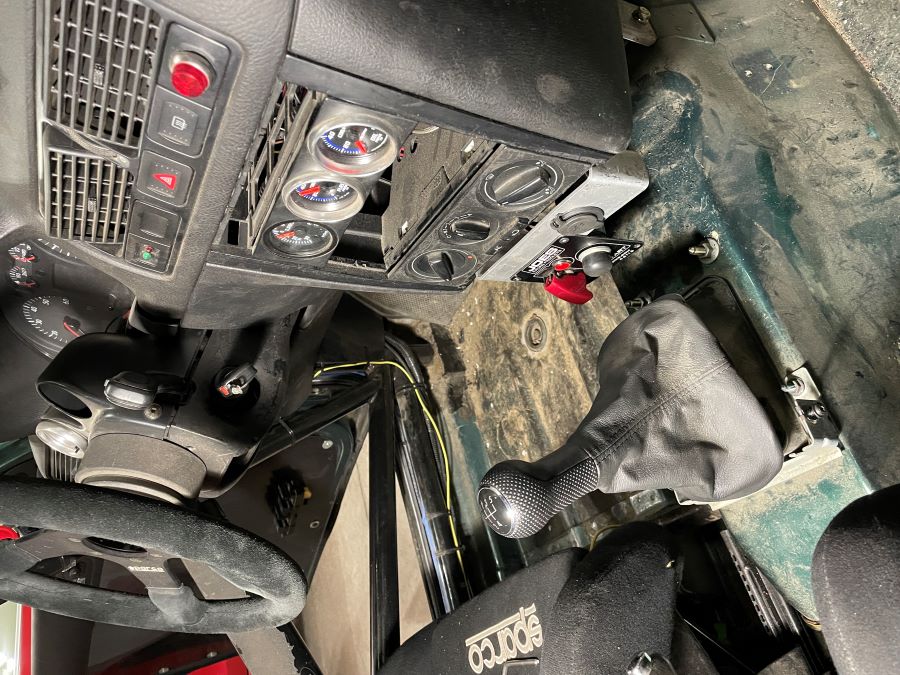
This weekend may include creating a panel in the dash to hold the three existing gauges along with the ignition/start switch to have everything in one place. This means that I may not reinstall the lower dash trim around the shifter... I like the idea of being able to easily access everything for inspection and maintenance.
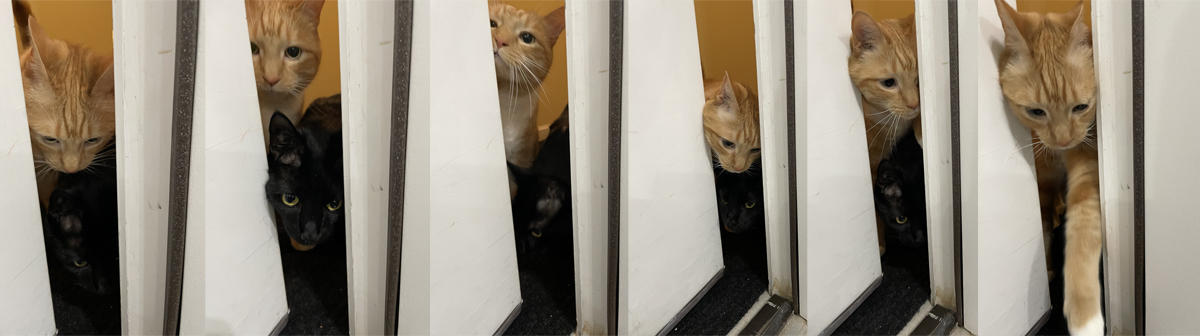
No project pictures... just our two hillclimb cats (got them from fellow racer) Marley and Minion wanting to check out the mouse situation in the garage.
Just some notes so I recall what I did and what I need to do.
Reinstalled the skid plate, car is now sitting on the tires, wheels TQ'ed, and tire pressure adjusted.
Tires are Toyo R888R 235-40-17. I used 34 front and 30 rear at Mt. Washington in 2017 (with same tires).
Tires are set for 34/30 for Philo. Asctuney (more technical and more heat in the tires) will be a better indicator of a good tire pressure.
I did not use the two step spring setup in the front; just ran the single main spring. Now I need to remember the hub to fender lip height to adjust the coilovers.
Tuning is this Friday on 93 octane pump fuel.
Steve
Adjusting the coilovers...
Stock is 15.5” front and 15.25” rear measuring from the center of the wheel to the lip on the fender.
I wasn't too accurate with the fender lip to center measurement. I just needed it to get understanding of approx where everything is sitting.
I didn't change anything in the rear from the original Gaz install, therefore, this is height that I am working with.
Wheel location | Fender Lip to Ground | Fender Lip to Approx Center of Wheel
Front Left | 25.00" | 13.25"
Front Right | 25.50" | 13.75" (half inch higher on right front vs. left front... visually noticeable)
Rear Left | 26.00" | 14.00"
Rear Right | 26.00" | 14.00"
The left front is the new strut... I just didn't measure everything accurately when counting coilover threads compared to the right side.
Both fronts are lower than expect because of the removal of the tender spring.
Looking at the rears, my current ride height (14.00) is 1.50" lower than stock of 15.25"
Ergo... I need to do 1.25" lower than stock on the fronts.
(multiply by the square-root of eleventeen and carry the two)
My goal should be 14.25" in the front (15.50" stock minus 1.25" lowering).
Steve
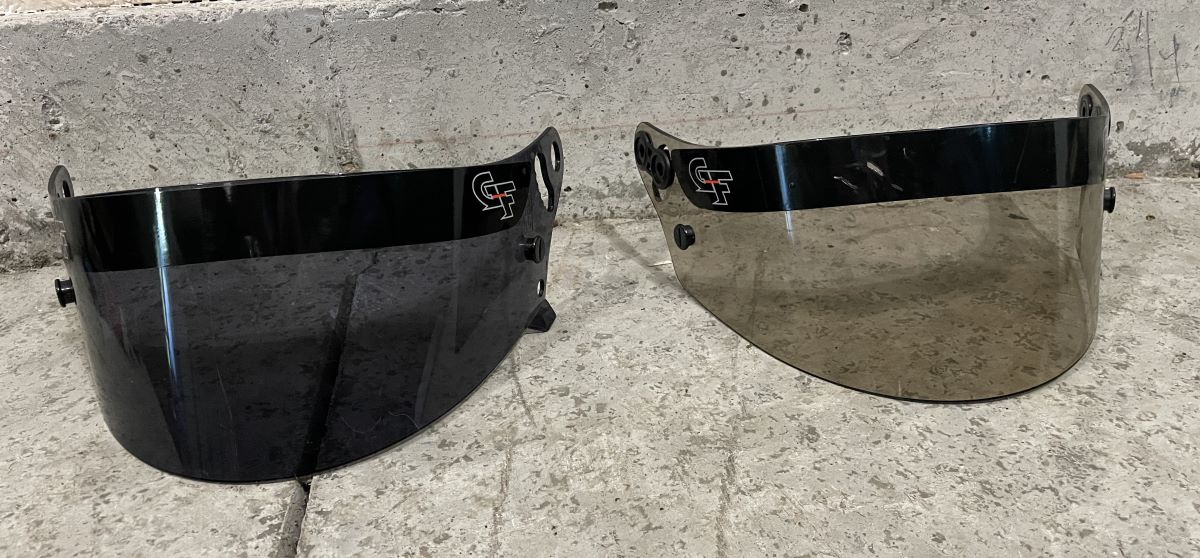
This morning was spent in the garage adjusting the height of the front of the car and installing the new darker shield on the helmet.
I realized I did some overthinking on the front suspension. Duh.
Rear is 26" fender lip to floor. Front of car should be 0.25" higher than the rear, so it is as simple as making the fronts 26.25"
They are now 26 and 1/16". Close enough.
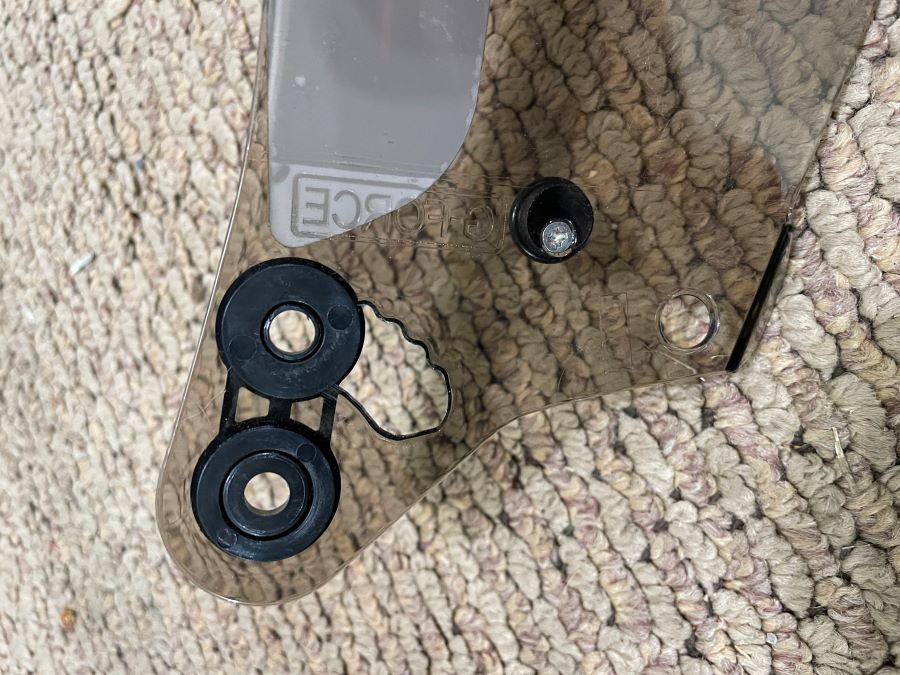
I also installed a darker shield on my helmet. I don't race with the shield down, and there is no requirement for me to have a shield (I could use an open face helmet), but I like having the shield for better protection in emergency situations (fire for example).
I don't normally wear sunglasses at the hillclimbs as there is a lot of sunny to dark transitions while navigating the treelined course. My old eyes don't like sunglasses with the dark parts.
So, I use the helmet shield as temporary sunglasses as needed... the shield is down a little from all the way open so that I can tilt my head down a little to utilize the bottom edge of the dark shield. Pretty snazzy.
I purchased a "light" tinted shield last year and realized that wasn't nearly dark enough... ordered the "dark".
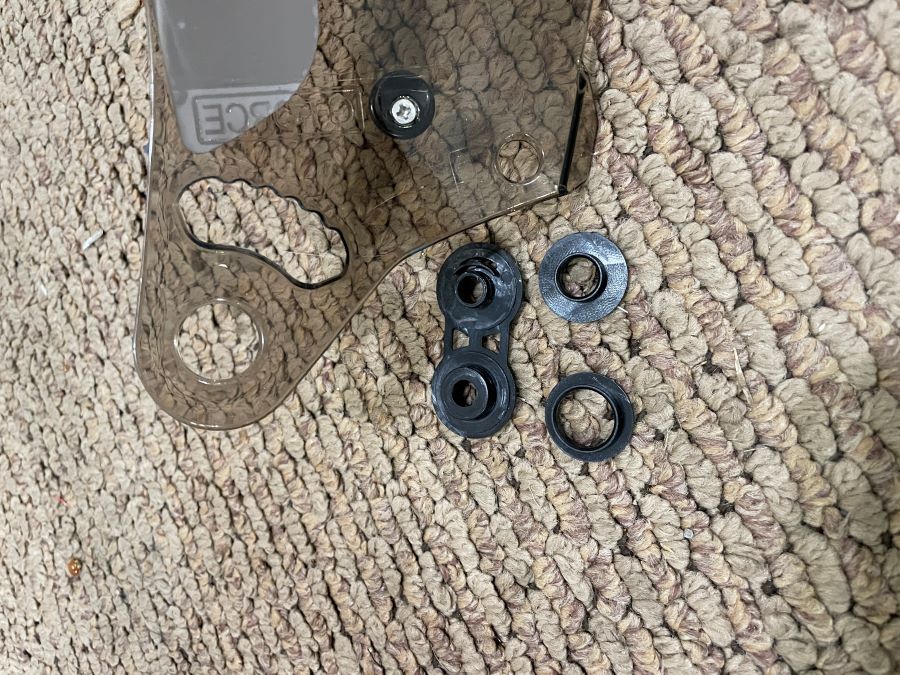
Fiddled around with the install to ensure all the pieces were correct.
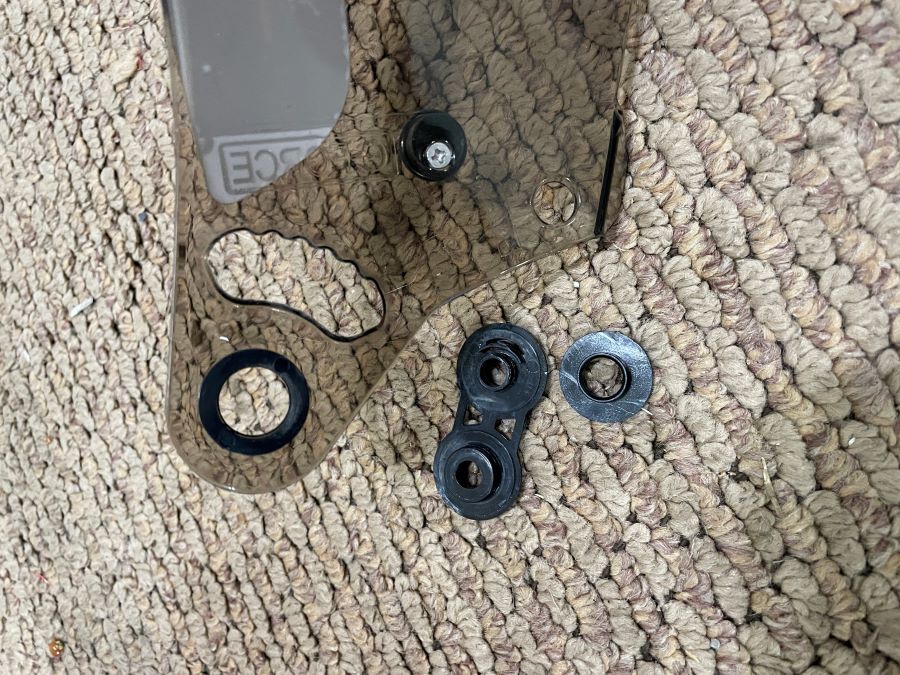
Pre-Caffeine brain... I accidentally missed the ring that was mounted to the hole in the shield and couldn't figure out why it was loose when assembled.
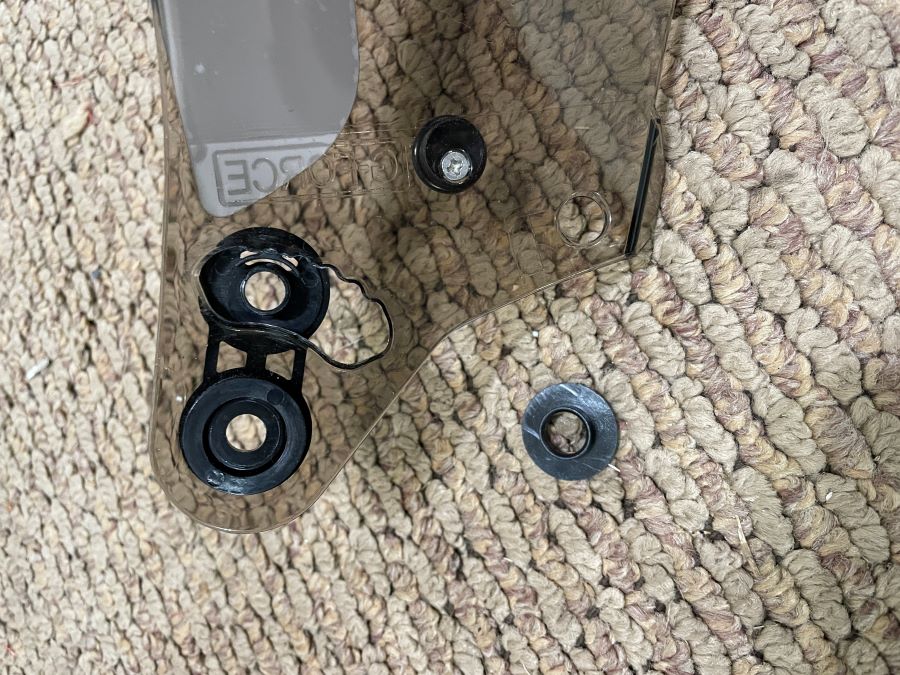
Here is the correct install (each ring snaps in)
Tonight's fabrication adventure once again proves to me that I cannot make a living making things.
I just needed a basic (and temporary) bracket to hold the ignition switch and USB power.
I think I swapped the entire front suspension in less time than it took to make the bracket.
I took a piece of 2" x 1/8" x 36" flat bar aluminum... that I purchased in 2018 for some project that I don't seem to have started.
Cut to length, bent it with sledge hammer using the vise as a metal brake, blocks of wood for the form, got to use my new rivet nut driver for the 6mm inserts, and use old bolts in the parts bin. Drilled 1/8" holes and tapped them with 4mm tap to mount the ignition switch.
I lost one bolt twice... it had a 10mm head, so I figure that had something to do with it.
Functional, but not pretty. I do plan to do an entire switch panel in the large open space, but didn't want to get into it until after the first two events. Going to get someone with a swear-wording lot more talent than I with fabrication when doing the full panel.
Car is essentially ready to go. I need to adjust the shifter. VEMS on Friday Apr 28 for the tune. If all goes well, I'm ready.
Dyno results and information coming soon.
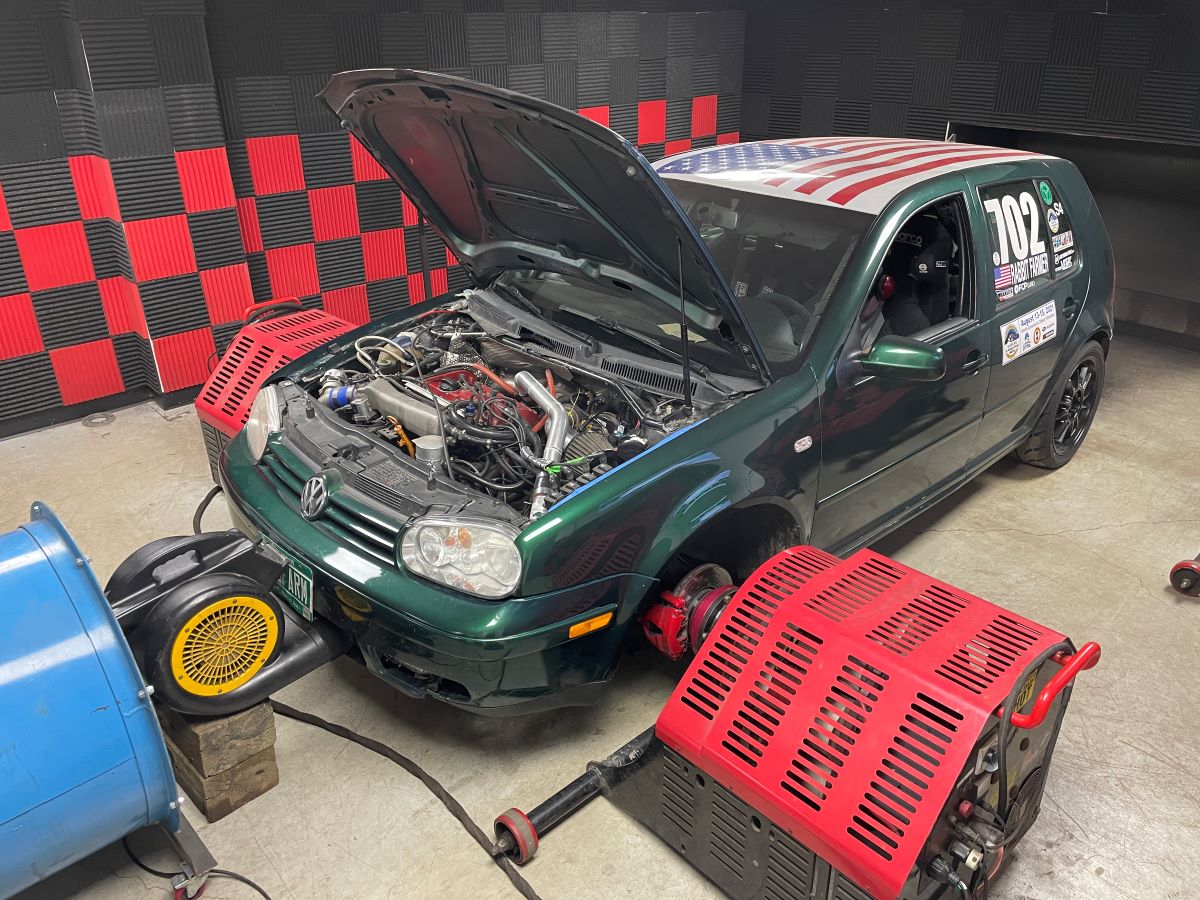
Tuned on 93 octane pump fuel.
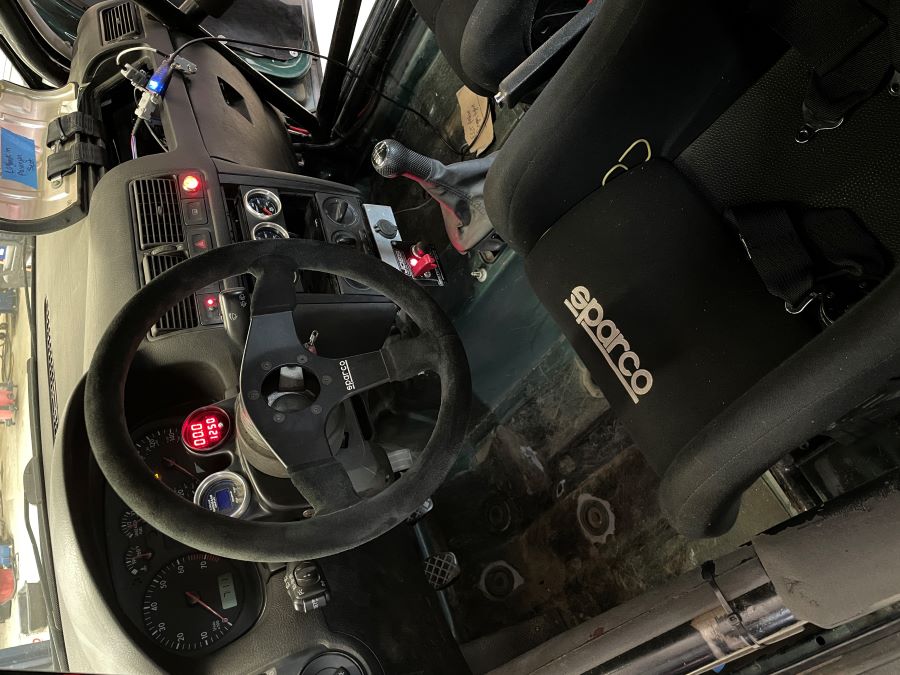
New EGT/air fuel gauge in pod on steering column.
Tuned associated with gear (for example, wastegate pressure only on first gear, moderate power on second, and all boost on other gears).... and, I can change it myself with a laptop.
Good power numbers where it counts... surprisingly, the max HP wasn't that far off of what I had before.
Nick at VEMS did a great job creating a safe and performance oriented tune. Looking forward to getting it on the hill.
Jason at VEMS pictured here.
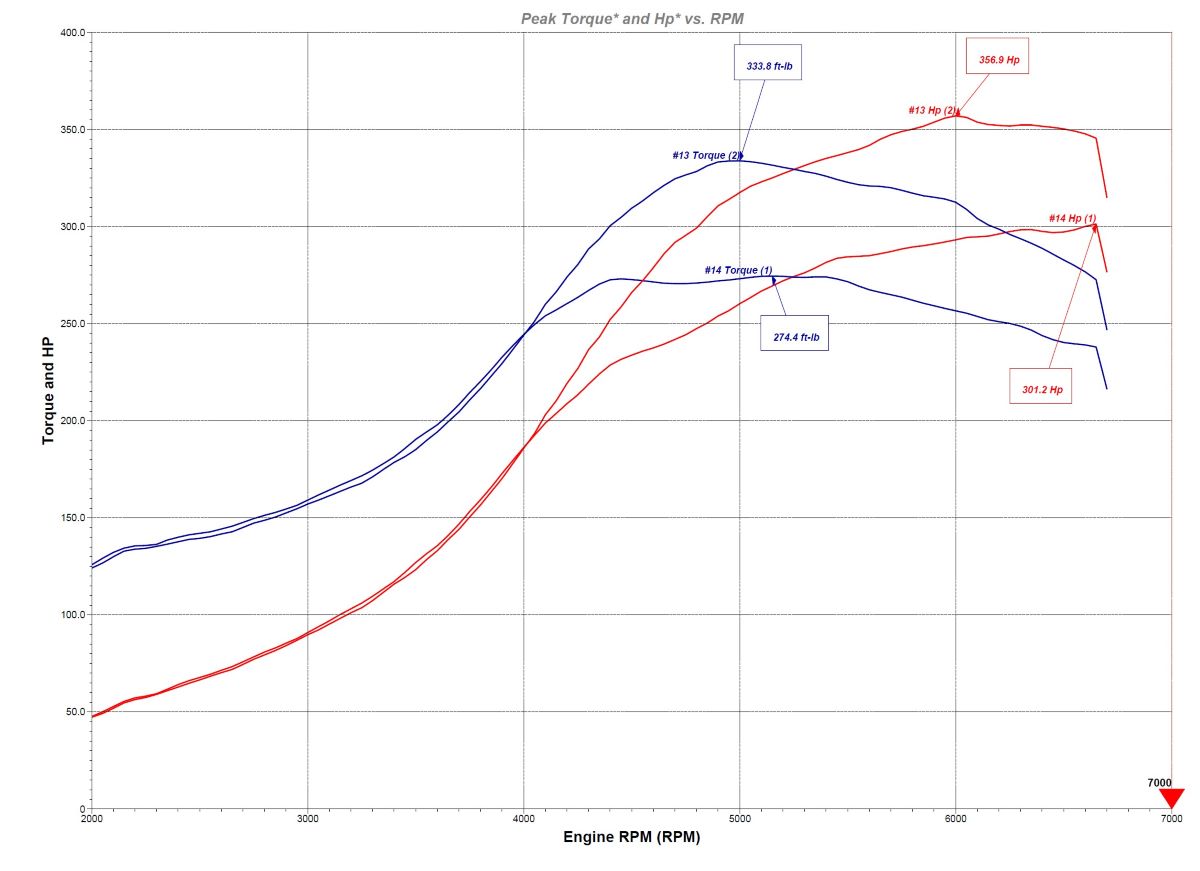
Results of the 93-octane pump gas tune with the new VEMS ECU is awesome.
I'm very impressed with the options available both from the experience tuner level and me, the mere mortal.
Nick at VEMS (Colchester, Vermont) tuned the car at many levels of RPM and boost pressure to create a range of performance between 18 psi and 24 psi that now allows me to select boost by gear.
I need purchase a simple laptop to plug into the VEMS ECU so that I can add or subtract boost (units are KPA, so I will have to look up what that means in Bar or PSI) in each gear.
We setup first gear at wastegate pressure (about 13psi of boost / ~190kpa) , second gear a bit more aggressive (I think using the 18 psi setting) with all other gears at 24psi.
The VVT seems to ramp up the low end power nicely.
Very happy with the tune and all options available. Looking forward to the first hillclimb to see how it impacts my times.
The previous tune on $21 gallon VP Racing C12 leaded race full yielded 383 wHP.
On pump, we are looking at 357 wHP / 334 ft-lb TQ at 24 psi and 302 wHP / 275 ft-lb TQ at 18 psi.
EGT and AF all look good across the range.
Technical stuff for me when I am looking to make changes to the boost for each gear and understanding the new EGT/AF gauge:
100 kpa = 1 bar = 14.5 psi
100 kpa or less is vacuum / over 100 kpa is boost
200 kpa = 14.5 psi of boost; 250 kpa = 21.75 psi of boost
Car is tuned at 224 kpa (18 psi) and high of 265 kpa (24 psi). Anywhere under 265 kpa is safe.
0% duty cycle on boost settings is `190 kpa (13 psi) waste gate spring
Air Fuel gauge is in Lamba: Stoich is 1.0, rich is lower, lean is higher. "Full rich" is 0.8ish.
Thank you to Jason and Nick at VEMS! https://www.facebook.com/VEMSUS
Steve
Burke 2023 hillclimb was fun; great seeing the usuals and new people. Well run event (two first-timer chairs) with lots of runs.
There was a lot of rain in the evening, but the days were pretty good. Very wet road on Sunday so I skipped a lot of runs as it was too slippery to put the power to the road.
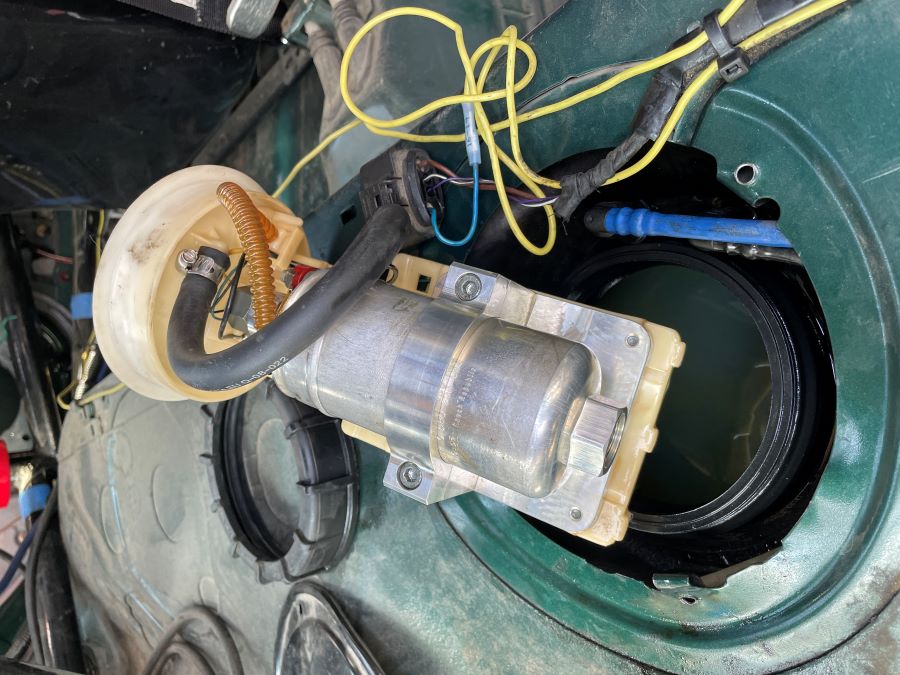
First one at tech inspection on Friday.
Before the weekend, I replaced the fuel pump seal. It seems with the monkeying around with pumping the race fuel out of the tank earlier this year, I dorked up the seal.
Three problems at the event.
On Saturday I noticed that my car was running hot while waiting in line to go up the hill. Since I was next in line to practice, I drove up the hill pretty slow just to get air going over the radiator. Cooled everything down.
At the top of the hill, I checked all the coolant hoses... they were all hot (means it isn’t the thermostat not opening). But... the fans weren’t running.
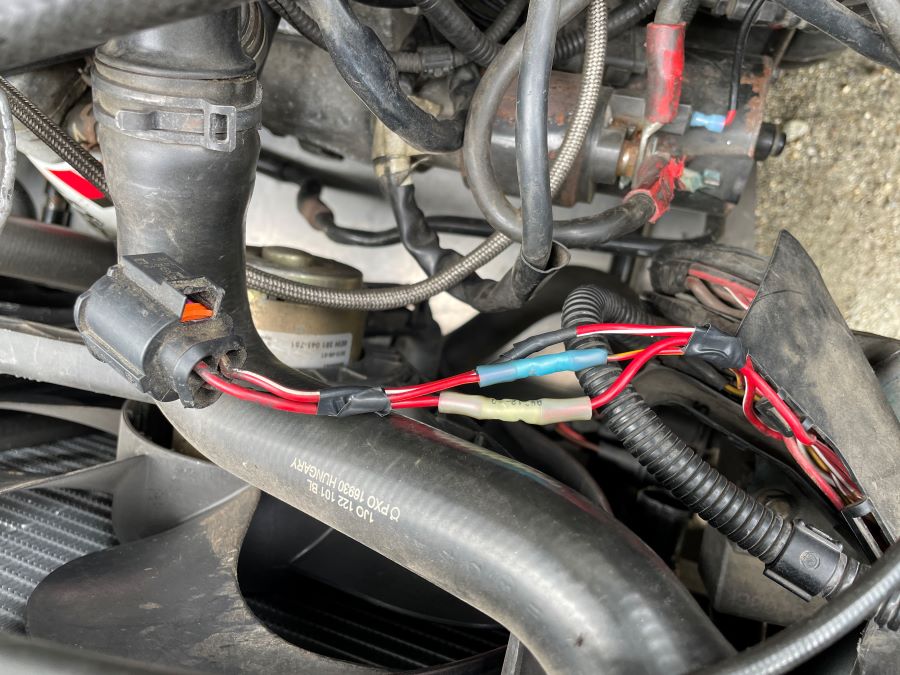
I turned off the car to poke around. Started the car again and pushed the AC button. I recall that the fans run full speed with the AC is on. Of course, I have no idea if this works on my car because so many stock wires were removed and there is no AC present.
But... the fans were now running. Pushed the AC button off and the fans still ran. Seems I had a correlation/causation fallacy.
Turns out it was simply some cut wires on the fan switch. The wire raceway was no longer connected to the car; this allowed the wires to come in contact with the sharp edge of the fan. Was able to fix thanks to fellow competitors with tools/parts.
I could also smell coolant (since the first hillclimb of the year), but didn’t locate the source until this weekend. The -6 AN fitting for coolant that connected to the turbo was leaking.
It was hardly leaking, but we decided to see if we could fit it. Nope... made it much worse!
Thankfully, Joey (Kales Fabrication) was coming to the event on Saturday night and brought extra fittings and hoses. We did a temp fix with two premade hoses. Something to address in the next few weeks.
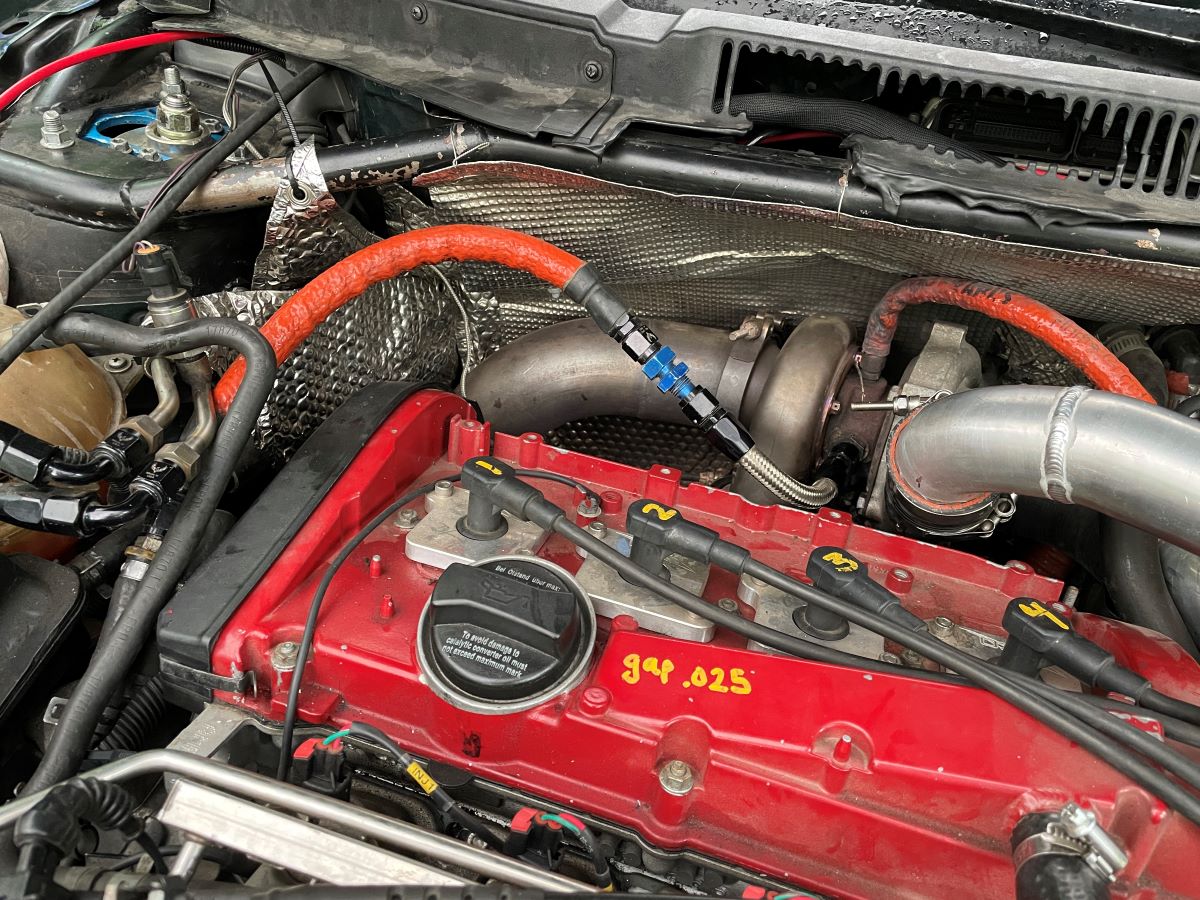
The biggest problem was discovered when we were fixing the coolant line. The hot side of the turbo was loose... it was able to wiggle and rotate on the center housing. We checked the bolts and what we could easily access were tight.
Will have to take the turbo apart over the next few months and figure out a solution.
I believe I will replace the timing belt/manual tensioner/water pump at the same time.
Two months until the next event... good time to start is this week.
Day 01: Scirocco
Remove 1.8T AEB engine with 5-speed 020. Next step is to determine how to make the 1.8T non-AEB engine with 5-speed 02J cable shift work.
Will have to work around the MK2 subframe and other front end modifications. This is a different animal than other Sciroccos with the extensive modifications to the structure of the car.

Update: 2001 VW Golf 1.8T
At the Burke hillclimb as we were fixing the turbo coolant line, we noticed there was play in the turbo where it would allow the hot side (Turbine) to rotate on the center section... and all the bolts were tight.
Joey and I removed the turbo and Joey brought it to his shop to check the play in the shaft and what needs to be done to tighten the turbine side to the center section.
Begosh... it's busted. Bearing shot in center section. Determining options... same center or different turbo.

Mmm box flared scirocco!
In reply to Rabbit Farmer :
I may still have a couple of the metal bits for mounting a G60 and an 02A in a Corrado, if they are any help.
preach said:Mmm box flared scirocco!
It is pretty cool. The car has a lot more modifications than just the fenders. Pretty wild what the original owner did when building this car. I am working to modernize it to get it back on the track/hills.
You'll need to log in to post.


