1 ... 3 4 5 6 7 ... 11
Berck
Berck Reader
4/30/22 10:20 a.m.

I too had issues with the axle nuts not being tight enough after an axle seal replacement.  Standard procedure is to torque it to 250ft-lbs, then keep going until the castle nut lines up for cotter pin installation.  I find that just wailing on it with giant impact gun until it stops turning gets better results.  Something about the way the impact works actually gets it tight enough.  Also, most of the axle seal kits come with an absolutely worthless washer that just won't hold up to racing.  I ordered some of these which actually hold up.

Carl Heideman
Carl Heideman
4/30/22 8:27 p.m.

In reply to Berck :

I've done the wailing with an impact for the past 30 years but thought we'd try the torque tool at the track. We're going 300 ft lbs. We're using new drums and they seem to need to take a set after some use or heat cycles. We didn't have to mess with them much today. 

Carl Heideman
Carl Heideman
4/30/22 8:28 p.m.

Another pretty good day.

The weather was better than expected and our two morning practice sessions were dry. 

Our only mechanical issue was the brand new tach misbehaving.


Theo and Jack are really organized with checklists and logs. Makes me happy.  They've been weighing fuel to calculate consumption (about 16-17 MPG).

Qualifying was at 1:15. Hard rain started at 1:05 so Jack got rain practice. They calculated fuel needed and only put in enough for qualifying. Jack ran out on the cool down lap and got his first tow. But their math was right: Enough for qualifying. It dried up pretty soon after the session. The afternoon sprint race for Jack welcomed the next rain so he didn't get any dry racing. There were a lot of spins and offs but Jack didn't have any himself. It's supposed to be nice tomorrow so we're looking forward to that. 

Carl Heideman
Carl Heideman
5/1/22 5:27 p.m.

We had a great weekend with some better weather today. 

Jack's first race today was a sprint at 8:00am. The track was a little damp from some nasty weather overnight. And wormy. Jack raced well and the car was working well too.

The second race was after lunch and longer. The carb started minor flooding on left turns again so Jack slipped back a few spots but still in the top half.  We're really happy with the results and the reliability. We're going put a less conservative tune on it next time and try to keep moving up. 

The VSCDA is a wonderful organization with lots of friendly and helpful people. 

I know what to do to fix the carb and I'll post details when I get there. I'll also post some lessons learned and other tidbits soon.

We probably won't run again until August at Grattan and then Road America in September so we have some time for fixes and tweaks. 

Carl Heideman
Carl Heideman
5/5/22 8:59 a.m.

I said I'd post some lessons learned and I think overall they're pretty boring, but maybe someone will find them useful.

  1. Since we have a 24' enclosed trailer, we took a lot of tools and spare parts. We've equipped a full Harbor Frieght lower cabinet with tools just for races and autocrosses.  While I'm a bit of a Snap-on snob, this cabinet has Craftsmen, HF, and other brands in it.  For a few wrench and socket sizes that matter, (7/16", 1/2", 9/16", 10mm, 12mm, 13mm, etc.) we have Snap-on stuff that we bought used over the years. Our screwdrivers are Snap-on because they're great screwdrivers and a set isn't crazy money. For spares, we have a few bins with generic things we need for any event:  fluids, wiring supplies, fuel hose, some hardware, rags, cleaners, etc.  Then we carry spares specific to the car.  For the FV, we brought a carb, distributor, front trailing arms, rear radius arms, kingpins, wheel cylinders, master cylinders, brake hoses, carb kits, spare switches, etc..  As we were building the car, we built the spares kit by ordering a 2nd component or finding appropriate used.  We are generally overprepared  almost everywhere we go, but for us it's an enjoyable part of the process.
  2. We have a checklist of about 30-40 things we go over between races.  Basically, we nut and bolt the car, check the pressures and fluid levels, check things like ensuring we get WOT, and check anything that has been an issue in the past. We also clean the car between sessions.  Not only do we like having a clean car, the cleaning process helps us inspect the car and look for anomalies.  Since this was a new car, we added about five things to the list. The most interesting thing we added was to shake the car while it idles to look for the carb flooding issue.
  3. Since the car was new, the nut and bolt was very important. We had many loose fasteners after the first practice, but around the 3rd time out, things had taken a set and weren't needing tightening.  I've seen this with just about every new build I've done.
  4. There were about 20 FVs at the event and two broke their right spindle.  We've been told that the left spindles usually break because they are hollow (speedo cable runs through), so everyone was surprised to see the rights break. Most of the experienced people said it seems to happen once a season, not twice in the same weekend.  We loaned one of the guys our spare right kingpin/spindle, which was bone stock (no offset bushings), but better than nothing. We were surprised to see that it was hollow and in talking with some people have discovered that some right spindles are hollow.
Mezzanine
Mezzanine Dork
5/5/22 12:43 p.m.

Really enjoying reading along with this adventure. The lessons learned are great and underline the value of cleanliness and careful inspection. 

The situation that FV is in where there is a huge base of knowledge but limited record of it on the internet is something many groups are in transition with now: the move from internet forums to user groups (like Facebook groups) and the loss of real data and knowledge. That loss comes with any platform transition of course.  

Carl Heideman
Carl Heideman
5/6/22 8:46 a.m.

Theo's girlfriend Liz is a pro photographer and took some nice pictures last weekend.

Carl Heideman
Carl Heideman
5/14/22 2:55 p.m.

Someone forwarded this photo that someone else posted to Facebook (sorry I can't credit the photographer) and I think it needs more sharing.  

Turn 1 after the start is always pretty exciting, but in this picture the track was a little damp and covered with many worms. Fortunately, Jack was in front of the cars that went off.

Carl Heideman
Carl Heideman
6/6/22 8:35 a.m.

We're going to Blackhawk Farms June 17-19 to run with the VSCDA again, so we're fixing some issues and prepping the car.  We made a to-do list right after the Gingerman race and of course ignored it until last weekend. 

So the first thing we did was cross off all the things we wouldn't have time for anymore.  We'll hopefully get to all of them before we run  Grattan in August.

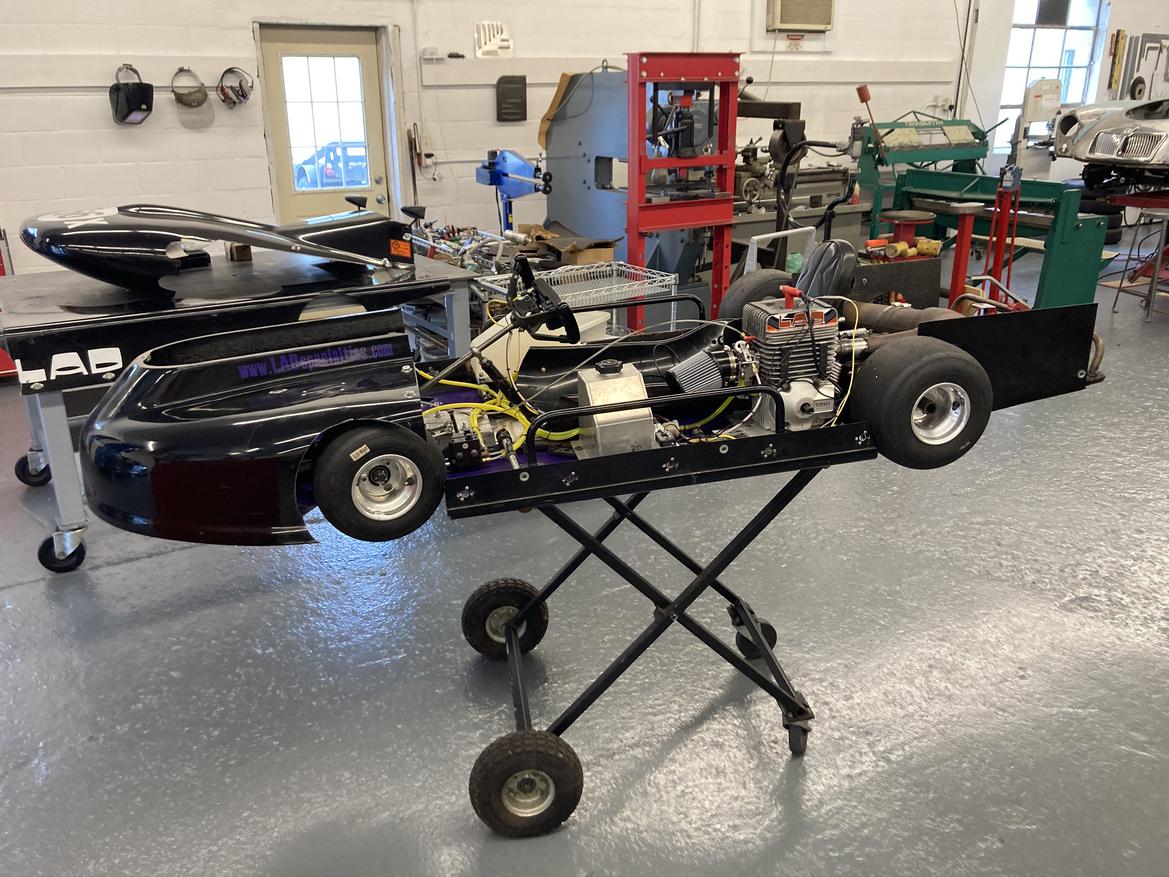
One of the reasons for not working on the FV is that Jack's decided he needs to go karting with a laydown enduro kart and he built this one up.  We have a good friend who is a national champ in one of these and Jack figures it will be good driving practice to run with him.  I think it's nuts to go 90MPH on your back.

Anyway, we put the Zink back on the table and got to work.

The carb issue we were having was a fairly common one with these carbs.  Over time, the top warps, usually because the four screws get overtightened.  Later carbs had screws in the center area, where this one was a bit high.  We put it on a surface plate with some fine 400 grit and sanded it flat again.  This should solve our issue, which was an over-rich condition on right hand turns, caused by the bowl overflowing through the warped center area of the top and splashing too much gas down the venturi.

We'll eventually paint the chassis and everything inside grey so it's easy to clean and easy to see oil leaks.  We had a valve cover leak that was dripping on the body sides, so we thought we'd get the insides grey now before any more oil seeps in.  We just used some brush-on grey that our local paint store sells as floor paint.  Cheap, durable, and easy to touch up.

We found out that there is a gearbox vent that should be routed to the catch can.  Ours was covered by our rear nerf bar, so we drilled and tapped a hole nearby 1/8" NPT for a fitting and plugged the original hole by tapping it and then putting in a set screw to seal it off (a bit hard to see, but the slotted screw at the top of the housing).

While we had it apart, we put a speed hole in the exhaust mount and painted everything silver.

We had a leaking valve cover gasket, so we replaced both and adjusted the valves again (.004").


Carl Heideman
Carl Heideman
6/19/22 5:32 p.m.

Well, we planned a three-day race weekend at Blackhawk Farms and TL;DR, we went home Friday night with a broken engine.

It looked like it was going to be a great weekend.  Friday was a little warm (high 80s) but Saturday and Sunday were supposed to be in the 70s, with overnights in the 50s.  Jack got in two practice sessions and one qualifying session and learned the track.  

There was an optional open-wheel enduro at the end of the day. Jack was the only FV out there with a bunch of Formula Fords and faster cars, but it was going to be 50 minutes of seat time.

The plan was to pull off for the required pit stop after 15 laps, but he pulled in at 10 because he felt a vibration.  We checked things over and couldn't find anything.  We thought maybe it was the exhaust rattling as that had happened at Gingerman.  He ran another lap and came back in since it just didn't feel right.  We let it cool and checked a few more things. Then he started the engine and I could see the front pulley walking back and forth about 1/8" so we knew were done for the weekend. 

On Saturday morning, back at Eclectic, we pulled it apart.  I called Bob and he said let's tear it apart on Sunday. Just after calling Bob, we noticed that the flywheel and the front pulley were floating a little, so we were pretty sure the crank was broken before going deeper. 

Sure enough, the crank was broken in half, but everything else looks okay.

If you look closely, you'll see the 2nd crack that would have turned it into a three-piece crank and likely destroyed everything else. It's a good thing Jack pulled off before that happened.  But it ran for three laps or so.

It always surprises me that cars can run with a broken crank like this.  I've seen it several times in British cars.  Bob said it's the first time he's seen it in a FV. 

We got about 10 hours out of the "freshened" engine.  We'll be crack-checking everything else before we put it back together.  Bob had another crank for us.  We want it back together so we can go to Grattan August 12-14.  Stay tuned...

Mezzanine
Mezzanine Dork
6/20/22 12:31 p.m.

Holy cats, what a failure and what a catch by sympathetic driver Jack! Good thing he was paying attention. 

Apexcarver
Apexcarver UltimaDork
6/20/22 2:50 p.m.

I'm impressed that it ran at all like that without grenading all over the place.

ChemGuy
ChemGuy None
6/22/22 1:04 p.m.

Carl,

Great job on the rebuild. Sorry to here about the crank.

From your posts it seems you are in west MI. I an in SW MI and talking to a guy about buying a vintage Zink FV car. I am concerned about fitting in these. I cant seem to send PM's yet, i just joined here. 


Can you PM me as i would like to see if i can come test sit in one of your Zink cars.


thanks,


Dan

Carl Heideman
Carl Heideman
6/23/22 9:10 a.m.

In reply to ChemGuy :

PM Sent, glad to let you try fitting.  If you fit in ours, you'll fit in others.  Ours is probably tighter due to the additional front downtubes on the rollbar.  We'll probably rework those a bit it in the future.

TurnerX19
TurnerX19 UltraDork
6/23/22 11:57 a.m.

Jack just proved himself to be the best driver you will ever find, and further proof that when the driver says "it doesn't feel right" the crew needs to hear him loud and clear. Congrats on a save!

Carl Heideman
Carl Heideman
6/25/22 10:55 a.m.

I stopped at the machine shop yesterday to drop off the pressure plate so they can balance the crank, flywheel, pressure plate, and front pulley.  They had looked at the rods.  They were all about the same weight, but when they weighed the big ends and the small ends separately, the big ends varied by 12 grams from lightest to heaviest.  They didn't think they could take 12 grams out of the heavy ones safely, so Bob's selling us another set of rods to prep.  We need to use stock rods, but we can smooth out the ribs and other stress risers, balance them, and use better hardware. 

I think for what we paid for the engine, it was still a decent buy to get us started.  And the Noble heads are a value to be sure. It looks like it was built from leftovers, which a lot of people do to keep costs down.

Speaking of the Noble heads, we will be going through them because now we want to check all of the other hardware in the engine.  The ports look great, but we want to make sure the valves and valvesprings aren't leftovers too. 

Carl Heideman
Carl Heideman
7/25/22 8:52 a.m.

Jack and I spent yesterday afternoon at Bob's and we've made good progress getting the bottom end assembled.

Bob has this fixture to setup the crank and rods. Basically, it holds down the each rod as it's positioned with a .015" feeler gauge establishing the end gap while its bolts are torqued.

Before we got there, Bob had made a quick windage piece for the sump. He says he often sees an "up and down" windage tray, but with FVs, you need to keep the oil from sloshing side to side, so a simple sheetmetal setup like this does the trick.

This shows the "up and down" tray that was previously in the case.  Bob wanted to replace it because the side-to-side plates that had been added didn't seal as well as his. These types of trays make more sense for dune buggies, etc..


We were pleased to see the oil screen holes already had TIME-SERTs in them. The original threads pull out of the magnesium alloy case fairly easily. We would have done this if the case was still original.


Carl Heideman
Carl Heideman
7/25/22 9:11 a.m.

Next was to get the crank and cam in to set the cam timing.

We used ARP assembly lube on the bearings.  On a AC VW, three of the four mains are one-piece like this one.

This middle bearing is split like in most engines.  

The cranks drops in and there are some alignment pins to hold the bearings in place that need to be positioned.

We put a dial indicator on the cam and made sure it had legal lift and each lobe was good.

We dropped the cam in and aligned it with the dots on the gears.

We timed it using the #1 intake lob.  We put that lifter in the other side of the case.  The spring tool keeps the lifter from falling out when the case half is lowered onto the other half.

After installing a dummy piston and cylinder, it was time for the degree wheel and dial indicator. We found that our cam was in straight up and we wanted it retarded a little to move the power band up, so it was time to pull it all apart again.

Carl Heideman
Carl Heideman
7/25/22 9:29 a.m.

Changing the cam timing:

The cam gets timed with an offset key, so the front gear needs to come off the crank with this special puller.

Bob has just a few offset keys laying around...

Here's a closer picture.

We picked the key that we thought would do the job for us and put it in (Jack doesn't want me telling people our number).

The gears went back on with a piece of tubing and a hammer.

No pictures, but we went through the whole cam timing procedure again and were on target for the timing we wanted, so it was time to button up the bottom end.

We put all the lifters in the case half and put the oil slinger on the front of the crank.  Then we went around the case with sealant.

Everyone has their favorite sealants and chemicals and we're using the ones Bob likes. He says this Loctite 574 was originally developed for Turbo Porsches by Loctite and he never has case leaks, so that's what we're using.

We applied more to the other case half and put the lifters in with cam lube on their faces.  

I forgot to take pictures of the assembled short block, but I can tell you we installed this case half and torqued all the case bolts, then thanked Bob for an educational afternoon. I've built a lot of engines over the years, but never the bottom end of a VW and it is so nice to learn the tricks.

TVR Scott
TVR Scott GRM+ Memberand SuperDork
7/25/22 3:40 p.m.

That stepped key is really interesting.  I've never seen that one before.  But I've also never built a ACVW race engine.

Thanks for all the details!

Carl Heideman
Carl Heideman
7/26/22 9:12 a.m.

In reply to TVR Scott :

It's pretty common on many engines to use offset keys to time the cam. Glad this thread is useful.

Carl Heideman
Carl Heideman
8/3/22 10:10 a.m.

I spent another afternoon with Bob and we nearly finished the top end.

First, each piston is put on its rod.

Then, the cylinder is prepped with this silicon-based sealant and an O-ring.

The cylinder goes on with the aid of a ratchet-type ring compressor.


And we repeated for the other pistons/cylinders.

This is an important piece of cooling tin that needs to be installed before the pushrod tubes and the head goes on.

I'll say these pictures are leaving a lot of prep out.  Bob basically is blueprinting his engines and while I was away, he chucked up each cylinder in a lathe and cut the bottom side where it meets the crankcase to get the right height. He then chucked up appropriate pistons in the lathe to cut the tops to get the right deck height of around .040" (I think--I need to double check).  He said there was about .020" variation in deck height when he started, which was leaving some compression ratio on the table.

I've got to say that we are very thankful that Bob has helped us so much with this project. It's inspiring to see so much wisdom and generosity. He keeps humbly saying, "if you've got a better idea, tell me." And I don't, despite 35 years and hundreds of engine builds in my own experience.  He's clearly motivated to see that the next two generations (me, then Jack), keep the mechanical and racing fire burning with a solid foundation of information.

Carl Heideman
Carl Heideman
8/3/22 10:30 a.m.

The heads came next.

We had Noble heads that came with the engine, but when we put them on the flow bench, they didn't flow as quite as well as another set of Noble heads that Bob had in his stockpile. So we bought those from Bob and the original set will go on the backup engine we'll build this winter.

Bob likes these chrome-moly valve hats so we switched to them.  I'll get the part number and edit this page with it.

Here is some good trivia. Pushrod tubes tend to leak and it's frustrating. Bob throws away the seals that come with gasket sets and uses these silicone ones that EMPI sells. The other trivia is that for FV engines, these bushings are installed in the pushrod tube holes in the block as part of the windage package to keep the oil where it needs to be during corners.

Here is the EMPI part number for the silicone pushrod tube seals.

Here are the bushings installed in the case.

And the head is on with the pushrods in place.

Carl Heideman
Carl Heideman
8/3/22 10:40 a.m.

Next up was the pushrods and rocker arms.

We rolled each pushrod to look for damage. This one was quite bent. The others were good, but one had an end that fell off.  So we needed two pushrods.

The rocker arms went back on.  Bob has this little fixture to hold a magnetic base.

The fixture, a magnetic base, and a dial indicator let us check to ensure we had the correct lift at each valve. Sometimes the rocker arms aren't quite right and the ratio is off, so this ensures we're not leaving any lift on the table.

We are using this PN #1791 oil pump with spin on mount from CB Performance.  The important thing here is that the gears are 26MM tall. A lot of the aftermarket pumps offer taller gears (30MM, 32MM, maybe more) for more pumping.  We figure those larger pumps may cost a tiny bit of HP and we need every bit we can get, so we're using the smallest pump.

In the end, we needed three replacement pushrods (one wasn't the right length, plus the two already mentioned) and Bob wanted to do that after dinner, so I left. We're an hour or two from finished and then we'll run it on Bob's dyno.  We're hoping to do that tomorrow, which gives us one week to put the car back together before the 2022 Vintage Grand Prix au Grattan XXXVI. It's not going to be a thrash to make it, but it's a little tighter than we'd like.


Carl Heideman
Carl Heideman
8/4/22 9:26 p.m.

And it's a racecar again.

Bob had the longblock buttoned up when I got to his house.

We mounted it to the dyno and put the tin and ancillaries back on.

We built up some oil pressure, then it fired on the second try.

Here's the console end of the dyno. We only ran the engine to about 4500 RPM and it made numbers that Bob liked.  It was nearly 90 degrees and the humidity was 85%, so if Bob liked the numbers in these conditions, we're happy.  There was so much condensation dripping off of the intake manifold, we thought it was a fuel leak.  Nope, just water from the humidity. 


It's about 45 minutes back to Eclectic where Jack and Theo were ready to put the car back together.

It didn't take long before we had the first test drive. Jack and Theo are going through a full prep and setup tonight, so we're ready a week before the race. That feels good.

I'm going to try to get it back on the chassis dyno before the race so we can see the whole power/torque plot.  We're expecting a tiny bit more power and hoping we moved the power band up just a little with the cam timing change.

1 ... 3 4 5 6 7 ... 11

You'll need to log in to post.

Our Preferred Partners
RrTkReW0CgFdQQLxkvIuUrrFgF9LwEjnCifxU3hiAgAlS8nQPdjORZIi3P4VsJJj