
Getting away from engine stuff for this post. I'm also working on other parts of the project, so here goes!
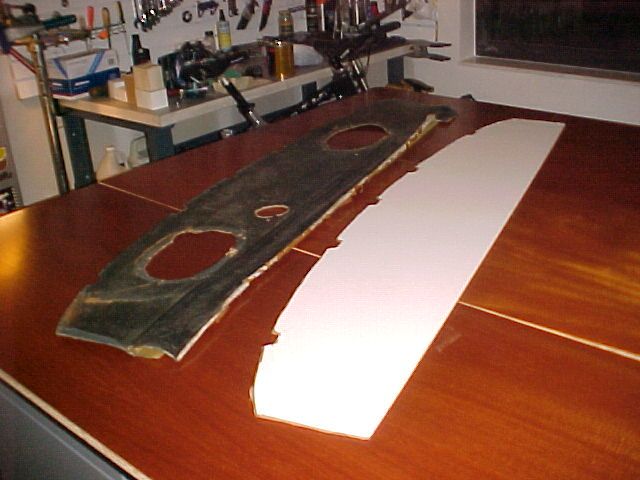
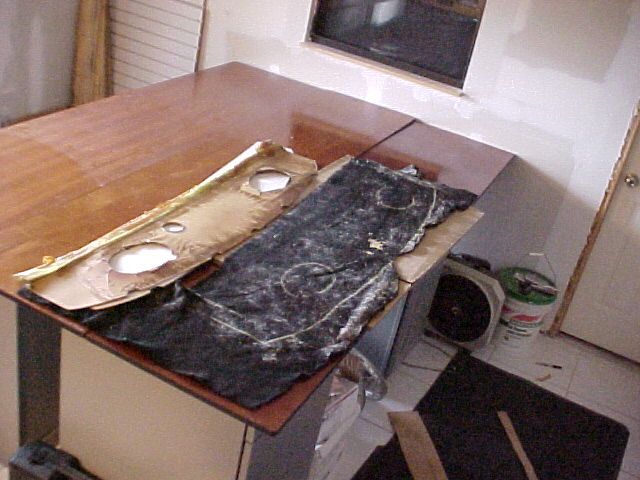
After 30 years the package shelf like many other original ones in G bodies looked really bad. It had warped, been repainted with vinyl dye, faded, had speaker holes for 6 X 9's hacked, couple different sets of speakers with different mounting bolt patterns and looked bad. The dark window tint kept it out of plain sight for the most part. Then Ralph the "expert" roll cage installer put another hole in it finishing it off. So I decided to make a new one.
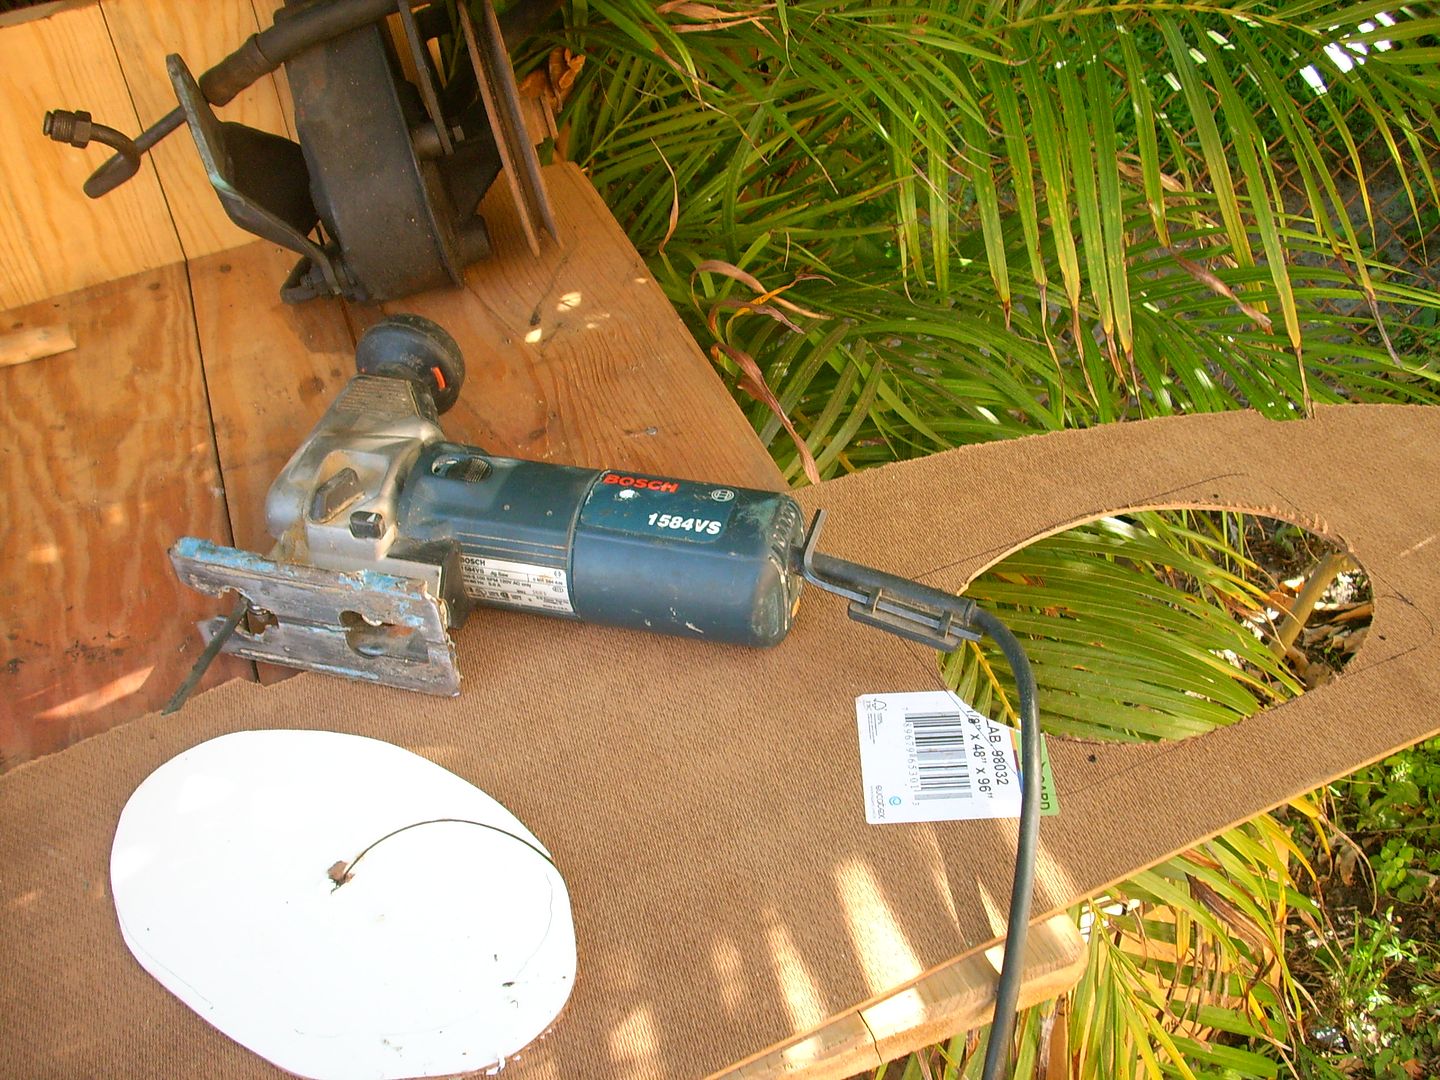
A while back I picked up a sheet of white hardboard at Home Cheapo for 6-7 bucks or something like that. traced out the old rear shelf and cut the hardboard with a skillsaw.
Since I don't have any extra loot to spend on the car right now I've been keeping my eyes open for some black rug raterial to work with for the shelf. A couple nights ago There was a black sub box out for junk at the repair garage next to the machine shop so I gave it a quick look in the dark and took it home to examine in daylight.
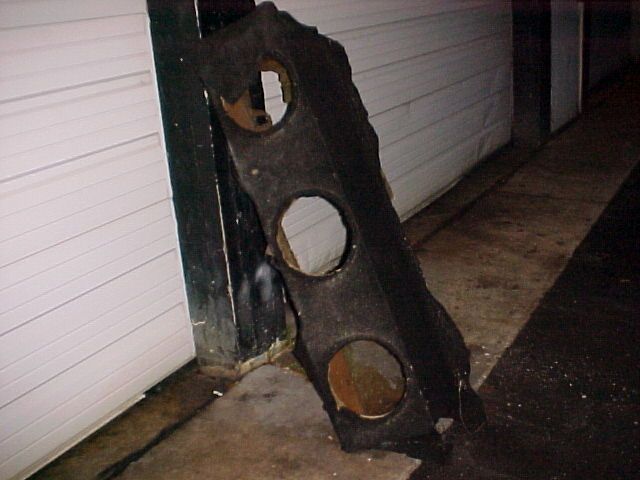
In daylight it looked like there would be enough usable material if I could peel it off. It must have been part of a "Custom" 80's-90's install complete with sheetrock screws and fiberglassed to the floorpan!
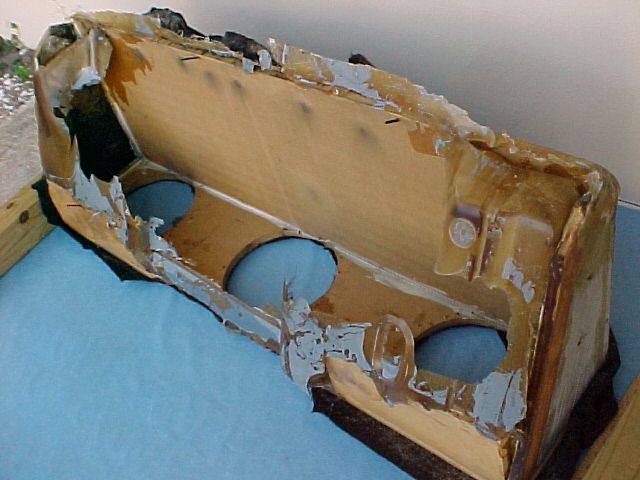
So I chiseled the material off with a painters scraping tool and razor blade. Turned out to be enough material as long as I put a slice (not by me) over a speaker hole.
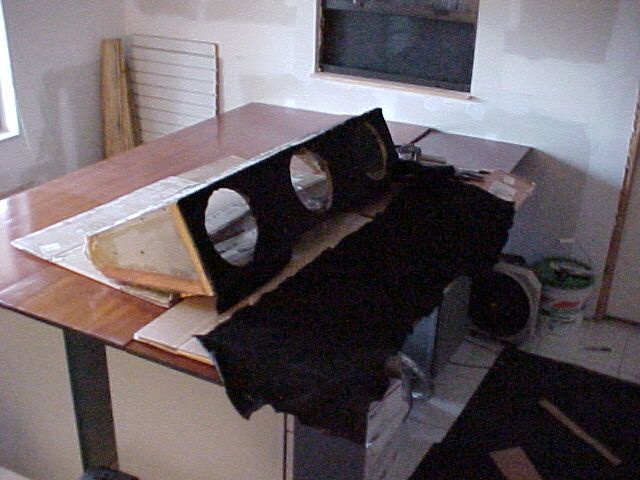
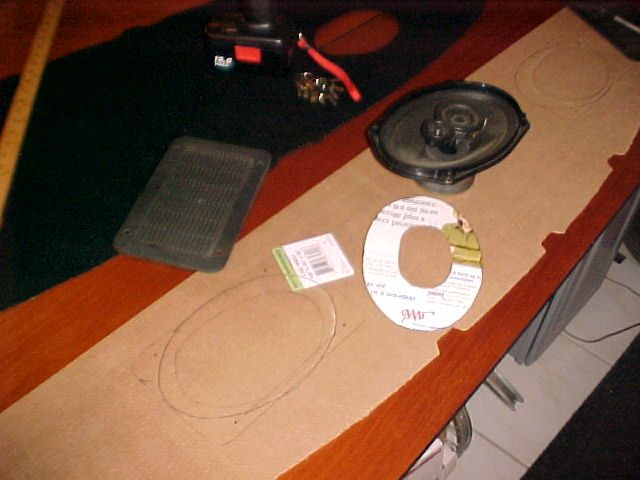
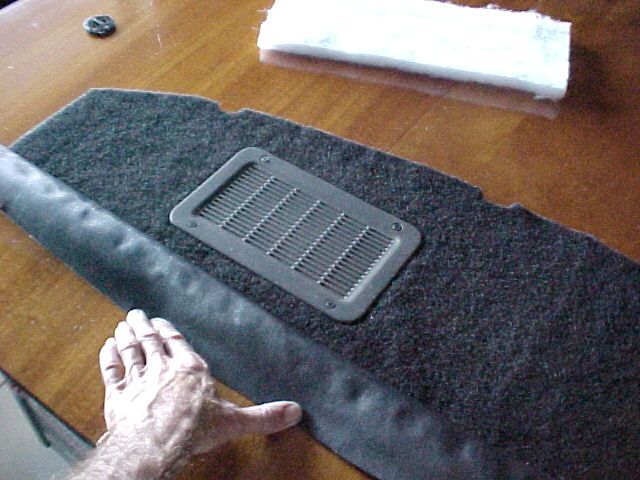
Cut the material out and made small version of the speaker holes for referance. Then figured out where I want the speaker covers. I'm using an old set of covers for a retro backdated appearance that will be mounted to the package shelf with the speakers mounted by themselves. I've spent enough time screwing around with shelf 6 X 9's to learn my lesson and am eliminating the sandwich mounting where the bolts that hold the speakers also hold the covers. Next I need to find my glue, some fasteners for the speaker covers and make a vinyl rollover for where the shelf meets the backseat.

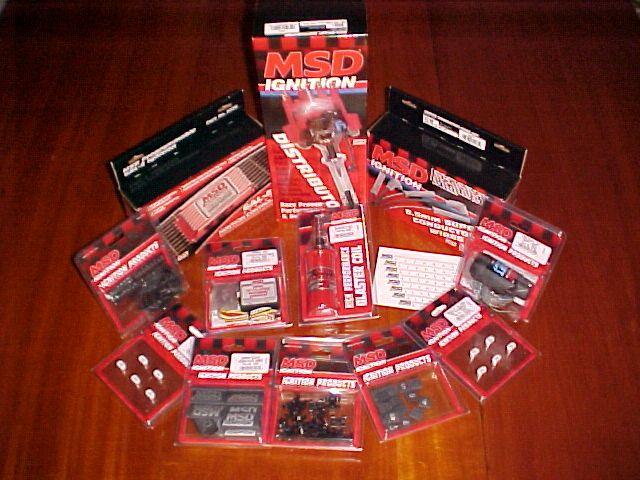
The last prize shipment for the Malibu from the Performance Therapy contest arrived!! Each company asked me to "make a list" of what I wanted from their company for the project and so I'd given MSD a list of things I wanted for the new engine, nitrous control, and a shift light. Here's what I recieved! Sweet deal eh? THANKS MSD!!!!!
Pro Billet Distributor. Programable 6AL-2 box. The new model that gets programmed with a laptop and has dual rev limiters. Blaster 2 coil. 8.5 Superconductor "make your own" wire set in black.
6' Pro boot guard. Headers and wires always seem to be a sore spot for me with a lightning show on occasion. Shrinksleeves. Wire number set. I'm getting old, don't want to make a mistake in the dark in the pits checking plugs or something. LOL Timing tapes for the balancer.
RPM activated window switch, a module to control nitrous eventually. LED stand alone shift light.
2 sets RPM module sets. One for nitrous activation switch, and one set for the shift light. Plug wire holders.
My car didn't have a factory tach. I've got a couple old aftermarket tachs (without shift lights) and I'll see if I can get one hooked up, so combined with the MSD shift light I should be set there. I had the nice MSD terminal crimp tool already so I'm set to make a custom wire set.
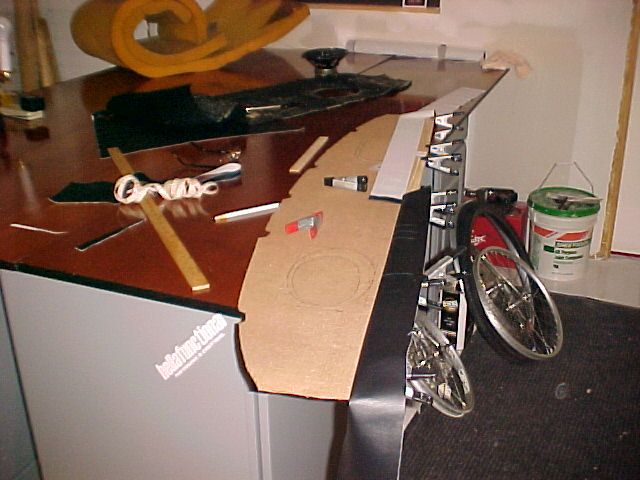
I didn't have any pieces of vinyl long enough so I had to make a center seam. Hand stitching the center seam came out fine so I test fitted the pieces and clamped them in place with paint sticks so I could see the material would lay when finished. The original vinyl piece and padding were sewn to the cardboard shelf. Thats not going to be possible with the hardboard so I've got to try and figure out a good way to bind them. Will test on scraps.
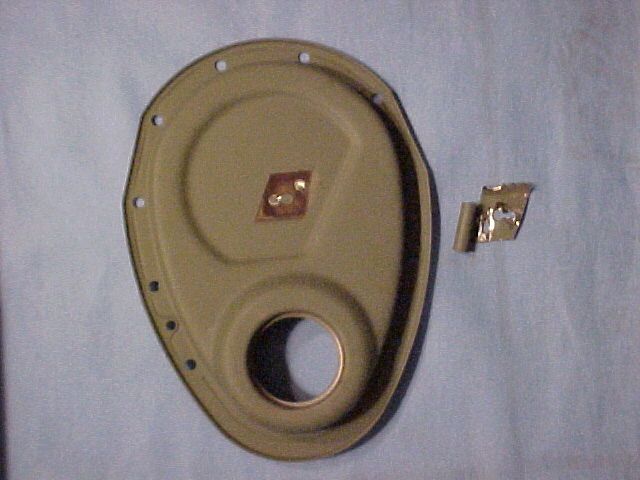
One of the guys at the machine shop gave me a nice straight stock timing chain cover he'd sandblasted and primed but never used. It was from an engine with an 8" balancer and I'm using 6" so I ground off the spot welds for the pointer to remove it and will use a bolt on pointer. A little more grinding to smooth the welds, bead blast a bit, and it'll be ready for the Krylon touch!
I love the re-use and re-cycle elements to your build. Along with all the other general aweseome 
ZOO wrote:
I love the re-use and re-cycle elements to your build. Along with all the other general aweseome
Thanks! I've always wanted more car crap than I could afford so I got started very young at figuring out how to get what I wanted by being creative, swapping, flipping, bartering, and making things. I'm trying to do this project using "stuff" thats either reused or leftover from other projects or available free. In this post...
"Extra" paint stirrers (which we all have a pile of right?). Rivets that were the wrong size for a project years ago. Batting leftover from bolstering the seats in another car when I recovered them a few years ago. Vinyl I got out of the garbage can at a trimmers shop when I was there to have him sew something for me last year. I needed it then for a rear seat trans tunnel cover for my Firebird. This is the second use of what he considered scrap.
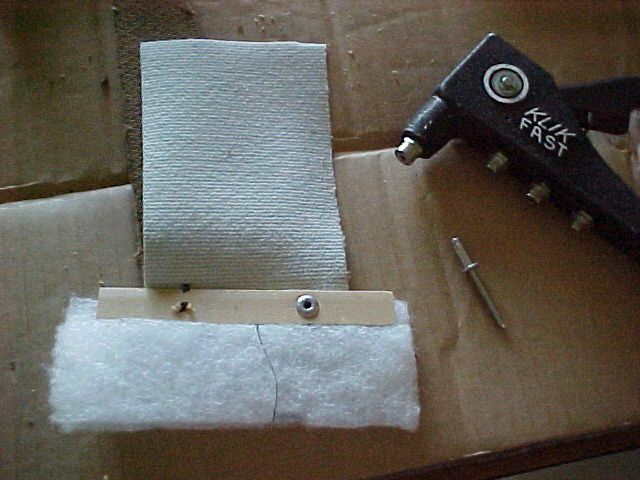
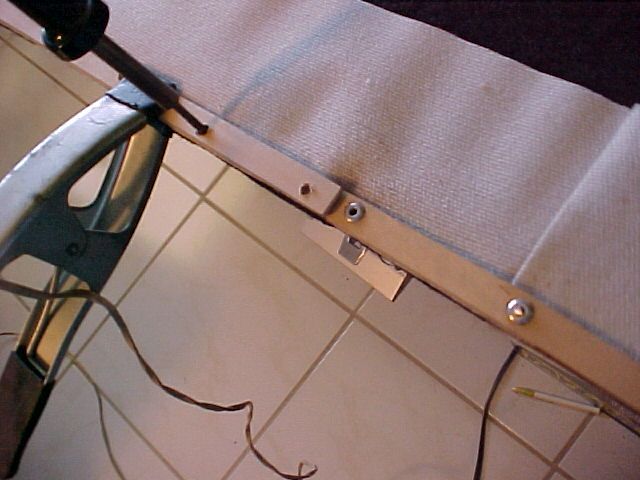
I tried a few ways of making the vinyl rollover using various materials and tools available to me already and here's what I came up with.
- Tack vinyl with trim adhesive to the edge of the shelf to keep it from moving.
- Tack 3/8" batting with adhesive along the edge of the piece with about 5/8" on the shelf.
- Separate batting in the middle along the 5/8" wide section. (I cut out the upper part of the split batting in the pics below so you can see what I'm doing.)
- Tack paint sticks cut down to 5/8" width on top of the batting with adhesive.
- Use "A" type spring clamps to hold everything tight.
- Drill 13/64 holes through everything for pop rivets.
- Install 3/16" medium length aluminum pop rivets.
When I do the shelf, the sub box material will already be on it and there will be a thin layer of the batting on top of the paint sticks. When the seatback is slid down to lock it in position in the car it will pull the vinyl rollover down.
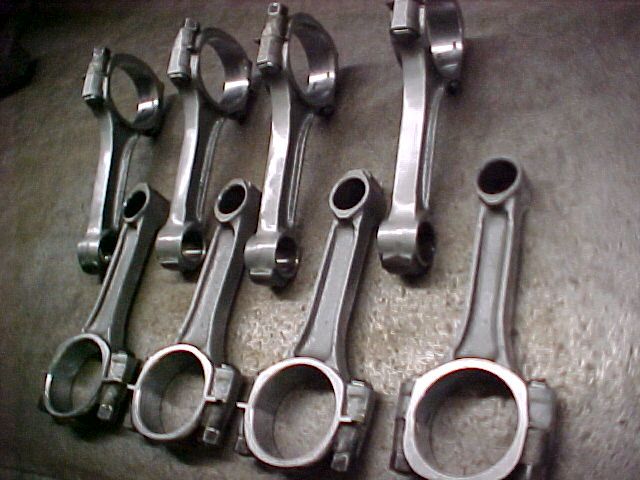
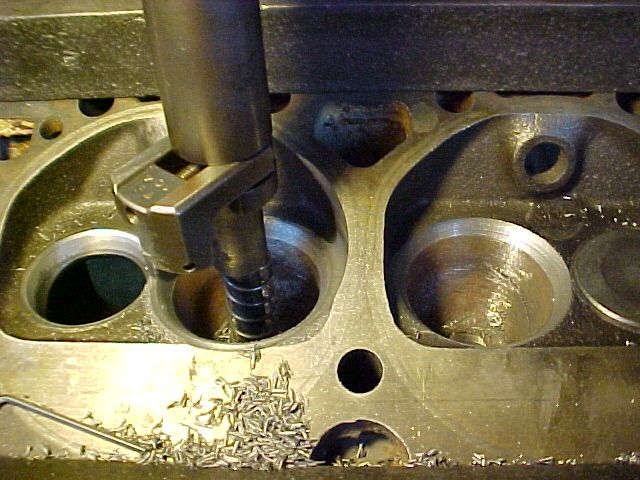
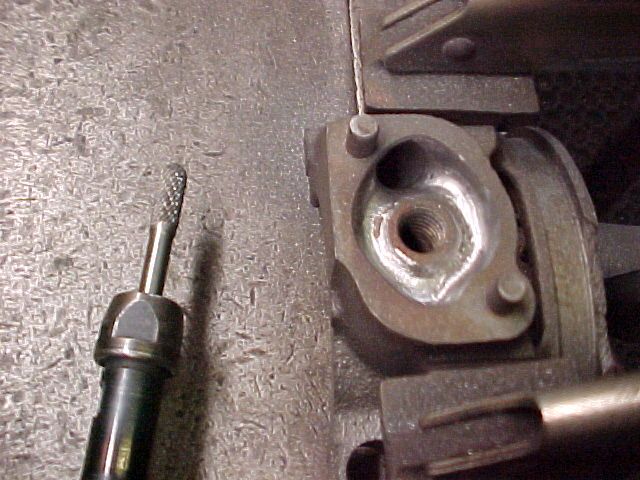
Rear shelf project is on temporary hold waiting on a saw to cut the speaker holes nicely. Meanwhile I finished up the rods and I've been working on the heads for the engine. I cut the heads for installation of hardened exhaust valve seats. Installed the seats (they get pounded in), made a bowl blend cut, then 3 angle cut for both intakes and exhaust while checking heights. Next was a cut around the edge of the chamber to unshroud the valves. You can't get the full effect of running bigger valves without unshrouding the edge close to the side of the chamber so they can breathe. Good camera's still dead so I can't get really good pics of the bits used because the picture definition isn't good enough.
Cutting the edge of the chamber to unshroud the intake valve in this pic. Chamber on left is done, right is still stock. Unshrouding exhausts gets done next.
I keep spending a little time on my own heads at the machine shop. Funny, but hundreds of heads have passed through my hands at the shop while mine sit on a shelf next to me! I've been there a while now and learned a lot, also realize how much calculating, measuring, machining, parts matching, etc. goes into the building of performance engines. I work on mine an hour or two here and there after I work on other peoples stuff. Kinda like a roofer with a leaky roof. Everybody else comes first. LOL Soooo.... almost all the work on my heads gets done between 11PM and 2 AM! AHAHAHA Last night was no exception and I stopped working on my heads about 1:30 AM. Here's the latest update.
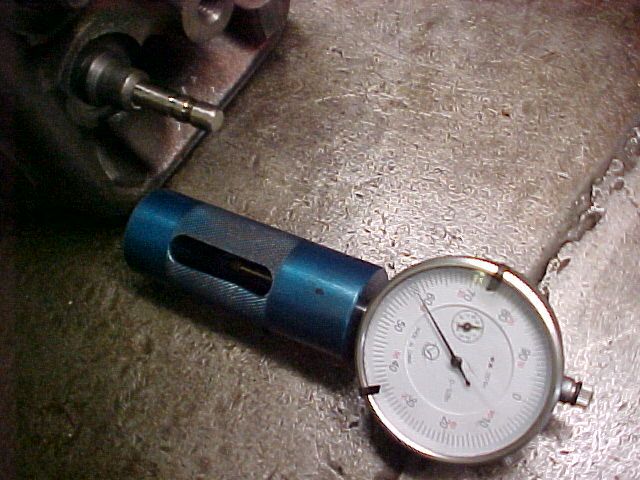
To measure the valve stem height while cutting the valve seats a special gauge is used. The base of the gauge is held against the spring seat and then the valve to be used for that chamber is inserted and pressed tightly against the seat. The valve stem pushes against a plunger in the gauge which measures how far the stem protrudes. As each valve seat is cut the stem height is checked occasionally so the stem heights will be very, very close when done and the seats are cut to a almost equal depth. A procedure later insures all the stem heights are exactly the same.
As a young man I always thought a multi angle valve cut required separate steps for each angle, however they're done in one step. The tool for cutting the valve seats cuts all the angles at the same time. The cutting blade is adjustable and is set for the diameter of the valve, then a pilot is inserted into the valve guide of the seat to be cut. The head has been leveled to the drill press and the pilot keeps the cutting tool straight with the valve guide. There's a spring that gets slid onto the pilot that pushes the cutting tool up away from the valve seat until the drill press pushes it down. The seat is then cut and intermittantly the stem height is checked, once the stem height is correct you're done and move on to the next valve.
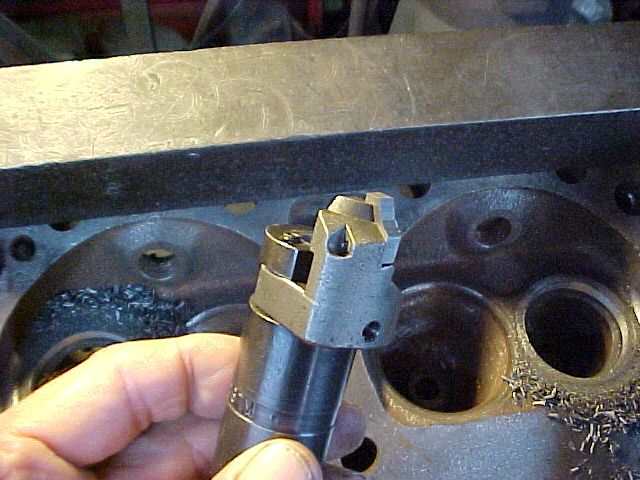
Because the cutting tool needs to be moved out of the way to constantly check the stem height etc. the tool is not mounted in the drill chuck but rather an attachment with a notch in it is mounted in the drill press and the tool slides into it as the press is lowered. A small bar on the tool fits in the groove which spins the cutting tool.


Cotton
Dork
12/1/10 10:56 a.m.
This is going to be a great car. Keep the updates coming.
this is a really awesome thread!
Thanks guys! Glad you're enjoying! Here's an update.
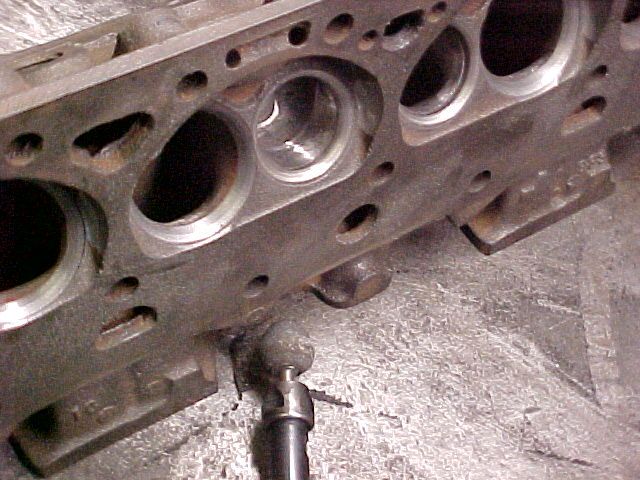
Had an opportunity to show a main cap with oil passages opened up next to my untouched cap before opening up mine, so one more thing's done and here's pics.
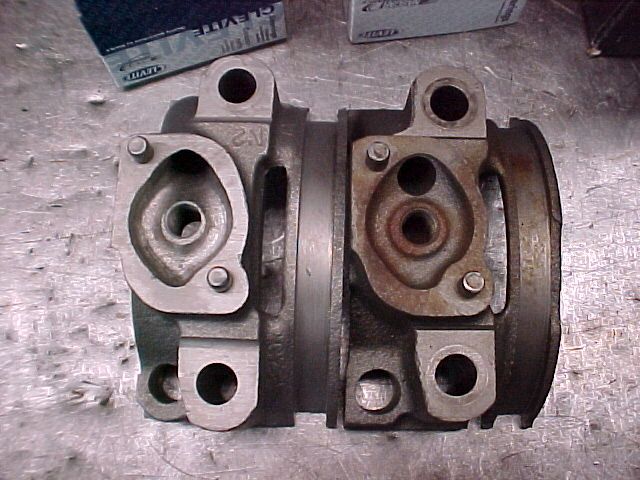
My cap isn't finished in the pic below but I was waiting for the compressor to catch up because a couple of us were using a lot of air so it was a good time to take a pic.
Kinda out of the normal order of procedures but I had some time, so I did the grinding to blend in the bowl cut with a stone on a grinder. Now the bowls are opened up with a nice radius to the exhaust seats.
When I left off on the package shelf I was waiting for a saw from a buddy. I could have chewed the speaker holes like a beaver by the time I got the saw! Anyway, I got it this week and got right on the shelf.
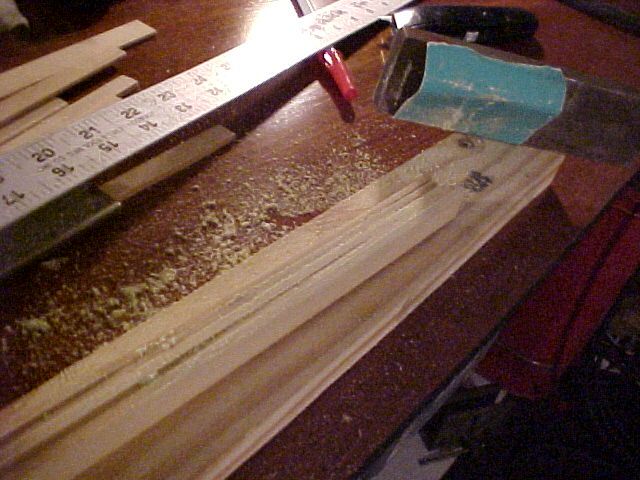
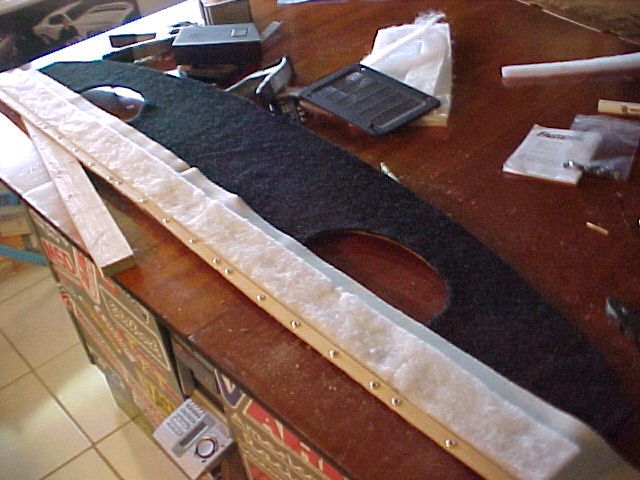
With the holes cut I moved onto getting the pieces ready to create the rollover to the rear seatback. I cut down paint sticks with a utility knife against a straight edge, then pinched them all together and sanded them all to the same width. Not really the optimal way to do this but the paint sticks were free and already here so....

Next I drilled the holes for the speaker grill screws then used 3 M spray adhesive and stuck the speaker box material to the hardboard shelf.

Then the time consuming process of attaching the rollover. I decided to rivet the strips to pinch the vinyl rollover and carpet material. Holes through the paint sticks were drilled. The pieces were clamped in place and the holes for the rivets were melted with a mini soldering iron through the vinyl and carpet. This prevents the material from wrapping up on the drill bit. Then the holes were drilled through the hardboard. Once the holes were set I inserted rivets in each to keep the pieces aligned while I pulled each rivet and used washers on the backside so the rivets wouldn't pull through the hardboard.
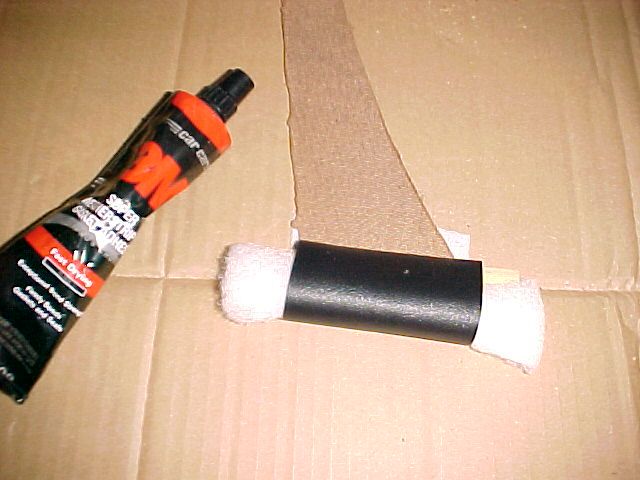
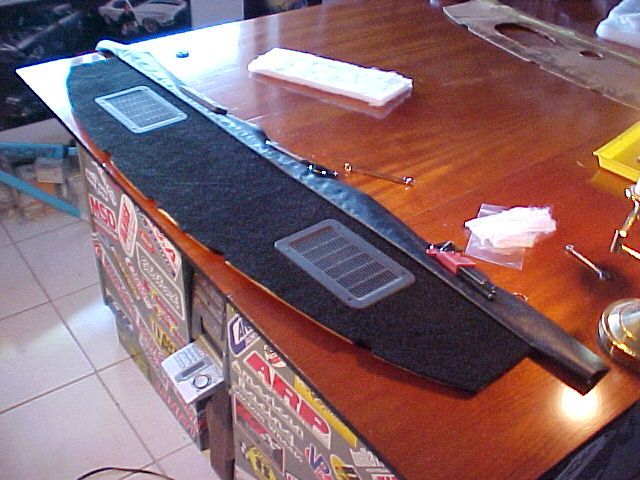
A section of padding was glued to the rollover similar to the original and gives the rollover a factory look. The rear seatback holds the rollover down when it's installed in the car. I left extra material on the ends and will trim to fit when I put the shelf in the car.
I looked around for some black machine screws for the speaker grills but didn't have any so I splurged and bought some new ones for a whopping $1.88 LOL The only cash spent to build the shelf was 6-7 bucks for a sheet of hardboad and the screws. With the speaker grills installed the shelf is ready! I may use some dum dum or other deadener to be sure the rivets or speaker grill bolts don't rattle when it's installed in the car.
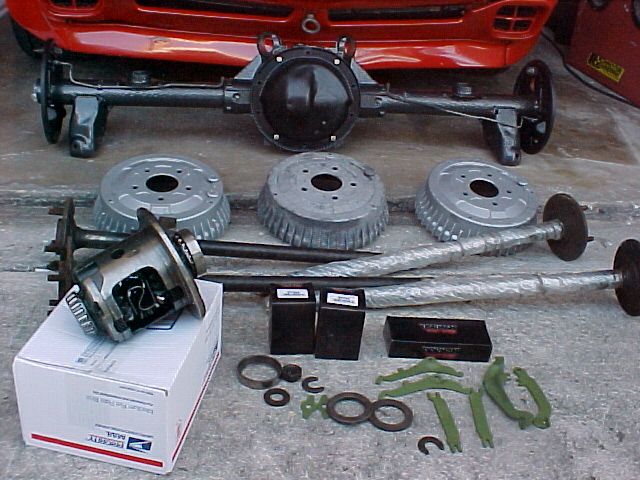
Three words for this thread update.... GRAND NATIONAL REAR. For a mild build G-body this is the affordable bolt in holy grail of rears. For years I've been outbid on Ebay, missed ones on CL and in local traders, looked for cars with them I could part out etc. etc. etc. I spotted a listing on a forum for a rear when I was taking a break while working online last Sat. and picked it up today.
So now I've got a 8.5" housing, axles (and spares), posi unit, yoke, and most of the brake components to work with including.... (insert drumroll here) ALUMINUM DRUMS! (+ a spare) The aluminum drums have a lower MOI so they speed up quicker as well as lowering unsprung weight. Hey, I need all the help I can get to make this car go! ahahaha So now I need to find a set of gears, and a rebuild kit etc. and then I'll have a rear that should hold up behind the 357 I'm building that I can put in while I'm doing the Hotchkis suaspension install. Here's a pic of the parts I got. In the boxes are a brake hardware kit and new wheel cylinders Dan included above and beyond the deal.
In reply to Rad_Capz:
I have only one thing to say to you...I hate you. I can't find one of those for my Cutty to save my butt. I have a 12 bolt though I think I will save that for a different build I have planned. I did just find a 7.5 with 3.08 gears and a posi at my local yard...
Good job on your find.
Good score! As per all your DIY projects, I'll be on the edge of my seat waiting for the next installment.
Thanks guys!
I should have mentioned the "deal" on the rear in my last post. Right now I have little/no disposable income for cars. The rear was listed on Maliburacing.com for $350.00 and seller offered to deliver within 100 miles for additional money. I contacted the seller and he offered to meet me half way (we're a couple hundred miles apart) for $50.00. I told a bud about the rear who knows I've been scouring the earth to figure out an inexpensive way to get a rear that will hold up. He offered to pay for the rear and the extra $50.00 in exchange for me doing a brake upgrade/repair and aftermarket AC install on a car. So no out of pocket expense for me.
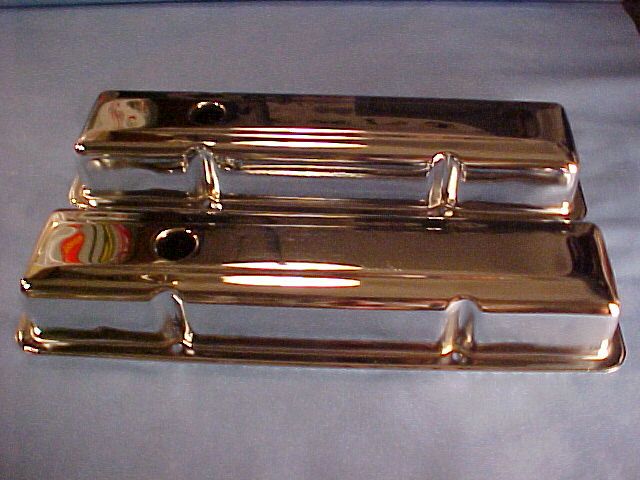
Picked up a set of NOS chrome steel aftermarket valve covers posted in the for sale section of another forum so there's one less thing I need now! They have just the right plain, old school look. So for 25 bucks including shipping they're the "big expense" out of pocket so far, and arrived today.
As often happens with projects Uncaged got shelved for a while (over a year) while I concentrated on working on others cars to build up a good customer base. So now my "regular" job is working on other peoples car toys as a traveling mechanic.
Although I wasn't working on the Malibu I slowly continued to collect parts I need/want for it (more on the parts later). I got back to porting the heads a couple weeks ago but caught a piece that flung out of the grinder right in the eye even though I had glasses on. Luckily, a gentleman I'm building a car for is an eye surgeon and fixed me up immediately even though it was late Sunday night on Labor day weekend.
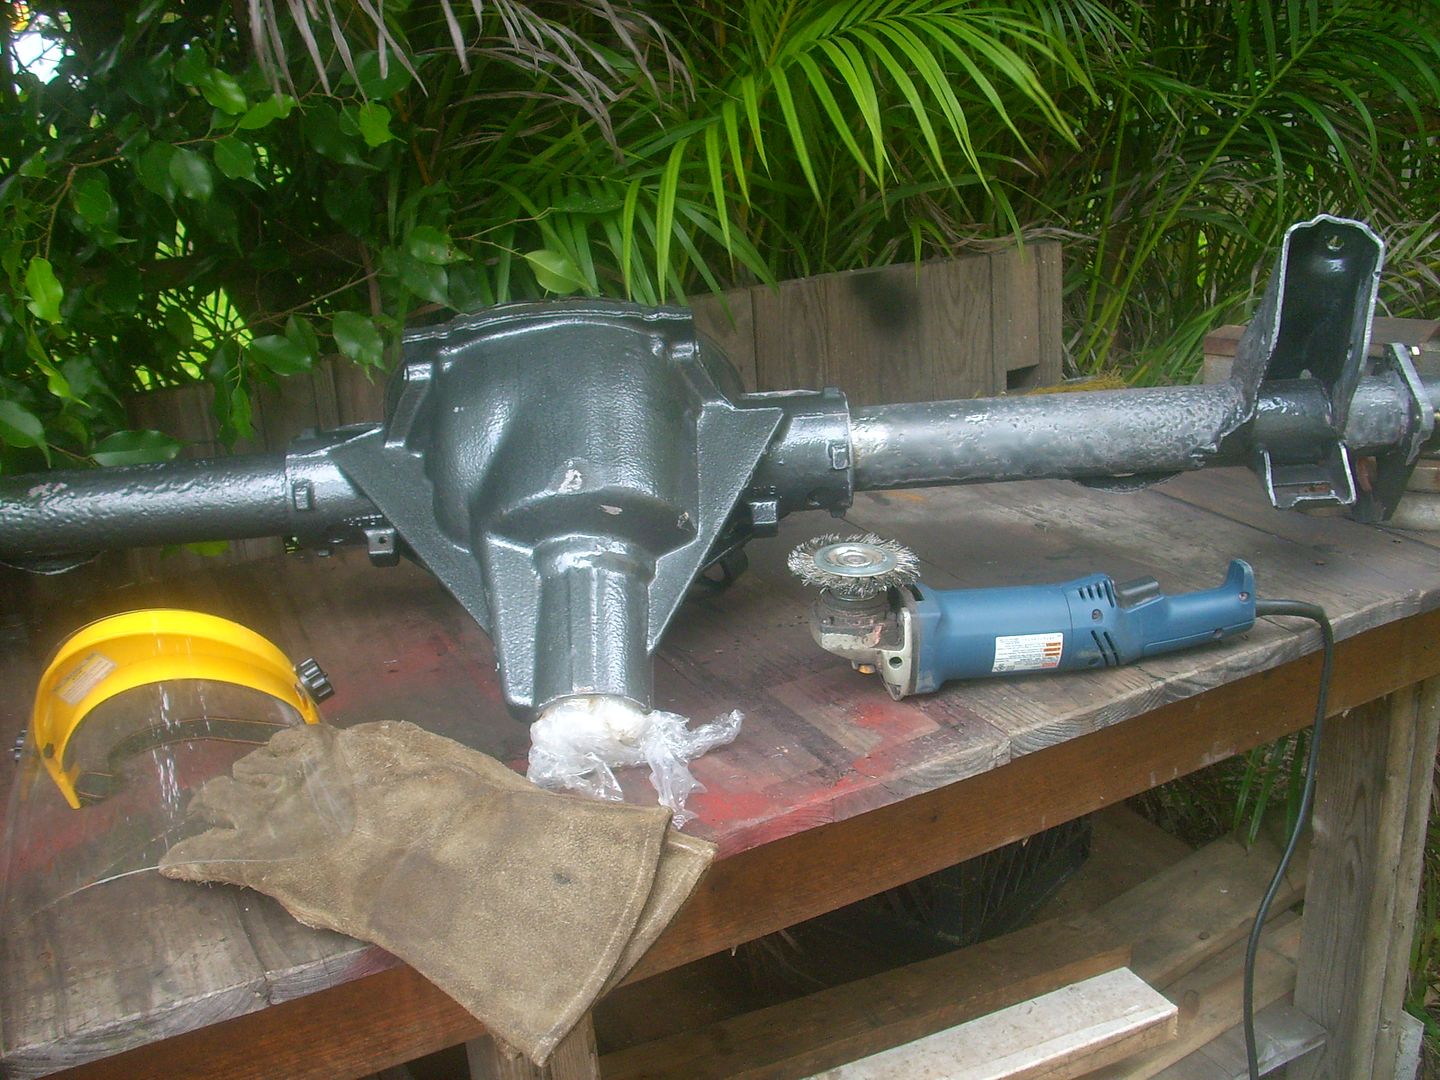
As for an update, I've also gotten started on building the rear. A few weeks ago I took all 4 axles to the machine shop I still work out of part of the time and checked them out after putting them in the washer to clean them up. The outer bearing surface was scored on one and a dial indicator showed one as slightly bent so the choice of which 2 to use was a no brainer. I bought a set of new Richmond 3.73 gears from a member on another forum and ordered a complete rebuild kit from Ratech for bearings, shims etc. The previous owner of the rear had cleaned up the rust on the outside of the housing and hit it with some POR 15 or something but because I want to weld the axle tubes to the center section the paint needed to come off that area. I figured I'd just clean and smooth the whole housing.
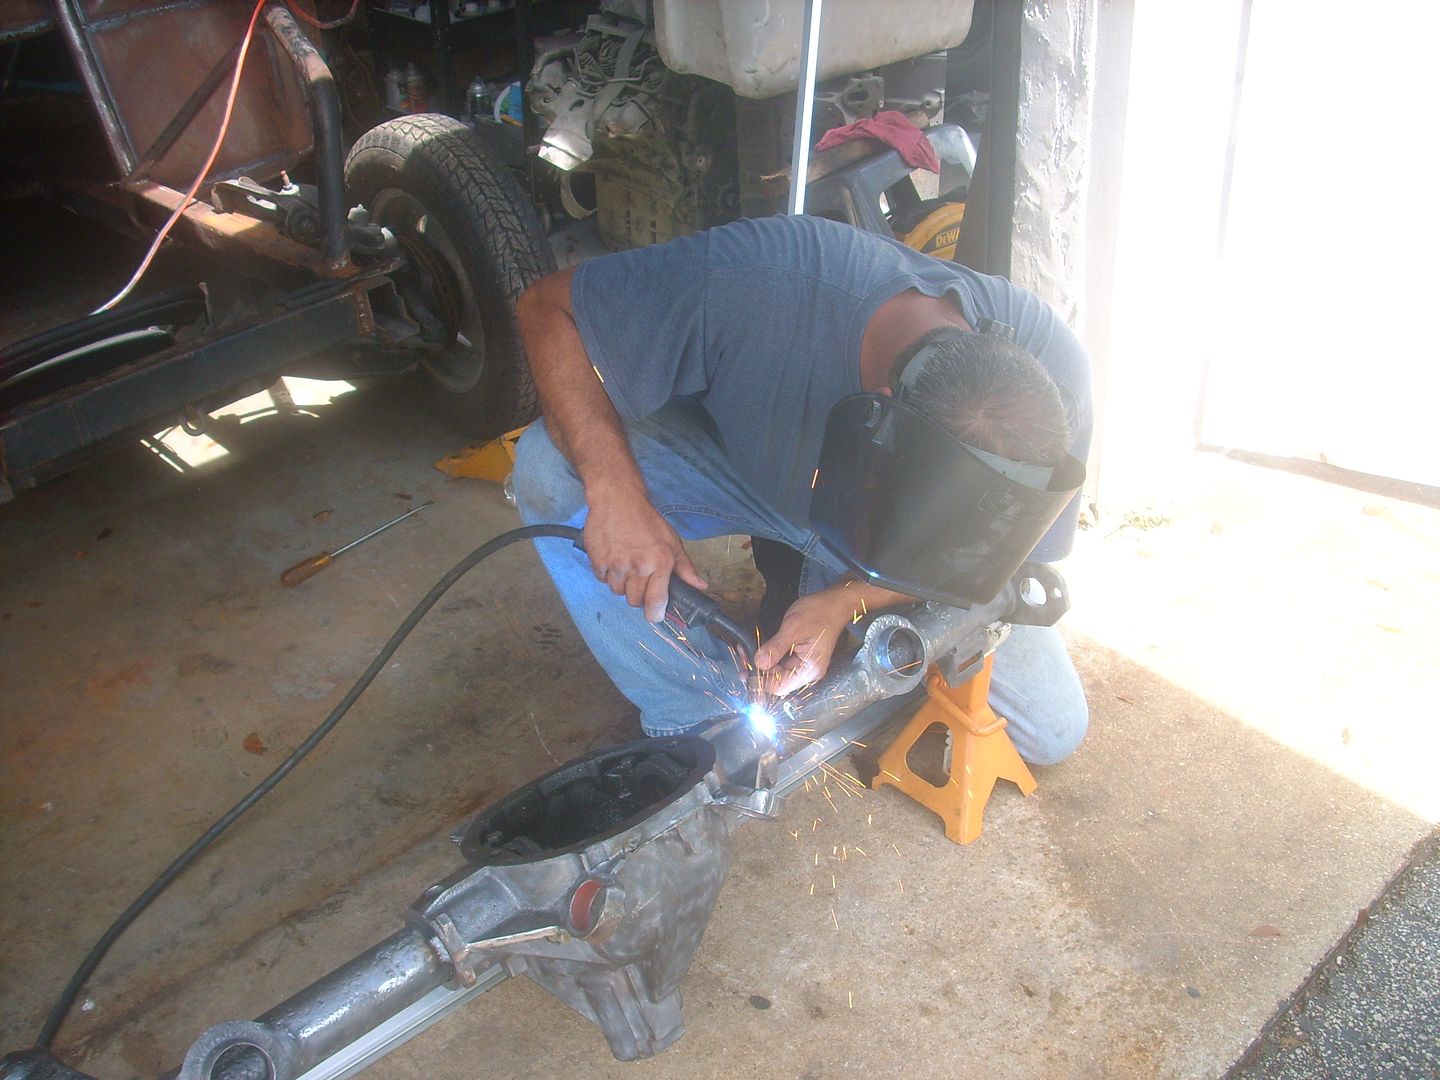
Once the paint was stripped I prepped it for welding the tubes to the center section, additional spring perch welds, and also ground out some questionable factory welds on the lower link brackets to be rewelded. Had my bud Rick I work with (who's a better welder than I) weld it up for me. Yes, I checked to be sure the axle tubes were straight before welding. I will be taking the car to the strip and running it on sticky drag tires and plan on some auto X action with A-6's so hopefully the extra welding will help things stay together and straight.


That is a great looking car.
bump for move to build thread section
As you could see in the pics above the axle tubes were pitted. Since I'm a PT kinda guy I used Ospho, sanded, shot with DP 74 epoxy primer, smoothed pitted metal with filler, and then shot a coat of K 38 high build sandable primer on it. Some more smoothing and it'll be ready for final paint! Will it make it go faster corner better or stop quicker? No, but sometimes mission creep takes over.

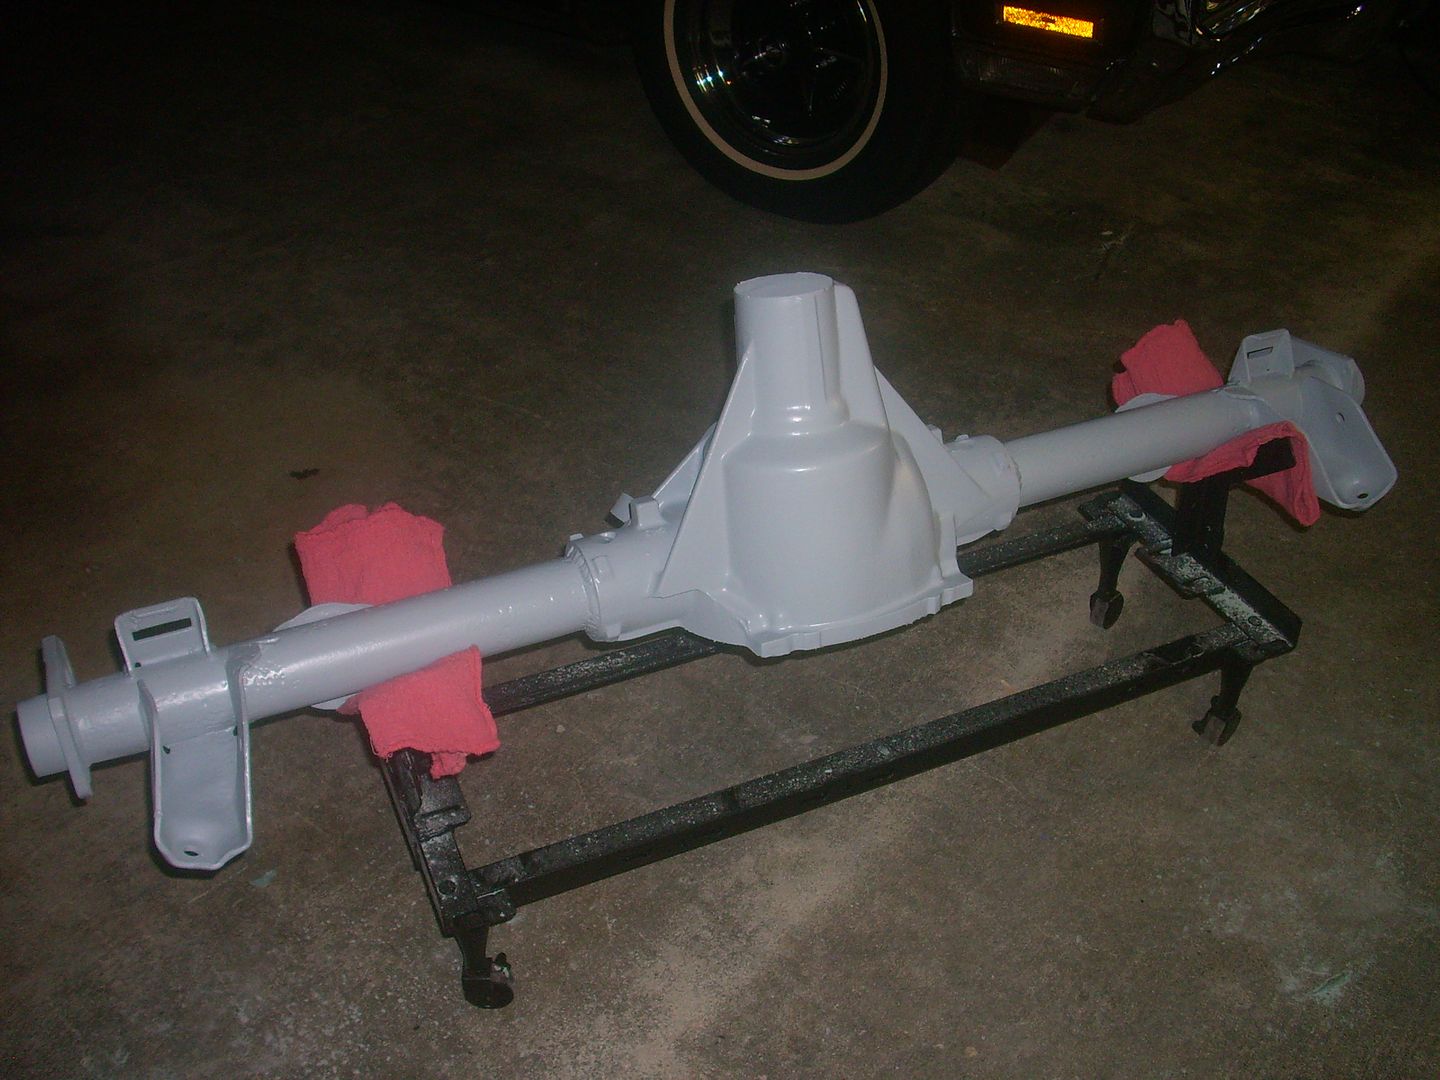
I hate doing things twice but sometimes you have no choice. Something caused the paint to lift in the corners, nooks/crannies of the Malibu rear I had in primer. I suspect it was caused by laying a coat too thick/wet.
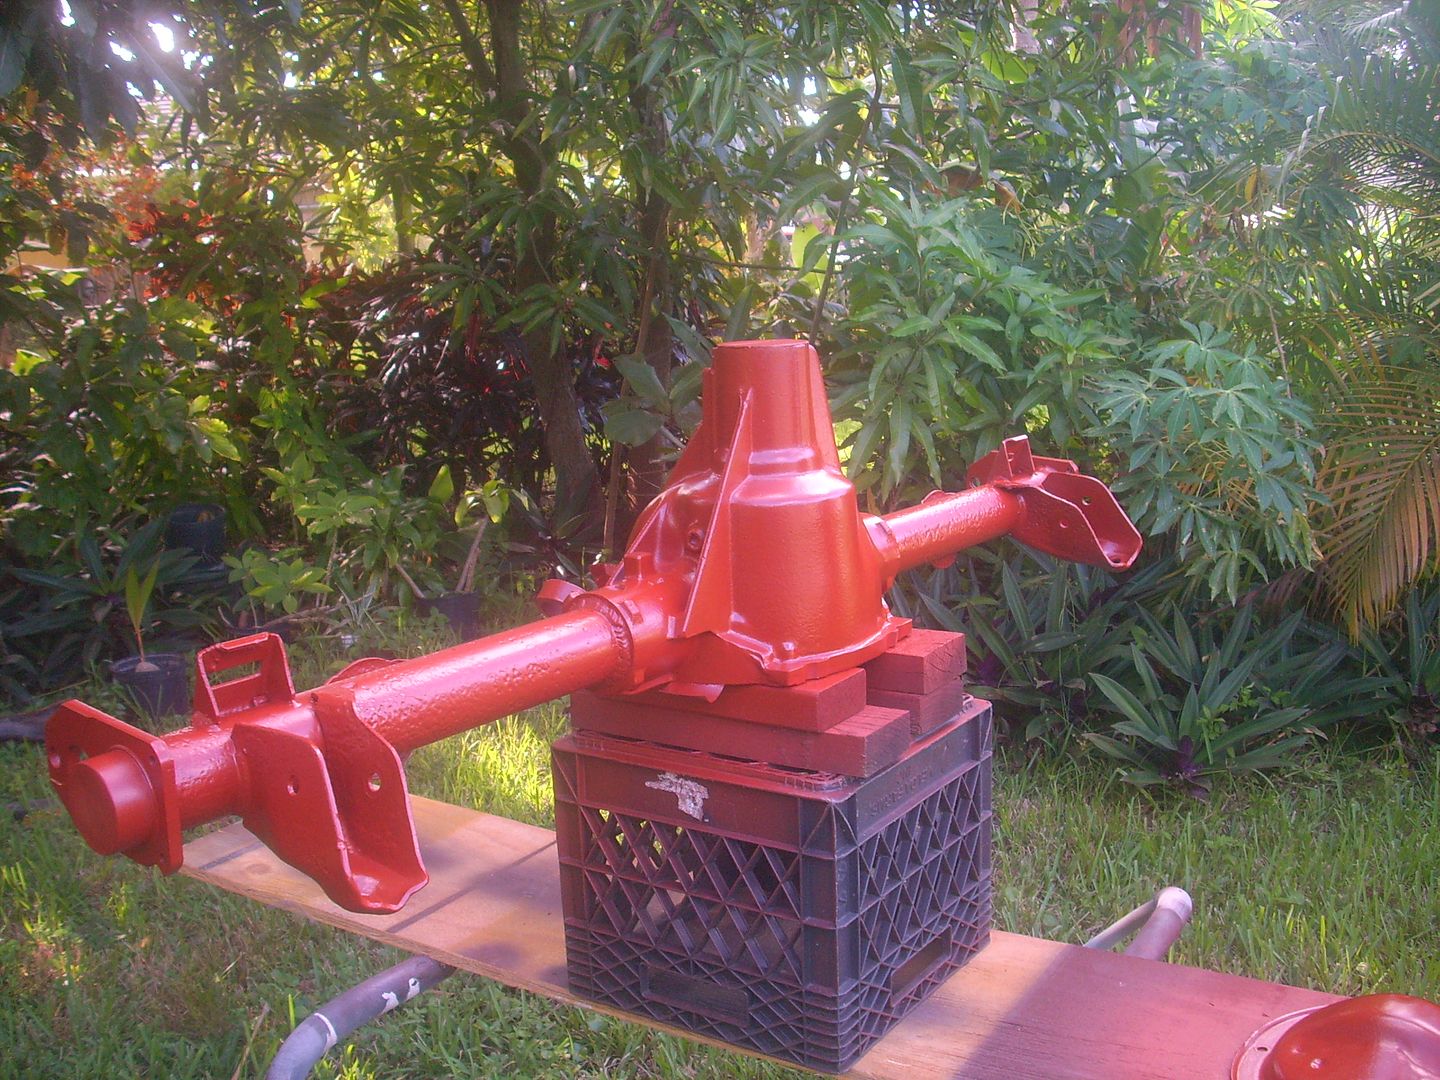
In any case I stripped it down of all paint in affected areas and prepped/primed/smoothed/primed/sanded till I had it looking the way I wanted to spray it gloss black. I don't usually do my own cars gloss underneath but all the new Hotchkis suspension components are powder coated gloss black so I figured I'd make the rear match.
I used PPG K38 high build primer and PPG single stage acrylic enamel.
[URL=http://s240.photobucket.com/user/NOTATA/media/81%20Malibu/004_zps9ac6aafb.jpg.html]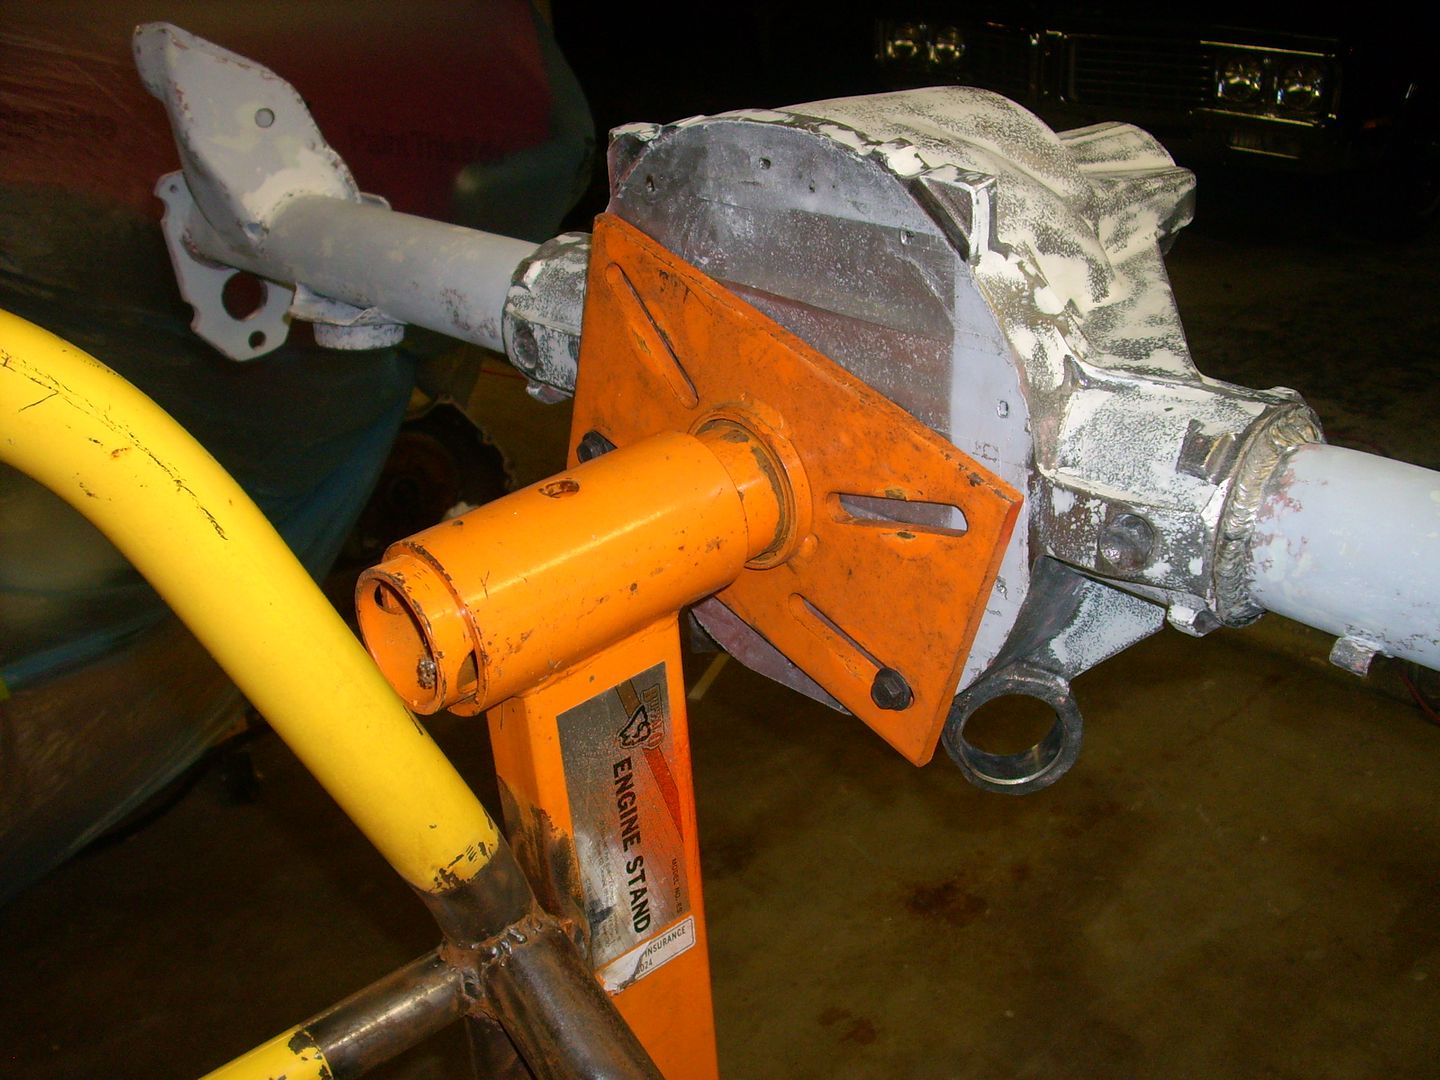 [/URL]
[URL=http://s240.photobucket.com/user/NOTATA/media/81%20Malibu/003_zps6a2d82be.jpg.html]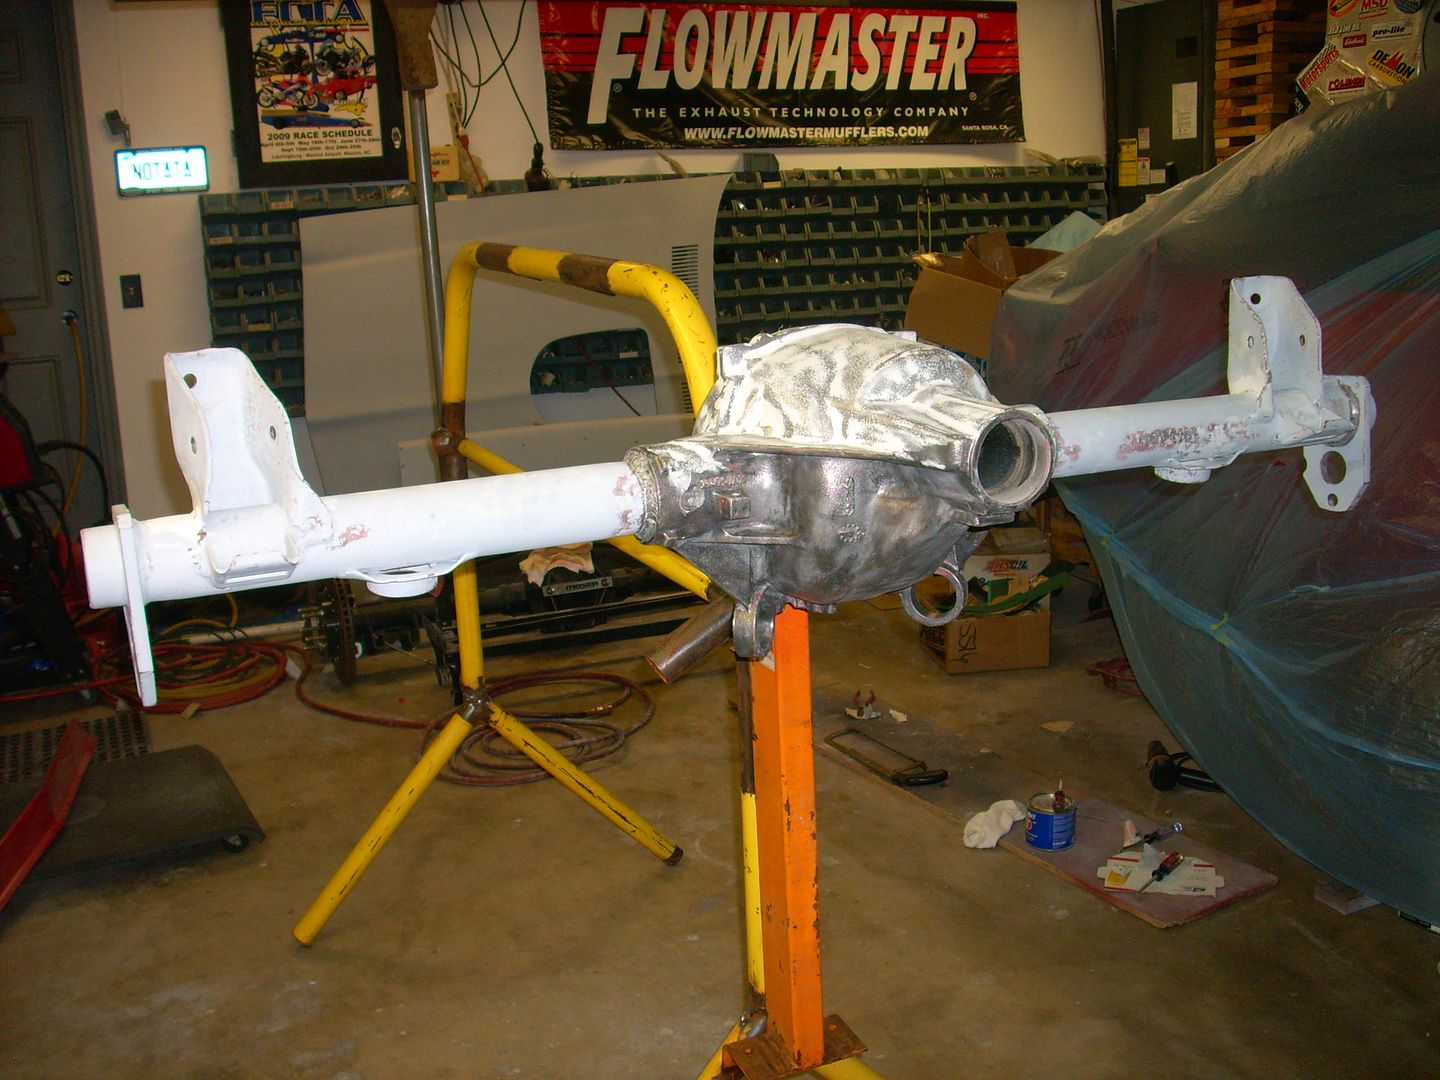 [/URL]
[URL=http://s240.photobucket.com/user/NOTATA/media/81%20Malibu/008_zps4ad695cb.jpg.html]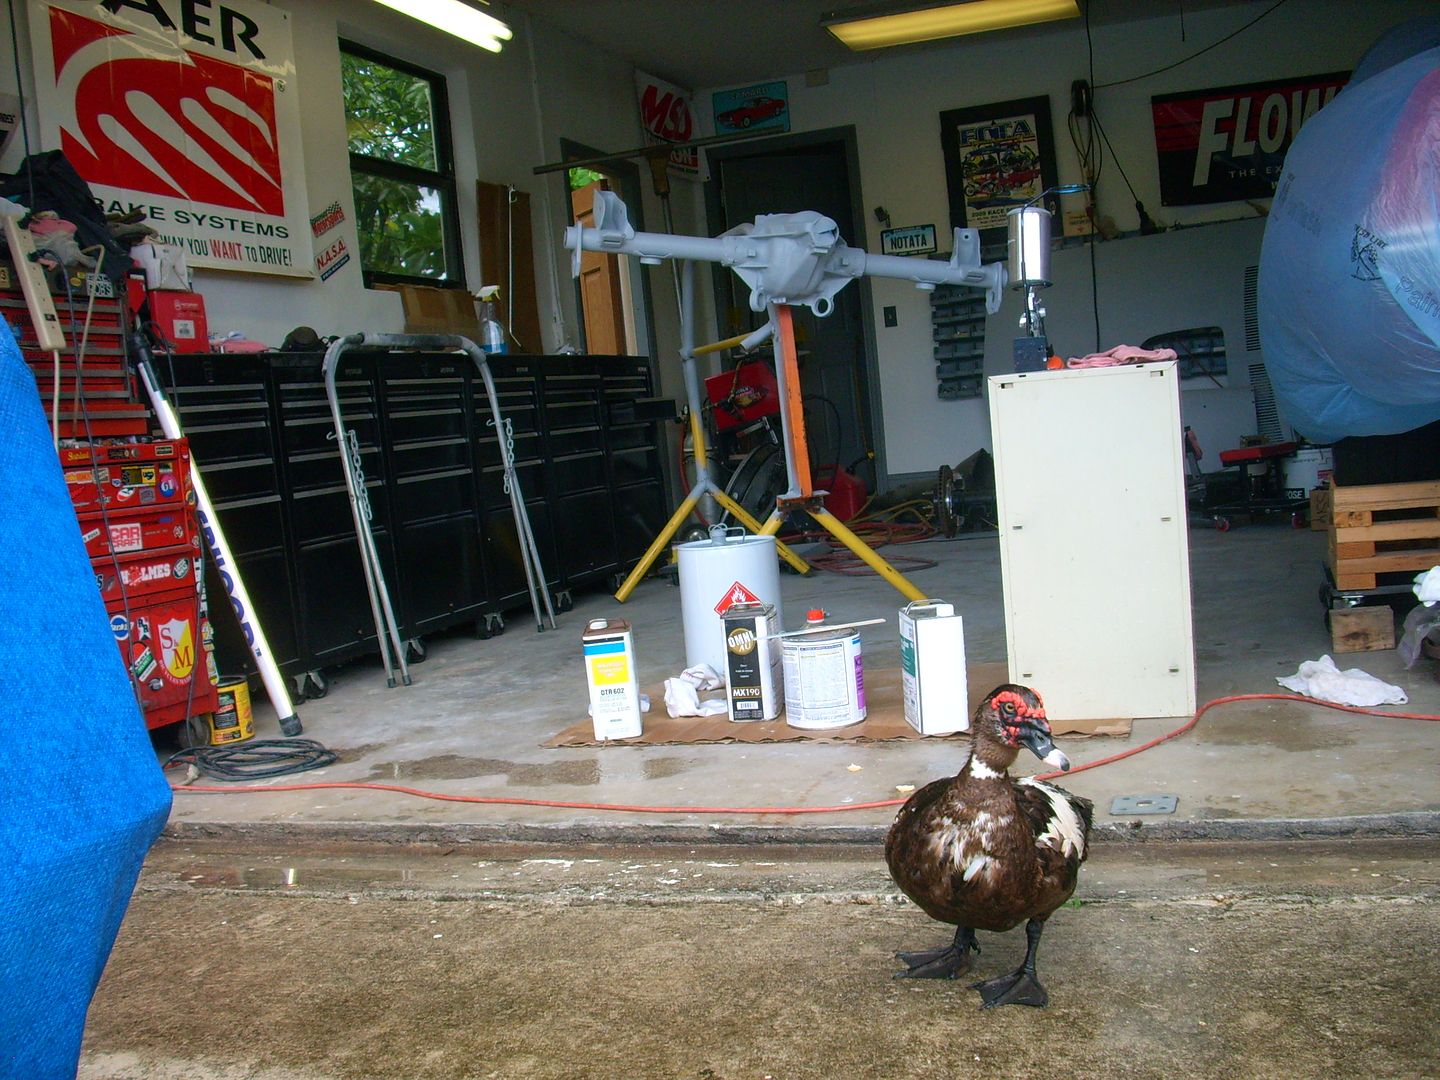 [/URL]
[URL=http://s240.photobucket.com/user/NOTATA/media/81%20Malibu/011_zps28079d78.jpg.html]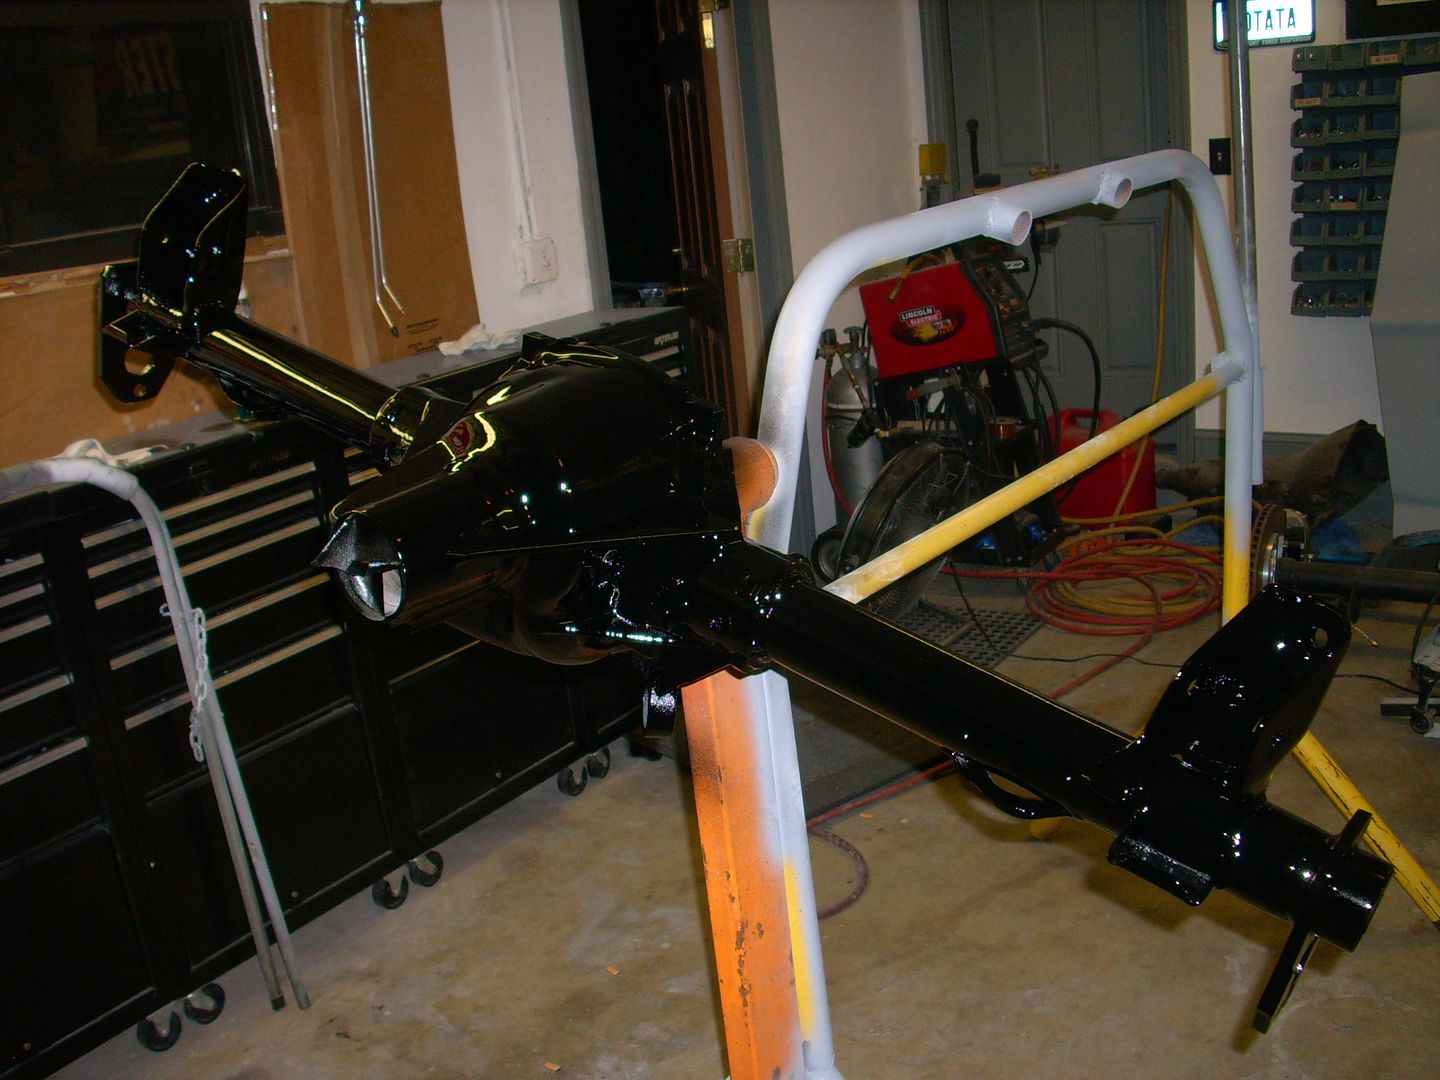 [/URL]
Rad_Capz wrote:
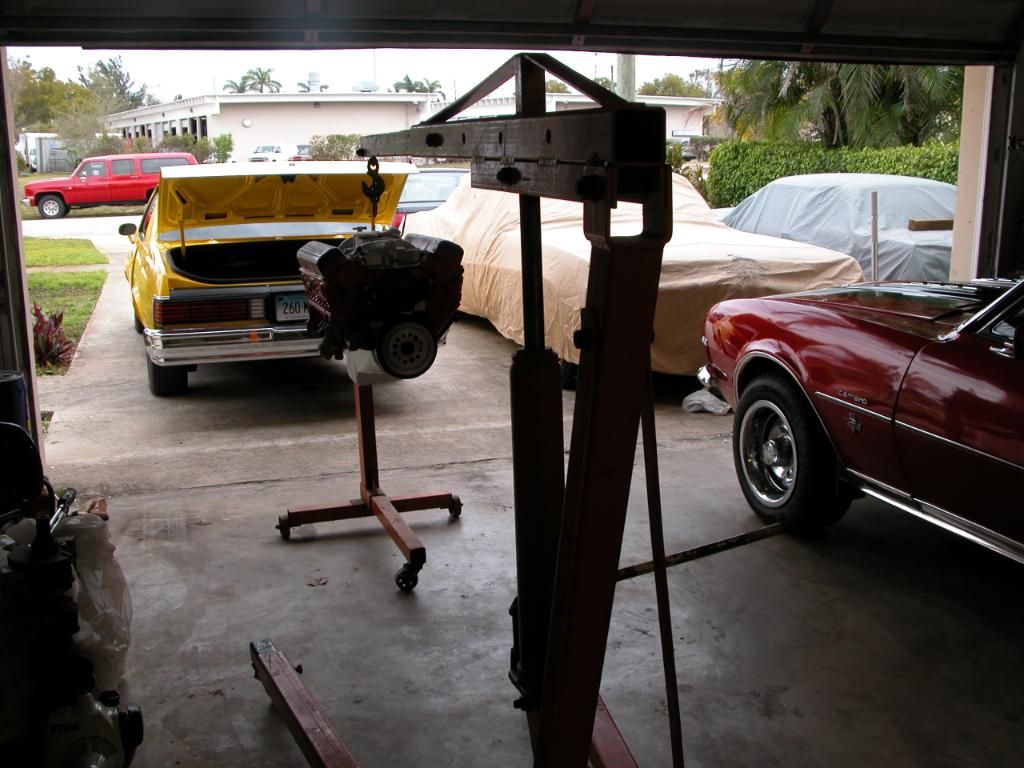
There is so much win in that photo, I even love the Suburban across the street!


