
This article is from a past issue of the magazine. Like stories like this? You’ll see every article as soon as it's published, and get access to our full digital archive, by subscribing to Grassroots Motorsports. Subscribe now.
Story and Photos by Carl Hiedeman
A custom bracket with mis-drilled holes is pretty much worthless. Want to save yourself a …
Read the rest of the story

jkstill
New Reader
11/30/18 3:48 p.m.
Nice article, thank you.
Another similar method that I have found that works:
Cut the heads off appropriately sized bolts, and grind the resulting end to a point.
Insert the bolts, then line up the workpiece and give it a good tap with a deadblow hammer.
The bolts will leave a nice dimple for drilling points.
When alignment is more critical, drill the first hole, and get a bolt through it, making it easier to line up the piece correctly, then tap it with the hammer.
Torqued
New Reader
11/30/18 4:19 p.m.
When transferring dimensions from the dividers to a rule such as a carpenter's square, you can increase your accuracy a little by starting with the dividers at the one inch mark instead of at the edge of the square, then just subtract the inch for your spacing calculations. I find it easier to place the divider precisely in this way, especially if the rule is well used and maybe has the edge dinged up a little.

Harbor Freight 6 in dig calipers, $10-20, have sharp points and can be used to scribe as a divider would; saves measuring and errors in doing so. as shown, the dividers are 1 13/16 apart.

Brotus7
HalfDork
12/1/18 10:13 a.m.
BimmerMaven said:
Harbor Freight 6 in dig calipers, $10-20, have sharp points and can be used to scribe as a divider would; saves measuring and errors in doing so. as shown, the dividers are 1 13/16 apart.
Agreed. Have a pair of cheap calipers that double as scribes. You can color the metal in the approximate area of interest with a sharpie marker before scribing to help it show up (or marking fluid/dykem).
Good tip
Now how do you keep the drill bit from walking or otherwise being not center? Center punching helps but on some of the larger holes I find the drill bits don’t move symmetrically about the center through the material, even after drilling a pilot hole. I hope that makes sense...
In reply to spandak :
A pilot hole that's at least at wide as the web thickness of the final drill bit should keep the drill from wandering. If the drill still goes in off-center, I'd guess that something is wrong with the drill (i.e. ground asymetrically).
Good short article with terrific clear photos! I could use more detail on Step 9, "sanding" the corners round. Does that just mean taking the part to the bench grinder and grinding the corners down to the scribed radius line?
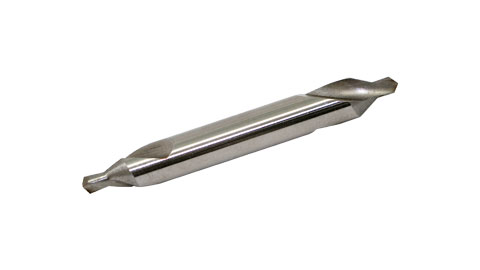
I like to use center drill bits when making pilot holes. They're pretty short and stout, so they don't flex much and tend to follow the center punch pretty well.
Thanks for the kind words.
Brotus: I use the center drill bits all the time. They don't flex at all. They just break if you go too hard on them. That's how I made the part, but we left the drilling out of the story to keep it short. Machinists often disapprove of the use, but they work so well
Danny: I usually sand on a combo 6" disk/belt sander You'll see it in a lot of the stories I write. An electric 4" hand held grinder works pretty well too if you clamp the part down.
Another trick: keep in mind where/when your car was made. If the car was made in a place or time where they were likely using metric, then it can be useful to convert your measurements (especially if they're a somewhat oddball fraction) to metric.
For example, that measurement you just took on your Honda probably isn't 1-11/64", it's 30mm. For bolt patterns and things like that you can assume that you're mostly going to be using pretty round whole numbers.
For the drilling of anything other than very small holes, I really like step bits. The holes have more of a reamed appearance, and you can use the next step to deburr the hole.

BA5 said:
Another trick: keep in mind where/when your car was made. If the car was made in a place or time where they were likely using metric, then it can be useful to convert your measurements (especially if they're a somewhat oddball fraction) to metric.
For example, that measurement you just took on your Honda probably isn't 1-11/64", it's 30mm. For bolt patterns and things like that you can assume that you're mostly going to be using pretty round whole numbers.
It works both ways, too. A lot of brake hardware is hand-me-down engineered all the way back to England, which is why even today you will see bore sizes like 22.2mm, or 50.8mm. The outward designs may change but the tooling still exists. There's probably also a vested interest in not making brake parts that are ALMOST interchangable. Imagine accidentally putting 22mm seals in a 22.2mm bore master cylinder, for example.
And then there's the "114.3mm" (4.5") wheel bolt pattern.
(108mm is 4 1/4", but it conveniently makes an even metric measurement)

JAGwinn
New Reader
2/15/19 4:44 p.m.
Great article and good pictures! Also, good comments and hints!
There always has to be "someone", and today I be he....it is radii not radiuses.
Retired Industrial Mechanic
I bought these dividers after reading this article and since then they have come in handy! I don't know how I didn't use these without them before!
Not much to add here.. 2 minor additions. I'm never perfect so I allow for minor deviation (no comments please) by drilling holes slightly oversize - a 64th" or 32nd". On step drills I also mark the the ring size above the hole size I want - easier to see when you've got the right hole. Wish these all had been here before - I learned these over many years and many mistakes.. GREAT article.
In reply to JAGwinn :
My mother was an English teacher ; Dad an Electrical Engineer. They spoke 8 languages between them. Yes, they grew up in Yurrup.
We had so much fun....
In reply to JAGwinn :
My mother was an English teacher ; Dad an Electrical Engineer. They spoke 8 languages between them. Yes, they grew up in Yurrup.
We had so much fun....
In reply to Carl Heideman :
Alternative:
Spot drill
https://www.mscdirect.com/browse/tn?searchterm=spot%20drill&tg=Suggested%20Keywords

DavyZ
New Reader
9/16/23 3:57 p.m.
Good information, especially (for me) about the transfer punches. For some reason, I don't own any and cannot think of how I have gotten along without them for so long. Great article and I appreciated the information and descriptive photos. 
How do you find the center of a circle and specifically a cat bowl?


SV reX
MegaDork
9/17/23 10:13 a.m.
In reply to VolvoHeretic :
How accurate do you have to be, and what tools do you have available?
It can be done mathematically, or with a centering square, but for that particular problem I'd build a jig, and make the circle a square...
If I was gonna drill a hole in the middle of a cat bowl, first I'd rip some wood the same width as the depth of the bowl. So, if the bowl is 3" deep, I'd rip the pieces 3" wide.
Then I'd build a square frame out of the wood with an inside dimension the exact same as the outside dimension of the cat bowl. So if the cat bowl is 10" in dia, the interior dimensions of my frame would be 10".
Put the cat bowl inside the frame upside down- with the bottom of the bowl facing up. Use a straight edge to connect the diagonal corners of the square frame. The intersection of the 2 diagonals is the center of the circle. Scribe the diagonals, use a centering punch, and drill the hole.
Extra points... the frame can be used to hold the cat bowl still while drilling.
In reply to SV reX :
Thanks, that sounds like an excellent easy way. I was thinking of using a circle drawing compass and using three points to trial and error it. A jig will be nice since I need to drill 16 bowls. Doesn't have to be perfect since it is for a static 1/5 scale model.
SV reX
MegaDork
9/17/23 1:33 p.m.
In reply to VolvoHeretic :
Build the jig once, clamp it to the drill press table, and voila! 16 holes


