


Nicely done with the floors! I like watching this build. You're making me feel like my floor replacement will be doable, haha! ![]() +1 on cutting disc to grind welds.
+1 on cutting disc to grind welds.

Nicely done with the floors! I like watching this build. You're making me feel like my floor replacement will be doable, haha! ![]() +1 on cutting disc to grind welds.
+1 on cutting disc to grind welds.

Knowing my special lady friend was going to be out of town, I planned a weekend with the Starlet.
Thursday, I went to Northern with a pocket full of coupons. I got a speed helmet, misc. clamps and grinding/ cleaning stuff, and some (non-related) allen wrenches.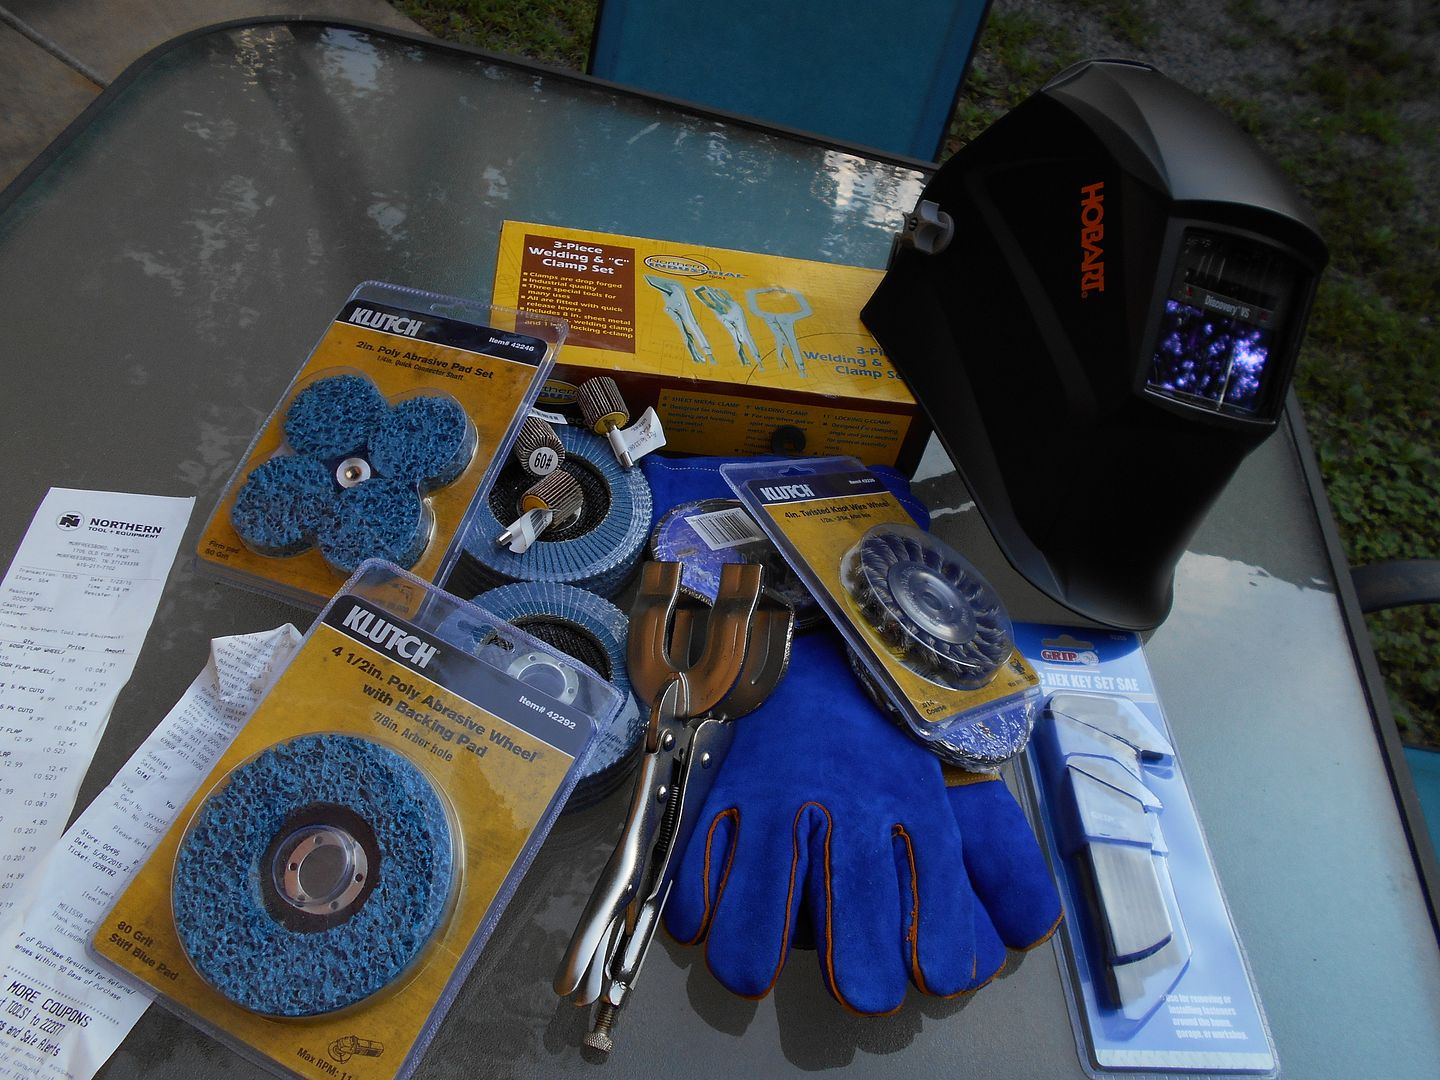 I haven't used an auto darkening hood in 10 years. The last one I bought was $300 and you had to also supply a hood. How times have changed. $109 got me a Hobart, which is powewed by a big watch battery, and as near as I can tell, solar from the welding (and if not, Why Not?)
So, I got home Friday, and proceed to clean, organize, assimilate new tools, and load the trusty Miller with the .023 wire. I did use cardboard to make a template this time, determined to fill the whole thing with one piece.Friday ended with a good bit of cipherin'. Then woke up early Saturday, and spent the whole day taking, and dispensing beatings. Unfortunately, my bead press didn't work out so great. I believe it would have, if I heated the metal, but I instead headed for the Alamo -BFH. At first, my results were, shall we say, CRAP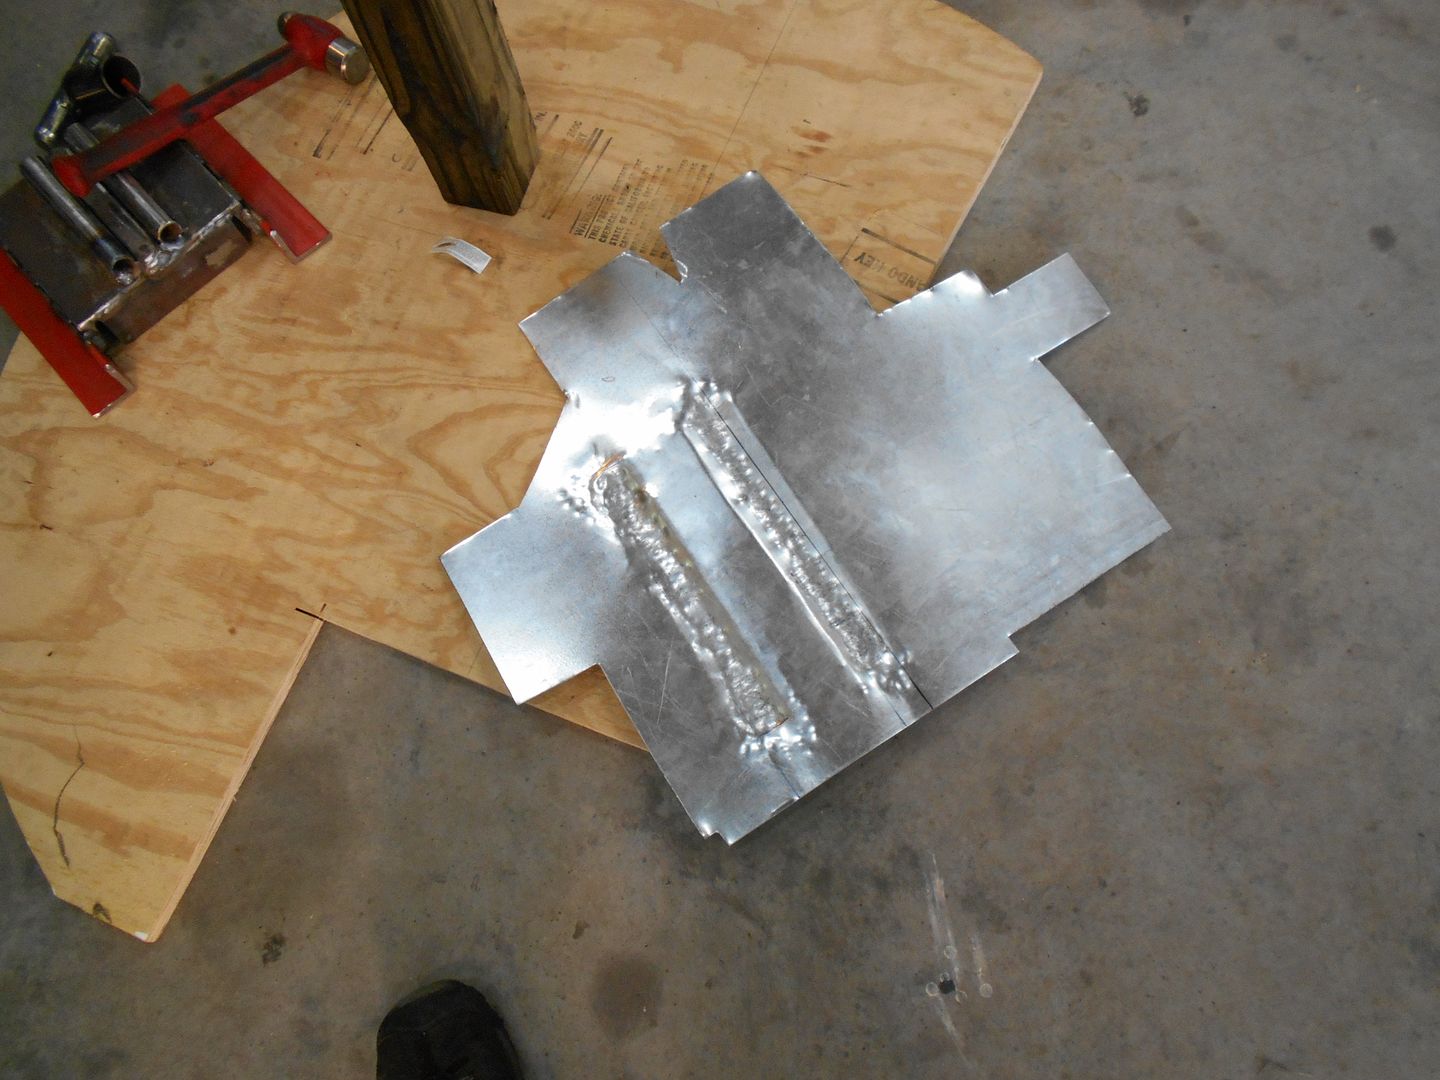 , but I kept at it. This is 20 ga. I got from work, and as such, a little tough. I re-purposed the "press" from my failed bead press, and beat on the metal using that as a dolly for some hours.
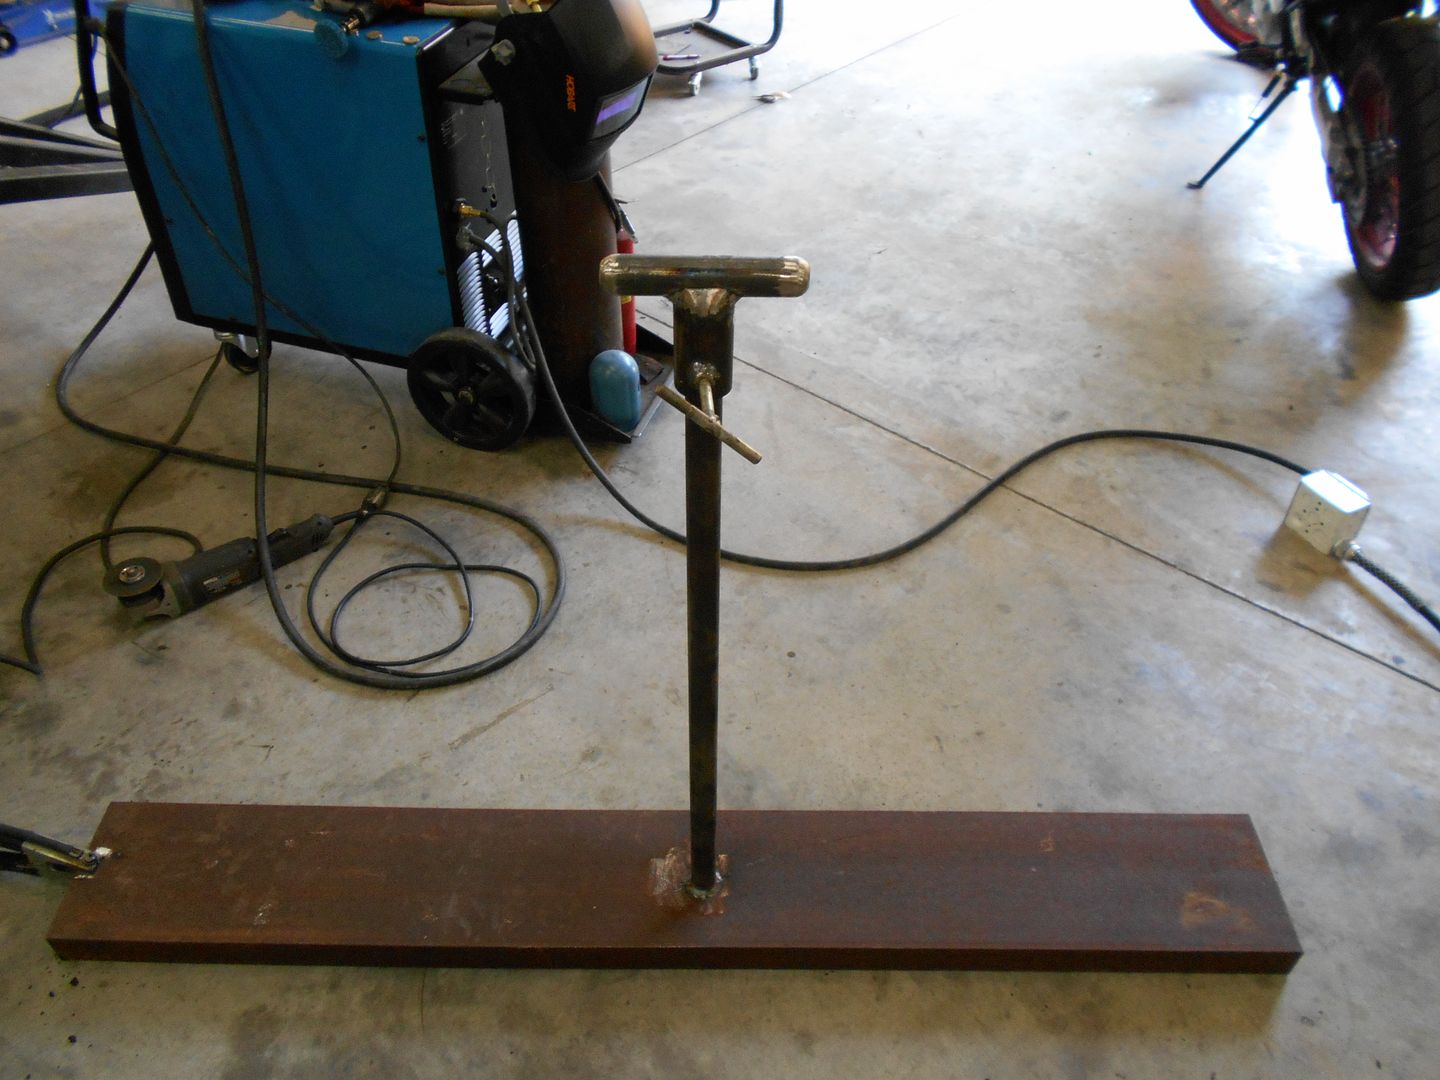 Here's a shot of the blister maker itself, as well as some pipe I thought was "about right" for the radius bend I needed. Note, my beads are looking somewhat better.
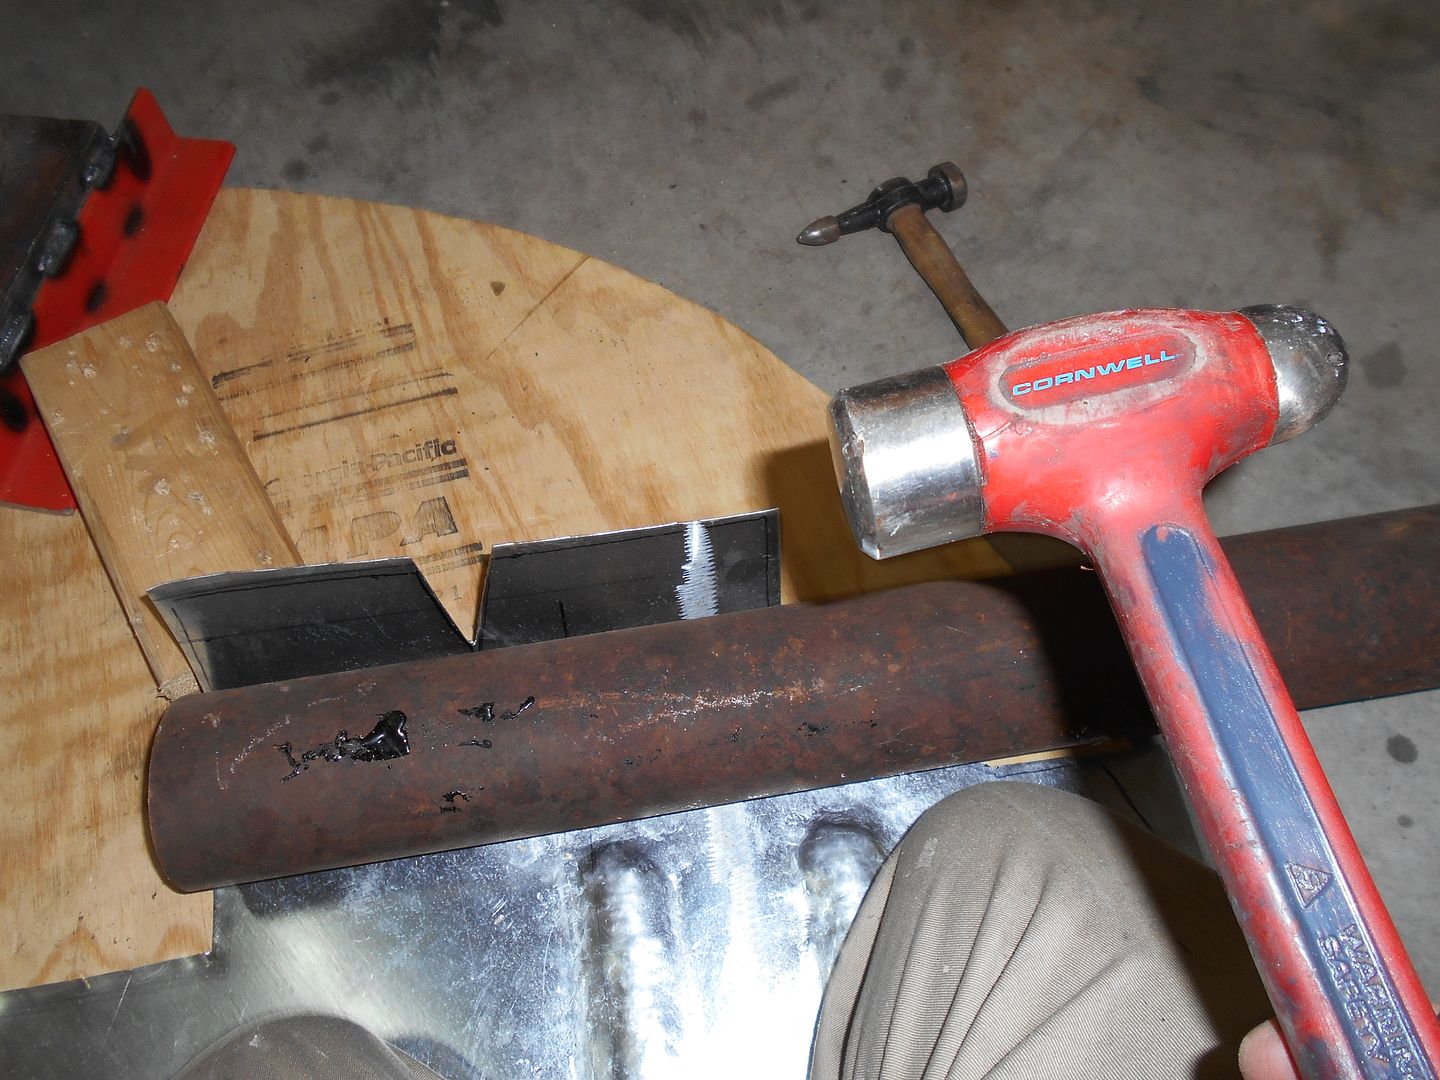
I cut some relief slots in the actual car to ease the transision from beads to no beads, and spent A LOT of time fitting, trimming, and refitting. Action Shot of one of several fittings.
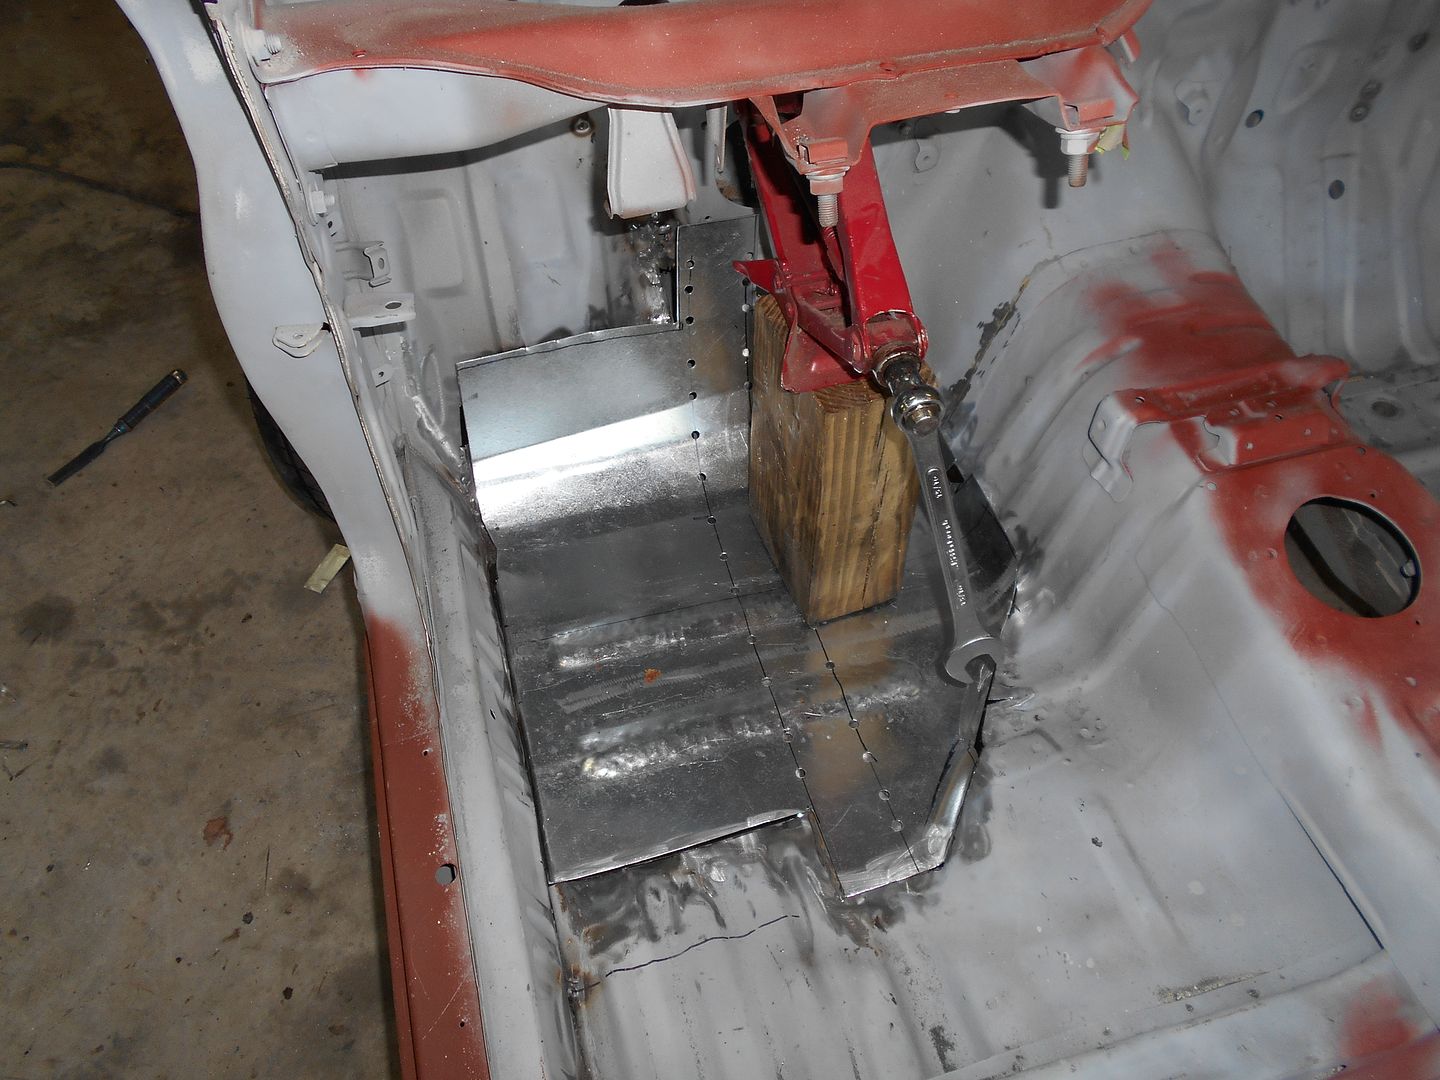 Aaand here's where I left off at 8:00 Saturday. Obviously, I missed my goal of using one piece. 3 patches to make tomorrow, and I've got a driver's floor. Nobody is going to accuse me of digging any ditches, not having a home, nor a near excessive love of ethnic food wraps, but here it is:
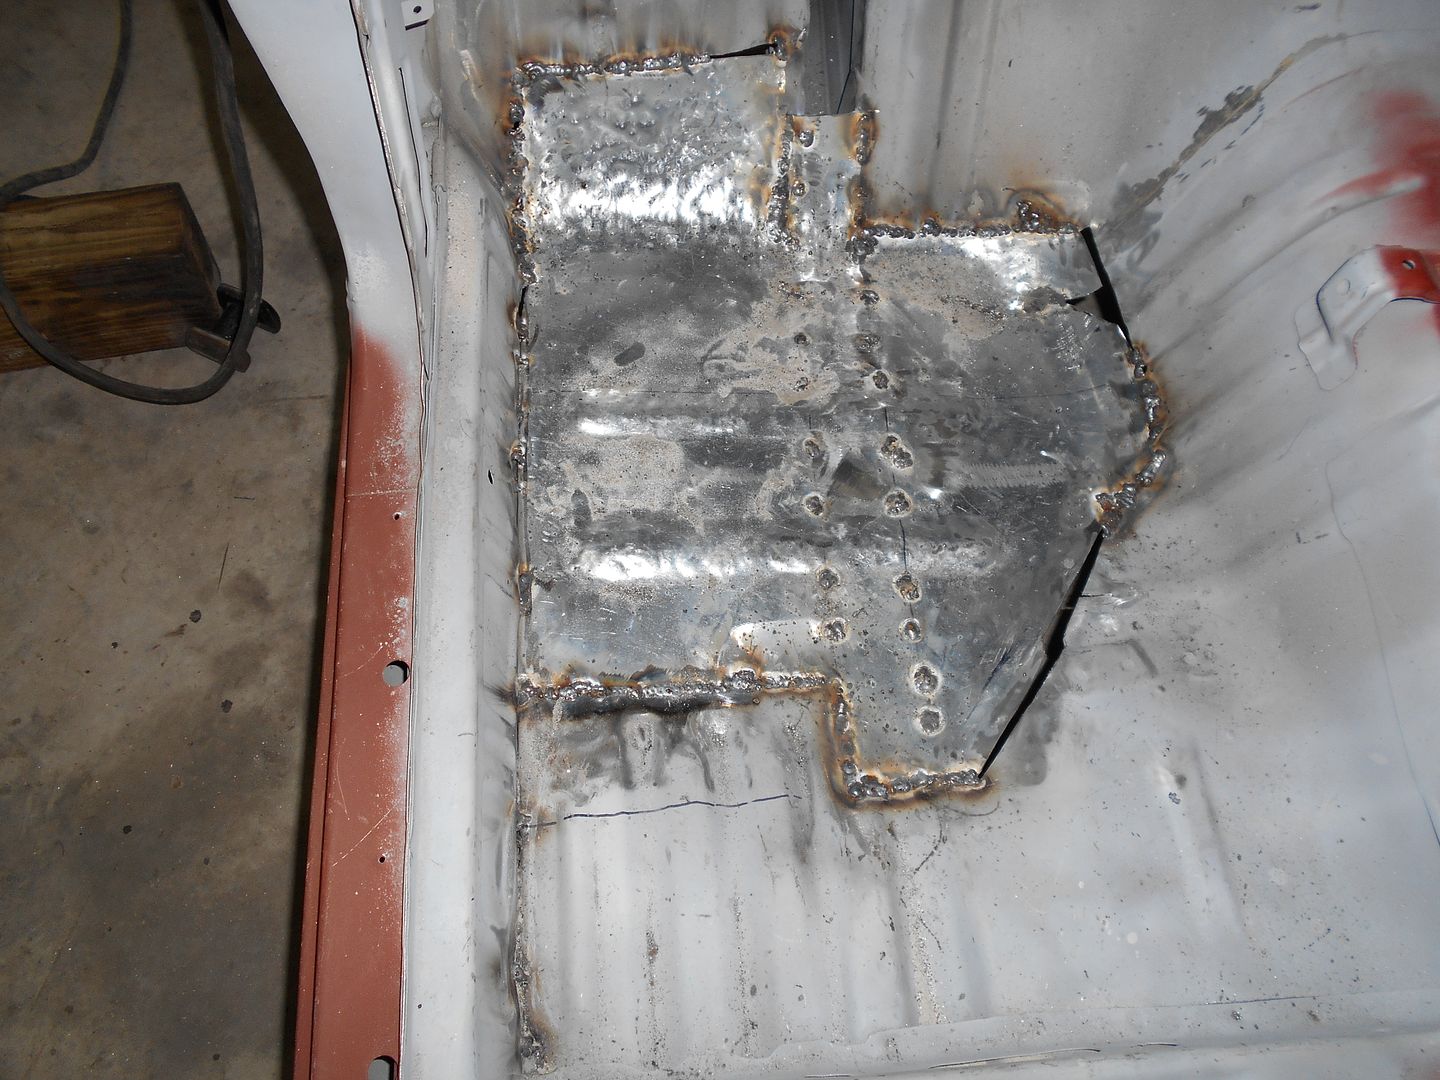 To summarize-
This car is light. I needed to turn it 180, but didn't want to get too involved. I just carried/ dragged each end around. All the blasting media that keeps falling out of EVERY nook and cranny made it just like shuffleboard.
.023 wire is everything I had hoped. I should have made the switch earlier.
Sometimes, trying to use one piece is just dumb. Had I taken a fold and weld approach to my floor patch, not only would it have been less work, but I would have gotten a better result. It depends on the situation.
I'm not calling the bead press a bad idea, it just didn't do exactly what I had planned. It worked great as an anvil. It should still come in handy for bending some stuff, and I saw an art exhibit shortly after building it that used an identical tool, only powered. I got the idea from when I needed to make a blister in the transmission tunnel of my Bugeye. I cut the hole shape I wanted into a sheet of plywood, screwed the panel to the plywood with several screws, and beat the metal to the depth of the plywood. Worked well, I then just had to weld up the holes. Live and learn.
The HOBART hood is sweet. Again, should have done this some time ago.
The biggest problem with the car is nearing its conclusion. That feels good.

Now just spend $100 on a harbor freight bead roller and you will have a tool that will do beads of different sizes
I HIGHLY recommend watching the David Gardener videos, he is amazing with nothing but a torch and hammers/dollies. You WILL learn alot!
Lomaxmotorsports wrote: Now just spend $100 on a harbor freight bead roller and you will have a tool that will do beads of different sizes
Have you used one? I always heard they were not worth the trouble (like my HF tubing bender). As such, i figured I'd spring for a good one, or not at all.
Thanks everyone else for the input. I'm working with what I've got right now, and improving. I will look into different processes when I have some down time, though.
TIG brazing??? The only brazing I'm aware of is with a torch. MIG brazing sounds even more alien to me.
Well, my chicken poop welds are cool now. Back to it.
wheelsmithy wrote:Lomaxmotorsports wrote: Now just spend $100 on a harbor freight bead roller and you will have a tool that will do beads of different sizesHave you used one? I always heard they were not worth the trouble (like my HF tubing bender). As such, i figured I'd spring for a good one, or not at all.
I have one, it has been modified a bit but works great for no more than I use it. If I had plenty of cash I would get one from Lazze with all the dies but till I win the lotto I guess I'll use what I can afford.
In reply to Lomaxmotorsports:
Mind sharing how you modified it?
In reply to wheelsmithy:
I'll take some pics when I get home, but basically it just needs to be stiffened up. I would do it slightly diffrent If I had it to do over again but for the money and time I have in it I am happy with it's performance
Thanks, Lomax. I anxiously await details.
...To wrap up our No Expenses Paid weekend with a starlet, here we go. This is where I left off. I figured the last beer should be consumed in the shower, so I broke off at 8:30 on this school night.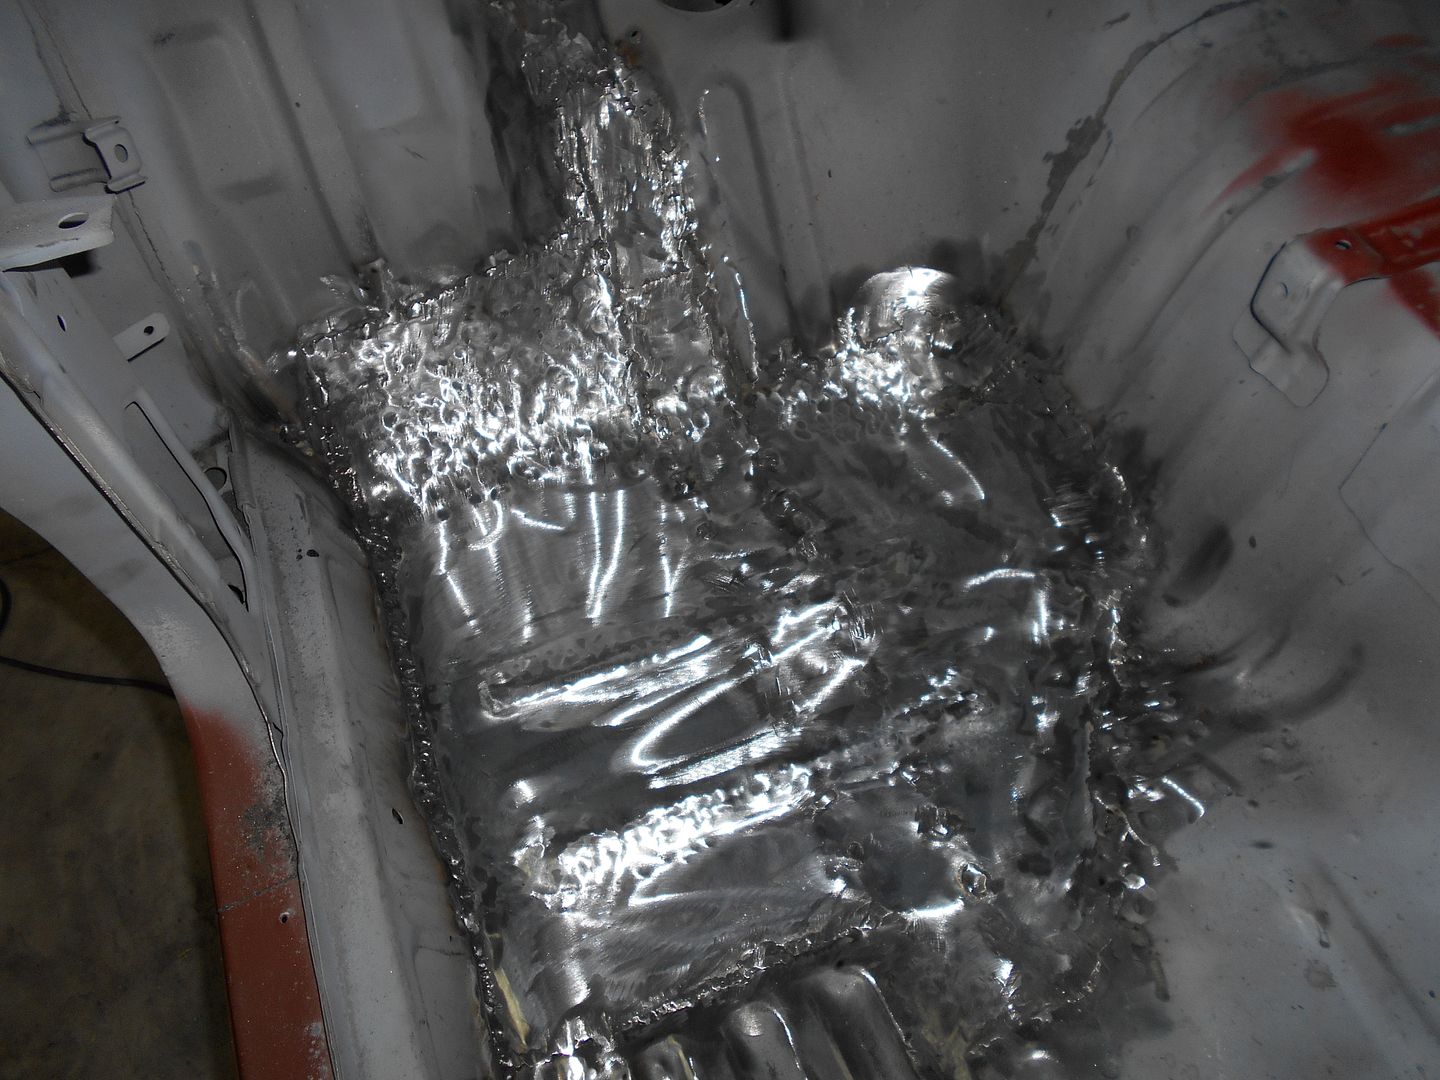 I just can't feel too bad about that. It was a complicated shape, what with the cat having its own special place off to one side of my project space. I nominate this picture for posterity. There is plenty of pinhole filling to come, along with...I'm gonna say a bad word...BONDO.
Oh yeah, I have started the seam welding process. Sorry for the blurry.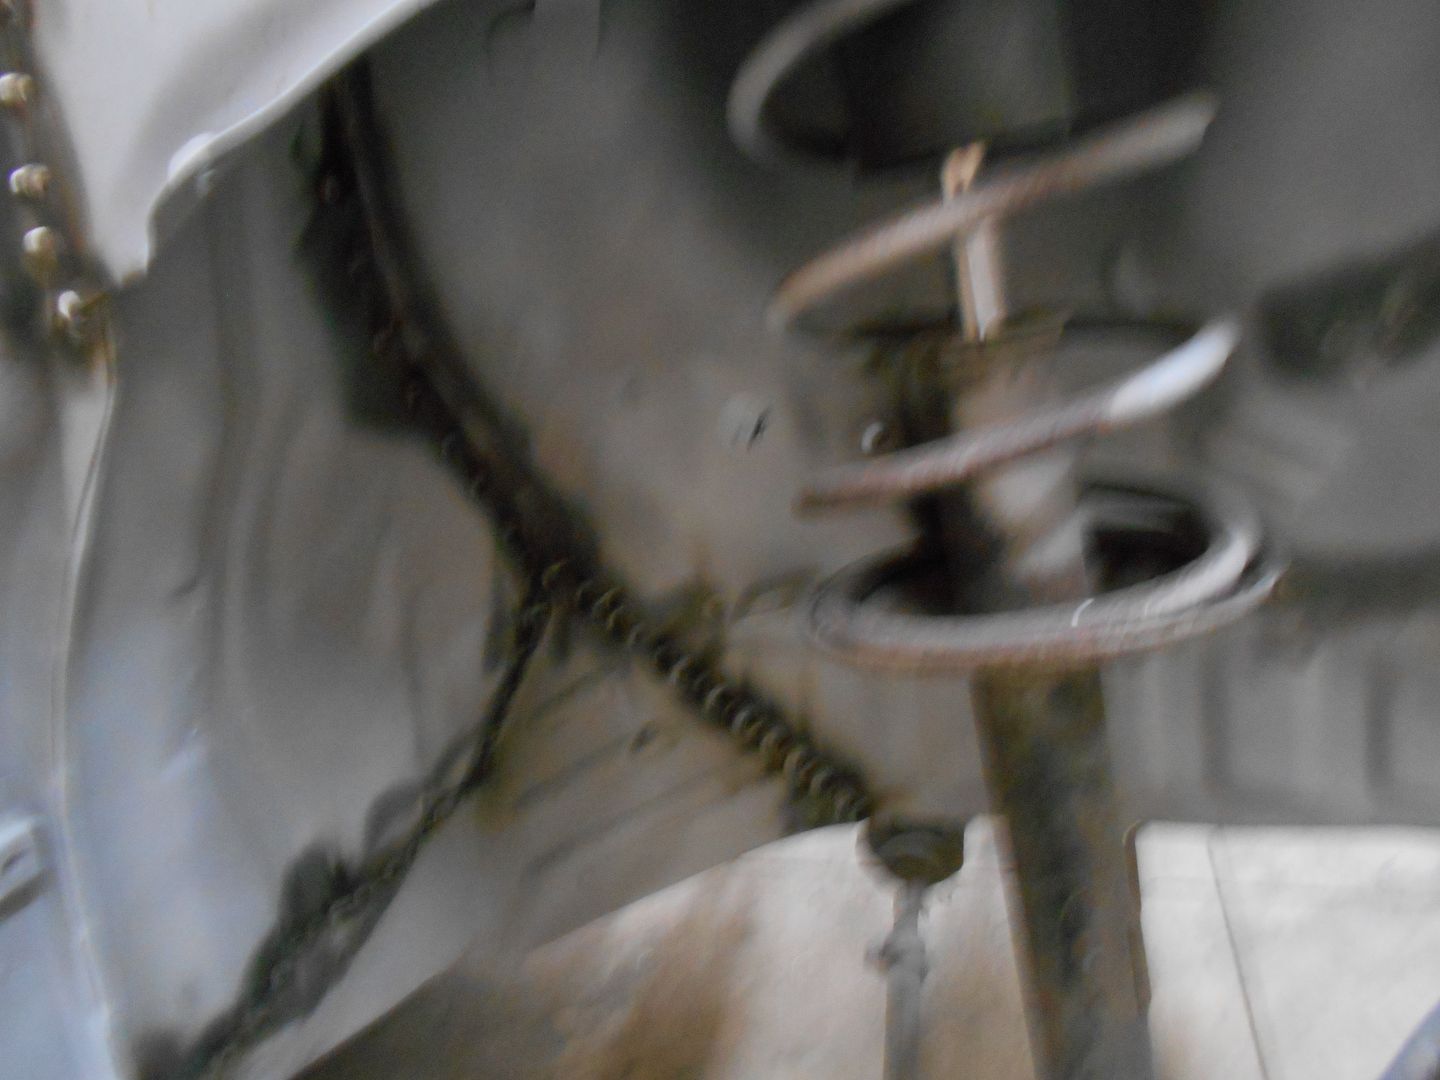 Observations:
Half of seam welding (maybe more) is burning the old seam sealer/ gorilla snot/ whatever out of the seams. I have no idea how, other than burning the bejeezus out of every seam, and hoping all the crap burns out as how to accomplish this end. Wire wheel was applied.
"Weld Through primer is, in as I see it, a marketing ploy. By all means, paint it on the hidden side of whatever you are working on, but, if you can see it, my opinion is that you should clean everything down to bare metal, just as usual. Take that as you wish.
Smithy out.
Have you used one? I always heard they were not worth the trouble (like my HF tubing bender). As such, i figured I'd spring for a good one, or not at all. Thanks everyone else for the input. I'm working with what I've got right now, and improving. I will look into different processes when I have some down time, though. TIG brazing??? The only brazing I'm aware of is with a torch. MIG brazing sounds even more alien to me. Well, my chicken poop welds are cool now. Back to it.
The Horror Fright Bead roller works remarkably well for the price
<img src=" " />
" />
<img src=" " />
" />
Ok here is a pic excuse the splatter marks I plan to take it down and sandblast and paint it just want to make sure I'm done modding it.

If I had it to do over I would use square tube and do it on the roller side as to not add width to the machine. But basically if you stiffen the up and down movement and the brace it so it won't move side to side it will do 18ga steel.


There is a lot of them on the net that are done better than mine but I had to use what I had on hand at the time to get a job done and out the door.
Thanks, Lomax. Looks great from my house. I particularly like the threaded tension adjustment, and those ornamental swirls a-la a mailbox are pure class.
Yep, Banzai, that does look damn fine. Thanks for sharing.
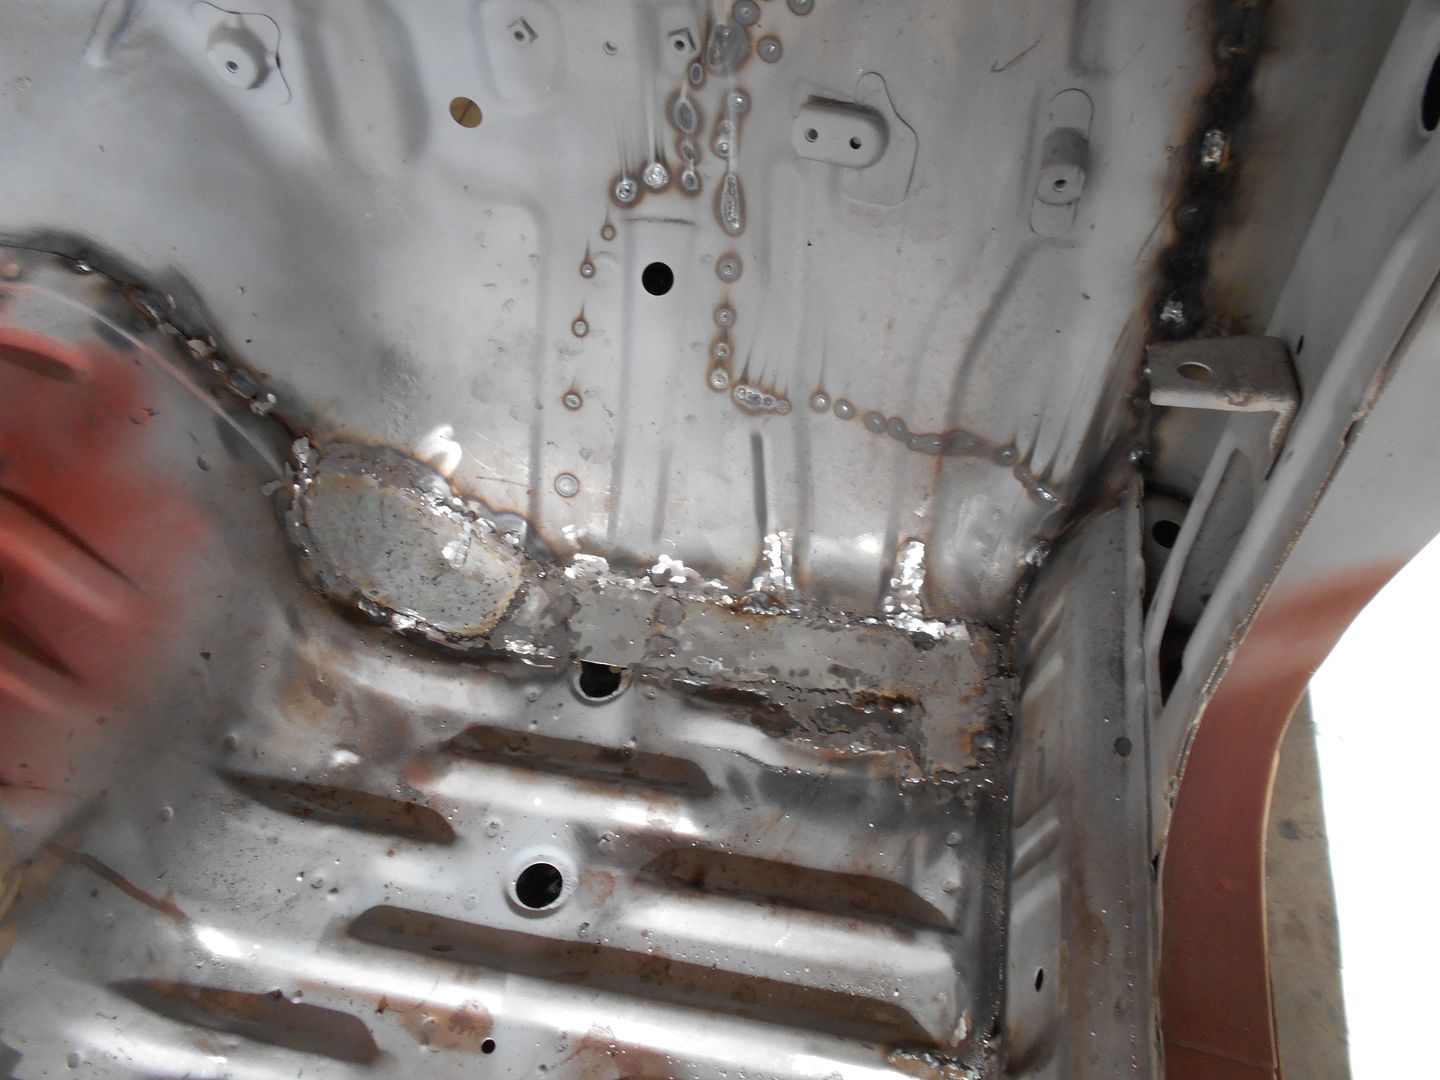
I've been working, but not a tremendous amount to show for it. I have been making pieces, and doing layout drawings for the next phase. Whenever I need to let an area cool, I go to random areas, and seam weld: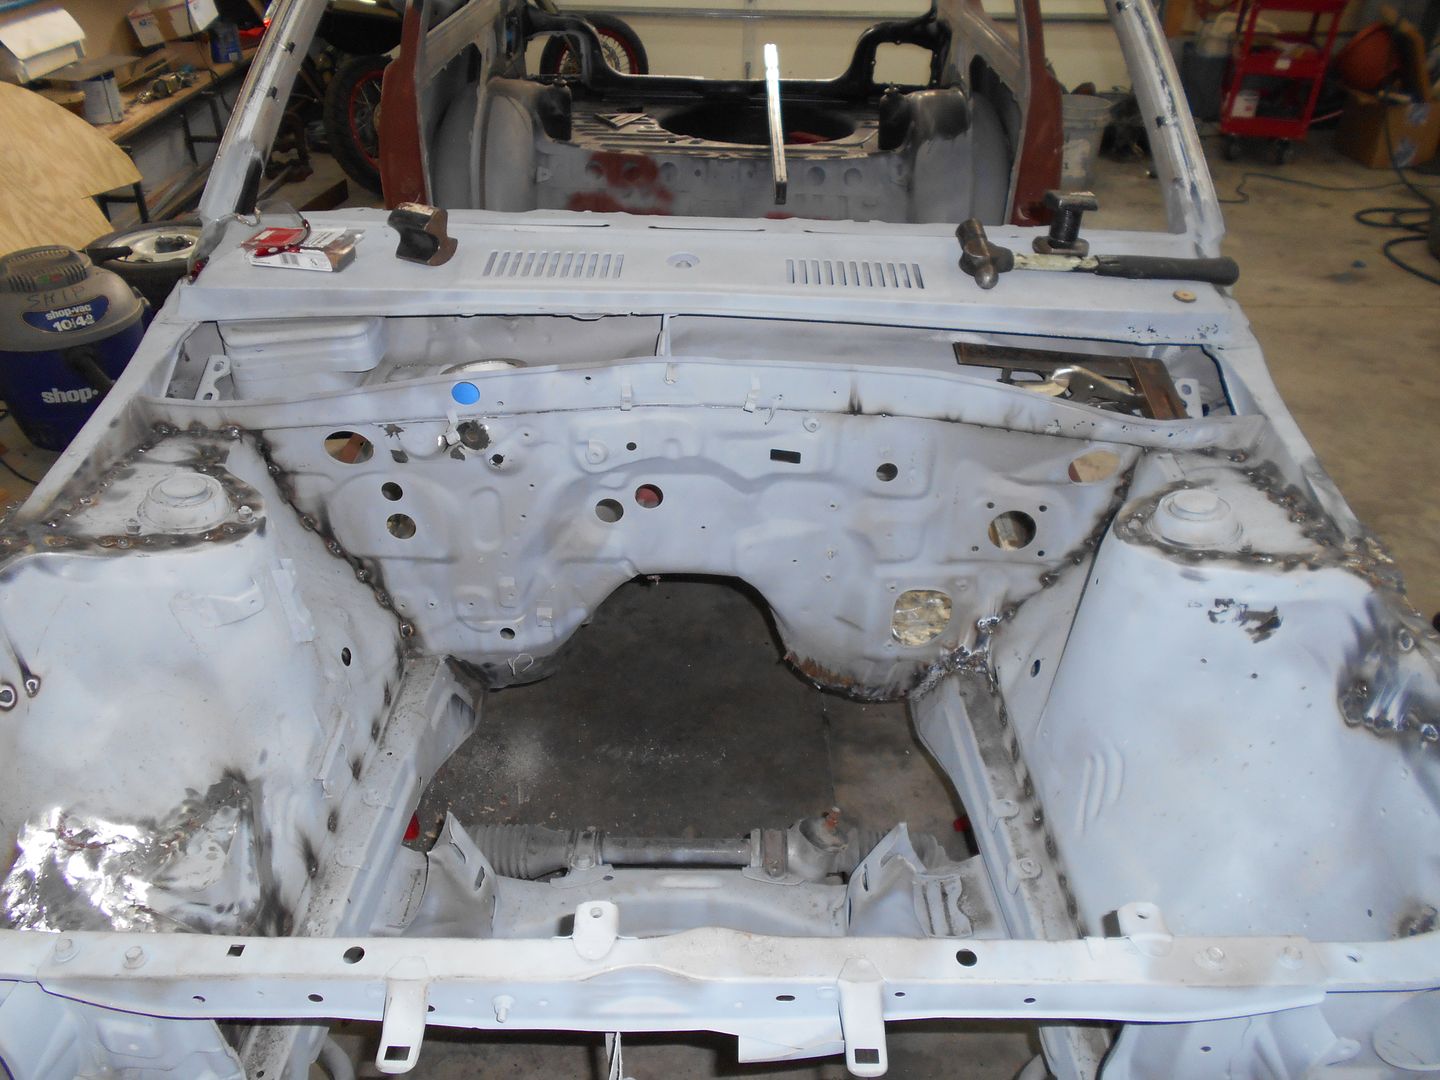 I repaired that inner fender bit from before. A better man would have made it mirror the other side, but I'm not a better man.
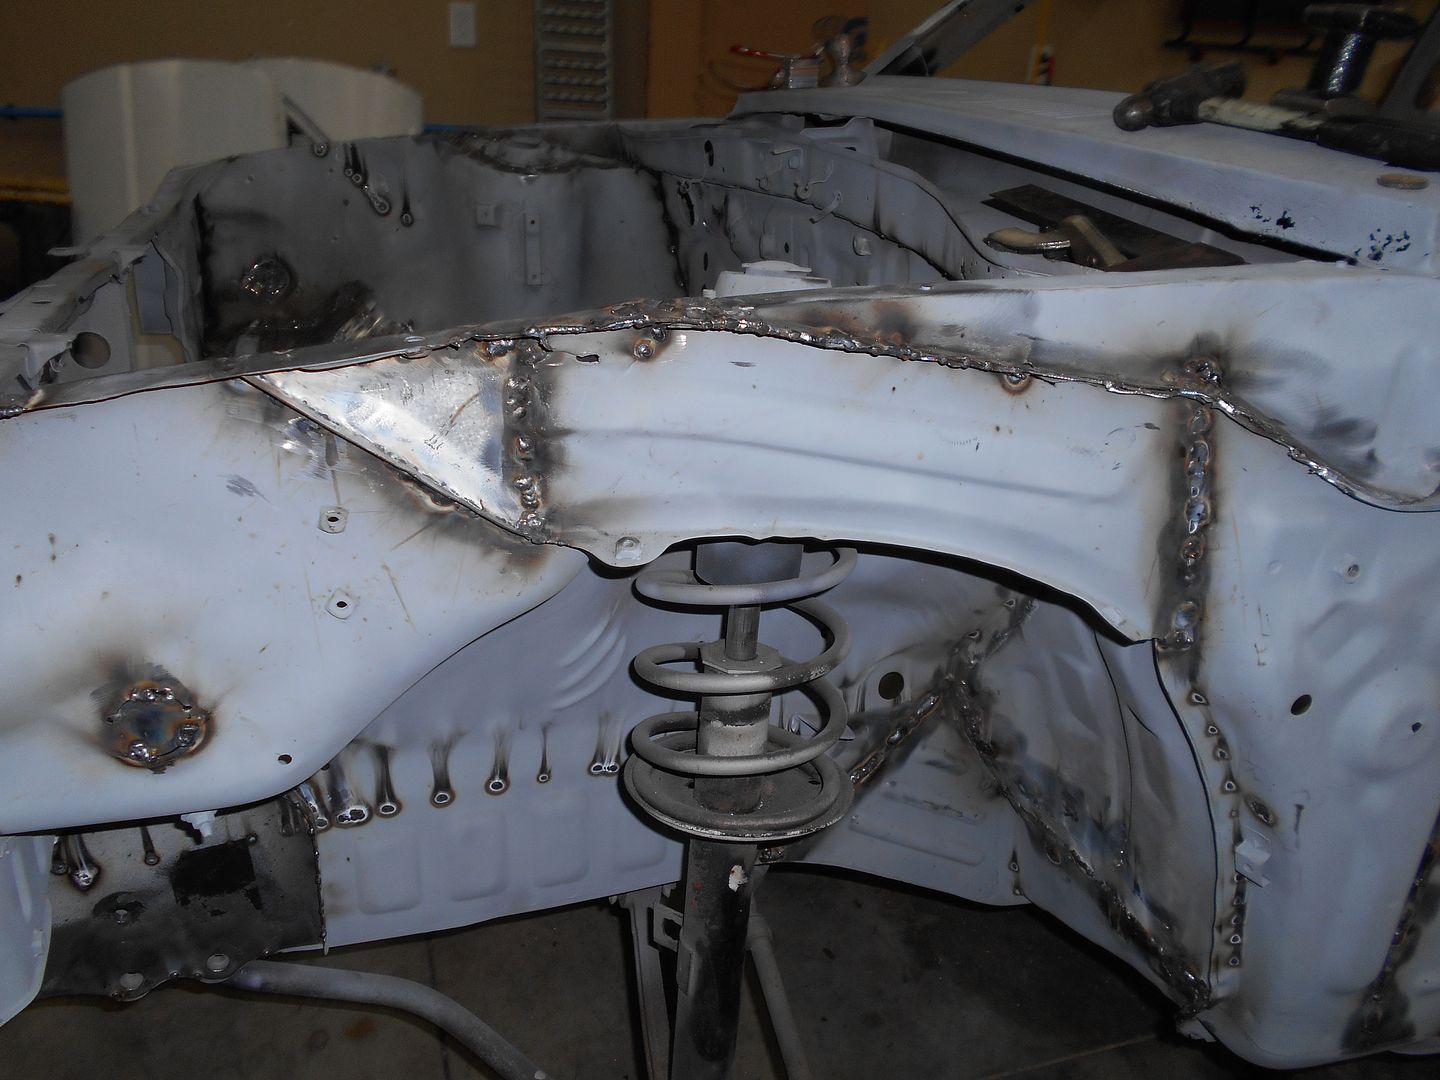
I also started on the passenger's floor,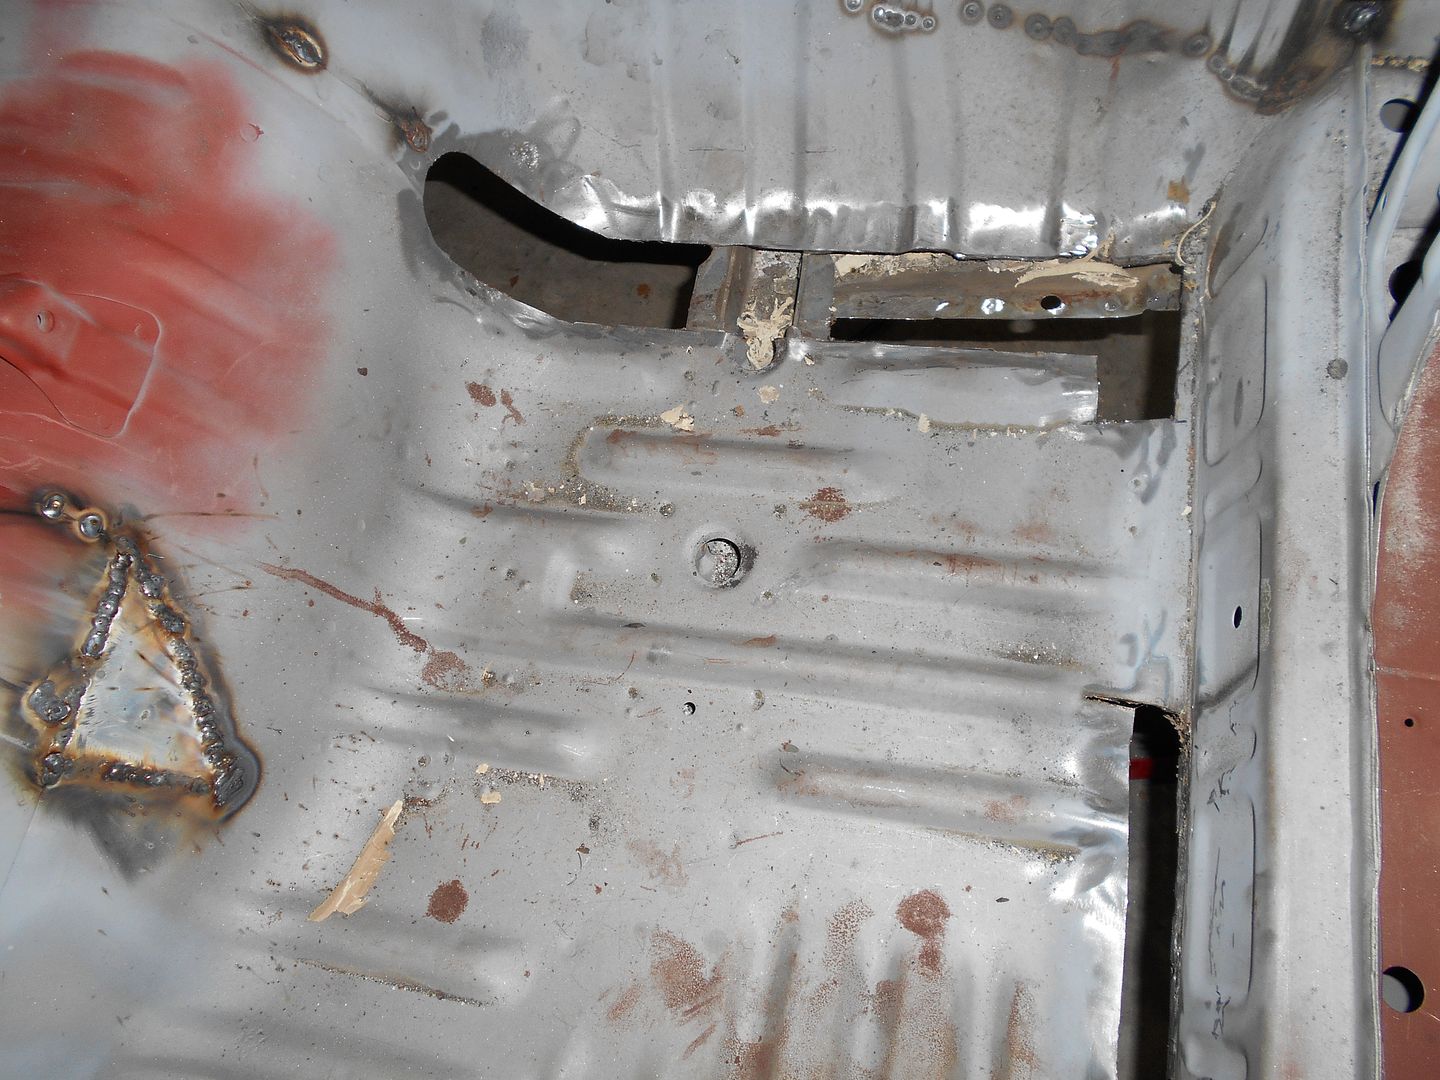 and transmission tunnel. This is after some cleanup,
  I am starting to get the hang of welding sheet metal.
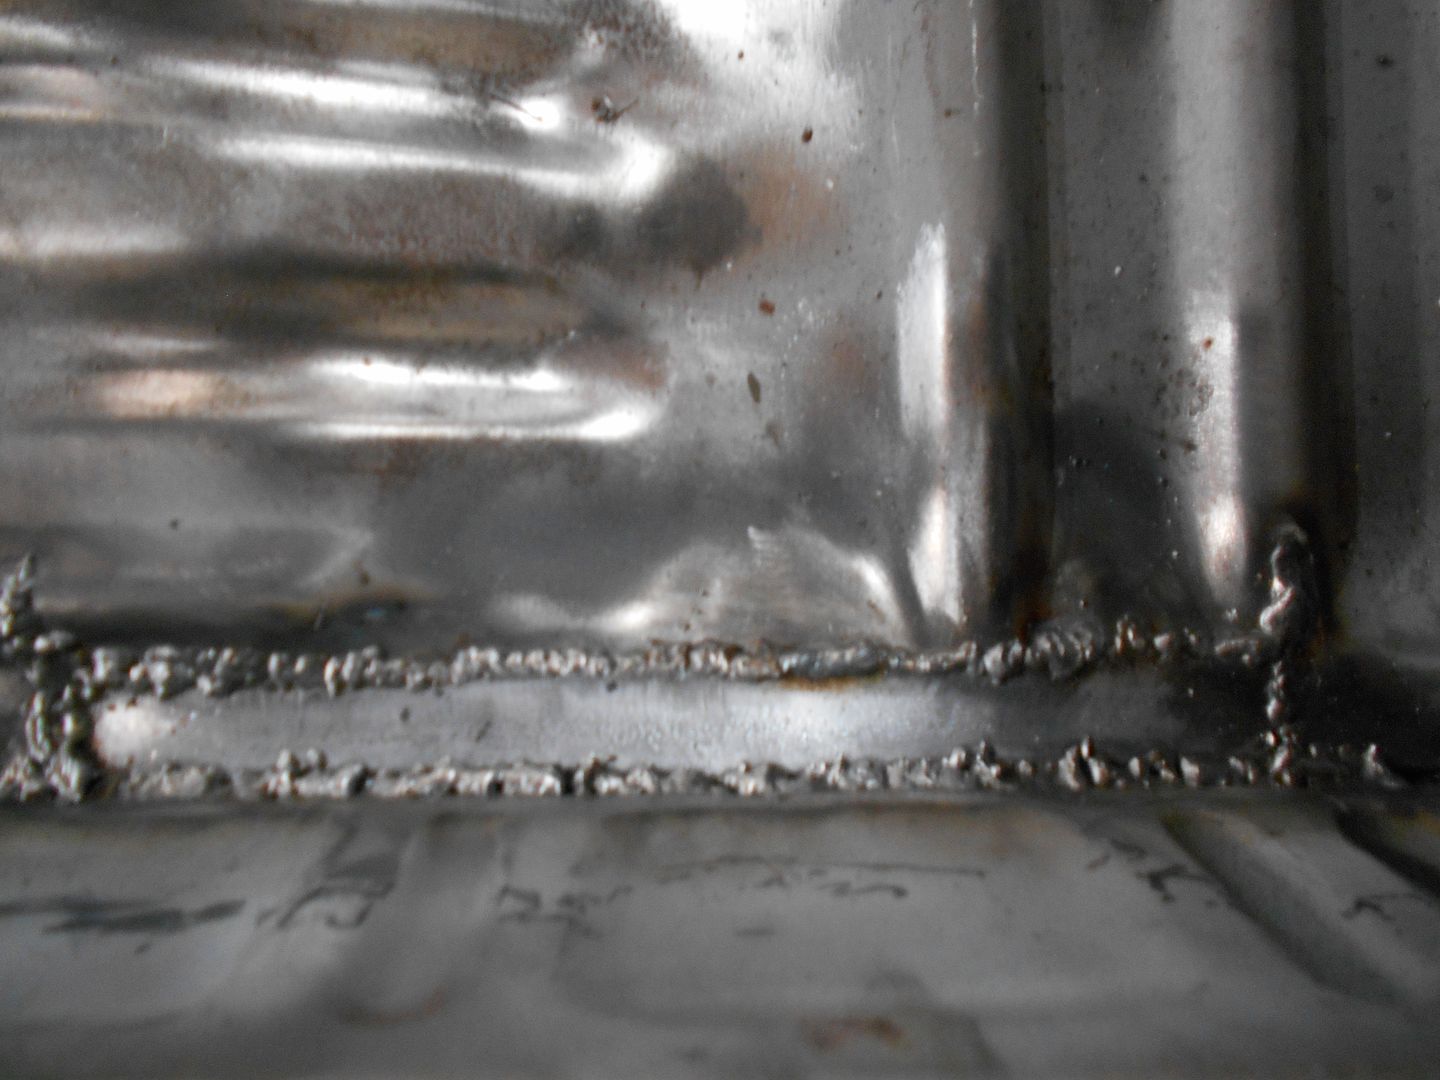 Here's where I left off. The hole is where I wiped out on my patch. This will be rectified next session. Again with the blurry... My apologies. Its pretty ugly anyway.
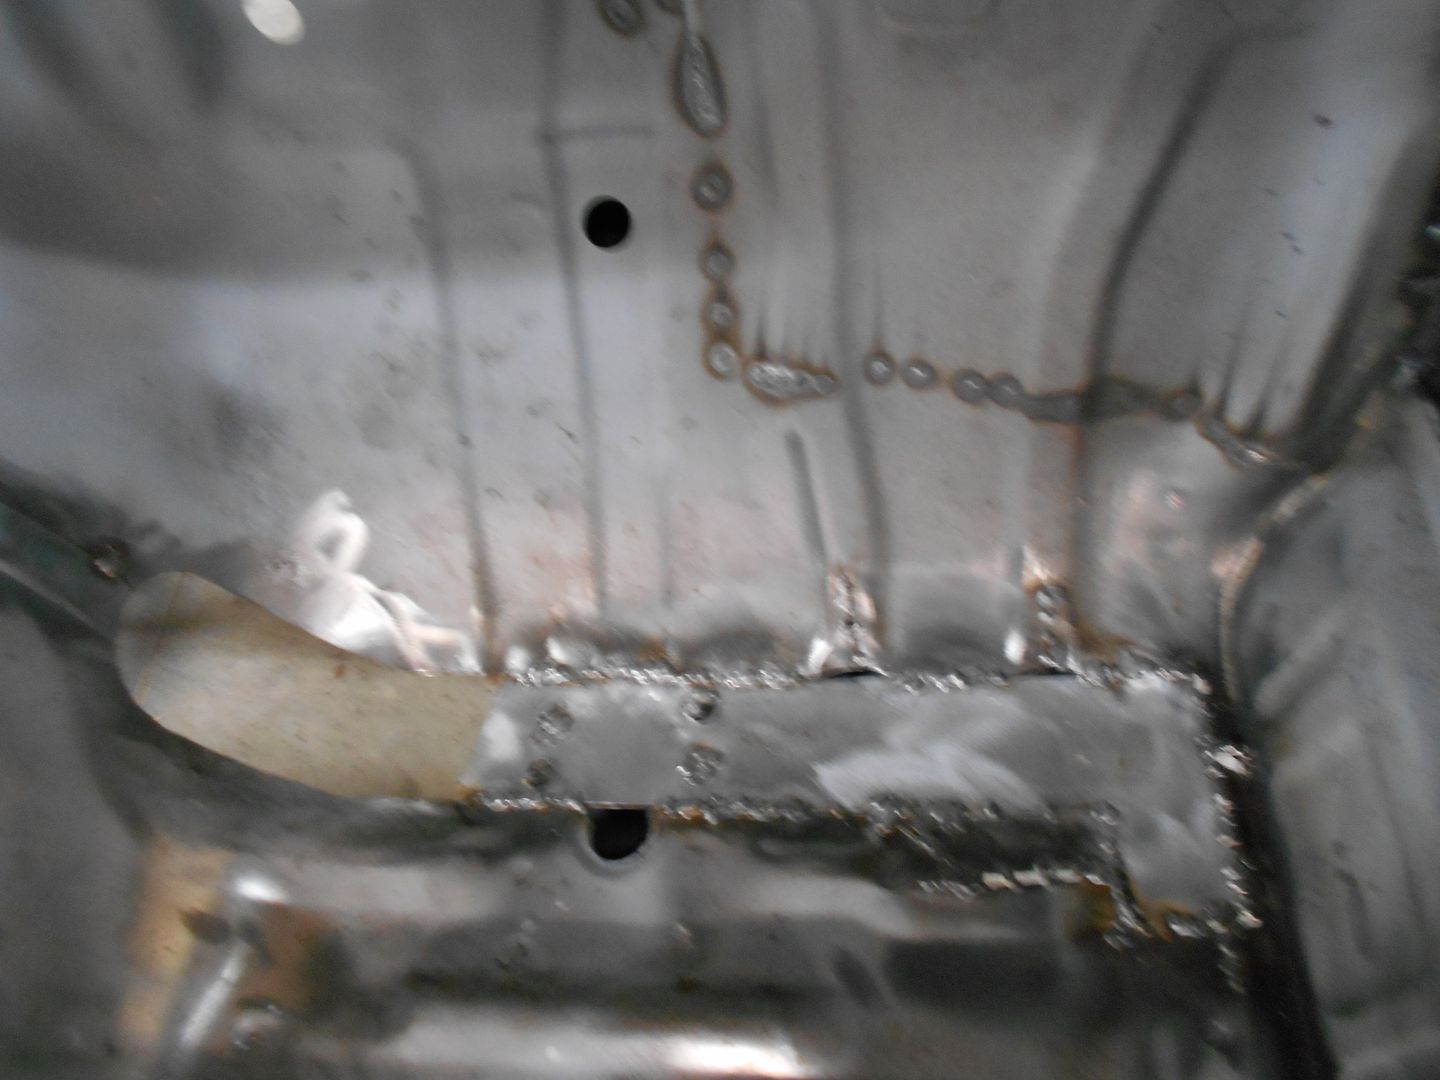 Later...

Awesome work! You could spot weld a 3x3 spot and I'd still enjoy pictures of it so keep posting, no matter the progress! When you get a chance can you post some pics of the bottom of the car/suspension of the front and rear, I'm just curious what it looks like after blasting for potential engine / suspension swaps. I wonder if the Miata IRS would fit or even make sense.
In reply to DirtyDiesel:
Sure thing.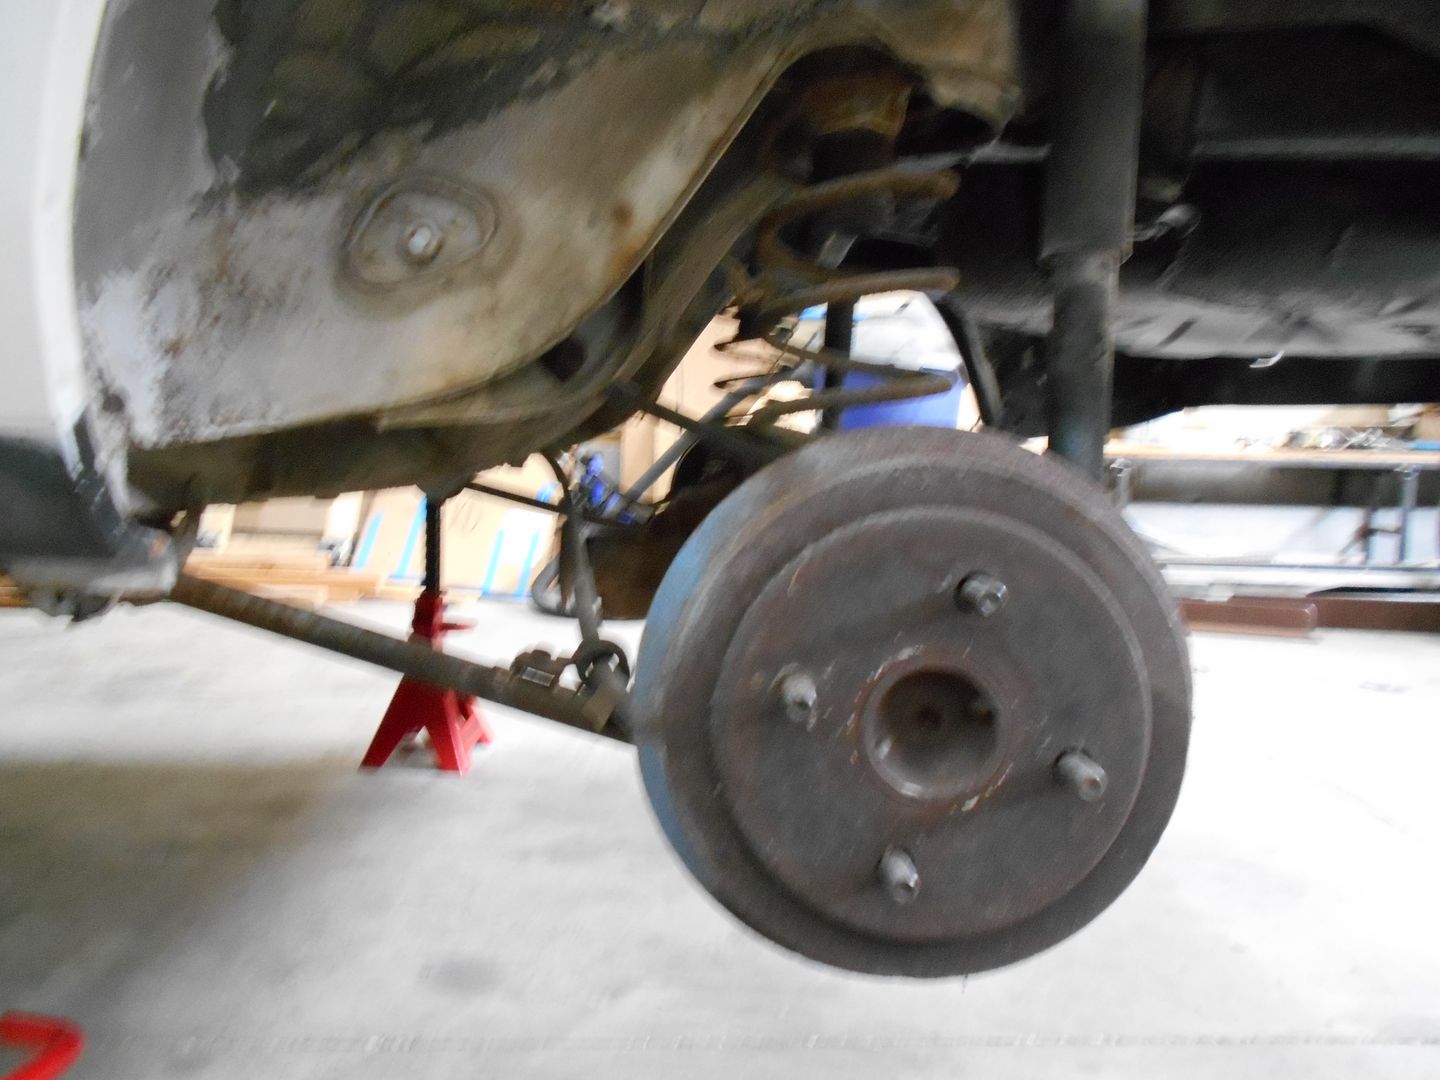
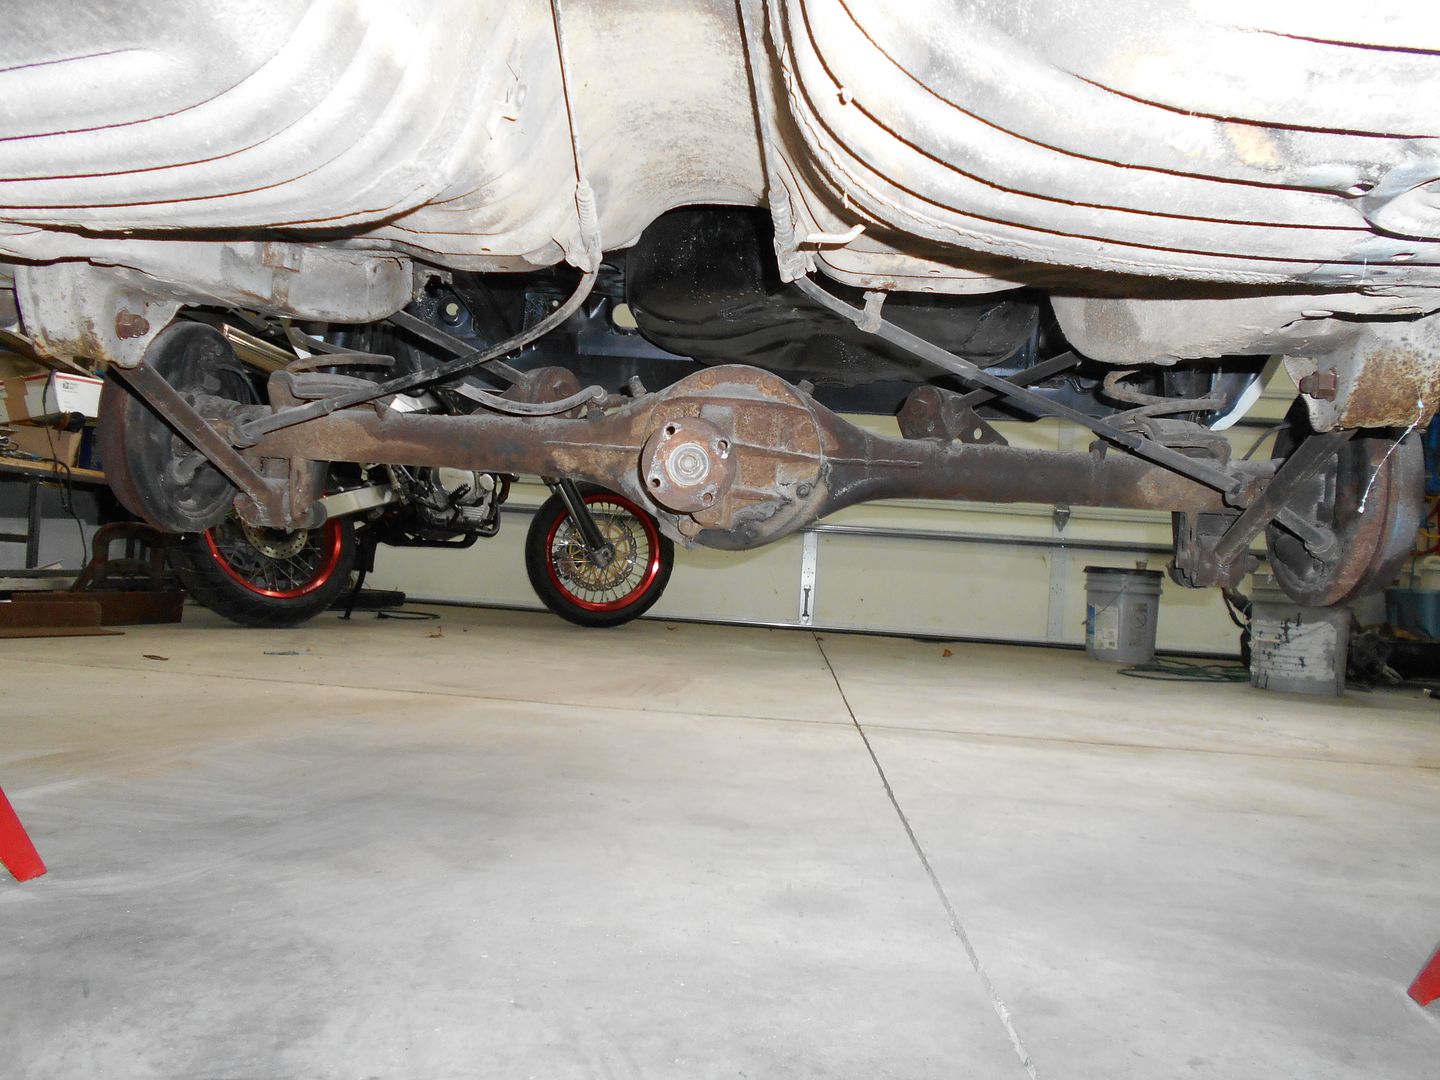
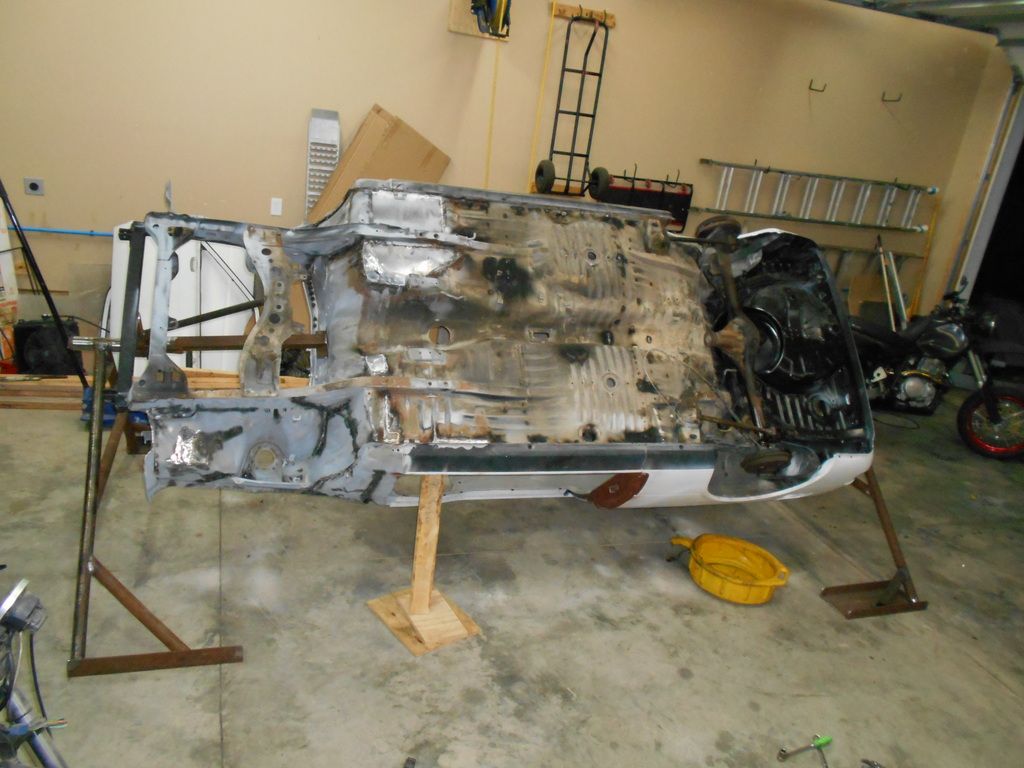
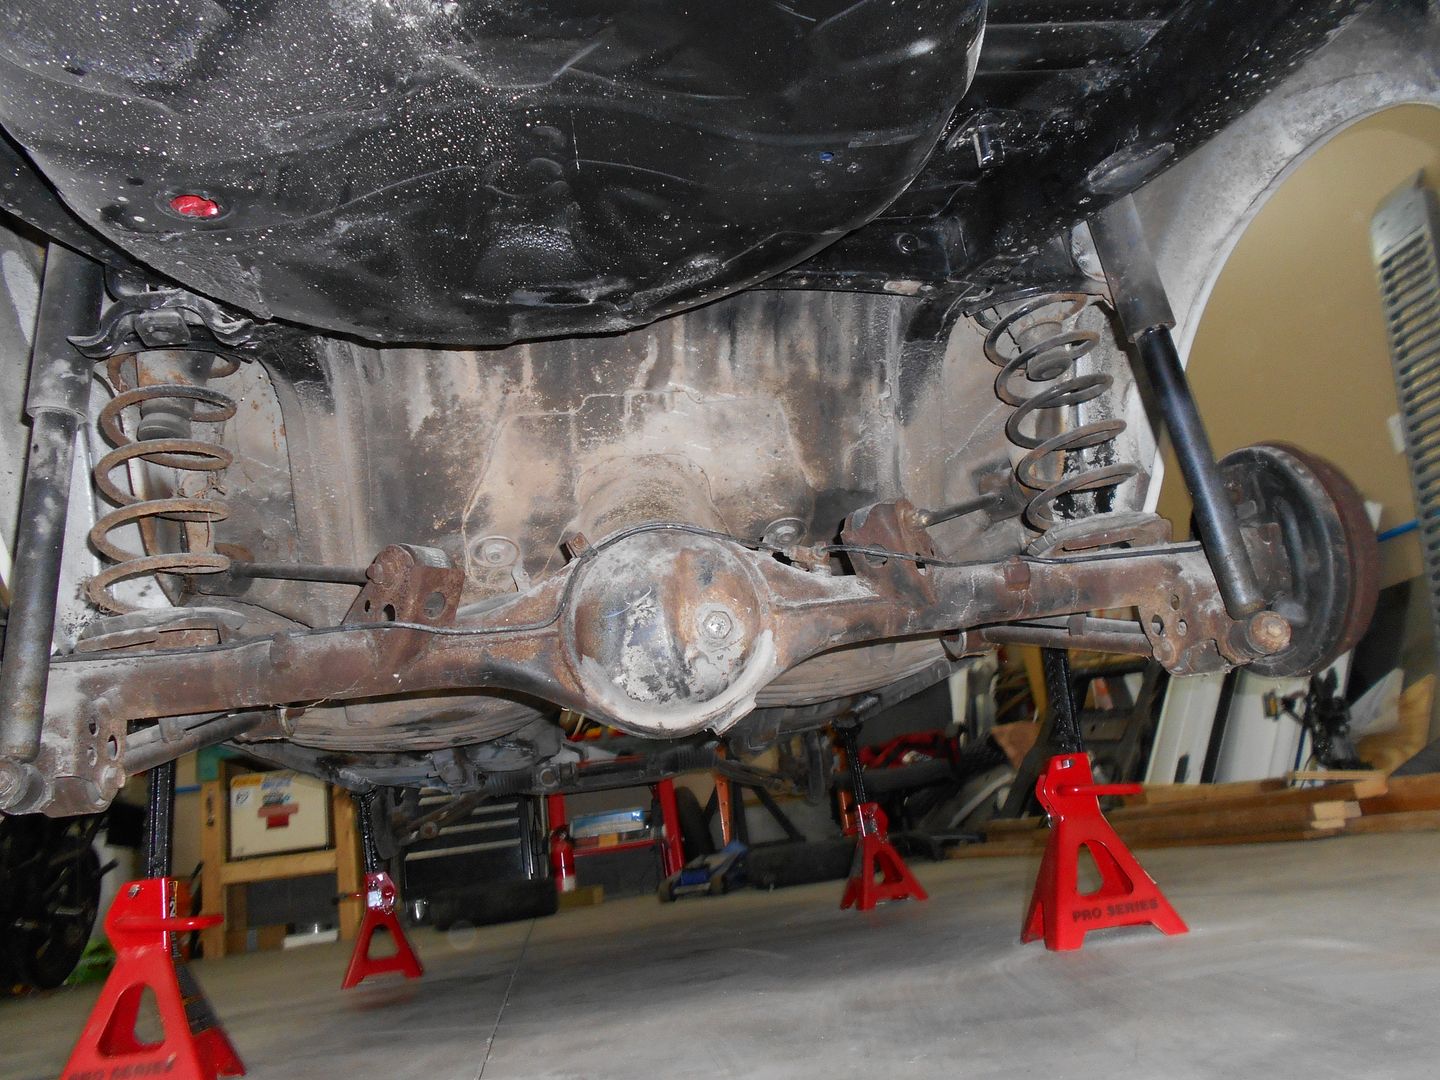 Front
Front
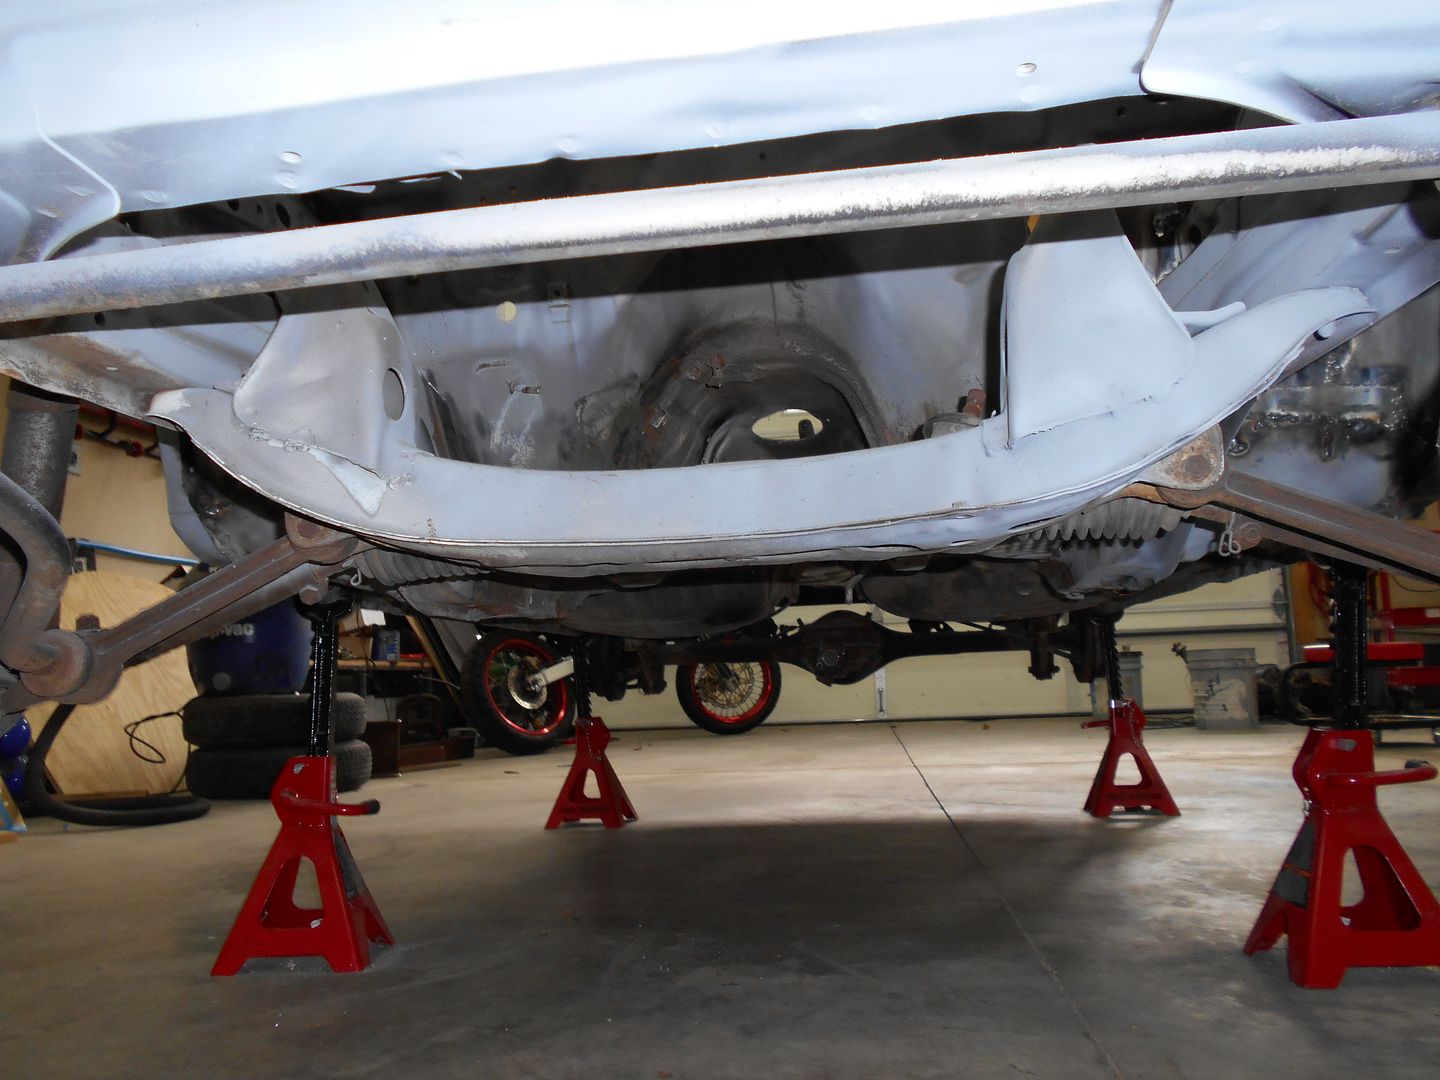 It is kind of tough to get a good picture, but essentially, there is some pretty good room once the tank is out. You could put a miata suspension under here, with some pretty good hacking. It measures almost 52" mounting surface to mounting surface in the front. The rear on this one is an inch proud of that, but the rearend is bent up pretty well. I'm going to have a rearend narrowed to make front and rear equal. Someone on this forum (Singleslammer as I recall), was looking at putting a SHO V6, and Miata suspension under a Starlet. Perhaps he will chime in with what he found having the two cars next to one another.
Thanks for the kind words. Its funny, but I find posting here extremely motivational. I'm glad people are interested in what, ultimately, will be a pretty mild build. I'm having fun.
Here's a teaser for the next phase.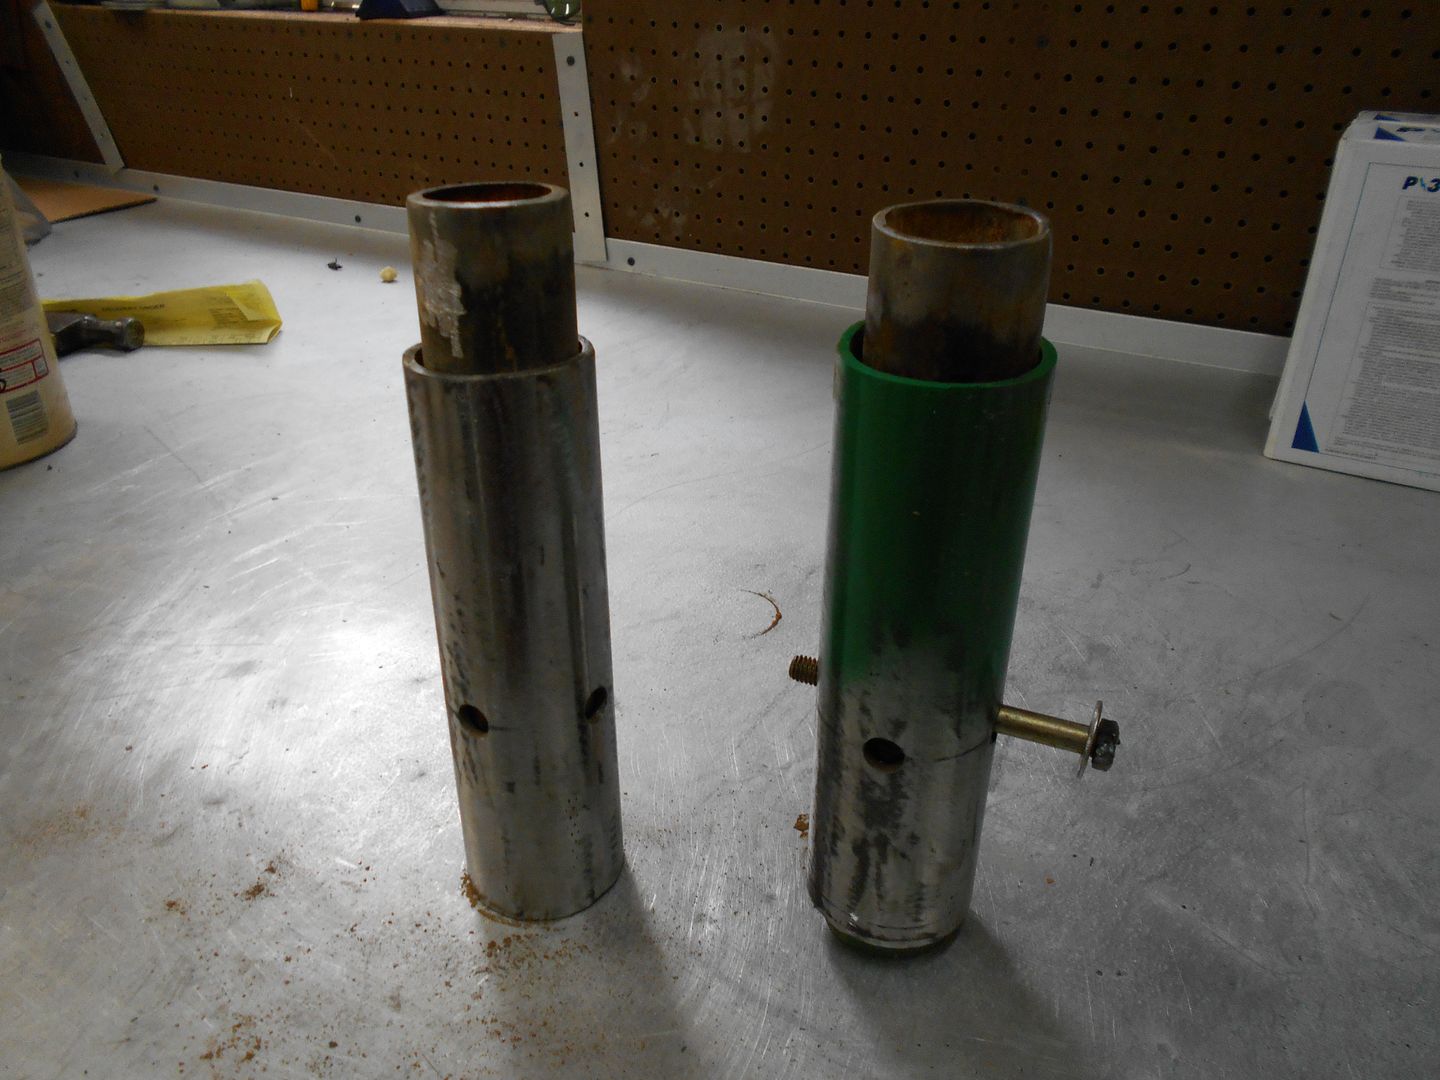
Nice, thanks for posting those, rear end looks the same as my old 89 Corolla all-trac AWD.
 Some progress. Finished my front floor patch. I'm improving. The hope is to be passable once I get back to the actual bodywork.
My engineer brother (Tedium850) stopped by, and in chatting about his '67 Mustang, some new ideas for strengthening the tub have come to the forefront. Basically, he told me, his car could be stiffened a lot with torque boxes from later years, and rocker and seat track stiffeners from convertibles.
The starlet already has torque boxes (which connect the frame rail to the rocker) in front that will be seam welded, and the back will get them if they are not already there. I'm considering a channel run along each inner rocker in leiu of actual subframe connectors. That, and I allocated the scrap steel I had set aside for that purpose to the next phase of this extravaganza. More later, but it won't look like much for a while...as the tack welding continues...
I chose to work on a different sort of project today. I admit it, spot welding gets old. Though it may seem odd, this next thing will make sense in time. Today, I made...A rear bumper.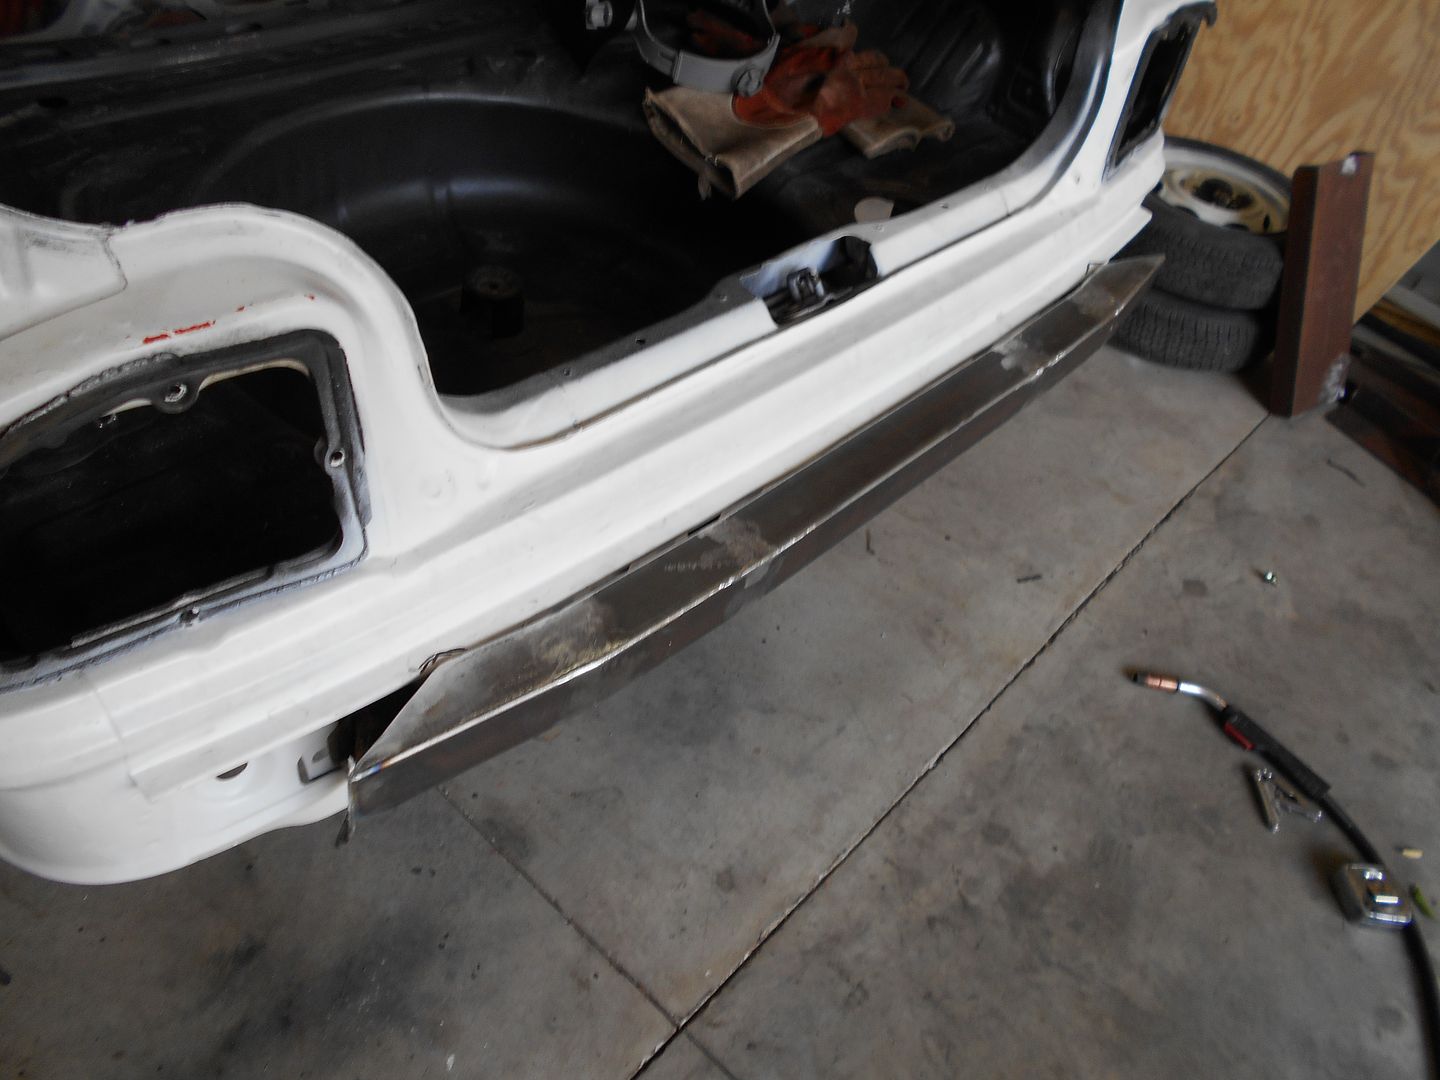 Above is the inner bumper, which I welded to the cut down stock mounts. I came in to let the welds cool before I box the mount in. Below, we have a mock-up of the "bumper cover"
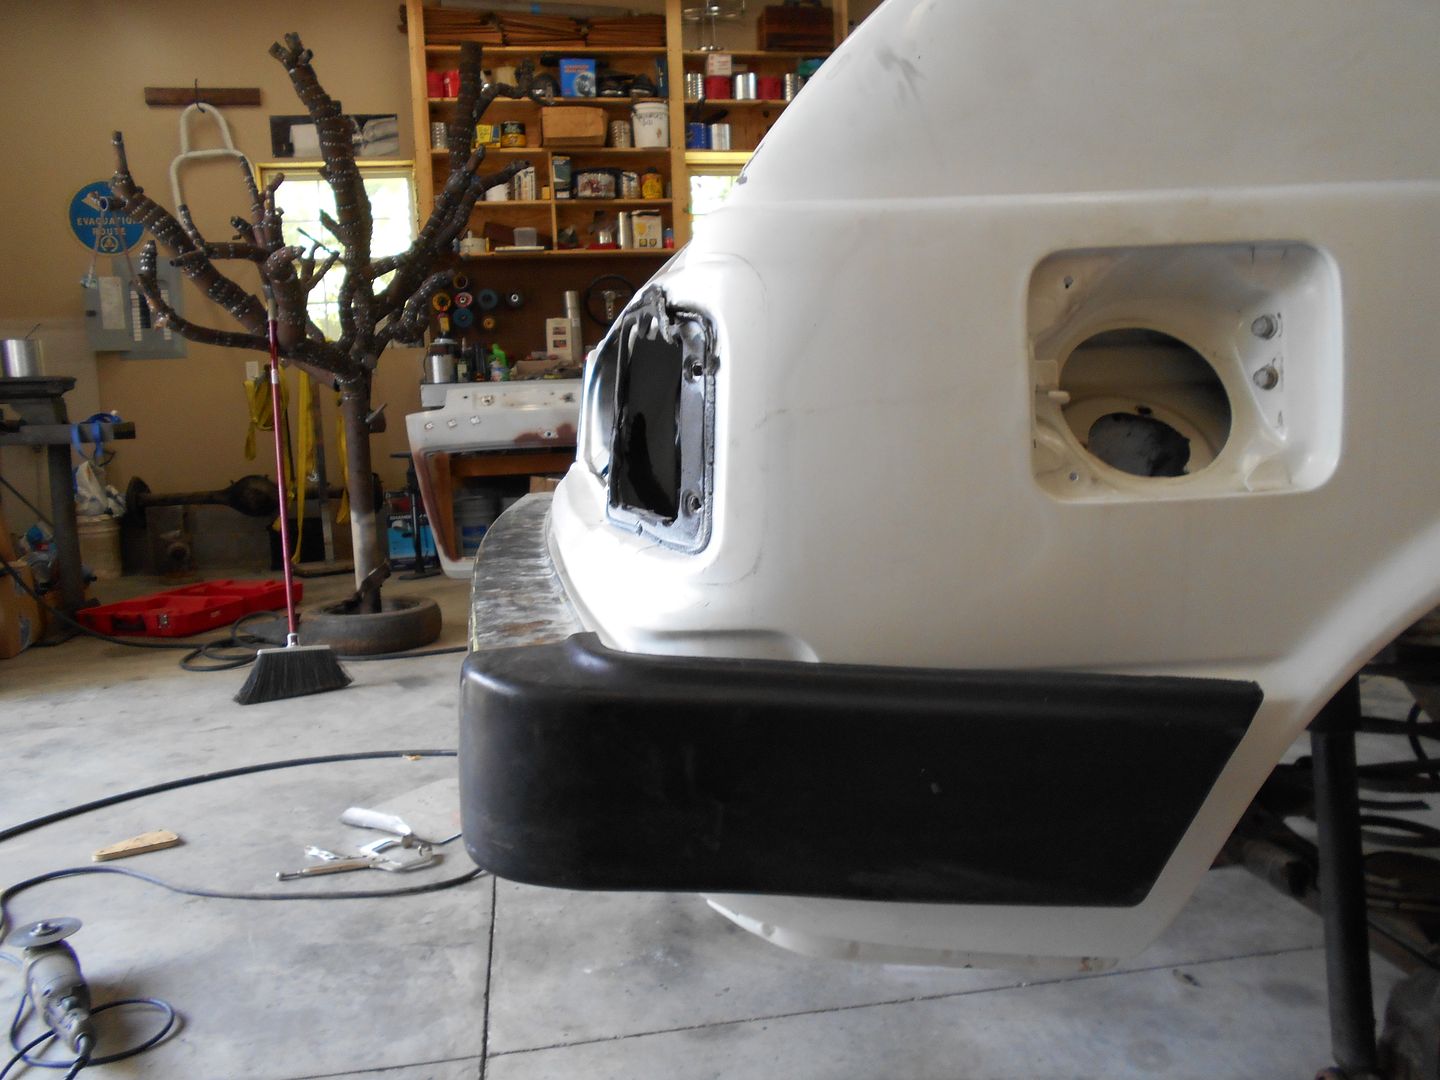 That's an Omni/Horizon front bumper I got at the PAP. I got another front bumper for the front of this car from another of the same (if I am making any sense). They are sweet. Aluminum, the right width, or maybe a touch wide(easy to cut down), and the price was right. This will tuck the rear bumper in maybe 6" from stock. Check the pictures on page 1. The stock one was HUGE. The goal is to look stock to the casual eye. As such, they will probably be painted black. Anyway, there is much more before that's complete, but I'll return to it later.
I also did this: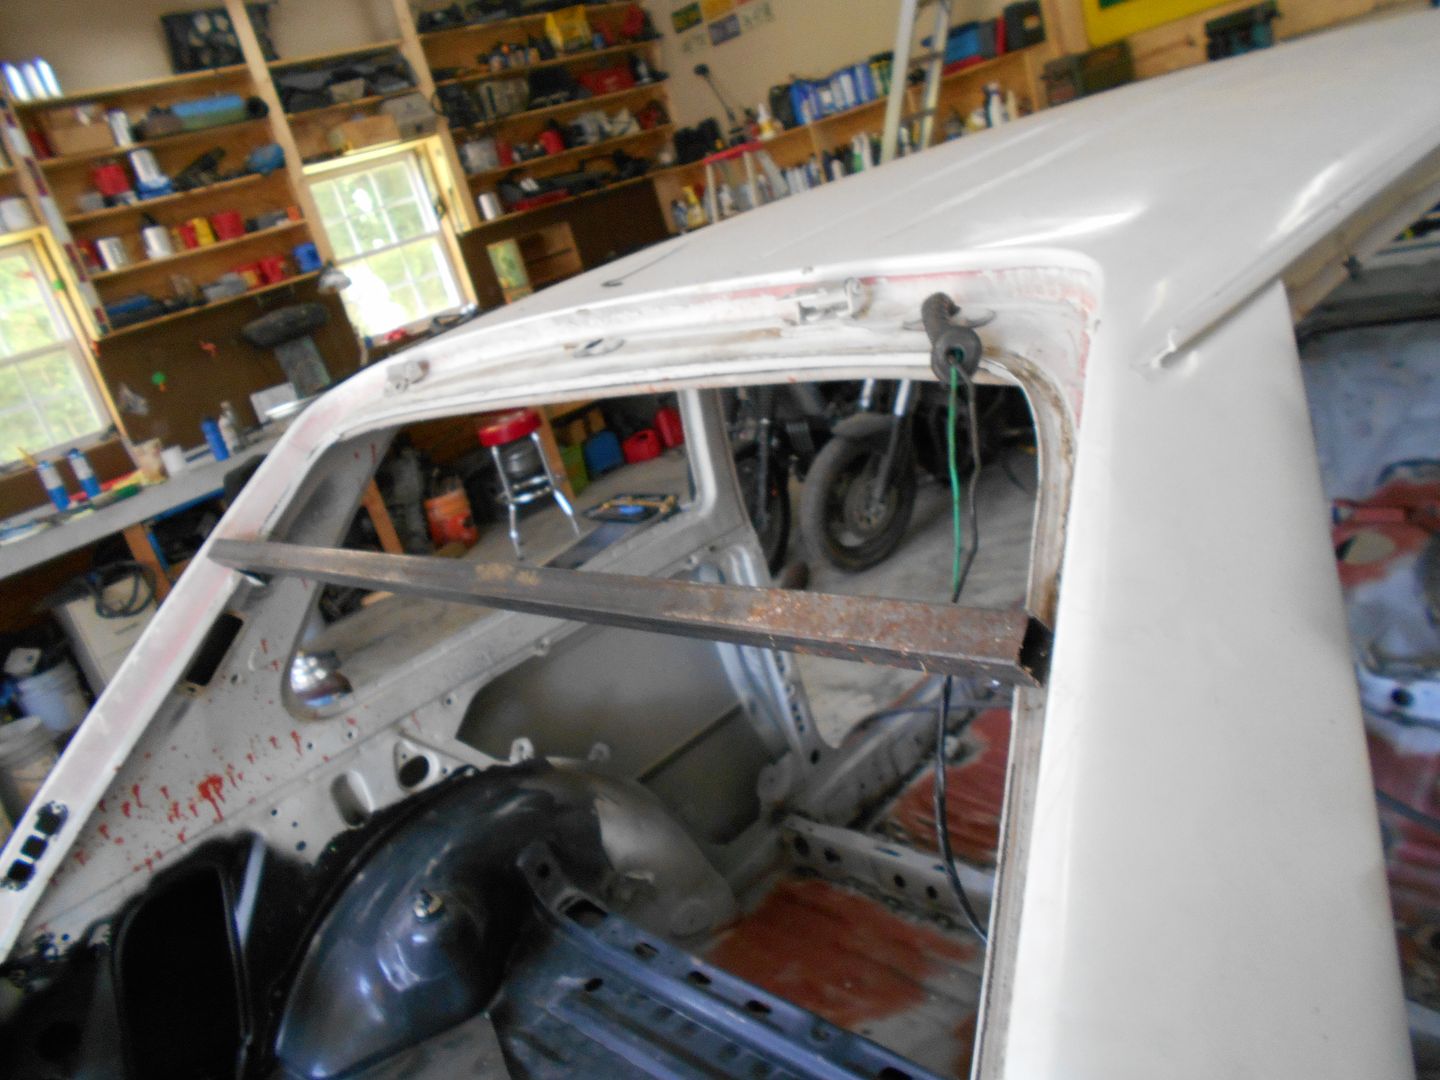 It goes between the hatch strut mounts, and bolts in/out. Back to it...
Nice bumper, I have been tring to decide what to do about bumpers for mine, the only thing I am sure of is the stock bumpers ain't going back on! Looking forward to seeing how it finishes out
Here's what I was on about this time.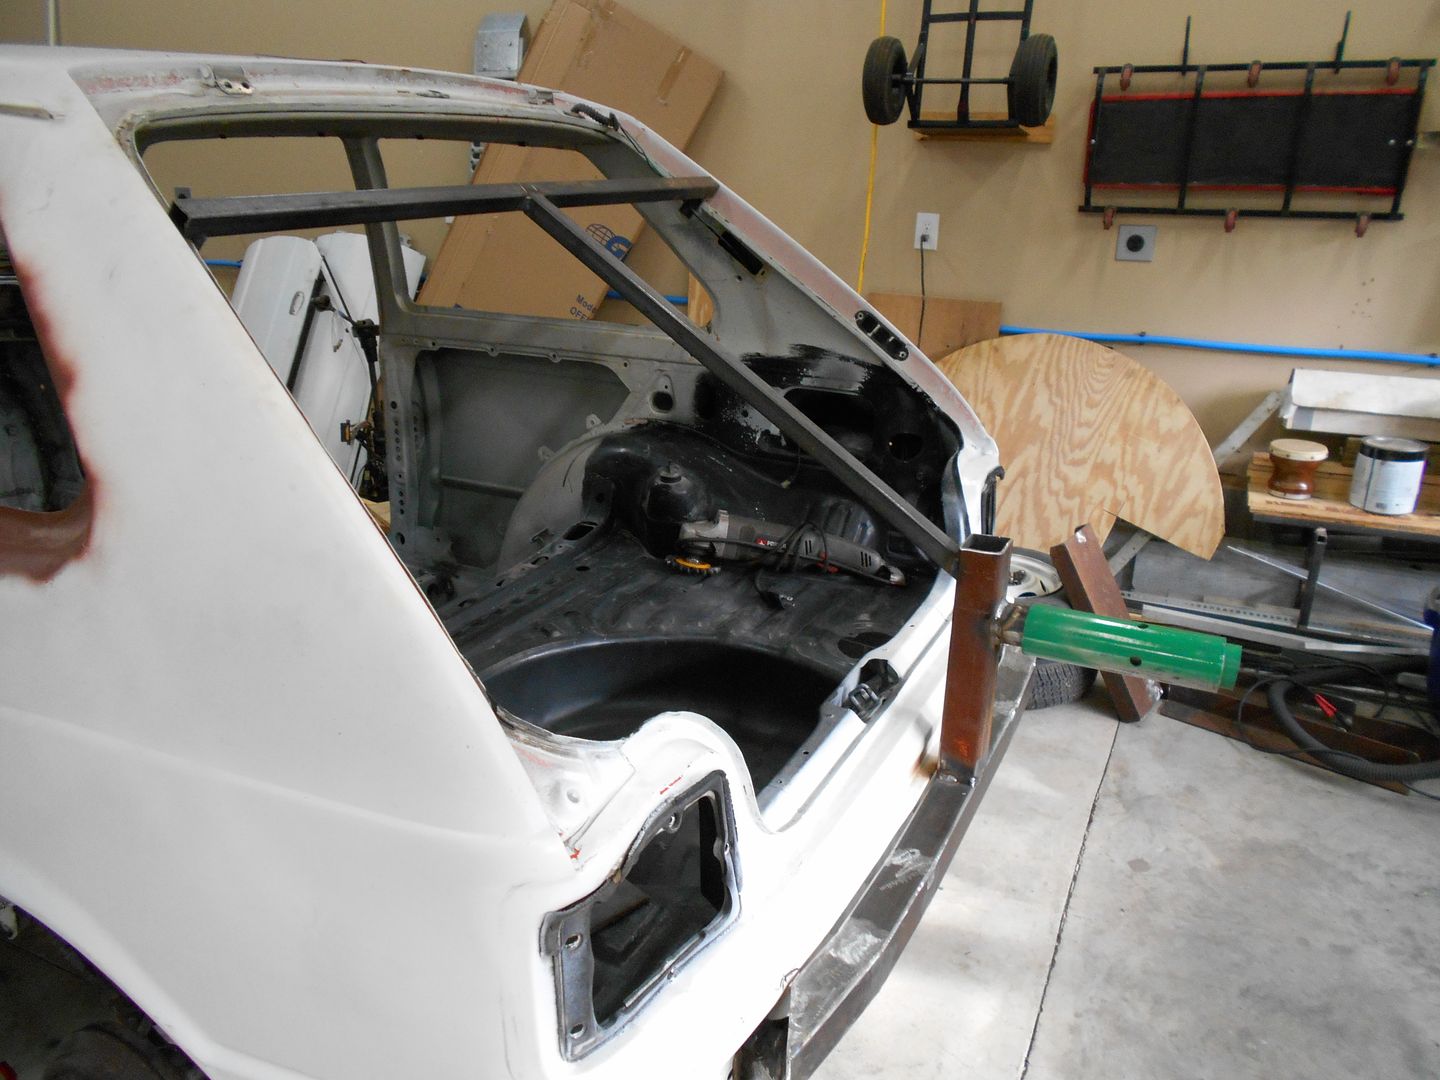
Then today, I did this: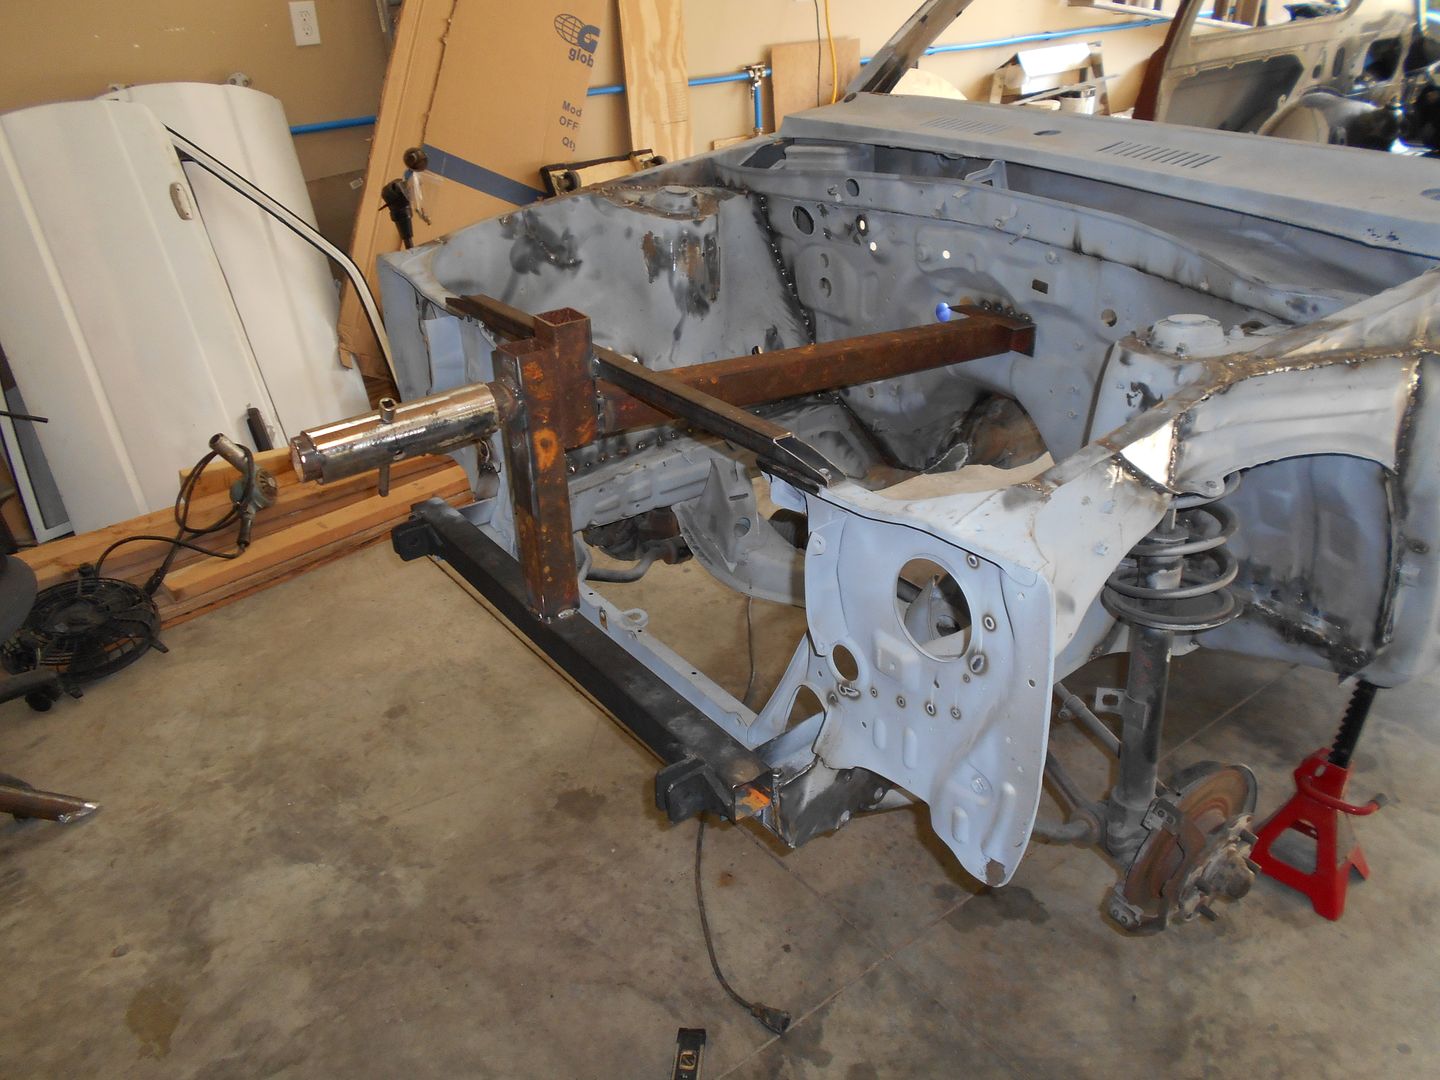 Followed by this:
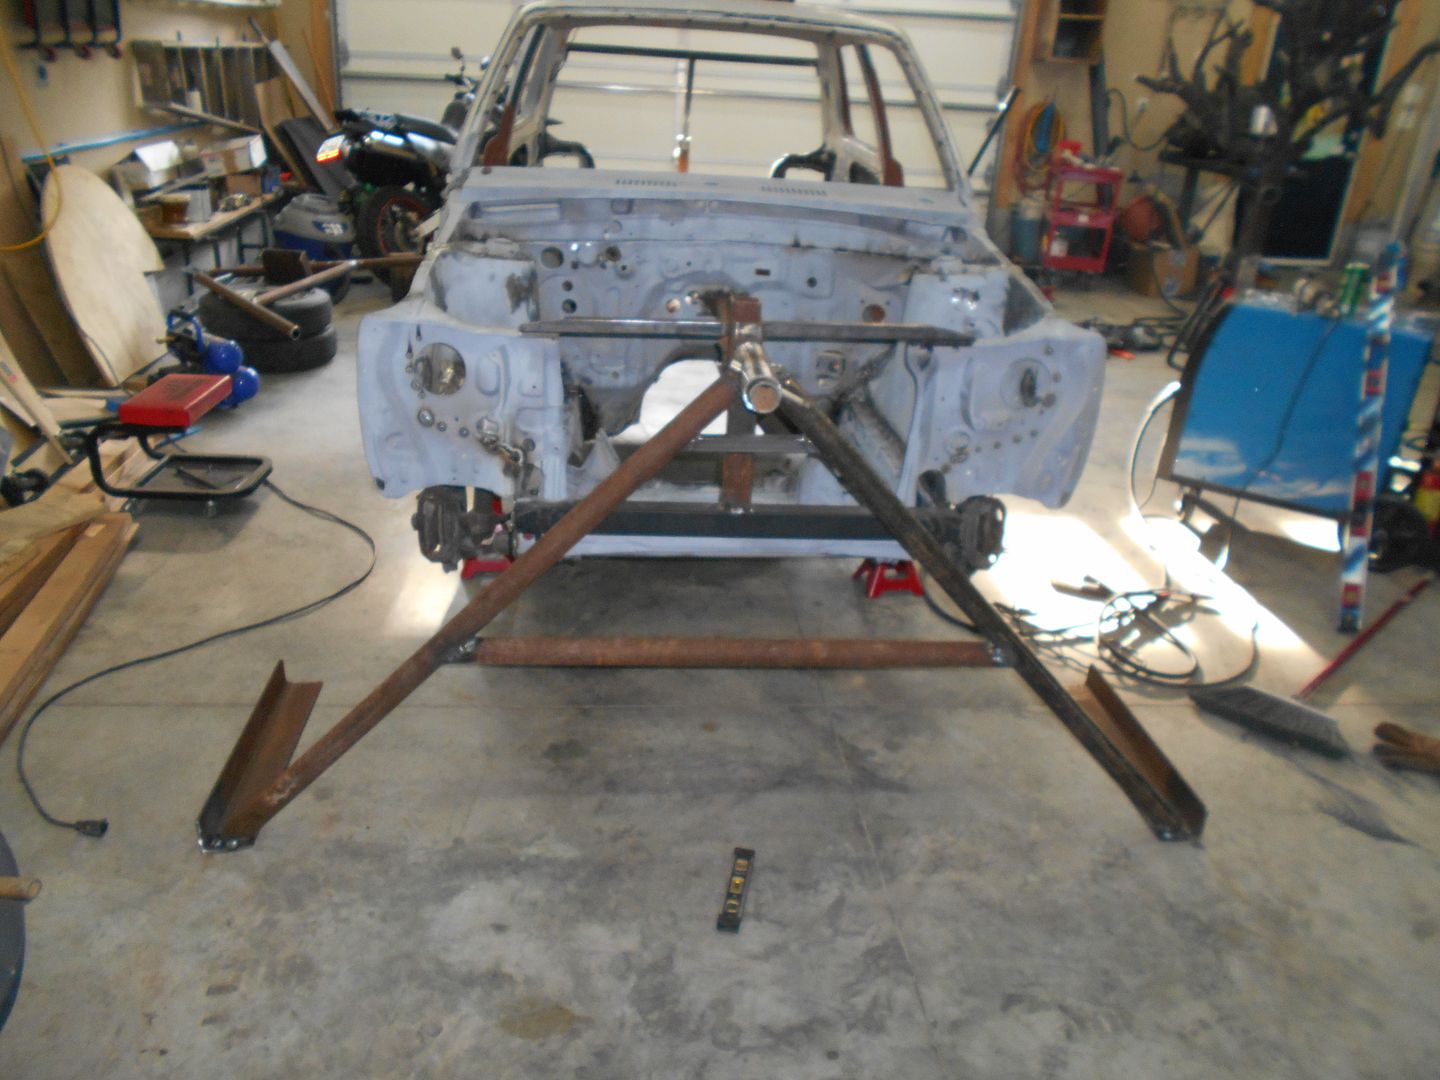 I only thought it made good sense to use the tow bar "bumper" as a base, as it was already made, and nearing the end of its life expectancy anyway.
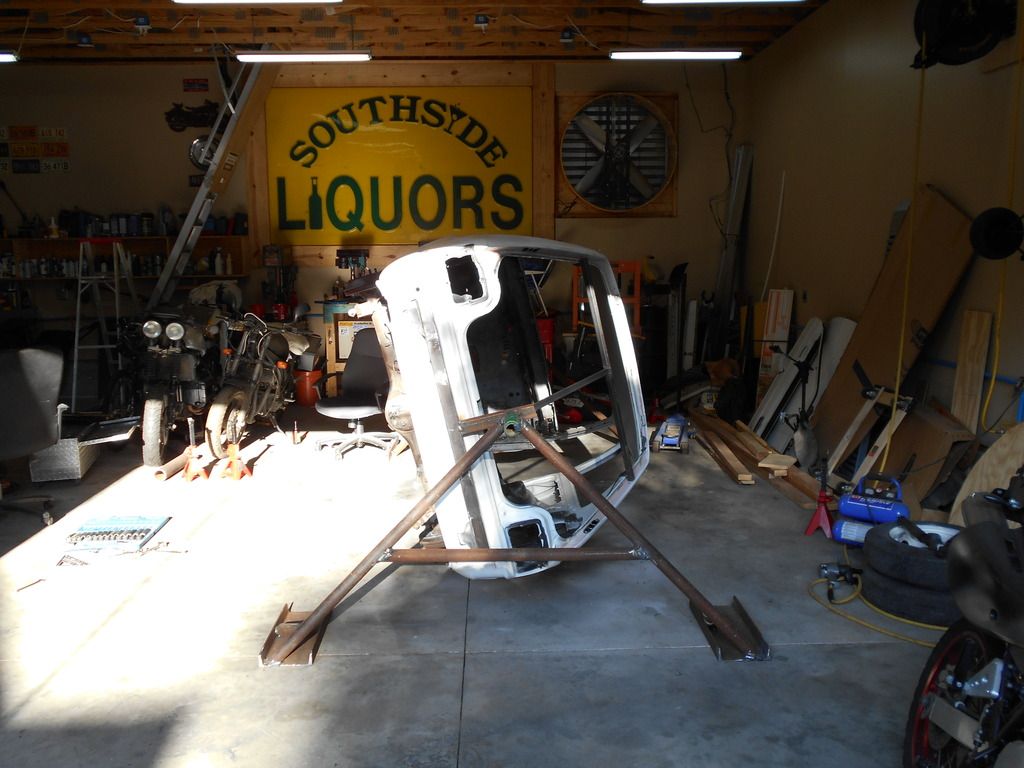
The original plan was to get one of those huge spools the phone company uses for telephone line, and screw one part to each end, but after a bit, I thought that was loser talk for a weldor, not to mention more work. So, I decided to build a rotisserie from scraps. I have a mess in the cowl/underdash area, and I started thinking how much easier underdash work would be if I were standing up through the door, with the car rotated 90 degrees. We'll see if it is as utopian as I think it will be.
Awesome work! I'm jealous of your fab skills, will you be able to rotate it totally upside-down with the light hitting the floor-pans?
Mr Diesel, that is definitely the plan. I hate to say it WILL until I know for sure. I have done tons of measuring, and making 1:1 scale drawings on the floor, and it SHOULD rotate 360 on those two pipes.Thanks for the generous compliments. I usually feel like a hack.
Without further ado, The rear.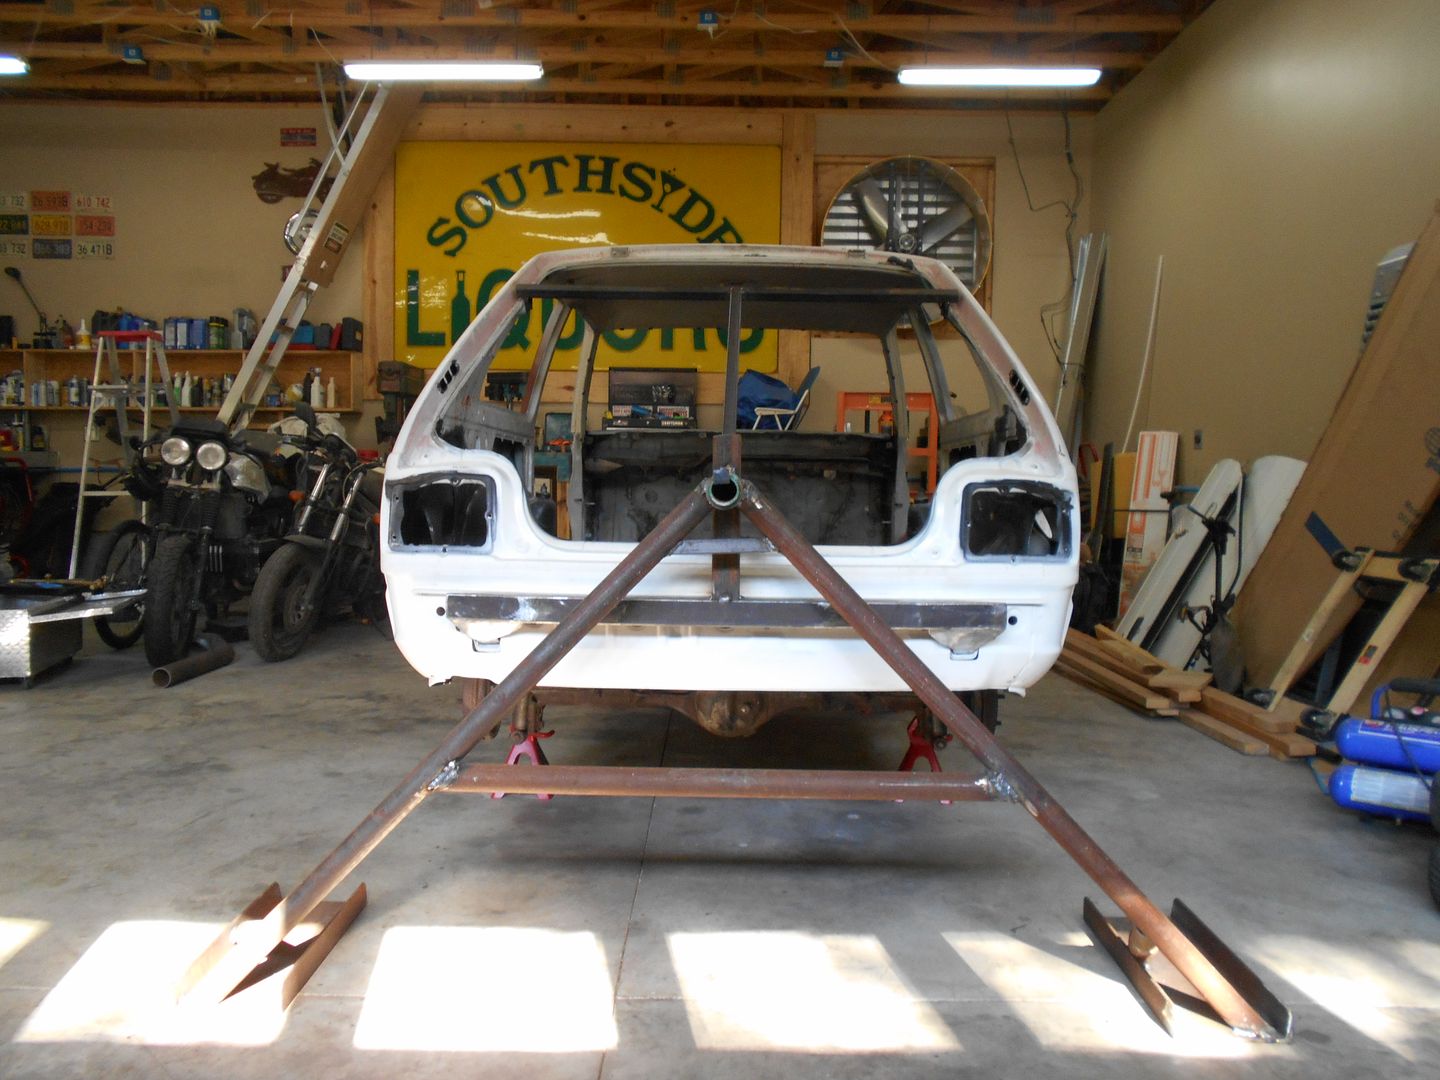
...and a couple of overall shots.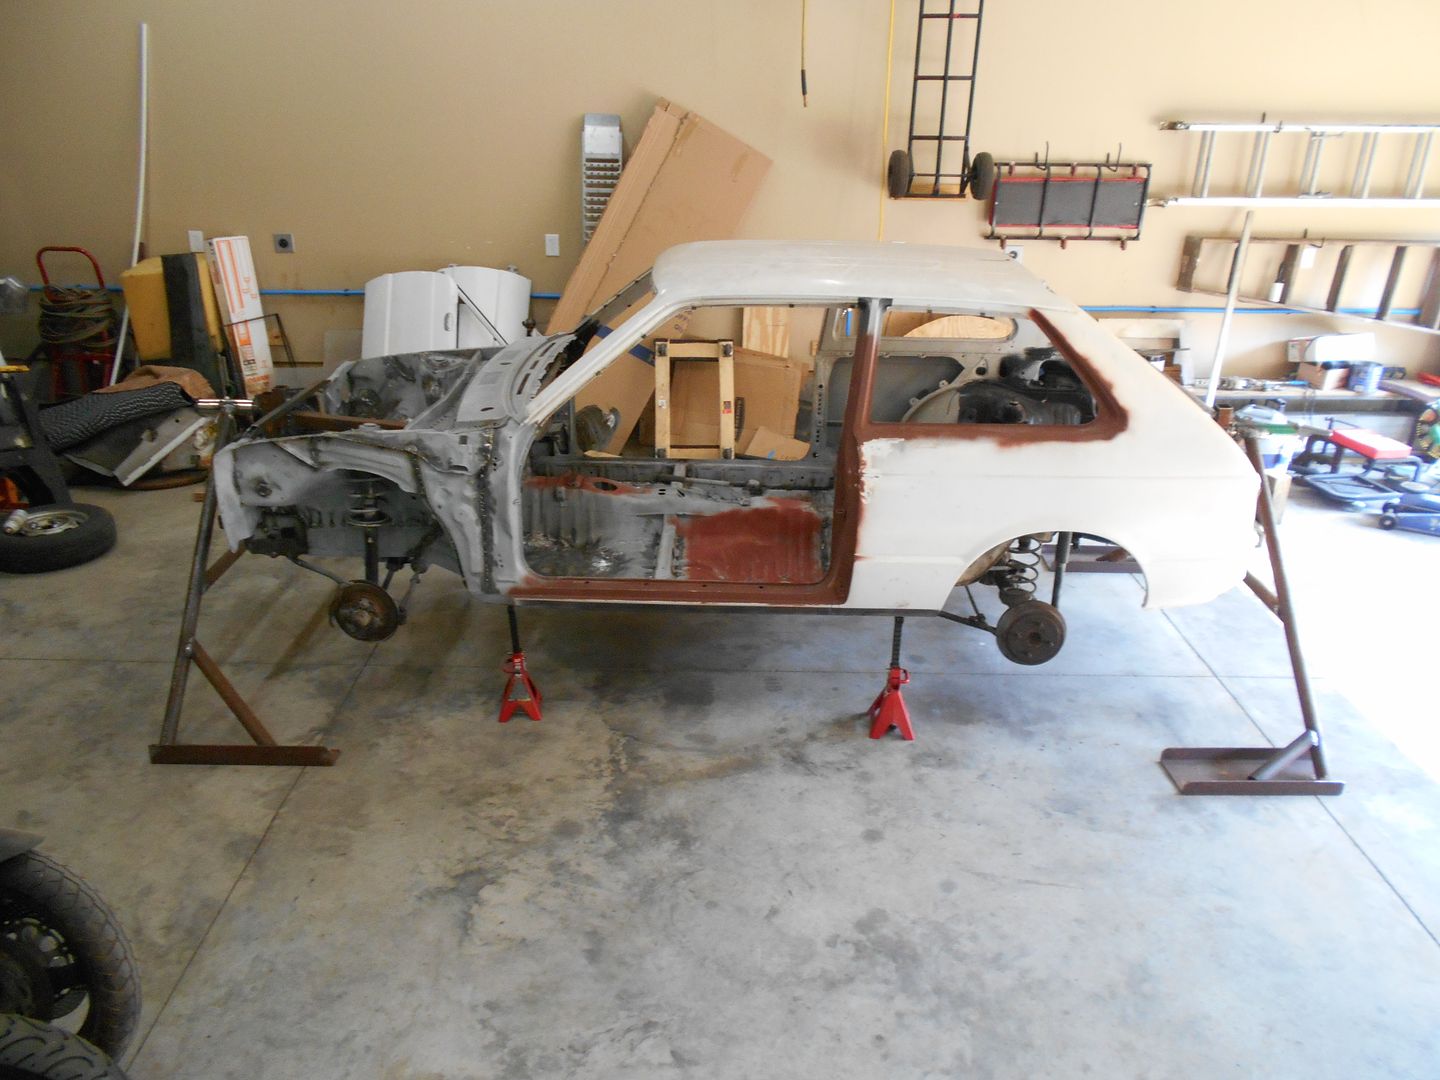
 I added some bracing, both to the mounts on the car, and the diagonals on the rotisserie legs.. The pivots now also have welded stops, so they will need to be ground away to get this thing off the spit. I cranked up the compressor before I came in to post, and the plan is to go back out, and start dropping the suspension. I am very anxious to try and spin it, but the smart thing is to have a couple of buddies over to spot me.
Also, probably a good idea to look at it for a while, just in case...
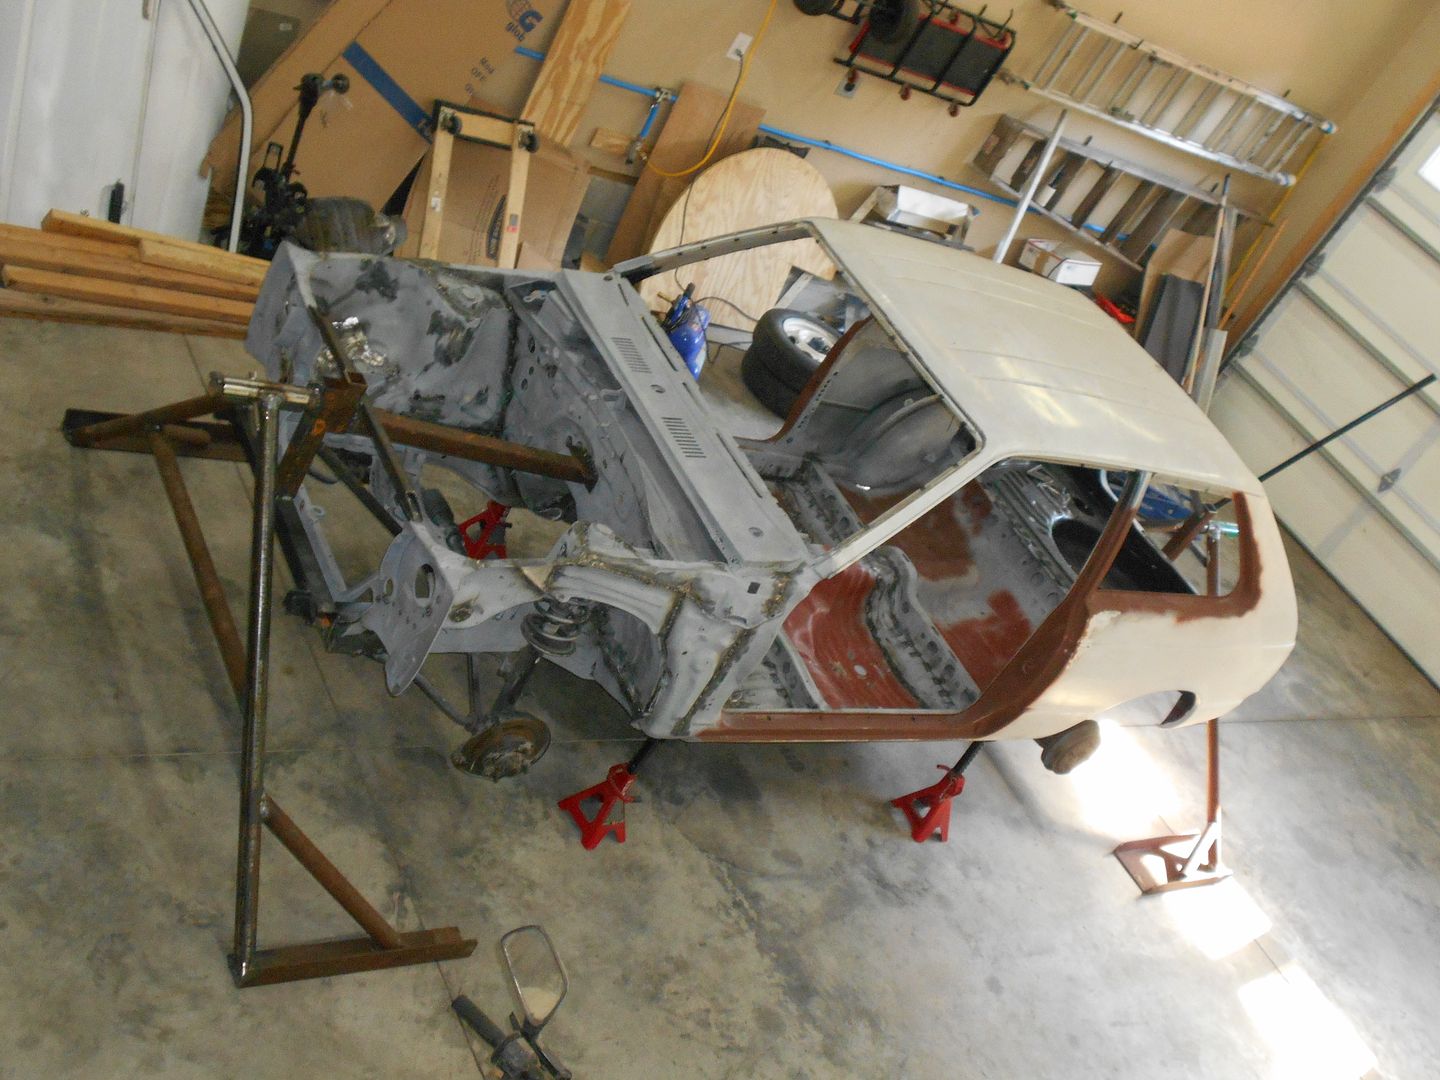
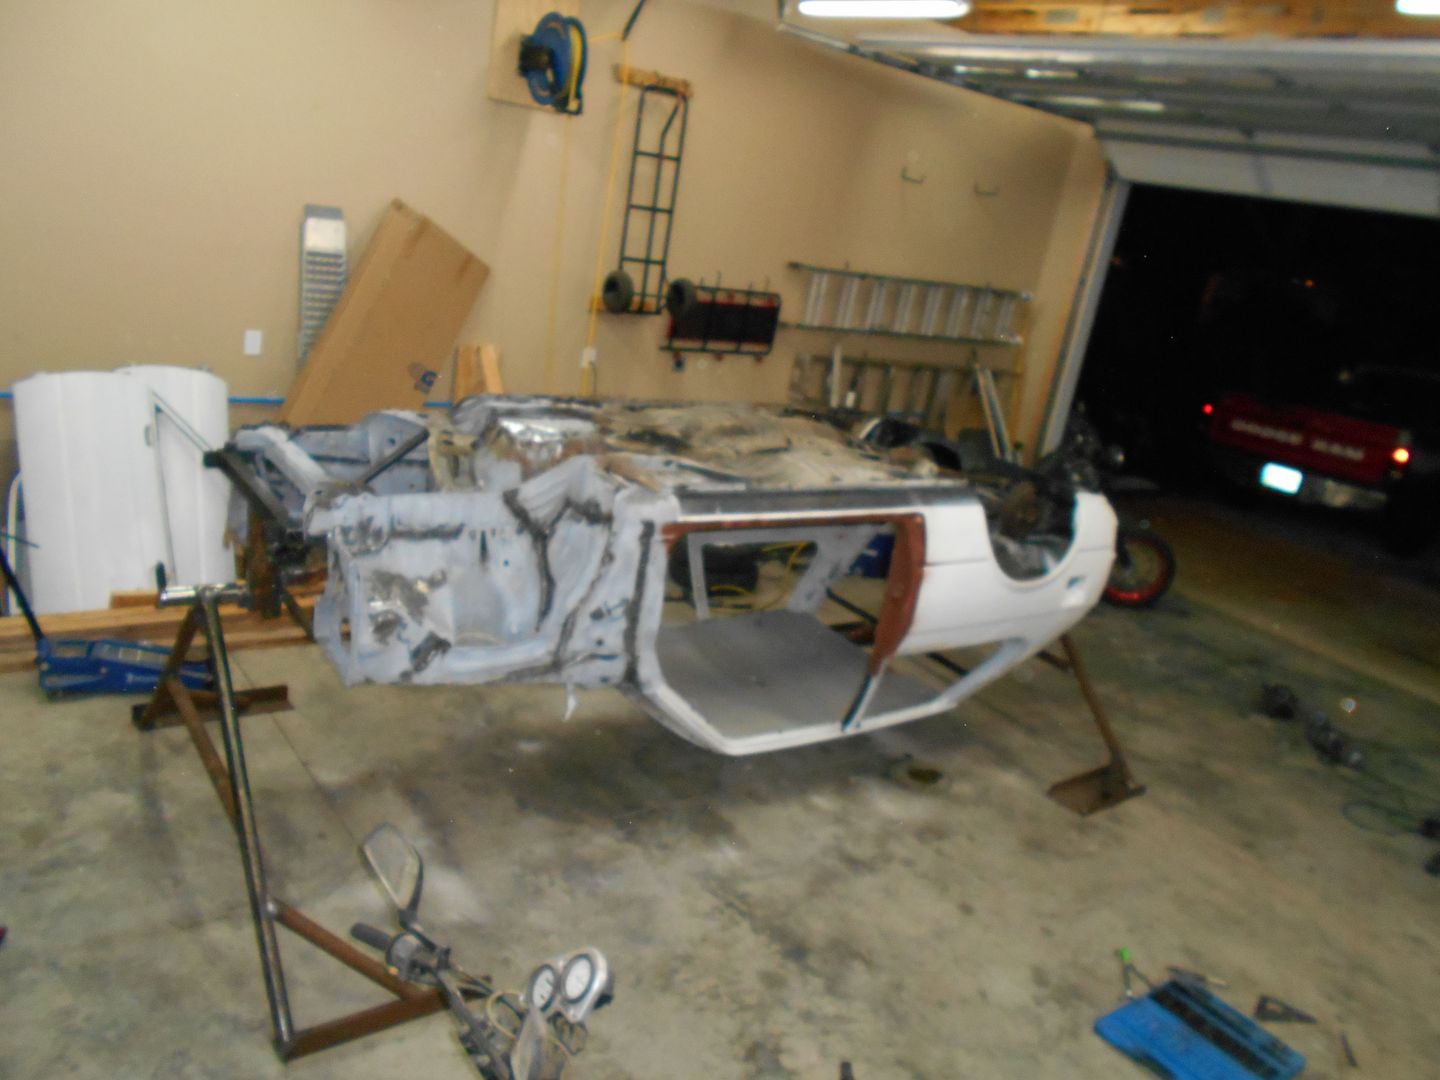
Success. 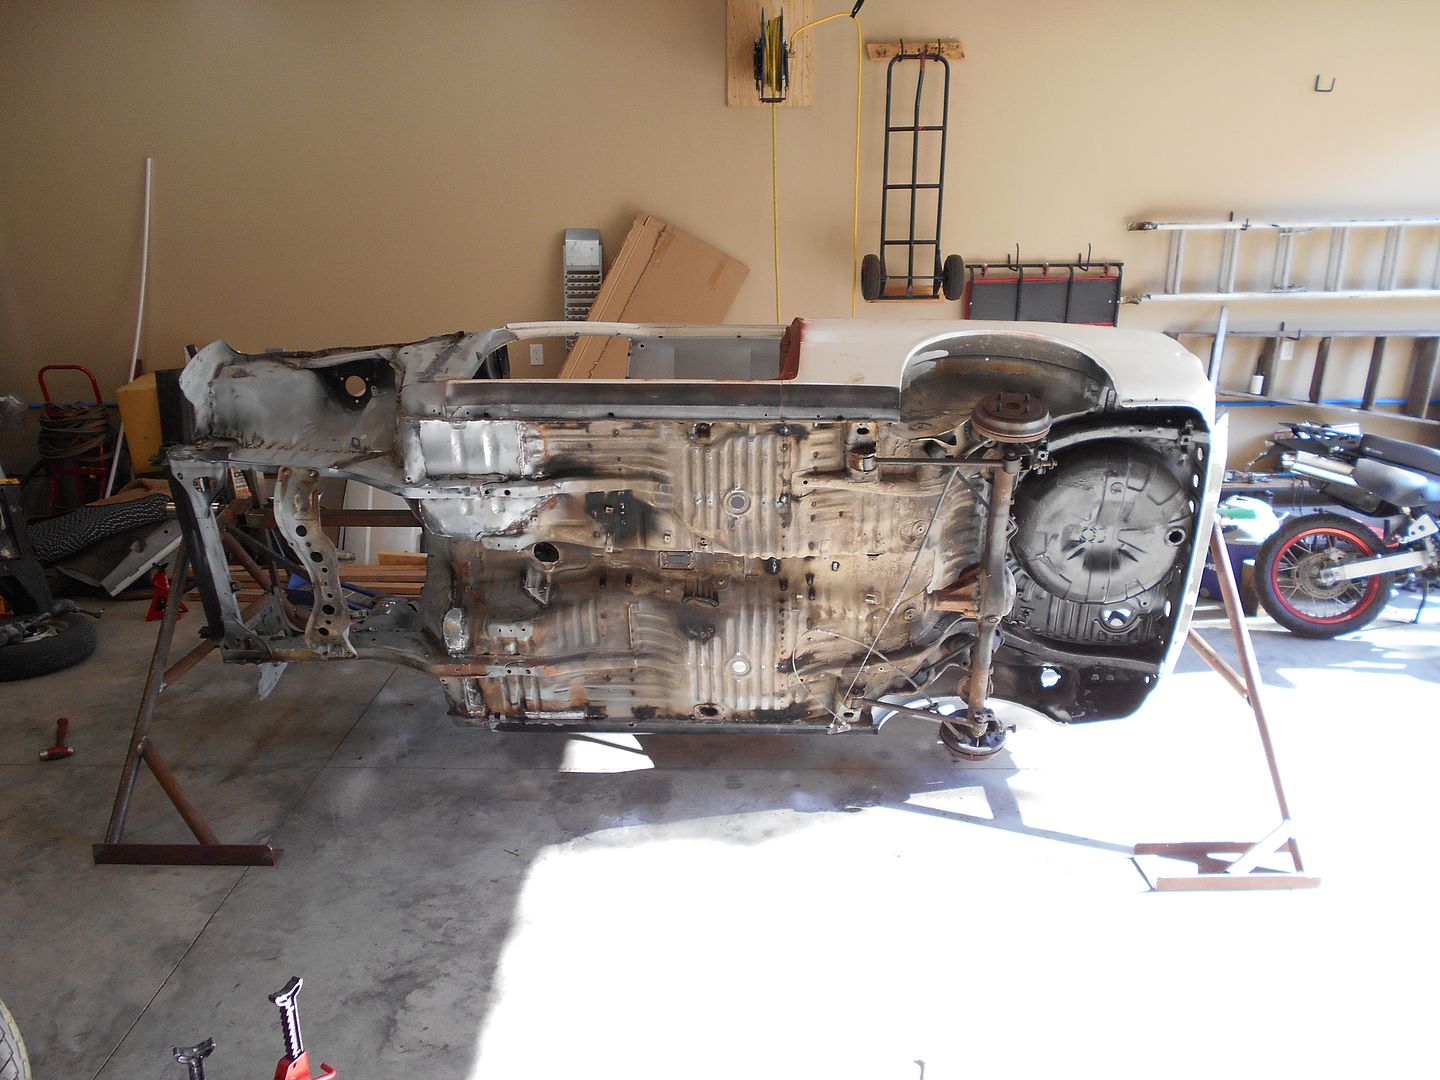
 I had trouble getting the rearend out, and had help, so we rotated it around. All is well. plenty of clearance, and the "wide stance" of the A-frames makes it stable, but it is bottom heavy. The risk is getting past the point of no return, and the whole thing going over. Check. I can't roll it alone- maybe (doubtfully) once I get the rearend out. None the less, it works...now comes the endless scraping, wire wheeling, and whatnot.
Just because...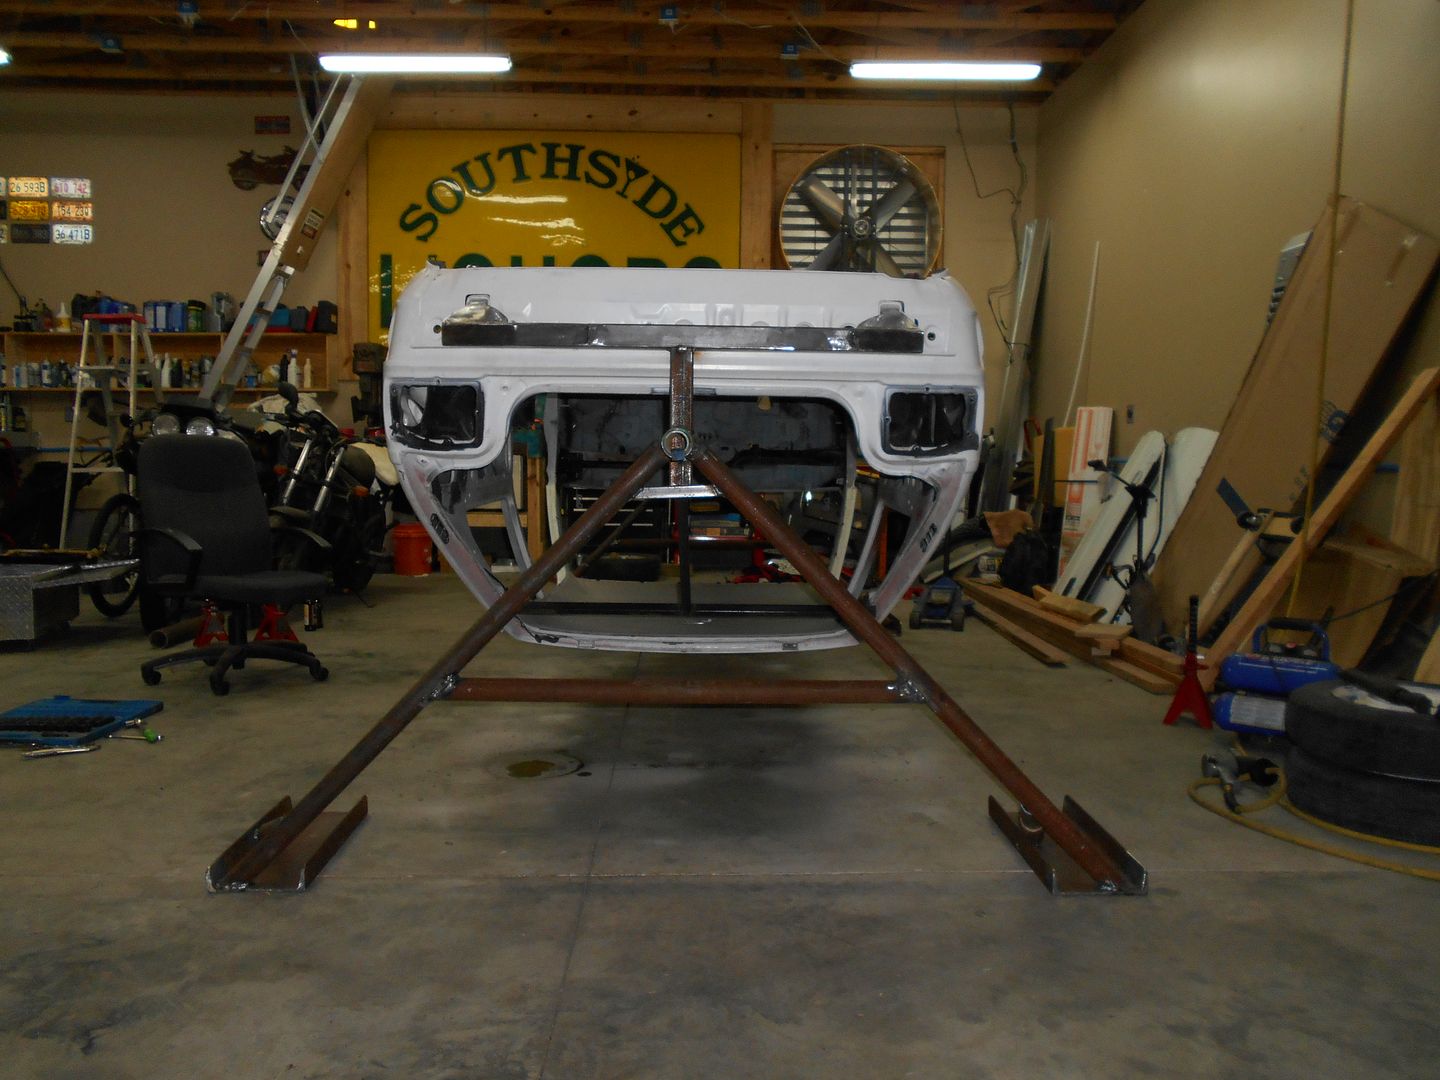
You'll need to log in to post.


